Embed Size (px)
Citation preview
Retractable Hose Reel
Instruction Manual
15M/25M Models
Installation, Hose Replacement, Care & Troubleshooting
1215H – Product Dimensions(mm): W:430 H:370 L:180 Weight: 7.00kg1225H – Product Dimensions(mm): W:440 H:410 L:220 Weight: 10.6kg
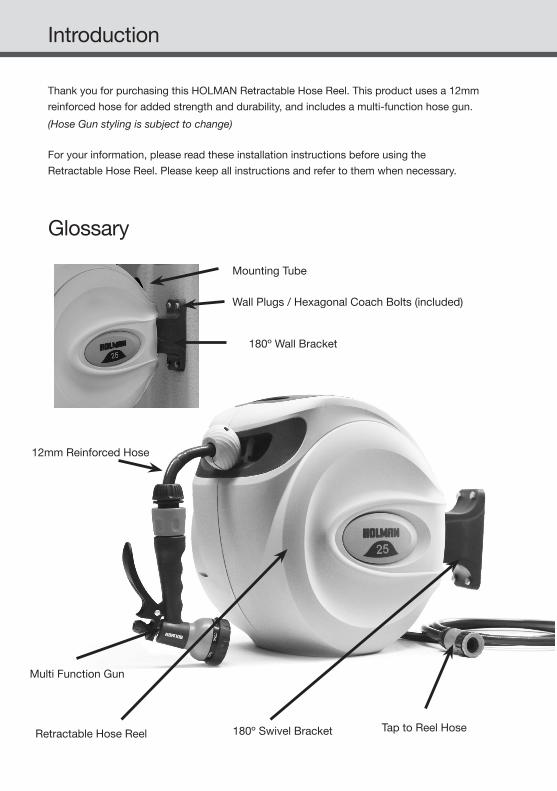
Glossary
Thank you for purchasing this HOLMAN Retractable Hose Reel. This product uses a 12mm reinforced hose for added strength and durability, and includes a multi-function hose gun. (Hose Gun styling is subject to change)
For your information, please read these installation instructions before using the Retractable Hose Reel. Please keep all instructions and refer to them when necessary.
Introduction
180º Wall Bracket
Mounting Tube
Retractable Hose Reel 180º Swivel Bracket Tap to Reel Hose
12mm Reinforced Hose
Multi Function Gun
Wall Plugs / Hexagonal Coach Bolts (included)
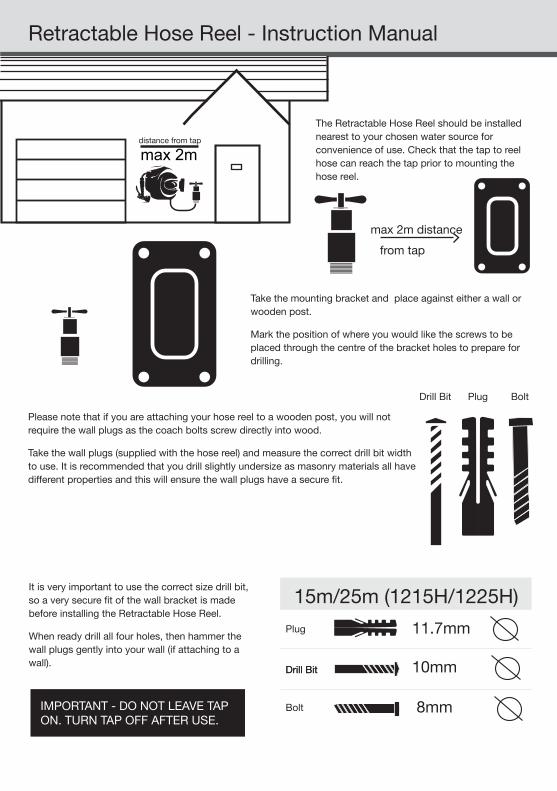
max 2m
The Retractable Hose Reel should be installed nearest to your chosen water source for convenience of use. Check that the tap to reel hose can reach the tap prior to mounting the hose reel.
Take the mounting bracket and place against either a wall or wooden post.
Mark the position of where you would like the screws to be placed through the centre of the bracket holes to prepare for drilling.
Retractable Hose Reel - Instruction Manual
max 2m distancefrom tap
It is very important to use the correct size drill bit, so a very secure fit of the wall bracket is made before installing the Retractable Hose Reel.
When ready drill all four holes, then hammer the wall plugs gently into your wall (if attaching to a wall).
distance from tap
IMPORTANT - DO NOT LEAVE TAP ON. TURN TAP OFF AFTER USE..
Drill Bit Plug Bolt
Drill BitDrill Bit
Bolt
Plug
Please note that if you are attaching your hose reel to a wooden post, you will not require the wall plugs as the coach bolts screw directly into wood.
Take the wall plugs (supplied with the hose reel) and measure the correct drill bit width to use. It is recommended that you drill slightly undersize as masonry materials all have different properties and this will ensure the wall plugs have a secure fit.
8mm
10mm
11.7mm
15m/25m (1215H/1225H)

Place the bracket in position over the four wall plugs and screw each hexagonal coach bolt into your wall or wooden post. Screw in each bolt until all four have a secure hold on the bracket against the surface.
Take your Retractable Hose Reel, and remove the securing pin at the base of the mounting tube. Remove the mounting tube from the hose reel and slot the hose reel around the wall bracket, so the fitting tube hole lines up with the wall bracket hole.
Connect the tap to reel hose, to the garden tap.
Retractable Hose Reel - Instruction Manual
Then replace the mounting tube into its hole to hold the hose reel in place and replace the securing pin into the base of the mounting tube.
max 2mdistance from tap
Retractable Hose Reel - Instruction Manual Hose Replacement - 1215H/1225H Models
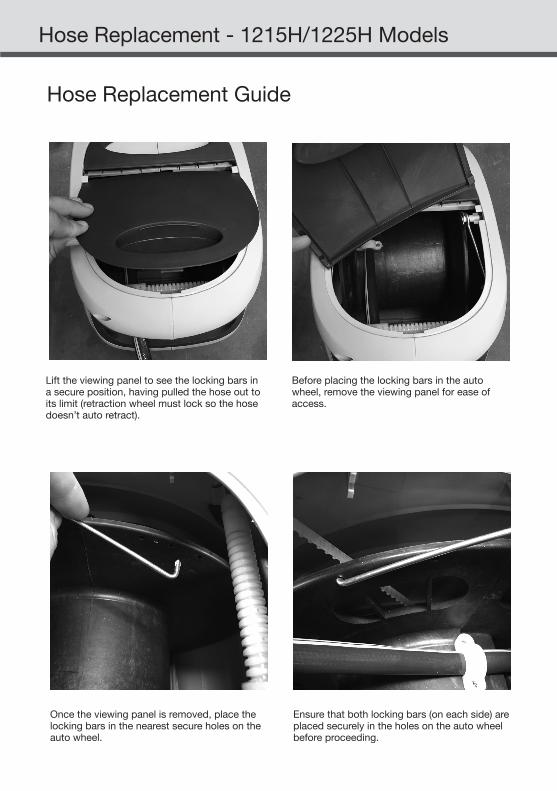
Lift the viewing panel to see the locking bars in a secure position, having pulled the hose out to its limit (retraction wheel must lock so the hose doesn’t auto retract).
Before placing the locking bars in the auto wheel, remove the viewing panel for ease of access.
Once the viewing panel is removed, place the locking bars in the nearest secure holes on the auto wheel.
Ensure that both locking bars (on each side) are placed securely in the holes on the auto wheel before proceeding.
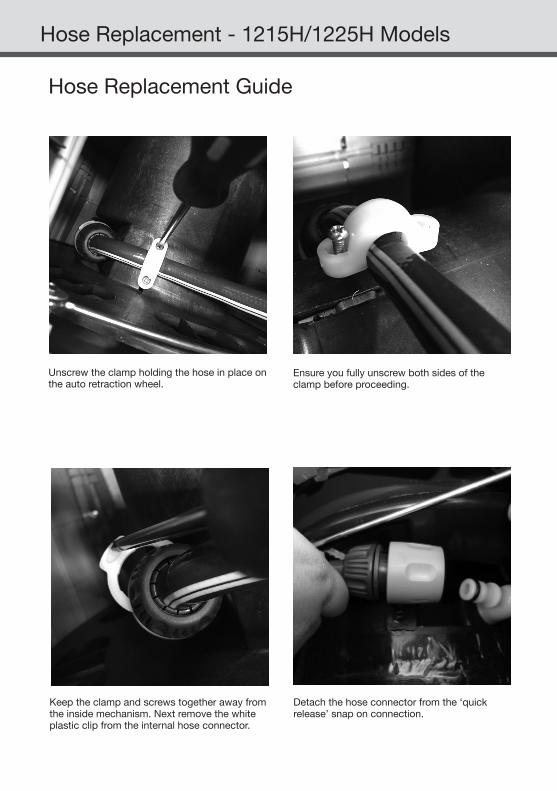
Hose Replacement Guide
Hose Replacement - 1215H/1225H Models
Unscrew the clamp holding the hose in place on the auto retraction wheel.
Ensure you fully unscrew both sides of the clamp before proceeding.
Keep the clamp and screws together away from the inside mechanism. Next remove the white plastic clip from the internal hose connector.
Detach the hose connector from the ‘quick release’ snap on connection.
Hose Replacement Guide
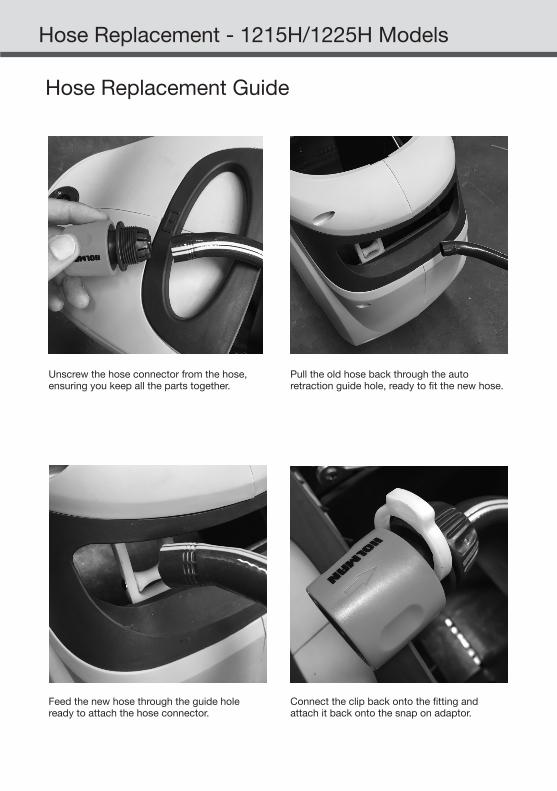
Unscrew the hose connector from the hose, ensuring you keep all the parts together.
Pull the old hose back through the auto retraction guide hole, ready to fit the new hose.
Feed the new hose through the guide hole ready to attach the hose connector.
Connect the clip back onto the fitting and attach it back onto the snap on adaptor.
Hose Replacement Guide
Hose Replacement - 1215H/1225H Models
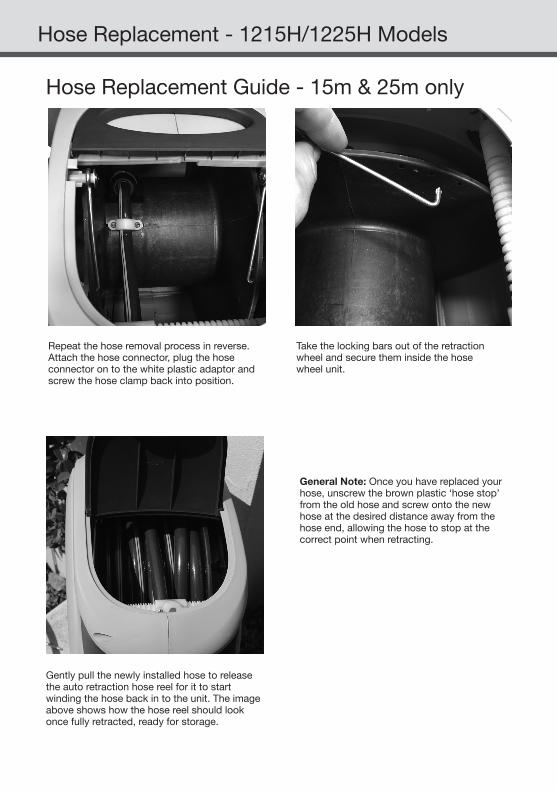
Repeat the hose removal process in reverse. Attach the hose connector, plug the hose connector on to the white plastic adaptor and screw the hose clamp back into position.
Gently pull the newly installed hose to release the auto retraction hose reel for it to start winding the hose back in to the unit. The image above shows how the hose reel should look once fully retracted, ready for storage.
Hose Replacement Guide - 15m & 25m only
Hose Replacement - 1215H/1225H Models
General Note: Once you have replaced your hose, unscrew the brown plastic ‘hose stop’ from the old hose and screw onto the new hose at the desired distance away from the hose end, allowing the hose to stop at the correct point when retracting.
Take the locking bars out of the retraction wheel and secure them inside the hose wheel unit.
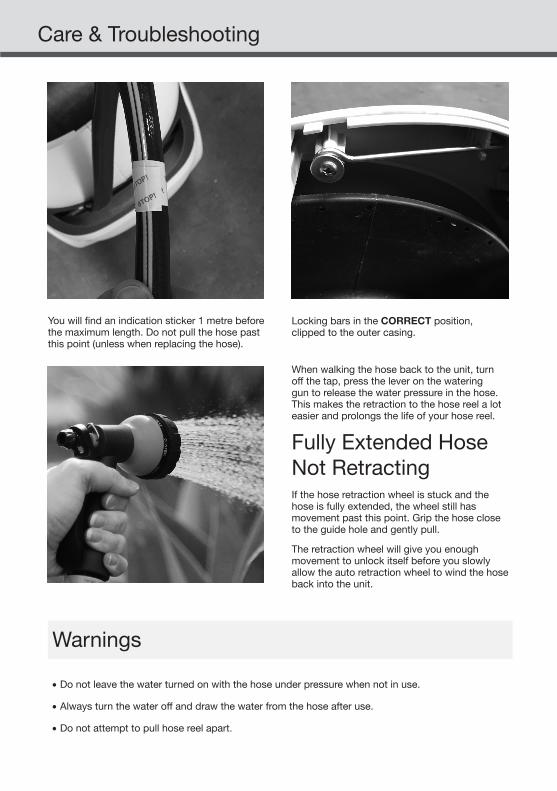
Hose Replacement - 1215H/1225H Models Care & Troubleshooting
Locking bars in the CORRECT position, clipped to the outer casing.
You will find an indication sticker 1 metre before the maximum length. Do not pull the hose past this point (unless when replacing the hose).
When walking the hose back to the unit, turn off the tap, press the lever on the watering gun to release the water pressure in the hose. This makes the retraction to the hose reel a lot easier and prolongs the life of your hose reel.
If the hose retraction wheel is stuck and the hose is fully extended, the wheel still has movement past this point. Grip the hose close to the guide hole and gently pull.
The retraction wheel will give you enough movement to unlock itself before you slowly allow the auto retraction wheel to wind the hose back into the unit.
Fully Extended Hose Not Retracting
Warnings
� Do not leave the water turned on with the hose under pressure when not in use.
� Always turn the water off and draw the water from the hose after use.
� Do not attempt to pull hose reel apart.
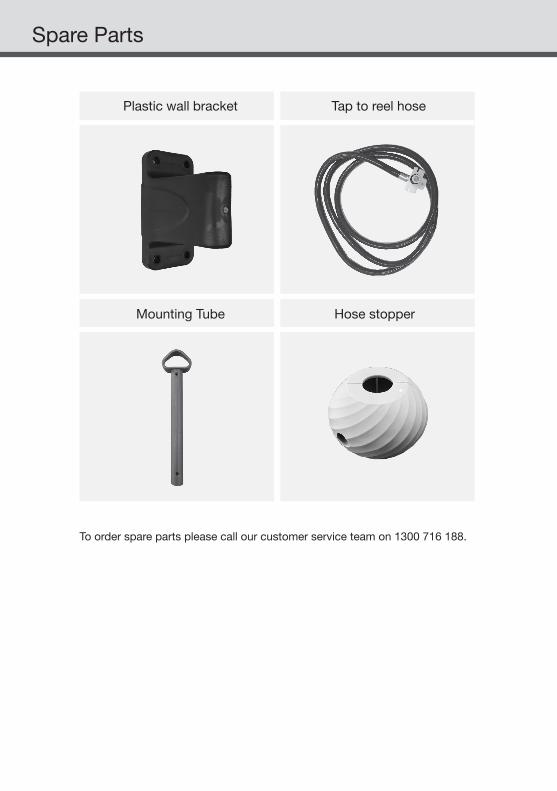
Spare Parts
To order spare parts please call our customer service team on 1300 716 188.
Hose stopperMounting Tube
Tap to reel hosePlastic wall bracket
Spare Parts Notes
Retractable Hose Reel - Warranty
Should you have any questions about this product or its operation please telephoneour customer service helpline on 1300 716 188 or visit www.holmanindustries.com.auHolman offer a 2 year replacement warranty from the original date of purchase.To claim warranty the product must be returned to the place of purchase with a copy of the original receipt.
We will honour all statutory guarantees that this product is of acceptable quality(including that it is fit for purpose).
HOLMAN INDUSTRIES11 Walters DriveOsborne Park
Western Australia 6017Tel: 08 9416 9999 Fax: 08 9416 9920Web: www.holmanindustries.com.au