Embed Size (px)
Citation preview

Retina Network Security Scanner
PowerShell Integration Guide
Revision/Update Information: February 2018
Software Version: 6.5
Revision Number: 0
Corporate Headquarters
5090 N. 40th Street Phoenix, AZ 85018 Phone: 1 818-575-4000
COPYRIGHT NOTICE
Copyright © 2018 BeyondTrust Software, Inc. All rights reserved.
The information contained in this document is subject to change without notice.
No part of this document may be photocopied, reproduced or copied or translated in any manner to another language without the prior written consent of BeyondTrust Software.
BeyondTrust Software is not liable for errors contained herein or for any direct, indirect, sp ecial, incidental or consequential damages, including lost profit or lost data, whether based on warranty, contract, tort, or any other legal theory in connection with the furnishing, performance, or use of this material.
All brand names and product names used in this document are trademarks, registered trademarks, or trade names of their respective holders. BeyondTrust Software is not associated with any other vendors or products mentioned in this document.
PowerShell Integration Guide iii © 2018. BeyondTrust Software, Inc
Contents
Introduction ........................................................................................................................... 5
Documentation Set for Retina ..................................................................................................... 5
Contacting Support ....................................................................................................................... 5
Telephone ................................................................................................................................... 5
Online ......................................................................................................................................... 5
Getting Started ....................................................................................................................... 6
Prerequisites ................................................................................................................................. 6
Importing the Module ................................................................................................................... 6
Samples......................................................................................................................................... 6
Getting Help .................................................................................................................................. 7
List available Cmdlets .................................................................................................................... 8
Environment .......................................................................................................................... 9
Retina Version ............................................................................................................................... 9
Engine Status ................................................................................................................................ 9
Engine Service ............................................................................................................................... 9
Engine Service Memory Dump ......................................................................................................10
Removing Data .............................................................................................................................10
Retina Paths .................................................................................................................................10
Licensing ......................................................................................................................................11
Serial Number ............................................................................................................................11
Configuration ...............................................................................................................................12
Registration Information ..............................................................................................................12
Central Policy ...............................................................................................................................14
Retina Update Server ...................................................................................................................15
Scanning .............................................................................................................................. 16
Create a scan ................................................................................................................................16
Add / Remove Single Port ...........................................................................................................17
Add / Remove Port Groups .........................................................................................................18
Add / Remove Audit Group .........................................................................................................19
Add / Remove Address Group .....................................................................................................20
Add / Remove Stored Credential .................................................................................................21
Add Named Host ........................................................................................................................22
Running a Scan .............................................................................................................................23
Managing Scans ...........................................................................................................................24
Start ...........................................................................................................................................24
Suspend .....................................................................................................................................24
PowerShell Integration Guide iv © 2018. BeyondTrust Software, Inc
Resume ......................................................................................................................................24
Stop ...........................................................................................................................................24
Getting Scan Status ......................................................................................................................26
Get-RetinaScanResults .................................................................................................................27
Getting Results for Specific Scans .................................................................................................27
Get-RetinaScanResults Options ....................................................................................................28
Scheduling Scans ..........................................................................................................................29
Creating a Scheduled Scan..........................................................................................................29
Updating a Scheduled Scan ........................................................................................................31
Removing a Scheduled Scan .......................................................................................................33
SCAP Scanning ..............................................................................................................................34
Create an SCAP Scan ..................................................................................................................34
Running an SCAP Scan ................................................................................................................35
Single Benchmark .......................................................................................................................36
Multiple Benchmarks ..................................................................................................................37
Address Groups .................................................................................................................... 40
Creating Address Groups ..............................................................................................................40
Removing Address Groups ............................................................................................................41
Audit Groups ........................................................................................................................ 42
Creating Audit Groups ..................................................................................................................42
Removing Audit Groups ................................................................................................................43
Port Groups .......................................................................................................................... 44
Creating Port Groups ....................................................................................................................44
Removing Port Groups .................................................................................................................45
Stored Credentials ................................................................................................................ 46
Creating Stored Credentials ..........................................................................................................46
Any Credential ............................................................................................................................46
Windows Credential ...................................................................................................................47
SSH-PlainText Credential ............................................................................................................47
SSH-PublicKey Credential ............................................................................................................48
MySQL Credential .......................................................................................................................49
MSSqlServer Credential ..............................................................................................................49
Oracle Credential .......................................................................................................................50
SNMP Credential ........................................................................................................................52
VMware Credential ....................................................................................................................52
Removing Stored Credentials .......................................................................................................53
Introduction
PowerShell Integration Guide 5 © 2018. BeyondTrust Software, Inc
Introduction
This guide provides the instructions and software requirements for Retina Network Security Scanner PowerShell Integration. For information about its features, benefits, functionality, and basic procedures, see the Retina User Guide.
The following sections include a list of documentation for the product, and where to get additional product information and technical assistance.
Documentation Set for Retina
The complete Retina documentation set includes the following:
• Retina Network Security Scanner Installation Guide
• Retina Network Security Scanner User Guide
• Retina Network Security Scanner Help
• Retina Network Security Scanner PowerShell Integration Guide
Contacting Support
For support, go to our Customer Portal then follow the link to the product you need assistance with.
The Customer Portal contains information regarding contacting Technical Support by telephone and chat, along with product downloads, product installers, license management, account, latest product releases, product documentation, webcasts and product demos.
Telephone
Privileged Account Management Support
Within Continental United States: 800.234.9072
Outside Continental United States: 818.575.4040
Vulnerability Management Support
North/South America: 866.529.2201 | 949.333.1997
+ enter access code
All other Regions:
Standard Support: 949.333.1995 + enter access code
Platinum Support: 949.333.1996 + enter access code
Online
http://www.beyondtrust.com/Resources/Support/
Getting Started
PowerShell Integration Guide 6 © 2018. BeyondTrust Software, Inc
Getting Started
Prerequisites
• Microsoft .Net Framework 4.7 or later
• Windows Management Framework 4.0 or later
Importing the Module
The Retina.PowerShell module must be imported into PowerShell before the Cmdlets will be available.
The Retina.PowerShell dll is located at <Retina Install>\API\PowerShell
Open a PowerShell session and use the Import-Module Cmdlet:
Import-Module .\Retina.PowerShell.dll
If you are not in the <Retina Install>\API\PowerShell directory, you need to specify the full path. Place this code into your PowerShell profile to automatically import the module.
Samples
In the <Retina Install>\API\PowerShell\Samples directory are a number of scripts that use many of the available Cmdlets. These scripts are helpful examples of Cmdlet usage and can serve as a starting point for your own scripts.
Getting Started
PowerShell Integration Guide 7 © 2018. BeyondTrust Software, Inc
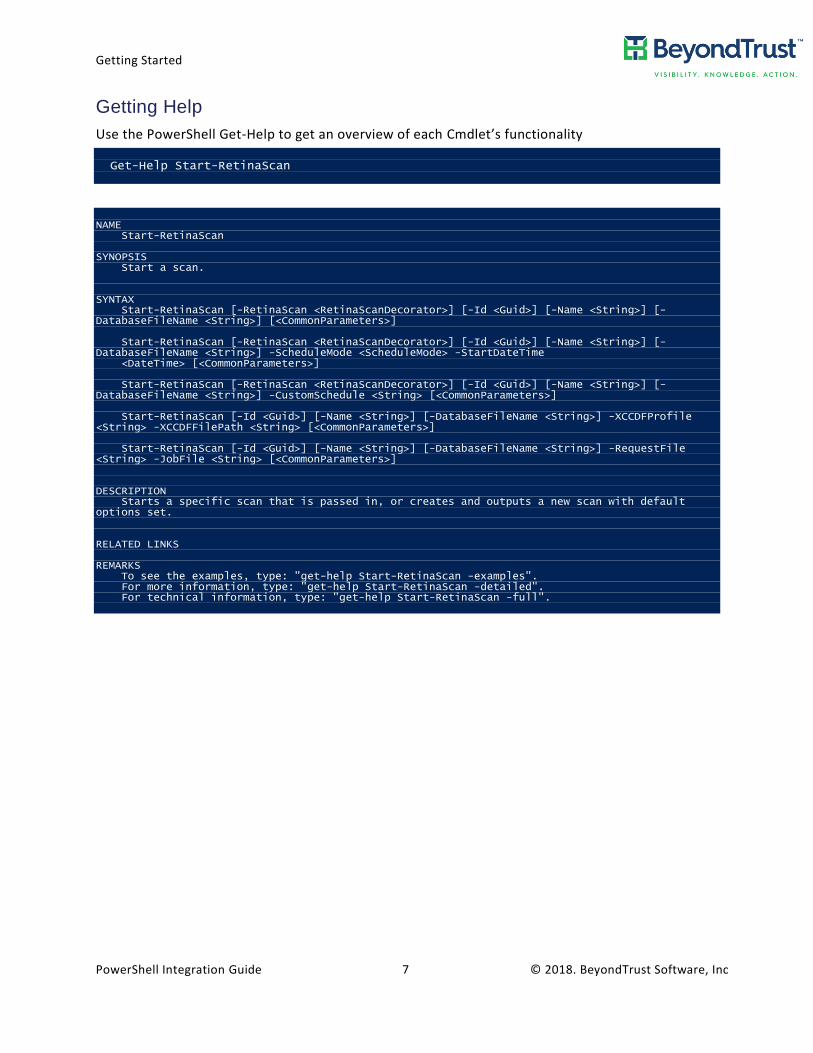
Getting Help
Use the PowerShell Get-Help to get an overview of each Cmdlet’s functionality
Get-Help Start-RetinaScan
NAME Start-RetinaScan SYNOPSIS Start a scan. SYNTAX Start-RetinaScan [-RetinaScan <RetinaScanDecorator>] [-Id <Guid>] [-Name <String>] [-DatabaseFileName <String>] [<CommonParameters>] Start-RetinaScan [-RetinaScan <RetinaScanDecorator>] [-Id <Guid>] [-Name <String>] [-DatabaseFileName <String>] -ScheduleMode <ScheduleMode> -StartDateTime <DateTime> [<CommonParameters>] Start-RetinaScan [-RetinaScan <RetinaScanDecorator>] [-Id <Guid>] [-Name <String>] [-DatabaseFileName <String>] -CustomSchedule <String> [<CommonParameters>] Start-RetinaScan [-Id <Guid>] [-Name <String>] [-DatabaseFileName <String>] -XCCDFProfile <String> -XCCDFFilePath <String> [<CommonParameters>] Start-RetinaScan [-Id <Guid>] [-Name <String>] [-DatabaseFileName <String>] -RequestFile <String> -JobFile <String> [<CommonParameters>] DESCRIPTION Starts a specific scan that is passed in, or creates and outputs a new scan with default options set. RELATED LINKS REMARKS To see the examples, type: "get-help Start-RetinaScan -examples". For more information, type: "get-help Start-RetinaScan -detailed". For technical information, type: "get-help Start-RetinaScan -full".
Getting Started
PowerShell Integration Guide 8 © 2018. BeyondTrust Software, Inc
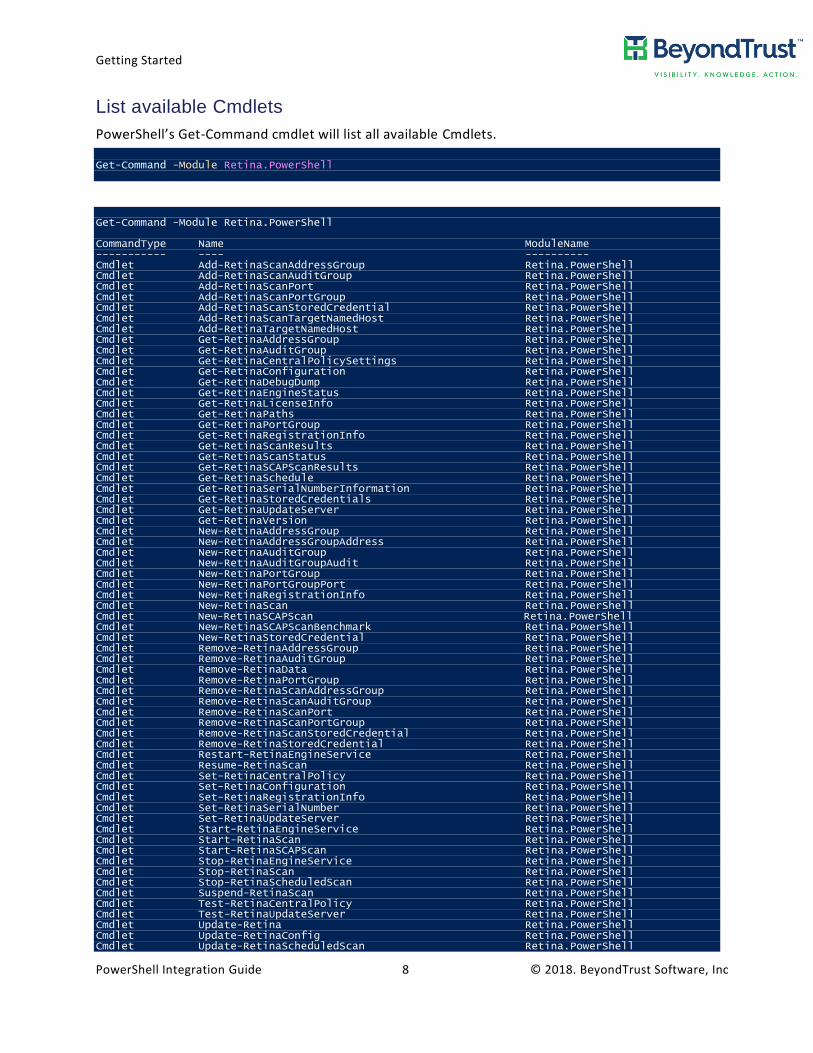
List available Cmdlets
PowerShell’s Get-Command cmdlet will list all available Cmdlets.
Get-Command -Module Retina.PowerShell
Get-Command -Module Retina.PowerShell CommandType Name ModuleName ----------- ---- ---------- Cmdlet Add-RetinaScanAddressGroup Retina.PowerShell Cmdlet Add-RetinaScanAuditGroup Retina.PowerShell Cmdlet Add-RetinaScanPort Retina.PowerShell Cmdlet Add-RetinaScanPortGroup Retina.PowerShell Cmdlet Add-RetinaScanStoredCredential Retina.PowerShell Cmdlet Add-RetinaScanTargetNamedHost Retina.PowerShell Cmdlet Add-RetinaTargetNamedHost Retina.PowerShell Cmdlet Get-RetinaAddressGroup Retina.PowerShell Cmdlet Get-RetinaAuditGroup Retina.PowerShell Cmdlet Get-RetinaCentralPolicySettings Retina.PowerShell Cmdlet Get-RetinaConfiguration Retina.PowerShell Cmdlet Get-RetinaDebugDump Retina.PowerShell Cmdlet Get-RetinaEngineStatus Retina.PowerShell Cmdlet Get-RetinaLicenseInfo Retina.PowerShell Cmdlet Get-RetinaPaths Retina.PowerShell Cmdlet Get-RetinaPortGroup Retina.PowerShell Cmdlet Get-RetinaRegistrationInfo Retina.PowerShell Cmdlet Get-RetinaScanResults Retina.PowerShell Cmdlet Get-RetinaScanStatus Retina.PowerShell Cmdlet Get-RetinaSCAPScanResults Retina.PowerShell Cmdlet Get-RetinaSchedule Retina.PowerShell Cmdlet Get-RetinaSerialNumberInformation Retina.PowerShell Cmdlet Get-RetinaStoredCredentials Retina.PowerShell Cmdlet Get-RetinaUpdateServer Retina.PowerShell Cmdlet Get-RetinaVersion Retina.PowerShell Cmdlet New-RetinaAddressGroup Retina.PowerShell Cmdlet New-RetinaAddressGroupAddress Retina.PowerShell Cmdlet New-RetinaAuditGroup Retina.PowerShell Cmdlet New-RetinaAuditGroupAudit Retina.PowerShell Cmdlet New-RetinaPortGroup Retina.PowerShell Cmdlet New-RetinaPortGroupPort Retina.PowerShell Cmdlet New-RetinaRegistrationInfo Retina.PowerShell Cmdlet New-RetinaScan Retina.PowerShell Cmdlet New-RetinaSCAPScan Retina.PowerShell Cmdlet New-RetinaSCAPScanBenchmark Retina.PowerShell Cmdlet New-RetinaStoredCredential Retina.PowerShell Cmdlet Remove-RetinaAddressGroup Retina.PowerShell Cmdlet Remove-RetinaAuditGroup Retina.PowerShell Cmdlet Remove-RetinaData Retina.PowerShell Cmdlet Remove-RetinaPortGroup Retina.PowerShell Cmdlet Remove-RetinaScanAddressGroup Retina.PowerShell Cmdlet Remove-RetinaScanAuditGroup Retina.PowerShell Cmdlet Remove-RetinaScanPort Retina.PowerShell Cmdlet Remove-RetinaScanPortGroup Retina.PowerShell Cmdlet Remove-RetinaScanStoredCredential Retina.PowerShell Cmdlet Remove-RetinaStoredCredential Retina.PowerShell Cmdlet Restart-RetinaEngineService Retina.PowerShell Cmdlet Resume-RetinaScan Retina.PowerShell Cmdlet Set-RetinaCentralPolicy Retina.PowerShell Cmdlet Set-RetinaConfiguration Retina.PowerShell Cmdlet Set-RetinaRegistrationInfo Retina.PowerShell Cmdlet Set-RetinaSerialNumber Retina.PowerShell Cmdlet Set-RetinaUpdateServer Retina.PowerShell Cmdlet Start-RetinaEngineService Retina.PowerShell Cmdlet Start-RetinaScan Retina.PowerShell Cmdlet Start-RetinaSCAPScan Retina.PowerShell Cmdlet Stop-RetinaEngineService Retina.PowerShell Cmdlet Stop-RetinaScan Retina.PowerShell Cmdlet Stop-RetinaScheduledScan Retina.PowerShell Cmdlet Suspend-RetinaScan Retina.PowerShell Cmdlet Test-RetinaCentralPolicy Retina.PowerShell Cmdlet Test-RetinaUpdateServer Retina.PowerShell Cmdlet Update-Retina Retina.PowerShell Cmdlet Update-RetinaConfig Retina.PowerShell Cmdlet Update-RetinaScheduledScan Retina.PowerShell
Scanning
PowerShell Integration Guide 9 © 2018. BeyondTrust Software, Inc
Environment
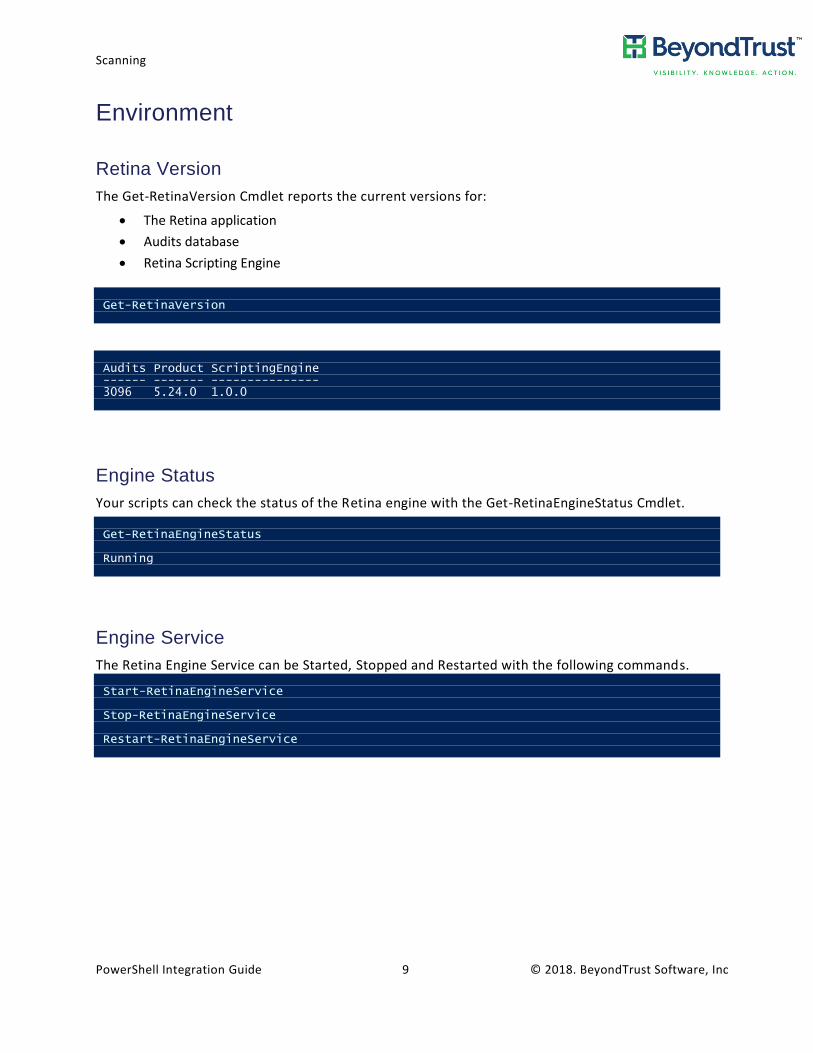
Retina Version
The Get-RetinaVersion Cmdlet reports the current versions for:
• The Retina application
• Audits database
• Retina Scripting Engine
Get-RetinaVersion
Audits Product ScriptingEngine ------ ------- --------------- 3096 5.24.0 1.0.0
Engine Status
Your scripts can check the status of the Retina engine with the Get-RetinaEngineStatus Cmdlet.
Get-RetinaEngineStatus Running
Engine Service
The Retina Engine Service can be Started, Stopped and Restarted with the following commands. Start-RetinaEngineService Stop-RetinaEngineService Restart-RetinaEngineService
Scanning
PowerShell Integration Guide 10 © 2018. BeyondTrust Software, Inc
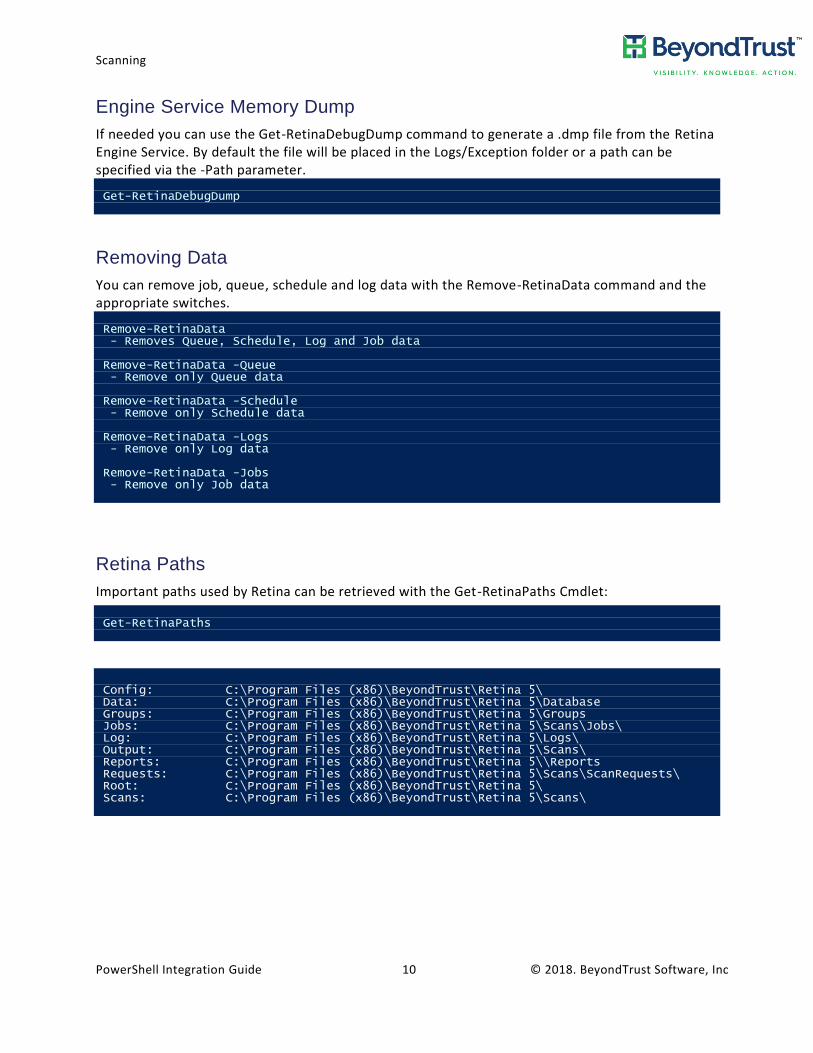
Engine Service Memory Dump
If needed you can use the Get-RetinaDebugDump command to generate a .dmp file from the Retina Engine Service. By default the file will be placed in the Logs/Exception folder or a path can be specified via the -Path parameter. Get-RetinaDebugDump
Removing Data
You can remove job, queue, schedule and log data with the Remove-RetinaData command and the appropriate switches. Remove-RetinaData - Removes Queue, Schedule, Log and Job data Remove-RetinaData -Queue - Remove only Queue data Remove-RetinaData -Schedule - Remove only Schedule data Remove-RetinaData -Logs - Remove only Log data Remove-RetinaData -Jobs - Remove only Job data
Retina Paths
Important paths used by Retina can be retrieved with the Get-RetinaPaths Cmdlet:
Get-RetinaPaths
Config: C:\Program Files (x86)\BeyondTrust\Retina 5\ Data: C:\Program Files (x86)\BeyondTrust\Retina 5\Database Groups: C:\Program Files (x86)\BeyondTrust\Retina 5\Groups Jobs: C:\Program Files (x86)\BeyondTrust\Retina 5\Scans\Jobs\ Log: C:\Program Files (x86)\BeyondTrust\Retina 5\Logs\ Output: C:\Program Files (x86)\BeyondTrust\Retina 5\Scans\ Reports: C:\Program Files (x86)\BeyondTrust\Retina 5\\Reports Requests: C:\Program Files (x86)\BeyondTrust\Retina 5\Scans\ScanRequests\ Root: C:\Program Files (x86)\BeyondTrust\Retina 5\ Scans: C:\Program Files (x86)\BeyondTrust\Retina 5\Scans\
Scanning
PowerShell Integration Guide 11 © 2018. BeyondTrust Software, Inc
Licensing
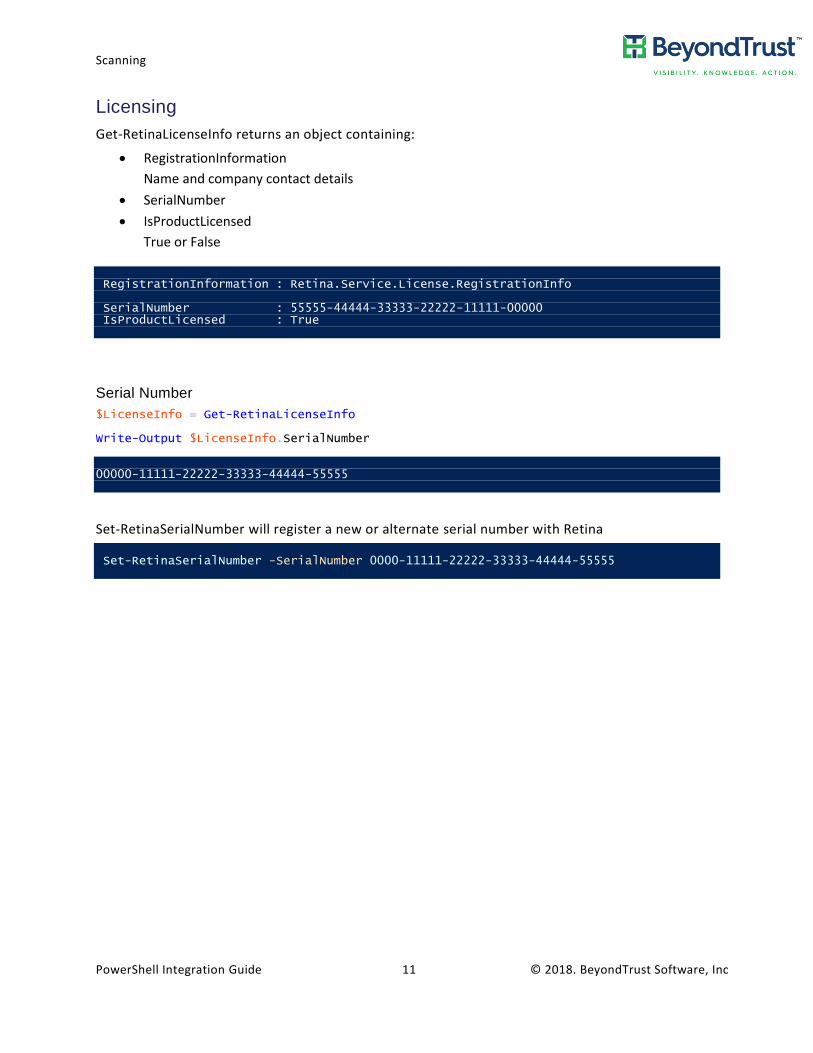
Get-RetinaLicenseInfo returns an object containing:
• RegistrationInformation
Name and company contact details
• SerialNumber
• IsProductLicensed
True or False
RegistrationInformation : Retina.Service.License.RegistrationInfo SerialNumber : 55555-44444-33333-22222-11111-00000 IsProductLicensed : True
Serial Number
$LicenseInfo = Get-RetinaLicenseInfo Write-Output $LicenseInfo.SerialNumber 00000-11111-22222-33333-44444-55555
Set-RetinaSerialNumber will register a new or alternate serial number with Retina
Set-RetinaSerialNumber -SerialNumber 0000-11111-22222-33333-44444-55555

Scanning
PowerShell Integration Guide 12 © 2018. BeyondTrust Software, Inc
Configuration
You can set various configuration settings in Retina using the Get-RetinaConfiguration, Set-RetinaConfiguration, and Update-RetinaConfig Cmdlets:
<# ------------------------------------------------------------------------------ Retina Network Security Scanner Sample PowerShell Script Manage Retina's settings ------------------------------------------------------------------------------ #> # Get the current settings/configuration and assign values to the properties $Config = Get-RetinaConfiguration # View the configuration categories Write-Output $Config # Set the logging settings $Config.Logging.MaxLogDiskSpace = 100 # Set maximum log size to 100 GB # Set the health and recovery settings $Config.HealthAndRecovery.ThreadScanAttempts = 3 # Set the number of scan attempts # Set the settings related to exception and snapshot files $Config.ExceptionAndSnapshot.MaxExceptionDumps = 15 # Limit the number of exception files to 15 # Write the settings to the configuration file Set-RetinaConfiguration -Configuration $Config # Refresh the application's settings from the configuration file Update-RetinaConfig
Registration Information
The registration information data contains contact information for the person associated with the current License.
Get-RetinaRegistrationInfo
Address : 2 Elm City : Winchester Company : SecurityCompany Country : USA Email : [email protected] Fax : FirstName : Ian LastName : Cognito Phone : 949-555-1212 State : CA Title : Software Architect ZipCode : 92596 FullName : Ian Cognito
Scanning
PowerShell Integration Guide 13 © 2018. BeyondTrust Software, Inc
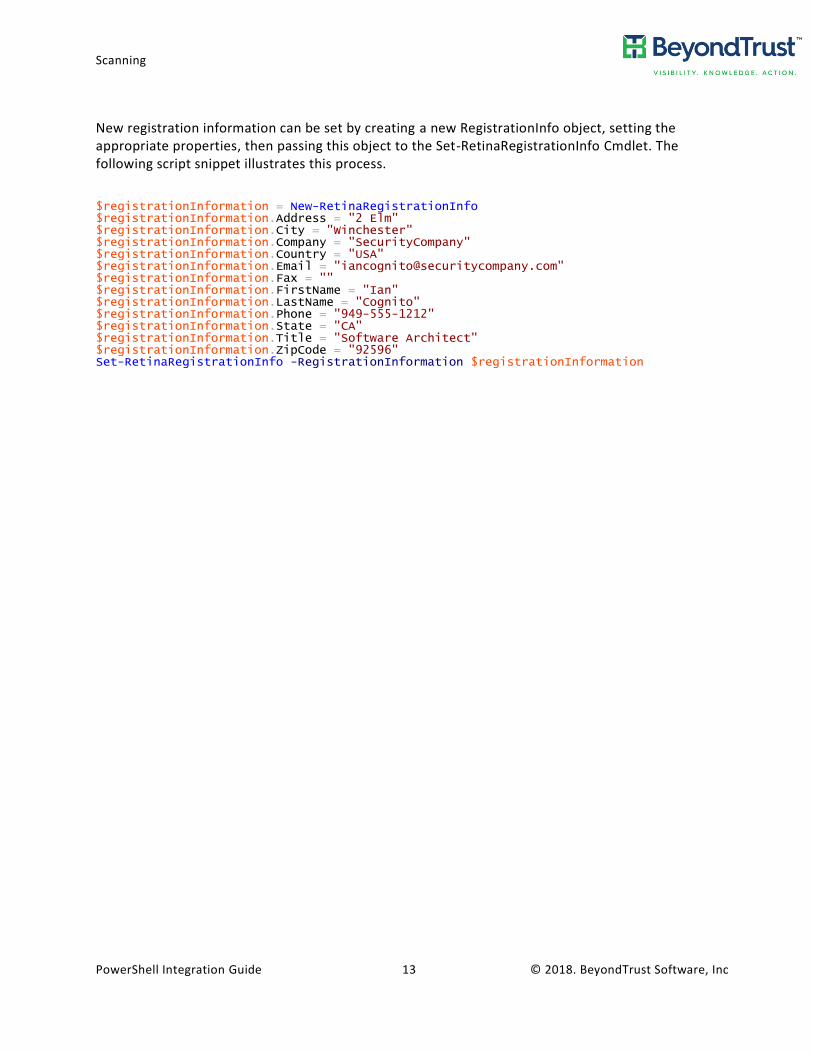
New registration information can be set by creating a new RegistrationInfo object, setting the appropriate properties, then passing this object to the Set-RetinaRegistrationInfo Cmdlet. The following script snippet illustrates this process.
$registrationInformation = New-RetinaRegistrationInfo $registrationInformation.Address = "2 Elm" $registrationInformation.City = "Winchester" $registrationInformation.Company = "SecurityCompany" $registrationInformation.Country = "USA" $registrationInformation.Email = "[email protected]" $registrationInformation.Fax = "" $registrationInformation.FirstName = "Ian" $registrationInformation.LastName = "Cognito" $registrationInformation.Phone = "949-555-1212" $registrationInformation.State = "CA" $registrationInformation.Title = "Software Architect" $registrationInformation.ZipCode = "92596" Set-RetinaRegistrationInfo -RegistrationInformation $registrationInformation
Scanning
PowerShell Integration Guide 14 © 2018. BeyondTrust Software, Inc
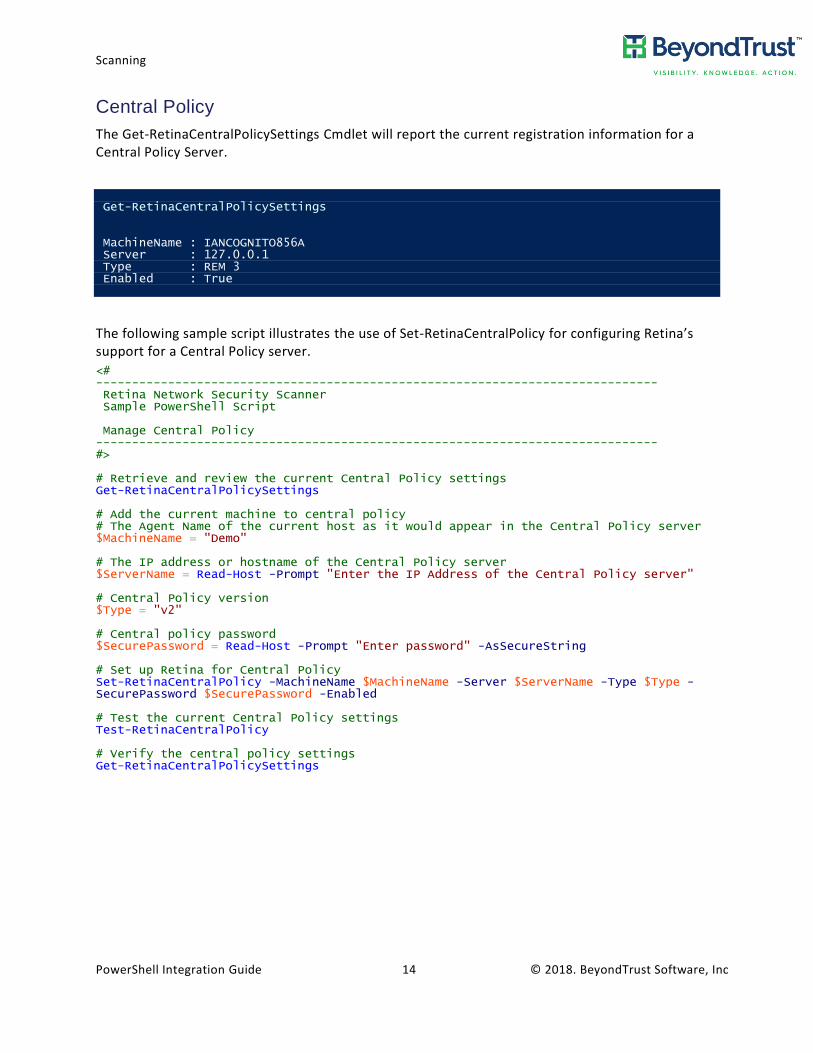
Central Policy
The Get-RetinaCentralPolicySettings Cmdlet will report the current registration information for a Central Policy Server.
Get-RetinaCentralPolicySettings MachineName : IANCOGNITO856A Server : 127.0.0.1 Type : REM 3 Enabled : True
The following sample script illustrates the use of Set-RetinaCentralPolicy for configuring Retina’s support for a Central Policy server.
<# ------------------------------------------------------------------------------ Retina Network Security Scanner Sample PowerShell Script Manage Central Policy ------------------------------------------------------------------------------ #> # Retrieve and review the current Central Policy settings Get-RetinaCentralPolicySettings # Add the current machine to central policy # The Agent Name of the current host as it would appear in the Central Policy server $MachineName = "Demo" # The IP address or hostname of the Central Policy server $ServerName = Read-Host -Prompt "Enter the IP Address of the Central Policy server" # Central Policy version $Type = "v2" # Central policy password $SecurePassword = Read-Host -Prompt "Enter password" -AsSecureString # Set up Retina for Central Policy Set-RetinaCentralPolicy -MachineName $MachineName -Server $ServerName -Type $Type -SecurePassword $SecurePassword -Enabled # Test the current Central Policy settings Test-RetinaCentralPolicy # Verify the central policy settings Get-RetinaCentralPolicySettings
Scanning
PowerShell Integration Guide 15 © 2018. BeyondTrust Software, Inc
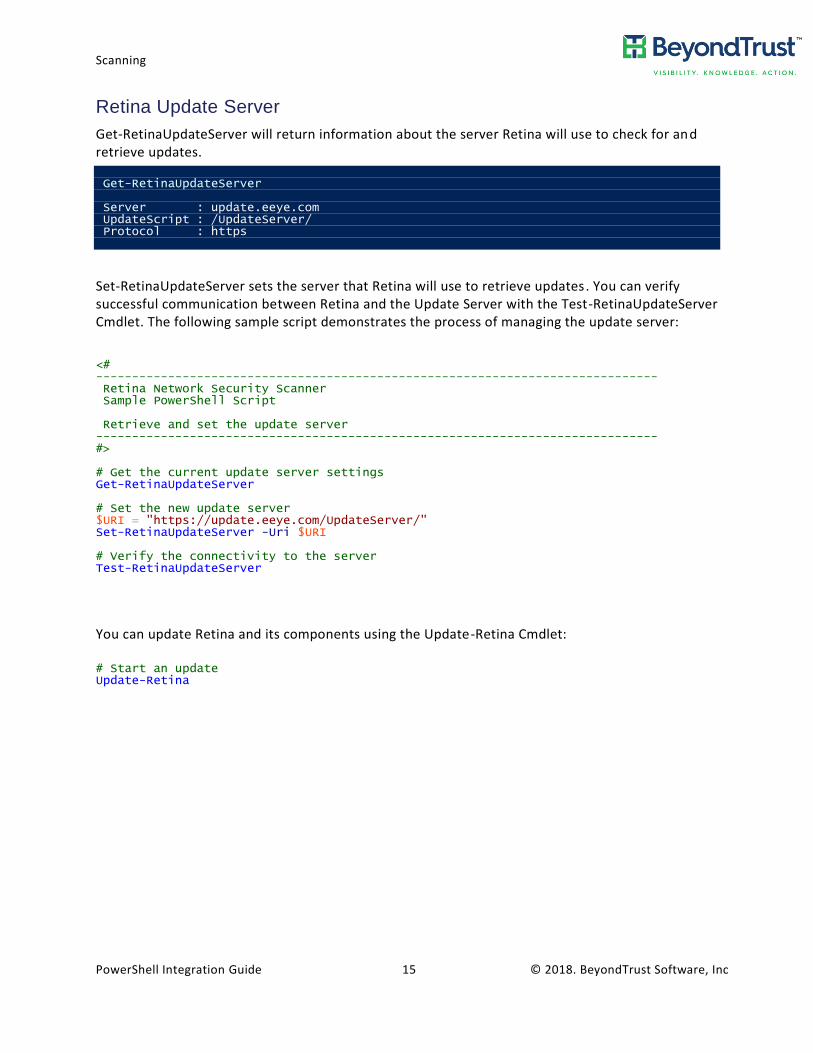
Retina Update Server
Get-RetinaUpdateServer will return information about the server Retina will use to check for and retrieve updates.
Get-RetinaUpdateServer Server : update.eeye.com UpdateScript : /UpdateServer/ Protocol : https
Set-RetinaUpdateServer sets the server that Retina will use to retrieve updates. You can verify successful communication between Retina and the Update Server with the Test-RetinaUpdateServer Cmdlet. The following sample script demonstrates the process of managing the update server:
<# ------------------------------------------------------------------------------ Retina Network Security Scanner Sample PowerShell Script Retrieve and set the update server ------------------------------------------------------------------------------ #> # Get the current update server settings Get-RetinaUpdateServer # Set the new update server $URI = "https://update.eeye.com/UpdateServer/" Set-RetinaUpdateServer -Uri $URI # Verify the connectivity to the server Test-RetinaUpdateServer
You can update Retina and its components using the Update-Retina Cmdlet:
# Start an update Update-Retina
Scanning
PowerShell Integration Guide 16 © 2018. BeyondTrust Software, Inc
Scanning
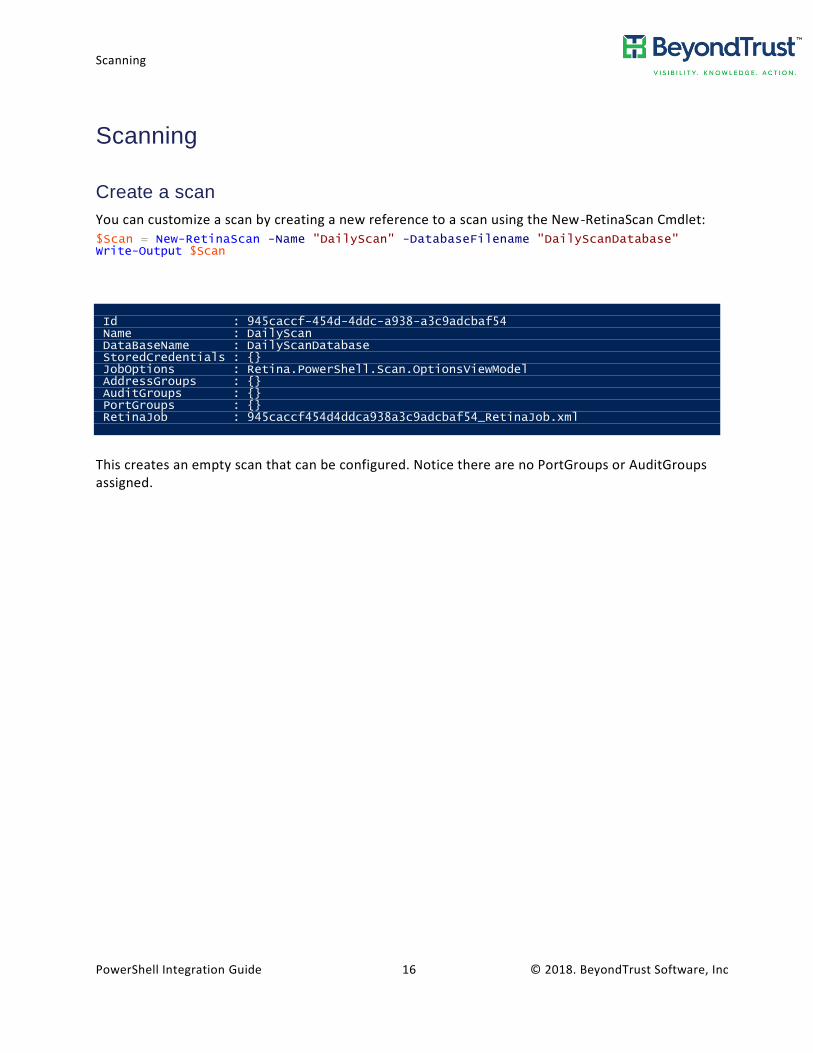
Create a scan
You can customize a scan by creating a new reference to a scan using the New-RetinaScan Cmdlet:
$Scan = New-RetinaScan -Name "DailyScan" -DatabaseFilename "DailyScanDatabase" Write-Output $Scan
Id : 945caccf-454d-4ddc-a938-a3c9adcbaf54 Name : DailyScan DataBaseName : DailyScanDatabase StoredCredentials : {} JobOptions : Retina.PowerShell.Scan.OptionsViewModel AddressGroups : {} AuditGroups : {} PortGroups : {} RetinaJob : 945caccf454d4ddca938a3c9adcbaf54_RetinaJob.xml
This creates an empty scan that can be configured. Notice there are no PortGroups or AuditGroups assigned.
Scanning
PowerShell Integration Guide 17 © 2018. BeyondTrust Software, Inc
Add / Remove Single Port
The Add-RetinaScanPort Cmdlet will associate a single port with the scan. Ports can be added to multiple scans optionally using the pipeline. The example script demonstrates the procedure:
<# ------------------------------------------------------------------------------ Retina Network Security Scanner Sample PowerShell Script Adding a single port to a scan ------------------------------------------------------------------------------ #> # Create a scan to work with $Scan = New-RetinaScan # Add a single port to the scan by passing the scan to the -RetinaScan parameter Add-RetinaScanPort -RetinaScan $Scan -Protocol both -Number 80 # Add a single port to multiple scans using the pipeline $Scan1 = New-RetinaScan $Scan2 = New-RetinaScan $Scan1,$Scan2 | Add-RetinaScanPort -Protocol both -Number 80
The ports can be removed from a scan identically using Remove-RetinaScanPort. The example script below demonstrates the process:
<# ------------------------------------------------------------------------------ Retina Network Security Scanner Sample PowerShell Script Removing a single port from a scan ------------------------------------------------------------------------------ #> # Create a scan to work with $Scan = New-RetinaScan # Remove a single port from the scan by passing the scan to the -RetinaScan parameter Remove-RetinaScanPort -RetinaScan $Scan -Protocol both -Number 80 # Remove a single port from multiple scans using the pipeline $Scan1 = New-RetinaScan $Scan2 = New-RetinaScan $Scan1,$Scan2 | Remove-RetinaScanPort -Protocol both -Number 80
Scanning
PowerShell Integration Guide 18 © 2018. BeyondTrust Software, Inc
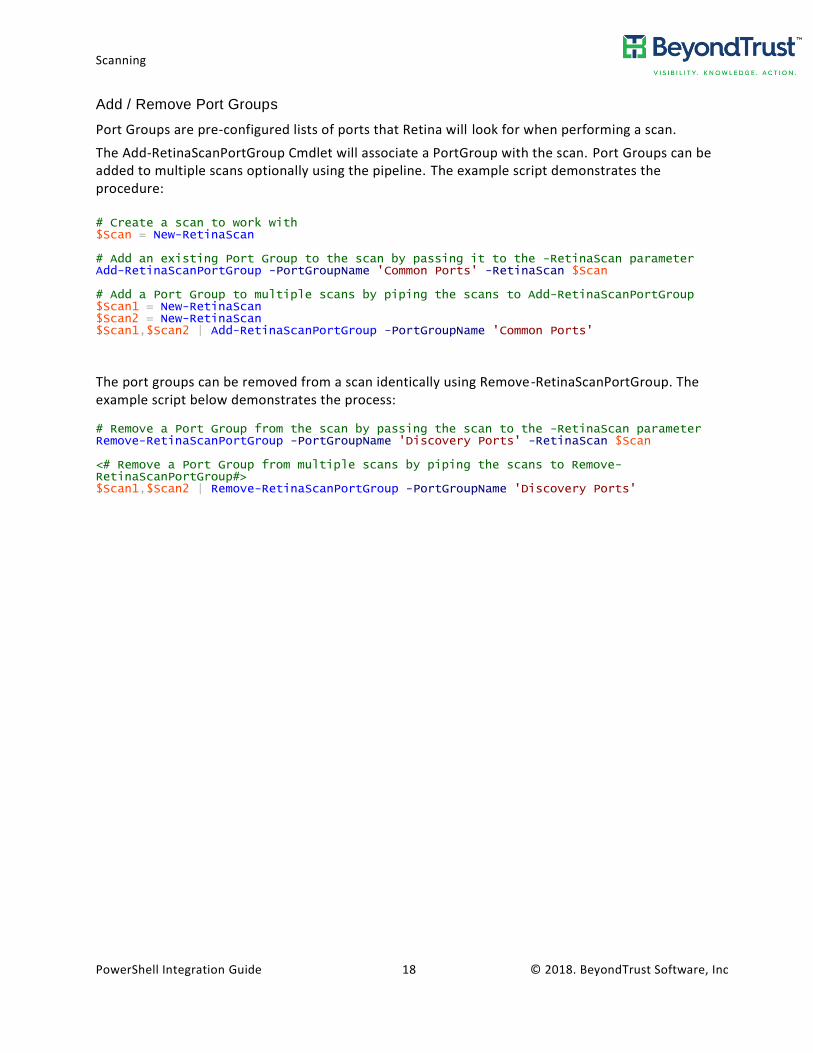
Add / Remove Port Groups
Port Groups are pre-configured lists of ports that Retina will look for when performing a scan.
The Add-RetinaScanPortGroup Cmdlet will associate a PortGroup with the scan. Port Groups can be added to multiple scans optionally using the pipeline. The example script demonstrates the procedure:
# Create a scan to work with $Scan = New-RetinaScan # Add an existing Port Group to the scan by passing it to the -RetinaScan parameter Add-RetinaScanPortGroup -PortGroupName 'Common Ports' -RetinaScan $Scan # Add a Port Group to multiple scans by piping the scans to Add-RetinaScanPortGroup $Scan1 = New-RetinaScan $Scan2 = New-RetinaScan $Scan1,$Scan2 | Add-RetinaScanPortGroup -PortGroupName 'Common Ports'
The port groups can be removed from a scan identically using Remove-RetinaScanPortGroup. The example script below demonstrates the process: # Remove a Port Group from the scan by passing the scan to the -RetinaScan parameter Remove-RetinaScanPortGroup -PortGroupName 'Discovery Ports' -RetinaScan $Scan <# Remove a Port Group from multiple scans by piping the scans to Remove-RetinaScanPortGroup#> $Scan1,$Scan2 | Remove-RetinaScanPortGroup -PortGroupName 'Discovery Ports'
Scanning
PowerShell Integration Guide 19 © 2018. BeyondTrust Software, Inc
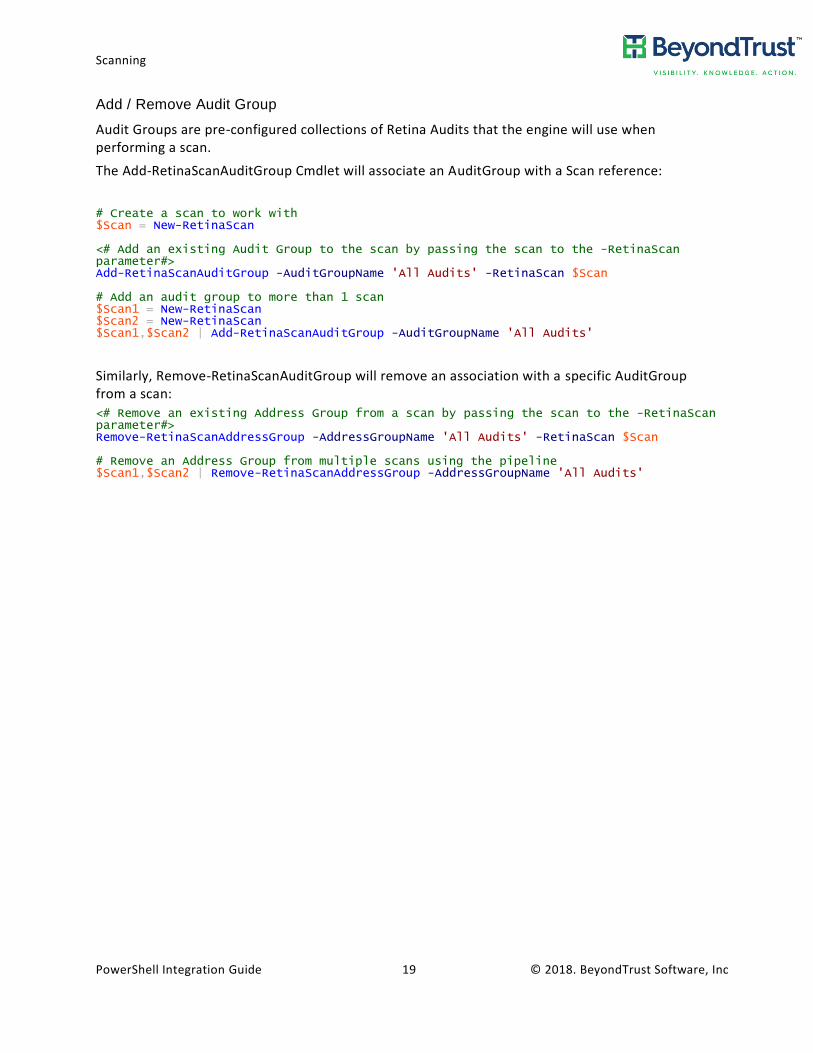
Add / Remove Audit Group
Audit Groups are pre-configured collections of Retina Audits that the engine will use when performing a scan.
The Add-RetinaScanAuditGroup Cmdlet will associate an AuditGroup with a Scan reference:
# Create a scan to work with $Scan = New-RetinaScan <# Add an existing Audit Group to the scan by passing the scan to the -RetinaScan parameter#> Add-RetinaScanAuditGroup -AuditGroupName 'All Audits' -RetinaScan $Scan # Add an audit group to more than 1 scan $Scan1 = New-RetinaScan $Scan2 = New-RetinaScan $Scan1,$Scan2 | Add-RetinaScanAuditGroup -AuditGroupName 'All Audits'
Similarly, Remove-RetinaScanAuditGroup will remove an association with a specific AuditGroup from a scan:
<# Remove an existing Address Group from a scan by passing the scan to the -RetinaScan parameter#> Remove-RetinaScanAddressGroup -AddressGroupName 'All Audits' -RetinaScan $Scan # Remove an Address Group from multiple scans using the pipeline $Scan1,$Scan2 | Remove-RetinaScanAddressGroup -AddressGroupName 'All Audits'
Scanning
PowerShell Integration Guide 20 © 2018. BeyondTrust Software, Inc
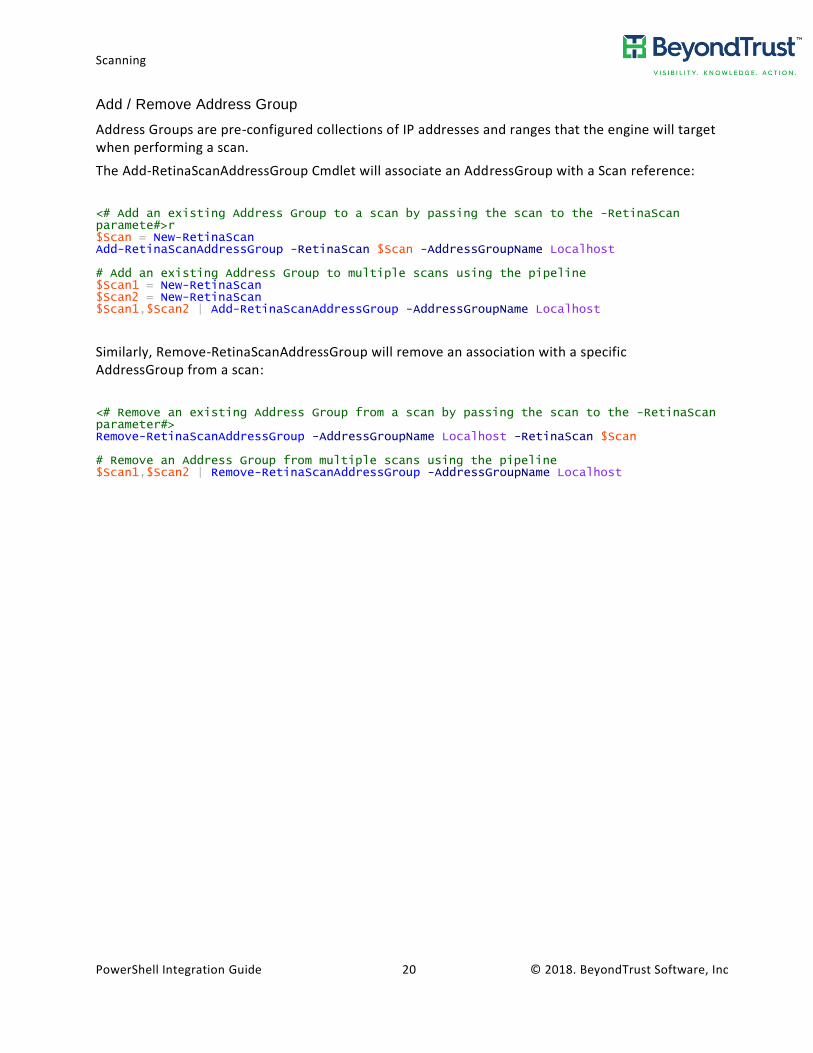
Add / Remove Address Group
Address Groups are pre-configured collections of IP addresses and ranges that the engine will target when performing a scan.
The Add-RetinaScanAddressGroup Cmdlet will associate an AddressGroup with a Scan reference:
<# Add an existing Address Group to a scan by passing the scan to the -RetinaScan paramete#>r $Scan = New-RetinaScan Add-RetinaScanAddressGroup -RetinaScan $Scan -AddressGroupName Localhost # Add an existing Address Group to multiple scans using the pipeline $Scan1 = New-RetinaScan $Scan2 = New-RetinaScan $Scan1,$Scan2 | Add-RetinaScanAddressGroup -AddressGroupName Localhost
Similarly, Remove-RetinaScanAddressGroup will remove an association with a specific AddressGroup from a scan:
<# Remove an existing Address Group from a scan by passing the scan to the -RetinaScan parameter#> Remove-RetinaScanAddressGroup -AddressGroupName Localhost -RetinaScan $Scan # Remove an Address Group from multiple scans using the pipeline $Scan1,$Scan2 | Remove-RetinaScanAddressGroup -AddressGroupName Localhost
Scanning
PowerShell Integration Guide 21 © 2018. BeyondTrust Software, Inc
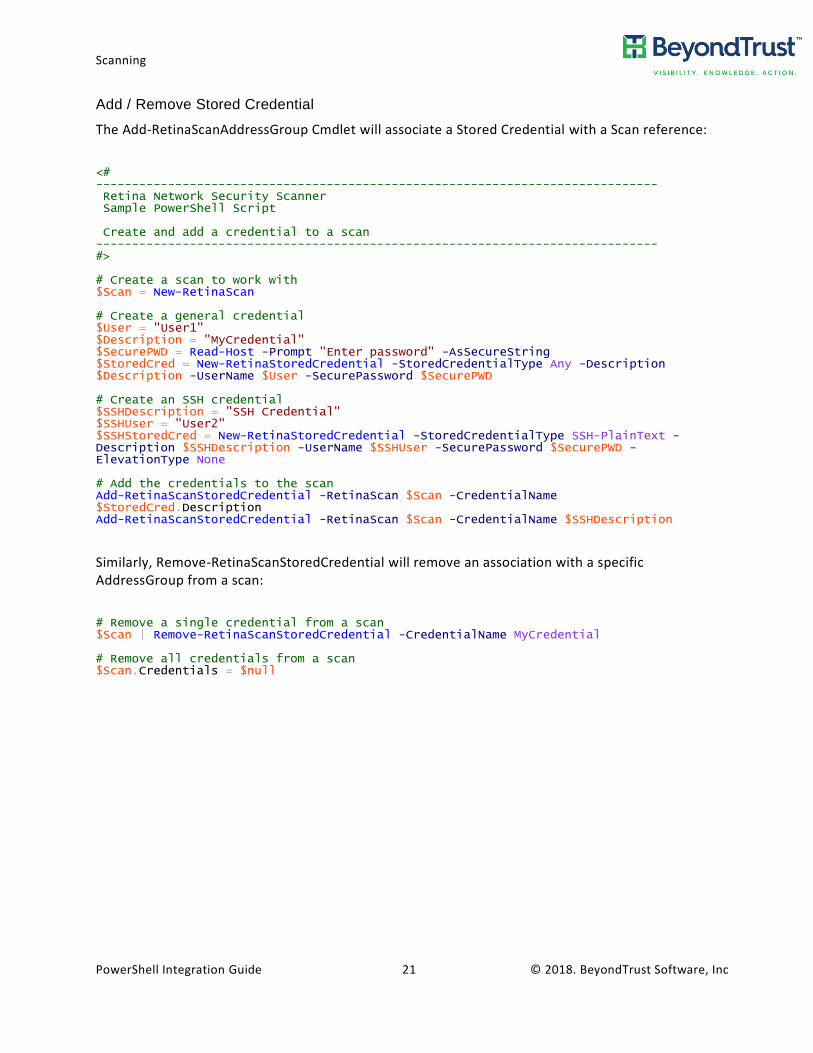
Add / Remove Stored Credential
The Add-RetinaScanAddressGroup Cmdlet will associate a Stored Credential with a Scan reference:
<# ------------------------------------------------------------------------------ Retina Network Security Scanner Sample PowerShell Script Create and add a credential to a scan ------------------------------------------------------------------------------ #> # Create a scan to work with $Scan = New-RetinaScan # Create a general credential $User = "User1" $Description = "MyCredential" $SecurePWD = Read-Host -Prompt "Enter password" -AsSecureString $StoredCred = New-RetinaStoredCredential -StoredCredentialType Any -Description $Description -UserName $User -SecurePassword $SecurePWD # Create an SSH credential $SSHDescription = "SSH Credential" $SSHUser = "User2" $SSHStoredCred = New-RetinaStoredCredential -StoredCredentialType SSH-PlainText -Description $SSHDescription -UserName $SSHUser -SecurePassword $SecurePWD -ElevationType None # Add the credentials to the scan Add-RetinaScanStoredCredential -RetinaScan $Scan -CredentialName $StoredCred.Description Add-RetinaScanStoredCredential -RetinaScan $Scan -CredentialName $SSHDescription
Similarly, Remove-RetinaScanStoredCredential will remove an association with a specific AddressGroup from a scan:
# Remove a single credential from a scan $Scan | Remove-RetinaScanStoredCredential -CredentialName MyCredential # Remove all credentials from a scan $Scan.Credentials = $null
Scanning
PowerShell Integration Guide 22 © 2018. BeyondTrust Software, Inc
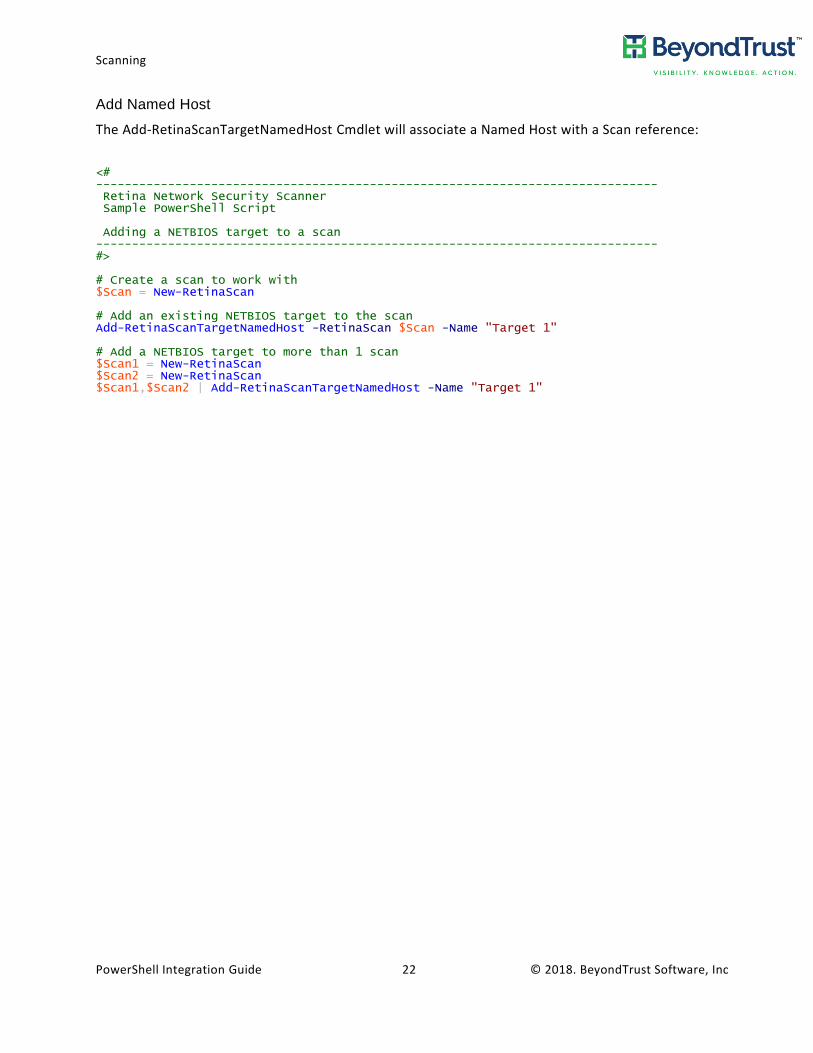
Add Named Host
The Add-RetinaScanTargetNamedHost Cmdlet will associate a Named Host with a Scan reference:
<# ------------------------------------------------------------------------------ Retina Network Security Scanner Sample PowerShell Script Adding a NETBIOS target to a scan ------------------------------------------------------------------------------ #> # Create a scan to work with $Scan = New-RetinaScan # Add an existing NETBIOS target to the scan Add-RetinaScanTargetNamedHost -RetinaScan $Scan -Name "Target 1" # Add a NETBIOS target to more than 1 scan $Scan1 = New-RetinaScan $Scan2 = New-RetinaScan $Scan1,$Scan2 | Add-RetinaScanTargetNamedHost -Name "Target 1"
Scanning
PowerShell Integration Guide 23 © 2018. BeyondTrust Software, Inc
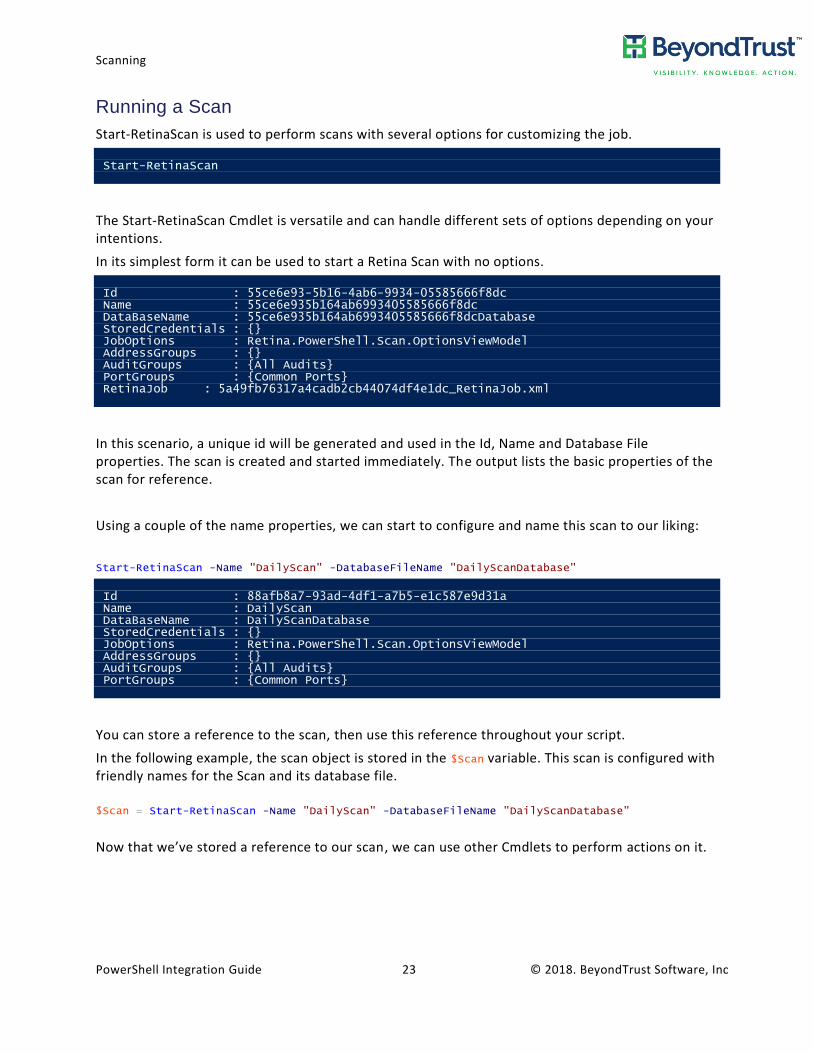
Running a Scan
Start-RetinaScan is used to perform scans with several options for customizing the job.
Start-RetinaScan
The Start-RetinaScan Cmdlet is versatile and can handle different sets of options depending on your intentions.
In its simplest form it can be used to start a Retina Scan with no options.
Id : 55ce6e93-5b16-4ab6-9934-05585666f8dc Name : 55ce6e935b164ab6993405585666f8dc DataBaseName : 55ce6e935b164ab6993405585666f8dcDatabase StoredCredentials : {} JobOptions : Retina.PowerShell.Scan.OptionsViewModel AddressGroups : {} AuditGroups : {All Audits} PortGroups : {Common Ports} RetinaJob : 5a49fb76317a4cadb2cb44074df4e1dc_RetinaJob.xml
In this scenario, a unique id will be generated and used in the Id, Name and Database File properties. The scan is created and started immediately. The output lists the basic properties of the scan for reference.
Using a couple of the name properties, we can start to configure and name this scan to our liking:
Start-RetinaScan -Name "DailyScan" -DatabaseFileName "DailyScanDatabase"
Id : 88afb8a7-93ad-4df1-a7b5-e1c587e9d31a Name : DailyScan DataBaseName : DailyScanDatabase StoredCredentials : {} JobOptions : Retina.PowerShell.Scan.OptionsViewModel AddressGroups : {} AuditGroups : {All Audits} PortGroups : {Common Ports}
You can store a reference to the scan, then use this reference throughout your script.
In the following example, the scan object is stored in the $Scan variable. This scan is configured with friendly names for the Scan and its database file.
$Scan = Start-RetinaScan -Name "DailyScan" -DatabaseFileName "DailyScanDatabase"
Now that we’ve stored a reference to our scan, we can use other Cmdlets to perform actions on it.
Scanning
PowerShell Integration Guide 24 © 2018. BeyondTrust Software, Inc
Managing Scans
Retina includes the ability to control a scan’s lifetime.
Scans can be started, suspended, resumed and aborted.
Start
Once you’ve created a new scan and configured it to your needs, you can start the scan using the Start-RetinaScan Cmdlet. Simply pass the scan into Start-RetinaScan’s -RetinaScan parameter. You can also pipe the scan (or multiple scans) into Start-RetinaScan:
Start-RetinaScan
Suspend
A currently active scan can be suspended for any reason with the Suspend-RetinaScan Cmdlet.
Suspend-RetinaScan
Resume
A suspended scan can be resumed with the Resume-RetinaScan Cmdlet.
Resume-RetinaScan
Stop
An active or queued scan can be aborted with the Stop-RetinaScan Cmdlet.
Stop-RetinaScan
Scanning
PowerShell Integration Guide 25 © 2018. BeyondTrust Software, Inc
The example script below demonstrates the usage of these Cmdlets:
<# ------------------------------------------------------------------------------ Retina Network Security Scanner Sample PowerShell Script Manage scans ------------------------------------------------------------------------------ #> # Create and start a new scan $Scan = Start-RetinaScan # Pause the current scan Suspend-RetinaScan -Name $Scan.Name # Resume the scan Resume-RetinaScan -Name $Scan.Name # Stop the scan Stop-RetinaScan -RetinaScan $Scan # Prompt to remove the scan data if ( (Read-Host -Prompt "Would you like to remove the scan data? (y,n)") -eq "y") { Remove-RetinaData }
Scanning
PowerShell Integration Guide 26 © 2018. BeyondTrust Software, Inc
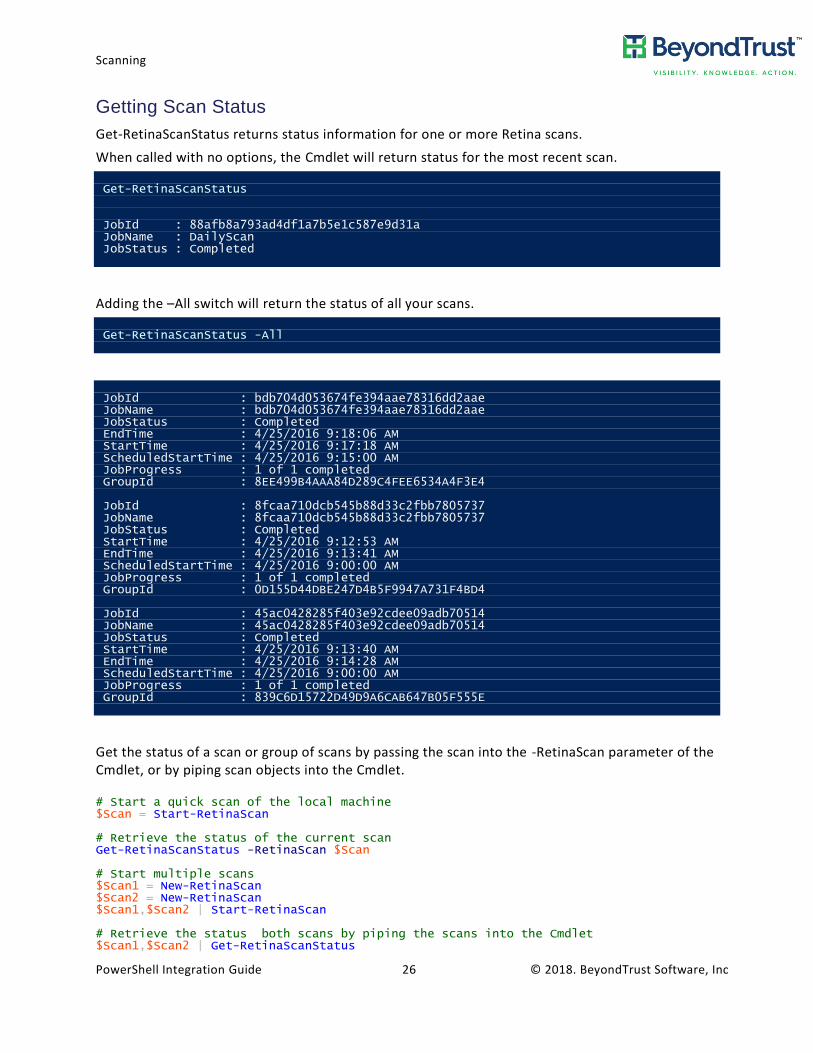
Getting Scan Status
Get-RetinaScanStatus returns status information for one or more Retina scans.
When called with no options, the Cmdlet will return status for the most recent scan.
Get-RetinaScanStatus JobId : 88afb8a793ad4df1a7b5e1c587e9d31a JobName : DailyScan JobStatus : Completed
Adding the –All switch will return the status of all your scans.
Get-RetinaScanStatus -All
JobId : bdb704d053674fe394aae78316dd2aae JobName : bdb704d053674fe394aae78316dd2aae JobStatus : Completed EndTime : 4/25/2016 9:18:06 AM StartTime : 4/25/2016 9:17:18 AM ScheduledStartTime : 4/25/2016 9:15:00 AM JobProgress : 1 of 1 completed GroupId : 8EE499B4AAA84D289C4FEE6534A4F3E4 JobId : 8fcaa710dcb545b88d33c2fbb7805737 JobName : 8fcaa710dcb545b88d33c2fbb7805737 JobStatus : Completed StartTime : 4/25/2016 9:12:53 AM EndTime : 4/25/2016 9:13:41 AM ScheduledStartTime : 4/25/2016 9:00:00 AM JobProgress : 1 of 1 completed GroupId : 0D155D44DBE247D4B5F9947A731F4BD4 JobId : 45ac0428285f403e92cdee09adb70514 JobName : 45ac0428285f403e92cdee09adb70514 JobStatus : Completed StartTime : 4/25/2016 9:13:40 AM EndTime : 4/25/2016 9:14:28 AM ScheduledStartTime : 4/25/2016 9:00:00 AM JobProgress : 1 of 1 completed GroupId : 839C6D15722D49D9A6CAB647B05F555E
Get the status of a scan or group of scans by passing the scan into the -RetinaScan parameter of the Cmdlet, or by piping scan objects into the Cmdlet. # Start a quick scan of the local machine $Scan = Start-RetinaScan # Retrieve the status of the current scan Get-RetinaScanStatus -RetinaScan $Scan # Start multiple scans $Scan1 = New-RetinaScan $Scan2 = New-RetinaScan $Scan1,$Scan2 | Start-RetinaScan # Retrieve the status both scans by piping the scans into the Cmdlet $Scan1,$Scan2 | Get-RetinaScanStatus
Scanning
PowerShell Integration Guide 27 © 2018. BeyondTrust Software, Inc
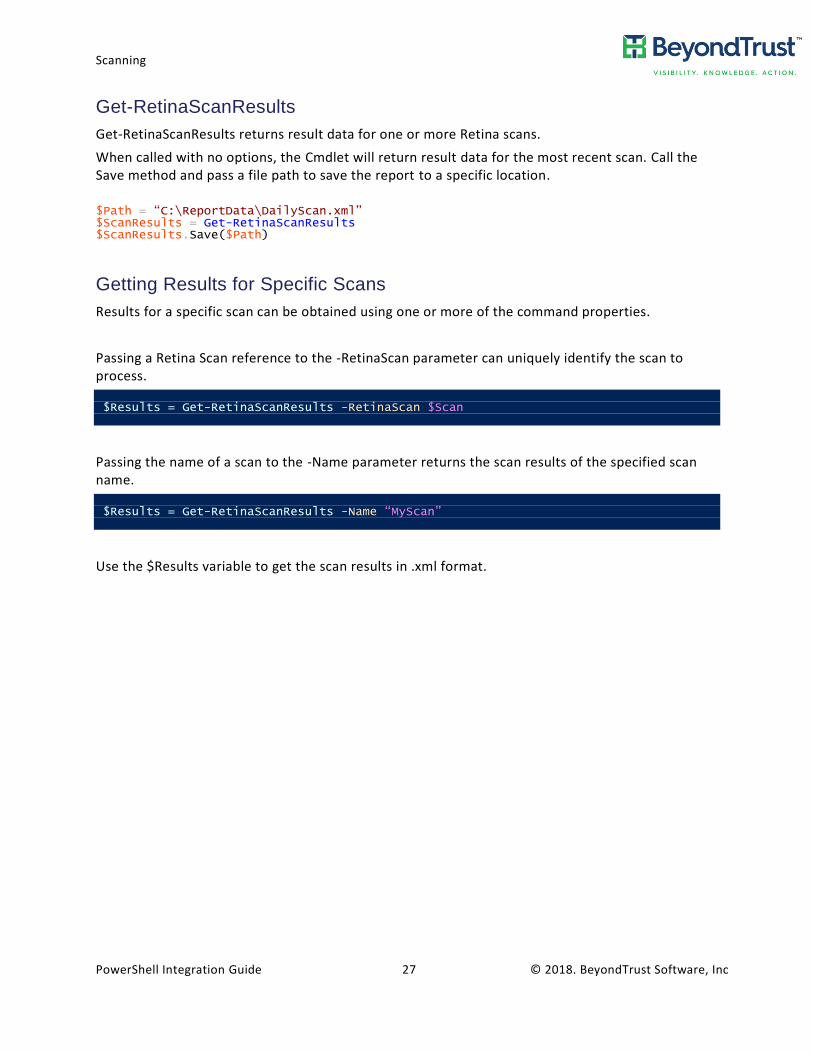
Get-RetinaScanResults
Get-RetinaScanResults returns result data for one or more Retina scans.
When called with no options, the Cmdlet will return result data for the most recent scan. Call the Save method and pass a file path to save the report to a specific location.
$Path = “C:\ReportData\DailyScan.xml” $ScanResults = Get-RetinaScanResults $ScanResults.Save($Path)
Getting Results for Specific Scans
Results for a specific scan can be obtained using one or more of the command properties.
Passing a Retina Scan reference to the -RetinaScan parameter can uniquely identify the scan to process.
$Results = Get-RetinaScanResults -RetinaScan $Scan
Passing the name of a scan to the -Name parameter returns the scan results of the specified scan name.
$Results = Get-RetinaScanResults -Name “MyScan”
Use the $Results variable to get the scan results in .xml format.
Scanning
PowerShell Integration Guide 28 © 2018. BeyondTrust Software, Inc
Get-RetinaScanResults Options
The level of detail in data returned from Get-RetinaScanResults can be tailored for specific needs.
-IncludePorts
Include specific information about the ports detected and the applications utilizing them.
-IncludeProcesses
Include detailed information about which processes were detected on scanned machines. -IncludeServices
Include detailed information about which services were found on scanned machines. -IncludeHardware
Include specific information about what hardware was detected on scanned machines. -IncludeShares
Include details about the shares present on scanned machines. -IncludeUsers
Include specific information about the users and groups found on the scanned machines. -IncludeSoftware
Include details about which software applications were detected on the scanned machines.
-IncludeCertificates
Include details about certificates installed on the target system.
-IncludeProtocols
Include details about protocols the target system supports. -IncludeAll
Include all detailed information. Ports, Processes, Services, Hardware, Shares, Users and Software.
-IncludeAlerts
Include alerts generated during a scan.
-IncludeAuditsNotVerified
Include audits...
-IncludeAuditsNotVulnerable
Include audit information about vulnerabilities that were not found in the scan.
-IncludeAuditsVulnerable
Include audit information about vulnerabilities the were found in the scan.
Scanning
PowerShell Integration Guide 29 © 2018. BeyondTrust Software, Inc
-IncludeGeneral
Include general information about each machine in the scan.
-IncludeUserGroups
Include information about user groups for each machine in the scan.
Get-RetinaScanResults -RetinaScan $Scan -Name "DailyScan" -IncludeAll
Scheduling Scans
Creating a Scheduled Scan
You can create a recurring scan using the Start-RetinaScan Cmdlet and passing the Cmdlet a scan as well as a schedule string:
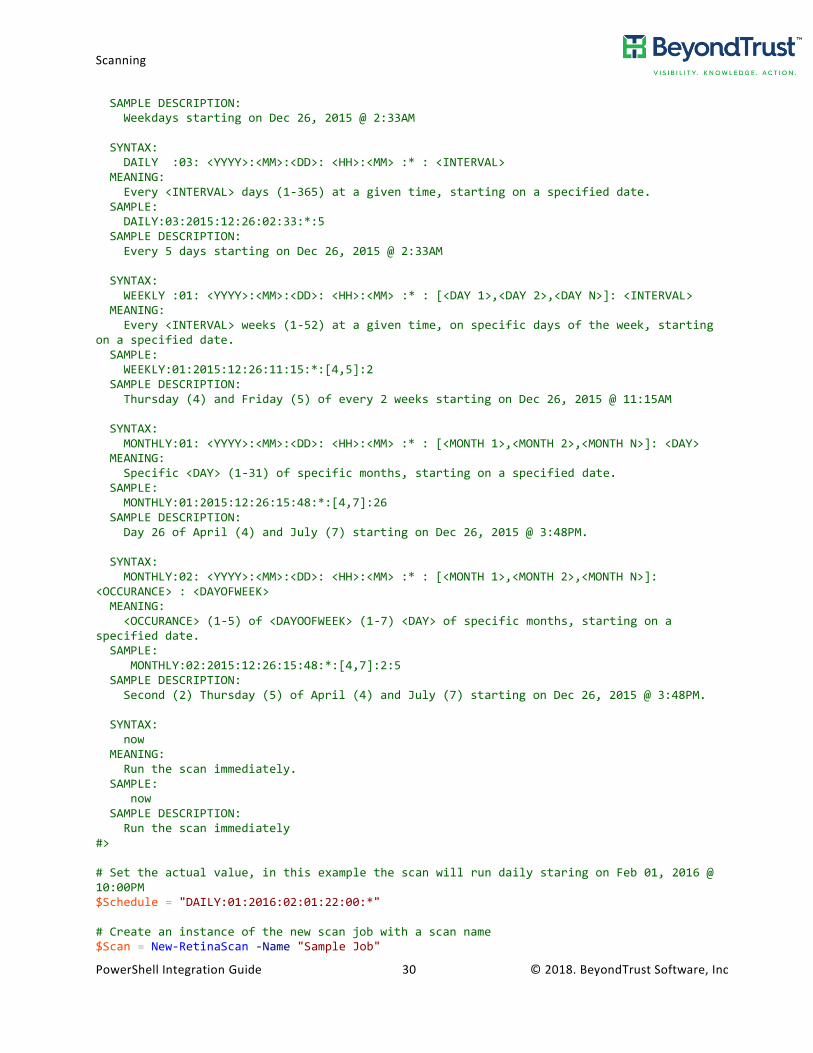
<# ------------------------------------------------------------------------------ Retina Network Security Scanner Sample PowerShell Script Add and remove scheduled scans ------------------------------------------------------------------------------ #> # Generate GUID for to be used as the Job ID. $JobId = [GUID]::NewGuid().ToString("N") <# Set the schedule frequency. Valid values are based on the below information SYNTAX: ONCE :01: <YYYY>:<MM>:<DD>: <HH>:<MM> :* MEANING: Run once on given date and time. SAMPLE: ONCE:01:2015:12:26:11:15 :* SAMPLE DESCRIPTION: Run once on Dec 26, 2015 @ 11:15AM SYNTAX: DAILY :01: <YYYY>:<MM>:<DD>: <HH>:<MM> :* MEANING: Every day at a given time, starting on a specified date. SAMPLE: DAILY:01:2015:12:26:02:33:* SAMPLE DESCRIPTION: Daily scan starting on Dec 26, 2015 @ 2:33AM SYNTAX: DAILY :02: <YYYY>:<MM>:<DD>: <HH>:<MM> :* MEANING: Weekdays only at a given time, starting on a specified date. SAMPLE: DAILY:02:2015:12:26:02:33:*
Scanning
PowerShell Integration Guide 30 © 2018. BeyondTrust Software, Inc
SAMPLE DESCRIPTION: Weekdays starting on Dec 26, 2015 @ 2:33AM SYNTAX: DAILY :03: <YYYY>:<MM>:<DD>: <HH>:<MM> :* : <INTERVAL> MEANING: Every <INTERVAL> days (1-365) at a given time, starting on a specified date. SAMPLE: DAILY:03:2015:12:26:02:33:*:5 SAMPLE DESCRIPTION: Every 5 days starting on Dec 26, 2015 @ 2:33AM SYNTAX: WEEKLY :01: <YYYY>:<MM>:<DD>: <HH>:<MM> :* : [<DAY 1>,<DAY 2>,<DAY N>]: <INTERVAL> MEANING: Every <INTERVAL> weeks (1-52) at a given time, on specific days of the week, starting on a specified date. SAMPLE: WEEKLY:01:2015:12:26:11:15:*:[4,5]:2 SAMPLE DESCRIPTION: Thursday (4) and Friday (5) of every 2 weeks starting on Dec 26, 2015 @ 11:15AM SYNTAX: MONTHLY:01: <YYYY>:<MM>:<DD>: <HH>:<MM> :* : [<MONTH 1>,<MONTH 2>,<MONTH N>]: <DAY> MEANING: Specific <DAY> (1-31) of specific months, starting on a specified date. SAMPLE: MONTHLY:01:2015:12:26:15:48:*:[4,7]:26 SAMPLE DESCRIPTION: Day 26 of April (4) and July (7) starting on Dec 26, 2015 @ 3:48PM. SYNTAX: MONTHLY:02: <YYYY>:<MM>:<DD>: <HH>:<MM> :* : [<MONTH 1>,<MONTH 2>,<MONTH N>]: <OCCURANCE> : <DAYOFWEEK> MEANING: <OCCURANCE> (1-5) of <DAYOOFWEEK> (1-7) <DAY> of specific months, starting on a specified date. SAMPLE: MONTHLY:02:2015:12:26:15:48:*:[4,7]:2:5 SAMPLE DESCRIPTION: Second (2) Thursday (5) of April (4) and July (7) starting on Dec 26, 2015 @ 3:48PM. SYNTAX: now MEANING: Run the scan immediately. SAMPLE: now SAMPLE DESCRIPTION: Run the scan immediately #> # Set the actual value, in this example the scan will run daily staring on Feb 01, 2016 @ 10:00PM $Schedule = "DAILY:01:2016:02:01:22:00:*" # Create an instance of the new scan job with a scan name $Scan = New-RetinaScan -Name "Sample Job"
Scanning
PowerShell Integration Guide 31 © 2018. BeyondTrust Software, Inc
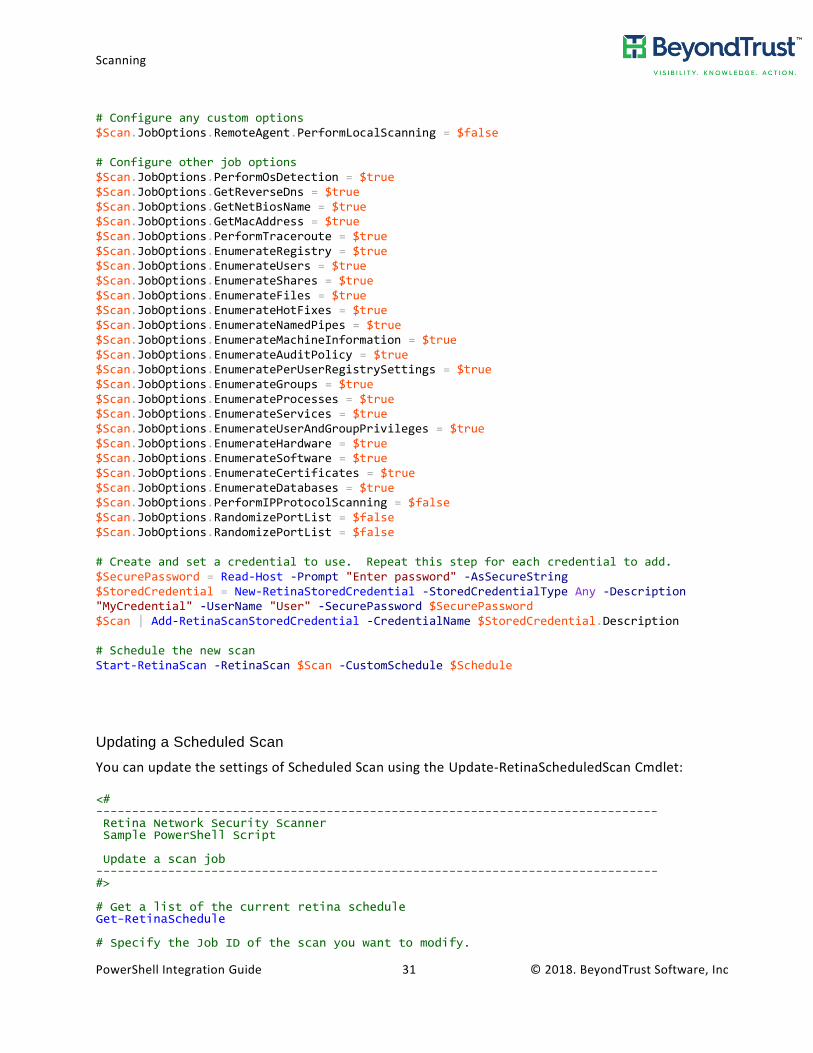
# Configure any custom options $Scan.JobOptions.RemoteAgent.PerformLocalScanning = $false # Configure other job options $Scan.JobOptions.PerformOsDetection = $true $Scan.JobOptions.GetReverseDns = $true $Scan.JobOptions.GetNetBiosName = $true $Scan.JobOptions.GetMacAddress = $true $Scan.JobOptions.PerformTraceroute = $true $Scan.JobOptions.EnumerateRegistry = $true $Scan.JobOptions.EnumerateUsers = $true $Scan.JobOptions.EnumerateShares = $true $Scan.JobOptions.EnumerateFiles = $true $Scan.JobOptions.EnumerateHotFixes = $true $Scan.JobOptions.EnumerateNamedPipes = $true $Scan.JobOptions.EnumerateMachineInformation = $true $Scan.JobOptions.EnumerateAuditPolicy = $true $Scan.JobOptions.EnumeratePerUserRegistrySettings = $true $Scan.JobOptions.EnumerateGroups = $true $Scan.JobOptions.EnumerateProcesses = $true $Scan.JobOptions.EnumerateServices = $true $Scan.JobOptions.EnumerateUserAndGroupPrivileges = $true $Scan.JobOptions.EnumerateHardware = $true $Scan.JobOptions.EnumerateSoftware = $true $Scan.JobOptions.EnumerateCertificates = $true $Scan.JobOptions.EnumerateDatabases = $true $Scan.JobOptions.PerformIPProtocolScanning = $false $Scan.JobOptions.RandomizePortList = $false $Scan.JobOptions.RandomizePortList = $false # Create and set a credential to use. Repeat this step for each credential to add. $SecurePassword = Read-Host -Prompt "Enter password" -AsSecureString $StoredCredential = New-RetinaStoredCredential -StoredCredentialType Any -Description "MyCredential" -UserName "User" -SecurePassword $SecurePassword $Scan | Add-RetinaScanStoredCredential -CredentialName $StoredCredential.Description # Schedule the new scan Start-RetinaScan -RetinaScan $Scan -CustomSchedule $Schedule
Updating a Scheduled Scan
You can update the settings of Scheduled Scan using the Update-RetinaScheduledScan Cmdlet: <# ------------------------------------------------------------------------------ Retina Network Security Scanner Sample PowerShell Script Update a scan job ------------------------------------------------------------------------------ #> # Get a list of the current retina schedule Get-RetinaSchedule # Specify the Job ID of the scan you want to modify.

Scanning
PowerShell Integration Guide 32 © 2018. BeyondTrust Software, Inc
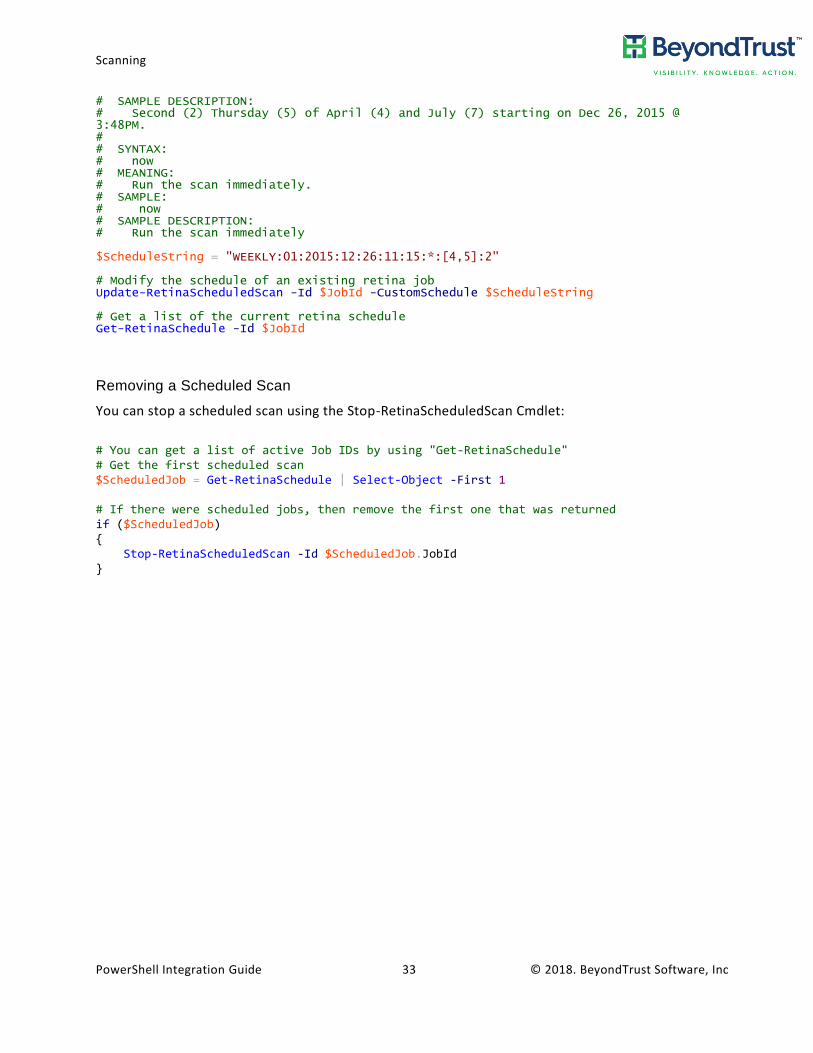
$JobId = $null # Make sure that a JobId was specified. $JobId = Read-Host -Prompt 'Input a Job ID' # Set the schedule frequency. Valid values are based on the below information # SYNTAX: # ONCE :01: <YYYY>:<MM>:<DD>: <HH>:<MM> :* # MEANING: # Run once on given date and time. # SAMPLE: # ONCE:01:2015:12:26:11:15 :* # SAMPLE DESCRIPTION: # Run once on Dec 26, 2015 @ 11:15AM # # SYNTAX: # DAILY :01: <YYYY>:<MM>:<DD>: <HH>:<MM> :* # MEANING: # Every day at a given time, starting on a specified date. # SAMPLE: # DAILY:01:2015:12:26:02:33:* # SAMPLE DESCRIPTION: # Daily scan starting on Dec 26, 2015 @ 2:33AM # # SYNTAX: # DAILY :02: <YYYY>:<MM>:<DD>: <HH>:<MM> :* # MEANING: # Weekdays only at a given time, starting on a specified date. # SAMPLE: # DAILY:02:2015:12:26:02:33:* # SAMPLE DESCRIPTION: # Weekdays starting on Dec 26, 2015 @ 2:33AM # # SYNTAX: # DAILY :03: <YYYY>:<MM>:<DD>: <HH>:<MM> :* : <INTERVAL> # MEANING: # Every <INTERVAL> days (1-365) at a given time, starting on a specified date. # SAMPLE: # DAILY:03:2015:12:26:02:33:*:5 # SAMPLE DESCRIPTION: # Every 5 days starting on Dec 26, 2015 @ 2:33AM # # SYNTAX: # WEEKLY :01: <YYYY>:<MM>:<DD>: <HH>:<MM> :* : [<DAY 1>,<DAY 2>,<DAY N>]: <INTERVAL> # MEANING: # Every <INTERVAL> weeks (1-52) at a given time, on specific days of the week, starting on a specified date. # SAMPLE: # WEEKLY:01:2015:12:26:11:15:*:[4,5]:2 # SAMPLE DESCRIPTION: # Thursday (4) and Friday (5) of every 2 weeks starting on Dec 26, 2015 @ 11:15AM # # SYNTAX: # MONTHLY:01: <YYYY>:<MM>:<DD>: <HH>:<MM> :* : [<MONTH 1>,<MONTH 2>,<MONTH N>]: <DAY> # MEANING: # Specific <DAY> (1-31) of specific months, starting on a specified date. # SAMPLE: # MONTHLY:01:2015:12:26:15:48:*:[4,7]:26 # SAMPLE DESCRIPTION: # Day 26 of April (4) and July (7) starting on Dec 26, 2015 @ 3:48PM. # # SYNTAX: # MONTHLY:02: <YYYY>:<MM>:<DD>: <HH>:<MM> :* : [<MONTH 1>,<MONTH 2>,<MONTH N>]: <OCCURANCE> : <DAYOFWEEK> # MEANING: # <OCCURANCE> (1-5) of <DAYOOFWEEK> (1-7) <DAY> of specific months, starting on a specified date. # SAMPLE: # MONTHLY:02:2015:12:26:15:48:*:[4,7]:2:5
Scanning
PowerShell Integration Guide 33 © 2018. BeyondTrust Software, Inc
# SAMPLE DESCRIPTION: # Second (2) Thursday (5) of April (4) and July (7) starting on Dec 26, 2015 @ 3:48PM. # # SYNTAX: # now # MEANING: # Run the scan immediately. # SAMPLE: # now # SAMPLE DESCRIPTION: # Run the scan immediately $ScheduleString = "WEEKLY:01:2015:12:26:11:15:*:[4,5]:2" # Modify the schedule of an existing retina job Update-RetinaScheduledScan -Id $JobId -CustomSchedule $ScheduleString # Get a list of the current retina schedule Get-RetinaSchedule -Id $JobId
Removing a Scheduled Scan
You can stop a scheduled scan using the Stop-RetinaScheduledScan Cmdlet:
# You can get a list of active Job IDs by using "Get-RetinaSchedule" # Get the first scheduled scan $ScheduledJob = Get-RetinaSchedule | Select-Object -First 1 # If there were scheduled jobs, then remove the first one that was returned if ($ScheduledJob) { Stop-RetinaScheduledScan -Id $ScheduledJob.JobId }
Scanning
PowerShell Integration Guide 34 © 2018. BeyondTrust Software, Inc
SCAP Scanning
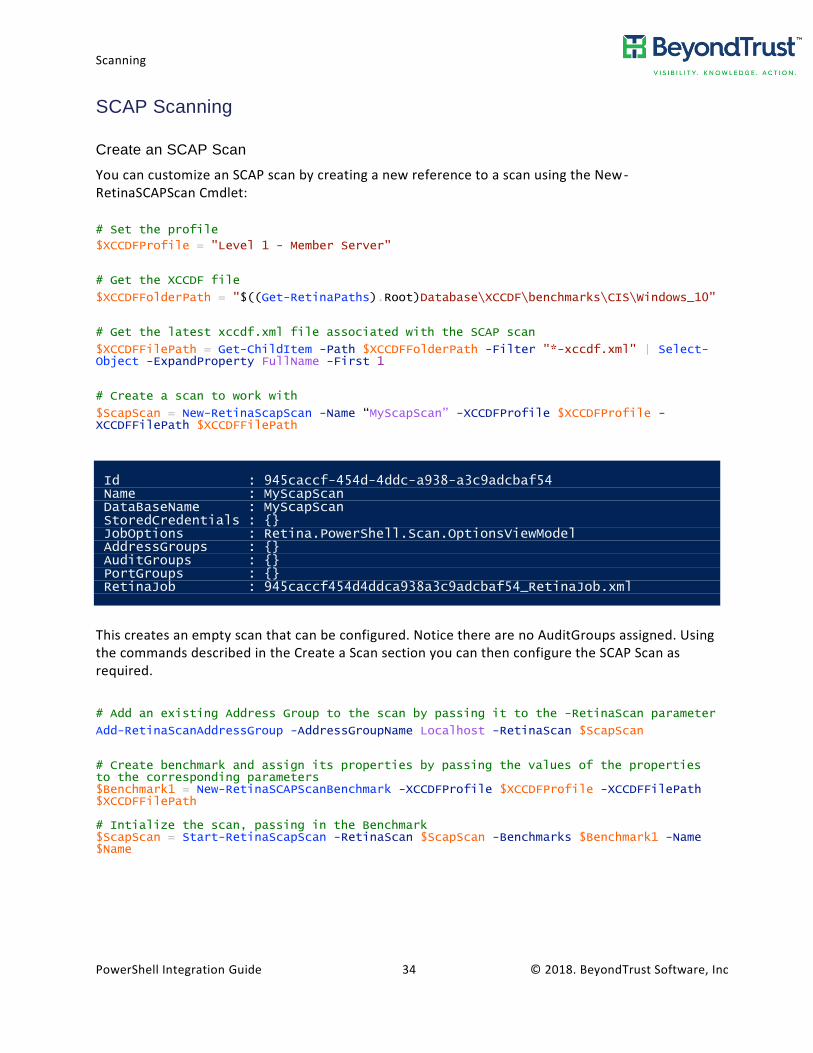
Create an SCAP Scan
You can customize an SCAP scan by creating a new reference to a scan using the New -RetinaSCAPScan Cmdlet:
# Set the profile
$XCCDFProfile = "Level 1 - Member Server"
# Get the XCCDF file
$XCCDFFolderPath = "$((Get-RetinaPaths).Root)Database\XCCDF\benchmarks\CIS\Windows_10"
# Get the latest xccdf.xml file associated with the SCAP scan
$XCCDFFilePath = Get-ChildItem -Path $XCCDFFolderPath -Filter "*-xccdf.xml" | Select-Object -ExpandProperty FullName -First 1
# Create a scan to work with
$ScapScan = New-RetinaScapScan -Name “MyScapScan” -XCCDFProfile $XCCDFProfile -XCCDFFilePath $XCCDFFilePath
Id : 945caccf-454d-4ddc-a938-a3c9adcbaf54 Name : MyScapScan DataBaseName : MyScapScan StoredCredentials : {} JobOptions : Retina.PowerShell.Scan.OptionsViewModel AddressGroups : {} AuditGroups : {} PortGroups : {} RetinaJob : 945caccf454d4ddca938a3c9adcbaf54_RetinaJob.xml
This creates an empty scan that can be configured. Notice there are no AuditGroups assigned. Using the commands described in the Create a Scan section you can then configure the SCAP Scan as required.
# Add an existing Address Group to the scan by passing it to the -RetinaScan parameter
Add-RetinaScanAddressGroup -AddressGroupName Localhost -RetinaScan $ScapScan
# Create benchmark and assign its properties by passing the values of the properties to the corresponding parameters $Benchmark1 = New-RetinaSCAPScanBenchmark -XCCDFProfile $XCCDFProfile -XCCDFFilePath $XCCDFFilePath # Intialize the scan, passing in the Benchmark $ScapScan = Start-RetinaScapScan -RetinaScan $ScapScan -Benchmarks $Benchmark1 -Name $Name
Scanning
PowerShell Integration Guide 35 © 2018. BeyondTrust Software, Inc
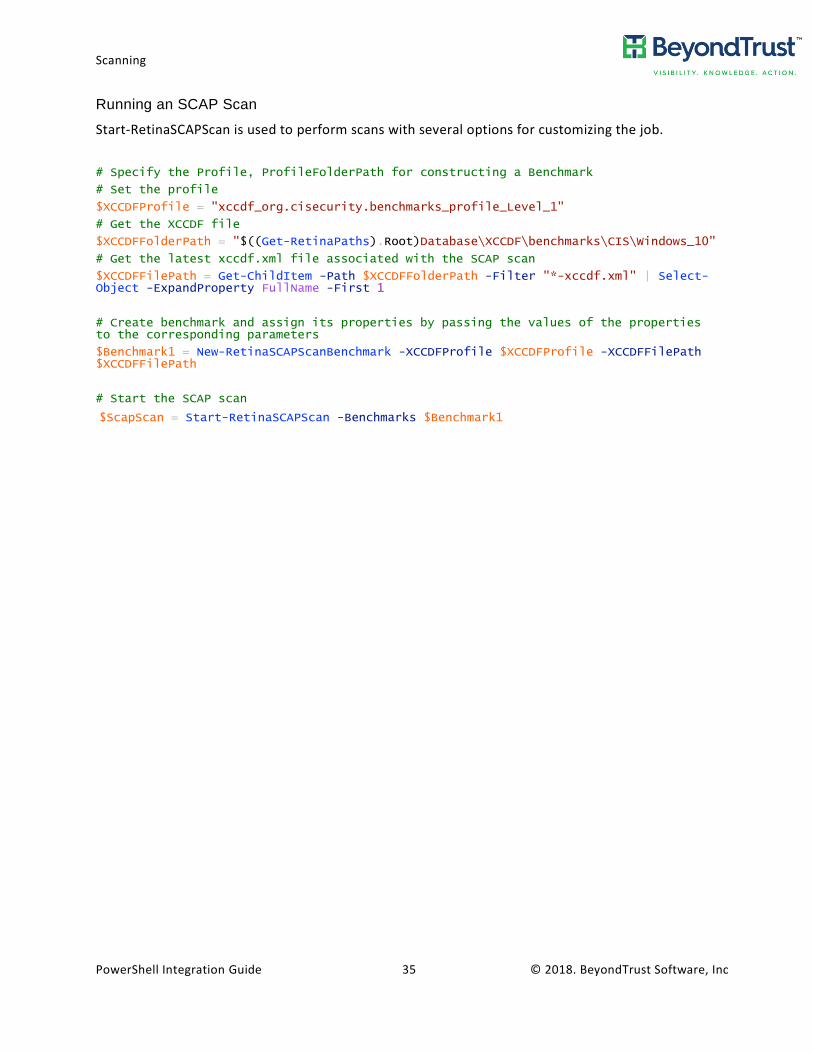
Running an SCAP Scan
Start-RetinaSCAPScan is used to perform scans with several options for customizing the job.
# Specify the Profile, ProfileFolderPath for constructing a Benchmark
# Set the profile
$XCCDFProfile = "xccdf_org.cisecurity.benchmarks_profile_Level_1"
# Get the XCCDF file
$XCCDFFolderPath = "$((Get-RetinaPaths).Root)Database\XCCDF\benchmarks\CIS\Windows_10"
# Get the latest xccdf.xml file associated with the SCAP scan
$XCCDFFilePath = Get-ChildItem -Path $XCCDFFolderPath -Filter "*-xccdf.xml" | Select-Object -ExpandProperty FullName -First 1
# Create benchmark and assign its properties by passing the values of the properties to the corresponding parameters
$Benchmark1 = New-RetinaSCAPScanBenchmark -XCCDFProfile $XCCDFProfile -XCCDFFilePath $XCCDFFilePath
# Start the SCAP scan
$ScapScan = Start-RetinaSCAPScan -Benchmarks $Benchmark1
Scanning
PowerShell Integration Guide 36 © 2018. BeyondTrust Software, Inc
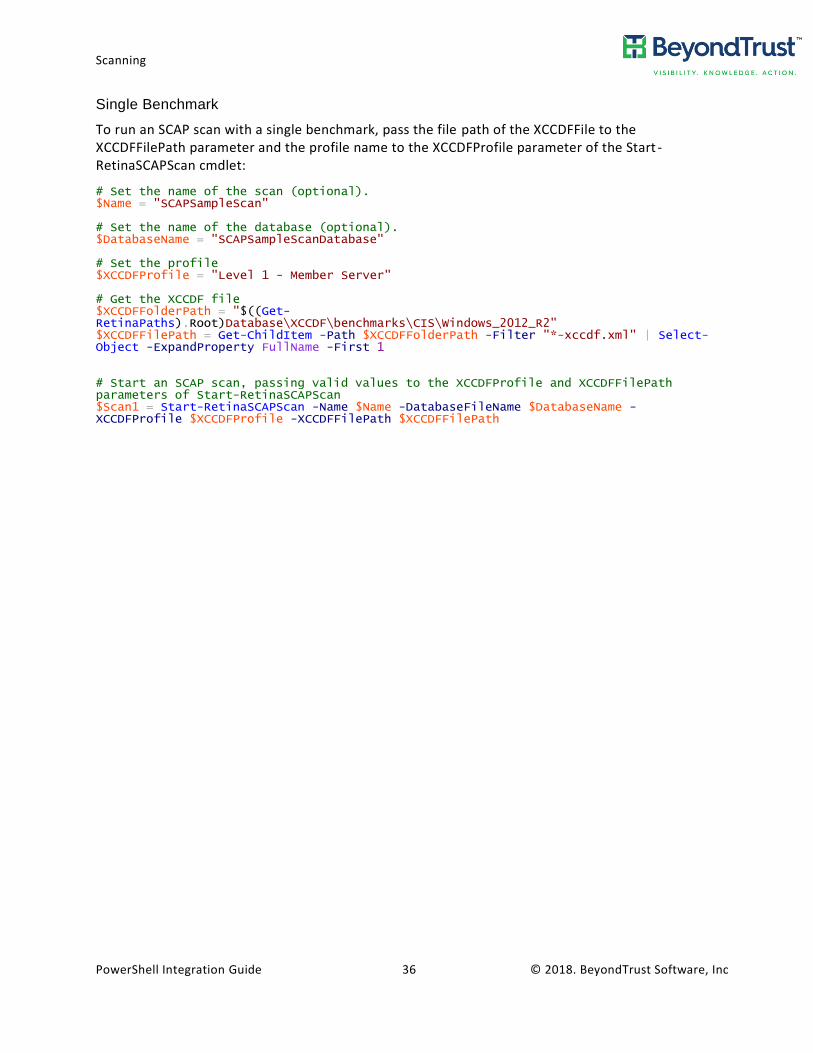
Single Benchmark
To run an SCAP scan with a single benchmark, pass the file path of the XCCDFFile to the XCCDFFilePath parameter and the profile name to the XCCDFProfile parameter of the Start -RetinaSCAPScan cmdlet: # Set the name of the scan (optional). $Name = "SCAPSampleScan" # Set the name of the database (optional). $DatabaseName = "SCAPSampleScanDatabase" # Set the profile $XCCDFProfile = "Level 1 - Member Server" # Get the XCCDF file $XCCDFFolderPath = "$((Get-RetinaPaths).Root)Database\XCCDF\benchmarks\CIS\Windows_2012_R2" $XCCDFFilePath = Get-ChildItem -Path $XCCDFFolderPath -Filter "*-xccdf.xml" | Select-Object -ExpandProperty FullName -First 1 # Start an SCAP scan, passing valid values to the XCCDFProfile and XCCDFFilePath parameters of Start-RetinaSCAPScan $Scan1 = Start-RetinaSCAPScan -Name $Name -DatabaseFileName $DatabaseName -XCCDFProfile $XCCDFProfile -XCCDFFilePath $XCCDFFilePath
Scanning
PowerShell Integration Guide 37 © 2018. BeyondTrust Software, Inc
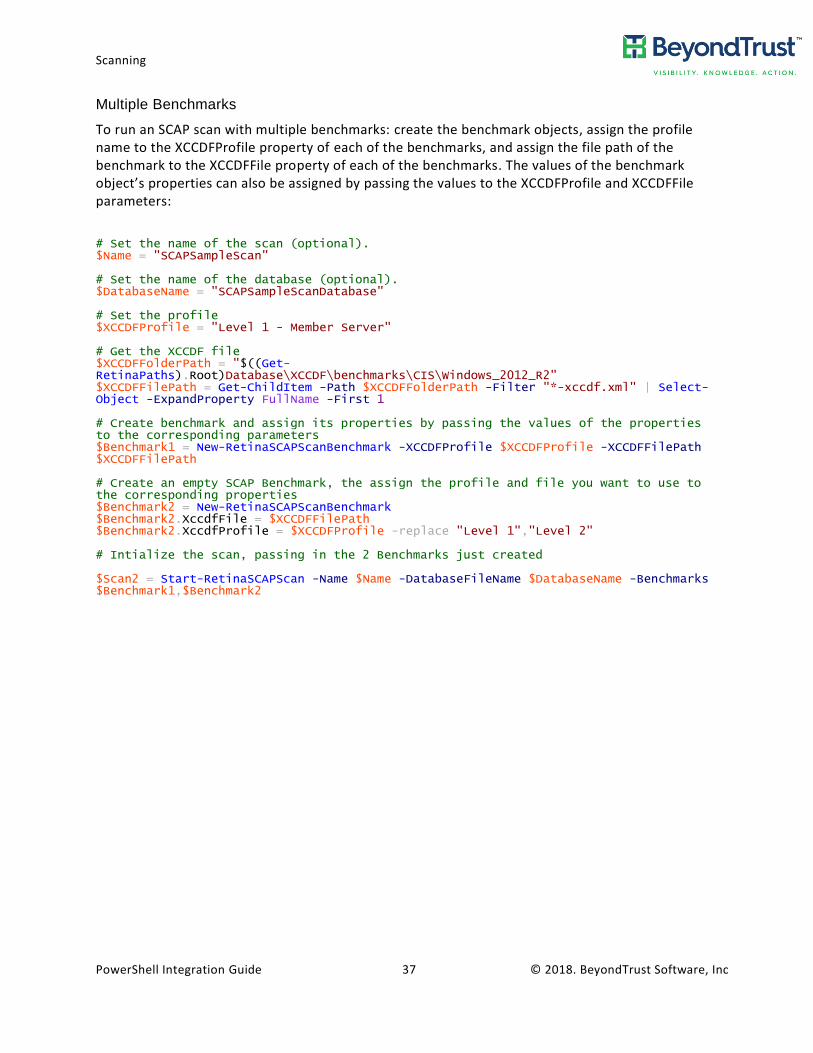
Multiple Benchmarks
To run an SCAP scan with multiple benchmarks: create the benchmark objects, assign the profile name to the XCCDFProfile property of each of the benchmarks, and assign the file path of the benchmark to the XCCDFFile property of each of the benchmarks. The values of the benchmark object’s properties can also be assigned by passing the values to the XCCDFProfile and XCCDFFile parameters:
# Set the name of the scan (optional). $Name = "SCAPSampleScan" # Set the name of the database (optional). $DatabaseName = "SCAPSampleScanDatabase" # Set the profile $XCCDFProfile = "Level 1 - Member Server" # Get the XCCDF file $XCCDFFolderPath = "$((Get-RetinaPaths).Root)Database\XCCDF\benchmarks\CIS\Windows_2012_R2" $XCCDFFilePath = Get-ChildItem -Path $XCCDFFolderPath -Filter "*-xccdf.xml" | Select-Object -ExpandProperty FullName -First 1 # Create benchmark and assign its properties by passing the values of the properties to the corresponding parameters $Benchmark1 = New-RetinaSCAPScanBenchmark -XCCDFProfile $XCCDFProfile -XCCDFFilePath $XCCDFFilePath # Create an empty SCAP Benchmark, the assign the profile and file you want to use to the corresponding properties $Benchmark2 = New-RetinaSCAPScanBenchmark $Benchmark2.XccdfFile = $XCCDFFilePath $Benchmark2.XccdfProfile = $XCCDFProfile -replace "Level 1","Level 2" # Intialize the scan, passing in the 2 Benchmarks just created $Scan2 = Start-RetinaSCAPScan -Name $Name -DatabaseFileName $DatabaseName -Benchmarks $Benchmark1,$Benchmark2
Scanning
PowerShell Integration Guide 38 © 2018. BeyondTrust Software, Inc
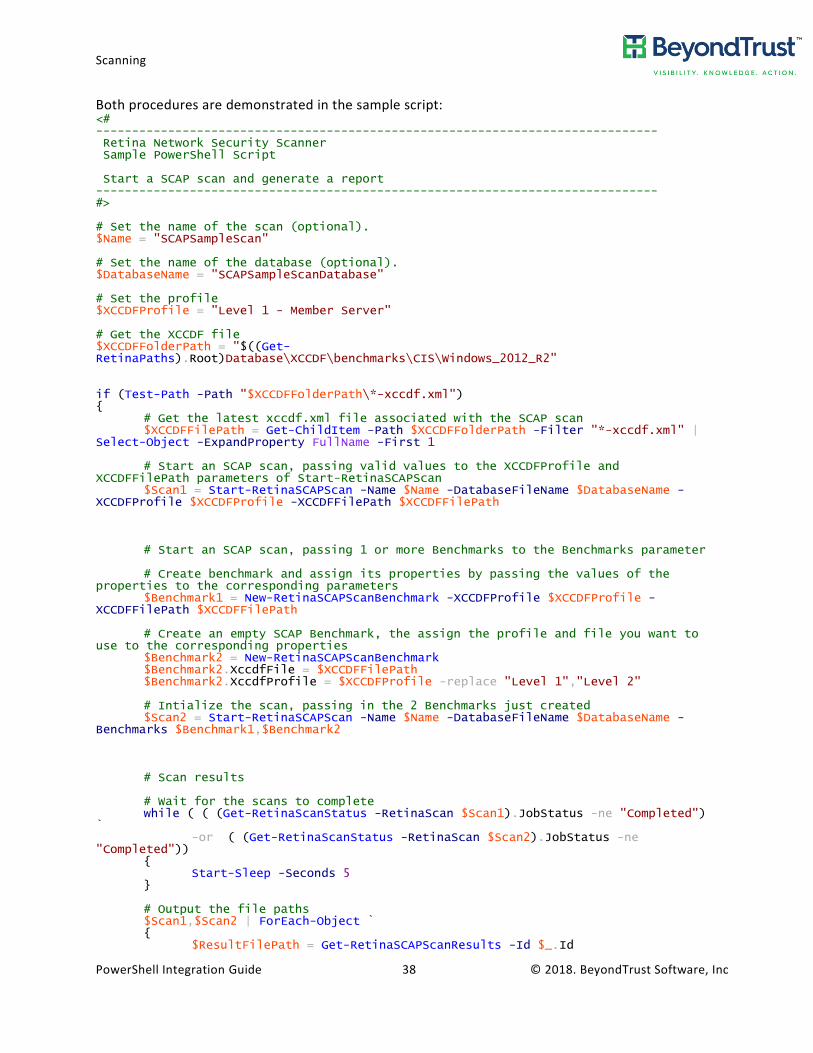
Both procedures are demonstrated in the sample script: <# ------------------------------------------------------------------------------ Retina Network Security Scanner Sample PowerShell Script Start a SCAP scan and generate a report ------------------------------------------------------------------------------ #> # Set the name of the scan (optional). $Name = "SCAPSampleScan" # Set the name of the database (optional). $DatabaseName = "SCAPSampleScanDatabase" # Set the profile $XCCDFProfile = "Level 1 - Member Server" # Get the XCCDF file $XCCDFFolderPath = "$((Get-RetinaPaths).Root)Database\XCCDF\benchmarks\CIS\Windows_2012_R2" if (Test-Path -Path "$XCCDFFolderPath\*-xccdf.xml") { # Get the latest xccdf.xml file associated with the SCAP scan $XCCDFFilePath = Get-ChildItem -Path $XCCDFFolderPath -Filter "*-xccdf.xml" | Select-Object -ExpandProperty FullName -First 1 # Start an SCAP scan, passing valid values to the XCCDFProfile and XCCDFFilePath parameters of Start-RetinaSCAPScan $Scan1 = Start-RetinaSCAPScan -Name $Name -DatabaseFileName $DatabaseName -XCCDFProfile $XCCDFProfile -XCCDFFilePath $XCCDFFilePath # Start an SCAP scan, passing 1 or more Benchmarks to the Benchmarks parameter # Create benchmark and assign its properties by passing the values of the properties to the corresponding parameters $Benchmark1 = New-RetinaSCAPScanBenchmark -XCCDFProfile $XCCDFProfile -XCCDFFilePath $XCCDFFilePath # Create an empty SCAP Benchmark, the assign the profile and file you want to use to the corresponding properties $Benchmark2 = New-RetinaSCAPScanBenchmark $Benchmark2.XccdfFile = $XCCDFFilePath $Benchmark2.XccdfProfile = $XCCDFProfile -replace "Level 1","Level 2" # Intialize the scan, passing in the 2 Benchmarks just created $Scan2 = Start-RetinaSCAPScan -Name $Name -DatabaseFileName $DatabaseName -Benchmarks $Benchmark1,$Benchmark2 # Scan results # Wait for the scans to complete while ( ( (Get-RetinaScanStatus -RetinaScan $Scan1).JobStatus -ne "Completed") ` -or ( (Get-RetinaScanStatus -RetinaScan $Scan2).JobStatus -ne "Completed")) { Start-Sleep -Seconds 5 } # Output the file paths $Scan1,$Scan2 | ForEach-Object ` { $ResultFilePath = Get-RetinaSCAPScanResults -Id $_.Id
Scanning
PowerShell Integration Guide 39 © 2018. BeyondTrust Software, Inc
Write-Output "Scan results saved to: $($ResultFilePath.FullName)" } } else { Write-Warning "The profile path $XCCDFFolderPath was not found" pause }
Scanning
PowerShell Integration Guide 40 © 2018. BeyondTrust Software, Inc
Address Groups
Creating Address Groups
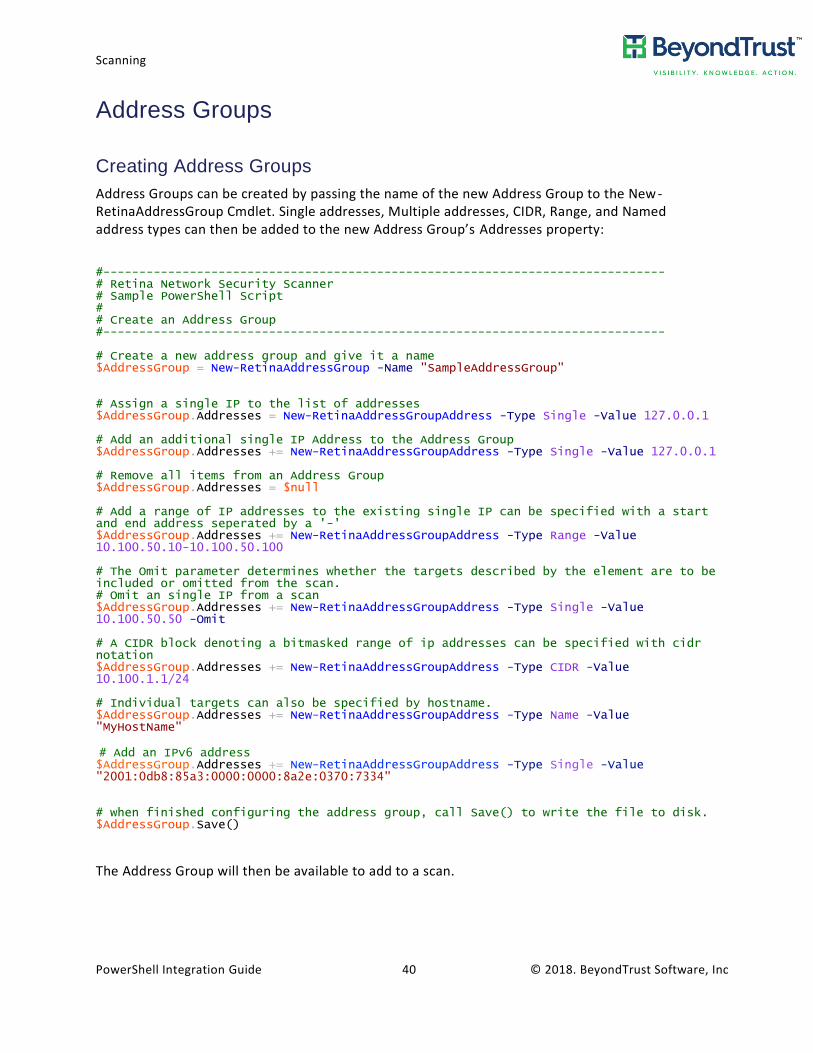
Address Groups can be created by passing the name of the new Address Group to the New -RetinaAddressGroup Cmdlet. Single addresses, Multiple addresses, CIDR, Range, and Named address types can then be added to the new Address Group’s Addresses property:
#------------------------------------------------------------------------------ # Retina Network Security Scanner # Sample PowerShell Script # # Create an Address Group #------------------------------------------------------------------------------ # Create a new address group and give it a name $AddressGroup = New-RetinaAddressGroup -Name "SampleAddressGroup" # Assign a single IP to the list of addresses $AddressGroup.Addresses = New-RetinaAddressGroupAddress -Type Single -Value 127.0.0.1 # Add an additional single IP Address to the Address Group $AddressGroup.Addresses += New-RetinaAddressGroupAddress -Type Single -Value 127.0.0.1 # Remove all items from an Address Group $AddressGroup.Addresses = $null # Add a range of IP addresses to the existing single IP can be specified with a start and end address seperated by a '-' $AddressGroup.Addresses += New-RetinaAddressGroupAddress -Type Range -Value 10.100.50.10-10.100.50.100 # The Omit parameter determines whether the targets described by the element are to be included or omitted from the scan. # Omit an single IP from a scan $AddressGroup.Addresses += New-RetinaAddressGroupAddress -Type Single -Value 10.100.50.50 -Omit # A CIDR block denoting a bitmasked range of ip addresses can be specified with cidr notation $AddressGroup.Addresses += New-RetinaAddressGroupAddress -Type CIDR -Value 10.100.1.1/24 # Individual targets can also be specified by hostname. $AddressGroup.Addresses += New-RetinaAddressGroupAddress -Type Name -Value "MyHostName" # Add an IPv6 address $AddressGroup.Addresses += New-RetinaAddressGroupAddress -Type Single -Value "2001:0db8:85a3:0000:0000:8a2e:0370:7334" # when finished configuring the address group, call Save() to write the file to disk. $AddressGroup.Save()
The Address Group will then be available to add to a scan.
Scanning
PowerShell Integration Guide 41 © 2018. BeyondTrust Software, Inc
Removing Address Groups
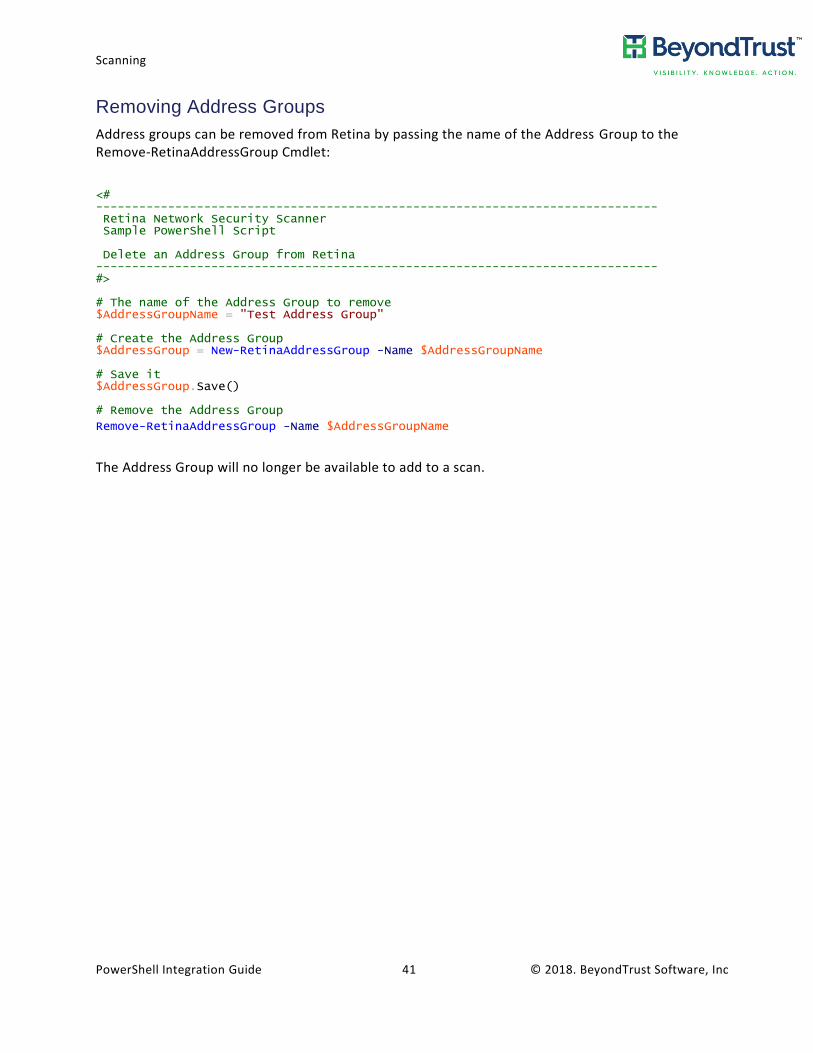
Address groups can be removed from Retina by passing the name of the Address Group to the Remove-RetinaAddressGroup Cmdlet:
<# ------------------------------------------------------------------------------ Retina Network Security Scanner Sample PowerShell Script Delete an Address Group from Retina ------------------------------------------------------------------------------ #> # The name of the Address Group to remove $AddressGroupName = "Test Address Group" # Create the Address Group $AddressGroup = New-RetinaAddressGroup -Name $AddressGroupName # Save it $AddressGroup.Save() # Remove the Address Group
Remove-RetinaAddressGroup -Name $AddressGroupName
The Address Group will no longer be available to add to a scan.
Scanning
PowerShell Integration Guide 42 © 2018. BeyondTrust Software, Inc
Audit Groups
Creating Audit Groups
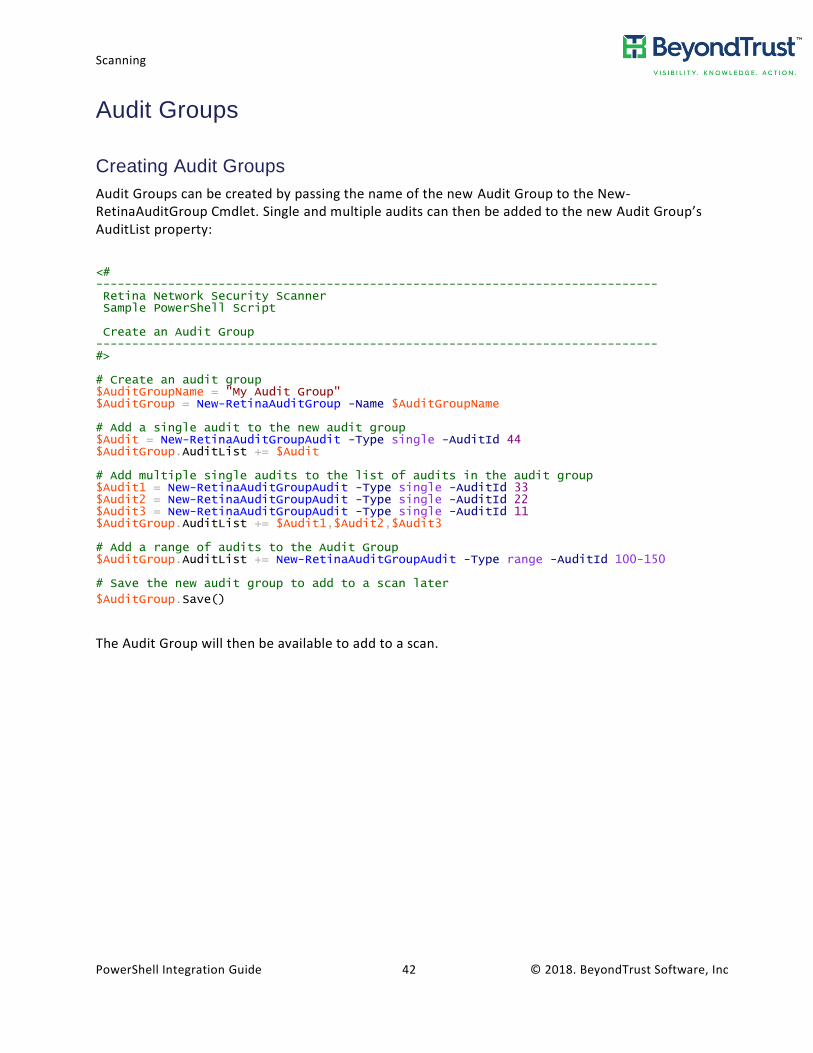
Audit Groups can be created by passing the name of the new Audit Group to the New-RetinaAuditGroup Cmdlet. Single and multiple audits can then be added to the new Audit Group’s AuditList property:
<# ------------------------------------------------------------------------------ Retina Network Security Scanner Sample PowerShell Script Create an Audit Group ------------------------------------------------------------------------------ #> # Create an audit group $AuditGroupName = "My Audit Group" $AuditGroup = New-RetinaAuditGroup -Name $AuditGroupName # Add a single audit to the new audit group $Audit = New-RetinaAuditGroupAudit -Type single -AuditId 44 $AuditGroup.AuditList += $Audit # Add multiple single audits to the list of audits in the audit group $Audit1 = New-RetinaAuditGroupAudit -Type single -AuditId 33 $Audit2 = New-RetinaAuditGroupAudit -Type single -AuditId 22 $Audit3 = New-RetinaAuditGroupAudit -Type single -AuditId 11 $AuditGroup.AuditList += $Audit1,$Audit2,$Audit3 # Add a range of audits to the Audit Group $AuditGroup.AuditList += New-RetinaAuditGroupAudit -Type range -AuditId 100-150 # Save the new audit group to add to a scan later
$AuditGroup.Save()
The Audit Group will then be available to add to a scan.
Scanning
PowerShell Integration Guide 43 © 2018. BeyondTrust Software, Inc
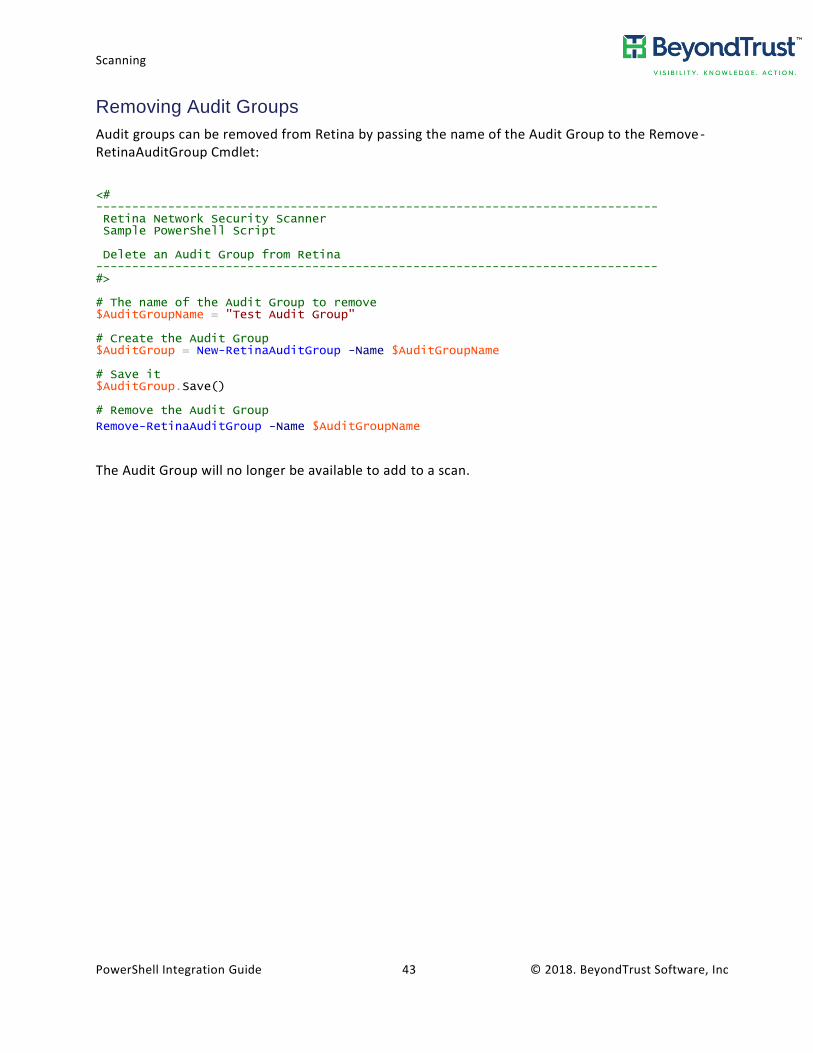
Removing Audit Groups
Audit groups can be removed from Retina by passing the name of the Audit Group to the Remove -RetinaAuditGroup Cmdlet:
<# ------------------------------------------------------------------------------ Retina Network Security Scanner Sample PowerShell Script Delete an Audit Group from Retina ------------------------------------------------------------------------------ #> # The name of the Audit Group to remove $AuditGroupName = "Test Audit Group" # Create the Audit Group $AuditGroup = New-RetinaAuditGroup -Name $AuditGroupName # Save it $AuditGroup.Save() # Remove the Audit Group
Remove-RetinaAuditGroup -Name $AuditGroupName
The Audit Group will no longer be available to add to a scan.

Scanning
PowerShell Integration Guide 44 © 2018. BeyondTrust Software, Inc
Port Groups
Creating Port Groups
Port Groups can be created by passing the name of the new Port Group to the New-RetinaPortGroup Cmdlet. UDP and TCP Ports as well as port ranges can then be added to the new Port Group’s PortList property:
<# ------------------------------------------------------------------------------ Retina Network Security Scanner Sample PowerShell Script Create a Port Group ------------------------------------------------------------------------------ #> # Create the port group $Name = "My Port Group" $PortGroup = New-RetinaPortGroup -Name $Name # Add ports to the port group # Add single a TCP/UDP port $PortGroup.PortList += New-RetinaPortGroupPort -Protocol both -Type single -PortNumber 443 # Add a range of TCP ports to a port group $PortGroup.PortList += New-RetinaPortGroupPort -Protocol tcp -Type range -PortNumber 1-1000 # Save the Port Group to add to scans later
$PortGroup.Save()
The Port Group will then be available to add to a scan.
Scanning
PowerShell Integration Guide 45 © 2018. BeyondTrust Software, Inc
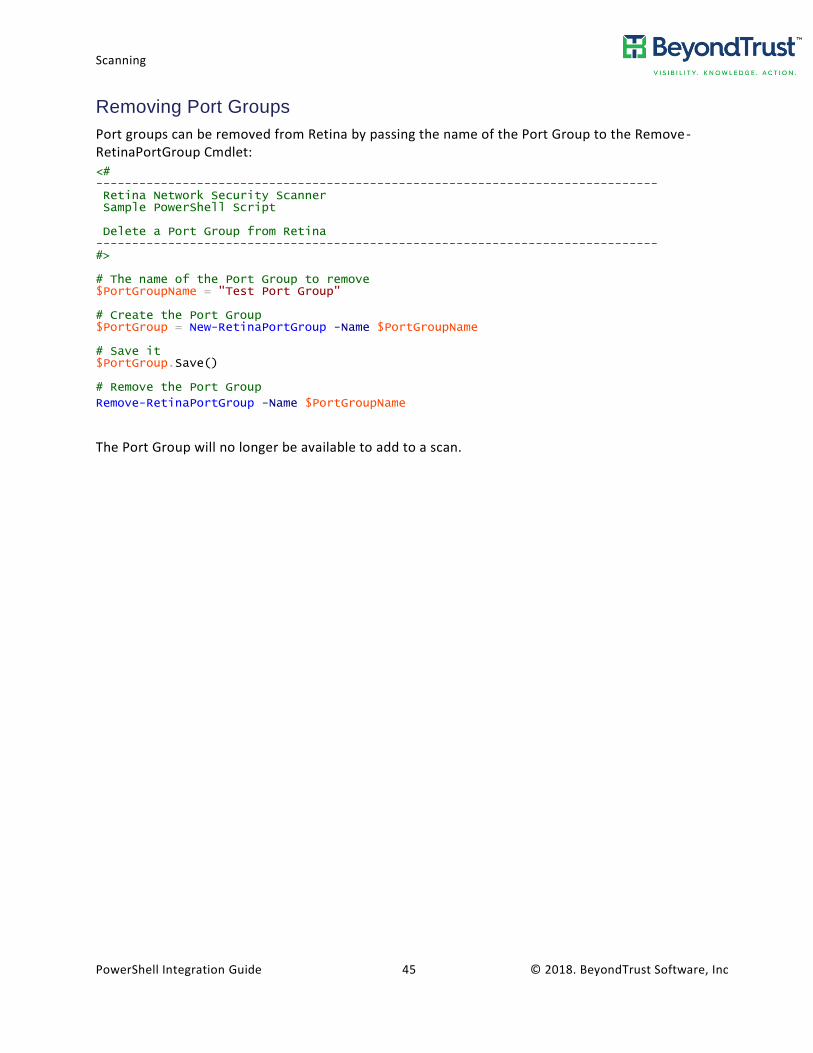
Removing Port Groups
Port groups can be removed from Retina by passing the name of the Port Group to the Remove-RetinaPortGroup Cmdlet:
<# ------------------------------------------------------------------------------ Retina Network Security Scanner Sample PowerShell Script Delete a Port Group from Retina ------------------------------------------------------------------------------ #> # The name of the Port Group to remove $PortGroupName = "Test Port Group" # Create the Port Group $PortGroup = New-RetinaPortGroup -Name $PortGroupName # Save it $PortGroup.Save() # Remove the Port Group
Remove-RetinaPortGroup -Name $PortGroupName
The Port Group will no longer be available to add to a scan.
Scanning
PowerShell Integration Guide 46 © 2018. BeyondTrust Software, Inc
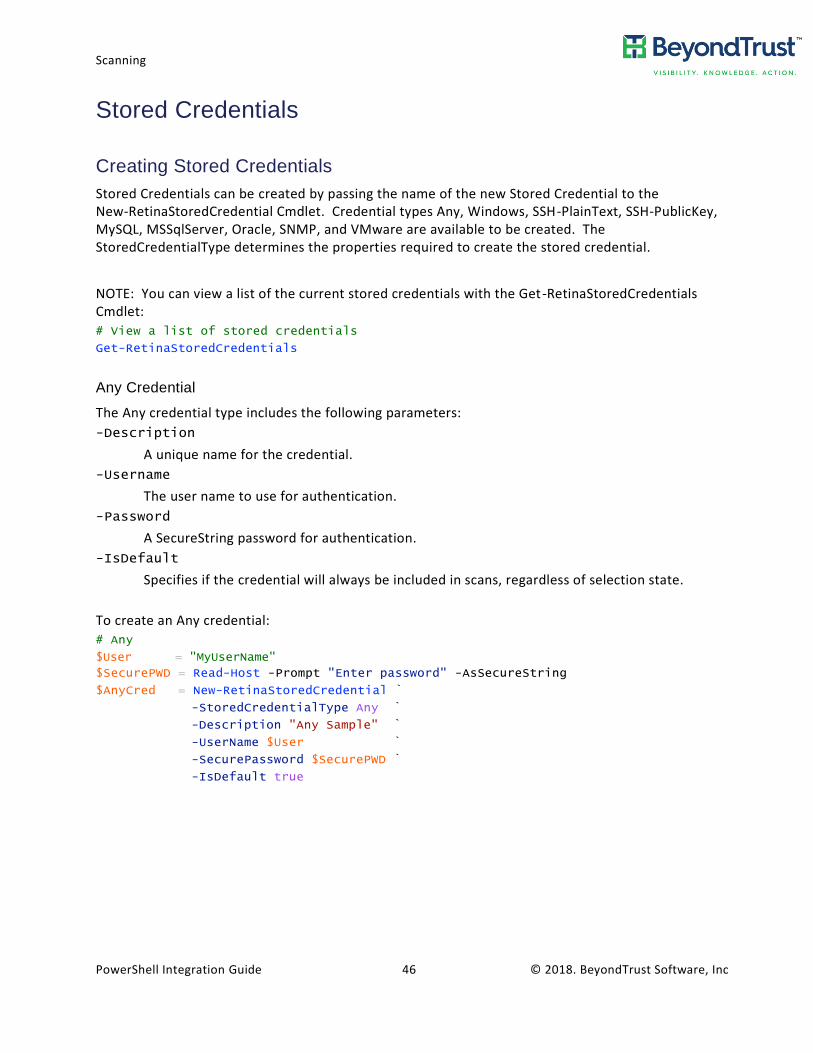
Stored Credentials
Creating Stored Credentials
Stored Credentials can be created by passing the name of the new Stored Credential to the New-RetinaStoredCredential Cmdlet. Credential types Any, Windows, SSH-PlainText, SSH-PublicKey, MySQL, MSSqlServer, Oracle, SNMP, and VMware are available to be created. The StoredCredentialType determines the properties required to create the stored credential.
NOTE: You can view a list of the current stored credentials with the Get-RetinaStoredCredentials Cmdlet:
# View a list of stored credentials
Get-RetinaStoredCredentials
Any Credential
The Any credential type includes the following parameters:
-Description
A unique name for the credential.
-Username
The user name to use for authentication.
-Password
A SecureString password for authentication.
-IsDefault
Specifies if the credential will always be included in scans, regardless of selection state.
To create an Any credential:
# Any
$User = "MyUserName"
$SecurePWD = Read-Host -Prompt "Enter password" -AsSecureString
$AnyCred = New-RetinaStoredCredential `
-StoredCredentialType Any `
-Description "Any Sample" `
-UserName $User `
-SecurePassword $SecurePWD `
-IsDefault true
Scanning
PowerShell Integration Guide 47 © 2018. BeyondTrust Software, Inc
Windows Credential
Windows credentials include the following parameters:
-Description
A unique name for the credential.
-Username
The user name to use for authentication.
-SecurePassword
A SecureString password for authentication.
To create a Windows credential:
# Windows
$User = "MyUserName" $SecurePWD = Read-Host -Prompt "Enter password" -AsSecureString $WindowsCred = New-RetinaStoredCredential ` -StoredCredentialType Windows ` -Description "WindowsCred" ` -UserName $User ` -SecurePassword $SecurePWD
SSH-PlainText Credential
SSH-PlainText credentials include the following parameters:
-Description
A unique name for the credential.
-Username
The user name to use for authentication.
-SecurePassword
A SecureString password for authentication.
-ElevationType
Valid values for elevation type are: None, Enable, sudo, and pbrun.
-ElevationUserName
Optional user name for sudo and pbrun elevation types. -ElevationPassword
Optional password for Enable elevation type.
To create an SSH-PlainText credential:
# SSH-PlainText
$User = "MyUserName"
$SecurePWD = Read-Host -Prompt "Enter password" -AsSecureString
$SSHPlainTextCred = New-RetinaStoredCredential `
-StoredCredentialType SSH-PlainText `
-Description "SSH-PlainText Sample" `
-UserName $User `
-SecurePassword $SecurePWD `
-ElevationType None
Scanning
PowerShell Integration Guide 48 © 2018. BeyondTrust Software, Inc
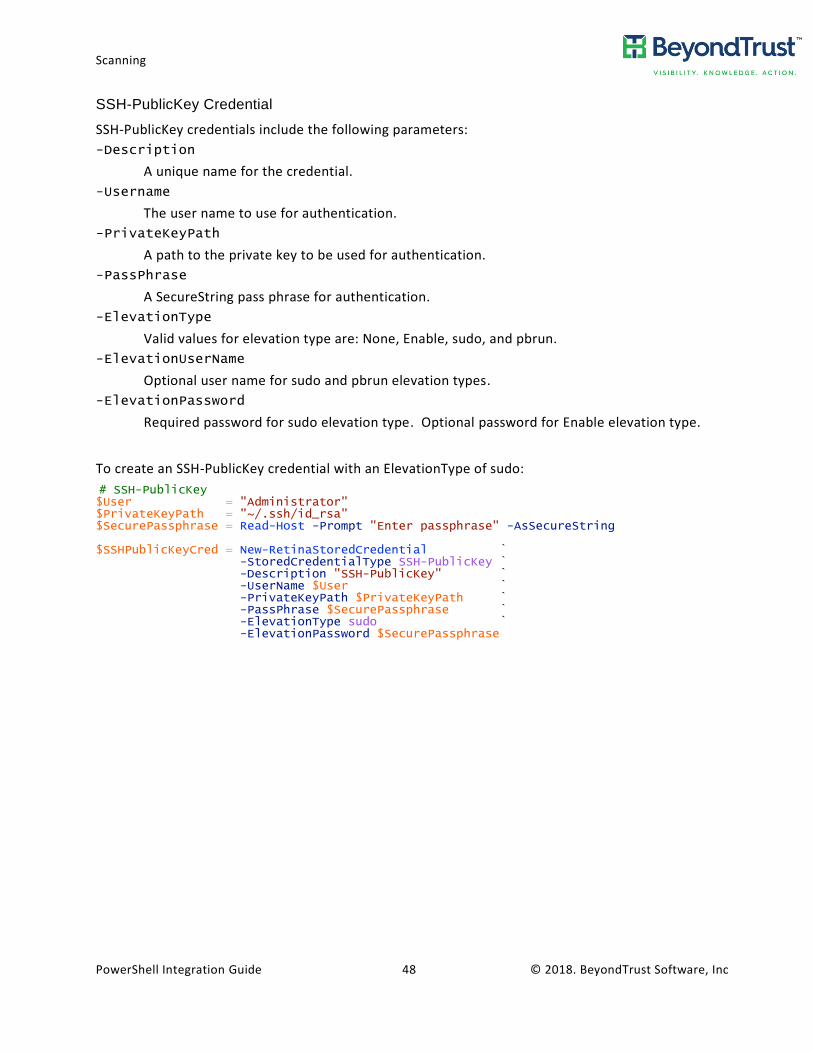
SSH-PublicKey Credential
SSH-PublicKey credentials include the following parameters:
-Description
A unique name for the credential.
-Username
The user name to use for authentication.
-PrivateKeyPath
A path to the private key to be used for authentication.
-PassPhrase
A SecureString pass phrase for authentication.
-ElevationType
Valid values for elevation type are: None, Enable, sudo, and pbrun.
-ElevationUserName
Optional user name for sudo and pbrun elevation types.
-ElevationPassword
Required password for sudo elevation type. Optional password for Enable elevation type.
To create an SSH-PublicKey credential with an ElevationType of sudo:
# SSH-PublicKey $User = "Administrator" $PrivateKeyPath = "~/.ssh/id_rsa" $SecurePassphrase = Read-Host -Prompt "Enter passphrase" -AsSecureString $SSHPublicKeyCred = New-RetinaStoredCredential ` -StoredCredentialType SSH-PublicKey ` -Description "SSH-PublicKey" ` -UserName $User ` -PrivateKeyPath $PrivateKeyPath ` -PassPhrase $SecurePassphrase ` -ElevationType sudo ` -ElevationPassword $SecurePassphrase
Scanning
PowerShell Integration Guide 49 © 2018. BeyondTrust Software, Inc
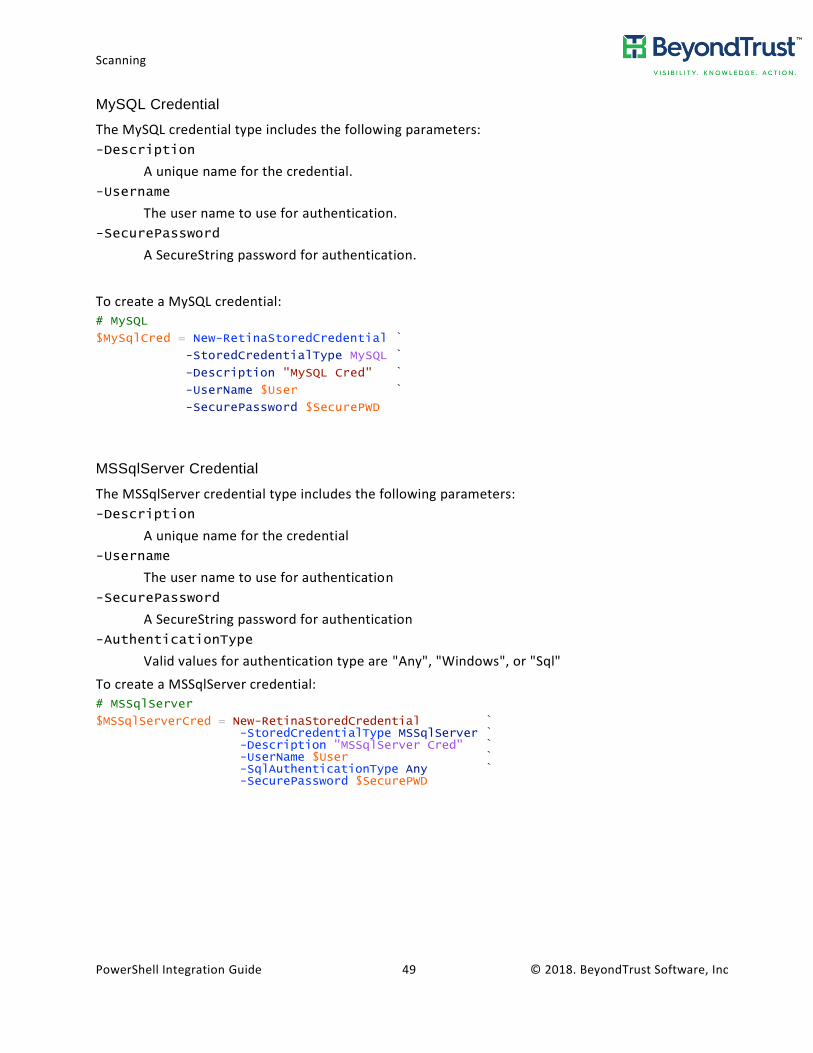
MySQL Credential
The MySQL credential type includes the following parameters:
-Description
A unique name for the credential.
-Username
The user name to use for authentication.
-SecurePassword
A SecureString password for authentication.
To create a MySQL credential:
# MySQL
$MySqlCred = New-RetinaStoredCredential `
-StoredCredentialType MySQL `
-Description "MySQL Cred" `
-UserName $User `
-SecurePassword $SecurePWD
MSSqlServer Credential
The MSSqlServer credential type includes the following parameters:
-Description
A unique name for the credential
-Username
The user name to use for authentication
-SecurePassword
A SecureString password for authentication
-AuthenticationType
Valid values for authentication type are "Any", "Windows", or "Sql"
To create a MSSqlServer credential:
# MSSqlServer
$MSSqlServerCred = New-RetinaStoredCredential ` -StoredCredentialType MSSqlServer ` -Description "MSSqlServer Cred" ` -UserName $User ` -SqlAuthenticationType Any ` -SecurePassword $SecurePWD
Scanning
PowerShell Integration Guide 50 © 2018. BeyondTrust Software, Inc
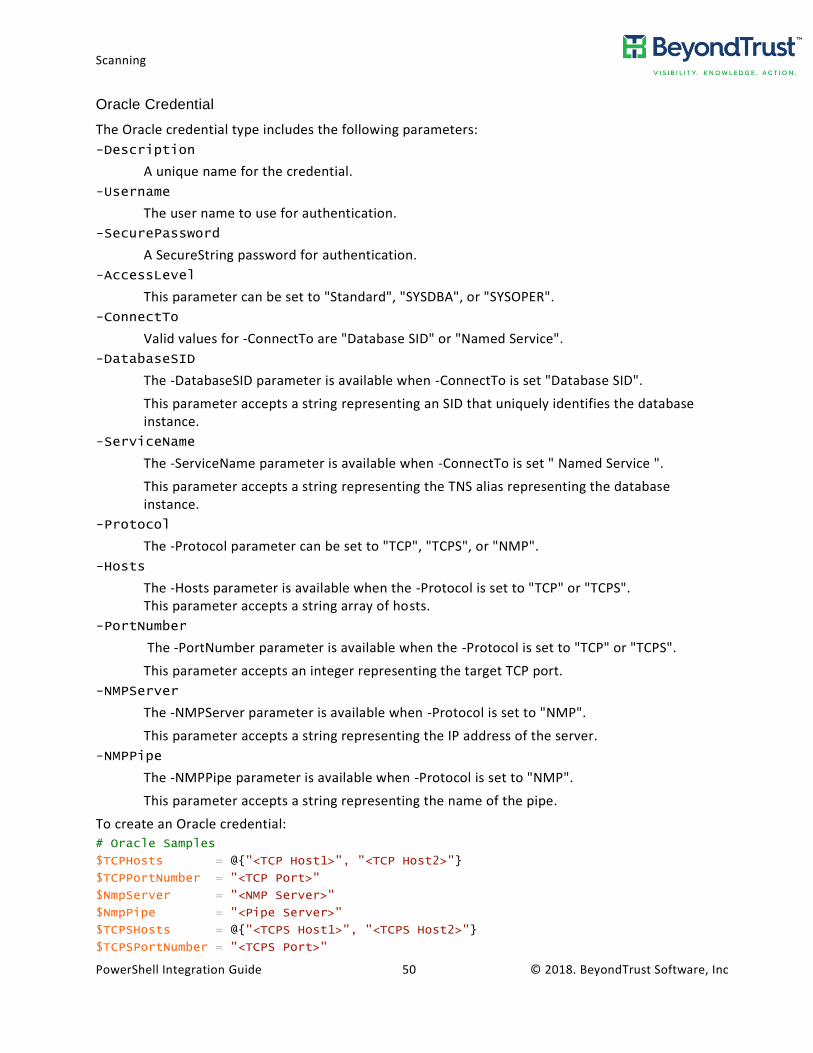
Oracle Credential
The Oracle credential type includes the following parameters:
-Description
A unique name for the credential.
-Username
The user name to use for authentication.
-SecurePassword
A SecureString password for authentication.
-AccessLevel
This parameter can be set to "Standard", "SYSDBA", or "SYSOPER".
-ConnectTo
Valid values for -ConnectTo are "Database SID" or "Named Service".
-DatabaseSID
The -DatabaseSID parameter is available when -ConnectTo is set "Database SID".
This parameter accepts a string representing an SID that uniquely identifies the database instance.
-ServiceName
The -ServiceName parameter is available when -ConnectTo is set " Named Service ".
This parameter accepts a string representing the TNS alias representing the database instance.
-Protocol
The -Protocol parameter can be set to "TCP", "TCPS", or "NMP".
-Hosts
The -Hosts parameter is available when the -Protocol is set to "TCP" or "TCPS". This parameter accepts a string array of hosts.
-PortNumber
The -PortNumber parameter is available when the -Protocol is set to "TCP" or "TCPS".
This parameter accepts an integer representing the target TCP port.
-NMPServer
The -NMPServer parameter is available when -Protocol is set to "NMP".
This parameter accepts a string representing the IP address of the server.
-NMPPipe
The -NMPPipe parameter is available when -Protocol is set to "NMP".
This parameter accepts a string representing the name of the pipe.
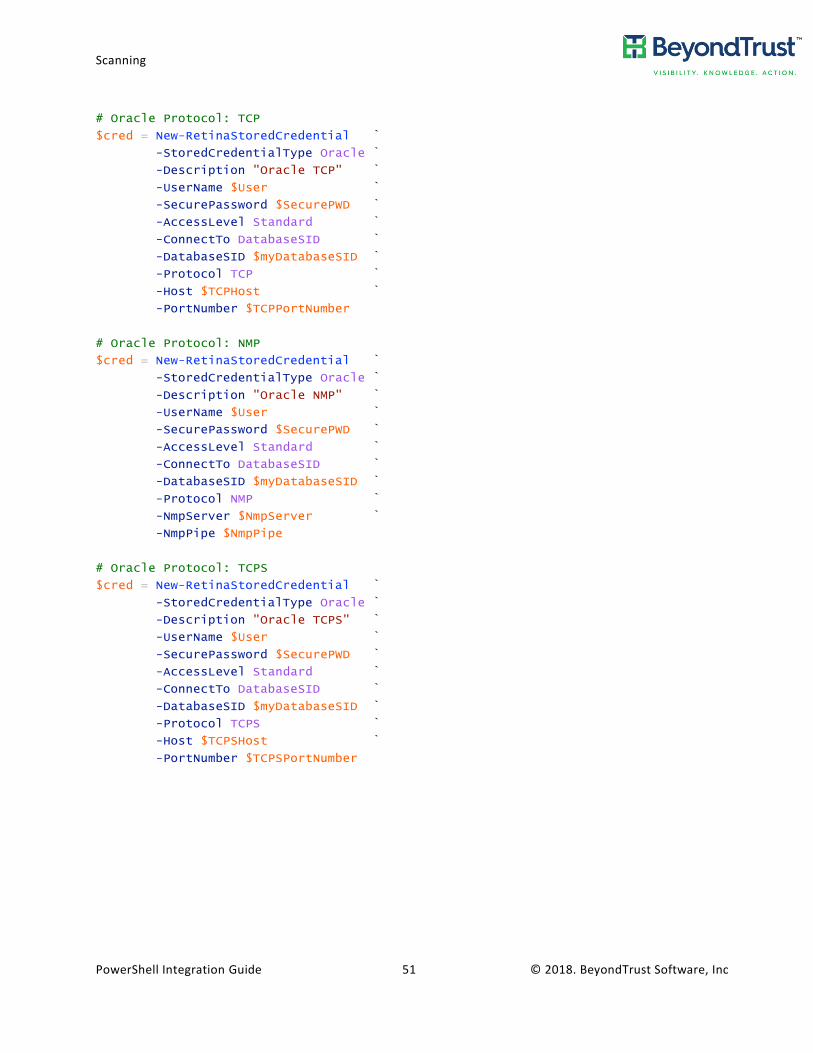
To create an Oracle credential:
# Oracle Samples
$TCPHosts = @{"<TCP Host1>", "<TCP Host2>"}
$TCPPortNumber = "<TCP Port>"
$NmpServer = "<NMP Server>"
$NmpPipe = "<Pipe Server>"
$TCPSHosts = @{"<TCPS Host1>", "<TCPS Host2>"}
$TCPSPortNumber = "<TCPS Port>"
Scanning
PowerShell Integration Guide 51 © 2018. BeyondTrust Software, Inc
# Oracle Protocol: TCP
$cred = New-RetinaStoredCredential `
-StoredCredentialType Oracle `
-Description "Oracle TCP" `
-UserName $User `
-SecurePassword $SecurePWD `
-AccessLevel Standard `
-ConnectTo DatabaseSID `
-DatabaseSID $myDatabaseSID `
-Protocol TCP `
-Host $TCPHost `
-PortNumber $TCPPortNumber
# Oracle Protocol: NMP
$cred = New-RetinaStoredCredential `
-StoredCredentialType Oracle `
-Description "Oracle NMP" `
-UserName $User `
-SecurePassword $SecurePWD `
-AccessLevel Standard `
-ConnectTo DatabaseSID `
-DatabaseSID $myDatabaseSID `
-Protocol NMP `
-NmpServer $NmpServer `
-NmpPipe $NmpPipe
# Oracle Protocol: TCPS
$cred = New-RetinaStoredCredential `
-StoredCredentialType Oracle `
-Description "Oracle TCPS" `
-UserName $User `
-SecurePassword $SecurePWD `
-AccessLevel Standard `
-ConnectTo DatabaseSID `
-DatabaseSID $myDatabaseSID `
-Protocol TCPS `
-Host $TCPSHost `
-PortNumber $TCPSPortNumber
Scanning
PowerShell Integration Guide 52 © 2018. BeyondTrust Software, Inc
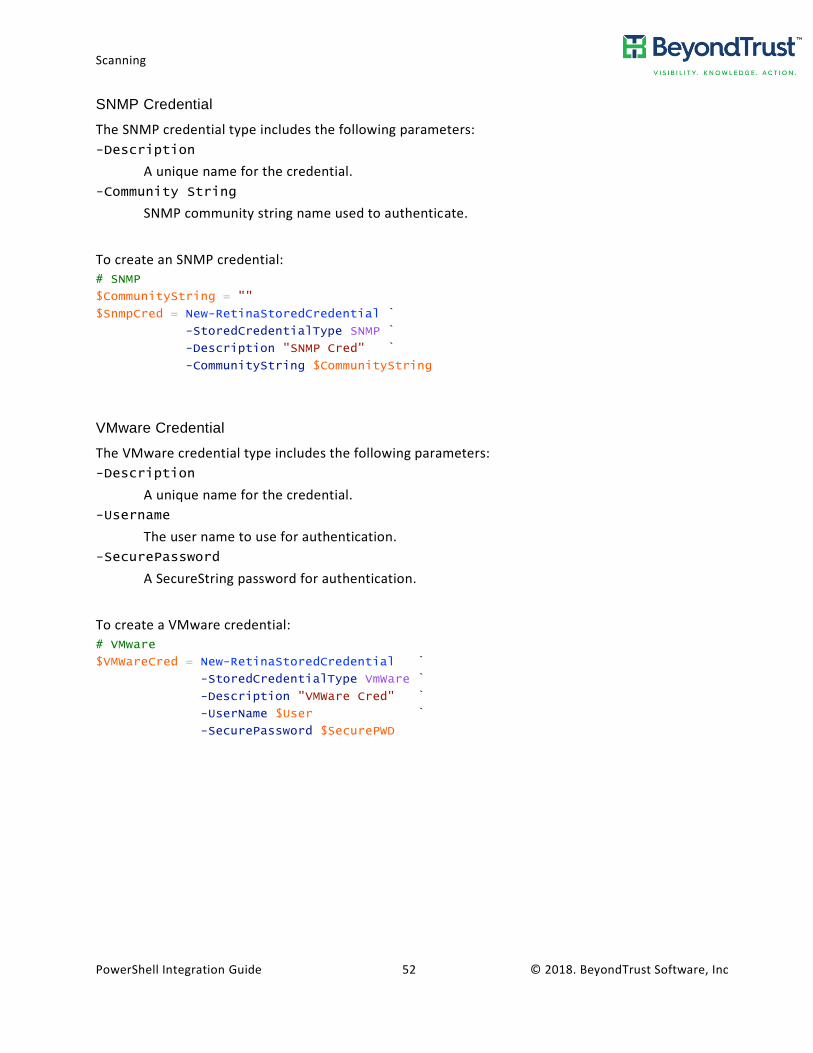
SNMP Credential
The SNMP credential type includes the following parameters:
-Description
A unique name for the credential.
-Community String
SNMP community string name used to authenticate.
To create an SNMP credential:
# SNMP
$CommunityString = ""
$SnmpCred = New-RetinaStoredCredential `
-StoredCredentialType SNMP `
-Description "SNMP Cred" `
-CommunityString $CommunityString
VMware Credential
The VMware credential type includes the following parameters:
-Description
A unique name for the credential.
-Username
The user name to use for authentication.
-SecurePassword
A SecureString password for authentication.
To create a VMware credential:
# VMware
$VMWareCred = New-RetinaStoredCredential `
-StoredCredentialType VmWare `
-Description "VMWare Cred" `
-UserName $User `
-SecurePassword $SecurePWD
Scanning
PowerShell Integration Guide 53 © 2018. BeyondTrust Software, Inc
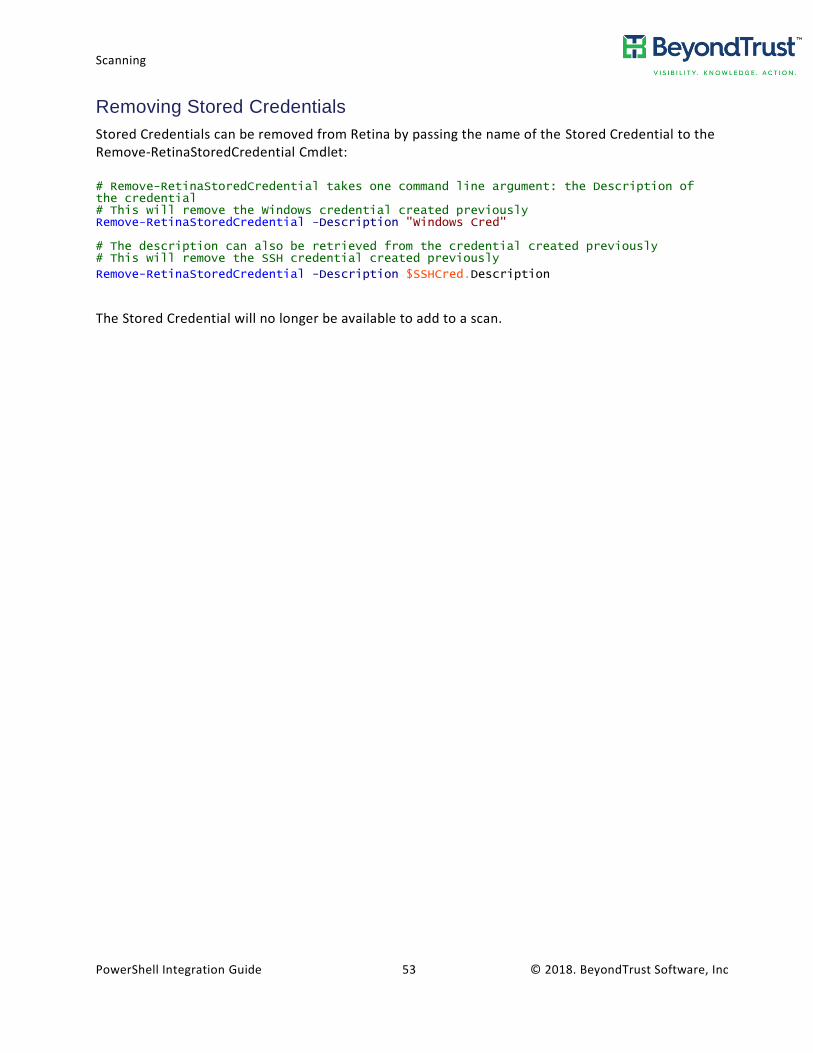
Removing Stored Credentials
Stored Credentials can be removed from Retina by passing the name of the Stored Credential to the Remove-RetinaStoredCredential Cmdlet:
# Remove-RetinaStoredCredential takes one command line argument: the Description of the credential # This will remove the Windows credential created previously Remove-RetinaStoredCredential -Description "Windows Cred" # The description can also be retrieved from the credential created previously # This will remove the SSH credential created previously
Remove-RetinaStoredCredential -Description $SSHCred.Description
The Stored Credential will no longer be available to add to a scan.


![[Webinar] PowerShell series part 3 – PowerShell and WMI](https://img.pdfslide.us/doc/110x75/559b61c31a28ab125f8b47a2/webinar-powershell-series-part-3-powershell-and-wmi.jpg)