Embed Size (px)
Citation preview
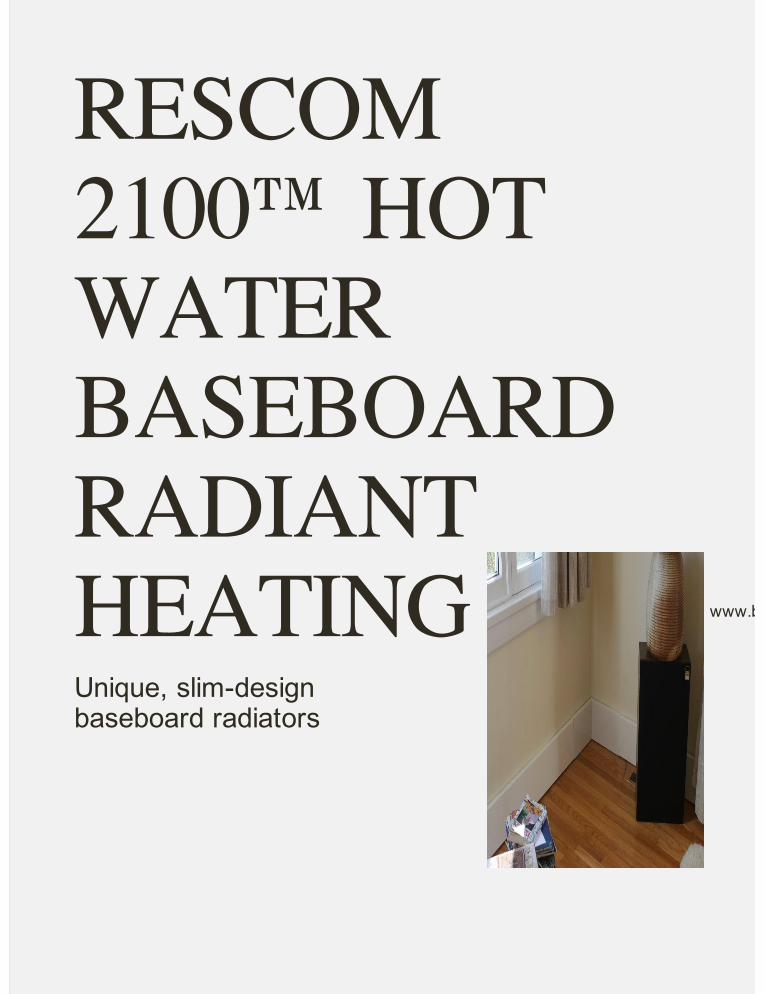
RESCOM2100™ HOTWATERBASEBOARDRADIANTHEATINGUnique, slim-designbaseboard radiators
www.baseboardrads.com
The RESCOM 2100™ system is unlike traditional baseboardheating systems. Smooth flat panels are easily secured to the wall.Hot water circulates through the panels emitting a radiant heat thatwarms objects and people in the room. This quiet, efficient andeven heat source can satisfy all of your heating requirements, froma small kitchen to a large family room, a complete house or office.Once installed, the panels are virtually invisible, blending into thedecor of the room.
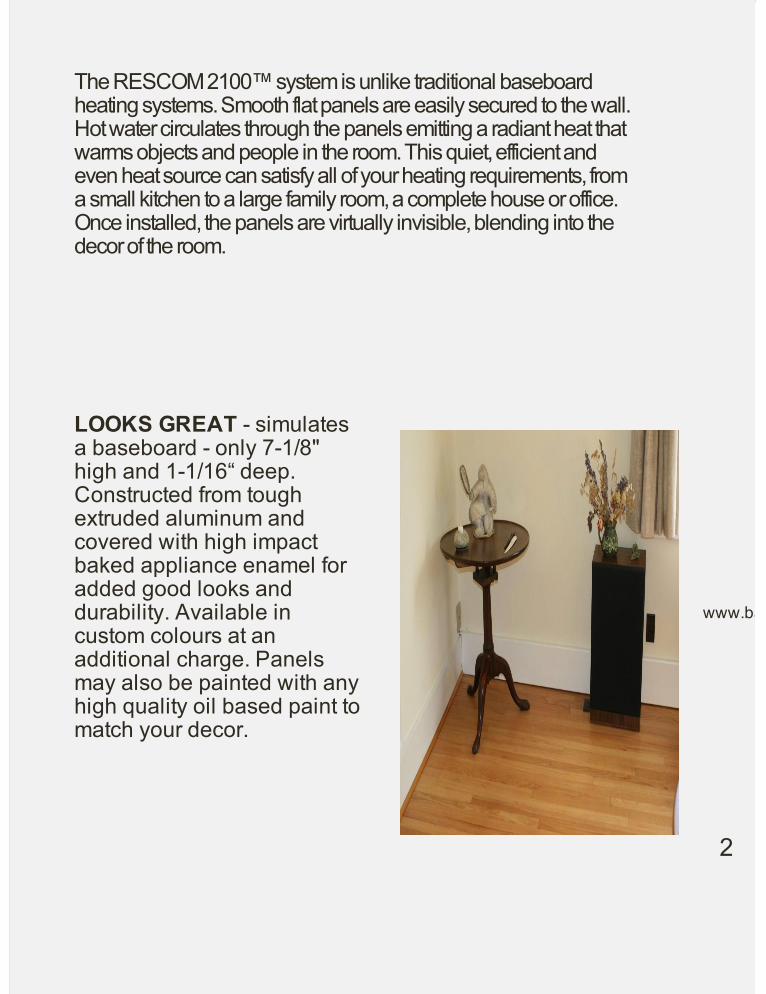
LOOKS GREAT - simulatesa baseboard - only 7-1/8"high and 1-1/16“ deep.Constructed from toughextruded aluminum andcovered with high impactbaked appliance enamel foradded good looks anddurability. Available incustom colours at anadditional charge. Panelsmay also be painted with anyhigh quality oil based paint tomatch your decor.
www.baseboardrads.com
2

UNIQUE SLIM-LINE DESIGN - blends into any interior setting for residential, commercial, or industrialapplications and allows freedom of furniture and curtain placement, as there are no ducts, no vents and norestriction of airflow.
CONSISTENT TEMPERATURES - are maintained throughout the room as gentle radiant warmth isprovided from the panels.
SAFE HEAT - designed at a water temperature of 160°F (71°C), which provides a safe panel surfacetemperature.
HEALTHY HEAT - is provided as most of the heat is generated by radiation, which does not create aircurrents for dust and dust mites to travel on. This is a major benefit to allergy sufferers.
ENERGY EFFICIENT - temperatures at the floor and ceilings are virtually the same allowing more comfort ata lower thermostat setting. (There is no heat blanket at the ceiling). Room by room control allows for evengreater savings by reducing heat in areas used less frequently.
SILENT OPERATION - only moving part is a small electric circulation pump.
EASY INSTALLATION - flexible polyethylene tubing can be run throughexisting floors and walls. Reflecto-Foil™ reflective insulation is providedwith each panel and is applied behind the panel to assure heat is directedinto the room, not into the wall. Dependable compression fittings allow forcomplete hook-ups to all panels and manifold without soldering. Quickfastening system means simple and low cost or do-it-yourself installation.
www.baseboardrads.com
3
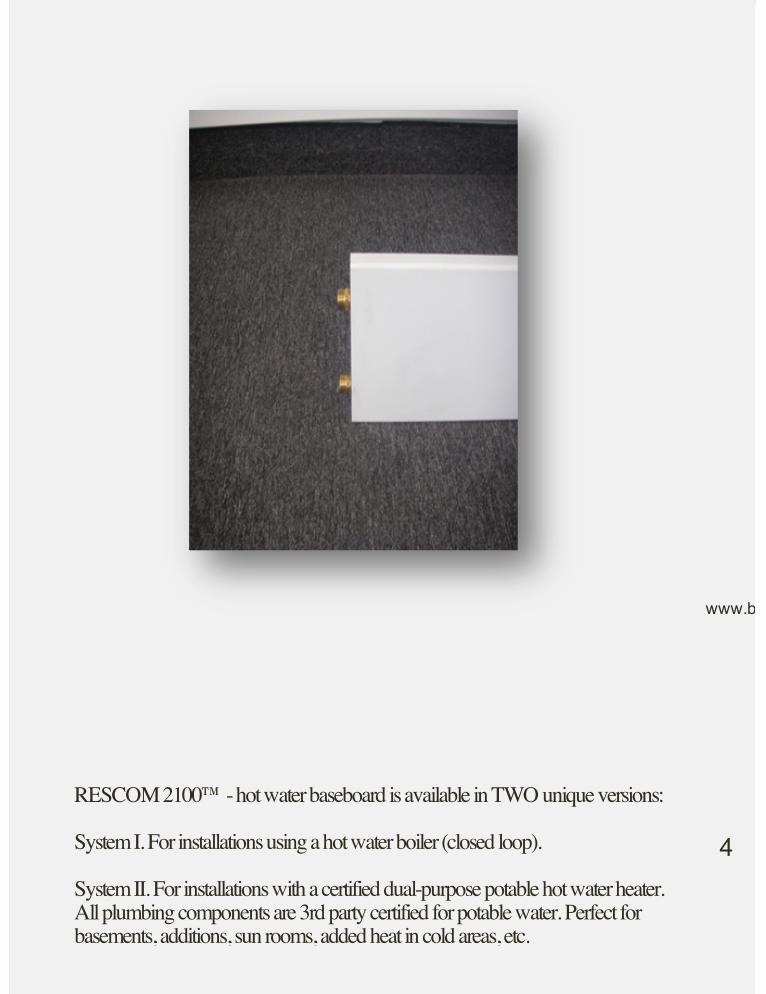
RESCOM 2100™ - hot water baseboard is available in TWO unique versions:
System I. For installations using a hot water boiler (closed loop).
System II. For installations with a certified dual-purpose potable hot water heater.All plumbing components are 3rd party certified for potable water. Perfect forbasements, additions, sun rooms, added heat in cold areas, etc.
www.baseboardrads.com
4

FREQUENTLY ASKED QUESTIONS
WHAT ABOUT OPERATING COSTS?Savings of as much as 75% can be achieved by converting from traditionalheating systems. The system can be run using any type of hot water source.
HOW WILL THESE PANELS LOOK IN MY ROOM?Having no vents or openings, these sleek, unobtrusive looking panels are 1-1/16"(27 mm) wide and 7-1/8" (18 cm) high, tight against the wall. They can easily be
painted to match or complement the colours in your room.
HOW EASY ARE THE PANELS TO INSTALL?Unlike standard panels, there is no cutting or soldering involved. The panels come
complete with mounting brackets, reflective insulation and brass compressionfittings for simple connections.
CAN I HEAT SMALL, HARD TO HEAT AREAS?Yes. The panels are designed to be stacked, run vertically or horizontally, placed
along the floor or anywhere on the wall to provide the heat you need.
MY HOUSE ALWAYS SEEMS DUSTY. CAN THIS PROBLEM BESOLVED?
Since radiant heat does not rely on air movement, there is no dust or pollen that isblown around the room. This also means a more uniform distribution of heat
throughout the room.
www.baseboardrads.com
5
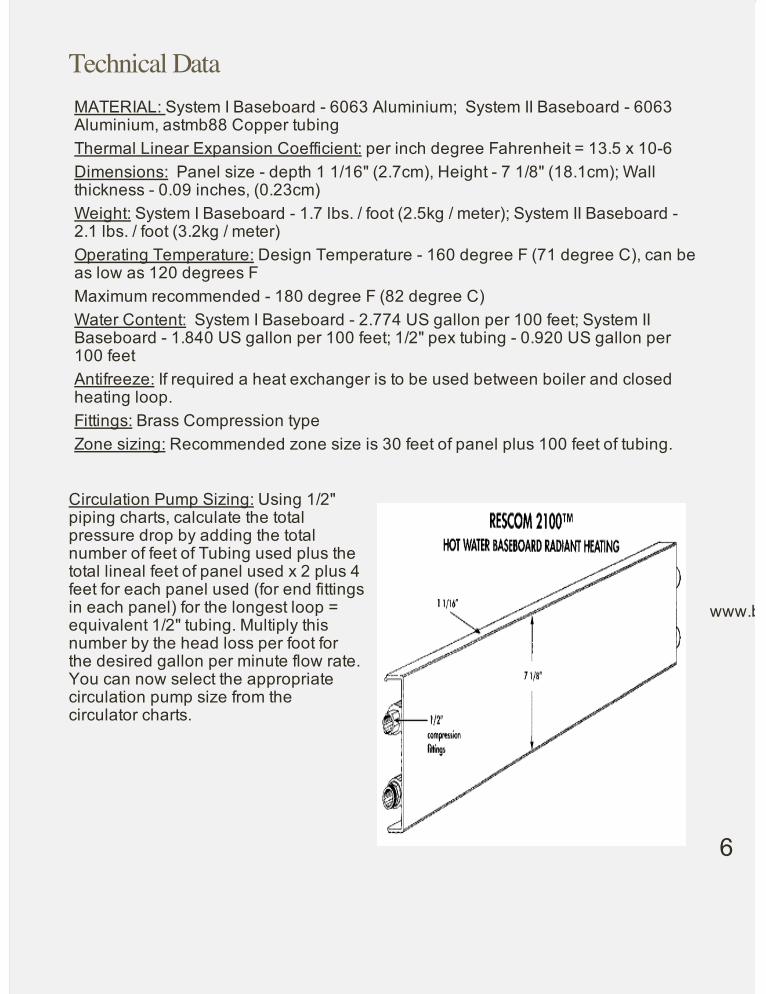
Technical DataMATERIAL: System I Baseboard - 6063 Aluminium; System II Baseboard - 6063Aluminium, astmb88 Copper tubingThermal Linear Expansion Coefficient: per inch degree Fahrenheit = 13.5 x 10⁻⁶Dimensions: Panel size - depth 1 1/16" (2.7cm), Height - 7 1/8" (18.1cm); Wallthickness - 0.09 inches, (0.23cm)Weight: System I Baseboard - 1.7 lbs. / foot (2.5kg / meter); System II Baseboard -2.1 lbs. / foot (3.2kg / meter)Operating Temperature: Design Temperature - 160 degree F (71 degree C), can beas low as 120 degrees FMaximum recommended - 180 degree F (82 degree C)Water Content: System I Baseboard - 2.774 US gallon per 100 feet; System IIBaseboard - 1.840 US gallon per 100 feet; 1/2" pex tubing - 0.920 US gallon per100 feetAntifreeze: If required a heat exchanger is to be used between boiler and closedheating loop.Fittings: Brass Compression typeZone sizing: Recommended zone size is 30 feet of panel plus 100 feet of tubing.
Circulation Pump Sizing: Using 1/2"piping charts, calculate the totalpressure drop by adding the totalnumber of feet of Tubing used plus thetotal lineal feet of panel used x 2 plus 4feet for each panel used (for end fittingsin each panel) for the longest loop =equivalent 1/2" tubing. Multiply thisnumber by the head loss per foot forthe desired gallon per minute flow rate.You can now select the appropriatecirculation pump size from thecirculator charts.
www.baseboardrads.com
6
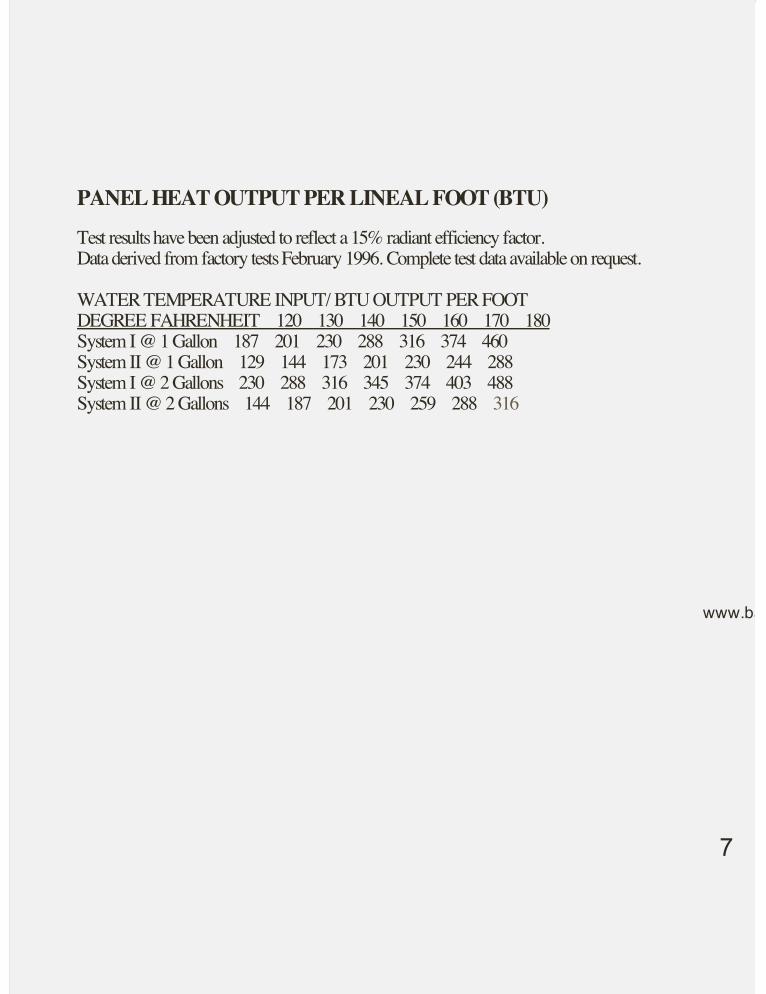
PANEL HEAT OUTPUT PER LINEAL FOOT (BTU)
Test results have been adjusted to reflect a 15% radiant efficiency factor.Data derived from factory tests February 1996. Complete test data available on request.
WATER TEMPERATURE INPUT/ BTU OUTPUT PER FOOTDEGREE FAHRENHEIT 120 130 140 150 160 170 180System I @ 1 Gallon 187 201 230 288 316 374 460System II @ 1 Gallon 129 144 173 201 230 244 288 System I @ 2 Gallons 230 288 316 345 374 403 488System II @ 2 Gallons 144 187 201 230 259 288 316
www.baseboardrads.com
7
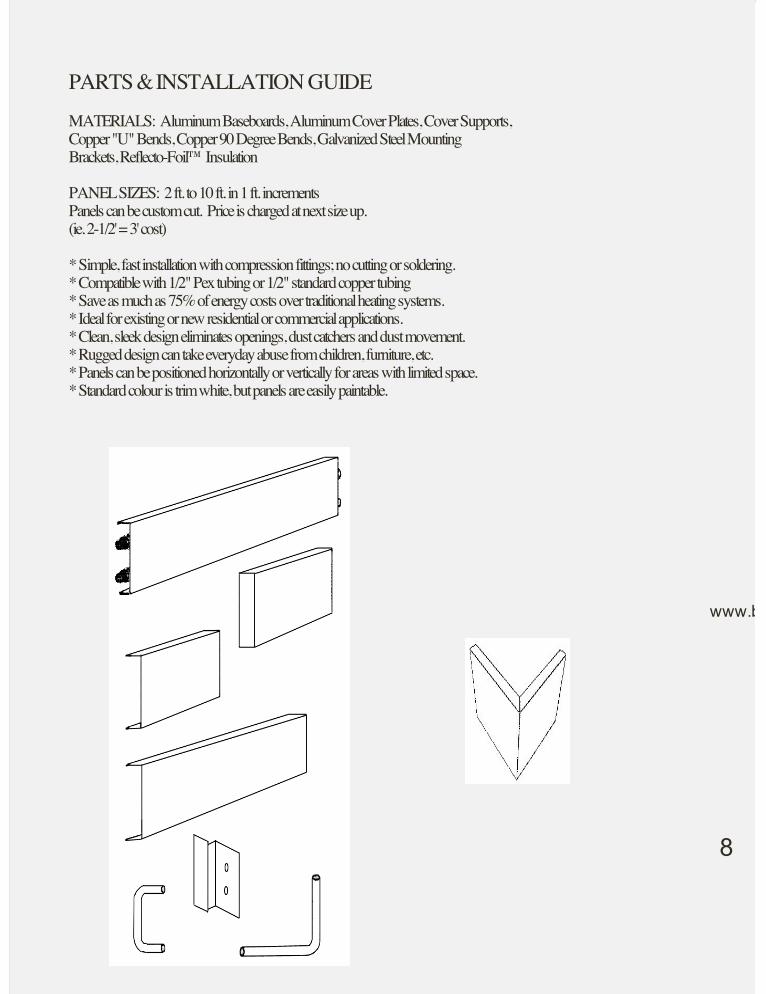
PARTS & INSTALLATION GUIDEMATERIALS: Aluminum Baseboards, Aluminum Cover Plates, Cover Supports,Copper "U" Bends, Copper 90 Degree Bends, Galvanized Steel MountingBrackets, Reflecto-Foil™ Insulation
PANEL SIZES: 2 ft. to 10 ft. in 1 ft. incrementsPanels can be custom cut. Price is charged at next size up. (ie. 2-1/2' = 3' cost)
* Simple, fast installation with compression fittings; no cutting or soldering.* Compatible with 1/2" Pex tubing or 1/2" standard copper tubing* Save as much as 75% of energy costs over traditional heating systems.* Ideal for existing or new residential or commercial applications.* Clean, sleek design eliminates openings, dust catchers and dust movement.* Rugged design can take everyday abuse from children, furniture, etc.* Panels can be positioned horizontally or vertically for areas with limited space.* Standard colour is trim white, but panels are easily paintable.
www.baseboardrads.com
8
This guide assists you in easily designing and installing the Rescom 2100™system. Although this system is very easy to install, we advise you to contactyour local municipal planning department regarding the design of your new hotwater heating system to ensure that it conforms to local plumbing and heatingcodes.
1. A proper heat-loss calculation for your house and a system layout should bedone to determine the number of feet of panel required to satisfy your heatingneeds.
2. Determine what will be the source of hot water for your heating system (i.e.boiler, hot water tank, etc.). You must allow for control and safety devices in thesystem.
3. Install both a return and supply line from your heating source. (We recommendPex tubing be used due to its ease of use and superior strength and durability.) Send the tubing up through the wall or along the floor joists to the point where youplan on locating the first Rescom 2100™ panel in the specific loop. Note: amaximum of 30 linear feet of panel is to be used in one loop.
Installation
www.baseboardrads.com
9

4. Tuck the enclosed section ofReflecto-Foil™ insulation into the backof the Rescom Rad. Next, insert one ofthe enclosed mounting brackets intoone end of the panel and screw thebracket to the wall. If carpet is to be laidafter installation, you should raise thepanel accordingly. Then insert thesecond mounting bracket into the otherend of the panel and screw to the wall. Wall plugs may be required to securethe mounting brackets. See diagram#1.
Diagram #1
10
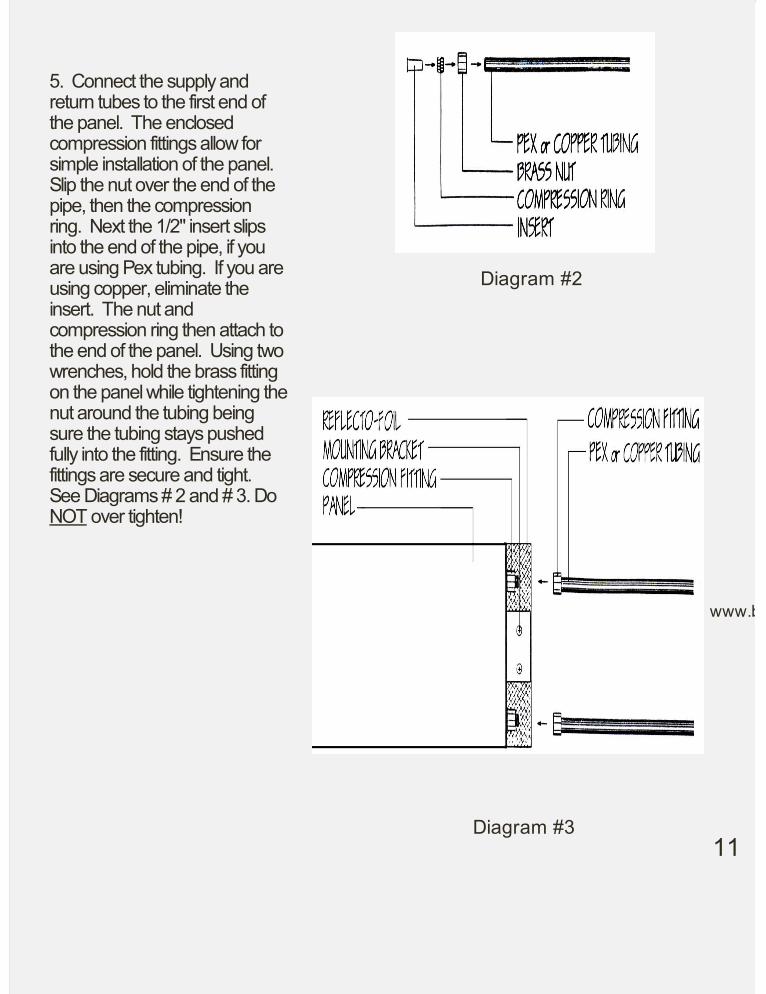
5. Connect the supply andreturn tubes to the first end ofthe panel. The enclosedcompression fittings allow forsimple installation of the panel. Slip the nut over the end of thepipe, then the compressionring. Next the 1/2" insert slipsinto the end of the pipe, if youare using Pex tubing. If you areusing copper, eliminate theinsert. The nut andcompression ring then attach tothe end of the panel. Using twowrenches, hold the brass fittingon the panel while tightening thenut around the tubing beingsure the tubing stays pushedfully into the fitting. Ensure thefittings are secure and tight. See Diagrams # 2 and # 3. DoNOT over tighten!
Diagram #2
Diagram #3
www.baseboardrads.com
11
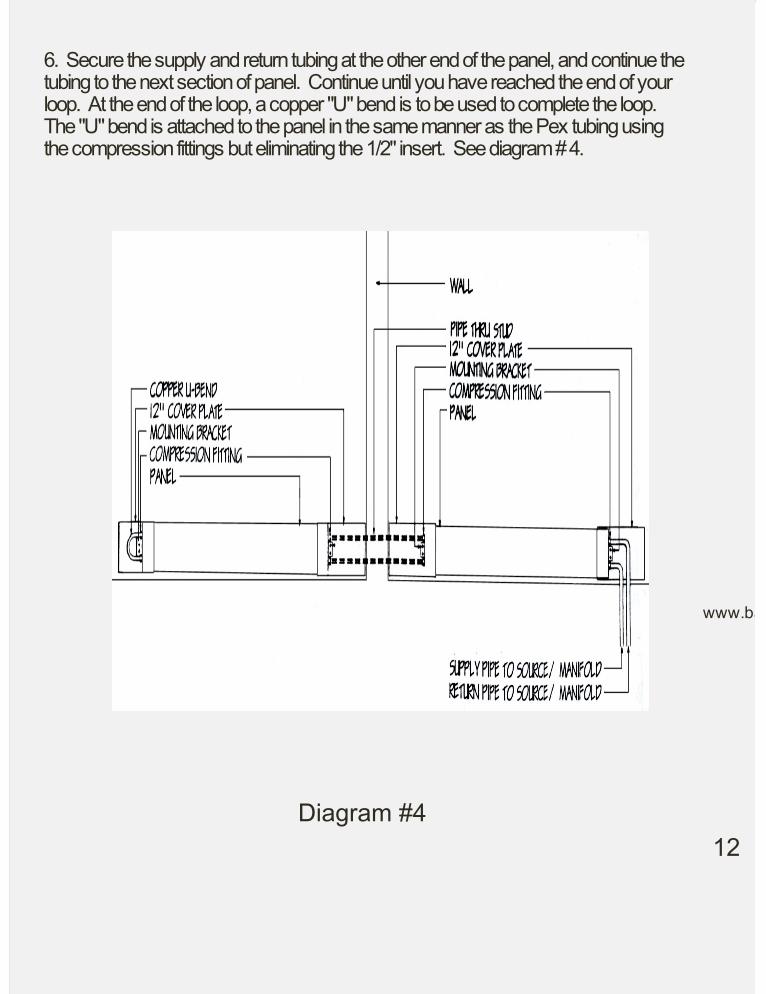
6. Secure the supply and return tubing at the other end of the panel, and continue thetubing to the next section of panel. Continue until you have reached the end of yourloop. At the end of the loop, a copper "U" bend is to be used to complete the loop. The "U" bend is attached to the panel in the same manner as the Pex tubing usingthe compression fittings but eliminating the 1/2" insert. See diagram # 4.
Diagram #4
www.baseboardrads.com
12
7. Next, snap cover plates onto either end of the panel to conceal the tubing andfittings; trim and cut cover plates, if necessary, to accommodate tubing.
8. The system is now ready to be filled and tested for leaks. Depending on thedesign of your system, water or a combination of water and glycol can be used (i.e.cottage application). Once the system has been filled, re-tighten all compressionfittings.
9. If a manifold controls your system, the manifold should be located near yourheating source and include a filling and venting device as well as an expansiontank. It is advised that the loops that service different rooms of the house areidentified at the manifold (i.e. living room, bedroom, etc.).
10. To clean the panels, use mild soapy water or WD-40.
www.baseboardrads.com
13
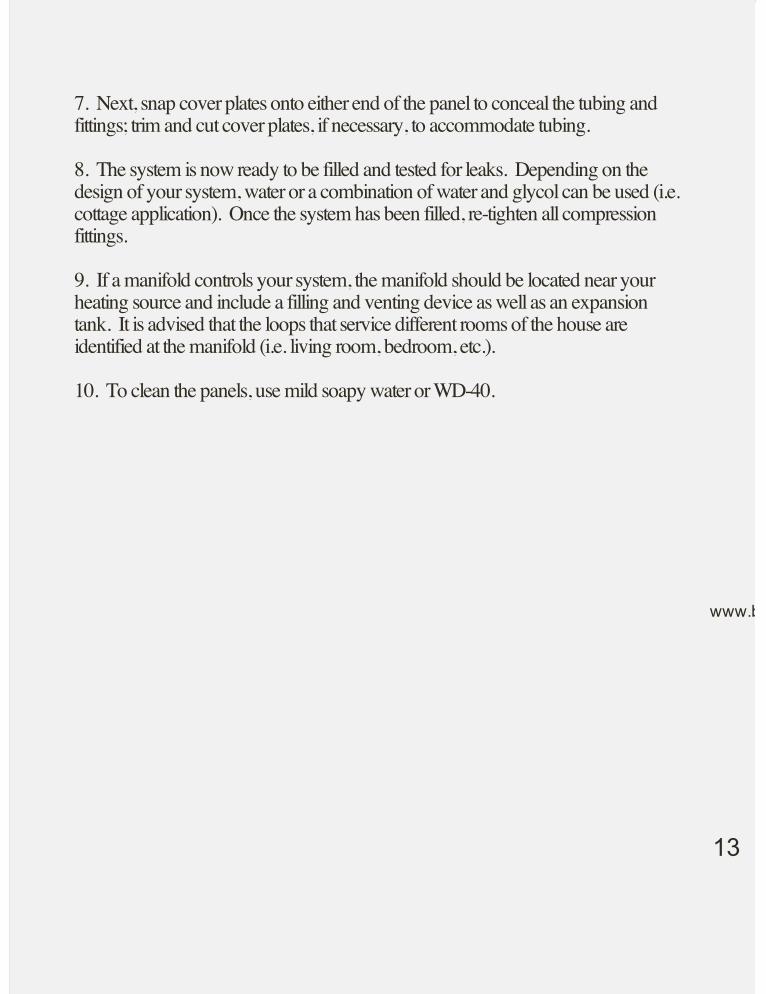
CORNER ASSEMBLY
Inside Corner Assembly
One cover panel hasnotches toaccommodate 90obends
1. Slide notched coverinto place first
www.baseboardrads.com
14
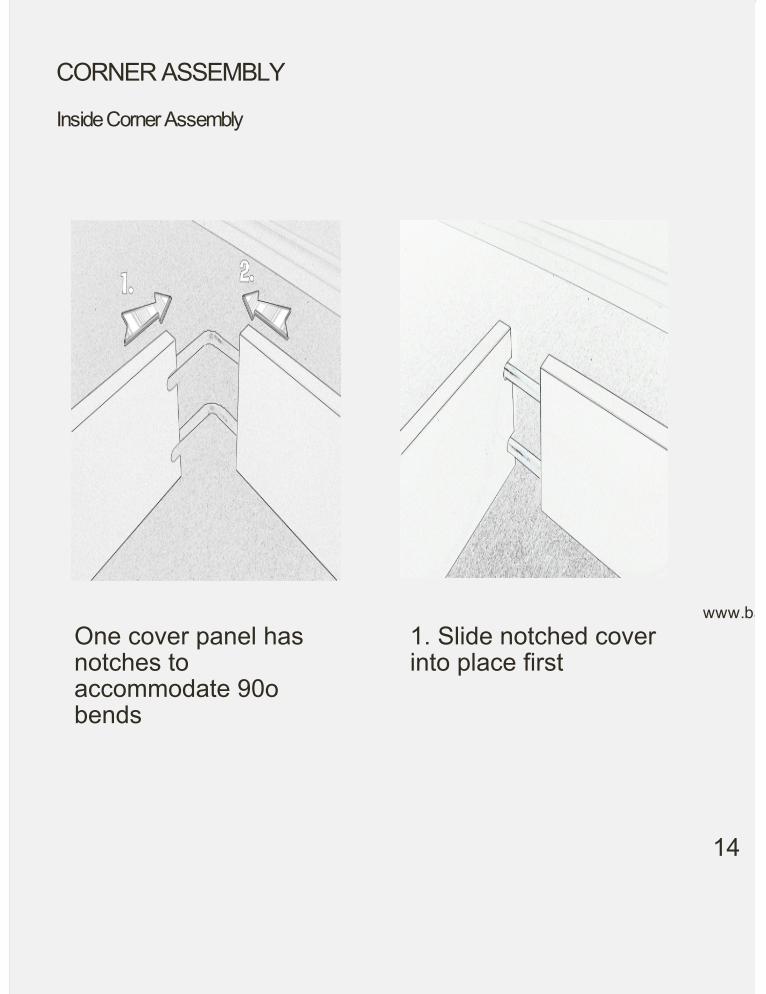
2. Then butt up a 12”cover plate against it. www.baseboardrads.com
15
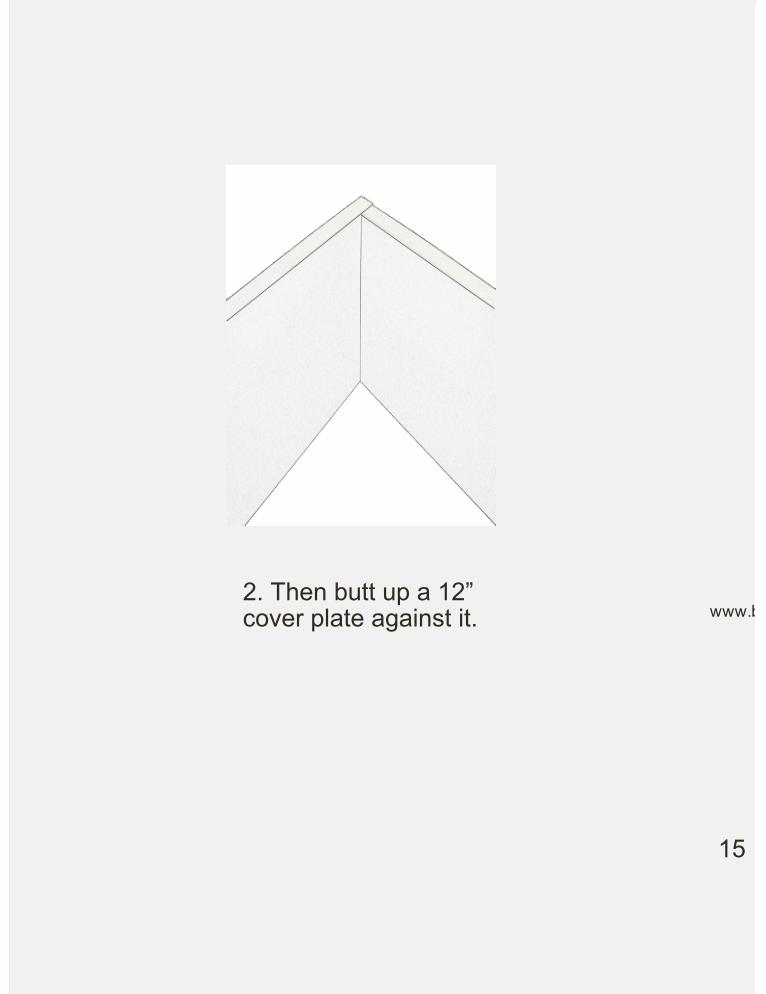
CORNER ASSEMBLY
Outside Corner Cover Plate
www.baseboardrads.com
16
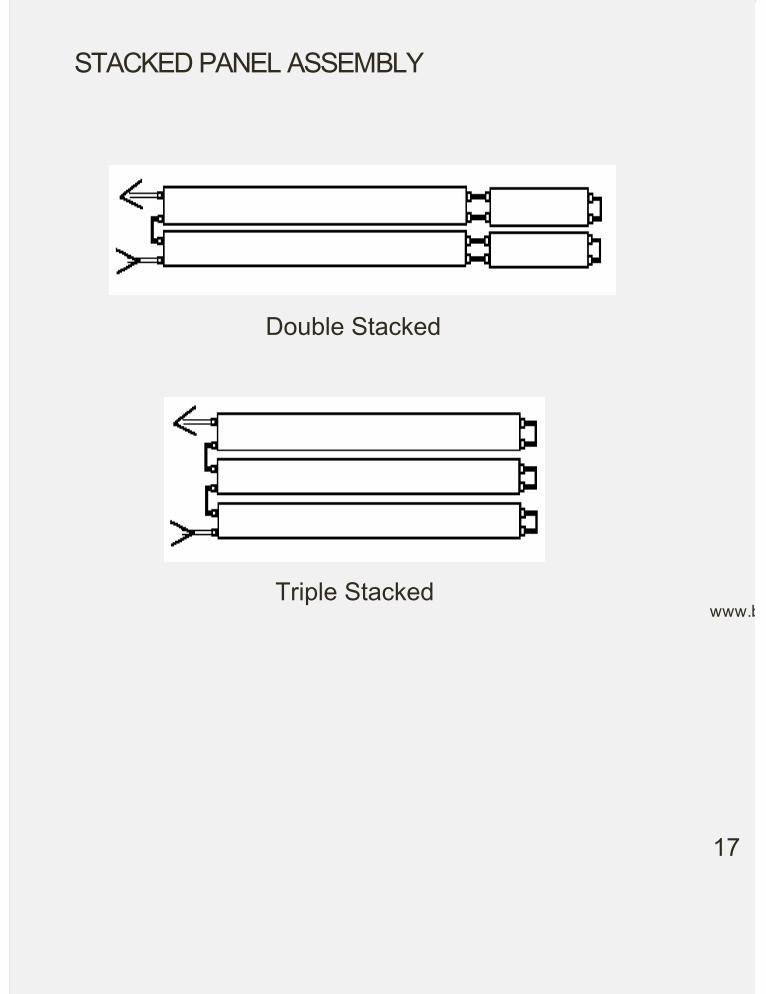
STACKED PANEL ASSEMBLY
Double Stacked
Triple Stackedwww.baseboardrads.com
17
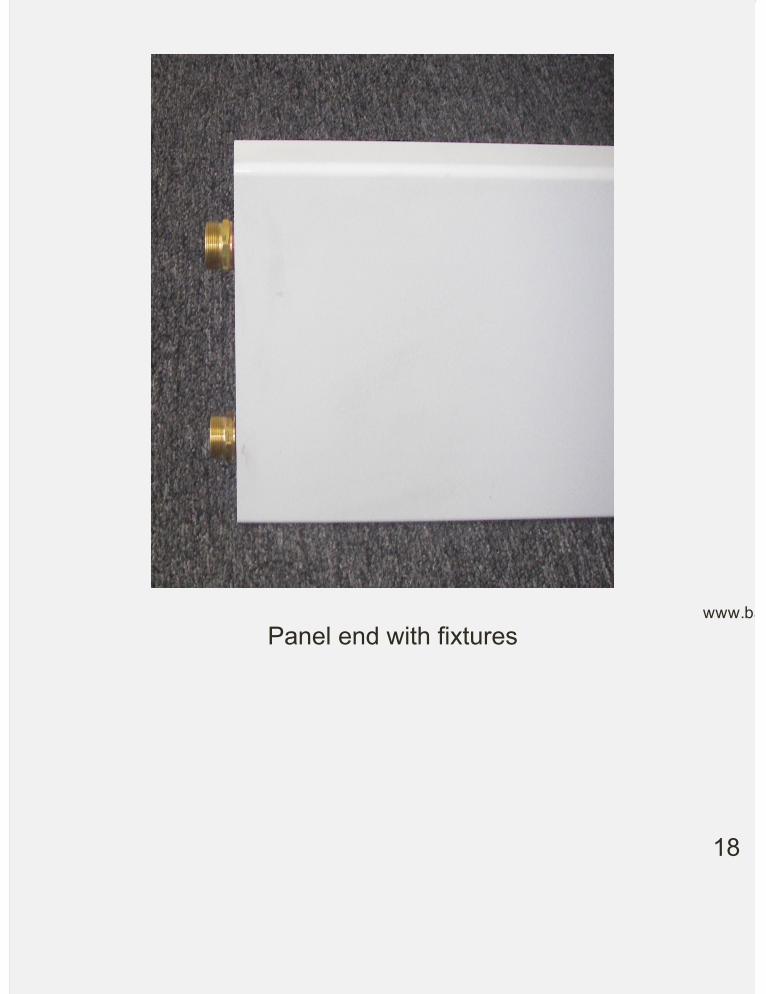
Panel end with fixtures
www.baseboardrads.com
18
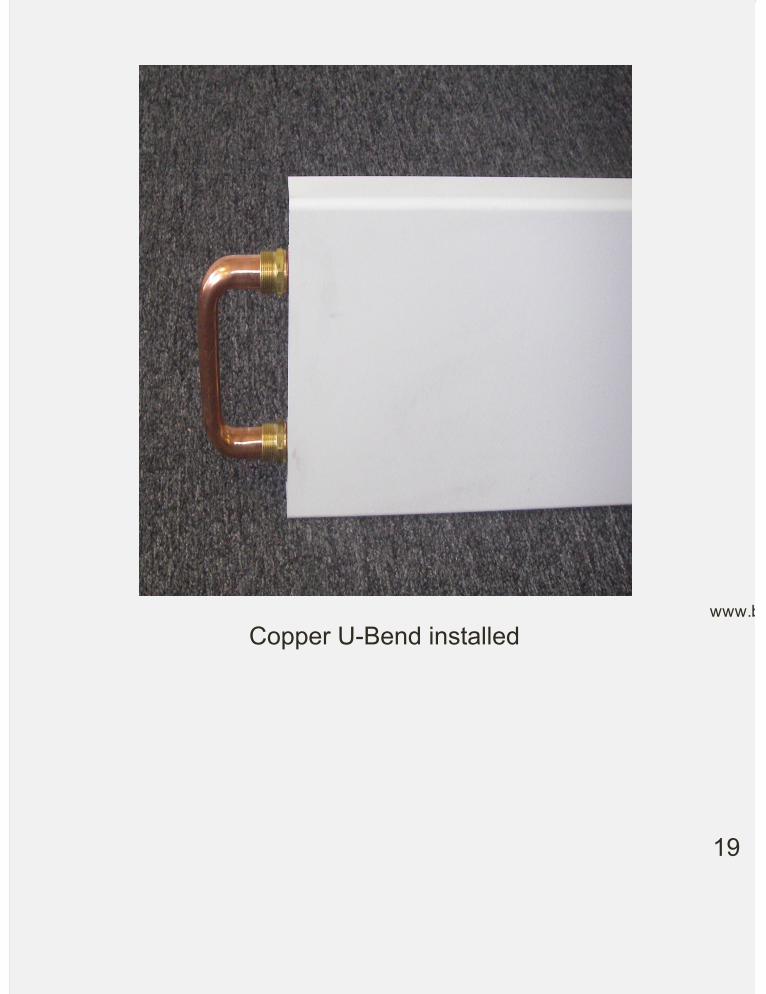
Copper U-Bend installed
www.baseboardrads.com
19
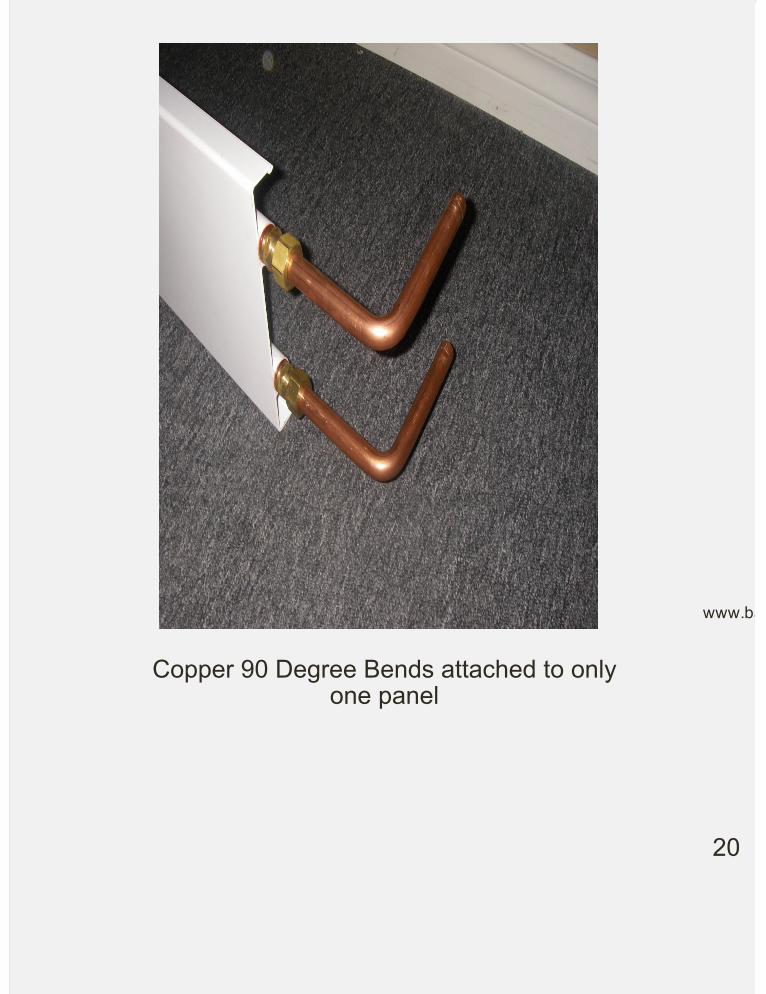
Copper 90 Degree Bends attached to onlyone panel
www.baseboardrads.com
20

Interior view of Outside Corner Cover Platecovering Copper 90 Degree Bends
www.baseboardrads.com
21
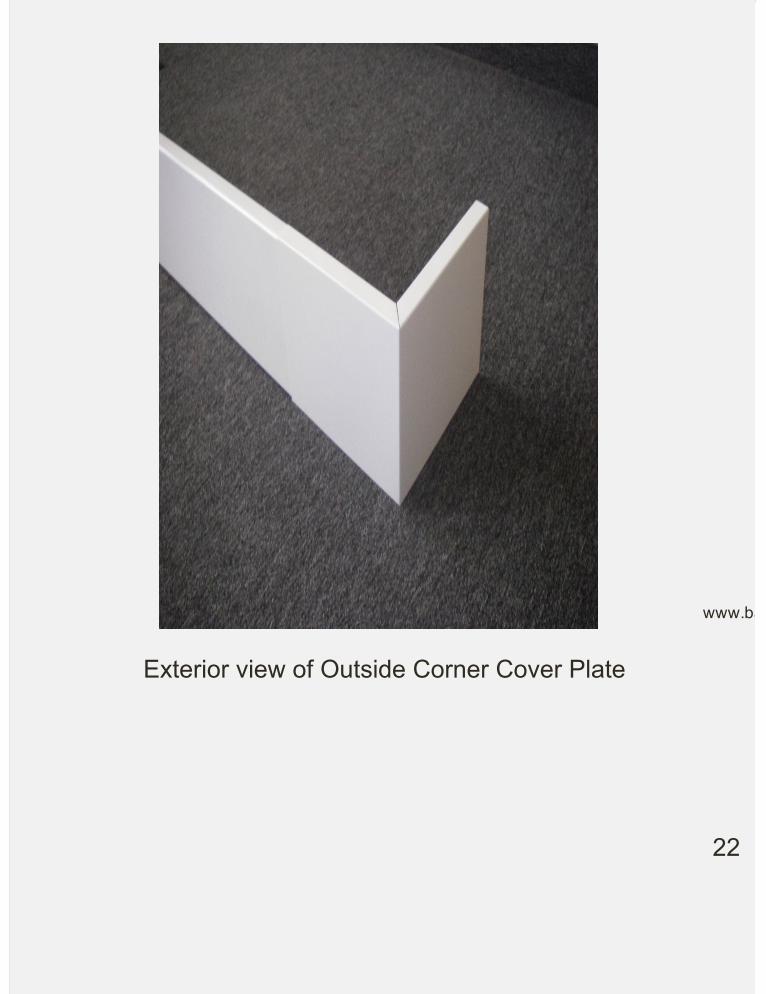
Exterior view of Outside Corner Cover Plate
www.baseboardrads.com
22
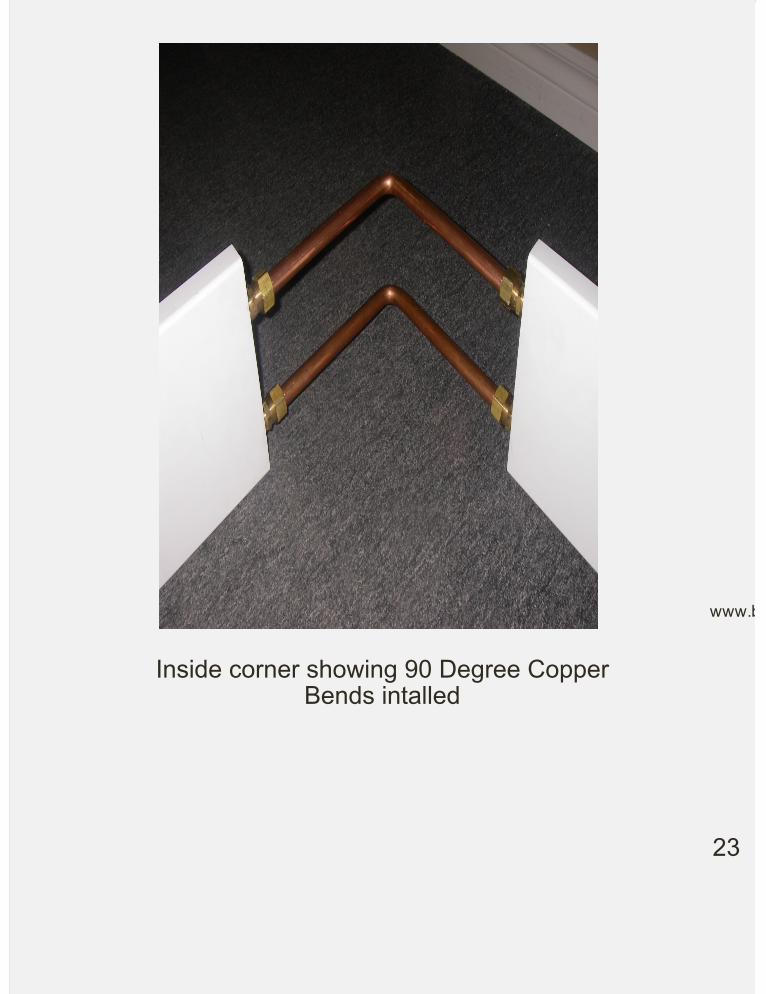
Inside corner showing 90 Degree CopperBends intalled
www.baseboardrads.com
23
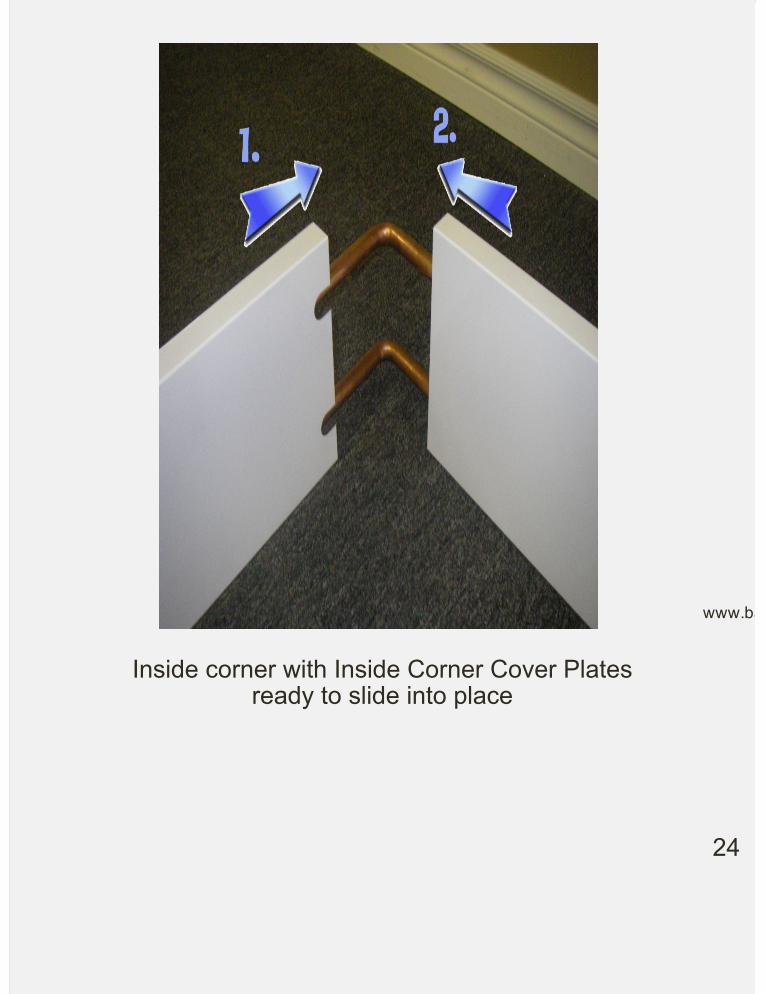
Inside corner with Inside Corner Cover Platesready to slide into place
www.baseboardrads.com
24
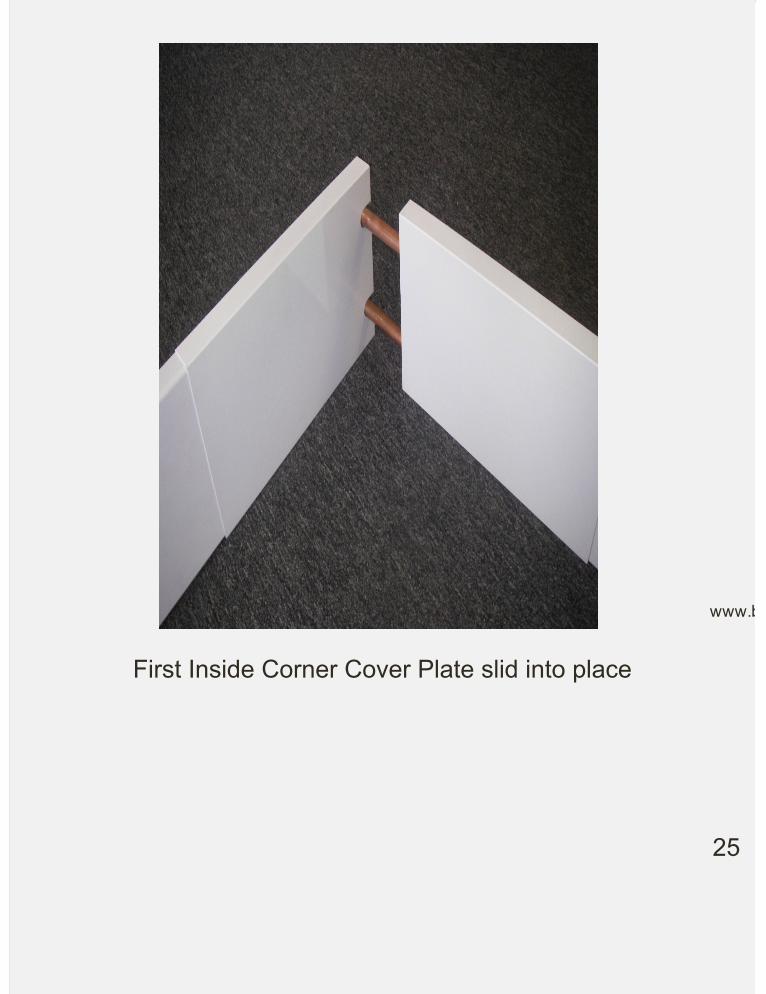
First Inside Corner Cover Plate slid into place
www.baseboardrads.com
25
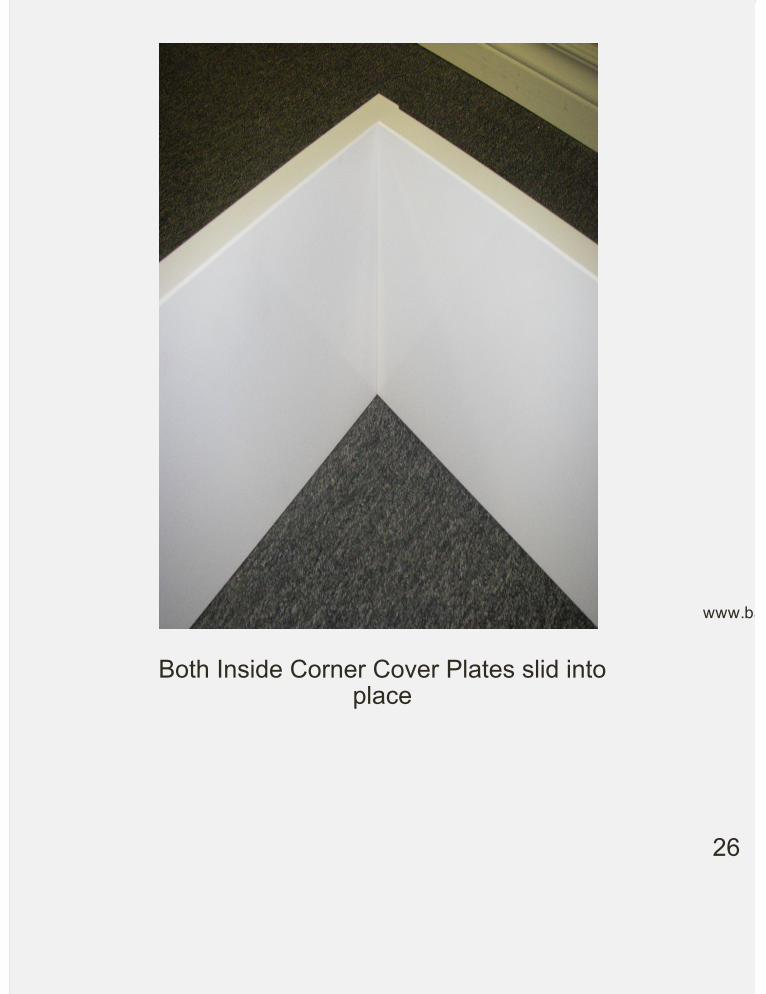
Both Inside Corner Cover Plates slid intoplace
www.baseboardrads.com
26
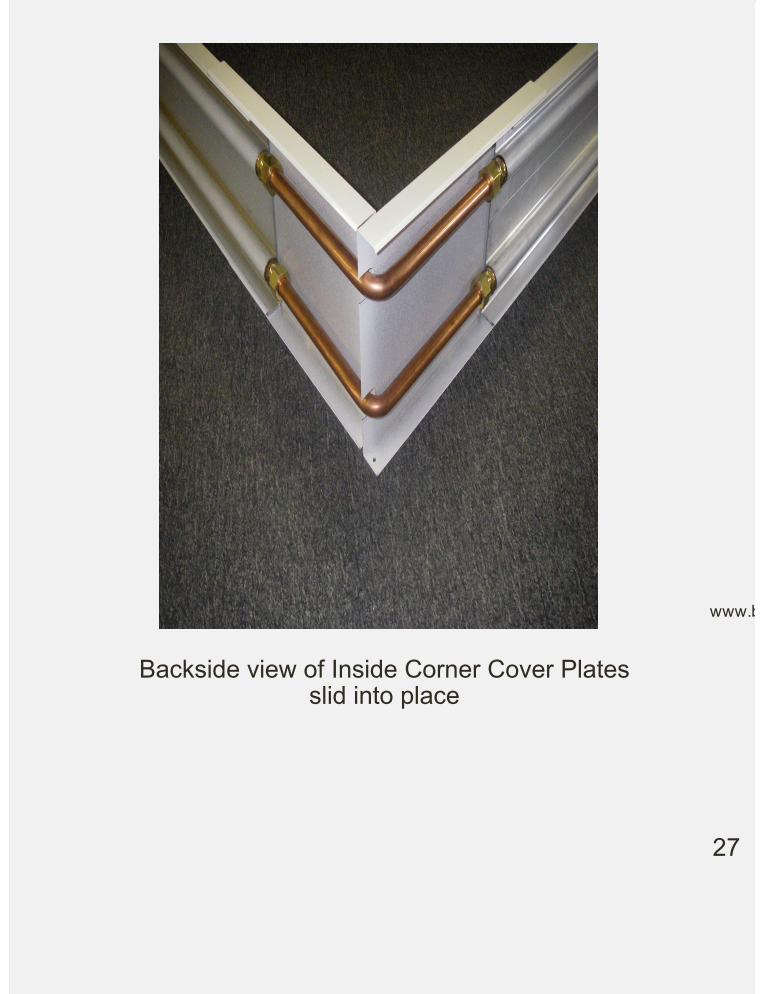
Backside view of Inside Corner Cover Platesslid into place
www.baseboardrads.com
27

For more information:
Call: 905-428-0146
eMail:[email protected]
Visit:
www.baseboardrads.com
www.baseboardrads.com
28