Embed Size (px)
Citation preview

1.
Requesting certificates for non-SINTEF usersExternal users will have to create a certificate request.
BackgroundMaking a certificate request
WindowsApple OS-XLinux, BSD and other systems
Enrolling for a certificateInstalling the certificate
WindowsApple OS-XLinux, BSD, and other systems
Making a backup of the certificate and private key in Windows systems.
Background
Accessing code.sintef.no services requires the use of public-private cryptography. In brief, we will instruct you to use a private key by which youcan generate a request for a digital certificate. Your private key is yours only, and we at SINTEF will never see this key nor know its contents. Youshould safeguard your private key so nobody else gets possession of it. Your private key is never transmitted over the network when contactingthe code.sintef.no services. Note that if you are using Microsoft Windows, the private key you generate will be kept safe by the operating systemand not written to file.
Using your private key, you can generate a certificate request. This results in a request file which you can use in a web service at SINTEF toenroll for a certificate. The combination of your private key and the certificate is used by your web browser in order to gain access in a very securemanner.
The certificate request and certificate file are not sensitive and can not be misused by anyone. Only your private key is sensitive, and should asthe name implies be kept private.
The process of making a private key and generating a certificate request is partly automated by programs on your computer. Below are specificinstructions depending on the operating system you are using.
The validity of this certificate will be 2 years from the date of enrollment, after which you can re-enroll if you still have an active account status withSINTEF.
Making a certificate request
Windows
Edit the file and modify values as indicated. Save the file as request.txt in the "My Documents" folder.request.txt
First time login problemNote that the first time you try to log in to code.sintef.no services, you will experience a log in failure. This is due to a synchronizationproblem with the user database. After you first failed login attempt retry after about 5 minutes.
Instructions are for non-SINTEF usersThe following instructions are to be followed by non-SINTEF users. The certificate request is to be generated by the non-SINTEF users.By no circumstances should a SINTEF employee generate the certificate request on behalf of the non-SINTEF user.
Take care of your private keyThe private key is never transmitted over the network and is only known to you.Should you lose or delete it, this will be a permanent loss. It can not be reconstructed. You should safeguard your private key and not share it with others.In case of accidental loss or theft of your private key, you should immediately inform your SINTEF contact.

1.
2.
request.txt
;----------------- request.txt -----------------[Version]Signature="$Windows NT$" [NewRequest]; C: two letter country code; O: organization name; CN: Common name, typically "Givenname Familyname"; Change bellow to your country code, organization, common name andemail address.Subject = "C=no, O=Your organization, CN=Your Name,[email protected]" ; Leave these valuesKeySpec = 1KeyLength = 2048Exportable = TRUESMIME = FalsePrivateKeyArchive = FALSEUserProtected = FALSEUseExistingKeySet = FALSEProviderName = "Microsoft RSA SChannel Cryptographic Provider"ProviderType = 12RequestType = PKCS10KeyUsage = 0xa0 [EnhancedKeyUsageExtension]OID=1.3.6.1.5.5.7.3.2
Open a command shell

2.
3.
4.
1. 2. 3.
Use the commands "cd %userprofile%\Documents" to move to the folder where you put the request.txt file:
Microsoft Windows [Version 6.1.7601]Copyright (c) 2009 Microsoft Corporation. All rights reserved. C:\Users\oberg>cd %userprofile%\DocumentsC:\Users\oberg\Documents>
Type the following command to generate the certificate request file "certreq.txt"
C:\Users\oberg\Documents>certreq -new request.txt certreq.txtC:\Users\oberg\Documents>
Apple OS-X
Open the key chain application found in Programs->Utilities->Keychain access (Programmer->Verktøy->Nøkkelringtilgang)Select the keyring "login" (pålogging).Create a certificate request (Nøkkelringtilgang->Sertifikatassistent->Be om et sertifikat fra en sertifikatautoritet...)

3.
Select "Saved to disk" and press "Continue".
Linux, BSD and other systems
Generate an RSA private key (Triple DES 2048 bits). Make sure you keep the private key file safe (code_sintef_no.key). Never share this file itwith anyone.
$ openssl genrsa -des3 -out code_sintef_no.key 20482048 Generating RSA private key, 2048 bit long modulus................................+++..................................+++ e is 65537 (0x10001) Enter pass phrase for code_sintef_no.key:Verifying - Enter pass phrase for code_sintef_no.key: $

1.
2. 3.
Generate a certificate request by editing the file containing the followingconf.txt
conf.txt
# Example file conf.txt for openssl req command # No need to change anything in the req section.#[ req ]default_bits = 2048default_md = sha256prompt = nostring_mask = utf8onlydistinguished_name = req_distinguished_namereq_extensions = req_cert_extensions
# Below, you should set your country two letter code,# company affiliation and your full name.## Use two letter short name for country as found here:# https://www.digicert.com/ssl-certificate-country-codes.htm# Examples: Norway=NO, Sweden=SE, USA=US, Great Britain (UK)=GB#[ req_distinguished_name ]countryName = NOorganizationName = Your organization namecommonName = Your full name
# Below, you should set your email address as indicated# with the dummy [email protected]#[ req_cert_extensions ]extendedKeyUsage = clientAuthsubjectAltName = email:[email protected]
Create the certificate request
$ openssl req -new -config conf.txt -key code_sintef_no.key -outcertreq.txt
Enrolling for a certificate
If you already have a password for access to SINTEF services, skip to 2. Otherwise, go to the site to resethttps://collaboration.sintef.noyour password by clicking the "I forgot my password" link at the bottom of the page. After a successful reset, continue to the next point. There is no use in logging in to the service on collaboration.sintef.no, as you will use this site for password reset.onlyGo to the site https://otp.vpn.sintef.noLog in with the username you have been given by SINTEF and add the extension - e.g. user . @ext.sintef.no [email protected]
3.
4.
5.
The system will send you an SMS to the mobile number you have been registered with at SINTEF when you press Sign In. Enter thecode you received by SMS.
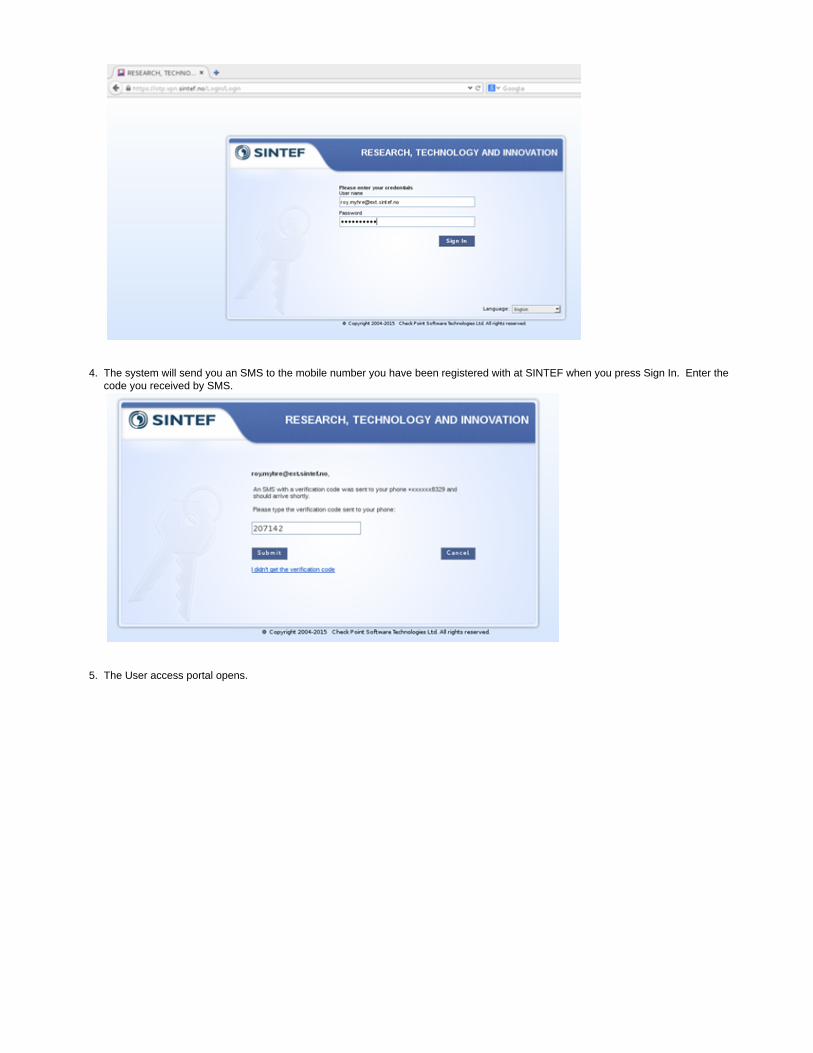
The User access portal opens.

5.
6. 7.
8.
Click on the published “ ” URL as outlined above.Microsoft Active Directory Services – PKI-SINTEFEX-IssThe certificate enrollment portal opens
Click "Request a certificate"

8.
9. 10.
11. 12.
13. 14.
Click “ ”Submit a certificate request by using a base-64-encoded CMC or PKCS #10 file…Paste the text from the file certreq.txt in the Saved Request-field, and make sure Certificate Template reads .UserV2
Then click .SubmitNew certificate has now been enrolled.
Press "Download certificate chain", which will give you a file "certnew.p7b" for download.Save your request to file by supplying a filename and press <Finish>.
Installing the certificate
Windows
Locate the file certnew.p7b that you downloaded, left-click with the mouse button, and choose "Install Certificate".

1. 2.
After installing the certificate successfully, point your web browser to https://www.code.sintef.no
Apple OS-X
Double click the certnew.p7b file to install the certificate.You are now ready to use the code.sintef.no services by pointing the Safari browser to . When accessing thehttps://www.code.sintef.no services with Safari, you will get the following prompt (with your name instead of "Nomen Nescio"):
Press "Allow" or "Always Allow" and you will arrive at the login page.
1.
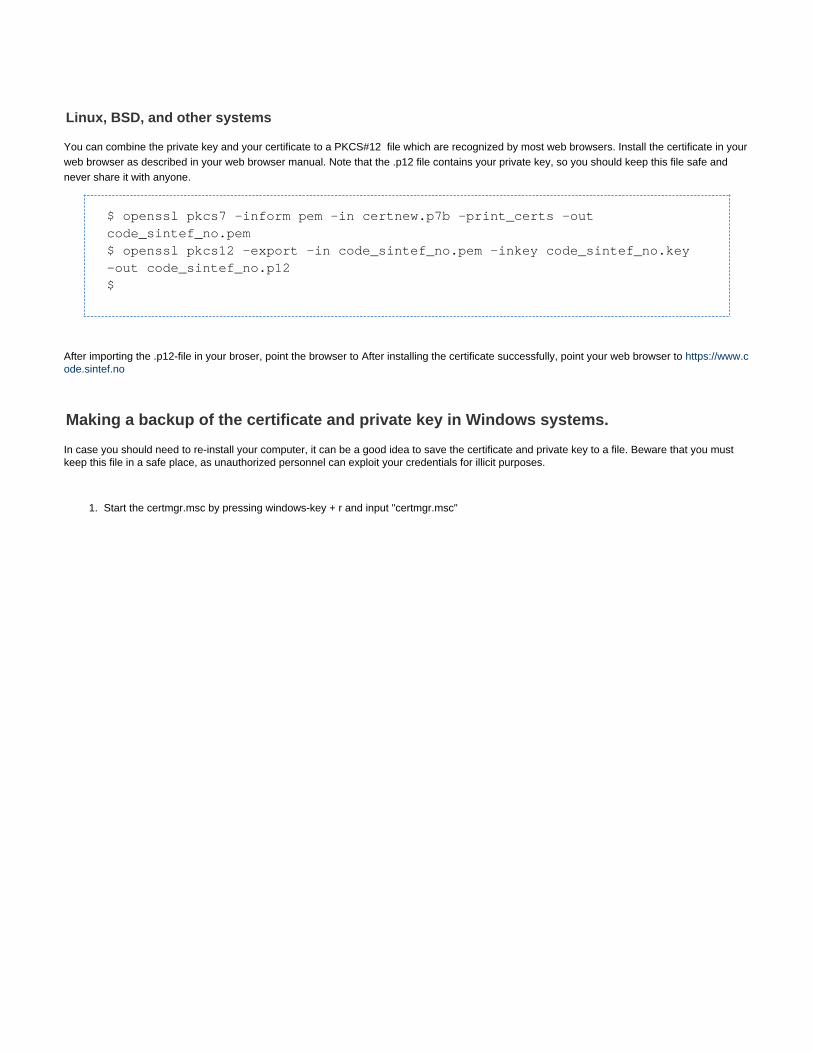
Linux, BSD, and other systems
You can combine the private key and your certificate to a PKCS#12 file which are recognized by most web browsers. Install the certificate in yourweb browser as described in your web browser manual. Note that the .p12 file contains your private key, so you should keep this file safe andnever share it with anyone.
$ openssl pkcs7 -inform pem -in certnew.p7b -print_certs -outcode_sintef_no.pem $ openssl pkcs12 -export -in code_sintef_no.pem -inkey code_sintef_no.key-out code_sintef_no.p12 $
After importing the .p12-file in your broser, point the browser to After installing the certificate successfully, point your web browser to https://www.code.sintef.no
Making a backup of the certificate and private key in Windows systems.
In case you should need to re-install your computer, it can be a good idea to save the certificate and private key to a file. Beware that you mustkeep this file in a safe place, as unauthorized personnel can exploit your credentials for illicit purposes.
Start the certmgr.msc by pressing windows-key + r and input "certmgr.msc"

1.
2.
In the certmgr.msc, navigate to your certificate, right click, select "All tasks" and "Export"

2.
3.
4. Press <Next>

4.
5. Select "Yes, export the private key".

5.
6. Press <Next>.

6.
7. Choose a password to protect the certificate and private key, then press <Next>.

7.
8.
Choose where to save the file by pressing <Browse>

8.
9. Press <Save>.

9.
10. Press <Next>.

10.
11. Press <Finish>.You are done and can copy the file to a safe place for later retrieval. This file contains .both your private key and your certificate
Make sure you never share this file with anyone.
Take care of your private keyThe private key is known only to you (or rather your computer). This means that you should take care of your private key and it is agood idea to make a backup copy of your certificate.