Embed Size (px)
Citation preview

Remote Data Manager DAServer
User’s Guide
Ver 1.0 Rev 1.0 DR 610 10
WONDERWARE FINLAND P.O. Box 38 FIN-00371 Helsinki Finland
tel. int. + 358 9 5404940 fax int. + 358 9 5413541
[email protected] www.wonderware.fi

Wonderware Finland Remote Data Manager DAServer i
RDM DAServer Ver 1.0 User Manual Rev 1.0 61010m10
Contents
Before You Begin ........................................................................................................... 2 About This User Guide ............................................................................................... 2
Introduction .................................................................................................................... 3 Overview ..................................................................................................................... 3 Communication Protocols ........................................................................................... 5
Application Communications Protocols ................................................................... 5 Accessing Items via the DAServer ............................................................................. 6
Features ..................................................................................................................... 6 Configuration .................................................................................................................. 7
Getting Started Quickly with the DAServer ................................................................. 7 Configuring the DAServer ........................................................................................... 9
DASRDM Hierarchy in the DAServer Manager .......................................................... 11 To create RDM Folders object from the Configuration branch ................................ 11 To add RE to your RDM hierarchy .......................................................................... 14
Some rules and sequences used in processing ...................................................... 15 Configuring Device Group Definitions ......................................................................... 16 Configuring Device Item Definitions ............................................................................ 17
Hot Configuration .................................................................................................... 20
Item Names .................................................................................................................... 21 RE Item Naming ......................................................................................................... 21
Control and monitoring items .................................................................................. 22 DAServer Standard System Items .............................................................................. 23
DAServer Global System Item ................................................................................ 24
DAServer Device-Specific System Items ................................................................ 24 DAServer Device-Group-Specific System Items ..................................................... 26
Generic OPC Syntax .................................................................................................. 28 Troubleshooting ............................................................................................................. 29
Reference ....................................................................................................................... 30 DAServer Architecture ................................................................................................ 30
DAServers ............................................................................................................... 30 Plug-ins ................................................................................................................... 31
Component Environments .......................................................................................... 32

Wonderware Finland Remote Data Manager DAServer 2
RDM DAServer Ver 1.0 User Manual Rev 1.0 61010m10
Before You Begin
About This User Guide This user’s guide describes the user interface and functions of the Wonderware Finland Remote Data Manager DAServer (hereafter referred to as the “RDM DAServer” or “DAServer”). It also provides you with the step-by-step procedures on how to configure and use the RDM DAServer after it is installed. Important Note! This release of user guide is a very early stage version containing only general overview and basic headings of sections. The RDM DAServer user’s guide is organized in the following fashion: • Contents • Introduction: contains overview information about the RDM DAServer and the
environment in which it works. • Configuration: contains a detailed description of the user interface elements of this
DAServer in addition to its functionality. • Item Names: describes the item naming conventions. • Troubleshooting: provides information about error messages, codes, and conditions
displayed by the RDM DAServer. • Reference: describes the DAServer architecture in general. • Index You can view this document on-line or you can print it, in part or whole, by using the Adobe Acrobat Reader’s print facility.

Wonderware Finland Remote Data Manager DAServer 3
RDM DAServer Ver 1.0 User Manual Rev 1.0 61010m10
CHAPTER 1
Introduction This chapter provides you with an overview of the RDM DAServer, including the application- and bus-level communications protocols, item naming conventions and DAServer features. Contents • Overview • Communications Protocols • Accessing Items via the DAServer • Features • Network Environment and Conditions
Overview The RDM DAServer (hereafter referred also as the “DASRDM” or “DAServer” throughout the remainder of this user’s guide) is a Microsoft ® Windows ® application program that acts as a communications protocol server. The RDM DAServer is developed by Wonderware Finland with main purpose to process and transfer the remote data produced by different kind of remote equipment into a standard data flux readable by Wonderware Application Server (IAS) and Historian. The RDM DAServer is developed with the Wonderware ArchestrA Data Access Server Toolkit 3.0 and therefore will be under the same compliance/usage rules as other Wonderware DAServers. The OPC or SuiteLink interfaces will be used to provide data for Wonderware Application Server. The general layout of environment where RDM DAServer can be used is like in picture below: There are following general data flows in this system:

Wonderware Finland Remote Data Manager DAServer 4
RDM DAServer Ver 1.0 User Manual Rev 1.0 61010m10
1. Raw data from remote equipment (referred as “RE” throughout the remainder of
this user’s guide” – packed raw data files from each RE. There can be individual
files for each tag and time period (minute or hour data).
2. Calling the Receiving Command file when one file was moved and the Command
file:
a. Creates unique folder
b. Unzips the files to the created folder
c. Makes a backup copy of the zip file
d. Calls pre-processing module
3. Pre-Processing module:
a. Removes empty files
b. Checks that all tags exist in tag definition file (puts the non-existing in log
file)
c. Merges all tag files in to one file ordered by time
4. RDM DAServer reads the input source files and makes the values available via
OPC or SuiteLink:
a. The DAServer publishes a new value when the handshake flag (separate for
each RE) is set to true; the publishing of new data can also be configured to
be sent automatically with cyclic time, like 1 new value per 1000 ms)
b. For each RE there is a “lastDataSentTimeStamp”, so if values with older
timestamp are found, there are put into the normal file load file (for Historian
import - point 9); the “lastDataSentTimeStamp” is locally stored in the
DAServer but it can also be set by IAS (like if IAS reads it from, Historian
after restart), a cross reference list is used to convert the RDM names to
istorian tags.
c. Item names in the DAServer are same as in the RDM files.
5. “Readiness for new value” = True (in case hanshaking is used) and possibly
“lastDataSentTimeStamp”) is sent to DAServer from IAS
6. Data values are provided by DAServer to IAS via OPC/SuiteLink and DAServer
sets “Readiness for new value” = False when new values are published
7. IAS model is configured to read values via OPC/SuiteLink and configured to
historize the values
8. Values are stored in Historian via Native historization functions
9. Old values are imported to Historian via Normal File load.
So, the points 4, 5. 6 and 9 above are directly related with RDM DAServer. While the RDM DAServer is primarily intended for use on Windows 2008 R2 Server, it may be used on any Microsoft Windows platform compatible with Wonderware Application Server 3.1 SP2 and later.

Wonderware Finland Remote Data Manager DAServer 5
RDM DAServer Ver 1.0 User Manual Rev 1.0 61010m10
Communication Protocols The RDM DAServer communicates with clients using the following different communications protocols: • Application communications protocols such as OPC, DDE and SuiteLink to communicate with clients located on either local or remote nodes. Important! This DAServer is compliant with the OPC Data Access (DA) 2.05 specification. For more information about the DAServer architecture, see the Reference section.
Application Communications Protocols The DAServer utilizes the following application communications protocols to communicate with the clients. OPC OPC (OLE for Process Control) is a non-proprietary set of standard interfaces based upon Microsoft’s OLE/COM technology. This standard makes possible interoperability between automation/control applications, field systems/devices and business/office applications. Avoiding the traditional requirement of software/application developers to write custom drivers to exchange data with field devices, OPC defines a common, high-performance interface that permits this work to be done once, and then easily reused by HMI, SCADA, control and custom applications. Over the network, OPC uses DCOM (Distributed COM) for remote communications. SuiteLink SuiteLink uses a TCP/IP-based protocol and is designed specifically to meet industrial needs such as data integrity, high throughput, and easier diagnostics. This TCP/IP standard is supported on Windows NT and Windows NT-technology-based operating systems (for example, Windows NT, Windows 2000, and Windows XP). SuiteLink is not a replacement for DDE, FastDDE, or NetDDE. The protocol used between a client and a server depends on your network connections and configurations. SuiteLink provides the following features: • Value Time Quality (VTQ) places a time stamp and quality indicator on all data values delivered to VTQ-aware clients. • Extensive diagnostics of the data throughput, server loading, computer resource consumption, and network transport are made accessible through the operating system’s performance monitor. This feature is critical for the operation and maintenance of distributed industrial networks. • Consistent high data volumes can be maintained between applications regardless if the applications are on a single node or distributed over a large node count. • The network transport protocol is TCP/IP using Microsoft’s standard WinSock interface. FastDDE FastDDE provides a means of packing many proprietary Wonderware Dynamic Data Exchange messages into a single Microsoft DDE message. This packing improves efficiency and performance by reducing the total number of DDE transactions required between a client and a server.

Wonderware Finland Remote Data Manager DAServer 6
RDM DAServer Ver 1.0 User Manual Rev 1.0 61010m10
Although Wonderware's FastDDE has extended the usefulness of DDE for our industry, this extension is being pushed to its performance constraints in distributed environments. DDE DDE is a communications protocol developed by Microsoft to allow applications in the Windows environment to send/receive data and instructions to/from each other. It implements a Client/Server relationship between two concurrently running applications. The server application provides the data and accepts requests from any other application interested in its data. Requesting applications are called clients. Some applications such as InTouch and Microsoft Excel can simultaneously be both a client and a server. NetDDE NetDDE is a communications protocol that extends the standard DDE functionality to include communications over local area networks and through serial ports. Network extensions are available to allow DDE links between applications running on different computers connected via networks or modems. For example, NetDDE supports DDE between applications running on IBM-compatible computers connected via LAN or modem, and DDE-aware applications running on non-IBM-compatible computers under operating environments such as VMS and UNIX.
Accessing Items via the DAServer The method for accessing items through the DAServer depends on the communications protocol being used.
Features The RDM DAServer provides the following features: • The ability to communicate over multiple application-level protocols at the same time. • The ability to add new application-level protocols on the fly. • The ability to be configured remotely. • New, robust diagnostic abilities. For more in-depth information on the DAServer architecture, see the Reference section.

Wonderware Finland Remote Data Manager DAServer 7
RDM DAServer Ver 1.0 User Manual Rev 1.0 61010m10
CHAPTER 2
Configuration Once the RDM DAServer has been installed, a small amount of configuration is required. This configuration is performed using the DAServer Manager hosted in the System Management Console after it is started through the Programs menu of the Windows Start button. Note: To run the RDM DAServer as a service, use the context menu on the DAServer name and select “Configure As Service”. You can configure it as an auto service or manual service. For more information about configuring your DAServer as a service, see the “Activation/Deactivation/Service Component” of the DAServer Manager documentation. Contents • Getting Started Quickly with the DAServer • Configuring the DAServer • Configuring Device Group Definitions • Configuring Device Item Definitions • Hot Configuration
Getting Started Quickly with the DAServer This section briefly describes the procedures required to prepare the RDM DAServer for use. Detailed descriptions of each step can be found in later sections of this documentation. This section is intended for people who are familiar with DAServers. Note: If you are not familiar with DAServer functionality, please proceed to the more-detailed procedures following this section. To prepare the RDM DAServer 1. Install the RDM DAServer on Windows by running the Setup.exe program. Note: DAServer installation instructions are included in a separate Help file (Install-DASRDM.chm). • Accept all the default settings during the installation. Important! Since there are no default values for security settings, you must take note of the user name and password selected during the install. 2. Start the Wonderware DAServer Manager by selecting the Programs menu from the Start button on the taskbar. 3. Navigate to the Wonderware folder that contains the System Management Console, then click System Management Console. 4. From the System Management Console, find the RDM DAServer in the DAServer Manager tree, the location in which it is installed.
Wonderware Finland Remote Data Manager DAServer 8
RDM DAServer Ver 1.0 User Manual Rev 1.0 61010m10
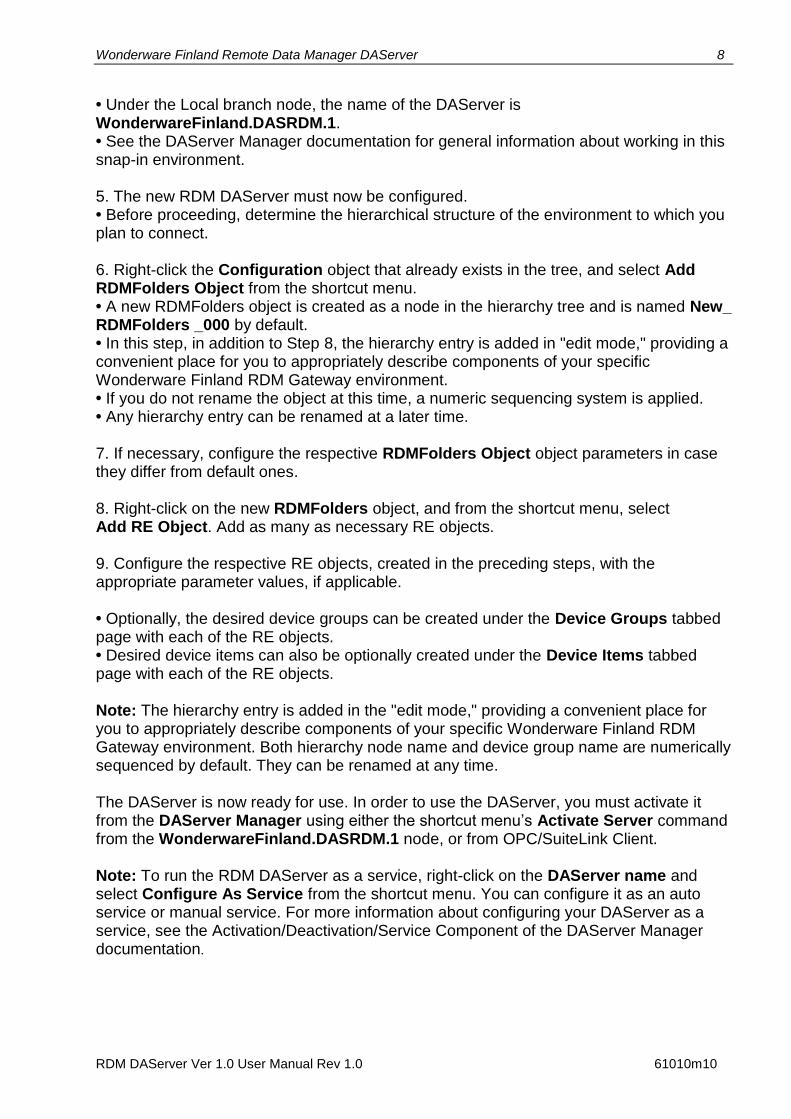
• Under the Local branch node, the name of the DAServer is WonderwareFinland.DASRDM.1. • See the DAServer Manager documentation for general information about working in this snap-in environment. 5. The new RDM DAServer must now be configured. • Before proceeding, determine the hierarchical structure of the environment to which you plan to connect. 6. Right-click the Configuration object that already exists in the tree, and select Add RDMFolders Object from the shortcut menu. • A new RDMFolders object is created as a node in the hierarchy tree and is named New_ RDMFolders _000 by default. • In this step, in addition to Step 8, the hierarchy entry is added in "edit mode," providing a convenient place for you to appropriately describe components of your specific Wonderware Finland RDM Gateway environment. • If you do not rename the object at this time, a numeric sequencing system is applied. • Any hierarchy entry can be renamed at a later time. 7. If necessary, configure the respective RDMFolders Object object parameters in case they differ from default ones. 8. Right-click on the new RDMFolders object, and from the shortcut menu, select Add RE Object. Add as many as necessary RE objects. 9. Configure the respective RE objects, created in the preceding steps, with the appropriate parameter values, if applicable. • Optionally, the desired device groups can be created under the Device Groups tabbed page with each of the RE objects. • Desired device items can also be optionally created under the Device Items tabbed page with each of the RE objects. Note: The hierarchy entry is added in the "edit mode," providing a convenient place for you to appropriately describe components of your specific Wonderware Finland RDM Gateway environment. Both hierarchy node name and device group name are numerically sequenced by default. They can be renamed at any time. The DAServer is now ready for use. In order to use the DAServer, you must activate it from the DAServer Manager using either the shortcut menu’s Activate Server command from the WonderwareFinland.DASRDM.1 node, or from OPC/SuiteLink Client. Note: To run the RDM DAServer as a service, right-click on the DAServer name and select Configure As Service from the shortcut menu. You can configure it as an auto service or manual service. For more information about configuring your DAServer as a service, see the Activation/Deactivation/Service Component of the DAServer Manager documentation.
Wonderware Finland Remote Data Manager DAServer 9
RDM DAServer Ver 1.0 User Manual Rev 1.0 61010m10
Configuring the DAServer Note: This DAServer is hosted by DAServer Manager, a Microsoft Management Console (MMC) snap-in, which is a part of the ArchestrA System Management Console (SMC) suite of utilities. Many high-level functions and user-interface elements of the DAServer Manager are universal to all DAServers, and only the documentation for the DAServer Manager contains descriptions of those universal functions/UI elements. Therefore, reading the documentation for both the MMC and the DAServer Manager is critical to understanding this user’s guide. To read the documentation about the MMC and DAServer Manager, click the Help topics on the SMC Help menu. Both the MMC Help and the DAServer Manager Help are displayed. Note: The shortcut menu items described in this document typically represent only a subset of any actual shortcut menu. Most items in each shortcut menu are standard Windows commands. For more information about those commands, please see Help, by right-clicking the System Management Console icon. To prepare the RDM DAServer 1. Install the RDM DAServer on Windows by running the Setup.exe program. Note: DAServer installation instructions are included in a separate Help file (Install-DASRDM.chm). 2. Accept all the default settings during the installation. Important! Since there are no default values for security settings, you must take note of the user name and password selected during the install. 3. After the DAServer has been installed, start the System Manager Console by clicking the Start button on the Windows taskbar and pointing to Programs. 4. Point to the Wonderware folder that contains the System Management Console, then click System Management Console. 5. From the System Management Console tree, click on DAServer Manager. 6. Click on Default Group, then the Local node. • Under the Local node, the DAServer name is WonderwareFinland.DASRDM.1:

Wonderware Finland Remote Data Manager DAServer 10
RDM DAServer Ver 1.0 User Manual Rev 1.0 61010m10
Note: See the DAServer Manager documentation for general information about working in this snap-in environment. Important! For step-by-step procedures on how to build the RDM DAServer objects hierarchy, please see the following section, "DASRDM Hierarchy in the DAServer Manager". Note: Selecting the Configuration object of the hierarchy tree displays the Global Parameters configuration view for this DAServer. The default Poke Mode settings for the DAServer is Optimization mode. Configuration of all other global parameters as required for this DAServer. For more information about the Global Parameters dialog box, including descriptions of the different Poke Modes, see the DAServer Manager documentation. You can access that documentation by clicking the DAServer Manager icon and selecting the Help topics on the Help menu, and then navigating through the DAServer Manager book. 7. When the DASRDM hierarchy build has been completed, you can start configuring the respective objects. 8. You may create the desired Device Groups for each RE object by: • Navigating to the object of interest in the DAServer Manager tree view. • Clicking on the Device Groups tab. • Right-clicking in the Device Groups dialog box and selecting the Add command from the shortcut menu. Important! For step-by-step procedures on configuring Device Groups, please see the following section: "Configuring Device Group Definitions". 9. Finally, you may create the desired Device Items for each RE object by: • Navigating to the object of interest in the DAServer Manager tree view. • Clicking on the Device Items tab. • Right-clicking in the Device Items dialog box and selecting the Add command from the shortcut menu. Important! For step-by-step procedures on configuring Device Items, please see the following section: "Configuring Device Item Definitions".

Wonderware Finland Remote Data Manager DAServer 11
RDM DAServer Ver 1.0 User Manual Rev 1.0 61010m10
Note: When any configuration view is in an open state and you open the same server the second time, the DAServer locks the second instance of this same-server access for any update or configuration activities. Access to this second opening instance will resume after the first one has been closed. The DAServer is now ready for use. In order to use the DAServer, you must activate it: • If you are using an OPC Client, the DAServer can be auto-started. • If you are using DDE/SuiteLink Client, you must start the DAServer either as a manual or automatic service. • To activate the DAServer, right-click on WonderwareFinland.DASRDM.1 and select Activate Server from the shortcut menu. Note: To run the RDM DAServer as a service, right-click on the DAServer name and select Configure As Service from the shortcut menu. You can configure it as an auto service or manual service. For more information about configuring your DAServer as a service, see the Activation/Deactivation/Service Component of the DAServer Manager documentation.
DASRDM Hierarchy in the DAServer Manager Note: Before attempting to configure your DAServer, you should determine the hierarchical structure of your Wonderware Finland RDM Gateway environment. The server-specific configuration portion of the DASRDM hierarchy tree under the DAServer Manager starts at the RDM Folders object. 1. Configure the RDM Folders object from the Configuration branch of the hierarchy after the DAServer has been installed. 2. Rename this object as appropriate. Important! If you subsequently clear your configuration hierarchy, you must create this RDM Folders object from the Configuration branch of the hierarchy. From this point, all of the following instructions apply.
To create RDM Folders object from the Configuration branch 1. Right-click on Configuration. 2. Select Add RDM Folders Object from the shortcut menu. • A new RDM Folders object is created as a node in the hierarchy tree, and it is named New_ RDMFolders _000 by default. 3. Rename the newly created object as appropriate, for example, “Folders”. The RDMFolders configuration view (right pane) is displayed:

Wonderware Finland Remote Data Manager DAServer 12
RDM DAServer Ver 1.0 User Manual Rev 1.0 61010m10
Enter/modify the RDMFolders parameters. Input Folder The full path of directory where are copied the source raw files created by Pre-Processing module. The default setting is “c:\Program Files\Wonderware Finland\DAServer\DASRDM\Input\”. Historian Import Folder The full path of directory where to write load files for Historian import, containing data with older timestamps. The default setting is “c:\Program Files\Wonderware Finland\DAServer\DASRDM\Output\”. Historian Import Secondary Folder The full path of directory where to write load files for Historian import, containing data obtained in situation when in source raw file there is some valid tagname (defined in Taglist file), but OPC/SuiteLink Client has not activated the subscription for this tagname. For such data the warning message is logged to DASRDM internal logger and value×tamp is put into Secondary Historian Normal Import File for use e.g. for later manual import to Historian.

Wonderware Finland Remote Data Manager DAServer 13
RDM DAServer Ver 1.0 User Manual Rev 1.0 61010m10
Taglist File Name The full path to file where are listed all valid names of tags included in source raw files created by Pre-Processing module. The default setting is “c:\Program Files\Wonderware Finland\DAServer\DASRDM\Config\taglist.txt”. Examples of Taglist File contents (it depends on Use RE Names in Taglist File setting – with or without RE Names): With RE Names: LAZ1_Stave_temperature_R01_VL06.min LAZ1_Stave_temperature_R01_VL02.min LAZ1_Circular_pressure.min LAZ1_Stave_temperature_R04_VL08.min Without RE Names: Stave_temperature_R01_VL06.min Stave_temperature_R01_VL02.min Circular_pressure.min Stave_temperature_R04_VL08.min Historian Name Conversion File Name The full path to file with conversion rules between the RDM tagnames (included in Taglist File ) and the Historian tagnames; The conversion must be provided only in case differences exist. The default setting is “c:\Program Files\Wonderware Finland\DAServer\DASRDM\Config\conv.txt”. Example of Historian Name Conversion File contents – in each row there is at first the RDM tagname (obligatory including the RE Name + underscore (“_”) at the beginning), then comma separator (can be space(s) after the comma) and then corresponding Historian tagname: LAZ1_Stave_temperature_R01_VL06.min,LAZ1_a28 LAZ1_Stave_temperature_R01_VL02.min, TempLAZ1_a29 DK3_Slag_SiO2.Aperiodic, DK3_a527 FOS2_Staves_Temperature_R12_VL06.Minute, FOS2_a331 Log File Folder The full path of directory where RDM DAServer internal log file(s) will be located. The default setting is “c:\Program Files\Wonderware Finland\DAServer\DASRDM”. Use RE Names in Taglist File This setting can be used to specify the format/contents of Taglist File currently used by RDM DAServer: including RE Names (default) or without RE Names. Use RE Names in Item Names This setting can be used to specify the format/contents of item names currently used by RDM DAServer: including RE Names (default) or without RE Names.

Wonderware Finland Remote Data Manager DAServer 14
RDM DAServer Ver 1.0 User Manual Rev 1.0 61010m10
Historian Normal Import Settings The following settings are used to create load files for Historian import: Time Format The available selections are: 0 = UTC (Time zone is ignored, default) or 1 = LOCAL. Missing Block Behaviour The available selections are: 0 = Do not create replacement blocks or 1 = Create replacement blocks (default). Time Span of Replacement Blocks The available selections are: 0 = Recreate blocks from first point to present time or 1 = Recreate blocks for the duration of CSV data (default). Operation Type The available selections are: 0 = ORIGINAL VALUE, 1 = INSERT (default), 2 = UPDATE, 3 = MULTIPOINT UPDATE. Values in EU/RAW The available selections are: 0 = EU (default) or 1 = RAW.
To add RE to your RDM hierarchy 1. Right-click on the RDM Folders branch. 2. Select Add RE Object from the shortcut menu. It is named “New_RE_000” by default. 3. Rename it as appropriate, e.g. to “RE_LAZ1” as used in following explanation – this new RE object name now will be used in the name of “Parameters” configuration view. The “Parameters” configuration view is displayed:
Enter/modify the RE parameters:

Wonderware Finland Remote Data Manager DAServer 15
RDM DAServer Ver 1.0 User Manual Rev 1.0 61010m10
RE Name Enter RE name used to determine which exact source raw file(s) in Input Folder belongs to this RE. The RE Name must match with source raw filename first part till underscore (“_”) character and with first data row first part till underscore (“_”) or decimal sign (“.”) character. For example, use the RE Name LAZ1 in case for this RE the source raw filename is LAZ1_FastLoadData11_50_11.txt and this file starts with following: ASCII | Lazaro|0|Server Local|10|1| LAZ1.Stave_temperature_R03_VL04.min|0|2010/03/30|05:00:00.000|0|58.000000|192 … Note! This RE Name configured here in “Parameters” configuration is not used in item/point naming (the OPC Item ID) provided to OPC Clients – in item/point naming for OPC Clients the RE object name from RDM DAServer’s hierarchy is used. For example, as it can be seen in picture above, the LAZ1 is used to determine the exact source raw file for this RE (for example, LAZ1_FastLoadData11_50_11.txt) and RE_LAZ1 is used as a part of OPC Item ID (for example, Folders.RE_LAZ1.Circular_pressure.min). Publish Interval Enter the periodic time interval (default 1000 milliseconds) how often DAServer will send new values (with same timestamps) to OPC/SuiteLink Client(s) in case the “Use Handshake” is not enabled. Use Handshake If selected (by default) Indicates RDM DAServer should wait to send new values (with same timestamps) until OPC/SuiteLink Client is ready to receive them. The readyForNewValue item (see Item Names section below) is used to enable such handshaking.
Some rules and sequences used in processing 1. The following two parameters in Historian Normal Import File are used 1:1 as in 3rd
row in corresponding source input file – the Name and Time Zone. For example, if 3rd row in corresponding source input file is: Lazaro|0|Server Local|10|1| then Name = Lazaro and Time Zone = Server Local will be used.
2. The Taglist File contains all possible valid names for all REs. If in input source file there are tagnames which are not defined in Taglist File or OPC/SuiteLink Client tries to activate invalid tagname then error message is logged to DASRDM internal logger – once for same tagname.
3. If in input source file there is some valid tagname (defined in Taglist file), but OPC/SuiteLink Client has not activated the subscription for this tagname then warning message is logged to DASRDM internal logger, but value×tamp are put into Secondary Historian Normal Import File.
4. The lastDataSentTimeStamp item last¤t values for each RE are stored and saved internally by DAServer. After DAServer restart these saved values are used

Wonderware Finland Remote Data Manager DAServer 16
RDM DAServer Ver 1.0 User Manual Rev 1.0 61010m10
as a basis to determine if data should be transferred via OPC/SuiteLink ar to be put into into Historian Normal Import File. In case system shutdown/restart happened during the input source file is opened then this source file will be processed again with high possibility the values processed earlier via OPC/SuiteLink now will go to Historian Normal Import File.
Configuring Device Group Definitions The Device Groups tab in the DAServer Manager user interface is used to create a new device group or modify or delete existing device group definitions for an object. For DDE/SuiteLink communications, one or more device group definitions must exist for each RE Object that the DAServer will communicate with. Each device group (topic) definition should contain a unique name for the RE associated with it.
Device Group Definitions The Device Groups dialog box, which is displayed by clicking the Device Groups tab in the Parameters configuration view, is used to perform the following activities: • Adding, defining, and deleting device groups. Notes: 1. When you add a new device group, enter a unique name. 2. The Update Interval is not applicable for RDM DAServer. 3. When you select another part of the DAServer tree hierarchy, you are prompted to save the modifications to the configuration set. To create or add device groups 1. To create or add device groups, right-click in the Device Groups box. 2. Select the Add command from the shortcut menu. • When you add a new device group, enter a unique name (like DevG_LAZ1 below):

Wonderware Finland Remote Data Manager DAServer 17
RDM DAServer Ver 1.0 User Manual Rev 1.0 61010m10
To make edits on device groups Make edits on a device group name or update interval for an object as follows: • In the Name column, double-click or press F2 on the device group’s name to be edited and make the edit. To delete device groups Deleting a device group from the list can be performed as follows: 1. Right-click on the device group to be deleted. 2. Select the Delete command from the shortcut menu. Note: When you select another part of the DAServer tree hierarchy, you are prompted to save the modifications to the configuration set.
Archiving Configuration Sets After you have configured your DAServer, you can archive that specific configuration. You can archive more than one configuration set, and subsequently choose different configurations for different purposes. To archive configuration sets 1. In the DAServer Manager, right-click on the Configuration node in the hierarchy below your DAServer. 2. Select Archive Configuration Set from the shortcut menu. 3. In the Archive Configuration Set configuration view, provide a Configuration Set Name. 4. Click Archive. • All current configuration values are saved to the archived set. Once you have archived at least one configuration set, you can select it for use. To use different configuration sets from the current one 1. Make sure the DAServer is not running. 2. In the DAServer Manager, right-click the Configuration node in the hierarchy below your DAServer. 3. Select Use Another Configuration Set from the shortcut menu and click on a configuration set in the sub-menu. • All parameters in the DAServer configuration hierarchy change to the chosen configuration set.
Configuring Device Item Definitions The Device Items tab in the Parameters configuration view is used to define aliases to actual RE items. The Device Items dialog box is the place where the following activities are performed: • Creating new device item definitions for RE items. • Modifying the existing device items.

Wonderware Finland Remote Data Manager DAServer 18
RDM DAServer Ver 1.0 User Manual Rev 1.0 61010m10
• Deleting device items. • Archiving the created list of device items to a .csv file, a file with values separated by commas. • Bringing a .csv file into the Device Items tab. Each device item definition should contain a unique name for the RE associated with it. Device Item Definitions The Device Items dialog box, which is displayed by clicking the Device Items tab in the RE Parameters configuration view, is used to add, clear all, rename, delete, import and export device items. The Device Items dialog box has the following two columns: • Name: This column defines the alias names to actual RE items. • Item Reference: The actual RE item names (names which present in Taglist File), linked to the created aliases, are defined in this column. For example, the following entries can be created:
Name Item Reference R03_VL04min Stave_temperature_R03_VL04.min
LAZ1-Meas_coal_flow.min LAZ1_Measured_coal_flow.min
Note: When you create or add a new device item, a unique name needs to be entered for it.
To create or add device items 1. To create or add device items, right-click in the Device Items dialog box. 2. Select the Add command from the shortcut menu. • A device item is created, and it is numerically named by default. For example, Item_0, Item_1, and so on. 3. Change the default name by double-clicking on it and entering the new name. • Enter a unique name for the new device item.

Wonderware Finland Remote Data Manager DAServer 19
RDM DAServer Ver 1.0 User Manual Rev 1.0 61010m10
To add item references Item references for each of the device items that have been created can be added as follows: 1. In the Item Reference column, double-click on the area in the same horizontal line as the selected device item. 2. Type in the actual RE item name in the frame that appears. 3. Click anywhere in the dialog box or press the Enter key to have the change take effect. To rename a device item from the list 1. Right-click on the device item to be renamed. 2. Select the Rename command from the shortcut menu and enter the new device item name. 3. Click anywhere in the dialog box or press the Enter key to apply the change. To delete a device item from the list 1. Right-click on the device item to be deleted. 2. Select the Delete command from the shortcut menu. • The device item and its corresponding actual RE item name will be deleted from the dialog box. Note: When you select another part of the RDM DAServer tree hierarchy, you are prompted to save the modifications to the configuration set. To clear all device items 1. Right-click anywhere in the Device Items dialog box. 2. Select the Clear All command from the shortcut menu. • All the device items listed in the dialog box, including their corresponding actual RE item names, will be deleted. To export device items When you have a list of device items that needs to be archived, use the Export feature in the Device Items dialog box to archive the list. 1. To save the list, right-click anywhere in the Device Items dialog box. 2. Select the Export command from the shortcut menu. 3. Select the folder into which the list is to be saved. 4. Name the list to be archived. 5. Click the Save button. • The whole list will be saved as a .csv file in Excel. To import device items The Import feature in the Device Items dialog box is used to bring an archived list of device items into the dialog box, when you need to utilize or reconfigure any of the device items on the archived list. 1. To import the list, right-click anywhere in the Device Items dialog box. 2. Select the Import command from the shortcut menu. 3. Select the archived list (.csv file) to be imported from the folder in which it is saved. 4. Click the Open button. • The whole list will be brought into the Device Items dialog box.

Wonderware Finland Remote Data Manager DAServer 20
RDM DAServer Ver 1.0 User Manual Rev 1.0 61010m10
Note: When the list to be imported contains duplicate names as found in the current list but the Item References are different, a dialog box will appear to prompt you to make a selection.
Hot Configuration The RDM DAServer is hot-configurable. The following hot-configuration functionality is incorporated in RDM DAServer: • Modifying Global Configuration parameters. • Adding, deleting, or modifying device nodes (without affecting any other device nodes, excluding the children of the modified device nodes). • Adding, deleting, or modifying device groups. Limited support is provided for the hot configuration for the server-specific configuration parameters in this release. You can modify server-specific parameters while the server is active. However, to have those changes take effect, you have to restart the DAServer. Note: If changes are made to server-specific parameters while the server is active, the DAServer will issue a warning message to the logger.

Wonderware Finland Remote Data Manager DAServer 21
RDM DAServer Ver 1.0 User Manual Rev 1.0 61010m10
CHAPTER 3
Item Names The RDM DAServer supports item/point names consistent with contents of source raw files created by Pre-Processing module (provided separately from RDM DAServer) and validated by the contents of Taglist File. As well for each RE several control and monitoring items are used. Contents • RE Item Naming • DAServer Standard System Items • Generic OPC Syntax
RE Item Naming For each RE the item/point names are consistent with the contents of source raw files created for this RE by Pre-Processing module. When RDM DAServer reads the new source raw file, at first the item name is validated by checking of its presence in Taglist File. The item name is extracted from the source raw file the following way, depending on Use RE Names in Item Names setting (configured in “RDMFolders parameters” configuration): - in case RE Names in Item Names is selected then item name is taken from start of each row till first pipe character (“|”); - in case RE Names in Item Names is not selected then item starts after RE name and underscore character (“_”) or decimal point (”.”) and is taken till first pipe character (“|”). For example, if source raw file contains: LAZ1_Stave_temperature_R03_VL04.min|0|2010/03/30|05:00:00.000|0|58.000000|192 LAZ1_Stave_temperature_R03_VL03.min|0|2010/03/30|05:00:00.000|0|59.000000|192 LAZ1_Stave_temperature_R03_VL05.min|0|2010/03/30|05:00:00.000|0|65.000000|192 then following item names will be used depending on Use RE Names in Taglist File setting: With RE Names: LAZ1_Stave_temperature_R03_VL04.min LAZ1_Stave_temperature_R03_VL03.min LAZ1_Stave_temperature_R03_VL05.min Without RE Names: Stave_temperature_R03_VL04.min Stave_temperature_R03_VL03.min Stave_temperature_R03_VL05.min

Wonderware Finland Remote Data Manager DAServer 22
RDM DAServer Ver 1.0 User Manual Rev 1.0 61010m10
Important Note! There is a ”maximum 31 character long item names for SuiteLink items” limitiation in Wonderware ArchestrA Data Access Server Toolkit – that should be considered in case SuiteLink/DDE Client is used for communication with RDM DAServer. Item names longer than 31 characters will be truncated by DAServer – and correspondingly such “>31 character long” item names will be rejected as invalid in case such long names present in Taglist File and/or in source raw data file.
Control and monitoring items For each RE following control and monitoring items are used: Active The Boolean (discrete) type item used to control and monitor the state of processing for the RE. If Active item value is set to False (0) by OPC/SuiteLink Client then DAServer stops the processing of any values from source raw files. When Active item value is set to True (1) then DAServer restarts the processing from the state when it was interrupted. At each RE object activation the initial value of Active item is False, so to initiate and start the processing, OPC/SuiteLink Client must set the Active item value to True. Error The Boolean (discrete) type item indicating the current procesing state for the RE. The Error = False (0) means currently there is no error, value True (1) indicates the error state. ErrorMsg The string item containing the current last error message in case error state has happened (for example, in case no initial value is provided for lastDataSentTimeStamp item). When error state disappers, the ErrorMsg string is cleared. lastDataSentTimeStamp The string item containing the last current timestamp (date and time) used in processing of RE data. The lastDataSentTimeStamp item exists or each RE, so if value with older timestamp is found in source raw file then this values is put into load file for Historian import and is not provided to OPC/SuiteLink Clents. The lastDataSentTimeStamp current value is locally stored by DAServer, but it can also be set from OPC/SuiteLink Client side (for example, to set-up the initial value after system restart). The format of lastDataSentTimeStamp string is 1:1 as format of timestamps in source raw files, except the space (“ ”) is used instead of pipe character (“|”) : YYYY/MM/DD HH:MM:SS.MSC where YYYY is year, MM is month (01-12), DD is day (01-31) , “ ” is date and time separator, HH is hour (00-23), MM is minutes (0-59), SS is seconds (0-59) and MSC is milliseconds (000-999).

Wonderware Finland Remote Data Manager DAServer 23
RDM DAServer Ver 1.0 User Manual Rev 1.0 61010m10
readyForNewValue The Boolean (discrete) type item used for to handshaking between OPC/SuiteLink Client and RDM DAServer. The DAServer publishes new value(s) (with same timestamps) when the handshake flag readyForNewValue is set to True (1) by OPC/SuiteLink Client; after all values with same timestamps are published, RDM DAServer sets the the readyForNewValue to False (0) and starts to wait for next readyForNewValue equal = True. Note: At RDM DAServer first time start-up, the value of lastDataSentTimeStamp is not available as it is not previously locally stored by DAServer. In purpose to initiate the processing, OPC/SuiteLink Client must provide the initial lastDataSentTimeStamp value for each active RE.
DAServer Standard System Items System Items provide you with easy access to the DAServer status and diagnostics information. They are treated just like ordinary items with respect to the client. However, in most cases these items are not directly acquired via the communications layer. System item values are usually generated through internal calculations, measurements, and the tracking of the DAS Engine. System items, like ordinary items, are defined by the following properties: • Group (client group/OPC group): The arbitrary collection of items, not correlated. • Hierarchical location (link name/OPC path. The hierarchical node section of the fully qualified OPC item ID.): The device the item is attached to. • Device group (OPC access path/topic, or a Scan Group on a hierarchical branch.): A collection of items on the same physical location with the same protocol update rate. Example: To check the status of an external device, the reference might be: DASRDM.Folders.RE_LAZ1.$SYS$Status Note: This syntax does not refer to the access path/device group. As long as the data requested is from the same external device (RE in DASRDM case), the value will always be the same. Note: For DDE/SuiteLink clients, $SYS$Status always comes from the leaf level of a DAServer hierarchy branch, which is the destination RE node. For OPC clients, $SYS$Status can be accessed at all hierarchy levels. $SYS$Status at the root level of the whole hierarchy tree is always good, as it represents the quality status of the local computer itself. Hence, for practical application, OPC clients should reference $SYS$Status at any hierarchy levels other than the root. In the ArchestrA context, the device group plays the most important role of identifying the scope of any item (the device group defines the hierarchical location implicitly when using globally unique device-group names, which is required for DDE/SuiteLink compatibility). All system items follow the same naming convention:

Wonderware Finland Remote Data Manager DAServer 24
RDM DAServer Ver 1.0 User Manual Rev 1.0 61010m10
• All system items start with $SYS$. • The DAS Engine scans and parses the name for system items. • Parsing of the name is case-insensitive. All system items can be accessed through subscriptions to a device group. However, while some system items return data for that device group, others are server-wide.
DAServer Global System Item The following system item refers to specific information regarding a global condition of the DAServer.
System Item Name
Type/ Access Rights
Description Values
$SYS$Licensed Boolean/ Read
Binary status indication of the existence of a valid license for the DAServer. If FALSE, this item causes the DAServer to stop updating existing tags, to refuse activation of new tags, and to reject write requests in addition to setting quality for all items to BAD. If TRUE, the DAServer functions as configured. All instances have the same value.
RANGE: 0, 1 1: Valid license exists. 0: No valid license exists.
Note: Within RDM DAServer the Global System Item $SYS$Licensed is not relevant.
DAServer Device-Specific System Items The following system items refer to specific information regarding the device(s) (REs in DASRDM case) the DAServer is connected to.
System Item Name
Type/ Access Rights
Description Values
$SYS$Status Boolean/ Read
Binary status indication of the connection state to the device (RE in hierarchy level in DASRDM case) the item is attached to. The device group (OPC access path/topic) does not affect the value. The status can be good even if individual items have errors. For DDE/SuiteLink clients, $SYS$Status always comes from the leaf level of a DAServer hierarchy branch, which is the
RANGE: 0, 1 1: DAServer connection to the device is intact. 0: Error communicating with the device.

Wonderware Finland Remote Data Manager DAServer 25
RDM DAServer Ver 1.0 User Manual Rev 1.0 61010m10
destination node (RE). For OPC clients, $SYS$Status can be accessed at all hierarchy levels. $SYS$Status at the root level of the whole hierarchy tree is always good, as it represents the quality status of the local computer itself. Hence, for practical application, OPC clients should reference $SYS$Status at any hierarchy levels other than the root.
$SYS$ErrorCode Longint/ Read
Detailed error code of the communications state to the device (RE). The device group (OPC access path/topic) does not affect the value.
>= 0: Good status (0 is the default state – connected. >0: is some device state like: connecting, initializing, etc. <0: Error status (value indicates the error).
$SYS$ErrorText String/ Read
Detailed error string of the communications state of the device (RE). The device group (OPC access path/topic) does not affect the value.
Descriptive text for the communications state corresponding to the error code.
$SYS$StoreSettings
Integer/ ReadWrite
Used to make the temporary update interval changes via the $SYS$UpdateInterval item permanent. If the client pokes a value of 1 into this system item, the currently set update interval is written to the server’s configuration file. The value of this system item clears to 0 after being set, if the configuration file write is successful. If the write fails, then the value is set to -1. If the update interval has been changed via the $SYS$UpdateInterval item and this item is not poked to 1, the DAServer uses the original update interval for that topic the next time it is started. Reading the item always
RANGE: -1, 0, 1 -1: Error occurred during saving the configuration file. 0: Read value always if status is OK. 1: Persist settings (cleared immediately).

Wonderware Finland Remote Data Manager DAServer 26
RDM DAServer Ver 1.0 User Manual Rev 1.0 61010m10
provides 0. Read/Write values are persisted only if the user sets this system item. The values other than this persist only for the life of the DAServer.
DAServer Device-Group-Specific System Items The following system items refer to specific information regarding device groups that have been configured in the DAServer.
System Item Name
Type/ Access Rights
Description Values
$SYS$UpdateInterval DWord/ ReadWrite
Used to access the currently set update interval. It is the current update interval of the device group in milliseconds. A client can poke new values into this item. The value of zero indicates that no non-system items on that topic are updated (data for these items are not acquired from the device).
RANGE: 1…2147483647 0: Topic inactive, no items are updated. Data acquisition is stopped. >0: Expected updated interval for the set of all items in the device group.
$SYS$MaxInterval DWord/ Read
Used to access the currently measured maximum update interval in milliseconds of all items of the corresponding device group. This item is read-only. The value of the slowest item is displayed.
RANGE: 0…2147483647 0: If update interval is 0 or if the status is false. >0: Measured update interval
$SYS$WriteComplete Integer/ ReadWrite
Used to access the state of pending write activities on the corresponding device group. On device group creation (adding items to an OPC group), the value of this system item is initially 1, indicating all write activities are complete – no pokes are pending. If values are poked into any items of the device group, the value of this item changes to 0, indicating write activity is currently in progress.
RANGE: -1, 0, 1 1: Write complete (no writes are pending – initial state). 0: Writes are pending. -1: Writes completed with errors.

Wonderware Finland Remote Data Manager DAServer 27
RDM DAServer Ver 1.0 User Manual Rev 1.0 61010m10
If the server has completed all write activities, the value of this item changes to 1 if all pokes were successful or to -1 if at least one poke has failed. If the value of this item is not zero, the client can poke 1 or -1 to it (poke a 1 to clear errors, or a -1 to test a client reaction on write errors). If the value of this item is zero, it cannot be poked.
$SYS$ReadComplete
Integer/ ReadWrite
Used to access the state of initial reads on all items in the corresponding device group. The value is 1 if all active items in a device group have been read at least once. If at least one item in the device group is activated, this item changes to 0. It changes to 1 if all items have been read successfully, or to -1 if at least one item has a non-good quality. Poking a 0 to this item resets the internal read states of all items in this device group. This resets this item to 0. If all items are read again after this poke, this item changes back to 1 or -1.
RANGE: -1, 0, 1 1: Read complete (all values have been read). 0: Not all values have been read. -1: All values have been read but some have a non-good quality.
$SYS$ItemCount DWord/ Read
Used to access the number of items in the corresponding device group. This item is read-only.
RANGE: 0…2147483647 >=0: Number of active items.
$SYS$ActiveItemCount DWord/ Read
Used to access the number of active items in the corresponding device group. This item is read-only.
RANGE: 0…2147483647 >=0: Number of active items.
$SYS$ErrorCount DWord/ Read
Used to access the number of all items (active and inactive) that have errors (non-good OPC quality) in the corresponding topic. If the communications status of a device group is bad, all items have errors. This item is read-only.
RANGE: 0…2147483647 >=0: Number of all items (active and inactive) with errors.
$SYS$PollNow Boolean/ ReadWrite
Poking a 1 to this item forces all items in the corresponding
RANGE: 0, 1

Wonderware Finland Remote Data Manager DAServer 28
RDM DAServer Ver 1.0 User Manual Rev 1.0 61010m10
device group to be read immediately (all messages in this device group become due). This is useful if you want to force to get the newest values from the device, regardless of its update interval. This also works on device groups with a zero update interval (manual protocol triggering).
Generic OPC Syntax DAServer serves as a container for the OPC Groups, which provide the mechanism for containing and logically organizing OPC items. Within each OPC Group, an OPC-compliant client can register OPC items, which represent connections to data sources in the field device. In other words, all access to OPC items is maintained through the OPC Group. The fully qualified name for an OPC item is called the Item ID (equivalent to Item Name). Generally, in OPC data acquisition DAServers, the syntax can be as follows: Folders.RE_LAZ1.Circular_pressure.min where each component represents a branch or leaf of the RDM DAServer’s hierarchy. In this example: • Folders is the name assigned to RDM Folders object in RDM DAServer’s hierarchy. • RE_LAZ1 is the RE name configured in RDM DAServer’s hierarchy. • Circular_pressure.min is the specific data point (Item) desired. • An item is typically a single value such as an analog, digital, or string value. Item ID describes the syntax for defining the desired data point, OPC provides for another parameter, called Access Path, that defines optional specifications for obtaining that data. In DAServers, Access Paths are equivalent to Device Groups; it is this parameter that is used to define the update interval between the DAServer and the field device for accessing the values of data points.
Wonderware Finland Remote Data Manager DAServer 29
RDM DAServer Ver 1.0 User Manual Rev 1.0 61010m10
CHAPTER 4
Troubleshooting This chapter describes the troubleshooting tools you can use to deal with the RDM DAServer problems you may encounter. The DAServer Manager provides access to diagnostics and other statistical data, and the Log Viewer provides access to event messages logged during the operation of a DAServer.
DAServer Error Messages The following table lists all the generic-DAServer and RDM DAServer-specific error messages that are logged to the Log Viewer.

Wonderware Finland Remote Data Manager DAServer 30
RDM DAServer Ver 1.0 User Manual Rev 1.0 61010m10
CHAPTER 5
Reference Contents • DAServer Architecture • Component Environments
DAServer Architecture This DAServer is a collection of components that work in concert to provide communications access with hardware field devices. These components include: • DAServer Manager: This is the Microsoft Management Console (MMC) snap-in, that is part of the ArchestrA System Management Console suite of utilities, supplied with the DAServer. It provides the necessary user-interface for diagnostics, configuration, and activation. • Client Plug-ins: These are the components that are added to a DAServer to enable communications with clients. Examples are: OPC, DDE/Suitelink, and so on. • DAS Engine: This is the library that contains all the common logic to drive data access. • Device Protocol: This is the custom code provided by this DAServer to define the communications with a particular device.
DAServers A DAServer is comprised of three physical parts (see the following figure). They are the following: • Plug-in Component(s): Responsible for communicating with clients. • DAS Engine: This common component is used by all DAServers. • PLC Protocol Layer, DAServer-specific: This component is responsible for communicating with the hardware (working with Wonderware Finland RDM Gateway source files in RDM DAServer case).

Wonderware Finland Remote Data Manager DAServer 31
RDM DAServer Ver 1.0 User Manual Rev 1.0 61010m10
Each physical part of a DAServer is comprised of a set of .exe and/or .dll modules. Wonderware provides the Plug-ins and the DAS Engine. The DAS Toolkit user creates the PLC Protocol Layer (DAServer-specific) modules. All three sets of modules are required for a fully functioning DAServer.
Plug-ins Plug-ins provide a protocol-translation function for device integration clients. Typical Plug-ins communicate in DDE, SuiteLink, or OPC protocol, and serve as interfaces between their clients and the DAS Engine. Note: Items of an array are not supported in the DDE/SL plug-in. These arrays are converted to HEX strings, which provide legacy behavior for DAServers that support this in the DAServer-specific code.
DAS Engine The DAS Engine is a middleware component that exposes two sets of unique interfaces, one for communicating with the Plug-ins and the other one for communicating with the PLC Protocol Layer components.

Wonderware Finland Remote Data Manager DAServer 32
RDM DAServer Ver 1.0 User Manual Rev 1.0 61010m10
PLC Protocol Layer The PLC Protocol Layer provides a protocol-translation function for specific hardware or other data provider and it serves as an interface between the DAS Engine and the hardware.
Component Environments Stand-alone DAServers have the following characteristics: • The DAS Engine is dynamically linked to the other DAServer components. In other words, a new DAS Engine (feature enhancement or bug fix) would not require relinking to the other components nor re-QA of those other components. When deployed to the system, the new DAS Engine would attach to all existing DAServer components. • Newly deployed Plug-ins (feature enhancements or bug fixes) do not require relinking nor re-QA of associated components. Even new Plug-ins (for example, OPC Alarm & Events) would not require any development changes to the other components, and therefore no relinking in a customer-installed base. In fact, it is feasible to implement new functionality in a Plug-in to enhance the DAServer without any involvement of the code of the other components. • DAServers can be configured in one stand-alone configuration utility (DAServer Manager), and the DAServer Managerand is capable of displaying specific configuration views for all DAServers. This utility allows the browsing and editing of DAServers on different nodes. • The DAServer Manager diagnostics tool displays generic diagnostic objects common to all DAServers, in addition to the DAServer-specific/DAServer-developer-defined diagnostic data. The DAServer data configuration format is XML. Any XML-enabled program (for example, XML Editor) can read this format.

Wonderware Finland Remote Data Manager DAServer 33
RDM DAServer Ver 1.0 User Manual Rev 1.0 61010m10
WONDERWARE FINLAND Remote Data Manager DAServer
Revision History
Jan 2012 Rev 1.0 First Release