Embed Size (px)
Citation preview
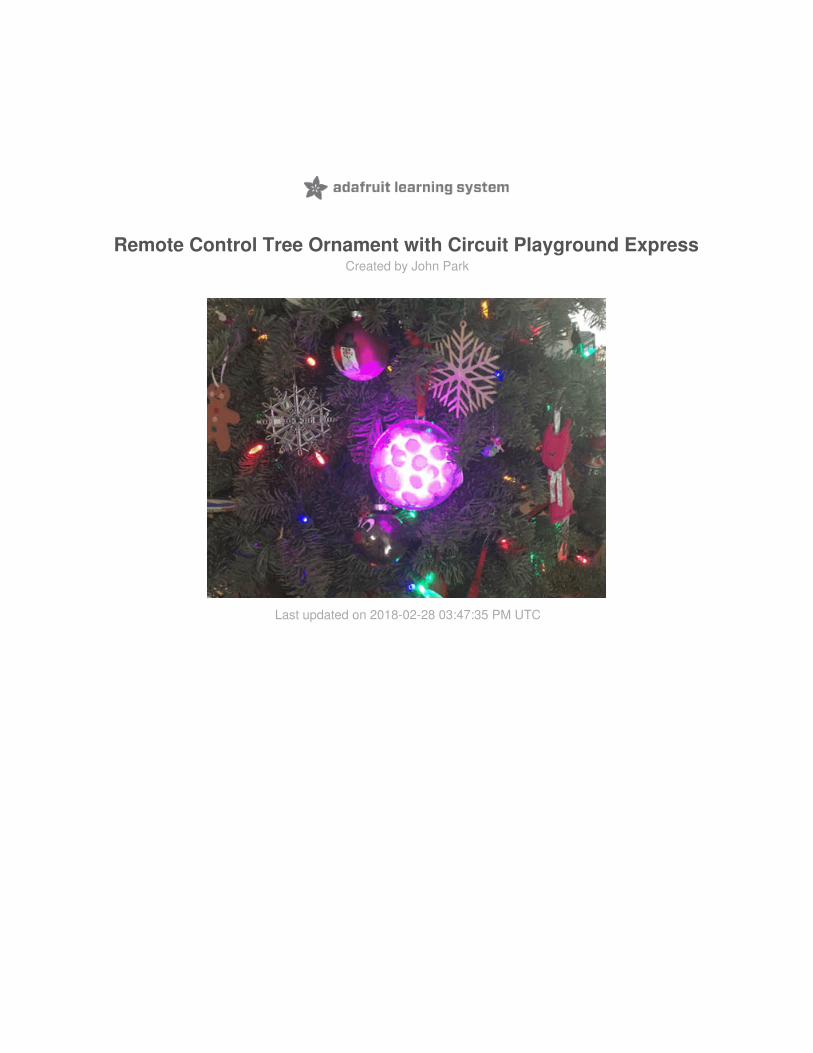
Remote Control Tree Ornament with Circuit Playground ExpressCreated by John Park
Last updated on 2018-02-28 03:47:35 PM UTC

233
555789
1010
121215
Guide Contents
Guide ContentsOverview
Materials
Code the Circuit Playground ExpressGet Ready!Download the Remote Tree Ornament CodeCode TourMessagesColor NamesMain LoopColor Commands
Assemble and Use the OrnamentFill the OrnamentUse the Remote
© Adafruit Industries https://learn.adafruit.com/remote-control-tree-ornament-with-circuit-playground-express Page 2 of 18

OverviewHave you put up with non-interactive, regular, old, low-tech tree ornaments for too long? Yes you have! But, this iswhere things change! It's time to build your own Remote Control Tree Ornament with Circuit Playground Express!!
The Circuit Playground Express (CPX) has a built in infrared (IR) sensor, and it's very simple to decode the signals usingCircuitPython, thanks to the Adafruit IR Remote library.
We'll program the CPX to read IR blasts from the mini remote control, and use these commands to change the bright,beautiful NeoPixels. Plus, we'll defuse the light and dress it up with an inexpensive hobby store ornament and festivepuff balls!
1 x Circuit Playground ExpressAwesome microcontroller with CircuitPython
ADD TO CART
1 x Mini Remote ControlIR remote with NEC encoding
ADD TO CART
1 x Battery Holder w On/Off switch3 x AAA battery holder
ADD TO CART
1 x Alkaline AAA batteries3 pack
ADD TO CART
1 x USB CableUSB A to USB Micro - 3 ft.
Out of StockNotify Me
Or, optionally, to get most of those parts in a single pack, and then just add the remote!
1 x Circuit Playground Express Base KitIncludes CPX, battery pack and batteries, USB cable, and storage box
ADD TO CART
Materials
In addition to the electronics, you'll need:
Clear 4" ball ornament from a craft store that opens into two halvesWhite iridescent pom poms from a craft storeRibbon or tree hanger hook
© Adafruit Industries https://learn.adafruit.com/remote-control-tree-ornament-with-circuit-playground-express Page 3 of 18

© Adafruit Industries https://learn.adafruit.com/remote-control-tree-ornament-with-circuit-playground-express Page 4 of 18

Code the Circuit Playground ExpressYou'll program your ornament to change colors based on the numbered buttons on the IR mini remote control by usingCircuitPython.
Get Ready!
First, make sure you're up and running by following these steps:
First, make sure you're familiar with the basics of using CircuitPython on the Circuit Playground Express. Followthis guide to familiarize yourself.Then, install CircuitPython on your board by following these instructionsNext, install the library bundle onto your board as shown here. The libraries give us what we need to code easilywith high level commands!
Library Bundle
https://adafru.it/AgR
There's one extra library to install for this project, that'll let you use the IR remote -- download the AdafruitIRRemote library and place it in the lib folder on your CircuitPython
Lighting up the NeoPixel ring in different colors is simple to do on the Circuit Playground Express using CircuitPython.In fact, it only takes a single line of code to make them all bright red: pixels.fill(255, 0, 0) will do the trick in the case ofour program!
To control which colors we see, we can use can use the IR remote control along with IR library that makes it easy todecode the IR commands.
IR commands are actually messages that are sent by the remote when it blinks its infrared light rapidly with veryprecise timing and duration. It's a little bit like Morse code in that sense.
Using its IR sensor, the Circuit Playground Express can decode those messages sent by the remote. For more detailson how this works, check out this great IR sensor guide.
So that you don't need to deal with the low level complexities of the decoding process, the Adafruit IRRemote librarymakes it simple!
Download the Remote Tree Ornament Code
Copy the code below, and paste it into a new text document in your text editor, or in the Mu code editor forCircuitPython.
import adafruit_irremoteimport boardimport digitalioimport neopixelimport pulseio
pixels = neopixel.NeoPixel(board.NEOPIXEL, 10)
red_led = digitalio.DigitalInOut(board.D13)red_led.direction = digitalio.Direction.OUTPUT
© Adafruit Industries https://learn.adafruit.com/remote-control-tree-ornament-with-circuit-playground-express Page 5 of 18

red_led.direction = digitalio.Direction.OUTPUT
pulsein = pulseio.PulseIn(board.REMOTEIN, maxlen=120, idle_state=True)decoder = adafruit_irremote.GenericDecode()
# among others, this example works with the Adafruit mini IR remote:# https://www.adafruit.com/product/389# size must match what you are decoding! for NEC use 4received_code = bytearray(4)
# IR Remote Mapping''' 1: [255, 2, 247, 8] 2: [255, 2, 119, 136] 3: [255, 2, 183, 72] 4: [255, 2, 215, 40] 5: [255, 2, 87, 168] 6: [255, 2, 151, 104] 7: [255, 2, 231, 24] 8: [255, 2, 103, 152] 9: [255, 2, 167, 88] 0: [255, 2, 207, 48]
^ : [255, 2, 95, 160]v : [255, 2, 79, 176]> : [255, 2, 175, 80]< : [255, 2, 239, 16]
Enter: [255, 2, 111, 144]Setup: [255, 2, 223, 32]Stop/Mode: [255, 2, 159, 96]Back: [255, 2, 143, 112]
Vol - : [255, 2, 255, 0]Vol + : [255, 2, 191, 64]
Play/Pause: [255, 2, 127, 128]'''
RED = (255, 0, 0)GREEN = (0, 255, 0)WHITE = (85, 85, 85)BLUE = (0, 0, 255)PINK = (128, 0, 128)YELLOW = (148, 108, 0)PURPLE = (200, 0, 55)TEAL = (0, 200, 100)ORANGE = (100, 45, 0)BLACK = (0, 0, 0)
last_command = None
while True: red_led.value = False try: pulses = decoder.read_pulses(pulsein) except MemoryError as e: print("Memory error: ", e) continue red_led.value = True
© Adafruit Industries https://learn.adafruit.com/remote-control-tree-ornament-with-circuit-playground-express Page 6 of 18

Now, save the code onto your Circuit Playground Express as main.py
The board will restart once the code has been saved. Now, point the remote at the board and press any numberbutton 1-9. See how the lights change color depending on the button!
Code Tour
Let's have a look at how the code works.
First, we import a few libraries that give us easy commands to use for more complex tasks.
red_led.value = True print("Heard", len(pulses), "Pulses:", pulses) command = None try: code = decoder.decode_bits(pulses, debug=False) if len(code) > 3: command = code[2] print("Decoded:", code) except adafruit_irremote.IRNECRepeatException: # unusual short code! print("NEC repeat!") command = last_command except adafruit_irremote.IRDecodeException as e: # failed to decode print("Failed to decode:", e) except MemoryError as e: print("Memory error: ", e)
if not command: continue last_command = command
print("----------------------------") red_led.value = False
if command == 247: # IR button 1 pixels.fill(RED) elif command == 119: # 2 pixels.fill(GREEN) elif command == 183: # 3 pixels.fill(WHITE) elif command == 215: # 4 pixels.fill(BLUE) elif command == 87: # 5 pixels.fill(PINK) elif command == 151: # 6 pixels.fill(YELLOW) elif command == 231: # 7 pixels.fill(PURPLE) elif command == 103: # 8 pixels.fill(TEAL) elif command == 167: # 9 pixels.fill(ORANGE) elif command == 207: pixels.fill(BLACK) # 0/10+
© Adafruit Industries https://learn.adafruit.com/remote-control-tree-ornament-with-circuit-playground-express Page 7 of 18

Next, we'll do a bit of setup, creating the NeoPixel object named pixels , and the on-board indicator LED calledred_led .
To prepare the IR pulse detection and decoding, we'll initialize these objects:
Next, we'll create a variable to store the decoded message number list:
Messages
The messages will be sets of four numbers. Here's a list of which buttons correlate to these messages. We'll use thislater in the code to know which button has been pressed.
import adafruit_irremoteimport boardimport digitalioimport neopixelimport pulseio
pixels = neopixel.NeoPixel(board.NEOPIXEL, 10)
red_led = digitalio.DigitalInOut(board.D13)red_led.direction = digitalio.Direction.OUTPUT
pulsein = pulseio.PulseIn(board.REMOTEIN, maxlen=120, idle_state=True)decoder = adafruit_irremote.GenericDecode()
received_code = bytearray(4)
© Adafruit Industries https://learn.adafruit.com/remote-control-tree-ornament-with-circuit-playground-express Page 8 of 18

Color Names
Next, we'll create a few variables that make it easier to call out colors by name. The colors of the NeoPixels aredescribed with red, green, and blue values from 0-255.
We'll also create a variable to store the value of the last command decoded from the remote, so that we can comparecommands to the previous one to know if anything has to change.
# IR Remote Mapping''' 1: [255, 2, 247, 8] 2: [255, 2, 119, 136] 3: [255, 2, 183, 72] 4: [255, 2, 215, 40] 5: [255, 2, 87, 168] 6: [255, 2, 151, 104] 7: [255, 2, 231, 24] 8: [255, 2, 103, 152] 9: [255, 2, 167, 88] 0: [255, 2, 207, 48]
^ : [255, 2, 95, 160]v : [255, 2, 79, 176]> : [255, 2, 175, 80]< : [255, 2, 239, 16]
Enter: [255, 2, 111, 144]Setup: [255, 2, 223, 32]Stop/Mode: [255, 2, 159, 96]Back: [255, 2, 143, 112]
Vol - : [255, 2, 255, 0]Vol + : [255, 2, 191, 64]
Play/Pause: [255, 2, 127, 128]'''
Note that CircuitPython code that is only meant for humans to read are commented out with the pound #symbol for individual lines, and three single quotes ''' around blocks.
RED = (255, 0, 0)GREEN = (0, 255, 0)WHITE = (85, 85, 85)BLUE = (0, 0, 255)PINK = (128, 0, 128)YELLOW = (148, 108, 0)PURPLE = (200, 0, 55)TEAL = (0, 200, 100)ORANGE = (100, 45, 0)BLACK = (0, 0, 0)
last_command = None
© Adafruit Industries https://learn.adafruit.com/remote-control-tree-ornament-with-circuit-playground-express Page 9 of 18

Main Loop
Now we get to the main loop that runs over and over after the line:
while True:
The first thing we do is turn the red LED off. This way, when an IR command is received later, the LED can be turned onto indicate this. In the absence of that, the LED will turn back off.
red_led.value = False
This next section is where the IR pulses are detected, and then tested to see if they conform to the expected protocol.If so, the decoded pulses are turned into a message we can use.
Color Commands
Lastly, we'll check the received commands against a list -- if the command corresponds to one of them, the code tochange the NeoPixel colors is run.
try: pulses = decoder.read_pulses(pulsein) except MemoryError as e: print("Memory error: ", e) continue red_led.value = True print("Heard", len(pulses), "Pulses:", pulses) command = None try: code = decoder.decode_bits(pulses, debug=False) if len(code) > 3: command = code[2] print("Decoded:", code) except adafruit_irremote.IRNECRepeatException: # unusual short code! print("NEC repeat!") command = last_command except adafruit_irremote.IRDecodeException as e: # failed to decode print("Failed to decode:", e) except MemoryError as e: print("Memory error: ", e)
if not command: continue last_command = command
print("----------------------------") red_led.value = False
© Adafruit Industries https://learn.adafruit.com/remote-control-tree-ornament-with-circuit-playground-express Page 10 of 18

Next, we'll build the ornament and use it!
if command == 247: # IR button 1 pixels.fill(RED) elif command == 119: # 2 pixels.fill(GREEN) elif command == 183: # 3 pixels.fill(WHITE) elif command == 215: # 4 pixels.fill(BLUE) elif command == 87: # 5 pixels.fill(PINK) elif command == 151: # 6 pixels.fill(YELLOW) elif command == 231: # 7 pixels.fill(PURPLE) elif command == 103: # 8 pixels.fill(TEAL) elif command == 167: # 9 pixels.fill(ORANGE) elif command == 207: pixels.fill(BLACK) # 0/10+
© Adafruit Industries https://learn.adafruit.com/remote-control-tree-ornament-with-circuit-playground-express Page 11 of 18

Assemble and Use the Ornament
Fill the Ornament
First, you'll want to tie on the hanging ribbon or hook, and separate the two halves of the clear ornament ball.
Next, fill one half with the pom poms. They will look festive, and help to diffuse the strong glow of the NeoPixels on theCircuit Playground Express.
© Adafruit Industries https://learn.adafruit.com/remote-control-tree-ornament-with-circuit-playground-express Page 12 of 18

Plug the battery pack's JST cable into the Circuit Playground Express, and then turn on the on switch.
Place the CPX and battery pack on top of the pom poms. Looks comfy!
© Adafruit Industries https://learn.adafruit.com/remote-control-tree-ornament-with-circuit-playground-express Page 13 of 18

Now, close up the ornament. It's ready for testing with the remote, and then for hanging on the tree!
© Adafruit Industries https://learn.adafruit.com/remote-control-tree-ornament-with-circuit-playground-express Page 14 of 18

Use the Remote
The IR signal needs to make it to the IR sensor on the CPX, so you may need to try it from different angles. It has thebenefit of bouncing off of lots of surfaces, so it isn't hard to make it work from nearby. Without a direct line of sight, it'sharder to control it from great distances, but definitely possible!
© Adafruit Industries https://learn.adafruit.com/remote-control-tree-ornament-with-circuit-playground-express Page 15 of 18

Try pressing the different number keys on the remote to see the different colors!
© Adafruit Industries https://learn.adafruit.com/remote-control-tree-ornament-with-circuit-playground-express Page 16 of 18

Now, you may hang it on the tree with care! When it's not in use you can press 0 to turn off the NeoPixels which willpreserve battery life. You can also open the ornament to flip off the switch for total energy savings.
Enjoy your festive ornament!
© Adafruit Industries https://learn.adafruit.com/remote-control-tree-ornament-with-circuit-playground-express Page 17 of 18

© Adafruit Industries Last Updated: 2018-02-28 03:47:34 PM UTC Page 18 of 18