Embed Size (px)
Citation preview
AUTODESK® INFERNO® 2007 SP 3 and Extension 1
AUTODESK® FLAME® 2007 SP 3 and Extension 1
AUTODESK® FLINT® 2007 SP 3 and Extension 1A Discreet® Systems product
Autodesk Inferno, Flint and Flame 2007 SP3 and Extension 1 Release Notes
Release Notes

© 2007 Autodesk Canada Co./Autodesk, Inc. All Rights Reserved.
This publication, or parts thereof, may not be reproduced in any form, by any method, for any purpose.
AUTODESK CANADA CO./AUTODESK, INC., MAKES NO WARRANTY, EITHER EXPRESS OR IMPLIED, INCLUDING BUT NOTLIMITED TO ANY IMPLIED WARRANTIES OF MERCHANTABILITY OR FITNESS FOR A PARTICULAR PURPOSE REGARDINGTHESE MATERIALS, AND MAKES SUCH MATERIALS AVAILABLE SOLELY ON AN "AS-IS" BASIS. IN NO EVENT SHALL AUTODESKCANADA CO./AUTODESK, INC., BE LIABLE TO ANYONE FOR SPECIAL, COLLATERAL, INCIDENTAL, OR CONSEQUENTIALDAMAGES IN CONNECTION WITH OR ARISING OUT OF ACQUISITION OR USE OF THESE MATERIALS. THE SOLE ANDEXCLUSIVE LIABILITY TO AUTODESK CANADA CO./AUTODESK, INC., REGARDLESS OF THE FORM OF ACTION, SHALL NOTEXCEED THE PURCHASE PRICE, IF ANY, OF THE MATERIALS DESCRIBED HEREIN.
Autodesk Canada Co./Autodesk, Inc., reserves the right to revise and improve its products as it sees fit. This publication describes the state of thisproduct at the time of its publication, and may not reflect the product at all times in the future.
The following are registered trademarks or trademarks of Autodesk, Inc., in the USA and other countries: 3DEC (design/logo), 3December,3December.com, 3ds Max, ActiveShapes, Actrix, ADI, Alias, Alias (swirl design/logo), AliasStudio, Alias|Wavefront (design/logo), ATC, AUGI,AutoCAD, AutoCAD Learning Assistance, AutoCAD LT, AutoCAD Simulator, AutoCAD SQL Extension, AutoCAD SQL Interface, Autodesk,Autodesk Envision, Autodesk Insight, Autodesk Intent, Autodesk Inventor, Autodesk Map, Autodesk MapGuide, Autodesk Streamline, AutoLISP,AutoSnap, AutoSketch, AutoTrack, Backdraft, Built with ObjectARX (logo), Burn, Buzzsaw, CAiCE, Can You Imagine, Character Studio,Cinestream, Civil 3D, Cleaner, Cleaner Central, ClearScale, Colour Warper, Combustion, Communication Specification, Constructware, ContentExplorer, Create>what’s>Next> (design/logo), Dancing Baby (image), DesignCenter, Design Doctor, Designer's Toolkit, DesignKids, DesignProf,DesignServer, DesignStudio, Design|Studio (design/logo), Design Your World, Design Your World (design/logo), DWF, DWG, DWG (logo),DWG TrueConvert, DWG TrueView, DXF, EditDV, Education by Design, Extending the Design Team, FBX, Filmbox, FMDesktop, GDX Driver,Gmax, Heads-up Design, Heidi, HOOPS, HumanIK, i-drop, iMOUT, Incinerator, IntroDV, Kaydara, Kaydara (design/logo), LocationLogic,Lustre, Maya, Mechanical Desktop, MotionBuilder, ObjectARX, ObjectDBX, Open Reality, PolarSnap, PortfolioWall, Powered with AutodeskTechnology, Productstream, ProjectPoint, Reactor, RealDWG, Real-time Roto, Render Queue, Revit, Showcase, SketchBook, StudioTools,Topobase, Toxik, Visual, Visual Bridge, Visual Construction, Visual Drainage, Visual Hydro, Visual Landscape, Visual Roads, Visual Survey, VisualSyllabus, Visual Toolbox, Visual Tugboat, Visual LISP, Voice Reality, Volo, and Wiretap.
The following are registered trademarks or trademarks of Autodesk Canada Co. in the USA and/or Canada and other countries: Backburner,Discreet, Fire, Flame, Flint, Frost, Inferno, Multi-Master Editing, River, Smoke, Sparks, Stone, Wire.
All other brand names, product names, or trademarks belong to their respective holders.
Third-Party Software Credits and Attributions
Portions of this software are copyright the FreeType Project (www.freetype.org). All rights reserved.
Apache License 2.0 – Perpetual, worldwide, non-exclusive, no-charge, royalty-free, irrevocable: (i) copyright license to reproduce, preparederivative works of, publicly perform, publicly display, sublicense and distribute the Work and any Derivative Works in source or object form; (ii)patent license to make, have made, use, offer to sell, sell import and otherwise transfer the Work.
Powered by Automatic Duck. © 2006 Automatic Duck, Inc. All rights reserved.
Portions copyright 1991-2006 Compuware Corporation.
Portions of this product Copyright 2006 Glyph & Cog, LLC.
DIRAC Time Stretch/Pitch Shift technology licensed from The DSP Dimension, http://www.dspdimension.com Developed and (c) 2005 StephanM. Bernsee.
This software uses the ffmpeg library, licensed under the LGPL license. See the file THIRD_PARTIES_LICENSES.txt (distributed with thissoftware) for more details about ffmpeg licensing terms or visit: http://ffmpeg.org/
This software uses the libquicktime library, licensed under the LGPL license. See the file THIRD_PARTIES_LICENSES.txt (distributed with thissoftware) for more details about libquicktime licensing terms or visit: http://libquicktime.sourceforge.net/
GOVERNMENT USE
Use, duplication, or disclosure by the U.S. Government is subject to restrictions as set forth in FAR 12.212 (Commercial Computer Software-Restricted Rights) and DFAR 227.7202 (Rights in Technical Data and Computer Software), as applicable.
Published By: Autodesk Canada Co./Autodesk, Inc. 111 Mclnnis Parkway San Rafael, CA 94903, USA
Title: Autodesk Inferno, Flint and Flame 2007 SP3 and Extension 1 Release NotesDocument Version: 5
Date: April 5, 2007
contents
iii
Contents
1 Release Information 1Summary . . . . . . . . . . . . . . . . . . . . . . . . . . . . . . . . . . . . . . . . . . . . . . . . . . . . . . . . . . . . . . . 1About This Service Pack and Extension Release . . . . . . . . . . . . . . . . . . . . . . . . . . . . . . 1About These Release Notes . . . . . . . . . . . . . . . . . . . . . . . . . . . . . . . . . . . . . . . . . . . . . . . . 1New Information for This Release . . . . . . . . . . . . . . . . . . . . . . . . . . . . . . . . . . . . . . . . . . 2Revision History . . . . . . . . . . . . . . . . . . . . . . . . . . . . . . . . . . . . . . . . . . . . . . . . . . . . . . . . . 2Related Documentation. . . . . . . . . . . . . . . . . . . . . . . . . . . . . . . . . . . . . . . . . . . . . . . . . . . 3Compatibility. . . . . . . . . . . . . . . . . . . . . . . . . . . . . . . . . . . . . . . . . . . . . . . . . . . . . . . . . . . . 5Contacting Customer Support . . . . . . . . . . . . . . . . . . . . . . . . . . . . . . . . . . . . . . . . . . . . . 6
2 System Information 9Summary . . . . . . . . . . . . . . . . . . . . . . . . . . . . . . . . . . . . . . . . . . . . . . . . . . . . . . . . . . . . . . . 9Overview. . . . . . . . . . . . . . . . . . . . . . . . . . . . . . . . . . . . . . . . . . . . . . . . . . . . . . . . . . . . . . . . 10Licensing Requirements. . . . . . . . . . . . . . . . . . . . . . . . . . . . . . . . . . . . . . . . . . . . . . . . . . . 10Operating System Requirements . . . . . . . . . . . . . . . . . . . . . . . . . . . . . . . . . . . . . . . . . . . 10New DKU Version 2.1.3 . . . . . . . . . . . . . . . . . . . . . . . . . . . . . . . . . . . . . . . . . . . . . . . . . . 12Hardware System Requirements . . . . . . . . . . . . . . . . . . . . . . . . . . . . . . . . . . . . . . . . . . . 12BIOS upgrade for HP xw8400 Workstations . . . . . . . . . . . . . . . . . . . . . . . . . . . . . . . . . 13Updating AJA OEM-2K PCI-X Firmware on HP 8400 Workstations . . . . . . . . . . . . 13Installing Linux on Burn Nodes Using a Kickstart File . . . . . . . . . . . . . . . . . . . . . . . . 15Daylight Saving Time (DST) Change Advisory . . . . . . . . . . . . . . . . . . . . . . . . . . . . . . . 15Linux Memory Considerations for Long Form 2K and 4K Workflow . . . . . . . . . . . 16Audio Delays for 720p with AJA-OEM-2K . . . . . . . . . . . . . . . . . . . . . . . . . . . . . . . . . . 16Emulator Behavior on HP Workstations . . . . . . . . . . . . . . . . . . . . . . . . . . . . . . . . . . . . 16HDCAM-SR Repeatability on HP Workstations . . . . . . . . . . . . . . . . . . . . . . . . . . . . . 16Varicam Video I/O Firmware Versions . . . . . . . . . . . . . . . . . . . . . . . . . . . . . . . . . . . . . 17
tentsCon
iv
About Data Archiving Devices . . . . . . . . . . . . . . . . . . . . . . . . . . . . . . . . . . . . . . . . . . . . . 17Wire no Longer Requires a License . . . . . . . . . . . . . . . . . . . . . . . . . . . . . . . . . . . . . . . . . 18Enabling InfiniBand Drivers on Linux Workstations. . . . . . . . . . . . . . . . . . . . . . . . . . 18Configuring Wire with Infiniband . . . . . . . . . . . . . . . . . . . . . . . . . . . . . . . . . . . . . . . . . . 20Infiniband Configuration for Burn 2007 SP1. . . . . . . . . . . . . . . . . . . . . . . . . . . . . . . . . 20Init Keywords for Background Wire and Proxy Generation. . . . . . . . . . . . . . . . . . . . 21Cleaner XL Version 1.5.1 Required . . . . . . . . . . . . . . . . . . . . . . . . . . . . . . . . . . . . . . . . . 21Cleaner Options Unavailable on Non-Subscription Linux Systems . . . . . . . . . . . . . 21Linux vs. IRIX Product Characteristics . . . . . . . . . . . . . . . . . . . . . . . . . . . . . . . . . . . . . . 22
3 User’s Guide Addendum 25Summary . . . . . . . . . . . . . . . . . . . . . . . . . . . . . . . . . . . . . . . . . . . . . . . . . . . . . . . . . . . . . . . 25Audio Preferences. . . . . . . . . . . . . . . . . . . . . . . . . . . . . . . . . . . . . . . . . . . . . . . . . . . . . . . . 25Creating a Soft Resize to Relink or Recapture Media of Different Resolutions . . . . 26Enabling Audio On Linux Systems . . . . . . . . . . . . . . . . . . . . . . . . . . . . . . . . . . . . . . . . . 26FBX 2006.11 Support . . . . . . . . . . . . . . . . . . . . . . . . . . . . . . . . . . . . . . . . . . . . . . . . . . . . . 26Image Sequence Name Change on Publish . . . . . . . . . . . . . . . . . . . . . . . . . . . . . . . . . . 27Importing 3D LUTs from Lustre . . . . . . . . . . . . . . . . . . . . . . . . . . . . . . . . . . . . . . . . . . . 27Lens Distortion: Error in New Features Guide . . . . . . . . . . . . . . . . . . . . . . . . . . . . . . . 27Lucid 88192 Audio Processor on Linux Systems. . . . . . . . . . . . . . . . . . . . . . . . . . . . . . 27Minor Changes to Import Image/EDL Menu . . . . . . . . . . . . . . . . . . . . . . . . . . . . . . . . 27New Media Import and Export Features for DPX Files . . . . . . . . . . . . . . . . . . . . . . . . 29New Hot Keys . . . . . . . . . . . . . . . . . . . . . . . . . . . . . . . . . . . . . . . . . . . . . . . . . . . . . . . . . . . 30QuickTime CODEC Support for Linux: Errors in the New Features Guide. . . . . . . 30Setting Block Size on Tape Devices . . . . . . . . . . . . . . . . . . . . . . . . . . . . . . . . . . . . . . . . . 30
4 Installation Documentation Workflows 33Summary . . . . . . . . . . . . . . . . . . . . . . . . . . . . . . . . . . . . . . . . . . . . . . . . . . . . . . . . . . . . . . . 33Overview. . . . . . . . . . . . . . . . . . . . . . . . . . . . . . . . . . . . . . . . . . . . . . . . . . . . . . . . . . . . . . . . 33Reinstalling from Scratch. . . . . . . . . . . . . . . . . . . . . . . . . . . . . . . . . . . . . . . . . . . . . . . . . . 33Connecting New or Expanded Stone Direct Storage . . . . . . . . . . . . . . . . . . . . . . . . . . 34Upgrading Your Effects or Editing Application . . . . . . . . . . . . . . . . . . . . . . . . . . . . . . 35Upgrading Your Operating System . . . . . . . . . . . . . . . . . . . . . . . . . . . . . . . . . . . . . . . . . 36Which Document Do I Need . . . . . . . . . . . . . . . . . . . . . . . . . . . . . . . . . . . . . . . . . . . . . . 36
1
Release Information
SummaryAbout This Service Pack and Extension Release . . . . . . . . . . . . . . . . . . . . . . . . . . . . . 1
About These Release Notes . . . . . . . . . . . . . . . . . . . . . . . . . . . . . . . . . . . . . . . . . . . . . . . . 1
New Information for This Release . . . . . . . . . . . . . . . . . . . . . . . . . . . . . . . . . . . . . . . . . . 2
Related Documentation . . . . . . . . . . . . . . . . . . . . . . . . . . . . . . . . . . . . . . . . . . . . . . . . . . . 3
Compatibility . . . . . . . . . . . . . . . . . . . . . . . . . . . . . . . . . . . . . . . . . . . . . . . . . . . . . . . . . . . . . 5
Contacting Customer Support . . . . . . . . . . . . . . . . . . . . . . . . . . . . . . . . . . . . . . . . . . . . . 6
About This Service Pack and Extension ReleaseThe 2007 SP3 and Extension 1 release of your Effects or Editing application is both a service pack and an extension release.
• If you have a valid 2007 license, you are entitled to download and install this service pack, which provides several fixes and improvements.
No new license is required for the service pack.
• If you are on subscription, you can enjoy many new and exciting extension features, as well as the fixes and improvements from the service pack. Extension features are enabled by a supplementary extension license.
You must install an extension license to access Extension 1 features.
See “Licensing Requirements” on page 10.
Upon launching your Effects or Editing application the splash screen will display the product version, which is either SP3 or SP3 Extension 1.
About These Release NotesThe chapters in this document provide important information pertinent to Autodesk® Inferno® 2007, Autodesk Flame® 2007, and Autodesk Flint® 2007 SP3 and Extension 1.
Release Information1
2
Chapter 1: Release Information — Provides information about related documentation, compatibility, and contacting customer support.
Chapter 2: System Information — Provides infrastructure and hardware-related information.
Chapter 3: User’s Guide Addendum — Provides new information that was released after the User’s Guide went to print and applies to both Service Pack 3 and Extension 1 users.
Chapter 4: Installation Documentation Workflows — Provides common installation workflows, such as reinstalling your entire system and upgrading your operating system.
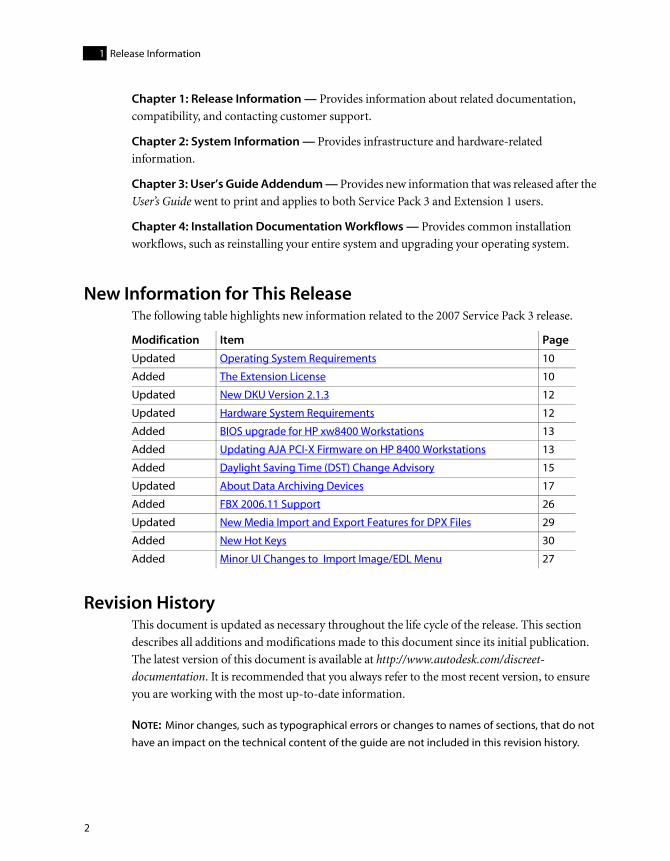
New Information for This ReleaseThe following table highlights new information related to the 2007 Service Pack 3 release.
Revision HistoryThis document is updated as necessary throughout the life cycle of the release. This section describes all additions and modifications made to this document since its initial publication. The latest version of this document is available at http://www.autodesk.com/discreet-documentation. It is recommended that you always refer to the most recent version, to ensure you are working with the most up-to-date information.
NOTE: Minor changes, such as typographical errors or changes to names of sections, that do not
have an impact on the technical content of the guide are not included in this revision history.
Modification Item Page
Updated Operating System Requirements 10
Added The Extension License 10
Updated New DKU Version 2.1.3 12
Updated Hardware System Requirements 12
Added BIOS upgrade for HP xw8400 Workstations 13
Added Updating AJA PCI-X Firmware on HP 8400 Workstations 13
Added Daylight Saving Time (DST) Change Advisory 15
Updated About Data Archiving Devices 17
Added FBX 2006.11 Support 26
Updated New Media Import and Export Features for DPX Files 29
Added New Hot Keys 30
Added Minor UI Changes to Import Image/EDL Menu 27
Related Documentation
3
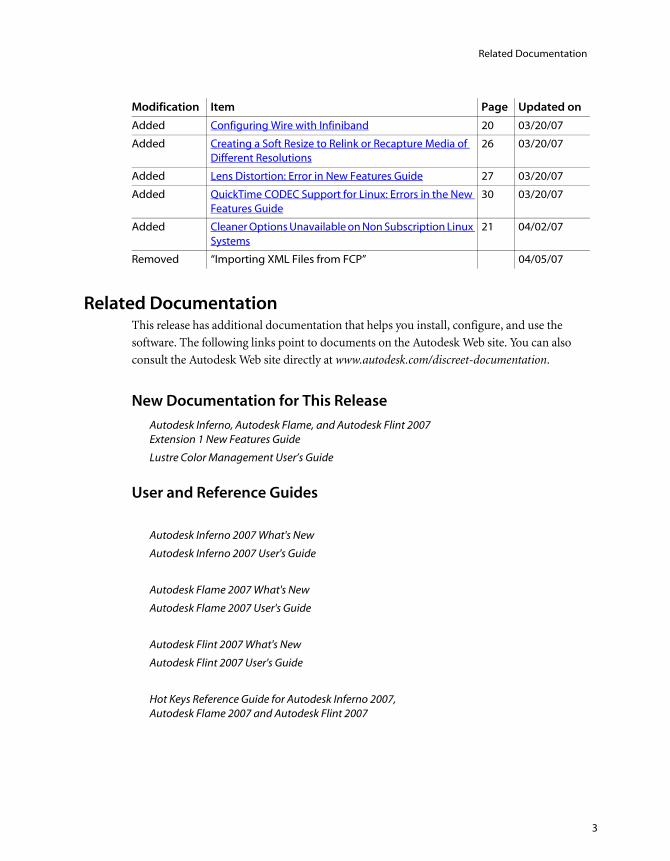
Related DocumentationThis release has additional documentation that helps you install, configure, and use the software. The following links point to documents on the Autodesk Web site. You can also consult the Autodesk Web site directly at www.autodesk.com/discreet-documentation.
New Documentation for This Release
User and Reference Guides
Modification Item Page Updated on
Added Configuring Wire with Infiniband 20 03/20/07
Added Creating a Soft Resize to Relink or Recapture Media of Different Resolutions
26 03/20/07
Added Lens Distortion: Error in New Features Guide 27 03/20/07
Added QuickTime CODEC Support for Linux: Errors in the New Features Guide
30 03/20/07
Added Cleaner Options Unavailable on Non Subscription Linux Systems
21 04/02/07
Removed “Importing XML Files from FCP” 04/05/07
Autodesk Inferno, Autodesk Flame, and Autodesk Flint 2007 Extension 1 New Features Guide
Lustre Color Management User’s Guide
Autodesk Inferno 2007 What's New
Autodesk Inferno 2007 User's Guide
Autodesk Flame 2007 What's New
Autodesk Flame 2007 User's Guide
Autodesk Flint 2007 What's New
Autodesk Flint 2007 User's Guide
Hot Keys Reference Guide for Autodesk Inferno 2007, Autodesk Flame 2007 and Autodesk Flint 2007
Release Information1
4
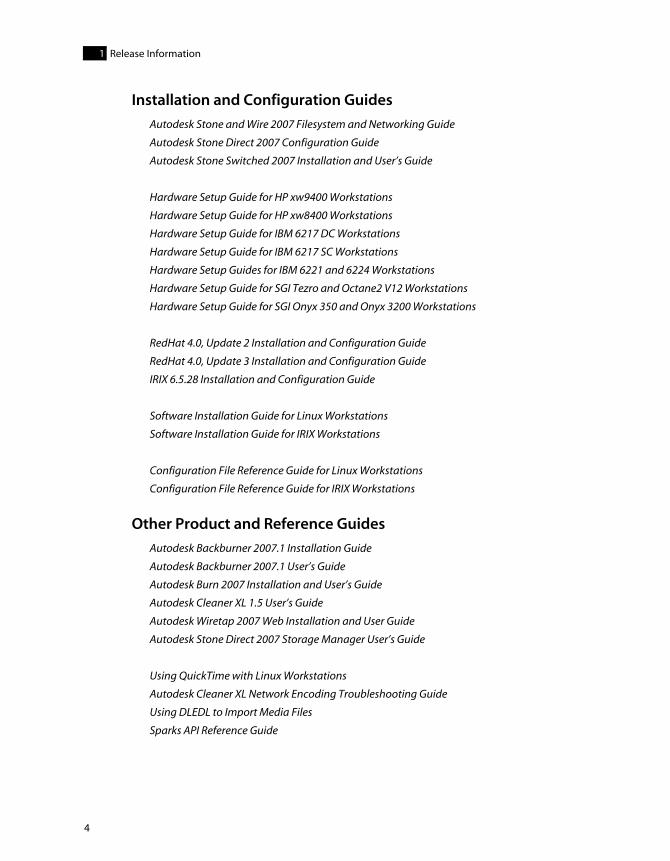
Installation and Configuration Guides
Other Product and Reference Guides
Autodesk Stone and Wire 2007 Filesystem and Networking Guide
Autodesk Stone Direct 2007 Configuration Guide
Autodesk Stone Switched 2007 Installation and User’s Guide
Hardware Setup Guide for HP xw9400 Workstations
Hardware Setup Guide for HP xw8400 Workstations
Hardware Setup Guide for IBM 6217 DC Workstations
Hardware Setup Guide for IBM 6217 SC Workstations
Hardware Setup Guides for IBM 6221 and 6224 Workstations
Hardware Setup Guide for SGI Tezro and Octane2 V12 Workstations
Hardware Setup Guide for SGI Onyx 350 and Onyx 3200 Workstations
RedHat 4.0, Update 2 Installation and Configuration Guide
RedHat 4.0, Update 3 Installation and Configuration Guide
IRIX 6.5.28 Installation and Configuration Guide
Software Installation Guide for Linux Workstations
Software Installation Guide for IRIX Workstations
Configuration File Reference Guide for Linux Workstations
Configuration File Reference Guide for IRIX Workstations
Autodesk Backburner 2007.1 Installation Guide
Autodesk Backburner 2007.1 User’s Guide
Autodesk Burn 2007 Installation and User’s Guide
Autodesk Cleaner XL 1.5 User’s Guide
Autodesk Wiretap 2007 Web Installation and User Guide
Autodesk Stone Direct 2007 Storage Manager User’s Guide
Using QuickTime with Linux Workstations
Autodesk Cleaner XL Network Encoding Troubleshooting Guide
Using DLEDL to Import Media Files
Sparks API Reference Guide

Compatibility
5
Documentation Sets
NOTE: The documentation set does not contain the application’s What’s New Guide or User’s Guide.
After the files are downloaded, untar the documentation set file by typing:For Linux: tar –zxvf <filename.tar.gz>For IRIX: zcat <filename.tar.gz> | tar –xvf -
Consulting the Latest Version of Release NotesAlways check the Web for the most recent updates to the Release Notes. The information contained in this document is continuously updated and the version provided on your product CD may already be lacking important release information. You can get the latest version of all documents from the Autodesk Web site at www.autodesk.com/discreet-documentation.
Fixed and Known BugsYou can consult a list of fixed and known bugs for this release on the Autodesk Web site at www.autodesk.com/discreet-documentation.
Accessing Documentation and Online HelpYou can also access PDF documentation from the Documentation directory on the application CD and from the Preferences menu in the application.
Included with the application is an HTML online help system that is displayed in a Web browser. The online help contains comprehensive information on the full feature set of the software. You can launch the help by pressing the left CTRL+= key combination.
For complete information on accessing PDF and online help documentation, see the “Introduction” chapter of your application User’s Guide.
CompatibilityAutodesk makes every effort to ensure that the compatibility of media and resources is as complete as possible when you upgrade your application, share projects between Autodesk Effects and Editing applications on both Linux and IRIX operating systems, and collaborate with Autodesk compositing and modeling applications such as Autodesk Combustion®.
Complete compatibility exists between Effects or Editing applications of the 2007 release and upwards.
Autodesk Effects 2007 Documentation Set

Release Information1
6
For information on compatibility with releases that pre-date the 2007 version of your application, see the “Compatibility” chapter of your application’s User’s Guide.
Contacting Customer SupportYou can contact Autodesk Media and Entertainment Customer Support at www.autodesk.com/support. Refer to the following table for additional contact information.
Location: Contact Information:
Within the Americas: Hotline (North America): 1-800-925-6442 Direct dial: 415-507-5256 (Country code = 1)8 AM to 8 PM EST Monday to Friday, excluding [email protected]
Within Europe, Middle-East and Africa:
Hotline (from London, UK): +44-207-851-8080 9 AM to 5:30 PM (local time)Monday to Friday, excluding [email protected]
Within Asia Pacific:(Excluding India, China, Australia, New Zealand and Japan)
Hotline (from Singapore): +65-6555-0399 9 AM to 6 PM (local time)Monday to Friday, excluding [email protected]
Within India: Hotline (from Mumbai): +91-22-6695-2244 9:30 AM to 6:30 PM (local time) Monday to Friday, excluding [email protected]
Within Japan: Hotline (from Tokyo): 0120-107-290Direct dial: +81-3-6221-181010 AM to 6 PM (local time) Monday to Friday, excluding [email protected]

Contacting Customer Support
7
Customer support is also available through your Autodesk reseller. To find a reseller near you, consult the reseller look-up database on the Autodesk Web site at www.autodesk.com/resellers.
Within China: Direct dial: +86-10-6505-68489 AM to 6 PM (local time) Monday to Friday, excluding [email protected]
Within Australia and New Zealand: Hotline (from Melbourne): +1-300-36-8355Direct dial: +61-3-9876-83558 AM to 6 PM AESTMonday to Friday, excluding [email protected]
Location: Contact Information:

Release Information1
8
9
System Information
SummaryOverview . . . . . . . . . . . . . . . . . . . . . . . . . . . . . . . . . . . . . . . . . . . . . . . . . . . . . . . . . . . . . . . . 10
Licensing Requirements . . . . . . . . . . . . . . . . . . . . . . . . . . . . . . . . . . . . . . . . . . . . . . . . . . 10
Operating System Requirements . . . . . . . . . . . . . . . . . . . . . . . . . . . . . . . . . . . . . . . . . . 10
New DKU Version 2.1.3 . . . . . . . . . . . . . . . . . . . . . . . . . . . . . . . . . . . . . . . . . . . . . . . . . . . 12
Hardware System Requirements . . . . . . . . . . . . . . . . . . . . . . . . . . . . . . . . . . . . . . . . . . 12
BIOS upgrade for HP xw8400 Workstations . . . . . . . . . . . . . . . . . . . . . . . . . . . . . . . . 13
Updating AJA OEM-2K PCI-X Firmware on HP 8400 Workstations . . . . . . . . . . 13
Installing Linux on Burn Nodes Using a Kickstart File . . . . . . . . . . . . . . . . . . . . . . . 15
Daylight Saving Time (DST) Change Advisory . . . . . . . . . . . . . . . . . . . . . . . . . . . . . 15
Linux Memory Considerations for Long Form 2K and 4K Workflow . . . . . . . . . 16
Audio Delays for 720p with AJA-OEM-2K . . . . . . . . . . . . . . . . . . . . . . . . . . . . . . . . . . 16
Emulator Behavior on HP Workstations . . . . . . . . . . . . . . . . . . . . . . . . . . . . . . . . . . . 16
HDCAM-SR Repeatability on HP Workstations . . . . . . . . . . . . . . . . . . . . . . . . . . . . . 16
Varicam Video I/O Firmware Versions . . . . . . . . . . . . . . . . . . . . . . . . . . . . . . . . . . . . . 17
About Data Archiving Devices . . . . . . . . . . . . . . . . . . . . . . . . . . . . . . . . . . . . . . . . . . . . 17
Wire no Longer Requires a License . . . . . . . . . . . . . . . . . . . . . . . . . . . . . . . . . . . . . . . . 18
Enabling InfiniBand Drivers on Linux Workstations . . . . . . . . . . . . . . . . . . . . . . . . 18
Configuring Wire with Infiniband . . . . . . . . . . . . . . . . . . . . . . . . . . . . . . . . . . . . . . . . . 20
Infiniband Configuration for Burn 2007 SP1 . . . . . . . . . . . . . . . . . . . . . . . . . . . . . . . 20
Init Keywords for Background Wire and Proxy Generation . . . . . . . . . . . . . . . . . 21
Cleaner XL Version 1.5.1 Required . . . . . . . . . . . . . . . . . . . . . . . . . . . . . . . . . . . . . . . . . 21
Cleaner Options Unavailable on Non-Subscription Linux Systems . . . . . . . . . . 21
Linux vs. IRIX Product Characteristics . . . . . . . . . . . . . . . . . . . . . . . . . . . . . . . . . . . . . 22
System Information2
10
OverviewThis chapter describes important installation-related and hardware-related notes and procedures.
Licensing Requirements
A New License is not Required for Service Pack 3 All users with a valid 2007 license are entitled to download and install this service pack. The 2007 license is sufficient to run 2007 SP3.
A New License is Required for Extension FeaturesTo gain access to Extension 1 features, users under subscription must add a supplementary Extension 1 license to their license file. An extension license looks similar to the following:
smoke_x86_64_2007_x1 discreet_l 2007.999
NOTE: “x1” signifies that this is an extension license.
To request a license code, and for more information on licensing your application, see the Software Installation Guide for your operating system.
Operating System Requirements
Upgrading From a 2007 ReleaseWhen upgrading from a 2007, 2007 SP1 or 2007 SP2 release of your Effects or Editing application, to the 2007 SP3 (Extension 1) release, no operating system upgrade is required.
Upgrading From a pre-2007 ReleaseWhen upgrading from a pre-2007 release of your Effects or Editing application, all platforms require an operating system upgrade. See the following lists for operating systems requirements for your platform.
Linux SystemsAutodesk Editing and Effects 2007 applications run under Red Hat® Enterprise Linux WS 4, Update 2 (64-bit or 32-bit) on IBM® workstations, and Red Hat Enterprise Linux WS 4, Update 3 (64-bit) on HP workstations. Upgrading from a pre-2007 version of an Effects or Editing application requires a fresh installation of the Linux operating system (you cannot upgrade to
Operating System Requirements
11
Red Hat Enterprise Linux WS 4, Update 2 from a previous version). A fresh installation of Linux erases the contents of the system disk so you must archive any user settings, project settings, and media that you want to preserve, prior to performing the upgrade.
Your Linux installation media should be as follows:
• For 64-bit systems (All HP and IBM workstations with the exception of the Zpro 6221)—Autodesk’s distribution of Red Hat Enterprise Linux Workstation 4 Update 2 (IBM) or Update 3 (HP)
One DVD, included with your release shipment. The Autodesk distribution installs the Linux software packages required by Autodesk Effects and Editing applications; these applications will not run under the commercial distribution of Red Hat Enterprise Linux WS 4 Update 2 or Update 3. If you received a new workstation with this release, your shipment also included the CD set for commercial distribution of Red Hat Enterprise Linux WS 4 Update 2. You should not use this commercial distribution, but use the DVD distribution instead. You can use the commercial distribution to activate your Red Hat subscription if it is not already activated.
• For 32-bit systems (Zpro 6221 only)—Autodesk’s distribution of Red Hat Enterprise Linux Workstation 4 Update 2
A set of 4 CDs, shipped to all owners of 32-bit workstations. The Autodesk distribution installs the Linux software packages required by Autodesk Effects and Editing applications; these applications will not run under the commercial distribution of Red Hat Enterprise Linux WS 4 Update 2.
• (32- and 64-bit systems) Discreet® Kernel Utility for Linux
One CD, included with your release shipment. The Discreet Kernel Utility (DKU) is a set of drivers, utilities, and a customized Linux kernel, that Autodesk Effects and Editing applications require to run.
If you do not have the correct CD or DVD distribution, contact Customer Support or your local sales representative.
For complete upgrade OS information, see the Linux RHEW 4.0, Update 2 Installation and Configuration Guide.
IRIX SystemsAutodesk Editing and Effects 2007 applications run under IRIX 6.5.28. If your SGI® workstation is currently running an earlier version of IRIX, you must upgrade to or install IRIX 6.5.28. Autodesk recommends upgrading only if you are currently running IRIX version 6.5.19f or above, as this is a non-destructive upgrade. Otherwise, perform a full installation of IRIX 6.5.28.
System Information2
12
To install IRIX 6.5.28, you require the following SGI CDs:
• IRIX 6.5.28 Installation Tools and Overlays (1 of 3) August 2005—P/N 812-0818-028
• IRIX 6.5.28 Overlays (2 of 3) August 2005—P/N 812-0819-028
• IRIX 6.5.28 Overlays (3 of 3) August 2005—P/N 812-0817-028
• IRIX 6.5 Applications August 2005—P/N 812-0877-028
• IRIX 6.5 Foundation 1—P/N 812-0759-002
• IRIX 6.5 Foundation 2—P/N 812-0760-002
• ONC3/NFS version 3, for IRIX 6.2, 6.3, 6.4, and 6.5—P/N 812-0774-002
Make sure that your CDs match this list precisely. If you do not have the correct CDs, contact your SGI support representative.
For IRIX upgrade and full installation procedures, see the IRIX 6.5.28 Installation Guide.
New DKU Version 2.1.3The 2007 SP3 (Extension 1) release of your Effects or Editing application requires the new 2.1.3 version of the DKU. For more information about installing the customized kernel on your workstations, see “Installing the Discreet Kernel Utility” in the Autodesk Effects and Editing 2007 Linux RHEW 4(Update2 or Update 3) Installation and Configuration Guide.
Hardware System RequirementsLinux workstations — This release fully supports all previously certified Linux workstations. However, some minor changes in video I/O connections or BIOS revision may be required if you are upgrading from a pre-2007 version of your Effect or Editing application. Consult these Release Notes and the Hardware Setup Guide for your workstation for information on BIOS requirements, connection to audio/video I/O hardware and other peripherals.
SGI workstations — This release fully supports the Octane2™ V12, Tezro™, Onyx2® (R12K), Onyx 350, and Onyx 3200 workstations. No changes in hardware configuration are required. For specifications, you can consult your existing documentation or download the Hardware Setup Guide for your workstation at www.autodesk.com/discreet-documentation.
New XR-series Stone Direct — The new XR-series Autodesk Stone® Direct storage is now available in 4Gb mode for all Linux workstations (4Gb fibre channel adapters required). XR-series is also supported in 2Gb mode on SGI workstations. Consult the Stone Direct 2007 Configuration Guide and the Stone Storage Manager 2007 for information on how to connect and configure your XR-series Stone Direct.
BIOS upgrade for HP xw8400 Workstations
13
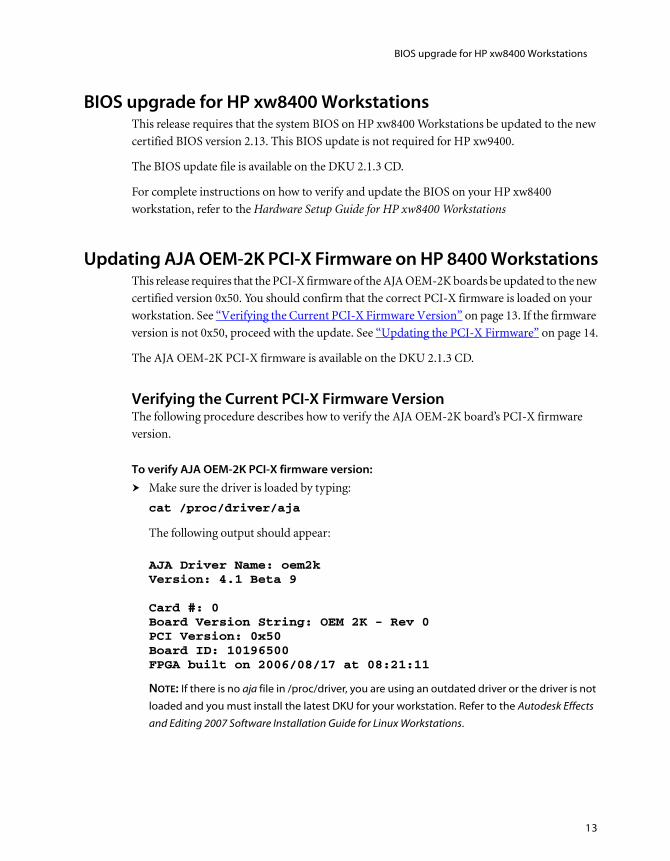
BIOS upgrade for HP xw8400 WorkstationsThis release requires that the system BIOS on HP xw8400 Workstations be updated to the new certified BIOS version 2.13. This BIOS update is not required for HP xw9400.
The BIOS update file is available on the DKU 2.1.3 CD.
For complete instructions on how to verify and update the BIOS on your HP xw8400 workstation, refer to the Hardware Setup Guide for HP xw8400 Workstations
Updating AJA OEM-2K PCI-X Firmware on HP 8400 WorkstationsThis release requires that the PCI-X firmware of the AJA OEM-2K boards be updated to the new certified version 0x50. You should confirm that the correct PCI-X firmware is loaded on your workstation. See “Verifying the Current PCI-X Firmware Version” on page 13. If the firmware version is not 0x50, proceed with the update. See “Updating the PCI-X Firmware” on page 14.
The AJA OEM-2K PCI-X firmware is available on the DKU 2.1.3 CD.
Verifying the Current PCI-X Firmware VersionThe following procedure describes how to verify the AJA OEM-2K board’s PCI-X firmware version.
To verify AJA OEM-2K PCI-X firmware version:
Make sure the driver is loaded by typing:
cat /proc/driver/aja
The following output should appear:
NOTE: If there is no aja file in /proc/driver, you are using an outdated driver or the driver is not
loaded and you must install the latest DKU for your workstation. Refer to the Autodesk Effects
and Editing 2007 Software Installation Guide for Linux Workstations.
AJA Driver Name: oem2kVersion: 4.1 Beta 9
Card #: 0Board Version String: OEM 2K - Rev 0PCI Version: 0x50Board ID: 10196500FPGA built on 2006/08/17 at 08:21:11
System Information2
14
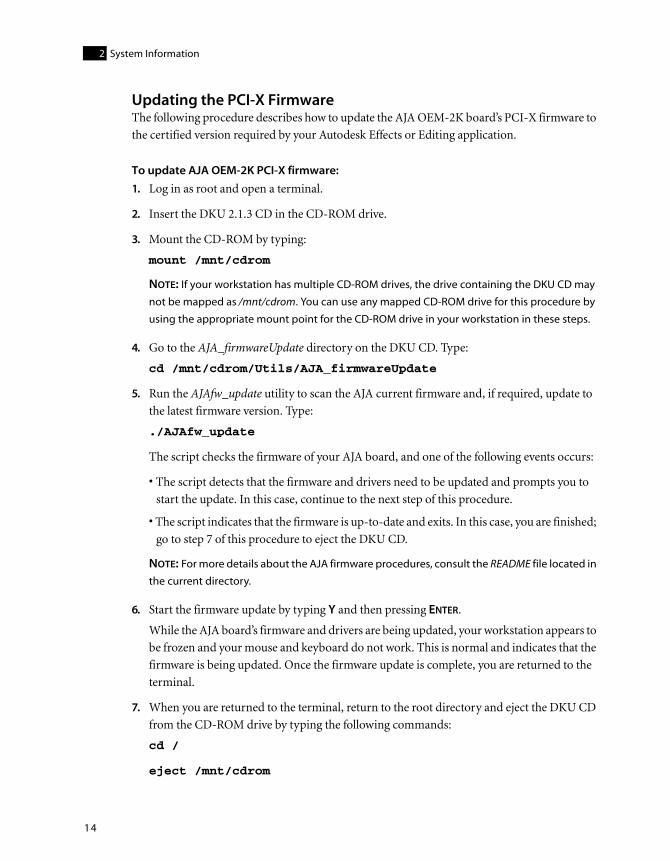
Updating the PCI-X FirmwareThe following procedure describes how to update the AJA OEM-2K board’s PCI-X firmware to the certified version required by your Autodesk Effects or Editing application.
To update AJA OEM-2K PCI-X firmware:
1. Log in as root and open a terminal.
2. Insert the DKU 2.1.3 CD in the CD-ROM drive.
3. Mount the CD-ROM by typing:
mount /mnt/cdrom
NOTE: If your workstation has multiple CD-ROM drives, the drive containing the DKU CD may
not be mapped as /mnt/cdrom. You can use any mapped CD-ROM drive for this procedure by
using the appropriate mount point for the CD-ROM drive in your workstation in these steps.
4. Go to the AJA_firmwareUpdate directory on the DKU CD. Type:
cd /mnt/cdrom/Utils/AJA_firmwareUpdate
5. Run the AJAfw_update utility to scan the AJA current firmware and, if required, update to the latest firmware version. Type:
./AJAfw_update
The script checks the firmware of your AJA board, and one of the following events occurs:
• The script detects that the firmware and drivers need to be updated and prompts you to start the update. In this case, continue to the next step of this procedure.
• The script indicates that the firmware is up-to-date and exits. In this case, you are finished; go to step 7 of this procedure to eject the DKU CD.
NOTE: For more details about the AJA firmware procedures, consult the README file located in
the current directory.
6. Start the firmware update by typing Y and then pressing ENTER.
While the AJA board’s firmware and drivers are being updated, your workstation appears to be frozen and your mouse and keyboard do not work. This is normal and indicates that the firmware is being updated. Once the firmware update is complete, you are returned to the terminal.
7. When you are returned to the terminal, return to the root directory and eject the DKU CD from the CD-ROM drive by typing the following commands:
cd /
eject /mnt/cdrom
Installing Linux on Burn Nodes Using a Kickstart File
15
8. Shut down your Linux workstation by typing:
shutdown -g0
If your workstation does not prompt you to power down, press the power button for 10 seconds to force a power down.
9. Disconnect the power cord.
10. Wait 10 seconds, reconnect the power cord, then restart your workstation normally.
Installing Linux on Burn Nodes Using a Kickstart FileYou can now install Red Hat Linux 4.0 Update 2 or Update 3 on Autodesk Burn™ 2007 nodes using a dedicated kickstart file included on the customized CD/DVD OS distribution media.
To install Red Hat Linux 4.0 Updates using a dedicated kickstart file:
1. Boot the Burn node from CD #1 or the DVD.
2. For Red Hat 4, Update 2, type the following command at the Linux Installation prompt:
linux ks=cdrom:/ks_burn.cfg
For Red Hat 4, Update 3, type the following command at the Linux Installation prompt: burn
Then press ENTER.
Consult the Autodesk Burn 2007 Installation and User’s Guide for more details on how to install and configure a Burn 2007 node.
Daylight Saving Time (DST) Change AdvisoryRecent legislation introduced in several countries changes existing DST practices for 2007. This means that applications relying on system time and date may not automatically adjust properly once DST comes into effect. This can lead to unexpected results when accuracy of system time and date is essential.
Operating system vendors have all provided certified patches to ensure this transition goes smoothly. These patches have been integrated in the software distributions associated to this 2007 SP3 release. No action is required on your part beyond installing this release’s software packages and DKU upgrade.
System Information2
16
Linux Memory Considerations for Long Form 2K and 4K Workflow
For projects based on long form 2K or 4K film, while the minimum physical memory requirement is 8GB, it is highly recommended that your system be fitted with 12GB for optimal interactivity and stability while using complex setups. For the list of minimal system memory requirements, consult the Software Installation Guide for Linux Workstations.
Audio Delays for 720p with AJA-OEM-2KSet broadcast and hi-res audio delays to 1.00 for projects with a resolution of 720p.
Audio delays are set in the Audio section of the Preferences panel. To sync audio with the broadcast monitor, select Sync To Broadcast. To sync audio with the hi-res display, select Sync To Hi-res.
For more information on setting audio delays for high resolution and broadcast monitors, refer to your application’s User’s Guide.
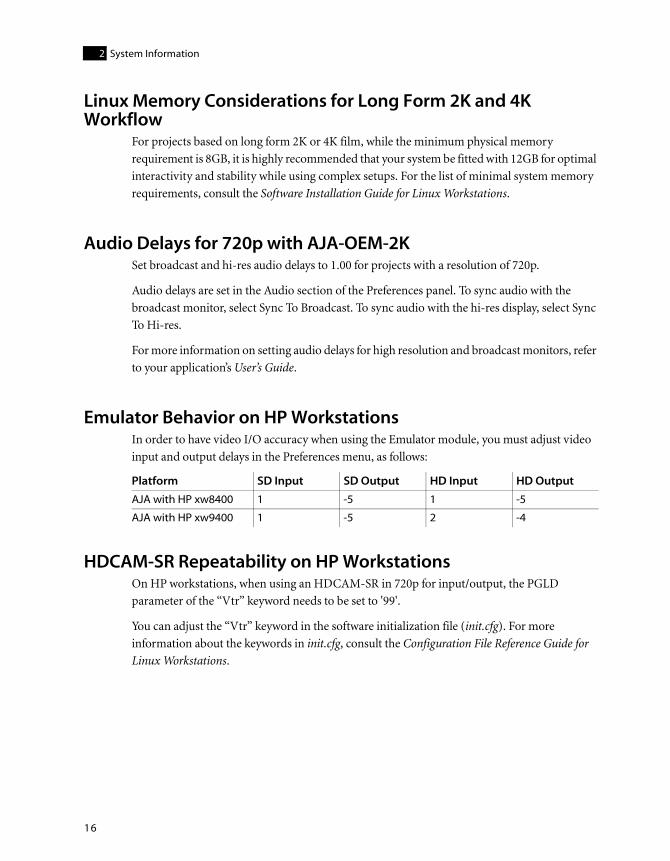
Emulator Behavior on HP WorkstationsIn order to have video I/O accuracy when using the Emulator module, you must adjust video input and output delays in the Preferences menu, as follows:
HDCAM-SR Repeatability on HP WorkstationsOn HP workstations, when using an HDCAM-SR in 720p for input/output, the PGLD parameter of the “Vtr” keyword needs to be set to '99'.
You can adjust the “Vtr” keyword in the software initialization file (init.cfg). For more information about the keywords in init.cfg, consult the Configuration File Reference Guide for Linux Workstations.
Platform SD Input SD Output HD Input HD Output
AJA with HP xw8400 1 -5 1 -5
AJA with HP xw9400 1 -5 2 -4
Varicam Video I/O Firmware Versions
17
Varicam Video I/O Firmware Versions To perform frame-accurate video input and output using Panasonic® variable frame rate VTR decks, you must use the following firmware versions:
• AJ-HD3700H D5-HD deck:
SYSCON: 1.04 or later
AV: 0.21 or later
FRONT: 0.13 or later
• AJ-HD1200A DVCPRO HD deck:
SYSIF: 1.30 or later
AVDV: 1.39 or later
SERVO: 1.22 or later
Regular video I/O is not affected by a firmware version.
NOTE: Refer to your Panasonic operational for information on verifying the firmware version.
About Data Archiving DevicesFor data archiving, your Effects or Editing 2007 application uses standard UNIX tape device calls. You should confirm with device vendors that they are certified for use with your operating system. For this release, the operating systems required are Linux Red Hat Enterprise Workstation 4.0, Update 2 (for IBM workstations) or Update 3 (for HP workstations), and IRIX 6.5.28.
System Information2
18
You should also note the following guidelines:
• On IRIX, you may be required to purchase tape device driver support from SGI to use SCSI or fiber channel archiving devices.
• On Linux, fibre channel devices that may be used are the ones for which the vendor confirms the following:
– The device driver is compliant with standard UNIX tape device calls.
– The specific version of your operating system and kernel is supported.
• While Autodesk Media & Entertainment makes no certification statement about any device, the following SCSI devices have been tested and found to be reliable when connected using an ATTO Fibre Channel to SCSI Bridge 2390:
– Quantum LT03
– Quantum DLT8000
– Quantum DLT7000
– Sony AIT3 SDX-D700C
– Sony AIT2
• The software initialization file (init.cfg) for your Effects or Editing 2007 application contains examples for the “ClipMgtDevice Tape” keyword to help you set up the appropriate block size value for your tape device and define a text label to identify the device in the Archiving module. Please refer to the documentation from your archiving device vendor for guidelines on the actual block size to use.
• On Linux workstations, you can also use USB 2 and FireWire® (IEEE 1394) attached devices to save data archives generated from your Effects or Editing application. These devices can be formatted as ext2, ext3 or Mac® file systems. NTFS is not supported.
Wire no Longer Requires a LicenseAs of this release, a Wire license is no longer required to enable Wire services. Any system on the Wire network can wire to and from a system upgraded with the 2007 SP3 release. No action is required on your part. Old Wire license strings can be left in or removed from the license file, as they will simply be ignored by the application.
Enabling InfiniBand Drivers on Linux WorkstationsInfiniBand (IB) drivers are now certified for IBM 6217SC/DC, HP xw8400 and HP xw9400 workstations. The drivers are installed on all Linux workstations by the DKU. If the DKU detects the IB hardware, the chkconfig flag for IB drivers is set to ON. If you add an optional IB
Enabling InfiniBand Drivers on Linux Workstations
19
HBA after the DKU was initially installed, the chkconfig flag for the IB drivers will not be properly set.
The following procedures describe how to use the InfiniBand configuration utility to set the chkconfig flag to ON for the IB drivers and configure the IP address and netmask of your Infiniband interface.
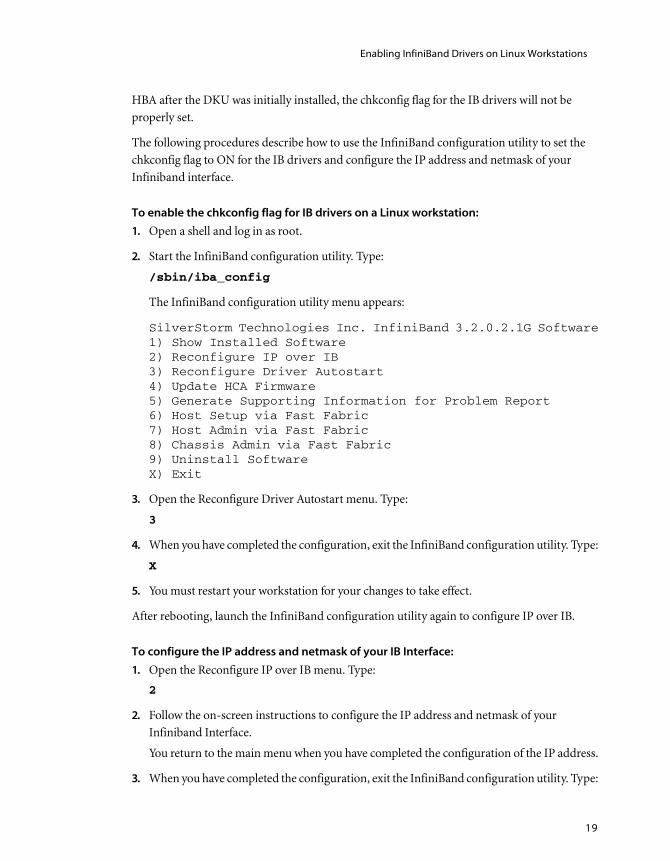
To enable the chkconfig flag for IB drivers on a Linux workstation:
1. Open a shell and log in as root.
2. Start the InfiniBand configuration utility. Type:
/sbin/iba_config
The InfiniBand configuration utility menu appears:
SilverStorm Technologies Inc. InfiniBand 3.2.0.2.1G Software1) Show Installed Software2) Reconfigure IP over IB3) Reconfigure Driver Autostart4) Update HCA Firmware5) Generate Supporting Information for Problem Report6) Host Setup via Fast Fabric7) Host Admin via Fast Fabric8) Chassis Admin via Fast Fabric9) Uninstall SoftwareX) Exit
3. Open the Reconfigure Driver Autostart menu. Type:
3
4. When you have completed the configuration, exit the InfiniBand configuration utility. Type:
X
5. You must restart your workstation for your changes to take effect.
After rebooting, launch the InfiniBand configuration utility again to configure IP over IB.
To configure the IP address and netmask of your IB Interface:
1. Open the Reconfigure IP over IB menu. Type:
2
2. Follow the on-screen instructions to configure the IP address and netmask of your Infiniband Interface.
You return to the main menu when you have completed the configuration of the IP address.
3. When you have completed the configuration, exit the InfiniBand configuration utility. Type:
System Information2
20
X
4. You must restart your workstation for your changes to take effect.
Configuring Wire with InfinibandTo allow Wire transfers over an Infiniband network, you must define a new interface of type PROT=IB_SDP in the [INTERFACE] section of the Wire sw_framestore_map file, as in the following example:
[FRAMESTORES]FRAMESTORE=london HADDR=177.20.15.53 ID=30
[INTERFACES]FRAMESTORE=londonPROT=IB_SDP IADDR=192.16.129.32 DEV=1PROT=TCP IADDR=177.20.15.53 DEV=1
Make sure that the IP address you assign to the Infiniband interface (that is, the one defined on the line beginning with PROT=IB_SDP) is not the same as the IP address defined for the host (that is, the one defined by HADDR=). Doing otherwise would send the house network traffic through the Infiniband interface and would impair Wire transfers.
NOTE: In the [INTERFACES] section, the interfaces are listed in order of preferences. In the example
above, the IB_SDP interface is the preferred one, which means that Wire will attempt to contact
other hosts with this interface first.
Documentation Erratum — Details about configuring the sw_framestore_map can be found in the Autodesk Stone & Wire 2007 Filesystem and Networking Guide. On page 41 of this guide, the sw_framestore_map example provided is currently erroneous, as it assigns the same IP address to both the Infiniband and the host interfaces.
Infiniband Configuration for Burn 2007 SP1Burn nodes can now be configured with an optional QuickSilver InfiniServ 7000 HCA. The drivers for this adapter are included in the latest Burn 2007 SP1 package, under the /Burn_2007_SP1_LINUX64_RHEL4/ib directory. This directory also includes a README file with instructions on how to install the drivers and configure your Infiniband™ interface.
NOTE: These drivers are compatible with Red Hat Linux Enterprise 4.0 Update 2 or Update 3. Other
operating systems are not supported at this time.
Init Keywords for Background Wire and Proxy Generation
21
Init Keywords for Background Wire and Proxy GenerationTo enable Background Wire and the new Background Proxy Generation functionality, you must ensure that the following keywords are un-commented and configured in the application’s software initialization file init.cfg.
• BackburnerManagerHostname <hostname>
• BackburnerManagerPort 3234
• BackburnerManagerHostname 50
• BackburnerManagerHostname <groupname>
If these keywords are not enabled (that is: commented out), the buttons Bg Proxy and Bg Wire are grayed out in the application’s library module.
For more information about the keywords in init.cfg, consult the Configuration File Reference Guide for Linux Workstations.
NOTE: As a prerequisite for this functionality, a Backburner manager system must be enabled on
the network. For information on how to setup a Backburner Manager system, consult the Autodesk
Backburner 2007.1 Installation Guide, and the Autodesk Backburner 2007.1 User’s Guide.
Cleaner XL Version 1.5.1 RequiredTo set up network encoding services, Cleaner® XL version 1.5 and the Cleaner XL 1.5.1 upgrade are required. You cannot install the Cleaner XL 1.5.1 upgrade without having installed Cleaner XL 1.5 first.
This upgrade is available online at www.autodesk.com/support. To download the upgrade, select Autodesk Cleaner XL from the drop-down list, click Data & Downloads, then click Updates & Services Packs. For information on setting up Cleaner XL network encoding, see the Software Installation Guide for your workstation.
This upgrade of Cleaner XL supports soft import of audio at 24 bits, compatibility with Autodesk Backburner™ 2007, and a larger selection of Cleaner output profiles in the Export Image dialog box.
Cleaner Options Unavailable on Non-Subscription Linux Systems
A late-breaking problem has been found in the 2007 SP3 Extension 1 version of the Effects and Editing products, where the Cleaner option settings are not displayed in the Export Image menu. This problem occurs only on Linux systems without a subscription license. Systems
System Information2
22
running with a subscription license or on the IRIX operating system do not exhibit this problem.
To fix the Cleaner issue:
1. Exit the Effects or Editing application.
2. Download the Cleaner fix package from the following location:
ftp://ftp2.discreet.com/support/QFEs/ifffs_2007_SP3_cleaner_fix.tar.gz
3. Copy the package to a temporary location on the Effects or Editing workstation.
For example: /var/tmp.
4. Go to the directory where the package was copied and uncompress and untar the package’s installation directory by typing:
cd /var/tmp
gzip -dc ifffs_2007_SP3_cleaner_fix.tar.gz | tar xvf -
5. Go to the untarred installation directory and launch the installation script:
cd ifffs_2007_SP3_cleaner_fix
./INSTALL
6. Re-launch the Effects or Editing application.
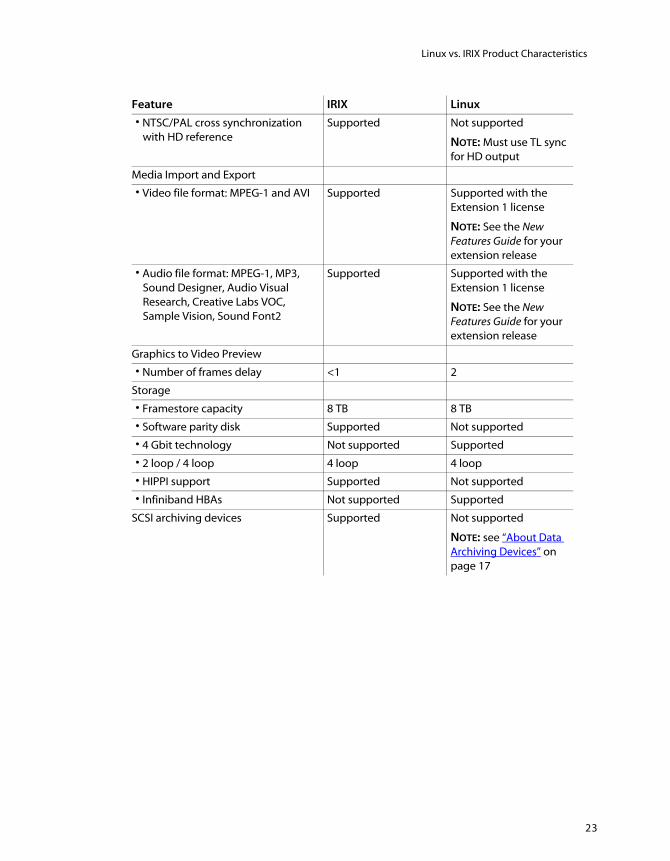
Linux vs. IRIX Product CharacteristicsThe following table lists the specific Linux and IRIX characteristics for the current version of your Effects or Editing application.
Feature IRIX Linux
Audio
• VST® audio Sparks® Supported Not supported
• Apply audio trim levels to monitoring during capture
Supported Not supported
• AES and analog audio in/out tracks 4x AES audio in8x AES audio out8x Analog in/out
8x AES audio in8x AES audio out8x Analog in/out
• Embedded Audio Not supported Supported
Video
• 1035i video format Supported Not supported
Linux vs. IRIX Product Characteristics
23
• NTSC/PAL cross synchronization with HD reference
Supported Not supported
NOTE: Must use TL sync for HD output
Media Import and Export
• Video file format: MPEG-1 and AVI Supported Supported with the Extension 1 license
NOTE: See the New Features Guide for your extension release
• Audio file format: MPEG-1, MP3, Sound Designer, Audio Visual Research, Creative Labs VOC, Sample Vision, Sound Font2
Supported Supported with the Extension 1 license
NOTE: See the New Features Guide for your extension release
Graphics to Video Preview
• Number of frames delay <1 2
Storage
• Framestore capacity 8 TB 8 TB
• Software parity disk Supported Not supported
• 4 Gbit technology Not supported Supported
• 2 loop / 4 loop 4 loop 4 loop
• HIPPI support Supported Not supported
• Infiniband HBAs Not supported Supported
SCSI archiving devices Supported Not supported
NOTE: see “About Data Archiving Devices” on page 17
Feature IRIX Linux

System Information2
24
25
User’s Guide Addendum
SummaryAudio Preferences . . . . . . . . . . . . . . . . . . . . . . . . . . . . . . . . . . . . . . . . . . . . . . . . . . . . . . . . 25
Creating a Soft Resize to Relink or Recapture Media of Different Resolutions 26
Enabling Audio On Linux Systems . . . . . . . . . . . . . . . . . . . . . . . . . . . . . . . . . . . . . . . . 26
FBX 2006.11 Support . . . . . . . . . . . . . . . . . . . . . . . . . . . . . . . . . . . . . . . . . . . . . . . . . . . . . 26
Image Sequence Name Change on Publish . . . . . . . . . . . . . . . . . . . . . . . . . . . . . . . . 27
Importing 3D LUTs from Lustre . . . . . . . . . . . . . . . . . . . . . . . . . . . . . . . . . . . . . . . . . . . 27
Lens Distortion: Error in New Features Guide . . . . . . . . . . . . . . . . . . . . . . . . . . . . . . 27
Lucid 88192 Audio Processor on Linux Systems . . . . . . . . . . . . . . . . . . . . . . . . . . . . 27
Minor Changes to Import Image/EDL Menu . . . . . . . . . . . . . . . . . . . . . . . . . . . . . . . 27
New Media Import and Export Features for DPX Files . . . . . . . . . . . . . . . . . . . . . . 29
New Hot Keys . . . . . . . . . . . . . . . . . . . . . . . . . . . . . . . . . . . . . . . . . . . . . . . . . . . . . . . . . . . . 30
QuickTime CODEC Support for Linux: Errors in the New Features Guide . . . . . 30
Setting Block Size on Tape Devices . . . . . . . . . . . . . . . . . . . . . . . . . . . . . . . . . . . . . . . . 30
Audio PreferencesInferno, Flame, and Flint 2007 ship with the Lucid 88192 converter, which supersedes the Lucid 8824 converter. Use the Lucid ADAT procedures found in your application’s User's Guide, with the exception of the following.
• The Lucid 88192 does not use SPDIF connectors and consequently any SPDIF option in an audio preference has no effect.
• Although you can enter any value in the range -96 to +31 for the analog output gain, the Lucid 88192 converter works with only two values (-10 dBV and +4 dBu). Values in the range -96 to 0 (not including 0) map to -10 dBV. Values in the range 0 to +31 map to +4 dBu (professional level).
User’s Guide Addendum3
26
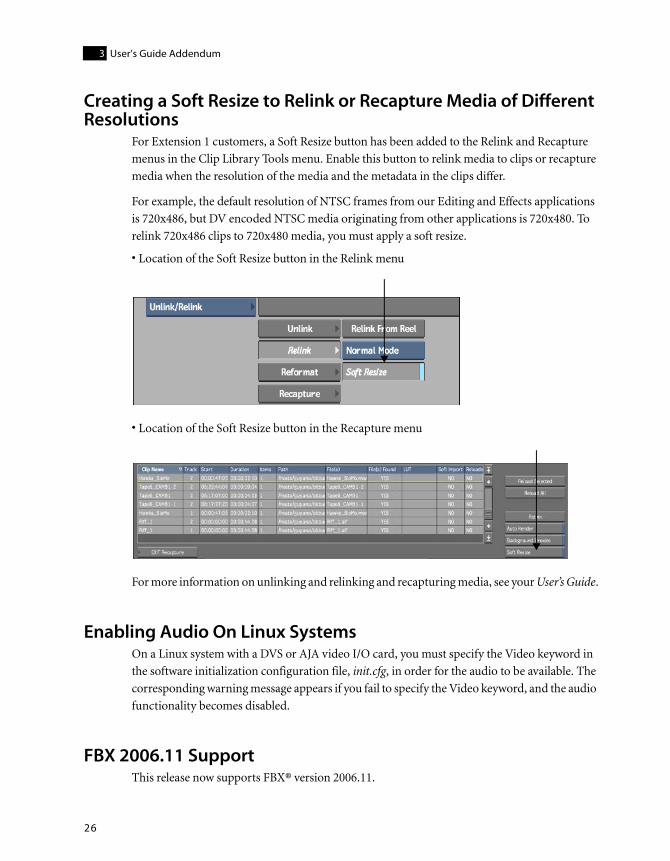
Creating a Soft Resize to Relink or Recapture Media of Different Resolutions
For Extension 1 customers, a Soft Resize button has been added to the Relink and Recapture menus in the Clip Library Tools menu. Enable this button to relink media to clips or recapture media when the resolution of the media and the metadata in the clips differ.
For example, the default resolution of NTSC frames from our Editing and Effects applications is 720x486, but DV encoded NTSC media originating from other applications is 720x480. To relink 720x486 clips to 720x480 media, you must apply a soft resize.
• Location of the Soft Resize button in the Relink menu
• Location of the Soft Resize button in the Recapture menu
For more information on unlinking and relinking and recapturing media, see your User’s Guide.
Enabling Audio On Linux SystemsOn a Linux system with a DVS or AJA video I/O card, you must specify the Video keyword in the software initialization configuration file, init.cfg, in order for the audio to be available. The corresponding warning message appears if you fail to specify the Video keyword, and the audio functionality becomes disabled.
FBX 2006.11 SupportThis release now supports FBX® version 2006.11.
Image Sequence Name Change on Publish
27
Image Sequence Name Change on PublishWhen you publish a clip, the stored image sequence files no longer contain _published in the names.
For example if you publish a DPX sequence, you will now get these two things:
• A new clip in the library, named <clip name>_published, which references the published image sequence.
• An image sequence at your destination, where file names are <clip name>.######.dpx.
Previously, the image sequence would have been named <clip name>_published.######.dpx.
Importing 3D LUTs from Lustre3D LUTs created in Lustre can now be imported into Inferno, Flame, and Flint 2007. The extension must be changed from .lut to .3dl.
Lens Distortion: Error in New Features GuideThere are procedural errors in the Lens Distortion chapter in the New Features Guide installed with the Extension 1 release. For the corrected procedures, please see the latest version of the New Features Guide in the documentation library:
ftp://ftp.discreet.com/pub2/doc/Inferno_Flame_Flint2007Ext1_New_Features.pdf
Lucid 88192 Audio Processor on Linux SystemsOn Linux systems, the Lucid ADA 88192 converter produces audible clicks and pops when it initializes on application start-up, when you enter I/O modules, at post roll of a clip output, and when you toggle the Input Source box from AES to Embedded.
Minor Changes to Import Image/EDL MenuSome user interface changes were made to the Import Image and EDL Preferences menus.
User’s Guide Addendum3
28
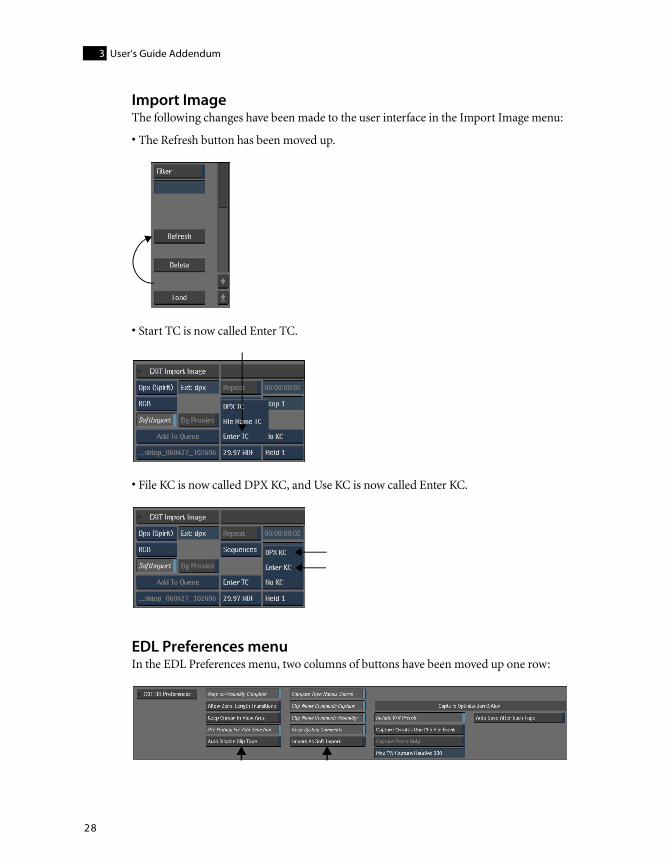
Import ImageThe following changes have been made to the user interface in the Import Image menu:
• The Refresh button has been moved up.
• Start TC is now called Enter TC.
• File KC is now called DPX KC, and Use KC is now called Enter KC.
EDL Preferences menuIn the EDL Preferences menu, two columns of buttons have been moved up one row:

New Media Import and Export Features for DPX Files
29
New Media Import and Export Features for DPX Files• Upon import of a DPX file, the frame rate box now has an option called “file FCM” which will
detect and use any existing frame rate information in the DPX file to create the clip.
• Upon import of DPX, Wavefront, or Softimage images, the aspect ratio data is now read correctly from the files.
• DPX files can now be exported as 12-bit clips.
• When exporting or publishing a DPX file, the application will now write “Autodesk” instead of “Discreet” in the manufacturer field of the DPX file header.
• When you disable the Resize button during import/export operations, the aspect ratio of the clip reverts to default.
• Background I/O now continues to completion even after you exit the application.
• Video clips can now be resized when exported in the Background.
DPX Transfer CharacteristicsWhen exporting DPX files, you now have the option of choosing a DPX Transfer Characteristic from the Transfer Characteristics option box. A DPX Transfer Characteristic is an information flag that is stored in the DPX image file header. It identifies the attributes associated with a particular film or video format, such as resolution, frame rate, and colour space.
Setting a Transfer Characteristic in no way changes the image information stored in the DPX file. The Transfer Characteristic is simply a flag that is used to indicate the attributes of the DPX file to another device or application. Some devices or applications may take advantage of this information to improve workflow. For example, selecting Logarithmic can allow a film recorder to adjust its parameters to print film-originated DPX files with the correct densities.
Although the SMPTE 268M standard defines a number of DPX Transfer Characteristics, it does not provide usage specifications for them. As a result, most of these Transfer Characteristics are not generally used in the industry. The table below explains the known and commonly used Transfer Characteristics.

User’s Guide Addendum3
30
New Hot Keys The following table lists hot keys introduced in this release.
These hot keys are not compatible with the previous release. To use these hot keys, you must create a new user.
QuickTime CODEC Support for Linux: Errors in the New Features Guide
There are errors in the list of supported QuickTime CODECs in the New Features Guide installed with the Extension 1 release. For the updated list, please see the latest versions of the New Features Guide in the documentation library:
• ftp://ftp.discreet.com/pub2/doc/Inferno_Flame_Flint2007Ext1_New_Features.pdf
• ftp://ftp.discreet.com/pub2/doc/Fire_Smoke_BConform2007Ext1_New_Features.pdf
Setting Block Size on Tape DevicesDue to a Linux driver limitation, when archiving to tape, the system cannot determine the tape block size. To work around this limitation, use the Block Size field in the Tape Format menu to set the proper block size before opening the tape archive.
Select: In the following cases:
Unspecified Format is not specified.
Logarithmic Typically used by negative film scanners that record status M densities.
Linear Often used for video images which have built-in gamma correction, but refers to images having a true linear quantization scheme (such as CG-originated material).
Printing Density Can be used for negative film scans which use the SMPTE Printing Density settings. SMPTE Printing Densities use status M density measurements with a higher gain in the red component.
Operation Hot Key
Pan in Text module CTRL+SHIFT+SPACEBAR and drag
Zoom in viewports CTRL+SPACEBAR and drag
NOTE: In a module’s animation view, the new zoom hot key replaces the ALT hot key.
Switch between straight and Hermite lines in Clip History
SHIFT+CTRL and click

Setting Block Size on Tape Devices
31

User’s Guide Addendum3
32
33
Installation Documentation Workflows
SummaryOverview . . . . . . . . . . . . . . . . . . . . . . . . . . . . . . . . . . . . . . . . . . . . . . . . . . . . . . . . . . . . . . . . 33
Reinstalling from Scratch . . . . . . . . . . . . . . . . . . . . . . . . . . . . . . . . . . . . . . . . . . . . . . . . . 33
Connecting New or Expanded Stone Direct Storage . . . . . . . . . . . . . . . . . . . . . . . 34
Upgrading Your Effects or Editing Application . . . . . . . . . . . . . . . . . . . . . . . . . . . . . 35
Upgrading Your Operating System . . . . . . . . . . . . . . . . . . . . . . . . . . . . . . . . . . . . . . . 36
Which Document Do I Need . . . . . . . . . . . . . . . . . . . . . . . . . . . . . . . . . . . . . . . . . . . . . . 36
OverviewYour Autodesk Effects or Editing System is shipped preconfigured with the appropriate operating system and application already installed. In normal situations, the final configuration procedures are simple and well documented. In certain instances, you may be required to perform partial or complete reinstallation of some system components. Such instances might include a hardware or software upgrade, or an exceptional recovery procedure.
It is always recommended to identify and gather all relevant documentation before you proceed with these more involved configuration procedures.
This chapter highlights four of the more common installation workflows that you may need to perform on your Effects or Editing system. It also lists the documentation relevant to each step in each workflow.
Reinstalling from ScratchPerform the tasks described in this workflow in cases where you need to rebuild your Effects or Editing system in its entirety, from cross-connecting the hardware peripherals and storage arrays, to installing the operation system, and installing, licensing, and configuring your Effects or Editing application.

Installation Documentation Workflows4
34
To reinstall your system from scratch:
1. Prepare for the installation.
Consult the latest Release Notes for your release before your begin any installation. They contain the most current and updated information about requirements, late-breaking features and procedures, as well as a detailed list of all updated related documents and URLs to download the documents directly to your workstation.
2. Connect your workstation’s hardware peripherals.
Consult the Hardware Setup Guide for your workstation.
3. Install the operating system and the DKU.
Consult the Installation and Configuration Guide for your operating system.
4. Connect your storage.
Consult the Autodesk Stone Direct Configuration Guide for your release.
5. Configure the RAID volumes and mount the storage.
Consult the Autodesk Stone Direct Configuration Guide for your release.
6. Install and license your Effects or Editing application.
Consult the Software Installation Guide.
7. Configure your Stone filesystem.
Consult the Autodesk Stone and Wire Filesystem and Networking Guide for your release.
8. Configure your application settings.
Consult the Configuration File Reference Guide for your operating system.
9. Get going.
Read the User’s Guide, What’s New, and Hot Keys Reference Guide to get familiar with your Effects or Editing application’s powerful features.
Connecting New or Expanded Stone Direct StoragePerform the tasks described in this workflow in cases where you need to rebuild your Autodesk Effects and Editing workstation’s Stone Direct storage array. For instance, this could happen when you purchase supplementary storage enclosures to expand available disk space.
To connect new or expanded Stone Direct storage:
1. Prepare for the installation.
Consult the Release Notes for your release before your begin any installation. They contain the most current and updated information about requirements, late-breaking features and
Upgrading Your Effects or Editing Application
35
procedures, as well as a detailed list of all updated related documents and URLs to download documents directly to your workstation.
2. Connect your storage.
Consult the Autodesk Stone Direct Configuration Guide for your release.
3. Configure the RAID volumes and mount the storage.
Consult the Autodesk Stone Direct Configuration Guide for your release.
4. Configure your Stone filesystem.
Consult the Autodesk Stone and Wire Filesystem and Networking Guide for your release.
5. Get going.
Read the User’s Guide, What’s New, and Hot Keys Reference Guide to get familiar with your Effects or Editing application’s powerful features.
Upgrading Your Effects or Editing ApplicationPerform the tasks described in this workflow in cases where you need to install or upgrade your Effects or Editing application. Typically, upgrading the application does not require the Stone filesystem to be reformatted or the operating system to be upgraded.
To upgrade your operating system:
1. Prepare for the installation.
Consult the Release Notes for your release before your begin any installation. They contain the most current and updated information about requirements, late-breaking features and procedures, as well as a detailed list of all updated related documents and URLs to download the documents directly to your workstation.
2. Install and license your Effects or Editing application.
Consult the Software Installation Guide for your operating system.
3. Configure your application settings.
Consult the Configuration File Reference Guide for your operating system.
4. Get going.
Read the User’s Guide, What’s New and Hot Keys Reference Guide to get familiar with your Effects or Editing application’s powerful features.
Installation Documentation Workflows4
36
Upgrading Your Operating SystemPerform the tasks described in this workflow in cases where you need to upgrade your operating system. For instance, this could be required by a new version of your Effects or Editing application. Typically, upgrading the operating system does not require the hardware components to be rewired or the Storage RAID devices to the reconfigured.
To upgrade your operating system:
1. Prepare for the installation.
Consult the Release Notes for your release before your begin any installation. They contain the most current and updated information about requirements, late-breaking features and procedures, as well as a detailed list of all updated related documents and URLs to download the documents directly to your workstation.
2. Install the operating system.
Consult the Installation and Configuration Guide for your operating system.
3. Install and license your Effects or Editing application.
Consult the Software Installation Guide for your operating system.
4. Configure your Stone filesystem.
Consult the Autodesk Stone and Wire Filesystem and Networking Guide for your operating system.
5. Configure your application settings.
Consult the Configuration File Reference Guide for your operating system.
6. Get going.
Read the User’s Guide, What’s New and Hot Keys Reference Guide to get familiar with your Effects or Editing application’s powerful features.
Which Document Do I NeedHere are a few examples of common installation enquiries, and the documentation that provides the answers to each.
I would like to request a license for FlameConsult the Software Installation Guide for installation procedures and information on obtaining and installing the licenses required to launch the Effects or Editing application.
Which Document Do I Need
37
Do I connect the DVI ramp to serial port #1 or serial port #2Consult the Hardware Setup Guide for your workstation for diagrams and guidelines on how to connect the hardware peripherals and video I/O components to your workstation.
I need to reformat my Stone FS partitionConsult the Autodesk Stone and Wire Filesystem and Networking Guide for procedures on how to create and mount the Stone filesystem.
I want to learn about the latest updatesConsult the Release Notes for your release. They contain the most current information about requirements and procedures, as well as a complete list of up-to-date related documents and URLs to download the documents directly to your workstation.
I want to know about all the new features for this releaseRead the What’s New for your Effects or Editing application for an overview of new features. For complete new feature information, consult the User’s Guide for your application.
I need to upgrade the DKUConsult the Installation and Configuration Guide for your operating system, for procedures on how to install the Linux operating system and DKU, or the IRIX operating system and required patches.
I would like to download the latest documentationConsult the Release Notes for your release for a complete list of up-to-date related documentation and URLs to download the documents directly to your workstation.

Installation Documentation Workflows4
38