Embed Size (px)
Citation preview

Another eBookWholesaler Publication
REFINISHING YOUR WOOD FURNITURE
By David Crowe
Proudly brought to you by
WOW Enterprises Inc.
Recommended Resources
• Web Site Hosting Service
• Internet Marketing
• Affiliate Program
“Refinishing Your Wood Furniture” by David Crowe Page 2 of 91
Please Read This First This Electronic book is Copyright © 2007 eBookwholesaler. All
rights are reserved. No part of this book may be reproduced,
stored in a retrieval system, or transmitted by any means;
electronic, mechanical, photocopying, recording or otherwise,
without written permission from the copyright holder(s).
You do not have any right to distribute any part of this ebook
in any way at all. Members of eBookwholesaler are the sole
distributors and they must abide by all the terms at
http://www.ebookwholesaler.net/terms.php
No Ebookwholesaler Exclusive product may be offered or
distributed through Auctions or similar events on the Internet
or elsewhere.
Disclaimer The advice contained in this material might not be suitable for
everyone. The author provided the information only as a broad
overview by a lay person about an important subject. The
author used information from sources believed to be reliable
and from his own personal experience, but he neither implies
nor intends any guarantee of accuracy. The results you obtain
will depend largely on your own efforts and other factors
beyond the knowledge and control of the author, publisher
and distributors. No particular result or outcome is promised
or guaranteed in any way. New theories and practices are
constantly being developed in this area.
Copyright © 2007 David Crowe All rights reserved
“Refinishing Your Wood Furniture” by David Crowe Page 3 of 91
The author, publisher and distributors never give legal,
accounting, medical or any other type of professional advice.
The reader must always seek those services from competent
professionals that can apply the latest technical information
and review their own particular circumstances.
The author, publisher and distributors particularly disclaim any
liability, loss, or risk taken by individuals who directly or
indirectly act on the information contained herein. All readers
must accept full responsibility for their use of this material.
All pictures used in this book are for illustrative purposes only.
No endorsement of the content by any person in the photos is
implied, nor should it be assumed.
Copyright © 2007 David Crowe All rights reserved

“Refinishing Your Wood Furniture” by David Crowe Page 4 of 91
About the Author David Crowe, like many other boys and some girls, started
woodwork when his father decided he was old enough to
handle the basic tools safely.
He has always been grateful for those sessions, even though
his early desire to make his living from carpentry of some kind
was dropped in favor a career in marketing.
His home workshop has been great respite from the stresses
of day-to-day business and the pieces he makes, or refinishes,
are treasured by his family and friends.
His skills came in very handy when his wife inherited some old
furniture which had not been looked after and also to improve
the appearance and strength of cheap pieces that they find at
garage sales.
He hopes that readers of his first book will be inspired to use
the tips he provides and also to encourage their children to
learn them as well.
Copyright © 2007 David Crowe All rights reserved

“Refinishing Your Wood Furniture” by David Crowe Page 5 of 91
TABLE OF CONTENTS Please Read This First ........................................................................ 2
Disclaimer ................................................................................................................ 2
About the Author................................................................................. 4
TABLE OF CONTENTS........................................................................ 5
1. Refinishing Wood Furniture – An Overview.................................. 9
Check the Quality of Your Furniture ..................................................................... 9
2. Steps to Refinish Wood Furniture................................................ 12
3. Preparing for Wood Refinishing and Assembling Materials ..... 15
Materials and Supplies for Wood Refinishing.................................................... 15 Essential Tools ............................................................................................................... 16 Essential Materials......................................................................................................... 16
Project Preparation ............................................................................................... 18
4. Checklist for Tools and Materials ................................................ 21
Cleaning and Testing Materials ........................................................................... 21 Stripping Materials................................................................................................ 21 Stripping Tools...................................................................................................... 21 Repairs and Sanding Materials............................................................................ 22 Repairs and Sanding Tools.................................................................................. 22 Refinishing Materials ............................................................................................ 23 Refinishing Tools .................................................................................................. 23
5. Selecting Your Worksite ............................................................... 24
6. Safety Precautions - Before You Begin .......................................................... 25
7. Basic Stripping Procedures ......................................................... 29
Simple Procedures for Stripping......................................................................... 29 Precautions............................................................................................................ 31
Copyright © 2007 David Crowe All rights reserved

“Refinishing Your Wood Furniture” by David Crowe Page 6 of 91
8. Stripping Paint from Wood ........................................................... 32
Strippers................................................................................................................. 32 Protective Gear and Surroundings ..................................................................... 33 Preparing Furniture for Stripping........................................................................ 33 Application of Semi-Paste Stripper..................................................................... 34 Application of Liquid Stripper.............................................................................. 36
Two Stages to Remove Stripper from Brushes .............................................................. 36
9. Common Mistakes in Stripping and Tips to Avoid Them .......... 38
10. Preparing the Surface ................................................................. 41
11. Making Repairs to Get Smooth Finish....................................... 43
Setting Right Veneers........................................................................................... 43 Repairing Chairs ................................................................................................... 44 Fixing Cracks, Screw Holes, Nicks, and Chips.................................................. 44 Taking Care of Wood Grain.................................................................................. 45
White Blotches or Rings in Furniture........................................................................... 45
12. Techniques for Sanding Wood................................................... 47
Necessity for Sanding .......................................................................................... 47 How to do Sanding................................................................................................ 48
Sanding by Machines..................................................................................................... 48 Hand Sanding ................................................................................................................ 48
Essential Sanding Techniques ............................................................................ 49 Great Sanding Tips ............................................................................................... 50
13. Selection of Stain Material.......................................................... 52
Types of Stains...................................................................................................... 52 Selecting a Suitable Stain .................................................................................... 53 Staining Tips.......................................................................................................... 54
14. Staining Wood Techniques ........................................................ 56
Wood Staining Techniques.................................................................................. 56 Assuring Even Staining on Wood Furniture ................................................................ 58
Copyright © 2007 David Crowe All rights reserved

“Refinishing Your Wood Furniture” by David Crowe Page 7 of 91
Essential Precautions While Staining Wood Furniture..................................... 59
15. Applying the Sealer ..................................................................... 61
Techniques for Applying Sealer .......................................................................... 62
16. Preparing to Fill Wooden Furniture ........................................... 63
Choice of Filler ...................................................................................................... 64 Filler Applying Techniques .................................................................................. 64
Checking Filling Outcomes ........................................................................................... 65
17. Final Coat to Get Smooth Finish................................................ 66
Water-based Polyurethane................................................................................... 66 Polyurethane.......................................................................................................... 67 Lacquer .................................................................................................................. 67 Penetrating Oil Finishes ....................................................................................... 67 Essential Precautions........................................................................................... 68
18. Finishing for First-Timers ........................................................... 70
Sanding .................................................................................................................. 70 Staining .................................................................................................................. 71 Finishing ................................................................................................................ 71
19. Restore Wooden Furniture without Refinishing ....................... 73
Starting the Restoration of Old Furniture........................................................... 73 Identification of Finish.................................................................................................. 73
Cleaning Techniques ............................................................................................ 74
20. Repairing Wood Furniture Surfaces Fast.................................. 76
21. Tips to Spruce up Old Furniture................................................. 79
22. Protect Your Wooden Furniture with Varnish and Preserver .. 81
Using Varnish to Protect your Furniture ............................................................ 81 Working with Wood Preserver ............................................................................. 82
23. Maintenance of Wooden Furniture............................................. 83
Copyright © 2007 David Crowe All rights reserved

“Refinishing Your Wood Furniture” by David Crowe Page 8 of 91
Essential Tips for Maintenance of Wood Furniture ........................................... 85
24. Frequently Asked Questions...................................................... 86
Copyright © 2007 David Crowe All rights reserved
“Refinishing Your Wood Furniture” by David Crowe Page 9 of 91
Part-I: Introduction
1. Refinishing Wood Furniture – An Overview
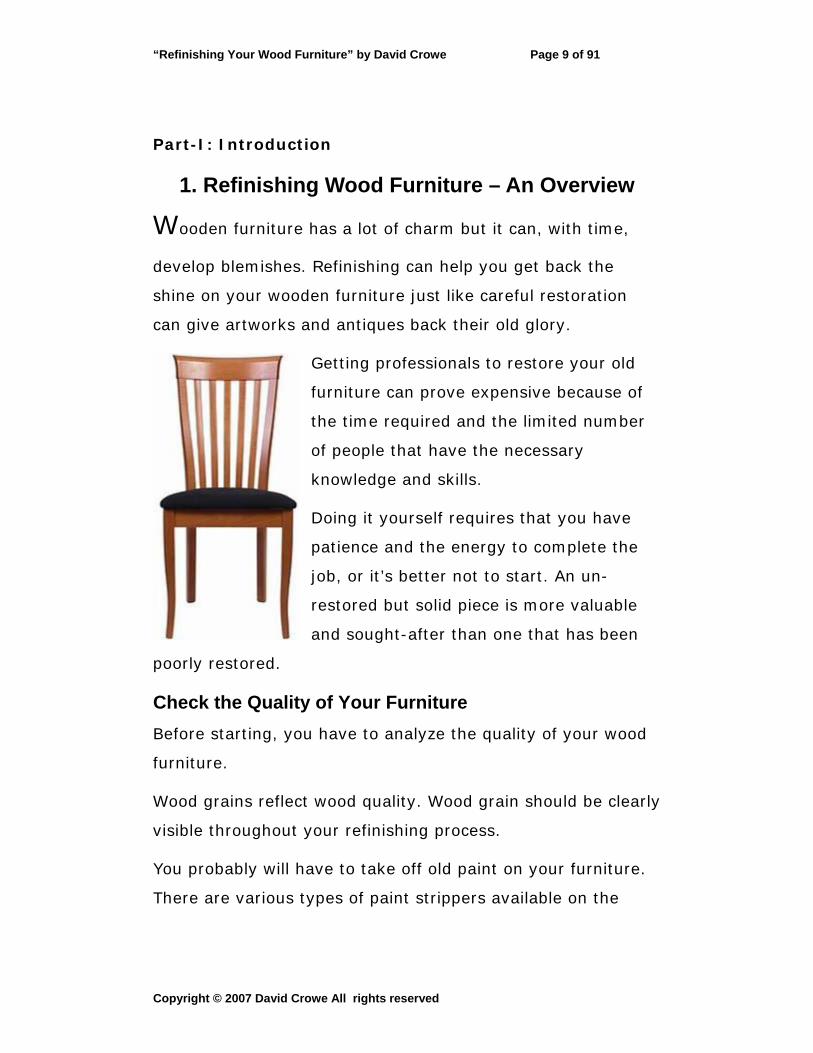
Wooden furniture has a lot of charm but it can, with time,
develop blemishes. Refinishing can help you get back the
shine on your wooden furniture just like careful restoration
can give artworks and antiques back their old glory.
Getting professionals to restore your old
furniture can prove expensive because of
the time required and the limited number
of people that have the necessary
knowledge and skills.
Doing it yourself requires that you have
patience and the energy to complete the
job, or it’s better not to start. An un-
restored but solid piece is more valuable
and sought-after than one that has been
poorly restored.
Check the Quality of Your Furniture Before starting, you have to analyze the quality of your wood
furniture.
Wood grains reflect wood quality. Wood grain should be clearly
visible throughout your refinishing process.
You probably will have to take off old paint on your furniture.
There are various types of paint strippers available on the
Copyright © 2007 David Crowe All rights reserved

“Refinishing Your Wood Furniture” by David Crowe Page 10 of 91
market. Care must be taken to use the most appropriate one
for the type of furniture that you have.
The next step before refinishing of
your wood furniture is to scan your
furniture for any holes, cracks,
broken edges and the like. Repair as
neatly and as much as possible. Fine
grade sandpaper might be used to
level out some minute inconsistencies.
If your wood furniture
includes fabric work, like a
cushion in the middle, do
not remove old fabric until
you have completed all
your woodwork. You can
change the fabric after
that.
Refinishing wood furniture depends a lot on how well you
remove old paint. You can use caustic or solvent solutions like
acetone, methylene chloride, and alcohol or you can use
sandpaper, a hand scraper and maybe an electric sander too.
Most importantly, you should treat the wood gently so that it
retains the existing quality.
Copyright © 2007 David Crowe All rights reserved

“Refinishing Your Wood Furniture” by David Crowe Page 11 of 91
While repairing, fill in holes and wood pores with diluted paste
fillers.
Refinishing wood furniture is not a simple job and it requires
care and energy.
It can prove to be an excellent pastime. There are many new
products entering the refinishing market every day. You can
ask for valuable guidance from your local hardware store
personnel. Attend in-store demonstrations too.
Simple tools, modern stains, and varnishes can produce
professional results when you refinish wood furniture but you
must persevere.
Then, you can relish the beauty of an exclusive piece for years
to come.
Copyright © 2007 David Crowe All rights reserved
“Refinishing Your Wood Furniture” by David Crowe Page 12 of 91
Part-II: Getting Started
2. Steps to Refinish Wood Furniture
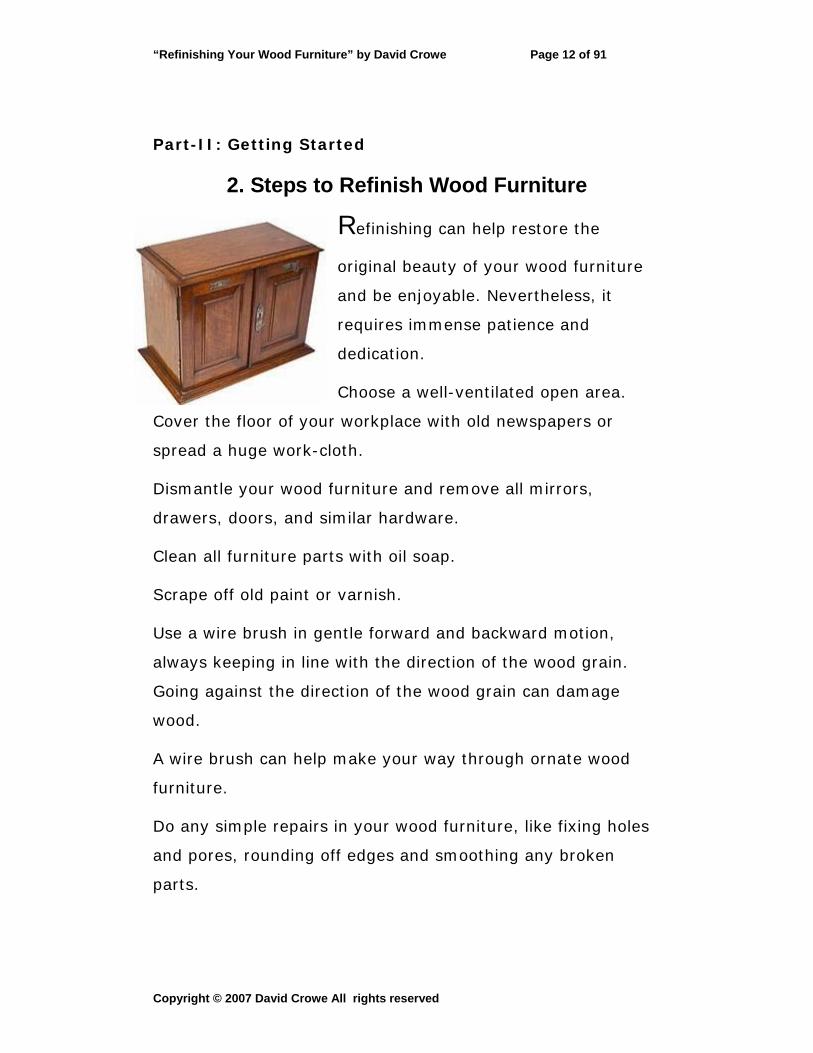
Refinishing can help restore the
original beauty of your wood furniture
and be enjoyable. Nevertheless, it
requires immense patience and
dedication.
Choose a well-ventilated open area.
Cover the floor of your workplace with old newspapers or
spread a huge work-cloth.
Dismantle your wood furniture and remove all mirrors,
drawers, doors, and similar hardware.
Clean all furniture parts with oil soap.
Scrape off old paint or varnish.
Use a wire brush in gentle forward and backward motion,
always keeping in line with the direction of the wood grain.
Going against the direction of the wood grain can damage
wood.
A wire brush can help make your way through ornate wood
furniture.
Do any simple repairs in your wood furniture, like fixing holes
and pores, rounding off edges and smoothing any broken
parts.
Copyright © 2007 David Crowe All rights reserved
“Refinishing Your Wood Furniture” by David Crowe Page 13 of 91
Fix drawers in their original position with doors facing
outward. If you do not want specific areas to be exposed to
strippers, cover them.
Vacuum or dust away residue after scraping.
Use a disposable but reasonable quality brush to apply
stripper on your wood furniture A cheap brush could leave
hairs in the finish. Leave the stripper in place for the required
amount of time. Scrape off the stripper thoroughly to remove
all old paint.
Use a fresh cloth to clean the surface.
Flip wooden furniture in all directions to allow the stripper to
penetrate each surface and take off all the old paint.
Use sandpaper to make the surface smooth before staining.
Clean furniture with a cloth thoroughly to remove all scrap.
Change newspapers or work-cloths frequently.
Apply stain and allow it to dry for the required amount of time.
Staining darkens the wood color and enhances the appearance
of the wood grain.
Apply the first coat of stain evenly, as this is the only one that
penetrates the wood. More coats only conceal the wood grain
and small blemishes.
Use a piece of cotton cloth to apply the stain. In difficult
places, you can use a brush. Then, wipe the liquid away with a
cloth and allow it to dry.
Copyright © 2007 David Crowe All rights reserved
“Refinishing Your Wood Furniture” by David Crowe Page 14 of 91
Sand gently after the stain dries.
Next, apply varnish on your stained wood. Use a foam brush
to apply varnish as some brushes shed bristles. Start
varnishing from the top and proceed downwards. Apply evenly
and brush away any varnish runs. Allow a full day to pass
after applying one varnish coat.
If you have to apply multiple layers of varnish, use fine quality
sandpaper to sand in between layers. Three to five coats of
varnish are essential. Light sanding and removing residue in
between coats can bring out a professional look. Use
sandpaper only after the varnish dries thoroughly on your
furniture.
Reattach all removed hardware and mirrors. Your wood
furniture refinishing is complete.
Copyright © 2007 David Crowe All rights reserved
“Refinishing Your Wood Furniture” by David Crowe Page 15 of 91
3. Preparing for Wood Refinishing and Assembling Materials
Wood refinishing requires working with various tools and
materials. You can make your temporary workshop in an
unfinished basement or a garage too but there must be
sufficient ventilation.
It is best to stay away from direct sunlight and excessive wind
too.
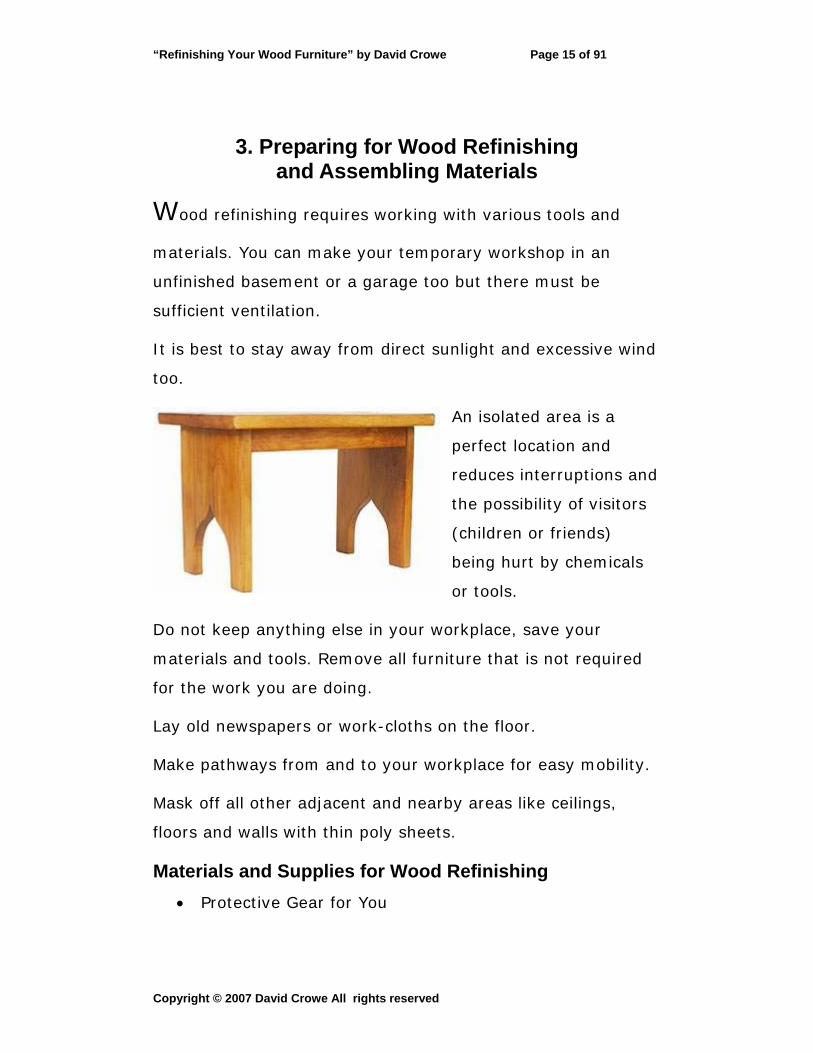
An isolated area is a
perfect location and
reduces interruptions and
the possibility of visitors
(children or friends)
being hurt by chemicals
or tools.
Do not keep anything else in your workplace, save your
materials and tools. Remove all furniture that is not required
for the work you are doing.
Lay old newspapers or work-cloths on the floor.
Make pathways from and to your workplace for easy mobility.
Mask off all other adjacent and nearby areas like ceilings,
floors and walls with thin poly sheets.
Materials and Supplies for Wood Refinishing • Protective Gear for You
Copyright © 2007 David Crowe All rights reserved
“Refinishing Your Wood Furniture” by David Crowe Page 16 of 91
• Mask
• Elbow-length rubber gloves (should be chemical
resistant like butyl or neoprene)
• Long-sleeved clothing and closed-toe shoes
• Safety goggles
Essential Tools • Plastic putty knife
• Scrubbing pad for stripping wood
• Wooden stir sticks
• Tin pie plates
• Brushes
• Screwdrivers
• Various grades of sandpaper
• Sanding block
• Various clamps to suit your wood furniture
• Electric drill
• Vacuum cleaner
Essential Materials • Stripper
• Finish sealer
• Sanding sealer
Copyright © 2007 David Crowe All rights reserved

“Refinishing Your Wood Furniture” by David Crowe Page 17 of 91
• Stain
• Varnish
• Denatured alcohol
• Steel wool (0000-3)
• Cotton balls or swabs
• Wood dough
• Carpenter's wood glue
• Lacquer thinner
• Latex wood filler
• Paraffin or linseed oil
• Mineral spirits
• Paste wax
• Clean dry rags
• Lint-free rags
• Bucket of water
• Toothpicks
• Newspaper
• Plastic drop sheet
• Paper towels or rags
• Metal cans for holding paint while working. You can use
them for collecting all waste materials too.
Copyright © 2007 David Crowe All rights reserved
“Refinishing Your Wood Furniture” by David Crowe Page 18 of 91
• Most metal containers with lids could be very useful.
Project Preparation The first step with your wood refinishing is to locate good old
wood furniture. It could be an old table, chair, or anything else
but made of wood. Wood furniture with a good finish is ideal.
Look through your attic to locate such furniture.
Some furniture could have cardboard or plastic within. Do not
use these for your project.
Removing paint or varnish off old furniture is fairly simple if
you follow the easy steps that I describe.
Before starting on your wood furniture, remove all hinges and
other hardware from your furniture.
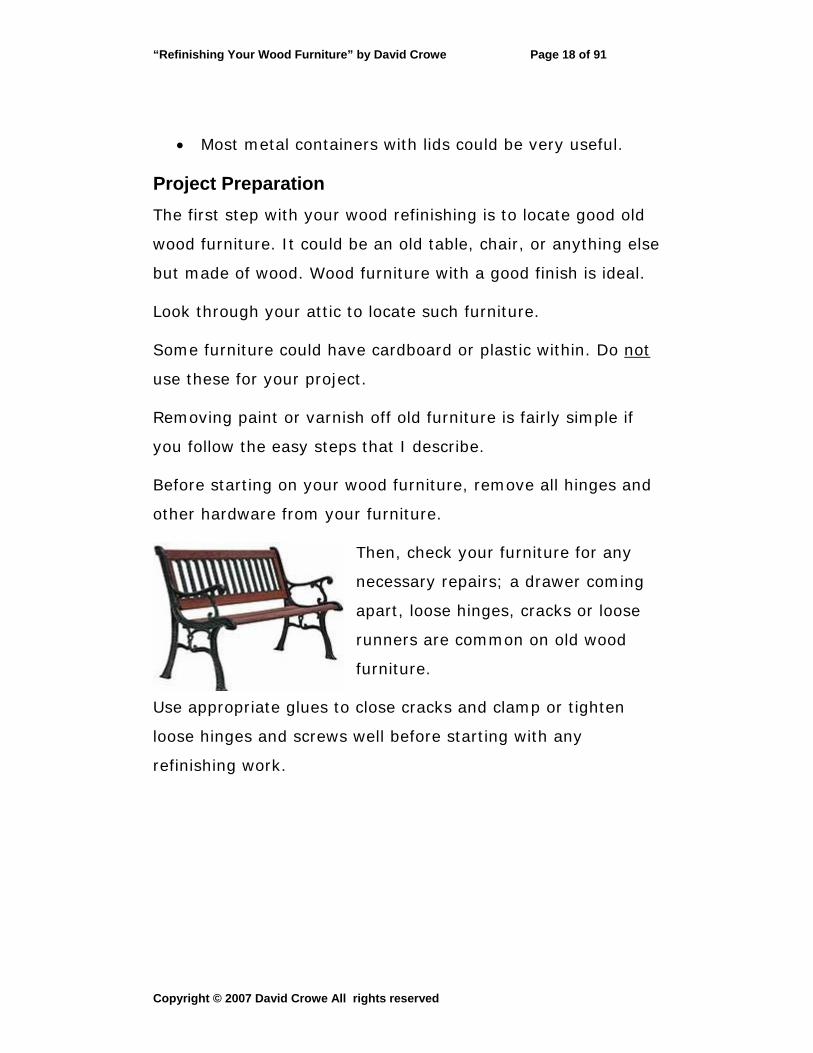
Then, check your furniture for any
necessary repairs; a drawer coming
apart, loose hinges, cracks or loose
runners are common on old wood
furniture.
Use appropriate glues to close cracks and clamp or tighten
loose hinges and screws well before starting with any
refinishing work.
Copyright © 2007 David Crowe All rights reserved
“Refinishing Your Wood Furniture” by David Crowe Page 19 of 91
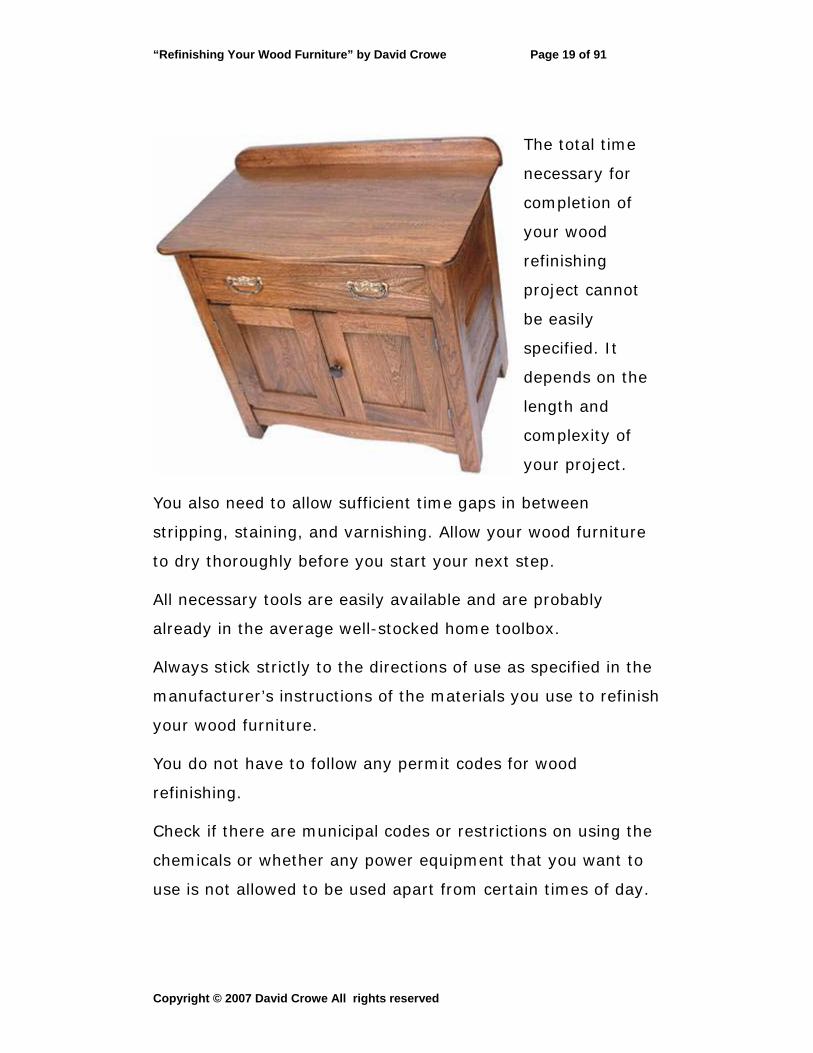
The total time
necessary for
completion of
your wood
refinishing
project cannot
be easily
specified. It
depends on the
length and
complexity of
your project.
You also need to allow sufficient time gaps in between
stripping, staining, and varnishing. Allow your wood furniture
to dry thoroughly before you start your next step.
All necessary tools are easily available and are probably
already in the average well-stocked home toolbox.
Always stick strictly to the directions of use as specified in the
manufacturer’s instructions of the materials you use to refinish
your wood furniture.
You do not have to follow any permit codes for wood
refinishing.
Check if there are municipal codes or restrictions on using the
chemicals or whether any power equipment that you want to
use is not allowed to be used apart from certain times of day.
Copyright © 2007 David Crowe All rights reserved

“Refinishing Your Wood Furniture” by David Crowe Page 20 of 91
Do not alter the original designs of your wood furniture unless
you are happy to lose any value it has as a genuine period
piece.
Copyright © 2007 David Crowe All rights reserved
“Refinishing Your Wood Furniture” by David Crowe Page 21 of 91
4. Checklist for Tools and Materials
Cleaning and Testing Materials
Clean Dry Rags
Cotton Balls
Denatured
Lacquer Thinner
Linseed Oil
Paraffin
Paste Wax
Stripping Materials Cardboard Box
Newspaper
Paper Towels or Cotton Swabs
Rags
Steel Wool
Toothpicks
Stripping Tools Brushes - Natural Bristle and Brass Bristle
Cloths
Durable Rubber Gloves
Old Paintbrushes
Copyright © 2007 David Crowe All rights reserved

“Refinishing Your Wood Furniture” by David Crowe Page 22 of 91
Paint Scraper
Plastic Buckets
Plastic Drop
Putty Knife
Safety Goggles
Screwdrivers
Squeegee
Repairs and Sanding Materials Carpenter's Wood Glue
Latex Wood Filler
Masking Tape
Plastic Sheeting
Sandpaper (100-Waxed paper 120-grit)
Tack cloth
Wood Dough
Repairs and Sanding Tools Files
Orbital Sander
Rubber Mallet
Sanding Block Blade
Sanding Shapes
Copyright © 2007 David Crowe All rights reserved
“Refinishing Your Wood Furniture” by David Crowe Page 23 of 91
Screwdrivers
Seam Roller
Sharp Razor
Syringe or Putty
Vacuum Cleaner
Various Clamps
Wood Chisels
Refinishing Materials Clean Rags
Finishing Sealer
Mineral Spirits
Paper Towels
Paste Wax
Sanding Sealer
Sandpaper
Stain
Refinishing Tools Brushes
Electric Drill
Lamb's Wool Pad
Orbital Sander for Drill and Sanding Blocks
Copyright © 2007 David Crowe All rights reserved

“Refinishing Your Wood Furniture” by David Crowe Page 24 of 91
5. Selecting Your Worksite
The best place for working on wood furniture refinishing is
outdoors but away from sun and wind. Working in a shaded
area with plenty of ventilation and fresh air can make it all the
more enjoyable. Sunlight helps in fast evaporation.
You can work in a carport or similar
shaded area to escape working under
direct sunlight. Otherwise, a garage
with windows and doors on both sides,
accelerating cross ventilation, is also a
good choice.
Copyright © 2007 David Crowe All rights reserved

“Refinishing Your Wood Furniture” by David Crowe Page 25 of 91
6. Safety Precautions - Before You Begin
Wood refinishing involves use of various chemicals and tools
that could prove dangerous.
Adopt these precautions to
protect yourself:
If you have to work indoors,
ensure maximum ventilation.
Maintain a strong flow of fresh
air in your workplace always.
Ventilation through fans is a
good option and can enhance
the effect of any fresh air
circulation within the room.
You should be careful while
using removers on wood
furniture indoors. Some
removers are flammable. Any
spark could ignite vapors due
to friction between metal
parts.
Paint removers contain
harmful chemicals.
Copyright © 2007 David Crowe All rights reserved

“Refinishing Your Wood Furniture” by David Crowe Page 26 of 91
The level of health risks depend on the extent and duration of
exposure but be cautious. Read all instructions on the label for
proper ventilation requirements before using any remover.
Provide strong supports for your work to elevate it so that it is
almost at your waist level. This makes working easy and you
do not have to bend so much.
Your work should not touch the floor for obvious reasons.
Keep children away from your work-site to prevent them being
exposed to paint-removing chemicals.
Always wear protective gear, including safety goggles for your
eyes, durable rubber or neoprene gloves and long-sleeved
clothing when stripping wood.
Ear protectors are essential while using power tools, as the
high decibels can damage your eardrums.
Your protective gear protects your body and eyes from
chemical splatters, burns, and rashes.
Use a face shield for complete protection of your face.
Wear a rubber-coated apron while working on any wood
furniture refinishing project.
Chemicals in use for wood refinishing are inflammable. Do not
smoke while working on wood refinishing work or anywhere in
the vicinity. Put out any open flames or pilot lights.
Chemical strippers let off harmful vapors. Therefore, work in a
well ventilated area, preferably outdoors. If you have to work
Copyright © 2007 David Crowe All rights reserved
“Refinishing Your Wood Furniture” by David Crowe Page 27 of 91
indoors, select a location with many doors and windows and
fans.
Sanding indoors causes the accumulation of wood dust, which
ignites easily, and prolonged exposure may also be bad for
you.
You must seal air-conditioning ducts and electrical outlets to
prevent an accident. Sanding in your basement can damage
other home equipment.
Oily rags are easily combustible. Rag and brushes containing
varnishes and finishes are very dangerous. Put them in a
bucket of water immediately after use and discard them later.
Do not keep them together in a bundle anywhere in your
workplace.
Use proper tools for every job in wood furniture refinishing.
Always unplug the sander before changing sandpaper and
treat other power tools with equal care.
Wash work clothes separately from other laundry.
Keep all wood furniture refinishing materials and tools out of
reach of children and pets.
Do not allow pregnant women to come into your workplace.
If you have any pulmonary disorders, chest pains, or suffer
from short breath, take advice of your physician before
starting on your wood furniture refinishing.
Copyright © 2007 David Crowe All rights reserved
“Refinishing Your Wood Furniture” by David Crowe Page 28 of 91
Old paints contain lead that comes out during stripping. Dust
masks cannot provide much protection. Use a respirator with
cartridge designed to filter lead while sanding, scraping or
stripping.
Do not store paint removers for long periods.
Read all directions for use and manufacturers’ safety
precautions on the labels before use. Refer to them
occasionally to familiarize and adopt the required precautions.
Work in a well ventilated area to allow all fumes to pass off.
Take fresh-air breaks regularly.
Open remover containers carefully. Cover with a cloth and
open lid gradually. This helps to make the escape of vapors
gradual.
Pour only the necessary amount of remover into a metal can
and replace lid immediately. Follow the same procedure every
time you use remover.
While testing products and their compatibility, choose obscure
and inconspicuous places on your work to avoid any accidents.
Copyright © 2007 David Crowe All rights reserved
“Refinishing Your Wood Furniture” by David Crowe Page 29 of 91
Part-III: Stripping Old Finishes
7. Basic Stripping Procedures
Stripping old paint off wood furniture can bring out the
beauty in your furniture. Stripping can help you get the best
results from your refinishing.
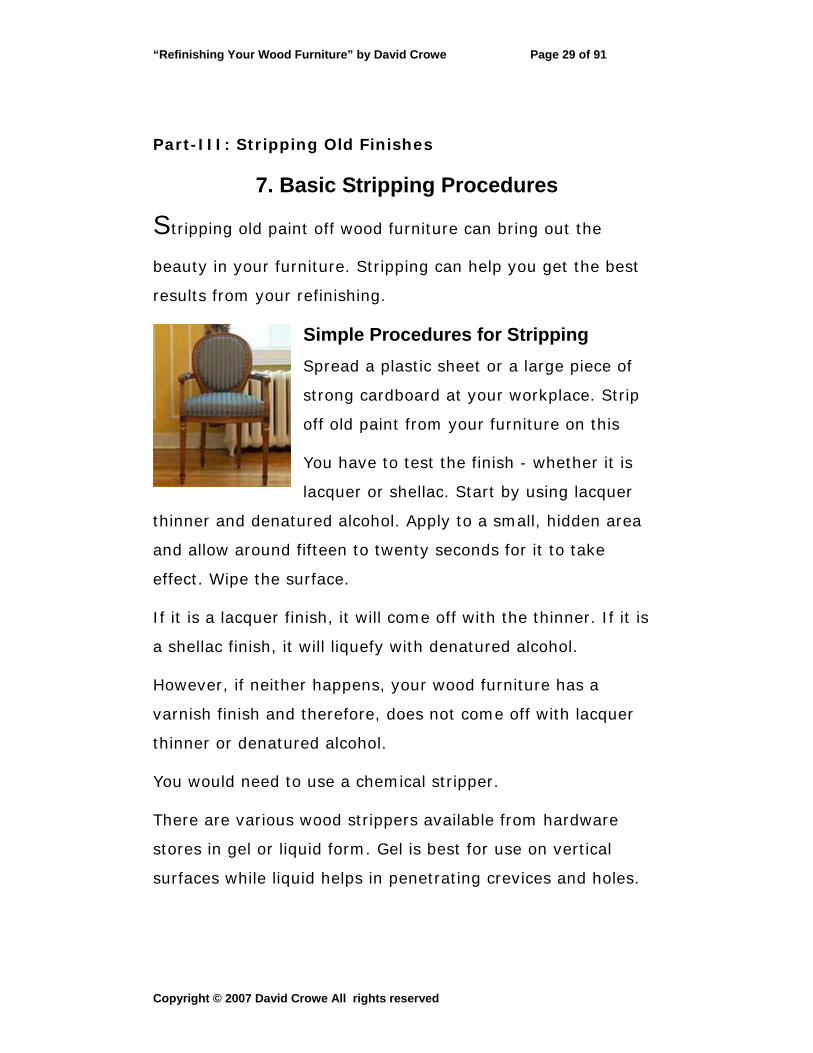
Simple Procedures for Stripping Spread a plastic sheet or a large piece of
strong cardboard at your workplace. Strip
off old paint from your furniture on this
You have to test the finish - whether it is
lacquer or shellac. Start by using lacquer
thinner and denatured alcohol. Apply to a small, hidden area
and allow around fifteen to twenty seconds for it to take
effect. Wipe the surface.
If it is a lacquer finish, it will come off with the thinner. If it is
a shellac finish, it will liquefy with denatured alcohol.
However, if neither happens, your wood furniture has a
varnish finish and therefore, does not come off with lacquer
thinner or denatured alcohol.
You would need to use a chemical stripper.
There are various wood strippers available from hardware
stores in gel or liquid form. Gel is best for use on vertical
surfaces while liquid helps in penetrating crevices and holes.
Copyright © 2007 David Crowe All rights reserved
“Refinishing Your Wood Furniture” by David Crowe Page 30 of 91
Use an old paintbrush to spread stripper on a small part of the
wood furniture.
Work on small parts at a time, as the stripper might dry while
you are spreading it on large area. Removing dried stripper is
very difficult. Apply a thick coat of stripper in a single direction
only. Do not over brush or apply many coats.
Normally, it is sufficient to allow fifteen to twenty minutes
after application of stripper. But, check the manufacturer’s
directions on the label.
Use a plastic scraper or a putty knife to scrape off paint from
your old furniture. Use the scraper or knife carefully as
stripper makes wood soft and you could gouge out the surface
if you put more pressure on it.
If your wood furniture has stubborn paint, use a second
coating of stripper.
Dip a piece of steel wool in stripper and rub it directly on the
wood surface. This takes away any finish that had become
ingrained within the wood.
Continue in a similar fashion until you are through with
stripping all parts of your wood furniture.
Clean the entire surface of the furniture with naphtha gas or
lacquer thinner. Or, you can use any other recommended
chemical as directed by manufacturer.
Copyright © 2007 David Crowe All rights reserved
“Refinishing Your Wood Furniture” by David Crowe Page 31 of 91
Dispose all accumulated old finish lying on the floor and clean
any other mess.
Allow time, at least an overnight spell, for your wood surface
to dry thoroughly. You can then start with your staining
process.
Precautions Practice utmost safety while using strippers. You require
excellent ventilation. Open all doors and windows if you are
working indoors. Use fans for sufficient ventilation and
regulation of fresh air.
Stripping off paint lets out strong fumes. Hot halogen lights
and pilot lights can cause ignition of these fumes. Switch off
all such lights, extinguish all open flames, and do not smoke
during paint stripping.
Remove and allow all finish to dry in a metal can before
disposing into trash. Put rags soaked in strippers into water
pails before disposing. Do not keep them in a bundle, as they
can catch fire easily.
Always wear protective clothing like chemical resistant rubber
coated apron and rubber gloves and safety goggles.
Strippers can cause severe burns if it is exposed to your skin.
Copyright © 2007 David Crowe All rights reserved
“Refinishing Your Wood Furniture” by David Crowe Page 32 of 91
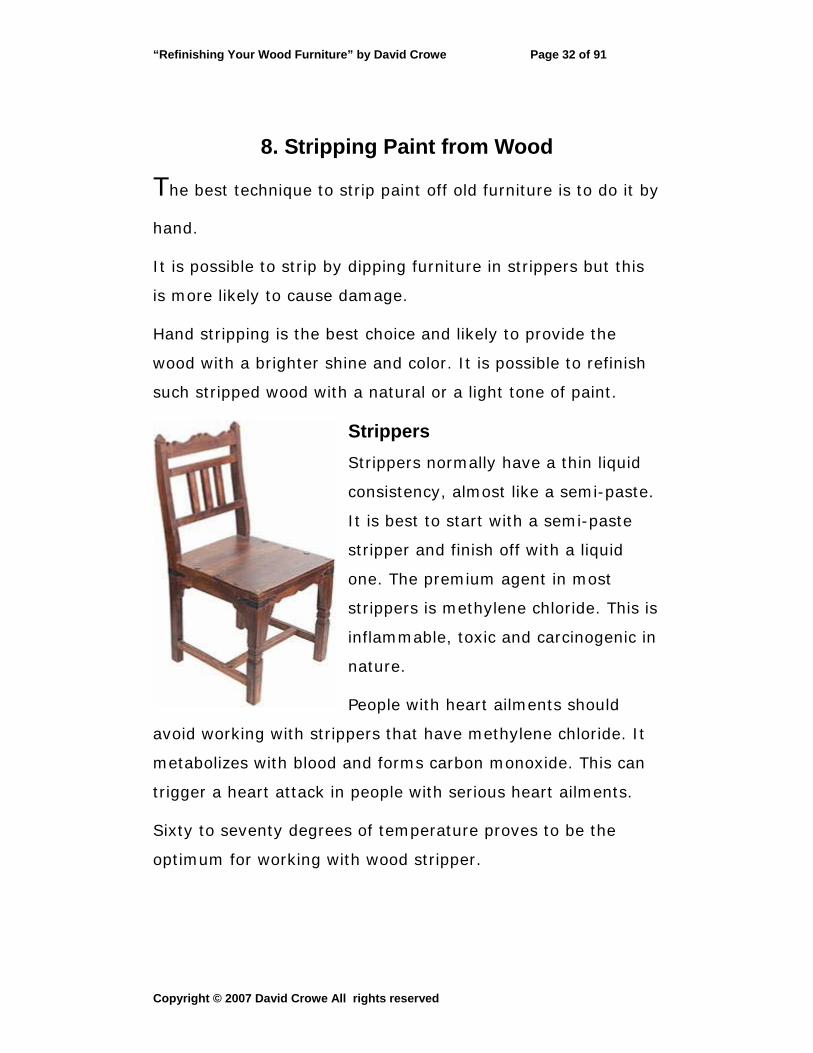
8. Stripping Paint from Wood
The best technique to strip paint off old furniture is to do it by
hand.
It is possible to strip by dipping furniture in strippers but this
is more likely to cause damage.
Hand stripping is the best choice and likely to provide the
wood with a brighter shine and color. It is possible to refinish
such stripped wood with a natural or a light tone of paint.
Strippers Strippers normally have a thin liquid
consistency, almost like a semi-paste.
It is best to start with a semi-paste
stripper and finish off with a liquid
one. The premium agent in most
strippers is methylene chloride. This is
inflammable, toxic and carcinogenic in
nature.
People with heart ailments should
avoid working with strippers that have methylene chloride. It
metabolizes with blood and forms carbon monoxide. This can
trigger a heart attack in people with serious heart ailments.
Sixty to seventy degrees of temperature proves to be the
optimum for working with wood stripper.
Copyright © 2007 David Crowe All rights reserved
“Refinishing Your Wood Furniture” by David Crowe Page 33 of 91
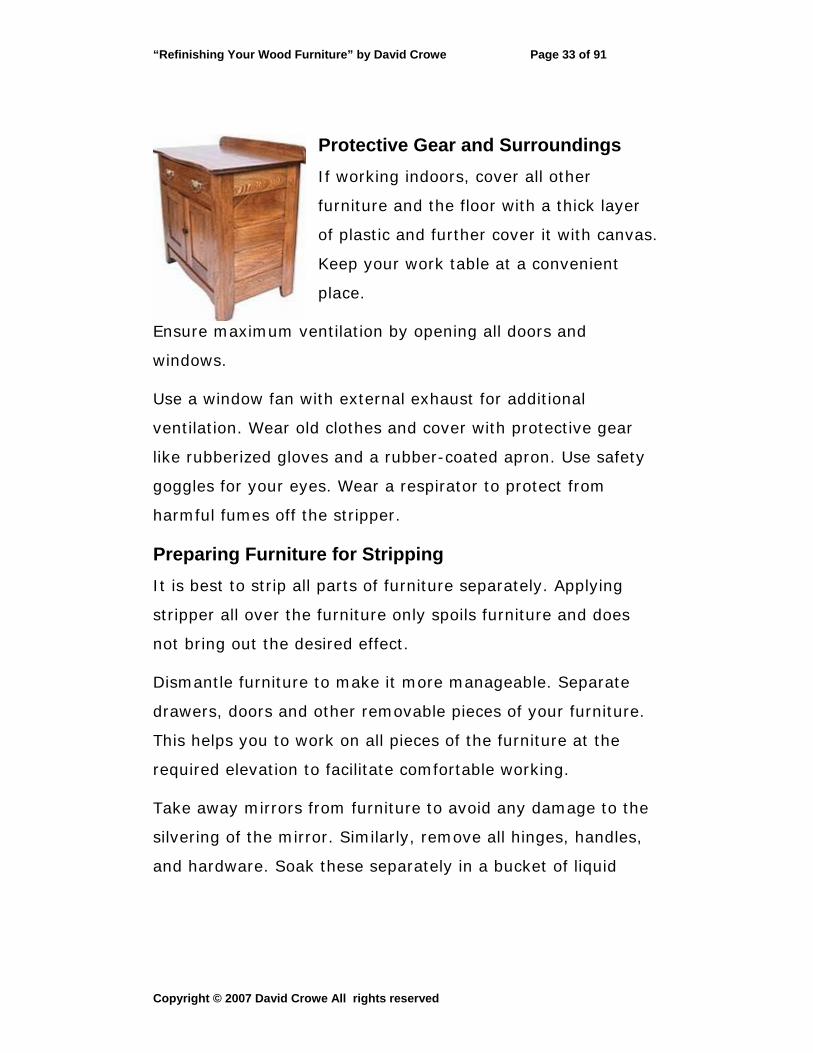
Protective Gear and Surroundings If working indoors, cover all other
furniture and the floor with a thick layer
of plastic and further cover it with canvas.
Keep your work table at a convenient
place.
Ensure maximum ventilation by opening all doors and
windows.
Use a window fan with external exhaust for additional
ventilation. Wear old clothes and cover with protective gear
like rubberized gloves and a rubber-coated apron. Use safety
goggles for your eyes. Wear a respirator to protect from
harmful fumes off the stripper.
Preparing Furniture for Stripping It is best to strip all parts of furniture separately. Applying
stripper all over the furniture only spoils furniture and does
not bring out the desired effect.
Dismantle furniture to make it more manageable. Separate
drawers, doors and other removable pieces of your furniture.
This helps you to work on all pieces of the furniture at the
required elevation to facilitate comfortable working.
Take away mirrors from furniture to avoid any damage to the
silvering of the mirror. Similarly, remove all hinges, handles,
and hardware. Soak these separately in a bucket of liquid
Copyright © 2007 David Crowe All rights reserved
“Refinishing Your Wood Furniture” by David Crowe Page 34 of 91
stripper. Keep bucket covered to prevent evaporation of
stripper.
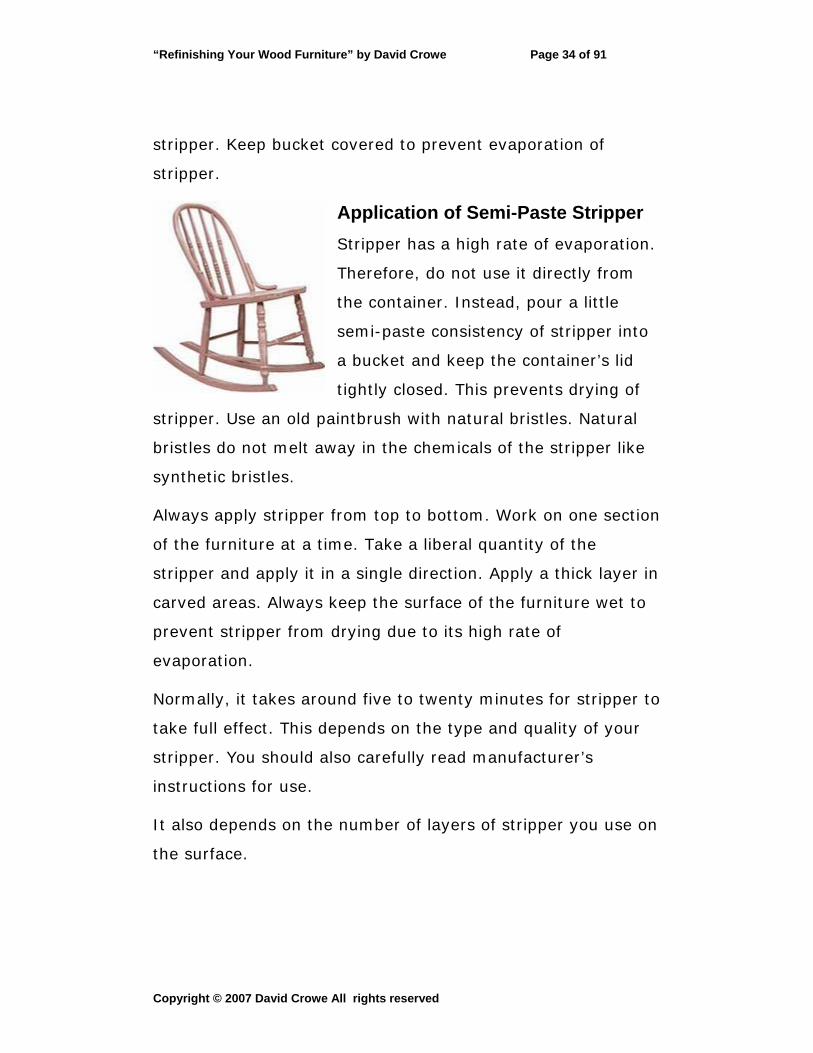
Application of Semi-Paste Stripper Stripper has a high rate of evaporation.
Therefore, do not use it directly from
the container. Instead, pour a little
semi-paste consistency of stripper into
a bucket and keep the container’s lid
tightly closed. This prevents drying of
stripper. Use an old paintbrush with natural bristles. Natural
bristles do not melt away in the chemicals of the stripper like
synthetic bristles.
Always apply stripper from top to bottom. Work on one section
of the furniture at a time. Take a liberal quantity of the
stripper and apply it in a single direction. Apply a thick layer in
carved areas. Always keep the surface of the furniture wet to
prevent stripper from drying due to its high rate of
evaporation.
Normally, it takes around five to twenty minutes for stripper to
take full effect. This depends on the type and quality of your
stripper. You should also carefully read manufacturer’s
instructions for use.
It also depends on the number of layers of stripper you use on
the surface.
Copyright © 2007 David Crowe All rights reserved
“Refinishing Your Wood Furniture” by David Crowe Page 35 of 91
The semi-liquid stripper can easily stick to all parts of your
wood furniture on both vertical and underneath surfaces too.
Stripper takes effect without causing any harm to the wood
quality. It does not discolor wood nor raise the wood grain. It
retains the wood’s charm and quality.
It only softens the paint on the wood and slowly lifts it off the
surface of your furniture.
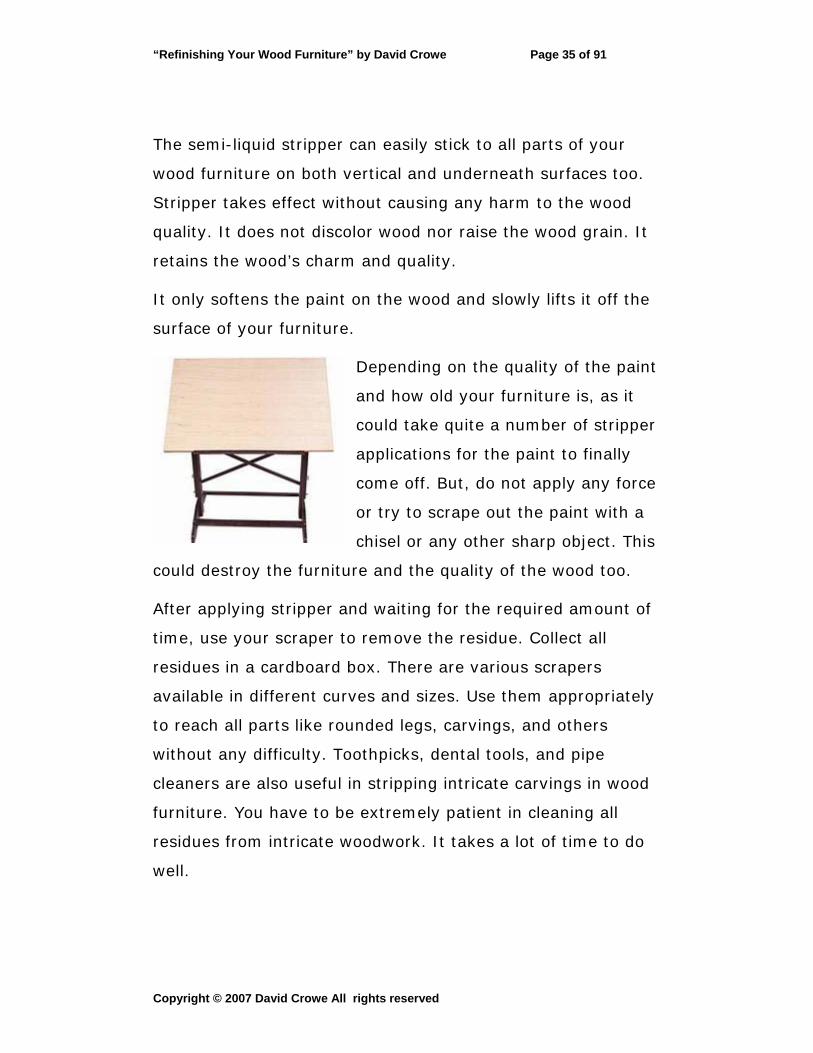
Depending on the quality of the paint
and how old your furniture is, as it
could take quite a number of stripper
applications for the paint to finally
come off. But, do not apply any force
or try to scrape out the paint with a
chisel or any other sharp object. This
could destroy the furniture and the quality of the wood too.
After applying stripper and waiting for the required amount of
time, use your scraper to remove the residue. Collect all
residues in a cardboard box. There are various scrapers
available in different curves and sizes. Use them appropriately
to reach all parts like rounded legs, carvings, and others
without any difficulty. Toothpicks, dental tools, and pipe
cleaners are also useful in stripping intricate carvings in wood
furniture. You have to be extremely patient in cleaning all
residues from intricate woodwork. It takes a lot of time to do
well.
Copyright © 2007 David Crowe All rights reserved
“Refinishing Your Wood Furniture” by David Crowe Page 36 of 91
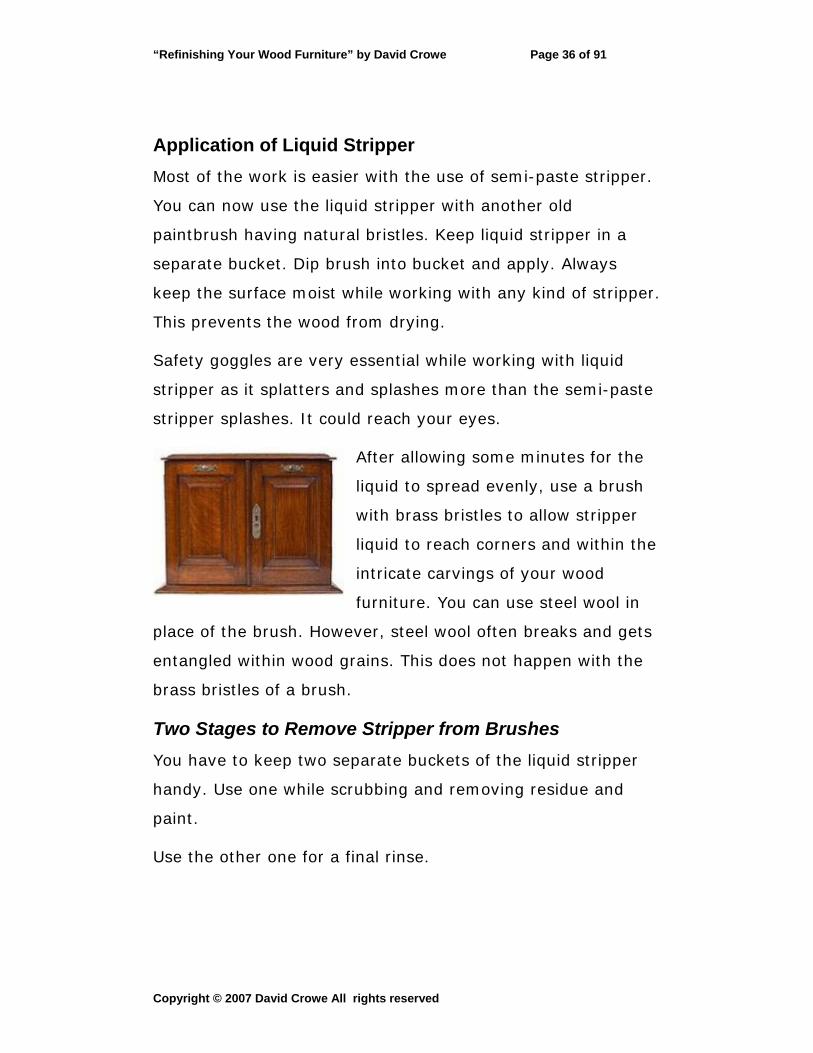
Application of Liquid Stripper Most of the work is easier with the use of semi-paste stripper.
You can now use the liquid stripper with another old
paintbrush having natural bristles. Keep liquid stripper in a
separate bucket. Dip brush into bucket and apply. Always
keep the surface moist while working with any kind of stripper.
This prevents the wood from drying.
Safety goggles are very essential while working with liquid
stripper as it splatters and splashes more than the semi-paste
stripper splashes. It could reach your eyes.
After allowing some minutes for the
liquid to spread evenly, use a brush
with brass bristles to allow stripper
liquid to reach corners and within the
intricate carvings of your wood
furniture. You can use steel wool in
place of the brush. However, steel wool often breaks and gets
entangled within wood grains. This does not happen with the
brass bristles of a brush.
Two Stages to Remove Stripper from Brushes You have to keep two separate buckets of the liquid stripper
handy. Use one while scrubbing and removing residue and
paint.
Use the other one for a final rinse.
Copyright © 2007 David Crowe All rights reserved
“Refinishing Your Wood Furniture” by David Crowe Page 37 of 91
Do not use water to clean away any residue. It is easy to
remove all residues with the help of old toothbrushes or
paintbrushes.
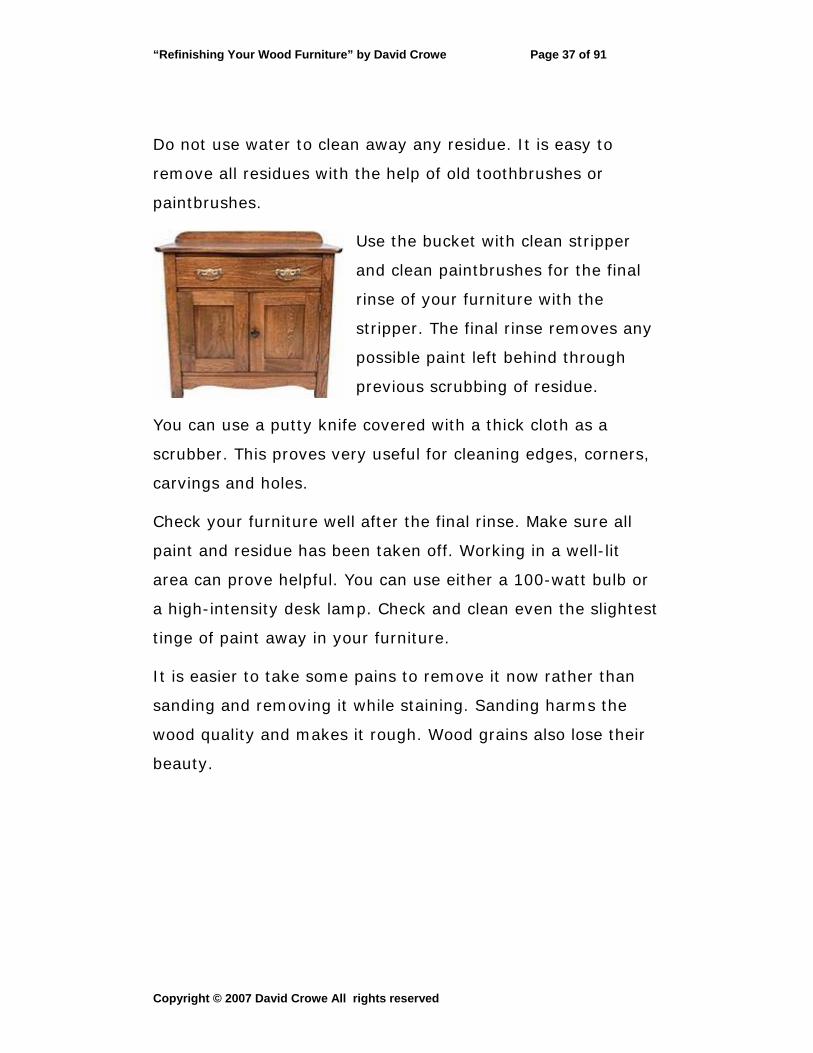
Use the bucket with clean stripper
and clean paintbrushes for the final
rinse of your furniture with the
stripper. The final rinse removes any
possible paint left behind through
previous scrubbing of residue.
You can use a putty knife covered with a thick cloth as a
scrubber. This proves very useful for cleaning edges, corners,
carvings and holes.
Check your furniture well after the final rinse. Make sure all
paint and residue has been taken off. Working in a well-lit
area can prove helpful. You can use either a 100-watt bulb or
a high-intensity desk lamp. Check and clean even the slightest
tinge of paint away in your furniture.
It is easier to take some pains to remove it now rather than
sanding and removing it while staining. Sanding harms the
wood quality and makes it rough. Wood grains also lose their
beauty.
Copyright © 2007 David Crowe All rights reserved

“Refinishing Your Wood Furniture” by David Crowe Page 38 of 91
9. Common Mistakes in Stripping and Tips to Avoid Them
Stripping is an important process of refinishing wood
furniture. Strippers are available in gel, paste and liquid
forms. Use specific types of stripper to get the best effect of
your refinishing job.
You may commit
simple mistakes
while stripping
but the following
tips will help you
understand
them and how
best to avoid
them:
Use gel or paste
strippers for
vertical surfaces and liquid strippers for horizontal surfaces to
avoid instances of dripping.
Always keep your stripper containers tightly closed as they
evaporate very fast.
Before starting the stripping, dismantle your furniture.
Stripping and refinishing an assembled piece is not only
difficult; it usually finishes as an incomplete work.
Copyright © 2007 David Crowe All rights reserved

“Refinishing Your Wood Furniture” by David Crowe Page 39 of 91
While using liquid stripper, pour a small quantity into a pie
plate after shaking the bottle well.
Apply stripper in a single direction only. Do not apply in a back
and forth manner.
Apply generous coats of stripper so that it can soak into the
wood. You may reapply if the stripper dries within half an
hour. Covering of your stripping part of furniture in wax paper
can prevent it from drying. It may be necessary to apply many
coats of stripper before all the paint comes off.
Do not apply stripper on refinishing furniture in direct sunlight.
This causes stripper to dry very fast. Using too much stripper
in one application can cause problems too. Also, apply stripper
in a shaded place with plenty of ventilation but free of strong
winds.
Allow sufficient time for the stripper to work and then scrape
off the paint.
Schedule your stripping process to be completed within a
single day. Extending stripping over many days only causes
the stripper to harden and you may have to repeat same part
of the process without making any progress.
Do your stripping work on a small area each time. Always
start from the top of the piece and proceed downwards.
Stripper starts bubbling to indicate it is time to start scraping
with a putty knife. However, do not exert excessive pressure
Copyright © 2007 David Crowe All rights reserved
“Refinishing Your Wood Furniture” by David Crowe Page 40 of 91
as putty knives create gouges on the wood surface, causing
irreparable damage to your furniture.
Use wood-stripping scrubbing pads to reach difficult parts like
spindles and corners of the legs. You can rinse and re-use
these pads. Steel wool is also efficient and useful. These
ensure complete removal of all traces of stripper from the
wood furniture.
Do not use water or other washable removers as it can spoil
the wood grain.
Do not use any metal scrapers as they can cause indents on
the soft furniture. You may not be able to see these indents
initially but they show up after completion of staining process.
Wipe the surface thoroughly with a lint-free rag to clean off
any traces of stripper.
Do not allow wood to stand for many days before you start
with staining. Unfinished wood could warp, if it remains so for
many days, due to environmental changes. one night may be
sufficient for your wood to dry completely before you start
with the staining process.
If wood is very soft, it could require around forty-eight hours
to dry thoroughly.
Complete the stripping process thoroughly. Do not leave any
paint on your furniture to take off during sanding. This would
only harm your furniture.
Copyright © 2007 David Crowe All rights reserved

“Refinishing Your Wood Furniture” by David Crowe Page 41 of 91
Part-IV: Preparing Wood
10. Preparing the Surface
After completing the process of stripping and allowing your
wood furniture to dry thoroughly, it is now time for sanding
the wood or preparing the surface.
If you have done a clean job of stripping, the sanding process
does not take much time and effort at all. Sanding is an
important part of wood refinishing. Careless sanding can ruin
the look of your furniture.
Check the surface for any traces of old paint left behind after
stripping. There should be a minimum gap of twenty-four
hours between stripping and sanding. This allows sufficient
time for the wood to dry thoroughly before sanding. If wood
remains damp, even after such a time, postpone your sanding
process for later.
It is important to
prepare the
surface of your
furniture for
sanding.
Before sanding,
complete all
necessary
Copyright © 2007 David Crowe All rights reserved
“Refinishing Your Wood Furniture” by David Crowe Page 42 of 91
repairs and filling up of holes. Start sanding with sandpaper of
grit 120. A smooth and steady sanding can give great results.
It smoothes out any rough patches left in the wood.
While sanding by hand, be careful to move towards the grain.
Be patient with your sanding process - do not work in a hurry.
Take your time to do a complete and neat job.
It is possible to sand with a machine too. The final sanding
should be with sandpaper of grit-220. A finishing sander can
ensure a smooth finish. Check if the surface is clean of any old
paint by using an after-stripper cleaner, lacquer thinner, or
denatured alcohol to scrub gently with a 0000 steel wool.
Never use water for cleaning, as water raises the grain.
After your project dries thoroughly, put on a pair of cotton
gloves and move your hands gently over the surface. If your
hands find any small hitches or hurdles anywhere on the
surface, gentle sanding can erase it off. If there are rough
patches, you have to restart with your after stripper cleaner.
If there are no hitches, your sanding process is complete and
thorough.
Copyright © 2007 David Crowe All rights reserved
“Refinishing Your Wood Furniture” by David Crowe Page 43 of 91
11. Making Repairs to Get Smooth Finish
Repairs are common in old furniture. You have to check for
any repairs even before the stripping process. There could be
small holes, dents, chipping of wood at edges, or broken legs
of chairs too. Further, after stripping, you could come across
deeper dents or scratches that were behind layers of paint.
Setting Right Veneers Veneers are common in old furniture. These thin, finished
layers of wood allow stripper to penetrate in to the deeper
layers of wood. It is possible to detect loose veneer edges by
tapping your fingernails on it. Change of sound indicates
presence of veneers. Setting veneers needs extreme patience
and delicate handling.
Carefully take away all glue and dirt from the area without
splitting veneer excessively. Use little bit of carpenter’s glue at
the opening of veneer with the edge of a putty knife.
Alternatively, use a 20-gauge needle syringe, apply little
amount of glue on it, and allow it to slide beneath the veneer.
Press the veneer gently yet firmly and rub away any extra
glue that oozes from the surface. Cover the entire area with
waxed paper and place suitable weight on it. This allows
surfaces to press together firmly while glue sticks them
together. Allow sufficient time for glue to take effect.
Copyright © 2007 David Crowe All rights reserved
“Refinishing Your Wood Furniture” by David Crowe Page 44 of 91
Repairing Chairs Old chairs often have many loose joints. Rock the chair gently
to detect loose joints. It is best to dismantle loose joints
before stripping. Use rubber mallets to prevent any denting or
marring of furniture while dismantling.
Sand joints and reassemble legs. Use carpenter’s glue in the
holes before fixing in the legs. Clamp legs with a bar clamp.
You can tighten loose joints by placing small wooden scrapes
between clamp jaws and legs. This prevents any damage to
the wood. Allow glue to dry thoroughly before starting with the
sanding process.
Fixing Cracks, Screw Holes, Nicks, and Chips Old furniture often has many small and insignificant cracks.
They become all the more prominent after stripping of old
paint. You have to fill all such cracks with wood dough before
sanding or finishing.
Take a little wood dough on your finger and apply it in the
cracks. Wood dough is available in various wood colors.
Choose one that dries fast, can sand easily, and absorb stain
too. After applying and drying of wood dough, use a fine brush
to simulate it just like a wood grain. Latex wood filler is the
best for filling splits and dents, as it resists shrinkage and
accepts stain easily.
Copyright © 2007 David Crowe All rights reserved

“Refinishing Your Wood Furniture” by David Crowe Page 45 of 91
Taking Care of Wood Grain Wood grains lend beauty to your furniture. Some woods have
a tight grain while some like mahogany and oak have open
grains. Wood furniture with open grains require proper filling
before refinishing. This ensures a smooth and even finish.
Grain filler is available as pigmented paste in a hue of colors.
Contrasting color can emphasize natural wood grain color.
Otherwise, choose a matching color to add to the color of the
wood grain. You can use grain fillers before or after staining of
furniture. It is best to go according to directions given on the
label of materials.
Use a stiff paintbrush or a rag to apply grain filler. Always
work towards the grain to add to the natural look. After a
thorough application, use a smooth-edged putty knife or a
plastic scrapper to remove excess grain filler from the region.
While working with a putty knife, be careful to hold it at an
angle to the wood surface. This prevents any damage to the
wood and the grain too. Allow filler to dry thoroughly before
sanding the grain gently.
White Blotches or Rings in Furniture This appears because of moisture trapped underneath the
finish or a film of wax. The remedial measure is removal of
wax buildup. If the area remains white, even after such
cleaning, try other remedies.
Copyright © 2007 David Crowe All rights reserved

“Refinishing Your Wood Furniture” by David Crowe Page 46 of 91
Take a little toothpaste on a white cloth and rub it on the
section. Dampen a small piece of cloth with thinner and pass it
over the affected area. Fumes from the cloth will take away
trapped moisture. Use sandpaper of grit 180 to 240 on shallow
scratches and use a sanding block to make the surface flat.
Copyright © 2007 David Crowe All rights reserved

“Refinishing Your Wood Furniture” by David Crowe Page 47 of 91
12. Techniques for Sanding Wood
Sanding is an essential process of a refinishing project. It
helps in preparing the surface of your wood furniture. There
are various techniques of sanding, each with individualistic
preferences. Nevertheless, all techniques ensure a smooth and
clean surface so that staining is simple and perfect.
Necessity for Sanding Sanding can
remove all
traces of
stripping. Often,
chemical
strippers leave
behind certain
traces. All of these vanish with sanding and thereby help stain
colors to come out prominently.
Normally, wood has a certain glaze. Removal of such glaze
proves essential for the stain to penetrate deep into the wood.
Sanding does just that. It does away with such mill glaze and
allows free penetration of stain deep into the wood.
Sanding causes small and almost invisible scratches on wood
surfaces. This enhances the effect of non-penetrating finishes.
Sanding helps open wood pores for deep penetration of finish.
Use of wood plane does not allow opening of wood pores.
Copyright © 2007 David Crowe All rights reserved
“Refinishing Your Wood Furniture” by David Crowe Page 48 of 91
Therefore, sanding becomes even more essential for wood
refinishing.
How to do Sanding Sanding can be in two ways: hand sanding and sanding with
machines. Whichever type of sander you use, you need to do
some amount of hand sanding to get the final look and appeal
on your furniture.
Sanding by Machines Sanding machines include orbital sanders and power sanders.
These sanding machines create vibrating actions and cut
through rough wood and old finishes quickly. These machines
however leave behind grooves on the surface. Hand sanding is
superior to machine sanding.
Hand Sanding Fold sandpaper into thirds. Hand sanding requires proper
coordination between sandpaper, sanding sponges, and a
sanding block.
A sanding block helps you work faster by spreading pressure
evenly over the entire surface. It further prevents you from
concentrating and working in a single area. This could create a
depression on the wood surface. A sanding block prevents
such an occurrence. Sanding blocks and sandpaper can
complete the sanding process on large flat wooden surfaces.
If you are working on contoured surfaces, a sanding block
would not prove very useful. Sanding sponges or sandpaper
Copyright © 2007 David Crowe All rights reserved
“Refinishing Your Wood Furniture” by David Crowe Page 49 of 91
wrapped around a dowel or your finger can prove useful.
Sanding sponges are available in various grits. You can use
them across any type of contour.
Essential Sanding Techniques Irrespective of whatever tool you use to sand wood, start with
the smoothest available grit and proceed through different
grits until you achieve the desired smoothness.
Using very coarse grit such as 80 or 100 grit can cause deep
dents in the wood surface. It could cause small cuts too. You
have to set them right before proceeding with refinishing a
wood project. Instead, start with 120-grit and finish with 150-
grit. This delivers a smooth wood surface without any major
blemishes or cuts. You can proceed through higher grits to get
more smooth surfaces.
However, too smooth a surface can cause problems too. Wood
finishes form mechanical bonds with wood surfaces. Very
smooth surfaces weaken such bonds. Ideally, wood sanding
should stop at 150-180 grit. This is effective for thick finishes
as applicable in protective coating available through lacquer or
varnish.
If you use finishes like Danish oil and Tung oil, smoothness of
surfaces does not pose any problems. An ultra-smooth surface
gels perfectly with these finishes. You cannot make oils
penetrate between coats. Therefore, ensure a superb smooth
surface before application of such oil finishes.
Copyright © 2007 David Crowe All rights reserved
“Refinishing Your Wood Furniture” by David Crowe Page 50 of 91
For using pigmented oil stains, sanding wood beyond 180-grit
is not necessary. Pigments collect in small scratches and pores
in the wood. The deeper the scratches, the greater
accumulation of pigments within them. Such accumulation
highlights scratches. Therefore, restrict sanding within the
necessary grit to get a smooth and even look of your
furniture. You can experiment on a piece of wood before trying
it on the requisite wood surface.
Great Sanding Tips Keep brushing or vacuuming dust as it forms on the surface
while sanding. Otherwise, dust loads onto sandpaper and
restricts your working. Use an old toothbrush to clean out
clogged sandpaper. This ensures a longer life for your
sandpaper.
Expose fresh sandpaper surfaces often to get better cutting or
sanding edges. You can refold sandpaper to expose such
edges too.
Always sand wood along the grain. Never sand against the
wood grain.
Use long, overlapping, and even sanding strokes to get an
exquisite look.
Vacuum clean the surface thoroughly before changing to the
next grit on your sandpaper. This clears all dust and prevents
any possible abrasives.
Copyright © 2007 David Crowe All rights reserved

“Refinishing Your Wood Furniture” by David Crowe Page 51 of 91
Discard sandpaper if it is not sanding the surface effectively.
Choose new and better sandpaper.
Allow sufficient time for glue to set and dry before starting
with your sanding process. High humidity in the environment
can increase time required for glue to set and dry. Sanding
requires extreme patience.
While using a sander, you do not have to press it down. The
weight of the sander will itself do the required work. A simple
guide sander even sweeps with the wood grain.
In places of wood dough application, sand the surface
thoroughly and flush out evenly. This prevents formation of
any halo while staining.
Extensive sanding is essential on very old wood and new wood
too. Sanding with progressive grits can make it easier to sand
through.
Copyright © 2007 David Crowe All rights reserved
“Refinishing Your Wood Furniture” by David Crowe Page 52 of 91
Part-V: Staining
13. Selection of Stain Material
It is optional to stain wood furniture while refinishing. Some
wood species have an excellent look. They do not require any
addition of color. Their natural colors are the best. You
therefore do not require any stain for such wood. Stains
normally change the color of wood. You can match them to
available surroundings within the room. Staining reduces
contrasts appearing due to different types and varieties of
wood used in making of the furniture.
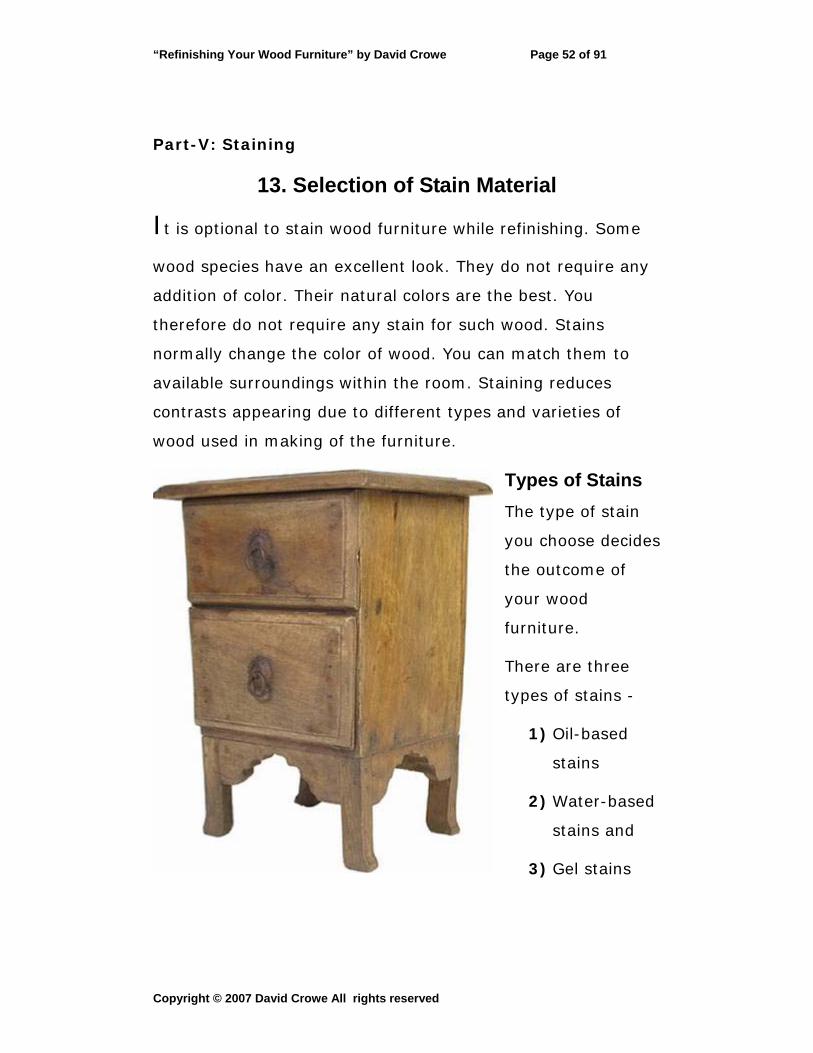
Types of Stains The type of stain
you choose decides
the outcome of
your wood
furniture.
There are three
types of stains -
1) Oil-based
stains
2) Water-based
stains and
3) Gel stains
Copyright © 2007 David Crowe All rights reserved

“Refinishing Your Wood Furniture” by David Crowe Page 53 of 91
Oil-based stains are similar to thin oil paints. These are
pigments suspended in a solvent or resin mixture.
Water-based stains are somewhat similar to thinned latex
paint with pigments suspended in a solvent or resin mixture.
Gel stains are pigments suspended in a paste. This changes
from a solid into a liquid as you apply it on the surface.
Selecting a Suitable Stain Selection of stain depends on the project you choose and the
type of stain that can gel with your project. None of the stains
poses any problems. Every stain is easy to apply.
This section gives the main reasons for selecting particular
types of stains.
Water-based stains dry fast. You can complete wood
staining and finishing processes within a single day using
wood stains. It proves beneficial for smaller projects like a
single door or mantle. You can deepen color with multiple
applications. Cleaning is also convenient. You only need some
soap and water. However, such stains raise wood grain.
Therefore, before starting with water-based stains, dampen
wood with rags and allow it to dry completely. Finish again
with sandpaper. Similar repetitions can restrict rising of wood
grain.
Oil-based stains take more than twenty-four hours to dry. It
exercises a greater control over the outcome of the color. This
stain is useful in full house projects consisting of doors,
Copyright © 2007 David Crowe All rights reserved

“Refinishing Your Wood Furniture” by David Crowe Page 54 of 91
windowsills, casing, and others. These are permanent stains
and multiple applications can darken the outcome. Such stain
does not affect wood grain. These have a strong odor and you
require mineral-based solvents to clean up any mess created
by such stains.
Gel-stains prove to be the best bet for any type of wood
project. It allows perfect staining over any type of wooden
surface. This stain is especially useful in wood surfaces posing
problems with other stains. It is useful in staining veneers and
plywood surfaces. These do not affect wood grain and do not
run like liquid stains. These stains are very expensive.
Staining Tips Remove all blemishes on wood before starting with staining.
You can test the type and color of stain initially on a piece of
wood. Thereafter, you can proceed. Starting without an test
could prove risky. Your stain sample displays all characteristics
of your wood. You can therefore take necessary precautions.
A thorough sanding is very essential before starting with
staining of your wood furniture. Sanding clears wood surfaces
extensively and brings out clear surfaces for staining.
Sometimes wood could look perfect for staining. However,
with application of stain, it could bring out blemishes and
scratches to the fore. You then have to stop staining. Allow
stains to dry and redo the sanding once again. This would
Copyright © 2007 David Crowe All rights reserved

“Refinishing Your Wood Furniture” by David Crowe Page 55 of 91
involve sanding of stain too. Meticulous and thorough sanding
can alone ensure a perfect finish of your wood furniture.
Copyright © 2007 David Crowe All rights reserved
“Refinishing Your Wood Furniture” by David Crowe Page 56 of 91
14. Staining Wood Techniques
Before starting with staining of wood furniture, you have to
decide whether you want to stain it or not. Wood furniture
without stain would resemble varnished furniture. You can try
applying little thinner on a piece of wood. Unstained furniture
gives the natural look. However, if you decide to stain your
furniture, it is best to proceed according to certain
specifications to get the perfect look.
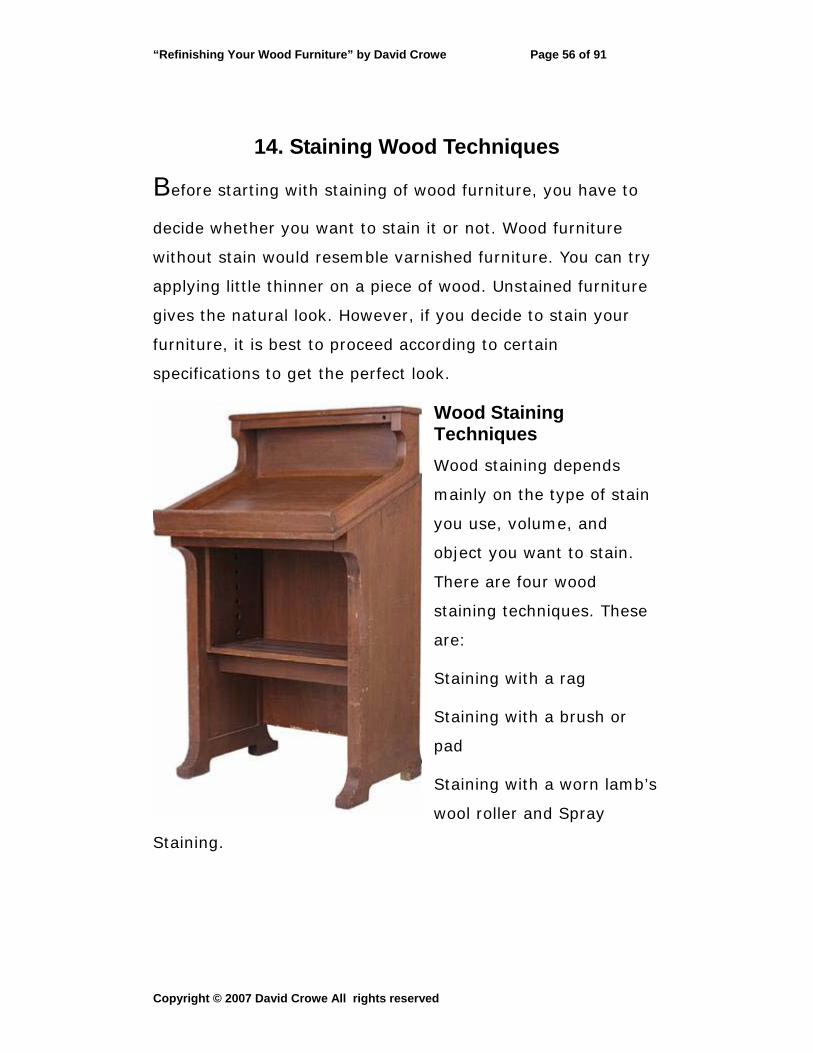
Wood Staining Techniques Wood staining depends
mainly on the type of stain
you use, volume, and
object you want to stain.
There are four wood
staining techniques. These
are:
Staining with a rag
Staining with a brush or
pad
Staining with a worn lamb’s
wool roller and Spray
Staining.
Copyright © 2007 David Crowe All rights reserved
“Refinishing Your Wood Furniture” by David Crowe Page 57 of 91
Staining with a rag produces best results if applied on flat
areas. It is simple to stain with a rag for small projects. Use
an oil-based wiping stain while staining with a rag. Dip a clean
white cotton rag into stain and soak for a few minutes.
Take liberal quantities of stain for application. Rub rag in the
direction of the wood grain. You can use circular motions while
applying but always finish with a straight direction, parallel to
the grain. Continue application until desired level and
thereafter remove remaining stain with a clean rag.
Staining with a brush or pad is similar to staining with a
rag. You can use any type of stain for staining with a brush.
Nylon brushes suit water-based stains best while bristle
brushes suit oil-based stains the best. Apply liberal quantities
of the stain and brush towards the grain. Remove any excess
stain with a clean rag.
Removing oil-based stains with a rag could prove difficult.
Hence, use a rag dipped in mineral spirits with gentle
movements. Use little quantity of mineral spirits without any
excessive pressure; otherwise, it could leave back spots. Apply
thin coatings of gel stains. You can always add an extra coat,
if need be.
Staining wood with a worn lamb’s wool roller is useful for
staining large bases. Use a handsaw to cut roller in half. This
gives you two stain applicators. Dip the roller into stain and
rub down the wood. Allow wood to soak in stain for sometime.
Copyright © 2007 David Crowe All rights reserved
“Refinishing Your Wood Furniture” by David Crowe Page 58 of 91
Thereafter, start staining again if necessary. Such staining
helps you cover large areas in little time.
Spray staining requires special skill to monitor the amount of
stain on wood. Use an air sprayer with the smallest tip, rather
a fine finish tip of 210 or 310. Keep very low-pressure on the
sprayer, as stain being thin spreads very fast and could end
with excess stain. Use this sprayer for staining multiple doors,
as it works faster and proves easier too.
While spraying with a machine, dilute stain further although
stain itself is thin and diluted. This helps you have good
control over the color and you do not have to spend lot of time
removing excess stain. Apply various thin coatings rather than
a single thick coating. While spray staining on soft woods,
dilute stain with an equal quantity of mineral spirits. However,
spray staining on hardwoods does not require any dilution of
stain.
An HVLP sprayer offers greater control over wood staining.
This is because this sprayer takes more time to apply even
thin coats. You can use this sprayer for small projects,
especially with multiple angles. Airless sprayers are most
popular for all staining projects.
Assuring Even Staining on Wood Furniture Staining wood is not a simple task. The major problem with
staining is differential color appearance due to blotching.
Uneven stain penetration causes such an appearance. This
Copyright © 2007 David Crowe All rights reserved
“Refinishing Your Wood Furniture” by David Crowe Page 59 of 91
problem prevails in certain types of wood. Therefore, pre-seal
wood with conditioners before staining. Conditioning is most
essential on softwoods like fir and pine.
Conditioning does not cause any harm, other than lightening
the shade of your stain. You can make it up by applying extra
coats of stain after first coat dries thoroughly. Make sure you
use water-based conditioners if staining with water-based
stain and oil-based conditioner if using oil-based stain.
After each dip of the brush into the stain can, brush off excess
on a plate edge to avoid any dripping on other wood parts.
Such dripping could leave indelible marks. There should be a
gap of twelve hours in between each coat of stain. Stains take
a long time to get the desired color. It comes to the fore only
after thorough penetration of stain into the wood. Allow stain
to dry thoroughly before starting with your finishing work.
Essential Precautions While Staining Wood Furniture Using oil-based stains on wood requires adhering to certain
precautions:
Ensure sufficient ventilation while staining, as it allows an easy
way out for the fumes.
Keep your staining area free of open flames and even pilot
lights. Do not smoke anywhere in the vicinity.
Stains are inflammable and stain-soaked rags are self-
combustible. Put all used rags into a bucket of water
immediately after use. Put them into the trash can when it is
Copyright © 2007 David Crowe All rights reserved
“Refinishing Your Wood Furniture” by David Crowe Page 60 of 91
possible. Do not keep these rags in a bundle, as they catch
fire easily.
Stains are poisonous in liquid form. Keep stains out of reach of
children and pets.
Use protective clothing and wear nitrile gloves while staining.
Refrain from prolonged exposure of your skin to stain.
Always read manufacturer’s recommendations on the label
thoroughly and adhere to it strictly.
Copyright © 2007 David Crowe All rights reserved
“Refinishing Your Wood Furniture” by David Crowe Page 61 of 91
Part-VI: Final Touches
15. Applying the Sealer
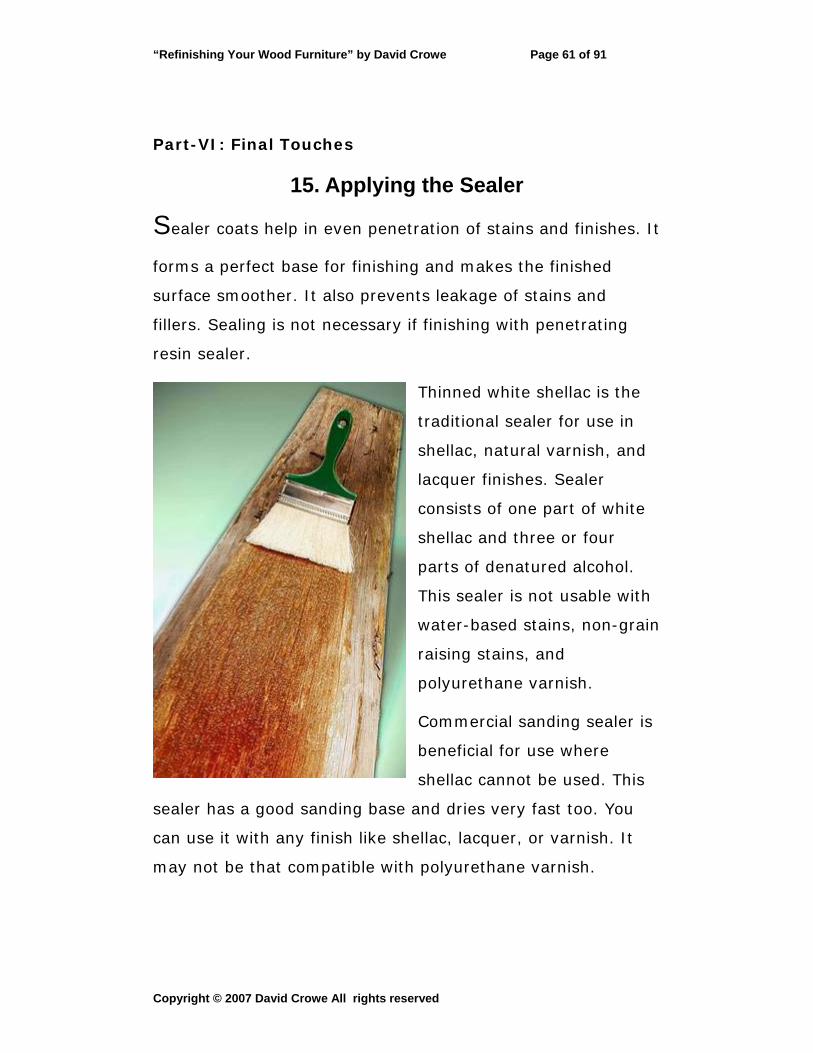
Sealer coats help in even penetration of stains and finishes. It
forms a perfect base for finishing and makes the finished
surface smoother. It also prevents leakage of stains and
fillers. Sealing is not necessary if finishing with penetrating
resin sealer.
Thinned white shellac is the
traditional sealer for use in
shellac, natural varnish, and
lacquer finishes. Sealer
consists of one part of white
shellac and three or four
parts of denatured alcohol.
This sealer is not usable with
water-based stains, non-grain
raising stains, and
polyurethane varnish.
Commercial sanding sealer is
beneficial for use where
shellac cannot be used. This
sealer has a good sanding base and dries very fast too. You
can use it with any finish like shellac, lacquer, or varnish. It
may not be that compatible with polyurethane varnish.
Copyright © 2007 David Crowe All rights reserved
“Refinishing Your Wood Furniture” by David Crowe Page 62 of 91
In case of lacquer or natural varnish finishes, use a thinned
mixture of the same finish as a sealer. Thinning varnish with
mineral spirits or turpentine can get you a natural varnish
sealer. Mix lacquer and lacquer thinner in equal parts to make
lacquer sealer. However, these sealers do not work with
polyurethane varnish or shellac.
Polyurethane varnish may or may not require sealers. Go
through manufacturer’s recommendations before using sealer.
Sometimes, you can use thinner as a sealer for this finish.
Nevertheless, ensure full compatibility of sealer and varnish
before use. A penetrating resin sealer is the best for such a
finish.
Techniques for Applying Sealer Before application of sealer, free wood of any possible dust
accumulation. Apply sealer in thin coats with a clean brush.
Allow sealer to flow evenly and quickly with the wood grain.
Cover all surfaces evenly and be careful about the end grain.
Incomplete and uneven sealing across end grain will cause it
to absorb stains and finishes more than the rest of the wood.
Allow sufficient time for sealer to dry thoroughly, normally
around an hour or two. Thereafter, sand surface with fine grit
sandpaper of grade 7/0.
Copyright © 2007 David Crowe All rights reserved

“Refinishing Your Wood Furniture” by David Crowe Page 63 of 91
16. Preparing to Fill Wooden Furniture
Filling is not an essential process of refinishing. It depends
more on your preferences and choice of wood furniture too.
Filler makes your furniture smooth and mirror-like. If you
prefer a natural look, there is no need for filling. You can leave
wood pores open. Otherwise, you can use a penetrating sealer
to close all pores.
Normally, furniture made
of redwood, pine, bass,
maple, willow, hemlock,
poplar, cedar, ebony, and
cypress do not require
any filler. Hardwoods like
sycamore, birch, and
cherry do not require any
filler either, as they are
close-grained. It is
sufficient to stain, seal,
and finish furniture of
such wood. Open-grained
woods like walnut, oak, beech, satinwood, rosewood, elm,
teak, mahogany, ash, butternut, hickory, and chestnut require
filler.
Copyright © 2007 David Crowe All rights reserved

“Refinishing Your Wood Furniture” by David Crowe Page 64 of 91
Choice of Filler Fillers are available in paste and liquid forms. Liquid filler does
not prove effective on open-grained wood. You can use tinted
liquid filler for lightening stains or changing color of wood.
Filler is best if used in paste form. You can thin it down to the
necessary consistency to help easy penetration into pores.
Paste filler is available in two types. One is cornstarch based
and the other is sanding filler. The most commonly available is
cornstarch-based. It is available in various colors with a
neutral tone. Match available filler color with that of wood.
Even after drying, filler is just a shade lighter than its
apparent color.
You can mix oil stain with filler for a darker finish. Few extra
applications of this darkened filler can bring out a dark look to
your furniture. Sanding filler is transparent and you do not
have to match it with wood color. This has a silicate base and
you require just a single application on your furniture.
Filler Applying Techniques Seal stained surfaces before filling. If your surface is
unstained, apply a thin coating of sanding sealer or thinned
shellac. Allow sealed wood to dry completely and then sand
using a fine grit sandpaper. Clean surface of all sanding
residue and then apply filler.
While using paste filler, mix with turpentine to make a smooth
batter. If wood pores are big, use a thick batter. Dip a clean
Copyright © 2007 David Crowe All rights reserved
“Refinishing Your Wood Furniture” by David Crowe Page 65 of 91
brush into filler and work in firm strokes along the wood grain.
Next, work across wood grain to close pore thoroughly. Take
up one single area if working on a large surface. Complete it
before proceeding to next surface.
Allow filler to set for around fifteen minutes. Make sure filler
surface is not dull. Next, wipe off excess filler with a rough
towel. This should only remove excess filler from wood surface
but leave it within pores. Wipe wood surface with a clean cloth
in the direction of the grain slowly and deftly. Allow twenty-
four hours for filler wood to dry.
Checking Filling Outcomes The best test for detecting perfect filling is the look of your
wood furniture. If there is a dull haze on the wood surface,
excess filler has not been completely removed. This could
cause clouding later while you are finishing it. Use fine grit
sandpaper to clean wood surface without harming filler. After
removing all debris, allow filled furniture to dry for another
twenty-four hours.
Sealing finished surface with filler can prevent it from leaking
or bleeding. Thinned shellac or any other sanding sealer can
do a perfect job. Always check compatibility of sealer and filler
to get a thorough finish.
Copyright © 2007 David Crowe All rights reserved

“Refinishing Your Wood Furniture” by David Crowe Page 66 of 91
17. Final Coat to Get Smooth Finish
Finish determines the final look of your furniture. There are
different types of finish available. You can make your choice
according to your personal preferences. Finish includes
polyurethane, lacquer, penetrating oils, catalytic sealers, and
natural waxes. Each product comes in a variety of sheen like
semi-gloss, high-gloss, matte finish, dull finish, or satin finish.
Choose the type you need for your furniture.
Ideally, your choice of finish should be one
that gives a good look to your furniture.
Finish should be more durable and
waterproof too. Finish with a slow drying
time can help you manage your finish
better. It would also cause fewer problems
than a quick drying finish.
Water-based Polyurethane These environment-friendly finishes are
simple to use and therefore are very
popular. Rub a piece of damp cloth over your furniture before
applying polyurethane. Allow wood to dry and sand away
raised grains. This is essential as water present in the finish
has the tendency to raise the grain.
This finish looks white and gives a similar appearance on
application too. However, it dries away later to a transparent
Copyright © 2007 David Crowe All rights reserved
“Refinishing Your Wood Furniture” by David Crowe Page 67 of 91
and clear color. As these finishes dry quickly, you do not
require lot of time in between coats.
Polyurethane This finish is very durable and provides extensive resistance to
alcohol and water. There are various sheens available in this
finish. Dip brush into polyurethane can and tap it lightly
against the can. Apply various thin coats of polyurethane in
long and overlapping strokes.
Restrain from applying thick coats of polyurethane finish. This
could cause wrinkling, sagging, and dripping of finish. In
between, sand furniture with 220-grit sandpaper. Stir
polyurethane within can well before dipping brush into it. This
keeps flattening agents suspended in the finish.
Lacquer Lacquer finish lends an exquisite look to your furniture.
Application of lacquer requires extreme patience and dexterity.
You need to apply many coats of finish and do sanding in
between application of coats. Do not apply it over other finish,
as it will soften and lift the finish. Spraying of lacquer brings in
best results. If you apply lacquer with a brush, apply fast with
a natural bristle brush.
Penetrating Oil Finishes Danish oil, Tung oil, and Antique oil are popular penetrating oil
finishes. These oils produce the best results in furniture that
Copyright © 2007 David Crowe All rights reserved
“Refinishing Your Wood Furniture” by David Crowe Page 68 of 91
do not undergo extensive wear and tear. These do not offer
finish as available through lacquer or varnish finish.
Oil finishes are simple to apply. They lend a natural and soft
appearance to your furniture. You apply them on wood, allow
it to soak in, and thereafter remove any excess by rubbing
with a rag. Such application requires various coatings for
getting the final desired effect.
Putting right small defects and scratches is simple with
penetrating oil finishes. Sand away the defective area and
reapply more finish oil. An additional coat at periodic intervals
can get you an excellent look. Applying paste wax on furniture
with penetrating oils can further complement the appearance.
Essential Precautions Simple precautions while applying finish on your wood
furniture can bring out an unblemished and excellent piece of
refinished furniture.
Allow sufficient time for finish to dry before applying the next
coat. Some finishes require four to six hours to dry
thoroughly. Lack of adhering to such time can cause smudges
and blotches on your furniture.
Apply finish smoothly without leaving behind any streaks or
ridges.
Restrain from shaking finish container and applying from it.
This causes bubbles on your furniture. Instead, use a long
wooden stir stick to stir contents within the can.
Copyright © 2007 David Crowe All rights reserved

“Refinishing Your Wood Furniture” by David Crowe Page 69 of 91
Pour finish in to a pie plate and apply lightly with a new brush.
Take a little finish at a time as it could cause drip marks and
annoying bubbles. Do not allow drips to harden; instead, catch
them in your brush.
Apply as many coats of finish as you desire. However, take
care to sand after each coat except the last one. This will
retain the smooth and silky look on your furniture.
Copyright © 2007 David Crowe All rights reserved

“Refinishing Your Wood Furniture” by David Crowe Page 70 of 91
18. Finishing for First-Timers
The basic steps involved in finishing include sanding wood to
get a smooth appearance, choosing color and applying it, and
finally applying the finish. All steps are easy to follow and
implement.
Sanding Sanding is essential to remove
any gouges, scratches, or
marks on the wood. These flaws
come to the fore if you do not
sand them away and instead
apply stain or finish. Sanding
should always be in the
direction of the grain.
Use coarse sandpaper with a
grit of 80 to 100. This helps
remove present flaws. Next,
use coarser grit sandpaper of around 150 to 180 to do away
with any traces of scratches or glitches. With experience, you
will be able to analyze when to move into a higher grit of
sandpaper.
If you are unable to understand if sanding has been sufficient
or not or if flaws appear after staining, you can remove stain
or finish with the help of a varnish or paint remover. You can
restart on your work again.
Copyright © 2007 David Crowe All rights reserved

“Refinishing Your Wood Furniture” by David Crowe Page 71 of 91
Staining Different kinds of wood require different types of stain. Gel
stains are best for use in hardwoods like mahogany, oak, and
walnut. These thick stains reduce blotching.
While staining, work on small surfaces. Use rag or brush to
apply a wet coat of stain and wipe off excess before it dries. If
you are unable to wipe off excess and it dries off, do not
panic. Instead, apply more stain on it and make it liquid.
Remove any excess stain immediately. Do not overlap stain on
completed surfaces. This could cause change in color of stain.
Finishing Finish protects wood from any type of damage like stains and
dirt. Apply finish directly over wood or stain as soon as it has
dried completely.
Wiping varnish and oil-based polyurethane in a satin sheen
are the best choices of finish for first-timers. Wiping varnish is
oil-based varnish. These do not dry very fast nor raise the
grain, thereby proving easier to use than water-based
finishes. You require just two to three applications.
Wiping varnish could require more applications than
polyurethane to get the same durability. Apply polyurethane
on surfaces facing lot of wear and tear. Wiping vanish gives a
thinner and flawless finish. Use a foam or bristle brush to
apply polyurethane.
Copyright © 2007 David Crowe All rights reserved

“Refinishing Your Wood Furniture” by David Crowe Page 72 of 91
Apply the first coat fully or thin it with paint thinner, similar to
a wiping varnish. Thinning causes finish to dry faster and you
can sand it sooner too. Remove sanding dust and apply a
second coat. Always brush with the wood grain.
While working on flat surfaces like tabletops, spread finish by
working from side to side. Apply thin layer of finish and use
brush strokes after covering six to twelve inches of the
surface. Use gentle lifting strokes near edges to move to the
other side. Continue doing until all bubbles go. Always work in
artificial light or reflected light. This light shows problems
immediately.
Copyright © 2007 David Crowe All rights reserved
“Refinishing Your Wood Furniture” by David Crowe Page 73 of 91
Part-VII: Restore the Beauty of Your Wooden Furniture
19. Restore Wooden Furniture without Refinishing
Refinishing old furniture is a long and cumbersome job.
However, it is not always necessary to refinish all old wood
furniture. Refinishing can decrease worth of old furniture. An
old piece of furniture with its old paint albeit in good condition
is definitely more worthy than a completely refinished piece of
furniture. Simple restoration techniques can bring back the old
shine and revive the look on your old furniture.
Starting the Restoration of Old Furniture Identification of Finish The very first step in restoration of old furniture is to
understand the type of finish on the furniture and thereafter
decide how to clean it and bring back its past glory.
Analyzing the finish on your furniture is very essential. This
can determine the type of repair work you need to undertake.
If your furniture does not have any gloss, the finish would
normally be wax, oil, or penetrating sealers. Reapplication of
relevant finish can restore such furniture.
It is easy to identify pigmented finishes like enamel or paint.
There are three major types of finishes: lacquer, shellac, and
varnish. Before you start working on such furniture, test the
finish to identify it.
Copyright © 2007 David Crowe All rights reserved

“Refinishing Your Wood Furniture” by David Crowe Page 74 of 91
Rub a little alcohol into an obscure place on the furniture. If
finish dissolves totally in alcohol, it is a shellac finish. If it
dissolves partially, it is either shellac or lacquer. Thereafter,
use a combination of lacquer thinner and alcohol and apply in
a similar obscure place on the furniture. This mixture would
dissolve it totally.
Next, apply little lacquer thinner at a small place, away from
the main part of the furniture. If applied area becomes rough
and thereafter smooth, it is a lacquer finish.
However, if finish does not become smooth again and instead
develops wrinkles, it is a varnish finish. Alcohol or lacquer
thinner has no effect on varnish. After thorough and sure
identification of finish, start with your restoration process of
old furniture.
Cleaning Techniques The very first restoration technique is cleaning of dirt, as old
furniture develops a coating of wax and dust. Use oil-based
commercial wood cleaner to clean such dirt and dust
accumulation.
Saturate commercial wood cleaner to a piece of soft cloth and
apply to furniture. Allow it to stand for an hour or more.
Thereafter, wipe off dirt with another clean cloth. You may
have to repeat it three or four times to clean away all dirt and
dust.
Copyright © 2007 David Crowe All rights reserved

“Refinishing Your Wood Furniture” by David Crowe Page 75 of 91
If commercial cleaner does not deliver the desired effect, use
a stronger solution of warm water with a little liquid detergent
mixed in it. Use it in small quantities on your furniture and do
not soak furniture in it. Clean furniture thoroughly and
thereafter dry furniture with a soft cloth. Buff the surface with
0000-steel wool lightly. Apply commercial conditioner and buff
again.
If detergent cleaning also does not do the trick, use a solvent
like turpentine, mineral spirits, or denatured alcohol according
to the type of finish. Solvent cleaning can damage the finish;
therefore, use it sparingly and as a last resort too.
Allow furniture to dry thoroughly, preferably in sunlight. Apply
one or two coats of spray varnish and allow it to dry. If there
are only few worn-out spots on your old furniture, sand them
lightly with fine grit sandpaper. Apply little oil-based stain with
a painter’s brush and match it with the rest of the furniture.
Copyright © 2007 David Crowe All rights reserved
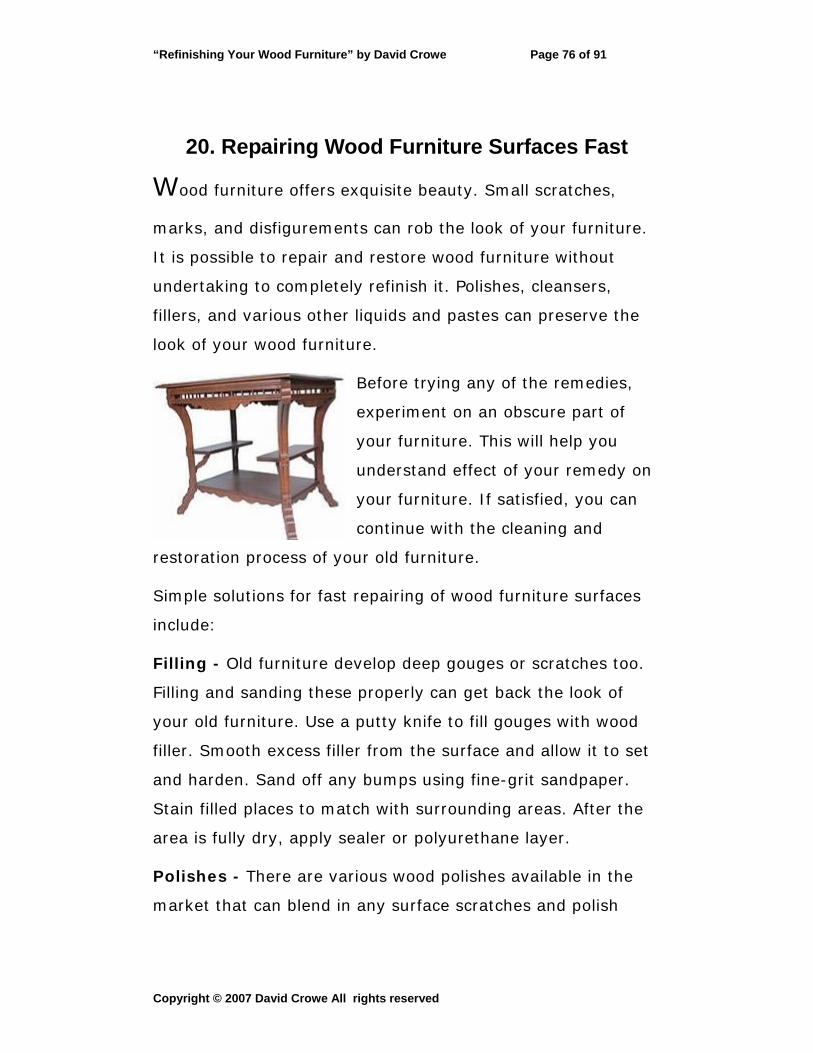
“Refinishing Your Wood Furniture” by David Crowe Page 76 of 91
20. Repairing Wood Furniture Surfaces Fast
Wood furniture offers exquisite beauty. Small scratches,
marks, and disfigurements can rob the look of your furniture.
It is possible to repair and restore wood furniture without
undertaking to completely refinish it. Polishes, cleansers,
fillers, and various other liquids and pastes can preserve the
look of your wood furniture.
Before trying any of the remedies,
experiment on an obscure part of
your furniture. This will help you
understand effect of your remedy on
your furniture. If satisfied, you can
continue with the cleaning and
restoration process of your old furniture.
Simple solutions for fast repairing of wood furniture surfaces
include:
Filling - Old furniture develop deep gouges or scratches too.
Filling and sanding these properly can get back the look of
your old furniture. Use a putty knife to fill gouges with wood
filler. Smooth excess filler from the surface and allow it to set
and harden. Sand off any bumps using fine-grit sandpaper.
Stain filled places to match with surrounding areas. After the
area is fully dry, apply sealer or polyurethane layer.
Polishes - There are various wood polishes available in the
market that can blend in any surface scratches and polish
Copyright © 2007 David Crowe All rights reserved

“Refinishing Your Wood Furniture” by David Crowe Page 77 of 91
furniture thoroughly. There are various shades of polishes
available to match the color of your furniture. Tinted polishes
help stain scratches and bare spots as you rub polish on to the
surface. Regular use of such polishes can help maintain the
shine and beauty of your wood furniture.
Crayons - Collect matching crayons to suit the color of your
furniture. Melt crayons and rub them into the scratch. This
proves to be a fast way of concealing scratches and small
abrasions.
Iodine: Iodine, as available in pharmacies, can prove useful
to hide and blend scratches in wood furniture. Rub gently and
apply as many coats as need be to allow it to blend within the
color of the furniture.
Homemade Remedies - Cut a Brazil nut or walnut and allow
the oil to come out. You can rub scratched surfaces with the
meat of this cut nut. This remedy works fine for concealing
scratches on light colored furniture pieces. Tung oil or
vegetable oil can restore polish and the look of your old
furniture. This produces best results if used on light pines. Use
a small piece of cloth to rub in the oil. Allow oil to soak into
the wood and reapply if necessary. Normally, you can get the
desired look after an application of around three coats of the
oil.
Cleansers - Regular use of commercial cleansers as available
in the market can help retain the beauty and look of your
wood furniture. Simple homemade cleansers can also do the
Copyright © 2007 David Crowe All rights reserved
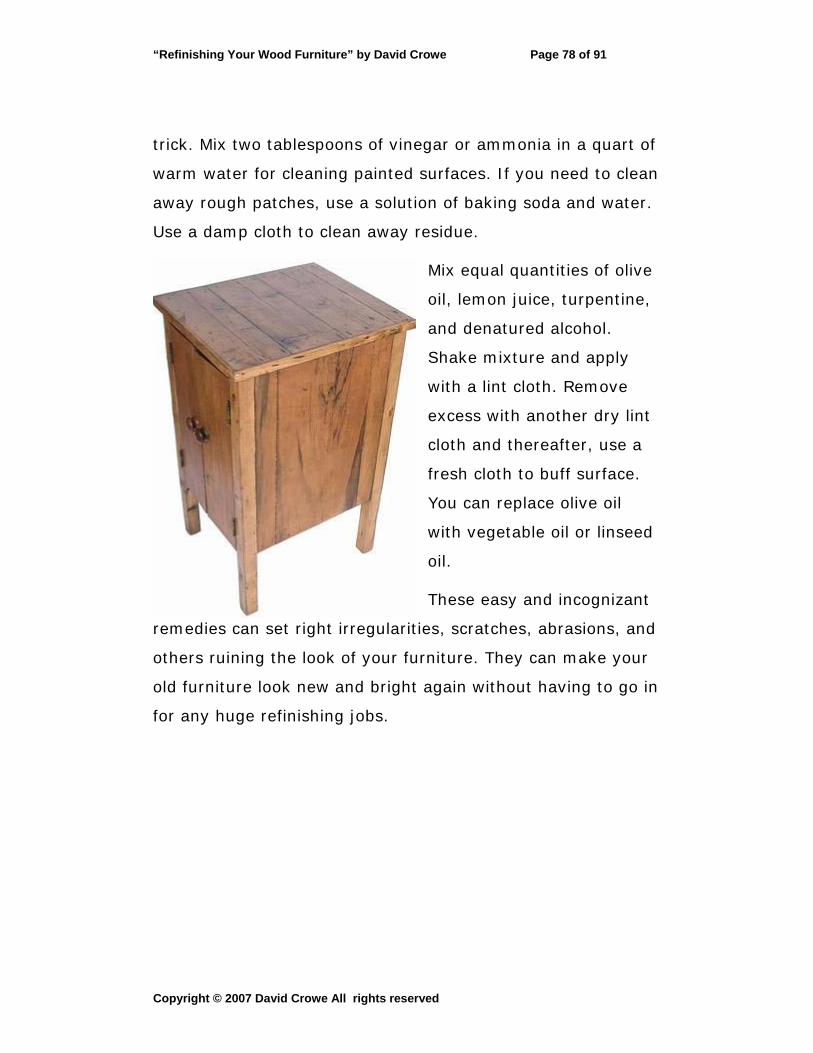
“Refinishing Your Wood Furniture” by David Crowe Page 78 of 91
trick. Mix two tablespoons of vinegar or ammonia in a quart of
warm water for cleaning painted surfaces. If you need to clean
away rough patches, use a solution of baking soda and water.
Use a damp cloth to clean away residue.
Mix equal quantities of olive
oil, lemon juice, turpentine,
and denatured alcohol.
Shake mixture and apply
with a lint cloth. Remove
excess with another dry lint
cloth and thereafter, use a
fresh cloth to buff surface.
You can replace olive oil
with vegetable oil or linseed
oil.
These easy and incognizant
remedies can set right irregularities, scratches, abrasions, and
others ruining the look of your furniture. They can make your
old furniture look new and bright again without having to go in
for any huge refinishing jobs.
Copyright © 2007 David Crowe All rights reserved
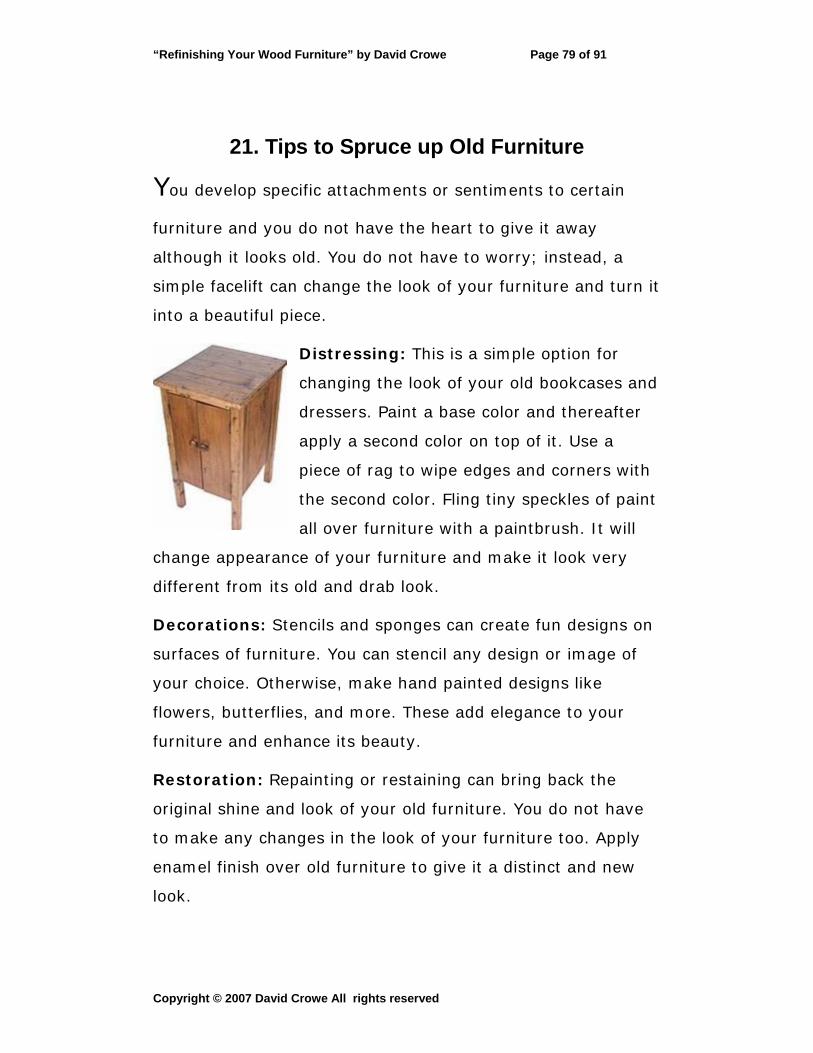
“Refinishing Your Wood Furniture” by David Crowe Page 79 of 91
21. Tips to Spruce up Old Furniture
You develop specific attachments or sentiments to certain
furniture and you do not have the heart to give it away
although it looks old. You do not have to worry; instead, a
simple facelift can change the look of your furniture and turn it
into a beautiful piece.
Distressing: This is a simple option for
changing the look of your old bookcases and
dressers. Paint a base color and thereafter
apply a second color on top of it. Use a
piece of rag to wipe edges and corners with
the second color. Fling tiny speckles of paint
all over furniture with a paintbrush. It will
change appearance of your furniture and make it look very
different from its old and drab look.
Decorations: Stencils and sponges can create fun designs on
surfaces of furniture. You can stencil any design or image of
your choice. Otherwise, make hand painted designs like
flowers, butterflies, and more. These add elegance to your
furniture and enhance its beauty.
Restoration: Repainting or restaining can bring back the
original shine and look of your old furniture. You do not have
to make any changes in the look of your furniture too. Apply
enamel finish over old furniture to give it a distinct and new
look.
Copyright © 2007 David Crowe All rights reserved
“Refinishing Your Wood Furniture” by David Crowe Page 80 of 91
Personalize Furniture: You can personalize baby furniture or
those of children. Inscribe birth dates with name of the baby
or child to add a personal touch to baby furniture like cradles.
Similarly, inscribe alphabets or numbers on a child’s desk to
make it look different. It also encourages children to study.
Tiles: Mosaic tiles and stained glass can add more life and
beauty to your old furniture. Allow your creative juices to flow
and create any innovative designs. Attach glass or tiles with
super glue. Allow sufficient time for glue to fix tile firmly into
place.
Simple things can add lot of beauty to your old furniture and
give it a new look. It can also remove the boring and drab look
of your furniture.
Copyright © 2007 David Crowe All rights reserved
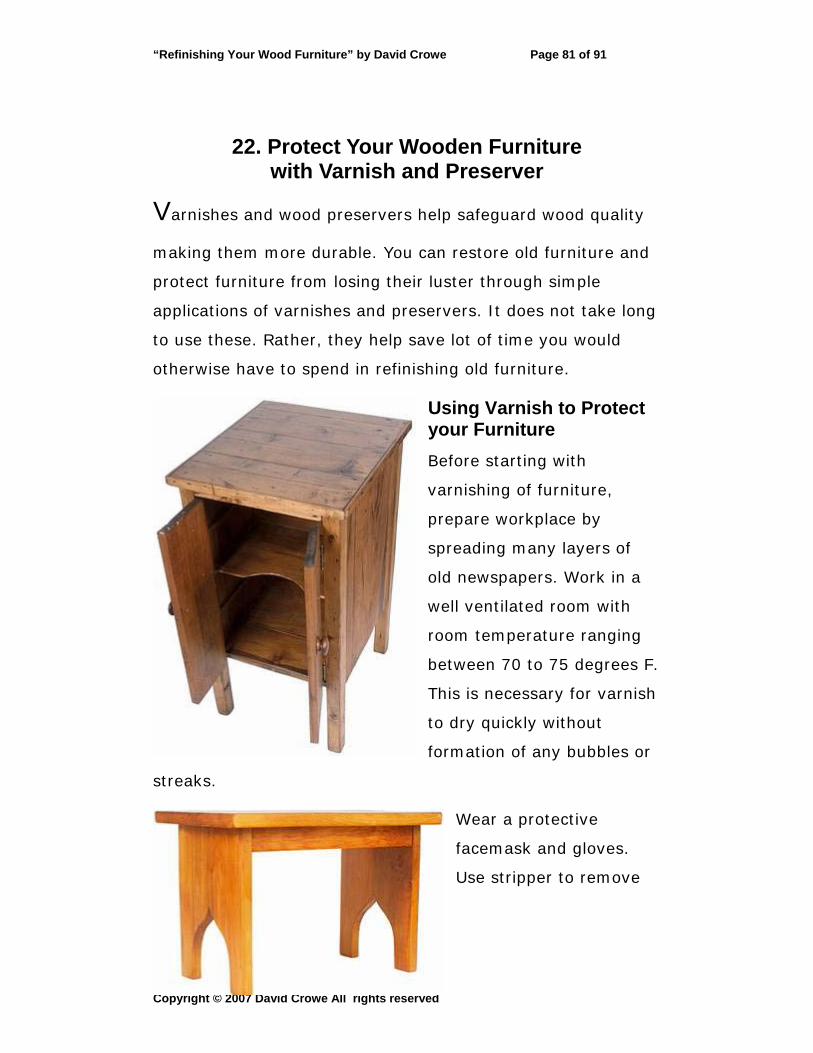
“Refinishing Your Wood Furniture” by David Crowe Page 81 of 91
22. Protect Your Wooden Furniture with Varnish and Preserver
Varnishes and wood preservers help safeguard wood quality
making them more durable. You can restore old furniture and
protect furniture from losing their luster through simple
applications of varnishes and preservers. It does not take long
to use these. Rather, they help save lot of time you would
otherwise have to spend in refinishing old furniture.
Using Varnish to Protect your Furniture Before starting with
varnishing of furniture,
prepare workplace by
spreading many layers of
old newspapers. Work in a
well ventilated room with
room temperature ranging
between 70 to 75 degrees F.
This is necessary for varnish
to dry quickly without
formation of any bubbles or
streaks.
Wear a protective
facemask and gloves.
Use stripper to remove
Copyright © 2007 David Crowe All rights reserved

“Refinishing Your Wood Furniture” by David Crowe Page 82 of 91
existing finish. Make a mixture of mineral spirits and linseed
oil. Dip steel wool in this mixture and clean wood. You can dry
wood with a clean rag.
Pour four parts varnish and one part mineral spirits into a
container. Also, look through the manufacturer’s
recommendations and any special warnings before starting to
varnish your furniture. Dip foam brush in this mixture and
work on your furniture, moving in the direction of the grain.
Allow it to dry thoroughly, normally for six hours. Thereafter,
apply a second coat using a new foam brush. Overall, your
furniture would require around five coats of varnish
application. However, use new brushes for every new coat.
Keep your workplace dust free, as a little dust could stick to
your varnish coating and rob its look. If dust creates
problems, use sandpaper to sand it away before starting with
your next coat.
Working with Wood Preserver Strip varnish or paint thoroughly from your furniture. Use a
stiff bristle brush to clear all debris. Use clear wood preserver
to make wood free of fungus and insects. Next, paint a full
coat of preservative on wood and repeat next coat as soon as
the first coat soaks in.
Normally, three coats of preservative are essential. Make sure
you reach all joints, ends, and sides. Work in a well-ventilated
area wearing a facemask and protective gear and gloves.
Copyright © 2007 David Crowe All rights reserved

“Refinishing Your Wood Furniture” by David Crowe Page 83 of 91
23. Maintenance of Wooden Furniture
With time, new furniture starts losing the new look. This is
due to various factors. Dust, dirt, cobwebs, and grime often
accumulate on wood furniture. These gradually lessen the
shine and gleam of your furniture, making it look dull.
Sometimes they form a wax type covering on furniture, which
makes its color turn dull and lifeless. You often try to discard
such furniture without realizing its worth. Good cleaning can
make your wood furniture look new.
Simple tips can help you maintain the
shine and look of your furniture
without damaging the interior
woodwork. Treat woodwork with
linseed oil or Tung oil. This forms an
invisible protective covering on your
furniture. Next, rub a soft cloth dipped
in lemon oil polish over the furniture.
This clears off all grime from the
surface.
If your furniture has a coating of wax formation, use a mixture
of white vinegar and water on your furniture first. Thereafter,
rub a soft cloth dipped in lemon oil polish over the furniture.
Next, clean a wood surface with a soft cloth clearing off all
dust from the surface.
Copyright © 2007 David Crowe All rights reserved

“Refinishing Your Wood Furniture” by David Crowe Page 84 of 91
Woodwork could have a varnish or
polyurethane finish. Clean this with
moistened baby wipes. Wipe off all
accumulated dirt and dust from across
edges of doorframes and baseboards.
You can use ladder to reach the
upperparts of your door, which could be
at the ceiling level.
Throw away dirty wipes and clean with
as many wipes as necessary until you
are able to clean the entire wood surface of all grime and dust.
You can wrap wipes around your finger to reach small parts of
your furniture.
Body oils, creams, and other sticky things accumulate on
wood furniture, mainly on armrests and chair backs, on top of
kitchen cabinets, and similar other things. Although you can
scrape off grime with your fingernails, it damages look of your
furniture.
The best way to treat this is to wash old furniture using a mild
soap and water. This soap does not damage the wood finish
and removes all accumulated dust and grime thoroughly. You
can also use a mixture of mineral spirits and linseed oil. Mix
three parts of the mineral spirits in one part of boiled linseed
oil. Use this mixture to clean all grime, dust, and dirt from old
wood furniture.
Copyright © 2007 David Crowe All rights reserved
“Refinishing Your Wood Furniture” by David Crowe Page 85 of 91
Essential Tips for Maintenance of Wood Furniture Do not rub cloth roughly across wood surface. It could cause
small scratches.
Use a soft cloth like a cotton cloth or baby wipes.
After cleaning of wood, you might find few cracks and gouges.
Fill these with appropriate fillers and stain them to get the old
look of your furniture.
Copyright © 2007 David Crowe All rights reserved

“Refinishing Your Wood Furniture” by David Crowe Page 86 of 91
Part-VIII: Frequently Asked Questions
24. Frequently Asked Questions
Q: Which are the best chemicals for stripping or
removing paint finishes?
A: Denatured alcohol, lacquer thinner and mineral spirits are
good for stripping finishes. Denatured alcohol can take off
shellac finishes while lacquer thinner can work on lacquer
finish. Using branded products can help you benefit from pure
products. Sometimes cheap mineral spirits contain latent oil
that leaves residue on your wood after applying finish. Good
quality mineral spirits leave no residue and evaporate
thoroughly.
Q: Newly purchased furniture has a
distinct odor emanating from it. What
is the remedy?
A: Odors from furniture are often due
to insufficient evaporation of
chemicals. Odors intensify during
cold months. Allow sufficient sunlight
on the furniture for all chemicals to evaporate thoroughly. As
a remedy for the time being, use a strong room freshener that
could subdue odor from the furniture in the room. This is a
temporary measure.
Copyright © 2007 David Crowe All rights reserved

“Refinishing Your Wood Furniture” by David Crowe Page 87 of 91
Q: There are few stain drips at door edges. How do I clean
them?
A: Dip some coarse cloth in mineral
spirits and scrub away the drips. It
could take some time and effort too.
This can take some shine off your
door. If drips or runs are not on the
main part, you can sand them.
Otherwise, use scotchbrite dipped in
paint thinner.
Q: How to get a dark stain on
cabinets made of Maplewood?
A: Use Red Mahogany oil based stain. Oil stains are very easy
to apply. Apply thick and liberal coats evenly over the entire
surface. As this stain remains wet for a longtime, you can take
your time to apply and wipe off any excess too. Maplewood is
hardwood and therefore takes lot of time to take in the stain.
You need to apply many coats of the stain to get the desired
effect.
Q: How do I stain? Which are the best stains?
A: There are different types of stains like gel stains, oil-based
stains, and water stains. You have to choose stain according
to the type of wood you are staining. Hardwoods require oil
stains while gel stains are the best bet for small projects. Gel
stains dry faster and therefore, you should control flow of
Copyright © 2007 David Crowe All rights reserved
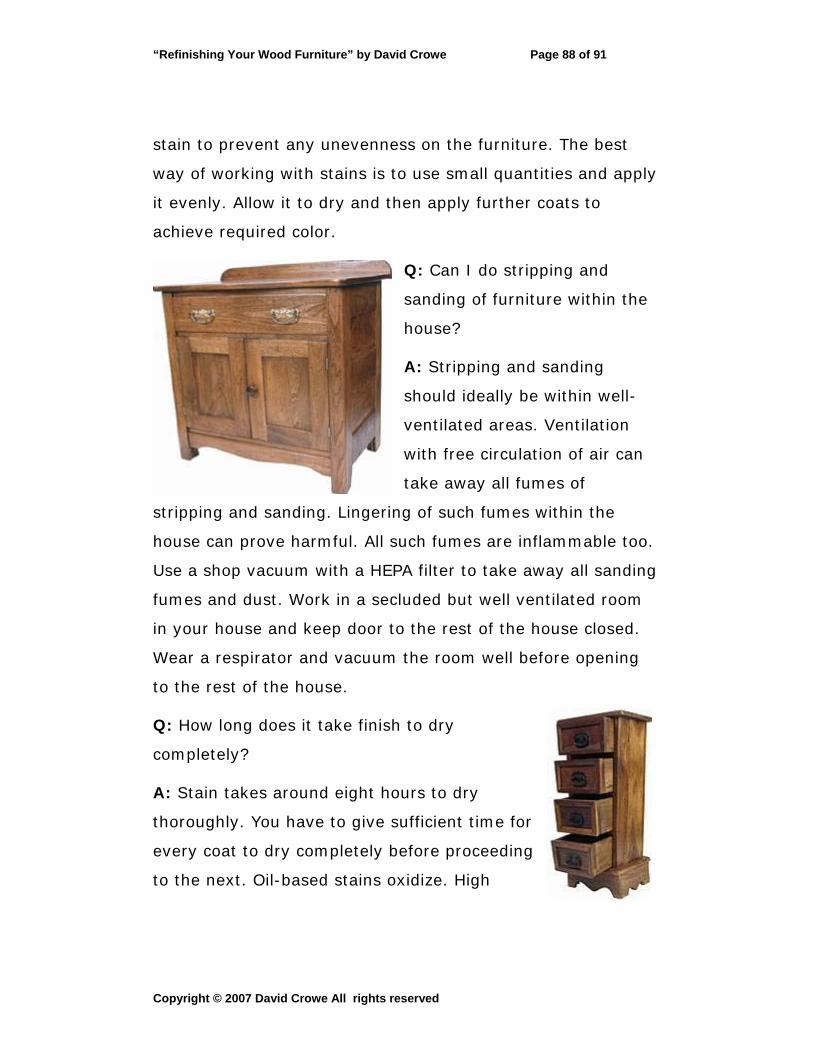
“Refinishing Your Wood Furniture” by David Crowe Page 88 of 91
stain to prevent any unevenness on the furniture. The best
way of working with stains is to use small quantities and apply
it evenly. Allow it to dry and then apply further coats to
achieve required color.
Q: Can I do stripping and
sanding of furniture within the
house?
A: Stripping and sanding
should ideally be within well-
ventilated areas. Ventilation
with free circulation of air can
take away all fumes of
stripping and sanding. Lingering of such fumes within the
house can prove harmful. All such fumes are inflammable too.
Use a shop vacuum with a HEPA filter to take away all sanding
fumes and dust. Work in a secluded but well ventilated room
in your house and keep door to the rest of the house closed.
Wear a respirator and vacuum the room well before opening
to the rest of the house.
Q: How long does it take finish to dry
completely?
A: Stain takes around eight hours to dry
thoroughly. You have to give sufficient time for
every coat to dry completely before proceeding
to the next. Oil-based stains oxidize. High
Copyright © 2007 David Crowe All rights reserved
“Refinishing Your Wood Furniture” by David Crowe Page 89 of 91
humidity could prolong drying processes.
Q: Placing hot dishes on a dining table leaves milk-colored
heat blushes. How do I correct this?
A: Heat from the dishes form vapor and it settles as rings on
the wood surface. Light or milk colored rings is due to the
presence of water within the finish. Use a soft cloth dipped in
camphor spirits or denatured alcohol and rub the area. This
could remove the light colored rings. Otherwise, use a little
toothpaste, mayonnaise, or a mild hand cleaner. Rub with
steel wool size 0000 or a clean cloth along the wood grain. If
your furniture has a wax finish, use turpentine dipped cloth to
clean wax and allow it to dry completely.
Q: How does pine wood furniture react to stain?
A: Pinewood does not take in stain instantly and evenly. It
stains irregularly. You can use a conditioner to even out the
stain on pinewood. Pine takes some time to darken stain and
better results are available through exposure to sunlight.
Apply around three coats of polyurethane finish to protect
pinewood from regular wear and tear.
Q: How to remove scratches and burn
marks from tabletop?
A: If burn marks and scratches are deep
into the wood of the table, you have to go
through complete refinishing of your
table. Start by stripping the finish and
Copyright © 2007 David Crowe All rights reserved
“Refinishing Your Wood Furniture” by David Crowe Page 90 of 91
then the surface of the table. You should sand out burn marks
evenly and thoroughly. Use artists’ oil paints to touch up burn
marks. Start with lighter colors first and then proceed to
darker colors. Apply in definite strokes and do not pile up
paint. Allow wood to soak in paint and then let it dry
completely.
Q: How do I scrape off veneer?
A: Veneer is thin layers of wood. If veneer is very old, soaking
it in hot water can take away hidden glue. It then becomes
easy to peel off veneer.
Q: How do I take off mold build-up on a wooden table?
A: Use equal quantities of household bleach and water. Mix
well and apply on mold to remove it. You can also use a
similar mixture of TSP (trisodium phosphate).
Q: How do I remove a sticky finish from within a cedar
box?
A: Sticky finish within a cedar box indicates the finish never
dried fully. Remove the finish and do it all again starting with
stripping.
Copyright © 2007 David Crowe All rights reserved

“Refinishing Your Wood Furniture” by David Crowe Page 91 of 91
Another eBookWholesaler Publication
Copyright © 2007 David Crowe All rights reserved