Embed Size (px)
Citation preview

Document ID: FLXU066
REFERENCE SOFTWARE FOR XRS DEVICES
User Guide

REFERENCE SOFTWARE FOR XRS DEVICES
User Guide 2 (58) Version 1.1
Flexibilis Oy retains the right to make changes to this document and the products described in this document at any time, without notice. No license, express or implied, by estoppel or otherwise, to any intellectual property rights is granted by this document. Flexibilis Oy makes no warranty of any kind, expressed or implied, with regard to any information contained in this document, including, but not limited to, the implied warranties of merchantability or fitness for any particular purposes. Further, Flexibilis Oy does not warrant the accuracy or completeness of the information, text, graphics, or other items contained within this document. Flexibilis Oy assumes no responsibility or liability whatsoever, and Flexibilis Oy disclaims any express or implied warranty, liability or warranties relating to fitness for a particular purpose, merchantability, or infringement of any patent, copyright or other intellectual property right.
© Copyright Flexibilis Oy 2016 All rights reserved.
Trademarks
All trademarks are the property of their respective owners.

REFERENCE SOFTWARE FOR XRS DEVICES
User Guide 3 (58) Version 1.1
Contents
1 About This Document .......................................................................................................... 7
2 SD Card Software ................................................................................................................. 8
2.1 Getting XRS RPi Disk Image ....................................................................................... 8 2.2 Hardware Requirements .............................................................................................. 8 2.3 Installing XRS RPi Disk Image .................................................................................. 11
2.3.1 Copying the Image on Windows .................................................................. 11 2.3.2 Copying the Image on Linux ........................................................................ 12
2.4 Accessing RPi ............................................................................................................ 12 2.4.1 Web interface ............................................................................................... 13 2.4.2 SSH .............................................................................................................. 14 2.4.3 NETCONF .................................................................................................... 14
2.5 Factory Settings ......................................................................................................... 15 2.5.1 XRS Register Access Method ...................................................................... 16
2.6 Source Code .............................................................................................................. 16 2.7 Modifying SD Card Software ..................................................................................... 17 2.8 Software Components ............................................................................................... 17
2.8.1 Bootloaders .................................................................................................. 17 2.8.2 Linux ............................................................................................................. 18 2.8.3 Device Tree .................................................................................................. 18 2.8.4 Drivers .......................................................................................................... 19
2.8.4.1 flx_xrs (XRS) ............................................................................... 20 2.8.4.2 flx_xrs_guard (SoC) .................................................................... 21 2.8.4.3 flx_frs (RS) .................................................................................. 22
2.8.4.3.1 Principle of Operation ...................................... 25 2.8.4.3.2 Accessing Switch Features .............................. 26 2.8.4.3.3 Port Link Mode Management .......................... 26 2.8.4.3.4 Accessing Port Statistics Counters .................. 26 2.8.4.3.5 Accessing MAC Address Table ....................... 27 2.8.4.3.6 Managing Port Forwarding Mode .................... 27 2.8.4.3.7 Auxiliary Network Interfaces ............................ 27 2.8.4.3.8 Independent Interfaces .................................... 27
2.8.4.4 flx_frtc (RTC) ............................................................................... 28 2.8.4.5 flx_time ........................................................................................ 28 2.8.4.6 flx_bus ......................................................................................... 28 2.8.4.7 flx_bus_i2c (XRS I2C Slave) ....................................................... 28 2.8.4.8 flx_bus_mdio (XRS MDIO Slave) ................................................ 29 2.8.4.9 flx_i2c_mdio (SFP PHY) ............................................................. 29 2.8.4.10 flx_i2c_gpio ............................................................................... 30 2.8.4.11 flx_gpio (XRS GPIO) ................................................................. 31 2.8.4.12 flx_fpts (TS) ............................................................................... 31 2.8.4.13 dp83848 (PHY) ......................................................................... 31 2.8.4.14 m88e1512 (PHY) ...................................................................... 31 2.8.4.15 leds_gpio ................................................................................... 31
2.8.5 User Space ................................................................................................... 31 2.8.5.1 XR7 PTP ..................................................................................... 31 2.8.5.2 XR7 Redundancy Supervision .................................................... 32 2.8.5.3 flx_fes_lib .................................................................................... 32 2.8.5.4 XR7 Management Software ........................................................ 32
2.8.5.4.1 XR7 FCM ......................................................... 33 2.8.5.4.2 XR7 Interface Manager .................................... 33 2.8.5.4.3 XR7 GUI ........................................................... 33
2.8.5.5 SSH Server ................................................................................. 33 2.8.5.6 LED Control ................................................................................. 33
2.9 Troubleshooting ......................................................................................................... 34

REFERENCE SOFTWARE FOR XRS DEVICES
User Guide 4 (58) Version 1.1
2.9.1 Driver Loading .............................................................................................. 34 2.9.2 Driver Load Verification ................................................................................ 34 2.9.3 Redundant Switch (RS) ................................................................................ 35
2.9.3.1 Switch Register Access .............................................................. 35 2.9.3.2 Port Register Access .................................................................. 36 2.9.3.3 Port Link Status and Speed ........................................................ 36 2.9.3.4 Use of Correct PHY Driver .......................................................... 37 2.9.3.5 SFP Module Change Detection .................................................. 37 2.9.3.6 Traffic Problems .......................................................................... 37
2.9.3.6.1 VLAN ................................................................ 38 2.9.3.6.2 RGMII ............................................................... 38
2.9.3.7 MTU ............................................................................................ 39 2.9.4 RTC .............................................................................................................. 39
2.9.4.1 Checking RTC Is Running .......................................................... 39 2.9.4.2 Rough Frequency Check ............................................................ 39
3 XRS SW Environment Setup ............................................................................................. 41
3.1 Getting XRS SW Environment ................................................................................... 41 3.2 Introduction to the Environment ................................................................................. 41 3.3 Setting up New Virtual Machine ................................................................................. 42
3.3.1 Networking.................................................................................................... 42 3.3.2 Creating VM with Virtual Box........................................................................ 43
3.3.2.1 Base Memory .............................................................................. 43 3.3.2.2 Main and Home Disks ................................................................. 43 3.3.2.3 VM Settings ................................................................................. 44 3.3.2.4 VM Networking Settings for NAT Networking ............................. 44
3.4 Common Machine Settings ........................................................................................ 45 3.4.1 System Accounts and Passwords ................................................................ 46 3.4.2 Text Editors .................................................................................................. 47 3.4.3 Keyboard Layout .......................................................................................... 47 3.4.4 Networking.................................................................................................... 47 3.4.5 Time Zone .................................................................................................... 47 3.4.6 Synchronizing System Clock with NTP ........................................................ 47
4 XRS SW Environment Usage Instructions ....................................................................... 48
4.1 Building Software and SD Card Images .................................................................... 48 4.1.1 Using CI Server ............................................................................................ 48 4.1.2 Using Command Line Tools ......................................................................... 48
4.2 Importing Source Code .............................................................................................. 48 4.3 Advanced Usage ........................................................................................................ 49
4.3.1 Recreate Build Environment ........................................................................ 49 4.3.2 Build Individual Package .............................................................................. 49 4.3.3 Install Individual Package ............................................................................. 49 4.3.4 Publish Individual Package .......................................................................... 50 4.3.5 Build and Publish All Packages .................................................................... 50 4.3.6 Build SD Card Image Only ........................................................................... 50 4.3.7 Customizing Generated SD Card Images .................................................... 50
4.3.7.1 About Environment Configuration ............................................... 50 4.3.7.2 List of Packages to Build ............................................................. 51 4.3.7.3 Adding Packages to SD Card ..................................................... 51
4.3.8 About Package Repository ........................................................................... 51 4.3.8.1 Remove Package from Package Repository .............................. 51
4.3.9 Increasing Disk Size ..................................................................................... 51 4.3.9.1 VirtualBox .................................................................................... 51
4.4 Freeing Disk Space .................................................................................................... 52
5 XRS SW Environment Components ................................................................................. 54
5.1.1 Web Server................................................................................................... 54 5.1.2 Continuous Integration Server ..................................................................... 54

REFERENCE SOFTWARE FOR XRS DEVICES
User Guide 5 (58) Version 1.1
5.1.3 Build Environment ........................................................................................ 54 5.1.4 Version Control System ................................................................................ 55 5.1.5 Package Repository ..................................................................................... 55
6 Abbreviations ...................................................................................................................... 57
7 References .......................................................................................................................... 58
Figures
Figure 1. Raspberry Pi Connected to XRS Reference Board ................................................... 9 Figure 2. LED Locations .......................................................................................................... 11 Figure 3. HDD Raw Copy Tool ................................................................................................ 11 Figure 4. XRS Reference Board Interfaces ............................................................................. 12 Figure 5. Accessing RPi .......................................................................................................... 13 Figure 6. Login Screen ............................................................................................................ 13 Figure 7. Web Interface ........................................................................................................... 14 Figure 8. RPi Boot Process ..................................................................................................... 18 Figure 9. Drivers, Devices and Busses ................................................................................... 20 Figure 10. Environment Components ...................................................................................... 42 Figure 11. VM System Console ............................................................................................... 46 Figure 12. Connecting to the VM with SSH ............................................................................. 46
Tables
Table 1. Reference Software LED Usage ............................................................................... 10 Table 2. Factory Settings ......................................................................................................... 16 Table 3. Flx_frs Driver API Header Files ................................................................................. 26 Table 4. flx_fes_lib Files .......................................................................................................... 32 Table 5. XRS SW Environment Inbound Networking Requirements ...................................... 43 Table 6. XRS SW Environment Outbound Networking Requirements .................................... 43 Table 7. Sample VirtualBox Port Forwarding Configuration .................................................... 45 Table 8. Default System Account Passwords ......................................................................... 47

REFERENCE SOFTWARE FOR XRS DEVICES
User Guide 6 (58) Version 1.1
Revision History
Rev Date Comments
1.0 12.2.2016 First version
1.1 29.6.2016 Raspberry Pi 3 Model B support
XRS register access method selection

REFERENCE SOFTWARE FOR XRS DEVICES
User Guide 7 (58) Version 1.1
1 About This Document
This document is a reference software user guide for XRS7004E and XRS7003E devices [1]. The main idea of the reference software is to provide a software environment for Flexibilis XRS device evaluation. The software consists of two parts: First part is XRS RPi Disk Image, an SD card image for Raspberry Pi which is used with Flexibilis XRS Reference Board [2]. Second part is XRS Software Environment which is an environment for building software for the SD card and creating SD card images.
The SD card images include device drivers and other software for using XRS devices. XRS RPi Disk Image, a prebuilt SD card image, allows XRS device evaluation without having to setup the environment and build any software. Chapter 2 contains usage information about SD card software.
Focus on other chapters of this document is in the XRS Software Environment. It is a Debian-based Linux distribution [3] which is meant to be run using Oracle VirtualBox [7].
Chapter 3 contains information on setting up the environment.
Chapter 4 contains a usage guide for building software and images.
Chapter 5 contains a depiction of the environment components.
List of used abbreviations are in chapter 6.
List of references are in chapter 7.
Command line commands are written with CommandLine style. Command line commands
are prefixed with either a dollar sign ($) or a hash (#), which both denote a command prompt. Commands prefixed with a hash require root privileges. Command line portions that are meant to be adapted for particular use are written in bold CommandLine style.

REFERENCE SOFTWARE FOR XRS DEVICES
User Guide 8 (58) Version 1.1
2 SD Card Software
Prebuilt SD card images (“XRS RPi Disk Image”) and SD card images built by the XRS SW Environment in default form contain reference software for XRS Reference Board.
The purpose of the reference software is to be able to test and demonstrate the functionality of the XRS7004E and XRS7003E devices. The software or parts of the software can also be licensed for customers employing XRS7000 series devices in their products. Main parts of the software stack are
XR7 PTP for time synchronization
XR7 Redundancy Supervision for HSR/PRP supervision protocol
XR7 Management Software for configuration management and status monitoring
System programs and utilities from Debian GNU/Linux distribution [3]
Linux kernel
Linux device drivers
See section 2.8 for more information on software components.
2.1 Getting XRS RPi Disk Image
The reference software for RPi can be downloaded from Flexibilis website, http://www.flexibilis.com/products/downloads/. The page has a download link to the ready-made RPi SD card image (“XRS RPi Disk Image”) for XRS Reference Board.
If you want to make changes to the reference design or compile it on your own, you should download the XRS Software Environment which you can use to build the SD card images. See chapter 3 for more information.
2.2 Hardware Requirements
The reference software runs on Raspberry Pi 1 Model B+, Raspberry Pi 2 Model B and Raspberry Pi 3 Model B (abbreviated to RPi). Raspberry Pi 3 Model B or Raspberry Pi 2 Model B are recommended as they have a few times more processing power than Raspberry Pi 1 Model B+.
The reference software works properly only in an environment where:
Raspberry Pi board is connected to the CPU/RPi connector of XRS Reference Board (“B” in Figure 1)
Raspberry Pi Ethernet port is connected to XRS Reference Board Port 0 (CPU port) with an Ethernet cable. (“A” in Figure 1)

REFERENCE SOFTWARE FOR XRS DEVICES
User Guide 9 (58) Version 1.1
Figure 1. Raspberry Pi Connected to XRS Reference Board
Reference software uses the XRS Reference Board LEDs in a certain way which is described in Table 1. Figure 2 shows the locations of the LEDs. See SpeedChip XRS7000 Reference Board User Manual for more information [2].

REFERENCE SOFTWARE FOR XRS DEVICES
User Guide 10 (58) Version 1.1
LED Marking Color Usage Explanation
RJ45_0 left - green Copper Eth 0 link/traffic
Lights up when link is up. Flashes when traffic.
RJ45_0 right - yellow Not in use The Reference Software does not use this LED.
Next to RJ45_0 LED14 red Not in use The Reference Software does not use this LED.
RJ45_1 left - green Copper Eth 1 link/traffic
Lights up when link is up. Flashes when traffic.
RJ45_1 right - yellow Copper Eth 1 1588_P2P
Lights up when IEEE1588 peer-to-peer communication is OK.
RJ45_2 left - green Copper Eth 2 link/traffic
Lights up when link is up. Flashes when traffic.
RJ45_2 right - yellow Copper Eth 2 1588_P2P
Lights up when IEEE1588 peer-to-peer communication is OK.
RJ45_3 left - green Copper Eth 3 link/traffic
Lights up when link is up. Flashes when traffic.
RJ45_3 right - yellow Copper Eth 3 1588_P2P
Lights up when IEEE1588 peer-to-peer communication is OK.
SFP1 green LED16_1 green SFP 1 link/traffic
Lights up when link is up. Flashes when traffic.
SFP1 yellow LED15_1 yellow SFP 1 1588_P2P
Lights up when IEEE1588 peer-to-peer communication is OK.
SFP2 green LED16_2 green SFP 2 link/traffic
Lights up when link is up. Flashes when traffic.
SFP2 yellow LED15_2 yellow SFP 2 1588_P2P
Lights up when IEEE1588 peer-to-peer communication is OK.
SFP3 green LED16_3 green SFP 3 link/traffic
Lights up when link is up. Flashes when traffic.
SFP3 yellow LED15_3 yellow SFP 3 1588_P2P
Lights up when IEEE1588 peer-to-peer communication is OK.
User LED1 LED1 green Software blinks
Indicates that SW is running and that communication works between the boards.
User LED2 LED2 red IEEE1588 slave
Lights up when (at least one port is) an IEEE1588 Slave and synchronized to a Master.
Table 1. Reference Software LED Usage

REFERENCE SOFTWARE FOR XRS DEVICES
User Guide 11 (58) Version 1.1
Figure 2. LED Locations
2.3 Installing XRS RPi Disk Image
The installation of the XRS reference software is basically copying the XRS RPi Disk Image to a micro SD card. This can be done for example with a Windows or Linux PC that is equipped with an SD card reader. The recommended card size is at least 1 GB, take note also of the card class that determines transfer speed. A list of RPi compatible SD cards can be found here: http://elinux.org/RPi_SD_cards.
2.3.1 Copying the Image on Windows
1. Point your web browser to http://hddguru.com/software/ and download the HDD Raw Copy Tool.
2. Install the HDD Raw Copy Tool (Admin rights required, consult your administrator). 3. Unzip the compressed Raspberry Pi disk image if it is in compressed form. 4. Use the HDD Raw Copy Tool to copy the unzipped Raspberry Pi disk image
(xrs-rpi.raw) to a micro SD card. Use the disk image file as the source and the
micro SD card as the target. Be careful not to overwrite any of your hard drives! See Figure 3.
Figure 3. HDD Raw Copy Tool

REFERENCE SOFTWARE FOR XRS DEVICES
User Guide 12 (58) Version 1.1
5. Power off the RPi. 6. Insert the micro SD card to the micro SD card reader of the RPi. 7. Power on the RPi
2.3.2 Copying the Image on Linux
You can use the following command:
$ man dd
Example:
# dd if=xrs-rpi.raw of=/dev/sdz bs=1M
# sync
# eject /dev/sdz
It is also possible to write the SD card image directly from within VirtualBox VM using a USB SD card reader if the VirtualBox Extension Pack has been installed. Please see the VirtualBox documentation for details. Use above Linux instructions when the USB SD card reader is detected by the VM.
Be careful not to overwrite any of your hard drives.
2.4 Accessing RPi
After creating the SD card (section 2.3) and powering up your RPi check that the user LED 1 is blinking and that the port 0 (CPU port) link LED lights up (see Figure 2 for LED locations). Interfaces are depicted in Figure 4.
Figure 4. XRS Reference Board Interfaces
After that you can access the RPi with your computer by connecting to Ethernet interface 3 of the XRS Reference Board (refer to Figure 5). Interfaces 1 and 2 can also be used, but as they are HSR/PRP interfaces in RedBox mode, it is usually better to use the Ethernet interface 3. The default IP address of the board is 192.168.7.1/24, so change the IP address of your computer so that it is in the same IP subnetwork – use for example IP address 192.168.7.2/24 (“/24” refers to the subnet mask and means 255.255.255.0). Factory settings are described in more detail in section 2.5.
If you create multiple SD card images for multiple Raspberry Pi devices, the IP addresses should be changed to be unique before connecting them together.

REFERENCE SOFTWARE FOR XRS DEVICES
User Guide 13 (58) Version 1.1
Figure 5. Accessing RPi
2.4.1 Web interface
Browse to the IP address of the board, which is http://192.168.7.1/ by default, and accept the security exceptions and warnings.
Username: admin
Password: admin
The IP Address field at the login page can be left empty, it is used only when running the web interface on another device than the one being controlled (see Figure 6).
Figure 6. Login Screen

REFERENCE SOFTWARE FOR XRS DEVICES
User Guide 14 (58) Version 1.1
By using the web interface (Figure 7) the user can view interface and other statistics and change different kinds of settings including IP settings, VLAN settings, interface redundancy settings and time synchronization settings.
Figure 7. Web Interface
2.4.2 SSH
Use your favorite SSH client (for example PuTTY) to connect to the SSH server running at RPi (the default address is 192.168.7.1). Once you have logged in you’ll have a command line shell with many GNU and Linux tools available.
Username: root
Password: root
2.4.3 NETCONF
SD card software contains XR7 Flexibilis Configuration Manager (FCM), which is a NETCONF [14] agent implementation. FCM can be accessed over SSH as described in RFC 4742 [15].
NETCONF itself is not meant to be used directly as a user interface. It provides an interface for applications to manage devices by retrieving status and configuration information and uploading new configuration data.
The web interface uses NETCONF for all status information and configuration manipulation related activity. FCM module configuration files can be found from

REFERENCE SOFTWARE FOR XRS DEVICES
User Guide 15 (58) Version 1.1
/etc/fcmd/<MODULE>/<PROFILE>, where <MODULE> is XR7 FCM module name and
<PROFILE> is NETCONF configuration datastore name, for example running or startup.
2.5 Factory Settings
By default the SD card software for XRS Reference Board uses factory settings, which are also used when configuration is reset using the web interface (section 2.4.1). Main characteristics of the factory configuration are
Interfaces 1 and 2 (CE01 and CE02, respectively) are HSR redundant ports.
Interface 3 (CE03) is used as interlink port (XRS7004).
Switch IP address is 192.168.7.1/24.
There are no additional static routes.
All RS ports are members of all VLAN IDs 0 – 4095. Untagged traffic will be tagged with VLAN ID 4095 on ingress. VLAN tag of frames with VLAN ID 4095 will be removed on egress.
PTP stack acts as a boundary clock between redundant interfaces and interlink interface (XRS7004).
PTP stack acts as an ordinary clock with both redundant interfaces (XRS7003).
PTP peer-to-peer delay measurement is enabled on all external interfaces.
Summary of the factory settings is in Table 2. Note that both XRS7004 and XRS7003 use the same basic configuration, but XRS7003 does not have interface CE03.
Configuration section Setting Value
Interface
CE01, CE02 and CE03 Enabled Yes
Speed and duplex Auto-negotiated
Default VLAN 4095
Default PCP 0
VLAN Tagging On
Default VLAN for VLAN 0 0
Priority for PCP 0 0
Priority for PCP 1 0
Priority for PCP 2 1
Priority for PCP 3 1
Priority for PCP 4 2
Priority for PCP 5 2
Priority for PCP 6 3
Priority for PCP 7 3
Switch
SE01 Address 192.168.7.1/24
Redundancy
SE01 Mode HSR
Net ID 1
Port S SE01
Port A CE01
Port B CE02
Port I CE03
Supervision Address 01:15:4E:00:01:00
Static Routing Routes (no routes)

REFERENCE SOFTWARE FOR XRS DEVICES
User Guide 16 (58) Version 1.1
VLAN
VLAN IDs 0-4095 Interfaces CE01, CE02, CE03
Description Default VLAN
Time Synchronization
Interface OC01 Profile iec_level1
Mode ordinary
Delay measurement disabled
Ports CE01 and CE02
Interface OC02 Profile iec_level1
Mode ordinary
Delay measurement disabled
Ports CE03
Interface CE01, CE02 and CE03 Profile iec_level1
Mode Transparent clock
Delay measurement peer-to-peer
Basic One step / two step clock One step clock
Clock Class 187
Accuracy 1 us
Priority 1 128
Priority 2 128
Domain 0
Time source internal oscillator
Table 2. Factory Settings
Some of the settings cannot be directly changed through the web interface (section 2.4.1), though they are configuration parameters of the underlying software.
Factory settings files can be found from /etc/fcmd/<MODULE>/factory, where
<MODULE> is XR7 FCM module name.
2.5.1 XRS Register Access Method
By default I2C is used to access XRS registers. This is controlled by FLX_BUS setting in
/etc/default/xrs file. Reboot is needed for the change to take effect.
Change it to this for using MDIO instead:
FLX_BUS=mdio
To switch back to I2C accesses change it back to this:
FLX_BUS=i2c
The setting determines simply which one of the drivers flx_bus_i2c or flx_bus_mdio is loaded. More fine-grained control would be possible via device tree, see section 2.8.3 for details.
2.6 Source Code
Source code for some parts of the reference software, for example Linux kernel and device drivers, are available in the XRS Software Environment. See section 5.1.4. On the other hand some parts of the reference software are included as prebuilt binary Debian packages in the VM package repository (section 5.1.5). To license the source codes of these binaries, please contact Flexibilis.
Used Debian software is downloaded directly from Debian servers when SD card image is built. Source code for that software is available from Debian as Debian source packages.
REFERENCE SOFTWARE FOR XRS DEVICES
User Guide 17 (58) Version 1.1
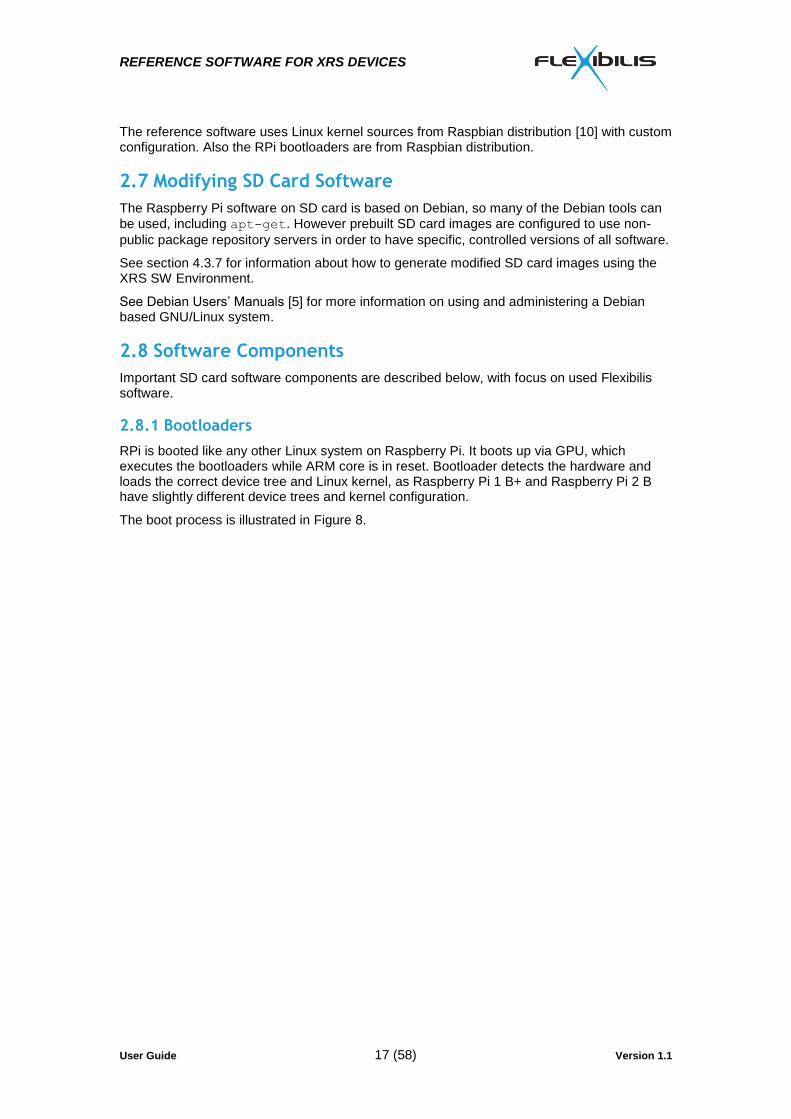
The reference software uses Linux kernel sources from Raspbian distribution [10] with custom configuration. Also the RPi bootloaders are from Raspbian distribution.
2.7 Modifying SD Card Software
The Raspberry Pi software on SD card is based on Debian, so many of the Debian tools can
be used, including apt-get. However prebuilt SD card images are configured to use non-
public package repository servers in order to have specific, controlled versions of all software.
See section 4.3.7 for information about how to generate modified SD card images using the XRS SW Environment.
See Debian Users’ Manuals [5] for more information on using and administering a Debian based GNU/Linux system.
2.8 Software Components
Important SD card software components are described below, with focus on used Flexibilis software.
2.8.1 Bootloaders
RPi is booted like any other Linux system on Raspberry Pi. It boots up via GPU, which executes the bootloaders while ARM core is in reset. Bootloader detects the hardware and loads the correct device tree and Linux kernel, as Raspberry Pi 1 B+ and Raspberry Pi 2 B have slightly different device trees and kernel configuration.
The boot process is illustrated in Figure 8.

REFERENCE SOFTWARE FOR XRS DEVICES
User Guide 18 (58) Version 1.1
1st stage bootloader
(GPU)
2nd
stage bootloader
(GPU)
3rd
stage bootloader
(GPU)
Linux
(ARM)
init
init scripts
ROM
SD-card partition 1
(FAT32)
SD-card partition 2
(root filesystem)
Daemons
Figure 8. RPi Boot Process
2.8.2 Linux
Linux kernel from Raspbian is used with custom kernel configuration. There is a different build of the kernel for both RPi models.
2.8.3 Device Tree
There is a separate device tree for both RPi models. The XRS7000 Reference Board specific
parts are in separate .dtsi files which are included into each RPi model’s main device tree.
XRS7000 registers can be accessed by either I2C or MDIO. Both are connected on the XRS7000 Reference Board. In order to test both methods each XRS block with user registers appears twice in the device tree. Which one to use is selected by which one of the two drivers flx_bus_i2c and flx_bus_mdio is loaded. It would also be possible to use both, by having different devices in the two busses. See sections 2.8.4.6, 2.8.4.7 and 2.8.4.8 for driver details.
I2C access is used by default because then RPi I2C controller can be used to form the bus access cycles, without having to do every detail of bus access cycles in software on RPi CPU. In default form the boot script responsible for driver loading does not load the flx_bus_mdio driver.
See also Figure 9 for an illustration how the used Linux devices, busses and drivers relate to each other.

REFERENCE SOFTWARE FOR XRS DEVICES
User Guide 19 (58) Version 1.1
2.8.4 Drivers
Linux drivers for XRS are modular. All needed Linux drivers from Flexiblis are licensed under GPL v2. Descriptions of Flexibilis Linux drivers used in the SD card follow below.
Many of the drivers provide useful status information in own subdirectory of /proc/driver.
Drivers are built separately for both RPi Linux kernels. They are loaded at boot time by init
script /etc/init.d/xr7-system from /etc/xr7/drivers. The actual HW specific init
scripts reside in /etc/xr7/script and they do also some other HW related initializations in
addition to just loading correct set of drivers.
Used Linux driver model busses, devices and drivers are illustrated in Figure 9. Each of the driver is described in turn.

REFERENCE SOFTWARE FOR XRS DEVICES
User Guide 20 (58) Version 1.1
Legend
driver
flx_gpio
flx_bus
flx_xrsflx_frs
flx_time
flx_frtc flx_fpts
flx_i2c_mdio
I2Cto SFP
flx_i2c_gpio
GPIO
dp83848
MDIO1
m88e1512
MDIO2
flx_busMDIO
flx_busI2C
flx_bus_mdio flx_bus_i2c
I2CRPi
gpio-leds
GPIOXRS
mdio_gpio
GPIORPi
pca953x
marvell
MDIO(virtual)
bus
3x
device
NETSE01
NETCE0*
3x
/dev/flx_fpts*
4x
/dev/flx_time0
PHYSE01
PHYCE0*
3x
PHYSFPCE0*
Chip IDproc, sysfs
LEDssysfs
Figure 9. Drivers, Devices and Busses
2.8.4.1 flx_xrs (XRS)
Flx_xrs is a driver for XRS chip identification. It can also optionally release device from reset and enable CPU interrupt in a controlled way, but see also flx_xrs_guard driver below. Device tree bindings look like this.

REFERENCE SOFTWARE FOR XRS DEVICES
User Guide 21 (58) Version 1.1
xrs@0 {
compatible = "flx,xrs";
reg = <0x0 0xa>;
/* GPIO signal for power OK, optional */
power-ok = <&gpio 27 0>;
/* GPIO signal for reset, optional */
reset = <&gpio 18 0>;
/* Interrupt to enable via sysfs, optional */
interrupt-parent = <&gpio>;
interrupts = <17 8>;
};
reg Defines register address range of XRS identification registers.
power-ok Defines optional GPIO signal to check for power OK conditional. If this signal is not up (1), driver refuses to use that device. This setting belongs to flx_xrs_guard when using that driver.
reset Defines optional active low GPIO signal to use to momentarily reset the device or bring it out of reset. When driver module is removed, the reset GPIO is also freed, which asserts the reset again. This setting belongs to flx_xrs_guard when using that driver.
interrupt-parent and interrupts Define optional interrupt signal for controlled CPU interrupt enablement. The interrupt will be disabled first, before bringing device out of reset if also reset signal was defined. Interrupt will be enabled when readiness is signaled from user space via
driver sysfs ready file by writing 1 to it. Readiness should be signaled when HW has
been initialized correctly. This can be used to prevent killing the CPU by unconfigured HW asserting level-sensitive interrupt line. This setting belongs to flx_xrs_guard when using that driver.
2.8.4.2 flx_xrs_guard (SoC)
This simple driver is actually part of the flx_xrs kernel module, but being a separate system driver it has its own device tree bindings. It can be used when more control is needed over bringing XRS device out of reset and enabling the CPU interrupt it is connected to.
For example when using MDIO to access XRS, the same MDIO bus might contain PHY devices and the XRS RESET_n signal which is typically connected to CPU GPIO, might control also the PHY devices. In such a situation the RESET_n must be released before MDIO bus driver (like the Linux bit-banging mdio-gpio driver) initialization. Further it may be desired to delay enabling the CPU interrupt until the PHY devices have been initialized. Otherwise a device with wrong configuration might keep the interrupt line asserted, which could easily make the very unresponsive.
Driver provides a sysfs file named ready which can be used to signal the driver when it is
safe to enable the CPU interrupt.
Device tree bindings look like the following. Note that there is no reg setting. This node is
typically placed inside a soc node, and in any case within a different node than the other XRS
device nodes, like the flx_xrs node.

REFERENCE SOFTWARE FOR XRS DEVICES
User Guide 22 (58) Version 1.1
xrs_guard {
compatible = "flx,xrs-guard";
/* GPIO signal for power OK, optional */
power-ok = <&gpio 27 0>;
/* GPIO signal for reset, optional */
reset = <&gpio 18 0>;
/* Interrupt to enable via sysfs, optional */
interrupt-parent = <&gpio>;
interrupts = <17 8>;
};
power-ok Defines optional GPIO signal to check for power OK conditional. If this signal is not up (1), driver refuses to use that device. Do not specify this for flx_xrs when using flx_xrs_guard driver.
reset Defines optional active low GPIO signal to use to momentarily reset the device or bring it out of reset. When driver module is removed, the reset GPIO is also freed, which asserts the reset again. Do not specify this for flx_xrs when using flx_xrs_guard driver.
interrupt-parent and interrupts Define optional interrupt signal for controlled CPU interrupt enablement. The interrupt will be disabled first, before bringing device out of reset if also reset signal was defined. Interrupt will be enabled when readiness is signaled from user space via
driver sysfs ready file by writing 1 to it. Readiness should be signaled when HW has
been initialized correctly. This can be used to prevent killing the CPU by unconfigured HW asserting level-sensitive interrupt line. Do not specify this for flx_xrs when using flx_xrs_guard driver.
2.8.4.3 flx_frs (RS)
Flx_frs is a driver for FRS, FES and XRS RS (FRS is an FPGA implementation of HSR/PRP switch, FES is similar but without HSR/PRP support).
Driver creates a Linux net device for each switch port. Net devices of the external ports are attached to PHY devices, if so configured. This allows existing Linux PHY drivers to be used for link mode monitoring in order to keep RS port registers synchronized with current link mode. Link mode can be managed through ETHTOOL ioctl. Driver provides also an ioctl interface to user space for accessing RS features.
Driver needs information about each switch and switch port in device tree to function correctly. Network interface names are defined in device tree. By convention CPU ports are named SE01, SE02, and so on while external ports are named CE01, CE02, CE03 and so on, although any valid names can be used.
Switch device tree bindings are listed in the following.
reg Address of switch registers and length in octets. Note that port registers are defined separately.
interrupts Interrupt definition in format specific to the parent interrupt controller.
mac_name Name of the Linux net device whose Ethernet MAC is connected to CPU port.

REFERENCE SOFTWARE FOR XRS DEVICES
User Guide 23 (58) Version 1.1
port<N> Port definitions for port number <N>.
Port device tree bindings are:
if_name Linux net device name for the port. Driver creates new net device for each port using this name.
medium_type Type of the medium used with this port. This affects how the driver deals with the port. Possible values are: 0 NONE, port is not used 1 SFP, port connected to SFP (fiber or copper) and may have a PHY 2 PHY, port hard-wired to a PHY 5 NO PHY, there is no PHY, speed can be changed at runtime Parameters phy-handle and phy-mode must be used with SFP and PHY medium types for the RS driver to be able to attach the Linux PHY device to the RS port net device. Parameter sfp-phy-handle can be used with SFP medium type to define access to PHY within copper SFP module. Parameter sfp-eeprom can be used with SFP medium type to detect SFP type from SFP EEPROM contents.
cpu-port Indicates a port connected to CPU.
interlink-port Indicates a port connected to another FRS or RS. This is used for example when building a QuadBox using a design with one CPU and two interconnected switches.
auto-speed-select Configure RS port to select speed from external signals or configure XRS RS port to select speed automatically.
reg Address of port registers and length in octets, optionally followed by address of port adapter registers and length in octets. RS does not have adapter registers.
phy-handle Link to PHY device which is defined somewhere else in the device tree. This is required for ports with medium type PHY and optional for ports with medium type SFP. If this is left out, driver assumes there is no PHY. Copper SFP modules may have a PHY, too. Parameter sfp-phy-handle should be used for them instead of phy-handle. For medium type SFP both phy-handle and sfp-phy-handle can be specified, when there is a separate PHY in addition to SFP PHY for a port. This may be necessary for example to put both PHYs in correct mode.
phy-mode PHY interface mode to use with the Linux PHY driver framework. This is required
when phy-handle is set. See Linux source file drivers/of/of_net.c for possible
values.
sfp-eeprom Link to I2C slave device of SFP EEPROM defined somewhere else in the device tree. If this is specified for ports which have medium_type value 1 (SFP), SFP module type is detected from SFP EEPROM contents. This is needed with some designs, including XRS7000 Reference Board for the port to function correctly with different SFP modules.

REFERENCE SOFTWARE FOR XRS DEVICES
User Guide 24 (58) Version 1.1
sfp-phy-handle Link to PHY device within copper SFP module. Copper SFP modules typically contain a PHY device which is accessed via I2C. For medium type SFP both phy-handle and sfp-phy-handle can be specified, when there is a separate PHY in addition to SFP PHY for a port. This may be necessary for example to put both PHYs in correct mode.
Device tree example is shown below.

REFERENCE SOFTWARE FOR XRS DEVICES
User Guide 25 (58) Version 1.1
rs@300000 {
#address-cells = <1>;
#size-cells = <1>;
compatible = "flx,rs";
/* Switch registers */
reg = <0x300000 0x8000>;
interrupt-parent = <&gpio>;
interrupts = <17 8>;
mac_name = "eth0";
port0 {
if_name = "SE01";
/* 0=none 1=SFP 2=PHY 5=NOPHY */
medium_type = <2>;
cpu-port;
/* port registers */
reg = <0x200000 0x10000>;
phy-handle = <&phy0>;
phy-mode = "rmii";
/*auto-speed-select;*/
};
port1 {
if_name = "CE01";
medium_type = <1>;
reg = <0x210000 0x10000>;
phy-handle = <&phy1>;
phy-mode = "rgmii-id";
/*auto-speed-select;*/
sfp-eeprom = <&sfp1_eeprom>;
sfp-phy-handle = <&sfp1_phy>;
};
port2 {
if_name = "CE02";
medium_type = <1>;
reg = <0x220000 0x10000
phy-handle = <&phy2>;
phy-mode = "rgmii-id";
/*auto-speed-select;*/
sfp-eeprom = <&sfp2_eeprom>;
sfp-phy-handle = <&sfp2_phy>;
};
port3 {
if_name = "CE03";
medium_type = <1>;
reg = <0x230000 0x10000>;
phy-handle = <&phy3>;
phy-mode = "rgmii-id";
/*auto-speed-select;*/
sfp-eeprom = <&sfp3_eeprom>;
sfp-phy-handle = <&sfp3_phy>;
};
};
2.8.4.3.1 Principle of Operation
Driver needs an Ethernet MAC device to work with. It catches all frames received by the MAC using Linux net device API and handles them itself. Because of this the original MAC network interface cannot be used for networking. So IP addresses and routes at OS level, for example, are configured to use the RS CPU network interface (typically SE01) instead of the original network interface.

REFERENCE SOFTWARE FOR XRS DEVICES
User Guide 26 (58) Version 1.1
All frames sent by OS to RS port network interfaces will be forwarded to the original MAC driver for actual sending. Before that the driver adds management trailer to all frames. Frames sent to CPU port network interface will get management trailer value zero, which causes RS to choose where to forward the frame. Frames to other port network interfaces (CExx) will get a management trailer with only the bit of that port set, causing the frame to be sent only through that port. Thus the driver relies on RS management trailer feature to work correctly.
All frames received from the MAC have the management trailer, too, which indicates the receiving external port. RS driver passes all frames to OS as coming from CPU port network interface, with the exception of HSR/PRP supervision frames and PTP frames. They are passed to OS as coming from the external port network interface so that the software can detect the original port. Because of this the external port network interfaces cannot be used for normal networking at OS level. But they can be used for link mode monitoring and enforcing a certain link mode, to retrieve port statistics counters and to access port registers.
When RS receives a PTP frame from CPU on the CPU port, it timestamps the frame and captures the frame into time stamp registers and generates an interrupt. The driver detects this and retrieves the original frame sent by software and its timestamp and passes the frame back to OS with the timestamp as coming from the first PTP enabled port. The local PTP software can detect that the frame was actually sent by itself and retrieve the PTP header information and actual send time and do corrections based on the information available. This is used for peer link delay measurement.
2.8.4.3.2 Accessing Switch Features
Driver provides an ioctl interface for accessing switch features from application code. See the driver header files for more information, files are listed in Table 3.
File Description
Flx_frs_iflib.h FRS specific ioctl API definitions
Flx_frs_if.h FRS register definitions
Table 3. Flx_frs Driver API Header Files
The preferred method is to use the provided flx_fes_lib API rather than the ioctl directly. See section 2.8.5.3.
There is also a command line utility flx_frs_tool which supports most of the API features.
Use the following command to see its usage.
# flx_frs_tool -h
2.8.4.3.3 Port Link Mode Management
Normal Linux ETHTOOL ioctl can be used to monitor and manage external port link status
and mode. There is also ethtool command available. Example command to get CE01 port
link status:
# ethtool CE01
Example command to force CE01 to 1000 Mbit/s full-duplex mode:
# ethtool -s CE01 autoneg off speed 1000 duplex full
Example command to enable auto-negotiation on CE01:
# ethtool -s CE01 autoneg on
2.8.4.3.4 Accessing Port Statistics Counters
All the statistics counters provided by RS ports are available through ETHTOOL ioctl as Linux network interface specific statistics. RS statistics counters are often much more useful than ordinary Linux net device statistics counters for diagnosing problems.

REFERENCE SOFTWARE FOR XRS DEVICES
User Guide 27 (58) Version 1.1
Example ethtool command to retrieve statistics counters for port CE01:
# ethtool -S CE01
2.8.4.3.5 Accessing MAC Address Table
Driver ioctl interface can be used to read RS MAC address table and to clear MAC address table entries of select ports.
Command flx_frs_tool can also be used to read the switch MAC table. Example:
# flx_frs_tool -m SE01
MAC address can be read from a proc file, too. Example:
# cat /proc/driver/flx_frs/device00_mac_table
Command flx_frs_tool can be used to clear switch MAC table entries of select ports.
Note that it is normally not recommended for redundant ports. Example:
# flx_frs_tool -c CE03
2.8.4.3.6 Managing Port Forwarding Mode
Normally port is in disabled mode when the corresponding network interface is down or there is no link, and in forwarding mode when link is also up. Ports have also a third mode: learning.
Driver ioctl can be used to control port forwarding mode. When set in non-automatic mode, driver still keeps the port in disabled mode when network interface is down or there is no link, and in specified mode when link is up. Normal behavior can be returned by setting port back to automatic mode. This is useful for example in implementing rapid spanning tree protocol (RSTP).
Command flx_frs_tool can be used to control the forwarding modes. Examples:
# flx_frs_tool -f CE03 learning
# flx_frs_tool -f CE03 auto
2.8.4.3.7 Auxiliary Network Interfaces
Management trailers can be used to send frames from only select switch ports. Driver automatically creates a network interface for each port. Additional, so called auxiliary network interfaces can be created for other uses. Multiple ports can be added to each auxiliary network interface, which allows sending frames to all those ports at the same time.
Auxiliary network interfaces are used with XR7 PTP to support PTP boundary clock feature, and some other PTP usage scenarios.
Auxiliary network interfaces can be managed using the flx_frs_tool command. Example
commands to create a new net device OC01 and add ports CE01 and CE02 to it:
# flx_frs_tool -A SE01 OC01
# flx_frs_tool -a OC01 CE01
# flx_frs_tool -a OC01 CE02
Example command to list RS ports of auxiliary network interface OC01:
# flx_frs_tool -l OC01
Example command to remove auxiliary network interface OC01:
# flx_frs_tool -D OC01
2.8.4.3.8 Independent Interfaces
As RS is basically an Ethernet switch, it forwards traffic between its ports. However it is possible to configure switch so that some of its ports appear as independent network

REFERENCE SOFTWARE FOR XRS DEVICES
User Guide 28 (58) Version 1.1
interfaces, just like an interface of a regular Ethernet network interface card. Driver supports this use case by allowing ports to be defined as being independent interfaces.
Module parameter ifacemodes can be set to a bitmask, where each bit corresponds to an
external port. Ports whose bit is set are treated as independent interfaces. Net devices of those external ports can then be used as if they were ordinary network interfaces. Normally a
different MAC address should be set for such net devices. Command ip can be used for
that when net device is down:
# ip link set dev CExx address XX:XX:XX:XX:XX:XX
Note that the implementation uses switch features like port forward mask, IPO rules and management trailers.
2.8.4.4 flx_frtc (RTC)
Flx_frtc is a driver for both FRTC (Flexibilis Real-Time Clock) and XRS RTC. When access to the RTC is needed from software, the device must be defined in device tree. Device tree definition looks like the following.
rtc@280000 {
compatible = "flx,rtc";
reg = <0x280000 0x10000>;
/* Step size in nanoseconds and subnanoseconds */
step-size = <8 0>;
};
reg Address of RTC registers and length in octets.
step-size NCO step size as two numbers: nanoseconds and subnanoseconds. Subnanoseconds is a 32-bit number, each second is divided to 232 subnanoseconds.
Driver is used from user space through the interface driver flx_time.
2.8.4.5 flx_time
Flx_time driver provides a common user space interface for all Flexibilis time related IPs and blocks, each of which has its own driver. The drivers provides character device
/dev/flx_time0.
Driver does not have device tree bindings.
2.8.4.6 flx_bus
Flx_bus is a Linux bus driver which provides other drivers an interface for accessing device registers indirectly, i.e. without using memory mapped I/O. Actual register access methods are implemented by separate drivers which register bus interface to flx_bus driver. A Linux bus of type flx_bus is created for each such registered interface, allowing other devices to be defined in that bus and access by their drivers.
Driver itself does not have device tree bindings, but implementing drivers have. Devices which are accessed indirectly are defined as device nodes within the node implementing flx_bus.
2.8.4.7 flx_bus_i2c (XRS I2C Slave)
Flx_bus_i2c is a Linux I2C slave device driver for XRS I2C slave block. It provides access to XRS registers via I2C. It allows other drivers to use I2C to access XRS registers via flx_bus.
Because flx_bus_i2c is also a bus driver, devices which are accessed through this driver must be specified within its device node in device tree.

REFERENCE SOFTWARE FOR XRS DEVICES
User Guide 29 (58) Version 1.1
Following device tree example shows how this would be used within an I2C controller node
with label i2c1, which is defined somewhere else in device tree. An xrs node compatible
with flx_xrs driver is also shown inside flx_bus bus node. Note the use of #address-cells
and #size-cells.
i2c1 {
flx_bus_i2c: flx_bus@24 {
#address-cells = <1>;
#size-cells = <1>;
compatible = "flx,bus-i2c";
/* Possible addresses: 0x24 / 0x34 / 0x64 / 0x74 */
reg = <0x24>;
xrs@0 {
compatible = "flx,xrs";
reg = <0x0 0xa>;
};
}:
};
2.8.4.8 flx_bus_mdio (XRS MDIO Slave)
Flx_bus_mdio is a driver for XRS MDIO slave block. It provides access to XRS registers via MDIO. It allows other drivers to use MDIO to access XRS registers via flx_bus.
Because flx_bus_mdio is also a bus driver, devices which are accessed through this driver must be specified within its device node in device tree.
Following device tree example shows how this would be used. A gpio node compatible with
flx_gpio driver is also shown inside flx_bus bus node. The bus node is defined outside of an
MDIO bus, i.e. not as an MDIO bus slave. Instead the MDIO bus to use is referenced using
mdio-bus parameter. Note the use of #address-cells and #size-cells.
flx_bus_mdio: flx_bus@8 {
compatible = "flx,bus-mdio ";
#address-cells = <1>;
#size-cells = <1>;
mdio-bus = <&mdio1>;
/* Possible addresses: 0x8 / 0x9 / 0x18 / 0x19 */
mdio-addr = <0x8>;
flx_gpio_behind_mdio: gpio@10000 {
compatible = "flx,gpio";
reg = <0x10000 0x1100>;
gpio-controller;
#gpio-cells = <2>;
width = <0x20>;
};
};
2.8.4.9 flx_i2c_mdio (SFP PHY)
Flx_i2c_mdio is a Linux I2C slave driver which turns the I2C slave into Linux MDIO bus. It is used for accessing PHYs on SFP modules.
In Linux PHY devices are devices on an MDIO bus. Only such PHY devices can be attached to Linux network interface (net device). PHYs on SFP modules on the other hand are I2C slave devices, a very different bus type in Linux.
Flx_i2c_mdio is an I2C slave driver which creates a virtual MDIO bus on the I2C bus created by any Linux I2C controller driver, like the bit-banging i2c-gpio (or flx_i2c_gpio) driver. It maps

REFERENCE SOFTWARE FOR XRS DEVICES
User Guide 30 (58) Version 1.1
MDIO bus accesses to I2C accesses. This allows Linux network stack to detect PHY devices automatically and to attach correct PHY driver to them. In practice most copper SFP modules include a Marvell 88E1111 PHY, which is handled by the marvell Linux driver (CONFIG_MARVELL_PHY).
A node bound to flx_i2c_mdio driver in device tree appears as an I2C slave within an I2C bus, and contains child nodes for PHY devices on the virtual MDIO bus.
Linux MDIO bus framework automatically scans the bus for PHY devices and uses PHY ID registers to bind the PHY devices to correct drivers. Representing them explicitly in the device tree allows to bind RS port net devices to the correct PHY device using device tree syntax.
Device tree bindings look like the following for an SFP with EEPROM and PHY in a bit-banging I2C bus.
/* I2C bus to SFP1 */
i2c-sfp1 {
compatible = "i2c-gpio";
#address-cells = <1>;
#size-cells = <0>;
/* SDA and SCL */
gpios = <&ioexpand_gpio 1 0
&ioexpand_gpio 2 0>;
//i2c-gpio,sda-open-drain;
//i2c-gpio,scl-open-drain;
//i2c-gpio,scl-output-only;
i2c-gpio,delay-us = <5>;
i2c-gpio,timeout-ms = <100>;
/* I2C slave: PHY in SFP */
sfp1-mdio {
#address-cells = <1>;
#size-cells = <0>;
compatible = "flx,i2c-mdio";
reg = <0x56>;
/* PHY device on virtual MDIO bus */
sfp1_phy: sfp1-phy {
compatible = "ethernet-phy-ieee802.3-c22";
/* I2C slave address 0xac with write bit,
* actual I2C slave address 0x56,
* PHY address 0x16. Largely irrelevant though.
*/
reg = <0x16>;
};
};
/* I2C slave: EEPROM in SFP */
sfp1_eeprom: sfp1-eeprom {
compatible = "atmel,at24c01a";
reg = <0x50>;
};
};
2.8.4.10 flx_i2c_gpio
Flx_i2c_gpio is a slightly modified version of standard Linux i2c-gpio driver to work with I2C GPIO. The standard driver assumes that GPIO can be accessed without sleeping which is not true for I2C connected GPIO, such as PCAL9555A IO expander used in the XRS7000 Reference Board.

REFERENCE SOFTWARE FOR XRS DEVICES
User Guide 31 (58) Version 1.1
On XRS7000 Reference Board SFP EEPROM and copper SFP PHYs are accessed using this driver.
2.8.4.11 flx_gpio (XRS GPIO)
Flx_gpio is a Linux GPIO driver for XRS GPIO block. Device tree usage looks like this.
flx_gpio_behind_i2c: gpio@10000 {
compatible = "flx,gpio";
reg = <0x10000 0x1100>;
gpio-controller;
#gpio-cells = <2>;
width = <0x20>;
};
2.8.4.12 flx_fpts (TS)
Flx_fpts is a Linux driver for FPTS (Flexibilis PPX Time Stamper) and XRS TS blocks. It
provides a character device /dev/flx_fpts<N> for each device where <N> is the device
number. Character device can be read from to read events. Driver provides an ioctl interface to select mode of operation. Driver also supports select and poll system calls for event based applications.
Driver user space API is defined in driver header file flx_fpts_api.h.
2.8.4.13 dp83848 (PHY)
Dp83848 is a Linux PHY driver for TI DP83848 PHY device which is used in XRS Reference Board.
2.8.4.14 m88e1512 (PHY)
M88e1512 is a Linux PHY driver for Marvell 88E1512 PHY device which is used in XRS Reference Board.
2.8.4.15 leds_gpio
Standard Linux leds_gpio driver is used for controlling LEDs connected to XRS GPIO on XRS Reference Board. LEDs are defined in device tree. See Table 1 for summary of the LEDs. Driver provides a sysfs based user space interface for LED control.
Note that PHY LEDs are controlled by PHY drivers.
2.8.5 User Space
The core user space environment consists of system programs, utilities and libraries from Debian GNU/Linux distribution [3]. Additional software from Flexibilis provides support for the features of XRS Reference Board and its XRS device. Those are described in the following.
2.8.5.1 XR7 PTP
XR7 PTP implements Precision Time Protocol. It is described in detail in XR7 PTP Design Specification [17]. XR7 PTP is modular software and uses dynamically linked shared object libraries on GNU/Linux systems. The following PTP modules are used in XRS Reference Software.
xr7ptp This is the main program (daemon) which includes the XR7 PTP library, i.e. the main functionality of the PTP stack.
os_if This library implements the OS interface on GNU/Linux for XR7 PTP library.

REFERENCE SOFTWARE FOR XRS DEVICES
User Guide 32 (58) Version 1.1
flx_frtc_clock_if This library implements the Clock interface for the XR7 PTP library and uses RTC as local clock. Thus when local device is a PTP slave, this library keeps local RTC time synchronized with the PTP master clock. It also enables certain features of RS. Flx_time driver user space API (ioctl) is used to access the RTC and library flx_fes_lib is used to access the RS.
flx_packet_if This library implements the Packet interface for the XR7 PTP library and uses RS timestamping features. Library flx_fes_lib is used to access RS.
netconf (XR7 FCM “sync” module) This library provides NETCONF interface to the PTP stack. It uses the Control and Configuration interfaces of the XR7 PTP library and implements XR7 FCM module API. FCM support for XR7 PTP is an optional component and requires XR7 FCM, see chapter 2.8.5.4.1 for more information.
host_clock_adj This is a separate daemon which keeps the OS (Linux) clock synchronized to RTC time.
2.8.5.2 XR7 Redundancy Supervision
XR7 Redundancy Supervision implements HSR/PRP Supervision protocol. It is described in detail in XR7 Redundancy Supervision Design Specification [18]. It is modular software and uses dynamically linked shared object libraries on GNU/Linux systems. Here is summary of the supervision modules used in XRS7000 Reference Software.
xr7_redundancy_supervision This is the main program (control daemon).
supervision_lib Supervision library implements the HSR/PRP Supervision protocol.
packet_lib Packet library provides access to the Linux network stack and interfaces. It uses library lfx_fes_lib to access RS.
netconf (XR7 FCM “redundancy_supervision” module) This library provides NETCONF interface to redundancy supervision. NETCONF is an optional feature and requires the XR7 FCM module, see chapter 2.8.5.4.1 for more information.
2.8.5.3 flx_fes_lib
The library contains helper functions for managing RS, FRS or FES. It is used by other software like XR7 PTP and XR7 Redundancy Supervision. The source code files are listed in Table 4.
File Description
flx_fes.h flx_fes.c
Helper functions for configuring FRS IP and RS. Includes for example reading and writing of registers and IPO settings.
flx_fes_rstp.h flx_fes_rstp.c
Helper functions for implementing RSTP.
flx_fes_aux.h flx_fes_aux.c
Functions for managing auxiliary network interfaces.
Table 4. flx_fes_lib Files
2.8.5.4 XR7 Management Software
XR7 Management Software provides a web interface and an XML based protocol for configuring devices and examining their status. It consists of the following three parts.

REFERENCE SOFTWARE FOR XRS DEVICES
User Guide 33 (58) Version 1.1
2.8.5.4.1 XR7 FCM
XR7 FCM stands for Flexibilis Configuration Manager. It is an implementation of IETF NETCONF [14] network management protocol. FCM design is modular. The daemon itself implements the protocol while FCM modules, implemented as dynamically linked shared object libraries, provide NETCONF support for specific system components like XR7 PTP, XR7 Redundancy Supervision, network interfaces and so on.
FCM modules communicate with FCM using local sockets and can thus be integrated into other daemons that actually handle the tasks related to the FCM module. For example FCM
module named sync implements time synchronization using XR7 PTP and runs in xr7ptp
daemon process.
2.8.5.4.2 XR7 Interface Manager
XR7 Interface Manager (IFM) is a daemon which provides NETCONF support for various network interfaces. Its design is modular, each module is implemented as a dynamically linked shared object library with XR7 FCM module interface. The following modules are used in the XRS Reference Software.
ethernet This module provides Ethernet interface status and configuration for external Ethernet interfaces CE01, CE02 and CE03. For example link speed and mode can be changed or current auto-negotiation status can be retrieved. It also provides RS port statistic counters.
vlan This module provides VLAN configuration support for RS.
ip This module provides IP address configuration for the system. Note that the RS CPU port net interface is used for normal networking, so the IP address is set to that Linux network interface.
routing This module provides static routing configuration for the system.
2.8.5.4.3 XR7 GUI
XR7 GUI provides web interface to the device for presenting status information and for configuring the system as desired by user. It is implemented as a Java servlet and uses NETCONF to access device resources.
In XRS7000 Reference Software Apache Tomcat is used as the web server and servlet engine. User can access the GUI from address https://192.168.7.1/ (when default IP address is configured).
2.8.5.5 SSH Server
OpenSSH server is used. SSH subsystem name netconf is configured to use fcm_manager
so that NETCONF requests over SSH are forwarded to FCM.
2.8.5.6 LED Control
XRS Reference Board LEDs are controlled either by XR7 LED Control daemon xr7_led_ctrld (XRS GPIO LEDs), or by PHY drivers (link LEDs). See Table 1 and descriptions of LEDs in XRS Reference Board User Manual.
The XR7 LED Control daemon identifies the XRS Reference Board from its XRS chip type and configures itself accordingly. It monitors the processes and XR7 PTP status from XR7 FCM and sets the LEDs according to determined system state.

REFERENCE SOFTWARE FOR XRS DEVICES
User Guide 34 (58) Version 1.1
2.9 Troubleshooting
This chapter describes various methods to verify and debug XRS devices and configurations.
2.9.1 Driver Loading
Flexibilis drivers are built as kernel modules which are loaded at boot time using an init script.
Use lsmod command to see list of loaded kernel modules.
2.9.2 Driver Load Verification
Flexibilis drivers typically output something to kernel ring buffer (dmesg log), when drivers are
bound to devices. Use dmesg command after loading the drivers to see them. Remember that
usually not everything output to kernel ring buffer is output to console, so it is better to the use
the dmesg command than to rely on boot time prints on console.
Examples of such prints are:
flx_xrs: Init driver
flx_xrs 0.xrs: XRS7004E revision 1.0
flx_gpio: Init driver
flx-gpio 10000.gpio: Added GPIO 476 .. 495
flx_i2c_mdio: Init driver
flx-i2c-mdio 0-0056: Registering virtual MDIO bus flx-i2c-mdio-0 for
I2C slave 0x56
flx-i2c-gpio soc:i2c-sfp1: using pins 497 (SDA) and 498 (SCL)
flx-i2c-mdio 2-0056: Registering virtual MDIO bus flx-i2c-mdio-1 for
I2C slave 0x56
flx-i2c-gpio soc:i2c-sfp2: using pins 502 (SDA) and 503 (SCL)
flx-i2c-mdio 3-0056: Registering virtual MDIO bus flx-i2c-mdio-2 for
I2C slave 0x56
flx-i2c-gpio soc:i2c-sfp3: using pins 507 (SDA) and 508 (SCL)
flx_time: char dev major 248
FLX_TIME: Register NCO component(s)
flx_frtc 280000.rtc: probe device
FLX_TIME: Component (index 0/1) registered
FLX_TIME: NCO using current time in init (11)
FLX_TIME: NCO using step size 8 ns 0 subns adjust_scale factor 34
flx_fpts: Init driver
flx_fpts 290000.ts: Setup device 0 IRQ 497 for indirect register
access
flx_fpts 298000.ts: Setup device 1 IRQ 497 for indirect register
access
flx_fpts 2a0000.ts: Setup device 2 IRQ 497 for indirect register
access
flx_fpts 2a8000.ts: Setup device 3 IRQ 497 for indirect register
access
flx_frs 300000.rs: Init device
flx_frs 300000.rs: port 0 reg 0x200000 adapter 0x0
flx_frs 300000.rs: port 1 reg 0x210000 adapter 0x0
flx_frs 300000.rs: port 2 reg 0x220000 adapter 0x0
flx_frs 300000.rs: port 3 reg 0x230000 adapter 0x0
flx_frs 300000.rs: Setup device for indirect register access
flx_frs 300000.rs: FRS IRQ 497 allocated
flx_frs 300000.rs: FRS SW reset done
flx_frs 300000.rs SE01: Link is DOWN (PORT_STATE: 0x2)
flx_frs: Flexibilis Redundant Switch (FRS) port SE01
flx_frs 300000.rs CE01: Link is DOWN (PORT_STATE: 0x2)
flx_frs: Flexibilis Redundant Switch (FRS) port CE01
flx_frs 300000.rs CE02: Link is DOWN (PORT_STATE: 0x2)

REFERENCE SOFTWARE FOR XRS DEVICES
User Guide 35 (58) Version 1.1
flx_frs: Flexibilis Redundant Switch (FRS) port CE02
flx_frs 300000.rs CE03: Link is DOWN (PORT_STATE: 0x2)
flx_frs: Flexibilis Redundant Switch (FRS) port CE03
flx_frs 300000.rs: Trailer length 1 offset 0 with CPU port
flx_frs 300000.rs: Port 0 send trailer 0x0
flx_frs 300000.rs: Port 1 send trailer 0x2
flx_frs 300000.rs: Port 2 send trailer 0x4
flx_frs 300000.rs: Port 3 send trailer 0x8
flx_frs 300000.rs: Ifacemodes: default
flx_frs 300000.rs SE01: Attached PHY driver [NatSemi DP83848]
(mii_bus:phy_addr=gpio-1:05)
flx_frs 300000.rs SE01: Link is DOWN (PORT_STATE: 0x806)
flx_frs 300000.rs SE01: Interface open
flx_frs 300000.rs CE01: Attached PHY driver [Marvell 88E1512]
(mii_bus:phy_addr=gpio-1:01)
flx_frs 300000.rs CE01: Link is DOWN (PORT_STATE: 0x402)
flx_frs 300000.rs CE01: Interface open
IPv6: ADDRCONF(NETDEV_UP): CE01: link is not ready
flx_frs 300000.rs CE02: Attached PHY driver [Marvell 88E1512]
(mii_bus:phy_addr=gpio-1:00)
flx_frs 300000.rs CE02: SFP type changed from NONE to 1000Base-X
flx_frs 300000.rs CE02: Link is DOWN (PORT_STATE: 0x402)
flx_frs 300000.rs CE02: Interface open
flx_frs 300000.rs CE03: Attached PHY driver [Marvell 88E1512]
(mii_bus:phy_addr=gpio-2:01)
flx_frs 300000.rs CE03: Attached PHY driver [Marvell 88E1111]
(mii_bus:phy_addr=flx-i2c-mdio-2:16)
flx_frs 300000.rs CE03: SFP type changed from NONE to 1000Base-T
flx_frs 300000.rs CE03: Link is DOWN (PORT_STATE: 0x402)
flx_frs 300000.rs CE03: Interface open
flx_frs 300000.rs SE01: Link is UP at 100 Mbps (PORT_STATE: 0xa04)
flx_frs 300000.rs: No FRS device found by trailer 0x0
flx_frs 300000.rs: Port not found for frame
flx_frs 300000.rs CE02: Link is UP at 1000 Mbps (PORT_STATE: 0x520)
flx_frs 300000.rs: No FRS device found by trailer 0x0
flx_frs 300000.rs: Port not found for frame
flx_frs 300000.rs OC01: Registered new FRS aux netdevice
flx_frs 300000.rs OC02: Registered new FRS aux netdevice
flx_frs 300000.rs CE01: Link is DOWN (PORT_STATE: 0x402)
flx_frs 300000.rs CE02: Link is UP at 1000 Mbps (PORT_STATE: 0x122)
flx_frs 300000.rs CE03: Link is DOWN (PORT_STATE: 0x402)
flx_frs 300000.rs CE01: Link is DOWN (PORT_STATE: 0x402)
flx_frs 300000.rs CE02: Link is UP at 1000 Mbps (PORT_STATE: 0x120)
flx_frs 300000.rs CE03: Link is DOWN (PORT_STATE: 0x402)
Many drivers also create files in /proc/driver for each device. Use find or ls command
to see the file names and cat command to see their contents. Example:
# find /proc/driver
If there are no files even though driver is loaded, the driver is not bound to a device. This may mean for example a problem with device initialization.
2.9.3 Redundant Switch (RS)
RS specific troubleshooting and debug tips follow.
2.9.3.1 Switch Register Access
Use driver /proc files to verify that switch registers can be accessed correctly. Note that the
driver uses word addresses, double the addresses to get byte addresses.

REFERENCE SOFTWARE FOR XRS DEVICES
User Guide 36 (58) Version 1.1
Example:
# cat /proc/driver/flx_frs/device00_common_registers
One of the first things to check in case of problems is to verify that the GENERAL register value is correct.
2.9.3.2 Port Register Access
Use driver /proc files to verify that port registers can be accessed correctly and are set to
correct values. Example:
# cat /proc/driver/flx_frs/device00_port_registers
Port registers of device 0 (REG): PORT0 PORT1 PORT2 PORT3
State (0x0000): 0x0204 0x0120 0x0120 0x0120
VLAN (0x0008): 0x8fff 0x8fff 0x8fff 0x8fff
…
2.9.3.3 Port Link Status and Speed
XRS Reference Board uses Ethernet PHYs on all externals ports (also CPU port is external in this case). Thus the Linux net device for such external ports, for example CE01, is attached to a Linux PHY device. This is configured in device tree and indicated in the kernel ring buffer (dmesg log) with a line like this:
flx_frs 300000.rs CE01: Attached PHY driver [Marvell 88E1512]
(mii_bus:phy_addr=gpio-1:01)
Use ethtool command to check the link mode:
# ethtool CE01
Settings for CE01:
Supported ports: [ TP MII FIBRE ]
Supported link modes: 10baseT/Full
100baseT/Full
1000baseT/Full
Supported pause frame use: No
Supports auto-negotiation: Yes
Advertised link modes: 10baseT/Full
100baseT/Full
1000baseT/Full
Advertised pause frame use: No
Advertised auto-negotiation: Yes
Link partner advertised link modes: 10baseT/Full
100baseT/Full
1000baseT/Full
Link partner advertised pause frame use: No
Link partner advertised auto-negotiation: Yes
Speed: 1000Mb/s
Duplex: Full
Port: MII
PHYAD: 1
Transceiver: external
Auto-negotiation: on
Supports Wake-on: d
Wake-on: d
Current message level: 0x00000007 (7)
drv probe link
Link detected: yes

REFERENCE SOFTWARE FOR XRS DEVICES
User Guide 37 (58) Version 1.1
Use driver /proc/driver/flx_frs/device<NN>_port_registers file to verify that the
RS port is in correct state (forwarding state, management state, speed).
2.9.3.4 Use of Correct PHY Driver
Linux PHY framework detects the type of PHY from PHY ID registers (register numbers two and three). It uses that information to decide which of the loaded PHY drivers to use to handle the PHY device.
Many PHY devices can work with the generic PHY driver. But many PHY devices require a specific driver to work correctly. This can also depend on the HW. It is possible that on some HW design PHY can work with the generic PHY driver while on a different HW design a specific PHY driver is needed, for example if HW design is such that certain PHY specific register values must be changed from their default values.
Driver shows the name of PHY driver used for an external port in kernel ring buffer (dmesg log). Example:
CE01: Attached PHY driver [Generic PHY] (mii_bus:phy_addr=flx-i2c-
mdio-0:16)
If the link does not work with the generic PHY driver, check if the Linux kernel contains a
specific PHY driver for your PHY. The PHY drivers are in drivers/net/phy directory in
kernel source tree. Enable the relevant PHY driver in kernel configuration and ensure the module is loaded at boot time before RS driver, or build the PHY driver directly into Linux
kernel. Use dmesg command to see that the PHY driver really accepts the PHY.
In some cases a newer Linux kernel may contain a suitable PHY driver. In other cases it may be necessary to write a new driver for the PHY.
2.9.3.5 SFP Module Change Detection
When port has been configured for medium type SFP, driver tries to detect when SFP module is changed. This might not work in all designs, because Linux PHY framework is not really designed to handle dynamically disappearing and appearing of PHY devices on an MDIO bus.
Together with flx_i2c_mdio driver SFP module change detection works. If flx_i2c_mdio is used with other drivers it may be necessary to disable this feature by this directive in device tree for flx_i2c_mdio node:
disable-change-detection;
2.9.3.6 Traffic Problems
First check that link is up and link status is correct in all places: from PHY driver, in port state register, and also on the link partner side.
Then check port statistics counters. They are very useful in some cases to narrow down the problem, because different counters for good and bad octets and for different types of frames are available for each port and for both directions. This makes it possible to track the flow of frames from source to destination through RS and back.
Use ethtool command to see the statistics counters. Example:
# ethtool -S SE01
# ethtool -S CE01
Example scenario: Communication is attempted from CPU with another device through an RS. Frames are sent from CPU through an EMAC connected to RS CPU port. Frames are expected to be forwarded by RS from CPU port SE01 to external interface CE01 which is directly connected to the destination device. The destination device is expected to send responses back and it is expected that the responses travel the same path in the reverse order.

REFERENCE SOFTWARE FOR XRS DEVICES
User Guide 38 (58) Version 1.1
First ensure that there are no daemons running on either side which could generate any extra traffic and that the switch and ports are in correct state. Then start to send frames from CPU. Check that the OS actually tries to send packets to the MAC which is connected to CPU port. The transmit counters of both CPU port (SE01) and MAC net device (for example eth0) should increase without error counters increasing. Example:
# cat /proc/net/dev ; sleep 1 ; cat /proc/net/dev
Then verify that CPU port RX counters increase (rx_good_octets):
# ethtool -S SE01
Then verify that RS forwards the frames to CE01: tx_octets should increase.
# ethtool -S CE01
Then verify that the destination device receives the frames.
If everything looks good, verify that the problem is not in the other direction. Verify that destination device actually sends the responses back.
Then verify that the CE01 port receives the frames: rx_good_octets should increase.
# ethtool -S CE01
Then verify that RS forwards the response frames to CPU port: tx_octets should increase:
# ethtool -S SE01
Then verify that the frames are pass through the MAC by checking RS CPU port net device receive counters (this time SE01 only, as RS driver passes received frames always from its own net devices to OS).
cat /proc/net/dev
If frames are sent by OS towards MAC, but CPU port RX counter never increases, the problem may be related to the MAC.
If frames received on CPU port are not forwarded to other RS ports, or responses are not forwarded from external ports to CPU port, the problem may be in IPO entries or in VLAN configuration. Check also RS port forward mask register value.
If frames sent out from external port do not appear at the destination, there may be a problem with the adapter connection or PHY or with the external device. It may also be useful to test with other types of destination devices to rule out some HW interoperability problems. PHY devices may also provide useful counters or status information. Also make sure the PHY device is put in correct interface mode.
2.9.3.6.1 VLAN
One common cause of traffic problems is an error in VLAN configuration. Verify that both the port specific VLAN registers and port VLAN membership registers are set correctly. Example:
# cat /proc/driver/flx_frs/device00_port_registers
# cat /proc/driver/flx_frs/device00_vlan_config_registers
Note the use of PORT_VLAN registers for default VLAN and tagging configuration.
2.9.3.6.2 RGMII
Remember that RGMII requires clock signal delay. Many PHYs support different internal
delay modes, which can be enabled using phy-mode parameter in device tree if the PHY
driver supports it. The relevant modes are: "rgmii-id", "rgmii", "rgmii-rxid" and
"rgmii-txid". In some cases some other method may have to be used to ensure clock
compatibility.

REFERENCE SOFTWARE FOR XRS DEVICES
User Guide 39 (58) Version 1.1
2.9.3.7 MTU
A management trailer is used on RS CPU port. This adds one octet, or in some setups two, to the frames sent to or received from RS CPU port. Some Ethernet MACs, like the MAC on RPi Ethernet port, may not work correctly with such Ethernet frames if the frame size exceeds the default MTU of 1500 octets (without VLAN tag).
This can be fixed by decreasing MTU of RS port network interfaces accordingly. XRS Reference SW init script does this automatically. Command to do this is
ip link set dev IFACE mtu 1498
where IFACE is the Linux network interface name (SE01, CE01, etc.).
2.9.4 RTC
A few checks for RTC follow.
2.9.4.1 Checking RTC Is Running
Use /proc/driver/flx_time/component_<NN>_registers file to see RTC register
values. <NN> is flx_time index number of the clock, starting from 00. Example:
# cat /proc/driver/flx_time/component_00_registers
Component index: 0
name : Local NCO
device id : 0x0090
revision id : 0x02
properties : 0x1f
Time read:
seconds : 137409
nanoseconds : 434575818
subnsecs : 0x0000
clk cycle cnt: 0x00000f9f29d35bf1
Register content:
nco subnsec reg : 0x00000000
nco nsec reg : 0x19e719ca
nco sec reg : 0x0000000218c1
nco cccnt reg : 0x0f9f29d35bf1
nco step subnsec reg : 0x00000000
nco step nsec reg : 0x08
nco adj nsec reg : 0x1614ecf2
nco adj sec reg : 0x000000000012
nco cmd reg : 0x00
By default RTC step size register values can be zero. When RTC driver is loaded, it writes configured nominal step size value to the step size registers and RTC starts running. Check that seconds and nanoseconds values increase.
2.9.4.2 Rough Frequency Check
Get RTC register values at for example ten seconds apart and compare elapsed time to wall clock time. Example:
# (cat /proc/driver/flx_time/component_00_registers ; sleep 10 ; cat
/proc/driver/flx_time/component_00_registers) | grep seconds
seconds : 137739
nanoseconds : 771582498
seconds : 137749
nanoseconds : 778224842

REFERENCE SOFTWARE FOR XRS DEVICES
User Guide 40 (58) Version 1.1
Note that if OS clock does not run at correct frequency, actual time between above prints may deviate a lot from ten seconds wall clock time. Calculate elapsed RTC time and divide it by elapsed wall clock time. The result should be close to one.
If RTC does not run at roughly the correct frequency, check that the nominal step size value is configured correctly.

REFERENCE SOFTWARE FOR XRS DEVICES
User Guide 41 (58) Version 1.1
3 XRS SW Environment Setup
This chapter describes how the XRS Software Environment can be set up for the first time.
3.1 Getting XRS SW Environment
To download the XRS Software Environment, please fill in the form on our website http://www.flexibilis.com/products/downloads/, and we will give you access to download the XRS SW Environment.
The delivery package contains the following:
- Release note document - XRS Reference Software User Guide document - XRS RPi Disk Image: Pre-built Raspberry Pi SD card image for XRS usage - Virtual machine disk image including the XRS Software Environment
3.2 Introduction to the Environment
The environment contains all necessary tools pre-installed for building and managing software and SD card images for RPi. Build processes are highly automated so that new and custom images can be built with minimum effort.
An included build environment provides a cross-compile tool chain for Raspberry Pi, used to build binary packages for the resulting SD card images.
The environment is used either with a continuous integration server (see 5.1.2 for more information) or with command line via SSH. The environment does not provide a graphical desktop environment.
Main components of the environment are depicted in Figure 10. More information on the components can be found in chapter 5.

REFERENCE SOFTWARE FOR XRS DEVICES
User Guide 42 (58) Version 1.1
Virtual machine
Version
control
system
Web server
Build environment Package repository
Package
building tools
Package
repository
tools
Local .deb
package
repository
Source
treeSVN
repository
Debian
package
repository
SD card
image
Firmware and
image tools
Documentation
Source code
Continuous integration server
Com
mands
Figure 10. Environment Components
3.3 Setting up New Virtual Machine
In order to start to use the XRS SW Environment, a virtual machine has to be set up to boot and run the virtual machine disk image provided by Flexibilis.
A virtual machine can be created with Oracle VM VirtualBox Manager Software. It is open source and can be downloaded from here: https://www.virtualbox.org/. You can find documentation for the software on the same site [16].
3.3.1 Networking
Before creating the virtual machine, it’s good to check the network status of the host computer. The virtual machine must have network connectivity. Needed network accesses from outside to the machine for each provided service are listed in Table 5. You can access some web sites with your favorite browser to check that at least DNS and HTTP are working.
Service Protocol: Port Description
Jenkins CI server [8] TCP: HTTP (8080) Jenkins CI server is used as an interface for building software and images.

REFERENCE SOFTWARE FOR XRS DEVICES
User Guide 43 (58) Version 1.1
Apache HTTP server [9] TCP: HTTP (80) HTTP server is used to serve built image files, documentation and source code. It can also be configured for other use.
Login TCP: SSH (22) Needed for command line usage and VM management tasks.
Table 5. XRS SW Environment Inbound Networking Requirements
The XRS SW Environment machine itself also needs network access to outside. These outbound networking requirements are listed in Table 6.
Service Protocol: Port Description
DNS UDP: DNS (53) TCP: DNS (53)
Used to query IP addresses for host names from DNS server.
NTP UDP: NTP (123) Used to keep environment machine system time synchronized to external NTP servers.
Package repository access
TCP: HTTP (80) This is required to be able to access Debian package repository on the internet [4].
Table 6. XRS SW Environment Outbound Networking Requirements
By default a NAT style network interface with port forwarding is assumed and DHCP is used to get IP address, default route and DNS name server. A different networking setup may also require adaptation in the VM.
3.3.2 Creating VM with Virtual Box
After downloading the virtual machine disk image and installing Oracle VM VirtualBox, open the VirtualBox software and click “New”.
Give the machine a name and then choose Linux as the type and Debian (64-bit) as the version.
3.3.2.1 Base Memory
The amount of memory (RAM) is one of the factors affecting how fast the virtual machine will compile the designs. At least 4 GB is recommended for smooth usage. Because the VM does not have a graphical desktop it will also work with much less but with small memory the compilation might take more than an hour. However, other factors will also affect the speed.
3.3.2.2 Main and Home Disks
Main disk is provided with the delivery package in VDI format. While creating a new machine, the VirtualBox will ask if you wish to add a virtual hard drive. Change the option to “use an existing virtual hard drive file” and choose the virtual machine disk image provided by
Flexibilis, xrs-sw-environment.vdi. You can then click “create”.
The main disk contains a single partition and a root filesystem on it. The disk in its delivery form does not contain enough free space for normal use, so more disk space must be made available for the VM. The XRS SW Environment adapts available storage for its use automatically on first boot.
Required extra disk space depends on use. One can get started with as low as 8 GB, but it is recommended to reserve space more generously right at the beginning.
The main disk size should be increased before the first boot. See section 4.3.9 for information about increasing it later.
To increase main disk space in Windows command prompt (one long line):
$ "%VBOX_INSTALL_PATH%\VBoxManage.exe" modifyhd
xrs-sw-environment.vdi --resize SIZE
SIZE is in megabytes. The environment requires SIZE to be more than 4000 MB for the disk to be adjusted at first boot.

REFERENCE SOFTWARE FOR XRS DEVICES
User Guide 44 (58) Version 1.1
Additionally an empty secondary disk can be defined. This might make the virtual machine
faster. If available, it will be used as /home and for data storage for certain services. The
home disk can be added from Settings > Storage > Controller: SATA > Add Hard Disk after creating the virtual machine.
It is recommended to provide two disks: a separate home disk with for example 8 GB or more space and additionally increase the main disk slightly, for example to 5 GB or 8 GB.
3.3.2.3 VM Settings
Before starting the VM for first time, you need to adjust some settings. Choose the VM you just created, go to Settings and change them to match these:
- General o Basic
Type: Linux Version: Debian (64-bit)
- System o Motherboard
Base Memory: (≥ 2 GB recommended) Boot Order: Hard Disk (disable others) Extended Features:
Enable IO APIC: yes
Enable EFI: no
Hardware clock in UTC time: yes o Processor
Processor(s) (≥ 2 recommended) o Display
Remote Display
Enable server: yes (recommended for headless setups) o Storage
Controller: SATA
Type: AHCI
Use host I/O cache: no
Port Count: 2
Disks o xrs-sw-environment.vdi
SATA Port 0 o xrs-sw-environment_home.vdi
SATA Port 1 (optional, recommended)
o Audio Enable Audio: no
o Network Adapter 1: (depends, see below)
Enable Network Adapter: yes
Adapter Type: Paravirtualized Network
Cable connected: yes
Note that certain combinations may require virtualization options (look for VT-x and VT-d) to be enabled in PC BIOS settings. The VirtualBox will notify you if BIOS settings need to be changed. You can access your computer’s BIOS settings when you start the computer: during the startup, there should appear a screen that indicates what button to press to get to the BIOS menu (usually F1, F2, F10, DEL or ESC). Some systems may have a dedicated button. You need to do it before the BIOS hands the control over to the operating system.
3.3.2.4 VM Networking Settings for NAT Networking
NAT networking with port forwarding can be used and may allow also other hosts to access the VM, depending on host firewall configuration. Without port forwarding the only way to

REFERENCE SOFTWARE FOR XRS DEVICES
User Guide 45 (58) Version 1.1
access the VM is VirtualBox console, no inbound network access would be possible. Note that firewall configuration may need changes for this to work.
In order to use NAT networking setup with port forwarding, configure network adapter as follows in the VirtualBox GUI (Settings > Network > Adapter 1 > Advanced > Port forwarding):
- Network o Adapter 1
Enable Network Adapter: yes Attached to: NAT Adapter Type: Paravirtualized Network (virtio-net) Cable connected: yes Port Forwarding: (See Table 7)
Name Protocol Host IP Host Port Guest IP Guest Port
SSH TCP 22 22
HTTP TCP 80 80
Jenkins TCP 8080 8080
Table 7. Sample VirtualBox Port Forwarding Configuration
Note that Guest IP must be set to value configured within VM if DHCP is not used. Note also that on multi-homed host it may be necessary or desirable to configure Host IP.
Port forwarding does not work if something on host is already listening to defined host port. In that case use a different value for host port and remember to adapt addresses used later in this document accordingly. Netstat command can be used to verify currently used addresses and ports.
$ netstat –na
For example if port 8888 is used instead of port 80 for host port, URL http://localhost/ on host would transform to http://localhost:8888/.
Note that different software may be listening to IPv4 and IPv6 addresses on the same port number. That is one reason why 127.0.0.1 may in some cases work differently than localhost.
On Windows machines http.sys is typically listening to TCP port 80. It may also be
possible to control it using netsh http command with administrator privileges.
3.4 Common Machine Settings
These settings are applied within the VM, so start it now. The system may restart itself a couple of times when it adapts itself on first boot. Wait for login prompt and proceed with the following on using either SSH or system console (see Figure 11). For system accounts and passwords, see chapter 3.4.1.

REFERENCE SOFTWARE FOR XRS DEVICES
User Guide 46 (58) Version 1.1
Figure 11. VM System Console
After logging in to the virtual machine, you can login with SSH by using an SSH client (for example PuTTY) on the host computer. If port forwarding was configured earlier, write “localhost” to the host name – see Figure 12.
Figure 12. Connecting to the VM with SSH
A lot of the information in Debian Users’ Manuals [5] are also valid for XRS SW Environment because it is based on Debian.
If you just want to build an SD card image using default VM and networking configuration, it is not necessary to do any further configuration. In that case you may proceed directly to chapter 4.
3.4.1 System Accounts and Passwords
A non-root user account, xrs, already exists in the system by default. Default password for the
account is “xrs”. Change the password to your liking with passwd.

REFERENCE SOFTWARE FOR XRS DEVICES
User Guide 47 (58) Version 1.1
Default root password is "root". It can be changed the same way by logging in as root. Note that actual work using the environment should be done as a non-root user.
$ passwd
Local package repository uses its own system account flxrep whose default password is “flxrep”. SSH is used locally to publish built binary packages to the local package repository.
System sets up public key SSH access for local non-root users so that packages can be published without having to type the password each time. For this reason flxrep account password is asked on first non-root user login.
Name Password Use
root root administration (only)
xrs xrs normal operation
flxrep flxrep package repository
Table 8. Default System Account Passwords
3.4.2 Text Editors
Some of the tasks may require editing text files. The following text editors are available: vim,
emacs, nano and pico.
Be careful not to wrap long lines to multiple lines inadvertently. With nano and pico it is often
a good idea to use the -w option.
3.4.3 Keyboard Layout
Default keyboard layout is US American. Use the following command as root to change it.
# dpkg-reconfigure console-data
Note that the keyboard layout affects only the system console, not SSH connections.
3.4.4 Networking
Network interfaces are configured in file /etc/network/interfaces. See Debian
documentation for details. File format is described also on its manual page which can be read by
$ man 5 interfaces
No changes are needed when using the default networking setup.
3.4.5 Time Zone
The time zone is set by default to Europe/Helsinki. Use the following command as root to select a different time zone:
# dpkg-reconfigure tzdata
3.4.6 Synchronizing System Clock with NTP
Environment includes chrony for synchronizing system time to NTP servers. Its configuration
file is /etc/chrony/chrony.conf. Modify all server lines in it if necessary for your
organization or networking setup. Then restart chrony by
# invoke-rc.d chrony restart
It is important to keep the environment machine system time synchronized.

REFERENCE SOFTWARE FOR XRS DEVICES
User Guide 48 (58) Version 1.1
4 XRS SW Environment Usage Instructions
This section contains list of instructions to follow to get started with the environment. VM must be set up and running as described in chapter 3.
4.1 Building Software and SD Card Images
Use either CI server or command line interface.
4.1.1 Using CI Server
The included Jenkins CI server [8] has a pre-installed job for building an SD card image for Raspberry Pi.
Navigate your web browser to http://localhost:8080 (or the address you configured for the virtual machine) and either click the schedule a build button on the right side of the Raspberry Pi SD card image job, or click on the job and select “Build Now” from the left side of the screen.
The job does the same procedure described in section 4.1.2, but in addition it copies the resulting image under the web server’s images directory. It can be found with a web browser in http://localhost/images/ (again adapt if necessary to match networking configuration).
4.1.2 Using Command Line Tools
It is recommended to use an SSH client rather than the system console as that is usually more convenient. Login as user xrs (Table 8).
A Raspberry Pi SD card image can be built by a single command:
$ flxb buildimage
The result is a raw image file, xrs-rpi.raw. The image file contains a fully functional
system for a Raspberry Pi device, and can be written to an SD card. The file goes to the user
folder, for example to /home/xrs.
The buildimage command does the following:
Compiles software packages from version control repository
Publishes new software packages to package repository
Builds an SD card image with newest packages
You can transfer the file from the virtual machine to your host computer for example by using an SCP client like WinSCP. Connect to “localhost”, login as xrs and then transfer the file.
4.2 Importing Source Code
For example in case of a new source code release from Flexibilis, the new software should be imported to the environment to include the latest release in the SD card images.
For the default Subversion [11] repository layout, see section 5.1.4. Below examples assume
that the SVN repository has been checked out to $HOME/svn/xrs_src, which can be done
by
$ cd $HOME
$ mkdir svn
$ cd svn
$ svn checkout svn+ssh://localhost/home/svn/xrs_src
In the following example a driver release is imported. First copy the release package to the system and extract it in a temporary directory:
$ unzip xr7_drivers-V1.11.zip

REFERENCE SOFTWARE FOR XRS DEVICES
User Guide 49 (58) Version 1.1
Then from the extracted location, find the source package directory. It is the one with a
debian/ directory for building it as a package. Then import the source package directory
under branches with a version number (in this case 1.11):
$ svn import xr7_drivers \
svn+ssh://localhost/home/svn/xrs_src/branches/xr7_drivers-1.11
Now the files extracted from the release .zip file can be removed from the temporary directory.
If there are no modifications to the trunk version, it can be replaced with the new release.
$ cd $HOME/svn/xrs_src
$ svn update
$ svn rm trunk/xr7_drivers
$ svn commit -m “Deleted old version of xr7_drivers”
$ svn copy branches/xr7_drivers-1.11 trunk/xr7_drivers
$ svn commit xr7_drivers -m “Added xr7_drivers 1.11 to trunk”
Now the new release is committed to the Subversion repository and it is available for the build tools to be built as a binary package and included in SD card images.
If sources in the trunk have been modified, the modifications must be merged to the new release. Merging changes to a new release is outside of the scope of this document.
See also section 4.3.7 for information how to manage which software packages are built and how the system finds them.
4.3 Advanced Usage
While flxb buildimage command does a lot of operations in one go, the different phases
can also be invoked individually. This is very useful when the environment is used actively.
This section describes some of the possibilities. See also flxb command online help:
$ flxb | less
4.3.1 Recreate Build Environment
Packages are built in a separate build environment in such a way that master build environment is not changed during the package build process. Command
flxb buildimage automatically creates or updates the master build environment, but
sometimes it may be desirable to just force regeneration of the build environment. The command is
$ suflxb buildenv
4.3.2 Build Individual Package
During development it is often useful to be able to build a single package, maybe even without first committing it to VCS. Run the following command from package working copy directory.
$ flxb build
There are two forms of packaging: DEBIAN/ and debian/. The former is for very simple packages that do not need any compilation phases nor separate build environment, the latter for normal packages. The files are described in Debian Policy Manual [6].
4.3.3 Install Individual Package
A single package built by flxb build command can be installed over SSH to target system.
Network connection from VM to the Raspberry Pi device is naturally needed. The command is
$ flxb debinst host=X.Y.Z.W

REFERENCE SOFTWARE FOR XRS DEVICES
User Guide 50 (58) Version 1.1
where X.Y.Z.W is the IP address of the Raspberry Pi device.
4.3.4 Publish Individual Package
This command publishes a package built by flxb build command to local package
repository. Note that all source changes must be committed to VCS first.
$ flxb publish
4.3.5 Build and Publish All Packages
This command builds and publishes all packages which are not up to date in the local package repository. SD card image is not generated.
$ flxb multipublish
4.3.6 Build SD Card Image Only
The following commands use packages already in package repository to create SD card image file, skipping the package up-to-date check and rebuild phases.
$ suflxb firmware
$ suflxb install
An alternate name for the image file can be given by dev parameter at install phase.
Example:
$ suflxb firmware
$ suflxb install dev=xrs-rpi-test.raw
Compressed images can be created by appending suffix of the compression method to the image file name. Example:
$ suflxb firmware
$ suflxb install dev=xrs-rpi-test.raw.zip
4.3.7 Customizing Generated SD Card Images
Command flxb buildimage uses a text file to determine which software packages to
build. It is possible to modify that list, for example to add own custom software or sources of obtained Flexibilis software releases.
However that list does not directly affect which packages are installed on SD card images. See below.
4.3.7.1 About Environment Configuration
A lot of the environment operations are defined in configuration files. By default the XRS SW Environment uses provided sample configuration that is not meant to be modified. However a copy of the configuration is available in local VCS repository directory
trunk/platform-config, see section 5.1.4. Configuration is split into multiple files, for
example main Debian mirror [4] is selected by setting MIRROR in file base, APT sources for
SD card software in file apt-sources, and APT sources for build environment in file
apt-sources.buildenv.
In order to use the VCS version of the configuration, environment variable FLXBUILD_CONFDIR must be set to absolute path to checked out working copy of the configuration directory. Following example assumes that the whole Subversion repository has
been checked out in $HOME/svn/xrs_src, in which case the configuration can be found
from $HOME/svn/xrs_src/trunk/platform-config. The configuration can be edited in
there as needed.
$ export FLXBUILD_CONFDIR=$HOME/svn/xrs_src/trunk/platform-config

REFERENCE SOFTWARE FOR XRS DEVICES
User Guide 51 (58) Version 1.1
Note that the environment variable must be reset after each login. This can be done
automatically by adding the export command to $HOME/.profile.
4.3.7.2 List of Packages to Build
The package list is configured in $FLXBUILD_CONFDIR/batch/testing.def. The format
is described in flxb online help.
$ flxb | less
Search for “batch operations”.
If C++ compiler is needed, change gcc to g++ in file $FLXBUILD_CONFDIR/base. Then
recreate the build environment as described in section 4.3.1.
4.3.7.3 Adding Packages to SD Card
Packages to install are determined from package dependencies. Meta package xr7-rpi-custom is provided in VCS repository for customization purposes, see section 5.1.4.
Custom package names can be added to its debian/control file Depends: list, for
example to add other Debian packages or own software possibly written in C or C++.
4.3.8 About Package Repository
The local package repository uses reprepro software [13], with additional features built on top of it. Thus basic features of reprepro apply.
Package repository is managed using command flxrep. The command must be run as a
separate system account named flxrep. Do not use reprepro command directly, everything
that reprepro can do can and should be accomplished by flxrep front end to reprepro.
Use these commands to get further information how to use flxrep and reprepro.
$ flxrep
$ man reprepro
4.3.8.1 Remove Package from Package Repository
One often encountered reprepro feature is that older packages than are already present in package repository cannot be published. If that is attempted, the packages simply are not imported. Such a situation could happen, for example, when newer version of package has been published for testing, but then one attempts to restore the older version by republishing it. To work around this the new package can be removed from the package repository before publishing the old version. Example commands to accomplish this for xr7-drivers package:
$ su - flxrep
$ flxrep xr7 remove rpi-testing xr7-drivers xr7-drivers-dev
$ exit
Note that multiple Debian packages can be generated from single source tree.
4.3.9 Increasing Disk Size
If VM disk image has been initially created too small, it can often be extended without rewriting whole images, disks or partitions.
4.3.9.1 VirtualBox
For VirtualBox VDI fixed format variant disks it is perhaps easiest to copy contents from old VDI to a new, bigger one. Example procedure:
- create a new VDI disk for the VM - attach the new VDI to the VM still keeping the old one - boot the VM

REFERENCE SOFTWARE FOR XRS DEVICES
User Guide 52 (58) Version 1.1
- partition new disk - create filesystem on the new disk - mount the new disk - copy everything from old disk to the new one handling sparse files efficiently
- update UUID in /etc/fstab
- shutdown the VM - detach old disk from VM - reboot VM and verify everything works
One good way to do the copying is (as root within VM):
# (cd OLD-MOUNTPOINT && tar -cf - LIST-OF-DIRECTORIES-TO-COPY) |
(cd NEW-MOUNTPOINT && tar –xSf -)
Another one:
# (cd OLD-MOUNTPOINT && cp -a --sparse=always \
LIST-OF-DIRECTORIES-TO-COPY NEW-MOUNTPOINT/.)
A dynamic format variant disk size could be increased with a VirtualBox command (one long line in Windows command prompt):
$ "%VBOX_INSTALL_PATH%\VBoxManage.exe" modifyhd
xrs-sw-environment_home.vdi --resize SIZE
After that the partition needs to be recreated and filesystem size increased. Because that cannot be done when filesystem is in use, it is perhaps easiest to create a temporary second VM, attach the old and new disks to it as extra disks, and to boot it from a different root filesystem disk. Then the old and new disk are available for exclusive access.
4.4 Freeing Disk Space
Command df can be used to check for disk usage. Example:
$ df -h
Use du command to see how much disk space certain directories or files consume.
Examples:
$ du -sh $HOME/.flxbuild*
$ du -sh $HOME/*
$ du -sh $HOME
Building packages and SD card images may require several hundred megabytes of free disk space in order to succeed.
By default Jenkins jobs store results of all runs. As time goes by a lot of disk space may be in use for this. Often it is not necessary to keep results forever. Jenkins jobs can be configured to discard old builds.
Sometimes it is desirable to retain certain test runs forever, for example test runs of released versions. In that case it is best to move such test results away from CI server for permanent storage.
The build process uses directories in $HOME/.flxbuild-* as working directories. The *
part depends on configured name in environment configuration. In some cases temporary files may accumulate in these directories, for example when the VM is shut down abruptly. Everything in these directories are recreated if necessary, but that can be a lengthy process. In any case it is always safe to delete just the temporary directories. Example:
$ rm -rf $HOME/.flxbuild*/tmp
Individual software packages are built under directory named ../build-area, relative to
the source tree (i.e. relative to the directory containing debian subdirectory). Over time those
can accumulate and consume a substantial amount of disk space. It is safe to delete these directories. Example:

REFERENCE SOFTWARE FOR XRS DEVICES
User Guide 53 (58) Version 1.1
$ find $HOME -name build-area -type d | xargs rm –rf

REFERENCE SOFTWARE FOR XRS DEVICES
User Guide 54 (58) Version 1.1
5 XRS SW Environment Components
This section gives a depiction of the different components in the XRS SW Environment.
5.1.1 Web Server
The environment includes Apache HTTP server [9] which is used to serve documentation, source code and Raspberry Pi SD card images that are built with the environment using CI server.
Document root of the web server on the environment file system is
/usr/share/xrs-sw-environment/www. The document root has the following directory
layout:
/usr/share/xrs-sw-environment/www
├── doc
│ ├── XRS_Reference_Software_User_Guide.pdf
│ └── SpeedChip_XRS7000_Reference_Board_Manual.pdf
├── images
│ └── xrs-rpi.raw.zip
└── src
└── xr7_drivers
Images is actually a symbolic link to a different location.
With the default networking setup the web server can be reached from the host using URL http://localhost/.
Note that in the default configuration there is a separate virtual host configuration for the package repository on localhost address. So within the VM the same URL accesses the package repository instead.
Apache HTTP server configuration files are in /etc/apache2, note the see symbolic links in
/etc/apache2/sites-enabled. For more information on Apache HTTP server
configuration, see its documentation [9].
5.1.2 Continuous Integration Server
The environment includes Jenkins [8] as a continuous integration (CI) server. A CI server is typically used for making software compilations and builds and providing an interface to a user to trigger builds and inspect their status. A CI server typically does builds either by a predefined schedule or when required due to changes to a component that triggers a build.
With the default networking setup the CI server can be reached from the host using URL http://localhost:8080/. There is a pre-installed job for building SD card images.
For more information on Jenkins CI server configuration and usage, see its documentation [8].
5.1.3 Build Environment
The XRS SW Environment has a build environment that includes tools for
Building Raspberry Pi SD card images
Cross-compiling software for Raspberry Pi
Managing the version control repository
Building software packages
Managing the package repository
The build environment is used from command line via SSH.
For usage information about build environment, see flxb command online help texts.
$ flxb | less

REFERENCE SOFTWARE FOR XRS DEVICES
User Guide 55 (58) Version 1.1
For information on preparing own software for building and packaging, see packaging of
provided source code (see section 5.1.4, and contents of debian subdirectory of each SW
package). For packaging guidelines in general, see Debian Policy Manual [6]. For more
information about commands used in debian/rules file, see debhelper manual pages and
other debhelper documentation.
man debhelper
5.1.4 Version Control System
The environment includes a pre-installed Subversion version control system [11] repository which contains source code for certain XRS software packages and the Linux kernel. Also device tree source files are included. The software packages are built as binary packages and published to the package repository when building an SD card image.
An example layout of the xrs software repository could look like the following:
xrs
├── branches
│ ├── linux-raspbian-3.18.11
│ ├── xr7_drivers-1.11
│ ├── xr7_drivers-1.12
│ ├── xr7-rpi-devtree-1.1
│ ├── xr7-rpi-custom-1.0
│ ├── flx_fes_lib-1.6
│ └── xr7_redundancy_supervision-1.14
└── trunk
├── platform-config
├── linux-raspbian
├── xr7_drivers
├── xr7-rpi-devtree
├── xr7-rpi-custom
├── flx_fes_lib
└── xr7_redundancy_supervision
The software packages written with a cursive font are not included in the environment.
Trunk is the location from where automated builds check out the source code for compilation
and package building and publishing. In case you modify the sources, do the modifications to the code under trunk.
Branches is used for different versions of software packages.
The SVN repository can be accessed in the VM using URL
svn+ssh://localhost/home/svn/xrs_src. The same URL can be used on the host,
too, if port forwarding for SSH port has been configured as described in section 3.3.2.4.
For more information on Subversion usage, see Version Control with Subversion [12].
5.1.5 Package Repository
The environment includes a Debian package repository with pre-published binary packages to build a Raspberry Pi SD card image for XRS. The repository is not a full mirror of the Debian repository, but internet connectivity is required to access the official Debian repositories [4]. The environment uses apt-cacher-ng as an APT proxy to reduce download traffic from Debian servers.
When a software package is built to a binary package, it is published to the package repository. When SD card images are built, binary packages are installed from the repository.
Certain XRS software packages are included in the image as source code and are thus available for modifications. When an image is built, these software packages are compiled

REFERENCE SOFTWARE FOR XRS DEVICES
User Guide 56 (58) Version 1.1
and built as binary packages which are published to the package repository before being used in the image building process.
The local package repository uses reprepro software [13], with additional features built on top of it. For more information on package archive management, see reprepro documentation [13] and flxrep command help texts (run it as user flxrep without any parameters). Reprepro manual page contains also a lot of useful information.
$ flxrep
$ man reprepro

REFERENCE SOFTWARE FOR XRS DEVICES
User Guide 57 (58) Version 1.1
6 Abbreviations Term Description
AHCI Advanced Host Controller Interface BIOS Basic Input/Output System CI Continuous Integration DNS Domain Name System EEPROM Electrically Erasable Programmable Read-Only Memory GMII Gigabit Media-Independent Interface GPT GUID Partition Table GPU Graphics Processing Unit GUI Graphical User Interface GUID Globally Unique Identifer HSR High-availability Seamless Redundancy HTTP Hypertext Transfer Protocol I2C Inter-Integrated Circuit IPv4 Internet Protocol version 4 IPv6 Internet Protocol version 6 MAC Media Access Control MBR Master Boot Record MDIO Management Data Input/Output MII Media-Independent Interface NAT Network Address Translation NTP Network Time Protocol OS Operating System PC Personal Computer PRP Parallel Redundancy Protocol PTP Precision Time Protocol RGMII Reduced Gigabit Media-Independent Interface RPi Raspberry Pi SATA Serial ATA SFP Small Form-factor Pluggable Transceiver SGMII Serial Gigabit Media-Independent Interface SSH Secure Shell TCP Transmission Control Protocol UDP User Datagram Protocol URL VCS
Uniform Resource Locator Version Control System
VDI Virtual Disk Image VM Virtual Machine

REFERENCE SOFTWARE FOR XRS DEVICES
User Guide 58 (58) Version 1.1
7 References
[1] SpeedChip XRS7000 and XRS3000 User Manual, http://www.flexibilis.com/products/downloads/
[2] SpeedChip XRS7000 Reference Board User Manual, http://www.flexibilis.com/products/downloads/
[3] Debian GNU/Linux distribution, http://www.debian.org/
[4] Debian repository mirrors, http://www.debian.org/mirror/list
[5] Debian Users’ Manuals, http://www.debian.org/doc/user-manuals
[6] Debian Policy Manual, http://www.debian.org/doc/debian-policy/
[7] Oracle VirtualBox, http://www.virtualbox.org/
[8] Jenkins Continuous Integration Server, https://jenkins-ci.org/
[9] Apache HTTP server, https://httpd.apache.org/
[10] Raspbian GNU/Linux distribution, https://www.raspbian.org/
[11] Subversion Version Control System, https://subversion.apache.org/
[12] Version Control with Subversion, http://svnbook.red-bean.com/
[13] Reprepro, http://mirrorer.alioth.debian.org/
[14] Network Configuration Protocol, RFC 4741, http://tools.ietf.org/html/rfc4741
[15] Using the NETCONF Configuration Protocol over Secure SHell (SSH), RFC 4742, http://tools.ietf.org/html/rfc4742
[16] Oracle VirtualBox end-user documentation, https://www.virtualbox.org/wiki/End-user_documentation
[17] XR7 PTP Design Specification, xr7_ptp_design.pdf
[18] XR7 Redundancy Supervision Design Spesification, xr7_redundancy_supervision_design.pdf