Embed Size (px)
Citation preview
REDCap Data Entry User’s Guide & Reference Manual Page 1
REDCap Data Entry User’s Guide & Reference Manual
Welcome to REDCap! REDCap is a secure, web-based application for managing your clinical data. This document will review the basic principles of data entry in REDCap.
REDCap structure and terminology
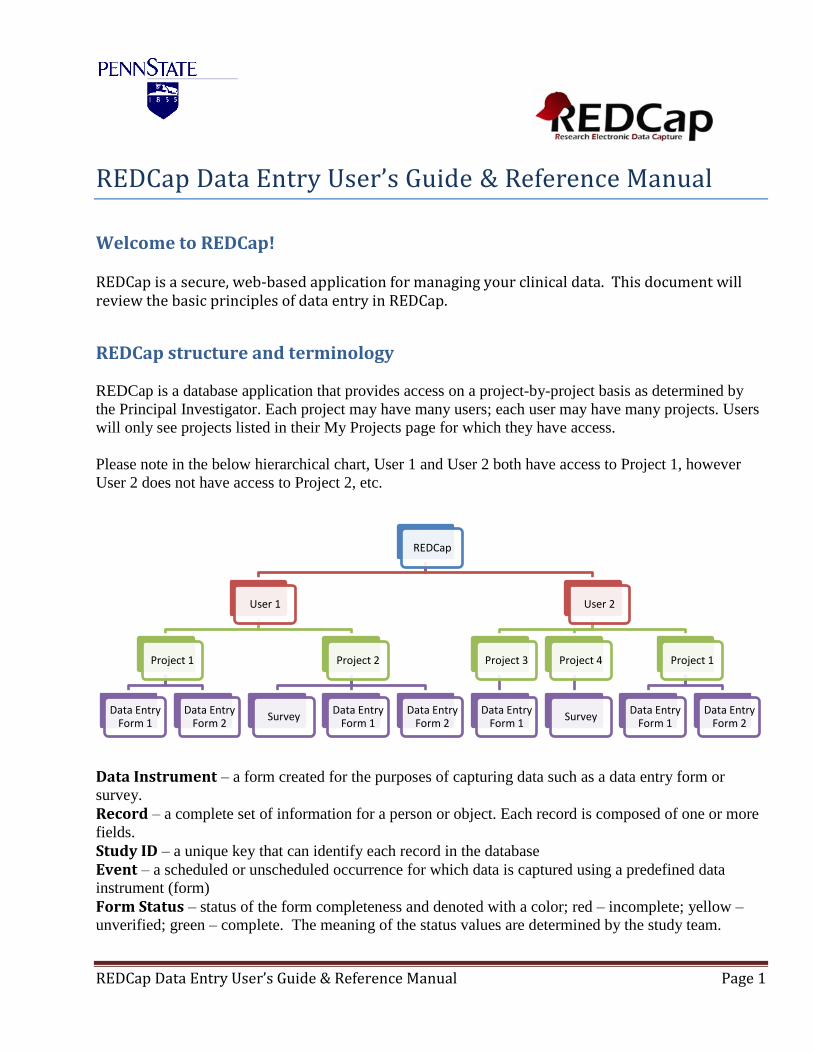
REDCap is a database application that provides access on a project-by-project basis as determined by
the Principal Investigator. Each project may have many users; each user may have many projects. Users
will only see projects listed in their My Projects page for which they have access.
Please note in the below hierarchical chart, User 1 and User 2 both have access to Project 1, however
User 2 does not have access to Project 2, etc.
Data Instrument – a form created for the purposes of capturing data such as a data entry form or
survey.
Record – a complete set of information for a person or object. Each record is composed of one or more
fields.
Study ID – a unique key that can identify each record in the database
Event – a scheduled or unscheduled occurrence for which data is captured using a predefined data
instrument (form)
Form Status – status of the form completeness and denoted with a color; red – incomplete; yellow –
unverified; green – complete. The meaning of the status values are determined by the study team.
REDCap
User 1
Project 1
Data Entry Form 1
Data Entry Form 2
Project 2
Survey Data Entry
Form 1 Data Entry
Form 2
User 2
Project 3
Data Entry Form 1
Project 4
Survey
Project 1
Data Entry Form 1
Data Entry Form 2
REDCap Data Entry User’s Guide & Reference Manual Page 2
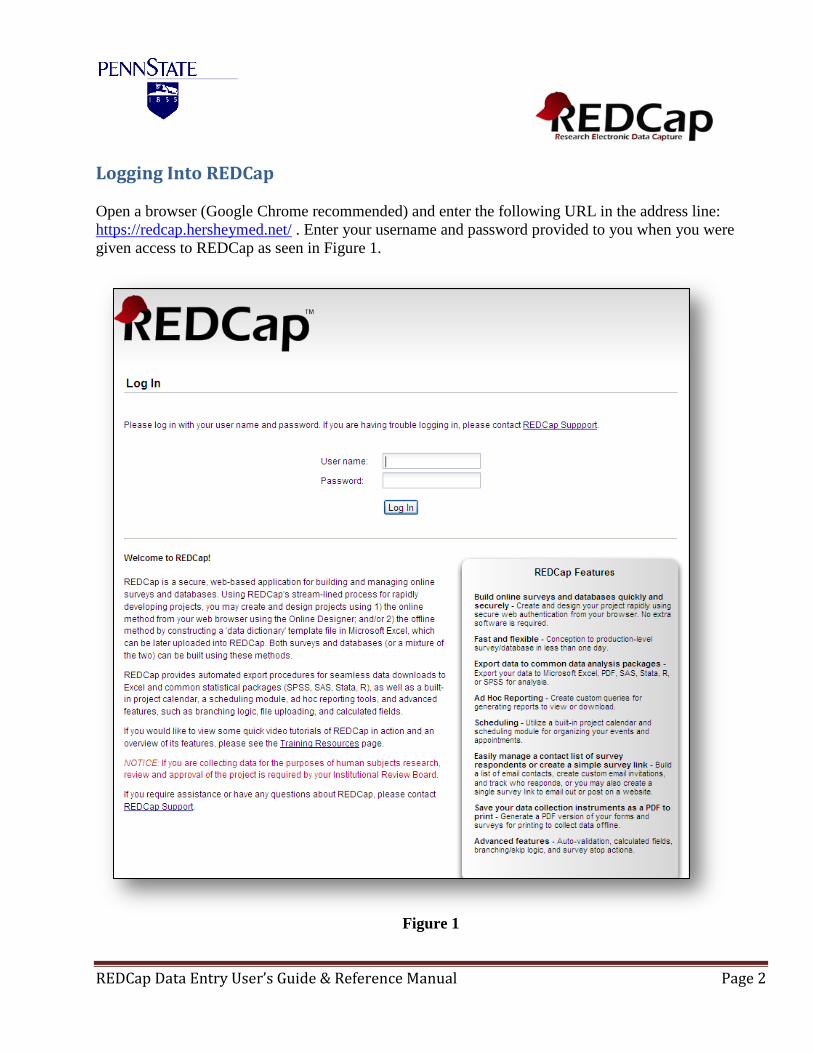
Logging Into REDCap
Open a browser (Google Chrome recommended) and enter the following URL in the address line:
https://redcap.hersheymed.net/ . Enter your username and password provided to you when you were
given access to REDCap as seen in Figure 1.
Figure 1
REDCap Data Entry User’s Guide & Reference Manual Page 3
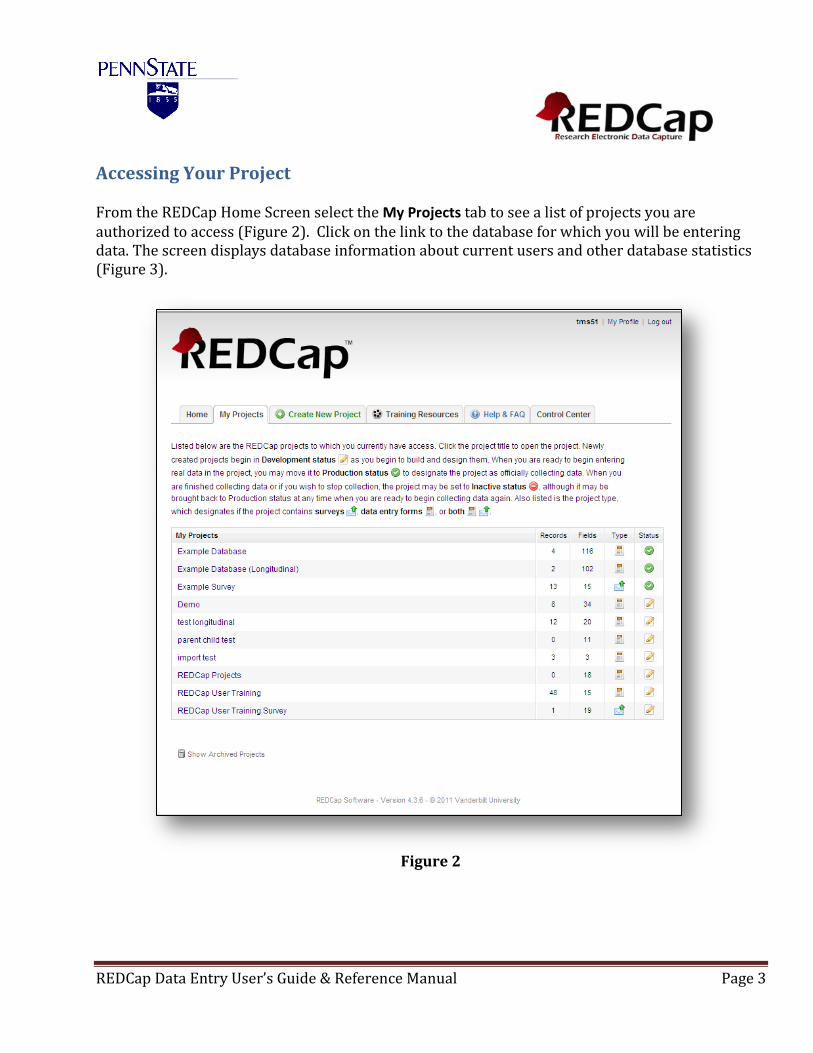
Accessing Your Project From the REDCap Home Screen select the My Projects tab to see a list of projects you are authorized to access (Figure 2). Click on the link to the database for which you will be entering data. The screen displays database information about current users and other database statistics (Figure 3).
Figure 2
REDCap Data Entry User’s Guide & Reference Manual Page 4
Data Collection Types There are two project types:
Classic – each form is used once for each participant. Longitudinal - each form may be used one or more times for each participant and each
instance of the form is assigned to an event (i.e., Visit Blood Workup form is used on the 1st, 3rd and last visit). The Scheduling Module may be used to schedule a participant on the study and identify the data forms to use at each event.
The Data Collection panel will appear different depending on the data collection type (Classic or
Longitudinal). For the Classic type, the data instruments (forms) are listed in the panel. For the
Longitudinal type, the instruments are listed in an event grid, see Figure 6 below for that view.
A new record may only be created in the first data instrument listed in the Data Collection panel.
REDCap Data Entry User’s Guide & Reference Manual Page 5
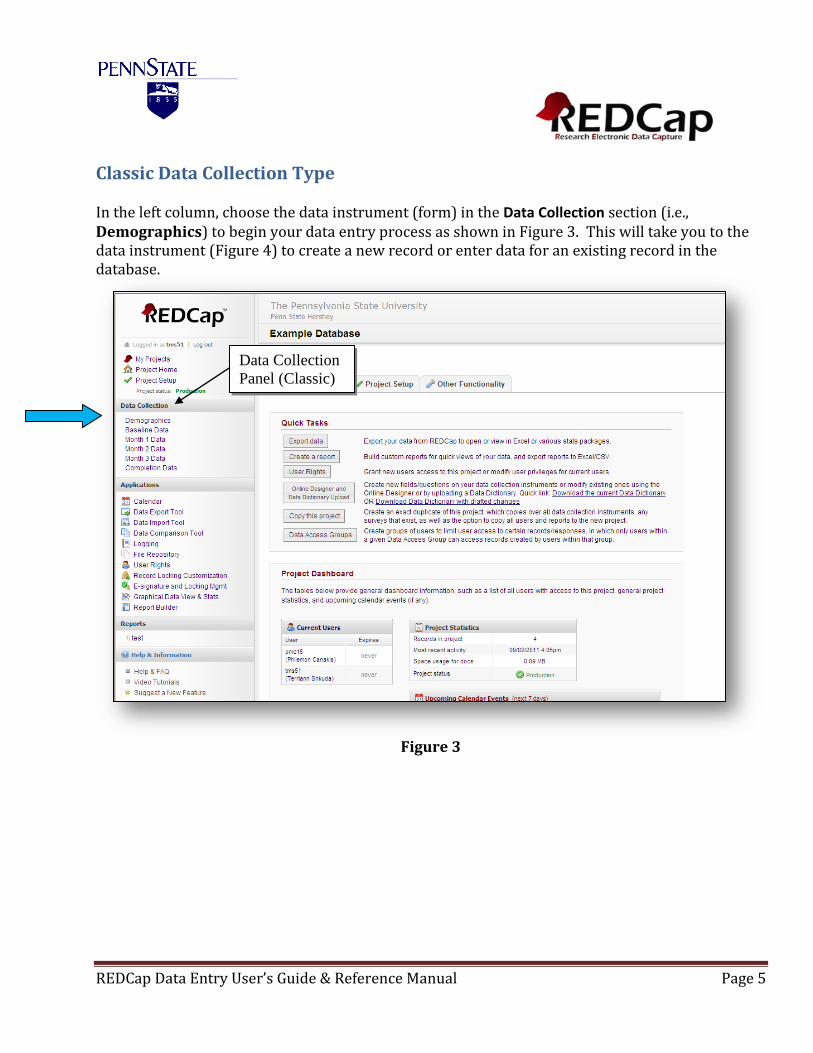
Classic Data Collection Type In the left column, choose the data instrument (form) in the Data Collection section (i.e., Demographics) to begin your data entry process as shown in Figure 3. This will take you to the data instrument (Figure 4) to create a new record or enter data for an existing record in the database.
Figure 3
Data Collection
Panel (Classic)
REDCap Data Entry User’s Guide & Reference Manual Page 6
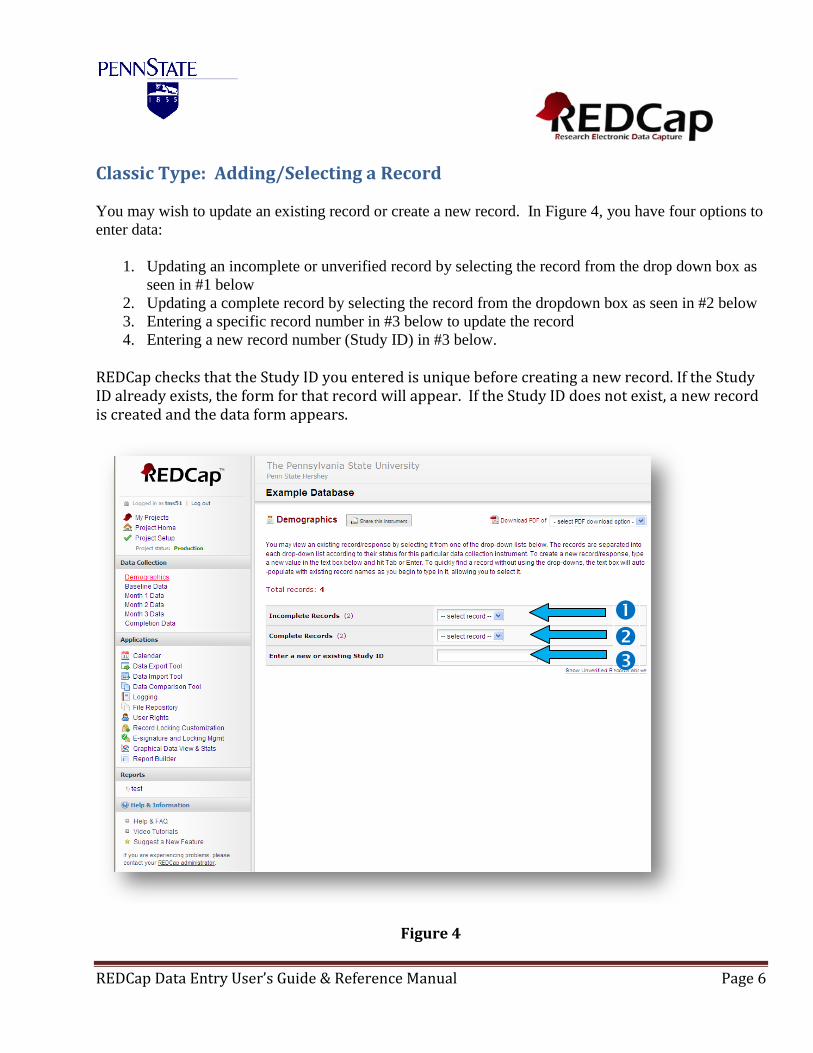
Classic Type: Adding/Selecting a Record
You may wish to update an existing record or create a new record. In Figure 4, you have four options to
enter data:
1. Updating an incomplete or unverified record by selecting the record from the drop down box as
seen in #1 below
2. Updating a complete record by selecting the record from the dropdown box as seen in #2 below
3. Entering a specific record number in #3 below to update the record
4. Entering a new record number (Study ID) in #3 below.
REDCap checks that the Study ID you entered is unique before creating a new record. If the Study ID already exists, the form for that record will appear. If the Study ID does not exist, a new record is created and the data form appears.
Figure 4
REDCap Data Entry User’s Guide & Reference Manual Page 7
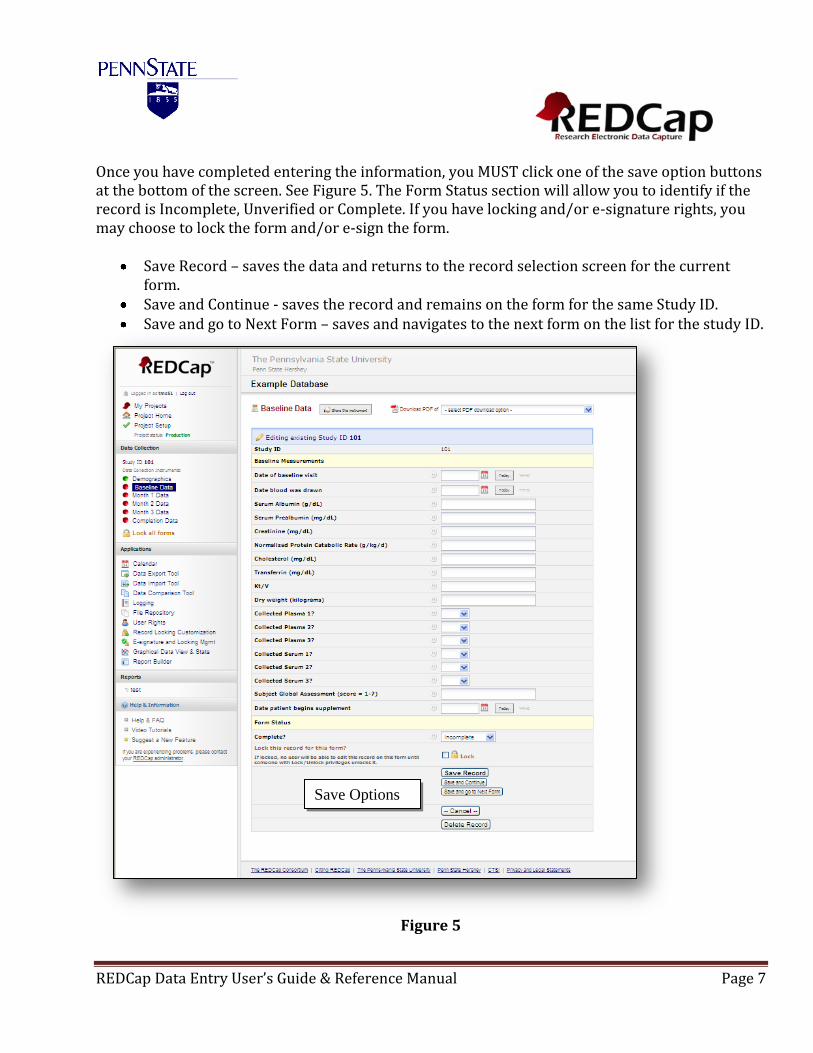
Once you have completed entering the information, you MUST click one of the save option buttons at the bottom of the screen. See Figure 5. The Form Status section will allow you to identify if the record is Incomplete, Unverified or Complete. If you have locking and/or e-signature rights, you may choose to lock the form and/or e-sign the form.
Save Record – saves the data and returns to the record selection screen for the current form.
Save and Continue - saves the record and remains on the form for the same Study ID. Save and go to Next Form – saves and navigates to the next form on the list for the study ID.
Figure 5
Save Options
REDCap Data Entry User’s Guide & Reference Manual Page 8
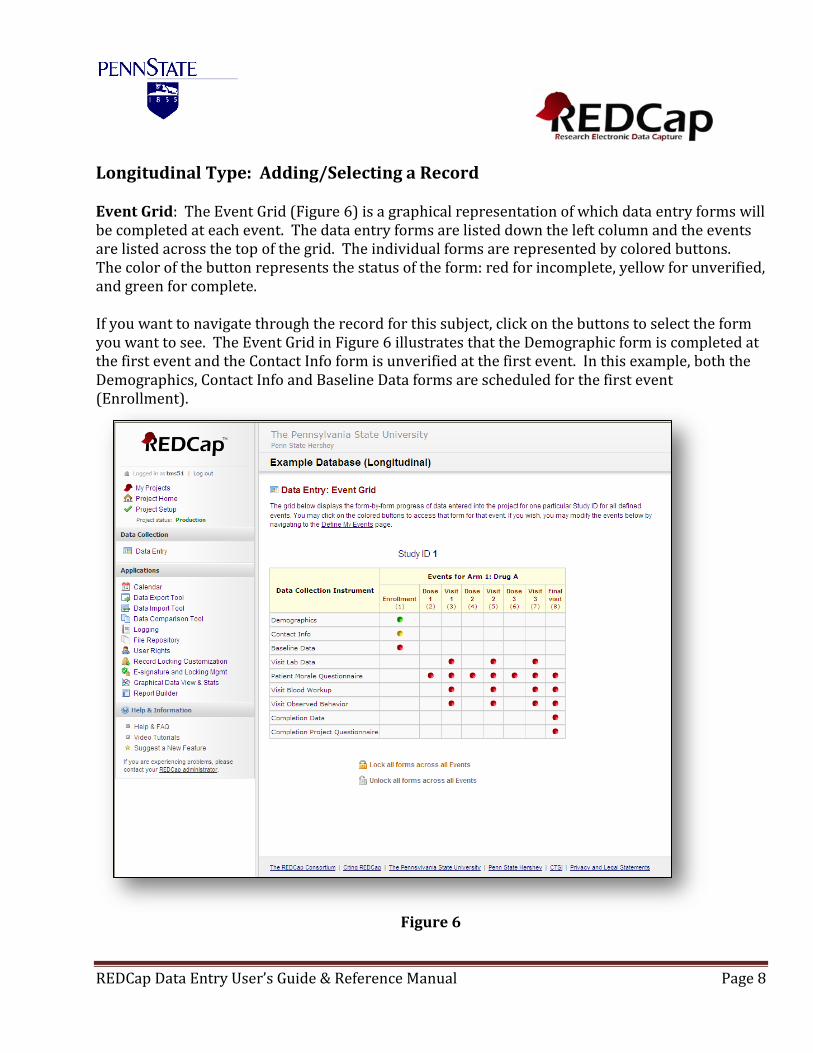
Longitudinal Type: Adding/Selecting a Record
Event Grid: The Event Grid (Figure 6) is a graphical representation of which data entry forms will be completed at each event. The data entry forms are listed down the left column and the events are listed across the top of the grid. The individual forms are represented by colored buttons. The color of the button represents the status of the form: red for incomplete, yellow for unverified, and green for complete. If you want to navigate through the record for this subject, click on the buttons to select the form you want to see. The Event Grid in Figure 6 illustrates that the Demographic form is completed at the first event and the Contact Info form is unverified at the first event. In this example, both the Demographics, Contact Info and Baseline Data forms are scheduled for the first event (Enrollment).
Figure 6
REDCap Data Entry User’s Guide & Reference Manual Page 9
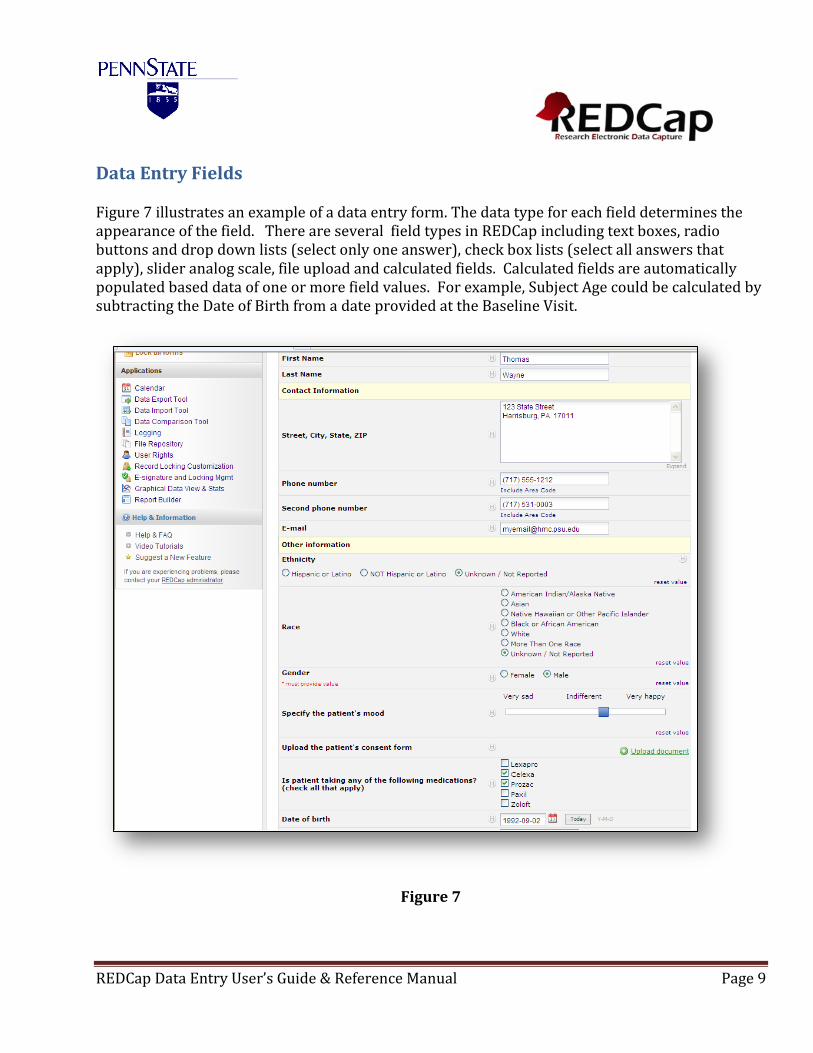
Data Entry Fields Figure 7 illustrates an example of a data entry form. The data type for each field determines the appearance of the field. There are several field types in REDCap including text boxes, radio buttons and drop down lists (select only one answer), check box lists (select all answers that apply), slider analog scale, file upload and calculated fields. Calculated fields are automatically populated based data of one or more field values. For example, Subject Age could be calculated by subtracting the Date of Birth from a date provided at the Baseline Visit.
Figure 7
REDCap Data Entry User’s Guide & Reference Manual Page 10
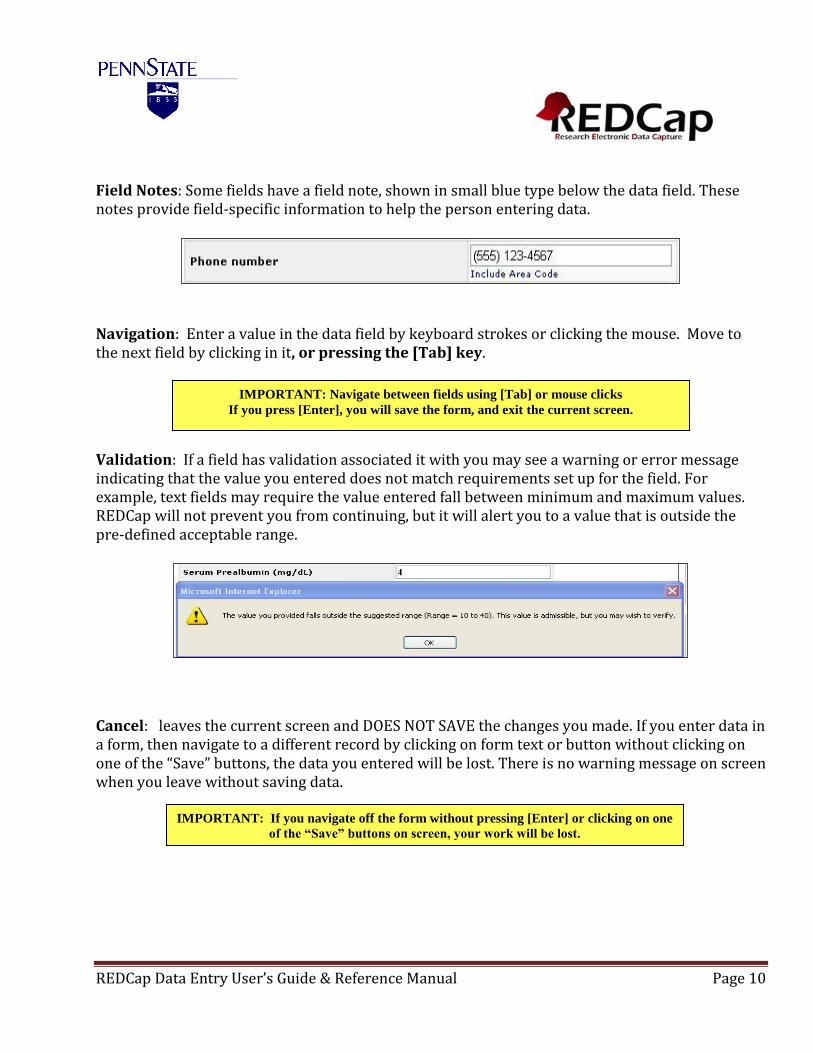
Field Notes: Some fields have a field note, shown in small blue type below the data field. These notes provide field-specific information to help the person entering data.
Navigation: Enter a value in the data field by keyboard strokes or clicking the mouse. Move to the next field by clicking in it, or pressing the [Tab] key.
Validation: If a field has validation associated it with you may see a warning or error message indicating that the value you entered does not match requirements set up for the field. For example, text fields may require the value entered fall between minimum and maximum values. REDCap will not prevent you from continuing, but it will alert you to a value that is outside the pre-defined acceptable range.
Cancel: leaves the current screen and DOES NOT SAVE the changes you made. If you enter data in a form, then navigate to a different record by clicking on form text or button without clicking on one of the “Save” buttons, the data you entered will be lost. There is no warning message on screen when you leave without saving data.
IMPORTANT: Navigate between fields using [Tab] or mouse clicks
If you press [Enter], you will save the form, and exit the current screen.
IMPORTANT: If you navigate off the form without pressing [Enter] or clicking on one
of the “Save” buttons on screen, your work will be lost.