Embed Size (px)
Citation preview

Red Hat Customer ContentServices
Red Hat Mobile Application Platform4.2MBaaS Administration andInstallation Guide
For Red Hat Mobile Application Platform 4.2


Red Hat Mobile Application Platform 4.2 MBaaS Administration andInstallation Guide
For Red Hat Mobile Application Platform 4.2

Legal Notice
Copyright © 2017 Red Hat, Inc.
The text of and illustrations in this document are licensed by Red Hat under a Creative CommonsAttribution–Share Alike 3.0 Unported license ("CC-BY-SA"). An explanation of CC-BY-SA isavailable athttp://creativecommons.org/licenses/by-sa/3.0/. In accordance with CC-BY-SA, if you distribute this document or an adaptation of it, you mustprovide the URL for the original version.
Red Hat, as the licensor of this document, waives the right to enforce, and agrees not to assert,Section 4d of CC-BY-SA to the fullest extent permitted by applicable law.
Red Hat, Red Hat Enterprise Linux, the Shadowman logo, JBoss, OpenShift, Fedora, the Infinitylogo, and RHCE are trademarks of Red Hat, Inc., registered in the United States and othercountries.
Linux ® is the registered trademark of Linus Torvalds in the United States and other countries.
Java ® is a registered trademark of Oracle and/or its affiliates.
XFS ® is a trademark of Silicon Graphics International Corp. or its subsidiaries in the United Statesand/or other countries.
MySQL ® is a registered trademark of MySQL AB in the United States, the European Union andother countries.
Node.js ® is an official trademark of Joyent. Red Hat Software Collections is not formally related toor endorsed by the official Joyent Node.js open source or commercial project.
The OpenStack ® Word Mark and OpenStack logo are either registered trademarks/service marksor trademarks/service marks of the OpenStack Foundation, in the United States and other countriesand are used with the OpenStack Foundation's permission. We are not affiliated with, endorsed orsponsored by the OpenStack Foundation, or the OpenStack community.
All other trademarks are the property of their respective owners.
AbstractThis document provides guides related to installation and administration of the RHMAP 4.x MBaaSon OpenShift 3.

. . . . . . . . . . . . . . . . . . . . . . . . . . . . . . . . . . . . . . . . . . . . . . . . . . . . . . . . . . . . . . . . . . . . . . . . . . . . . . . . . . . . . . . . . . . . . . . . . . . . . . . . . . . . . . . . . . . . . . . . . . . . . . . . . . . . . . . . . . . . . . . . . . . . . . . . . . . . . . . . . . . . . . . . . . . . . . . . . . . . . . . . . . . . . . . . . . . . . . . . . . . . . . . . . . . . . . . . . . . . . . . . . . . . . . . . . . . . . . . . . . . . . . . . . . . . . . . . . . . . . . . . . . . . . . . . . . . . . . . .
. . . . . . . . . . . . . . . . . . . . . . . . . . . . . . . . . . . . . . . . . . . . . . . . . . . . . . . . . . . . . . . . . . . . . . . . . . . . . . . . . . . . . . . . . . . . . . . . . . . . . . . . . . . . . . . . . . . . . . . . . . . . . . . . . . . . . . . . . . . . . . . . . . . . . . . . . . . . . . . . . . . . . . . . . . . . . . . . . . . . . . . . . . . . . . . . . . . . . . . . . . . . . . . . . . . . . . . . . . . . . . . . . . . . . . . . . . . . . . . . . . . . . . . . . . . . . . . . . . . . . . . . . . . . . . . . . . . . . . . .
. . . . . . . . . . . . . . . . . . . . . . . . . . . . . . . . . . . . . . . . . . . . . . . . . . . . . . . . . . . . . . . . . . . . . . . . . . . . . . . . . . . . . . . . . . . . . . . . . . . . . . . . . . . . . . . . . . . . . . . . . . . . . . . . . . . . . . . . . . . . . . . . . . . . . . . . . . . . . . . . . . . . . . . . . . . . . . . . . . . . . . . . . . . . . . . . . . . . . . . . . . . . . . . . . . . . . . . . . . . . . . . . . . . . . . . . . . . . . . . . . . . . . . . . . . . . . . . . . . . . . . . . . . . . . . . . . . . . . . . .
. . . . . . . . . . . . . . . . . . . . . . . . . . . . . . . . . . . . . . . . . . . . . . . . . . . . . . . . . . . . . . . . . . . . . . . . . . . . . . . . . . . . . . . . . . . . . . . . . . . . . . . . . . . . . . . . . . . . . . . . . . . . . . . . . . . . . . . . . . . . . . . . . . . . . . . . . . . . . . . . . . . . . . . . . . . . . . . . . . . . . . . . . . . . . . . . . . . . . . . . . . . . . . . . . . . . . . . . . . . . . . . . . . . . . . . . . . . . . . . . . . . . . . . . . . . . . . . . . . . . . . . . . . . . . . . . . . . . . . . .
. . . . . . . . . . . . . . . . . . . . . . . . . . . . . . . . . . . . . . . . . . . . . . . . . . . . . . . . . . . . . . . . . . . . . . . . . . . . . . . . . . . . . . . . . . . . . . . . . . . . . . . . . . . . . . . . . . . . . . . . . . . . . . . . . . . . . . . . . . . . . . . . . . . . . . . . . . . . . . . . . . . . . . . . . . . . . . . . . . . . . . . . . . . . . . . . . . . . . . . . . . . . . . . . . . . . . . . . . . . . . . . . . . . . . . . . . . . . . . . . . . . . . . . . . . . . . . . . . . . . . . . . . . . . . . . . . . . . . . . .
. . . . . . . . . . . . . . . . . . . . . . . . . . . . . . . . . . . . . . . . . . . . . . . . . . . . . . . . . . . . . . . . . . . . . . . . . . . . . . . . . . . . . . . . . . . . . . . . . . . . . . . . . . . . . . . . . . . . . . . . . . . . . . . . . . . . . . . . . . . . . . . . . . . . . . . . . . . . . . . . . . . . . . . . . . . . . . . . . . . . . . . . . . . . . . . . . . . . . . . . . . . . . . . . . . . . . . . . . . . . . . . . . . . . . . . . . . . . . . . . . . . . . . . . . . . . . . . . . . . . . . . . . . . . . . . . . . . . . . . .
. . . . . . . . . . . . . . . . . . . . . . . . . . . . . . . . . . . . . . . . . . . . . . . . . . . . . . . . . . . . . . . . . . . . . . . . . . . . . . . . . . . . . . . . . . . . . . . . . . . . . . . . . . . . . . . . . . . . . . . . . . . . . . . . . . . . . . . . . . . . . . . . . . . . . . . . . . . . . . . . . . . . . . . . . . . . . . . . . . . . . . . . . . . . . . . . . . . . . . . . . . . . . . . . . . . . . . . . . . . . . . . . . . . . . . . . . . . . . . . . . . . . . . . . . . . . . . . . . . . . . . . . . . . . . . . . . . . . . . . .
. . . . . . . . . . . . . . . . . . . . . . . . . . . . . . . . . . . . . . . . . . . . . . . . . . . . . . . . . . . . . . . . . . . . . . . . . . . . . . . . . . . . . . . . . . . . . . . . . . . . . . . . . . . . . . . . . . . . . . . . . . . . . . . . . . . . . . . . . . . . . . . . . . . . . . . . . . . . . . . . . . . . . . . . . . . . . . . . . . . . . . . . . . . . . . . . . . . . . . . . . . . . . . . . . . . . . . . . . . . . . . . . . . . . . . . . . . . . . . . . . . . . . . . . . . . . . . . . . . . . . . . . . . . . . . . . . . . . . . . .
Table of Contents
CHAPTER 1. RHMAP 4.X MBAAS1.1. OVERVIEW1.2. ARCHITECTURE OF THE MBAAS1.3. SECURITY CONSIDERATIONS
CHAPTER 2. INSTALLING THE MBAAS
CHAPTER 3. PROVISIONING AN RHMAP 4.X MBAAS IN OPENSHIFT 33.1. OVERVIEW3.2. PREREQUISITES3.3. AUTOMATIC INSTALLATION3.4. MANUAL INSTALLATION3.5. CREATING AN MBAAS TARGET3.6. AFTER INSTALLATION
CHAPTER 4. ADJUSTING SYSTEM RESOURCE USAGE OF THE MBAAS AND CLOUD APPS4.1. OVERVIEW4.2. PREREQUISITES4.3. ADJUSTING RESOURCE USAGE OF THE MBAAS4.4. ADJUSTING RESOURCE USAGE OF CLOUD APPS4.5. SETTING RESOURCE REQUESTS AND LIMITS4.6. USING CLUSTER METRICS TO VISUALIZE RESOURCE CONSUMPTION
CHAPTER 5. SETTING UP SMTP FOR CLOUD APP ALERTS5.1. OVERVIEW5.2. PREREQUISITES5.3. CONFIGURING SMTP SETTINGS IN FH-MBAAS5.4. VERIFYING SMTP SETTINGS5.5. TROUBLESHOOTING
CHAPTER 6. BACKING UP AN MBAAS6.1. REQUIREMENTS6.2. EXPECTED STORAGE REQUIREMENTS6.3. WHAT DATA IS BACKED UP6.4. BACKING UP THE MONGODB DATA6.5. BACKING UP THE NAGIOS DATA6.6. BACKUP FREQUENCY6.7. EXAMPLE BACKUP SCRIPT
CHAPTER 7. RESTORING AN MBAAS BACKUP7.1. OVERVIEW7.2. REQUIREMENTS7.3. WHAT DATA IS RESTORED7.4. RESTORING NAGIOS DATA7.5. RESTORING MONGODB DATA7.6. CONFIRMING RESTORATION
CHAPTER 8. TROUBLESHOOTING THE RHMAP MBAAS8.1. OVERVIEW8.2. CHECK THE HEALTH ENDPOINT OF THE MBAAS8.3. ANALYZE LOGS8.4. COMMON PROBLEMS
3333
5
66677
1618
19191919202122
242424242424
2626262626262727
28282828282930
3131313232
Table of Contents
1

Red Hat Mobile Application Platform 4.2 MBaaS Administration and Installation Guide
2

CHAPTER 1. RHMAP 4.X MBAAS
1.1. OVERVIEW
Red Hat Mobile Application (RHMAP) 4.x has a hybrid deployment model — the Core, the MBaaS,and the Build Farm are deployed in different locations.
Development and management of apps occurs in the multi-tenant cloud instance of the RHMAPCore hosted by Red Hat.
Application data, runtime, and integrations are deployed to the RHMAP MBaaS installed in aprivate or public instance of OpenShift Enterprise 3.
The Build Farm is deployed separately from the Core and the MBaaS and is shared between allinstances of RHMAP. Third-party Linux, Windows, and Apple server hosting providers are usedto support building client app binaries for all platforms.
The Mobile Backend-as-a-Service (MBaaS) is a core component of RHMAP – the back-end platformhosting containerized cloud applications in conjunction with database storage (MongoDB). Thecloud applications deployed in an MBaaS can make use of RHMAP APIs, such as datasynchronization, caching, or push notifications, and integrate with enterprise systems or other cloudservices.
1.2. ARCHITECTURE OF THE MBAAS
The RHMAP MBaaS 4.x is built on top of several technologies, including OpenShift Enterprise 3,Kubernetes, Docker, and Red Hat Software Collections. The MBaaS consists of severalcomponents, each running in its own Docker container. Similarly, every cloud app deployed to theMBaaS runs in a Docker container. Those containers are deployed and orchestrated by Kubernetes.
In the MBaaS, the users can configure multiple isolated runtime and storage environments tosupport software development life-cycle stages, such as development, testing, and production. Eachenvironment can host multiple cloud apps.
1.3. SECURITY CONSIDERATIONS
CHAPTER 1. RHMAP 4.X MBAAS
3

Since the MBaaS is not hosted in Red Hat’s public multi-tenant cloud, the data transmitted betweenthe mobile device and the cloud app does not pass through any servers operated by Red Hat or anyother third party. Private data from backend systems is transmitted directly between mobile devicesand the MBaaS.
The following data still resides in the RHMAP Core:
User names and passwords of RHMAP accounts
Master database of the Core, with entries for projects, apps, and their IDs
Git repositories hosting the source code of client and cloud apps
App store containing the built binaries of client apps
Red Hat Mobile Application Platform 4.2 MBaaS Administration and Installation Guide
4
CHAPTER 2. INSTALLING THE MBAAS
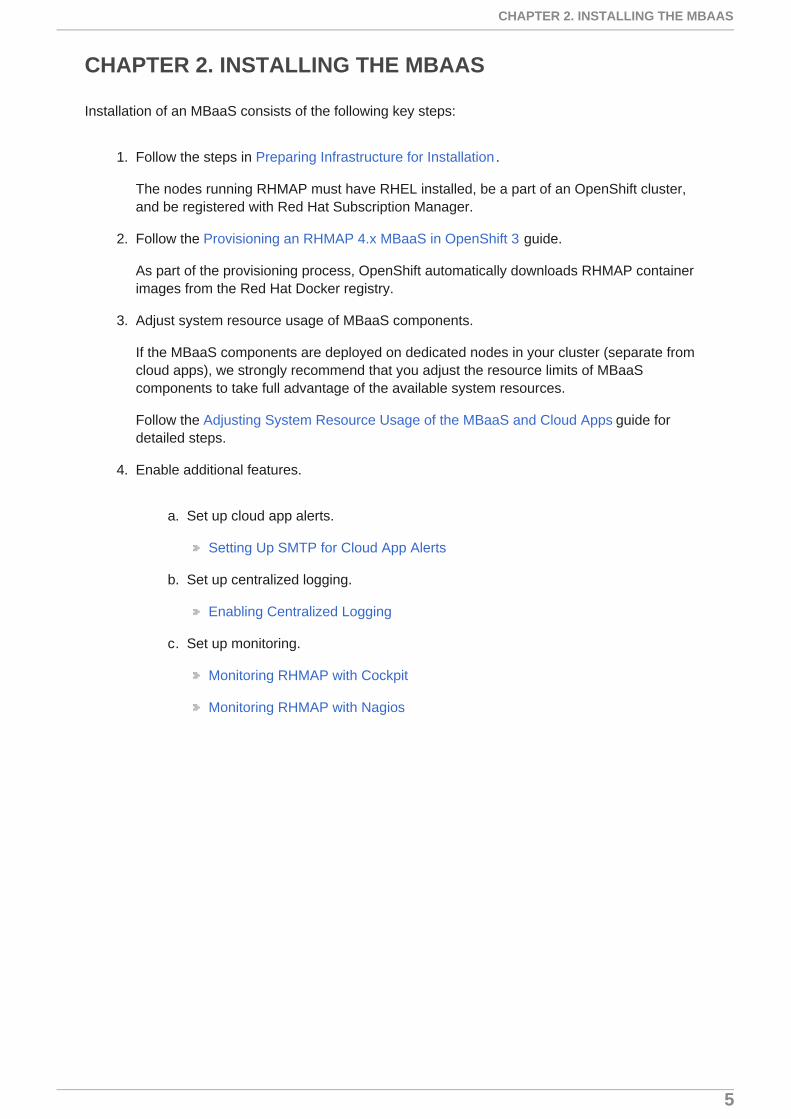
Installation of an MBaaS consists of the following key steps:
1. Follow the steps in Preparing Infrastructure for Installation .
The nodes running RHMAP must have RHEL installed, be a part of an OpenShift cluster,and be registered with Red Hat Subscription Manager.
2. Follow the Provisioning an RHMAP 4.x MBaaS in OpenShift 3 guide.
As part of the provisioning process, OpenShift automatically downloads RHMAP containerimages from the Red Hat Docker registry.
3. Adjust system resource usage of MBaaS components.
If the MBaaS components are deployed on dedicated nodes in your cluster (separate fromcloud apps), we strongly recommend that you adjust the resource limits of MBaaScomponents to take full advantage of the available system resources.
Follow the Adjusting System Resource Usage of the MBaaS and Cloud Apps guide fordetailed steps.
4. Enable additional features.
a. Set up cloud app alerts.
Setting Up SMTP for Cloud App Alerts
b. Set up centralized logging.
Enabling Centralized Logging
c. Set up monitoring.
Monitoring RHMAP with Cockpit
Monitoring RHMAP with Nagios
CHAPTER 2. INSTALLING THE MBAAS
5
CHAPTER 3. PROVISIONING AN RHMAP 4.X MBAAS INOPENSHIFT 3
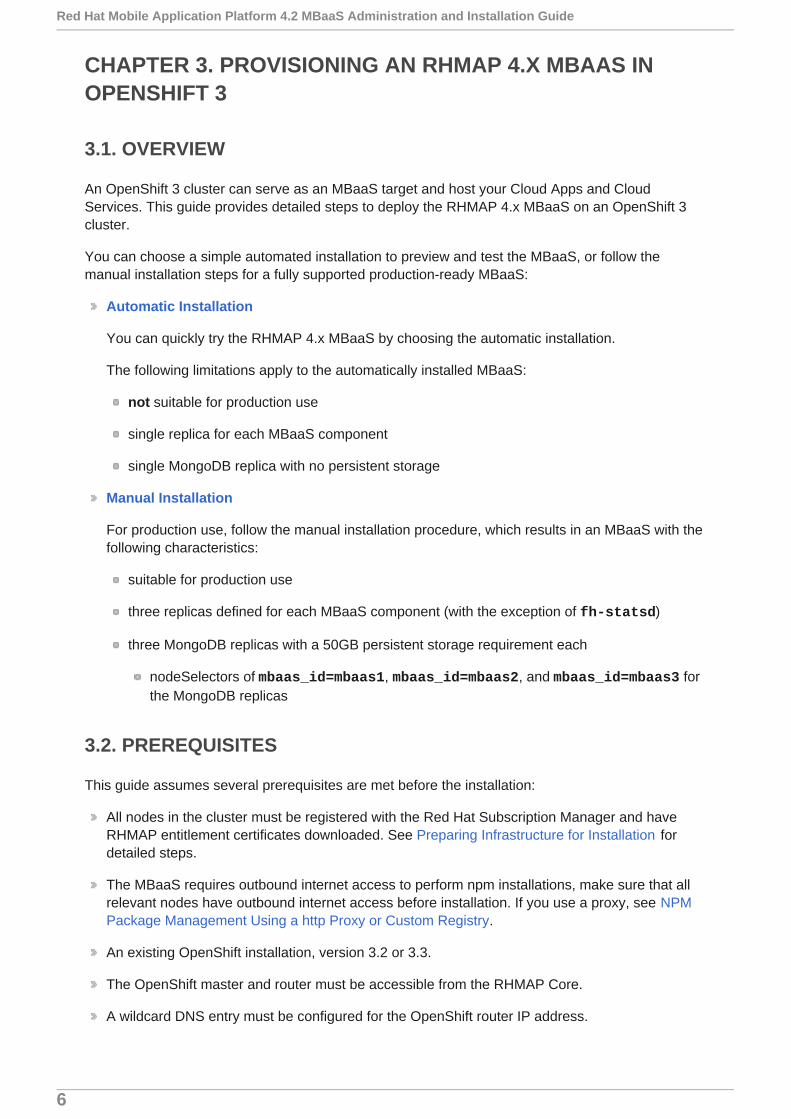
3.1. OVERVIEW
An OpenShift 3 cluster can serve as an MBaaS target and host your Cloud Apps and CloudServices. This guide provides detailed steps to deploy the RHMAP 4.x MBaaS on an OpenShift 3cluster.
You can choose a simple automated installation to preview and test the MBaaS, or follow themanual installation steps for a fully supported production-ready MBaaS:
Automatic Installation
You can quickly try the RHMAP 4.x MBaaS by choosing the automatic installation.
The following limitations apply to the automatically installed MBaaS:
not suitable for production use
single replica for each MBaaS component
single MongoDB replica with no persistent storage
Manual Installation
For production use, follow the manual installation procedure, which results in an MBaaS with thefollowing characteristics:
suitable for production use
three replicas defined for each MBaaS component (with the exception of fh-statsd)
three MongoDB replicas with a 50GB persistent storage requirement each
nodeSelectors of mbaas_id=mbaas1, mbaas_id=mbaas2, and mbaas_id=mbaas3 forthe MongoDB replicas
3.2. PREREQUISITES
This guide assumes several prerequisites are met before the installation:
All nodes in the cluster must be registered with the Red Hat Subscription Manager and haveRHMAP entitlement certificates downloaded. See Preparing Infrastructure for Installation fordetailed steps.
The MBaaS requires outbound internet access to perform npm installations, make sure that allrelevant nodes have outbound internet access before installation. If you use a proxy, see NPMPackage Management Using a http Proxy or Custom Registry.
An existing OpenShift installation, version 3.2 or 3.3.
The OpenShift master and router must be accessible from the RHMAP Core.
A wildcard DNS entry must be configured for the OpenShift router IP address.
Red Hat Mobile Application Platform 4.2 MBaaS Administration and Installation Guide
6

A trusted wildcard certificate must be configured for the OpenShift router. See Using WildcardCertificates in OpenShift documentation.
Image streams and images in the openshift namespace must be updated to the latest version.Refer to sections 3.3.8. Updating the Default Image Streams and Templates and 3.3.9. Importingthe Latest Images in the OpenShift 3.2 Installation and Configuration guide.
You must have administrative access to the OpenShift cluster using the oc CLI tool, enablingyou to:
Create a project, and any resource typically found in a project (for example, deploymentconfiguration, service, route).
Edit a namespace definition.
Create a security context constraint.
Manage nodes, specifically labels.
For information on installation and management of an OpenShift cluster and its users, see the officialOpenShift documentation.
3.3. AUTOMATIC INSTALLATION
The automatic installation of an MBaaS in OpenShift 3 results in the MBaaS components beinginstalled on nodes chosen by the OpenShift scheduler. Only a single instance of each componentruns at any time and thus makes the MBaaS susceptible to downtime in case of failure of a singlenode. The data of the MongoDB database is not backed by any permanent storage and is thereforetransient.
There are no setup steps required before the automatic installation. Refer to Creating an MBaaSTarget to continue the installation.
Note
In order for automatic MBaaS installation to work, the OpenShift SDN must be configuredto use the ovs-subnet SDN plugin (this is the default). If it is not set to this, refer toNetwork Configuration.
3.4. MANUAL INSTALLATION
The manual installation of an MBaaS in OpenShift 3 results in a resilient three-node cluster:
MBaaS components are spread across all three nodes.
Warning
The automatic installation procedure must not be used in production environments. Youshould only use this procedure for evaluation purposes, since the provided template isnot optimized for resiliency and stability required in production environments. Follow themanual installation steps for production use.
CHAPTER 3. PROVISIONING AN RHMAP 4.X MBAAS IN OPENSHIFT 3
7

MongoDB replica set is spread over three nodes.
MongoDB data is backed by persistent volumes.
A Nagios service with health checks and alerts is set up for all MBaaS components.
The installation consists of several phases. Before the installation, you must prepare your OpenShiftcluster:
Set up persistent storage - you need to create Persistent Volumes with specific parameters inOpenShift.
Label the nodes - nodes need to be labeled in a specific way, to match the node selectorsexpected by the OpenShift template of the MBaaS.
Network Configuration - configuring the SDN network plugin used in OpenShift so that CloudApps can communicate with MongoDB in the MBaaS.
After the OpenShift cluster is properly configured:
Install the MBaaS from a template
Verify the installation
3.4.1. Before The Installation
The manual installation procedure poses certain requirements on your OpenShift cluster in order toguarantee fault tolerance and stability.
3.4.1.1. Network Configuration
Cloud Apps in an MBaaS communicate directly with a MongoDB replica set. In order for this to work,the OpenShift SDN must be configured to use the ovs-subnet SDN plugin. For more detailedinformation on configuring this, see Migrating Between SDN Plug-ins in the OpenShift Enterprisedocumentation.
3.4.1.1.1. Making Project Networks Global
If you cannot use the ovs-subnet SDN plugin, you must make the network of the MBaaS projectglobal after installation. For example, if you use the ovs-multitenant SDN plugin, projects mustbe configured as global. The following command is an example of how to make a project global:
To determine if projects are global, use the following command:
In the output, any projects that are configured global have namespaces with a value of "0"
Note
If a project network is configured as global, you cannot reconfigure it to reduce networkaccessibility.
oadm pod-network make-projects-global live-mbaas
oc get netnamespaces
Red Hat Mobile Application Platform 4.2 MBaaS Administration and Installation Guide
8

For further information on how to make projects global, see Making Project Networks Global in theOpenShift Enterprise documentation.
3.4.1.2. Persistent Storage Setup
Note
Ensure that any NFS server and shares that you use are configured according to theOpenShift documentation for configuring NFS PersistentVolumes. See theTroubleshooting NFS Issues section for more information on configuring NFS.
Some components of the MBaaS require persistent storage. For example, MongoDB for storingdatabases, and Nagios for storing historical monitoring data.
As a minimum, make sure your OpenShift cluster has the following persistent volumes in an Available state, with at least the amount of free space listed below:
Three 50 GB persistent volumes, one for each MongoDB replica
One 1 GB persistent volume for Nagios
For detailed information on persistent volumes and how to create them, see Persistent Storage inthe OpenShift Enterprise documentation.
3.4.1.3. Apply Node Labels
By applying labels to OpenShift nodes, you can control which nodes the MBaaS components,MongoDB replicas, and Cloud Apps will be deployed to.
This section describes the considerations for:
Section 3.4.1.3.1, “Labelling for MBaaS components”
Section 3.4.1.3.2, “Labelling for MongoDB replicas”
Cloud apps get deployed to nodes labeled with the default nodeSelector, which is usually set to type=compute (defined in the OpenShift master configuration).
You can skip this entire labeling section if your OpenShift cluster only has a single schedulablenode. In such case, all MBaaS components, MongoDB replicas, and Cloud Apps will necessarily runon that single node.
3.4.1.3.1. Labelling for MBaaS components
It is recommended, but not required, to deploy the MBaaS components to dedicated nodes, separatefrom other applications (such as RHMAP Cloud Apps).
Refer to Infrastructure Sizing Considerations for Installation of RHMAP MBaaS for therecommended number of MBaaS nodes and Cloud App nodes for your configuration.
For example, if you have 12 nodes, the recommendation is:
Dedicate three nodes to MBaaS and MongoDB.
Dedicate three nodes to Cloud Apps.
CHAPTER 3. PROVISIONING AN RHMAP 4.X MBAAS IN OPENSHIFT 3
9

To achieve this, apply a label, such as type=mbaas to the three dedicated MBaaS nodes.
Then, when creating the MBaaS project, as described later in Section 3.4.2, “Installing the MBaaS”,set this label as the nodeSelector.
You can check what type labels are applied to all nodes with the following command:
NAME STATUS AGE TYPEose-master Ready,SchedulingDisabled 27d masterinfra-1 Ready 27d infrainfra-2 Ready 27d infraapp-1 Ready 27d computeapp-2 Ready 27d computeapp-3 Ready 27d computembaas-1 Ready 27d mbaasmbaas-2 Ready 27d mbaasmbaas-3 Ready 27d mbaas
In this example, the deployment would be as follows:
Cloud apps get deployed to the three dedicated Cloud App nodes app-1, app-2, and app-3.
The MBaaS components get deployed to the three dedicated MBaaS nodes mbaas-1, mbaas-2, and mbaas-3 (if the nodeSelector is also set on the MBaaS Project).
3.4.1.3.2. Labelling for MongoDB replicas
In the production MBaaS template, the MongoDB replicas are spread over three MBaaS nodes. Ifyou have more than three MBaaS nodes, any three of them can host the MongoDB replicas.
To apply the required labels (assuming the three nodes are named mbaas-1, mbaas-2, and mbaas-3):
You can verify the labels were applied correctly by running this command:
NAME STATUS AGE MBAAS_ID10.10.0.102 Ready 27d <none>10.10.0.117 Ready 27d <none>10.10.0.141 Ready 27d <none>10.10.0.157 Ready 27d mbaas310.10.0.19 Ready,SchedulingDisabled 27d <none>
oc label node mbaas-1 type=mbaasoc label node mbaas-2 type=mbaasoc label node mbaas-3 type=mbaas
oc get nodes -L type
oc label node mbaas-1 mbaas_id=mbaas1oc label node mbaas-2 mbaas_id=mbaas2oc label node mbaas-3 mbaas_id=mbaas3
oc get nodes -L mbaas_id
Red Hat Mobile Application Platform 4.2 MBaaS Administration and Installation Guide
10

10.10.0.28 Ready 27d mbaas110.10.0.33 Ready 27d <none>10.10.0.4 Ready 27d <none>10.10.0.99 Ready 27d mbaas2
See Updating Labels on Nodes in the OpenShift documentation for more information on how toapply labels to nodes.
3.4.1.3.2.1. Why are MongoDB replicas spread over multiple nodes?
Each MongoDB replica is scheduled to a different node to support failover.
For example, if an OpenShift node failed, data would be completely inaccessible if all threeMongoDB replicas were scheduled on this failing node. Setting a different nodeSelector for eachMongoDB DeploymentConfig, and having a corresponding OpenShift node in the clustermatching this label will ensure the MongoDB pods get scheduled to different nodes.
In the production MBaaS template, there is a different nodeSelector for each MongoDB DeploymentConfig:
mbaas_id=mbaas1 for mongodb-1
mbaas_id=mbaas2 for mongodb-2
mbaas_id=mbaas3 for mongodb-3
Excerpt of DeploymentConfig of mongodb-1
{ "kind": "DeploymentConfig", "apiVersion": "v1", "metadata": { "name": "mongodb-1", "labels": { "name": "mongodb" } }, "spec": { ... "template": { ... "spec": { "nodeSelector": { "mbaas_id": "mbaas1" }
3.4.2. Installing the MBaaS
3.4.2.1. MBaaS Templates
The following templates can be used to provision an MBaaS in Openshift 3 using the 'oc' client:
fh-mbaas-template-1node.json (Automatic Installation Template)
CHAPTER 3. PROVISIONING AN RHMAP 4.X MBAAS IN OPENSHIFT 3
11

Important
This template is not recommended for production use.
Use this template to create an MBaaS with characteristics that are similar to the AutomaticInstallation template, but also include persistent storage and a Nagios component for monitoring:
+ a single MongoDB replica with a 25GiB PersistentVolume requirement a single replicadefined for each MBaaS component a Nagios service with a 1GiB** PersistentVolume requirement
fh-mbaas-template-3node.json (Manual Installation Template)
Use this template to create an MBaaS with the same characteristics as the MBaaS templatecreated by selecting the Manual Installation from RHMAP Studio, it is the templaterecommended for production use:
three MongoDB replicas with a 50GiB PersistentVolume requirement each
a Nagios service with a 1GiB PersistentVolume requirement
three replicas defined for each MBaaS component (with the exception of fh-statsd)
nodeSelectors of mbaas_id=mbaas1, mbaas_id=mbaas2 & mbaas_id=mbaas3 for eachof the MongoDB replicas
3.4.2.2. Installation
In this step, you will provision the MBaaS to the OpenShift cluster from the command line, based onthe MBaaS OpenShift template.
First, download the latest version of the MBaaS OpenShift template.
1. In the Studio, navigate to the Admin > MBaaS Targets section. Click New MBaaS Target.
2. Choose OpenShift 3 as Type.
3. At the bottom of the page, click Download Template and save the template file fh-mbaas-template-3node.json. You may now close the New MBaaS Target screen.
Using the downloaded template, provision the MBaaS in the OpenShift cluster from the commandline. For general information about the OpenShift CLI, see CLI Operations in the OpenShiftEnterprise documentation.
1. Create a new project.
Log in to OpenShift as an administrator. You will be prompted for credentials.
Create the project:
oc login <public URL of the OpenShift master>
Red Hat Mobile Application Platform 4.2 MBaaS Administration and Installation Guide
12
2. Set the node selector of the project to target MBaaS nodes.
This ensures that all MBaaS components are deployed to the dedicated MBaaS nodes.
Note
If you have chosen not to have dedicated MBaaS nodes in Section 3.4.1.3.1,“Labelling for MBaaS components”, skip this step.
Set the openshift.io/node-selector annotation to type=mbaas in the project’snamespace:
Note
You may need to add this annotation if it is missing.
apiVersion: v1kind: Namespacemetadata: annotations: openshift.io/node-selector: type=mbaas...
3. Provide SMTP server details for email alerts.
The Nagios monitoring software, which is a part of the MBaaS template, sends alerts overemail through a user-provided SMTP server.
Create a ServiceAccount for the monitoring container, and give it the admin role.
Set the following environment variables with values appropriate for your environment:
Warning
The name of the OpenShift project chosen here must have the suffix -mbaas.The part of the name before -mbaas is used later in this guide as the ID of theMBaaS target associated with this OpenShift project. For example, if the ID ofthe MBaaS target is live, the OpenShift project name set here must be live-mbaas.
oc new-project live-mbaas
oc edit ns live-mbaas
oc create serviceaccount nagiosoc policy add-role-to-user admin -z nagios
export SMTP_SERVER="localhost"
CHAPTER 3. PROVISIONING AN RHMAP 4.X MBAAS IN OPENSHIFT 3
13

If you do not need email alerts or want to set it up later, use the values provided in thesample above.
4. Copy the fh-mbaas-template-3node.json file you downloaded as part of Installationinto the current directory.
5. Create all the MBaaS resources from the template.
After all the resources are created, you should see output similar to the following:
--> Deploying template fh-mbaas for "fh-mbaas" With parameters: MONGODB_FHMBAAS_USER=u-mbaas ...
--> Creating resources ...--> Creating resources ... configmap "fh-mbaas-info" created service "fh-mbaas-service" created service "fh-messaging-service" created service "fh-metrics-service" created service "fh-statsd-service" created service "mongodb-1" created service "mongodb-2" created service "mongodb-3" created service "nagios" created serviceaccount "nagios" created rolebinding "nagiosadmin" created deploymentconfig "fh-mbaas" created deploymentconfig "fh-messaging" created deploymentconfig "fh-metrics" created deploymentconfig "fh-statsd" created deploymentconfig "nagios" created persistentvolumeclaim "mongodb-claim-1" created persistentvolumeclaim "mongodb-claim-2" created persistentvolumeclaim "mongodb-claim-3" created deploymentconfig "mongodb-1" created deploymentconfig "mongodb-2" created deploymentconfig "mongodb-3" created pod "mongodb-initiator" created route "mbaas" created
export SMTP_USERNAME="username"export SMTP_PASSWORD="password"export SMTP_FROM_ADDRESS="[email protected]"export ADMIN_EMAIL="root@localhost"
oc new-app -f fh-mbaas-template-3node.json \-p SMTP_SERVER="${SMTP_SERVER}" \-p SMTP_USERNAME="${SMTP_USERNAME}" \-p SMTP_PASSWORD="${SMTP_PASSWORD}" \-p SMTP_FROM_ADDRESS="${SMTP_FROM_ADDRESS}" \-p ADMIN_EMAIL="${ADMIN_EMAIL}"
Red Hat Mobile Application Platform 4.2 MBaaS Administration and Installation Guide
14

route "nagios" created
--> Success Run 'oc status' to view your app.
It may take a minute for all the resources to get created and up to 10 minutes for all thecomponents to get to a Running status.
3.4.3. Verifying The Installation
1. Ping the health endpoint.
If all services are created, all pods are running, and the route is exposed, the MBaaS healthendpoint can be queried as follows:
The endpoint responds with health information about the various MBaaS components andtheir dependencies. If there are no errors reported, the MBaaS is ready to be configured foruse in the Studio. Successful output will resemble the following:
curl `oc get route mbaas --template "{{.spec.host}}"`/sys/info/health
{ "status": "ok", "summary": "No issues to report. All tests passed without error", "details": [ { "description": "Check Mongodb connection", "test_status": "ok", "result": { "id": "mongodb", "status": "OK", "error": null }, "runtime": 33 }, { "description": "Check fh-messaging running", "test_status": "ok", "result": { "id": "fh-messaging", "status": "OK", "error": null }, "runtime": 64 }, { "description": "Check fh-metrics running", "test_status": "ok", "result": { "id": "fh-metrics", "status": "OK", "error": null }, "runtime": 201
CHAPTER 3. PROVISIONING AN RHMAP 4.X MBAAS IN OPENSHIFT 3
15

2. Verify that all Nagios checks are passing.
Log in to the Nagios dashboard of the MBaaS by following the steps in the Accessing theNagios Dashboard section in the Operations Guide.
After logging in to the Nagios Dashboard, all checks under the left-hand-side Servicesmenu should be indicated as OK. If any of the checks are not in an OK state, consult theTroubleshooting and Debugging guide, which explains the likely causes and fixes forcommon problems.
After verifying that the MBaaS is installed correctly, you must create an MBaaS target for the newMBaaS in the Studio.
3.5. CREATING AN MBAAS TARGET
1. In the Studio, navigate to the Admin > MBaaS Targets section. Click New MBaaS Target.
2. The user is presented with two options for the Deployment Type, Manual (Recommended)or Automatic.
3.5.1. Automatic MBaaS Target Creation
1. As Deployment Type, Click Automatic.
2. Enter the following information
MBaaS Id - a unique ID for the MBaaS, for example, live. The ID must be equal to theOpenShift project name chosen in the Installing the MBaaS section, without the -mbaassuffix.
OpenShift Master URL - the URL of the OpenShift master, for example, https://master.openshift.example.com:8443.
OpenShift Router DNS - a wildcard DNS entry of the OpenShift router, for example, *.cloudapps.example.com.
OpenShift API Token - an API Token is a short lived authentication token allowingRHMAP to interact with the OpenShift installation. A new API Token can be obtainedfrom the OpenShift Master: https://master_host/oauth/token/request.
}, { "description": "Check fh-statsd running", "test_status": "ok", "result": { "id": "fh-statsd", "status": "OK", "error": null }, "runtime": 7020 } ]}
Red Hat Mobile Application Platform 4.2 MBaaS Administration and Installation Guide
16

3. Click Save MBaaS and you will be directed to the MBaaS Status screen. It can take severalminutes before the status is reported back.
3.5.2. Manual MBaaS Target Creation
1. As Deployment Type, Click Manual (Recommended).
2. Enter the following information
MBaaS Id - a unique ID for the MBaaS, for example, live. The ID must be equal to theOpenShift project name chosen in the Installing the MBaaS section, without the -mbaassuffix.
OpenShift Master URL - the URL of the OpenShift master, for example, https://master.openshift.example.com:8443.
OpenShift Router DNS - a wildcard DNS entry of the OpenShift router, for example, *.cloudapps.example.com.
MBaaS Service Key
Equivalent to the value of the FHMBAAS_KEY environment variable, which isautomatically generated during installation. To find out this value, run the followingcommand:
Alternatively, you can find the value in the OpenShift Console, in the Details tab of the fh-mbaas deployment, in the Env Vars section.
MBaaS URL
A URL of the route exposed for the fh-mbaas-service, including the https protocolprefix. This can be retrieved from the OpenShift web console, or by running the followingcommand:
MBaaS Project URL - (Optional) URL where the OpenShift MBaaS project is availablee.g. https://mbaas-mymbaas.openshift.example.com:8443/console/project/my-mbaas/overview.
Nagios URL - (Optional) Exposed route where Nagios is running in OpenShift 3 e.g.https://nagios-my-mbaas.openshift.example.com.
3. Click Save MBaaS and you will be directed to the MBaaS Status screen. For a manualinstallation, the status should be reported back in less than a minute.
Once the process of creating the MBaaS has successfully completed, you can see the new MBaaSin the list of MBaaS targets.
oc env dc/fh-mbaas --list | grep FHMBAAS_KEY
echo "https://"$(oc get route/mbaas -o template --template {{.spec.host}})
CHAPTER 3. PROVISIONING AN RHMAP 4.X MBAAS IN OPENSHIFT 3
17

In your OpenShift account, you can see the MBaaS represented by a project.
3.6. AFTER INSTALLATION
Create an Environment - you must create at least one environment for the MBaaS to be usableby Cloud Apps and Cloud Services
Adjusting System Resource Usage of the MBaaS and Cloud Apps - we strongly recommendthat you adjust the system resource usage of MBaaS components as appropriate for yourproduction environment
Optional: Enabling Centralized Logging - deploy a centralized logging solution based onElasticSearch, Fluentd, and Kibana to debug issues with the MBaaS
Red Hat Mobile Application Platform 4.2 MBaaS Administration and Installation Guide
18

CHAPTER 4. ADJUSTING SYSTEM RESOURCE USAGE OFTHE MBAAS AND CLOUD APPS
4.1. OVERVIEW
In the RHMAP 4.x MBaaS based on OpenShift 3, each cloud app and and each MBaaS componentruns in its own container. This architecture allows for granular control of CPU and memoryconsumption. A fine level of control of system resources helps to ensure efficient use of nodes, andto guarantee uninterrupted operation of critical services.
An application can be prepared for various situations, such as high peak load or sustained load, bymaking decisions about the resource limits of individual components. For example, you could decidethat MongoDB must keep working at all times, and assign it high, guaranteed amount of resources.At the same time, if the availability of a front-end Node.js server is less critical, the server can beassigned less initial resources, with the possibility to use more resources when available.
4.2. PREREQUISITES
The system resources of MBaaS components and cloud apps in the MBaaS can be regulated usingthe mechanisms available in OpenShift – resource requests, limits, and quota. Before proceedingwith the instructions in this guide, we advise you to read the Quotas and Limit Ranges section in theOpenShift documentation.
4.3. ADJUSTING RESOURCE USAGE OF THE MBAAS
The RHMAP MBaaS is composed of several components, each represented by a single containerrunning in its own pod. Each container has default resource requests and limits assigned in theMBaaS OpenShift template. See the section Overview of Resource Usage of MBaaS Componentsfor a complete reference of the default values.
Depending on the deployment model of the MBaaS, you may have to adjust the resource limits andrequests to fit your environment. If the MBaaS components are deployed on the same nodes as thecloud apps, there is no adjustment required.
However, when the MBaaS components are deployed on nodes dedicated to running the MBaaSonly, it is strongly recommended to adjust the resource limits to take full advantage of the availableresources on the dedicated nodes.
4.3.1. Calculating the Appropriate Resource Requests and Limits
Note
This section refers to CPU resources in two different terms – the commonly used termvCPU (virtual CPU), and the term millicores used in OpenShift documentation. The unit of1 vCPU is equal to 1000 m (millicores), which is equivalent to 100% of the time of oneCPU core.
The resource limits must be set accordingly for your environment and depend on the characteristicsof load on your cloud apps. However, the following rules can be used as a starting point foradjustments of resource limits:
CHAPTER 4. ADJUSTING SYSTEM RESOURCE USAGE OF THE MBAAS AND CLOUD APPS
19

Allow 2 GiB of RAM and 1 vCPU for the underlying operating system.
Split the remainder of resources in equal parts amongst the MBaaS Components.
4.3.1.1. Example
Given a virtual machine with 16 GiB of RAM and 4 vCPUs, we allow 2 GiB of RAM and 1 vCPU forthe operating system. This leaves 14GB RAM and 3 vCPUs (equal to 3000 m) to distribute amongstthe 5 MBaaS components.
14 GiB / 5 = 2.8 GiB of RAM per component
3000 m / 5 = 600 m per component
In this example, the resource limit for each MBaaS component would be 2.8 GiB of RAM and 600millicores of CPU. Depending on the desired level of quality of service of each component, set theresource request values as described in the section Quality of service tiers in the OpenShiftdocumentation.
4.3.2. Overview of Resource Usage of MBaaS Components
The following table lists the components of the MBaaS, their idle resource usage, default resourcerequest, and default resource limit.
MBaaScomponent
Idle RAMusage
RAMrequest
RAMlimit
Idle CPUusage
CPUrequest
CPUlimit
fh-mbaas 160 MiB 200 MiB 800 MiB <1% 200 m 800 m
fh-messaging 160 MiB 200 MiB 400 MiB <1% 200 m 400 m
fh-metrics 120 MiB 200 MiB 400 MiB <1% 200 m 400 m
fh-statsd 75 MiB 200 MiB 400 MiB <1% 200 m 400 m
mongodb 185 MiB 200 MiB 1000MiB
<1% 200 m 1000 m
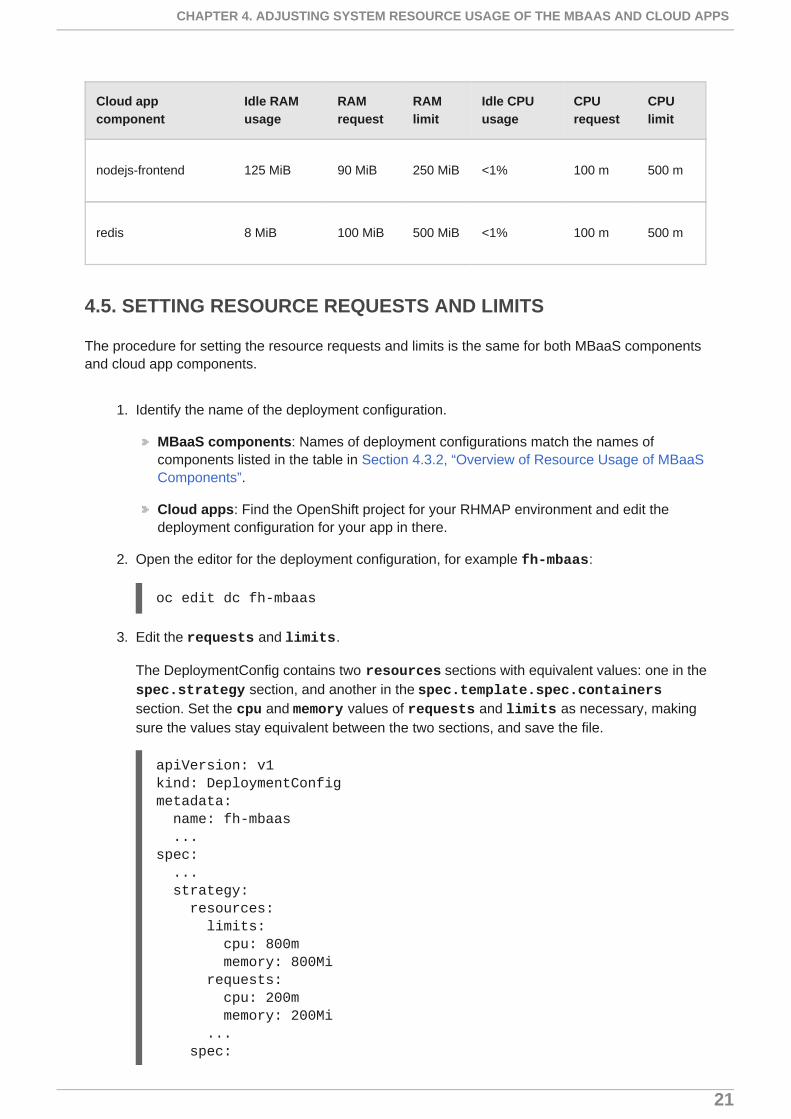
4.4. ADJUSTING RESOURCE USAGE OF CLOUD APPS
The resource requests and limits of cloud apps can be set the same way as for MBaaScomponents. There is no particular guideline for doing the adjustment in cloud apps.
4.4.1. Overview of Resource Usage of Cloud App Components
Red Hat Mobile Application Platform 4.2 MBaaS Administration and Installation Guide
20
Cloud appcomponent
Idle RAMusage
RAMrequest
RAMlimit
Idle CPUusage
CPUrequest
CPUlimit
nodejs-frontend 125 MiB 90 MiB 250 MiB <1% 100 m 500 m
redis 8 MiB 100 MiB 500 MiB <1% 100 m 500 m
4.5. SETTING RESOURCE REQUESTS AND LIMITS
The procedure for setting the resource requests and limits is the same for both MBaaS componentsand cloud app components.
1. Identify the name of the deployment configuration.
MBaaS components: Names of deployment configurations match the names ofcomponents listed in the table in Section 4.3.2, “Overview of Resource Usage of MBaaSComponents”.
Cloud apps: Find the OpenShift project for your RHMAP environment and edit thedeployment configuration for your app in there.
2. Open the editor for the deployment configuration, for example fh-mbaas:
3. Edit the requests and limits.
The DeploymentConfig contains two resources sections with equivalent values: one in thespec.strategy section, and another in the spec.template.spec.containerssection. Set the cpu and memory values of requests and limits as necessary, makingsure the values stay equivalent between the two sections, and save the file.
apiVersion: v1kind: DeploymentConfigmetadata: name: fh-mbaas ...spec: ... strategy: resources: limits: cpu: 800m memory: 800Mi requests: cpu: 200m memory: 200Mi ... spec:
oc edit dc fh-mbaas
CHAPTER 4. ADJUSTING SYSTEM RESOURCE USAGE OF THE MBAAS AND CLOUD APPS
21

containers: ... resources: limits: cpu: 800m memory: 800Mi requests: cpu: 200m memory: 200Mi
Note
Changing the deployment configuration triggers a new deployment. Once thedeployment is complete, the resource limits are updated.
For more information on resources, see Deployment Resources in the OpenShift documentation.
4.6. USING CLUSTER METRICS TO VISUALIZE RESOURCECONSUMPTION
It is possible to view the immediate and historical resource usage of pods and containers in the formof donut charts and line charts using the Cluster Metrics deployment in OpenShift. Refer to EnablingCluster Metrics in the OpenShift documentation for steps to enable cluster metrics.
Once cluster metrics are enabled, in the OpenShift web console, navigate to Browse > Pods andclick on the component of interest. Click on the Metrics tab to see the visualizations.
Red Hat Mobile Application Platform 4.2 MBaaS Administration and Installation Guide
22

CHAPTER 4. ADJUSTING SYSTEM RESOURCE USAGE OF THE MBAAS AND CLOUD APPS
23

CHAPTER 5. SETTING UP SMTP FOR CLOUD APP ALERTS
5.1. OVERVIEW
Each cloud app can automatically send alerts by e-mail when specified events occur, such as whenthe cloud app gets deployed, undeployed, or logs an error. See Alerts & Email Notifications for moreinformation.
For the RHMAP 4.x MBaaS based on OpenShift 3, the e-mail function is not available immediatelyafter installation. You must configure an SMTP server to enable e-mail support.
5.2. PREREQUISITES
An RHMAP 4.x MBaaS running in OpenShift Enterprise 3
An account on an SMTP server through which notification alerts can be sent
An email address where alerts should be sent
A deployed Cloud App
5.3. CONFIGURING SMTP SETTINGS IN FH-MBAAS
The FH_EMAIL_SMTP and FH_EMAIL_ALERT_FROM environment variables in the fh-mbaasDeploymentConfig need to be set, using the below commands:
oc project <mbaas-project-id>oc env dc/fh-mbaas FH_EMAIL_SMTP="smtps://username:password@localhost" FH_EMAIL_ALERT_FROM="[email protected]"
After modifying the DeploymentConfig, a redeploy of the fh-mbaas pod should be triggeredautomatically. Once the pod is running again, you can verify the changes.
5.4. VERIFYING SMTP SETTINGS
1. In the Studio, navigate to a deployed Cloud App.
2. Go to the Notifications > Alerts section.
3. Click Create An Alert .
4. In the Emails field, enter your e-mail address.
5. Click Test Emails.
You should receive an e-mail from the e-mail address set as FH_EMAIL_ALERT_FROM.
5.5. TROUBLESHOOTING
If the test email fails to send, verify the SMTP settings in the running fh-mbaas Pod.
oc env pod -l name=fh-mbaas --list | grep EMAIL
Red Hat Mobile Application Platform 4.2 MBaaS Administration and Installation Guide
24

It may help to view the fh-mbaas logs while attempting to send an email, looking for any errorsrelated to SMTP or email.
oc logs -f fh-mbaas-<deploy-uuid>
Ensure the Cloud App you are using to send a test mail with is running. If the test email sends OK,but fails to arrive, check it hasn’t been placed in your spam or junk folder.
CHAPTER 5. SETTING UP SMTP FOR CLOUD APP ALERTS
25

CHAPTER 6. BACKING UP AN MBAAS
You can back up an MBaas by following this procedure. After completing the procedure and storingthe backup data safely, you can restore an MBaaS to the state at the time of backup.
6.1. REQUIREMENTS
A self-managed MBaaS installation on an OpenShift platform
A local installation of the oc binary
The oc binary has a logged in user on the platform you wish to back up
The oc binary has a logged in user with permission to run the oc get pc command
6.2. EXPECTED STORAGE REQUIREMENTS
As most of the data being backed up is the data stored in the platform’s cloud apps, the amount ofbackup storage space required is proportional to the amount of data stored by the cloud apps.
Other factors that have an impact on how much storage is required for backups include:
how often you backup
what compression is used
the length of time you store the backups
6.3. WHAT DATA IS BACKED UP
You must back up the following items to back up an MBaaS:
MongoDB replica set data
Nagios historical data
6.4. BACKING UP THE MONGODB DATA
Back up the MongoDB data using the mongodump command in combination with the oc execcommand:
6.5. BACKING UP THE NAGIOS DATA
Back up the Nagios data by copying the files from the Nagios pod using the oc exec command:
oc exec `oc get po --selector='deploymentconfig=mongodb-1' --template="{{(index .items 0).metadata.name}}"` bash -- -c '/opt/rh/rh-mongodb32/root/usr/bin/mongodump -u admin -p ${MONGODB_ADMIN_PASSWORD} --gzip --archive' > ./core7_mongodb.gz
Red Hat Mobile Application Platform 4.2 MBaaS Administration and Installation Guide
26

For example, if the <nagios-pod-name> is nagios-1:
6.6. BACKUP FREQUENCY
Red Hat recommends backing up at least once per day, but you might decide to back up critical datamore frequently.
6.7. EXAMPLE BACKUP SCRIPT
The example script below shows how you can back up an MBaaS from a backup server, assumingthat the user on the backup server has permission to execute commands via the oc binary:
oc exec <nagios-pod-name> bash -- -c 'tar -zcf - /var/log/nagios/' > nagios-backup.tar.gz
oc exec nagios-1 bash -- -c 'tar -zcf - /var/log/nagios/' > nagios-backup.tar.gz
ts=$(date +%y-%m-%d-%H-%M-%S)# Backup the Mongo servicesproject=mbaasfor pod in $(oc get pods -n $project | grep mongodb-[0-9]-[0-9]-[0-9a-zA-Z] | awk '{print $1}'); do service=$(echo $pod | cut -f1,2 -d"-"); oc exec $pod bash -- -c '/opt/rh/rh-mongodb32/root/usr/bin/mongodump -u admin -p ${MONGODB_ADMIN_PASSWORD} --gzip --archive' > $project-$service-$ts.gzdone
# Backup the Nagios serviceoc exec -n $project <nagios-pod-name> bash -- -c 'tar -zcf - /var/log/nagios/' > nagios-backup-$ts.tar.gz
CHAPTER 6. BACKING UP AN MBAAS
27

CHAPTER 7. RESTORING AN MBAAS BACKUP
7.1. OVERVIEW
You can back up an MBaaS by following the Backing up an MBaaS procedure. Once you havecreated the backup, you can restore a MBaaS to the state at the time of backup.
7.2. REQUIREMENTS
A self-managed MBaaS installation on an OpenShift platform
The oc binary has a logged in user with permission to edit deployment configurations and viewpersistent volumes.
A backup of the data for mongodb and Nagios services as described in Backing up an MBaaS .
7.3. WHAT DATA IS RESTORED
Mongodb replicaset data
Nagios historical data
7.4. RESTORING NAGIOS DATA
1. Locate the Nagios persistent volume claim-name from the Nagios pod:
2. Determine the volume-name using the claim-name from step 1:
3. Using the volume-name, run the following command:
The output contains a Source section, similar to:
This information describes where the data for the Nagios persistent volume is located.
4. Stop the Nagios pod by editing the Nagios deployment config and set replicas to 0:
oc describe pod <nagios-pod-name> | grep "ClaimName:"claimName: <claim-name>
oc describe pvc <claim-name> | grep "Volume:"Volume: <volume-name>
oc describe pv <volume-name>
Source: Type: NFS (an NFS mount that lasts the lifetime of a pod) Server: nfs-server.local Path: /path/to/nfs/directory ReadOnly: false
oc edit dc nagios
Red Hat Mobile Application Platform 4.2 MBaaS Administration and Installation Guide
28

Change replicas to 0:
5. Restore the Nagios data by deleting the contents of the pod’s current persistent volume,then extract your backed up data into that directory. Ensure that after extraction the status.dat and related files are at the root of the persistent volume.
6. Once the restore is complete, start the Nagios pod by editing the Nagios deployment configand set replicas to 1:
Change replicas back to 1:
7.5. RESTORING MONGODB DATA
To restore the MongoDB data, the replicaset must be operational. If this is not the case, see theMongoDB doesn’t respond after repeated installation of the MBaaS section of this guide.
Should you encounter isses with MongoDB, see Troubleshooting MongoDB Issues.
1. Locate the primary Mongodb node. You must restore using the primary member of theMongodb replicaset, you can find this by logging into any of the Mongodb nodes via remoteshell:
Connect to the mongo shell in this pod:
Check the replicaset status:
The node with the status set to PRIMARY is the node to use in the following restorationprocedure.
2. Upload MongoDB data to the primary pod using the oc rsync command:
spec: replicas: 0
oc edit dc nagios
spec: replicas: 1
oc rsh <mongodb-pod-name>
mongo admin -u admin -p ${MONGODB_ADMIN_PASSWORD}
rs.status()
oc rsync /path/to/backup/directory/ <primary-mongodb-pod>:/tmp/backup
CHAPTER 7. RESTORING AN MBAAS BACKUP
29

Tip
rsync copies everything in a directory. To save time put the MongoDB data files into anempty directory before using rsync.
3. Import data into the Mongodb replicaset using the 'mongorestore' tool from inside themongodb pod. Log into the pod:
Restore the data:
For more information on this tool, see the mongorestore documentation.
7.6. CONFIRMING RESTORATION
Log in to the studio and ensure that all the projects, environments and MBaaS targets are correctlyrestored.
oc rsh <mongodb-pod-name>
mongorestore -u admin -p <mongo-admin-password> --gzip --archive=mongodb-backup.gz
Red Hat Mobile Application Platform 4.2 MBaaS Administration and Installation Guide
30

CHAPTER 8. TROUBLESHOOTING THE RHMAP MBAAS
8.1. OVERVIEW
This document provides information on how to identify, debug, and resolve possible issues that canbe encountered during installation and usage of the RHMAP MBaaS on OpenShift 3.
In Common Problems, you can see a list of resolutions for problems that might occur duringinstallation or usage of the MBaaS.
8.2. CHECK THE HEALTH ENDPOINT OF THE MBAAS
The first step to check whether an MBaaS is running correctly is to see the output of its healthendpoint. The HTTP health endpoint in the MBaaS reports the health status of the MBaaS and of itsindividual components.
From the command line, run the following command:
To find the MBaaS URL:
1. Navigate to the MBaaS that you want to check, by selecting Admin, then MBaaS Targets,and then choosing the MBaaS.
2. Copy the value of the MBaaS URL field from the MBaaS details screen.
If the MBaaS is running correctly without any errors, the output of the command should be similar tothe following, showing a "test_status": "ok" for each component:
If there are any errors, the output will contain error messages in the result.error object of the details array for individual components. Use this information to identify which component is failingand to get information on further steps to resolve the failure.
You can also see a HTTP 503 Service Unavailable error returned from the health endpoint. This canhappen in several situations:
curl https://<MBaaS URL>/sys/info/health
{ "status": "ok", "summary": "No issues to report. All tests passed without error", "details": [ { "description": "Check fh-statsd running", "test_status": "ok", "result": { "id": "fh-statsd", "status": "OK", "error": null }, "runtime": 6 },...}
CHAPTER 8. TROUBLESHOOTING THE RHMAP MBAAS
31

The MBaaS hasn’t finished deploying.
The URL of the MBaaS is not reachable on port 80. Check your network configuration.
Provisioning of the MBaaS has failed. See the Prerequisites and Before the Installation (formanual installation) sections of the Provisioning an MBaaS in Red Hat OpenShift Enterprise 3guide and make sure your OpenShift cluster fulfills all the listed requirements.
Alternatively, you can see the result of this health check in the Studio. Navigate to the Admin >MBaaS Targets section, select your MBaaS target, and click Check the MBaaS Status.
If there is an error, you are presented with a screen showing the same information as describedabove. Use the provided links to OpenShift Web Console and the associated MBaaS Project inOpenShift to help with debugging of the issue on the OpenShift side.
8.3. ANALYZE LOGS
To see the logging output of individual MBaaS components, you must configure centralized loggingin your OpenShift cluster. See Enabling Centralized Logging for a detailed procedure.
The section Identifying Issues in an MBaaS provides guidance on discovering MBaaS failures bysearching and filtering its logging output.
8.4. COMMON PROBLEMS
8.4.1. A replica pod of mongodb-service is replaced with a new one
8.4.1.1. Summary
The replica set is susceptible to down time if the replica set members configuration is not up to datewith the actual set of pods. There must be at least two members active at any time, in order for anelection of a primary member to happen. Without a primary member, the MongoDB service won’tperform any read or write operations.
A MongoDB replica may get terminated in several situations:
A node hosting a MongoDB replica is terminated or evacuated.
A re-deploy is triggered on one of the MongoDB Deployment objects in the project – manually orby a configuration change.
One of the MongoDB deployments is scaled down to zero pods, then scaled back up to one pod.
To learn more about replication in MongoDB, see Replication in the official MongoDBdocumentation.
8.4.1.2. Fix
Red Hat Mobile Application Platform 4.2 MBaaS Administration and Installation Guide
32

The following procedure shows you how to re-configure a MongoDB replica set into a fullyoperational state. You must synchronize the list of replica set members with the actual set ofMongoDB pods in the cluster, and set a primary member of the replica set.
1. Note the MongoDB endpoints.
Make note of the list of endpoints. It is used later to set the replica set membersconfiguration.
2. Log in to the oldest MongoDB replica pod.
List all the MongoDB replica pods.
In the output, find the pod with the highest value in the AGE field.
In this case, it is mongodb-1-1-4nsrv with an age of 19 hours.
Log in to the pod using oc rsh.
3. Open a MongoDB shell on the primary member.
oc get ep | grep mongo
NAME ENDPOINTS AGEmongodb-1 10.1.2.152:27017 17hmongodb-2 10.1.4.136:27017 17hmongodb-3 10.1.5.16:27017 17h
oc get po -l name=mongodb-replica
NAME READY STATUS RESTARTS AGEmongodb-1-1-4nsrv 1/1 Running 0 19hmongodb-2-1-j4v3x 1/1 Running 0 3hmongodb-3-2-7tezv 1/1 Running 0 1h
oc rsh mongodb-1-1-4nsrv
mongo admin -u admin -p ${MONGODB_ADMIN_PASSWORD} --host ${MONGODB_REPLICA_NAME}/localhost
MongoDB shell version: 2.4.9connecting to: rs0/localhost:27017/admin[...]Welcome to the MongoDB shell.For interactive help, type "help".For more comprehensive documentation, see http://docs.mongodb.org/Questions? Try the support group http://groups.google.com/group/mongodb-userrs0:PRIMARY>
CHAPTER 8. TROUBLESHOOTING THE RHMAP MBAAS
33

4. List the configured members.
Run rs.conf() in the MongoDB shell.
5. Ensure all hosts have either PRIMARY or SECONDARY status.
Run the following command. It may take several seconds to complete.
There must be exactly one PRIMARY node. All the other nodes must be SECONDARY. If amember is in a STARTUP, STARTUP2, RECOVERING, or UNKNOWN state, try running theabove command again in a few minutes. These states may signify that the replica set isperforming a startup, recovery, or other procedure potentially resulting in an operationalstate.
8.4.1.3. Result
After applying the fix, all three MongoDB pods will be members of the replica set. If one of the threemembers terminates unexpectedly, the two remaining members are enough to keep the MongoDBservice fully operational.
8.4.2. MongoDB doesn’t respond after repeated installation of the MBaaS
8.4.2.1. Summary
rs0:PRIMARY> rs.conf(){ "_id" : "rs0", "version" : 56239, "members" : [ { "_id" : 3, "host" : "10.1.0.2:27017" }, { "_id" : 4, "host" : "10.1.1.2:27017" }, { "_id" : 5, "host" : "10.1.6.4:27017" } ]}
rs0:PRIMARY> rs.status().members.forEach(function(member) {print(member.name + ' :: ' + member.stateStr)})
mongodb-1:27017 :: PRIMARYmongodb-2:27017 :: SECONDARYmongodb-3:27017 :: SECONDARYrs0:PRIMARY>
Red Hat Mobile Application Platform 4.2 MBaaS Administration and Installation Guide
34

Note
The described situation can result from an attempt to create an MBaaS with the samename as a previously deleted one. We suggest you use unique names for every MBaaSinstallation.
If the mongodb-service is not responding after the installation of the MBaaS, it is possible thatsome of the MongoDB replica set members failed to start up. This can happen due to a combinationof the following factors:
The most likely cause of failure in MongoDB startup is the presence of a mongod.lock lock fileand journal files in the MongoDB data folder, left over from an improperly terminated MongoDBinstance.
If a MongoDB pod is terminated, the associated persistent volumes transition to a Releasedstate. When a new MongoDB pod replaces a terminated one, it may get attached to the samepersistent volume which was attached to the terminated MongoDB instance, and thus getexposed to the files created by the terminated instance.
8.4.2.2. Fix
Note
SSH access and administrator rights on the OpenShift master and the NFS server arerequired for the following procedure.
Note
This procedure describes a fix only for persistent volumes backed by NFS. Refer toConfiguring Persistent Storage in the official OpenShift documentation for generalinformation on handling other volume types.
The primary indicator of this situation is the mongodb-initiator pod not reaching the Completedstatus.
Run the following command to see the status of mongodb-initiator:
If the status is any other than Completed, the MongoDB replica set is not created properly. If mongodb-initiator stays in this state too long, it may be a signal that one of the MongoDB podshas failed to start. To confirm whether this is the case, check logs of mongodb-initiator usingthe following command:
oc get pod mongodb-initiator
NAME READY STATUS RESTARTS AGEmongodb-initiator 1/1 Running 0 5d
oc logs mongodb-initiator
CHAPTER 8. TROUBLESHOOTING THE RHMAP MBAAS
35

If the above message is the last one in the output, it signifies that some of the MongoDB pods arenot responding.
Check the event log by running the following command:
If the output contains a message similar to the following, you should continue with the belowprocedure to clean up the persistent volumes:
FailedMount {kubelet ip-10-0-0-100.example.internal} Unable to mount volumes for pod "mongodb-1-1-example-mbaas": Mount failed: exit status 32
The following procedure will guide you through the process of deleting contents of existingpersistent volumes, creating new persistent volumes, and re-creating persistent volume claims.
1. Find the NFS paths.
On the OpenShift master node, execute the following command to find the paths of allpersistent volumes associated with an MBaaS. Replace <mbaas-project-name> with thename of the MBaaS project in OpenShift.
Example output:
2. Delete all contents of the found NFS paths.
Log in to the NFS server using ssh.
Execute the following command to list contents of the paths. Replace <NFS paths> withthe list of paths from the previous step, separated by spaces.
=> Waiting for 3 MongoDB endpoints ...mongodb-1mongodb-2mongodb-3=> Waiting for all endpoints to accept connections...
oc get ev
list=$(oc get pv | grep <mbaas-project-name> | awk '{ print $1}');for pv in ${list[@]} ; do path=$(oc describe pv ${pv} | grep Path: | awk '{print $2}' | tr -d '\r') echo ${path}done
/nfs/exp222/nfs/exp249/nfs/exp255
for path in <NFS paths> ; do echo ${path} sudo ls -l ${path} echo " "done
Red Hat Mobile Application Platform 4.2 MBaaS Administration and Installation Guide
36

Example output:
If the listed contents of the paths resemble the output shown above, delete all contents ofthe found NFS paths. Replace <NFS paths> with the list of paths from step 1, separatedby spaces.
3. Re-create persistent volumes.
/nfs/exp222-rw-------. 1001320000 nfsnobody admin.0-rw-------. 1001320000 nfsnobody admin.ns-rw-------. 1001320000 nfsnobody fh-mbaas.0-rw-------. 1001320000 nfsnobody fh-mbaas.ns-rw-------. 1001320000 nfsnobody fh-metrics.0-rw-------. 1001320000 nfsnobody fh-metrics.ns-rw-------. 1001320000 nfsnobody fh-reporting.0-rw-------. 1001320000 nfsnobody fh-reporting.nsdrwxr-xr-x. 1001320000 nfsnobody journal-rw-------. 1001320000 nfsnobody local.0-rw-------. 1001320000 nfsnobody local.1-rw-------. 1001320000 nfsnobody local.ns-rwxr-xr-x. 1001320000 nfsnobody mongod.lockdrwxr-xr-x. 1001320000 nfsnobody _tmp
/nfs/exp249drwxr-xr-x. 1001320000 nfsnobody journal-rw-------. 1001320000 nfsnobody local.0-rw-------. 1001320000 nfsnobody local.ns-rwxr-xr-x. 1001320000 nfsnobody mongod.lockdrwxr-xr-x. 1001320000 nfsnobody _tmp
/nfs/exp255drwxr-xr-x. 1001320000 nfsnobody journal-rw-------. 1001320000 nfsnobody local.0-rw-------. 1001320000 nfsnobody local.ns-rwxr-xr-x. 1001320000 nfsnobody mongod.lockdrwxr-xr-x. 1001320000 nfsnobody _tmp
Warning
Make sure to back up all data before proceeding. The following operation mayresult in irrecoverable loss of data.
for path in <NFS paths>do if [ -z ${path+x} ] then echo "path is unset" else echo "path is set to '$path'" cd ${path} && rm -rf ./* fidone
CHAPTER 8. TROUBLESHOOTING THE RHMAP MBAAS
37
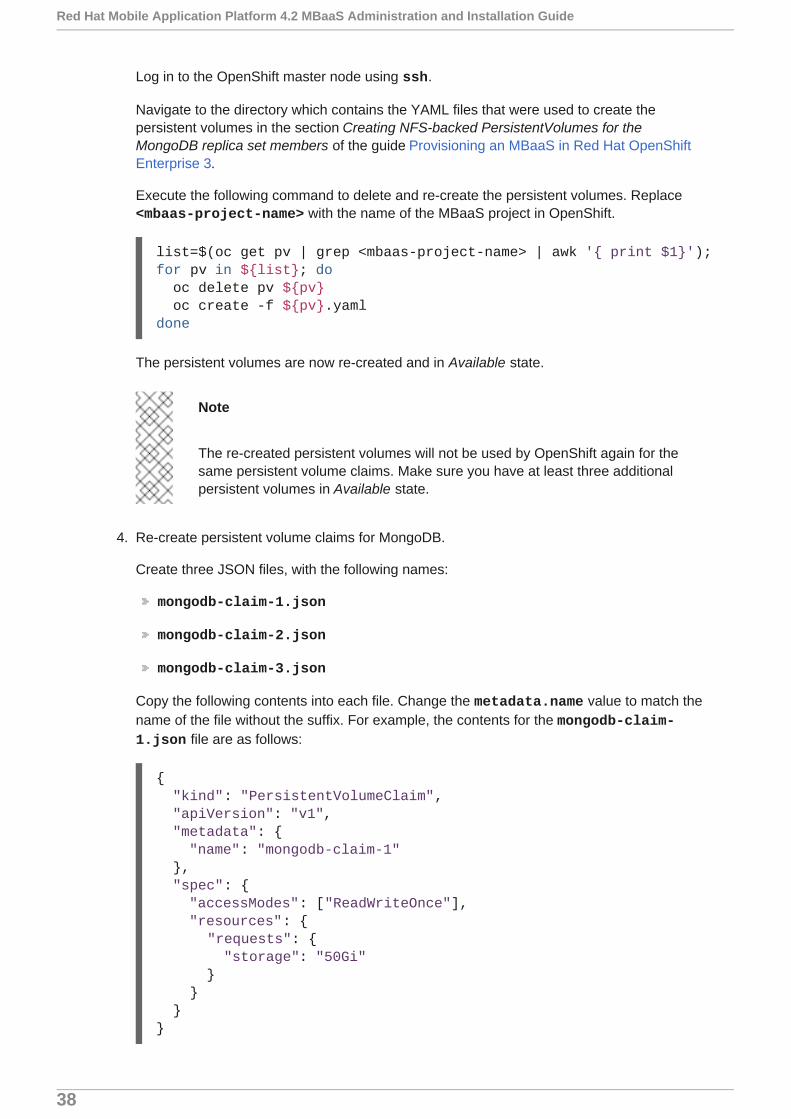
Log in to the OpenShift master node using ssh.
Navigate to the directory which contains the YAML files that were used to create thepersistent volumes in the section Creating NFS-backed PersistentVolumes for theMongoDB replica set members of the guide Provisioning an MBaaS in Red Hat OpenShiftEnterprise 3.
Execute the following command to delete and re-create the persistent volumes. Replace <mbaas-project-name> with the name of the MBaaS project in OpenShift.
The persistent volumes are now re-created and in Available state.
Note
The re-created persistent volumes will not be used by OpenShift again for thesame persistent volume claims. Make sure you have at least three additionalpersistent volumes in Available state.
4. Re-create persistent volume claims for MongoDB.
Create three JSON files, with the following names:
mongodb-claim-1.json
mongodb-claim-2.json
mongodb-claim-3.json
Copy the following contents into each file. Change the metadata.name value to match thename of the file without the suffix. For example, the contents for the mongodb-claim-1.json file are as follows:
list=$(oc get pv | grep <mbaas-project-name> | awk '{ print $1}');for pv in ${list}; do oc delete pv ${pv} oc create -f ${pv}.yamldone
{ "kind": "PersistentVolumeClaim", "apiVersion": "v1", "metadata": { "name": "mongodb-claim-1" }, "spec": { "accessModes": ["ReadWriteOnce"], "resources": { "requests": { "storage": "50Gi" } } }}
Red Hat Mobile Application Platform 4.2 MBaaS Administration and Installation Guide
38

Run the following command to re-create the persistent volume claims.
5. Verify that mongodb-initiator proceeds with initialization.
Run the following command to see the logs of mongodb-initiator.
After mongodb-initiator completes its work, the log output should contain the followingmessage, indicating that the MongoDB replica set was successfully created.
8.4.2.3. Result
The MongoDB service is fully operational with all three replicas attached to their persistent volumes.The persistent volumes left in Released state from the previous installation are now in the Availablestate, ready for use by other persistent volume claims.
8.4.3. MongoDB replica set stops replicating correctly
8.4.3.1. Summary
If some of the MBaaS components start to crash, this may be because they can not connect to aprimary member in the MongoDB replica set. This usually indicates that the replica set configurationhas become inconsistent. This can happen if a majority of the member pods get replaced and havenew IP addresses. In this case, data cannot be written to or read from MongoDB replica set in theMBaaS project.
To verify the replica set state as seen by each member, run the following command in the shell of auser logged in to OpenShift with access to the MBaaS project:
For a fully consistent replica set, the output for each member would contain a members object listingdetails about each member. If the output resembles the following, containing the "ok" : 0 valuefor some members, proceed to the fix in order to make the replica set consistent.
for pvc in mongodb-claim-1 mongodb-claim-2 mongodb-claim-3; do oc delete pvc ${pvc} oc create -f ${pvc}.jsondone
oc logs mongodb-initiator -f
=> Successfully initialized replSet
for i in `oc get po -a | grep -e "mongodb-[0-9]\+" | awk '{print $1}'`; do echo "## ${i} ##" echo mongo admin -u admin -p \${MONGODB_ADMIN_PASSWORD} --eval "printjson\(rs.status\(\)\)" | oc rsh --shell='/bin/bash' $idone
## mongodb-1-1-8syid ##MongoDB shell version: 2.4.9connecting to: admin{ "startupStatus" : 1,
CHAPTER 8. TROUBLESHOOTING THE RHMAP MBAAS
39

8.4.3.2. Fix
You can make the replica set consistent by forcing a re-deploy.
1. Note the MongoDB endpoints which are in an error status.
Example:
```bashNAME READY STATUS RESTARTS AGEmongodb-1-1-pu0fz 1/1 Error 0 1h
```
2. Force a deploy of this Pod
8.4.3.3. Result
The replica starts replicating properly again and dependent MBaaS components start working again.
8.4.4. An MBaaS component fails to start because no suitable nodes are found
8.4.4.1. Summary
If some of the MBaaS components are not starting up after the installation, it may be the case thatthe OpenShift scheduler failed to find suitable nodes on which to schedule the pods of those MBaaScomponents. This means that the OpenShift cluster doesn’t contain all the nodes required by theMBaaS OpenShift template, or that those nodes don’t satisfy the requirements on system resources,
"ok" : 0, "errmsg" : "loading local.system.replset config (LOADINGCONFIG)"}## mongodb-2-1-m6ao1 ##MongoDB shell version: 2.4.9connecting to: admin{ "startupStatus" : 1, "ok" : 0, "errmsg" : "loading local.system.replset config (LOADINGCONFIG)"}## mongodb-3-2-e0a11 ##MongoDB shell version: 2.4.9connecting to: admin{ "startupStatus" : 1, "ok" : 0, "errmsg" : "loading local.system.replset config (LOADINGCONFIG)"}
oc get po
oc deploy mongodb-1 --latest
Red Hat Mobile Application Platform 4.2 MBaaS Administration and Installation Guide
40

node labels, and other parameters.
Read more about the OpenShift Scheduler in the OpenShift documentation.
To verify that this is the problem, run the following command to list the event log:
If the output contains one of the following messages, you are most likely facing this problem – thenodes in your OpenShift cluster don’t fulfill some of the requirements.
Failed for reason MatchNodeSelector and possibly others
Failed for reason PodExceedsFreeCPU and possibly others
8.4.4.2. Fix
To fix this problem, configure nodes in your OpenShift cluster to match the requirements of theMBaaS OpenShift template.
Apply correct labels to nodes.
Refer to Apply Node Labels in the guide Provisioning an MBaaS in Red Hat OpenShift Enterprise3 for details on what labels must be applied to nodes.
Make sure the OpenShift cluster has sufficient resources for the MBaaS components, cloudapps, and cloud services it runs.
Configure the machines used as OpenShift nodes to have more CPU power and internalmemory available, or add more nodes to the cluster. Refer to the guide on Overcommitting andCompute Resources in the OpenShift documentation for more information on how containersuse system resources.
Clean up the OpenShift instance.
Delete unused projects from the OpenShift instance.
Alternatively, it is also possible to correct the problem from the other side — change the deploymentconfigurations in the MBaaS OpenShift template to match the setup of your OpenShift cluster.
To list all deployment configurations, run the following command:
oc get ev
Warning
Changing the deployment configurations may negatively impact the performance andreliability of the MBaaS. Therefore, this is not a recommended approach.
oc get dc
NAME TRIGGERS LATESTfh-mbaas ConfigChange 1fh-messaging ConfigChange 1fh-metrics ConfigChange 1
CHAPTER 8. TROUBLESHOOTING THE RHMAP MBAAS
41

To edit a deployment configuration, use the oc edit dc <deployment> command. Forexample, to edit the configuration of the fh-mbaas deployment, run the following command:
You can modify system resource requirements in the resources sections.
Changing a deployment configuration triggers a deployment operation.
8.4.4.3. Result
If you changed the setup of nodes in the OpenShift cluster to match the requirements of the MBaaSOpenShift template, the MBaaS is now fully operational without any limitation to quality of service.
If you changed the deployment configuration of any MBaaS component, the cluster should now befully operational, with a potential limitation to quality of service.
8.4.5. NPM Package Management Using a http Proxy or Custom Registry
8.4.5.1. Summary
If your OpenShift installation only has outbound internet access via a proxy server, you may haveissues when the node.js builder in OpenShift attempts to do an npm installation. Also, if you have acustom npm registry, you need to configure npm to avoid issues with node.js builder.
To overcome this, create a .npmrc file in the root directory of your cloud app. Use this file to specifythe proxy location and possibly the npm registry location. For more information, see the npmconfiguration documentation. For example, to use a http(s) proxy and registry for company.com,you might create the following .npmrc file:
8.4.5.2. Result
You can now deploy your app to the RHMAP MBaaS.
fh-statsd ConfigChange 1mongodb-1 ConfigChange 1mongodb-2 ConfigChange 1mongodb-3 ConfigChange 1
oc edit dc fh-mbaas
...resources: limits: cpu: 800m memory: 800Mi requests: cpu: 200m memory: 200Mi...
proxy=http://proxy.company.com:8080/https-proxy=http://proxy.company.com:8080registry=http://registry.company.com/
Red Hat Mobile Application Platform 4.2 MBaaS Administration and Installation Guide
42

CHAPTER 8. TROUBLESHOOTING THE RHMAP MBAAS
43


![[WSO2Con Asia 2014] Accelerating Mobile App Development with MBaaS](https://img.pdfslide.us/doc/110x75/554d1d58b4c905ca208b4894/wso2con-asia-2014-accelerating-mobile-app-development-with-mbaas.jpg)