Embed Size (px)
Citation preview
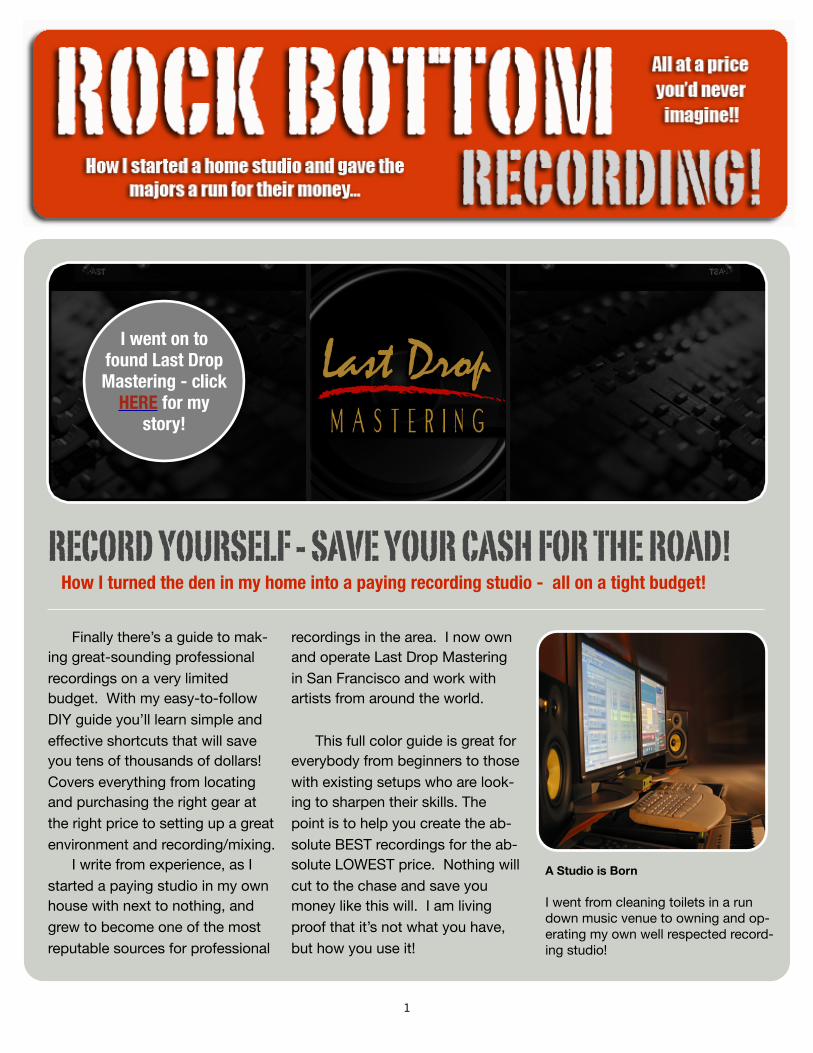
RECORD YOURSELF - SAVE YOUR CASH FOR THE ROAD! How I turned the den in my home into a paying recording studio - all on a tight budget!
Finally there’s a guide to mak-ing great-sounding professional recordings on a very limited budget. With my easy-to-follow DIY guide you’ll learn simple and effective shortcuts that will save you tens of thousands of dollars! Covers everything from locating and purchasing the right gear at the right price to setting up a great environment and recording/mixing.
I write from experience, as I started a paying studio in my own house with next to nothing, and grew to become one of the most reputable sources for professional
recordings in the area. I now own and operate Last Drop Mastering in San Francisco and work with artists from around the world.
This full color guide is great for everybody from beginners to those with existing setups who are look-ing to sharpen their skills. The point is to help you create the ab-solute BEST recordings for the ab-solute LOWEST price. Nothing will cut to the chase and save you money like this will. I am living proof that it’s not what you have, but how you use it!
1
A Studio is Born
I went from cleaning toilets in a run down music venue to owning and op-erating my own well respected record-ing studio!
I went on to found Last Drop Mastering - click
HERE for my story!
INTRO PG. 3 EQUIPMENT PG. 4 SETUP PG. 8 RECORDING PG. 11 MIXING PG. 16 PLUGINS PG. 18 MASTERING PG. 22 PRO TOOLS COMPUTER REQUIREMENTS PG. 23
2
The acoustics, the gear and the
recording+mixing technics...made
SIMPLE
Why should I record myself?
Recording studios traditionally
required a few hundred thousand dol-
lars to buy into. Thanks to modern
technology and the information age,
you now have everything you need to
create comparable recordings for just
a sliver of the cost. I know because I
did it myself!
Why pay a professional and be
creatively limited by your budget? If
they know what they’re doing,
chances are it’s going to cost you. For
the price of one good album’s worth of
recording you can have everything you
need to spend unlimited time record-
ing yourself, and even get paid to re-
cord others! Keep an eye out for the
next Ebook with more info on how to
run a paying studio.
Being a musician since I was a kid,
I always dreamed of working in the
music industry. Eventually I took some
music production classes and realized
that working with the software wasn’t
nearly as difficult as I thought it would
be. I immediately left school and
started planning how I would convert
my den (which had been remodeled
into a bar...where “Last Drop” came
from) into a fully functioning recording
studio. The challenge was doing this
on my budget, which was almost
nothing. I researched gear and setup
for a few weeks...pulling information
from all over the place. Through a
combination of all this and a few inno-
vations of my own, my studio was up
and running in no time. After some
fairly extensive testing recording my-
self and my friends, I set out to find
customers and start a new career.
Check out actual
recordings: www.myspace.com/lastdropm
If you’ve taken the time to listen to
the recordings I made with the setup
described in this guide, you see what I
mean! This was done in the den of my
house on a VERY limited budget. You
too can get a sound like this in your
own home, and I’m going to show you
how. I’ve found that determination
and a good ear can take you much
further than having all the top of the
line equipment in the world! Remem-
ber, people love to talk in this industry.
There are a lot of “gear snobs” and
naysayers out there. This is exactly
what I did, and this guide explains ex-
actly how I did it. Most importantly,
what I did WORKED.
Most of the examples in this guide
will be using Pro Tools, as this is the
most popular recording software to
date. The basic info can be applied to
any software though, so keep that in
mind.
3
SO WHAT DO I NEED?
Hopefully you have a little time to
play around with, as this is the best
way to find the greatest deals on eve-
rything you’ll need. Craigslist ads can
do wonders for you. I found quite a bit
of my setup materials and furniture in
the “free” section. IMPORTANT!
Make sure you thoroughly test any-
thing you’re considering buying! Also
keep in mind that it can be hard to
unload things on Craigslist, so you can
almost always talk people down on the
price. If you play hardball and pretend
like it might not be exactly what you
need, you’re almost guaranteed a
lower price on your gear!
Ebay is nice because you can
generally trust people’s ratings. I
would just bid very low on a variety of
items there in the off chance that you
might actually win. If you happen to
have already bought something (on
Craigslist) that you end up winning,
you can end up selling it for profit. I
did this a few times. I liked to stick to
Craigslist for the most part, but there’s
much more available on Ebay. On
Craigslist you can also check other
cities and see if the sellers are willing
to send your gear out at the right
price. Be careful if you go this
route, as you can’t test this gear!
COMPUTER
First, you need the computer to
run your software. The good news is
that computers are becoming more
powerful and less expensive all the
time, and if you’ve bought one in the
past few years there’s a good chance
you’ll be able to use it. In general, a
laptop that’s capable of running re-
cording software will be harder to find
at a really great price than a desktop.
For Pro Tools, check the back of this
guide for the latest system require-
ments for both PC and Mac (from
digidesign.com). Keep in mind that
you might be able to get by with a bit
less than what they recommend here, I
think they might just playing it safe. I
wouldn’t recommend using a com-
puter that goes online unless you have
serious virus protection on it!
If your computer is not quite up to
par, there is always the option of up-
grading your RAM or hard drives if
need be. Check out your local dis-
count electronics store for the best
deal on this stuff, and tell that com-
puter geek friend of yours you’ll re
cord him playing the accordion if
he’ll fix up your computer for you.
Remember, if you’re having any is-
sues, always try some creative
searches on Google. No matter what
you’re encountering, somebody’s been
through it and the answers are out
there. This is the beauty of the infor-
mation age.
SOFTWARE/HARDWARE
You need a recording software and
a hardware unit that will allow you to
plug multiple XLR microphone cables
into it. This hardware will then convert
your analog signal into digital and run
it into your computer through a USB or
Firewire cable.
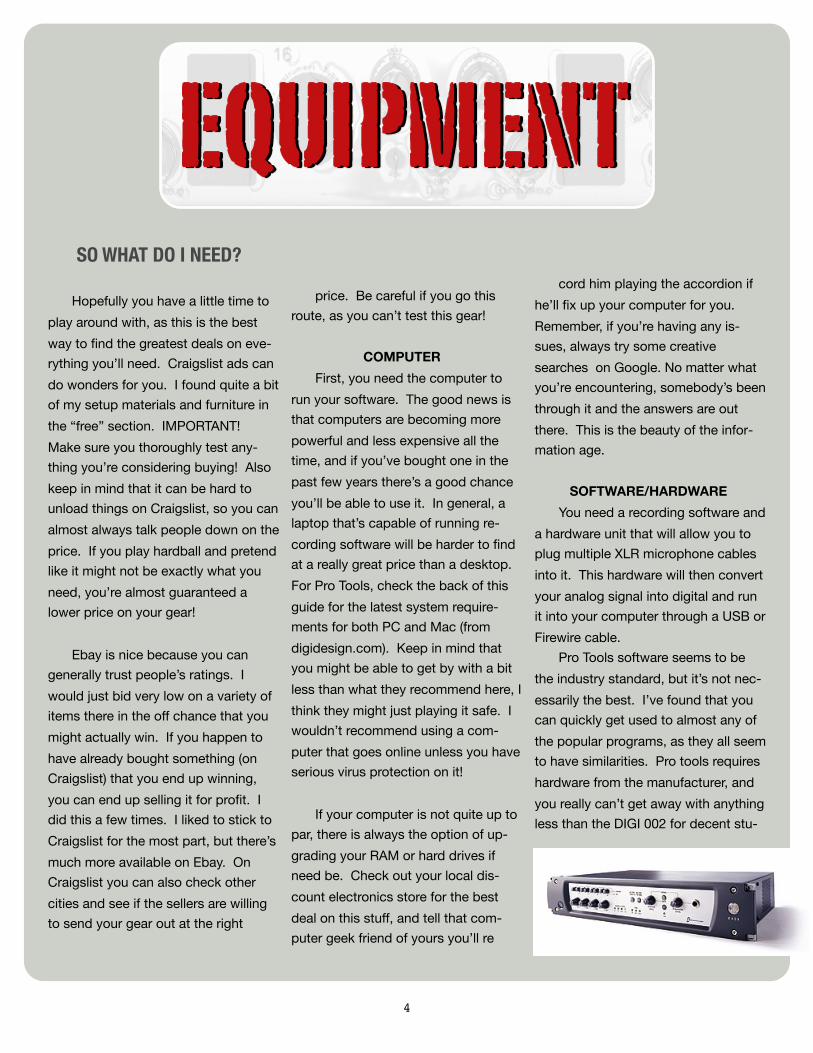
Pro Tools software seems to be
the industry standard, but it’s not nec-
essarily the best. I’ve found that you
can quickly get used to almost any of
the popular programs, as they all seem
to have similarities. Pro tools requires
hardware from the manufacturer, and
you really can’t get away with anything
less than the DIGI 002 for decent stu-
4
dio recording. My most recent search
on Craigslist found a few of these
units for around $480-550. In my
opinion you need at least eight simul-
taneous (XLR) inputs for a really great
recording, and this unit only provides
4 XLR mic inputs. It does have 4
more 1/4 inch inputs though. This is
what I had to work around in my first
home studio.
What I found was that I could
“cheat” by using four more inputs
from a separate mixing console. I
used a Behringer MX-2004A. The rea-
son this was possible is that the con-
sole has a 1/4 inch “insert” on the
back of each channel. For whatever
reason, a little known secret is that you
plug 1/4 inch cables just half-way into
these inserts and they then function as
outputs into another unit (like the Digi
002). The cables just plug right into
the 1/4 inputs 5-8. This will give you a
full eight inputs into Pro Tools, which
will allow great drum recording! Note,
your mixing console MUST have “in-
serts” for this to work!
If I had it to do over again, I’d
probably get a great 8-channel XLR
interface such as the Presonus Fire-
studio instead. Pro Tools won’t allow
you to connect this unit, but programs
like Acid will, and it’s great.
The Firestudio you can get (with a
little luck) for $300-400 on Craigslist or
Ebay. Having all 8 inputs together in
one unit gives you both convenience
and consistency.
If you’re using a Mac, I highly rec-
ommend using the Logic recording
software. It will also work with the
Firestudio, and the combination on a
Mac is great (as they’re the ones who
designed the software!).
MICROPHONES
You can’t get far without these.
You’re going to need 2 overhead mics
(condenser mics are best for over-
heads) on the drums, as well as a
good bass drum mic and at least 3
mics for the toms and snare drum.
Dynamic mics can be used almost
anywhere, and at very high volumes.
That’s why these are good for close
distance snare, tom, bass drum and
guitar amp recordings. Guitar amps
also. Condenser mics require some-
thing called phantom power in order to
work. Most hardware and mixing con-
soles have a switch to turn this on and
off for a few of the inputs. Condens-
ers are perfect for more crisp and deli-
cate sounds like acoustic guitar, vo-
cals and cymbals. When considering
any microphones, make sure and do a
google search for reviews beforehand.
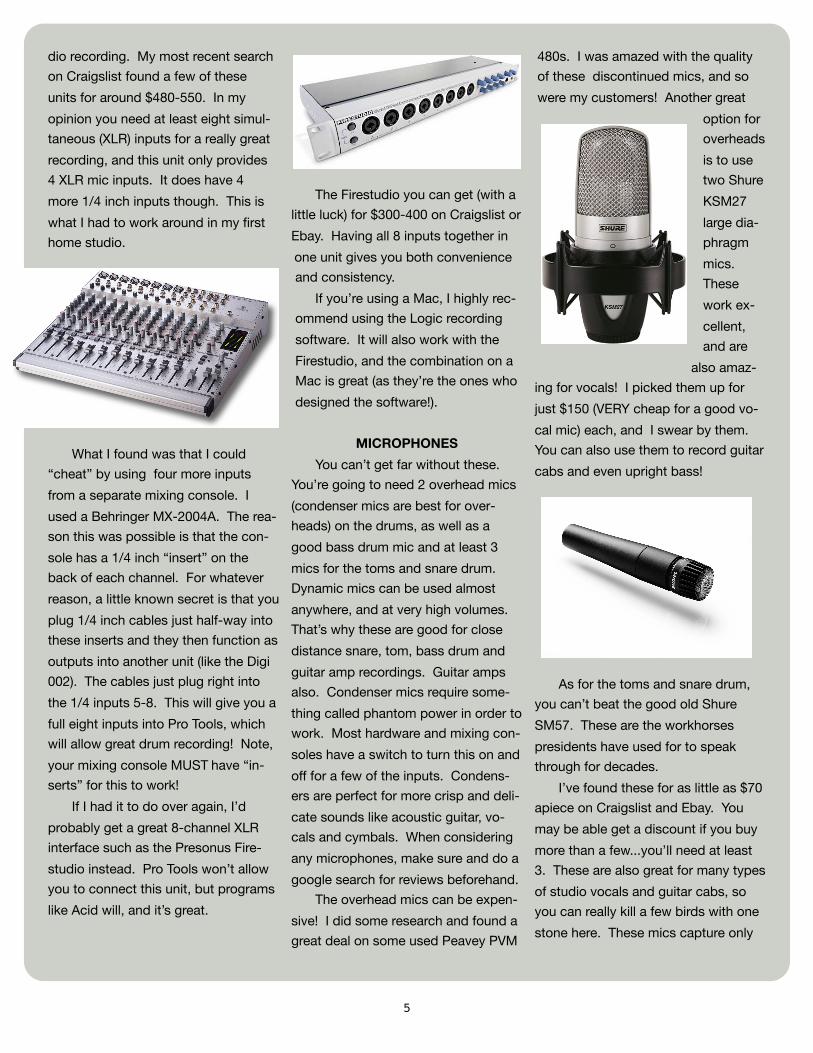
The overhead mics can be expen-
sive! I did some research and found a
great deal on some used Peavey PVM
480s. I was amazed with the quality
of these discontinued mics, and so
were my customers! Another great
option for
overheads
is to use
two Shure
KSM27
large dia-
phragm
mics.
These
work ex-
cellent,
and are
also amaz-
ing for vocals! I picked them up for
just $150 (VERY cheap for a good vo-
cal mic) each, and I swear by them.
You can also use them to record guitar
cabs and even upright bass!
As for the toms and snare drum,
you can’t beat the good old Shure
SM57. These are the workhorses
presidents have used for to speak
through for decades.
I’ve found these for as little as $70
apiece on Craigslist and Ebay. You
may be able get a discount if you buy
more than a few...you’ll need at least
3. These are also great for many types
of studio vocals and guitar cabs, so
you can really kill a few birds with one
stone here. These mics capture only
5
what’s placed directly in front of them,
so they’re great for nice clean record-
ings.
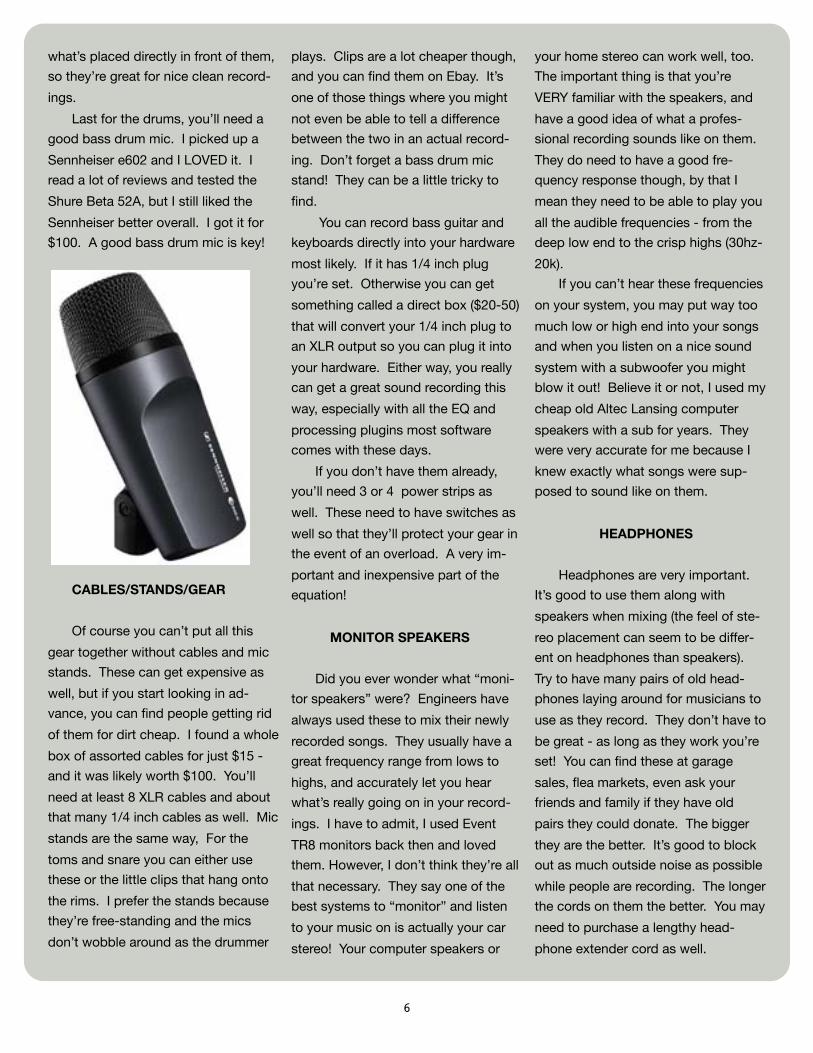
Last for the drums, you’ll need a
good bass drum mic. I picked up a
Sennheiser e602 and I LOVED it. I
read a lot of reviews and tested the
Shure Beta 52A, but I still liked the
Sennheiser better overall. I got it for
$100. A good bass drum mic is key!
CABLES/STANDS/GEAR
Of course you can’t put all this
gear together without cables and mic
stands. These can get expensive as
well, but if you start looking in ad-
vance, you can find people getting rid
of them for dirt cheap. I found a whole
box of assorted cables for just $15 -
and it was likely worth $100. You’ll
need at least 8 XLR cables and about
that many 1/4 inch cables as well. Mic
stands are the same way, For the
toms and snare you can either use
these or the little clips that hang onto
the rims. I prefer the stands because
they’re free-standing and the mics
don’t wobble around as the drummer
plays. Clips are a lot cheaper though,
and you can find them on Ebay. It’s
one of those things where you might
not even be able to tell a difference
between the two in an actual record-
ing. Don’t forget a bass drum mic
stand! They can be a little tricky to
find.
You can record bass guitar and
keyboards directly into your hardware
most likely. If it has 1/4 inch plug
you’re set. Otherwise you can get
something called a direct box ($20-50)
that will convert your 1/4 inch plug to
an XLR output so you can plug it into
your hardware. Either way, you really
can get a great sound recording this
way, especially with all the EQ and
processing plugins most software
comes with these days.
If you don’t have them already,
you’ll need 3 or 4 power strips as
well. These need to have switches as
well so that they’ll protect your gear in
the event of an overload. A very im-
portant and inexpensive part of the
equation!
MONITOR SPEAKERS
Did you ever wonder what “moni-
tor speakers” were? Engineers have
always used these to mix their newly
recorded songs. They usually have a
great frequency range from lows to
highs, and accurately let you hear
what’s really going on in your record-
ings. I have to admit, I used Event
TR8 monitors back then and loved
them. However, I don’t think they’re all
that necessary. They say one of the
best systems to “monitor” and listen
to your music on is actually your car
stereo! Your computer speakers or
your home stereo can work well, too.
The important thing is that you’re
VERY familiar with the speakers, and
have a good idea of what a profes-
sional recording sounds like on them.
They do need to have a good fre-
quency response though, by that I
mean they need to be able to play you
all the audible frequencies - from the
deep low end to the crisp highs (30hz-
20k).
If you can’t hear these frequencies
on your system, you may put way too
much low or high end into your songs
and when you listen on a nice sound
system with a subwoofer you might
blow it out! Believe it or not, I used my
cheap old Altec Lansing computer
speakers with a sub for years. They
were very accurate for me because I
knew exactly what songs were sup-
posed to sound like on them.
HEADPHONES
Headphones are very important.
It’s good to use them along with
speakers when mixing (the feel of ste-
reo placement can seem to be differ-
ent on headphones than speakers).
Try to have many pairs of old head-
phones laying around for musicians to
use as they record. They don’t have to
be great - as long as they work you’re
set! You can find these at garage
sales, flea markets, even ask your
friends and family if they have old
pairs they could donate. The bigger
they are the better. It’s good to block
out as much outside noise as possible
while people are recording. The longer
the cords on them the better. You may
need to purchase a lengthy head-
phone extender cord as well.
6
I’d recommend picking up some
Vic Firth noise canceling headphones
for recording the drums. I picked mine
up for $50 brand new. These will also
work well for the guitar player who has
to their amp up so loud he or she can
barely hear the music over it while re-
cording!
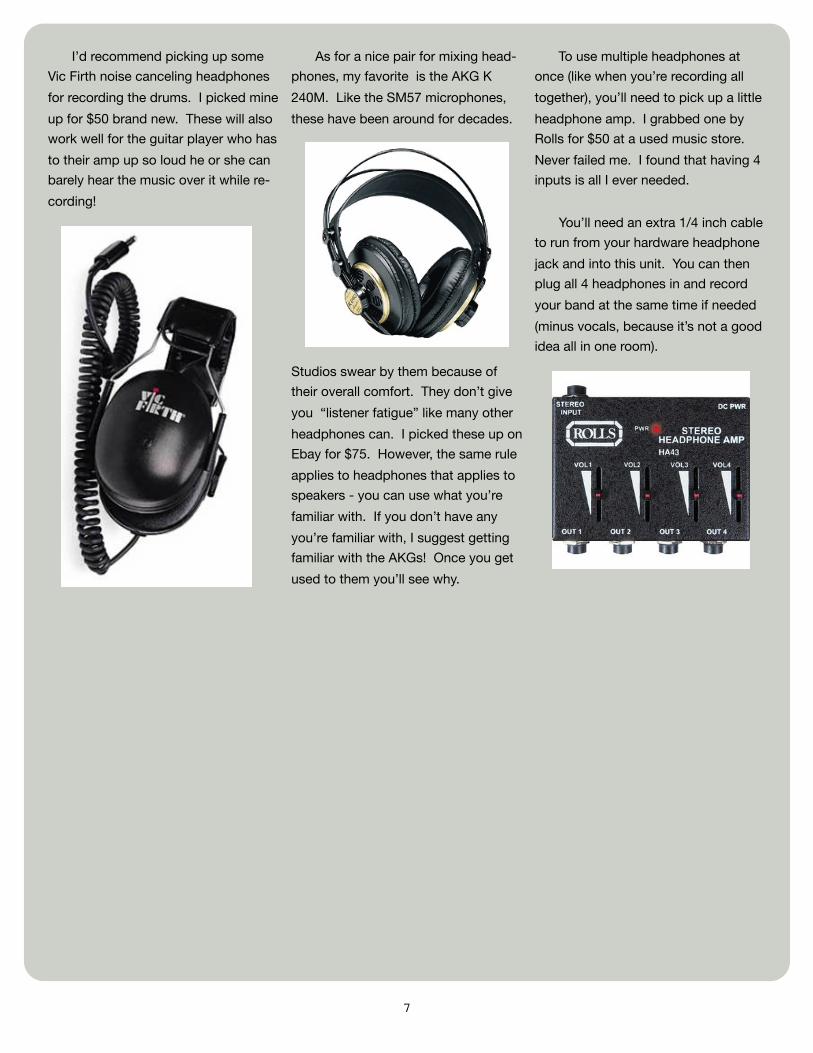
As for a nice pair for mixing head-
phones, my favorite is the AKG K
240M. Like the SM57 microphones,
these have been around for decades.
Studios swear by them because of
their overall comfort. They don’t give
you “listener fatigue” like many other
headphones can. I picked these up on
Ebay for $75. However, the same rule
applies to headphones that applies to
speakers - you can use what you’re
familiar with. If you don’t have any
you’re familiar with, I suggest getting
familiar with the AKGs! Once you get
used to them you’ll see why.
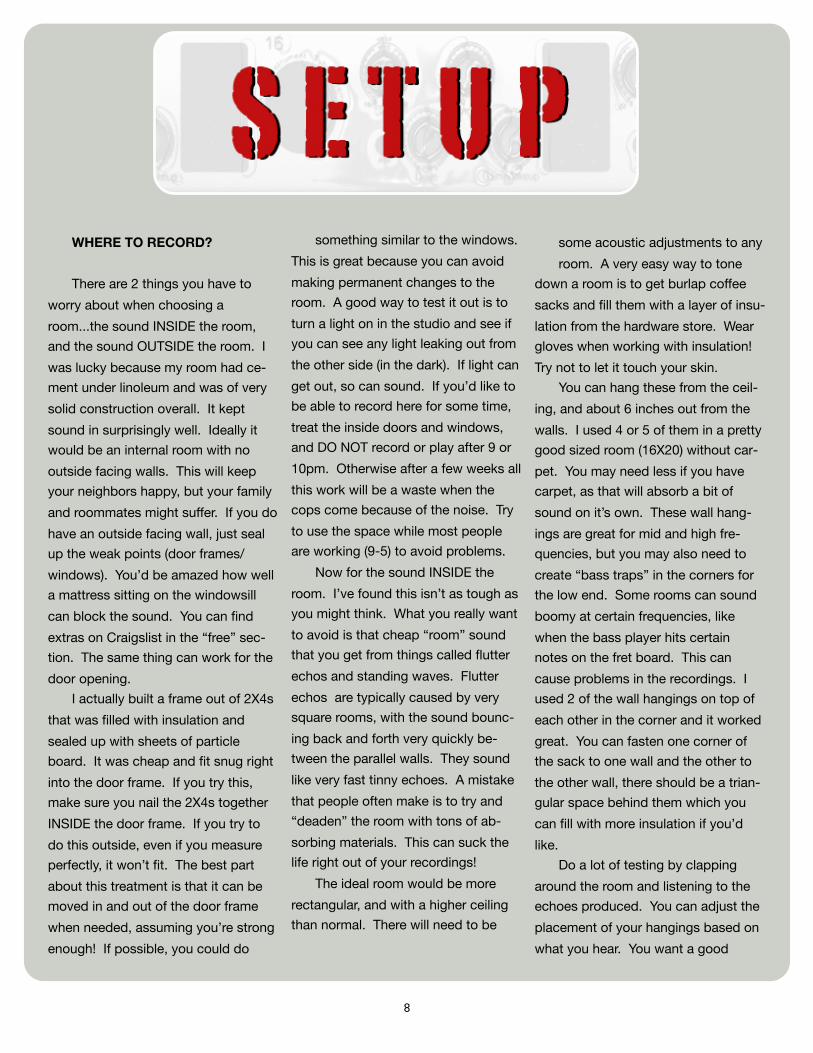
To use multiple headphones at
once (like when you’re recording all
together), you’ll need to pick up a little
headphone amp. I grabbed one by
Rolls for $50 at a used music store.
Never failed me. I found that having 4
inputs is all I ever needed.
You’ll need an extra 1/4 inch cable
to run from your hardware headphone
jack and into this unit. You can then
plug all 4 headphones in and record
your band at the same time if needed
(minus vocals, because it’s not a good
idea all in one room).
7
WHERE TO RECORD?
There are 2 things you have to
worry about when choosing a
room...the sound INSIDE the room,
and the sound OUTSIDE the room. I
was lucky because my room had ce-
ment under linoleum and was of very
solid construction overall. It kept
sound in surprisingly well. Ideally it
would be an internal room with no
outside facing walls. This will keep
your neighbors happy, but your family
and roommates might suffer. If you do
have an outside facing wall, just seal
up the weak points (door frames/
windows). You’d be amazed how well
a mattress sitting on the windowsill
can block the sound. You can find
extras on Craigslist in the “free” sec-
tion. The same thing can work for the
door opening.
I actually built a frame out of 2X4s
that was filled with insulation and
sealed up with sheets of particle
board. It was cheap and fit snug right
into the door frame. If you try this,
make sure you nail the 2X4s together
INSIDE the door frame. If you try to
do this outside, even if you measure
perfectly, it won’t fit. The best part
about this treatment is that it can be
moved in and out of the door frame
when needed, assuming you’re strong
enough! If possible, you could do
something similar to the windows.
This is great because you can avoid
making permanent changes to the
room. A good way to test it out is to
turn a light on in the studio and see if
you can see any light leaking out from
the other side (in the dark). If light can
get out, so can sound. If you’d like to
be able to record here for some time,
treat the inside doors and windows,
and DO NOT record or play after 9 or
10pm. Otherwise after a few weeks all
this work will be a waste when the
cops come because of the noise. Try
to use the space while most people
are working (9-5) to avoid problems.
Now for the sound INSIDE the
room. I’ve found this isn’t as tough as
you might think. What you really want
to avoid is that cheap “room” sound
that you get from things called flutter
echos and standing waves. Flutter
echos are typically caused by very
square rooms, with the sound bounc-
ing back and forth very quickly be-
tween the parallel walls. They sound
like very fast tinny echoes. A mistake
that people often make is to try and
“deaden” the room with tons of ab-
sorbing materials. This can suck the
life right out of your recordings!
The ideal room would be more
rectangular, and with a higher ceiling
than normal. There will need to be
some acoustic adjustments to any
room. A very easy way to tone
down a room is to get burlap coffee
sacks and fill them with a layer of insu-
lation from the hardware store. Wear
gloves when working with insulation!
Try not to let it touch your skin.
You can hang these from the ceil-
ing, and about 6 inches out from the
walls. I used 4 or 5 of them in a pretty
good sized room (16X20) without car-
pet. You may need less if you have
carpet, as that will absorb a bit of
sound on it’s own. These wall hang-
ings are great for mid and high fre-
quencies, but you may also need to
create “bass traps” in the corners for
the low end. Some rooms can sound
boomy at certain frequencies, like
when the bass player hits certain
notes on the fret board. This can
cause problems in the recordings. I
used 2 of the wall hangings on top of
each other in the corner and it worked
great. You can fasten one corner of
the sack to one wall and the other to
the other wall, there should be a trian-
gular space behind them which you
can fill with more insulation if you’d
like.
Do a lot of testing by clapping
around the room and listening to the
echoes produced. You can adjust the
placement of your hangings based on
what you hear. You want a good
8
natural echo, but not anything too long
or tinny sounding. I found a good
place for an egg crate foam pad on
the ceiling to further break up the ech-
oes. You can play around with the
placement of this also.
You can also throw the sound off
(in a good way) with objects in the
room. A tall shelf filled with books can
be a perfect “sound diffuser.” Equip-
ment and even people in the room
(when you record) will help out the
sound as well, so don’t overdue the
absorption before you hear it in “ac-
tion”.
One area of the room that needs
to be very “dead” sounding is the vo-
cal booth. This is very important, be-
cause you’ll want to add compression
(see “plugins” chapter) to the vocals to
smooth them out, and this will bring
the overall volume of your vocal track
up, revealing all the background noise
in the room leaking into the mic. A
vocal booth will cut out all echoes and
room noise, leaving you with a good
clean recording.
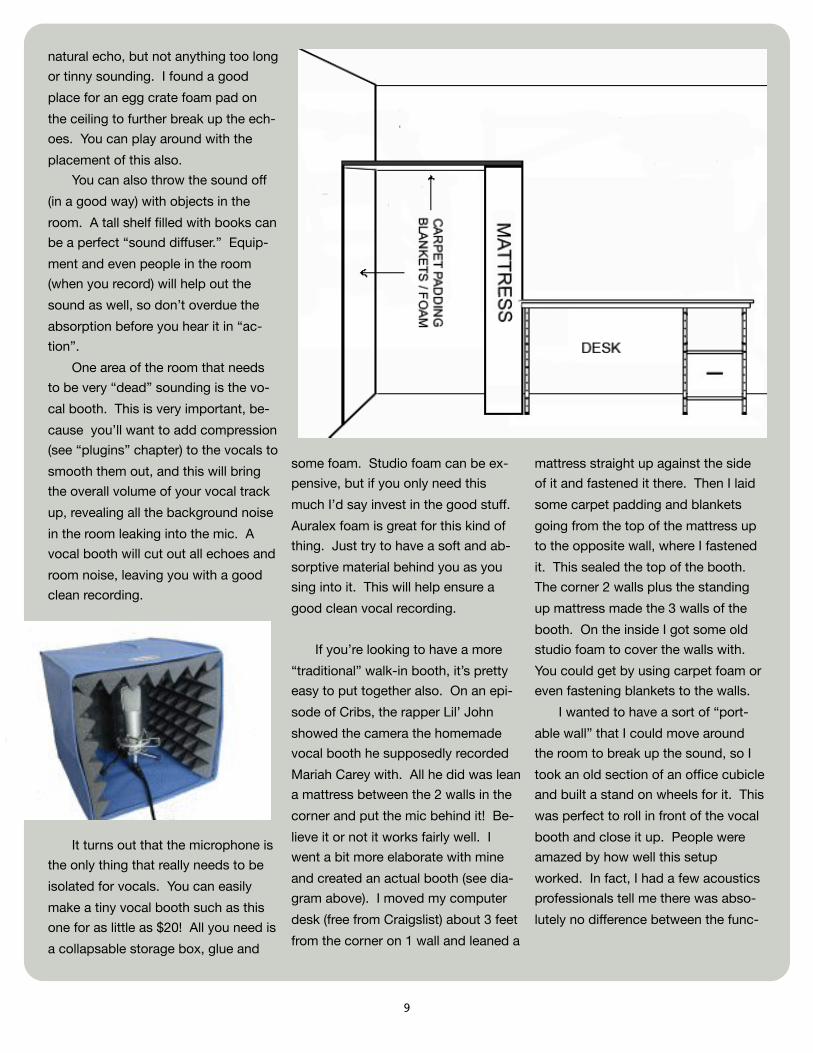
It turns out that the microphone is
the only thing that really needs to be
isolated for vocals. You can easily
make a tiny vocal booth such as this
one for as little as $20! All you need is
a collapsable storage box, glue and
some foam. Studio foam can be ex-
pensive, but if you only need this
much I’d say invest in the good stuff.
Auralex foam is great for this kind of
thing. Just try to have a soft and ab-
sorptive material behind you as you
sing into it. This will help ensure a
good clean vocal recording.
If you’re looking to have a more
“traditional” walk-in booth, it’s pretty
easy to put together also. On an epi-
sode of Cribs, the rapper Lil’ John
showed the camera the homemade
vocal booth he supposedly recorded
Mariah Carey with. All he did was lean
a mattress between the 2 walls in the
corner and put the mic behind it! Be-
lieve it or not it works fairly well. I
went a bit more elaborate with mine
and created an actual booth (see dia-
gram above). I moved my computer
desk (free from Craigslist) about 3 feet
from the corner on 1 wall and leaned a
mattress straight up against the side
of it and fastened it there. Then I laid
some carpet padding and blankets
going from the top of the mattress up
to the opposite wall, where I fastened
it. This sealed the top of the booth.
The corner 2 walls plus the standing
up mattress made the 3 walls of the
booth. On the inside I got some old
studio foam to cover the walls with.
You could get by using carpet foam or
even fastening blankets to the walls.
I wanted to have a sort of “port-
able wall” that I could move around
the room to break up the sound, so I
took an old section of an office cubicle
and built a stand on wheels for it. This
was perfect to roll in front of the vocal
booth and close it up. People were
amazed by how well this setup
worked. In fact, I had a few acoustics
professionals tell me there was abso-
lutely no difference between the func-
9
tionality of this and booths that cost
$5,000 or more!
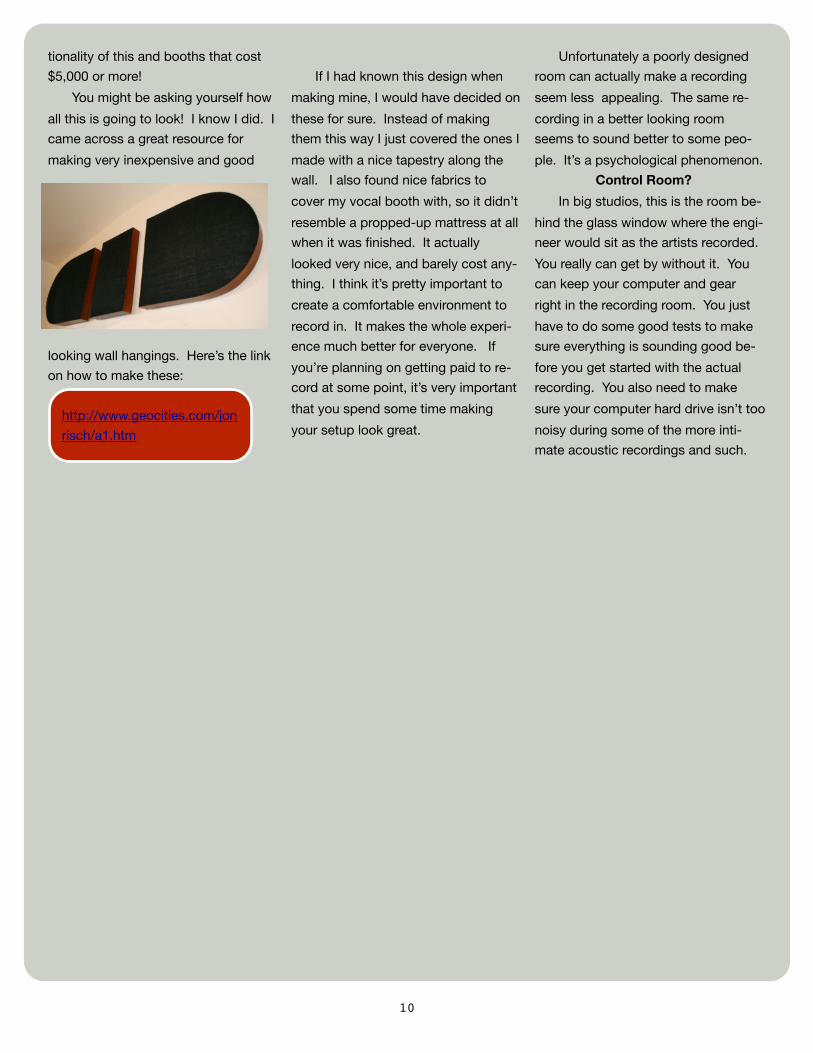
You might be asking yourself how
all this is going to look! I know I did. I
came across a great resource for
making very inexpensive and good
looking wall hangings. Here’s the link
on how to make these:
http://www.geocities.com/jon
risch/a1.htm
If I had known this design when
making mine, I would have decided on
these for sure. Instead of making
them this way I just covered the ones I
made with a nice tapestry along the
wall. I also found nice fabrics to
cover my vocal booth with, so it didn’t
resemble a propped-up mattress at all
when it was finished. It actually
looked very nice, and barely cost any-
thing. I think it’s pretty important to
create a comfortable environment to
record in. It makes the whole experi-
ence much better for everyone. If
you’re planning on getting paid to re-
cord at some point, it’s very important
that you spend some time making
your setup look great.
Unfortunately a poorly designed
room can actually make a recording
seem less appealing. The same re-
cording in a better looking room
seems to sound better to some peo-
ple. It’s a psychological phenomenon.
Control Room?
In big studios, this is the room be-
hind the glass window where the engi-
neer would sit as the artists recorded.
You really can get by without it. You
can keep your computer and gear
right in the recording room. You just
have to do some good tests to make
sure everything is sounding good be-
fore you get started with the actual
recording. You also need to make
sure your computer hard drive isn’t too
noisy during some of the more inti-
mate acoustic recordings and such.
10
Setting Up Your Session
Assuming you’ve got the room
sounding pretty good, you can move
on to getting ready to record. I liked to
set up all the cables
for recording the
night before. I at-
tached numbered
tags to each of them
and laid them out
roughly where they
were going to go to
record the drums.
Speaking of drums,
WEAR EARPLUGS. I
cannot stress this
enough. If you’re
going to be recording
yourself or others in
the years to come,
your ears should be
your #1 priority! Nothing is more im-
portant than preserving your hearing
for this kind of work.
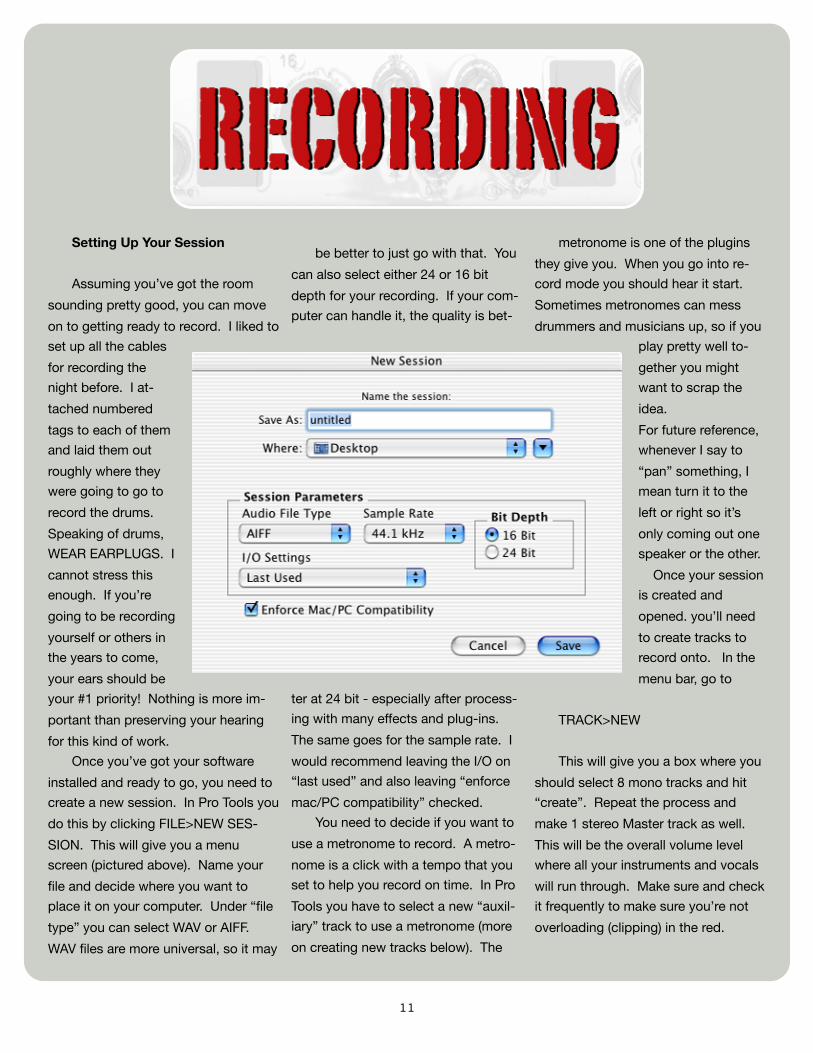
Once you’ve got your software
installed and ready to go, you need to
create a new session. In Pro Tools you
do this by clicking FILE>NEW SES-
SION. This will give you a menu
screen (pictured above). Name your
file and decide where you want to
place it on your computer. Under “file
type” you can select WAV or AIFF.
WAV files are more universal, so it may
be better to just go with that. You
can also select either 24 or 16 bit
depth for your recording. If your com-
puter can handle it, the quality is bet-
ter at 24 bit - especially after process-
ing with many effects and plug-ins.
The same goes for the sample rate. I
would recommend leaving the I/O on
“last used” and also leaving “enforce
mac/PC compatibility” checked.
You need to decide if you want to
use a metronome to record. A metro-
nome is a click with a tempo that you
set to help you record on time. In Pro
Tools you have to select a new “auxil-
iary” track to use a metronome (more
on creating new tracks below). The
metronome is one of the plugins
they give you. When you go into re-
cord mode you should hear it start.
Sometimes metronomes can mess
drummers and musicians up, so if you
play pretty well to-
gether you might
want to scrap the
idea.
For future reference,
whenever I say to
“pan” something, I
mean turn it to the
left or right so it’s
only coming out one
speaker or the other.
Once your session
is created and
opened. you’ll need
to create tracks to
record onto. In the
menu bar, go to
TRACK>NEW
This will give you a box where you
should select 8 mono tracks and hit
“create”. Repeat the process and
make 1 stereo Master track as well.
This will be the overall volume level
where all your instruments and vocals
will run through. Make sure and check
it frequently to make sure you’re not
overloading (clipping) in the red.
11
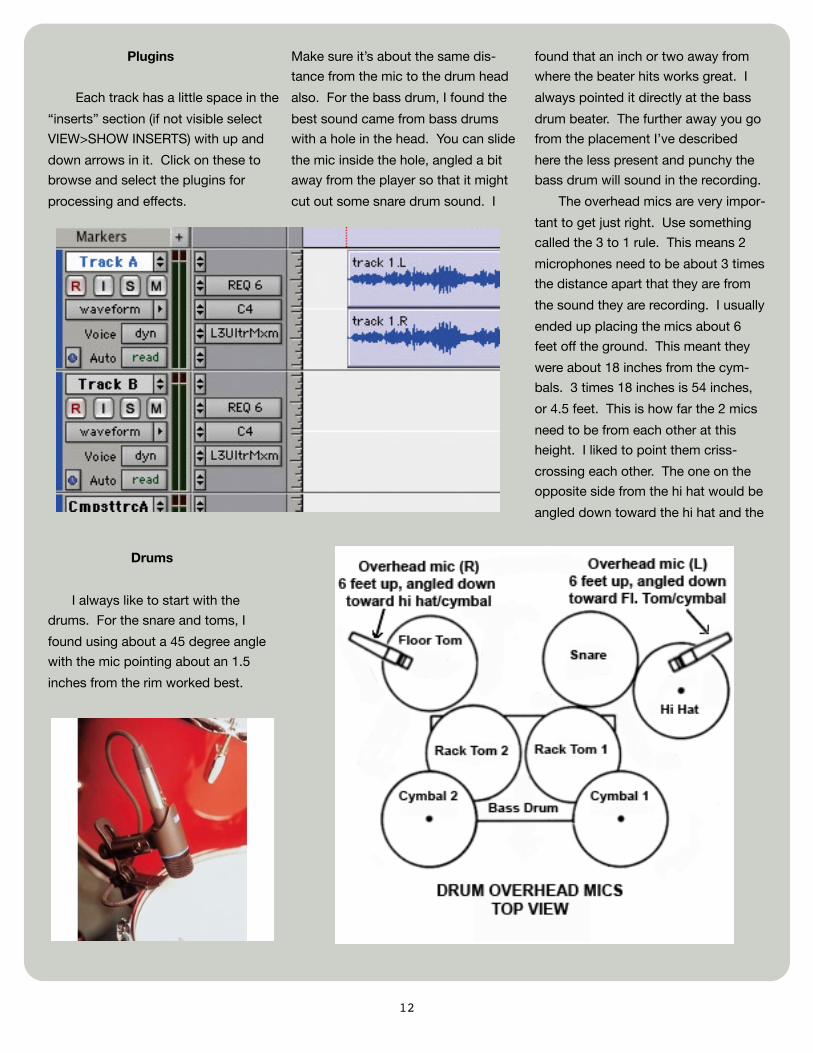
Plugins
Each track has a little space in the
“inserts” section (if not visible select
VIEW>SHOW INSERTS) with up and
down arrows in it. Click on these to
browse and select the plugins for
processing and effects.
Drums
I always like to start with the
drums. For the snare and toms, I
found using about a 45 degree angle
with the mic pointing about an 1.5
inches from the rim worked best.
Make sure it’s about the same dis-
tance from the mic to the drum head
also. For the bass drum, I found the
best sound came from bass drums
with a hole in the head. You can slide
the mic inside the hole, angled a bit
away from the player so that it might
cut out some snare drum sound. I
found that an inch or two away from
where the beater hits works great. I
always pointed it directly at the bass
drum beater. The further away you go
from the placement I’ve described
here the less present and punchy the
bass drum will sound in the recording.
The overhead mics are very impor-
tant to get just right. Use something
called the 3 to 1 rule. This means 2
microphones need to be about 3 times
the distance apart that they are from
the sound they are recording. I usually
ended up placing the mics about 6
feet off the ground. This meant they
were about 18 inches from the cym-
bals. 3 times 18 inches is 54 inches,
or 4.5 feet. This is how far the 2 mics
need to be from each other at this
height. I liked to point them criss-
crossing each other. The one on the
opposite side from the hi hat would be
angled down toward the hi hat and the
12
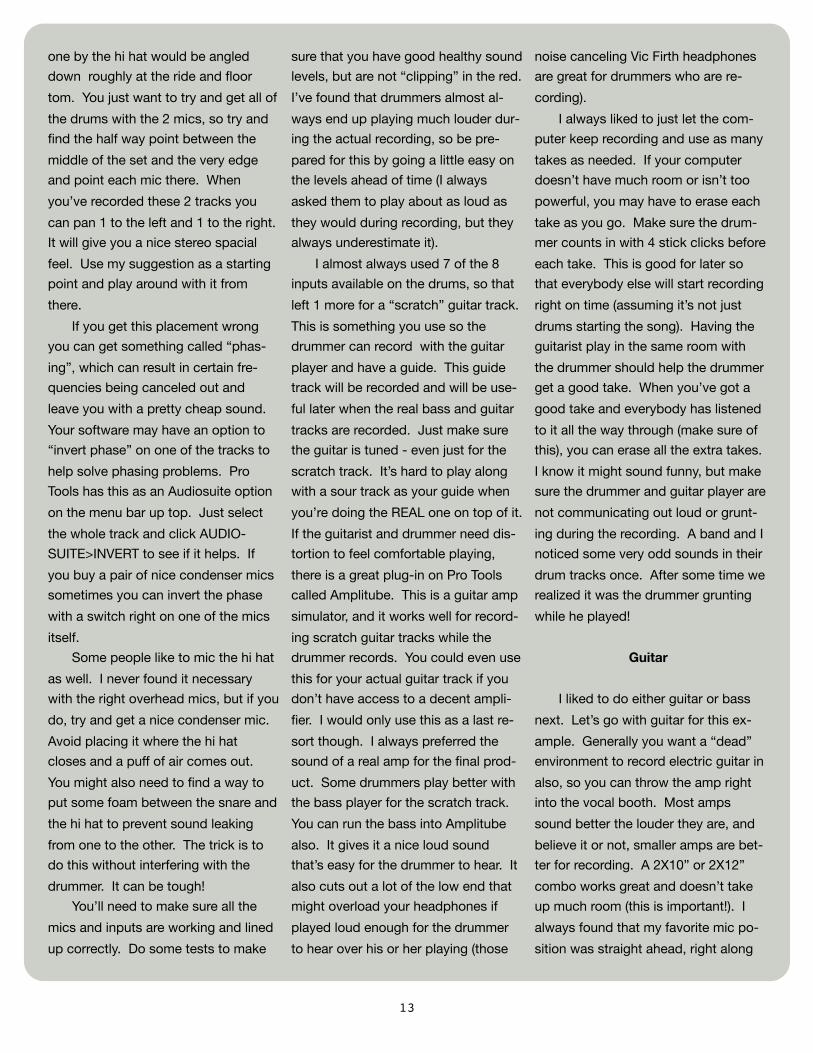
one by the hi hat would be angled
down roughly at the ride and floor
tom. You just want to try and get all of
the drums with the 2 mics, so try and
find the half way point between the
middle of the set and the very edge
and point each mic there. When
you’ve recorded these 2 tracks you
can pan 1 to the left and 1 to the right.
It will give you a nice stereo spacial
feel. Use my suggestion as a starting
point and play around with it from
there.
If you get this placement wrong
you can get something called “phas-
ing”, which can result in certain fre-
quencies being canceled out and
leave you with a pretty cheap sound.
Your software may have an option to
“invert phase” on one of the tracks to
help solve phasing problems. Pro
Tools has this as an Audiosuite option
on the menu bar up top. Just select
the whole track and click AUDIO-
SUITE>INVERT to see if it helps. If
you buy a pair of nice condenser mics
sometimes you can invert the phase
with a switch right on one of the mics
itself.
Some people like to mic the hi hat
as well. I never found it necessary
with the right overhead mics, but if you
do, try and get a nice condenser mic.
Avoid placing it where the hi hat
closes and a puff of air comes out.
You might also need to find a way to
put some foam between the snare and
the hi hat to prevent sound leaking
from one to the other. The trick is to
do this without interfering with the
drummer. It can be tough!
You’ll need to make sure all the
mics and inputs are working and lined
up correctly. Do some tests to make
sure that you have good healthy sound
levels, but are not “clipping” in the red.
I’ve found that drummers almost al-
ways end up playing much louder dur-
ing the actual recording, so be pre-
pared for this by going a little easy on
the levels ahead of time (I always
asked them to play about as loud as
they would during recording, but they
always underestimate it).
I almost always used 7 of the 8
inputs available on the drums, so that
left 1 more for a “scratch” guitar track.
This is something you use so the
drummer can record with the guitar
player and have a guide. This guide
track will be recorded and will be use-
ful later when the real bass and guitar
tracks are recorded. Just make sure
the guitar is tuned - even just for the
scratch track. It’s hard to play along
with a sour track as your guide when
you’re doing the REAL one on top of it.
If the guitarist and drummer need dis-
tortion to feel comfortable playing,
there is a great plug-in on Pro Tools
called Amplitube. This is a guitar amp
simulator, and it works well for record-
ing scratch guitar tracks while the
drummer records. You could even use
this for your actual guitar track if you
don’t have access to a decent ampli-
fier. I would only use this as a last re-
sort though. I always preferred the
sound of a real amp for the final prod-
uct. Some drummers play better with
the bass player for the scratch track.
You can run the bass into Amplitube
also. It gives it a nice loud sound
that’s easy for the drummer to hear. It
also cuts out a lot of the low end that
might overload your headphones if
played loud enough for the drummer
to hear over his or her playing (those
noise canceling Vic Firth headphones
are great for drummers who are re-
cording).
I always liked to just let the com-
puter keep recording and use as many
takes as needed. If your computer
doesn’t have much room or isn’t too
powerful, you may have to erase each
take as you go. Make sure the drum-
mer counts in with 4 stick clicks before
each take. This is good for later so
that everybody else will start recording
right on time (assuming it’s not just
drums starting the song). Having the
guitarist play in the same room with
the drummer should help the drummer
get a good take. When you’ve got a
good take and everybody has listened
to it all the way through (make sure of
this), you can erase all the extra takes.
I know it might sound funny, but make
sure the drummer and guitar player are
not communicating out loud or grunt-
ing during the recording. A band and I
noticed some very odd sounds in their
drum tracks once. After some time we
realized it was the drummer grunting
while he played!
Guitar
I liked to do either guitar or bass
next. Let’s go with guitar for this ex-
ample. Generally you want a “dead”
environment to record electric guitar in
also, so you can throw the amp right
into the vocal booth. Most amps
sound better the louder they are, and
believe it or not, smaller amps are bet-
ter for recording. A 2X10” or 2X12”
combo works great and doesn’t take
up much room (this is important!). I
always found that my favorite mic po-
sition was straight ahead, right along
13
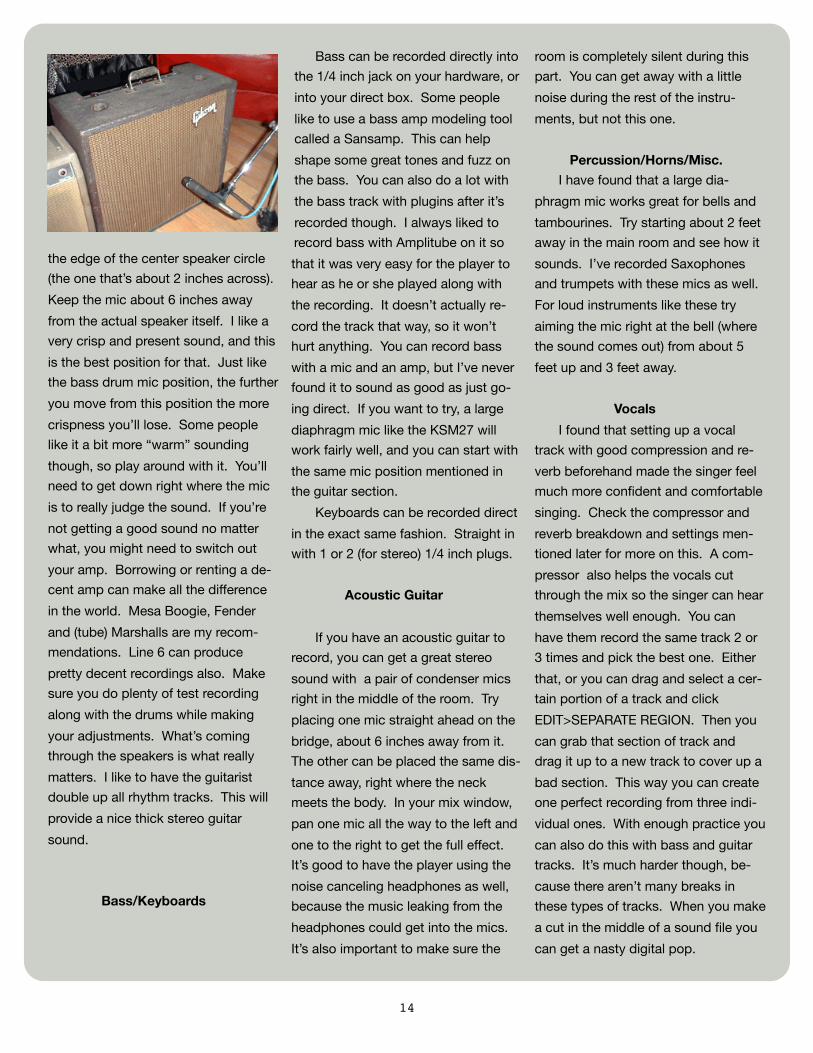
the edge of the center speaker circle
(the one that’s about 2 inches across).
Keep the mic about 6 inches away
from the actual speaker itself. I like a
very crisp and present sound, and this
is the best position for that. Just like
the bass drum mic position, the further
you move from this position the more
crispness you’ll lose. Some people
like it a bit more “warm” sounding
though, so play around with it. You’ll
need to get down right where the mic
is to really judge the sound. If you’re
not getting a good sound no matter
what, you might need to switch out
your amp. Borrowing or renting a de-
cent amp can make all the difference
in the world. Mesa Boogie, Fender
and (tube) Marshalls are my recom-
mendations. Line 6 can produce
pretty decent recordings also. Make
sure you do plenty of test recording
along with the drums while making
your adjustments. What’s coming
through the speakers is what really
matters. I like to have the guitarist
double up all rhythm tracks. This will
provide a nice thick stereo guitar
sound.
Bass/Keyboards
Bass can be recorded directly into
the 1/4 inch jack on your hardware, or
into your direct box. Some people
like to use a bass amp modeling tool
called a Sansamp. This can help
shape some great tones and fuzz on
the bass. You can also do a lot with
the bass track with plugins after it’s
recorded though. I always liked to
record bass with Amplitube on it so
that it was very easy for the player to
hear as he or she played along with
the recording. It doesn’t actually re-
cord the track that way, so it won’t
hurt anything. You can record bass
with a mic and an amp, but I’ve never
found it to sound as good as just go-
ing direct. If you want to try, a large
diaphragm mic like the KSM27 will
work fairly well, and you can start with
the same mic position mentioned in
the guitar section.
Keyboards can be recorded direct
in the exact same fashion. Straight in
with 1 or 2 (for stereo) 1/4 inch plugs.
Acoustic Guitar
If you have an acoustic guitar to
record, you can get a great stereo
sound with a pair of condenser mics
right in the middle of the room. Try
placing one mic straight ahead on the
bridge, about 6 inches away from it.
The other can be placed the same dis-
tance away, right where the neck
meets the body. In your mix window,
pan one mic all the way to the left and
one to the right to get the full effect.
It’s good to have the player using the
noise canceling headphones as well,
because the music leaking from the
headphones could get into the mics.
It’s also important to make sure the
room is completely silent during this
part. You can get away with a little
noise during the rest of the instru-
ments, but not this one.
Percussion/Horns/Misc.
I have found that a large dia-
phragm mic works great for bells and
tambourines. Try starting about 2 feet
away in the main room and see how it
sounds. I’ve recorded Saxophones
and trumpets with these mics as well.
For loud instruments like these try
aiming the mic right at the bell (where
the sound comes out) from about 5
feet up and 3 feet away.
Vocals
I found that setting up a vocal
track with good compression and re-
verb beforehand made the singer feel
much more confident and comfortable
singing. Check the compressor and
reverb breakdown and settings men-
tioned later for more on this. A com-
pressor also helps the vocals cut
through the mix so the singer can hear
themselves well enough. You can
have them record the same track 2 or
3 times and pick the best one. Either
that, or you can drag and select a cer-
tain portion of a track and click
EDIT>SEPARATE REGION. Then you
can grab that section of track and
drag it up to a new track to cover up a
bad section. This way you can create
one perfect recording from three indi-
vidual ones. With enough practice you
can also do this with bass and guitar
tracks. It’s much harder though, be-
cause there aren’t many breaks in
these types of tracks. When you make
a cut in the middle of a sound file you
can get a nasty digital pop.
14
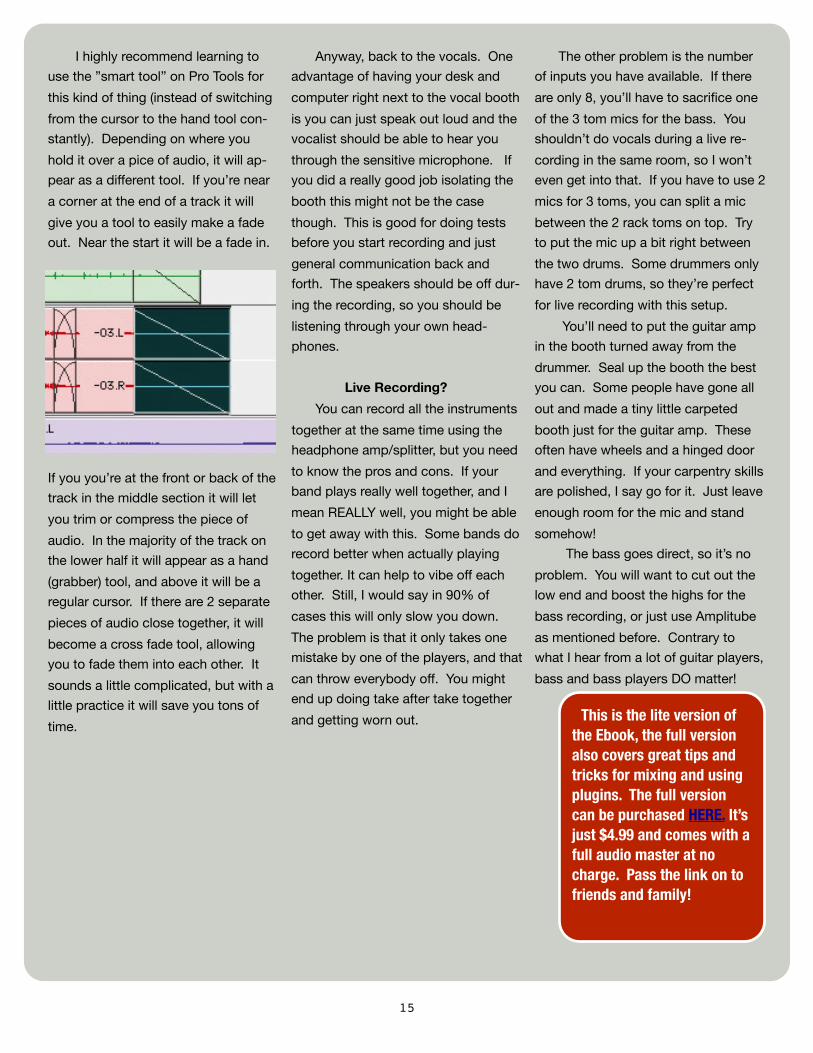
I highly recommend learning to
use the ”smart tool” on Pro Tools for
this kind of thing (instead of switching
from the cursor to the hand tool con-
stantly). Depending on where you
hold it over a pice of audio, it will ap-
pear as a different tool. If you’re near
a corner at the end of a track it will
give you a tool to easily make a fade
out. Near the start it will be a fade in.
If you you’re at the front or back of the
track in the middle section it will let
you trim or compress the piece of
audio. In the majority of the track on
the lower half it will appear as a hand
(grabber) tool, and above it will be a
regular cursor. If there are 2 separate
pieces of audio close together, it will
become a cross fade tool, allowing
you to fade them into each other. It
sounds a little complicated, but with a
little practice it will save you tons of
time.
Anyway, back to the vocals. One
advantage of having your desk and
computer right next to the vocal booth
is you can just speak out loud and the
vocalist should be able to hear you
through the sensitive microphone. If
you did a really good job isolating the
booth this might not be the case
though. This is good for doing tests
before you start recording and just
general communication back and
forth. The speakers should be off dur-
ing the recording, so you should be
listening through your own head-
phones.
Live Recording?
You can record all the instruments
together at the same time using the
headphone amp/splitter, but you need
to know the pros and cons. If your
band plays really well together, and I
mean REALLY well, you might be able
to get away with this. Some bands do
record better when actually playing
together. It can help to vibe off each
other. Still, I would say in 90% of
cases this will only slow you down.
The problem is that it only takes one
mistake by one of the players, and that
can throw everybody off. You might
end up doing take after take together
and getting worn out.
The other problem is the number
of inputs you have available. If there
are only 8, you’ll have to sacrifice one
of the 3 tom mics for the bass. You
shouldn’t do vocals during a live re-
cording in the same room, so I won’t
even get into that. If you have to use 2
mics for 3 toms, you can split a mic
between the 2 rack toms on top. Try
to put the mic up a bit right between
the two drums. Some drummers only
have 2 tom drums, so they’re perfect
for live recording with this setup.
You’ll need to put the guitar amp
in the booth turned away from the
drummer. Seal up the booth the best
you can. Some people have gone all
out and made a tiny little carpeted
booth just for the guitar amp. These
often have wheels and a hinged door
and everything. If your carpentry skills
are polished, I say go for it. Just leave
enough room for the mic and stand
somehow!
The bass goes direct, so it’s no
problem. You will want to cut out the
low end and boost the highs for the
bass recording, or just use Amplitube
as mentioned before. Contrary to
what I hear from a lot of guitar players,
bass and bass players DO matter!
This is the lite version of the Ebook, the full version also covers great tips and tricks for mixing and using plugins. The full version can be purchased HERE. It’s just $4.99 and comes with a full audio master at no charge. Pass the link on to friends and family!
15
MASTERINGThe final stage in the music making process, and in many ways the most crucial!
Mastering is the final stage of the
music making process. If you kept
your master track levels below the red,
your mix should be at a pretty low vol-
ume. Mastering will bring it up to a
“normal” level. Before mastering, to
test next to a comparable professional
song, just turn your mix up to com-
pensate for the volume difference.
Mastering really is an art, and it
can do wonders for your music. You’d
be amazed how much better an al-
ready great sounding mix can turn out
in the hands of an experienced mas-
tering engineer. Some people try to do
it themselves, but audio professionals
have always said it’s best to let a pair
of fresh unbiased ears finish off your
project for the best results. Even the
top mastering engineers in the world
very often give their own music to an-
other engineer to master!
Obviously I’m going to be biased,
being a mastering engineer myself. At
this point I have worked with hundreds
of artists from around the world. If you
want to hear the difference mas-
tering can make on your own music,
we'll be happy to show you what we
can do at no charge. You can send
your song in online and we’ll get you a
before-and-after clip of your song
back.
For a quick example, you can up-
load your song in any format to:
http://lastdropmastering.com/
If you have a pressing project
waiting and need your sample back
asap, please let Martin know. Please,
serious inquiries only:
If it's a WAV or AIFF file, be pa-
tient. Uploading can take a while, but
nothing compared to regular mail.
For testimonials, samples (before and after) and general info about Last Drop Mastering please click:
http://www.lastdropmastering.
Client list is buried in the blogs section.
For info on how to submit a free test master or a paid project, please click:
http://www.lastdropmastering.
For inquiries about rates, please click:
http://www.lastdropmastering
16
Mastering makes the ladies
go crazy!!
Questions? Feedback?We’d love to here from you. Please
feel free to contact our intern Martin:
Nathan Allen and Last Drop Mastering
shall personally be held responsible for
any and all face-melting recordings as
a direct result of this informative guide.
Special Thanks:
Jon RischJinx Chin - http://jinxchin.comLinda AllenNicole KearChris Allen
LAST DROP MASTERING639 Geary St 1102
San Francisco, CA
94102
Copyright 2008. All rights reserved.
PCPro Tools LE 7.4 for Windows XP and Vista has the following system requirements:
Installation Requirements
* DVD drive required for Pro Tools LE 7.4 installation DVD * Not required for Download-only Pro Tools LE 7.4 installation
Pro Tools LE Audio Interface RequiredPro Tools LE 7.4 supports the following Digidesign audio devices:
* 003 * 003 Rack * Digi 002 * Digi 002 Rack * Mbox 2 Pro * Mbox 2 * Mbox 2 Mini * Mbox 2 Micro * Mbox
Pro Tools LE 7.4 software will not launch without one of the above Digidesign Pro Tools LE hardware in-terfaces connected. Please note:
* Pro Tools LE supports the use of any single Pro Tools LE audio interface * Simultaneous use of multiple Pro Tools LE hardware devices is not sup-ported
Maximum Sample Rate:
* 003, 003 Rack, Digi 002, Digi 002 Rack, Mbox 2 Pro - 96 kHz * Mbox 2, Mbox 2 Mini, Mbox 2 Mi-cro, Mbox - 48 kHz
System Software
PRO TOOLS SYSTEM REQUIREMENTS
* Windows Vista Business or Ultimate Edition o 32-bit OS Installation Only * Windows XP Professional or Home Edition o With Windows XP Service Pack 2 or Service Pack 3
* Not Supported: o Windows Vista 64-bit (any ver-sion) o Windows XP Professional x64 Edition o Windows XP Media Center Edition o Windows 98, Me, 2000, NT, 95, 3.1, DOS
* Not Tested: o Windows Vista Home and Home Premium Edition o Although Windows Vista Home and Home Premium Edition have not been tested or qualified by Digidesign, there are currently no known issues with Vista Home and Home Premium 32-bit operating systems and Pro Tools LE 7.4 compared to the supported Windows Vista Business or Ultimate Edition operating systems.
Windows Vista SP1There are currently no known issues with Service Pack 1 for Windows Vista based on our initial limited testing and customer feedback. Although full quali-fication with all Digidesign products has not been completed, we do not recommend against updating to SP1, given the number of important overall system fixes in SP1. We do recom-mend that you backup your system and create a restore point before up-dating to SP1, should you encounter
any problems after installing the up-date.
Total System RAM
* 1GB minimum required for Pro Tools LE 7.4 - More Recommended * More RAM increases overall sys-tem and Pro Tools performance * Refer to motherboard manufac-turer for supported RAM version
More RAM highly recommended for sessions with:
* Large amounts of audio * High edit density * Large DigiBase databases * A large number of installed plug-ins * Options like DigiTranslator * Elastic Time enabled on multiple tracks * Simultaneous use with other appli-cations
Note that maximum track count may vary depending on CPU, OS, number of edits, drives, or other factors. See additional requirements for DV Tookit 2 & Music Production Toolkit options at the bottom of this page.
Audio Record/Playback Drive Re-quirementsPlease see the following for formatting and compatibility information:
* Hard Drive Requirements - Pro Tools LE for Windows
Please Note: FAT32 Volumes Not Supported for Recording with Pro Tools 7.4 and Higher for Windows
* Pro Tools 7.3.x is the last version of Pro Tools that supports FAT32 for Recording. * Pro Tools 7.4 and higher for Win-dows XP and Windows Vista do not support FAT32 for recording, but will
17
continue to support FAT32 formatted volumes for Playback and Transfer.
FireWire Connections
* Qualified FireWire/1394 HBA Cards for Windows
Compatible with Pro Tools LE 7.4 for Windows
* FWx Record/Playback Option for VENUE D-Show Systems * Control Surfaces: o C|24 o Command|8 o Control|24 o Mackie Designs HUI o CM Labs MotorMix * Avid Mojo SDI o Avid Mojo/Mojo SDI & Pro Tools 7.4 Requirements for Windows XP o Avid Vide Peripherals are cur-rently not compatible with the Win-dows Vista operating system. * Avid Media Composer 3.0 Co-installation with Pro Tools o Pro Tools LE 7.4 for Windows XP only o Mbox 2 Family only
Additional Requirements
Monitor & Graphics
* Minimum screen resolution of 1024 x 768 * Dedicated Graphics Controller Re-quired * 17" or larger monitor recom-mended if using external monitor
Performance Guidelines
* Recording to the system startup drive is not recommended or supported * Although limited recording and playback of audio tracks may be pos-sible using the startup drive, one or more separate 7200 rpm dedicated
audio hard drive(s) required for maxi-mum performance and track count * Dual processor machines may need to have network cards disabled for best performance
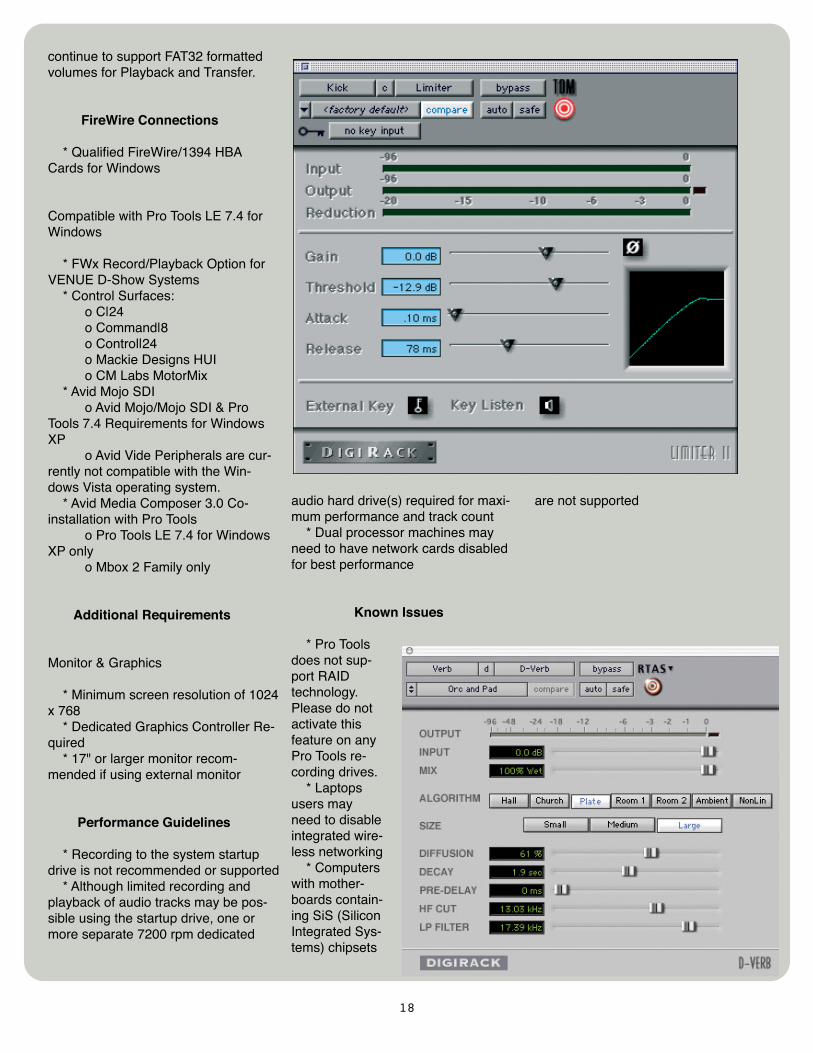
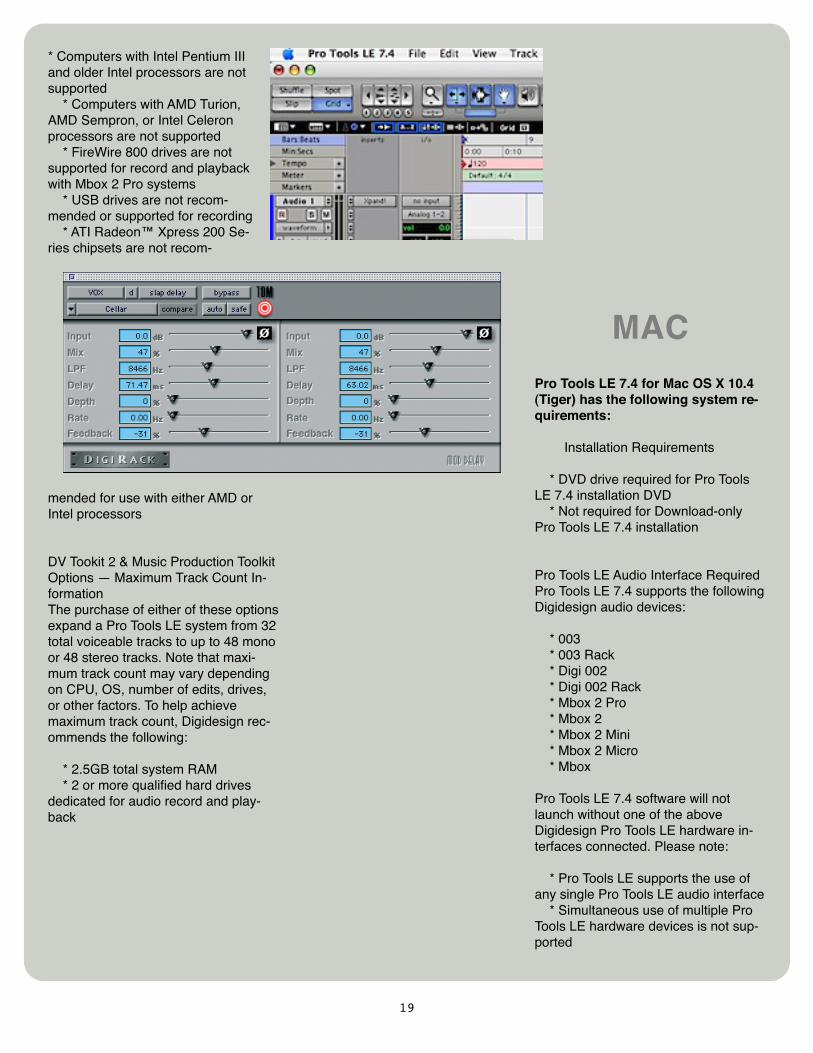
Known Issues
* Pro Tools does not sup-port RAID technology. Please do not activate this feature on any Pro Tools re-cording drives. * Laptops users may need to disable integrated wire-less networking * Computers with mother-boards contain-ing SiS (Silicon Integrated Sys-tems) chipsets
are not supported
18
* Computers with Intel Pentium III and older Intel processors are not supported * Computers with AMD Turion, AMD Sempron, or Intel Celeron processors are not supported * FireWire 800 drives are not supported for record and playback with Mbox 2 Pro systems * USB drives are not recom-mended or supported for recording * ATI Radeon™ Xpress 200 Se-ries chipsets are not recom-
mended for use with either AMD or Intel processors
DV Tookit 2 & Music Production Toolkit Options — Maximum Track Count In-formationThe purchase of either of these options expand a Pro Tools LE system from 32 total voiceable tracks to up to 48 mono or 48 stereo tracks. Note that maxi-mum track count may vary depending on CPU, OS, number of edits, drives, or other factors. To help achieve maximum track count, Digidesign rec-ommends the following:
* 2.5GB total system RAM * 2 or more qualified hard drives dedicated for audio record and play-back
MACPro Tools LE 7.4 for Mac OS X 10.4 (Tiger) has the following system re-quirements:
Installation Requirements
* DVD drive required for Pro Tools LE 7.4 installation DVD * Not required for Download-only Pro Tools LE 7.4 installation
Pro Tools LE Audio Interface RequiredPro Tools LE 7.4 supports the following Digidesign audio devices:
* 003 * 003 Rack * Digi 002 * Digi 002 Rack * Mbox 2 Pro * Mbox 2 * Mbox 2 Mini * Mbox 2 Micro * Mbox
Pro Tools LE 7.4 software will not launch without one of the above Digidesign Pro Tools LE hardware in-terfaces connected. Please note:
* Pro Tools LE supports the use of any single Pro Tools LE audio interface * Simultaneous use of multiple Pro Tools LE hardware devices is not sup-ported
19
Maximum Sample Rate:
* 003, 003 Rack, Digi 002, Digi 002 Rack, Mbox 2 Pro - 96 kHz * Mbox 2, Mbox 2 Mini, Mbox 2 Mi-cro, Mbox - 48 kHz
Supported Apple ComputersPlease view the individual compatibility pages for additional requirements with your Digidesign hardware and each Apple computer model in the Support section of the website (choose Pro Tools LE 7.4 Mac from the Pro Tools LE category). Pro Tools LE 7.4 for Mac OS X 10.4 (Tiger) is qualified with the following:
Apple Intel-based Computers Sup-ported with Pro Tools LE 7.4
* Mac Pro * MacBook Pro * MacBook * iMac (Intel) * Mac mini (Intel)
Newer models that ship with Mac OS X 10.5 (Leopard) pre-installed are not compatible with Pro Tools LE 7.4 for Mac OS X 10.4 (Tiger). Pro Tools LE 7.4.2 (a free update for 7.4 owners) is required for systems running Leopard.
Apple PowerPC-based Computers Supported with Pro Tools LE 7.4
* Power Mac G5 PCIe * Power Mac G5 PCI * Power Mac G4 * iMac G5 * Mac mini (PPC) * PowerBook G4
Not Tested:
* iBook G4 * iMac G4
System Software — Mac OS X 10.4 (Tiger)
* Pro Tools LE 7.4 is officially sup-ported on Mac OS X 10.4.9
* Although Mac OS X 10.4.10 and 10.4.11 have not been tested or quali-fied by Digidesign, the only known is-sue at this time has to do with Pro Tools failure to launch in some cases due to improper prebinding. * Please see the following for impor-tant information: o Mac OS X Compatibility Infor-mation o If you have installed Mac OS X 10.4.9, 10.4.10, or 10.4.11, or if your computer came with Mac OS X 10.4.9 or 10.4.10 preinstalled, please down-load the Mac OS X Prebinding Script from that page if you experience failure of Pro Tools or other applications to launch. * There are reports that Mac OS X 10.4.11 may contain fixes for some of the Mbox 2 USB interface problems such as kernel panics on newer Intel-based Macs. * Pro Tools 7.x will not run on Mac OS X 10.3.9 and earlier
Pro Tools 7.4.2 Required for Mac OS X 10.5 (Leopard)Pro Tools LE 7.4 for Mac OS X 10.4 is not compatible with Mac OS X 10.5. Pro Tools LE 7.4.2 for Mac OS X 10.5 is a free update for Pro Tools LE 7.4 owners that adds compatibility with Leopard. For more information and links to downloads, please see the fol-lowing:
* Pro Tools 7.4.2 for Mac OS X 10.5.3 & 10.5.4 (Leopard)
Total System RAM
* 1GB minimum required for Pro Tools LE 7.4 - More Recommended * More RAM increases overall sys-tem and Pro Tools performance * Refer to motherboard manufac-turer for supported RAM version
More RAM highly recommended for sessions with:
* Large amounts of audio * High edit density * Large DigiBase databases
* A large number of installed plug-ins * Options like DigiTranslator * Elastic Time enabled on multiple tracks * Simultaneous use with other appli-cations
Note that maximum track count may vary depending on CPU, OS, number of edits, drives, or other factors. See additional requirements for DV Tookit 2 & Music Production Toolkit options at the bottom of this page.
Audio Record/Playback Drive Re-quirements
* Hard Drive Requirements - Pro Tools LE for Mac OS X
Compatible with Pro Tools LE 7.4 for Mac OS X
* FWx Record/Playback Option for VENUE D-Show Systems * Control Surfaces: o C|24 o Command|8 o Control|24 o Mackie Designs HUI o CM Labs MotorMix * Avid Mojo SDI * Avid Mojo
Additional Requirements
Monitor
* Minimum resolution of 1024 x 768 * 17" or larger recommended if using external monitor
Performance Guidelines
* Recording to the system startup drive is not recommended or supported * Although limited recording and playback of audio tracks may be pos-sible using the startup drive, one or more separate dedicated audio hard drive(s) is required for maximum per-formance and track count (7200 rpm or faster)
Known Issues
20
* Pro Tools does not support RAID technology. Please do not activate this feature on any Pro Tools recording drives. * USB drives are not recommended or supported for recording * Pro Tools Does Not Support Sleep Mode: o In the Mac OS X Apple Menu or Applications folder, open System Preferences. Launch Energy Saver, click the Sleep tab, and disable all Sleep features. Set "Put the computer to sleep when it is inactive" to Never. Do not manually put your computer to sleep when running Pro Tools.
DV Toolkit 2 & Music Production Toolkit Options — Maximum Track Count
The purchase of either of these options expand a Pro Tools LE system from 32 total voiceable tracks to up to 48 mono or 48 stereo tracks. Note that maxi-mum track count may vary depending
on CPU, OS, number of edits, drives, or other factors. To help achieve maximum track count, Digidesign rec-ommends the following:
* 2.5GB total system RAM * 2 or more qualified hard drives dedicated for audio record and play-back * Qualified Apple Power Mac G5 or Intel-based Mac computer with the fol-lowing processor requirements: o Intel Core 2 Duo processor o Intel Core Duo processor o Mac Pro (all models) o Dual or Quad processor Power Mac G5 (Power Mac G5 Dual 2GHz first generation model M9032 may not achieve maximum track count)
Although Pro Tools LE 7.4, DV Toolkit 2, and Music Production Toolkit options are compatible with Macs with G4 processors, please be advised that even with additional RAM and 2 quali-fied audio drives, maximum track count with these options is not supported on
any single or dual G4 processor Macs, or with single processor Power Mac G5 models.
Maximum Track Count with Mbox 2 Pro on MacBook ProTo help achieve maximum track count with DV Toolkit 2 or Music Production Toolkit when using the Mbox 2 Pro on the MacBook Pro, the following con-figuration is required:
* SIIG FireWire 2-Port ExpressCard (part number NN-EC2012-S1) * Connect the Mbox 2 Pro to the built-in MacBook Pro FireWire 400 port * Connect 2 or more qualified Fire-Wire 400 drives (daisy chained) to one of the ports on the SIIG FireWire 2-Port ExpressCard
21