Embed Size (px)
Citation preview
www.lasertools.co.uk
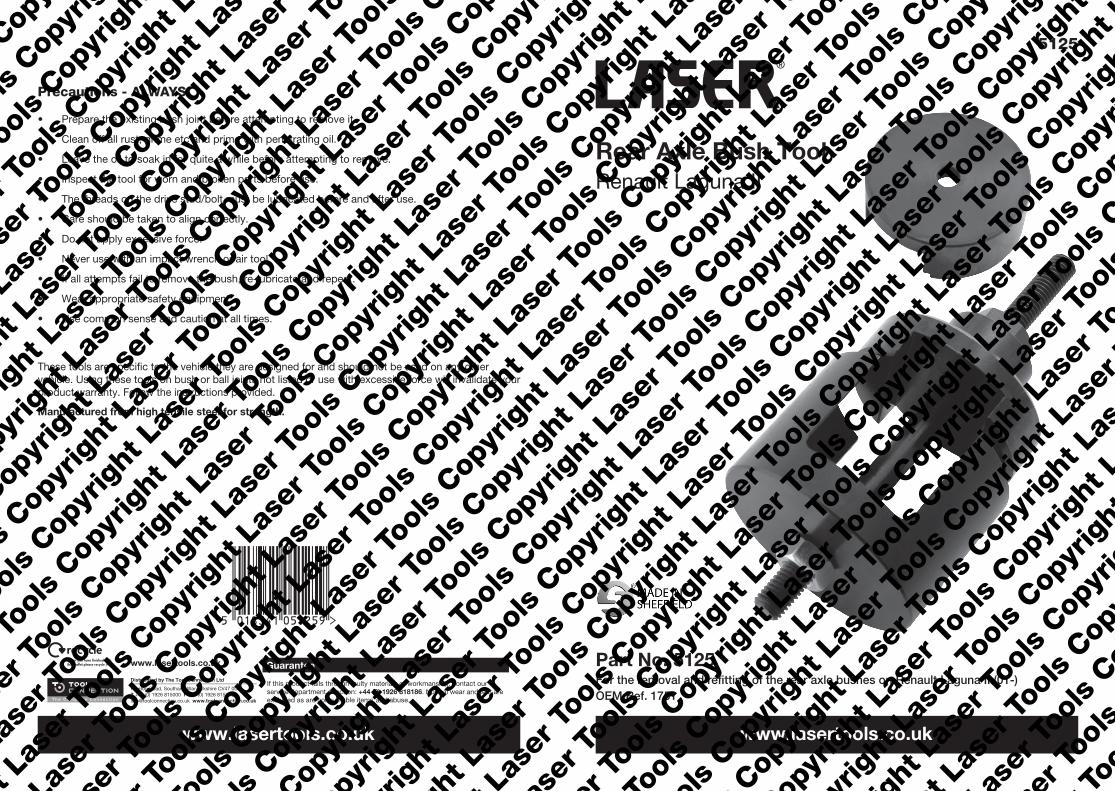
Part No. 4350 Rear Axle Bush Tool
Renault Laguna II
www.lasertools.co.uk
Part No. 5125For the removal and refi tting of the rear axle bushes on Renault Laguna II (01-)OEM Ref. 1751
Precautions - ALWAYS
• Prepare the existing bush joint before attempting to remove it.
• Clean off all rust, grime etc and prime with penetrating oil.
• Leave the oil to soak in for quite a while before attempting to remove.
• Inspect the tool for worn and broken parts before use.
• The threads on the drive stud/bolt must be lubricated before and after use.
• Care should be taken to align correctly.
• Do not apply excessive force.
• Never use with an impact wrench or air tool
• If all attempts fail to remove the bush, re-lubricate and repeat.
• Wear appropriate safety equipment.
• Use common sense and caution at all times.
These tools are specifi c to the vehicle they are designed for and should not be used on any other vehicle. Using these tools on bush or ball joints not listed or use with excessive force will invalidate your product warranty. Follow the instructions provided.
Manufactured from high tensile steel for strength.
5125
2 3
www.lasertools.co.uk www.lasertools.co.uk
Contents Instruction
Preparation:
• Ensure the vehicle is securely supported allowing access to both sides of the bushes
• Remove the brake pipe retaining plate, rear suspension damper fi xing bolts and the suspension bush retaining plates
• Clean area around the bush with a wire brush and spray with release agent
• Mark the positioning of the bush relative to the axle/sub-frame to ensure the new bush goes back in the same position
• Ensure the force screw and force screw nut with bearing are kept clean and well lubricated with Molybdenum type grease
DO NOT USE AIR TOOLS ON
THIS KIT.
ALWAYS WEAR GOGGLES
AND GLOVES.
LUBRICATE CENTRE SCREW AND
THRUST NUT BEARING BEFORE AND
AFTER USE.
NB: Due to the forces involved with this tool the force screw and nuts must be considered as consumable components with replacements available from your supplier
Instruction for use:
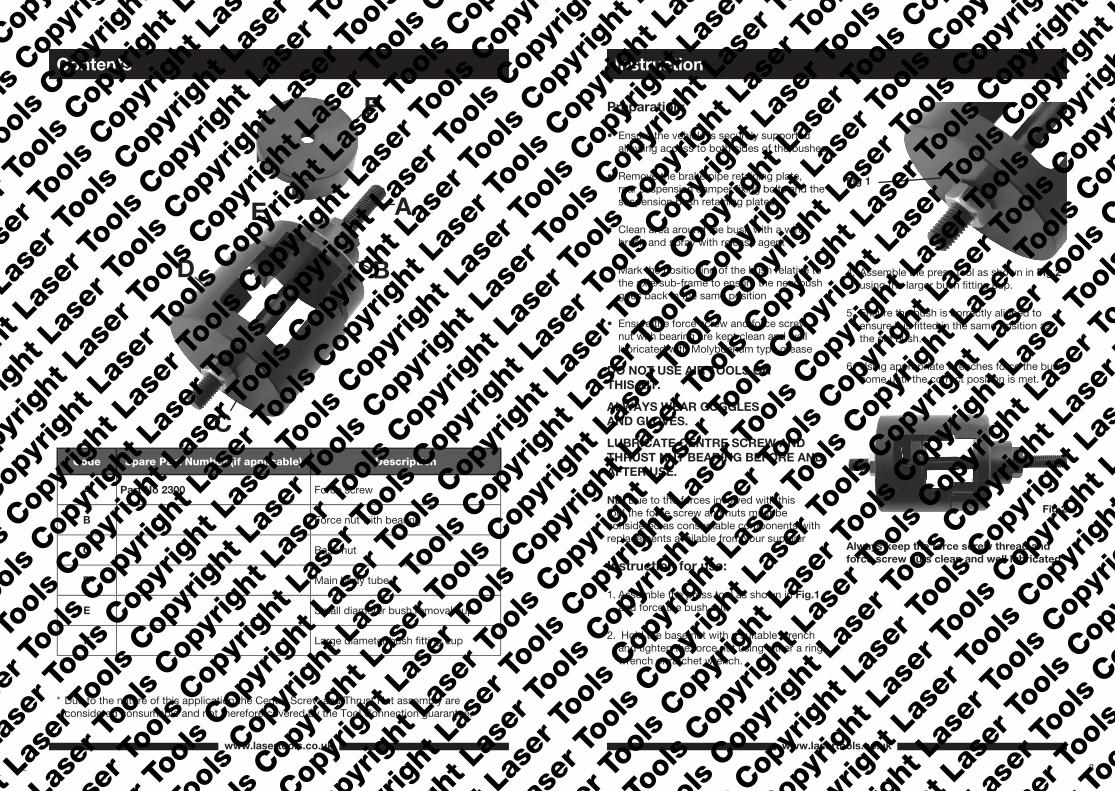
1. Assemble the press tool as shown in Fig.1 and force the bush out.
2. Hold the base nut with a suitable wrench and tighten the force nut using either a ring wrench or ratchet wrench.
Code Spare Part Number (if applicable) Description
A Part No 2300 Force screw
B Force nut with bearing
C Base nut
D Main body tube
E Small diameter bush removal cup
F Large diameter bush fi tting cup
* Due to the nature of this application the Centre Screw and Thrust Nut assembly are considered consumable and not therefore covered by the Tool Connection guarantee.
A
BD
E
F
Fig 1
4. Assemble the press tool as shown in Fig 2 using the larger bush fi tting cup.
5. Ensure the bush is correctly aligned to ensure it is fi tted in the same position as the old bush.
6. Using appropriate wrenches force the bush home until the correct position is met.
Always keep the force screw thread and
force screw nuts clean and well lubricated
Fig 2
C