Embed Size (px)
Citation preview

RealView® DebuggerVersion 4.1
Command Line Reference Guide
Copyright © 2002-2011 ARM. All rights reserved.ARM DUI 0175N (ID052111)

RealView DebuggerCommand Line Reference Guide
Copyright © 2002-2011 ARM. All rights reserved.
Release Information
The following changes have been made to this document.
Proprietary Notice
Words and logos marked with ® or ™ are registered trademarks or trademarks of ARM in the EU and other countries, except as otherwise stated below in this proprietary notice. Other brands and names mentioned herein may be the trademarks of their respective owners.
Neither the whole nor any part of the information contained in, or the product described in, this document may be adapted or reproduced in any material form except with the prior written permission of the copyright holder.
The product described in this document is subject to continuous developments and improvements. All particulars of the product and its use contained in this document are given by ARM in good faith. However, all warranties implied or expressed, including but not limited to implied warranties of merchantability, or fitness for purpose, are excluded.
This document is intended only to assist the reader in the use of the product. ARM shall not be liable for any loss or damage arising from the use of any information in this document, or any error or omission in such information, or any incorrect use of the product.
Where the term ARM is used it means “ARM or any of its subsidiaries as appropriate”.
Confidentiality Status
This document is Non-Confidential. The right to use, copy and disclose this document may be subject to license restrictions in accordance with the terms of the agreement entered into by ARM and the party that ARM delivered this document to.
Product Status
The information in this document is final, that is for a developed product.
Change History
Date Issue Confidentiality Change
April 2002 A Non-Confidential Release v1.5
September 2002 B Non-Confidential Release v1.6
February 2003 C Non-Confidential Release v1.6.1
September 2003 D Non-Confidential Release v1.6.1 for RealView Developer Suite v2.0
January 2004 E Non-Confidential Release v1.7 for RealView Developer Suite v2.1
December 2004 F Non-Confidential Release v1.8 for RealView Developer Suite v2.2
May 2005 G Non-Confidential Release v1.8 SP1 for RealView Developer Suite v2.2 SP1
March 2006 H Non-Confidential Release v3.0 for RealView Development Suite v3.0
March 2007 I Non-Confidential Release v3.1 for RealView Development Suite v3.1
September 2008 J Non-Confidential Release v4.0 for RealView Development Suite v4.0
27 March 2009 K Non-Confidential Release v4.0 SP1 for RealView Development Suite v4.0
28 May 2010 L Non-Confidential Release 4.1 for RealView Development Suite v4.1
30 September 2010 M Non-Confidential Release 4.1 SP1 for RealView Development Suite v4.1 SP1
31 May 2011 N Non-Confidential Release 4.1 SP2 for RealView Development Suite v4.1 SP2
ARM DUI 0175N Copyright © 2002-2011 ARM. All rights reserved. iiID052111 Non-Confidential

Web Address
http://www.arm.com
ARM DUI 0175N Copyright © 2002-2011 ARM. All rights reserved. iiiID052111 Non-Confidential

ARM DUI 0175N Copyright © 2002-2011 ARM. All rights reserved. ivID052111 Non-Confidential
ContentsRealView Debugger Command Line Reference Guide
PrefaceAbout this book ........................................................................................................... viFeedback .................................................................................................................... ix
Chapter 1 Working with the CLI1.1 General command language syntax ........................................................................ 1-21.2 Window and file numbers ........................................................................................ 1-51.3 Using expressions and statements .......................................................................... 1-61.4 Command scripts ..................................................................................................... 1-71.5 Macro language ..................................................................................................... 1-101.6 Constructing expressions ...................................................................................... 1-141.7 Using variables in the debugger ............................................................................ 1-281.8 Source patching with macros ................................................................................. 1-35
Chapter 2 RealView Debugger Commands2.1 Command syntax definition ..................................................................................... 2-22.2 Debugger commands listed by function ................................................................... 2-32.3 Alphabetical command reference .......................................................................... 2-12
Chapter 3 RealView Debugger Predefined Macros3.1 Predefined macros listed by function ....................................................................... 3-23.2 Alphabetical predefined macro reference ................................................................ 3-6
Chapter 4 RealView Debugger Keywords4.1 Keywords listed by function ..................................................................................... 4-24.2 Alphabetical keyword reference ............................................................................... 4-4

Preface
This preface introduces the RealView® Debugger Command Line Reference Guide. It contains the following sections:• About this book on page vi• Feedback on page ix.
ARM DUI 0175N Copyright © 2002-2011 ARM. All rights reserved. vID052111 Non-Confidential

Preface
About this bookThis book describes the RealView Debugger Command-Line Interface (CLI) commands, macros, and keywords.You can control RealView Debugger by using either its Graphical User Interface (GUI) or its CLI.
Intended audience
This book is written for developers who are using RealView Debugger to debug software written to run on ARM architecture-targeted development projects. It assumes that you are a software developer who is familiar with command-line tools. It does not assume that you are familiar with RealView Debugger.
Using this book
This book is organized into the following parts and chapters:
Chapter 1 Working with the CLI Read this chapter for an introduction to the RealView Debugger CLI.
Chapter 2 RealView Debugger Commands Read this chapter for a detailed description of the RealView Debugger CLI commands.
Chapter 3 RealView Debugger Predefined Macros Read this chapter for a detailed description of the RealView Debugger predefined macros.
Chapter 4 RealView Debugger Keywords Read this chapter for a detailed description of the RealView Debugger keywords.
Typographical conventions
The typographical conventions are:
italic Highlights important notes, introduces special terminology, denotes internal cross-references, and citations.
bold Highlights interface elements, such as menu names. Denotes signal names. Also used for terms in descriptive lists, where appropriate.
monospace Denotes text that can be entered at the keyboard, such as commands, file and program names, and source code.
monospace Denotes a permitted abbreviation for a command or option. The underlined text can be entered instead of the full command or option name.
monospace italic Denotes arguments to commands and functions where the argument is to be replaced by a specific value.
monospace bold Denotes language keywords when used outside example code.
Further reading
This section lists publications by ARM and by third parties.
See also:• Infocenter, http://infocenter.arm.com for access to ARM documentation.
ARM DUI 0175N Copyright © 2002-2011 ARM. All rights reserved. viID052111 Non-Confidential

Preface
• ARM web site , http://www.arm.com for current errata, addenda, and Frequently Asked Questions.
• ARM Glossary, http://infocenter.arm.com/help/topic/com.arm.doc.aeg0014-/index.html, for a list of terms and acronyms specific to ARM.
ARM publications
This book contains information that is specific to this product. See the following documents for other relevant information:• RealView Debugger Essentials Guide (ARM DUI 0181)• RealView Debugger User Guide (ARM DUI 0153)• RealView Debugger Target Configuration Guide (ARM DUI 0182).• RealView Debugger Trace User Guide (ARM DUI 0322)• RealView Debugger RTOS Guide (ARM DUI 0323).
For details on using the compilation tools, see the books in the ARM Compiler toolchain documentation.
For details on using RealView ARMulator® ISS, see the following documentation:• RealView ARMulator ISS User Guide (ARM DUI 0207).
For general information on software interfaces and standards supported by ARM tools, see install_directory\Documentation\Specifications\....
See the following documentation for information relating to the ARM debug interfaces suitable for use with RealView Debugger:
• ARM DSTREAM Setting Up the Hardware (ARM DUI 0481)
• ARM DSTREAM System and Interface Design Reference (ARM DUI 0499)
• ARM DSTREAM and RVI Using the Debug Hardware Configuration Utilities (ARM DUI 0498)
• ARM RVI and RVT Setting Up the Hardware (ARM DUI 0515)
• ARM RVI and RVT System and Interface Design Reference (ARM DUI 0517).
See the datasheet or Technical Reference Manual for your hardware.
For details on ARM architectures, see:
• ARMv6-M Architecture Reference Manual (ARM DDI 0419)
• ARMv7-M Architecture Reference Manual (ARM DDI 0403)
• ARM Architecture Reference Manual, ARMv7-A and ARMv7-R edition (ARM DDI 0406).
Other publications
For a comprehensive introduction to ARM architecture see:
Steve Furber, ARM System-on-Chip Architecture, Second Edition, 2000, Addison Wesley, ISBN 0-201-67519-6.
For a detailed introduction to regular expressions, as used in the RealView Debugger search and pattern matching tools, see:
ARM DUI 0175N Copyright © 2002-2011 ARM. All rights reserved. viiID052111 Non-Confidential

Preface
Jeffrey E. F. Friedl, Mastering Regular Expressions, Powerful Techniques for Perl and Other Tools, 1997, O'Reilly & Associates, Inc. ISBN 1-56592-257-3.
For the definitive guide to the C programming language, on which the RealView Debugger macro and expression language is based, see:
Brian W. Kernighan, Dennis M. Ritchie, The C Programming Language, second edition, 1989, Prentice-Hall, ISBN 0-13-110362-8.
For more information about IEEE Std. 1149.1 (JTAG), see:
IEEE Standard Test Access Port and Boundary Scan Architecture (IEEE Std. 1149.1), available from the IEEE (www.ieee.org).
ARM DUI 0175N Copyright © 2002-2011 ARM. All rights reserved. viiiID052111 Non-Confidential

Preface
FeedbackARM welcomes feedback on this product and its documentation.
Feedback on this product
If you have any problems with this product, submit a Software Problem Report:
1. Select Help → Send a Problem Report... from the Code window main menu.
2. Complete all sections of the Software Problem Report.
3. To get a rapid and useful response, give:• a small standalone sample of code that reproduces the problem, if applicable• a clear explanation of what you expected to happen, and what actually happened• the commands you used, including any command-line options• sample output illustrating the problem.
4. E-mail the report to your supplier.
Feedback on this book
If you have comments on content then send an e-mail to [email protected]. Give:• the title• the number, ARM DUI 0175N• the page numbers to which your comments apply• a concise explanation of your comments.
ARM also welcomes general suggestions for additions and improvements.
ARM DUI 0175N Copyright © 2002-2011 ARM. All rights reserved. ixID052111 Non-Confidential

Chapter 1 Working with the CLI
This chapter introduces the RealView® Debugger Command-Line Interface (CLI). It contains the following sections:• General command language syntax on page 1-2• Window and file numbers on page 1-5• Using expressions and statements on page 1-6• Command scripts on page 1-7• Macro language on page 1-10• Constructing expressions on page 1-14• Using variables in the debugger on page 1-28• Source patching with macros on page 1-35.
ARM DUI 0175N Copyright © 2002-2011 ARM. All rights reserved. 1-1ID052111 Non-Confidential

Working with the CLI
1.1 General command language syntaxThe following sections describe the general syntax conventions that are supported by the RealView Debugger CLI:• General syntax rules• Command qualifiers and flags• Command parameters on page 1-3• Abbreviations on page 1-4.
1.1.1 General syntax rules
The commands you submit to the debugger must conform to the following rules:
• Each command line can contain only one debugger command.
• If you refer to a symbol, then you must use the same case that the symbol has in the symbol table. Therefore, variables you create with the ADD command and user-defined macros you create are case sensitive.
• A command line can be up to 4095 characters in length.
1.1.2 Command qualifiers and flags
Many commands accept flags, qualifiers, and parameters, using the following syntax:
COMMAND [,qualifier | /flag] [parameter]...
If a command qualifier is present, it must appear after the command name and before any command parameters.
Qualifiers
You introduce each command qualifier with a punctuation character, as follows:
,qualifier A comma introduces a qualifier that provides the debugger with additional information on how to execute a command. For example, the command:DHELP,FULL =command_name
displays the full version instead of the summary version of its help text.
Flags
You introduce each command flag with a forward slash character, as follows:
/flag A flag is either one or two letters that acts as a switch.For example, some commands accept a size flag. Valid size flags are:8 bits Sets the size of some value or values to a byte.16 bits Sets the size of some value or values to a halfword.32 bits Sets the size of some value or values to a word.For an example of a command that accepts these qualifiers, see FILL on page 2-149.Where a command supports flags, the flags are described as part of the command syntax.
ARM DUI 0175N Copyright © 2002-2011 ARM. All rights reserved. 1-2ID052111 Non-Confidential

Working with the CLI
See also
• Chapter 2 RealView Debugger Commands.
1.1.3 Command parameters
As described in Command qualifiers and flags on page 1-2, commands accept flags, qualifiers, and parameters.
Command parameters are typically expressions that represent values or addresses to be used by a command. Parameters must be separated from each other with some form of punctuation. However, punctuation for the first parameter might be optional:
=text An equals sign introduces a text string when you have multiple parameters. It is not required for the first parameter. Depending on the command, this might specify:• a resource• a thread or process name• a number or string expression• an address or offset• a description• an instance• a location• a configuration.
;windowid | ;fileid A semicolon introduces a specification of where any output produced by the command is to be sent. If you supply a ;windowid or ;fileid parameter, it must be the final parameter of the command.
;macro-call A semicolon also introduces a specification of a macro to be called by the command. If you supply a ;macro-call parameter, it must be the final parameter of the command. You cannot use a ;windowid or ;fileid parameter with a ;macro-call parameter. If you want to send the output from the macro to a window or file, use the VMACRO command.
Rules for specifying command parameters
The parameters you supply to a RealView Debugger command must conform to the following rules:
• One or more spaces must separate command parameters from a command when there is no punctuation (for example, a /, ,, or =).
• If a parameter, for example a filename, includes spaces or other special characters, you must enclose it in double quotation marks ("..."), or single quotation marks ('...').
• In high-level mode, code addresses must be referenced by line numbers, labels, and function names, or casted values.
See also• Window and file numbers on page 1-5• VMACRO on page 2-324.
ARM DUI 0175N Copyright © 2002-2011 ARM. All rights reserved. 1-3ID052111 Non-Confidential

Working with the CLI
1.1.4 Abbreviations
You can enter many debugger commands in an abbreviated form. The debugger requires enough letters to uniquely identify the command you enter.
Many commands also have aliases. An alias is a different name that you can use instead of the listed name (see ALIAS on page 2-21). If you can use a short form of an alias, the underlined characters show the shortest acceptable form, for example:
BREAKI Is an acceptable short form of BREAKINSTRUCTION.
BINSTRUCTION Is an alias of BREAKINSTRUCTION.
BI Is an acceptable short form of the alias for BREAKINSTRUCTION.
DCOM Is an acceptable short form of DCOMMANDS.
DHELP Is an alias of DCOMMANDS.
See also• Chapter 2 RealView Debugger Commands.
ARM DUI 0175N Copyright © 2002-2011 ARM. All rights reserved. 1-4ID052111 Non-Confidential

Working with the CLI
1.2 Window and file numbersMany commands and macros enable you to specify a window number (windowid) or file number (fileid). The number identifies a window or file to which any output is sent. You must use a number in the range 50 to 1024.
Note When a user-defined number is in use for a window or a file, that number cannot be reused until you close the associated window or file. Either:• use the VCLOSE command to close both windows and files at the command line• use the fclose predefined macro to close a file from within a macro.
To see what windows and files you have opened, use the WINDOW command.
See also:• FOPEN on page 2-154• VOPEN on page 2-326• VCLOSE on page 2-321• WINDOW on page 2-332• fclose on page 3-17• fopen on page 3-20• Chapter 2 RealView Debugger Commands.
ARM DUI 0175N Copyright © 2002-2011 ARM. All rights reserved. 1-5ID052111 Non-Confidential

Working with the CLI
1.3 Using expressions and statementsThe basic components of the RealView Debugger command-line language can be classified as either expressions or statements, or a combination of both, where statements are typically contained in INCLUDE files (see Chapter 15 Debugging with Command Scripts in the RealView Debugger User Guide).
See also:• Expressions• Keywords• Predefined macros.
1.3.1 Expressions
There are many types of expressions accepted by the RealView Debugger CLI, enabling you to extend the operation of a command from the CLI. Expressions can be, for example, binary mathematical expressions, references to module names, or calls to functions.
See also• Types of debugger expressions on page 1-14.
1.3.2 Keywords
The RealView Debugger keywords are statements that can be used in a macro definition. These keywords are the same as the C language keywords, and they cannot be redefined or used in any other context.
See also• Chapter 4 RealView Debugger Keywords.
1.3.3 Predefined macros
RealView Debugger also provides predefined macros. Predefined macros can be used:• in macros that you define• directly at the command line• with the CEXPRESSION command, if the macro returns a value.
See also• Chapter 3 RealView Debugger Predefined Macros• the following in the RealView Debugger User Guide:
— Chapter 16 Using Macros for Debugging.
ARM DUI 0175N Copyright © 2002-2011 ARM. All rights reserved. 1-6ID052111 Non-Confidential

Working with the CLI
1.4 Command scriptsYou can automate a debugging session by running command scripts. A command script is a text file, which can contain:• CLI commands (see Chapter 2 RealView Debugger Commands)• predefined macros (see Chapter 3 RealView Debugger Predefined Macros).• user-defined macros (see Macro language on page 1-10).
You can also include comments in your command scripts (see Command script comments).
See also:• Considerations when using command scripts• Command script comments• Example command script on page 1-8.
1.4.1 Considerations when using command scripts
Each command must be on a separate line, and must not be split across multiple lines.
You do not have to be connected to a target to run a command script. However, some commands require that you have:• established a connection to a target (such as the LOAD command)• an image loaded (such as the BREAKINSTRUCTION command).
You can connect to a target and load an image either:• manually before running your command script• within the command script.
See also
• Chapter 3 RealView Debugger Predefined Macros
• the following in the RealView Debugger User Guide:— Chapter 15 Debugging with Command Scripts.
1.4.2 Command script comments
You can use comments in your command scripts. Any characters identified as belonging to a comment are ignored by RealView Debugger. The following rules apply to comments in command scripts:
• C style comments begin with a slash followed by an asterisk (/*) and end with an asterisk followed by a slash (*/). Also the comment text and the delimiters must be on a single line:— valid comment
/* comment */
These comments appear in log and journal files.— invalid comment
/* another comment*/
• C++ style comments begin with two slashes (//) and end when the end of the line is reached, for example:
ARM DUI 0175N Copyright © 2002-2011 ARM. All rights reserved. 1-7ID052111 Non-Confidential

Working with the CLI
// This is a line comment// Copyright (c) ARM Limited
• Comments that begin with //, but are not placed after a command, do not appear in any log and journal files.
• Comments can begin with a semicolon (;), for example:; A comment
• Comments can begin with //# and end when the end of the line is reached.
• Comments that begin with //#, but are not placed after a command, appear only in a journal file. Also, the //# prefix is replaced with ; in the that file.
• Only // or //# comments can be placed at the end of a command, for example:ADD int value // integer value
• Comments cannot be nested.
See also• Macro comments on page 1-12.
1.4.3 Example command script
Example 1-1 shows a command script that:
• connects to a target
• loads an image
• defines a user-defined macro to display the value of a variable in the image
• sets a breakpoint that runs the user-defined macro to display the value of a variable when the breakpoint is activated.
Example 1-1 Sample command script
ERROR=ABORT // Abort if error occurs when processing the scriptWAIT=ON // Wait for each command to finish
// Log the output from the imageSTDIOLOG ON='c:\myprojects\project1\stdoutput.txt'
/* Connect to the ARM_Cortex-A8 model with ISSM */CONNECT @ARM_Cortex-A8@ISSM
/* Load the project1.axf image from myprojects directory */LOAD/r 'c:\myprojects\project1\Debug\project1.axf'
/* Define macro to print a value (must be defined after image load) */define /R int printval(thisVal)int thisVal;{ /* Print the value of the myvar variable when the breakpoint is activated */ $PRINTVALUE thisVal$; return 1; // continue execution after breakpoint is activated}.
ARM DUI 0175N Copyright © 2002-2011 ARM. All rights reserved. 1-8ID052111 Non-Confidential

Working with the CLI
// Scope to main() so that we can set a// breakpoint using a line numberSCOPE main
/* Set a breakpoint at line 149 in project1.c */BREAKINSTRUCTION \PROJECT1\#149:1 ; printval(myvar)
GO // Run the image
STDIOLOG OFF // Close the log file
UNLOAD 1 // Unload the imageDELFILE 1 // Remove the symbol definitionsDISCONNECT @ARM_Cortex-A8@ISSM // Disconnect from the targetWAIT=OFF
See also• Macro language on page 1-10.
ARM DUI 0175N Copyright © 2002-2011 ARM. All rights reserved. 1-9ID052111 Non-Confidential

Working with the CLI
1.5 Macro languageMacros are constructed in a Kernighan and Ritchie C-like scripting language that is interpreted on the host. You can create your own or use one of the available predefined run-time macros.
See also:• Macro definition• Macro body on page 1-11• Macro terminator on page 1-12• Macro comments on page 1-12• Macro local symbols on page 1-13.
1.5.1 Macro definition
A macro definition must contain:• the DEFINE command• the macro name, which is case sensitive• the macro body• a terminating full stop or period (.) as the first and only character on the line following
the macro.
The syntax of a macro definition is as follows:
DEFINE [/R] [return_type] macro_name([parameter_list])[param_definitions]{ macro_body}.
where:
/R The new macro can replace an existing user-defined macro with the same name. If any symbol other than a user-defined macro has the same name as the new macro, then the following error is displayed:Error: E004D: Symbol with this name already exists.
return_type The return type for the macro and is an optional component of the macro definition. The type can be any legal C or C++ data type, except const. The default type is int.
Note One use of a macro return value is to control what action RealView
Debugger takes when a breakpoint is activated.
parameter_list A parameter list for the macro and is an optional component of the macro definition. You specify a parameter list in the same way that you specify arguments for a C function. If parameter_list is defined then the type must also be specified or else type int is assumed. The following example illustrates the use of a parameter_list:define int scpy(target, source)char *target;char *source;
The declaration defines arguments for the macro scpy(). The type of both the target and the source are declared to be pointers to a char.
ARM DUI 0175N Copyright © 2002-2011 ARM. All rights reserved. 1-10ID052111 Non-Confidential
Working with the CLI
See also• Macro terminator on page 1-12• BREAKINSTRUCTION on page 2-55• DEFINE on page 2-105• the following in the RealView Debugger User Guide:
— Chapter 16 Using Macros for Debugging.
1.5.2 Macro body
The macro body consists of the source lines of the macro and optional formal arguments. You can have multiple statements on a single line, but a single statement must not be split across multiple lines.
The syntax of a macro body is as follows:
[local_definitions]macro_statement;[macro_statement;]...
where:
local_definitions defines variables used locally in the macro body.
Formal arguments can be used throughout the macro body. These arguments are later replaced by the values of the actual arguments in the macro call.
Using CLI commands in a macro
You can use debugger commands in the macro body. If used, you must enclose the command with dollar signs ($) and end in a semi-colon (;), and the command must not be split across multiple lines, for example:
last_time = @cycle;value = base[offset];base[offset] = 0;$printf "base offset value=%d\n",value$;
You can substitute the value of an integer variable in a CLI command before the command is executed. A format specifier can also be included:
d decimal format
h or x hexadecimal format (this is the default).
The syntax for variable substitution is ${variable[:format]}.
For example:
define /R int tstMacro(){ int num; num = 1; $FOPEN 150, "C:\\myfiles\\myfile${num:d}.txt"$; // substitution $FPRINTF 150, "Test value: %d", num$; $VCLOSE 150$;}.
The filename in this example is myfile1.txt. The text written to the file is "Test value: 1".
You can also use macro arguments and local variables in RealView Debugger commands.
ARM DUI 0175N Copyright © 2002-2011 ARM. All rights reserved. 1-11ID052111 Non-Confidential
Working with the CLI
Commands prohibited inside a macro
RealView Debugger prohibits the use of the following commands inside a macro:• BOARD
• CONNECT
• DEFINE (unless it is the macro definition itself)• DELFILE
• DISCONNECT
• GOSTEP
• HELP
• HOST
• INCLUDE
• LOAD
• QUIT
• UNLOAD.
Also you cannot use execution-type commands (for example, STEP) in a macro if you attach the macro to another entity, such as a breakpoint.
See also• Chapter 3 RealView Debugger Predefined Macros• the following in the RealView Debugger User Guide:
— Chapter 16 Using Macros for Debugging.
1.5.3 Macro terminator
A macro terminator is used as the last character of the macro definition. This is a full-stop or period (.) and must be the first and only character on the line.
If you include multiple macro definitions in a single script file, the macro terminator must appear after each macro definition.
1.5.4 Macro comments
You can use comments in your macros to document your code. Any characters identified as belonging to a comment are ignored by RealView Debugger. The following rules apply to comments in macros:
• C style comments begin with a slash followed by an asterisk (/*) and end with an asterisk followed by a slash (*/), for example:/* comment *//* This is another comment*/
• C++ style comments begin with two slashes (//) and end when the end of the line is reached, for example:// This is a line comment// Copyright (c) ARM Limited
• Only // comments can be placed at the end of a macro statement, for example:macro_statement; // comment
• Only // comments can be nested within a /* */ comment, for example:
ARM DUI 0175N Copyright © 2002-2011 ARM. All rights reserved. 1-12ID052111 Non-Confidential
Working with the CLI
/* This is a comment // This is another comment*/
See also• Command script comments on page 1-7• the following in the RealView Debugger User Guide:
— Chapter 16 Using Macros for Debugging.
1.5.5 Macro local symbols
You can create symbols in a macro that are local to the macro. You must declare a type for macro local symbols. The type can be any legal C or C++ data type, except const. For example:
define /R int sqrValue(value)int value;{ int squared; squared = value * value; return squared;}.
All symbols declared within a macro exist only during the execution of the macro, that is the static keyword is not recognized.
To create the equivalent of a global static variable, use the ADD command to create the symbol before defining the macro that references the symbol. For example:
add int cntdefine /R counter(){ cnt = cnt + 1;}.
See also• ADD on page 2-16.• the following in the RealView Debugger User Guide:
— Chapter 16 Using Macros for Debugging.
ARM DUI 0175N Copyright © 2002-2011 ARM. All rights reserved. 1-13ID052111 Non-Confidential

Working with the CLI
1.6 Constructing expressionsThis section introduces the basic elements of the CLI, and how to construct expressions based on these elements.
The debugger groups expressions into two classes:• C source language expressions, used in assembled or compiled source mode• assembly language expressions, used in assembly source or disassembly mode.
Most valid C expressions are also valid in the debugger (see Using expressions and statements on page 1-6). However, if you are an assembly language user, you do not have to know how to program in C to use the debugger. Simple C expressions are the same as standard algebraic expressions.
See also:• Types of debugger expressions• Permitted symbol names on page 1-15• Program symbols on page 1-15• Debugger variable symbols on page 1-16• Macro symbols on page 1-17• Reserved symbols on page 1-17• Operations on symbols and registers on page 1-25• Addresses on page 1-26• Expression strings on page 1-27.
1.6.1 Types of debugger expressions
Table 1-1 shows the types of expressions that are accepted by CLI commands. For each type, there is a cross-reference to a command where the expression type is used as an example. However, usage is not limited to these commands.
Table 1-1 Types of CLI expressions
Type Usage cross-reference
Arithmetical operation (value or address) FILL on page 2-149
Array element reference (value or address) ARGUMENTS on page 2-27
Conditional expression BREAKINSTRUCTION on page 2-55
Floating-point expression FPRINTF on page 2-156
Function name reference (code address) LIST on page 2-175
Line reference (code address) SCOPE on page 2-234
Macro call ALIAS on page 2-21
Memory address BREAKINSTRUCTION on page 2-55
Memory address PRINTVALUE on page 2-211
Memory location BREAKREAD on page 2-61
Memory range expression BREAKREAD on page 2-61
Qualified line (specifying source module) SCOPE on page 2-234
Stack level reference SCOPE on page 2-234
ARM DUI 0175N Copyright © 2002-2011 ARM. All rights reserved. 1-14ID052111 Non-Confidential

Working with the CLI
See also• General command language syntax on page 1-2• Using expressions and statements on page 1-6• Chapter 2 RealView Debugger Commands.
1.6.2 Permitted symbol names
A symbol (also called an identifier) is a name that identifies something, for example program and debugger variables, macros, keywords, and registers.
Symbols can be up to 1024 characters in length. The first character in a symbol must be alphabetic, an underscore _, or the at sign @. The valid characters in a symbol include upper- and lower-case alphabetic characters, numeric characters, the dollar sign $, at sign @, and underscore _. Other symbolic characters cannot be used in symbols. The debugger distinguishes between uppercase and lowercase characters in a symbol. A symbol is therefore matched by the following regular expression:
[a-zA-Z_@][a-zA-Z_@$0-9]{0,1023}
Regular expressions are described in Mastering Regular Expressions (see Other publications on page vii).
If your compiler or assembler creates symbols that contain characters that are invalid in RealView Debugger symbols, prefix the symbol name with an @ and enclose the rest of the name in double quotation marks " to reference it, for example @"!parser". You cannot access a symbol including a double quotation mark character in its name.
1.6.3 Program symbols
Program symbols are identifiers associated with a source program. They include variables, function names, and, depending on the compiler, macro names. Symbols defined in the source of the application can normally be passed to the debugger. When a program is loaded for debugging, program symbols are normally loaded into a symbol table associated with the target connection.
Some compilers insert a leading underscore _ to all program source symbols so that program symbol names are distinguished from other names. The debugger strips the first leading underscore from such program symbols when an application file is read so references to program symbols are as originally written.
Some compilers pass C and C++ preprocessor macros to the debugger. These are also usable in expressions. The debugger shows the expansion in the output.
Listing Symbols
You can list all symbols currently defined in RealView Debugger. To do this, enter:
String expression FILL on page 2-149
Symbol reference (value or address) ADD on page 2-16
Target connection reference CONNECT on page 2-93
Target program function BREAKINSTRUCTION on page 2-55
Table 1-1 Types of CLI expressions (continued)
Type Usage cross-reference
ARM DUI 0175N Copyright © 2002-2011 ARM. All rights reserved. 1-15ID052111 Non-Confidential

Working with the CLI
printsymbols /w *
Referencing symbols
References to symbols or source-level line numbers can be unqualified or qualified. An unqualified reference includes only the symbol or line number itself. A qualified reference includes the symbol or line number preceded by a root (defined in the following section), module and/or function name. Root, module, and function names are separated from the symbol or line number by a backslash \. Module names must be in uppercase. Table 1-2 summarizes examples of qualified symbols.
See also• PRINTSYMBOLS on page 2-208.
1.6.4 Debugger variable symbols
Debugger variables are created during a debugging session with the ADD CLI command, and all have global scope. When a debugger symbol is created you can assign it a data type (for example char, int, or long) and an initial value, but cannot assign initial values to struct, union, or class type symbols.
Debugger variables can be stored in either:• Debugger memory. The debugger allocates memory for the variable for you.• Target memory. You must specify a target memory address for the variable.
Table 1-2 Qualified symbol references
Form Example Comment
@root\\ @tst\\TS1ROOT References module TS1ROOT in root @tst. (Usually from file loaded as tst.x or tst.out.)
\global ::global \x ::x References global variable x in current root.
function\local main\x References local variable x in function main.
MODULE\function SIEVE\main References function main in module sieve.
MODULE\static SIEVE\y References static variable y in module sieve.
MODULE\line_number ENTRY\#18 References line number 18 in module entry.
MODULE\function\local ENTRY\main\x References local variable x in function main in module entry.
LINE\local #20\x References local variable x in an unnamed block at line 20.
ARM DUI 0175N Copyright © 2002-2011 ARM. All rights reserved. 1-16ID052111 Non-Confidential

Working with the CLI
1.6.5 Macro symbols
A RealView Debugger macro is similar to a C function. It has a name, a return type, and optional arguments. You can also define macro-local variables, and the macro itself is a sequence of statements. Symbols are used in macros in two ways:
Macro name This identifies the macro. Macro names are case sensitive. You must avoid using the following when creating your own macros:• names of the predefined macros• keywords• debugger commands• aliases you have defined using the ALIAS command (see ALIAS on
page 2-21).
Local variables Local variables can be defined within a macro as working storage while the macro executes. A macro local variable can only be accessed by the macro in which it is defined. It is created when the macro is executed and has an undefined initial value.
Macros can call other macros, but not recursively. If your macro calls another user-defined macro, then the called macro must be defined in the command script before the macro that calls it.
See also• Chapter 2 RealView Debugger Commands• Chapter 3 RealView Debugger Predefined Macros• Chapter 4 RealView Debugger Keywords• the following in the RealView Debugger User Guide:
— Chapter 16 Using Macros for Debugging.
1.6.6 Reserved symbols
Reserved symbols are reserved words that represent registers, status bits, and debugger control variables. These symbols are always recognized by the debugger and can be used at any time during a debugging session. Because reserved symbols have special meanings within the debugger command language, they cannot be defined and used for other purposes. To avoid conflict with other symbols, the names of all reserved symbols are preceded by an at sign @. See Table 1-3 on page 1-18 for a list of reserved symbols and their descriptions.
Displaying a list of currently defined symbols
You can display a list of the symbols that are currently defined in RealView Debugger. To do this, use the PRINTSYMBOLS command:
printsymbols *
This command lists:
• RealView Debugger reserved symbols. These include symbols defined for the target associated with the current connection.
• RealView Debugger predefined macros.
• If you have an image loaded for the current connection, then the symbols defined for that image are listed.
ARM DUI 0175N Copyright © 2002-2011 ARM. All rights reserved. 1-17ID052111 Non-Confidential

Working with the CLI
• If you have defined any macros, then any arguments and local symbols defined for those macros are listed.
Referencing reserved symbols
The RealView Debugger defines several symbols, known as reserved symbols, that retain specific information for you to access. Table 1-3 shows these reserved symbols with a short description. Reserved symbol names always begin with an at sign @ and can be all uppercase or all lowercase.
Table 1-3 Reserved symbols
Symbol Description
@register References the named register.For example, @R0. Use this symbol to reference register r0.
@entry Used to form a function pseudo-label, function\@entry, that identifies the first location in the function after the code that sets up the function parameters. In general, function\@entry refers to either:• the first executable line of code in that function• the first auto local that is initialized in that function.In either case, function\@entry is beyond the function prologue, to ensure that the function parameters can be accessed. This enables you to set a breakpoint on a function without having to locate to the function in the source or disassembly view, or without having to know an address.If no lines exist that set up any parameters for the function (for example, an embedded assembler function), then the following error message is displayed:Error: E0039: Line number not found.
As an example, if you have a function func_1(value) you might want to set a breakpoint that triggers only when the argument value has a specific value on entry to the function:bi,when:{value==2} func_1\@entry
@hlpc Indicates your current high-level source code line. @hlpc is valid only if the Program Counter (PC) is in a module that has high-level line information (that is, a C, C++, or assembler source module compiled with debug turned on).@hlpc contains the line number at the current PC only if located in source code. Otherwise, it is zero.
@last_host_output The last line of output that was generated by the HOST command.
@line_range Contains the line range of the source code associated with the PC.
@module Indicates the name of the current module as determined by the location of the PC.
@procedure Indicates the name of the current function as determined by the location of the PC.
@file Indicates the name of the current file as determined by the location of the PC.
@root Indicates the current root name.
ARM DUI 0175N Copyright © 2002-2011 ARM. All rights reserved. 1-18ID052111 Non-Confidential

Working with the CLI
Printing reserved symbols
To print the reserved symbols, use the FPRINTF or PRINTF command with the appropriate format specifier. Alternatively, use the PRINTVALUE command to print the contents of a numerical reserved symbol, for example @hlpc. You can also use the PRINTSYMBOLS/F command with no arguments, and the command displays all roots.
Table 1-4 shows the format specifiers to use when printing reserved symbols.
Example
The following example shows how to use these symbols:
1. Create an INCLUDE file, for example symbols.inc, containing the following command and macro definition:add int windowOpened=0define /R int rsvdSymbols(outputID)int outputID;{ if ((outputID > 49) && (outputID <=1024)) { if (windowOpened != outputID) $vopen outputID$; $fprintf outputID, "****************************\n"$; $fprintf outputID, "root: %s\n", @root$; $fprintf outputID, "hlpc: %d\n", @hlpc$; $fprintf outputID, "code line: %h\n", @hlpc$; $fprintf outputID, "instruction: %m", @pc$; $fprintf outputID, "file: %s\n", @file$; $fprintf outputID, "line_range: %s\n", @line_range$; $fprintf outputID, "module: %s\n", @module$; $fprintf outputID, "procedure: %s\n", @procedure$; windowOpened=outputID; } else { error(3,"Invalid window ID %d.\nValid range 50 to 1024.",outputID); windowOpened=0;
Table 1-4 Format specifiers for printing reserved symbols
Information to print Symbol to use Format specifier
Register contents @register This must match the type of the register.
Current instruction @pc %m
Current line number @hlpc %d
Current source line as text @hlpc %h
Last line output by the HOST command @last_host_output %s
Line range of the source code identified by the PC @line_range %s
Current module name @module %s
Current procedure name @procedure %s
Current file name determined by the PC @file %s
Current root name @root %s
ARM DUI 0175N Copyright © 2002-2011 ARM. All rights reserved. 1-19ID052111 Non-Confidential

Working with the CLI
} // return 0 to stop at the breakpoint return (0);}.
2. Connect to RealView ARMulator® ISS (RVISS), for example:connect "@ARM7TDMI@RVISS"
3. Load the Dhrystone image from the main examples directory:load/r 'main_examples_directory\dhrystone\Debug\dhrystone.axf'
4. Include the file you created in step 1 to define the macro. If this is in the directory c:\myscripts, then enter:include 'c:\myscripts\symbols.inc'
5. Run the macro, with an outputID of 50:macro rsvdSymbols(50)
The following details are displayed:root: @dhrystonehlpc: 0code line: <invalid line>instruction: $00008000 EAFFFFFF B $L0x8004 $ ~<S0x8004>file: ../../angel/startup.sline_range:module: STARTUP_Sprocedure: __main
Here the high-level source code line is zero, and no code line can be displayed. This is because the PC is at a location in a library module that was compiled without debug turned on, and the source file is not available.
6. Set a breakpoint at the first executable line of code in function main, that also runs the rsvdSymbols() macro when the breakpoint is reached:breakinstruction,macro:{rsvdSymbols(50)} main\@entry
7. Run the Dhrystone application (see GO on page 2-159):go
When the breakpoint is reached, the rsvdSymbols() macro runs, and the following details are displayed:root: @dhrystonehlpc: 91code line: Next_Ptr_Glob = (Rec_Pointer) malloc (sizeof (Rec_Type));instruction: 000084D0 E3A00030 MOV r0,#0x30file: c:\program files\arm\rvds\examples\...\...\...\...\main\dhrystone\dhry_1.cline_range: 91..91module: DHRY_1procedure: main
8. Reload the Dhrystone application and clear the previous breakpoint:reloadclearbreak
9. Set the breakpoint again, but specify the module and line:breakinstruction,macro:{rsvdSymbols(50)} \DHRY_1\#149:1
10. Run the Dhrystone application:go
ARM DUI 0175N Copyright © 2002-2011 ARM. All rights reserved. 1-20ID052111 Non-Confidential

Working with the CLI
The listing shown in step 7 is displayed, but the line_range has changed to 79..91.
Symbols for referencing the common processor core registers
Table 1-5 shows the symbols to use if you want to reference the processor core registers. These are the registers shown in the Core tab of the Registers view, and they are common to all ARM architectures. You can also perform operations on these registers.
Table 1-5 Common processor core register symbols
Register symbol Description
@Rn Use this symbol to reference registers r1 to r12.
@R13 or @SP References the SP register.
@R14 or @LR References the LR register.
@R15 or @PC References the PC register.
@CPSR References the CPSR register.
@CPSR_C References the Carry flag of the CPSR NZCV flags.
@CPSR_F References the FIQ register of the CPSR.
@CPSR_FLG A bitmap referencing the NZCV flags of the CPSR.
@CPSR_I References the IRQ register of the CPSR.
@CPSR_MODE References the MODE register of the CPSR.
@CPSR_N References the Negative flag of the CPSR NZCV flags.
@CPSR_T References the T flag of the CPSR STATE register.
@CPSR_V References the Overflow flag of the CPSR NZCV flags.
@CPSR_Z References the Zero flag of the CPSR NZCV flags.
@R8_bank
@R9_bank
@R10_bank
@R11_bank
@R12_bank
References registers R8, R9, R10, R11, and R12 in register bank bank. These are used only in register banks USR and FIQ.For example, @R9_USR.
@R13_bank References the SP register in register bank bank.For example, @R13_IRQ.
@R14_bank References the LR register in register bank bank.For example, @R14_SVC.
ARM DUI 0175N Copyright © 2002-2011 ARM. All rights reserved. 1-21ID052111 Non-Confidential

Working with the CLI
Symbols for referencing the extended CPSR and SPSR registers
Table 1-6 shows the CPSR and SPSR register symbols that are available on processors cores that support the extended ARM architectures. These symbols are in addition to those listed in Table 1-5 on page 1-21.
@SPSR_bank
@SPSR_bank_regs
References the SPSR registers in a register bank. regs is one of the following (see the equivalent CPSR symbols for details):
C
FLG
F
I
MODE
N
T
V
Z
Carry flag of the NZCV flagsNZCV flagsFIQ registerIRQ registerMODE registerNegative flag of the NZCV flagsT State flag of the STATE registerOverflow flag of the NZCV flagsZero flag of the NZCV flags
Note There is no SPSR register in the USR bank.
For example, @SPSR_IRQ_T references the processor STATE register in the IRQ register bank.
Table 1-5 Common processor core register symbols (continued)
Register symbol Description
Table 1-6 Extended CPSR and SPSR processor core register symbols
Register symbol DescriptionEarliest architecture supported
@CPSR_A References the Imprecise Data Abort (IDA) Control flag of the CPSR. ARMv6 or later
@CPSR_E References the Endianness Control flag of the CPSR. ARMv6 or later
@CPSR_FLGE A bitmap referencing the NZCVQ flags of the CPSR. ARMv5TE and ARMv6 or later
@CPSR_GE A bitmap referencing the Greater than or Equal flags GE[3:0] of the CPSR.
ARMv6 or later
@CPSR_IT References the If Then register of the CPSR. ARMv6T2 or later
@CPSR_J References the J State flag of the CPSR STATE register. Jazelle®-capable
@CPSR_JT References the J and T State flags of the CPSR STATE register. Set to the following values:0 To clear both flags (ARM state)0x00000020 To set the T flag (Thumb state)0x01000000 To set the J flag (Jazelle bytecode state)0x01000020 To set both the T and J flags (Thumb-2EE state)
Thumb®-capable or Jazelle-capable
@CPSR_Q References the Unsaturated flag of the CPSR NZCVQ flags. ARMv5TE and ARMv6 or later
ARM DUI 0175N Copyright © 2002-2011 ARM. All rights reserved. 1-22ID052111 Non-Confidential

Working with the CLI
Symbols for referencing internal variables and board-specific registers
You can also reference internal debugger variables and board-specific registers:
• Internal debugger variables are displayed in extra tabs of the Registers view, and depend on your target connection. For example, the Debug tab is available when connecting to a target through an ARM DSTREAM™ or RealView ICE debug unit.
• Board-specific registers are displayed in other tabs of the Registers view.
Note You can also perform operations on the internal debugger variables and board-specific registers.
To find the symbol names for the internal debugger variables, you must use the RealView Debugger GUI. To find the symbol names for board-specific registers, you can use either the RealView Debugger GUI, or look in the related Board/Chip Definition file (.bcd) in your default settings directory identified by the RVDEBUG_SHADOW_DIR_ETC environment variable.
To find the name of a board-specific (memory mapped) register or internal debugger variable using the RealView Debugger GUI:
1. Select the required tab, for example, Debug.
2. Right-click on the register or variable that you want to reference, for example, semihost_enabled.
3. Select Properties from the context menu.This displays an Information dialog. The Register: field shows the symbol name. For semihost_enabled, the symbol name is @SEMIHOST_ENABLED.
@SPSR_bank
@SPSR_bank_regs
References the SPSR registers in a register bank. regs is one of the following (see the equivalent CPSR symbols for details):
A
FLGE
E
GE
IT
J
JT
Q
IDA Control flagNZCVQ flagsEndianness Control flagGreater than or Equal flagsIF Then registerJ State flag of the STATE registerJ and T State flags of the STATE registerUnsaturated flag of the NZCVQ flags
Note There is no SPSR register in the USR bank.
For example, @SPSR_IRQ_T references the processor STATE register in the IRQ register bank.
Table 1-6 Extended CPSR and SPSR processor core register symbols (continued)
Register symbol DescriptionEarliest architecture supported
ARM DUI 0175N Copyright © 2002-2011 ARM. All rights reserved. 1-23ID052111 Non-Confidential

Working with the CLI
To find the name of a board-specific (memory mapped) register from the related board/chip definition file:
1. Find the file in your default settings directory that has the same name as the board/chip definition. For example, the names for the Integrator/AP board are defined in the file AP.bcd.
2. Open the file with a text editor.
Note Do not make changes to this file directly. Use the Connection Properties dialog box in the
GUI to make any changes.
3. Search for lines containing Register.regname, where regname is the name of the register, for example Register.G_SC_PCI.
See also• Window and file numbers on page 1-5• Macro language on page 1-10• Reserved symbols on page 1-17• Symbols for referencing the common processor core registers on page 1-21• Symbols for referencing internal variables and board-specific registers on page 1-23• Operations on symbols and registers on page 1-25• BREAKINSTRUCTION on page 2-55• CLEARBREAK on page 2-89• CONNECT on page 2-93• FPRINTF on page 2-156• HOST on page 2-166• INCLUDE on page 2-168• LOAD on page 2-176• PRINTF on page 2-205• PRINTSYMBOLS on page 2-208• PRINTVALUE on page 2-211• REGINFO on page 2-223• RELOAD on page 2-225• the following in the RealView Debugger Target Configuration Guide:
— Chapter 3 Customizing a Debug Configuration.
ARM DUI 0175N Copyright © 2002-2011 ARM. All rights reserved. 1-24ID052111 Non-Confidential

Working with the CLI
1.6.7 Operations on symbols and registers
You can perform operations on symbols, on the registers listed in Table 1-5 on page 1-21, the internal debugger variables, and board-specific registers. Table 1-7 lists the operations you can perform on registers.
Table 1-7 Register operations
Operation Description Examples
@var = value Assign a value to the symbol. @PC = 0x8000
@var++, @var-- Increment or decrement the value in the symbol. @R6++
@var = @var + value
@var = @var - value
Add a value to, or subtract a value from, the symbol. @R12 = @R11+2
@var = @var * value
@var = @var / value
Multiply or divide the value in the symbol by a specified value. Dividing by zero gives an error message.
@R7 = @R7*2
@var &= [~]mask AND the mask value with the contents of the symbol. ~ indicates the inverse of the mask value.
@FLG &= 3
@FLG &= ~3
@var |= [~]mask OR the mask value with the contents of the symbol. ~ indicates the inverse of the mask value.
@FLG |= 3
@var ^= [~]mask Exclusive OR the mask value with the contents of the symbol. ~ indicates the inverse of the mask value.
@FLG ^= 3
ARM DUI 0175N Copyright © 2002-2011 ARM. All rights reserved. 1-25ID052111 Non-Confidential

Working with the CLI
1.6.8 Addresses
An address can be represented by most C expressions that evaluate to a single value. In source-level mode, expressions that evaluate to a code address cannot contain numeric constants or operators, unless you use a cast.
Data address and assembly-level code address expressions can also be represented by most legal C expressions. For details on legal C expressions, see the C language Reference Manual. There are no restrictions involving constants or operators. Table 1-8 summarizes the special addressing types supported by the RealView Debugger.
Table 1-8 Address expressions
Addressing type Indicator Examples
Indirect addresses [ ] PRINTVALUE (H W) [23]
Source line numbers (omitting \MODULE\ defaults to the source file currently selected in the Code window)
\MODULE\# BREAKINSTRUCTION \DHRY_1\#149
BREAKINSTRUCTION #149
Address ranges .. DUMP 0x2200..0x2214
DUMP 0x2200..+14
Multistatement reference : BREAKINSTRUCTION #21:32 (refers to the statement on line 21 that contains column 32)
. BREAKINSTRUCTION #21.2 (refers to the second statement on line 21)
Address of non-label symbol. The symbol cannot be that of a register or a constant.
& BREAKREAD &var
ARM DUI 0175N Copyright © 2002-2011 ARM. All rights reserved. 1-26ID052111 Non-Confidential

Working with the CLI
1.6.9 Expression strings
An expression string is a list of values separated by commas. The expression string can contain expressions and ASCII character strings enclosed in quotation marks. For several commands, each value in an expression string can be changed to the size specified by the size qualifiers. If the size is changed, padding is added to elements that do not fit.
Table 1-9 shows examples of expression strings.
You can cast values to arrays, so that for example you can access the second byte of a 32 bit word by casting the word to a byte array.
Note If you enter a command line that starts with an open-bracket (, or an asterisk *, the debugger interprets this as if you had entered a CEXPRESSION command with that text as its argument. For example:
*(char*)0x8000 = 0
is equivalent to:
CE *(char*)0x8000 = 0
As with the normal CEXPRESSION command, you can use this to view or modify program variables and memory. CE is the abbreviation for CEXPRESSION.
See also
• CEXPRESSION on page 2-87.
Table 1-9 Examples of expression strings
String Results
1,2,"abc" Values 1 and 2, and ASCII values of abc.
3+4, count, foo() Value 7, value of count, results of calling foo.
'1xyz123' ASCII values of 1, x, y, z, 1, 2, and 3.
ARM DUI 0175N Copyright © 2002-2011 ARM. All rights reserved. 1-27ID052111 Non-Confidential

Working with the CLI
1.7 Using variables in the debuggerIt is important to understand how to access variables that are stored in memory. This section describes symbol storage classes and data types. It describes how to qualify a symbolic reference with a module or function name, how to specify fully referenced variables, and how to make stack references.
See also:• Scope• Data types on page 1-29• Root names on page 1-30• Module names on page 1-31• Variable references on page 1-32• Stack references on page 1-33.
1.7.1 Scope
All variables and functions in a C or C++ source program have a storage class that defines how the variable or function is created and accessed. C preprocessor symbols might not be available to the debugger.
Global (extern) In the debugger, global variables can be referred to from any module. However, if a symbol of the same name exists in the local scope, this variable must be qualified by a root name, by \ (current root), or with ::.
Static In the debugger, static functions can be referred to from the same module without qualification. Static functions in other modules must be qualified with the module name if the name is ambiguous or the module has not been used yet (not loaded).
Local A local variable is accessible when it is local to the current function, local to the current unnamed block, or when its function is on the stack. It can be qualified by function, line, or stack level.
Register Register variables might not be available from all lines in the function, because hardware registers can be shared by more than one local register variable. A register variable is accessible when it is local to the current function or when its function is on the stack. It can be qualified by function or stack level.
Scoping rules
References to symbols follow the standard scoping rules of C and C++. If a symbol is referenced, the debugger searches its symbol table using the following priority:
1. Any symbol local to the current macro.
2. Any symbol local to the current line.
3. Any symbol local to the current function.
4. Any symbol local to the class of the current function.
5. Any symbol static to the current module.
6. Any global symbol not necessarily in the current module.
7. A static symbol in another module.
ARM DUI 0175N Copyright © 2002-2011 ARM. All rights reserved. 1-28ID052111 Non-Confidential

Working with the CLI
8. A global symbol in another root (that is, a different loaded file).
1.7.2 Data types
All symbols and expressions have an associated data type:• Source language modules can contain any valid C or C++ language data type.• Assembly language modules can contain variables. Table 1-10 shows the types of
variables supported. Some assemblers might have other types such as fixed-point. In addition, each symbol has an attribute that indicates whether a variable was defined in a code or data area. Also, the assembler can create arrays of these types in addition to structures (check with the assembler manufacturer for details).
You can access a specific number of bytes in memory using the following predefined macros:• byte() to return an unsigned char• word() to return an unsigned short int• dword() to return an unsigned long.
Type conversion
The RealView Debugger performs data-type conversions under the following circumstances:
• when two or more operands of different types appear in an expression, data type conversion is performed according to the rules of C or C++
• when arguments are passed to a macro, the types of the passed arguments are converted to the types given in the macro function definition
• when the data type of an operand is forced by user-specified type casting, it is converted
• when a specific type is required by a command, the value is converted according to the rules of C/C++.
Type casting
Type casting forces the conversion of an expression to the specified data type. The contents of any variables that are referenced are not altered. Debugger expressions can be cast into different types using the following syntax:
(type_name) expression
Table 1-10 Equivalent RealView Debugger data types for ARM assembler
ARM assembler data type Equivalent data type in RealView Debugger
Size (bytes)
byte unsigned char 1
word unsigned short int 2
long unsigned long 4
8-byte long long long 8
single-precision floating point float 4
double-precision floating point double 8
label label 1
ARM DUI 0175N Copyright © 2002-2011 ARM. All rights reserved. 1-29ID052111 Non-Confidential

Working with the CLI
Example 1-2 shows examples of casting different types.
Example 1-2 Casting symbols and expressions into different types
(char) prime /* prime is cast to type char */(float) 12 /* value is 12.0. (integer 12 in floating point) */(int) sin(0.2) /* value is 0, sin(0.2) is 0.198, truncates to 0 */(int) ptr_char /* the variable expression ptr_char is */ /* cast to type int */
The debugger can cast some expression types to an array type. Example 1-3 casts the constant expression 7 to an array of three characters starting at location 0x0007.
Example 1-3 Casting to an array
(char[3]) 7 /* address is 0x0007 */
This type of casting to an array can be used with the PRINTVALUE command. Assembly language structures can be displayed in a more meaningful form by using this technique. Table 1-11 lists additional special casting types. Arrays of hexadecimal types and pointers to hexadecimal types can also be used.
See also• PRINTVALUE on page 2-211• byte on page 3-11• word on page 3-65• dword on page 3-14.
1.7.3 Root names
Root names indicate the top level in a qualified path name. Each time the debugger is invoked, it automatically creates a base root. This root is assigned the name \\ and contains all debugger variables, macros, and most user-defined symbols. The only user-defined symbols that are not in the base root are those created with the ADD command. The remainder are built-in.
Table 1-11 Special casting types
Cast Commands Meaning
(QUOTED STRING) or (Q S) PRINTVALUE Show as "string."
(INSTRUCTION ADDRESS) or (I A) All Convert into a legal source-level address.
(UNKNOWN TYPE) or (U T) All Convert into a single byte.
(HEX BYTE) or (H B) All Show in hex bytes.
(HEX WORD) or (H W) All Show in 16 bit hex.
(HEX DOUBLE WORD) or (H D) All Show in 32 bit hex.
ARM DUI 0175N Copyright © 2002-2011 ARM. All rights reserved. 1-30ID052111 Non-Confidential

Working with the CLI
When an executable program is loaded, the debugger automatically creates a second root for that program. The name of this root is the name of the program with an at sign @ prepended to it. For example, when the debugger loads the proga program, it creates the root @PROGA. An alternative root name can be specified with the LOAD command.
If two programs have the same name, the debugger appends an underscore followed by a number (that is, @NAME_1, @NAME_2) to the second (and any subsequent) program.
To specify which root a module belongs to, use @ROOT\\MODULE where ROOT is the root name and MODULE is the module name. The \\ specifies that the preceding symbol is a root name. Use \\ to specify the base root, which contains built-in type, macro, and reserved word information. In the PRINTSYMBOLS command, the root can be specified directly. The reserved symbol @ROOT points to the current root name. Example 1-4 shows some examples of how to use root names.
Example 1-4 Using root names
ps \ /* Shows all symbols in current root */ps/t \\ /* Shows types in base root */ps/m @sieve\\ /* Shows all modules in root @sieve */ps/f /* Shows all roots */
The debugger considers the context to help determine the current root. If the context is within a module, the root of that module is the current context. The use of a backslash \ refers to the current root, as specified by the context.
See also• Reserved symbols on page 1-17• ADD on page 2-16• LOAD on page 2-176.
1.7.4 Module names
Module names qualify symbolic references. The module name is usually the source filename without the extension. If the extension is not one of .*c, .*cp, .*c++, .*cpp, .cxx, or .ixx, then the extension is preserved and the dot (.) is replaced with an underscore (_). This convention avoids a conflict with the C period operator (.), that indicates a structure reference.
Therefore, module names are changed as follows:• SIEVE.C becomes SIEVE• SIEVE.H becomes SIEVE_H• PORT.ASG becomes PORT_ASG
You might have to use module names when referencing symbols, for example:• SIEVE\main
• SIEVE_H\#4
• PORT_ASG\x
All module names are converted to uppercase by the debugger. To avoid confusion, it is recommended that function names are not all uppercase. If two or more modules have the same name, the debugger appends an underscore followed by a number to the second, and any subsequent, module (for example, PROGA_1, PROGA_2, and PROGA_3). To see the current module and function that is in scope, use the CONTEXT command.
ARM DUI 0175N Copyright © 2002-2011 ARM. All rights reserved. 1-31ID052111 Non-Confidential

Working with the CLI
See also• Printing reserved symbols on page 1-19• CONTEXT on page 2-96.
1.7.5 Variable references
In C, using a variable in an expression can result in a value or an address:• a fully referenced variable results in a value• a partially referenced variable results in an address.
Some legal assembly language variables can conflict with C operators, such as dot (.) and question mark (?). These characters are replaced with an underscore (_).
Table 1-12 shows examples of variable references that are supported, including an indication of what type of reference is being made.
When you refer to a variable in a C/C++ expression that is not fully referenced, you are referring to the address of that variable, not the value. For this reason, the variable is considered unreferenced. The normal C operators are implemented to modify references. Table 1-13 shows the C operators.
Table 1-12 Examples of references to variables
Variable reference Reference type
int A;
A = 5;A is fully referenced.
long temp;
temp = 9;temp is fully referenced.
int arr[10], *LABEL; arr is not fully referenced so its address is used.
LABEL = arr;
arr[3] = 8;arr[3] is fully referenced.
int AB[10][10], *LABX; AB is not fully referenced so its address is used.
LABX = AB[5];
LABX = LABEL;LABEL is fully referenced so its value is used (the address it points to).
char *p,c;
p = &c;p is fully referenced. c is not fully referenced.
c = *LABEL; LABEL is dereferenced so the value of its address is used.
Table 1-13 C operators for referencing and dereferencing variables
Operator Scalar Pointer Array Structure Union
* - Ref Ref - -
& Deref Deref - Deref Deref
-> - Refa
a. Must be a pointer to a structure or union. The right side must be a member of that structure or union. Otherwise, it is illegal.
- - -
. - - - Ref Ref
[ ] - Ref Ref - -
ARM DUI 0175N Copyright © 2002-2011 ARM. All rights reserved. 1-32ID052111 Non-Confidential

Working with the CLI
These operators let you reference, or get the value of, and dereference, or get the address of, variables. The concept of referenced and dereferenced variables also applies to breakpoints. For example:
BREAKACCESS arrayname
This command sets an access breakpoint at the start address of the array arrayname because arrayname is not fully referenced.
The following form of the command sets a breakpoint at the value stored in arrayname[3] and not the address of arrayname[3], because it is fully referenced:
BREAKACCESS arrayname[3]
By including the special operator &, the following command enables you to set a breakpoint at the address of the array element arrayname[3]:
BREAKACCESS &arrayname[3]
1.7.6 Stack references
When a function is invoked in C/C++, space is allocated on the stack for most local variables. Typically, space is also allocated for a return address for returning to the calling routine. If a function calls another function, all information is saved on the stack to continue execution when the called function returns. The function is now nested.
You can reference variables and functions nested on the stack implicitly or explicitly.
Implicit stack references
Within the debugger, you can implicitly reference variables on the stack as follows:
• To refer to variables on the stack in the current function, specify the name of the variable, for example x.
• To refer to a local variable in a nested function, specify the function name followed by a backslash and the name of the local variable (main\i for example). If the nested function is recursive, the last occurrence of that function is used. An explicit reference enables any occurrence to be selected.
Explicit stack references
A function is allocated storage for its variables on the stack when it is currently executing. To refer to variables on the stack explicitly, you must specify the nesting level of the function preceded by an at sign @. The Call Stack window in source-level mode displays nesting level information. The current function is @0, its caller is @1.
You can reference functions on the stack as follows:
• To refer to the address where some function on the stack returns, specify the function nesting level preceded by an at sign @. For example, GO @1 executes the program until the debugger reaches the address that corresponds to the location where the current function returns to its caller (the instruction after the call). The LIST and DISASSEMBLE commands can be used to show the code at the return address (LI @2 for example).In nonrecursive programs, the command GO @1 corresponds to setting a breakpoint when the current function returns to its caller. In recursive programs, the address alone might not be enough to specify the instance that you want. A command such as GO@1;
ARM DUI 0175N Copyright © 2002-2011 ARM. All rights reserved. 1-33ID052111 Non-Confidential

Working with the CLI
until(depth == 4) can be used to specify the instance of the address that you want (assuming depth is a local variable in your recursive function that determines the instance you are executing).
• To explicitly refer to a local variable in a nested function, specify the function nesting level followed by a backslash and the name of the variable. For example, PRINTVALUE @3\str references the local variable str of the function at nesting level 3.
• To see all available information about a function, specify the EXPAND command followed by the function nesting level. For example, EXPAND @7 displays all information about the function at the specified level for that particular invocation. This information includes the name of the function, the address that is returned to, and all local variables in the function and their values.
ARM DUI 0175N Copyright © 2002-2011 ARM. All rights reserved. 1-34ID052111 Non-Confidential

Working with the CLI
1.8 Source patching with macrosWhen debugging your application program, sometimes errors can be temporarily patched with source statements. It is often unnecessary to edit the source code, and recompile and link. Instead, you can use a temporary patch by using macros with breakpoints.
See also:• Patching example to insert lines of source code• Patching example to jump over lines of source code• Patching example to re-implement a loop on page 1-37• Patching example to emulate a serial port on page 1-38• Other ways to use macros on page 1-39.
1.8.1 Patching example to insert lines of source code
To insert a few lines of source code in your program:
1. Define a macro containing the statements that you want to insert.
2. Start a debugging session and set a breakpoint on the source line following the point where you want to insert the new lines.
3. Attach your macro to this breakpoint.
4. Run the program until execution stops at the breakpoint.
5. The source statements in your macro are interpreted and executed. The macro completes.
6. Program execution continues normally.
Note Using a macro in this way might cause problems with compiler optimizations, for example the ordering of instructions might have been altered by the compiler.
See also
• Chapter 2 RealView Debugger Commands
• the following in the RealView Debugger User Guide:— Setting a breakpoint that depends on the result of a macro on page 12-21.
1.8.2 Patching example to jump over lines of source code
You can also use a similar approach to jump over or skip lines of source code:
1. Define a macro to set the PC to a point beyond the lines that are not executed.
2. Start a debugging session and set a breakpoint on the first line to be skipped.
3. Attach your macro to this breakpoint.
4. Run the program until execution stops at the breakpoint.
5. The source statements in your macro are interpreted and executed. The macro completes.
6. Program execution continues normally from the new position of the PC.
ARM DUI 0175N Copyright © 2002-2011 ARM. All rights reserved. 1-35ID052111 Non-Confidential

Working with the CLI
You can also use the JUMP command for looping and skipping over commands. The JUMP command takes a label and an expression. If the expression evaluates to True then control jumps to the specified label. If the label is positioned earlier in the file, this loops. If the label is positioned later in the file, all intermediate commands are skipped.
The expression can test:• symbols, using the isalive keyword• results• local symbols, created with ADD• file tests, using macros.
Example 1-5 shows a script command fragment containing the JUMP command.
Example 1-5 Using the JUMP command
add int cnt = 20initialize :repeat /* loop 20 times */some_commands jump repeat,cnt /* repeat until cnt==0 */;; define some local vars if not defined.;jump nodefine,isalive(cnt)==1some_commands :nodefine
See also• ADD on page 2-16• JUMP on page 2-174• isalive on page 4-12.
ARM DUI 0175N Copyright © 2002-2011 ARM. All rights reserved. 1-36ID052111 Non-Confidential

Working with the CLI
1.8.3 Patching example to re-implement a loop
The source code being debugged contains the following lines:
2425 count = 5;26 for (i=0; i < MAXNUM; i++)27 {28 array[i]=1;29 count=count+2;30 k=count*i;31 }32
To jump over or skip lines 29 and 30, and to insert a new line temporarily, which increments count by 1:
1. Define a macro that contains statements to increment count and move the PC over the two lines:DEFINE patch_29(){ count++; /* increment count by 1 */ $SETREG @PC = #31$; /* reset program counter so skipping 29 & 30 */ return(1); /* return 1 to continue normal execution */}.
2. Start a debugging session and set an instruction breakpoint on line 29.
3. Attach your macro to this breakpoint.
4. Run the program until execution stops at the breakpoint.
5. The source statements in your macro are interpreted and executed. The macro completes.
6. Program execution continues normally.
See also• Execution control on page 2-4• the following in the RealView Debugger User Guide:
— Chapter 11 Setting Breakpoints.
ARM DUI 0175N Copyright © 2002-2011 ARM. All rights reserved. 1-37ID052111 Non-Confidential

Working with the CLI
1.8.4 Patching example to emulate a serial port
To emulate a serial port in your source code:
1. Define a macro that emulates a serial port:add unsigned long last_time; /* create local symbol */define int ser_port(offset,base) /* macro definition */ int offset; /* offset of device register */ unsigned short *base; /* base of port */{ unsigned short value; if (offset == 0) { /* control register */ if (last_time && ((@cycle - last_time) < 20)) { error (0, "ser_port: access less than allowed time: %d", @cycle - last_time); return (0); } last_time = @cycle; value = base[offset]; /* cache written value */ base[offset] = 0; /* reset */ if (value == 0x20) { /* want to read */ ... } ... } ... $SETREG @PC = #line_num$; /* reset PC to skip the patched lines */}.
2. Start a debugging session and set a breakpoint on the source code to stop execution immediately before it accesses the serial port, for example at line 20 of module_name.c, and attach your macro to this breakpoint:BREAKINSTRUCTION \MODULE_NAME\#20 ;ser_port(0,&ser_port)
3. Continue debugging using the newly-inserted serial port emulation.
As with the previous example, this is only a temporary patch so the source code must be edited and then recompiled. Be careful, however, when using such a patch in optimized code.
ARM DUI 0175N Copyright © 2002-2011 ARM. All rights reserved. 1-38ID052111 Non-Confidential

Working with the CLI
1.8.5 Other ways to use macros
This section describes other ways that you can use macros.
Using macros to interact with files and windows
During your debugging session, you can use macros to read from or write to a file, or to write to a window. Table 1-14 shows the macros to do this.
Using macros with commands
Table 1-15 lists the commands you can use macros. For these commands, the macro is executed automatically when an event occurs, such as the activation of a breakpoint. The return value from the macro can also determine the subsequent execution (for example, see the macro_call argument to the breakpoint commands).
Table 1-14 Macros for interacting with files and windows
Macro Acts on See
fclose() Files fclose on page 3-17
fopen() Files fopen on page 3-20
fgetc() Files fgetc on page 3-18
fputc() Files fputc on page 3-22
fread() Files fread on page 3-23
fwrite() Files and windows
fwrite on page 3-25
Table 1-15 Commands that run macros automatically
Command See
BGLOBAL BGLOBAL on page 2-31
BREAKACCESS BREAKACCESS on page 2-38
BREAKEXECUTION BREAKEXECUTION on page 2-47
BREAKINSTRUCTION BREAKINSTRUCTION on page 2-55
BREAKREAD BREAKREAD on page 2-61
BREAKWRITE BREAKWRITE on page 2-70
GO GO on page 2-159
GOSTEP GOSTEP on page 2-161
ARM DUI 0175N Copyright © 2002-2011 ARM. All rights reserved. 1-39ID052111 Non-Confidential

Working with the CLI
Table 1-16 lists the commands that you can use to manage macros.
Sending debug information to the Output view
You can send debugging information to the Output view in the GUI with the error() predefined macro.
Interacting with a user
Table 1-17 lists the macros that are provided to enable a user to interact with your script and then continue execution based on the decision, or data, entered.
You can also use these predefined macros with other macros and INCLUDE files. If using these predefined macros with the MACRO command in INCLUDE files, use the JUMP command to implement the user’s decision. Example 1-6 shows how you can use these predefined macros with the MACRO command:
Example 1-6 Using the prompt macros with JUMP
add int valadd char buff[15]strcpy(buff, "one\ntwo\nthree")
// Implement user’s choicedefine /R void choice(option)int option;{ if (choice > 0) { if (choice == 1) $printf "Item one selected.\n"$;
Table 1-16 Commands that enable you to manage macros
Command See
CEXPRESSION CEXPRESSION on page 2-87
DEFINE DEFINE on page 2-105
DELETE DELETE on page 2-109
MACRO MACRO on page 2-182
SHOW SHOW on page 2-248
VMACRO VMACRO on page 2-324
Table 1-17 Macros for interacting with a user
Command See
prompt_file prompt_file on page 3-37
prompt_list prompt_list on page 3-39
prompt_text prompt_text on page 3-40
prompt_yesno prompt_yesno on page 3-42
prompt_yesno_cancel prompt_yesno_cancel on page 3-43
ARM DUI 0175N Copyright © 2002-2011 ARM. All rights reserved. 1-40ID052111 Non-Confidential

Working with the CLI
else if (choice == 2) $printf "Item two selected.\n"$; else $printf "Item three selected.\n"$; }}.// Choose an option:repeat macro val = prompt_list("Choose one:", buff) choice(val) jump repeat, val>0 // Repeat until user clicks Cancel
See also• Alphabetical command reference on page 2-12• error on page 3-15.
ARM DUI 0175N Copyright © 2002-2011 ARM. All rights reserved. 1-41ID052111 Non-Confidential

Chapter 2 RealView Debugger Commands
This chapter describes available RealView® Debugger commands. It contains the following sections:• Command syntax definition on page 2-2• Debugger commands listed by function on page 2-3• Alphabetical command reference on page 2-12.
ARM DUI 0175N Copyright © 2002-2011 ARM. All rights reserved. 2-1ID052111 Non-Confidential

RealView Debugger Commands
2.1 Command syntax definitionMany commands have alternative names, or aliases, that you might find easier to remember. Command names and aliases can be abbreviated. For example, ADDBOARD can be abbreviated to ADDBO. The syntax definition for each command shows how it can be shortened by underlining the abbreviation, that is ADDBOARD.
In the syntax definition of each command:
• square brackets [...] enclose optional parameters
• words enclosed in braces {} separated by a vertical bar | indicate alternatives from which you choose one
• parameters that can be repeated are followed by an ellipsis (...).
Do not type square brackets, braces, or the vertical bar. Replace parameters in italics with the value you want. When you supply more than one parameter, use a comma or a space or a semicolon as a separator, as shown in the syntax definition for the command. If a parameter is a name that includes spaces, enclose it in double quotation marks.
See also:
• Specifying address ranges
2.1.1 Specifying address ranges
Many commands enable you to specify a range of addresses. You specify an address range using either of the following formats:
start_addr..end_addr Start address and an absolute end address, for example:memmap,define 0x10000..0x20000
start_addr..+length Start address and length of the address region, for example:memmap,define 0x10000..+0x10000
In both cases, the start and end values are inclusive.
You can also use symbol names such as macros, function names, and variables as the start address:
printdsm mymacro()..+1000
printdsm main..+1000
fill Arr_2_Glob..+64=0xFF
ARM DUI 0175N Copyright © 2002-2011 ARM. All rights reserved. 2-2ID052111 Non-Confidential

RealView Debugger Commands
2.2 Debugger commands listed by functionThe following sections list the commands according to their general function:• Board file access• Execution control on page 2-4• Examining source files on page 2-5• Program image management on page 2-5• Target registers and memory on page 2-6• Cache enquiries on page 2-6• Status enquiries on page 2-7• Macros and aliases on page 2-7• CLI on page 2-8• Program symbol manipulation on page 2-8• Creating and writing to files and windows on page 2-9• Processor tracing on page 2-9• OS-aware debugging on page 2-10• Miscellaneous on page 2-10.
However, it does not include command aliases. See Alphabetical command reference on page 2-12 for a full, alphabetical list of commands.
2.2.1 Board file access
Table 2-1 shows the commands that operate on boards, that is target processors, development systems and their subcomponents.
Table 2-1 Board file access commands
Description See
Select a particular target connection BOARD on page 2-35
Connect the debugger to a target CONNECT on page 2-93
Remove a Debug Configuration DELBOARD on page 2-108
Disconnect the debugger from a target DISCONNECT on page 2-118
List board descriptions DTBOARD on page 2-125
Write board memory map as linker file DUMPMAP on page 2-133
Edit current board definition EDITBOARDFILE on page 2-136
Read, or reread, a board file READBOARDFILE on page 2-218
ARM DUI 0175N Copyright © 2002-2011 ARM. All rights reserved. 2-3ID052111 Non-Confidential

RealView Debugger Commands
2.2.2 Execution control
Table 2-2 shows the commands that control target execution, including instruction and data breakpoints.
Table 2-2 Execution control commands
Description See
Initialize or reset the processor EMURESET on page 2-138RESTART on page 2-230
Start executing from current state GO on page 2-159RUN on page 2-232
Set a data or instruction breakpoint BREAKACCESS on page 2-38BREAKEXECUTION on page 2-47BREAKINSTRUCTION on page 2-55BREAKREAD on page 2-61BREAKWRITE on page 2-70
Clear, enable or disable a breakpoint CLEARBREAK on page 2-89DISABLEBREAK on page 2-114ENABLEBREAK on page 2-140RESETBREAKS on page 2-228
Stop execution at current point HALT on page 2-163STOP on page 2-267
Set or change processor exceptions BGLOBAL on page 2-31
Step by instruction STEPINSTR on page 2-259STEPOINSTR on page 2-263
Step by source line STEPLINE on page 2-261STEPO on page 2-265
Step invoking a macro at each step GOSTEP on page 2-161
Synchronize execution SYNCHACTION on page 2-269SYNCHEXEC on page 2-271XTRIGGER on page 2-335
Do something when execution starts or stops ONSTATE on page 2-193
ARM DUI 0175N Copyright © 2002-2011 ARM. All rights reserved. 2-4ID052111 Non-Confidential

RealView Debugger Commands
2.2.3 Examining source files
Table 2-3 shows the commands that let you examine the program source files.
2.2.4 Program image management
Table 2-4 shows the commands that manipulate image (executable) files.
Table 2-3 Examining source file commands
Description See
Display a specific source file LIST on page 2-175
Display execution context CONTEXT on page 2-96DOWN on page 2-124UP on page 2-318WHERE on page 2-331
Display locals of an execution context EXPAND on page 2-146
Select source or assembly display MODE on page 2-190
Move the display location within program SCOPE on page 2-234
Display program source files DTFILE on page 2-128
Table 2-4 Program image management commands
Description See
Reload or restart current executable RELOAD on page 2-225RESTART on page 2-230
Add or remove executable file from loaded files list
ADDFILE on page 2-19DELFILE on page 2-111
Load target with one or more executable files
LOAD on page 2-176RELOAD on page 2-225
Unload an executable file or process UNLOAD on page 2-316
Write to FLASH memory FLASH on page 2-152
Define program arguments (argc, argv) ARGUMENTS on page 2-27
Define run mode RUN on page 2-232
Disassemble target memory DISASSEMBLE on page 2-116
Print disassembled target memory PRINTDSM on page 2-203
Verify data or image file against memory VERIFYFILE on page 2-322
Display more information about load errors DLOADERR on page 2-120
Do something when execution starts or stops ONSTATE on page 2-193
ARM DUI 0175N Copyright © 2002-2011 ARM. All rights reserved. 2-5ID052111 Non-Confidential

RealView Debugger Commands
2.2.5 Target registers and memory
Table 2-5 shows the commands that manipulate target registers and memory.
2.2.6 Cache enquiries
Table 2-6 shows the commands that display cache information.
Table 2-5 Target register and memory access commands
Description See
Enable and change target memory layout MEMMAP on page 2-184
Fill target memory with value or values FILL on page 2-149SETMEM on page 2-239CEXPRESSION on page 2-87
Copy or compare target memory areas COPY on page 2-98COMPARE on page 2-91
Change target registers SETREG on page 2-242
Convert a virtual address to a physical address
VA2PA on page 2-319
Display target and memory mapped register information
REGINFO on page 2-223
Display memory in window MEMWINDOW on page 2-188LIST on page 2-175
Disassemble target memory DISASSEMBLE on page 2-116
Search for value or values in memory SEARCH on page 2-236
Write to FLASH memory FLASH on page 2-152
Write memory map to linker file DUMPMAP on page 2-133
Write host file into target memory READFILE on page 2-219
Write target memory to screen DUMP on page 2-131
Write target memory to host file WRITEFILE on page 2-333
Compare host file with target memory TEST on page 2-273VERIFYFILE on page 2-322
Table 2-6 Cache enquiry commands
Description See
Search for an address in the cache CACHEFIND on page 2-81
Display summary information about the cache
CACHEINFO on page 2-82
Locate a specific cache line and display information about it.
CACHELINE on page 2-84
ARM DUI 0175N Copyright © 2002-2011 ARM. All rights reserved. 2-6ID052111 Non-Confidential

RealView Debugger Commands
2.2.7 Status enquiries
Table 2-7 shows the commands that display information about the current debugger session.
2.2.8 Macros and aliases
Table 2-8 shows the commands that define and display command aliases and macros.
See also
The following in the RealView Debugger User Guide:• Macro language on page 1-10• Chapter 16 Using Macros for Debugging.
Table 2-7 Status enquiry commands
Description See
Display information about the current target COREINFO on page 2-99
Display the execution state of the current target
CORESTATE on page 2-100
Display current image file information DTFILE on page 2-128
Display more information about load errors DLOADERR on page 2-120
Display execution context CONTEXT on page 2-96WHERE on page 2-331
Display currently set breakpoints and tracepoints
DTBREAK on page 2-126
Display trace status DTRACE on page 2-130
Display board descriptions DTBOARD on page 2-125
Display the contents of a macro SHOW on page 2-248
Display and define user preferences OPTION on page 2-195SETTINGS on page 2-245
Displays RealView ARMulator® ISS (RVISS) bus and processor cycles.
STATS on page 2-254
Table 2-8 Macro and alias commands
Description See
Define a command macro DEFINE on page 2-105
Invoke a command macro MACRO on page 2-182
Step invoking a macro at each step GOSTEP on page 2-161
Define, list, delete command alias ALIAS on page 2-21
Attach macro to window with auto-update VMACRO on page 2-324
Display the contents of a macro SHOW on page 2-248
ARM DUI 0175N Copyright © 2002-2011 ARM. All rights reserved. 2-7ID052111 Non-Confidential

RealView Debugger Commands
2.2.9 CLI
Table 2-9 shows the functions that manipulate the command line itself.
2.2.10 Program symbol manipulation
Table 2-10 shows the commands that display and change symbols in the debugger symbol table.
Table 2-9 CLI commands
Description See
Run script file INCLUDE on page 2-168
Define error action for script file ERROR on page 2-142
Cause an abnormal error for script file FAILINC on page 2-148
Interrupt current asynchronous command CANCEL on page 2-85INTRPT on page 2-171
Jump (go to) another point in the script JUMP on page 2-174
Log CLI actions to file JOURNAL on page 2-172LOG on page 2-180
Log STDIO messages to a file STDIOLOG on page 2-257
Table 2-10 Program symbol manipulation commands
Description See
Create symbols referencing target memory ADD on page 2-16
Create host-debugger symbols ADD on page 2-16
Delete symbols DELETE on page 2-109
Browse C++ class structure BROWSE on page 2-79
Load only the symbols for a program LOAD on page 2-176
Display symbols in the symbol table PRINTSYMBOLS on page 2-208
Display variable type details PRINTTYPE on page 2-210
Evaluate expressions involving symbols CEXPRESSION on page 2-87PRINTVALUE on page 2-211
Display value of symbol every time debugger stops target
MONITOR on page 2-191NOMONITOR on page 2-192
ARM DUI 0175N Copyright © 2002-2011 ARM. All rights reserved. 2-8ID052111 Non-Confidential

RealView Debugger Commands
2.2.11 Creating and writing to files and windows
Table 2-11 shows the commands that manipulate windows.
2.2.12 Processor tracing
Table 2-12 shows the processor instruction tracing functions.
Table 2-11 Creating files and text writing commands
Description See
Opening a file FOPEN on page 2-154
Creating a new window VOPEN on page 2-326
Clearing a window VCLEAR on page 2-320
Setting the cursor position within a window VSETC on page 2-328
Deleting a window VCLOSE on page 2-321
Attaching a macro to a window VMACRO on page 2-324
Display list of open files and windows WINDOW on page 2-332
Writing text to a file or window FPRINTF on page 2-156PRINTF on page 2-205Commands that support the ;windowid or ;fileid parameter.
Table 2-12 Processor tracing commands
Description See
Enable and disable tracing TRACE on page 2-277
Configure the trace capture logic ANALYZER on page 2-23ETM_CONFIG on page 2-143
Display status information DTRACE on page 2-130
Set tracepoints in the program TRACE on page 2-277TRACEDATAACCESS on page 2-288TRACEDATAREAD on page 2-293TRACEDATAWRITE on page 2-298TRACEEXTCOND on page 2-303TRACEINSTREXEC on page 2-307TRACEINSTRFETCH on page 2-312
Displaying, saving, and loading captured trace information
TRACEBUFFER on page 2-279
ARM DUI 0175N Copyright © 2002-2011 ARM. All rights reserved. 2-9ID052111 Non-Confidential

RealView Debugger Commands
2.2.13 OS-aware debugging
Table 2-13 shows the commands that are specific to OS-aware connections.
Table 2-14 shows those commands that provide arguments or have specific behavior for OS-aware connections.
Other commands can be used with OS-aware connections, such as those for stepping, accessing memory and registers, and setting hardware breakpoints.
2.2.14 Miscellaneous
Table 2-15 shows the remaining functions.
Table 2-13 OS-aware specific debugging commands
Description See
Control OS-aware debugging OSCTRL on page 2-200
OS-aware action commands AOS_resource_list on page 2-26
OS-aware resource commands DOS_resource_list on page 2-122
Select thread in OS-aware thread group THREAD on page 2-276
Table 2-14 Debugging commands with OS-aware related features
Description See
Set an instruction breakpoint for a specific thread
BREAKINSTRUCTION on page 2-55
Stop execution HALT on page 2-163STOP on page 2-267
Reset processor and cleanup thread states and other OS issues
RESET on page 2-227
Table 2-15 Miscellaneous commands
Description See
Open and close the Connect to Target window
CCTRL on page 2-86
Change and display the current working directory
CWD on page 2-101PWD on page 2-216
Get help on command HELP on page 2-165DHELP on page 2-113DCOMMANDS on page 2-103
Run a command on the host operating system
HOST on page 2-166
Define user preferences OPTION on page 2-195SETTINGS on page 2-245
Force debugger to wait for a specified number of seconds
PAUSE on page 2-202
ARM DUI 0175N Copyright © 2002-2011 ARM. All rights reserved. 2-10ID052111 Non-Confidential

RealView Debugger Commands
Force debugger to wait, or not to wait, for command to complete
WAIT on page 2-329
Quit debugger QUIT on page 2-217
Enable or disable the auto save breakpoints feature
RVDCONTEXT on page 2-233
Table 2-15 Miscellaneous commands (continued)
Description See
ARM DUI 0175N Copyright © 2002-2011 ARM. All rights reserved. 2-11ID052111 Non-Confidential

RealView Debugger Commands
2.3 Alphabetical command referenceThe following sections list in alphabetical order all the commands that you can issue to RealView Debugger using the CLI:• ADD on page 2-16• ADDFILE on page 2-19• ALIAS on page 2-21• ANALYZER on page 2-23• AOS_resource_list on page 2-26• ARGUMENTS on page 2-27• BACCESS on page 2-30• BEXECUTION on page 2-30• BGLOBAL on page 2-31• BINSTRUCTION on page 2-34• BOARD on page 2-35• BREAD on page 2-37• BREAK on page 2-37• BREAKACCESS on page 2-38• BREAKEXECUTION on page 2-47• BREAKINSTRUCTION on page 2-55• BREAKREAD on page 2-61• BREAKWRITE on page 2-70• BROWSE on page 2-79• BWRITE on page 2-80• CACHEFIND on page 2-81• CACHEINFO on page 2-82• CACHELINE on page 2-84• CANCEL on page 2-85• CCTRL on page 2-86• CEXPRESSION on page 2-87• CLEARBREAK on page 2-89• COMPARE on page 2-91• CONNECT on page 2-93• CONTEXT on page 2-96• COPY on page 2-98• COREINFO on page 2-99• CORESTATE on page 2-100• CWD on page 2-101• DBOARD on page 2-102• DBREAK on page 2-102• DCOMMANDS on page 2-103• DEFINE on page 2-105• DELBOARD on page 2-108• DELETE on page 2-109• DELFILE on page 2-111• DHELP on page 2-113• DISABLEBREAK on page 2-114• DISASSEMBLE on page 2-116
ARM DUI 0175N Copyright © 2002-2011 ARM. All rights reserved. 2-12ID052111 Non-Confidential

RealView Debugger Commands
• DISCONNECT on page 2-118• DLOADERR on page 2-120• DMAP on page 2-121• DOS_resource_list on page 2-122• DOWN on page 2-124• DTBOARD on page 2-125• DTBREAK on page 2-126• DTFILE on page 2-128• DTRACE on page 2-130• DUMP on page 2-131• DUMPMAP on page 2-133• DVFILE on page 2-135• EDITBOARDFILE on page 2-136• EMURESET on page 2-138• EMURST on page 2-139• ENABLEBREAK on page 2-140• ERROR on page 2-142• ETM_CONFIG on page 2-143• EXPAND on page 2-146• FAILINC on page 2-148• FILL on page 2-149• FLASH on page 2-152• FOPEN on page 2-154• FPRINTF on page 2-156• GO on page 2-159• GOSTEP on page 2-161• HALT on page 2-163• HELP on page 2-165• HOST on page 2-166• HWRESET on page 2-167• INCLUDE on page 2-168• INTRPT on page 2-171• JOURNAL on page 2-172• JUMP on page 2-174• LIST on page 2-175• LOAD on page 2-176• LOG on page 2-180• MACRO on page 2-182• MEMMAP on page 2-184• MEMWINDOW on page 2-188• MMAP on page 2-189• MODE on page 2-190• MONITOR on page 2-191• NOMONITOR on page 2-192• ONSTATE on page 2-193• OPTION on page 2-195• OS action commands on page 2-198
ARM DUI 0175N Copyright © 2002-2011 ARM. All rights reserved. 2-13ID052111 Non-Confidential

RealView Debugger Commands
• OS resource commands on page 2-199• OSCTRL on page 2-200• PAUSE on page 2-202• PRINTDSM on page 2-203• PRINTF on page 2-205• PRINTSYMBOLS on page 2-208• PRINTTYPE on page 2-210• PRINTVALUE on page 2-211• PROPERTIES on page 2-213• PS on page 2-214• PT on page 2-215• PWD on page 2-216• QUIT on page 2-217• READBOARDFILE on page 2-218• READFILE on page 2-219• REEXEC on page 2-222• REGINFO on page 2-223• RELOAD on page 2-225• RESET on page 2-227• RESETBREAKS on page 2-228• RESTART on page 2-230• RSTBREAKS on page 2-231• RUN on page 2-232• RVDCONTEXT on page 2-233• SCOPE on page 2-234• SEARCH on page 2-236• SETFLAGS on page 2-238• SETMEM on page 2-239• SETREG on page 2-242• SETTINGS on page 2-245• SHOW on page 2-248• SINSTR on page 2-249• SM on page 2-250• SOINSTR on page 2-251• SOVERLINE on page 2-252• SR on page 2-253• STATS on page 2-254• STDIOLOG on page 2-257• STEPINSTR on page 2-259• STEPLINE on page 2-261• STEPOINSTR on page 2-263• STEPO on page 2-265• STOP on page 2-267• SYNCHACTION on page 2-269• SYNCHEXEC on page 2-271• TEST on page 2-273• THREAD on page 2-276
ARM DUI 0175N Copyright © 2002-2011 ARM. All rights reserved. 2-14ID052111 Non-Confidential

RealView Debugger Commands
• TRACE on page 2-277• TRACEBUFFER on page 2-279• TRACEDATAACCESS on page 2-288• TRACEDATAREAD on page 2-293• TRACEDATAWRITE on page 2-298• TRACEEXTCOND on page 2-303• TRACEINSTREXEC on page 2-307• TRACEINSTRFETCH on page 2-312• UNLOAD on page 2-316• UP on page 2-318• VA2PA on page 2-319• VCLEAR on page 2-320• VCLOSE on page 2-321• VERIFYFILE on page 2-322• VMACRO on page 2-324• VOPEN on page 2-326• VSETC on page 2-328• WAIT on page 2-329• WARMSTART on page 2-330• WHERE on page 2-331• WINDOW on page 2-332• WRITEFILE on page 2-333• XTRIGGER on page 2-335.
ARM DUI 0175N Copyright © 2002-2011 ARM. All rights reserved. 2-15ID052111 Non-Confidential

RealView Debugger Commands
2.3.1 ADD
Creates a symbol and adds it to the debugger symbol table.
Syntax
ADD [type] symbol_name [&address] [=value [,value]...]
where:
type One of the following data types:int The symbol represents a location holding a four byte signed integer
value. This is the default type of symbols.char The symbol represents a location holding a one byte value.short The symbol represents a location holding a two byte signed value.long The symbol represents a location holding a four byte signed value.long long The symbol represents a location holding an 8-byte signed value.You can also:• Prefix the data type with unsigned.• Use the data types together with * and [] to indicate pointer and array
variables, using the C language syntax.If the symbol is an array, then you must specify the array size after the symbol name within the square brackets. You can define multidimensional arrays by appending several bracketed array dimensions.
• Create symbols with type float or double, but you cannot initialize them with a value in the ADD statement.
• Create references to existing instances of the following types:struct The symbol is an instance of, or a pointer to, a C structure.enum The symbol is an instance of, or a pointer to, a C enumeration.union The symbol is an instance of, or a pointer to, a C union.You cannot create new enumerations, structures, or unions. You cannot initialize complete structures at once, although you can assign values to the individual members with the CEXPRESSION command.
symbol_name Is the name of the symbol being added. The name must start with an alphabetic character or an underscore, optionally followed by alphabetic or numeric characters or underscores. The symbol name must not already exist (when appropriate, use the DELETE command to remove a symbol).
address Is the address in target memory that is referred to by this debugger symbol. If you do not specify an address, the new debugger symbol refers to a location in debugger memory, and is not available to code running on the target.
value Is the initial value of the added symbol. You can use:• integer values corresponding to the C types int, char, short, long or
long long
• pointers to integers in target memory• strings in double quotation marks, matching the character array type,
char[n], but not char *• a list of values separated by a comma.
ARM DUI 0175N Copyright © 2002-2011 ARM. All rights reserved. 2-16ID052111 Non-Confidential

RealView Debugger Commands
If the symbol type is a pointer, an assigned value must be the address of the value on the target.You can initialize array symbols using multiple value arguments. For example:> add char names[3][2] ="aa", "bb"> print names[1]"bb...
The ... after bb indicates that there is no terminating NUL for the string, because each element of the array is only 2 characters in size.The value is loaded into the memory location referred to by the symbol. If value is not specified, the symbol is set to zero in debugger memory but is not given a value in target memory.Floating-point values are not recognized.
Description
The ADD command adds a symbol to the debugger symbol table for the current connection. You cannot add a symbol without a connection, but you do not have to load an executable image file. If you then load an image, the symbol is destroyed. However, the symbol survives an executable image being reloaded (for example by selecting Target → Reload Image to Target from the Code window main menu) but is destroyed if the target is disconnected and then reconnected or another, different, image is loaded.
You can remove a symbol defined using ADD by using the DELETE command, and you can modify its value using the CEXPRESSION command.
Rules for the ADD command
The following rules apply to the use of the ADD command:
• ADD runs asynchronously unless in a macro.
• The specified symbol must not exist at the time it is added.
• To change the symbol type, delete the symbol and then add it again.
• When initializing symbols, the size of the symbol is used, not the size of the type of value supplied. In particular, the size of a char array is not determined by the string used to initialize it.
• If a char array is created, for example using ADD char namearray[n], it is filled with the initial value.
• If there is a runtime error in the initial value, the symbol is still created. You can then assign the correct value with the CEXPRESSION command, or you can delete the symbol and add it again with a legal initial value.
Examples
The following examples show how to use ADD:
add mysymbol =-3 Adds a new symbol called mysymbol of type int, which is signed, to the debugger symbol table.
add unsigned long ul=1234567890 Adds a new symbol called ul of type unsigned long to the debugger symbol table.
ARM DUI 0175N Copyright © 2002-2011 ARM. All rights reserved. 2-17ID052111 Non-Confidential

RealView Debugger Commands
add char *xyz Adds a new symbol called xyz to the debugger symbol table. The new symbol is of character pointer type and has an initial value of zero.
See also• CEXPRESSION on page 2-87• DELETE on page 2-109.• PRINTSYMBOLS on page 2-208• PRINTVALUE on page 2-211.
ARM DUI 0175N Copyright © 2002-2011 ARM. All rights reserved. 2-18ID052111 Non-Confidential

RealView Debugger Commands
2.3.2 ADDFILE
Adds the named file to the executable image file list but does not load it. You can optionally empty the list before adding the new filename.
Syntax
ADDFILE [,auto] =filename [=string,...]
where:
auto Specifies that only one added file is permitted for each process or processor. Any previously added file is removed when the specified file is added.
filename The name of the file to be added. You must use single or double quotation marks around the filename.You can include one or more environment variables in the filename. For example, if MYPATH defines the location C:\Myimages, you can specify:addfile ="$MYPATH\\myimage.axf"
string The target pathname, for example, an OS loader.
Description
The RealView Debugger executable file list contains the names of the files containing the target code for your application. Normally this contains a single linker output file, for example dhry.axf and, in this case, you use the LOAD and RELOAD commands as required.
However, when the application is more complex it is sometimes easier to create it as several files, for example one file for the Operating System (OS) and one for each major process. In these cases, you use the ADDFILE and RELOAD, or the ADDFILE and LOAD/A commands, to manipulate the files that are loaded onto the target.
To load the files on the file list use RELOAD, described on page 2-225.
Restrictions on the use of ADDFILE
The ADDFILE command is not allowed in a macro.
Examples
The following example removes any existing files from the executable file list and loads dhry.axf into it. The reload command then transfers the executable contents of dhry.axf to the target and sets the processor PC to the image entry point:
addfile,auto ='c:\source\debug\dhry.axf'reload
This is the same as:
load 'c:\source\debug\dhry.axf'
This example loads the file dhry.axf into the file list, removing any existing files. It then adds the file kernel.axf to the file list. The reload command transfers the executable contents of both files to the target and sets the PC to the entry address of the last executable loaded, in this case that of kernel.axf.
addfile,auto ='c:\source\dhry\debug\dhry.axf'addfile ='c:\source\OS\debug\kernel.axf'reload
ARM DUI 0175N Copyright © 2002-2011 ARM. All rights reserved. 2-19ID052111 Non-Confidential

RealView Debugger Commands
See also• DELFILE on page 2-111• DTFILE on page 2-128• LOAD on page 2-176• RELOAD on page 2-225• UNLOAD on page 2-316.
ARM DUI 0175N Copyright © 2002-2011 ARM. All rights reserved. 2-20ID052111 Non-Confidential

RealView Debugger Commands
2.3.3 ALIAS
Enables you to manipulate command aliases. Aliases are new debugger commands constructed from (optionally, parts of) existing debugger commands or macros.
Syntax
ALIAS [alias_name [=[definition]]]
where:
alias_name Names your new debugger command. This name is accepted as a legal debugger command name.An optional asterisk * embedded in the name indicates that the parts of the name that follow are not required, so your command can be abbreviated.
definition Defines the replacement string that is substituted in place of alias_name whenever alias_name is invoked.The definition normally contains macro invocations or debugger internal commands, or parts of such commands. However, any string of legal debugger characters is accepted.Using $* within a definition inserts the command-line parameters to the alias in the expansion. By default, parameters are appended to the alias when command expansion occurs.
Description
The ALIAS command can create, list, or delete new debugger commands. The building blocks are existing debugger commands and macros and, optionally, specific parameters. You can use ALIAS to define either:
• a new name (for example, one that is shorter or easier to remember) for an existing command
• a command that defines fixed parameters for an existing command.
ALIAS can only substitute one command for another. If you require a multiple command alias, use the MACRO command instead.
Enter ALIAS without parameters to display a list of the defined alias commands in the order in which they were added.
You can name your alias using almost any sequence of letters or numbers. However, when a command is entered the debugger searches for internal debugger commands before it searches for aliases. Therefore, you must ensure that you do not use an alias name that is the same as an internal debugger command. The name priorities are as follows:1. Debugger internal command, or defined abbreviation of command2. Defined alias names, and the defined abbreviations of alias names3. Macro names.
You can place alias command arguments in a specific position in the expanded debugger command by inserting the sequence $* where the parameters to the command alias must appear.
Rules for the ALIAS command
The following rules apply to the use of the ALIAS command:
• ALIAS runs asynchronously unless it is called within a macro.
ARM DUI 0175N Copyright © 2002-2011 ARM. All rights reserved. 2-21ID052111 Non-Confidential

RealView Debugger Commands
• alias_name must not exist at the time it is added. To change the definition of an alias, first define the alias equal to the nothing (alias nm=) to delete it and then add it again.
• If a debugger command has the same name as an alias, the debugger command is the one that is executed.
• Alias names are always matched before macros names.
• If two alias abbreviations or an alias and an abbreviation match, the first alias added during the current session is always used.
• An alias definition must be defined in terms of predefined debugger commands or macro names.
• An alias definition can reference debugger commands and macros.
Examples
The following examples show how to use ALIAS:
alias showf*ile =dtfile ;99 Defines a command called SHOWFILE that can be abbreviated to SHOWF, that is equivalent to the DTFILE command with its output directed to window number 99.
alias dub =dump /b Defines a command called DUB, with no abbreviation, that expands to the DUMP command in byte mode (/b).dub 0x20
Calls the alias dub to print out memory in bytes from address 0x20. This alias invocation is exactly the same as typing:dump /b 0x20
alias bpc =breakexecution,continue,message:{Break} $* ;DoCheck() Defines a command called BPC, with no abbreviation, that expands to the breakexecution command with specific parameters and trigger macro DoCheck(). It must be invoked with the address to break at as a parameter:bpc \MAIN_C\#15
This is equivalent to typing the command:breakexecution,continue,message:{Break} \MAIN_C\#15 ;DoCheck()
See also• DEFINE on page 2-105• DTFILE on page 2-128• MACRO on page 2-182.
ARM DUI 0175N Copyright © 2002-2011 ARM. All rights reserved. 2-22ID052111 Non-Confidential

RealView Debugger Commands
2.3.4 ANALYZER
Controls the configuration of the trace logic analyzer.
Syntax
ANALYZER {[,disable]|[,enable]}
ANALYZER {[edit_properties]|[,map_log_phys]|[,triggers]|[,connect]|[,set_size]}
ANALYZER {[,clear]|[,clear_triggers]}
ANALYZER {[,before]|[,around]|[,after]|[,stop_on_trigger]|[,continue_on_trigger]}
ANALYZER {,full_stop|,full_ignore|,full_ring}
ANALYZER {,collect_all|,collect_flow}
ANALYZER {,dataonly|,addronly|,fulltrace}
ANALYZER {,disconnect}
ANALYZER {,auto_off|,auto_instronly|,auto_dataonly|,auto_both}
ANALYZER {,mode_continuous|,mode_trigger}
where:
disable Disable tracing.
enable Enable tracing.
edit_properties When connecting to a target other than an ARM® processor with Embedded Trace Macrocell™ (ETM™), this is the equivalent of the Configure Analyzer Properties... option on the Analysis window Edit menu.
Note To configure an ETM use ETM_CONFIG.
map_log_phys The equivalent of the Physical to Logical Address Mapping... option on the Analysis window Edit menu. Not available with an ARM ETM-enabled processor.
triggers The equivalent of the Set/Edit Event Triggers option on the Analysis window Edit menu. Not available with an ARM ETM-enabled processor.
connect The equivalent of the Connect Analyzer option on the Analysis window Edit menu. Not available with an ARM ETM-enabled processor because an ARM ETM is automatically connected.
set_size=(n) Enables you to set the trace buffer size.The equivalent of the Set Trace Buffer Size... option on the Analysis window Edit menu. If the value is specified in the command it is used, otherwise display the Set Trace Buffer Size dialog and set the value from that.
clear Clear the captured trace buffer.
clear_triggers Clear any triggers set using an ANALYZER,triggers command. Not available with an ARM ETM-enabled processor.
before Capture data before the trigger, that is, 100% before, 0% after.
ARM DUI 0175N Copyright © 2002-2011 ARM. All rights reserved. 2-23ID052111 Non-Confidential

RealView Debugger Commands
around Capture data around the trigger, that is, 50% before, 50% after.
after Capture data after the trigger, that is, 0% before, 100% after.
stop_on_trigger Stop the processor when a trigger point is reached. This option is only applicable to the ARM ETM.
continue_on_trigger
Continue program execution across trigger points. This option is only applicable to the ARM ETM.
full_stop Stop the processor and put it into debug state when the trace buffer is full. Not available with an ARM ETM-enabled processor.
full_ignore Stop collecting trace information when the trace buffer is full, but let the processor continue running. Not available with an ARM ETM-enabled processor.
full_ring Continue collecting trace information when the trace buffer fills by discarding the oldest trace information, treating the buffer as a ring. This is the only option available for the ARM ETM.
collect_all Store all trace the information generated. Not available with an ARM ETM-enabled processor.
collect_flow Store only flow-control trace information. Cannot be changed for an ARM ETM-enabled processor because normal ETM operation is a variant of this that includes some additional synchronization points.
dataonly Trace only data bus transfers.
addronly Trace only address bus transfers.
fulltrace Trace both data and address bus transfers.
disconnect Disconnects the Analysis window.
auto_off Disables automatic tracing.
auto_instronly When no tracepoints are set, captures trace information only for executed instructions.
auto_dataonly When no tracepoints are set, captures trace information only for data accesses. This is supported only by ETMv3.
auto_both When no tracepoints are set, captures trace information for both executed instructions and data accesses.
Description
The ANALYZER command, and the ETM_CONFIG command, enables you to control the configuration of your trace capture analyzer.
Note Because trace analyzer capabilities and implementations vary, some of the qualifiers provided by the ANALYZER command are not available on some of the trace targets supported by RealView Debugger. Operation of the ARM ETM is controlled in more depth with the ETM_CONFIG command.
ARM DUI 0175N Copyright © 2002-2011 ARM. All rights reserved. 2-24ID052111 Non-Confidential

RealView Debugger Commands
The options are split into several groups:
• Options config, edit_properties, map_log_phys, triggers, and set_size display a GUI dialog that enables you to configure the associated trace component.
Note These options are not available when running in command line mode.
• The clear option acts on the trace capture buffer.
• Options before, around, after, clear_triggers, stop_on_trigger, and continue_on_trigger enable you to control the relative location of the trace trigger within the trace buffer and the effect of the trigger. See the TRACE, TRACEINSTREXEC, TRACEDATAACCESS and similar commands for control of tracepoint location in target memory.
• Options full_stop, full_ignore, and full_ring enable control over the behavior of the trace buffer when it becomes full.
• Options collect_all and collect_flow enable control of the trace data collection strategy. Collecting all bus transactions provides the benefit of following everything that is happening without recourse to external information, but conversely requires a very high bandwidth trace port. Collecting only bus transactions that change the flow of control provides most of the important information if you also have access to an accurate memory image.
Examples
The following examples show how to use ANALYZER:
ANALYZER,set_size=500
Set the trace buffer size to 500 records, if this action is supported by the logic analyzer you are using.
ANALYZER,full_ring,around
Set the logic analyzer to capture trace information around the defined trigger point, using the trace buffer in ring mode so that it cannot overflow.
See also• DTBREAK on page 2-126• DTRACE on page 2-130• ETM_CONFIG on page 2-143• TRACE on page 2-277• TRACEBUFFER on page 2-279• TRACEDATAACCESS on page 2-288• TRACEDATAREAD on page 2-293• TRACEDATAWRITE on page 2-298• TRACEINSTREXEC on page 2-307• TRACEINSTRFETCH on page 2-312• the following in the RealView Debugger Trace User Guide:
— Chapter 6 Setting Unconditional Tracepoints— Chapter 7 Setting Conditional Tracepoints
• the Embedded Trace Macrocell Specification.
ARM DUI 0175N Copyright © 2002-2011 ARM. All rights reserved. 2-25ID052111 Non-Confidential

RealView Debugger Commands
2.3.5 AOS_resource_list
Performs an action on an object chosen from the OS resource list.
Syntax
AOS_resource_list ,qualifier [=value]
where:
resource Specifies the resource list.
qualifier Specifies the action, that is action-name[:value].
value Identifies an object in the specified resource list.
Description
The AOS_resource_list command performs an action on an object chosen from the OS resource list. The resource and qualifier depend on the OS you are using.
You can get a list of these commands using the DCOMMANDS command, for example:
dcommands all
You can also determine the commands from the Resource Viewer:
• resource is determined by the tab you select in the Resource List, with the exception of the Conn tab
• qualifier is determined by right clicking on an object in the selected tab of the Resource List.
You might want to log your use of the Resource Viewer to determine the CLI commands you can use with your OS. See LOG on page 2-180 for details. You can then modify the log file, and use it as a command script, see INCLUDE on page 2-168.
Examples
The following examples show how to use AOS_resource-list:
aos_thread_list,suspend = 0x39d8
Suspends the thread 0x39d8.
aos_timer_list,deactivate = timer_1
Deactivates the timer timer_1.
See also• DOS_resource_list on page 2-122• OSCTRL on page 2-200• THREAD on page 2-276• the following in the RealView Debugger RTOS Guide:
— Chapter 6 Viewing OS Resources.
ARM DUI 0175N Copyright © 2002-2011 ARM. All rights reserved. 2-26ID052111 Non-Confidential

RealView Debugger Commands
2.3.6 ARGUMENTS
Enables you to specify the command-line arguments for the application. These are used for each subsequent run on this connection.
Note You can also specify arguments as part of the LOAD command.
Syntax
ARGUMENTS [{,delete|,prompt}]
ARGUMENTS [,default] string
where:
delete Delete the currently set ARGUMENTS list, so the argv list for the next run of a program is only the program filename.
default Make the defined arguments the default, so they apply to new connections created in this session.
prompt Display a dialog to prompt you for the arguments when the ARGUMENTS command is executed.
string Defines the command line that the application sees when it inspects the argv[] array, or equivalent.
Description
The ARGUMENTS command enables you to specify arguments that the target application might require when it starts execution. The specified string is made available to the application running on the target through the semihosting mechanism. Any previous argument definition is overwritten.
If a literal double-quotation mark character is required in the arguments, you must escape it using the backslash character and embed it in single quotation marks, for example:
ARGUMENTS '-f \"my file.c\"'
If you enter this command without any parameters, the current argument definition is displayed.
About using the ARGUMENTS command
You must issue the ARGUMENTS command after loading and reloading an image:
• This sequence works:LOAD .....ARGUMENTS "hello"
• This sequence does not work:ARGUMENTS "hello"LOAD
• This sequence works initially, but the argument setttings are lost after the reload:LOADARGUMENTS "hello"GORELOAD
ARM DUI 0175N Copyright © 2002-2011 ARM. All rights reserved. 2-27ID052111 Non-Confidential

RealView Debugger Commands
After reloading the image, enter this command again to specify the arguments before running the image.
Examples
The following examples show how to use ARGUMENTS:
ARGUMENTS '-f file.c -o file.o'
Sets the command line so that, if the line is parsed in the normal way by _main(), the argv[] array contains:argv[0] target program filename, for example: com.axfargv[1] -f
argv[2] file.c
argv[3] -o
argv[4] file.o
argv[5] NUL
ARGUMENTS '-f \"my file.c\" -o \"my file.o\"'
Sets the command line so that, if the line is parsed in the normal way by _main(), the argv[] array contains:argv[0] target program filename, for example: "com.axf"argv[1] -f
argv[2] "my file.c"
argv[3] -o
argv[4] "my file.o"
argv[5] NUL
load /pd/r 'com.axf;;-f file.c -o file.o'goarguments '-f \"my file.c\" -o \"my file.o\"'restartgo
Changes the arguments without unloading the image. Table 2-16 shows the argument assignments in the original LOAD command, and the new assignments specified by the ARGUMENTS command.
Table 2-16 Changed argument assignments
Argument Original value New value
argv[0] com.axf com.axf
argv[1] -f -f
argv[2] file.c "my file.c"
argv[3] -o -o
argv[4] file.o "my file.o"
argv[5] NUL NUL
ARM DUI 0175N Copyright © 2002-2011 ARM. All rights reserved. 2-28ID052111 Non-Confidential

RealView Debugger Commands
See also• GO on page 2-159• LOAD on page 2-176• RESTART on page 2-230.
ARM DUI 0175N Copyright © 2002-2011 ARM. All rights reserved. 2-29ID052111 Non-Confidential

RealView Debugger Commands
2.3.7 BACCESS
BACCESS is an alias of BREAKACCESS.
See BREAKACCESS on page 2-38.
2.3.8 BEXECUTION
BEXECUTION is an alias of BREAKEXECUTION.
See BREAKEXECUTION on page 2-47.
ARM DUI 0175N Copyright © 2002-2011 ARM. All rights reserved. 2-30ID052111 Non-Confidential

RealView Debugger Commands
2.3.9 BGLOBAL
Enables or disables global breakpoints, also called processor exceptions.
Note This command overrides the settings in the Connection Properties of the current connection. However, if you disconnect and reconnect then the settings in the Connection Properties are applied to the connection.
Syntax
BGLOBAL {,enable|,disable} [name [;macro-call]]
BGLOBAL ,gui [;macro-call]
BGLOBAL
where:
qualifier If no qualifier is specified, then a list of all the global breakpoints is displayed together with the current state of each breakpoint.If specified, must be one of the following:enable Enable the specified global breakpoint. If name is omitted, then a list of
the currently enabled global breakpoints is displayed.disable Disable the specified global breakpoint. If name is omitted, then a list
of the currently disabled global breakpoints is displayed.gui Display a dialog box that enables you to select a global breakpoint to
enable or disable.
Note This qualifier has no effect when running in command line mode.
name Identifies the global breakpoint to be enabled or disabled. See Compatibility on page 2-32 for a list of supported names.
macro-call Specifies a macro and any parameters it requires. This macro is run when a global breakpoint is triggered.If the macro returns a nonzero value, execution continues. If the macro returns zero, or if you do not specify a macro, target execution stops and the debugger waits in command mode.
Description
The BGLOBAL command enables or disables global breaks. A global breakpoint is a processor event that can cause execution to halt in any application using this connection. For example, taking an undefined instruction trap might be a global breakpoint. The list of possible global breakpoint events is defined by a combination of the target processor and the Debug Interface. For more information on the meaning of the processor exceptions see the processor architecture manual.
Some simulators, including RVISS, can extend the list of possible breakpoint events beyond that defined for the processor. These extensions are normally defined by peripheral or memory models included in the simulator. For example, a memory model might define a DMA transfer event.
ARM DUI 0175N Copyright © 2002-2011 ARM. All rights reserved. 2-31ID052111 Non-Confidential

RealView Debugger Commands
Each extra event is named by the model that implements it, and these names are displayed with the standard names in the GUI. You can set and modify global breakpoints for these events using the bglobal command by specifying the event name as name in the command. If the name includes spaces, you must enclose it in double quotation marks.
Note Some processor exceptions interact with other debugger functions. For non ARMv7-M processors with the semihosting vector set to the default (0x8), you cannot enable semihosting if the SuperVisor Call (SVC) vector catch is enabled.
Compatibility
The supported events are determined in part by the currently connected processor type:
Connections to ARM hardware processors The possible events are the exception types supported by connections to ARM processors through a hardware Debug Interface, such as DSTREAM or RealView ICE. The following options are supported for name:reset The RESET exception.undef The undefined instruction exception.SWI The SVC exception.prefetch abort The prefetch abort (instruction memory read abort)
exception. You must use double quotation marks to specify this name, for example:bglobal,enable "prefetch abort"
data abort The data abort (data memory read or write abort) exception. You must use double quotation marks to specify this name, for example:bglobal,enable "data abort"
IRQ The interrupt request exception.FIQ The fast interrupt request exception.
RealView ARMulator ISS connections to ARM simulated processors The possible events are the exception types supported by simulated processors on RealView ARMulator ISS connections. The following options are supported for name:Reset The RESET exception.Undefined The undefined instruction exception.SWI The SVC exception.P_Abort The prefetch abort (instruction memory read abort)
exception.D_Abort The data abort (data memory read or write abort) exception.Address The address exception. Used only by the obsolete 26-bit
ARM processor architectures.IRQ The interrupt request exception.FIQ The fast interrupt request exception.ErrorP The error exception.
ARM DUI 0175N Copyright © 2002-2011 ARM. All rights reserved. 2-32ID052111 Non-Confidential

RealView Debugger Commands
Examples
The following examples show how to use BGLOBAL:
• To disable debugger interception of the ARM architecture SVC exception, so that an application can process SVC exceptions itself, enter:bglobal,disable SWI
• To enable debugger interception of the ARM architecture UNDEF exception, so that if the application starts executing data literals (the usual reason for unintentionally executing an undefined instruction) you can find out why, enter:bglobal,enable undefined
• To list all global breakpoints with the current status, enter:bglobal
See also• BREAKACCESS on page 2-38• BREAKEXECUTION on page 2-47• BREAKINSTRUCTION on page 2-55• BREAKREAD on page 2-61• BREAKWRITE on page 2-70• GO on page 2-159.
ARM DUI 0175N Copyright © 2002-2011 ARM. All rights reserved. 2-33ID052111 Non-Confidential

RealView Debugger Commands
2.3.10 BINSTRUCTION
BINSTRUCTION is an alias of BREAKINSTRUCTION.
See BREAKINSTRUCTION on page 2-55.
ARM DUI 0175N Copyright © 2002-2011 ARM. All rights reserved. 2-34ID052111 Non-Confidential

RealView Debugger Commands
2.3.11 BOARD
Changes the current board, also known as the current connection. By default, all actions apply to the current connection.
Syntax
BOARD [{,next|,default|[=]resource}]
where:
next Connects the debugger to the next connection listed in the connection list.
default Connects the debugger to the connection that is listed first in the connection list.
resource Identifies the connection that is to become the current connection. The = in this parameter is optional.The connection information is specified in the same format as it is displayed in the Code window title bar. You can specify this using one of the following formats:@target@DebugConfiguration
"@target@DebugConfiguration"
"target@DebugConfiguration"
where:• target is the connection name for the target, for example ARM966E-S_0• DebugConfiguration is the Debug Configuration (for example RVISS), which
you can determine from the board file or from the Connect to Target window.
Description
With no parameters, the BOARD command displays the name of the current board. The displayed information has the following format:
Current Board is target:manufacturer target - DebugConfiguration_description
where target is the name of the target processor, and DebugConfiguration_description is either:
• CONNECTION via localhost (P1), if no description is specified for the Debug Configuration and any assigned BCD file
• the description of the Debug Configuration, if specified for the Debug Configuration or in an assigned BCD file.
With one of the qualifiers or the resource argument, the command sets the current connection to:• to the current board• to the next board in the board list• the default board.
The newly selected board becomes the current target connection. RealView Debugger uses the term board because a target connection is defined by more than a processor. The memory map and the available peripherals are normally defined by the target as a whole, and so it is more appropriate to refer to boards than to processors.
You can display the boards that you can cycle through using board,next by clicking the connection drop-down list from the toolbar.
ARM DUI 0175N Copyright © 2002-2011 ARM. All rights reserved. 2-35ID052111 Non-Confidential

RealView Debugger Commands
You can remove an unconnected board from the list using DELBOARD. To add or remove a board from the board list permanently, you must edit the board file using EDITBOARDFILE.
Note If a Code window is attached to a connection, then connection information is displayed only if you use the BOARD command without a qualifier or the resource argument.
Restrictions on the use of BOARD
The BOARD command is not allowed in a macro.
Examples
The following examples show how to use BOARD:
• To change the current board to the next defined board from the board list:> board,nextNew Current Board is ARM1176JZ-S:ARM-A-SW ARM1176JZ-S - ARM1176JZF-S (simulated on RVISS) (P1)
• To change the current board to the named board in the board list:> board "ARM966E-S_0@RVI"New Current Board is ARM966E-S_0:ARM-ARM-NW ARM966E-S - ARM966E-S on Integrator/AP (RVI-USB) (P1)
• To display the name of the current connection use the BOARD command without arguments, for example:> boardCurrent Board is ARM966E-S_1:ARM-ARM-NW ARM966E-S - ARM966E-S on Integrator/AP (RVI-USB) (P1)
See also• CONNECT on page 2-93• DELBOARD on page 2-108• DISCONNECT on page 2-118• EDITBOARDFILE on page 2-136• THREAD on page 2-276.
ARM DUI 0175N Copyright © 2002-2011 ARM. All rights reserved. 2-36ID052111 Non-Confidential

RealView Debugger Commands
2.3.12 BREAD
BREAD is an alias of BREAKREAD.
See BREAKREAD on page 2-61.
2.3.13 BREAK
BREAK is an alias of BREAKINSTRUCTION.
See BREAKINSTRUCTION on page 2-55.
ARM DUI 0175N Copyright © 2002-2011 ARM. All rights reserved. 2-37ID052111 Non-Confidential

RealView Debugger Commands
2.3.14 BREAKACCESS
Sets a hardware breakpoint that activates when specified memory locations are accessed, either by a memory read or a memory write.
Syntax
BREAKACCESS [,qualifier...] {address|address-range} [;macro-call]
where:
qualifier Is a list of zero or more qualifiers. The possible qualifiers are described in List of qualifiers for the BREAKACCESS command on page 2-41.
address | address-range
Specifies a single address or an address range in target memory. The address can also be a memory mapped register (see Memory mapped registers on page 2-39). For details on how to specify an address range, see Specifying address ranges on page 2-2.
macro-call Specifies a macro and any parameters it requires. This macro runs when the access breakpoint is hit. The macro is treated as being specified last in the qualifier list.If the macro returns a nonzero value, or you specified continue in the qualifiers, execution continues. If the macro returns zero, or if you do not specify a macro, target execution stops and the debugger waits in command mode.The macro argument symbols are interpreted when the breakpoint is specified and so they must be in scope at that point, or you must explicitly qualify them.
Description
BREAKACCESS is used to set or modify memory access breakpoints. Access breakpoints activate when one or more specified memory addresses are read from or written to. If the command has no arguments, it behaves like DTBREAK, listing the current breakpoints (see List of qualifiers for the BREAKACCESS command on page 2-41).
Hardware address breakpoints can use other hardware tests in association with the address test, such as trigger inputs and outputs, hardware pass counters, and and-then, or chained, tests (see Qualifiers that define hardware tests on page 2-40).
All breakpoints can have conditions, for example expressions, macros, C++ object tests, and pass counters. All address breakpoints can include actions including: counters, timing (with hardware assist), update of specified windows, enabling or disabling other breakpoints, and the starting and stopping of other processors or threads.
When a hardware data access breakpoint is hit on the target, the following sequence of events occurs:
1. The debugger or the hardware associates the event with a specific debugger breakpoint ID.
2. If the breakpoint has a software pass count associated with it, the count is updated.
3. The conditions for this breakpoint, if any, are tested in the order specified on the command line (see Qualifiers that define conditional breakpoints on page 2-40). If any condition is False, target execution resumes with the instruction at the breakpointed location. Macros specified with the macro: qualifier or the ;macro-call argument are run in this phase.
ARM DUI 0175N Copyright © 2002-2011 ARM. All rights reserved. 2-38ID052111 Non-Confidential

RealView Debugger Commands
4. If the breakpoint has actions associated with it (for example, using message displays a user-specified message) these actions are run, in the order specified on the command line (see Qualifiers that define conditional breakpoints on page 2-40).
5. If the qualifiers include continue, target execution resumes with the instruction at the breakpointed location. If not, the debugger updates the state of the GUI and waits for a command, leaving the application halted.
If you are debugging multiprocessor applications, and you have set up synchronization and cross-triggering, then you can specify how each processor is affected when a breakpoint activates.
Memory mapped registers
You can set a breakpoint that activates when a memory-mapped registers is accessed in any way. To specify a memory mapped register, enter the following expression for the address:
register:expression
The register is identified by expression. For example:
BREAKACCESS register:PR1
or
BREAKACCESS register:@PR1
Note You can only specify memory mapped registers that are defined in Board/Chip Definition (.bcd) files that you have assigned to a Debug Configuration. You cannot set breakpoints on core registers.
Combining hardware and software pass counts
You can combine hardware and software pass counts to achieve higher count values. If you define both hardware and software pass counts:
1. When the hardware pass count reaches zero, the software pass count is decremented. What happens next depends on your hardware:• For RVISS, the hardware count remains at zero, so that
total count = hw_passcount + passcount• Other processors might exhibit the RVISS behavior, or might reset the hardware
pass count to the initial value, so that:total count = (hw_passcount +1) * passcount + hw_passcount
2. When the software pass count reaches zero, the breakpoint activates and the activation count is incremented. The following example shows the counts for the breakpoint bexec,hw_pass:3,pass:50 \DHRY_1\#70:0 on an RVISS target:• Initial state:
> dtbreakS ID Type Address Count Miscellaneous- -- ---- ------- ----- ------------- 1 Exec 0x00008480 0 Pass=50
• State after activation:
ARM DUI 0175N Copyright © 2002-2011 ARM. All rights reserved. 2-39ID052111 Non-Confidential

RealView Debugger Commands
> dtbreakS ID Type Address Count Miscellaneous- -- ---- ------- ----- ------------- 1 Exec 0x00008480 1 Pass=0
If the breakpoint is in a loop, then activation occurs on hit 53.
The breakpoint list index number
RealView Debugger assigns a breakpoint list index number to each breakpoint. This number is assigned consecutively. However, if you delete a breakpoint, then the numbering might no longer be consecutive.
To determine the breakpoint list index of an existing breakpoint:
1. Start RealView Debugger in GUI mode.
2. Select View → Break/Tracepoints from the Code window main menu to open the Break/Tracepoint view.
3. Select the checkbox for the chosen breakpoint to disable it.
4. Click the Cmd tab in the Output view.The breakpoint list index (number) for the breakpoint is shown in the command:disable,h number
5. Select the checkbox for the chosen breakpoint to enable it.
Qualifiers that define conditional breakpoints
To set up a conditional breakpoint, use one or more of the following condition qualifiers:• macro (or ;macro-call)• obj
• passcount
• when
• when_not.
Qualifiers that define breakpoint actions
To specify actions to be performed when a breakpoint activates, use the following action qualifiers:• continue
• message
• update.
Qualifiers that define hardware tests
To specify hardware tests for data access breakpoints, use the following qualifiers:• data_only
• hw_ahigh
• hw_amask
• hw_and
• hw_dhigh
• hw_dmask
• hw_dvalue
• hw_in
• hw_not
ARM DUI 0175N Copyright © 2002-2011 ARM. All rights reserved. 2-40ID052111 Non-Confidential

RealView Debugger Commands
• hw_passcount.
List of qualifiers for the BREAKACCESS command
The list of qualifiers depends on the processor and Debug Interface, and so the GUI does not present things that do not make sense. The command handler generates an error if a specific combination is invalid for a specific processor or Debug Interface, but this is determined when you issue the command.
The possible qualifiers are:
append:(n) Instead of creating a new breakpoint, append the qualifiers specified with this command to an existing breakpoint with breakpoint list index number n (see The breakpoint list index number on page 2-40).
Note You cannot use append to change the breakpoint address or to create
chained breakpoints.
continue Execution continues when the breakpoint activates and no breakpoint details are displayed. Any specified action qualifiers are still performed, depending on the results of any condition qualifiers.
data_only The breakpoint activates if a data value, specified using hw_dvalue, is detected by the debug hardware on the processor data bus.
hw_ahigh:(n) Specifies the high address for an address-range breakpoint. The low address is specified by the standard breakpoint address.This facility is not supported by ARM EmbeddedICE® macrocells. For example, this command sets a breakpoint that activates for any address between 0x1000-0x1200:BREAKACCESS,hw_ahigh:0x1200 0x1000
This is equivalent to the command:BREAKACCESS 0x1000..0x1200
hw_amask:(n) Specifies the address mask value for an address-range breakpoint. The address range is determined by masking lower order bits out of the specified address.This facility is supported by ARM EmbeddedICE macrocells.For example, to set a breakpoint that activates when any address in the range 0x1FA00-0x1FA0F is accessed, enter the command:BREAKACCESS,hw_amask:0xFFFF0 0x1FA00
This is equivalent to the command:BREAKACCESS 0x1FA00..0x1FA0F
hw_and:{id | "then-id"} Perform an and or an and-then conjunction with another breakpoint, to create a chain of breakpoints. The parentheses are optional. Each breakpoint in the chain is called a breakpoint unit.You specify the
ARM DUI 0175N Copyright © 2002-2011 ARM. All rights reserved. 2-41ID052111 Non-Confidential

RealView Debugger Commands
breakpoint units in the reverse order that RealView Debugger processes them. The position of the breakpoint unit in the chain is identified by id, which is one of the following:next Indicates that this breakpoint unit is to be linked to another
breakpoint unit specified for this connection. You must set a breakpoint unit with the ID next before you set any other breakpoint units for the chain. When used with then-, this breakpoint unit is the last one processed in the chain.
prev Indicates that this breakpoint unit is to be linked to an existing breakpoint unit specified for this connection. Make sure the existing breakpoint has been set with a next, prev, or index_number ID, and is a hardware breakpoint.
Note When using the prev ID, you must finish defining the complete
breakpoint chain before you create any non-chained breakpoints.
index_number The breakpoint list index number of an existing breakpoint unit (see The breakpoint list index number on page 2-40). Make sure the existing breakpoint has been set with a next, prev, or index_number ID, and is a hardware breakpoint.
How RealView Debugger processes the breakpoint units depends on the conjunction you have used:• In the and form, the conditions associated with both breakpoint units
are chained together, so that the action associated with the second breakpoint unit is performed only when both conditions simultaneously match.For example:BREAKACCESS,hw_and:next,hw_dvalue:1 @copyfns\\COPYFNS\mycpy\appendBREAKEXECUTION,hw_and:prev @copyfns\\COPYFNS\mycpy\
• In the and-then form, RealView Debugger examines the breakpoint units starting with the last one you specified. When the condition for the last breakpoint unit (breakpoint unit N) is met, the associated actions are performed and the previous breakpoint is enabled (breakpoint unit N-1). RealView Debugger continues processing all remaining breakpoints in the chain, until the condition in the first one you specified is met (breakpoint unit 1). At this point, unless the continue qualifier is specified in that breakpoint, execution stops.
Note You must include the quotes when using the and-then form.
For example, you might have three breakpoint units in a chain, which you specify in the following order:BREAKACCESS,hw_and:"then-next",continue 0x1001B (BPU1)BREAKACCESS,hw_and:"then-prev" 0x10018 (BPU2)BREAKACCESS,hw_and:"then-prev" 0x10014 (BPU3)
ARM DUI 0175N Copyright © 2002-2011 ARM. All rights reserved. 2-42ID052111 Non-Confidential

RealView Debugger Commands
In this case, RealView Debugger first checks for a data access at address 0x10014 (BPU3), then at address 0x10018 (BPU2), and finally at address 0x1001B (BPU1). When all conditions are met, processing continues as instructed by BPU1.
If you clear BPU1, then all breakpoints in the chain are cleared.If you clear any other breakpoint unit, then that breakpoint unit and the following ones are cleared. The previous breakpoint units remain set. For example, clearing BPU2, clears both BPU2 and BPU3, but not BPU1.
hw_dhigh:(n) Specifies the high data value for a data-range breakpoint. The low data value is specified by the hw_dvalue qualifier.This facility is not supported by ARM EmbeddedICE macrocells. For example, this command sets a breakpoint that activates for any data value between 0x00-0x18:BREAKACCESS,hw_dvalue:0x0,hw_dhigh:0x18 0x1000
hw_dmask:(n) Specifies the data value mask for a data-range breakpoint. The data value to which the mask is applied is specified by the hw_dvalue qualifier. The data value range is determined by masking lower order bits out of the specified data value.This facility is supported by ARM EmbeddedICE macrocells.For example, to set a breakpoint that activates when a data value in the range 0x400-0x4FF is accessed at address 0x1FA00, enter the command:BREAKACCESS,hw_dvalue:0x400,hw_dmask:0xF00 0x1FA00
hw_dvalue:(n) Specifies a data value to be compared to values transmitted on the processor data bus.This facility is supported by ARM EmbeddedICE macrocells. For example, this command sets a breakpoint that activates for the data value 0x400:BREAKACCESS,hw_dvalue:0x400
hw_in:{s} Input trigger tests. The string that follows matches hardware-supported input tests as a list of names or a value. The available tests depends on the Debug Interface and the target processor.Table 2-17 shows the possible strings for an ARM940T™ processor.
Table 2-17 Example hw_in test strings for an ARM940T
Input test string Meaning
No "Ext=level" string Ignore external trigger level
Ext=0x00000001 Low
Ext=0x00000002 High
No "Mode=mode" string Any mode
Mode=0x00000004 Privileged
Mode=0x00000008 User
No "AccessSize=size" string
Default access size
ARM DUI 0175N Copyright © 2002-2011 ARM. All rights reserved. 2-43ID052111 Non-Confidential

RealView Debugger Commands
For example, you might have a connection to an ARM940T processor through DSTREAM or RealView ICE. For this processor, to test for a low external trigger level and 32-bit data accesses in User mode at address 0x10014, enter:BREAKACCESS,hw_in:"Ext=0x00000002",hw_in:"Mode=0x00000008",hw_in:"A
ccessSize=0x00000300" 0x10014
hw_not:{s} Use this qualifier to invert the sense of an address, data, or hw_and term specified in the same command. The argument s can be set to:addr Invert the breakpoint address value.data Invert the breakpoint value.then Invert an associated hw_and:{then} condition.For example, to break when a data value does not match a mask, you can write:BREAKACCESS,hw_not:data,hw_dmask:0x00FF ...
The break commands require an address value, and the addr variant of hw_not uses this address.BREAKACCESS,hw_not:addr 0x10040
This means to break at any address other than 0x10040. This example is probably not useful.The hw_not:then variant of the command is used in conjunction with hw_and to form or and nand-then conditions.This facility is not supported by ARM EmbeddedICE macrocells.
hw_out:{s} Not supported in this release.
hw_passcount:(n) Specifies the number of times that the break condition is ignored before the breakpoint activates. The default value is 0. This qualifier differs from passcount only in that it is implemented in hardware. n is limited to a 32-bit value by the debugger, but might be much more limited by the target hardware, for example to 8 or 16 bits.You can combine the hardware and software pass counts to achieve higher count values. However, the behavior depends on your processor (see Combining hardware and software pass counts on page 2-39).
macro:{MacroCall(arg1,arg2)} When the breakpoint is hit, the specified macro is executed. Any program variables or functions must be in scope at the time the breakpoint request is entered, or the names must be fully qualified. You must include the braces { and }.
AccessSize=0x00000100 8-bit
AccessSize=0x00000200 16-bit
AccessSize=0x00000300 32-bit
AccessSize=0x00000400 8/16-bit
AccessSize=0x00000500 8/32-bit
Table 2-17 Example hw_in test strings for an ARM940T (continued)
Input test string Meaning
ARM DUI 0175N Copyright © 2002-2011 ARM. All rights reserved. 2-44ID052111 Non-Confidential

RealView Debugger Commands
message:{"$windowid | fileid$message"} Activation of the breakpoint results in message being output. Prefixing message with $windowid | fileid$ enables you to write the message text to a user-defined window or file. For example:BREAKACCESS,message:{"$100$this is a message"}
modify:(n) Instead of creating a new breakpoint, modify the breakpoint with breakpoint list index number n (see The breakpoint list index number on page 2-40). The address expression and the qualifiers of the existing breakpoint are replaced by those specified in this command.
obj:(n) This condition is True if the argument n matches the C++ object pointer, normally called this.
passcount:(n) Specifies the number of times that the break condition is ignored before the breakpoint activates. The default value is 0. If you specify this in the middle of a sequence of break conditions, those specified before the pass count are processed whether or not the count reaches zero. The conditions specified afterwards are run only when the count reaches zero.There is a hardware pass count qualifier available, hw_passcount, for debug hardware that supports it. You can combine the hardware and software pass counts to achieve higher count values. However, the behavior depends on your processor (see Combining hardware and software pass counts on page 2-39).
Note If a breakpoint uses a passcount, the counting is performed on the host, and
so program execution stops briefly every time the breakpoint is hit, even when the count has not been reached.
update:{"name"} Update the named windows, or all windows, by reading the memory and processor state when the breakpoint activates. You can use the name all to refresh all windows, or a name specified in the title bar of the window.This qualifier enables you to get an overview of the process state at a particular point, without having to manually restart the process at each break. The update still takes a significant period of time, and so this method is unsuitable as a non-intrusive debugging tool.
when:{condition} The breakpoint activates whenever condition, a debugger expression, evaluates to True.
Note Using a macro as an argument to when, reverses the sense of the return
value from the macro.
when_not:{condition} The breakpoint activates whenever condition, a debugger expression, evaluates to False.
Alias
BACCESS is an alias of BREAKACCESS.
ARM DUI 0175N Copyright © 2002-2011 ARM. All rights reserved. 2-45ID052111 Non-Confidential

RealView Debugger Commands
See also
• Window and file numbers on page 1-5
• Addresses on page 1-26
• BREAKEXECUTION on page 2-47
• BREAKINSTRUCTION on page 2-55
• BREAKREAD on page 2-61
• BREAKWRITE on page 2-70
• CLEARBREAK on page 2-89
• DTBREAK on page 2-126
• ENABLEBREAK on page 2-140
• VMACRO on page 2-324
• the following in the RealView Debugger User Guide:— Chapter 7 Debugging Multiprocessor Applications— Chapter 11 Setting Breakpoints
• the following in the RealView Debugger Target Configuration Guide:— Chapter 4 Configuring Custom Memory Maps, Registers and Peripherals.
ARM DUI 0175N Copyright © 2002-2011 ARM. All rights reserved. 2-46ID052111 Non-Confidential

RealView Debugger Commands
2.3.15 BREAKEXECUTION
Sets an execution breakpoint that enables ROM-based breakpoints by using the hardware breakpoint facilities of the target.
Syntax
BREAKEXECUTION [,qualifier...] expression [;macro-call]
where:
qualifier Is an ordered list of zero or more qualifiers. The possible qualifiers are described in List of qualifiers for the BREAKEXECUTION command on page 2-49.
expression Specifies the address at which the breakpoint is placed. By default, this is the address where program execution stops.
macro-call Specifies a macro and any parameters it requires. The macro runs when the breakpoint is hit and before the instruction at the breakpoint is executed. The macro is treated as being specified last in the qualifier list.If the macro returns a nonzero value, or you specified continue in the qualifiers, execution continues. If the macro returns zero, or if you do not specify a macro, target execution stops and the debugger waits in command mode.The macro argument symbols are interpreted when the breakpoint is specified and so they must be in scope at that point, or you must explicitly qualify them.
Description
This command is used to set or modify an execution address breakpoint. An execution breakpoint identifies the location of an instruction that, if executed, causes the breakpoint to be hit. When the breakpoint is hit, RealView Debugger determines when the breakpoint is activated. Activation depends on whether or not any condition qualifiers are assigned to the breakpoint (see Qualifiers that define conditional breakpoints on page 2-49):
• If no condition qualifiers are assigned, then the breakpoint activates immediately.
• If condition qualifiers are assigned, then activation is be delayed until all the conditions are met.
When the breakpoint activates, any action qualifiers that are assigned to the breakpoint are performed (see Qualifiers that define breakpoint actions on page 2-49). If no action qualifiers are assigned, the default action is to stop execution.
When a hardware breakpoint instruction is hit on the target, the following sequence of events occurs:
1. The debugger or the hardware associates the event with a specific debugger breakpoint ID.
2. If the breakpoint has a software pass count associated with it, the count is updated.
3. The conditions for this breakpoint, if any, are tested in the order specified on the command line (see Qualifiers that define conditional breakpoints on page 2-49). If any condition is False, target execution resumes with the instruction at the breakpointed location. Macros specified with the macro: qualifier or the ;macro-call argument are run in this phase.
4. If the breakpoint has actions associated with it (for example, using timed to note the time the breakpoint occurred) these actions are run, in the order specified on the command line (see Qualifiers that define breakpoint actions on page 2-49).
ARM DUI 0175N Copyright © 2002-2011 ARM. All rights reserved. 2-47ID052111 Non-Confidential

RealView Debugger Commands
5. If the qualifiers include continue, target execution resumes with the instruction at the breakpointed location. If not, the debugger updates the state of the GUI and waits for a command, leaving the application halted.
If the command has no arguments, it behaves like DTBREAK, listing the current breakpoints.
Execution breakpoints can also use various hardware tests (see Qualifiers that define hardware tests on page 2-49), such as trigger inputs, hardware pass counters, and and-then, or chained, tests.
If you are debugging multiprocessor applications, and you have set up synchronization and cross-triggering, then you can specify how each processor is affected when a breakpoint activates.
Combining hardware and software pass counts
You can combine hardware and software pass counts to achieve higher count values. If you define both hardware and software pass counts:
1. When the hardware pass count reaches zero, the software pass count is decremented. What happens next depends on your hardware:• For RVISS, the hardware count remains at zero, so that
total count = hw_passcount + passcount• Other processors might exhibit the RVISS behavior, or might reset the hardware
pass count to the initial value, so that:total count = (hw_passcount +1) * passcount + hw_passcount
2. When the software pass count reaches zero, the breakpoint activates and the activation count is incremented. The following example shows the counts for the breakpoint bexec,hw_pass:3,pass:50 \DHRY_1\#70:0 on an RVISS target:• Initial state:
> dtbreakS ID Type Address Count Miscellaneous- -- ---- ------- ----- ------------- 1 Exec 0x00008480 0 Pass=50
• State after activation:> dtbreakS ID Type Address Count Miscellaneous- -- ---- ------- ----- ------------- 1 Exec 0x00008480 1 Pass=0
If the breakpoint is in a loop, then activation occurs on hit 53.
The breakpoint list index number
RealView Debugger assigns a breakpoint list index number to each breakpoint. This number is assigned consecutively. However, if you delete a breakpoint, then the numbering might no longer be consecutive.
To determine the breakpoint list index of an existing breakpoint:
1. Start RealView Debugger in GUI mode.
2. Select View → Break/Tracepoints from the Code window main menu to open the Break/Tracepoint view.
3. Select the checkbox for the chosen breakpoint to disable it.
4. Click the Cmd tab in the Output view.
ARM DUI 0175N Copyright © 2002-2011 ARM. All rights reserved. 2-48ID052111 Non-Confidential

RealView Debugger Commands
The breakpoint list index (number) for the breakpoint is shown in the command:disable,h number
5. Select the checkbox for the chosen breakpoint to enable it.
Qualifiers that define conditional breakpoints
To set up a conditional breakpoint, use one or more of the following condition qualifiers:• macro (or ;macro-call)• obj
• passcount
• when
• when_not.
Qualifiers that define breakpoint actions
To specify actions to be performed when a breakpoint activates, use the following action qualifiers:• continue
• message
• update.
Qualifiers that define hardware tests
To specify hardware tests for execution breakpoints, use the following qualifiers:• hw_ahigh
• hw_amask
• hw_and
• hw_in
• hw_not
• hw_passcount.
List of qualifiers for the BREAKEXECUTION command
The list of qualifiers is dependent on the processor and Debug Interface, and so the GUI does not present things that do not make sense. The command handler generates an error if a specific combination is invalid for a specific processor or Debug Interface, but this is determined when you issue the command.
The possible qualifiers are:
append:(n) Instead of creating a new breakpoint, append the qualifiers specified with this command to an existing breakpoint with breakpoint list index number n (see The breakpoint list index number on page 2-48).
Note You cannot use append to change the breakpoint address or to create
chained breakpoints.
continue Execution continues when the breakpoint activates and no breakpoint details are displayed. Any specified action qualifiers are still performed, depending on the results of any condition qualifiers.
hw_ahigh:(n) Specifies the high address for an address-range breakpoint. The low address is specified by the standard breakpoint address.
ARM DUI 0175N Copyright © 2002-2011 ARM. All rights reserved. 2-49ID052111 Non-Confidential

RealView Debugger Commands
This facility is not supported by ARM EmbeddedICE macrocells. For example, this command sets a breakpoint that activates for any address between 0x1000-0x1200:BREAKEXECUTION,hw_ahigh:0x1200 0x1000
This is equivalent to the command:BREAKEXECUTION 0x1000..0x1200
hw_amask:(n) Specifies the address mask value for an address-range breakpoint. The address range is determined by masking lower order bits out of the specified address.This facility is supported by ARM EmbeddedICE macrocells.For example, to set a breakpoint that activates when any address in the range 0x1FA00-0x1FA0F is accessed, enter the command:BREAKEXECUTION,hw_amask:0xFFFF0 0x1FA00
This is equivalent to the command:BREAKEXECUTION 0x1FA00..0x1FA0F
hw_and:{id | "then-id"} Perform an and or an and-then conjunction with another breakpoint, to create a chain of breakpoints. The parentheses are optional. Each breakpoint in the chain is called a breakpoint unit.You specify the breakpoint units in the reverse order that RealView Debugger processes them. The position of the breakpoint unit in the chain is identified by id, which is one of the following:next Indicates that this breakpoint unit is to be linked to another
breakpoint unit specified for this connection. You must set a breakpoint unit with the ID next before you set any other breakpoint units for the chain. When used with then-, this breakpoint unit is the last one processed in the chain.
prev Indicates that this breakpoint unit is to be linked to an existing breakpoint unit specified for this connection. Make sure the existing breakpoint has been set with a next, prev, or index_number ID, and is a hardware breakpoint.
Note When using the prev ID, you must finish defining the complete
breakpoint chain before you create any non-chained breakpoints.
index_number The breakpoint list index number of an existing breakpoint unit (see The breakpoint list index number on page 2-48). Make sure the existing breakpoint has been set with a next, prev, or index_number ID, and is a hardware breakpoint.
How RealView Debugger processes the breakpoint units depends on the conjunction you have used:• In the and form, the conditions associated with both breakpoint units
are chained together, so that the action associated with the second breakpoint unit is performed only when both conditions simultaneously match.For example:
ARM DUI 0175N Copyright © 2002-2011 ARM. All rights reserved. 2-50ID052111 Non-Confidential

RealView Debugger Commands
BREAKACCESS,hw_and:next,hw_dvalue:1 @copyfns\\COPYFNS\mycpy\appendBREAKEXECUTION,hw_and:prev @copyfns\\COPYFNS\mycpy\
• In the and-then form, RealView Debugger examines the breakpoint units starting with the last one you specified. When the condition for the last breakpoint unit (breakpoint unit N) is met, the associated actions are performed and the previous breakpoint is enabled (breakpoint unit N-1). RealView Debugger continues processing all remaining breakpoints in the chain, until the condition in the first one you specified is met (breakpoint unit 1). At this point, unless the continue qualifier is specified in that breakpoint, execution stops.
Note You must include the quotes when using the and-then form.
For example, you might have three breakpoint units in a chain, which you specify in the following order:BREAKEXECUTION,hw_and:"then-next",continue
DHRY_2\Proc_7 (BPU1)BREAKEXECUTION,hw_and:"then-prev" DHRY_1\Proc_4 (BPU2)BREAKEXECUTION,hw_and:"then-prev" DHRY_1\Proc_5 (BPU3)In this case, RealView Debugger first checks for the execution of the procedure Proc_5 in the source dhry_1.c (BPU3), then the procedure Proc_4 in the source dhry_1.c (BPU2), and finally the procedure Proc_7 in the source dhry_2.c (BPU1). When all conditions are met, processing continues as instructed by the first breakpoint in the chain.
If you clear BPU1, then all breakpoints in the chain are cleared.If you clear any other breakpoint unit, then that breakpoint unit and the following ones are cleared. The previous breakpoint units remain set. For example, clearing BPU2, clears both BPU2 and BPU3, but not BPU1.
hw_in:{s} Input trigger tests. The string that follows matches hardware-supported input tests as a list of names or a value. The available tests depends on the Debug Interface and the target processor.Table 2-18 shows the possible strings for an ARM940T processor.
Table 2-18 Example hw_in test strings for an ARM940T
Input test string Meaning
No "Ext=level" string Ignore external trigger level
Ext=0x00000001 Low
Ext=0x00000002 High
No "Mode=mode" string Any mode
Mode=0x00000004 Privileged
Mode=0x00000008 User
No "AccessSize=size" string
Default access size
AccessSize=0x00000100 8-bit
ARM DUI 0175N Copyright © 2002-2011 ARM. All rights reserved. 2-51ID052111 Non-Confidential

RealView Debugger Commands
For example, you might have a connection to an ARM940T processor through DSTREAM or RealView ICE. For this processor, to test for a Privileged mode access from at line 149 in dhry_1.c, enter:BREAKEXECUTION,hw_in:"Mode=0x00000004" \DHRY_1\#149:1
hw_not:{s} Use this qualifier to invert the sense of an address, data, or hw_and term specified in the same command. The argument s can be set to:addr Invert the breakpoint address value.data Invert the breakpoint value.then Invert an associated hw_and:{then} condition.For example, to break when a data value does not match a mask, you can write:BREAKEXECUTION,hw_not:data,hw_dmask:0x00FF ...
The break commands require an address value, and the addr variant of hw_not uses this address.BREAKEXECUTION,hw_not:addr 0x10040
This means to break at any address other than 0x10040. This example is probably not useful.The hw_not:then variant of the command is used in conjunction with hw_and to form nand and nand-then conditions.This facility is not supported by ARM EmbeddedICE macrocells.
hw_out:{s} Not supported in this release.
hw_passcount:(n) Specifies the number of times that the break condition is ignored before it activates. The default value is 0. This qualifier differs from passcount only in that it is implemented in hardware. n is limited to a 32-bit value by the debugger, but might be much more limited by the target hardware, for example to 8 or 16 bits.You can combine the hardware and software pass counts to achieve higher count values. However, the behavior depends on your processor (see Combining hardware and software pass counts on page 2-48).
macro:{MacroCall(arg1,arg2)} When the breakpoint is hit, the specified macro is executed. Any program variables or functions must be in scope at the time the breakpoint request is entered, or the names must be fully qualified. You must include the braces { and }.
message:{"$windowid | fileid$message"} Activation of the breakpoint results in message being output. Prefixing message with $windowid | fileid$ enables you to write the message text to a user-defined window or file. For example:
AccessSize=0x00000200 16-bit
AccessSize=0x00000300 32-bit
AccessSize=0x00000400 8/16-bit
AccessSize=0x00000500 8/32-bit
Table 2-18 Example hw_in test strings for an ARM940T (continued)
Input test string Meaning
ARM DUI 0175N Copyright © 2002-2011 ARM. All rights reserved. 2-52ID052111 Non-Confidential

RealView Debugger Commands
BREAKEXECUTION,message:{"$100$this is a message"}
modify:(n) Instead of creating a new breakpoint, modify the breakpoint with breakpoint list index number n (see The breakpoint list index number on page 2-48). The address expression and the qualifiers of the existing breakpoint are replaced by those specified in this command.
obj:(n) This condition is True if the argument n matches the C++ object pointer, normally called this.
passcount:(n) Specifies the number of times that the break condition is ignored before it activates. The default value is 0. If you specify this in the middle of a sequence of break conditions, those specified before the pass count are processed whether or not the count reaches zero. The conditions specified afterwards are run only when the count reaches zero.There is a hardware pass count qualifier available, hw_passcount, for debug hardware that supports it. You can combine the hardware and software pass counts to achieve higher count values. However, the behavior depends on your processor (see Combining hardware and software pass counts on page 2-48).
Note If a breakpoint uses a passcount, the counting is performed on the host, and
so program execution stops briefly every time the breakpoint is hit, even when the count has not been reached.
update:{"name"} Update the named windows, or all windows, by reading the memory and processor state when the breakpoint activates. You can use the name all to refresh all windows, or a name specified in the title bar of the window.This qualifier enables you to get an overview of the process state at a particular point, without having to manually restart the process at each break. The update still takes a significant period of time, and so this method is unsuitable as a non-intrusive debugging tool.
when:{condition} The breakpoint activates whenever condition, a debugger expression, evaluates to True.
Note Using a macro as an argument to when, reverses the sense of the return
value from the macro.
when_not:{condition} The breakpoint activates whenever condition, a debugger expression, evaluates to False.
Examples
The following examples show how to use BREAKEXECUTION:
BREAKEXECUTION 0x8000 Set a hardware breakpoint at address 0x8000.
BREAKEXECUTION \MATH_1\#449:22 Set a hardware breakpoint at line 449, column 22 in the file math.c.
ARM DUI 0175N Copyright © 2002-2011 ARM. All rights reserved. 2-53ID052111 Non-Confidential

RealView Debugger Commands
BREAKEXECUTION,append:(1),continue,update:{all} Given an already set breakpoint at position 1 in the breakpoint list, add a request to update all windows in the code window for this connection and continue execution each time the breakpoint activates.
BREAKEXECUTION,hw_pass:(5) \MAIN_1\#49 Set a hardware breakpoint using a hardware counter to stop at the fifth time that execution reaches line 49 of main.c.
BREAKEXECUTION \MAIN_1\MAIN_C\#33 ;CheckStruct() Set a hardware breakpoint that calls a debugger macro CheckStruct each time it reaches line 33 of main.c. If CheckStruct returns a nonzero value, the debugger continues application execution.
BREAKEXECUTION,when:{check_struct()} \MAIN_1\#33 Set a hardware breakpoint that calls a target program function check_struct() each time it reaches line 33 of main.c. If this function returns zero, the debugger continues application execution.
Alias
BEXECUTION is an alias of BREAKEXECUTION.
See also
• Window and file numbers on page 1-5
• Addresses on page 1-26
• BREAKACCESS on page 2-38
• BREAKINSTRUCTION on page 2-55
• BREAKREAD on page 2-61
• BREAKWRITE on page 2-70
• DTBREAK on page 2-126
• ENABLEBREAK on page 2-140
• VMACRO on page 2-324
• the following in the RealView Debugger User Guide:— Chapter 7 Debugging Multiprocessor Applications— Chapter 11 Setting Breakpoints— Chapter 12 Controlling the Behavior of Breakpoints.
ARM DUI 0175N Copyright © 2002-2011 ARM. All rights reserved. 2-54ID052111 Non-Confidential

RealView Debugger Commands
2.3.16 BREAKINSTRUCTION
Sets a software instruction breakpoint at the specified memory location. Software breakpoints are implemented by writing a special instruction at the break address, and so cannot be set in ROM.
Syntax
BREAKINSTRUCTION [,qualifier...] expression [=threads,...] [;macro-call]
where:
qualifier Is an ordered list of zero or more qualifiers. The possible qualifiers are described in List of qualifiers for the BREAKINSTRUCTION command on page 2-56.
expression Specifies the address at which the breakpoint is placed. By default, this is the address where program execution stops.
threads The list of threads that make up the break trigger group.Only available for OS-aware RSD connections.
macro-call Specifies a macro and any parameters it requires. The macro runs when the breakpoint activates and before the instruction at the breakpoint is executed. The macro is treated as being specified last in the qualifier list.If the macro returns a nonzero value, or you specified continue in the qualifiers, execution continues. If the macro returns zero, or if you do not specify a macro, target execution stops and the debugger waits in command mode.The macro argument symbols are interpreted when the breakpoint is specified and so they must be in scope at that point, or you must explicitly qualify them.
Description
BREAKINSTRUCTION is used to set or modify software address breakpoints. Software address breakpoints include breakpoints set by patching special instructions into the program and hardware that tests the address and data values. If the command has no arguments, it behaves like DTBREAK on page 2-126, listing the current breakpoints.
If you try to set a software breakpoint at a location in ROM or Flash, the attempt fails by default. However, if you use the failover qualifier, RealView Debugger attempts to set a hardware breakpoint instead. The attempt fails if insufficient hardware facilities are available.
You can use qualifiers evaluated in the debugger, such as expressions, macros, C++ object tests, and software pass counters. You can also define actions to occur when the breakpoint is triggered (hit), including updating counters or windows, and the enabling or disabling of other breakpoints (see List of qualifiers for the BREAKINSTRUCTION command on page 2-56).
When a software breakpoint instruction is hit on the target, the following sequence of events occurs:
1. The debugger associates the address with a specific breakpoint ID. A memory address can only be associated with one user breakpoint at a time.
2. If the breakpoint has a pass count associated with it, the count is updated.
3. The conditions for this breakpoint, if any, are tested in the order specified on the command line (see Qualifiers that define conditional breakpoints on page 2-56). If any condition is False, target execution resumes with the instruction at the breakpointed location. Macros specified with the macro: qualifier or the ;macro-call argument are run in this phase.
ARM DUI 0175N Copyright © 2002-2011 ARM. All rights reserved. 2-55ID052111 Non-Confidential

RealView Debugger Commands
4. If the breakpoint has actions associated with it (for example, using timed to note the time the breakpoint occurred) these actions are run, in the order specified on the command line (see Qualifiers that define breakpoint actions).
5. If the qualifiers include continue, target execution resumes with the instruction at the breakpointed location. If not, the debugger updates the state of the GUI and waits for a command, leaving the application halted.
If you are debugging multiprocessor applications, and you have set up synchronization and cross-triggering, then you can specify how each processor is affected when a breakpoint activates.
The breakpoint list index number
RealView Debugger assigns a breakpoint list index number to each breakpoint. This number is assigned consecutively. However, if you delete a breakpoint, then the numbering might no longer be consecutive.
To determine the breakpoint list index of an existing breakpoint:
1. Start RealView Debugger in GUI mode.
2. Select View → Break/Tracepoints from the Code window main menu to open the Break/Tracepoint view.
3. Select the checkbox for the chosen breakpoint to disable it.
4. Click the Cmd tab in the Output view.The breakpoint list index (number) for the breakpoint is shown in the command:disable,h number
5. Select the checkbox for the chosen breakpoint to enable it.
Qualifiers that define conditional breakpoints
To set up a conditional breakpoint, use one or more of the following condition qualifiers:• macro (or ;macro-call)• obj
• passcount
• when
• when_not.
Qualifiers that define breakpoint actions
To specify actions to be performed when a breakpoint activates, use the following action qualifiers:• continue
• message
• update.
List of qualifiers for the BREAKINSTRUCTION command
The list of qualifiers is dependent on the processor and Debug Interface, and so the GUI does not present things that do not make sense. The command handler generates an error if a specific combination is invalid for a specific processor or Debug Interface, but this is determined when you issue the command.
ARM DUI 0175N Copyright © 2002-2011 ARM. All rights reserved. 2-56ID052111 Non-Confidential

RealView Debugger Commands
The possible qualifiers are:
append:(n) Instead of creating a new breakpoint, append the qualifiers specified with this command to an existing breakpoint with breakpoint list index number n (see The breakpoint list index number on page 2-56). You cannot change the breakpoint address.
continue Execution continues when the breakpoint activates and no breakpoint details are displayed. Any specified action qualifiers are still performed, depending on the results of any condition qualifiers.
failover When you attempt to set a software breakpoint in read-only memory, the default behavior causes the operation to fail. The error message displayed depends on whether or not memory mapping is enabled:• Memory mapping enabled:
Error V004E (Vehicle): Memory map forbids software breakpoint at this address
• Memory mapping disabled:Error V2801C (Vehicle): 0x050b0001: Unable to write sw breakpoint to memory.
However, in some circumstances it might be useful to convert the software breakpoint to a hardware breakpoint. To do this, use the failover qualifier.
macro:{MacroCall(arg1,arg2)} When the breakpoint is hit, the specified macro is executed. Any program variables or functions must be in scope at the time the breakpoint request is entered, or the names must be fully qualified. A macro call specified here is treated in the same way as a macro specified after a ;. You must include the braces { and }.
message:{"$windowid | fileid$message"} Activation of the breakpoint results in message being output. Prefixing message with $windowid | fileid$ enables you to write the message text to a user-defined window or file. For example:BREAKINSTRUCTION,message:{"$100$this is a message"}
modify:(n) Instead of creating a new breakpoint, modify the breakpoint with breakpoint list index number n (see The breakpoint list index number on page 2-56). The address expression and the qualifiers of the existing breakpoint are replaced by those specified in this command.
obj:(n) This condition is True if the argument n matches the C++ object pointer, normally called this.
passcount:(n) Specifies the number of times that the break condition is ignored before the breakpoint activates. The default value is 0. If you specify this in the middle of a sequence of break conditions, those specified before the passcount are processed whether or not the count reaches zero. The conditions specified afterwards are run only when the count reaches zero.
rtos:type Sets a breakpoint for OS-aware connections, where type is one of:hsd Sets a Halted System Debug (HSD) breakpoint for debugging
your OS-aware image.process Not supported in this release.system Sets a system breakpoint for debugging images running in
Running System Debug (RSD) mode.
ARM DUI 0175N Copyright © 2002-2011 ARM. All rights reserved. 2-57ID052111 Non-Confidential

RealView Debugger Commands
thread Sets a thread breakpoint for debugging images running in RSD mode.
size:n Set the size of the breakpoint to either 16 or 32 bits. For example:BREAKINSTRUCTION,size:32 0x10040
Use this qualifier if no debug information is available for your image. By default, RealView Debugger sets a 32-bit breakpoint.
update:{"name"} Update the named windows, or all windows, by reading the memory and processor state when the breakpoint activates. You can use the name all to refresh all windows, or a name specified in the title bar of the window.This qualifier enables you to get an overview of the process state at a particular point, without having to manually restart the process at each break. The update still takes a significant period of time, and so this method is unsuitable as a non-intrusive debugging tool.
when:{condition} The breakpoint activatesactivates whenever condition, a debugger expression, evaluates to True.
Note Using a macro as an argument to when, reverses the sense of the return
value from the macro.
when_not:{condition} The breakpoint activates whenever condition, a debugger expression, evaluates to False.
Rules for the BREAKINSTRUCTION command
The following rules apply to the use of the BREAKINSTRUCTION command:
• Breakpoints are specific to the board, process, or task active in the window at the time they are set.
• If synchronous breakpoints are set on two or more threads on the same board, the debugger stops the threads as close to the same time as the architecture of the board permits.
Examples
The following examples show how to use BREAKINSTRUCTION:
BREAKINSTRUCTION 0x8000 Set a breakpoint at address 0x8000.
BREAKINSTRUCTION \MATH_1\MATH_C\#449:22 Set a breakpoint at line 449, column 22 in the file math.c.
BREAKINSTRUCTION,append:(1),continue,update:{all} Given an already set breakpoint at position 1 in the breakpoint list, add a request to update all windows in the code window for this connection and continue execution each time the breakpoint activates.
ARM DUI 0175N Copyright © 2002-2011 ARM. All rights reserved. 2-58ID052111 Non-Confidential

RealView Debugger Commands
BREAKINSTRUCTION,pass:(5) \MAIN_1\MAIN_C\#49 Set a breakpoint using a hardware counter to stop at the fifth time that execution reaches line 49 of main.c.
BREAKINSTRUCTION \MAIN_1\MAIN_C\#33 ;CheckStruct() Set a breakpoint that calls a debugger macro CheckStruct each time it reaches line 33 of main.c. If CheckStruct returns a nonzero value, the debugger continues application execution.
BREAKINSTRUCTION,when:{count<4 || err==5} \MAIN_1\SUBFN_C\#33 Set a breakpoint that activates when the expression count<4 || err==5 is True when execution reaches line 33 of subfn.c.
BREAKINSTRUCTION,when:{check_struct()} \MAIN_1\MAIN_C\#33 Set a breakpoint that calls a target program function check_struct() each time it reaches line 33 of main.c. If this function returns zero, the debugger continues application execution.
BREAKINSTRUCTION, rtos:hsd \DEMO\#201 Set a HSD breakpoint at line 201 in demo.c.
BREAKINSTRUCTION,rtos:system \DEMO\#154 Set a system breakpoint at line 154 in demo.c.
BREAKINSTRUCTION,rtos:thread \DEMO\#154 = 0x39d8, 0x3a68 Set a thread breakpoint using a break trigger group consisting of two threads, defined by the addresses of the thread control blocks.
BREAKINSTRUCTION,rtos:thread \DEMO\#180 = thread_2, thread_6, thread_8 Set a thread breakpoint using a break trigger group consisting of three threads, defined by the thread names.
BREAKINSTRUCTION,modify:2,rtos:system Modify breakpoint number 2, a thread breakpoint, to be a system breakpoint.
BREAKINSTRUCTION,modify:3,rtos:thread = 0x1395c, 0x13bac Modify breakpoint number 3, a thread breakpoint, to specify a different break trigger group, shown in Figure 2-1.
Figure 2-1 Changing the break trigger group
Alias
BINSTRUCTION and BREAK are aliases of BREAKINSTRUCTION.
ARM DUI 0175N Copyright © 2002-2011 ARM. All rights reserved. 2-59ID052111 Non-Confidential

RealView Debugger Commands
See also
• Window and file numbers on page 1-5
• Addresses on page 1-26
• AOS_resource_list on page 2-26
• BREAKACCESS on page 2-38
• BREAKEXECUTION on page 2-47
• BREAKREAD on page 2-61
• BREAKWRITE on page 2-70
• CLEARBREAK on page 2-89
• DOS_resource_list on page 2-122
• ENABLEBREAK on page 2-140
• OSCTRL on page 2-200
• STOP on page 2-267
• VMACRO on page 2-324
• the following in the RealView Debugger User Guide:— Chapter 7 Debugging Multiprocessor Applications— Chapter 11 Setting Breakpoints— Chapter 12 Controlling the Behavior of Breakpoints
• the following in the RealView Debugger RTOS Guide:— Chapter 7 Debugging Your OS Application.
ARM DUI 0175N Copyright © 2002-2011 ARM. All rights reserved. 2-60ID052111 Non-Confidential

RealView Debugger Commands
2.3.17 BREAKREAD
Sets a hardware breakpoint that activates when a read operation is performed on any of the specified memory locations.
Syntax
BREAKREAD [,qualifier...] {address|address-range} [;macro-call]
where:
qualifier Is an ordered list of zero or more qualifiers. The possible qualifiers are described in List of qualifiers for the BREAKREAD command on page 2-64.
address | address-range
Specifies a single address or an address range in target memory. The address can also be a memory mapped register (see Memory mapped registers on page 2-62).
macro-call Specifies a macro and any parameters it requires. The macro runs when the breakpoint is hit and before the instruction at the breakpoint is executed. The macro is treated as being specified last in the qualifier list.If the macro returns a nonzero value, or you specified continue in the qualifiers, execution continues. If the macro returns zero, or if you do not specify a macro, target execution stops and the debugger waits in command mode.The macro argument symbols are interpreted when the breakpoint is specified and so they must be in scope at that point, or you must explicitly qualify them.
Description
BREAKREAD is used to set or modify data read breakpoints. Data read breakpoints activate when data that matches a condition is read from memory at a particular address or address range. If the command has no arguments, it behaves like DTBREAK, listing the current breakpoints.
Hardware address breakpoints can use other hardware tests in association with the address test, such as trigger inputs and outputs, hardware pass counters, and and-then, or chained, tests (see Qualifiers that define hardware tests on page 2-63).
You can use qualifiers evaluated in the debugger, such as expressions, macros, C++ object tests, and software pass counters. You can also define actions to occur when the breakpoint is triggered (hit), including updating counters or windows, and the enabling or disabling of other breakpoints (see List of qualifiers for the BREAKREAD command on page 2-64).
If you do not specify an address, the read breakpoint is set at the address defined by the current value of the PC. The breakpoint is triggered if the target program reads data from any specified target memory area.
When a hardware data read breakpoint is hit on the target, the following sequence of events occurs:
1. The debugger or the hardware associates the event with a specific debugger breakpoint ID.
2. If the breakpoint has a software pass count associated with it, the count is updated.
3. The conditions for this breakpoint, if any, are tested in the order specified on the command line (see Qualifiers that define conditional breakpoints on page 2-63). If any condition is False, target execution resumes with the instruction at the breakpointed location. Macros specified with the macro: qualifier or the ;macro-call argument are run in this phase.
ARM DUI 0175N Copyright © 2002-2011 ARM. All rights reserved. 2-61ID052111 Non-Confidential

RealView Debugger Commands
4. If the breakpoint has actions associated with it (for example, using timed to note the time the breakpoint occurred) these actions are run, in the order specified on the command line (see Qualifiers that define breakpoint actions on page 2-63).
5. If the qualifiers include continue, target execution resumes with the instruction at the breakpointed location. If not, the debugger updates the state of the GUI and waits for a command, leaving the application halted.
If you are debugging multiprocessor applications, and you have set up synchronization and cross-triggering, then you can specify how each processor is affected when a breakpoint activates.
Memory mapped registers
You can set a breakpoint that activates on a read from a memory-mapped register. To specify a memory mapped register, enter the following expression for the address:
register:expression
The register is identified by expression. For example:
BREAKREAD register:PR1
or
BREAKREAD register:@PR1
Note You can only specify memory mapped registers that are defined in Board/Chip Definition (.bcd) files that you have assigned to a Debug Configuration. You cannot set breakpoints on core registers.
Combining hardware and software pass counts
You can combine hardware and software pass counts to achieve higher count values. If you define both hardware and software pass counts:
1. When the hardware pass count reaches zero, the software pass count is decremented. What happens next depends on your hardware:• For RVISS, the hardware count remains at zero, so that
total count = hw_passcount + passcount• Other processors might exhibit the RVISS behavior, or might reset the hardware
pass count to the initial value, so that:total count = (hw_passcount +1) * passcount + hw_passcount
2. When the software pass count reaches zero, the breakpoint activates and the activation count is incremented. The following example shows the counts for the breakpoint bexec,hw_pass:3,pass:50 \DHRY_1\#70:0 on an RVISS target:• Initial state:
> dtbreakS ID Type Address Count Miscellaneous- -- ---- ------- ----- ------------- 1 Exec 0x00008480 0 Pass=50
• State after activation:
ARM DUI 0175N Copyright © 2002-2011 ARM. All rights reserved. 2-62ID052111 Non-Confidential

RealView Debugger Commands
> dtbreakS ID Type Address Count Miscellaneous- -- ---- ------- ----- ------------- 1 Exec 0x00008480 1 Pass=0
If the breakpoint is in a loop, then activation occurs on hit 53.
The breakpoint list index number
RealView Debugger assigns a breakpoint list index number to each breakpoint. This number is assigned consecutively. However, if you delete a breakpoint, then the numbering might no longer be consecutive.
To determine the breakpoint list index of an existing breakpoint:
1. Start RealView Debugger in GUI mode.
2. Select View → Break/Tracepoints from the Code window main menu to open the Break/Tracepoint view.
3. Select the checkbox for the chosen breakpoint to disable it.
4. Click the Cmd tab in the Output view.The breakpoint list index (number) for the breakpoint is shown in the command:disable,h number
5. Select the checkbox for the chosen breakpoint to enable it.
Qualifiers that define conditional breakpoints
To set up a conditional breakpoint, use one or more of the following condition qualifiers:• macro (or ;macro-call)• obj
• passcount
• when
• when_not.
Qualifiers that define breakpoint actions
To specify actions to be performed when a breakpoint activates, use the following action qualifiers:• continue
• message
• update.
Qualifiers that define hardware tests
To specify hardware tests for data read breakpoints, use the following qualifiers:• data_only
• hw_ahigh
• hw_amask
• hw_and
• hw_dhigh
• hw_dmask
• hw_dvalue
• hw_in
• hw_not
ARM DUI 0175N Copyright © 2002-2011 ARM. All rights reserved. 2-63ID052111 Non-Confidential

RealView Debugger Commands
• hw_passcount.
List of qualifiers for the BREAKREAD command
The list of qualifiers is dependent on the processor and Debug Interface, and so the GUI does not present things that do not make sense. The command handler generates an error if a specific combination is invalid for a specific processor or Debug Interface, but this is determined when you issue the command.
The possible qualifiers are:
append:(n) Instead of creating a new breakpoint, append the qualifiers specified with this command to an existing breakpoint with breakpoint list index number n (see The breakpoint list index number on page 2-63).
Note You cannot use append to change the breakpoint address or to create
chained breakpoints.
continue Execution continues when the breakpoint activates and no breakpoint details are displayed. Any specified action qualifiers are still performed, depending on the results of any condition qualifiers.
data_only The breakpoint is triggered if a data value, specified using hw_dvalue, is detected by the debug hardware on the processor data bus.
hw_ahigh:(n) Specifies the high address for an address-range breakpoint. The low address is specified by the standard breakpoint address.This facility is not supported by ARM EmbeddedICE macrocells. For example, this command sets a breakpoint that activates for any address between 0x1000-0x1200:BREAKREAD,hw_ahigh:0x1200 0x1000
This is equivalent to the command:BREAKREAD 0x1000..0x1200
hw_amask:(n) Specifies the address mask value for an address-range breakpoint. The address range is determined by masking lower order bits out of the specified address.This facility is supported by ARM EmbeddedICE macrocells.For example, to set a breakpoint that activates when any address in the range 0x1FA00-0x1FA0F is accessed, enter the command:BREAKREAD,hw_amask:0xFFFF0 0x1FA00
This is equivalent to the command:BREAKREAD 0x1FA00..0x1FA0F
hw_and:{id | "then-id"} Perform an and or an and-then conjunction with another breakpoint, to create a chain of breakpoints. The parentheses are optional. Each breakpoint in the chain is called a breakpoint unit.You specify the
ARM DUI 0175N Copyright © 2002-2011 ARM. All rights reserved. 2-64ID052111 Non-Confidential

RealView Debugger Commands
breakpoint units in the reverse order that RealView Debugger processes them. The position of the breakpoint unit in the chain is identified by id, which is one of the following:next Indicates that this breakpoint unit is to be linked to another
breakpoint unit specified for this connection. You must set a breakpoint unit with the ID next before you set any other breakpoint units for the chain. When used with then-, this breakpoint unit is the last one processed in the chain.
prev Indicates that this breakpoint unit is to be linked to an existing breakpoint unit specified for this connection. Make sure the existing breakpoint has been set with a next, prev, or index_number ID, and is a hardware breakpoint.
Note When using the prev ID, you must finish defining the complete
breakpoint chain before you create any non-chained breakpoints.
index_number The breakpoint list index number of an existing breakpoint unit (see The breakpoint list index number on page 2-63). Make sure the existing breakpoint has been set with a next, prev, or index_number ID, and is a hardware breakpoint.
How RealView Debugger processes the breakpoint units depends on the conjunction you have used:• In the and form, the conditions associated with both breakpoint units
are chained together, so that the action associated with the second breakpoint unit is performed only when both conditions simultaneously match.For example:BREAKREAD,hw_and:next,hw_dvalue:1 @copyfns\\COPYFNS\mycpy\appendBREAKEXECUTION,hw_and:prev @copyfns\\COPYFNS\mycpy\
• In the and-then form, RealView Debugger examines the breakpoint units starting with the last one you specified. When the condition for the last breakpoint unit (breakpoint unit N) is met, the associated actions are performed and the previous breakpoint is enabled (breakpoint unit N-1). RealView Debugger continues processing all remaining breakpoints in the chain, until the condition in the first one you specified is met (breakpoint unit 1). At this point, unless the continue qualifier is specified in that breakpoint, execution stops.
Note You must include the quotes when using the and-then form.
For example, you might have three breakpoint units in a chain, which you specify in the following order:BREAKREAD,hw_and:"then-next",continue 0x10014 (BPU1)BREAKREAD,hw_and:"then-prev" 0x10018 (BPU2)BREAKREAD,hw_and:"then-prev" 0x1001B (BPU3)
ARM DUI 0175N Copyright © 2002-2011 ARM. All rights reserved. 2-65ID052111 Non-Confidential

RealView Debugger Commands
In this case, RealView Debugger first checks for a data read at address 0x1001B (BPU3), then at address 0x10018 (BPU2), and finally at adress 0x10014 (BPU1). When all conditions are met, processing continues as instructed by the first breakpoint in the chain.
If you clear BPU1, then all breakpoints in the chain are cleared.If you clear any other breakpoint unit, then that breakpoint unit and the following ones are cleared. The previous breakpoint units remain set. For example, clearing BPU2, clears both BPU2 and BPU3, but not BPU1.
hw_dhigh:(n) Specifies the high data value for a data-range breakpoint. The low data value is specified by the hw_dvalue qualifier.This facility is not supported by ARM EmbeddedICE macrocells. For example, this command sets a breakpoint that activates for any data value between 0x00-0x18:BREAKREAD,hw_dvalue:0x0,hw_dhigh:0x18 0x1000
hw_dmask:(n) Specifies the data value mask for a data-range breakpoint. The data value to which the mask is applied is specified by the hw_dvalue qualifier. The data value range is determined by masking lower order bits out of the specified data value.This facility is supported by ARM EmbeddedICE macrocells.For example, to set a breakpoint that activates when a data value in the range 0x400-0x4FF is accessed at address 0x1FA00, enter the command:BREAKREAD,hw_dvalue:0x400,hw_dmask:0xF00 0x1FA00
hw_dvalue:(n) Specifies a data value to be compared to values transmitted on the processor data bus.This facility is supported by ARM EmbeddedICE macrocells. For example, this command sets a breakpoint that activates for the data value 0x400:BREAKREAD,hw_dvalue:0x400 0x1FA00
hw_in:{s} Input trigger tests. The string that follows matches hardware-supported input tests as a list of names or a value. The available tests depends on the Debug Interface and the target processor.Table 2-19 shows the possible strings for an ARM940T processor.
Table 2-19 Example hw_in test strings for an ARM940T
Input test string Meaning
No "Ext=level" string Ignore external trigger level
Ext=0x00000001 Low
Ext=0x00000002 High
No "Mode=mode" string Any mode
Mode=0x00000004 Privileged
Mode=0x00000008 User
No "AccessSize=size" string
Default access size
ARM DUI 0175N Copyright © 2002-2011 ARM. All rights reserved. 2-66ID052111 Non-Confidential

RealView Debugger Commands
For example, you might have a connection to an ARM940T processor through DSTREAM or RealView ICE. For this processor, to test for a low external trigger level and a 32-bit data read in User mode from address 0x10014, enter:BREAKREAD,hw_in:"Ext=0x00000002",hw_in:"Mode=0x00000008",hw_in:"Acc
essSize=0x00000300" 0x10014
hw_not:{s} Use this qualifier to invert the sense of an address, data, or hw_and term specified in the same command. The argument s can be set to:addr Invert the breakpoint address value.data Invert the breakpoint value.then Invert an associated hw_and:{then} condition.For example, to break when a data value does not match a mask, you can write:BREAKREAD,hw_not:data,hw_dmask:0x00FF ...
The break commands require an address value, and the addr variant of hw_not uses this address.BREAKREAD,hw_not:addr 0x10040
This means to break at any address other than 0x10040. This example is probably not useful.The hw_not:then variant of the command is used in conjunction with hw_and to form nand and nand-then conditions.This facility is not supported by ARM EmbeddedICE macrocells.
hw_out:{s} Not supported in this release.
hw_passcount:(n) Specifies the number of times that the break condition is ignored before the breakpoint activates. The default value is 0. This qualifier differs from passcount only in that it is implemented in hardware. Although n is limited to a 32-bit value by the debugger, it might be much more limited by the target hardware, for example to 8 or 16 bits.You can combine the hardware and software pass counts to achieve higher count values. However, the behavior depends on your processor (see Combining hardware and software pass counts on page 2-62).
macro:{MacroCall(arg1,arg2)} When the breakpoint is hit, the specified macro is executed. Any program variables or functions must be in scope at the time the breakpoint request is entered, or the names must be fully qualified. You must include the braces { and }.
AccessSize=0x00000100 8-bit
AccessSize=0x00000200 16-bit
AccessSize=0x00000300 32-bit
AccessSize=0x00000400 8/16-bit
AccessSize=0x00000500 8/32-bit
Table 2-19 Example hw_in test strings for an ARM940T (continued)
Input test string Meaning
ARM DUI 0175N Copyright © 2002-2011 ARM. All rights reserved. 2-67ID052111 Non-Confidential

RealView Debugger Commands
message:{"$windowid | fileid$message"} Activation of the breakpoint results in message being output. Prefixing message with $windowid | fileid$ enables you to write the message text to a user-defined window or file. For example:breakread,message:{"$100$this is a message"}
modify:(n) Instead of creating a new breakpoint, modify the breakpoint with breakpoint list index number n (see The breakpoint list index number on page 2-63). The address expression and the qualifiers of the existing breakpoint are replaced by those specified in this command.
obj:(n) This condition is True if the argument n matches the C++ object pointer, normally called this.
passcount:(n) Specifies the number of times that the break condition is ignored before the breakpoint activates. The default value is 0. If you specify this in the middle of a sequence of break conditions, those specified before the pass count are processed whether or not the count reaches zero. The conditions specified afterwards are run only when the count reaches zero.There is a hardware pass count qualifier available, hw_passcount, for debug hardware that supports it. You can combine the hardware and software pass counts to achieve higher count values. However, the behavior depends on your processor (see Combining hardware and software pass counts on page 2-62).
Note If a hardware breakpoint uses a passcount, the counting is performed on
the host, and so program execution stops briefly every time the breakpoint is hit, even when the count has not been reached.
update:{"name"} Update the named windows, or all windows, by reading the memory and processor state when the breakpoint activates. You can use the name all to refresh all windows, or a name specified in the title bar of the window.This qualifier enables you to get an overview of the process state at a particular point, without having to manually restart the process at each break. The update still takes a significant period of time, and so this method is unsuitable as a non-intrusive debugging tool.
when:{condition} The breakpoint activates whenever condition, a debugger expression, evaluates to True.
Note Using a macro as an argument to when, reverses the sense of the return
value from the macro.
when_not:{condition} The breakpoint activates whenever condition, a debugger expression, evaluates to False.
Examples
The following examples show how to use BREAKREAD:
BREAKREAD 0x8000 Stop program execution if a read occurs at location 0x8000.
ARM DUI 0175N Copyright © 2002-2011 ARM. All rights reserved. 2-68ID052111 Non-Confidential

RealView Debugger Commands
BREAKREAD 0x100..0x200 Stop program execution if a read occurs in the 257 bytes from 0x100-0x200 (inclusive).
Alias
BREAD is an alias of BREAKREAD.
See also
• Window and file numbers on page 1-5
• Addresses on page 1-26
• Specifying address ranges on page 2-2
• BREAKACCESS on page 2-38
• BREAKEXECUTION on page 2-47
• BREAKINSTRUCTION on page 2-55
• BREAKWRITE on page 2-70
• CLEARBREAK on page 2-89
• DTBREAK on page 2-126
• ENABLEBREAK on page 2-140
• VMACRO on page 2-324
• the following in the RealView Debugger User Guide:— Chapter 7 Debugging Multiprocessor Applications— Chapter 11 Setting Breakpoints— Chapter 12 Controlling the Behavior of Breakpoints
• the following in the RealView Debugger Target Configuration Guide:— Chapter 4 Configuring Custom Memory Maps, Registers and Peripherals.
ARM DUI 0175N Copyright © 2002-2011 ARM. All rights reserved. 2-69ID052111 Non-Confidential

RealView Debugger Commands
2.3.18 BREAKWRITE
Sets a hardware breakpoint that activates when a write operation is performed on any of the specified memory locations.
Syntax
BREAKWRITE [,qualifier...] {address|address-range} [;macro-call]
where:
qualifier Is an ordered list of zero or more qualifiers. The possible qualifiers are described in List of qualifiers for the BREAKWRITE command on page 2-73.
address | address-range
Specifies a single address or an address range in target memory. The address can also be a memory mapped register (see Memory mapped registers on page 2-71).
macro-call Specifies a macro and any parameters it requires. The macro runs when the breakpoint is hit and before the instruction at the breakpoint is executed. The macro is treated as being specified last in the qualifier list.If the macro returns a nonzero value, or you specified continue in the qualifiers, execution continues. If the macro returns zero, or if you do not specify a macro, target execution stops and the debugger waits in command mode.The macro argument symbols are interpreted when the breakpoint is specified and so they must be in scope at that point, or you must explicitly qualify them.
Description
BREAKWRITE is used to set or modify data write breakpoints. Data write breakpoints activate when data that matches a condition is written to memory at a particular address or address range. If the command has no arguments, it behaves like DTBREAK, listing the current breakpoints.
Hardware address breakpoints can use other hardware tests in association with the address test, such as trigger inputs and outputs, hardware pass counters, and and-then, or chained, tests (see Qualifiers that define hardware tests on page 2-72).
You can use qualifiers evaluated in the debugger, such as expressions, macros, C++ object tests, and software pass counters. You can also define actions to occur when the breakpoint activates, including updating counters or windows, and the enabling or disabling of other breakpoints (see List of qualifiers for the BREAKWRITE command on page 2-73).
If you do not specify an address, the write breakpoint is set at the address defined by the current value of the PC. The breakpoint is hit if the target program writes data to any part of the specified target memory area.
When a hardware data write breakpoint is hit on the target, the following sequence of events occurs:
1. The debugger or the hardware associates the event with a specific debugger breakpoint ID.
2. If the breakpoint has a software pass count associated with it, the count is updated.
3. The conditions for this breakpoint, if any, are tested in the order specified on the command line (see Qualifiers that define conditional breakpoints on page 2-72). If any condition is False, target execution resumes with the instruction at the breakpointed location. Macros specified with the macro: qualifier or the ;macro-call argument are run in this phase.
ARM DUI 0175N Copyright © 2002-2011 ARM. All rights reserved. 2-70ID052111 Non-Confidential

RealView Debugger Commands
4. If the breakpoint has actions associated with it (for example, using timed to note the time the breakpoint occurred) these actions are run, in the order specified on the command line (see Qualifiers that define breakpoint actions on page 2-72).
5. If the qualifiers include continue, target execution resumes with the instruction at the breakpointed location. If not, the debugger updates the state of the GUI and waits for a command, leaving the application halted.
If you are debugging multiprocessor applications, and you have set up synchronization and cross-triggering, then you can specify how each processor is affected when a breakpoint activates.
Memory mapped registers
You can set a breakpoint that activates on a write to a memory-mapped register. To specify a memory mapped register, enter the following expression for the address:
register:expression
The register is identified by expression. For example:
BREAKWRITE register:PR1
or
BREAKWRITE register:@PR1
Note You can only specify memory mapped registers that are defined in Board/Chip Definition (.bcd) files that you have assigned to a Debug Configuration. You cannot set breakpoints on core registers.
Combining hardware and software pass counts
You can combine hardware and software pass counts to achieve higher count values. If you define both hardware and software pass counts:
1. When the hardware pass count reaches zero, the software pass count is decremented. What happens next depends on your hardware:• For RVISS, the hardware count remains at zero, so that
total count = hw_passcount + passcount• Other processors might exhibit the RVISS behavior, or might reset the hardware
pass count to the initial value, so that:total count = (hw_passcount +1) * passcount + hw_passcount
2. When the software pass count reaches zero, the breakpoint activates and the activation count is incremented. The following example shows the counts for the breakpoint bexec,hw_pass:3,pass:50 \DHRY_1\#70:0 on an RVISS target:• Initial state:
> dtbreakS ID Type Address Count Miscellaneous- -- ---- ------- ----- ------------- 1 Exec 0x00008480 0 Pass=50
• State after activation:
ARM DUI 0175N Copyright © 2002-2011 ARM. All rights reserved. 2-71ID052111 Non-Confidential

RealView Debugger Commands
> dtbreakS ID Type Address Count Miscellaneous- -- ---- ------- ----- ------------- 1 Exec 0x00008480 1 Pass=0
If the breakpoint is in a loop, then activation occurs on hit 53.
The breakpoint list index number
RealView Debugger assigns a breakpoint list index number to each breakpoint. This number is assigned consecutively. However, if you delete a breakpoint, then the numbering might no longer be consecutive.
To determine the breakpoint list index of an existing breakpoint:
1. Start RealView Debugger in GUI mode.
2. Select View → Break/Tracepoints from the Code window main menu to open the Break/Tracepoint view.
3. Select the checkbox for the chosen breakpoint to disable it.
4. Click the Cmd tab in the Output view.The breakpoint list index (number) for the breakpoint is shown in the command:disable,h number
5. Select the checkbox for the chosen breakpoint to enable it.
Qualifiers that define conditional breakpoints
To set up a conditional breakpoint, use one or more of the following condition qualifiers:• macro (or ;macro-call)• obj
• passcount
• when
• when_not.
Qualifiers that define breakpoint actions
To specify actions to be performed when a breakpoint activates, use the following action qualifiers:• continue
• message
• update.
Qualifiers that define hardware tests
To specify hardware tests for data write breakpoints, use the following qualifiers:• data_only
• hw_ahigh
• hw_amask
• hw_and
• hw_dhigh
• hw_dmask
• hw_dvalue
• hw_in
• hw_not
ARM DUI 0175N Copyright © 2002-2011 ARM. All rights reserved. 2-72ID052111 Non-Confidential
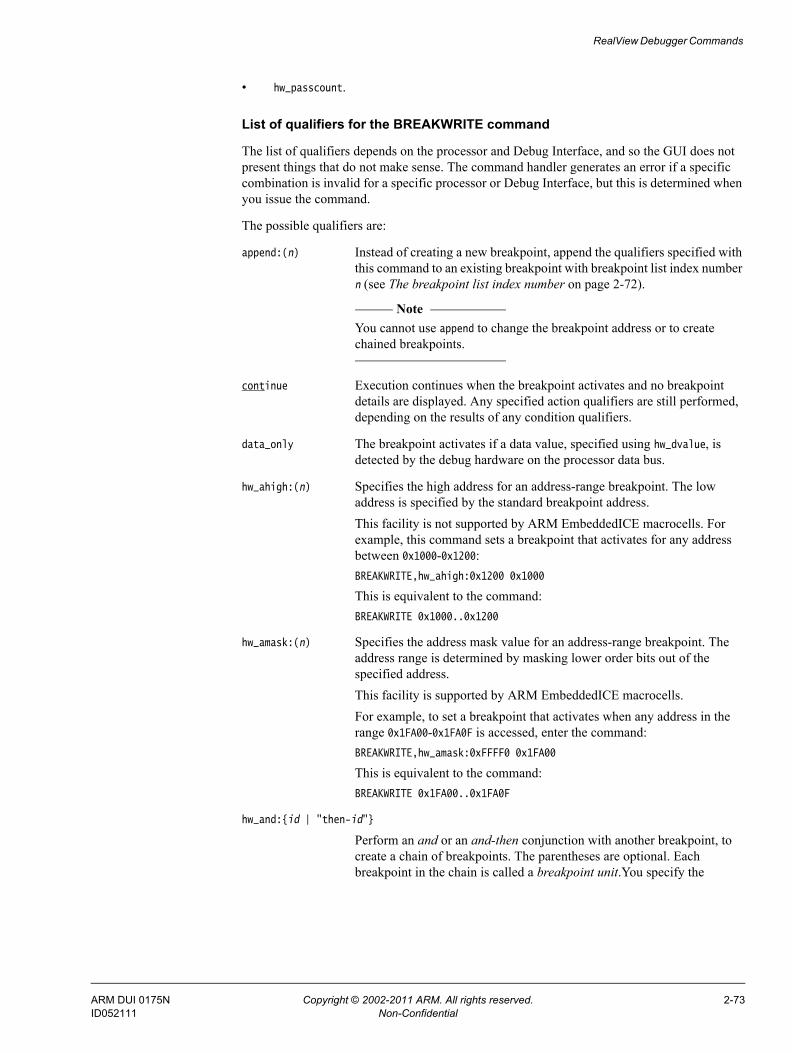
RealView Debugger Commands
• hw_passcount.
List of qualifiers for the BREAKWRITE command
The list of qualifiers depends on the processor and Debug Interface, and so the GUI does not present things that do not make sense. The command handler generates an error if a specific combination is invalid for a specific processor or Debug Interface, but this is determined when you issue the command.
The possible qualifiers are:
append:(n) Instead of creating a new breakpoint, append the qualifiers specified with this command to an existing breakpoint with breakpoint list index number n (see The breakpoint list index number on page 2-72).
Note You cannot use append to change the breakpoint address or to create
chained breakpoints.
continue Execution continues when the breakpoint activates and no breakpoint details are displayed. Any specified action qualifiers are still performed, depending on the results of any condition qualifiers.
data_only The breakpoint activates if a data value, specified using hw_dvalue, is detected by the debug hardware on the processor data bus.
hw_ahigh:(n) Specifies the high address for an address-range breakpoint. The low address is specified by the standard breakpoint address.This facility is not supported by ARM EmbeddedICE macrocells. For example, this command sets a breakpoint that activates for any address between 0x1000-0x1200:BREAKWRITE,hw_ahigh:0x1200 0x1000
This is equivalent to the command:BREAKWRITE 0x1000..0x1200
hw_amask:(n) Specifies the address mask value for an address-range breakpoint. The address range is determined by masking lower order bits out of the specified address.This facility is supported by ARM EmbeddedICE macrocells.For example, to set a breakpoint that activates when any address in the range 0x1FA00-0x1FA0F is accessed, enter the command:BREAKWRITE,hw_amask:0xFFFF0 0x1FA00
This is equivalent to the command:BREAKWRITE 0x1FA00..0x1FA0F
hw_and:{id | "then-id"} Perform an and or an and-then conjunction with another breakpoint, to create a chain of breakpoints. The parentheses are optional. Each breakpoint in the chain is called a breakpoint unit.You specify the
ARM DUI 0175N Copyright © 2002-2011 ARM. All rights reserved. 2-73ID052111 Non-Confidential

RealView Debugger Commands
breakpoint units in the reverse order that RealView Debugger processes them. The position of the breakpoint unit in the chain is identified by id, which is one of the following:next Indicates that this breakpoint unit is to be linked to another
breakpoint unit specified for this connection. You must set a breakpoint unit with the ID next before you set any other breakpoint units for the chain. When used with then-, this breakpoint unit is the last one processed in the chain.
prev Indicates that this breakpoint unit is to be linked to an existing breakpoint unit specified for this connection. Make sure the existing breakpoint has been set with a next, prev, or index_number ID, and is a hardware breakpoint.
Note When using the prev ID, you must finish defining the complete
breakpoint chain before you create any non-chained breakpoints.
index_number The breakpoint list index number of an existing breakpoint unit (see The breakpoint list index number on page 2-72). Make sure the existing breakpoint has been set with a next, prev, or index_number ID, and is a hardware breakpoint.
How RealView Debugger processes the breakpoint units depends on the conjunction you have used:• In the and form, the conditions associated with both breakpoint units
are chained together, so that the action associated with the second breakpoint unit is performed only when both conditions simultaneously match.For example:BREAKWRITE,hw_and:next,hw_dvalue:1 @copyfns\\COPYFNS\mycpy\appendBREAKEXECUTION,hw_and:prev @copyfns\\COPYFNS\mycpy\
• In the and-then form, RealView Debugger examines the breakpoint units starting with the last one you specified. When the condition for the last breakpoint unit (breakpoint unit N) is met, the associated actions are performed and the previous breakpoint is enabled (breakpoint unit N-1). RealView Debugger continues processing all remaining breakpoints in the chain, until the condition in the first one you specified is met (breakpoint unit 1). At this point, unless the continue qualifier is specified in that breakpoint, execution stops.
Note You must include the quotes when using the and-then form.
For example, you might have three breakpoint units in a chain, which you specify in the following order:BREAKWRITE,hw_and:"then-next",continue 0x10014 (BPU1)BREAKWRITE,hw_and:"then-prev" 0x10018 (BPU2)BREAKWRITE,hw_and:"then-prev" 0x1001B (BPU3)
ARM DUI 0175N Copyright © 2002-2011 ARM. All rights reserved. 2-74ID052111 Non-Confidential

RealView Debugger Commands
In this case, RealView Debugger first checks for a data write at address 0x1001B (BPU3), then at address 0x10018 (BPU2), and finally at adress 0x10014 (BPU1). When all conditions are met, processing continues as instructed by the first breakpoint in the chain.
If you clear BPU1, then all breakpoints in the chain are cleared.If you clear any other breakpoint unit, then that breakpoint unit and the following ones are cleared. The previous breakpoint units remain set. For example, clearing BPU2, clears both BPU2 and BPU3, but not BPU1.
hw_dhigh:(n) Specifies the high data value for a data-range breakpoint. The low data value is specified by the hw_dvalue qualifier.This facility is not supported by ARM EmbeddedICE macrocells. For example, this command sets a breakpoint that activates for any data value between 0x00-0x18:BREAKWRITE,hw_dvalue:0x0,hw_dhigh:0x18 0x1000
hw_dmask:(n) Specifies the data value mask for a data-range breakpoint. The data value to which the mask is applied is specified by the hw_dvalue qualifier. The data value range is determined by masking lower order bits out of the specified data value.This facility is supported by ARM EmbeddedICE macrocells.For example, to set a breakpoint that activates when a data value in the range 0x400-0x4FF is accessed at address 0x1FA00, enter the command:BREAKWRITE,hw_dvalue:0x400,hw_dmask:0xF00 0x1FA00
hw_dvalue:(n) Specifies a data value to be compared to values transmitted on the processor data bus.This facility is supported by ARM EmbeddedICE macrocells. For example, this command sets a breakpoint that activates for the data value 0x400:BREAKWRITE,hw_dvalue:0x400 0x1FA00
hw_in:{s} Input trigger tests. The string that follows matches hardware-supported input tests as a list of names or a value. The available tests depends on the Debug Interface and the target processor.Table 2-20 shows the possible strings for an ARM940T processor.
Table 2-20 Example hw_in test strings for an ARM940T
Input test string Meaning
No "Ext=level" string Ignore external trigger level
Ext=0x00000001 Low
Ext=0x00000002 High
No "Mode=mode" string Any mode
Mode=0x00000004 Privileged
Mode=0x00000008 User
No "AccessSize=size" string
Default access size
ARM DUI 0175N Copyright © 2002-2011 ARM. All rights reserved. 2-75ID052111 Non-Confidential

RealView Debugger Commands
For example, you might have a connection to an ARM940T processor through DSTREAM or RealView ICE. For this processor, to test for a low external trigger level and a 32-bit data write in User mode to address 0x10014, enter:BREAKWRITE,hw_in:"Ext=0x00000002",hw_in:"Mode=0x00000008",hw_in:"Ac
cessSize=0x00000300" 0x10014
hw_not:{s} Use this qualifier to invert the sense of an address, data, or hw_and term specified in the same command. The argument s can be set to:addr Invert the breakpoint address value.data Invert the breakpoint value.then Invert an associated hw_and:{then} condition.For example, to break when a data value does not match a mask, you can write:BREAKWRITE,hw_not:data,hw_dmask:0x00FF ...
The break commands require an address value, and the addr variant of hw_not uses this address.BREAKWRITE,hw_not:addr 0x10040
This means to break at any address other than 0x10040. This example is probably not useful.The hw_not:then variant of the command is used in conjunction with hw_and to form nand and nand-then conditions.This facility is not supported by ARM EmbeddedICE macrocells.
hw_out:{s} Not supported in this release.
hw_passcount:(n) Specifies the number of times that the break condition is ignored before the breakpoint activates. The default value is 0. This qualifier differs from passcount only in that it is implemented in hardware. n is limited to a 32-bit value by the debugger, but might be much more limited by the target hardware, for example to 8 or 16 bits.You can combine the hardware and software pass counts to achieve higher count values. However, the behavior depends on your processor (see Combining hardware and software pass counts on page 2-71).
macro:{MacroCall(arg1,arg2)} When the breakpoint is hit, the specified macro is executed. Any program variables or functions must be in scope at the time the breakpoint request is entered, or the names must be fully qualified. You must include the braces { and }.
AccessSize=0x00000100 8-bit
AccessSize=0x00000200 16-bit
AccessSize=0x00000300 32-bit
AccessSize=0x00000400 8/16-bit
AccessSize=0x00000500 8/32-bit
Table 2-20 Example hw_in test strings for an ARM940T (continued)
Input test string Meaning
ARM DUI 0175N Copyright © 2002-2011 ARM. All rights reserved. 2-76ID052111 Non-Confidential

RealView Debugger Commands
message:{"$windowid | fileid$message"} Activation of the breakpoint results in message being output. Prefixing message with $windowid | fileid$ enables you to write the message text to a user-defined window or file. For example:BREAKWRITE,message:{"$100$this is a message"}
modify:(n) Instead of creating a new breakpoint, modify the breakpoint with breakpoint list index number n (see The breakpoint list index number on page 2-72). The address expression and the qualifiers of the existing breakpoint are replaced by those specified in this command.
obj:(n) This condition is True if the argument n matches the C++ object pointer, normally called this.
passcount:(n) Specifies the number of times that the break condition is ignored before the breakpoint activates. The default value is 0. If you specify this in the middle of a sequence of break conditions, those specified before the pass count are processed whether or not the count reaches zero. The conditions specified afterwards are run only when the count reaches zero.There is a hardware pass count qualifier available, hw_passcount, for debug hardware that supports it. You can combine the hardware and software pass counts to achieve higher count values. However, the behavior depends on your processor (see Combining hardware and software pass counts on page 2-71).
Note If a hardware breakpoint uses a passcount, the counting is performed on
the host, and so program execution stops briefly every time the breakpoint is hit, even when the count has not been reached.
update:{"name"} Update the named windows, or all windows, by reading the memory and processor state when the breakpoint activates. You can use the name all to refresh all windows, or a name specified in the title bar of the window.This qualifier enables you to get an overview of the process state at a particular point, without having to manually restart the process at each break. The update still takes a significant period of time, and so this method is unsuitable as a non-intrusive debugging tool.
when:{condition} The breakpoint activates whenever condition, a debugger expression, evaluates to True.
Note Using a macro as an argument to when, reverses the sense of the return
value from the macro.
when_not:{condition} The breakpoint activates whenever condition, a debugger expression, evaluates to False.
Examples
The following examples show how to use BREAKWRITE:
BREAKWRITE 0x8000 Stop program execution if the program writes to location 0x8000.
ARM DUI 0175N Copyright © 2002-2011 ARM. All rights reserved. 2-77ID052111 Non-Confidential

RealView Debugger Commands
BREAKWRITE 0x1100..0x1200 Stop program execution if the program writes to the 257 bytes from 0x1100-0x1200 (inclusive).
BREAKWRITE 0x1100..0x1200 ; CheckMem(0x100) Stop program execution if the program writes to the 257 bytes from 0x1100-0x1200 (inclusive) and calls the macro CheckMem with the base address 0x100.
Alias
BWRITE is an alias of BREAKWRITE.
See also
• Window and file numbers on page 1-5
• Addresses on page 1-26
• Specifying address ranges on page 2-2
• BREAKACCESS on page 2-38
• BREAKEXECUTION on page 2-47
• BREAKINSTRUCTION on page 2-55
• BREAKREAD on page 2-61
• CLEARBREAK on page 2-89
• DTBREAK on page 2-126
• ENABLEBREAK on page 2-140
• VMACRO on page 2-324
• the following in the RealView Debugger User Guide:— Chapter 7 Debugging Multiprocessor Applications— Chapter 11 Setting Breakpoints— Chapter 12 Controlling the Behavior of Breakpoints
• the following in the RealView Debugger Target Configuration Guide:— Chapter 4 Configuring Custom Memory Maps, Registers and Peripherals.
ARM DUI 0175N Copyright © 2002-2011 ARM. All rights reserved. 2-78ID052111 Non-Confidential

RealView Debugger Commands
2.3.19 BROWSE
Invokes the C++ class browser interface
Syntax
BROWSE symbol
where:
symbol Specifies a C++ class or structure to be browsed.
Description
Displays the parent class or classes and any child classes for the class you specify. You can specify the class as either a variable name or the class name.
Examples
The following example shows how to use BROWSE:
browse Shakespeare Shakespeare parents | children ____________________|____________________ / \ | baseclass
ARM DUI 0175N Copyright © 2002-2011 ARM. All rights reserved. 2-79ID052111 Non-Confidential

RealView Debugger Commands
2.3.20 BWRITE
BWRITE is an alias of BREAKWRITE.
See BREAKWRITE on page 2-70.
ARM DUI 0175N Copyright © 2002-2011 ARM. All rights reserved. 2-80ID052111 Non-Confidential

RealView Debugger Commands
2.3.21 CACHEFIND
Searches for an address within the cache.
Syntax
CACHEFIND [,level:n] [,instruction | ,data] address
where:
,level:n The cache level to search. If omitted, the level 1 cache is searched. This qualifier can be shortened to l.
,instruction Search for the address in the instruction cache.
,data Search for the address in the data cache.
address The address to be searched. For a processor that supports the TrustZone® technology, you can specify the S: or N: address prefix, for example S:0x2040.
Description
Search the instruction or data cache for the specified address. If both i and d are omitted, the command searches both instruction and data caches. An address must be provided.
The address does not have to be cache line-aligned. If found, details of the cache line are displayed, including the set and way and the range of addresses cached.
This command is supported on the following processors:• ARM1136• ARM1156• Cortex™-A8.
Examples
To check whether the address 0x1FFE0 is in the level 1 instruction and data caches on an ARM1136JF-S, enter:
> cachefind 0x1FFE0Data cache line in set 127; way 0 contains address range 0x0001FFE0..0x0001FFFF
See also• CACHEINFO on page 2-82• CACHELINE on page 2-84• VA2PA on page 2-319• cache_find_set on page 3-12• cache_find_way on page 3-13.
ARM DUI 0175N Copyright © 2002-2011 ARM. All rights reserved. 2-81ID052111 Non-Confidential

RealView Debugger Commands
2.3.22 CACHEINFO
Displays details about the cache.
Syntax
CACHEINFO [,level:n] [,instruction | ,data] [,contents]
where:
,level:n The cache level. If omitted, information about the level 1 cache is displayed. This qualifier can be shortened to l.
,instruction Display a summary of the instruction cache.
,data Display a summary of the data cache.
,contents Display a table of all the cache entries.
Description
Displays details about the specified cache. If you do not specify i or d, then information on all available caches for the specified level is displayed.
This command is supported on the following processors:• ARM1136• ARM1156• Cortex-A8.
Examples
To display a summary of the level 1 instruction and data caches on an ARM1136JF-S, enter:
> cacheinfoData cache, of size 16KB, arranged in 128 sets of 4 ways, with lines of 32 bytes.Instruction cache, of size 16KB, arranged in 128 sets of 4 ways, with lines of 32 bytes.
To dump the entire contents of the level 1 data cache on an ARM1136JF-S, enter:
> cacheinfo,d,cData cache, of size 16KB, arranged in 128 sets of 4 ways, with lines of 32 bytes. | Way 0 Way 1 Way 2 Way 3 ------------------------------------------------------------------------------------------Set 0 | Phy<0x00010000> Phy<0x00021000> Phy<0x00026000> Phy<0x00023000> Set 1 | Phy<0x00010020> Phy<0x00021020> Phy<0x00022020> Phy<0x00023020> Set 2 | Phy<0x00025040> Phy<0x00022040> Phy<0x00023040> Phy<0x00026040> Set 3 | Phy<0x00024060> Phy<0x00010060> Phy<0x00026060> Phy<0x00023060>...Set 124 | Phy<0x0001FF80> Phy<0x00020F80> Phy<0x00023F80> Phy<0x00025F80> Set 125 | Phy<0x0001FFA0> Phy<0x00025FA0> Phy<0x00024FA0> Phy<0x00000FA0> Set 126 | Phy<0x00025FC0> Phy<0x00024FC0> Phy<0x0001FFC0> Phy<0x00022FC0> Set 127 | Phy<0x0001FFE0> Phy<0x00000FE0> Phy<0x00025FE0> Phy<0x00024FE0>
To display a summary of the level 2 cache, enter:
> cacheinfo,l:2Unified cache, of size 16640KB, arranged in 33280 sets of 8 ways, with lines of 64 bytes.
ARM DUI 0175N Copyright © 2002-2011 ARM. All rights reserved. 2-82ID052111 Non-Confidential

RealView Debugger Commands
See also• CACHEFIND on page 2-81• CACHELINE on page 2-84• VA2PA on page 2-319• cache_find_set on page 3-12• cache_find_way on page 3-13.
ARM DUI 0175N Copyright © 2002-2011 ARM. All rights reserved. 2-83ID052111 Non-Confidential

RealView Debugger Commands
2.3.23 CACHELINE
Prints information about a specific cache line.
Syntax
CACHELINE [,level:n] {,instruction | ,data} ,set:index [,way:index]
where:
,level:n The cache level. If omitted, information about the level 1 cache is displayed. This qualifier can be shortened to l.
,instruction Display a summary of the instruction cache.
,data Display a summary of the data cache.
,set:index Display details about the specific set line. This qualifier can be shortened to s.
,way:index Display details about a specific way line in the specified set. This qualifier can be shortened to w.
Note If the processor has a unified cache, you can omit the i and d qualifiers. If the processor has a Harvard cache, you must specify i or d.
Description
Prints information about a specific cache line. If no way is specified, all cache lines in the same set are printed.
This command is supported on the following processors:• ARM1136• ARM1156• Cortex-A8.
Examples
To display all way lines for set line 10 in the level 1 instruction cache on an ARM1136JF-S, enter:
> cacheline,i,set:10Instruction cache line in set 10; way 0 contains physical address range Phy<0x00004140>..Phy<0x0000415F>Instruction cache line in set 10; way 1 contains physical address range Phy<0x00000140>..Phy<0x0000015F>Instruction cache line in set 10; way 2 contains physical address range Phy<0x00003140>..Phy<0x0000315F>Instruction cache line in set 10; way 3 contains physical address range Phy<0x00001140>..Phy<0x0000115F>
See also• CACHEFIND on page 2-81• CACHEINFO on page 2-82• VA2PA on page 2-319• cache_find_set on page 3-12• cache_find_way on page 3-13.
ARM DUI 0175N Copyright © 2002-2011 ARM. All rights reserved. 2-84ID052111 Non-Confidential

RealView Debugger Commands
2.3.24 CANCEL
Cancels, or interrupts, the execution of commands.
Syntax
CANCEL
Description
The CANCEL command enables you to interrupt, or cancel, an asynchronous command that is still executing. It is equivalent to the Cancel toolbar icon. If the target is running, only commands that can definitely be run with a running target are executed. Other commands are held in a queue for execution when the target stops. This is called pending the command. Use the CANCEL command to clear pending commands from the list, to stop them being executed.
The CANCEL command can be used to interrupt a script that has been started using Tools → Include Commands from File..., or the Scripts toolbar.
You cannot use this command to halt target execution. Use HALT to do this.
Note Synchronous commands can only be run when target program execution has stopped.
Asynchronous commands can be run at all times.
See also• HALT on page 2-163• INTRPT on page 2-171• WAIT on page 2-329.
ARM DUI 0175N Copyright © 2002-2011 ARM. All rights reserved. 2-85ID052111 Non-Confidential

RealView Debugger Commands
2.3.25 CCTRL
Opens and closes the Connect to Target window.
Note This command has no effect when running in command line mode.
Syntax
CCTRL
Description
The CCTRL command enables you to open and close the Connect to Target window. If the Connect to Target window is open, then the command closes the window. If the Connect to Target window is closed, then the command opens the window.
ARM DUI 0175N Copyright © 2002-2011 ARM. All rights reserved. 2-86ID052111 Non-Confidential

RealView Debugger Commands
2.3.26 CEXPRESSION
Calculates and displays the value of an expression. You can also modify variables using the assignment operator.
Syntax
CEXPRESSION [/R] expression
where:
/R Suppresses printing of the result, that is the line beginning with the textResult is:
expression A valid debugger expression:• an expression or symbol name• a source code line number.
Description
The CEXPRESSION command calculates the value of an expression or assigns a value to a variable. You cannot manipulate values larger than 4 bytes, other than double values, in an expression.
Rules for the CEXPRESSION command
The following rules apply to the use of the CEXPRESSION command:
• CEXPRESSION runs synchronously if the expression uses target registers, including the stack pointer, or if it uses target memory and background memory access is not available.Use the WAIT command to force it to run synchronously.
• Results are displayed in either floating-point format, address format, or in decimal, hexadecimal, or ASCII format depending on the type of variables used in the expression.
• The ASCII representation is displayed if the expression value is a printable ASCII character.
• Floating-point numbers are shown as double by default (14 decimal digits of precision). They can be cast to float to display 6 decimal digits of precision.
Examples
The following examples show how to use CEXPRESSION:
CEXPRESSION Run_Index Displays the current value of the variable named Run_Index.
CE /R Run_Index=50 Assigns a value of 50 to the variable named Run_Index, and suppresses the printing of the result.
CE @R0 =20h Writes 0x20 to target register R0.
CE #146.2 Displays details of the second statement at line 146 in the current source file. For example, for the dhry_1.c source file of the dhrystone image this command prints:
Result is: code address 0x00008318 @dhrystone\\DHRY_1\main Line 146..146 column 7..21 at 0x00008318..0x0000831B
ARM DUI 0175N Copyright © 2002-2011 ARM. All rights reserved. 2-87ID052111 Non-Confidential

RealView Debugger Commands
See also• Constructing expressions on page 1-14• Referencing reserved symbols on page 1-18• ADD on page 2-16• DEFINE on page 2-105• DUMP on page 2-131• MACRO on page 2-182• PRINTSYMBOLS on page 2-208• PRINTVALUE on page 2-211• REGINFO on page 2-223• SETMEM on page 2-239• SETREG on page 2-242• Chapter 1 Working with the CLI.
ARM DUI 0175N Copyright © 2002-2011 ARM. All rights reserved. 2-88ID052111 Non-Confidential

RealView Debugger Commands
2.3.27 CLEARBREAK
Deletes one or more breakpoints.
Syntax
CLEARBREAK,a {breakpoint_address|breakpoint_address_range}
CLEARBREAK [{breakpoint_number|breakpoint_number_range}]
where:
,a breakpoint_address
Specifies the address of the breakpoint to be cleared.
,a breakpoint_address_range
Specifies that all breakpoints within the address range are to be cleared. See Specifying address ranges on page 2-2 for details on how to specify an address range.
breakpoint_number
Specifies the number of the breakpoint to be cleared.
breakpoint_number_range
Specifies a range of breakpoint numbers as two integers separated by the range operator (..).
Description
This command clears (deletes) the breakpoints you specify using either:
• The address of the breakpoint, or an address range containing multiple breakpoints.
• The position of the breakpoint in a list of breakpoints.You can display a list of the currently defined breakpoints using the command DTBREAK, and also by displaying the Break/Tracepoints view in the Code window.When specifying a range of breakpoints, you can either specify the end of the range as an absolute position, or you can specify the number of breakpoints to delete by typing a plus sign followed by the number of breakpoints. For example: +3 indicates three breakpoints.
To delete all breakpoints, use CLEARBREAK with no parameters.
CLEARBREAK runs synchronously.
Note You can disable a breakpoint, so that the breakpoint is unset but remembered by the debugger, using the DISABLEBREAK command. You can enable breakpoints that you have disabled, so setting them on the target again, using the ENABLEBREAK command.
Examples
The following examples show how to use CLEARBREAK:
CL Clears every breakpoint.
CL,a 0x8008 Clears the breakpoint at the address 0x8008.
ARM DUI 0175N Copyright © 2002-2011 ARM. All rights reserved. 2-89ID052111 Non-Confidential

RealView Debugger Commands
CL,a 0x8008..0x8024 Clears all breakpoints in the address range 0x8008..0x8024.
CL,a 5..7 Clears the fifth, sixth, and seventh breakpoints in the current list.
CL 5..+3 Clears the fifth, sixth, and seventh breakpoints in the current list.
See also• BREAKACCESS on page 2-38• BREAKEXECUTION on page 2-47• BREAKINSTRUCTION on page 2-55• BREAKREAD on page 2-61• BREAKWRITE on page 2-70• DISABLEBREAK on page 2-114• DTBREAK on page 2-126• ENABLEBREAK on page 2-140• RESETBREAKS on page 2-228.
ARM DUI 0175N Copyright © 2002-2011 ARM. All rights reserved. 2-90ID052111 Non-Confidential

RealView Debugger Commands
2.3.28 COMPARE
Compares two blocks of memory and displays the differences.
Syntax
COMPARE [/R] address-range, address
where:
/R Instructs the debugger to continue comparing and displaying mismatches until either the end of the block is reached or you press CTRL+Break to abort the operation.
address-range
Specifies the address range to be compared using two addresses separated by the range operator (..). See Specifying address ranges on page 2-2 for details on how to specify an address range.
address Specifies the starting address of the block of memory to use as a comparison.
Description
A specified block of memory is compared to a block of the same size starting at a specified location.
Mismatched addresses and values are displayed. If you are using the GUI, then they are displayed in the Output view. Entering the command again at this point without parameters continues the process starting with the first byte after the mismatch.
If the contents of the two blocks of memory are the same, the debugger displays the message:
Memory blocks are the same.
COMPARE runs synchronously unless background access to target memory is supported. Use the WAIT command to force it to run synchronously.
Examples
The following examples show how to use COMPARE:
com 0x8100..0x82FF,0x8700
Compares the contents of memory from 0x8100 to 0x82FF with the contents of memory from 0x8700 to 088FF, stopping at the first mismatch.
com/r 0x8100..0x81FF,0x8700
Compares the contents of memory from 0x8100 to 0x81FF with the contents of memory from 0x8700 to 087FF, displaying all the differences found.
com/r 0x8100..+512,0x8700
Compares the contents of memory from 0x8100 to 0x81FF with the contents of memory from 0x8700 to 088FF, displaying all the differences found.
See also• COPY on page 2-98• FILL on page 2-149• MEMWINDOW on page 2-188
ARM DUI 0175N Copyright © 2002-2011 ARM. All rights reserved. 2-91ID052111 Non-Confidential

RealView Debugger Commands
• TEST on page 2-273• VERIFYFILE on page 2-322.
ARM DUI 0175N Copyright © 2002-2011 ARM. All rights reserved. 2-92ID052111 Non-Confidential

RealView Debugger Commands
2.3.29 CONNECT
Connects the debugger to a specified target.
Syntax
CONNECT [{,reset|,noreset}] [{,halt|,nohalt}] [=] "@connection-id"
CONNECT [,gui] [=] "@connection-id"
where:
reset Reset the target before connecting to it.
noreset Do not reset the target on connecting to it.
halt Stop the target on connecting to it.
nohalt Do not stop the target on connecting to it.
"connection-id"
Specifies the required connection name (see Connecting to a target on page 2-94).The quotes are optional for connections to targets with names that contain alphanumeric characters, underscores, or hyphens. For example:@ARM926EJ-S_0@RealView-ICE
If you have a SoC Designer target, the target and model names are usually separated by a period, and multiprocessor models include the processor number in square brackets. Therefore, you must include the quotes. For example:"@ARM926EJ-S_x2.arm926ej-s[0]@SoC"
gui Enables you to choose the connect mode from a dialog or prompt:• If you use this option when running in GUI mode, it displays a dialog.• If you use this option when running in command line mode, it displays a
prompt.The connect specifies what state you want the debugger to leave the target in after the connection. See Connect modes on page 2-94 for more details.
Description
The CONNECT command creates a new target connection. The details of the connection are specified using the board file. To connect to a target you indicate which target in the board file you want to connect to, using the identifier string.
Using the CONNECT command means that you do not use the Connect to Target window. However, it is helpful to think of that window when considering the operation of the CONNECT command. An example Connect to Target window is shown in Figure 2-2 on page 2-94.
ARM DUI 0175N Copyright © 2002-2011 ARM. All rights reserved. 2-93ID052111 Non-Confidential

RealView Debugger Commands
Figure 2-2 Connect to Target window (Configuration grouping)
Note If you set the connect mode in the board (.BRD) file of the target the target connects using that mode. If you specify prompt for the connect mode, then the CONNECT command acts as though you specified the ,gui qualifier. The reset, noreset, halt, and nohalt qualifiers override the connect mode setting in the board file.
Restrictions on the use of CONNECT
The CONNECT command is not allowed in a macro.
Connect modes
When you connect to a target, the connect mode determines what happens to the target:
No Reset and Stop (,noreset,halt) Connect to the target, but do not reset it. If the target is running, stop it. This is the default.
No Reset and No Stop (,noreset,nohalt) Connect to the target, but do not reset it. The running state of the target is unchanged.
Reset and Stop (,reset,halt) Connect to the target, and reset it. If the target is running after the reset, stop it.
Reset and No Stop (,reset,nohalt) Connect to the target, and reset it. The running state of the target is unchanged.
Note The connect modes available depend on the Debug Interface you are using.
Connecting to a target
You can connect to a target where the Debug Configuration is not currently expanded using a single command:
connect "@target@DebugConfiguration"
ARM DUI 0175N Copyright © 2002-2011 ARM. All rights reserved. 2-94ID052111 Non-Confidential

RealView Debugger Commands
Depending on the Debug Interface, target might include a numerical suffix. If there is more than one target configured for a Debug Configuration, then the number reflects the order on the JTAG scan chain for hardware targets.
If you have created more than one Debug Configuration, and both provide access to targets with the same name (for example, ARM940T_0), then the debugger connects to the target of the first Debug Configuration that you accessed.
For example:
connect @ARM940T_0@RealView-ICE
This command connects to the ARM940T_0 target, expecting this to be available in the RealView-ICE Debug Configuration.
If the Debug Configuration, in this case RealView-ICE, has not been configured with an ARM940T_0, the connection fails with the message Error P1001E (Parser): Specified target not in list of available targets. You must correctly configure the Debug Configuration before you connect to the target.
If you specify a target that has not been configured, you are prompted to configure the target before you can connect.
See also
• BOARD on page 2-35
• DISCONNECT on page 2-118
• EDITBOARDFILE on page 2-136
• RESTART on page 2-230
• RUN on page 2-232
• SYNCHEXEC on page 2-271
• XTRIGGER on page 2-335
• the following in the RealView Debugger User Guide:— About creating a Debug Configuration on page 3-8— Specifying connect and disconnect mode on page 3-19
• the following in the RealView Debugger Target Configuration Guide:— Chapter 2 Customizing a Debug Interface configuration.
ARM DUI 0175N Copyright © 2002-2011 ARM. All rights reserved. 2-95ID052111 Non-Confidential

RealView Debugger Commands
2.3.30 CONTEXT
Displays the current context.
Syntax
CONTEXT [/F]
where:
/F Displays all contexts (roots).
Description
The CONTEXT command displays the current context. If you are using the GUI, then the context is displayed in the Output view. The context includes the current root, module, procedure, and line. The context must be in a module with high-level debug information for the line number to be displayed.
If the context is at the PC, then the text At the PC: is displayed.
If you have changed scope to a location other than that pointed to by the PC, then the text Scoped to: is displayed.
CONTEXT runs asynchronously unless it is run in a macro.
Examples
The following example shows how to use CONTEXT using the dhrystone application:
> contextAt the PC: (0x00008000): ENTRY\__mainSource view: DHRY_1\main Line 78
This demonstrates the case where the PC and the current source view do not correspond. In this case, the editor is displaying the beginning of the function main() at line 78, while the pc is at location 0x8000 in the __main(), the routine that calls main().
The following example sets a breakpoint in main() and runs to that breakpoint:
> bi \DHRY_1\#98:0> goStopped at 0x000084D0 due to SW Instruction BreakpointStopped at 0x000084D0: DHRY_1\main Line 98> conAt the PC: (0x000084D0): DHRY_1\main Line 98
Because the PC and the source view are synchronized, the form of the message changes.
Finally, the /F form, of CONTEXT displays the Root: specification shown in the following example:
> CONTEXT/FAt the PC: (0x000084D0): DHRY_1_1\DHRY_1_C\main Line 98Root: @dhrystone\\ [SCOPE]
See also• DOWN on page 2-124• PRINTSYMBOLS on page 2-208• SCOPE on page 2-234• SETREG on page 2-242
ARM DUI 0175N Copyright © 2002-2011 ARM. All rights reserved. 2-96ID052111 Non-Confidential

RealView Debugger Commands
• UP on page 2-318• Chapter 1 Working with the CLI.
ARM DUI 0175N Copyright © 2002-2011 ARM. All rights reserved. 2-97ID052111 Non-Confidential

RealView Debugger Commands
2.3.31 COPY
Copies a region of memory.
Syntax
COPY addressrange ,targetaddr
where:
addressrange Specifies the address range to be copied.
targetaddr Specifies the starting address where the copied memory is placed.
Description
The COPY command copies the contents of a specified block of memory to a block of the same size starting at a specified location.
The command copies data from low address to high addresses, without taking account of overlapping source and destination memory regions. You must not rely on this behavior in future versions of the debugger.
COPY runs synchronously unless background access to target memory is supported. Use the WAIT command to force it to run synchronously.
Examples
The following examples show how to use COPY:
copy 0x8100..0x81FF,0x8700 Copies the contents of memory at 0x8100 to 0x81FF to memory at 0x8700 to 087FF.
copy 0x8100..+128,0x8700 Copies the contents of memory at 0x8100 to 0x817F to memory at 0x8700 to 0877F.
See also• COMPARE on page 2-91• FILL on page 2-149• LOAD on page 2-176• READFILE on page 2-219• TEST on page 2-273• SETMEM on page 2-239.
ARM DUI 0175N Copyright © 2002-2011 ARM. All rights reserved. 2-98ID052111 Non-Confidential

RealView Debugger Commands
2.3.32 COREINFO
Displays information about the current target.
Note This command is supported for ARM architecture-based targets only.
Syntax
COREINFO [type]
where:
type Specifies the type of information required, which can be one of the following:ip_vendor Displays the intellectual property (IP) vendor name.architecture
Displays the architecture of the target, for example, ARMv5TE.core_name Displays the processor name, for example, ARM966E-S.arm_isa Displays the ARM ISA version, for example, ARM_ISAv5.thumb_isa Displays the Thumb ISA version, for example, THUMB_ISAv2.vfp Indicates the supported VFP version if available, for example, VFPv1.If no type is specified, then the list of available types is displayed.
Description
The COREINFO command displays specific information about the current target.
See also• CORESTATE on page 2-100.
ARM DUI 0175N Copyright © 2002-2011 ARM. All rights reserved. 2-99ID052111 Non-Confidential

RealView Debugger Commands
2.3.33 CORESTATE
Displays the execution state of the current target.
Syntax
CORESTATE
Description
The CORESTATE command displays the execution state of the current target, either:• Stopped
• Running.
See also• COREINFO on page 2-99.
ARM DUI 0175N Copyright © 2002-2011 ARM. All rights reserved. 2-100ID052111 Non-Confidential
RealView Debugger Commands
2.3.34 CWD
Change the current working directory.
Syntax
CWD directory
Description
Sets the current working directory to a specified directory. By default, the current working directory depends on where you first start RealView Debugger, and is changed to the location of a loaded image.
See also• PWD on page 2-216• the following in the RealView Debugger User Guide:
— The current working directory on page 2-10.
ARM DUI 0175N Copyright © 2002-2011 ARM. All rights reserved. 2-101ID052111 Non-Confidential

RealView Debugger Commands
2.3.35 DBOARD
DBOARD is an alias of DTBOARD.
See DTBOARD on page 2-125.
2.3.36 DBREAK
DBREAK is an alias of DTBREAK.
See DTBREAK on page 2-126.
ARM DUI 0175N Copyright © 2002-2011 ARM. All rights reserved. 2-102ID052111 Non-Confidential

RealView Debugger Commands
2.3.37 DCOMMANDS
Lists the commands available based on the Debug Interface, target processor, and type of connection.
Syntax
DCOMMANDS [{,full | ,alias}] [,cmd_class...] [{;windowid | ;fileid}]
DCOMMANDS [{,full | ,alias}] =specific_cmd [{;windowid | ;fileid}]
where:
cmd_class Specifies a class of commands to have details displayed, and can be any of the following:status or display
to list status and display commandssetstatus or ss
to list setstatus commandsbreakcomplex or bc
to list breakcomplex commandsIf no command class is specified, all of the commands known to DCOMMANDS are described.
alias Show a summary of names and aliases for the specified command class.
full Show more detailed information on the specified command class.
specific_cmd Specifies a particular command to display, or all to display all commands known to DCOMMANDS.
;windowid | ;fileid
Identifies the window or file where the command is to send the output. See Window and file numbers on page 1-5 for details.If you do not supply a ;windowid or ;fileid parameter, output is displayed on the screen. If you are using the GUI, then the output is displayed in the Output view.
Description
The DCOMMANDS command displays the list of commands supported by the current target. The optional command class qualifier enables you to display one or more specific classes of commands. The specific_cmd argument shows a specified command. The full qualifier provides extended detail on the command.
Note Some commands are not listed in the DCOMMANDS command list, and DCOMMANDS reports that these commands are unknown if you request help with the specific_cmd argument. This is a limitation of the current implementation of the help system and does not indicate a fault in the operation of the commands.
Examples
The following examples show the use of DCOMMANDS. The first command displays a summary of all status commands that are available on the current target:
ARM DUI 0175N Copyright © 2002-2011 ARM. All rights reserved. 2-103ID052111 Non-Confidential

RealView Debugger Commands
> dcom,status =all dcommands [{,cmd_classes...}] [=specific_cmd] [;viewport]or dhelp [{,cmd_classes...}] [=specific_cmd] [;viewport] dtboard [={resource,...}] [;viewport]or dboard [={resource,...}] [;viewport] dtprocess [={task,...}] [;viewport]or dvprocess [={task,...}] [;viewport] dtfile [={value,...}] [;viewport]or dvfile [={value,...}] [;viewport]or dmap [={value,...}] [;viewport] dtbreak [={threads,...}] [;viewport]or dbreak [={threads,...}] [;viewport]
Note ;viewport in the command syntax can be either ;windowid or ;fileid.
This command displays a more complete summary of the XTRIGGER command:
> dcom,full xtrig xtrigger [{,qualifier...}] [={boards,...}]
Qualifiers: in_disable in_enabl eout_disable out_enable onhost
This command is used to set the cross-triggering state of the selectedboards. This can be used to control what happens when any board stops. Itwill be implemented using hardware when possible but can be forced to usesoftware (on host) methods.
Alias
DHELP is an alias of DCOMMANDS.
See also• HELP on page 2-165• SHOW on page 2-248.
ARM DUI 0175N Copyright © 2002-2011 ARM. All rights reserved. 2-104ID052111 Non-Confidential

RealView Debugger Commands
2.3.38 DEFINE
Creates a macro for use by other RealView Debugger components.
Note Because a macro definition requires multiple lines, you cannot use the DEFINE command from the RealView Debugger command prompt. Instead, you must either:• Use the macro command GUI.• Write your macro definition in a text file and load it into RealView Debugger using the
INCLUDE command.
Syntax
DEFINE [/R] [return_type] macro_name ([parameters])[parameter_definitions]{ macro_body}.
where:
/R The new macro can replace an existing symbol with the same name.
return_type Specifies the return type of the macro. If a type is not specified, return_type defaults to type int.
macro_name Specifies the name of the macro.
parameters Lists parameters (comma-separated list within parentheses). These parameters can be used throughout the macro definition and are later replaced with the values of the actual parameters in the macro call.
param_definitions
Defines the types of the variables in parameter_list. If types are not specified, the default type int is assumed.
macro_body Represents the contents of the macro, and is split over many lines. The syntax for macro_body is:[local_definitions]macro_statement;[macro_statement;] ...
local_definitions are the variables used within the macro_body.A macro_statement is any legal C statement except switch and goto statements, or a debugger command. If macro_statement is a debugger command, it must start with a dollar sign ($) and end with a dollar sign and a semicolon ($;). All statements are terminated by a semicolon.The macro_body ends with a line containing only a period (full stop).
Description
The definition contains a macro name, the parameters passed to the macro, the source lines of the macro, and a terminating period as the first and only character on the last line.
ARM DUI 0175N Copyright © 2002-2011 ARM. All rights reserved. 2-105ID052111 Non-Confidential

RealView Debugger Commands
After a macro has been loaded into RealView Debugger, the definition is stored in the symbol table. If the symbol table is recreated, for example when an image is loaded with symbols, any macros are automatically deleted. The number of macros that can be defined is limited only by the available memory on your workstation.
Macros can be invoked by name on the command line where the name does not conflict with other commands or aliases and the return value is not required. You can also invoke a macro on the command line using the MACRO command, and in expressions, for example using the CEXPRESSION command.
Macros can also be invoked as actions associated with:• a window, for example VMACRO• the GO and GOSTEP commands• a breakpoint, for example BREAKEXECUTION• deferred commands, for example BGLOBAL.
Note Macros invoked as associated actions cannot execute GO, or GOSTEP, or any of the stepping commands, for example STEPINSTR.
If you require a breakpoint that, when the condition is met, does something and then continues program execution, you must use the breakpoint continue qualifier, or return 1 from the macro call, instead of the GO command. See the breakpoint command descriptions for more details.
Restrictions on the use of DEFINE
The DEFINE command is not allowed in a macro.
Examples
The following examples show how to use DEFINE:
define float square(f) float f;{ return (f*f);}.
define show_i(){ int i; i = 10; $printf "value of i = %d\n", i$; return (1);}.
define /R int userPrompt(){ char userPromptBuffer[100]; int retval; retval = prompt_text( "Please enter text", userPromptBuffer ); if (retval == 0) { $printf "Clicked OK\n"$; $printf "%s\n", userPromptBuffer$; } else $printf "Clicked Cancel\n"$;
ARM DUI 0175N Copyright © 2002-2011 ARM. All rights reserved. 2-106ID052111 Non-Confidential

RealView Debugger Commands
return 1;}.
See also• Macro language on page 1-10• ALIAS on page 2-21• BGLOBAL on page 2-31• BREAKEXECUTION on page 2-47• CEXPRESSION on page 2-87• GO on page 2-159• GOSTEP on page 2-161• INCLUDE on page 2-168• MACRO on page 2-182.• SHOW on page 2-248• VMACRO on page 2-324• the following in the RealView Debugger User Guide:
— Chapter 16 Using Macros for Debugging.
ARM DUI 0175N Copyright © 2002-2011 ARM. All rights reserved. 2-107ID052111 Non-Confidential

RealView Debugger Commands
2.3.39 DELBOARD
Temporarily deletes a Debug Configuration entry from the displayed list.
Syntax
DELBOARD [=resource,...]
where:
resource The name of the Debug Configuration that is to have its entry deleted from the list.
Description
Use this command to temporarily delete a Debug Configuration that does not have any targets connected. Also, if you are using the Configuration grouping in the Connect to Target window, then the Debug Configuration must not have been expanded to show the list of targets. If you specify a Debug Configuration that has a target connected, or has been expanded, then the following message is displayed:
Board n is connected - cannot delete.
If you do not specify a Debug Configuration, all Debug Configurations that do not have targets connected are deleted.
Note The Debug Configurations are not deleted from the board file (.brd). The deleted Debug Configuration becomes available again you issue a READBOARDFILE command or restart the debugger. However, you must disconnect from all connected target first.
Example
To temporarily delete the RVISS_2 Debug Configuration, enter:
delboard ="RVISS_2"
This command deletes the Debug Configuration NAME RVISS_2. The target for this configuration must not be connected when the command is issued.
See also
• BOARD on page 2-35
• CONNECT on page 2-93
• EDITBOARDFILE on page 2-136
• the following in the RealView Debugger Target Configuration Guide:— Loading a different board file on page 3-15.
ARM DUI 0175N Copyright © 2002-2011 ARM. All rights reserved. 2-108ID052111 Non-Confidential

RealView Debugger Commands
2.3.40 DELETE
Deletes macros or one or more symbols from the symbol table.
Syntax
DELETE {symbol_name | \\ | \ | macroname} [,y]
where:
symbol_name Specifies the symbol to be removed from the symbol table.
symbol_name\ Deletes the specified symbol and all symbols it owns (its child symbols).
root\\ Deletes all symbols of the specified root.
\\ Deletes all user-defined symbols of the base root.
\ Deletes all symbols of the current root.
macroname Deletes the specified macro.
y Specifies that DELETE can delete child symbols if the specified symbol has them. If this is not done, DELETE prompts for confirmation before deleting child symbols.
Description
The DELETE command deletes symbols from the symbol table associated with the current connection. Symbols are entered into the symbol table when an executable file containing them is loaded onto the connection using LOAD or RELOAD, and when you use the ADD command.
Deleting a symbol or group of symbols is useful if the program has changed, perhaps as a result of runtime patching of the executable. To change the memory location of a symbol such as an address label, you must first delete it and then add it again at the new location.
You can also use the DELETE command to delete debugger macros that you have created using the MACRO command.
You cannot use DELETE to delete debugger command aliases. Instead, define the alias to be nothing:
alias name=
Rules for the DELETE command
The following rules apply to the use of the DELETE command:
• The DELETE command runs asynchronously unless in a macro.
• If the DELETE command is used inside a macro, and you attempt to delete the macro containing the command, an error message is displayed.
• All debugging information for that symbol is deleted, but program execution is unchanged.
Note If you delete a symbol that is defined by your image, then you cannot perform various
debugging tasks on that symbol, such as setting a breakpoint on that symbol. You must do a full load of the image to recover the debugging symbols.
ARM DUI 0175N Copyright © 2002-2011 ARM. All rights reserved. 2-109ID052111 Non-Confidential

RealView Debugger Commands
• Only program symbols, macros, and user-defined debugger symbols can be deleted from the symbol table. Predefined symbols, such as register names, cannot be deleted.
• If more than one symbol exists with the same name, then RealView Debugger displays the error:Error: E0098: Cannot delete: more than one symbol with this name.
You must specify the full symbol reference to delete it.For example, if you load a macro called sqr, and you have a function in your image called sqr, then to delete the macro you must enter:delete \\sqr
Note To see all the definitions that exist for a symbol name, use the PRINTSYMBOLS command, for
example:printsymbols sqr
• If the specified symbol or macro has local symbols, confirmation is requested that you want to delete all the local symbols. Entering the ,y parameter provides this confirmation automatically.
See also• ADD on page 2-16• ALIAS on page 2-21• PRINTSYMBOLS on page 2-208• DEFINE on page 2-105.
ARM DUI 0175N Copyright © 2002-2011 ARM. All rights reserved. 2-110ID052111 Non-Confidential

RealView Debugger Commands
2.3.41 DELFILE
Removes filenames from the executable file list, provided the specified file is not loaded onto the target.
Syntax
DELFILE [,auto] {filename | file_num}
where:
auto Causes the command to remove unloaded files from the file list that were added as a result of the ADDFILE,auto command.
filename|file_num
Identifies a file to be removed from the executable file list.You can include one or more environment variables in the filename. For example, if MYPATH defines the location C:\Myfiles, you can specify:delfile "$MYPATH\\myimage.axf"
Description
The ADDFILE and the DELFILE commands are used to manipulate the executable image file list. This list is in most cases only one file, the executable you load onto the target using LOAD. There are circumstances where you must load more than one file onto the target at once. In these cases you use ADDFILE to set up the files to load, and RELOAD or LOAD/A to load them onto the target.
You use DELFILE to remove unloaded files that you have added to the executable file list. There are several ways to specify the files to delete:• by complete filename, for example C:\Source\dhry\Debug\dhry.axf• by short filename, for example dhry.axf• by file number, for example 2• as the currently unloaded files that were added to the list by ADDFILE,auto• as all currently unloaded files.
DELFILE with no arguments deletes all currently unloaded files, and DELFILE,auto deletes any currently unloaded files added as a result of an ADDFILE,auto.
Use DTFILE to display the current file list, including the defined short filenames, file numbers and whether the file is loaded or not.
Note • If you use the full filename you must enclose it in double quotation marks. You do not
have to quote the short filename in quotation marks, although you can.
Restrictions on the use of DELFILE
The DELFILE command has the following restrictions:
• The DELFILE command is not allowed in a macro.
• You cannot delete multiple named or numbered files in a single command. Use multiple DELFILE commands, or delete all files and then use ADDFILE as required.
• An executable file must be unloaded from the target before its name can be removed from the file list. Use the UNLOAD command to unload a file that is no longer being used by the target.
ARM DUI 0175N Copyright © 2002-2011 ARM. All rights reserved. 2-111ID052111 Non-Confidential

RealView Debugger Commands
Examples
The following examples show how to use ADDFILE and DELFILE:
> addfile ="C:\Source\helloworld\Debug\helloworld.axf"> dtfileFile 1 with modid <not loaded>: Symbols not Loaded. 0 Sections. 'helloworld.axf' As 'C:\Source\helloworld\Debug\helloworld.axf'
A file is added to the executable list, using ADDFILE, and DTFILE shows that it is on the list and has file number, or id, of 1 (the File 1 part of the output from DTFILE).
Because the file has not been loaded, the debugger has not read the symbol table to determine the code, data and Base Stack Segment (BSS) section sizes that a DTFILE following a LOAD displays.
To delete this file, you can use the file ID, reported in the first line of DTFILE output, as follows:
> delfile 1> dtfileNo files for this process.
The DTFILE output tells you that the deletion was successful. In this particular case, the file id is not required, because a DELFILE with no parameters deletes all unloadable files. For example:
> addfile ="C:\Source\helloworld\Debug\helloworld.axf"> delfile> dtfileNo files for this process.
You can name the file to delete, using either the full name of the file or the short name listed in the DTFILE result:
> addfile ="C:\Source\helloworld\Debug\helloworld.axf"> delfile helloworld.axf> dtfileNo files for this process.
> addfile ="C:\Source\helloworld\Debug\helloworld.axf"> delfile "C:\Source\helloworld\Debug\helloworld.axf"> dtfileNo files for this process.
See also• ADDFILE on page 2-19• DTFILE on page 2-128• LOAD on page 2-176• RELOAD on page 2-225• UNLOAD on page 2-316.
ARM DUI 0175N Copyright © 2002-2011 ARM. All rights reserved. 2-112ID052111 Non-Confidential

RealView Debugger Commands
2.3.42 DHELP
DHELP is an alias of DCOMMANDS.
See DCOMMANDS on page 2-103.
ARM DUI 0175N Copyright © 2002-2011 ARM. All rights reserved. 2-113ID052111 Non-Confidential

RealView Debugger Commands
2.3.43 DISABLEBREAK
Disables one or more specified breakpoints.
Syntax
DISABLEBREAK ,a {breakpoint_address|breakpoint_address_range}
DISABLEBREAK [,h] [break_num,...]
where:
,a breakpoint_address
Specifies the address of the breakpoint to be disabled.
,a breakpoint_address_range
Specifies that all breakpoints within the address range are to be disabled. See Specifying address ranges on page 2-2 for details on how to specify an address range.
break_num Specifies one or more breakpoints to disable, separated by commas.You identify breakpoints by their position in the list displayed by the DTBREAK command.
h Do not use this qualifier. It is for debugger internal use only.
Description
The DISABLEBREAK command disables one or more breakpoints. A disabled breakpoint is removed from the target as if the breakpoint were deleted, but the debugger keeps a record of it. You can then enable it again by using the breakpoint address or the breakpoint number when required, rather than having to recreate it from scratch.
If you issue the command with no parameters then all breakpoints for this connection are disabled. Disabling a breakpoint that is already disabled has no effect.
Examples
The following examples show how to use DISABLEBREAK:
disablebreak,a 0x8008 Disables the breakpoint at the address 0x8008.
disablebreak,a 0x8008..0x8024 Disables all breakpoints in the address range 0x8008..0x8024.
disablebreak 4,6,8 Disables the fourth, sixth, and eighth breakpoints in the current list of breakpoints.
disablebreak Disables all the current breakpoints.
See also• BREAKACCESS on page 2-38• BREAKEXECUTION on page 2-47• BREAKINSTRUCTION on page 2-55• BREAKREAD on page 2-61
ARM DUI 0175N Copyright © 2002-2011 ARM. All rights reserved. 2-114ID052111 Non-Confidential

RealView Debugger Commands
• BREAKWRITE on page 2-70• CLEARBREAK on page 2-89• DTBREAK on page 2-126• ENABLEBREAK on page 2-140• RESETBREAKS on page 2-228.
ARM DUI 0175N Copyright © 2002-2011 ARM. All rights reserved. 2-115ID052111 Non-Confidential

RealView Debugger Commands
2.3.44 DISASSEMBLE
Displays memory addresses and corresponding assembly code on the Disassembly tab of the Code window.
Syntax
DISASSEMBLE [{/D|/S|/A|/B|/E}] [{address | @stack_level}]
where:
/D Attempt to auto-detect the disassembly mode.
For ARM architecture processors, select from ARM, Thumb®, Jazelle® bytecodes, or Thumb-2 Execution Environment (Thumb-2EE) using information from the image file where available.
/S Disassemble using the standard instruction disassembly mode.For ARM architecture processors, select ARM state (32-bit) instructions.
/A Disassemble using the alternate instruction disassembly mode.For ARM architecture processors, select Thumb state (16-bit) instructions.
/B Disassemble using Jazelle bytecode assembly instructions. This is available only for ARM processors.
/E Disassemble using Thumb-2EE assembly instructions. This is available only for ARM processors.
address Specifies the starting address for disassembly. This can be a literal address or a debugger expression.
stack_level Enables you to specify the starting point without knowing its address. Stack level 0 is the current address in the current procedure, stack level 1 is the code address from which the current procedure was called.
Description
The DISASSEMBLE command displays memory addresses in hexadecimal and assembly code on the Disassembly tab of the Code window, starting at the specified memory location and using the assembler mnemonics and register names associated with the processor type of this connection.
Where multiple assembler mnemonics exist for the same processor type (for example, with the ARM and the GNU assemblers for ARM processors) the debugger can only use one of them. There is no way to select the alternate form.
Note Different target connections can be connected to different processor types and so have differing register names and assembler mnemonics.
If the specified address falls in the middle of an instruction, the whole instruction is displayed. Memory is displayed starting at the address held in the PC if you do not supply an address. The current execution context and variable scope of the program remains unchanged even if you select an alternate stack level.
ARM DUI 0175N Copyright © 2002-2011 ARM. All rights reserved. 2-116ID052111 Non-Confidential

RealView Debugger Commands
If you issue the OPTION command with the LINES=ON option, source code is intermixed with the assembly language code. If you issue the OPTION command with the SYMBOLS=ON option, symbol references are displayed with the assembly language symbols and labels.
The DISASSEMBLE command runs synchronously unless background access to target memory is supported. Use the WAIT command to force it to run synchronously.
Examples
The following examples show how to use DISASSEMBLE:
DISASSEMBLE /S @1 Disassemble, using the standard instruction format (for ARM processors, the ARM state format), the instructions that are executed when the current function returns, displaying the result in the Disassembly tab of the Code window.
DISASSEMBLE 0x80200 Disassemble, using an instruction format selected using symbol table information, the instructions starting at address 0x80200, displaying the result in the Disassembly tab of the Code window.
See also• DUMPMAP on page 2-133• DUMP on page 2-131• LOAD on page 2-176• MEMWINDOW on page 2-188• MODE on page 2-190• PRINTDSM on page 2-203• SETTINGS on page 2-245• WHERE on page 2-331.
ARM DUI 0175N Copyright © 2002-2011 ARM. All rights reserved. 2-117ID052111 Non-Confidential

RealView Debugger Commands
2.3.45 DISCONNECT
Disconnects the debugger from a target.
Syntax
DISCONNECT [,all | ,gui] [{,debug|,nodebug}] [=][@target]
where:
all Disconnects all connections.
gui Enables you to choose the disconnect mode from a dialog or prompt:• If you use this option when running in GUI mode, it displays a dialog.• If you use this option when running in command line mode, it displays a
prompt.The disconnect specifies what state you want the debugger to leave the target in after the disconnection. See Disconnect modes for more details.
debug Disconnects using the As-is with Debug mode (see Disconnect modes).
nodebug Disconnects using the As-is without Debug mode (see Disconnect modes). This is the default.
target Specifies the required target name as it appears in the GUI.
Description
The DISCONNECT command disconnects the debugger from a target, undoing the action of a previous CONNECT. You can specify the target as outlined for the CONNECT command.
Note If you set the disconnect mode in the board (.BRD) file of the target, the target disconnects using that mode. If you specify prompt for the disconnect mode, then the DISCONNECT command acts as though you specified the ,gui qualifier.
The DISCONNECT command runs asynchronously.
You cannot use the DISCONNECT command inside a macro.
Disconnect modes
When you disconnect from a target, the disconnect mode determines what happens to the target:
As-is with Debug Leave the target in the current run state and the current debug state. That is:• If the target is running, leave it running. If the target is stopped in
debug state, leave it stopped.• Current debug state intact, for example, breakpoints remain set.
As-is without Debug Leave the target in the current run state but without the current debug state. That is:• If the target is running, leave it running. If the target is stopped in
debug state, leave it stopped.• Current debug state lost, for example, breakpoints are removed.
ARM DUI 0175N Copyright © 2002-2011 ARM. All rights reserved. 2-118ID052111 Non-Confidential

RealView Debugger Commands
Note The disconnect modes available depend on the Debug Interface you are using.
Implications for OS-aware connections
If you disconnect from an OS-aware connection, RealView Debugger sends a command to the Debug Agent, which might resume all stopped threads depending on how the Debug Agent is implemented.
Restrictions on the use of DISCONNECT
The DISCONNECT command is not allowed in a macro.
Examples
The following examples show how to use DISCONNECT:
disconnect,all Disconnect all currently connected connections.
disconnect Disconnect the current target:In the GUI, this is the target shown in the title bar of the Code window where you enter the command. Therefore, if you enter the command in a Code window that is attached to a connection, then the connection to which the Code window is attached is disconnected.
Note You can determine the current connection using the BOARD command.
disconnect,gui @ARM940T_0@RVI Open the Disconnect Mode selection dialog box to disconnect the target @ARM940T_0@RVI.
disconnect @ARM7TDMI@RVISS Disconnect the named RVISS target. The Debug Configuration, @RVISS, is optional where there is no ambiguity.
Note Target names must be entered as they appear in the Connect to Target window.
See also
• BOARD on page 2-35
• CONNECT on page 2-93
• RESTART on page 2-230
• the following in the RealView Debugger User Guide:— Disconnecting from a target using different modes on page 3-55.
ARM DUI 0175N Copyright © 2002-2011 ARM. All rights reserved. 2-119ID052111 Non-Confidential

RealView Debugger Commands
2.3.46 DLOADERR
Displays possible reasons for the last load error.
Syntax
dloaderr [{,gui | ;windowid | ;fileid}]
where:
gui This qualifier causes the results to be displayed in a dialog.
Note This qualifier has no effect when running in command line mode.
;windowid | ;fileid
Identifies the window or file where the command is to send the output. See Window and file numbers on page 1-5 for details.
Description
The DLOADERR command displays possible reasons for the most recent program executable load error, and suggests actions you might take.
If you issue the command with no qualifier or parameter, then its output is displayed on the screen. If you are using the GUI, then the output is displayed in the Output view. You can use the FOPEN or VOPEN commands to open a user-defined file or window and redirect the message output to that file or window.
See also• FOPEN on page 2-154• LOAD on page 2-176• RELOAD on page 2-225• VOPEN on page 2-326.
ARM DUI 0175N Copyright © 2002-2011 ARM. All rights reserved. 2-120ID052111 Non-Confidential

RealView Debugger Commands
2.3.47 DMAP
DMAP is an alias of DTFILE.
See DTFILE on page 2-128.
ARM DUI 0175N Copyright © 2002-2011 ARM. All rights reserved. 2-121ID052111 Non-Confidential

RealView Debugger Commands
2.3.48 DOS_resource_list
Displays an OS resource list or shows details of one element in that list.
Syntax
DOS_resource_list ,qualifier [=value] [{;windowid | ;fileid}]
where:
resource Specifies the resource list, for example thread.
qualifier Specifies what to display, that is all or detail. detail is the default if you specify a value. If you do not specify a value, you must use all.
value Identifies an object in the specified resource list.
;windowid | ;fileid
Identifies the window or file where the command is to send the output. See Window and file numbers on page 1-5 for details.
Description
The DOS_resource_list command displays an OS resource list or shows details of one element in that list. If you are using the GUI, then these are displayed in the Output view. It displays the information as shown in the Details area of the Resource Viewer. The resource and qualifier depend on the OS you are using.
You can get a list of these commands using the DCOMMANDS command, for example:
dcommands all
You can also determine these from the Resource Viewer:
• resource is determined by the tab you select in the Resource List, with the exception of the Connection tab
• qualifier is determined by right clicking on an object in the selected tab of the Resource List.
You might want to log your use of the Resource Viewer to determine the CLI commands you can use with your OS.
Examples
The following examples show how to use DOS_resource-list:
fopen 100,'c:\myfiles\threads.txt'dos_thread_list,all ;100vclose 100
Copies the details of all thread resources to the file c:\myfiles\threads.txt.
dos_thread_list,detail = thread_4
dos_thread_list,detail = 0x39d8
Displays details about the thread named thread_4 and the thread with ID 0x39d8.
dos_timer_list,detail = 0x39d8
Displays details about the specified timer.
ARM DUI 0175N Copyright © 2002-2011 ARM. All rights reserved. 2-122ID052111 Non-Confidential

RealView Debugger Commands
See also• AOS_resource_list on page 2-26• BREAKINSTRUCTION on page 2-55• GO on page 2-159• HALT on page 2-163• INCLUDE on page 2-168• LOG on page 2-180• OSCTRL on page 2-200• STOP on page 2-267• THREAD on page 2-276• the following the RealView Debugger RTOS Guide:
— Chapter 6 Viewing OS Resources.
ARM DUI 0175N Copyright © 2002-2011 ARM. All rights reserved. 2-123ID052111 Non-Confidential

RealView Debugger Commands
2.3.49 DOWN
Moves the variable scope and source location down the stack (that is, away from the program entry point, towards the current PC).
Syntax
DOWN [levels]
where:
levels Specifies the number of stack levels to move down. This must be a positive number.
Description
This command moves the current variable scope, and source or disassembly view location down the stack by the specified number of levels. The debugger modifies the local variable scope to display the variables in the new location, and potentially hiding those at the previous level.
If you are already at the lowest level (nearest to the program entry point), a message reminds you that you cannot move down any more. You must have used an UP command or a SCOPE command before a DOWN command becomes meaningful. You can move down one level by using the command without parameters.
The DOWN command runs synchronously unless background access to target memory is supported. Use the WAIT command to force it to run synchronously.
Example
The following example shows how to use DOWN. The UP command moves the context up the stack to the enclosing function, so that a variable index is in scope. The value of the index variable is examined. Another variable, count, is examined by looking at the preceding function. When count is displayed, the DOWN 2 command is used to return down the stack two levels, to the scope of the initial function.
> up> ce indexindex = 3> up> ce countcount = 55> down 2
See also• CEXPRESSION on page 2-87• CONTEXT on page 2-96• EXPAND on page 2-146• SCOPE on page 2-234• UP on page 2-318• WHERE on page 2-331.
ARM DUI 0175N Copyright © 2002-2011 ARM. All rights reserved. 2-124ID052111 Non-Confidential

RealView Debugger Commands
2.3.50 DTBOARD
Displays information about the current or a specified connection.
Syntax
DTBOARD [="resource",...] [{;windowid | ;fileid }]
where:
resource Identifies the connection that is to have its details displayed. You must specify each name in double quotation marks, for example:dtboard ="ARM7TDMI","ARM940T_0"
windowid | fileid
Identifies the window or file where the command is to send the output.
Description
The DTBOARD command displays information about the current or a specified connection. If you do not specify a connection, the command displays information about the current connection. If you do not supply a ;windowid parameter, the output is displayed on the screen. If you are using the GUI, then the output is displayed in the Output view.
Example
The following examples show how to use DTBOARD:
> dtboardConnected Board 'ARM7TDMI' Port 0: Server supporting Single Tasking. Port string: localhost Entry of router/broker RVISS
> dtboard "ARM940T_0"Connected Board 'ARM940T_0' Port 0: Server supporting Single Tasking. Port string: USB:109340084 Entry of router/broker RVI
Alias
DBOARD is an alias of DTBOARD.
See also• Window and file numbers on page 1-5• BOARD on page 2-35• CONNECT on page 2-93• DTFILE on page 2-128• VOPEN on page 2-326.
ARM DUI 0175N Copyright © 2002-2011 ARM. All rights reserved. 2-125ID052111 Non-Confidential

RealView Debugger Commands
2.3.51 DTBREAK
Displays information on all breakpoints and tracepoints set.
Syntax
DTBREAK [=thread,...] [{;windowid | ;fileid}]
where:
thread Not supported in this release.
windowid | fileid
Identifies the window or file where the command is to send the output.If you do not supply a windowid or fileid parameter, the output is displayed on the screen. If you are using the GUI, then the output is displayed in the Output view.
Description
The DTBREAK command displays information about the currently defined breakpoints and tracepoints.
The output includes the following fields:
S Indicates the enabled and disabled state of the breakpoint or tracepoint:• a blank entry indicates enabled• D indicated disabled.
Type The type of breakpoint or tracepoint.
Address The address associated with the breakpoint or tracepoint.For a data only breakpoint, this field displays the text Data-Value.
Count The number of times a breakpoint has been activated.If a pass count is assigned, then this field does not begin incrementing until the pass count has reached zero.
Miscellaneous Shows the current value of any software pass count condition that is assigned to the breakpoint.
Example
The following is an example of the output from DTBREAK:
> dtbreakS Type Address Count Miscellaneous- ---- ------- ----- ------------- Instr 0x24000408 0 Pass=10 Read 0x24000434 0 Trace InstrExec 0x000085A8 0
Alias
DBREAK is an alias of DTBREAK.
ARM DUI 0175N Copyright © 2002-2011 ARM. All rights reserved. 2-126ID052111 Non-Confidential

RealView Debugger Commands
See also• Window and file numbers on page 1-5• BREAKACCESS on page 2-38• BREAKEXECUTION on page 2-47• BREAKINSTRUCTION on page 2-55• BREAKREAD on page 2-61• BREAKWRITE on page 2-70• CLEARBREAK on page 2-89• DISABLEBREAK on page 2-114• DTRACE on page 2-130• ENABLEBREAK on page 2-140• TRACEBUFFER on page 2-279• TRACEDATAACCESS on page 2-288• TRACEDATAREAD on page 2-293• TRACEDATAWRITE on page 2-298• TRACEEXTCOND on page 2-303• TRACEINSTREXEC on page 2-307• TRACEINSTRFETCH on page 2-312.
ARM DUI 0175N Copyright © 2002-2011 ARM. All rights reserved. 2-127ID052111 Non-Confidential

RealView Debugger Commands
2.3.52 DTFILE
Displays information about one or more specified files or all files of the current process.
Syntax
DTFILE [=file_num,...] [{;windowid | ;fileid}]
where:
file_num One or more integer numbers that identify the file or files about which you want to see information. If you do not supply this parameter, details of all the currently loaded files are displayed.
windowid | fileid
Identifies the window or file where the command is to send the output.If you do not supply a windowid or fileid parameter, output is displayed on the screen. If you are using the GUI, then the output is displayed in the Output view.
Description
The DTFILE command displays information about the currently loaded executable file. The file numbers are the same as those used in the ADDFILE and DELFILE commands. The information displayed varies:
• if the file has been loaded onto the target, then the information contains details about the code and data section sizes and the load addresses
• if the file has not been loaded, the debugger has not yet determined the code and data sizes and so does not display them.
The first line of the output includes the following information:
File file_num Used by the ADDFILE, DELFILE, RELOAD and UNLOAD commands to refer to the file.
modid num An internal number.
Symbols Loaded This item tells you whether the executable file has program debug symbols and whether they have been loaded. In most cases you require debug symbols to make sense of the program instructions.
n sections This item tells you how many program sections there are in the file. Each loaded program section is normally listed with any associated information.
The second line of output contains first the shortname and then the file path name of the file. The short name is an abbreviation of the name, normally the filename with no directory specification. The file path name includes the full directory path name for the file. You must normally specify the file path name enclosed in double quotation marks when entering it in commands.
If a file was built with separate load regions defined, these load regions are also shown in the output.
ARM DUI 0175N Copyright © 2002-2011 ARM. All rights reserved. 2-128ID052111 Non-Confidential

RealView Debugger Commands
Example
The following example shows the output of DTFILE, displaying information about a loaded executable called shapes.axf.
> dtfile =1File 1 with modid 1: Symbols Loaded. 3 Sections. 'shapes.axf' As 'c:\src\cpp\shapes_Data\Debug\shapes.axf' Code section of size 0x02154 at 0x00008000: ER_RO Data section of size 0x00018 at 0x0000A154: ER_RW BSS section of size 0x00190 at 0x0000A16C: ER_ZI
Alias
DMAP and DVFILE are aliases of DTFILE.
See also• Window and file numbers on page 1-5• ADDFILE on page 2-19• DELFILE on page 2-111• LOAD on page 2-176• MEMMAP on page 2-184• RELOAD on page 2-225• UNLOAD on page 2-316.
ARM DUI 0175N Copyright © 2002-2011 ARM. All rights reserved. 2-129ID052111 Non-Confidential

RealView Debugger Commands
2.3.53 DTRACE
Displays information on trace.
Syntax
DTRACE [{;windowid | ;fileid}]
where:
windowid | fileid
Identifies the window or file where the command is to send the output.If you do not supply a windowid or fileid parameter, output is displayed on the screen. If you are using the GUI, then the output is displayed in the Output view.
Description
The DTRACE command displays information about the trace analyzer you are using and the triggers that are defined.
Example
The following example illustrates the output of DTRACE:
> dtraceARM Analyzer: ARM Trace Support. Version 2.0.2 Tracepoints defined. Trigger On at Code 0x846C. Trigger On at Code 0x8540.Buffer collected Before Trigger.(Before/Around/After Supported).
See also• Window and file numbers on page 1-5• ANALYZER on page 2-23• ETM_CONFIG on page 2-143• TRACE on page 2-277• TRACEBUFFER on page 2-279• TRACEDATAACCESS on page 2-288• TRACEDATAREAD on page 2-293• TRACEDATAWRITE on page 2-298• TRACEEXTCOND on page 2-303• TRACEINSTREXEC on page 2-307• TRACEINSTRFETCH on page 2-312.
ARM DUI 0175N Copyright © 2002-2011 ARM. All rights reserved. 2-130ID052111 Non-Confidential

RealView Debugger Commands
2.3.54 DUMP
Displays memory contents in hexadecimal or ASCII format.
Syntax
DUMP [{/B|/H|/W|/8|/16|/32}] [{address | address-range}]
Note /B|/H|/W are deprecated in this release.
where:
/B | /8 Sets the display format to 8 bits. Each line of output displays 16 bytes.
/H | /16 Sets the display format to 16 bits. Each line of output displays eight 16-bit values.
/W | /32 Sets the display format to 32 bits. Each line of output displays four 32-bit values.
Note If no display format is specified, the default is the native format for the debug
target. For example, the ARM7TDMI processor naturally addresses 8 bits.
address Specifies a memory address at which to begin the display of contents. If the start address is at an offset from the address of a line, then any values at addresses before the start address are not displayed. The remainder of that line and the whole of the following line are displayed. For an example, see Examples.
address-range
Specifies a range of memory addresses whose contents are to be displayed. If the start address is at an offset from the address of a line, then any values at addresses before the start address are not displayed. If the end address is at an offset from the address of a line, then any values at addresses after the end address are not displayed. For an example, see Examples.
Description
The DUMP command displays memory contents in 8-bit, 16-bit or 32-bit hexadecimal values and ASCII characters on the screen. If you are using the GUI, then they are displayed in the Output view.
If you do not specify any parameters, the next five lines of data after the previously dumped address range are displayed. In the character output format, nonprintable characters (such as a carriage return) are represented by a period (.).
The DUMP command runs synchronously unless background access to target memory is supported. Use the WAIT command to force it to run synchronously.
Examples
The following example illustrates the output of DUMP. The first example displays two rows of memory from 0x8000.
> dump 0x8000 0x00008000 00 00 00 EA 24 06 00 EA 28 C0 8F E2 00 0C 9C E8 ....$...(....... 0x00008010 0C A0 8A E0 01 70 4A E2 0C B0 8B E0 0B 00 5A E1 .....pJ.......Z.
ARM DUI 0175N Copyright © 2002-2011 ARM. All rights reserved. 2-131ID052111 Non-Confidential

RealView Debugger Commands
Executing DUMP again displays a page of memory from 0x8020.
> dump +0 +1 +2 +3 +4 +5 +6 +7 +8 +9 +A +B +C +D +E +F ------------------------------------------------ 0x00008020 86 06 00 0A 0F 00 BA E8 14 E0 4F E2 01 00 13 E3 ..........O..... 0x00008030 03 F0 47 10 03 F0 A0 E1 54 6A 00 00 64 6A 00 00 ..G.....Tj..dj.. 0x00008040 00 30 A0 E3 00 40 A0 E3 00 50 A0 E3 00 60 A0 E3 [email protected]...`.. 0x00008050 10 20 52 E2 78 00 A1 28 FC FF FF 8A 82 2E B0 E1 . R.x..(........ 0x00008060 30 00 A1 28 00 30 81 45 0E F0 A0 E1 04 30 9F E5 0..(.0.E.....0..
Requesting a DUMP of memory as 16-bit values, and specifying a range of addresses produces the following result:
> dump /16 0x8338..0x8348 0x00008330 4844 5952 5453 4E4F DHRYSTON 0x00008340 2045 5250 474F 4152 2C4D E PROGRAM,
See also• Specifying address ranges on page 2-2• CEXPRESSION on page 2-87• FILL on page 2-149• MEMWINDOW on page 2-188• WRITEFILE on page 2-333.
ARM DUI 0175N Copyright © 2002-2011 ARM. All rights reserved. 2-132ID052111 Non-Confidential

RealView Debugger Commands
2.3.55 DUMPMAP
Writes the current memory map out as a file, using the native linker format.
Syntax
DUMPMAP filename
where:
filename Specifies the filename or file pathname to which the map is written. It must be enclosed in either single or double quotation marks if a pathname is specified, and the pathname must already exist on your system.You can include one or more environment variables in the filename. For example, if MYPATH defines the location C:\Myfiles, you can specify:dumpmap '$MYPATH\ld.map'
Description
The DUMPMAP command writes a linker map file in the format associated with the current processor to the named file.
If the filename is a file path name, it must be enclosed in double quotation marks. If it is not an absolute path name, it is written relative to the current directory of RealView Debugger, which on Windows is normally your desktop.
If the file already exists, RealView Debugger only replaces the information between the RVDEBUG: generated data block and the RVDEBUG: generated data above comments.
The command runs synchronously.
Example
The following command saves the memory map for an ARM1176JZF-S processor on an Integrator/CP development board to the file c:\source\arm1176jzf-s_cp.map:
dumpmap "c:\source\arm1176jzf-s_cp.map"
Example 2-1 shows an example of a generated linker command file. This example shows the Secure and Normal World memory maps. An image is loaded into the Normal world, and the Integrator/CP memory map is set up in the Secure World.
Example 2-1 Command file format for an ARM1176JZF-S on an Integrator/CP board
/* Linker Command file for the ARM processor *//* This file was generated by RVDEBUG. You can edit everything outside the MEMORY block defined by RVDEBUG. Updates by RVDEBUG will only affect that block.*/
/* RVDEBUG: generated data block. Updated Thu Mar 13 12:08:44 2008 Do not modify this block. Do not put MEMORY lines above this line, put below end of this block.*/MEMORY{ /* Register @G_CM_CTRL has (masked) value 0004 */ /* Register @G_SC_DEC has (masked) value 0000 */SECURE MEMORY{ M_REMAP_SSRAM:org=0x0000, len=0xFFFFF /* external 'SSRAM' */
ARM DUI 0175N Copyright © 2002-2011 ARM. All rights reserved. 2-133ID052111 Non-Confidential

RealView Debugger Commands
M_SDRAM: org=0x100000, len=0xFEFFFFF /* external 'SDRAM' */ M_CPU_REG: org=0x10000000, len=0x003F /* external 'CPU Registers' */ M_CPU_INT_CTRL:org=0x10000040, len=0x003F /* external 'CPU Int.Ctrl' */ M_SPDMEM: org=0x10000100, len=0x01FF /* external 'SDRAM SPDMEM' */ M_SSRAM: org=0x10800000, len=0xFFFFF /* external 'SSRAM' */ M_CNT_TIMER: org=0x13000000, len=0xFFFFFF /* external 'Counter Timer' */ M_INT_CTRL: org=0x14000000, len=0xFFFFFF /* external 'Int. Ctrl' */ M_RTC: org=0x15000000, len=0xFFFFFF /* external 'RTC' */ M_UART0: org=0x16000000, len=0xFFFFFF /* external 'Uart0' */ M_UART1: org=0x17000000, len=0xFFFFFF /* external 'Uart1' */ M_KBD: org=0x18000000, len=0xFFFFFF /* external 'Keyboard' */ M_MOUSE: org=0x19000000, len=0xFFFFFF /* external 'Mouse' */ M_DEBUG: org=0x1A000000, len=0xFFFFFF /* external 'Debug' */ M_MMC: org=0x1C000000, len=0xFFFFFF /* external 'MMC' */ M_AACI: org=0x1D000000, len=0xFFFFFF /* external 'AACI' */ M_TCHSCRN: org=0x1E000000, len=0xFFFFFF /* external 'TouchScrn' */ M_FLASH(R): org=0x24000000, len=0xFFFFFF /* external 'From ASIC/Board' */ M_SDRAM_ALIAS:org=0x80000000, len=0xFFFFFFF /* external 'SDRAM' */ M_CLCD: org=0xC0000000, len=0xFFFFFF /* external 'CLCD' */ M_ETHERNET: org=0xC8000000, len=0xFFFFFF /* external 'Ethernet' */ M_GPIO: org=0xC9000000, len=0xFFFFFF /* external 'GPIO' */ M_CP_INTCON: org=0xCA000000, len=0xFFFFFF /* external 'IntCON' */ M_SYS_REGS: org=0xCB000000, len=0xEFFFFFF /* external 'System Registers' */}NORMAL MEMORY{ A_RAM: org=0x8000, len=0x001B /* external 'Sect ER_RO' */}}/* RVDEBUG: generated data above */
See also• MEMMAP on page 2-184.
ARM DUI 0175N Copyright © 2002-2011 ARM. All rights reserved. 2-134ID052111 Non-Confidential

RealView Debugger Commands
2.3.56 DVFILE
DVFILE is an alias of DTFILE.
See DTFILE on page 2-128.
ARM DUI 0175N Copyright © 2002-2011 ARM. All rights reserved. 2-135ID052111 Non-Confidential

RealView Debugger Commands
2.3.57 EDITBOARDFILE
Enables you to configure a Debug Configuration.
Note This command is not available when running in command line mode.
Syntax
EDITBOARDFILE [,configure] [="boardfilename","routeID"...]
where:
configure Opens the Debug Interface configuration dialog for the specified Debug Configuration.
boardfilename
Identifies the board file that you want to edit. This can be in single or double quotation marks, for example, "myboard.brd".You can include one or more environment variables in the filename. For example, if MYPATH defines the location C:\Myfiles, you can specify:editboardfile ="$MYPATH\\myboard.brd"
routeID Identifies the route ID for the Debug Configuration associated with the board file that you want to edit. This can be in single or double quotation marks, for example, '3'.
Description
The EDITBOARDFILE command enables you to configure a Debug Configuration. By default, the command displays the Connection Properties dialog box to edit the specified Debug Configuration. If you do not specify a board file, the settings of the current board file are displayed for you to edit. If you specify the ,configure qualifier, then the Debug Interface configuration dialog box is opened instead.
Note If you specify a routeID, you must also specify a blank boardfilename, for example:
editboardfile,configure "","3"
You can specify one or more boardfilename/routeID combinations.
If you make any changes to a board file, the updated file is reread when you close the Connection Properties dialog box.
The command runs asynchronously.
Example
The following example shows how to use EDITBOARDFILE to open the Connection Properties dialog box:
editboardfile
The following example shows how to use EDITBOARDFILE to open the Debug Interface configuration dialog box:
ARM DUI 0175N Copyright © 2002-2011 ARM. All rights reserved. 2-136ID052111 Non-Confidential

RealView Debugger Commands
editboardfile,configure "","4"
If you specify a board that does not have a target-specific configuration, then a Prompt dialog box is opened informing you that a configuration file could not be found. To create a configuration file:
• Click Empty to create the configuration file from an empty file. The Select Name of new file: dialog box is opened. Do the following:1. Enter a name for the new file, together with the file extension for the related Debug
Interface as shown in Table 2-21.
2. Set Save as type to All Files (*).3. Click Save to create the new file. The configuration utility for the related Debug
Interface is displayed. Configure the target in the usual way.
• Click Copy to create the configuration file by copying an existing file. The Select file to copy from: dialog box is opened. Do the following:1. Select the file to use for the copy. The file you use must be from the same Debug
Interface as shown in Table 2-21.2. Click Open to open the Select Name of new file: dialog box.3. Enter a name for the new file, together with the file extension for the related Debug
Interface as shown in Table 2-21.4. Set Save as type to All Files (*).5. Click Save to create the new file. The configuration utility for the related Debug
Interface is displayed. Configure the target in the usual way.
See also• DELBOARD on page 2-108• DTBOARD on page 2-125• READBOARDFILE on page 2-218.
Table 2-21 Configuration file extensions for each Debug Interface
Debug Interface File extension
Instruction Set System Model(ISSM) .smc
Model Library .cml
Model Process .cmp
Real-Time System Model(RTSM) .smc
RealView ICE .rvc
RealView Instruction Set Simulator (RVISS) .auc
SoC Designer .smc
ARM DUI 0175N Copyright © 2002-2011 ARM. All rights reserved. 2-137ID052111 Non-Confidential

RealView Debugger Commands
2.3.58 EMURESET
Tests and resets a hardware emulator for targets connected through the DSTREAM or RealView ICE Debug Interface.
Syntax
EMURESET [,test] id
where:
test Runs an emulation test on the connection identified by id. This can involve JTAG testing or self checks.
id Connection identity.
Description
The EMURESET command resets a hardware emulator or monitor for targets connected through DSTREAM or RealView ICE. This is not the same as RESET which resets the target processor or board. The emulation reset is used to set the communications up properly or to prepare the board for debugging.
Example
The following example shows how to reset the hardware on the connection with an ID of 4.
emureset 4
Alias
EMURST and HWRESET are aliases of EMURESET.
See also• RESET on page 2-227• RESTART on page 2-230• WARMSTART on page 2-330.
ARM DUI 0175N Copyright © 2002-2011 ARM. All rights reserved. 2-138ID052111 Non-Confidential

RealView Debugger Commands
2.3.59 EMURST
EMURST is an alias of EMURESET.
See EMURESET on page 2-138.
ARM DUI 0175N Copyright © 2002-2011 ARM. All rights reserved. 2-139ID052111 Non-Confidential

RealView Debugger Commands
2.3.60 ENABLEBREAK
Enables one or more specified breakpoints.
Syntax
ENABLEBREAK ,a {breakpoint_address|breakpoint_address_range}
ENABLEBREAK [,h] [break_num,...]
where:
,a breakpoint_address
Specifies the address of the disabled breakpoint to be enabled.
,a breakpoint_address_range
Specifies that all disabled breakpoints within the address range are to be enabled. See Specifying address ranges on page 2-2 for details on how to specify an address range.
break_num Specifies one or more breakpoints to enable, separated by commas.You identify breakpoints by their position in the list displayed by the DTBREAK command.
h Do not use this qualifier. It is for debugger internal use only.
Description
The ENABLEBREAK command enables one or more breakpoints that have been disabled. A disabled breakpoint is removed from the target as if the breakpoint were deleted, but the debugger keeps a record of it. You can enable it again, using this command, by referring to the breakpoint number, avoiding then having to recreate it from scratch.
If you issue the command with no parameters then all breakpoints are enabled. Enabling a breakpoint that is already enabled has no effect.
The command runs synchronously.
Example
The following examples show how to use ENABLEBREAK:
enablebreak,a 0x8008 Enables the breakpoint at the address 0x8008.
enablebreak,a 0x8008..0x8024 Enables all breakpoints in the address range 0x8008..0x8024.
enablebreak 4,6,8 Enables the fourth, sixth, and eighth breakpoints in the current list of breakpoints.
enablebreak Enables all the current breakpoints.
See also• BREAKEXECUTION on page 2-47• BREAKINSTRUCTION on page 2-55• BREAKREAD on page 2-61
ARM DUI 0175N Copyright © 2002-2011 ARM. All rights reserved. 2-140ID052111 Non-Confidential

RealView Debugger Commands
• BREAKWRITE on page 2-70• CLEARBREAK on page 2-89• DISABLEBREAK on page 2-114• DTBREAK on page 2-126• RESETBREAKS on page 2-228.
ARM DUI 0175N Copyright © 2002-2011 ARM. All rights reserved. 2-141ID052111 Non-Confidential

RealView Debugger Commands
2.3.61 ERROR
Specifies what happens if an error occurs in processing an INCLUDE file.
Note This command has no effect when running in command line mode.
Syntax
ERROR = {quit | abort | continue}
where:
quit Instructs the debugger to quit the session and exit to the operating system.
abort Instructs the debugger to return to command mode and wait for keyboard input.
continue Instructs the debugger to abandon the command that produced the error, and to execute the next command in the INCLUDE file.
Description
The ERROR command specifies the action the debugger takes if an error occurs while processing an INCLUDE file. If you issue the ERROR command without parameters, program execution terminates.
The ERROR command runs asynchronously unless in a macro.
Example
The following example shows how to use ERROR:
error = abort If an error occurs, abort reading the INCLUDE file and return to the command prompt.
See also• INCLUDE on page 2-168• QUIT on page 2-217.
ARM DUI 0175N Copyright © 2002-2011 ARM. All rights reserved. 2-142ID052111 Non-Confidential

RealView Debugger Commands
2.3.62 ETM_CONFIG
Provides control over the ARM ETM.
Syntax
ETM_CONFIG [,qualifier...]
where:
qualifier Is a list of qualifiers. The possible qualifiers are described in List of qualifiers.
Description
The ETM_CONFIG command provides control over the ARM ETM. The arguments to a single invocation of the command specify a configuration of the ETM, so the presence or absence of qualifiers is relevant.
List of qualifiers
The list of qualifiers depends on the processor and Debug Interface. The command handler generates an error if a specific combination is invalid for a specific processor or Debug Interface, but this is determined when you issue the command. The possible qualifiers are:
addronly Trace only address bus transfers. (Deprecated)
coprocessor Enable coprocessor tracing. To disable, issue the command without this qualifier.
cycle_accurate Enable cycle-accurate tracing, if the ETM supports it. To disable, issue the command without this qualifier.
demultiplex Select the demultiplexed trace port transmission mode.
dataonly Trace only data bus transfers.
datasuppression Enables ETMv3 data suppression on FIFO full. This is supported only by ETMv3.
disableport Disable the ETM trace port. To enable, issue the command without this qualifier.
extinN:value External extended input selector register parts:extin1:n External extended input 1.extin2:n External extended input 2.extin3:n External extended input 3.extin4:n External extended input 4.The value n of each part can be a value in the range 0 to 255, inclusive. However, the number of inputs, the range of values supported, and the default value of each input depends on the ETM you are using. For example, the ARM1136JF-S™ has two extended external inputs with values in the range zero to 20 and default values of zero.Use the TRACEEXTCOND command to specify which input to test.These inputs are supported only by ETMv3.1, and later.
FIFO_hw:n Set the FIFO high-water mark to n.
ARM DUI 0175N Copyright © 2002-2011 ARM. All rights reserved. 2-143ID052111 Non-Confidential

RealView Debugger Commands
filtercoprocessor Enables filtering of CPRTs when data trace is enabled. This is supported only by ETMv3.
fulltrace Trace both data and address bus transfers. (Deprecated)
half_rate Enable half-rate clocking of the trace port by the ETM. For full-rate, issue the command without this qualifier.
mmap_decode:n Set the ETM memory map value to n. This is an implementation-dependent value that varies depending on the memory map decode logic present in your system.
multiplex Select the multiplexed trace port transmission mode.
nomultiplex Select the normal (not multiplexed or demultiplexed) trace port transmission mode.
packauto Selects the automatic packing mode for the TPA.
packnormal Selects the normal packing mode for the TPA.
packdouble Selects the double packing mode for the TPA.
packquad Selects the quad packing mode for the TPA.
portratio:n Enables ETMv3 port speed to ETM clock speed ratios to be set. This is supported only by ETMv3. Appropriate values for n are:0 Use a 1:1 ratio.1 Use a 1:2 ratio.2 Use a 1:3 ratio.3 Use a 1:4 ratio.4 Use a 2:1 ratio.5 Use dynamic ratio modes for on-chip trace.6 Use the implementation-defined mode, if implemented by the
ASIC designer.
port_width:n Set the ETM port width, where n is one of:0 4-bit port.1 8-bit port.2 16-bit port.3 24-bit port.4 32-bit port.The 24-bit and 32-bit settings are supported only for ETB11™ connections using RealView ICE.
size:n Set the ETM trace buffer size to n records.
stall_full Enable processor stalling if the FIFO becomes full, if the ETM and processor support it. To disable, issue the command without this qualifier.
suppressdata Suppress data tracing if the FIFO becomes full. To leave data tracing enabled, issue the command without this qualifier.
syncfrequency:n For ETMv3, and later, a synchronization frequency register is used to define the time between synchronization points in the trace data. That is, the points where the trace tools start decompressing the trace output.
ARM DUI 0175N Copyright © 2002-2011 ARM. All rights reserved. 2-144ID052111 Non-Confidential

RealView Debugger Commands
The synchronization frequency n can be a value in the range 100 to 4095, inclusive, with the default being 1024:• for ETMv3.0, the value is in cycles• for ETMv3.1 and later, the value is in bytes.
time_stamps Enable time stamping if the ETM and trace capture hardware support it. To disable, issue the command without this qualifier.
twin Not supported.
twinmaster Not supported.
Examples
The following examples show how to use ETM_CONFIG:
ETM_CONFIG,port_width:0,coprocessor,fulltrace,size:10240
Set up the ETM for a 4-bit, full-rate, nonmultiplexed trace port, no stalling or timestamps, 10K trace records, address and data tracing, and in non cycle-accurate mode.
ETM_CONFIG,port_width:1,stall_full,multiplex,fulltrace,suppressdata,size:1024
Set up the ETM for an 8-bit, full-rate, multiplexed trace port, processor stalling and data suppression on FIFO full, no timestamps, 1024 trace records, address and data tracing, and in non cycle-accurate mode.
See also• ANALYZER on page 2-23• DTBREAK on page 2-126• DTRACE on page 2-130• TRACE on page 2-277• TRACEBUFFER on page 2-279• TRACEDATAREAD on page 2-293• TRACEDATAACCESS on page 2-288• TRACEDATAWRITE on page 2-298• TRACEINSTREXEC on page 2-307• TRACEINSTRFETCH on page 2-312• the following in the RealView Debugger Trace User Guide:
— Chapter 4 Configuring the ETM• Embedded Trace Macrocell Specification.
ARM DUI 0175N Copyright © 2002-2011 ARM. All rights reserved. 2-145ID052111 Non-Confidential

RealView Debugger Commands
2.3.63 EXPAND
Displays the values of parameters to a procedure and any local variables that have been set up.
Syntax
EXPAND [@stack_level [{,windowid | ,fileid}]]
Where:
@stack_level Specifies a stack level if you want to see only a single level expanded. For example, you can specify @3 to expand stack level 3 only.
,windowid | ,fileid
Identifies the window or file where the command is to send the output. See Window and file numbers on page 1-5 for details. You can specify a window or file ID only if you specify a stack level.
Description
The EXPAND command displays the values of parameters to a procedure and any local variables that have been set up. You can expand any procedure in a directly called chain from the main program to the current procedure. Other procedures are not accessible.
If no stack level is specified, all procedures nested on the stack are displayed. Stack levels are numbered starting with the current procedure equaling 0, the caller of this procedure is 1, the caller of that procedure is 2.
The EXPAND command runs synchronously.
Messages that can be output by the EXPAND command have the following meanings:
<Bad float> Invalid floating-point value, cannot be converted.
<bad size> Type size invalid.
<UNKNOWN: xx> Invalid enum value, where xx = value.
<INFINITY> Floating-point value is infinity.
<Invalid value (x)>
Error number (x) occurred.
<NAN> Not a number (for a floating-point value).
<not a source procedure. Address is ...>
Routine is not defined as a function in the object file.
<not alive> Local register variable no longer exists.
<Not in procedure> PC located before first executable line.
<unknown type> Type is not recognized by the debugger.
Example
The following example illustrates the EXPAND command executed during a run of the dhrystone program. You can see three of the messages in use: an UNKNOWN enum value, a variable that is not alive, and a procedure that has no source or debug information available.
ARM DUI 0175N Copyright © 2002-2011 ARM. All rights reserved. 2-146ID052111 Non-Confidential

RealView Debugger Commands
> go> expand 00. Proc_1: at line 309. Ptr_Val_Par07FFFF60 = (record *)0x01000260 Next_Record00000005 = (record *)0x0100C274 01. main: at line 170. Int_1_Loc 07FFFF60 = 16777824 Int_2_Loc 07FFFF60 = 16777824 Int_3_Loc 07FFFF5C = 134217624 Ch_Index 'C' Enum_Loc 07FFFF58 = <UNKNOWN: 255> Str_1_Loc 07FFFF38 = "\xFF\xFF\xFF\xFFx\x1E" Str_2_Loc 07FFFF18 = "" Run_Index 07FFFF64 = 16827048 Number_Of_Runs100000 n <not alive> 02. <not a source procedure. Address is 01001DF0>
The program was halted in Proc_1 at line 309. The output shows that Proc_1 was called from main line 170, and main was called by unnamed code at address 0x01001DF0, which is part of the C runtime library.
Because main is called from the C runtime library, no source and no debug information is available for the procedure that called main, so EXPAND reports the pc address from which the call to main is made.
See also• CEXPRESSION on page 2-87• JOURNAL on page 2-172• PRINTVALUE on page 2-211• WHERE on page 2-331.
ARM DUI 0175N Copyright © 2002-2011 ARM. All rights reserved. 2-147ID052111 Non-Confidential

RealView Debugger Commands
2.3.64 FAILINC
Causes an abnormal exit from processing an INCLUDE file.
Syntax
FAILINC "string"
where:
string A string to display that explains the reason for aborting the INCLUDE file.
Description
The FAILINC command enables you to abort processing an INCLUDE file. You might do this when checks of the target or debugger environment have failed to find resources the INCLUDE file requires.
Use the string parameter to explain the abort.
Example
The following example shows how to use the FAILINC command in a macro:
if ( *((char*)(0xffe00)) != 0 ) $failinc "Peripheral not initialized. Aborting$";
The following example shows how to use the FAILINC command in an INCLUDE file:
jump nofail,( *((char*)(0xffe00)) == 0 )failinc "Peripheral not initialized. Aborting":nofail
These two examples test a memory address, expecting to read a 0 from some peripheral register. If it does not read 0, it aborts INCLUDE file processing.
See also• ERROR on page 2-142• INCLUDE on page 2-168• JUMP on page 2-174.
ARM DUI 0175N Copyright © 2002-2011 ARM. All rights reserved. 2-148ID052111 Non-Confidential

RealView Debugger Commands
2.3.65 FILL
Fills a memory block with values.
Syntax
FILL [{/8|/16|/32}] [/NW] addressrange ={expression | expressionlist}
where:
/8 Sets the access size to 8 bits.
/16 Sets the access size to 16 bits.
/32 Sets the access size to 32 bits.
Note If no access size is specified, the default is the native format for the debug target.
For example, the ARM7TDMI processor naturally addresses 8 bits.
/NW Suppresses the warning prompt when filling a large area of memory.
addressrange Specifies the range of addresses that identify the memory contents to be filled with the pattern. The start and the end of the range is included in the range, which is never to be exceeded. For example a byte fill from 0x400..0x500 writes to 0x400 and to 0x500.
expression An expression to be evaluated to a value and used to fill memory. The expression can be:• a decimal or hexadecimal number• a debugger expression, for example a math calculation• a string enclosed in single or double quotation marks.If you use a quoted string:• each character of the string is treated as a byte value in an expressionlist• no C-style zero terminator byte is written to memory.Also, see Rules for specifying strings in the FILL command on page 2-150 for more details on using strings with the FILL command.
expressionlist
Specifies the pattern used to fill memory. An expressionlist is a sequence of expressions separated by commas, for example "Test",0,0x20.
Note All expressions in an expression string are padded or truncated to the size
specified by the size qualifiers if they do not fit the specified size evenly. This also applies to each character of a string.
Description
The FILL command fills a memory block with values obtained from evaluating an expression or list of expressions. The size qualifier is used to determine the size of each element of expressionlist.
ARM DUI 0175N Copyright © 2002-2011 ARM. All rights reserved. 2-149ID052111 Non-Confidential

RealView Debugger Commands
Considerations when using the FILL command
Be aware of the following when using the FILL command:
• All expressions in an expression string are padded or truncated to the size specified by the Size value if they do not fit the specified size evenly.
• If the length of the expression list is less than the number of bytes in the specified address range, RealView Debugger repeats the pattern to fill the remaining number of blocks specified. For example,if you specify a pattern of 10 bytes and a fill area of 16 bytes, RealView Debugger repeats the pattern to fill the remaining six bytes.
• If more values are given than can be contained in the specified address range, excess values are ignored. The specified address range is never exceeded.
• If a pattern is not specified, RealView Debugger displays an error message.
• If you specify only a start address, one copy of the expression is written, taking up only as many bytes as required for the expression.
• If you specify an address range with equal start and end addresses, the memory at that address is modified, taking up only as many bytes as required for the expression. If an expression is not specified, the debugger acts as if =0 had been specified as the expression.
• The FILL command runs synchronously unless background access to target memory is supported. Use the WAIT command to force it to run synchronously.
Rules for specifying strings in the FILL command
Follow these rules when specifying a string:
• No C-style zero terminator byte is written to memory after a specified string. To write a NUL-terminated string, add a zero value expression after the string, for example:"Test Message",0
• You cannot use an empty string to write a NUL character.
• Use the /8 qualifier if you want to write the characters of a string to consecutive bytes of memory.
Examples
The following examples show how to use FILL:
fill 0x1000..0x1005="hello",0 Writes hello with a zero termination in the locations 0x1000...0x1005.
fill 0x1000..0x1001="hello" Writes h in the location 0x1000 and e in the location 0x1001.
fill 0x1000..0x1013 Writes as bytes the value 0 to locations 0x1000...0x1013.
fill /16 0x1000..0x1014 Writes the 16-bit value 0 to locations 0x1000...0x1014.
fill 0x1000..0x1013="hello" Writes hellohellohellohello in the locations 0x1000...0x1013.
ARM DUI 0175N Copyright © 2002-2011 ARM. All rights reserved. 2-150ID052111 Non-Confidential

RealView Debugger Commands
fill /32 0x2032..0x2053=0xDEADC0DE For a little-endian memory system, writes 0xDE to 0x2032, 0xC0 to 0x2033, 0xAD to 0x2034, 0xDE to 0x2035 and on to: 0xDE to 0x2052, and 0xC0 to 0x2053.
fill 0x3000..0x4756 =0xEA000000/2 Writes 0x00 to 0x3000..0x4756. The value of 0xEA000000/2 is calculated as 0x75000000. Because fill defaults to a byte expression width, this is then truncated to 0x00 and written.
fill /32 0x3000..0x4758 =0xEA000000 Writes 0xEA000000 to 0x3000..0x4756, 0xEA to 0x4757, and 0x00 to 0x4758, so truncating the last two bytes of the data.
See also• Specifying address ranges on page 2-2• CEXPRESSION on page 2-87• MEMWINDOW on page 2-188• READFILE on page 2-219• SETMEM on page 2-239.• TEST on page 2-273
ARM DUI 0175N Copyright © 2002-2011 ARM. All rights reserved. 2-151ID052111 Non-Confidential

RealView Debugger Commands
2.3.66 FLASH
Enables you to write, verify, or erase Flash blocks.
Syntax
flash [,qualifier...] [={addressrange | address, ...}]
where:
qualifier If specified, must be one or more of the following:cancel Discard the patched or downloaded changes.clk:(frequency)
If required by your Flash device, specify the clock frequency as a positive integer, representing the clock frequency in Hz. For example, enter 14175000 to specify a frequency of 14.175 MHz.
erase Erase the specified blocks. This normally sets every byte in the block to 0xFF or 0x00, depending on the type of Flash memory used. You can identify the Flash block using a handle, an address or an address range.
write Write data to the specified blocks of Flash memory. If you do not specify a block or address, then the write begins at the start of the first block.
verify If you specify this qualifier the data written to the Flash blocks is verified against the data source.
handle=blocknum,...
Identifies one or more Flash blocks to be operated on.To list the Flash blocks, use the FLASH command with no arguments (see Examples on page 2-153).The block numbers are also shown in the Open Flash Blocks list of the Flash Memory Control dialog box.
Note Do not use an address or address range with this qualifier.
useorig This qualifier specifies that the original contents of the memory is used wherever it is not explicitly modified.
scratch This qualifier specifies that the original contents of the target memory buffer is not saved first. This might save you some time if the buffer is large.By default the target memory buffer is saved first, and restored afterwards.
addressrange Multiple Flash blocks can be specified using a range of addresses. The start and the end of the range is included in the range. For example, 0x24000000..0x24FFFFFF specifies the blocks in the address range 0x24000000 to 0x24FFFFFF.If you use the handle qualifier, then do not specify an address range.
address The Flash block can be specified by address.If you use the handle qualifier, then do not specify an address.
ARM DUI 0175N Copyright © 2002-2011 ARM. All rights reserved. 2-152ID052111 Non-Confidential

RealView Debugger Commands
Note If you use the address or addressrange qualifiers, then those blocks that are touched by the address or addressrange are written to completely. For example, if you specify an address range that starts at block zero, and finishes part way into block three, then the whole of blocks one, two and three are written to.
Description
This command is used to manage Flash memory. This command enables you to:• write and verify Flash blocks, which require that the blocks be opened first• erase Flash blocks, which does not require the blocks to be open.
The Flash block is specified by address. You cannot program more than one Flash device at a time.
If this command is used with no arguments, it reports the currently open blocks.
Examples
The following examples show how to use the FLASH command:
• To display information for the currently loaded Flash image on an Integrator/AP board, enter:> flashFlash opened on ARM920T_0@RealView-ICE for 'Intel DT28F320S3 2Mx16 x2 x4' at '0x24000000' Block 0: +0x0000..+2644
• To erase the Flash in the range 0x24000000 to 0x24FFFFFF inclusive, enter:flash,erase =0x24000000..0x24FFFFFF
See also• Specifying address ranges on page 2-2• MEMMAP on page 2-184• the following in the RealView Debugger User Guide:
— Chapter 6 Writing Binaries to Flash.
ARM DUI 0175N Copyright © 2002-2011 ARM. All rights reserved. 2-153ID052111 Non-Confidential

RealView Debugger Commands
2.3.67 FOPEN
Opens a file and assigns to it a specified file number.
Syntax
FOPEN [/A] [/R] fileid ,filename
where:
/A Appends new data to an existing file. You cannot read or write the existing information, and the existing information is retained.
/R Opens a file as read-only. You must use this qualifier if you want to read the file with the fgetc() macro.
fileid Specifies the identity of the file to be opened. This must be a user-defined fileid.
filename Specifies the file being opened. Quotation marks are optional, but see Rules for specifying filenames in the FOPEN command for details on how to specify filenames that include a path.
Description
This command enables you to read or write a file on the host filesystem by associating it with a RealView Debugger custom file number.
The file is opened for writes only by default, but you can specify append or read-only modes instead. You write to the file using the FPRINTF command, the fputc or fwrite macros, or by redirecting output from those commands that accept the fileid specifier. You read the file using either the fgetc or fread macros. You close the file using the VCLOSE command.
Note Be aware of the following:
• The FOPEN command runs asynchronously unless it is used in a macro.
• If you open a new or existing file for writing, no data is written to the file until the output buffer is flushed. This happens when you close the file with the VCLOSE command, but it might happen at other times because the buffered I/O behavior is the same as in C.
• If you specify a filename with a path that does not exist, then an error message is displayed. RealView Debugger does not create the non-existent path.
Rules for specifying filenames in the FOPEN command
Follow these rules when specifying a filename:
• If the filename consists of only alphanumeric characters, slashes, or a period, but the filename does not start with a slash, then you do not have to use quotation marks. For example, includes/file.
• Filenames with a leading slash must be in double quotation marks, for example "/file".
• Filenames containing a backslash must be in single quotation marks. For example '\file' or 'c:\myfiles\file'.Alternatively, you can escape each backslash and use double quotation marks. For example, "c:\\myfiles\\file".
ARM DUI 0175N Copyright © 2002-2011 ARM. All rights reserved. 2-154ID052111 Non-Confidential

RealView Debugger Commands
• You can use environment variables to specify paths to a file. For example, if PATHROOT=C:\MYFILES and PATHTEST=TEST1:'$PATHROOT\$PATHTEST\test1.c'
You can include:— the filename as part of the second environment variable, and then specify
'$PATHROOT\$PATHTEST'.— the path separator in the environment variable, and then specify
'$PATHROOT$PATHTEST'.
Examples
The following examples show how to use FOPEN:
fopen 50, 'c:\temp\file.txt'fprintf 50, "Start of function\n"
Open a file and write some text to it.
fopen /r 50, 'c:\temp\file.txt'ce fgetc(50)
Open a file and read the first character of the file.
See also• Window and file numbers on page 1-5• FPRINTF on page 2-156• VCLOSE on page 2-321• VMACRO on page 2-324• VOPEN on page 2-326• WINDOW on page 2-332• fclose on page 3-17• fgetc on page 3-18• fopen on page 3-20• fputc on page 3-22• fread on page 3-23• fwrite on page 3-25.
ARM DUI 0175N Copyright © 2002-2011 ARM. All rights reserved. 2-155ID052111 Non-Confidential

RealView Debugger Commands
2.3.68 FPRINTF
Displays formatted text to a specified file or window.
Syntax
FPRINTF {windowid | fileid} ,"format_string" [,argument...]
where:
windowid | fileid
Identifies the window or file where the command is to send the output.
format_string
Is a format specification conforming to C/C++ rules with extensions. It might be a text message, or it can describe how one or more arguments are to be presented. See Format string syntax for details.
argument The value or values to be written.
Description
The command is similar to the C run-time fprintf function. You select the windowid or fileid to use from the range 50..1024. For output to a file, the file must be opened using the FOPEN command. For output to a user window, the window must be opened using the VOPEN command.
Format string syntax
The text in format_string is defines what is displayed. If there are no % characters in the string, the text is written out and any other arguments to FPRINTF are ignored. The % symbol is used to indicate the start of an argument conversion specification.
The syntax of the specification is:
%[flag][fieldwidth][precision][lenmod]convspec
where:
flag An optional conversion modification flag -. If specified, the result is left-justified within the field width. If not specified, the result is right-justified.
fieldwidth An optional minimum field width specified in decimal.
precision An optional precision specified in decimal, with a preceding . (period character) to identify it.
lenmod An optional argument length specifier:h a 16-bit valuel a 32-bit valuell a 64-bit value
convspec The possible conversion specifier characters, <convspec>, are:% A literal % character.m The mnemonic for the processor instruction in memory pointed to by
the argument. The expansion includes a newline character. The information that is printed includes:• the memory address in hexadecimal
ARM DUI 0175N Copyright © 2002-2011 ARM. All rights reserved. 2-156ID052111 Non-Confidential

RealView Debugger Commands
• the memory contents in hexadecimal• the instruction mnemonic and arguments• an ASCII representation of the memory contents, if printable.
H A line from the current source file, where the argument is the line number.
h A line from the current source file, where the argument is the source line address (as opposed to a target memory address).
d, i, or u An integer argument printed in decimal. d and i are equivalent, and indicate a signed integer. u is used for unsigned integers.
x or X An integer argument printed in unsigned hexadecimal. x indicates that the letters a to f are used for the extra digits, and X indicates that the letters A to F are used.
c A single character argument.s A string argument. The string itself can be stored on the host or on the
target.p A pointer argument. The value of the pointer is printed in hexadecimal.e, E, f, g, or G
A floating point argument, printed in scientific notation, fixed point notation, or the shorter of the two. The capital letter forms use a capital E in scientific notation rather than an e.
Output is formatted beginning at the left of the format string and is copied to the screen. If you are using the GUI, then the string is copied to the Output view. Whenever a conversion specification is encountered, the next argument is converted according to the specification, and the result is copied to the screen.
Rules
The following rules apply to the use of the FPRINTF command:
• FPRINTF runs synchronously
• windowid must identify a user-defined window that you have previously opened with the VOPEN command
• fileid must identify a file that you have previously opened in write mode, for example:FOPEN 100, "c:\myfiles\file.txt"
• if there are too many arguments, some of those that do not correspond with a format specifier are not printed
• if there are too few arguments (that is, there are more conversion specifiers in the format string than there are arguments after the format string), the string <invalid value> is output instead
• if the argument type does not correspond to its conversion field specification, arguments are converted incorrectly.
Example
The following examples show how to use FPRINTF:
fprintf 50,"Syntax error\n" Writes the string Syntax error to the window or file.
ARM DUI 0175N Copyright © 2002-2011 ARM. All rights reserved. 2-157ID052111 Non-Confidential

RealView Debugger Commands
fprintf 50, "Execution time: %d seconds\n", tend-tstart Prints the result of the calculation to the window or file, in the format:Execution time: 20 seconds
fprintf 50, "Value is %d\n" Prints the following to the window or file:Value=<invalid value>
See also
• Window and file numbers on page 1-5
• CEXPRESSION on page 2-87
• FOPEN on page 2-154
• PRINTF on page 2-205
• PRINTVALUE on page 2-211
• VOPEN on page 2-326
• VCLOSE on page 2-321
• fclose on page 3-17
• fopen on page 3-20
• fputc on page 3-22
• fread on page 3-23
• the following in the RealView Debugger User Guide:— Using variable substitution in commands within a macro on page 16-6.
ARM DUI 0175N Copyright © 2002-2011 ARM. All rights reserved. 2-158ID052111 Non-Confidential

RealView Debugger Commands
2.3.69 GO
Executes the target program starting from the current PC or from a specified address.
Syntax
GO [=start_address[,]] [ {temp_break [%%passcount][,] }... [;macro-call]]
where:
start_address
Specifies an address at which execution is to begin.
temp_break Acts as a temporary instruction breakpoint, which is automatically cleared when program execution is suspended.
passcount Specifies the number of times the temp_break address is executed before the command actually halts.
macro_name Invokes a macro if a temporary break occurs. The macro return value determines whether execution continues or not. If there is an attached macro, execution continues when the macro returns a non-zero value. If the macro returns zero, execution halts.
Description
This command executes the target program starting from the current PC or from a specified address. The command also causes program execution to resume after it has been suspended. Execution continues until a permanent or temporary breakpoint, an error, or a halt instruction is encountered. You can also use the HALT and STOP commands to halt execution.
RealView Debugger continues to accept commands after GO has been entered. Commands that cannot be completed while the target is running (synchronous commands) are delayed until the target is next stopped. For more information about the limitations the Debug Interface imposes while the target is running, see your target documentation.
You can specify a temporary instruction breakpoint with the GO command, providing similar functionality to the Go to Cursor GUI command. The temporary breakpoint is removed as soon as the target stops, whether the breakpoint was hit or not. You can also associate a macro to be run that can also determine whether the target remains stopped at the breakpoint.
The GO command runs synchronously.
If you are working with OS-aware images, and the current connection is running in RSD mode, then the GO command starts the current thread.
Note When specifying a start address you must be careful to make sure that the processor stack has been set up and remains balanced.
The GO command cannot be used in a macro if the macro is attached to another entity, such as a breakpoint.
Examples
The following examples show how to use GO:
GO Start or resume executing the target program from the current PC.
ARM DUI 0175N Copyright © 2002-2011 ARM. All rights reserved. 2-159ID052111 Non-Confidential

RealView Debugger Commands
GO @1 Resume executing the target program from the current PC, stopping when the current function returns to its caller.
GO write_io; until (x==2) Resume executing the target program from the current PC, and stop when x has the value 2.
go \DHRY_1\#149:3 ;countHits() Set a temporary breakpoint at line 149 in dhry_1.c, start executing the dhrystone image, and run the countHits() macro when the temporary breakpoint is hit. You might use this in a script as follows:add int hitCount
define /R int countHits(){ if (@PC == 0x8480) hitCount++; return 1;}.
go \DHRY_1\#149:3 ;countHits()// Display the hit count before deleting the variableprintval hitCountdelete hitCount
See also
• Execution control on page 2-4
• HALT on page 2-163
• GOSTEP on page 2-161
• RUN on page 2-232
• STOP on page 2-267
• the following in the RealView Debugger User Guide:— Chapter 7 Debugging Multiprocessor Applications
• the following in the RealView Debugger RTOS Guide:— Chapter 4 Associating Threads with Views.
ARM DUI 0175N Copyright © 2002-2011 ARM. All rights reserved. 2-160ID052111 Non-Confidential

RealView Debugger Commands
2.3.70 GOSTEP
Single-steps through the program, invoking a named macro at every step.
Syntax
GOSTEP macro_name
where:
macro_name Specifies the name of the macro that is invoked after each instruction.The macro return value determines whether execution continues or not. Execution continues when the macro returns a non-zero value.
Description
The GOSTEP command single-steps through the program, invoking a named macro at every step. Execution starts at the current PC, and continues until you click Stop to halt execution, the macro returns zero, or a breakpoint is hit. Single-stepping is by source line for high-level source code and by processor instruction for assembly language code.
The GOSTEP command runs synchronously.
Note • Using the command significantly slows target execution speed.
• Using the command might cause target program execution errors because of timing issues.
Restrictions on the use of GOSTEP
The GOSTEP command is not allowed in a macro.
Example
The following examples show how to use GOSTEP:
GOSTEP checkvariable Start or resume executing the target program from the current PC. At each step, invoke a macro called checkvariable. A step is an instruction or a statement, depending on the source display MODE.
GOSTEP until (y>100) Resume executing the target program, stopping when the program variable y exceeds 100. until is a predefined macro.
See also• Execution control on page 2-4• HALT on page 2-163• GO on page 2-159• MODE on page 2-190• RUN on page 2-232• STEPINSTR on page 2-259• STEPLINE on page 2-261• STEPOINSTR on page 2-263
ARM DUI 0175N Copyright © 2002-2011 ARM. All rights reserved. 2-161ID052111 Non-Confidential

RealView Debugger Commands
• STEPO on page 2-265• STOP on page 2-267• until on page 3-63.
ARM DUI 0175N Copyright © 2002-2011 ARM. All rights reserved. 2-162ID052111 Non-Confidential

RealView Debugger Commands
2.3.71 HALT
Stops target program execution.
Syntax
HALT [[=]threadID]
where:
threadID Identifies the thread to be stopped when running in RSD mode.
Description
The behavior of the HALT command depends on the whether your program is running on a non OS-aware connection, an OS-aware connection, or a RealMonitor-aware connection.
Using the HALT command on non OS-aware connections
The HALT command stops the processor.
Using the HALT command on OS-aware connections
The behavior of the HALT command depends on whether the processor is running in HSD or RSD mode:
• If the processor is running in HSD mode, the command stops the processor.
• If RSD is enabled, the behavior depends on whether or not a thread identifier is specified:— If no thread identifier is specified, the command stops either the currently running
thread or the thread attached to the Code window.— The thread with the identifier specified in the command is stopped.
• If the processor is running in RSD mode, and you use the HALT command without specifying a thread, the command stops either the currently running thread or the thread attached to the Code window.
• If the processor is running in RSD mode, and you use the HALT command with a thread identifier, the identified thread is stopped.The stopping of threads is accomplished by the Debug Agent using the associated OS service.
Using the HALT command on connections running RealMonitor
If RealMonitor support is enabled, then only the application thread stops. The RealMonitor thread continues running.
Examples
The following examples show how to use HALT:
halt Stops the currently running thread or the thread attached to the Code window.
halt = thread_4 Stops the specified thread in RSD.
halt = 0x39d8 Stops the thread specified by the TCB address in RSD.
ARM DUI 0175N Copyright © 2002-2011 ARM. All rights reserved. 2-163ID052111 Non-Confidential

RealView Debugger Commands
See also
• Execution control on page 2-4
• AOS_resource_list on page 2-26
• DOS_resource_list on page 2-122
• GO on page 2-159
• GOSTEP on page 2-161
• OSCTRL on page 2-200
• RUN on page 2-232
• STOP on page 2-267
• the following in the RealView Debugger User Guide:— Chapter 7 Debugging Multiprocessor Applications
• the following in the RealView Debugger Target Configuration Guide:— Configuring RealMonitor for connections through DSTREAM or RealView ICE on
page 3-43
• the following in the RealView Debugger RTOS Guide:— Chapter 7 Debugging Your OS Application.
ARM DUI 0175N Copyright © 2002-2011 ARM. All rights reserved. 2-164ID052111 Non-Confidential

RealView Debugger Commands
2.3.72 HELP
Displays RealView Debugger online help. To do this type:
HELP
The topic Welcome to RealView Debugger Help includes more information about using online help in RealView Debugger.
Note This command has no effect when running in command line mode. Use the DHELP or DCOMMANDS instead.
Restrictions on the use of HELP
The HELP command is not allowed in a macro.
See also• DCOMMANDS on page 2-103• DHELP on page 2-113.
ARM DUI 0175N Copyright © 2002-2011 ARM. All rights reserved. 2-165ID052111 Non-Confidential

RealView Debugger Commands
2.3.73 HOST
Enables you to run a command on your host operating system.
Syntax
HOST command
where:
command The command that you want to run on your host operating system. This can be a DOS command on a Windows system or Red Hat Linux command.
Description
The HOST command enables you to run a command on your host operating system (Windows or Red Hat Linux).
Restrictions on the use of HOST
The HOST command has the following restrictions:
• The HOST command is not allowed in a macro.
• The SET command to modify environment variables is not supported. However, you can use the SET command to list the environment variables that are defined.
• You cannot use the HOST command to change the current working directory pointed to by RealView Debugger. For example, HOST cd "c:\my sources" has no effect. Instead, use the CWD command.
Examples
The following examples show how to use HOST on Windows system:
host dir "c:\my sources" Lists the contents of directory c:\my sources. This must be in quotation marks because there is a space in the path name.
host cd Displays the current directory pointed to by RealView Debugger.
See also
• CWD on page 2-101.
ARM DUI 0175N Copyright © 2002-2011 ARM. All rights reserved. 2-166ID052111 Non-Confidential

RealView Debugger Commands
2.3.74 HWRESET
HWRESET is an alias of EMURESET.
See EMURESET on page 2-138.
ARM DUI 0175N Copyright © 2002-2011 ARM. All rights reserved. 2-167ID052111 Non-Confidential
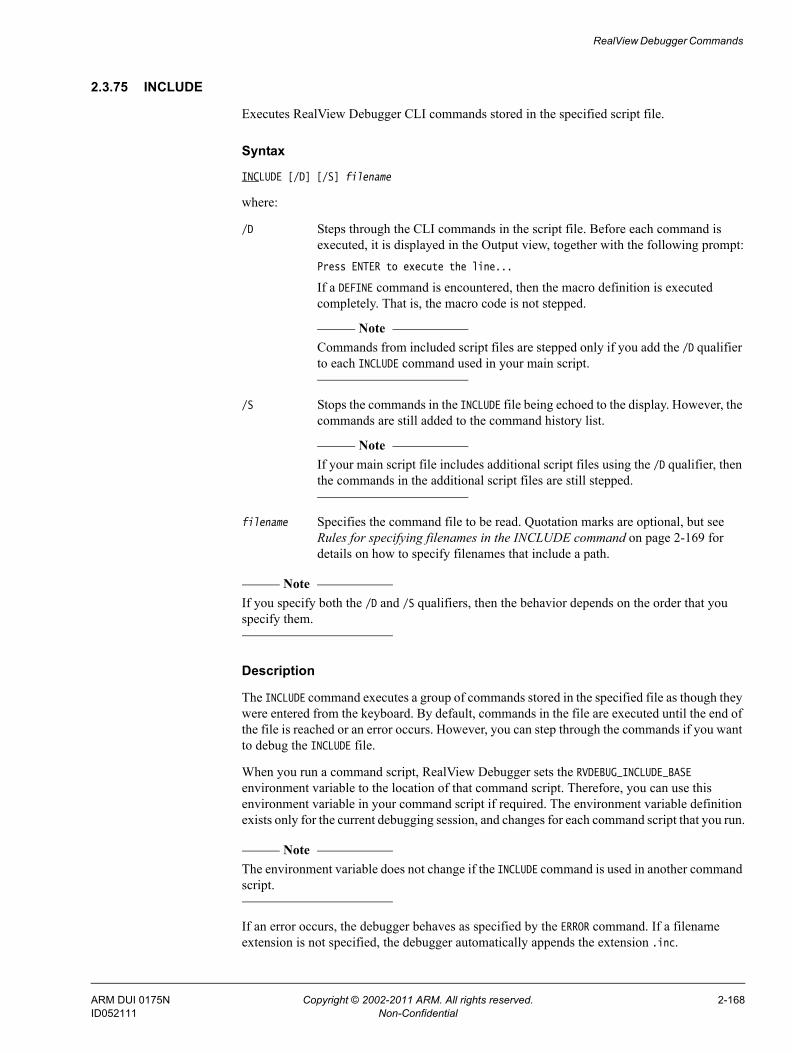
RealView Debugger Commands
2.3.75 INCLUDE
Executes RealView Debugger CLI commands stored in the specified script file.
Syntax
INCLUDE [/D] [/S] filename
where:
/D Steps through the CLI commands in the script file. Before each command is executed, it is displayed in the Output view, together with the following prompt:Press ENTER to execute the line...
If a DEFINE command is encountered, then the macro definition is executed completely. That is, the macro code is not stepped.
Note Commands from included script files are stepped only if you add the /D qualifier
to each INCLUDE command used in your main script.
/S Stops the commands in the INCLUDE file being echoed to the display. However, the commands are still added to the command history list.
Note If your main script file includes additional script files using the /D qualifier, then
the commands in the additional script files are still stepped.
filename Specifies the command file to be read. Quotation marks are optional, but see Rules for specifying filenames in the INCLUDE command on page 2-169 for details on how to specify filenames that include a path.
Note If you specify both the /D and /S qualifiers, then the behavior depends on the order that you specify them.
Description
The INCLUDE command executes a group of commands stored in the specified file as though they were entered from the keyboard. By default, commands in the file are executed until the end of the file is reached or an error occurs. However, you can step through the commands if you want to debug the INCLUDE file.
When you run a command script, RealView Debugger sets the RVDEBUG_INCLUDE_BASE environment variable to the location of that command script. Therefore, you can use this environment variable in your command script if required. The environment variable definition exists only for the current debugging session, and changes for each command script that you run.
Note The environment variable does not change if the INCLUDE command is used in another command script.
If an error occurs, the debugger behaves as specified by the ERROR command. If a filename extension is not specified, the debugger automatically appends the extension .inc.
ARM DUI 0175N Copyright © 2002-2011 ARM. All rights reserved. 2-168ID052111 Non-Confidential

RealView Debugger Commands
Note If you want to include a batch file when a target is running, you must first enter the wait=off command, then include the batch file:
> wait=off> include myfile.inc
Your batch file can still include the wait=on command, if required.
The INCLUDE command is normally used to perform repetitive or complex initializations, such as:
• loading and running programs, setting up breakpoints and initial variable definitions
• creating debugger aliases and macros, perhaps for use in later debugging
Note The DEFINE command, used to create macros, can only be used in an INCLUDE file.
• running test suites.
You can configure the debugger to load a given INCLUDE file automatically when a target connection is made using the Commands setting of the Advanced_Information block for your target.
You can also run script files using the -inc argument to RealView Debugger itself.
The INCLUDE command runs asynchronously.
Restrictions on the use of INCLUDE
The INCLUDE command is not allowed in a macro.
Rules for specifying filenames in the INCLUDE command
Follow these rules when specifying a filename:
• If the filename consists of only alphanumeric characters, slashes, or a period, but the filename does not start with a slash, then you do not have to use quotation marks. For example, includes/file.
• Filenames with a leading slash must be in double quotation marks, for example "/file".
• Filenames containing a backslash must be in single quotation marks. For example '\file' or 'c:\myfiles\file'.Alternatively, you can escape each backslash and use double quotation marks. For example, "c:\\myfiles\\file".
• You can use environment variables to specify paths to a file. For example, if PATHROOT=C:\MYFILES and PATHTEST=TEST1:'$PATHROOT\$PATHTEST\test1.c'
You can include:— the filename as part of the second environment variable, and then specify
'$PATHROOT\$PATHTEST'.— the path separator in the environment variable, and then specify
'$PATHROOT$PATHTEST'.
ARM DUI 0175N Copyright © 2002-2011 ARM. All rights reserved. 2-169ID052111 Non-Confidential

RealView Debugger Commands
Example
The following example shows how to use INCLUDE:
INCLUDE "startup.inc" Read the file startup.inc in the current directory and interpret the contents as RealView Debugger commands. The file startup.inc might contain:; startup.inc 12/12/00; Author: J.Doe;alias sf*ile =dtfile ;99alias dub =dump /bvopen 99
See also
• ALIAS on page 2-21
• DEFINE on page 2-105
• ERROR on page 2-142
• FAILINC on page 2-148
• JUMP on page 2-174
• MACRO on page 2-182
• WAIT on page 2-329
• the following in the RealView Debugger User Guide:— Considerations when running command scripts on page 15-12— Chapter 15 Debugging with Command Scripts
• the following in the RealView Debugger Target Configuration Guide:— Running CLI commands automatically on connection on page 3-41.
ARM DUI 0175N Copyright © 2002-2011 ARM. All rights reserved. 2-170ID052111 Non-Confidential

RealView Debugger Commands
2.3.76 INTRPT
Interrupts the execution of commands.
Syntax
INTRPT
Description
The INTRPT command enables you to interrupt an asynchronous command that the target is still executing. Commands are held in a queue for execution when the target stops. This is called pending the command.
Use the CANCEL command to clear pending commands from the list, to stop them being executed.
You cannot use this command to halt target execution. Use HALT to do this.
Note Synchronous commands can only be run when target program execution has stopped.
Asynchronous commands can be run at all times.
See also• CANCEL on page 2-85• HALT on page 2-163• WAIT on page 2-329.
ARM DUI 0175N Copyright © 2002-2011 ARM. All rights reserved. 2-171ID052111 Non-Confidential

RealView Debugger Commands
2.3.77 JOURNAL
Controls the logging of commands and output.
Syntax
JOURNAL [/A] [{OFF | ON="filename"}]
where:
/A Appends information to an existing file.
OFF Closes the journal file and stops collecting information. This is the default setting.
ON Starts writing information to the journal file.
filename Specifies the journal filename. If you do not specify a filename extension, the extension .jou is used. Quotation marks are optional, but see Rules for specifying filenames in the JOURNAL command for details on how to specify filenames that include a path.
Description
The JOURNAL command starts or stops saving, in a specified file:• the commands that you enter• any output that is generated by a command• error messages• text specifically sent to the journal file.
If you are using the GUI, then the log file contains the same information that is displayed in the Cmd tab of the Output view.
Note If the specified file exists and you do not specify the /A parameter, the existing contents of the file are overwritten and lost.
The JOURNAL command runs asynchronously unless it is in a macro.
Rules for specifying filenames in the JOURNAL command
Follow these rules when specifying a filename:
• If the filename consists of only alphanumeric characters, slashes, or a period, but the filename does not start with a slash, then you do not have to use quotation marks. For example, includes/file.
• Filenames with a leading slash must be in double quotation marks, for example "/file".
• Filenames containing a backslash must be in single quotation marks. For example '\file' or 'c:\myfiles\file'.Alternatively, you can escape each backslash and use double quotation marks. For example, "c:\\myfiles\\file".
• You can use environment variables to specify paths to a file. For example, if PATHROOT=C:\MYFILES and PATHTEST=TEST1:'$PATHROOT\$PATHTEST\test1.c'
ARM DUI 0175N Copyright © 2002-2011 ARM. All rights reserved. 2-172ID052111 Non-Confidential

RealView Debugger Commands
You can include:— the filename as part of the second environment variable, and then specify
'$PATHROOT\$PATHTEST'.— the path separator in the environment variable, and then specify
'$PATHROOT$PATHTEST'.
Example
The following examples show how to use JOURNAL:
JOURNAL ON='c:\temp\log.txt' Start logging output to the file c:\temp\log.txt, overwriting any existing file of that name.
JOURNAL /A ON="log" Start logging output to the file log.jou in the current directory of the debugger, appending the new log text to the file if it already exists.
JOURNAL OFF Stop logging output.
See also• LOG on page 2-180• STDIOLOG on page 2-257• VOPEN on page 2-326.
ARM DUI 0175N Copyright © 2002-2011 ARM. All rights reserved. 2-173ID052111 Non-Confidential

RealView Debugger Commands
2.3.78 JUMP
Continues execution at a label in the current INCLUDE file.
Syntax
JUMP label [,condition]
where:
label Is the string that identifies the target line in the INCLUDE file to which you want control to jump. The first character of the target label must be a colon :, and it must be followed by a label string.
condition Is an optional expression that can be evaluated as True or False. The jump to the specified label takes place only if the condition is True, otherwise control passes to the next command in the INCLUDE file.
Description
The JUMP command can only be used in an INCLUDE file. If you specify a condition, then the jump takes place only if the condition is True. Otherwise control passes to the next line in the INCLUDE file.
You cannot use the JUMP command inside a macro, nor place a target label inside a macro. However, you can provide similar functionality by using the if, for, while and do-while flow control constructs in macros.
Example
The following fragment of an INCLUDE file shows the use of labels and jumps:
initialize:retryjump skip_setup,x==1 // variable x is 1 when setup is completesome_commandsjump retry // keep trying to initialize:skip_setup
See also• DEFINE on page 2-105• FAILINC on page 2-148• Chapter 4 RealView Debugger Keywords.
ARM DUI 0175N Copyright © 2002-2011 ARM. All rights reserved. 2-174ID052111 Non-Confidential

RealView Debugger Commands
2.3.79 LIST
Displays source code in the Code window.
Syntax
LIST [{#line_number|function_name|@stack_level}]
where:
line_number Specifies the number of the first line to be displayed.
function_name
Specifies a function that is to have its source code displayed.
@stack_level Displays the line that is returned to after the specified nesting level. For example, @1 represents the instruction after the call to the current procedure.
Description
The LIST command displays the source code in the Code window beginning at the specified line number, stack level, or function name.
You can qualify line number or procedure names by preceding them with a module name. If you do not specify a parameter for the LIST command, the line pointed to by the PC is displayed.
The LIST command runs asynchronously unless in a macro.
Example
The following examples show how to use LIST:
list List the text of the current source file from the current PC location, if that refers to a source file with debugging information.
list #44 List the text of the current source file from line 44.
list @1 List the text of the source file containing the call to the current procedure, starting from the statement after the call.
See also• CONTEXT on page 2-96• DISASSEMBLE on page 2-116• DOWN on page 2-124• EXPAND on page 2-146• SCOPE on page 2-234• UP on page 2-318• WHERE on page 2-331.
ARM DUI 0175N Copyright © 2002-2011 ARM. All rights reserved. 2-175ID052111 Non-Confidential

RealView Debugger Commands
2.3.80 LOAD
Loads the specified executable file onto the target.
Syntax
LOAD [/A] [/C] [/NI] [{/NP|/SP}] [/NS] [/PD] [/PY] [/R] absolute_filename [,root] [;section [,section]...] [;arg1 ...] [&base_address]
where:
/A Loads and appends another executable image without deleting any existing one. In addition, the value of the PC remains unchanged. This is the default option if /R is not used.If the new image file overlaps the addresses of the existing object modules, the load terminates and displays an error message. If you want to replace the current image with a new one, use /R.
/C Converts all symbols to lowercase as they are read by the absolute file reader.
/NI Loads only the symbol table. Overlap of addresses is checked unless /R is also used. Does not load the program image code or the data.
/NP Prevents the command changing the value of the PC.
/NS Prevents the command loading debug information into the symbol table. Only the program image is loaded. No check for overlapping addresses is made. The /NS option can be used to reload the current program image without affecting the symbol table.
/PD Displays a dialog box for errors and warnings, rather than dumping them to the log.
/PY For images that enable the Memory Management Unit (MMU) and perform a remap, loads progam sections at physical addresses rather than virtual addresses. However, all symbols still refer to virtual address.
Note To debug MMU initialization code, that code must have the same virtual and
physical address.
/R Replaces the existing program with the program being loaded. In addition, when no other qualifiers are specified:• the value of the PC is set to the image entry address• any debug information is loaded into the symbol table.
/SP Sets the PC to the start address specified in the object module. This is the default behavior when symbols are loaded, the image file specifies an entry address, and the /R flag is specified.
absolute_filename
Specifies the name of the absolute object file to be loaded. Quotation marks are optional, but see Rules for specifying filenames in the FOPEN command on page 2-154 for details on how to specify filenames that include a path. Also, see Rules for the LOAD command on page 2-178.
ARM DUI 0175N Copyright © 2002-2011 ARM. All rights reserved. 2-176ID052111 Non-Confidential

RealView Debugger Commands
root Specifies the root associated with the symbols in the program being loaded. The default root is the filename without an extension. See Rules for the LOAD command on page 2-178 for details on how to specify a root.
section Lists sections to load when an image is being loaded. The default is to load all sections. This option is commonly used to reload the initialized data area when starting a program.The section names that are available for a specific image can be listed using the ARM development tools command fromelf or the GNU development tools command objdump. See Rules for the LOAD command on page 2-178 for details on how to specify sections.
args Specifies an optional, space-separated, list of arguments to the image.
Note You cannot use arguments with the LOAD command on ISSM, Model Library, and
Model Process targets.
The case of arguments is preserved. See Rules for the LOAD command on page 2-178 for details on how to specify arguments.
Note You can also specify arguments using the ARGUMENTS command. For example, you
can might want to modify the arguments without unloading the image.
base_address Specifies an address offset to be added to all sections when computing the load addresses.For this option to work correctly with position-independent code and data, your program must have been compiled with Position-Independent Code (PIC) and Position-Independent Data (PID).If your applications delegates security-critical functionality to TrustZone Software, be aware of the following:• An image is loaded into the current world by default.• To load an image into a specific world, then prefix the address with &N:
(Normal World) or &S: (Secure World). For example:— the following command loads an image into the Normal World at the
image entry point:load ‘C:\myproject\myimage.axf’ &N:0
— the following command loads a position-independent image into the Normal World:load ‘C:\myproject\myimage.axf’ &N:0x1000
Description
The LOAD command loads the specified executable file into the debug target. The file specified must be a format supported by the RealView Debugger.
To reset the initialized values of program variables after entering a RESET or a RESTART command, you must reload your program using the LOAD command. The RELOAD command checks the file date to determine whether program symbols have changed and therefore whether they must be reloaded.
If a load is performed that includes the symbol table, any breakpoints or macros referring to symbols in the previous root are invalidated.
ARM DUI 0175N Copyright © 2002-2011 ARM. All rights reserved. 2-177ID052111 Non-Confidential

RealView Debugger Commands
The LOAD command runs synchronously.
Rules for the LOAD command
Follow these rules when using LOAD:
• absolute_filename, root, section, and args must all be placed in the same set of quotation marks. For example, on Windows:load /pd/r 'c:\source\demofile.axf ;ER_RO,ER_ZI ;12345' &0x8A00
• If you want to specify arguments, but not a section, you must specify an empty section. All sections are loaded in this case. For example:load /pd/r 'c:\source\myfile.axf;;arg1 arg2 arg3'
• Where an argument includes spaces, additional quotation marks must be used. Use single quotation marks around arguments if the outer quotation marks are doubles. Use double quotation marks around arguments if the outer quotation marks are singles. For example:load /pd/r "myimage.axf ;;12345 'Argument Two'" &0x8A00load /pd/r 'c:\source\myimage.axf ;;12345 "Argument Two"' &0x8A00
• base_address must be placed outside the quotation marks, and must be the last parameter specified.
Restrictions on the use of LOAD
The LOAD command is not allowed in a macro.
You cannot use arguments with the LOAD command on ISSM, Model Library, and Model Process targets.
Examples
The following examples show how to use LOAD:
load 'c:\source\myfile.axf' Load the executable file myfile.axf to the target, without overwriting any existing image that is loaded, and without changing the value of the PC.
load /ni/sp 'c:\source\rtos.axf' Load the symbol table for an image rtos.axf that is also in target ROM, setting the PC to the program start address so that a subsequent GO runs the program.
load /np 'c:\source\mp3.axf' Load the executable library mp3.axf onto the target so that the preloaded executable can use it. The PC is not modified. Symbol table entries in mp3.axf are added to the existing symbol table.
Note Ensure that executables you load in this way occupy distinct memory regions. No
relocation is performed by RealView Debugger unless you specify a base offset.
load /pd/r 'c:\source\demofile.axf ;ER_RO,ER_ZI' &0x8A00 Load the executable file demofile.axf to the default target. Specify an offset added to all sections to compute the load addresses. Load only the specified sections ER_RO and ER_ZI.
ARM DUI 0175N Copyright © 2002-2011 ARM. All rights reserved. 2-178ID052111 Non-Confidential

RealView Debugger Commands
load /pd/r 'c:\source\myfile.axf;;arg1 arg2 arg3' Load the executable file myfile.axf to the default target using an arguments list. An empty section list is given so all sections are loaded.
See also• ADDFILE on page 2-19• ARGUMENTS on page 2-27• DTFILE on page 2-128• GO on page 2-159• RELOAD on page 2-225• RESET on page 2-227• RESTART on page 2-230• RUN on page 2-232• UNLOAD on page 2-316.
ARM DUI 0175N Copyright © 2002-2011 ARM. All rights reserved. 2-179ID052111 Non-Confidential

RealView Debugger Commands
2.3.81 LOG
Records user input and places it in a specified file.
Syntax
LOG [/A] [{OFF | ON="filename"}]
where:
/A Specifies that new records are to be added to any that already exist in the specified file.
OFF Closes the log file and stops collecting information. This is the default.
ON Starts writing information to the log file.
filename Specifies the name of the log file. Quotation marks are optional, but see Rules for specifying filenames in the LOG command for details on how to specify filenames that include a path.
Description
This command records user input and places it in a specified file. Commands that are issued but not successfully completed are written to the log file as comments along with the associated error codes. All successful commands are written to the log file, so the file can be used as an INCLUDE file.
Note If you want to use the log file as an INCLUDE file, first remove the log command that appears at the start of the file.
If the specified file exists and you do not specify the /A parameter, the existing contents of the file are overwritten and lost.
Using LOG with no parameters shows the current log file, if any. User input is recorded in the log file until the LOG OFF command is issued.
The LOG command runs asynchronously unless in a macro.
Rules for specifying filenames in the LOG command
Follow these rules when specifying a filename:
• If the filename consists of only alphanumeric characters, slashes, or a period, but the filename does not start with a slash, then you do not have to use quotation marks. For example, includes/file.
• Filenames with a leading slash must be in double quotation marks, for example "/file".
• Filenames containing a backslash must be in single quotation marks. For example '\file' or 'c:\myfiles\file'.Alternatively, you can escape each backslash and use double quotation marks. For example, "c:\\myfiles\\file".
• You can use environment variables to specify paths to a file. For example, if PATHROOT=C:\MYFILES and PATHTEST=TEST1:'$PATHROOT\$PATHTEST\test1.c'
ARM DUI 0175N Copyright © 2002-2011 ARM. All rights reserved. 2-180ID052111 Non-Confidential

RealView Debugger Commands
You can include:— the filename as part of the second environment variable, and then specify
'$PATHROOT\$PATHTEST'.— the path separator in the environment variable, and then specify
'$PATHROOT$PATHTEST'.
Example
The following examples show how to use LOG:
LOG ON='c:\temp\log.txt' Start logging output to the file c:\temp\log.txt, overwriting any existing file of that name.
LOG /A ON="log" Start logging output to the file log.log in the current directory of the debugger, appending the new log text to the file if it already exists.
LOG OFF Stop logging output.
See also• JOURNAL on page 2-172• STDIOLOG on page 2-257• VOPEN on page 2-326.
ARM DUI 0175N Copyright © 2002-2011 ARM. All rights reserved. 2-181ID052111 Non-Confidential

RealView Debugger Commands
2.3.82 MACRO
Enables you to run a predefined or user-defined macro.
Syntax
MACRO macroname(parameters...)
where:
macroname Specifies that name of the macro.
parameters The actual values of parameters required by the macro.
Description
The MACRO command runs a macro. You can run macros in these ways:• as part of the expression in a CE command• as the argument to the MACRO command• as a command on its own.
The CE command enables you to see the result of the macro, as set with the RETURN statement. If the macro does not explicitly return information, or you do not have to know the return value, you can use the macro name as a command. However, in this case the macro is only run if the name does not match any other debugger command or any alias defined with ALIAS. You can therefore use the MACRO command to ensure that the command that is run is the macro, and not a debugger command or an alias.
Note It is recommended that, if you call macros in an INCLUDE file and they do not return a value, you use MACRO to make the call. This ensures that the future operation of the INCLUDE file is not changed if new commands are added to the debugger, for example using ALIAS.
Macros can also be invoked as actions associated with:• a window, for example VMACRO • a breakpoint, for example BREAKEXECUTION• deferred commands, for example BGLOBAL.
Note Macros that are not directly invoked from the command line cannot use execution-type commands, such as GO or STEPINSTR.
Example
The following example shows how to use MACRO:
macro fgetc(50) Read a character from the file associated with the file number 50 and throw it away, with the side effect of advancing the file pointer to the next character.
See also• ALIAS on page 2-21• CEXPRESSION on page 2-87• DEFINE on page 2-105
ARM DUI 0175N Copyright © 2002-2011 ARM. All rights reserved. 2-182ID052111 Non-Confidential

RealView Debugger Commands
• INCLUDE on page 2-168• PRINTSYMBOLS on page 2-208.• SHOW on page 2-248• VMACRO on page 2-324.
ARM DUI 0175N Copyright © 2002-2011 ARM. All rights reserved. 2-183ID052111 Non-Confidential

RealView Debugger Commands
2.3.83 MEMMAP
Enables you to control memory mapping and to define temporary memory map entries.
Syntax
MEMMAP [,qualifier...] [={address|address-range}]
where:
qualifier One of the following:access:text Set the memory access type to text, which must be one of
the predefined strings:RAM Memory can be read and written with no specific
provision.ROM Memory can only be read.WOM Memory can only be written.NOM There is no memory in this region.Flash There is Flash memory in this region. It can
always be read, and it can be written as required using the Flash memory procedure if this is defined. Also, see the fauto, fclk, and fme qualifiers.
Auto There is memory in this region but the type is inferred by the image that is loaded. Memory in regions not defined by the image are assumed to be absent (equivalent to NOM).
Prompt There is memory in this region but you set the type by responding to a prompt when loading an image to it. The default is there is no memory.
asize:size The size of memory accesses, where size is one of:1 1-byte accesses2 2-byte accesses4 4-byte accesses8 8-byte accesses
autosection When loading an image, create memory mappings automatically from the sections of the image. This is default behavior.
define Creates a new memory region using the address range in address. You can specify additional information about the region with the type, access, and description qualifiers.
delete Deletes memory map entries:• if you supply a memory map entry start address in
address, delete that entry• if you supply no arguments, delete all memory maps.
description:text Set the name of this memory map region to text. This is used to label the entry for your own reference.
disable Turns off memory mapping control. The debugger assumes that all memory is RAM.
ARM DUI 0175N Copyright © 2002-2011 ARM. All rights reserved. 2-184ID052111 Non-Confidential

RealView Debugger Commands
enable Turns on memory mapping control. This is the default.The debugger only accesses the target memory in regions that are defined in the map, and uses the access method to determine the operations that are permitted.
fauto Enables the Flash auto-write mode.fclk:speed If fauto is used and the harware requires a clock frequency,
this qualifier specifies the clock in Hz.fme:filename For Flash memory, the Flash programming method file
(*.fme) that is to be used. You must enter the full path and file name, enclosed in double quotation marks.
type:text Set the memory type to text, which must be one of the defined memory type strings for the processor architecture. For ARM processors, the only available type is Any.
updateautomap Update the memory map based on the information provided in the board file. This is automatically done when:• the debugger starts up• the target program stops• the registers that control the map are changed by you.This qualifier enables you to manually request a map update.
address The start address of the memory region, specified as a single address. Use this form with the delete qualifier.
address-range
The memory region, specified as an address range. Use this form with the define qualifier. The start and the end of the range is included in the range.
Note For targets that support the TrustZone technology, prefix the start address with S: or N: to identify the Secure World or Normal World. The prefix S: is the default.
Description
The MEMMAP command enables you to:
• Enable and disable memory mapping.
• Define new temporary memory regions based on type and access rights. The list of valid access rights and types is defined by the Debug Interface and target processor.
• Delete memory map entries.
If you have assigned a BCD file to your Debug Configuration, then memoray mapping is automatically enabled when you connect to a target associated with that Debug Configuration. Any memory map settings in a BCD file assigned to the related Debug Configuration are not changed. If you disable and enable memory mapping, any changes you make to the memory map with MEMMAP are preserved. However, the changes are lost when you disconnect. When you next connect to the target, the original memory map from the assigned BCD file is restored.
ARM DUI 0175N Copyright © 2002-2011 ARM. All rights reserved. 2-185ID052111 Non-Confidential

RealView Debugger Commands
Examples
The following examples show how to use MEMMAP:
memmap,define 0x10000..0x20000 Creates a memory map region from 0x10000 to 0x20000, inclusive. The length of the region is 0x10001 bytes.
memmap,define N:0x10000..0x20000 Creates a memory map region from 0x10000 to 0x20000, inclusive, in the Normal World for a target that supports the TrustZone technology. The length of the region is 0x10001 bytes.
memmap,define 0x10000..+0x10000 Creates a memory map region from 0x10000 to 0x1FFFF, inclusive. The length of the region is 0x10000 bytes.
mmap,def,access:Flash,type:Any,asize:4,descr:"Intel",fme:"C:\myflash\IntegratorAP\flash
_IntegratorAP.fme"=0x24000000..0x25FFFFFF Define a Flash memory region called Intel, using 4-byte memory accesses, and using the Flash programming method file located in C:\myflash\IntegratorAP\flash_IntegratorAP.fme.
mmap,def,access:RAM,type:Any,description:"Data space"=0x0000..0x7FFF Define a read/write memory region called Data space in the first 32KB of memory.
mmap,def,access:ROM,type:Any,descr:"Bootrom"=0x10000..+0xFFFF Define the 64KB region starting at 0x10000 as a read-only region called Bootrom.
mmap,delete =0x10000 Delete the memory map entry that starts at 0x10000, resetting the map for that area to the Auto map.
mmap,delete Delete all memory map entries, resetting the map to the default Auto map over the whole address space.
mmap,disable Disable memory mapping.
Alias
MMAP is an alias of MEMMAP.
See also
• Specifying address ranges on page 2-2
• DUMPMAP on page 2-133
• FLASH on page 2-152
• MEMWINDOW on page 2-188
• SETMEM on page 2-239
• the following in the RealView Debugger User Guide:— Chapter 9 Mapping Target Memory
ARM DUI 0175N Copyright © 2002-2011 ARM. All rights reserved. 2-186ID052111 Non-Confidential

RealView Debugger Commands
• the following in the RealView Debugger Target Configuration Guide:— Chapter 4 Configuring Custom Memory Maps, Registers and Peripherals— Memory mapping Advanced_Information settings reference on page A-20.
ARM DUI 0175N Copyright © 2002-2011 ARM. All rights reserved. 2-187ID052111 Non-Confidential

RealView Debugger Commands
2.3.84 MEMWINDOW
Sets the base address of the Memory view.
Note This command is not available when running in command line mode.
Syntax
MEMWINDOW [{/8|/16|/32}] address
where:
/8 Sets the display format to 8 bits.
/16 Sets the display format to 16 bits.
/32 Sets the display format to 32 bits.
Note If no display format is specified, the default is the native format for the debug
target. For example, the ARM7TDMI processor naturally addresses bytes of 8 bits.
address The base address for the Memory view.
Description
The MEMWINDOW command sets the base address of the Memory view. You can specify the size of each printed value using the qualifiers. If you do not specify a size, the previous size is retained.
Example
The following example shows how to use MEMWINDOW:
memw /8 0x200 Display values in the Memory view as bytes from the address 0x200.
See also• SETMEM on page 2-239.
ARM DUI 0175N Copyright © 2002-2011 ARM. All rights reserved. 2-188ID052111 Non-Confidential

RealView Debugger Commands
2.3.85 MMAP
MMAP is an alias of MEMMAP.
See MEMMAP on page 2-184.
ARM DUI 0175N Copyright © 2002-2011 ARM. All rights reserved. 2-189ID052111 Non-Confidential

RealView Debugger Commands
2.3.86 MODE
Switches the code window between disassembly and source view.
Note This command has no effect when running in command line mode.
Syntax
MODE [{HIGHLEVEL | ASSEMBLY}]
where:
HIGHLEVEL Set the code window to the source view.
ASSEMBLY Set the code window to the disassembly view.
Description
The MODE command enables you to toggle between disassembly and source modes of the Code view, and along with this, the stepping mode of the GOSTEP command. Without an argument, the current mode is toggled. With an argument, the current view mode is set to the indicated mode.
See also• CONTEXT on page 2-96.• DISASSEMBLE on page 2-116.• GOSTEP on page 2-161• LIST on page 2-175.
ARM DUI 0175N Copyright © 2002-2011 ARM. All rights reserved. 2-190ID052111 Non-Confidential

RealView Debugger Commands
2.3.87 MONITOR
Adds the named variable to the list of monitored, or watched, variables, displayed in the Watch view.
Note This command is not available when running in command line mode.
Syntax
MONITOR variable_name
where:
variable_name The name of a variable or expression in the current context, or a path name, using the \\module\proc\variable syntax, for a variable that you are monitoring.
Description
The MONITOR command adds a variable to the list of watched variables displayed in the Watch view of the debugger. This list displays the values of each variable every time the debugger stops, for example at a breakpoint. If the variable is out of scope when the debugger stops, the value is printed as Symbol not found without qualification.
You can add pointer and structure variables to this list. If you do, the values of members and referenced variables can be displayed using the icon next to the pointer name in the Watch view.
Note • MONITOR is equivalent to display, found in some other debuggers.
• You can print the value of a variable using the CEXPRESSION or PRINTVALUE command.
Examples
The following examples show how to use MONITOR:
monitor count Monitor the value of the variable count, displaying the value as an integer.
moni this Monitor the members of the current C++ class, through the C++ class pointer this.
moni \\MAIN_1\ALLOC\maxalloc Monitor the global variable maxalloc from the file main.c.
See also• CEXPRESSION on page 2-87• CONTEXT on page 2-96• DUMP on page 2-131.• NOMONITOR on page 2-192• PRINTVALUE on page 2-211.
ARM DUI 0175N Copyright © 2002-2011 ARM. All rights reserved. 2-191ID052111 Non-Confidential

RealView Debugger Commands
2.3.88 NOMONITOR
Deletes variables from the Watch view.
Note This command is not available when running in command line mode.
Syntax
NOMONITOR [{linenum | linenum..linenum}]
where:
linenum A line number or a line number range for the items to delete.
Description
This NOMONITOR command deletes variables added to the Watch view by MONITOR, using a line number in the view to identify the item to delete.
Line numbers start at 1 for the first line and increment by one for each top-level variable. A structure or array variable that has been expanded using the icon to the left of the variable name,
, counts as only one line. If you reference a line that is not present, the command is ignored.
You can delete several consecutive elements from the Watch view using a line number range, separating the first and last line numbers with a double-dot (..). If the end of a line range is not present, only the lines that are present are deleted.
If you do not specify a line number or line number range, all lines are deleted from the Watch view.
Examples
The following examples show how to use NOMONITOR:
nomonitor 2 Delete the variable on line 2 of the Watch view.
nomonitor 2..4 Delete the variables on lines 2, 3, and 4 of the Watch view.
See also• MONITOR on page 2-191.
ARM DUI 0175N Copyright © 2002-2011 ARM. All rights reserved. 2-192ID052111 Non-Confidential

RealView Debugger Commands
2.3.89 ONSTATE
Executes the associated command when a particular event occurs.
Syntax
ONSTATE [,event] [,timer] [,replace] [command]
where:
event Specifies the event to trigger on from the following list:start Execute the command immediately before program execution starts.stop Execute the command immediately after program execution stops.starttimed
Execute the command immediately before program execution starts and at the specified interval thereafter until the program stops running. The target must support execution of commands on a running target.
tstart An alias of starttimed.stoptimed
Execute the command immediately after program execution stops and at the specified interval thereafter, until the debugger starts the program again or the target is disconnected. Specify the time interval using the ,timer qualifier, with the interval in milliseconds.
tstop An alias of stoptimed.reset If target reset is detected by the debugger, execute the command.
timer A qualifier used to specify the time interval used with timed events. The minimum interval is 10ms.
replace A qualifier used to specify that this ONSTATE command replaces all previous ONSTATE commands for the same event.If this qualifier is not specified, new commands for an event are added to the end of a list of commands to execute when the event happens.
command The debugger command to execute. It can be more than one word.
Description
The ONSTATE command executes a given debugger command when a specified event occurs. If no arguments are provided, ONSTATE lists out the currently registered commands for each type of event.
Examples
The following examples show how to use ONSTATE:
onstate,tstop,timer:5000 ce 0x8000 While the debugger has the target stopped at a five-second interval, execute the command ce 0x8000.
onstate,stop,replace Delete the event commands associated with the stop event.
onstate List the current event commands in the following format:
ARM DUI 0175N Copyright © 2002-2011 ARM. All rights reserved. 2-193ID052111 Non-Confidential

RealView Debugger Commands
On Start: <no commands registered>On Stop: <no commands registered>On Start Timed (every 0 msecs): <no commands registered>On Stop Timed (every 5000 msecs): ce 0x8000On Reset: <no commands registered>
See also• BGLOBAL on page 2-31.
ARM DUI 0175N Copyright © 2002-2011 ARM. All rights reserved. 2-194ID052111 Non-Confidential

RealView Debugger Commands
2.3.90 OPTION
Enables you to change the settings of debugger options for this session, or to display their current settings.
Syntax
OPTION [option = value]
where:
option Specifies a setting from the list:DEMANDLOAD
A flag that controls when the debugger symbol table is loaded. The value must be one of:ON The debug sections of the executable file are loaded into the
debugger symbol table as required, speeding up the target load time. This is the default setting.
OFF The whole symbol table is loaded from the file when the LOAD or RELOAD commands are issued.
ENDIANITY A flag that indicates the endianness of the target. The value must be one of:LITTLE The least significant byte of data is in the lowest address in
memory, or appears first in a word in a data stream.BIG The most significant byte of data is in the lowest address in
memory, or appears last in a word in a data stream.Use this option to temporarily override the Endianess setting in the Debug Configuration for the target.The initial value is set on connection, and depends on the type of target:• For hardware targets, the value is determined by the equivalent
board file setting (Endianess) of the related Debug Configuration.
• For RVISS targets, the value is determined by the Debug Endian setting you selected for the configured target.
FRAMESTOP A flag that controls the behavior of the call stack algorithm. The value must be one of:ON The call stack stops when a stack frame is encountered that
does not have associated debug information. This is the default.
OFF The call stack stops when the end of stack is reached or when the stack frame no longer makes sense.
PENDMODE A flag that controls the pending command behavior:single Enables you to step, run or execute any pendable command
on a processor that is synchronized with a running processor, but is not itself running.
ARM DUI 0175N Copyright © 2002-2011 ARM. All rights reserved. 2-195ID052111 Non-Confidential

RealView Debugger Commands
synchronized Enables you to pend any pendable command on a processor that is synchronized with a running processor, but is not itself running.
RADIX The number base used for numeric input and output. The value must be one of:DECIMAL The default input number base is decimal, base 10, using the
digits 0..9. You can also suffix a decimal number with t. This is the default setting.
HEXADECIMAL The default input number base is hexadecimal, base 16, using the digits 0..9 and a..f, or 0..9 and A..F. You can also prefix a hexadecimal number with 0x or suffix it with h.
Note It is suggested that you use either the 0x prefix or h suffix
for every hexadecimal number. This ensures that the value is valid if you change the radix to decimal. For example, 0x80FF is always valid, but 80FF is invalid for a decimal radix.Also, if you use the h suffix, it is suggested that you prefix the hexadecimal number with a zero digit to avoid confusion with symbol names, for example, 0FADEh.
OUTDEC The output number base is decimal, base 10, using the digits 0..9. This is the default setting.
OUTHEX The output number base is hexadecimal, base 16, is prefixed with 0x and uses the digits 0..9 and A..F.
The number base for a particular session can also be set in the workspace options.
STEPPING A flag that controls the high-level stepping behavior.In the Disassembly tab, lines of interleaved source in the disassembly view are prefixed by either >>> or ---. This flag determines whether lines prefixed with --- are stepped to or stepped over.The value must be one of:ALL Step to the first instruction of the next line of source
prefixed with >>> or ---.STATEMENT Step to the first instruction of the next line of source
prefixed by >>>. That is, step over any lines of source prefixed with ---. This is the default.
value Defines the value that you want to assign to the specified option.
Description
The OPTION command enables you to change the settings of debugger options for this session, or to display their current settings. If you supply no parameters, the command displays the current settings of various options.
Examples
option Displays the current option settings, for example:
ARM DUI 0175N Copyright © 2002-2011 ARM. All rights reserved. 2-196ID052111 Non-Confidential

RealView Debugger Commands
DEMANDLOAD = ONENDIANITY = LITTLEFRAMESTOP = OFFRADIX = DECIMAL, OUTHEXSTEPPING = STATEMENTPENDMODE = SINGLE
option radix=hex The numerical input base is hexadecimal. The following are valid numbers when the default number base is hexadecimal:• 0xAB (AB hex, 171 decimal)• 0AB (AB hex, 171 decimal)• 45 (45 hex, 69 decimal)• 45t (45 decimal)• 45H (45 hex, 69 decimal).and the following are not valid:• AB (does not start with a digit)• 0t45 (t must be at the end).
The following example opens a user-defined window with the name User80 followed by a window named User50:
> option radix=hex> vopen 50> option radix=dec> vopen 50
See also
• CEXPRESSION on page 2-87
• LOAD on page 2-176
• PRINTVALUE on page 2-211
• SETTINGS on page 2-245
• STEPLINE on page 2-261
• STEPO on page 2-265
• the following in the RealView Debugger Target Configuration Guide:— Customizing an RVISS Debug Interface configuration on page 2-13— Debug Configuration Advanced_Information settings reference on page A-10.
ARM DUI 0175N Copyright © 2002-2011 ARM. All rights reserved. 2-197ID052111 Non-Confidential

RealView Debugger Commands
2.3.91 OS action commands
OS action commands.
See AOS_resource_list on page 2-26.
ARM DUI 0175N Copyright © 2002-2011 ARM. All rights reserved. 2-198ID052111 Non-Confidential
RealView Debugger Commands
2.3.92 OS resource commands
OS resource commands.
See DOS_resource_list on page 2-122.
ARM DUI 0175N Copyright © 2002-2011 ARM. All rights reserved. 2-199ID052111 Non-Confidential

RealView Debugger Commands
2.3.93 OSCTRL
Controls debugging on OS-aware connections.
Syntax
OSCTRL ,qualifier
where:
qualifier Specifies the action, and can be one of:addfilter="event;process;module"
Not supported in this release.clearfilter
Not supported in this release.enableeventcapture
Not supported in this release.disableeventcapture
Not supported in this release.enable_rsd
Enable RSD.disable_rsd
Disable RSD.properties_rsd
Report the current RSD properties on the screen.setevents=events
Not supported in this release.
Description
The OSCTRL command enables you to control debugging on OS-aware connections. You can:
• Enable or disable RSD.
• Display the current RSD properties, such as:— the status of the RSD module— settings as specified in your board file (or .bcd file where available)— RSD breakpoints.If you are using the GUI, then the properties are displayed in the Output view.
Examples
The following examples shows how to use OSCTRL:
osctrl,enable_rsd Enables RSD for the current target connection.
See also• AOS_resource_list on page 2-26• BREAKINSTRUCTION on page 2-55• DOS_resource_list on page 2-122
ARM DUI 0175N Copyright © 2002-2011 ARM. All rights reserved. 2-200ID052111 Non-Confidential

RealView Debugger Commands
• HALT on page 2-163• STOP on page 2-267• THREAD on page 2-276.
ARM DUI 0175N Copyright © 2002-2011 ARM. All rights reserved. 2-201ID052111 Non-Confidential
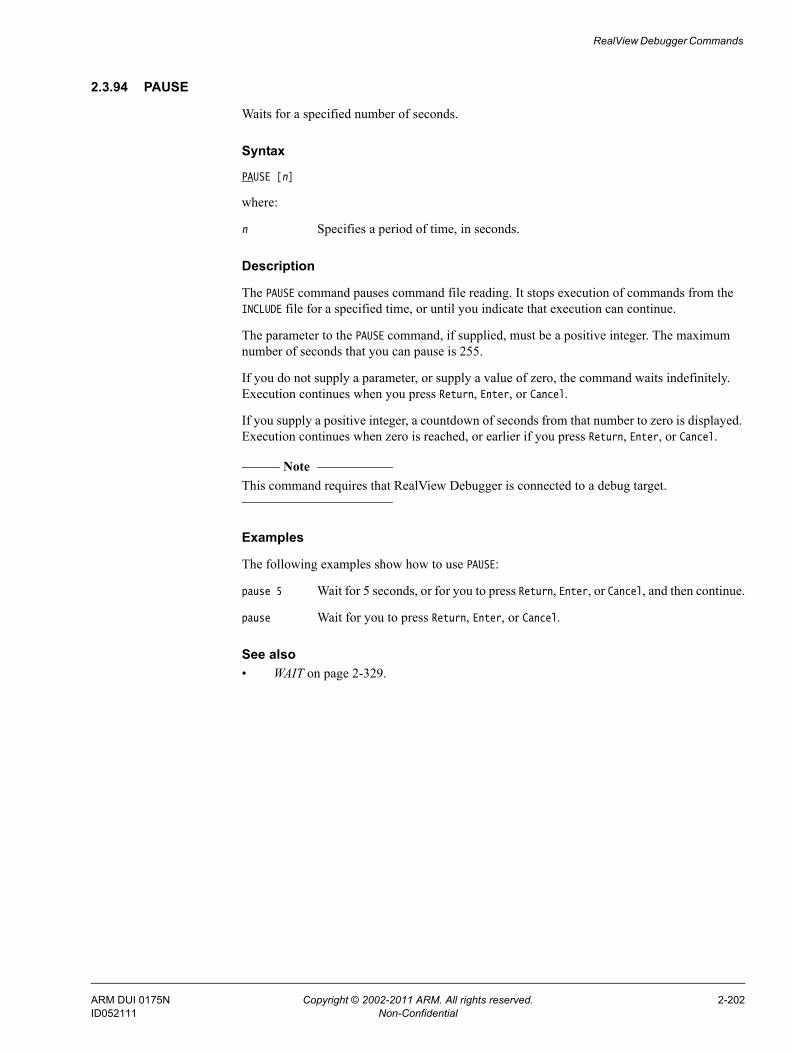
RealView Debugger Commands
2.3.94 PAUSE
Waits for a specified number of seconds.
Syntax
PAUSE [n]
where:
n Specifies a period of time, in seconds.
Description
The PAUSE command pauses command file reading. It stops execution of commands from the INCLUDE file for a specified time, or until you indicate that execution can continue.
The parameter to the PAUSE command, if supplied, must be a positive integer. The maximum number of seconds that you can pause is 255.
If you do not supply a parameter, or supply a value of zero, the command waits indefinitely. Execution continues when you press Return, Enter, or Cancel.
If you supply a positive integer, a countdown of seconds from that number to zero is displayed. Execution continues when zero is reached, or earlier if you press Return, Enter, or Cancel.
Note This command requires that RealView Debugger is connected to a debug target.
Examples
The following examples show how to use PAUSE:
pause 5 Wait for 5 seconds, or for you to press Return, Enter, or Cancel, and then continue.
pause Wait for you to press Return, Enter, or Cancel.
See also• WAIT on page 2-329.
ARM DUI 0175N Copyright © 2002-2011 ARM. All rights reserved. 2-202ID052111 Non-Confidential

RealView Debugger Commands
2.3.95 PRINTDSM
Displays disassembled target memory at a specified address or between a range of addresses.
Syntax
PRINTDSM { address | addressrange }
where:
address The address containing the line of code to be disassembled. For example, 0x8000.
addressrange The start and end addresses containing the code to be disassembled. For example, 0x8000..0x8FFF specifies addresses in the address range 0x8000 to 0x8FFF.
Description
The PRINTDSM command prints disassembled target memory at the specified address, or in the specified address range:• if you are using the GUI, then output is sent to the Cmd tab of the Output view• if you have a journal file open, the disassembly is also sent to that file.
The output is in the same format as the disassmbly in the Disassembly tab of the Code window. Use the DISASSEMBLE command to change the format.
Note This command requires that RealView Debugger is connected to a debug target.
Examples
The following examples use the dhrystone image to show how to use PRINTDSM:
printdsm 0x8000..0x800F Prints a disassembled version of the code from 0x8000 to 0x800F, for example: __main: RW:00008000 EA000000 B __scatterload_rt2 <0x8008> RW:00008004 EA00069C B __rt_entry <0x9a7c> __scatterload_rt2: RW:00008008 E28F0028 ADR r0,{pc}+0x30 ; 0x8038 RW:0000800C E8900C00 LDM r0,{r10,r11}
printdsm main..+16 Prints a disassembled version of the 16 bytes of code starting from the address of function main, for example: main: RW:00008200 E92D47F0 PUSH {r4-r10,r14} RW:00008204 E24DD070 SUB r13,r13,#0x70 RW:00008208 E3A00030 MOV r0,#0x30 RW:0000820C EB00040E BL malloc <0x924c>
See also• Specifying address ranges on page 2-2• DISASSEMBLE on page 2-116• DUMPMAP on page 2-133• DUMP on page 2-131
ARM DUI 0175N Copyright © 2002-2011 ARM. All rights reserved. 2-203ID052111 Non-Confidential

RealView Debugger Commands
• SETTINGS on page 2-245.
ARM DUI 0175N Copyright © 2002-2011 ARM. All rights reserved. 2-204ID052111 Non-Confidential

RealView Debugger Commands
2.3.96 PRINTF
Displays formatted text on the screen.
Syntax
PRINTF "format_string" [,argument]...
where:
format_string
Is a format specification conforming to C/C++ rules with extensions. It might be a text message, or it can describe how one or more arguments are to be presented. See Format string syntax for details.
Note Only the first 256 characters of the string are displayed, even after formatting is
applied.
argument Is a list of values that you want displayed in the way described by the specified format.
Description
The PRINTF command uses a special format string to write text and numbers to the screen. If you are using the GUI, then they are displayed in the Output view. It works in a similar way to the ANSI C standard library function printf(), with a number of extensions to better support the debugger environment.
Format string syntax
The message in format_string is a string. If there are no % characters in the string, the message is written out and any arguments are ignored. The % symbol is used to indicate the start of an argument conversion specification.
The syntax of the specification is:
%[flag][fieldwidth][precision][lenmod]convspec
where:
flag An optional conversion modification flag -. If specified, the result is left-justified within the field width. If not specified, the result is right-justified.
fieldwidth An optional minimum field width specified in decimal.
precision An optional precision specified in decimal, with a preceding . (period character) to identify it.
lenmod An optional argument length specifier:h a 16-bit valuel a 32-bit valuell a 64-bit value
convspec The possible conversion specifier characters are:% A literal % character.
ARM DUI 0175N Copyright © 2002-2011 ARM. All rights reserved. 2-205ID052111 Non-Confidential

RealView Debugger Commands
m The mnemonic for the processor instruction in memory pointed to by the argument. The expansion includes a newline character. The information that is printed includes:• the memory address in hexadecimal• the memory contents in hexadecimal• the instruction mnemonic and arguments• an ASCII representation of the memory contents, if printable.
H A line from the current source file, where the argument is the line number.
h A line from the current source file, where the argument is a target memory address.
d, i, or u An integer argument printed in decimal. d and i are equivalent, and indicate a signed integer. u is used for unsigned integers.
x or X An integer argument printed in unsigned hexadecimal. x indicates that the letters a to f are used for the extra digits, and X indicates that the letters A to F are used.
c A single character argument.s A string argument. The string itself can be stored on the host or on the
target.p A pointer argument. The value of the pointer is printed in hexadecimal.e, E, f, g, or G
A floating point argument, printed in scientific notation, fixed point notation, or the shorter of the two. The capital letter forms use a capital E in scientific notation rather than an e.
Rules
The following rules apply to the use of the PRINTF command:
• if there are too many arguments, some of them are not printed
• if there are too few arguments (that is, there are more conversion specifiers in the format string than there are arguments after the format string), the string <invalid value> is output instead
• if the argument type does not correspond to its conversion field specification, arguments are converted incorrectly.
Examples
The following examples show how to use PRINTF:
printf "Found %d errors\n", ecount Print out a message, substituting the value of ecount. So, if ecount had the value 5, the message is:Found 5 errors
printf "Completion %\n", runs Print out a message that includes a single percent symbol. The argument runs is ignored, so the message is:Completion %
ARM DUI 0175N Copyright © 2002-2011 ARM. All rights reserved. 2-206ID052111 Non-Confidential

RealView Debugger Commands
printf "%h\n", #82 Print out a source file line 82. For example:REG char Ch_Index;
printf "Var is %hd.\n", short_var Print out the variable short short_var. For example:Var is 22.
printf "Instruction1 %m\nInstruction2 %m", 0x100, 0x104 Print out the disassembly of the contents of location 0x100, two newlines and the contents of location 0x104. For example, it might print:Instruction1 000000100 20011410 ANDCS r1,r1,r0,LSL r4
Instruction2 000000104 20011412 ANDCS r1,r1,r2,LSL r4
printf "Average execution time %f secs\n", totaltime / (double)20 Print out a message, substituting the value of the expression. So, if totaltime had the value 523.3, the message is:Average execution time 26.165 secs
See also
• CEXPRESSION on page 2-87
• FPRINTF on page 2-156
• PRINTTYPE on page 2-210
• PRINTVALUE on page 2-211
• the following in the RealView Debugger User Guide:— Using variable substitution in commands within a macro on page 16-6.
ARM DUI 0175N Copyright © 2002-2011 ARM. All rights reserved. 2-207ID052111 Non-Confidential

RealView Debugger Commands
2.3.97 PRINTSYMBOLS
Displays information about the specified symbol including its name, data type, storage class, and memory location.
Syntax
PRINTSYMBOLS [{/C|/D|/E|/F|/M|/R|/T|/W}] [name[*]] [{\|\\|*}]
where:
/C Displays functions and labels.
/D Displays data and macros.
/E Displays any symbol declaration conflicts.Mismatch errors occur when global variables are declared with different types in different modules or global functions are declared with different return types or argument counts in different modules.
/F Displays symbols in all roots (all contexts). All matching names in all roots are shown.
/M Displays modules and module names.
/R Displays reserved symbols, registers, internal variables, and any memory mapped registers.
/T Displays types.
/W Displays symbols in wide format (names only).
name Specifies the symbolic unit:• symbol name• source code line number.The wildcard character (*) can be used to match the first zero or more letters of a name. The * must be the last character in the partial name.
* An asterisk as the only parameter displays all symbols in the current context.
\ Displays information about all modules.
\\ Displays information about debugger symbols.
Description
The PRINTSYMBOLS command displays information about the specified symbol including its name, data type, storage class, and memory location. If you want to see all modules in your current root, use only \ and \\. If you want to see all symbols in a particular function or module, append \ to the module name.
PRINTSYMBOLS with no options specified acts the same as the CONTEXT command. Also, PRINTSYMBOLS /F acts the same as CONTEXT /F.
Note The symbol name must be specified in the correct case, even when a wildcard is used.
ARM DUI 0175N Copyright © 2002-2011 ARM. All rights reserved. 2-208ID052111 Non-Confidential

RealView Debugger Commands
Examples
The following examples show how to use PRINTSYMBOLS:
printsymbols funct1\ Prints the names of all symbols within funct1, for example, all local variables.
ps #146.2 Prints details if the second statement on line 146 of the current source file. For example, for the dhry_1.c source file of the dhrystone image this command prints:Module DHRY_1 Line 146..146 at 0x00008318
printsymbols /m * Prints the names of all modules in the image. For example, for the dhrystone image this command prints:@dhrystone\\DHRY_H : Codeless Include File.@dhrystone\\TIME_H : Codeless Include File.@dhrystone\\DHRY_1 : High level module. Code section = 0x00008278 to 0x00008FB3 Code section = 0x0000D8BC to 0x0000D8BF@dhrystone\\DHRY_2 : NON-LOADED module. Code section = 0x0000807C to 0x0000826F@dhrystone\\STARTUP_S : Assembly level module. Code section = 0x00008000 to 0x00008007@dhrystone\\SCATTER_S : Assembly level module. Code section = 0x00008008 to 0x0000807B@dhrystone\\SYSAPP : Assembly level module. Code section = 0x00008FB4 to 0x00008FF3 Code section = 0x0000AE20 to 0x0000AEE7 Code section = 0x0000D07C to 0x0000D093...
Alias
PS is an alias of PRINTSYMBOLS.
See also• Constructing expressions on page 1-14• CEXPRESSION on page 2-87• CONTEXT on page 2-96• FPRINTF on page 2-156• PRINTF on page 2-205• PRINTTYPE on page 2-210• PRINTVALUE on page 2-211• REGINFO on page 2-223.
ARM DUI 0175N Copyright © 2002-2011 ARM. All rights reserved. 2-209ID052111 Non-Confidential

RealView Debugger Commands
2.3.98 PRINTTYPE
Displays language type information for a symbol.
Syntax
PRINTTYPE {symbol_name | expression}
where:
symbol_name Specifies the name of a symbol.
expression Specifies a debugger expression.
Description
The PRINTTYPE command displays language type information for a symbol or debugger expression. The information is displayed in a style similar to the source language.
Note The symbol name must be specified in the correct case, even if a wildcard is used for part of the name.
Examples
The following examples show how to use PRINTTYPE:
printtype Enumeration Shows details of the enum type Enumeration, defined by the dhrystone image: typedef enum Enumeration { , Ident_1:0 Ident_2:1, Ident_3:2, Ident_4:3, Ident_5:4 } Enumeration; -- Defined within module DHRY_H
printtype ptr->databuf Shows type details of a field referenced by the pointer databuf.
Alias
PT is an alias of PRINTTYPE.
See also• ADD on page 2-16• BROWSE on page 2-79• DELETE on page 2-109• FPRINTF on page 2-156• PRINTF on page 2-205• PRINTSYMBOLS on page 2-208• PRINTVALUE on page 2-211• REGINFO on page 2-223.
ARM DUI 0175N Copyright © 2002-2011 ARM. All rights reserved. 2-210ID052111 Non-Confidential

RealView Debugger Commands
2.3.99 PRINTVALUE
Displays the value of a variable or expression.
Syntax
PRINTVALUE [{/H|/MB|/R|/S|/T}] {expression | expression_range}
where:
/T Displays the value in decimal format.
/H Displays the value in hexadecimal format.
/MB Displays multibyte characters using the current encoding, for example UTF-8. You must use the GUI to set up the character encoding.
/R Suppresses the display of the address when you specify a variable in an image.
/S Suppresses the display of characters in the string, but displays the character pointer.
expression Specifies an expression to be displayed. If you are using the GUI, then the expression is displayed in the Output view.
expression_range
Specifies an expression range to be displayed. If you are using the GUI, the expressions range is displayed in the Output view.
Description
The PRINTVALUE command prints to the screen the value of a variable or expression using its natural type for formatting. It can display all of aggregate types, such as structures, and expressions can be type cast to display it in a different format. All values that make up a complex type are printed. If you are using the GUI, then they are displayed in the Output view.
Each value within an expression_range is displayed according to the base type if one exists. All expressions printed with this command are displayed according to their type. If the type of the expression is unknown, it defaults to type byte.
The PRINTVALUE command runs synchronously unless access to target memory is required and background access is not possible. Use the WAIT command to force it to run synchronously.
The following messages can be displayed by the PRINTVALUE command:
<ENUM: xx> Invalid enum value, xx = value.
<INFINITY> Floating-point value is infinity.
<NAN> Not a number. A floating-point error.
Examples
The following examples show how to use PRINTVALUE:
printvalue /mb pchUTF8 Prints the multibyte character variable pchUTF8, encoded in UTF-8, as multibyte characters. Without the /mb switch the characters are displayed as escaped characters.
ARM DUI 0175N Copyright © 2002-2011 ARM. All rights reserved. 2-211ID052111 Non-Confidential

RealView Debugger Commands
printvalue *Ptr_Glob The command can be used to print the full contents of a record, for example this instance from a run of dhrystone:
printv *Ptr_Glob 0x00011540 = {Ptr_Comp=(record *)0x00011508,Discr=Ident_1,variant={var_1= {Enum_Comp=Ident_3,Int_Comp=17,Str_Comp="DHRYSTONE PROG RAM, SOME STRING"},var_2={E_Comp_2=Ident_3,Str_2_Comp="C \x02\xC7\x11"},var_3={Ch_1_Comp='\x02',Ch_2_Comp='C'}}}
Note For the same expression, CEXPRESSION prints the address, not the full value:
> ce *Ptr_Glob Result is: data address 0x00011540
p Ptr_Glob Printing the value of the pointer tells you the address of the pointer, its type and the value stored there:0x0000EBBC = (record *)0x00011540
Note For the same expression, CEXPRESSION prints the value of the pointer, but not its
type and address:> ce Ptr_Glob Result is: data address 0x00011540
See also• CEXPRESSION on page 2-87• FPRINTF on page 2-156• MONITOR on page 2-191• PRINTF on page 2-205• PRINTSYMBOLS on page 2-208• PRINTTYPE on page 2-210• REGINFO on page 2-223• the following in the RealView Debugger Essentials Guide:
— Localizing the RealView Debugger interface on page 2-20.
ARM DUI 0175N Copyright © 2002-2011 ARM. All rights reserved. 2-212ID052111 Non-Confidential

RealView Debugger Commands
2.3.100 PROPERTIES
PROPERTIES is an alias of SETTINGS.
See SETTINGS on page 2-245.
ARM DUI 0175N Copyright © 2002-2011 ARM. All rights reserved. 2-213ID052111 Non-Confidential

RealView Debugger Commands
2.3.101 PS
PS is an alias of PRINTSYMBOLS.
See PRINTSYMBOLS on page 2-208.
ARM DUI 0175N Copyright © 2002-2011 ARM. All rights reserved. 2-214ID052111 Non-Confidential

RealView Debugger Commands
2.3.102 PT
PT is an alias of PRINTTYPE.
See PRINTTYPE on page 2-210.
ARM DUI 0175N Copyright © 2002-2011 ARM. All rights reserved. 2-215ID052111 Non-Confidential

RealView Debugger Commands
2.3.103 PWD
Displays the current working directory.
See also• CWD on page 2-101• the following in the RealView Debugger User Guide:
— The current working directory on page 2-10.
ARM DUI 0175N Copyright © 2002-2011 ARM. All rights reserved. 2-216ID052111 Non-Confidential

RealView Debugger Commands
2.3.104 QUIT
Exits the debugger.
Syntax
QUIT [Y]
where:
Y Exits the debugger without displaying a confirmation dialog. Include this when using the QUIT command in a batch file.
Description
The QUIT command exits the debugger. It displays a dialog box where you can confirm the operation.
If you have any unsaved changes, you are prompted to save these before the debugger exits.
Be aware of the following:
• If any connections are established, then those connections are stored in the current workspace file. RealView Debugger attempts to establish the connections when you next start a debugging session.
• If an image is loaded that has breakpoints set, and the auto save breakpoints feature is enabled, then the breakpoints are stored in a file. This file is saved in the same location as the image.
Restrictions on the use of QUIT
The QUIT command is not allowed in a macro.
Examples
The following examples show how to use QUIT:
quit Exits the debugger. Displays a dialog box where you can choose to confirm or abort the operation. If you choose to exit, the debugger warns of any unsaved changes.
quit y Exits the debugger without additional confirmation. However, the debugger warns of any unsaved changes.
See also
• UNLOAD on page 2-316
• the following in the RealView Debugger User Guide:— Storing connections when exiting RealView Debugger on page 3-60— Enabling the auto save breakpoints feature on page 11-12.
ARM DUI 0175N Copyright © 2002-2011 ARM. All rights reserved. 2-217ID052111 Non-Confidential

RealView Debugger Commands
2.3.105 READBOARDFILE
Reads the specified board file.
Syntax
READBOARDFILE [,auto] [=board-filename]
where:
auto Is an optional qualifier. If you specify auto the command does not read the specified board file if it is the same as the last one read.
board-filename
Specifies the name of the board file to read. This can be enclosed in single or double quotation marks.You can include one or more environment variables in the filename. For example, if MYPATH defines the location C:\Myfiles, you can specify:readboardfile ="$MYPATH\\gizmo.brd"
Description
The READBOARDFILE command reads the specified board file. If you do not specify a board file, the command rereads the current board file. If you do not specify a board file and no board file has been read, the command reads the default rvdebug.brd.
The READBOARDFILE command runs synchronously.
Examples
The following example shows how to use READBOARDFILE:
readboardfile ='c:\sources\gizmo.brd' Read the file gizmo.brd into memory, replacing the current file.
See also• BOARD on page 2-35• DELBOARD on page 2-108• EDITBOARDFILE on page 2-136.
ARM DUI 0175N Copyright © 2002-2011 ARM. All rights reserved. 2-218ID052111 Non-Confidential

RealView Debugger Commands
2.3.106 READFILE
Reads a file into target memory.
Syntax
READFILE ,obj [,nowarn] filename [[=]address]
READFILE ,{raw|raw8|raw16|raw32} [,nowarn] filename [=]address
READFILE ,ascii[,opts] [,nowarn] filename [[=]address|address-range]
where:
obj The file is an executable file in the standard target format. For ARM targets, this is ARM-ELF.
raw Read the file as raw data, using the most efficient access size for the target.
Note Use this option in situations where the length of data is not a multiple of the
specified access size.
raw8 Read the file as raw data, one byte for each byte of memory.
raw16 Read the file as raw data, 16 bits for each 16 bits of memory.
raw32 Read the file as raw data, 32 bits for each 32 bits of memory.
Note You must specify an address with all raw qualifiers.
ascii The file is a stream of ASCII digits separated by whitespace. The interpretation of the digits is specified by other qualifiers (see the opts qualifier). The starting address of the file must be specified in a one line header in one of the following ways:[start] The start address.[start,end] The start address, a comma, and the end address.[start,+len] The start address, a comma, and the length.[start,end,size] The start address, a comma, the end address, a comma, and
the size of each value (8, 16, or 32 bits). This is the format used by the WRITEFILE command.
If the size of the items in the file is not specified, the debugger determines the size by examining the number of white-space separated significant digits in the first data value. For example, if the first data value is 00A0, the size is set to 16-bits.
opts Optional qualifiers available for use with the ascii qualifier:byte The file is a stream of 8-bit values that are written to target memory
without extra interpretation.half_word | word
The file is a stream of 16-bit values.long The file is a stream of 32-bit values.
nowarn Suppress the display of the large file warning messages, such as:
ARM DUI 0175N Copyright © 2002-2011 ARM. All rights reserved. 2-219ID052111 Non-Confidential

RealView Debugger Commands
Downloading n bytes can take a long time. (Hint: Choosing a larger access
size may reduce this time) Do it anyway?
filename The name of the file to be read. The file can be one that you have written with the WRITEFILE command.The filename must be enclosed in either single or double quotation marks if a pathname is specified, and the pathname must already exist on your system. You can include one or more environment variables in the filename. For example, if MYPATH defines the location C:\Myfiles, you can specify:readfile,raw '$MYPATH\myfile.dat' 0x8000
address The starting address in target memory for the load.
address-range
For an ascii file type, the address range to be loaded. The load terminates when the end of the address range is reached.
Note For targets that support the TrustZone technology, you can prefix the address or
address range with S: or N: to indicate Secure World or Normal World addresses.
Description
The READFILE command reads a file, performs a format conversion on its contents if required, and loads the resulting information into target memory.
The types of file and file formats supported depend on the target processor and any loaded DLLs. The type of memory assumed depends on the target processor. For example, ARM architecture-based processors have byte addressable memory.
Examples
The following examples show how to use READFILE:
readfile ,obj 'c:\temp\file.exe' Reads the contents of the named executable file into memory at its specified start address.
readfile ,ascii,long "c:\temp\file.txt" =0xA000 Reads the contents of the named text file to address 0xA000 in memory. Values are written as words using the target endianness to translate values in the file into bytes in target memory. The file contents can look, for example, like this:[0x8000,0x8FFF,32]E28F8090 E898000F E0800008 E0811008 E0822008 E0833008 E240B001 E242C001 E1500001 0A00000E E8B00070 E1540005...
See also• FILL on page 2-149• FLASH on page 2-152• LOAD on page 2-176• SETMEM on page 2-239• TEST on page 2-273
ARM DUI 0175N Copyright © 2002-2011 ARM. All rights reserved. 2-220ID052111 Non-Confidential

RealView Debugger Commands
• VERIFYFILE on page 2-322• WRITEFILE on page 2-333.
ARM DUI 0175N Copyright © 2002-2011 ARM. All rights reserved. 2-221ID052111 Non-Confidential

RealView Debugger Commands
2.3.107 REEXEC
REEXEC is an alias of RESTART.
See RESTART on page 2-230.
ARM DUI 0175N Copyright © 2002-2011 ARM. All rights reserved. 2-222ID052111 Non-Confidential

RealView Debugger Commands
2.3.108 REGINFO
Displays a description of the registers available for the current target.
Syntax
REGINFO [{,qualifier}] [=address-range] [{;windowid | ;fileid}]
where:
all Displays information for all register types (target, user, and access).
target Displays information for the registers on the connected target.
user Displays information for the memory mapped registers defined in one or more BCD files attached to the target connection, if any.
access Displays information for the target access registers.
details Displays additional information for each register. The information displayed depends on the specified register type (target, user, or access).
bitfields Displays information for any bit fields associated with the specified register type (target, user, or access).
match:[@]register_name
Displays information for all registers with names that contain the given string. The string can form any part of the name. For example, match:SPSR matches all register names beginning with SPSR.
address-range
Displays information for any memory mapped registers within the specified address range.
,windowid | ,fileid
Identifies the window or file where the command is to send the output.If you do not supply a ,windowid or ,fileid parameter, or there is no window or file associated with the ID, the output is displayed on the screen. If you are using the GUI, then the output is displayed in the Output view.
Description
The REGINFO command enables you to view the list of available registers for the current connection. You can list:
• All registers.
• Registers only for the connected target.
• User-defined memory mapped register and peripheral registers defined in any BCD files associated with the current connection.
• Target access registers.
By default, a summary of the registers is displayed. However, you can choose to display:
• More detailed information for each register, such as:— the size (in bytes)— type of value (such as, signed char and unsigned long)
ARM DUI 0175N Copyright © 2002-2011 ARM. All rights reserved. 2-223ID052111 Non-Confidential

RealView Debugger Commands
— type of register: core register, memory-mapped register, target access register.
• The bitfields for any registers that have them (such as the CPSR register).
Examples
The following examples show how to use REGINFO:
reginfo,match:@SPSR Lists all the SPSR registers:Register @SPSR_FIQ (display name "SPSR")Register @SPSR_SVC (display name "SPSR")Register @SPSR_ABT (display name "SPSR")Register @SPSR_IRQ (display name "SPSR")Register @SPSR_UND (display name "SPSR")
reginfo,match:SPSR_SVC,bitfields Displays the following bit field information for the SPSR_SVC register:
Register @SPSR_SVC (display name "SPSR") bit-fields: name: @SPSR_SVC_FLG display name: "NZCV" mask: ( >> 28) & 0xf name: @SPSR_SVC_FLGE display name: "NZCVQ" mask: ( >> 27) & 0x1f name: @SPSR_SVC_N display name: "N" mask: ( >> 31) & 0x1 name: @SPSR_SVC_Z display name: "Z" mask: ( >> 30) & 0x1 name: @SPSR_SVC_C display name: "C" mask: ( >> 29) & 0x1 name: @SPSR_SVC_V display name: "V" mask: ( >> 28) & 0x1 name: @SPSR_SVC_Q display name: "Q" mask: ( >> 27) & 0x1 name: @SPSR_SVC_GE display name: "GE" mask: ( >> 16) & 0xf name: @SPSR_SVC_IT display name: "IT" mask: ( >> 10) & 0x1803f name: @SPSR_SVC_E display name: "E" mask: ( >> 9) & 0x1 name: @SPSR_SVC_A display name: "A" mask: ( >> 8) & 0x1 name: @SPSR_SVC_I display name: "IRQ" mask: ( >> 7) & 0x1 name: @SPSR_SVC_F display name: "FIQ" mask: ( >> 6) & 0x1 name: @SPSR_SVC_T display name: "STATE" mask: ( >> 5) & 0x1 name: @SPSR_SVC_J display name: "BYTECODE" mask: ( >> 24) & 0x1 name: @SPSR_SVC_JT display name: "STATE" mask: ( >> 0) & 0x1000020 name: @SPSR_SVC_MODE display name: "MODE" mask: ( >> 0) & 0x1f
See Also• Window and file numbers on page 1-5• CEXPRESSION on page 2-87• FPRINTF on page 2-156• PRINTF on page 2-205• PRINTSYMBOLS on page 2-208• PRINTTYPE on page 2-210• PRINTVALUE on page 2-211• SETREG on page 2-242.
ARM DUI 0175N Copyright © 2002-2011 ARM. All rights reserved. 2-224ID052111 Non-Confidential

RealView Debugger Commands
2.3.109 RELOAD
Loads a linked program image containing program code and data.
Syntax
RELOAD [{,qualifier...}] [{filename | file_num}] [=task]
where:
qualifier If specified, qualifier must be one of the following:all Loads all the files in the file list.symbols_only Reloads the symbols only, not the executable image.image_only Reloads the executable image only, not the symbols.force Forces the load to proceed even if it might be aborted
because, for example, the file being loaded overlaps a file already loaded.
filename | file_num
Specifies a file to be reloaded. If you do not specify a file, the whole process is reloaded.Use the DTFILE command to list details of the file or files that are associated with the current connection. The details include:• the file number, which is shown at the start of the output for each file listed
by the text File file_num• the filename and path.
task Specifies the task that is to start. This parameter is required only when the target is running multiple tasks.
Description
The RELOAD command loads or reloads an absolute file image containing program code and data. You can load a specified file, or one or more files from the file list. The PC is reset to the start location.
If any file being reloaded is already loaded, it is unloaded before being loaded again. If the symbols for a given file are already loaded, they are not reloaded unless the file modification date has changed.
You can reload symbols only, or the image only. For details see the descriptions of the command qualifiers.
The effect of reloading the system file is defined by the Debug Interface.
Note If you reload an image that requires arguments, you must use the ARGUMENTS command to specify them before running the image. Alternatively, use the LOAD command and specify the arguments as part of that command.
See also• ADDFILE on page 2-19• ARGUMENTS on page 2-27• DTFILE on page 2-128
ARM DUI 0175N Copyright © 2002-2011 ARM. All rights reserved. 2-225ID052111 Non-Confidential

RealView Debugger Commands
• LOAD on page 2-176• READFILE on page 2-219• UNLOAD on page 2-316.
ARM DUI 0175N Copyright © 2002-2011 ARM. All rights reserved. 2-226ID052111 Non-Confidential

RealView Debugger Commands
2.3.110 RESET
Performs or simulates a target processor reset.
Syntax
RESET [,cleanup] [=resource]
where:
cleanup Use this command qualifier only with operating systems that support it. Its purpose is to cleanup thread states and other OS issues.
resource Specifies the target processor that is to be reset, for example, @[email protected] must specify @RVI only if the target identifier is not unique. For example, you might have another @ARM966E-S_0 target in a different Debug Configuration.
Description
This command is used to reset the target processor and peripherals on the board. If a hardware reset is not possible, the command places the processor in a state that is as close as possible to the hardware reset state. The behavior varies from one processor type to another and from one Debug Interface type to another. Check with the manufacturer for details. Variables are not reset to their original values, because memory is not re-initialized
The RESET command runs synchronously.
Alias
WARMSTART is an alias of RESET.
Examples
The following examples show how to use RESET:
reset @ARM966E-S_0@RVI Resets the ARM966E-S™ target processor on the RVI Debug Configuration.
reset,cleanup @ARM966E-S_0 Resets the ARM966E-S processor, and cleans up the thread states and any other OS issues on the processor.
See also• RESTART on page 2-230.
ARM DUI 0175N Copyright © 2002-2011 ARM. All rights reserved. 2-227ID052111 Non-Confidential

RealView Debugger Commands
2.3.111 RESETBREAKS
Resets breakpoint pass counters and and-then conditions.
Syntax
resetbreaks ,a {breakpoint_address|breakpoint_address_range} [=thread,...]
resetbreaks [,h] [break_num,...] [=thread,...]
where:
,a breakpoint_address
Specifies the address of the breakpoint to be reset.
,a breakpoint_address_range
Specifies that all breakpoints within the address range are to be reset. See Specifying address ranges on page 2-2 for details on how to specify an address range.
break_num Specifies one or more breakpoints to have their pass counters reset to zero.You identify breakpoints by their position in the list displayed by the DTBREAK command.
thread Specifies one or more threads to which this command applies. Other threads remain unaffected. If you do not supply this parameter, then breakpoints on all threads are reset.You do not have to supply this parameter if the processor has only a single execution thread or the OS extension is not enabled.
h Do not use this qualifier. It is for debugger internal use only.
Description
The RESETBREAKS command resets breakpoint pass counters. The pass counters are the counts of the number of times breakpoints have been triggered, as shown by the DTBREAK command. It also resets the and and and-then condition state so that the first breakpoint is again required before the second can trigger.
If you issue a RESETBREAKS command without specifying a breakpoint address or breakpoint number, the pass counter, and and and-then conditions for all the current pass counters are reset to zero.
You might typically issue a RESETBREAKS command after a RELOAD command, so that the counts all begin again from zero when you restart execution.
Examples
The following examples show how to use RESETBREAKS:
resetbreaks,a 0x8008
Resests the pass counters for the breakpoint at the address 0x8008.
resetbreaks,a 0x8008..0x8024
Enables the pass counters for all breakpoints in the address range 0x8008..0x8024.
ARM DUI 0175N Copyright © 2002-2011 ARM. All rights reserved. 2-228ID052111 Non-Confidential

RealView Debugger Commands
resetbreaks 4,6,8 Resets the pass counters and conditions of the fourth, sixth, and eighth breakpoints in the current list of breakpoints.
resetbreaks =2 Resets all the pass counters and conditions in thread 2.
Alias
RSTBREAKS is an alias of RESETBREAKS.
See also• BREAKEXECUTION on page 2-47• BREAKINSTRUCTION on page 2-55• BREAKREAD on page 2-61• BREAKWRITE on page 2-70• CLEARBREAK on page 2-89• DISABLEBREAK on page 2-114• DTBREAK on page 2-126• ENABLEBREAK on page 2-140• RELOAD on page 2-225.
ARM DUI 0175N Copyright © 2002-2011 ARM. All rights reserved. 2-229ID052111 Non-Confidential

RealView Debugger Commands
2.3.112 RESTART
Resets the PC to the program starting address.
Syntax
RESTART [=task]
where:
task Specifies the task that is to start. This parameter is required when the target is running multiple tasks and the OS extension is enabled.
Note This argument is not available in this release.
Description
The RESTART command resets the PC to the program starting address, so that the next GO, STEP or GOSTEP command restarts execution at the beginning of the program. The RESTART command does not reset the values of variables, the stack pointer is not reset and breakpoints are not cleared. If required, RESTART can be configured to reload the image using the SETTINGS command. All declared I/O ports are unaffected. You can use the ARGUMENTS command to change the arguments passed to the process for a restart.
Note • If the program relies on the initial values of variables in initialized data areas, and those
variables are modified during program execution, then using RESTART to rerun the program fails.
• The RESTART command might behave differently if you are using the OS extension to RealView Debugger. See the instructions for the specific OS extension for more details.
The RESTART command runs synchronously.
Alias
REEXEC is an alias of RESTART.
See also• ARGUMENTS on page 2-27• GO on page 2-159• RELOAD on page 2-225.
ARM DUI 0175N Copyright © 2002-2011 ARM. All rights reserved. 2-230ID052111 Non-Confidential

RealView Debugger Commands
2.3.113 RSTBREAKS
RSTBREAKS is an alias of RESETBREAKS.
See RESETBREAKS on page 2-228.
ARM DUI 0175N Copyright © 2002-2011 ARM. All rights reserved. 2-231ID052111 Non-Confidential

RealView Debugger Commands
2.3.114 RUN
Starts execution using a specific mode, or sets the default mode used by the GO command.
Syntax
RUN
RUN ,setdefault
RUN [,setdefault],{debug|normal}
RUN [,setdefault],{clock|benchmark}
RUN [,setdefault],{free|user}
where:
setdefault Set the default mode for the GO command to the mode specified by this command, but do not start execution.If no mode is specified, then the default mode (debug or normal) is set.
debug | normal
Run with breakpoints active. This is the default mode.
clock | benchmark
Run with breakpoint timing hardware enabled. This mode is only available on some targets.
free | user Run at full speed, with breakpoints disabled. Depending on the target, hardware, this might not be any faster than normal mode.
Description
If supported by the target, the RUN command starts execution using a specific mode, or sets the default mode used by the GO command.
If you supply no parameters, RUN displays the current mode.
Examples
The following examples show how to use RUN:
run,setdefault,normal Set the default run mode to normal, so that the next GO command for this connection runs the target in the normal way.
run,free Run the target with breakpoints disabled.
See also• GO on page 2-159• HALT on page 2-163• STOP on page 2-267.
ARM DUI 0175N Copyright © 2002-2011 ARM. All rights reserved. 2-232ID052111 Non-Confidential

RealView Debugger Commands
2.3.115 RVDCONTEXT
Enables or disables the auto save breakpoints feature. You can also use this command to save and load breakpoints for one or more loaded images.
Syntax
RVDCONTEXT {,load | ,save} [=file_num, ...]
RVDCONTEXT {,autoon | ,autooff}
RVDCONTEXT
where:
autooff Disables auto saving of breakpoints.
autoon Enables auto saving of breakpoints.
file_num, ... A comma-separated list of file numbers for which breakpoints are to be saved or loaded. If you do not specify a file number, then saved breakpoints are set for each loaded image as apporpriate.
Note To find a file number, enter the DTFILE command.
load Either:• loads a previously saved context file for the specified file• loads a previously saved context file for each loaded file.
save Either:• saves the context file for the specified file• saves a context file for each loaded file.
Description
This command enables or disables the auto save breakpoints feature. When enabled, any breakpoints that are set in an image are stored in a context file when the image file is unloaded. This file is saved in the same location as the image file.
If you specify the command without options or qualifiers, then RealView Debugger displays the current status of the auto save breakpoints feature.
If you have saved breakpoints for a loaded image, and subsequently modify breakpoints in a debugging session, then you can restore the saved breakpoints without unloading the image. To do this, enter:
RVDCONTEXT,load
See also
• DTFILE on page 2-128
• UNLOAD on page 2-316
• the following in the RealView Debugger User Guide:— Enabling the auto save breakpoints feature on page 11-12.
ARM DUI 0175N Copyright © 2002-2011 ARM. All rights reserved. 2-233ID052111 Non-Confidential

RealView Debugger Commands
2.3.116 SCOPE
Specifies the current module and procedure scope.
Syntax
SCOPE /F
SCOPE root_name\\
SCOPE [root_name\\] module_name
SCOPE [[root_name\\] module_name\] {function_name | (expression) | @stack_level | #line_number}
where:
/F Selects the first module of the next root.
root_name Specifies the name of a root (for example, @sieve).
module_name Specifies the name of a module (for example, SIEVE).
function_name Specifies the name of a function (for example, proc1).
expression Specifies an expression specifying the location of a calling function.
stack_level Specifies a stack level.
line_number Specifies a high-level line number.
Description
The SCOPE command specifies the current module and procedure scope. This determines the current context. The current context determines how local variables are accessed and what symbol qualification is required. The following context types are supported:• the current PC• a specific module, function, or source file line• a stack frame position• auto-set, used when the debugger is in source mode and the PC is not in a source view
context, for example when the program is at the entry point.
The SCOPE command can change the default root, module, procedure, line number, or stack level, but it does not change the PC.
To return the scope to display source at the current PC location, use SCOPE with no parameters. To display the current scope, use the CONTEXT command.
The current root and module is the default when line numbers and local symbols are referenced without a module or procedure qualifier. For example, if line number 3 is entered on the command line as #3, it is interpreted as default_module\#3. The new source file or disassembly is shown in the Code window.
The SCOPE command runs asynchronously. Use the WAIT command to force it to run synchronously.
Examples
The following examples show how to use SCOPE:
scope #155 Set the current context to line 155 in the current module (file).
ARM DUI 0175N Copyright © 2002-2011 ARM. All rights reserved. 2-234ID052111 Non-Confidential

RealView Debugger Commands
Scoped to: (0x01000560): DHRY_1\main Line 155
sc \\DHRY_1 Set the current context to the start of the file dhry_1.c.Scoped to: (0x010002BC): DHRY_1\main Line 78
sc @1 Set the scope to the stack frame of the calling function.
sc Return the current context to the execution point.At the PC: (0x01000544): DHRY_1\main Line 152
See also• CONTEXT on page 2-96• PRINTVALUE on page 2-211• WHERE on page 2-331.
ARM DUI 0175N Copyright © 2002-2011 ARM. All rights reserved. 2-235ID052111 Non-Confidential

RealView Debugger Commands
2.3.117 SEARCH
Searches memory for a specified value or pattern.
Syntax
SEARCH [{/B|/H|/W|/8|/16|/32}] [/R] [address-range [={expression | expression_string}]]
Note /B|/H|/W are deprecated in this release.
where:
/B|/8 Sets the display format to 8 bits.
/B|/16 Sets the display format to 16 bits.
/B|/32 Sets the display format to 32 bits.
Note If no display format is specified, the default is the native format for the debug
target. For example, the ARM7TDMI processor naturally addresses 8 bits.
/R Continues to search for the specified expression displaying each match until the end of the block or until the STOP button is used.
address-range
Specifies the range of addresses to be searched.
expression Specifies the value to search for.
expression_string
Specifies the pattern to search for.
Description
The SEARCH command searches a memory area for the specified value or pattern string. When it is found, the debugger stops searching and displays the address where the expression was found.
If they do not fit the specified size evenly, all expressions in an expression string are padded or truncated to the size specified by the size qualifiers. If you do not specify an expression or expression string, the debugger searches the memory area for zeros. If you issue a SEARCH command without parameters, the debugger continues searching through the originally specified address range starting from where the last match was found.
The SEARCH command runs synchronously.
Examples
The following examples show how to use SEARCH:
search 0x1000..0x2000 =122 Search for the first occurrence of the byte value 122 (ASCII z), in the 4KB block of memory starting at 0x1000.
ARM DUI 0175N Copyright © 2002-2011 ARM. All rights reserved. 2-236ID052111 Non-Confidential

RealView Debugger Commands
search /r 0x1000..0x2000 =163 Display all occurrences of the byte value 163 (ASCII £) in the 4KB block of memory starting at 0x1000.
search 0x1000..0x2000 ="-help" Search for the first occurrence of the string -help in the 4KB block of memory starting at 0x1000.
See also• Specifying address ranges on page 2-2• MEMWINDOW on page 2-188• SETMEM on page 2-239.
ARM DUI 0175N Copyright © 2002-2011 ARM. All rights reserved. 2-237ID052111 Non-Confidential

RealView Debugger Commands
2.3.118 SETFLAGS
Reserved for internal use by the RealView Debugger.
ARM DUI 0175N Copyright © 2002-2011 ARM. All rights reserved. 2-238ID052111 Non-Confidential

RealView Debugger Commands
2.3.119 SETMEM
Changes the contents of memory to a specified value.
Syntax
SETMEM [{/8|/16|/32}] address [={expression | expressionlist}]
where:
/8 Sets the access size to 8 bits.
/16 Sets the access size to 16 bits.
/32 Sets the access size to 32 bits.
Note If no access size is specified, the default is the native format for the debug target.
For example, the ARM7TDMI processor naturally addresses 8 bits.
address The memory address where the contents are to be changed.
expression An expression to be evaluated to a value and placed into the specified memory address. The expression can be:• a decimal or hexadecimal number• a debugger expression, for example a math calculation• a string enclosed in single or double quotation marks.If you use a quoted string:• each character of the string is treated as a byte value in an expressionlist• no C-style zero terminator byte is written to memory.Also, see Rules for specifying strings in the SETMEM command on page 2-240 for more details on using strings with the SETMEM command.
expressionlist
A list of expressions to be placed into memory starting at the specified address. An expressionlist is a sequence of expressions separated by commas, for example "Text",0,0x20.
Note All expressions in an expression list are padded or truncated to the size specified
by the size qualifiers if they do not fit the specified size evenly. This also applies to each character of a string.
Description
The SETMEM command changes the contents of the specified memory location to the value or values defined by expression or expressionlist. SETMEM is used to set assembly-level memory. For example, you can use it to work around a section of code that is producing incorrect results by changing variables to the correct values.
ARM DUI 0175N Copyright © 2002-2011 ARM. All rights reserved. 2-239ID052111 Non-Confidential

RealView Debugger Commands
Considerations when using the SETMEM command
Be aware of the following when using the SETMEM command:
• The SETMEM command does not recognize variable typing, so you must ensure the expression size qualifier is compatible with the variable type.
• All expressions in an expression string are padded or truncated to the size specified by the Size value if they do not fit the specified size evenly.
• If a pattern is not specified, RealView Debugger displays the Interactive Memory Setting dialog box when running in GUI mode.
• The SETMEM command runs synchronously unless background access to target memory is supported. Use the WAIT command to force it to run synchronously.
Rules for specifying strings in the SETMEM command
Follow these rules when specifying a string:
• No C-style zero terminator byte is written to memory after a specified string. To write a NUL-terminated string, add a zero value expression after the string, for example:"Test Message",0
• You cannot use an empty string to write a NUL character.
• Use the /8 qualifier if you want to write the characters of a string to consecutive bytes of memory.
Examples
The following examples show how to use SETMEM:
• To write a NUL-terminated string to consecutive bytes at address 0x9000, specify the command:setmem 0x9000="Test Message",0
• To write 0xBA55FADE to the 32-bit memory location starting at address 0x9004, specify the command:setmem/32 0x9004=0xBA55FADE
• The following command writes 0xFADE to the 16-bit location starting at address 0x9008:setmem/16 0x9008=0xBA55FADE
• The following command writes each individual character of "Test Message" to the lowest byte of consecutive 32-bit memory locations starting at address 0x900C:setmem/32 0x900C="Test Message"
The remainder of each 32-bit memory location is set to zero.
• Assuming the following definitions: int count=2, buf[8]; int *ptr = buf;
And the following memory map:0x10200 : 0x00000002 count 0x10204 : 0x00000000 buf0x10224 : 0x00010204 ptr
The following two statements both set the value of count to 5:
ARM DUI 0175N Copyright © 2002-2011 ARM. All rights reserved. 2-240ID052111 Non-Confidential

RealView Debugger Commands
setmem /32 &count=5setmem /32 0x10200=5
Note The command setmem count=5 sets the memory location addressed by the value of count
to 5, leaving the contents of count unchanged.
Alias
SM is an alias of SETMEM.
See also• CEXPRESSION on page 2-87• FILL on page 2-149• READFILE on page 2-219• TEST on page 2-273.
ARM DUI 0175N Copyright © 2002-2011 ARM. All rights reserved. 2-241ID052111 Non-Confidential

RealView Debugger Commands
2.3.120 SETREG
Changes the contents of a register, status flag, or a special target variable such as the cycle count.
Syntax
SETREG [@register_name [=value]]
where:
register_name
Specifies a register. Register names begin with an at sign (@).
value Defines the value to be placed in the register.
Description
This command changes the contents of a register, status flag, or a special target variable such as the cycle count.
Note If you use this command when running in command line mode, you must supply a register_name. Otherwise, the command has no effect.
Register names
You can set the value of any register, or register bit-field, that is defined by an active .bcd file. To link a relevant definition file to the current connection, use Connection Properties window to set the BoardChip name for the connection.
You can view the currently defined registers using the PRINTSYMBOLS command, for example:
PRINTSYMBOLS /r *
This also displays any reserved symbols and internal variables that are currently defined.
By defining new registers in a .bcd file, you can extend the register list to, for example, include peripheral control registers for your target.
Note Some processors and peripherals have some read-only registers. These cannot be written to with SETREG.
Command line usage
You can set the value of registers defined in a board chip file or by the processor model, by prefixing the register name with the @ symbol and assigning it a value. The value can include program and debugger symbols and debugger expressions.
Note Change the values of target registers with care. Compilers and operating systems do not always use registers in the expected manner.
ARM DUI 0175N Copyright © 2002-2011 ARM. All rights reserved. 2-242ID052111 Non-Confidential

RealView Debugger Commands
Fully Interactive register setting
In the GUI, if you supply no parameters, the SETREG command displays the Interactive Register Setting dialog box where you can specify a register and a value. Figure 2-3 shows an example. The Register drop-down list contains the names of recently used registers. To select other register names, click either Next Reg or Prev Reg. The current value of the register is displayed in the Value field, in both unsigned hexadecimal and in signed decimal.
Figure 2-3 Interactive Register Setting dialog
Enter a new value in the combo-box beneath Enter New Value and then click Set. The Log tab displays the changes you have made.
Select Clear New to clear the Enter New Value field after setting a register with Set. If Clear New is unchecked, the value you enter remains in the field and you can set multiple registers with repeated clicks on Set.
Click Auto Inc Reg or Auto Dec Reg to select whether, after clicking Set, the next higher or next lower numbered register is selected.
Partly Interactive register setting
If you supply only a register name, the SETREG command displays a prompt, shown in Figure 2-4, enabling you to enter a new value for that register.
Figure 2-4 Register value prompt
Enter the value in the text field and click Set to change the register, or click Cancel to abort the command.
Alias
SR is an alias of SETREG.
ARM DUI 0175N Copyright © 2002-2011 ARM. All rights reserved. 2-243ID052111 Non-Confidential

RealView Debugger Commands
Examples
The following examples show how to use SETREG:
setreg @r3=0x50 Write the value 0x50 to processor register R3.
setreg @spsr_svc Display a prompt, shown in Figure 2-4 on page 2-243, containing the current value of ARM processor register SPSR_SVC (saved program status register, Supervisor mode). Use the text box to enter a new value.
setreg @v=1 Set the ALU overflow flag in the current program status register.
setreg Invoke the Interactive Register Setting dialog shown in Figure 2-3 on page 2-243.
See also• Referencing reserved symbols on page 1-18• ADD on page 2-16• CEXPRESSION on page 2-87• FPRINTF on page 2-156• PRINTF on page 2-205• PRINTSYMBOLS on page 2-208• PRINTTYPE on page 2-210• PRINTVALUE on page 2-211• REGINFO on page 2-223.
ARM DUI 0175N Copyright © 2002-2011 ARM. All rights reserved. 2-244ID052111 Non-Confidential

RealView Debugger Commands
2.3.121 SETTINGS
Enables you to define target settings.
Syntax
SETTINGS [{default | option_list}]
where:
default Causes all settings to revert to their default values.
option_list A list of option names and values. Each option-value pair consists of a setting name, an equals sign, and a value. The available option names and values are described in List of options.You can specify multiple options in the list by separating each option-value pair with a colon.
Description
The SETTINGS command enables you to define settings (properties) for target support. Some of these options have equivalent settings in the Workspace of the GUI. See the individual option description in List of options for the equivalent GUI setting.
Note If you want to change other Workspace settings, you must use the GUI.
If the only parameter is the default qualifier, then all the settings revert to their default values. If you supply no parameters, the command displays the current values of settings for which a default value is defined.
Each setting is defined in the form of name=value, and multiple settings can be changed using a colon (:) as a separator.
List of options
The standard option names are:
loadact={default|noimask|reset|pre_reset} Action on load:default Normal load image behavior. For ARM processors, the processor is
placed in ARM state and supervisor mode with interrupts disabled.noimask Do not change the processor status register. For example, on ARM
processors, the default modification of CPSR is not performed.reset Reset the processor after the load, to perform a start from reset.pre_reset Reset the processor before the load.
restart={set_pc|reload|reload_data} Defines the action of the RESTART command. The possible values are:set_pc Set the PC to the entry point of the image.reload Reload the image as for RELOAD. The options relating to RELOAD, that is
loadact and pcset, also apply.
ARM DUI 0175N Copyright © 2002-2011 ARM. All rights reserved. 2-245ID052111 Non-Confidential

RealView Debugger Commands
reload_data Reload only the initialized data of the image. The option relating to RELOAD, that is loadact, also applies.
restart_reset={True|False} Reset on restart:True Reset the processor on RESTART, in addition to any other actions.False Do not reset the processor on RESTART.
fillstack=value Define a value to fill stack memory with before the program starts. This is not used for ARM processor image files.
fillheap=value Define a value to fill memory defined as heap. This is not used for ARM processor image files.
fillundefined=value Define a value to fill unused words of memory, such as words between each section of the image in memory. This is not used for ARM processor image files.
imagecache_enabled={True|False} The image cache stores debug information from the image rather than from physical memory. This enables RealView Debugger to access the debug information if it cannot access the physical memory, for example, when the target is running. This is especially important when tracing, so that you do not have to stop the target for RealView Debugger to collect or decompress trace information.However, you might want to disable image caching if, for example, you have self-modifying code, which can lead to incorrect information being displayed.Also, if the image cache is disabled, you cannot view the disassembly of your image when the target is running.Enables and disables the image cache:True Enables the image cache.False Disables the image cache.
Note Image caching is enabled by default.
disasm={default|standard|alternate|bytecode|extended} Set the disassembly mode. This affects the Disassembly tab, and the output from the PRINTDSM command.The possible values are:default Attempt to auto-detect the disassembly mode.
For ARM processors, select from ARM, Thumb, Jazelle bytecodes, or Thumb-2EE, using information from the image file where available.
standard Select the standard instruction disassembly mode.For ARM processors, select ARM state (32-bit) instructions.
alternate Select the alternate instruction disassembly mode.For ARM processors, select Thumb state (16-bit) instructions.
ARM DUI 0175N Copyright © 2002-2011 ARM. All rights reserved. 2-246ID052111 Non-Confidential

RealView Debugger Commands
bytecode Select the Jazelle bytecode disassembly mode. This is available only for ARM processors.
extended Select the Thumb-2EE disassembly mode. This is available only for ARM processors.
Equivalent Workspace setting: DEBUGGER, Disassembler, Format.
dsmvalue={True|False} Selects whether the instruction code is displayed in disassembly listings. The possible values are:True Disassembly listings include the instruction opcode, along with the
instruction memory address and mnemonics.False Disassembly listings do not include the instruction opcode.Equivalent Workspace setting: DEBUGGER, Disassembler, Instr_value.
Additional options might be implemented for a particular Debug Interface. See the documentation of your Debug Interface for more information.
Alias
PROPERTIES is an alias of SETTINGS.
Examples
The following examples show how to use SETTINGS:
settings loadact=reset After an image is loaded or reloaded, reset the processor (in hardware). This is useful when the image has been constructed to run from target reset.
settings disasm=standard:dsmvalue=true Specifies that disassembly is to be displayed using the standard format for the target, and that the instruction code is to be hidden from the disassembly listings.
See also
• DISASSEMBLE on page 2-116
• LOAD on page 2-176
• OPTION on page 2-195
• PRINTDSM on page 2-203
• RELOAD on page 2-225
• RESET on page 2-227
• RESTART on page 2-230
• the following in the RealView Debugger User Guide:— Chapter 17 Configuring Workspace Settings.
ARM DUI 0175N Copyright © 2002-2011 ARM. All rights reserved. 2-247ID052111 Non-Confidential

RealView Debugger Commands
2.3.122 SHOW
Displays the source code of a specified debugger macro.
Syntax
SHOW macro_name [{,windowid | ,fileid}]
where:
macro_name Specifies the name of the macro to be displayed.
,windowid | ,fileid
Identifies the window or file where the command is to send the output.If you do not supply a ,windowid or ,fileid parameter, or there is no window or file associated with the ID, the macro is displayed on the screen. If you are using the GUI, then the macro is displayed in the Output view.
Description
The SHOW command displays the source code of a specified macro.
Example
To display the contents of a macro called mac in window number 50, enter:
> vopen 50> show mac,50
See also• Window and file numbers on page 1-5• DEFINE on page 2-105• INCLUDE on page 2-168• MACRO on page 2-182• the following in the RealView Debugger User Guide:
— Chapter 16 Using Macros for Debugging.
ARM DUI 0175N Copyright © 2002-2011 ARM. All rights reserved. 2-248ID052111 Non-Confidential

RealView Debugger Commands
2.3.123 SINSTR
SINSTR is an alias of STEPINSTR.
See STEPINSTR on page 2-259.
ARM DUI 0175N Copyright © 2002-2011 ARM. All rights reserved. 2-249ID052111 Non-Confidential

RealView Debugger Commands
2.3.124 SM
SM is an alias of SETMEM.
See SETMEM on page 2-239.
ARM DUI 0175N Copyright © 2002-2011 ARM. All rights reserved. 2-250ID052111 Non-Confidential

RealView Debugger Commands
2.3.125 SOINSTR
SOINSTR is an alias of STEPOINSTR.
See STEPOINSTR on page 2-263.
ARM DUI 0175N Copyright © 2002-2011 ARM. All rights reserved. 2-251ID052111 Non-Confidential
RealView Debugger Commands
2.3.126 SOVERLINE
SOVERLINE is an alias of STEPO.
See STEPO on page 2-265.
ARM DUI 0175N Copyright © 2002-2011 ARM. All rights reserved. 2-252ID052111 Non-Confidential
RealView Debugger Commands
2.3.127 SR
SR is an alias of SETREG.
See SETREG on page 2-242.
ARM DUI 0175N Copyright © 2002-2011 ARM. All rights reserved. 2-253ID052111 Non-Confidential

RealView Debugger Commands
2.3.128 STATS
Displays bus and processor cycles for RVISS targets. You can specify user-defined reference points to show the counts from specific points in the execution.
Syntax
STATS [[=]ref_name]
STATS {,setref | ,clearref} [[=]ref_name]
STATS ,reset [=]ref_name
STATS ,clearall
where:
clearall Removes all user-defined reference points.
clearref Removes the specified user-defined reference point.If no reference point is specified, the last reference point in the list is deleted, if any.
reset Resets the specified user-defined reference point.
setref Creates a specified user-defined reference point.If no reference point is specified, a reference point is created, which has the the default name:Ref_nn
where nn is a numerical identifier starting at 01. This is incremented with each new reference point you create.
ref_name The name of a user-defined reference point, which can have a maximum of nine characters. The name can include alphanumeric characters and the underscore (_), colon (:), and space characters. You cannot specify the default reference point name Ref_Cur (see Default reference point on page 2-255).For example, i10_a:1.
Note If you include a space character, then delimit the name with double quotation
marks, for example "a1 loop".
Description
This command enables you to:• display values of statistics counters• create one or more reference point for those counters• reset an existing reference point• delete an existing reference point or all reference points.
Note The statistics counters are the values returned by the RVISS $statistics structure.
ARM DUI 0175N Copyright © 2002-2011 ARM. All rights reserved. 2-254ID052111 Non-Confidential

RealView Debugger Commands
Statistics counters
The statistics counters displayed depends on the type of processor:
• uncached von Neuman cores, such as the ARM7TDMI, display:Instructions, Core_Cycles, S_Cycles, N_Cycles, I_Cycles, and C_Cycles
• Harvard cores, such as the ARM9TDMI® display:Instructions, Core_Cycles, ID_Cycles, IBus_Cycles, Idle_Cycles, and Dbus_Cycles
• cores with AMBA® ASB interfaces, such as the ARM940T, display:Instructions, Core_Cycles, S_Cycles, N_Cycles, A_Cycles, and C_Cycles
• cores with AMBA AHB interfaces, such as the ARM946E-S™, display:Instructions, Core_Cyles, SEQ, NON-SEQ, IDLE, and BUSY.
For all types a total count is also displayed.
Default reference point
A default reference point exists, called Ref_Cur, which shows the total counts for the target. You cannot delete or reset the values for this reference point. These default reference point counts are also shown in the CycleCount tab of the Registers view.
You can access the individual statistics count values for the default reference point using debugger symbols. To find the symbol name for a statistics counter, enter the command:
REGINFO,access,match:@stats
User-defined reference points
A user-defined reference point shows the counts only from the point at which it is created.
If you enter the command without a qualifier or reference name, then the statistics counters for all reference points are displayed.
If you enter the command with a reference name only, then the statistics counters are displayed only for that reference point.
Note When you disconnect from the target, the user-defined reference points are deleted and the Ref_Cur counts are reset to zero.
Example
For example, you might want to view the counts from the point at which a breakpoint is hit. To do this, you might set a breakpoint that is activated after 10 passes, then create a reference point to show the counts from this point onwards. The following example uses the dhrystone image:
1. Connect to an RVISS target on the RealView Instruction Set Simulator Debug Interface.
2. Load the example dhrystone image ...\Debug\dhrystone.axf.
3. Enter the following command to set a breakpoint:BREAKINSTRUCTION,passcount:10 \DHRY_1\#149:1
4. Start execution.
5. Enter 1000 when prompted for the number of runs.
ARM DUI 0175N Copyright © 2002-2011 ARM. All rights reserved. 2-255ID052111 Non-Confidential

RealView Debugger Commands
6. When the breakpoint is activated, create your reference point (iter:10):STATS,setref iter:10
7. View the current values:> STATSRef_Point Instructions Core_Cycles _S_Cycles _N_Cycles _A_Cycles C_Cycles Total Ref_Cur 00007cb1 0000c703 0000e4b6 00000000 00031279 00000000 0003f72f iter:10 00000000 00000000 00000000 00000000 00000000 00000000 00000000
8. Restart execution.
9. View the current values:> STATSRef_Point Instructions Core_Cycles _S_Cycles _N_Cycles _A_Cycles C_Cycles Total Ref_Cur 00007e97 0000ca13 0000e800 00000000 00031e87 00000000 00040687 iter:10 000001e6 00000310 0000034a 00000000 00000c0e 00000000 00000f58
10. You can create additional reference points as required.
See also• CEXPRESSION on page 2-87• FPRINTF on page 2-156• PRINTF on page 2-205• PRINTSYMBOLS on page 2-208• PRINTTYPE on page 2-210• PROPERTIES on page 2-213• REGINFO on page 2-223• RealView ARMulator ISS User Guide.
ARM DUI 0175N Copyright © 2002-2011 ARM. All rights reserved. 2-256ID052111 Non-Confidential
RealView Debugger Commands
2.3.129 STDIOLOG
Records the messages that are sent to STDIO.
Syntax
STDIOLOG [/A] [{OFF | ON="filename"}]
where:
/A Specifies that new records are to be added to any that already exist in the specified file.
OFF Closes the log file and stops collecting information. This is the default.
ON Starts writing information to the log file.
filename Specifies the name of the log file. Quotation marks are optional, but see Rules for specifying filenames in the STDIOLOG command for details on how to specify filenames that include a path.
Description
This command records the messages that are sent to STDIO. It does not record any responses you give to prompts.
Note If you use this command in the Cmd tab of the Output view, the messages are the same as those displayed in the StdIO tab of the Output view.
If the specified file exists and you do not specify the /A parameter, the existing contents of the file are overwritten and lost.
Using STDIOLOG with no parameters shows the current log file, if any. STDIO output is recorded in the log file until the STDIOLOG OFF command is issued.
The STDIOLOG command runs asynchronously unless in a macro.
Rules for specifying filenames in the STDIOLOG command
Follow these rules when specifying a filename:
• If the filename consists of only alphanumeric characters, slashes, or a period, but the filename does not start with a slash, then you do not have to use quotation marks. For example, includes/file.
• Filenames with a leading slash must be in double quotation marks, for example "/file".
• Filenames containing a backslash must be in single quotation marks. For example '\file' or 'c:\myfiles\file'.Alternatively, you can escape each backslash and use double quotation marks. For example, "c:\\myfiles\\file".
• You can use environment variables to specify paths to a file. For example, if PATHROOT=C:\MYFILES and PATHTEST=TEST1:'$PATHROOT\$PATHTEST\test1.c'
ARM DUI 0175N Copyright © 2002-2011 ARM. All rights reserved. 2-257ID052111 Non-Confidential

RealView Debugger Commands
You can include:— the filename as part of the second environment variable, and then specify
'$PATHROOT\$PATHTEST'.— the path separator in the environment variable, and then specify
'$PATHROOT$PATHTEST'.
Example
The following examples show how to use STDIOLOG:
STDIOLOG ON='c:\temp\stdiolog.txt' Start logging output to the file c:\temp\stdiolog.txt, overwriting any existing file of that name.
STIOLOG /A ON="stdiolog" Start logging output to the file stdiolog.log in the current directory of the debugger, appending the new log text to the file if it already exists.
STDIOLOG OFF Stop logging output.
See also• JOURNAL on page 2-172• LOG on page 2-180• VOPEN on page 2-326.
ARM DUI 0175N Copyright © 2002-2011 ARM. All rights reserved. 2-258ID052111 Non-Confidential

RealView Debugger Commands
2.3.130 STEPINSTR
Executes a specified number of processor instructions (low-level step).
Note If a breakpoint is set on an instruction that is encompassed by the STEPINSTR command, then the breakpoint is actioned. The breakpoint behavior depends on any condition qualifiers that are assigned. If you do not want the breakpoint to be actioned, then either disable or clear the breakpoint before stepping.
Syntax
STEPINSTR [value]
STEPINSTR =starting_address [,value]
where:
starting_address
Specifies where execution is to begin. If you do not supply this parameter execution continues from the current PC.
Note Specifying an address is equivalent to directly modifying the PC. Do not specify
a starting address unless you are sure of the consequences to the processor and program state.
value Specifies the number of instructions to be executed.If you do not supply this parameter a single instruction is executed. All instructions, including instructions that fail a conditional execution test, count towards the number of instructions executed.
Description
The STEPINSTR command executes a specified number of instructions. If the instructions include procedure calls, these are stepped into.
Note For some procedure call standards there is code inserted between the call site and the destination of the call by the linker, and this might not have debug information or source code available. If this is the case for your code, a STEPINSTR call that stops in this code causes the source window to be blanked.
It is normal to use this instruction in conjunction with the disassembly mode of the source window, selected using the MODE command.
The STEPINSTR command cannot be used in a macro if the macro is attached to another entity, such as a breakpoint.
Examples
The following examples show how to use STEPINSTR:
stepinstr Step the program by one instruction.
ARM DUI 0175N Copyright © 2002-2011 ARM. All rights reserved. 2-259ID052111 Non-Confidential

RealView Debugger Commands
si 5 Step the program five instructions.
si =0x8000,5 Starting at address 0x8000, step the program five instructions.
Alias
SINSTR is an alias of STEPINSTR.
See also• Execution control on page 2-4• DISASSEMBLE on page 2-116• GO on page 2-159• GOSTEP on page 2-161• MODE on page 2-190• STEPLINE on page 2-261• STEPOINSTR on page 2-263• STEPO on page 2-265.
ARM DUI 0175N Copyright © 2002-2011 ARM. All rights reserved. 2-260ID052111 Non-Confidential

RealView Debugger Commands
2.3.131 STEPLINE
Executes one or more program statements (high-level step), and steps into procedure and function calls.
Note If you perform a high-level step in code for which there is no source available, RealView Debugger attempts to step up the call stack until a location is reached that has source available.
Syntax
STEPLINE [value]
STEPLINE =starting_address [,value]
where:
starting_address
Specifies where execution is to begin. If you do not supply this parameter execution continues from the current PC.
Note Specifying an address is equivalent to directly modifying the PC. Do not specify
a starting address unless you are sure of the consequences to the processor and program state.
value Specifies the number of lines of source code to be executed.If you do not supply this parameter a single statement or source line is executed. All lines that contain executable code, including those in called functions, count towards the number of lines executed.
Description
The STEPLINE command executes one or more source program units. If the debug information in the executable:
• describes the boundaries of program statements, then STEPLINE steps by program statement
• describes the source file line for each machine instruction, then STEPLINE steps by source line
• describes only the external functions in the code, then STEPLINE steps by machine instruction.
STEPLINE steps into procedure or function calls. When line or statement debug information is available, the transition from the call site to the first executable statement of the called code counts as one step. If source debug information is available for some but not all of the functions in the program, STEPLINE steps to the next source line, whether this is within a called function, for example, from program entry-point to main(), or outside of the current function, for example from an assembler library routine PC to an enclosing source function.
If the step starts in the middle of a statement (for example, because you have used STEPINSTR) a single step takes you to the start of the next statement.
ARM DUI 0175N Copyright © 2002-2011 ARM. All rights reserved. 2-261ID052111 Non-Confidential

RealView Debugger Commands
If you compile high level language code with debug information and with optimization enabled, for example using armcc -g -O1, it is possible that:
• source code is not executed in the order it appears in the source file
• some source program statements are not executed because the optimizer has deduced they are redundant
• some source program statements appear to be not executed because the optimizer has indivisibly combined them with other statements
• statements are executed fewer times than you expect
• it might not be possible to breakpoint or step some statements, because the machine instructions are shared with other source code.
These, and other effects, are the normal consequences of compiler optimization.
For assembler source files assembled with debug information, a single assembly statement consists of;
• an explicitly written assembly instruction
• an assembler pseudo-operation resulting in machine instructions, even if several instructions are generated, for example an ARM ADR instruction
• a call of an assembler macro that generates machine instructions.
It is normal to use this instruction in conjunction with the disassembly mode of the source window, selected using the MODE command.
The STEPLINE command cannot be used in a macro if the macro is attached to another entity, such as a breakpoint.
Examples
The following examples show how to use STEPLINE:
stepline Step the program by one statement.
stepline 5 Step the program five statements.
s =0x8000,5 Starting at address 0x8000, step the program five statements.
See also• Execution control on page 2-4• DISASSEMBLE on page 2-116• GO on page 2-159• GOSTEP on page 2-161• MODE on page 2-190• OPTION on page 2-195• STEPINSTR on page 2-259• STEPOINSTR on page 2-263• STEPO on page 2-265.
ARM DUI 0175N Copyright © 2002-2011 ARM. All rights reserved. 2-262ID052111 Non-Confidential

RealView Debugger Commands
2.3.132 STEPOINSTR
Executes a specified number of instructions (low-level step), and completely executes program calls.
Note If a breakpoint is set on an instruction that is encompassed by the STEPOINSTR command, then the breakpoint is actioned. The breakpoint behavior depends on any condition qualifiers that are assigned. If you do not want the breakpoint to be actioned, then either disable or clear the breakpoint before stepping.
Syntax
STEPOINSTR [value]
STEPOINSTR =starting_address [,value]
where:
starting_address
Specifies where execution is to begin. If you do not supply this parameter execution continues from the current PC.
Note Specifying an address is equivalent to directly modifying the PC. Do not specify
a starting address unless you are sure of the consequences to the processor and program state.
value Specifies the number of instructions to be executed.If you do not supply this parameter a single instruction is executed. All instructions in the current function, including instructions that fail a conditional execution test, count towards the number of instructions executed. Function calls count as one instruction.
Description
The STEPOINSTR command executes a specified number of instructions. If the instructions include procedure calls, these are stepped over, counting as only one instruction.
It is normal to use this instruction in conjunction with the disassembly mode of the source window, selected using the MODE command.
The STEPOINSTR command cannot be used in a macro if the macro is attached to another entity, such as a breakpoint.
Examples
The following examples show how to use STEPOINSTR:
stepoinstr Step the program by one instruction.
stepoinstr 5 Step the program five instructions.
ARM DUI 0175N Copyright © 2002-2011 ARM. All rights reserved. 2-263ID052111 Non-Confidential

RealView Debugger Commands
soi =0x8000,5 Starting at address 0x8000, step the program five instructions, counting a subroutine call as one instruction.
Alias
SOINSTR is an alias of STEPOINSTR.
See also• Execution control on page 2-4• DISASSEMBLE on page 2-116• GO on page 2-159• GOSTEP on page 2-161• MODE on page 2-190• STEPINSTR on page 2-259• STEPLINE on page 2-261• STEPO on page 2-265.
ARM DUI 0175N Copyright © 2002-2011 ARM. All rights reserved. 2-264ID052111 Non-Confidential

RealView Debugger Commands
2.3.133 STEPO
Executes a specified number of lines (high-level step), and completely executes functions.
Note If you perform a high-level step in code for which there is no source available, RealView Debugger attempts to step up the call stack until a location is reached that has source available.
Syntax
STEPO [={starting_address [,value] | value}]
where:
starting_address
Specifies where execution is to begin. If you do not supply this parameter execution begins at the address currently defined by the PC.
Note Specifying an address is equivalent to directly modifying the PC. Do not specify
a starting address unless you are sure of the consequences to the processor and program state.
value Specifies the number of lines of source code to be executed. If you do not supply this parameter a single line is executed. All lines in the current program count towards the number of lines executed. A call to a function causes the whole of the function to be executed, and counts as one line.
Description
The STEPO command executes one or more source program units. If the debug information in the executable:
• describes the boundaries of program statements, then STEPO steps by program statement
• describes the source file line for each machine instruction, then STEPO steps by source line
• describes only the function entry points in the code, then STEPO steps by machine instruction.
If a statement calls one or more procedures or functions, they are all executed to completion as part of the execution of the statement.
If the step starts in the middle of a statement (for example, because you have used STEPINSTR) a single step takes you to the start of the next statement.
If you compile high level language code with debug information and with optimization enabled, for example using armcc -g -O1, it is possible that:
• source code is not executed in the order it appears in the source file
• some source program statements are not executed because the optimizer has deduced they are redundant
• some source program statements appear to be not executed because the optimizer has indivisibly combined them with other statements
• statements are executed fewer times than you expect
ARM DUI 0175N Copyright © 2002-2011 ARM. All rights reserved. 2-265ID052111 Non-Confidential

RealView Debugger Commands
• it might not be possible to breakpoint or step some statements, because the machine instructions are shared with other source code.
These, and other effects, are the normal consequences of compiler optimization.
For assembler source files assembled with debug information, a single assembly statement consists of;
• an explicitly written assembly instruction
• an assembler pseudo-operation resulting in machine instructions, even if several instructions are generated, for example an ARM ADR instruction
• a call of an assembler macro that generates machine instructions.
It is normal to use this instruction in conjunction with the disassembly mode of the source window, selected using the MODE command.
The STEPO command cannot be used in a macro if the macro is attached to another entity, such as a breakpoint.
Alias
SO is an alias of STEPO.
Examples
The following examples show how to use STEPO:
stepo Step the program by one statement.
so 5 Step the program five statements.
so =0x8000,5 Starting at address 0x8000, step the program five statements.
See also• Execution control on page 2-4• DISASSEMBLE on page 2-116• GO on page 2-159• GOSTEP on page 2-161• MODE on page 2-190• OPTION on page 2-195• STEPINSTR on page 2-259• STEPLINE on page 2-261• STEPOINSTR on page 2-263.
ARM DUI 0175N Copyright © 2002-2011 ARM. All rights reserved. 2-266ID052111 Non-Confidential

RealView Debugger Commands
2.3.134 STOP
Stops target program execution, or a specified thread when the processor is running in RSD mode.
Syntax
STOP [[=]threadID]
where:
threadID Identifies the thread to be stopped when running in RSD mode.
Description
The behavior of the STOP command depends on the whether your program is running on a non OS-aware connection, an OS-aware connection, or a RealMonitor-aware connection.
Using the STOP command on non OS-aware connections
The STOP command stops the processor.
Using the STOP command on OS-aware connections
The behavior of the STOP command depends on whether the processor is running in HSD or RSD mode:
• If the processor is running in HSD mode, the command stops the whole processor.
• If the processor is running in RSD mode, and you use the STOP command without specifying a thread, RealView Debugger attempts to stop the processor. The behavior depends on the OS System_Stop setting in the Advanced_Information block for the connection.If the System_Stop setting is set to Prompt, you are prompted to continue with the request: — Yes stops the processor, and the processor falls back to HSD mode.— No cancels the stop request, and the processor continues to run.If the System_Stop setting is set to Never, the STOP command is not actioned.
• If the processor is running in RSD mode, and you use the STOP command with a thread identifier, the identified thread is stopped.The stopping of threads is accomplished by the Debug Agent using the associated OS service.
Using the STOP command on connections running RealMonitor
If RealMonitor support is enabled, then only the application thread stops. The RealMonitor thread continues running.
Examples
The following examples show how to use STOP:
stop Stops the processor.
stop = thread_4 Stops the specified thread in RSD.
ARM DUI 0175N Copyright © 2002-2011 ARM. All rights reserved. 2-267ID052111 Non-Confidential

RealView Debugger Commands
stop = 0x39d8 Stops the thread specified by the TCB address in RSD.
See also
• Execution control on page 2-4
• AOS_resource_list on page 2-26
• DOS_resource_list on page 2-122
• GO on page 2-159
• HALT on page 2-163
• OSCTRL on page 2-200
• the following in the RealView Debugger User Guide:— Chapter 7 Debugging Multiprocessor Applications
• the following in the RealView Debugger Target Configuration Guide:— Configuring RealMonitor for connections through DSTREAM or RealView ICE on
page 3-43
• the following in the RealView Debugger RTOS Guide:— Managing configuration settings on page 2-12— Chapter 7 Debugging Your OS Application.
ARM DUI 0175N Copyright © 2002-2011 ARM. All rights reserved. 2-268ID052111 Non-Confidential

RealView Debugger Commands
2.3.135 SYNCHACTION
Controls what actions are to be performed on each synchronized processor.
Syntax
SYNCHACTION [,load] [,unload] [,reload] [,restart] [,reset] [,setpc] [,readfile] [[=]connections]
SYNCHACTION ,remove {,all | [=]connections}
where:
load Loads a target application image file.
unload Unloads the current image file.
reload Reloads the current image file.
restart Resets the program counter.
reset Resets the target processor.
setpc Sets the program counter.
readfile Reads the contents of a binary file.
remove Remove the connections from the synchronized group.
connections A comma-separated list of connection identifier strings, of the form:"connection-id" [,"connection-id",...]
where:connection-id The connection name. If the targets have unique names,
then you have only to use the target name. Otherwise, you must also specify the Debug Configuration name.
Description
Synchronization of processors takes place when an operation performed on one processor affects the operation of other processors. For example, when you load an image on one processor, the image is also loaded on the other synchronized processors. Synchronizing of commands is provided whenever the command selected for synchronization is issued through the CLI, a menu item, or another part of the GUI.
Example
The following example shows how to use the SYNCHACTION command. It assumes connection has been made to an ARM7TDMI and an ARM926EJ-S:
synchaction,load,unload @ARM7TDMI@RVISS,@ARM926EJ-S@RVISS_1
Load the dhrystone image in your RealView Development Suite (RVDS) examples directory:
load/pd/r “install_directory\RVDS\Examples\...\main\dhrystone\Debug\dhrystone.axf”
The image is loaded to all targets.
ARM DUI 0175N Copyright © 2002-2011 ARM. All rights reserved. 2-269ID052111 Non-Confidential

RealView Debugger Commands
See Also
The following commands provide similar or related functionality:• BEXECUTION on page 2-30• CONNECT on page 2-93• GO on page 2-159• HALT on page 2-163• STEPINSTR on page 2-259• STOP on page 2-267• SYNCHEXEC on page 2-271• XTRIGGER on page 2-335• the following in the RealView Debugger User Guide:
— Chapter 7 Debugging Multiprocessor Applications.
ARM DUI 0175N Copyright © 2002-2011 ARM. All rights reserved. 2-270ID052111 Non-Confidential

RealView Debugger Commands
2.3.136 SYNCHEXEC
Controls how connections and threads run, step, and stop together.
Note Multiprocessor models are inherently synchronized. For this reason, you must not set up synchronzed execution for more than one processor from a multiprocessor model that is a Model Library, Model Process, ISSM, RTSM, or SoC Designer model.
Syntax
SYNCHEXEC [,run] [,step] [,stop] [{,all | [=]connections}]
SYNCHEXEC,remove {,all | [=]connections}
where:
run, step, stop
Qualifiers that you can specify in any combination to define the operations to synchronize. If you do not supply a qualifier, all operations are assumed.
remove Removes the connections from the synchronized group.
all Indicates all existing connections.
Note Do not use synchexec,all if you have connections to multiprocessor models on
any of the following Debug Interfaces, or to single-processor models in more than one of these interfaces:• Model Library• Model Process• ISSM• RTSM• SoC Designer.
connections A comma-separated list of connection identifier strings, of the form:"connection-id" [,"connection-id",...]
where:connection-id The connection name. If the targets have unique names,
then you have only to use the target name. Otherwise, you must also specify the Debug Configuration name.
Description
The SYNCHEXEC command controls how RealView Debugger controls multiple target processors. The initial state is that every target processor is controlled independently. Therefore, stopping or starting a program on one processor only affects other processors if there is a link between the processors.
If you require RealView Debugger to stop or start several target processors together, you use this command to link them into a synchronized execution group. You can choose whether this group applies to single stepping, to free-running, or to stopping (in the sense of a user-initiated halt), independently.
ARM DUI 0175N Copyright © 2002-2011 ARM. All rights reserved. 2-271ID052111 Non-Confidential

RealView Debugger Commands
Examples
The following examples show how to use SYNCHEXEC:
synchexec,rem,all Unsynchronize all processors.
synchexec,step,run,stop @Cortex-A9_0@DSTREAM,@Cortex-A9_1@DSTREAM Synchronize the following target connections on step, stop and run:• Cortex-A9_0, available on the DSTREAM Debug Configuration• Cortex-A9_1, available on the DSTREAM Debug Configuration
synchexec,all Synchronizes all available target connections on step, stop and run.
See also
• BEXECUTION on page 2-30
• CONNECT on page 2-93
• GO on page 2-159
• HALT on page 2-163
• STEPINSTR on page 2-259
• STOP on page 2-267
• SYNCHACTION on page 2-269
• XTRIGGER on page 2-335
• the following in the RealView Debugger User Guide:— Chapter 7 Debugging Multiprocessor Applications.
ARM DUI 0175N Copyright © 2002-2011 ARM. All rights reserved. 2-272ID052111 Non-Confidential

RealView Debugger Commands
2.3.137 TEST
Reads target memory to verify that specified values exist throughout the specified memory area.
Syntax
TEST [{/B|/H|/W|/8|/16|/32}] [/R] address-range [={expression | expressionlist}]
Note /B|/H|/W are deprecated in this release.
where:
/B|/8 Sets the access size to 8 bits.
/H|/16 Sets the access size to 16 bits.
/W|/32 Sets the access size to 32 bits.
Note If no access size is specified, the default is the native format for the debug target.
For example, the ARM7TDMI processor naturally addresses 8 bits.
/R Continues to test for the specified expression, displaying each match until the end of the block or until the stop button Cancel is pressed.
address-range
The range of addresses to be tested. See Specifying address ranges on page 2-2 for details on how to specify an address range.
expression A value to check against the contents of memory.An expression to be evaluated to a value and checked against the specified memory region. The expression can be:• a decimal or hexadecimal number• a debugger expression, for example a math calculation• a string enclosed in single or double quotation marks.If you use a quoted string:• each character of the string is treated as a byte value in an expressionlist• no C-style zero terminator byte is written to memory.Also, see Rules for specifying strings in the TEST command on page 2-274 for more details on using strings with the TEST command.
expressionlist
A list of expressions to check against the contents of the specified memory region. An expressionlist is a sequence of expressions separated by commas, for example "Text",0,0x20.The debugger tests the memory area to verify that it is filled with those values in the pattern of the string.
Note All expressions in an expression list are padded or truncated to the size specified
by the size qualifiers if they do not fit the specified size evenly. This also applies to each character of a string.
ARM DUI 0175N Copyright © 2002-2011 ARM. All rights reserved. 2-273ID052111 Non-Confidential

RealView Debugger Commands
Description
The TEST command examines target memory to verify that specified values exist throughout the specified memory area. Unless you use the /R qualifier, Testing stops when a mismatch is found. The debugger always displays any mismatched address and value.
Subsequent TEST commands issued without parameters cause the debugger to continue testing through the address range originally specified, beginning with the last address that did not match.
Considerations when using the TEST command
Be aware of the following when using the TEST command:
• The TEST command does not recognize variable typing, so you must ensure the access size qualifier is compatible with the variable type.
• If the length of the expression list is greater than the specified address range, any values in the expression list after the end of the address range are ignored. For example, test/8 0x9000..0x9003="Message" compares the four bytes in the address range with "Mess", and ignores "age".
• If you specify only a start address, one copy of the expression is checked, examining only as many bytes as required for the expression. For example, test/8 0x9000="Message" compares bytes in the address range 0x9000 to 0x9006 with "Message".
• If you specify an address range with equal start and end addresses, then only that memory location is checked against first byte of the expression. The rest of the expression list is ignored. For example, test/8 0x9000..0x9000="Message" compares the byte at address 0x9000 with "M".If an expression is not specified, the debugger acts as if =0 had been specified as the expression.
• The TEST command runs synchronously.
Rules for specifying strings in the TEST command
Follow these rules when specifying a string:
• No C-style zero terminator byte is checked in memory after a specified string. To check for a NUL-terminated string, add a zero value expression after the string, for example:"Test Message",0
• You cannot use an empty string to test for a NUL character.
• Use the /8 qualifier, if you want to compare the characters of a string with consecutive bytes of memory.
Examples
The following examples show how to use TEST:
test/8 0x8000..0x9000 =0 Find the address of the first non-zero byte in the 4KB page from 0x8000.
ARM DUI 0175N Copyright © 2002-2011 ARM. All rights reserved. 2-274ID052111 Non-Confidential

RealView Debugger Commands
test/r/16 0x10000..0x20000 =0xFFFF Find and display the addresses of any 16-bit values in the address range that is not 0xFFFF. This might be useful to find out which regions of a Flash memory device are programmed.
test/8 0x9008..0x9014="Test Message",0 Check if the memory region from 0x9008 to 0x9014 matches the NUL terminated string "Test Message". This might be useful to check the memory reqion after you have written a NUL-teminated string to that region using the SETMEM command.
See also• FILL on page 2-149.• READFILE on page 2-219• SETMEM on page 2-239• VERIFYFILE on page 2-322.
ARM DUI 0175N Copyright © 2002-2011 ARM. All rights reserved. 2-275ID052111 Non-Confidential

RealView Debugger Commands
2.3.138 THREAD
Sets the specified thread to be the current thread.
Syntax
THREAD [{,next|,default}]
THREAD [=thread]
where:
next Change the current thread to be the next one in the list of threads.
default Ensures that there is a valid current thread.
thread Define the thread that is to become the current thread. You can use the thread name or the thread ID.
Description
The THREAD command sets the specified thread to be the current thread.
The current thread is normally set by whichever thread stops last. This command enables you to specify a thread that is to be the current thread. By default, all actions apply to the current board, process, and thread.
Examples
The following examples show how to use THREAD:
thread,next Change the current thread to the next thread.
thread =thread_2 Change the current thread to the thread named thread_2.
thread =0x13dac Change the current thread to the thread with an ID of 0x13dac.
See also• BOARD on page 2-35• OSCTRL on page 2-200• RUN on page 2-232.• the folloiwng in the RealView Debugger User Guide:
— Chapter 7 Debugging Multiprocessor Applications• the following in the RealView Debugger RTOS Guide:
— Chapter 7 Debugging Your OS Application.
ARM DUI 0175N Copyright © 2002-2011 ARM. All rights reserved. 2-276ID052111 Non-Confidential

RealView Debugger Commands
2.3.139 TRACE
Provides a quick method of enabling or disabling tracing during program execution. The tracepoints you set with this command are unconditional.
Syntax
TRACE location
TRACE [{{,endpoint}|{,prompt}|{,trigger}}] location
TRACE ,range startlocation..endlocation
TRACE ,data startlocation..endlocation
where:
location A program source location, specified symbolically or numerically.
startlocation The start of a program source range, which must be at a lower address than that specified by endlocation.
endlocation The end of a program source range, which must be at a higher address than that specified by startlocation.
Description
The TRACE command enables you to set trace trigger, start points, and end points in the program. This enables you to switch tracing on or off at specific addresses during program execution (see Trace control during program execution). The tracepoints you set are unconditional tracepoints. To set more complex tracepoints, use the TRACEDATAACCESS, TRACEDATAREAD, TRACEDATAWRITE, TRACEEXTCOND, TRACEINSTREXEC, or TRACEINSTRFETCH command as appropriate.
Trace control during program execution
The endpoint, range, data, prompt, and trigger qualifiers are used to control tracing during program execution. With no qualifier, the TRACE command sets a trace start point.
To use these commands, you must specify a program source location, for example a memory address within the program image, or a source module and line number.
The commands are as follows:
TRACE location
Set a trace start point in the program at address location.
trace ,endpoint location
Set a trace end point in the program at address location.
trace ,trigger location
Set a trace trigger in the program at address location.
trace ,prompt location
Set an unconditional tracepoint in the program at address location, where the type of tracepoint is selected from a list of supported types presented in a dialog box.
Note The prompt qualifier is not available when running in command line mode.
ARM DUI 0175N Copyright © 2002-2011 ARM. All rights reserved. 2-277ID052111 Non-Confidential

RealView Debugger Commands
trace ,range startlocation..endlocation
Set a trace range in the program from address startlocation to endlocation, so that instructions at addresses between these points are traced.
trace ,data startlocation..endlocation
Set a trace range in the program from address startlocation to endlocation, so that data at addresses between these points are traced.
trace ,range ,data startlocation..endlocation
Set a trace range in the program from address startlocation to endlocation, so that instructions executed and data accessed at addresses between these points are traced.
Note ARM program code often includes literal pools, constants required by the
program that cannot be easily included in the instruction opcodes. Literal pool accesses shows up on data tracing, and might quickly fill up the ETM FIFO buffer quickly, depending on the program.
Examples
The following examples show how to use TRACE:
TRACE,prompt \DHRY_1\#78
Prompts you with a selection of tracepoints that you can set.
TRACE,range,data 0x80200..0x80400
Set tracepoints so that data and code accesses between 0x80200-0x80400 are traced, but not accesses at other addresses.
See also• ANALYZER on page 2-23• DTBREAK on page 2-126• DTRACE on page 2-130• ETM_CONFIG on page 2-143• TRACEBUFFER on page 2-279• TRACEDATAACCESS on page 2-288• TRACEDATAREAD on page 2-293• TRACEDATAWRITE on page 2-298• TRACEEXTCOND on page 2-303• TRACEINSTREXEC on page 2-307• TRACEINSTRFETCH on page 2-312.• the following in the RealView Debugger Trace User Guide:
— Chapter 5 Tracepoints in RealView Debugger— Chapter 6 Setting Unconditional Tracepoints.
ARM DUI 0175N Copyright © 2002-2011 ARM. All rights reserved. 2-278ID052111 Non-Confidential

RealView Debugger Commands
2.3.140 TRACEBUFFER
Manipulates the contents and display of the program execution trace buffer.
Syntax
TRACEBUFFER ,subcommand [,qualifier] ="text"
TRACEBUFFER ,subcommand =value
TRACEBUFFER ,subcommand
where:
subcommand The possible commands are described in Subcommands.
qualifier The possible qualifiers are described in Subcommands.
text The name of a file or program symbol.
value A numeric value or range, for example 4 or 5..8.
Description
The TRACEBUFFER command manipulates the program execution and data trace buffer associated with a trace analyzer, enabling you to save, load, find, and filter the data. The actions are differentiated using the subcommand, and are described in the section Subcommands.
Subcommands
The possible subcommands listed in the syntax are described in the following sections:
Loadfile
TRACEBUFFER ,loadfile ="filename"
Load a file into the trace buffer for extra analysis. filename is the name of the file to load, and must be quoted.
Note If you have captured trace to a file using the RVISS Tracer feature, you cannot load it into the Analysis window.
You can include one or more environment variables in the filename. For example, if MYPATH defines the location C:\Myfiles, you can specify:
TRACEBUFFER,loadfile '$MYPATH\mytrace.dat'
Note You must have saved the file using the savefile subcommand with the qualifier:• defunnelled, full, or the GUI equivalent for ETM-enabled targets• full, minimal, profile, or the GUI equivalent for RVISS targets.
Savefile (ETM-enabled targets)
TRACEBUFFER ,savefile [,ascii|,full|,defunnelled [,sourceid:n]| ,decompress|,profile] [,append] [,filtered] ="filename"
ARM DUI 0175N Copyright © 2002-2011 ARM. All rights reserved. 2-279ID052111 Non-Confidential

RealView Debugger Commands
The save trace buffer to file options for ETM-enabled targets are:
ascii Save the trace buffer contents in a similar format to the Trace tab of the Analysis window. Additional formatting, such as inferred registers is not saved.. This file type cannot be reloaded into the Analysis window.
decompress Stores the uncompressed trace in an XML file. This file type cannot be reloaded into the Analysis window.
Note Be aware that very large XML files can be created when saving uncompressed
trace.
defunnelled [,sourceid:n]
Stores defunneled trace in compressed form to an XML file for the specified trace source sourceid:n. By default the current trace source is saved. You can reload this file type into the Analysis window.
full Save the whole trace buffer as a binary file in a RealView Debugger internal format. You can reload this file type into the Analysis window.
append Append the new trace data to an existing file. Do not append data in one format to files in a different format.
Note This option must be used only with the ascii option.
filtered Apply the selected display filters when saving trace data. If not specified, the entire trace buffer is saved, regardless of selected display filters.
filename The name of the file to write the data to. If the full argument is specified, the filename extension is ignored. If the full argument is not specified, then the filename must use a known extension (.trc, .trm, .trp, .txt or .xml).You can include one or more environment variables in the filename. For example, if MYPATH defines the location C:\Myfiles, you can specify:TRACEBUFFER,savefile '$MYPATH\mytrace.dat'
Savefile (RVISS targets)
TRACEBUFFER ,savefile [,ascii|,minimal|,full|,decompress|,profile] [,append] [,filtered] ="filename"
The save trace buffer to file options for RVISS targets are:
ascii Save the trace buffer contents in a similar format to the Trace tab. Additional formatting, such as inferred registers is not saved.. This file type cannot be reloaded into the Analysis window.
full Save the whole trace buffer as a binary file in a RealView Debugger internal format. You can reload this file type into the Analysis window.
minimal Save only timing, address, and access type data from the trace buffer as a binary file in a RealView Debugger internal format. The files created are much smaller than the full format, but some information is lost.
ARM DUI 0175N Copyright © 2002-2011 ARM. All rights reserved. 2-280ID052111 Non-Confidential
RealView Debugger Commands
profile Save only execution profile data from the trace buffer as a binary file in a RealView Debugger internal format. The files created are smaller than the minimal format, but only include enough information to display execution profiles.
append Append the new trace data to an existing file. Do not append data in one format to files in a different format.
filtered Apply the selected display filters when saving trace data. If not specified, the entire trace buffer is saved, regardless of selected display filters.
filename The name of the file to write the data to. If the full argument is specified, the filename extension is ignored. If the full argument is not specified, then the filename must use a known extension (.trc, .trm, .trp, or .txt).You can include one or more environment variables in the filename. For example, if MYPATH defines the location C:\Myfiles, you can specify:TRACEBUFFER,savefile '$MYPATH\mytrace.dat'
Closefile
TRACEBUFFER ,closefile
Unload the data from the last file loaded with loadfile and clear the Analysis window.
Amount
TRACEBUFFER ,amount =size
This subcommand is deprecated. Specify the number of captured trace records to read from the trace buffer. There is a default value that normally corresponds to the entire trace buffer. Set this if you do not require analysis of all of the captured trace buffer.
The value of size is one of:
0 The default buffer size. Normally this is the whole buffer, but see your analyzer documentation for full details.
n The maximum number of records to read.
n..m The range of records to read, with 0 being the trigger record, if any, and the start of the buffer point if not triggered. If you have a trigger record, you can use negative values to reference records before the trigger.For example, if a trigger is specified then 10..200 means read 190 records starting 10 records after the analyzer triggered.If no trigger is specified, the same string, 10..200, means to read the 190 records starting 10 records into the buffer. To read the records around the trigger position in the buffer, you can specify -20..20.
Scaletime
TRACEBUFFER ,scaletime =scale
Set the units for time values displayed in the Analysis window, where scale is:0 The default units1 Picoseconds (10-12 seconds)2 Nanoseconds (10-9 seconds)3 Microseconds (10-6 seconds)
ARM DUI 0175N Copyright © 2002-2011 ARM. All rights reserved. 2-281ID052111 Non-Confidential

RealView Debugger Commands
4 Milliseconds (10-3 seconds)5 Seconds6 Cycles.
For ARM ETM, the default units are nanoseconds, and you cannot use scale 6, cycles.
Speed
TRACEBUFFER ,speed =mhz
Set the speed of the target processor clock for use in cycle-to-time conversions, where mhz is the clock frequency in MHz. The default value is 20MHz. For example:
TRACEBUFFER,speed=40
sets the speed to 40MHz, so that a period of 400 cycles is considered to take 400/40E6 seconds, or 10 microseconds.
Find_trigger
TRACEBUFFER ,find_trigger
Searches for the trigger position in the trace buffer. If found, the item is selected and the Analysis window display is centered on it. There are no arguments.
Find_position
TRACEBUFFER ,find_position =position
Searches for the indicated position or set of positions in the trace buffer, where position is an integer or range:n The position to find.n..m Find the first in a range of positions from n to m inclusive.n..+o Find the first in a range of positions from n to n+o inclusive.
The values n and m can be negative if a trigger is defined. If any of the positions is found, the first is selected and the Analysis window display is centered on it.
Find_time
TRACEBUFFER ,find_time =time
Searches for the indicated time or range of times in the trace buffer, where time is an integer, a floating point number, or a range:n The time to find.n..m Find the first in a range of times from n to m inclusive.n..+o Find the first in a range of times from n to n+o inclusive.
The values n and m can be negative if a trigger is defined. If any of the times are found, the first is selected and the Analysis window display is centered on it.
Find_address
TRACEBUFFER ,find_address =address
Searches for the indicated address or set of positions in the trace buffer, where address is an integer or range:n The address to find.n..m Find the first in a range of addresses from n to m inclusive.n..+o Find the first in a range of addresses from n to n+o inclusive.
ARM DUI 0175N Copyright © 2002-2011 ARM. All rights reserved. 2-282ID052111 Non-Confidential

RealView Debugger Commands
If any of the addresses are found, the first is selected and the Analysis window display is centered on it.
Find_data
TRACEBUFFER ,find_data =dbval
Searches for the indicated data bus value or set of values in the trace buffer, where dbval is an integer or range:n The data bus value to find.n..m Find the first in a range of data bus values from n to m inclusive.n..+o Find the first in a range of data bus values from n to n+o inclusive.
The values n and m can be negative. If any of the values are found, the first is selected and the Analysis window display is centered on it.
Find_name
TRACEBUFFER ,find_name ="text"
Searches for the supplied text. The search is based on a textual search of the information in the Symbolic column of the analysis window. If found, the record is selected and the Analysis window display is centered on it.
Posfilter
TRACEBUFFER ,posfilter =position
Restricts the trace buffer information displayed in the Analysis window based on a positions or set of positions, where position is an integer or range:n The position to display.n..m Display the range of positions from n to m inclusive. n can be negative.n..+o Display the range of positions from n to n+o inclusive.
The values n and m can be negative if a trigger is defined. Positions are displayed in the Elem column of the Analysis window.
Applying a filter to the trace buffer does not lose information unless you save the trace with the filtered qualifier. See Savefile (ETM-enabled targets) on page 2-279 for more information.
Timefilter
TRACEBUFFER ,timefilter =time
Restricts the trace buffer information displayed in the Analysis window based on a time or range of times in the current time scale units, where time is an integer, a floating point number, or a range:n The time to display.n..m Display the range of times from n to m inclusive.n..+o Display the range of times from n to n+o inclusive.
The values n and m can be negative if a trigger is defined. You can use cycle numbers instead of time values. Applying a filter to the trace buffer does not lose information unless you save the trace with the filtered qualifier. See Savefile (ETM-enabled targets) on page 2-279 for more information.
Addressfilter
TRACEBUFFER ,addrfilter =address
ARM DUI 0175N Copyright © 2002-2011 ARM. All rights reserved. 2-283ID052111 Non-Confidential

RealView Debugger Commands
TRACEBUFFER ,addressfilter =address
Restricts the trace buffer information displayed in the Analysis window based on an address or range of addresses, where address is an integer or range:n The address to display.n..m Display the range of addresses from n to m inclusive.n..+o Display the range of addresses from n to n+o inclusive.
You cannot specify addresses symbolically with addressfilter. Use namefilter instead.
Applying a filter to the trace buffer does not lose information unless you save the trace with the filtered qualifier. See Savefile (ETM-enabled targets) on page 2-279 for more information.
Namefilter
TRACEBUFFER ,namefilter ="name"
Restricts the trace buffer information displayed in the Analysis window based on a symbolic name, where name is a single string. The symbol names used by this filter are displayed in the Symbolic column of the Analysis window.
Applying a filter to the trace buffer does not lose information unless you save the trace with the filtered qualifier. See Savefile (ETM-enabled targets) on page 2-279 for more information.
Percentfilter
TRACEBUFFER ,percentfilter =percent
Restricts the trace buffer information displayed in the Analysis window based on an percentage of the buffer, where percent is an integer or range:n The percentage to display.n..m Display the range of percentages from n to m inclusive.n..+o Display the range of percentages from n to n+o inclusive.
Applying a filter to the trace buffer does not lose information unless you save the trace with the filtered qualifier. See Savefile (ETM-enabled targets) on page 2-279 for more information.
Datavaluefilter
TRACEBUFFER ,dvalfilter =value
TRACEBUFFER ,datavaluefilter =value
Restricts the trace buffer information displayed in the Analysis window based on an data value or range of values, where value is an integer or range:n The value to display.n..m Display the range of value from n to m inclusive.n..+o Display the range of value from n to n+o inclusive.
Applying a filter to the trace buffer does not lose information unless you save the trace with the filtered qualifier. See Savefile (ETM-enabled targets) on page 2-279 for more information.
Accesstypefilter
TRACEBUFFER ,typefilter =mask
TRACEBUFFER ,accesstypefilter =mask
ARM DUI 0175N Copyright © 2002-2011 ARM. All rights reserved. 2-284ID052111 Non-Confidential

RealView Debugger Commands
Restricts the trace buffer information displayed in the Analysis window based on an access type, where mask is a bitwise-OR of the following values:0x001 Code access.0x002 Data access.0x004 Instruction prefetch.0x008 DMA.0x010 Interrupt.0x020 Bus transaction.0x040 Probe collection.0x080 Pin or signal change.0x100 Non-trace error.
Applying a filter to the trace buffer does not lose information unless you save the trace with the filtered qualifier. See Savefile (ETM-enabled targets) on page 2-279 for more information.
Clearfilter
TRACEBUFFER ,clearfilter
Remove any and all of the filters applied to the trace buffer, so that the Analysis window displays all the collected trace information.
Or_filter
TRACEBUFFER ,or_filter
Specifies that, if multiple filter conditions are applied to the trace buffer, the trace data is displayed if any of the filters display it. That is, the display is the union of all the filters. This is the initial state and you can change it using and_filter. Specifying or_filter overrides a previously active and_filter setting, and the change is applied to the Analysis window immediately.
And_filter
TRACEBUFFER ,and_filter
Specifies that, if multiple filter conditions are applied to the trace buffer, the trace data is displayed only if all of the filters display it. That is, the display is the intersection of all the filters. Specifying and_filter overrides a previously active or_filter setting and the change is applied to the Analysis window immediately.
Invert_filter
TRACEBUFFER ,invert_filter
Invert the sense of the specified filter conditions.
For example, if you specify posfilter and Datavaluefilter, then:
• with and_filter specified, the filtering process returns trace information for the areas of execution except where both the position and data value match criteria you have entered are satisfied
• for or_filter specified, the filtering process returns trace information for the areas of execution except where either the position or data value match criterion you have entered is satisfied.
Normal_filter
TRACEBUFFER ,normal_filter
ARM DUI 0175N Copyright © 2002-2011 ARM. All rights reserved. 2-285ID052111 Non-Confidential

RealView Debugger Commands
Revert back to non-inverted filtering (the default).
Pos_relative
TRACEBUFFER ,pos_relative
Specifies that the element (position) numbering used in the Elem column of the Analysis window is relative to the trigger position, so that the trigger record is numbered 0, the record before (in time) the trigger is -1, and the record after is 1.
Pos_absolute
TRACEBUFFER ,pos_absolute
Specifies that the element (position) numbering used in the Elem column of the Analysis window is absolute, so that the record captured first is numbered 0, and records captured later are numbered in increasing sequence.
You cannot use this mode with the ARM ETM because records are always relative to a trigger.
Refresh
TRACEBUFFER ,refresh
This option refreshes the trace display.
Gui
TRACEBUFFER ,gui
This option modifies the action of the other commands. It specifies that the TRACEBUFFER command was initiated from the GUI, and that messages must be displayed using dialogs rather than text in the command window.
Note This option has no effect when running in command line mode.
Examples
The following examples show how to use TRACEBUFFER:
TRACEBUFFER,timefilter 49.9..50.1
Set a filter that displays in the Analysis window only trace records captured 0.1 time unit before and after 50 time units. You set time units with scaletime.
TRACEBUFFER,savefile,defunneled,sourceid:1 ="tracerun.xml"
Save the complete trace buffer for the trace source with ID 1, because no filtering is applied, to a file in the current directory called tracerun.xml.
TRACEBUFFER,find_name ="main"
Search through the Analysis window for the first occurrence of the text main, and display it.
See also• ANALYZER on page 2-23• DTBREAK on page 2-126• DTRACE on page 2-130
ARM DUI 0175N Copyright © 2002-2011 ARM. All rights reserved. 2-286ID052111 Non-Confidential
RealView Debugger Commands
• ETM_CONFIG on page 2-143• TRACE on page 2-277• TRACEDATAACCESS on page 2-288• TRACEDATAREAD on page 2-293• TRACEDATAWRITE on page 2-298• TRACEEXTCOND on page 2-303• TRACEINSTREXEC on page 2-307• TRACEINSTRFETCH on page 2-312• the following in the RealView Debugger Trace User Guide:
— Chapter 9 Analyzing Trace with the Analysis Window.
ARM DUI 0175N Copyright © 2002-2011 ARM. All rights reserved. 2-287ID052111 Non-Confidential

RealView Debugger Commands
2.3.141 TRACEDATAACCESS
Sets a trace point on data accesses, that is, either reads or writes.
Note This command is valid only for ETM-based hardware targets.
Syntax
TRACEDATAACCESS [,qualifier...] {address | address-range}
where:
qualifier Is an ordered list of zero or more qualifiers. The possible qualifiers are described in List of qualifiers.
address Specifies the address at which the tracepoint is placed.
address-range
Specifies the address range for the tracepoint.
Description
This command sets a tracepoint at the address or address range you specify that triggers when an instruction access at the indicated address accesses data from memory.
The tracepoint type is by default to trigger, that is, start collecting trace information into the trace buffer. You can modify the action using the hw_out: qualifier to, for example, stop tracing.
List of qualifiers
The command qualifiers are as follows, but not all qualifiers are available for all of the supported trace targets:
hw_ahigh:(n) Specifies the high address for an address-range tracepoint. The low address is specified by the standard tracepoint address.For example, to set a tracepoint that triggers when any data value is accessed at an address in the range 0x1000-0x1200, enter the command:TRACEDATAACCESS,hw_ahigh:0x1200 0x1000
hw_and:{id | "then-id"} Perform an and or an and-then conjunction with an existing tracepoint identified by id, which is one of:• next for the next breakpoint specified for this connection• prev for the last breakpoint specified for this connection• the breakpoint list index of an existing breakpoint. The parentheses are optional.Tracepoints set in this way are called chained tracepoints. How RealView Debugger processes the tracepoints depends on the conjunction you have used:• In the and form, the conditions associated with both tracepoints are
chained together, so that trace capture starts only when both conditions simultaneously match.For example:
ARM DUI 0175N Copyright © 2002-2011 ARM. All rights reserved. 2-288ID052111 Non-Confidential

RealView Debugger Commands
TRACEDATAACCESS,hw_and:next \MODIFY\#582TRACEDATAACCESS,hw_and:prev \ACCESS\#379
• In the and-then form, RealView Debugger examines the chained tracepoints starting with the last one you specified. When the condition for the last tracepoint is met, the previous tracepoint is enabled. However, trace capture starts only when this tracepoint condition is met. RealView Debugger continues processing all tracepoints in the chain, until the condition in first one you specified is met. At this point, trace capture starts.
Note You must include the quotes when using the and-then form.
For example, you might have three tracepoints in a chain:TRACEDATAACCESS,hw_and:"then-next" 0x10014TRACEDATAACCESS,hw_and:"then-prev" 0x10018TRACEDATAACCESS,hw_and:"then-prev" 0x1001B
In this case, RealView Debugger first checks for a data access at address 0x1001B, then at address 0x10018, and finally at address 0x10014. When all conditions are met, trace capture starts.
If you clear a tracepoint that has the ID next, then all tracepoints in the chain are cleared.If you clear a tracepoint that has the ID prev, then that tracepoint and the following ones are cleared. The previous breakpoints in the chain remain set.
hw_dhigh:(n) Specifies the high data value for a data-range tracepoint. The low data value is specified by the hw_dvalue qualifier.For example, to set a tracepoint that triggers when a data value in the range 0x00-0x18 is accessed at address 0x1000, enter the command:TRACEDATAACCESS,hw_dvalue:0x0,hw_dhigh:0x18 0x1000
hw_dmask:(n) Specifies the data value mask for a data-range tracepoint. The data value to which the mask is applied is specified by the hw_dvalue qualifier. The data value range is determined by masking lower order bits out of the specified data value.For example, to set a tracepoint that triggers when a data value in the range 0x400-0x4FF is accessed at address 0x1000, enter the command:TRACEDATAACCESS,hw_dvalue:0x400,hw_dmask:0xF00 0x1000
hw_dvalue:(n) Specifies a data value to be compared to values transmitted on the processor data bus.For example, to set a tracepoint that triggers when the data value 0x400 is accessed at address 0x1FA00, enter the command:TRACEDATAACCESS,hw_dvalue:0x400 0x1FA00
hw_in:{s} Input trigger tests. The string s is specific to the trace connection being used. For the ARM ETM, the following case-sensitive forms are available:Ignore Security Level=Yes|No
Enables Secure World and Normal World data comparisons for processors that implement the TrustZone technology:Yes Match when the processor is in any mode. This is the
default.
ARM DUI 0175N Copyright © 2002-2011 ARM. All rights reserved. 2-289ID052111 Non-Confidential

RealView Debugger Commands
No Match only when the processor is in the mode specified by the address suffix:• S:address indicates Secure World.• N:address indicates Normal World.
For example, to capture trace when a data value is accessed at the Secure World address 0x8100, enter the command:TRACEDATAACCESS,hw_in:{Ignore Security Level=No} S:0x8100.
"Size of Data Access=s"
This determines the following:• for data accesses, the size of the data transfer• for instruction accesses, the size of the instruction
accessed.The size s is one of:Any Depends on the implementation:
• halfword for Thumb code• word for ARM code.This is the default.
Halfword 16-bit accesses (Thumb code).Word 32-bit accesses (ARM code).For example, to set a tracepoint that triggers for any 32-bit data read or a write that occurs at an address in the range 0x1E000-0x1FF00:TRACEDATAACCESS,hw_in:"Size of Data Access=Word" 0x1E00..0x1FF00
hw_not:{s} Use this qualifier to invert the sense of an address, data, or hw_and term specified in the same command. The argument s can be set to:addr Invert the tracepoint address value.data Invert the tracepoint value.then Invert an associated hw_and:{then} condition.For example, to set a tracepoint that triggers when a data value does not match a mask, enter the command:TRACEDATAACCESS,hw_not:data,hw_dmask:0x00FF ...
The trace commands require an address value, and the addr variant of hw_not uses this address. For example, to trace execution at addresses other than the range 0x10040-0x10060, that is, exclude this region from the trace, enter the command:TRACEDATAACCESS,hw_not:addr 0x10040..0x10060
The hw_not:then variant of the command is used in conjunction with hw_and to form or and nand-then conditions.
hw_out:{s} Output trigger tests. The string s is specific to the trace connection being used. For the ARM ETM, the following case-sensitive form is defined:"Tracepoint Type=s"
Specify the trace action that occurs when data is accessed by an instruction at the specified address, where s is:Trigger Output a trigger event to the TPA.Start Tracing Start trace capture.Stop Tracing Stop trace capture.
ARM DUI 0175N Copyright © 2002-2011 ARM. All rights reserved. 2-290ID052111 Non-Confidential

RealView Debugger Commands
Trace Instr Trace instructions only.Trace Instr and Data
Trace instructions and data.
Note An address range can be specified only for Trace Instr and Trace Instr
and Data.
For example, to trace only instructions when a data read or write occurs and an instruction is executed at an address in the range 0x1E000-0x1FF00, enter the command:TRACEDATAACCESS,hw_out:"Tracepoint Type=Trace Instr" 0x1E00..0x1FF00
hw_passcount:(n) Specifies the number of times that the specified condition has to occur to trigger the tracepoint.You can use this option to set up and use the ARM ETM counter hardware, if the ETM has counters and there is one available for use. ETM counters are 32 bits.
modify:(n) Instead of creating a new tracepoint, modify the tracepoint with tracepoint ID number n by replacing the address expression and the qualifiers of the existing tracepoint to those specified in this command.
Note You cannot use this qualifier with the hw_and qualifier to change a
non-chained tracepoint to a chained tracepoint. However, you can modify a chained tracepoint with any other qualifier and also change the address expression.
Examples
The following examples show how to use TRACEDATAACCESS:
TRACEDATAACCESS &@trace\\num_runs Trigger trace output when the variable num_runs is accessed in the file trace.c.
TRACEDATAACCESS,hw_out:"Tracepoint Type=Trace Instr" 0x8100..0x8110 Start tracing instructions when a data access occurs at an address in the range 0x8100-0x8110.
TRACEDATAACCESS,hw_pass:5,hw_out:"Tracepoint Type=Start Tracing" 0x8100 Start tracing when a data access occurs at address 0x8100.
TRACEDATAACCESS,hw_out:"Tracepoint Type=Stop Tracing" 0x8100..0x8110 Stop tracing when a data access occurs at an address in the range 0x8100-0x8110.
Alias
TRCDACCES is an alias of TRACEDATAACCESS.
ARM DUI 0175N Copyright © 2002-2011 ARM. All rights reserved. 2-291ID052111 Non-Confidential

RealView Debugger Commands
See also• Specifying address ranges on page 2-2• ANALYZER on page 2-23• DTBREAK on page 2-126• DTRACE on page 2-130• ETM_CONFIG on page 2-143• TRACE on page 2-277• TRACEBUFFER on page 2-279• TRACEDATAREAD on page 2-293• TRACEDATAWRITE on page 2-298• TRACEEXTCOND on page 2-303• TRACEINSTREXEC on page 2-307• TRACEINSTRFETCH on page 2-312• the following in the RealView Debugger Trace User Guide:
— Chapter 6 Setting Unconditional Tracepoints— Chapter 7 Setting Conditional Tracepoints.
• Embedded Trace Macrocell Specification.
ARM DUI 0175N Copyright © 2002-2011 ARM. All rights reserved. 2-292ID052111 Non-Confidential

RealView Debugger Commands
2.3.142 TRACEDATAREAD
Enables you to set a tracepoint on data reads.
Note This command is valid only for ETM-based hardware targets.
Syntax
TRACEDATAREAD [,qualifier...] {address | address-range}
where:
qualifier Is an ordered list of zero or more qualifiers. The possible qualifiers are described in List of qualifiers.
address Specifies the address at which the tracepoint is placed.
address-range
Specifies the address range at which the tracepoint is placed.
Description
This command sets a tracepoint at the address or address range you specify that triggers when an instruction access at the indicated address reads data from memory.
The tracepoint type is by default to trigger, that is, start collecting trace information into the trace buffer. You can modify the action using the hw_out: qualifier to, for example, stop tracing.
List of qualifiers
The command qualifiers are as follows, but not all qualifiers are available for all of the supported trace targets:
hw_ahigh:(n) Specifies the high address for an address-range tracepoint. The low address is specified by the standard tracepoint address.For example, to set a tracepoint that triggers when any data value is read from an address in the range 0x1000-0x1200, enter the command:TRACEDATAREAD,hw_ahigh:0x1200 0x1000
This is equivalent to the command:TRACEDATAREAD 0x1000..0x1200
hw_and:{id | "then-id"} Perform an and or an and-then conjunction with an existing tracepoint identified by id, which is one of:• next for the next breakpoint specified for this connection• prev for the last breakpoint specified for this connection• the breakpoint list index of an existing breakpoint.The parentheses are optional.
ARM DUI 0175N Copyright © 2002-2011 ARM. All rights reserved. 2-293ID052111 Non-Confidential

RealView Debugger Commands
Tracepoints set in this way are called chained tracepoints. How RealView Debugger processes the tracepoints depends on the conjunction you have used:• In the and form, the conditions associated with both tracepoints are
chained together, so that trace capture starts only when both conditions simultaneously match.For example:TRACEDATAREAD,hw_and:next \MODIFY\#582TRACEDATAREAD,hw_and:prev \ACCESS\#379
• In the and-then form, RealView Debugger examines the chained tracepoints starting with the last one you specified. When the condition for the last tracepoint is met, the previous tracepoint is enabled. However, trace capture starts only when this tracepoint condition is met. RealView Debugger continues processing all tracepoints in the chain, until the condition in first one you specified is met. At this point, trace capture starts.
Note You must include the quotes when using the and-then form.
For example, you might have three tracepoints in a chain:TRACEDATAREAD,hw_and:"then-next" 0x10014TRACEDATAREAD,hw_and:"then-prev" 0x10018TRACEDATAREAD,hw_and:"then-prev" 0x1001B
In this case, RealView Debugger first checks for a data read at address 0x1001B, then at address 0x10018, and finally at address 0x10014. When all conditions are met, trace capture starts.
If you clear a tracepoint that has the ID next, then all tracepoints in the chain are cleared.If you clear a tracepoint that has the ID prev, then that tracepoint and the following ones are cleared. The previous breakpoints in the chain remain set.
hw_dhigh:(n) Specifies the high data value for a data-range tracepoint. The low data value is specified by the hw_dvalue qualifier.For example, to set a tracepoint that triggers when a data value in the range 0x00-0x18 is read from address 0x1000, enter the command:TRACEDATAREAD,hw_dvalue:0x0,hw_dhigh:0x18 0x1000
hw_dmask:(n) Specifies the data value mask for a data-range tracepoint. The data value to which the mask is applied is specified by the hw_dvalue qualifier. The data value range is determined by masking lower order bits out of the specified data value.For example, to set a tracepoint that triggers when a data value in the range 0x400-0x4FF is read from address 0x1000, enter the command:TRACEDATAREAD,hw_dvalue:0x400,hw_dmask:0xF00 0x1000
hw_dvalue:(n) Specifies a data value to be compared to values transmitted on the processor data bus.For example, to set a tracepoint that triggers when the data value 0x400 is read from the address 0x1FA00, enter the command:TRACEDATAREAD,hw_dvalue:0x400 0x1FA00
ARM DUI 0175N Copyright © 2002-2011 ARM. All rights reserved. 2-294ID052111 Non-Confidential

RealView Debugger Commands
hw_in:{s} Input trigger tests. The string s is specific to the trace connection being used. For the ARM ETM, the following case-sensitive forms are defined:Ignore Security Level=Yes|No
Enables Secure World and Normal World data comparisons for processors that implement the TrustZone technology:Yes Match when the processor is in any mode. This is the
default.No Match only when the processor is in the mode
specified by the address suffix:• S:address indicates Secure World.• N:address indicates Normal World.
For example, to capture trace when a data value is read from the Secure World address 0x8100, enter the command:TRACEDATAREAD,hw_in:{Ignore Security Level=No} S:0x8100.
"Size of Data Access=s"
This determines the following:• for data accesses, the size of the data transfer• for instruction accesses, the size of the instruction
accessed.The size s is one of:Any Depends on the implementation:
• halfword for Thumb code• word for ARM code.This is the default.
Halfword 16-bit accesses (Thumb code).Word 32-bit accesses (ARM code).For example, to set a tracepoint that triggers for any 32-bit data read that occurs at an address in the range 0x1E000-0x1FF00, enter the command:TRACEDATAREAD,hw_in:"Size of Data Access=Word" 0x1E00..0x1FF00
hw_not:{s} Use this qualifier to invert the sense of an address, data, or hw_and term specified in the same command. The argument s can be set to:addr Invert the tracepoint address value.data Invert the tracepoint value.then Invert an associated hw_and:{then} condition.For example, to capture trace when a data value does not match a mask, enter the command:TRACEDATAREAD,hw_not:data,hw_dmask:0x00FF ...
The trace commands require an address value, and the addr variant of hw_not uses this address. For example, to trace execution at addresses other than in the range 0x10040-0x10060, that is, exclude this region from the trace, enter the command:TRACEDATAREAD,hw_not:addr 0x10040..0x10060
The hw_not:then variant of the command is used in conjunction with hw_and to form or and nand-then conditions.
ARM DUI 0175N Copyright © 2002-2011 ARM. All rights reserved. 2-295ID052111 Non-Confidential

RealView Debugger Commands
hw_out:{s} Output trigger tests. The string s is specific to the trace connection being used. For the ARM ETM, the following case-sensitive form is defined:"Tracepoint Type=s"
Specify the trace action that occurs when data is read by an instruction at the specified address, where s is:Trigger Output a trigger event to the TPA.Start Tracing Start trace capture.Stop Tracing Stop trace capture.Trace Instr Trace instructions only.Trace Instr and Data
Trace instructions and data.
Note An address range can be specified only for Trace Instr and Trace Instr
and Data.
For example, to trace only instructions when a data read occurs and an instruction is executed at an address in the range 0x1E000-0x1FF00, enter the command:TRACEDATAREAD,hw_out:"Tracepoint Type=Trace Instr" 0x1E00..0x1FF00
hw_passcount:(n) Specifies the number of times that the specified condition has to occur to trigger the tracepoint.You can use this option to set up and use the ARM ETM counter hardware, if the ETM has counters and there is one available for use. ETM counters are 32 bits.
modify:(n) Instead of creating a new tracepoint, modify the tracepoint with tracepoint ID number n by replacing the address expression and the qualifiers of the existing tracepoint to those specified in this command.
Note You cannot use this qualifier with the hw_and qualifier to change a
non-chained tracepoint to a chained tracepoint. However, you can modify a chained tracepoint with any other qualifier and also change the address expression.
Examples
The following examples show how to use TRACEDATAREAD:
TRACEDATAREAD &@trace\\num_runs Trigger trace output when the variable num_runs is read in the file trace.c.
TRACEDATAREAD,hw_out:"Tracepoint Type=Trace Instr" 0x8100..0x8110 Start tracing instructions when a data read occurs at an address in the range 0x8100-0x8110.
TRACEDATAREAD,hw_pass:5,hw_out:"Tracepoint Type=Start Tracing" 0x8100 Start tracing when a data read occurs at address 0x8100.
ARM DUI 0175N Copyright © 2002-2011 ARM. All rights reserved. 2-296ID052111 Non-Confidential

RealView Debugger Commands
TRACEDATAREAD,hw_out:"Tracepoint Type=Stop Tracing" 0x8100..0x8110 Stop tracing when a data read occurs from an address in the range 0x8100-0x8110.
Alias
TRCDREAD is an alias of TRACEDATAREAD.
See also• Specifying address ranges on page 2-2• ANALYZER on page 2-23• DTBREAK on page 2-126• DTRACE on page 2-130• ETM_CONFIG on page 2-143• TRACE on page 2-277• TRACEBUFFER on page 2-279• TRACEDATAACCESS on page 2-288• TRACEDATAWRITE on page 2-298• TRACEEXTCOND on page 2-303• TRACEINSTREXEC on page 2-307• TRACEINSTRFETCH on page 2-312• the following in the RealView Debugger Trace User Guide:
— Chapter 6 Setting Unconditional Tracepoints— Chapter 7 Setting Conditional Tracepoints.
• Embedded Trace Macrocell Specification.
ARM DUI 0175N Copyright © 2002-2011 ARM. All rights reserved. 2-297ID052111 Non-Confidential

RealView Debugger Commands
2.3.143 TRACEDATAWRITE
Enables you to set a tracepoint on data writes.
Note This command is valid only for ETM-based hardware targets.
Syntax
TRACEDATAWRITE [,qualifier...] {address | address-range}
where:
qualifier Is an ordered list of zero or more qualifiers. The possible qualifiers are described in List of qualifiers.
address Specifies the address at which the tracepoint is placed.
address-range
Specifies the address range at which the tracepoint is placed.
Description
This command sets a tracepoint at the address or address range you specify that triggers when an instruction access at the indicated address writes data to memory.
The tracepoint type is by default to trigger, that is, start collecting trace information into the trace buffer. You can modify the action using the hw_out: qualifier to, for example, stop tracing.
List of qualifiers
The command qualifiers are as follows, but not all qualifiers are available for all of the supported trace targets:
hw_ahigh:(n) Specifies the high address for an address-range tracepoint. The low address is specified by the standard tracepoint address.For example, to set a tracepoint that triggers when any data value is written to an address in the range 0x1000-0x1200, enter the command:TRACEDATAWRITE,hw_ahigh:0x1200 0x1000
This is equivalent to the command:TRACEDATAWRITE 0x1000..0x1200
hw_and:{id | "then-id"} Perform an and or an and-then conjunction with an existing tracepoint identified by id, which is one of:• next for the next breakpoint specified for this connection• prev for the last breakpoint specified for this connection• the breakpoint list index of an existing breakpoint.The parentheses are optional.
ARM DUI 0175N Copyright © 2002-2011 ARM. All rights reserved. 2-298ID052111 Non-Confidential

RealView Debugger Commands
Tracepoints set in this way are called chained tracepoints. How RealView Debugger processes the tracepoints depends on the conjunction you have used:• In the and form, the conditions associated with both tracepoints are
chained together, so that trace capture starts only when both conditions simultaneously match.For example:TRACEDATAWRITE,hw_and:next \MODIFY\#582TRACEDATAWRITE,hw_and:prev \ACCESS\#379
• In the and-then form, RealView Debugger examines the chained tracepoints starting with the last one you specified. When the condition for the last tracepoint is met, the previous tracepoint is enabled. However, trace capture starts only when this tracepoint condition is met. RealView Debugger continues processing all tracepoints in the chain, until the condition in first one you specified is met. At this point, trace capture starts.
Note You must include the quotes when using the and-then form.
For example, you might have three tracepoints in a chain:TRACEDATAWRITE,hw_and:"then-next" 0x10014TRACEDATAWRITE,hw_and:"then-prev" 0x10018TRACEDATAWRITE,hw_and:"then-prev" 0x1001B
In this case, RealView Debugger first checks for a data write at address 0x1001B, then at address 0x10018, and finally at address 0x10014. When all conditions are met, trace capture starts.
If you clear a tracepoint that has the ID next, then all tracepoints in the chain are cleared.If you clear a tracepoint that has the ID prev, then that tracepoint and the following ones are cleared. The previous breakpoints in the chain remain set.
hw_dhigh:(n) Specifies the high data value for a data-range tracepoint. The low data value is specified by the hw_dvalue qualifier.For example, to set a tracepoint that triggers when a data value in the range 0x00-0x18 is written to address 0x1000, enter the command:TRACEDATAWRITE,hw_dvalue:0x0,hw_dhigh:0x18 0x1000
hw_dmask:(n) Specifies the data value mask for a data-range tracepoint. The data value to which the mask is applied is specified by the hw_dvalue qualifier. The data value range is determined by masking lower order bits out of the specified data value.For example, to set a tracepoint that triggers when a data value in the range 0x400-0x4FF is written to address 0x1000, enter the command:TRACEDATAWRITE,hw_dvalue:0x400,hw_dmask:0xF00 0x1000
hw_dvalue:(n) Specifies a data value to be compared to values transmitted on the processor data bus.For example, to set a tracepoint that triggers when data value 0x400 is written to the address 0x1FA00, enter the command:TRACEDATAWRITE,hw_dvalue:0x400 0x1FA00
ARM DUI 0175N Copyright © 2002-2011 ARM. All rights reserved. 2-299ID052111 Non-Confidential

RealView Debugger Commands
hw_in:{s} Input trigger tests. The string s is specific to the trace connection being used. For the ARM ETM, the following case-sensitive forms are defined:Ignore Security Level=Yes|No
Enables Secure World and Normal World data comparisons for processors that implement the TrustZone technology:Yes Match when the processor is in any mode. This is the
default.No Match only when the processor is in the mode
specified by the address suffix:• S:address indicates Secure World.• N:address indicates Normal World.
For example, to capture trace when any data value is written to the Secure World address 0x8000, enter the command:TRACEDATAWRITE,hw_in:{Ignore Security Level=No} S:0x8100.
"Size of Data Access=s"
This determines the following:• for data accesses, the size of the data transfer• for instruction accesses, the size of the instruction
accessed.The size s is one of:Any Depends on the implementation:
• halfword for Thumb code• word for ARM code.This is the default.
Halfword 16-bit accesses (Thumb code).Word 32-bit accesses (ARM code).For example, to capture trace when any 32-bit data read or write occurs at an address in the range 0x1E000-0x1FF00, enter the command:TRACEDATAWRITE,hw_in:"Size of Data Access=Word" 0x1E00..0x1FF00
hw_not:{s} Use this qualifier to invert the sense of an address, data, or hw_and term specified in the same command. The argument s can be set to:addr Invert the tracepoint address value.data Invert the tracepoint value.then Invert an associated hw_and:{then} condition.For example, to capture trace when a data value does not match a mask, enter the command:TRACEDATAWRITE,hw_not:data,hw_dmask:0x00FF ...
The trace commands require an address value, and the addr variant of hw_not uses this address. For example, to trace execution at addresses other than the range 0x10040 to 0x10060, that is, exclude this region from the trace, enter the command:TRACEDATAWRITE,hw_not:addr 0x10040..0x10060
The hw_not:then variant of the command is used in conjunction with hw_and to form or and nand-then conditions.
ARM DUI 0175N Copyright © 2002-2011 ARM. All rights reserved. 2-300ID052111 Non-Confidential

RealView Debugger Commands
hw_out:{s} Output trigger tests. The string s is specific to the trace connection being used. For the ARM ETM, the following case-sensitive form is defined:"Tracepoint Type=s"
Specify the trace action that occurs when data is written by an instruction at the specified address, where s is:Trigger Output a trigger event to the TPA.Start Tracing Start trace capture.Stop Tracing Stop trace capture.Trace Instr Trace instructions only.Trace Instr and Data
Trace instructions and data.
Note An address range can be specified only for Trace Instr and Trace Instr
and Data.
For example, to trace only instructions when a data write occurs and an instruction is executed at an address in the range 0x1E000-0x1FF00, enter the command:TRACEDATAWRITE,hw_out:"Tracepoint Type=Trace Instr" 0x1E00..0x1FF00
hw_passcount:(n) Specifies the number of times that the specified condition has to occur to trigger the tracepoint.You can use this option to set up and use the ARM ETM counter hardware, if the ETM has counters and there is one available for use. ETM counters are 32 bits.
modify:(n) Instead of creating a new tracepoint, modify the tracepoint with tracepoint ID number n by replacing the address expression and the qualifiers of the existing tracepoint to those specified in this command.
Note You cannot use this qualifier with the hw_and qualifier to change a
non-chained tracepoint to a chained tracepoint. However, you can modify a chained tracepoint with any other qualifier and also change the address expression.
Examples
The following example shows how to use TRACEDATAWRITE:
TRACEDATAWRITE &@trace\\num_runs Trigger trace output when a write to the variable num_runs occurs in the file trace.c.
TRACEDATAWRITE,hw_out:"Tracepoint Type=Trace Instr" 0x8100..0x8110 Start tracing instructions when a data write occurs to an address in the range 0x8100-0x8110.
TRACEDATAWRITE,hw_pass:5,hw_out:"Tracepoint Type=Start Tracing" 0x8100 Start tracing when a data write occurs to address 0x8100.
ARM DUI 0175N Copyright © 2002-2011 ARM. All rights reserved. 2-301ID052111 Non-Confidential

RealView Debugger Commands
TRACEDATAWRITE,hw_out:"Tracepoint Type=Stop Tracing" 0x8100..0x8110 Stop tracing when a data write occurs to an address in the range 0x8100-0x8110.
Alias
TRCDWRITE is an alias of TRACEDATAWRITE.
See also• Specifying address ranges on page 2-2• ANALYZER on page 2-23• DTBREAK on page 2-126• DTRACE on page 2-130• ETM_CONFIG on page 2-143• TRACE on page 2-277• TRACEBUFFER on page 2-279• TRACEDATAACCESS on page 2-288• TRACEDATAREAD on page 2-293• TRACEEXTCOND on page 2-303• TRACEINSTREXEC on page 2-307• TRACEINSTRFETCH on page 2-312• the following in the RealView Debugger Trace User Guide:
— Chapter 6 Setting Unconditional Tracepoints— Chapter 7 Setting Conditional Tracepoints.
• Embedded Trace Macrocell Specification.
ARM DUI 0175N Copyright © 2002-2011 ARM. All rights reserved. 2-302ID052111 Non-Confidential

RealView Debugger Commands
2.3.144 TRACEEXTCOND
Enables you to set a tracepoint that triggers when a specified external condition occurs.
Note This command is valid only for ETM-based hardware targets.
Syntax
TRACEEXTCOND [,qualifier...]
where:
qualifier Is an ordered list of zero or more qualifiers. The possible qualifiers are described in List of qualifiers.
Note You must always specify the hw_in qualifier.
Description
This command sets a tracepoint that triggers when a specified external condition occurs. By default, the tracepoint type is Trigger, that is start collecting trace information into the trace buffer. You can modify the action using the hw_out: qualifier to, for example, stop tracing.
List of qualifiers
The command qualifiers are as follows, but not all qualifiers are available for all of the supported trace targets:
hw_and:{id | "then-id"} Perform an and or an and-then conjunction with an existing tracepoint identified by id, which is one of:• next for the next breakpoint specified for this connection• prev for the last breakpoint specified for this connection• the breakpoint list index of an existing breakpoint.The parentheses are optional.Tracepoints set in this way are called chained tracepoints. How RealView Debugger processes the tracepoints depends on the conjunction you have used:• In the and form, the conditions associated with both tracepoints are
chained together, so that trace capture starts only when both conditions simultaneously match.
• In the and-then form, RealView Debugger examines the chained tracepoints starting with the last one you specified. When the condition for the last tracepoint is met, the previous tracepoint is enabled. However, trace capture starts only when this tracepoint condition is met. RealView Debugger continues processing all tracepoints in the chain, until the condition in first one you specified is met. At this point, trace capture starts.
ARM DUI 0175N Copyright © 2002-2011 ARM. All rights reserved. 2-303ID052111 Non-Confidential

RealView Debugger Commands
Note You must include the quotes when using the and-then form.
If you clear a tracepoint that has the ID next, then all tracepoints in the chain are cleared.If you clear a tracepoint that has the ID prev, then that tracepoint and the following ones are cleared. The previous breakpoints in the chain remain set.
hw_in:{s} Input trigger to test for external condition events. You must always specify this qualifier. The string s is specific to the trace connection being used. For the ARM ETM, the following case-sensitive forms are defined:"External Condition=s"
The tracepoint is activated on the events shown in Table 2-22.
Note For Extended external inputs 1 to 4, you must also use the
ETM_CONFIG command to specify the number of the external input to test.
Up to four signals are available. The ASIC manufacturer determines the availability and usage of these output signals. See your ASIC documentation for details.
hw_not:{then} Use this qualifier to invert the sense of a hw_and:{then} condition specified in the same command.For example, to form or and nand-then conditions use the hw_not:then qualifier in conjunction with hw_and, for example:TRACEEXTCOND,hw_and:next,hw_not:then,hw_in:"External Condition=ExternalIn1"
Table 2-22 External condition events
Event String setting
External inputs 1-4 ExternalIn1 ExternalIn2 ExternalIn3 ExternalIn4
Extended external inputs 1-4(ETMv3.1 and later)The number of inputs available depends on the ETM.
Extended ExternalIn1Extended ExternalIn2Extended ExternalIn3Extended ExternalIn4
EmbeddedICE watchpoints 1-2 Watchpoint1
Watchpoint2
Access to ASIC memory maps 1-16 ASIC Memmap 1...ASIC Memmap 16
ARM DUI 0175N Copyright © 2002-2011 ARM. All rights reserved. 2-304ID052111 Non-Confidential

RealView Debugger Commands
hw_out:{s} Output trigger tests. The string s is specific to the trace connection being used. For the ARM ETM, the following case-sensitive forms are defined:"Tracepoint Type=s"
Specify the trace action when an external condition occurs at an address in the specified range, where s is:Trigger Output a trigger event to the TPA.Start Tracing Start trace capture.Stop Tracing Stop trace capture.Trace Instr Trace instructions only.Trace Instr and Data
Trace instructions and data.ExternalOut1, ExternalOut2, ExternalOut3, or ExternalOut4
Trace the specified external output.
Note An address range can be specified only for Trace Instr and Trace Instr
and Data.
For example, to trace only instructions when an external condition occurs and an instruction is executed at an address in the range 0x1E000-0x1FF00, enter the command:TRACEEXTCOND,hw_out:"Tracepoint Type=Trace Instr",hw_in:"External Condition=ExternalIn1"
hw_passcount:(n) Specifies the number of times that the specified condition has to occur to trigger the tracepoint. You can use this option to set up and use the ARM ETM counter hardware, if the ETM has counters and there is one available for use. ETM counters are 32 bits.
modify:(n) Instead of creating a new tracepoint, modify the tracepoint with tracepoint ID number n by replacing the address expression and the qualifiers of the existing tracepoint to those specified in this command.
Note You cannot use this qualifier with the hw_and qualifier to change a
non-chained tracepoint to a chained tracepoint. However, you can modify a chained tracepoint with any other qualifier and also change the address expression.
Examples
The following example shows how to use TRACEEXTCOND:
TRACEEXTCOND,hw_out:"Tracepoint Type=Trigger",hw_pass:5,hw_in:"External
Condition=ExternalIn1" Set a trigger to output captured trace after the fifth external condition on External input 1.
Alias
TRCEEXTC is an alias of TRACEEXTCOND.
ARM DUI 0175N Copyright © 2002-2011 ARM. All rights reserved. 2-305ID052111 Non-Confidential

RealView Debugger Commands
See also• ANALYZER on page 2-23• DTBREAK on page 2-126• DTRACE on page 2-130• ETM_CONFIG on page 2-143• TRACE on page 2-277• TRACEBUFFER on page 2-279• TRACEDATAACCESS on page 2-288• TRACEDATAREAD on page 2-293• TRACEDATAWRITE on page 2-298• TRACEINSTREXEC on page 2-307• TRACEINSTRFETCH on page 2-312• the following in the RealView Debugger Trace User Guide:
— Chapter 6 Setting Unconditional Tracepoints— Chapter 7 Setting Conditional Tracepoints.
• Embedded Trace Macrocell Specification.
ARM DUI 0175N Copyright © 2002-2011 ARM. All rights reserved. 2-306ID052111 Non-Confidential

RealView Debugger Commands
2.3.145 TRACEINSTREXEC
Enables you to set a tracepoint on instruction execution.
Syntax
TRACEINSTREXEC [,qualifier...] {address | address-range}
where:
qualifier Is an ordered list of zero or more qualifiers. The possible qualifiers are described in List of qualifiers.
address Specifies the address at which the tracepoint is placed.
address-range
Specifies the address range at which the tracepoint is placed.
Description
This command sets a tracepoint at the address or address range you specify that triggers when an instruction is executed in the indicated address range.
The tracepoint type is by default to trigger, that is, start collecting trace information into the trace buffer. You can modify the action using the hw_out: qualifier to, for example, stop tracing.
List of qualifiers
The command qualifiers are as follows, but not all qualifiers are available for all of the supported trace targets:
hw_ahigh:(n) Specifies the high address for an address-range tracepoint. The low address is specified by the standard tracepoint address.For example, to set a tracepoint that triggers when an instruction is executed at an address in the range 0x1000-0x1200, enter the command:TRACEINSTREXEC,hw_ahigh:0x1200 0x1000
This is equivalent to the command:TRACEINSTREXEC 0x1000..0x1200
hw_and:{id | "then-id"} Perform an and or an and-then conjunction with an existing tracepoint identified by id, which is one of:• next for the next breakpoint specified for this connection• prev for the last breakpoint specified for this connection• the breakpoint list index of an existing breakpoint.The parentheses are optional.Tracepoints set in this way are called chained tracepoints. How RealView Debugger processes the tracepoints depends on the conjunction you have used:• In the and form, the conditions associated with both tracepoints are
chained together, so that trace capture starts only when both conditions simultaneously match.
ARM DUI 0175N Copyright © 2002-2011 ARM. All rights reserved. 2-307ID052111 Non-Confidential

RealView Debugger Commands
• In the and-then form, RealView Debugger examines the chained tracepoints starting with the last one you specified. When the condition for the last tracepoint is met, the previous tracepoint is enabled. However, trace capture starts only when this tracepoint condition is met. RealView Debugger continues processing all tracepoints in the chain, until the condition in first one you specified is met. At this point, trace capture starts.
Note You must include the quotes when using the and-then form.
If you clear a tracepoint that has the ID next, then all tracepoints in the chain are cleared.If you clear a tracepoint that has the ID prev, then that tracepoint and the following ones are cleared. The previous breakpoints in the chain remain set.
hw_dhigh:(n) Specifies the high data value for a data-range tracepoint. The low data value is specified by the hw_dvalue qualifier.For example, to set a tracepoint that triggers when an instruction opcode in the range 0xEA000040-0xEA00004F is executed at an address in the range 0x1FA00-0x1FAFF, enter the command:TRACEINSTREXEC,hw_dvalue:0xEA000040,hw_dhigh:0xEA00004F 0x1FA00..0x1FAFF
hw_dmask:(n) Specifies the data value mask for a data-range tracepoint. The data value to which the mask is applied is specified by the hw_dvalue qualifier. The data value range is determined by masking lower order bits out of the specified data value.For example, to set a tracepoint that triggers when an instruction having a basic opcode 0xEA000040 but with any value in bits [15:8] is executed at an address in the range 0x1FA00-0x1FAFF, enter the command:TRACEINSTREXEC,hw_dvalue:0xEA000040,hw_dmask:0xFFFF00FF 0x1FA00..0x1FAFF
hw_dvalue:(n) Specifies a data value to be compared to values transmitted on the processor data bus.For example, to capture trace when an instruction with an opcode of 0xEA000040 is executed at an address in the range 0x1FA00-0x1FAFF, enter the command:TRACEINSTREXEC,hw_dvalue:0xEA000040 0x1FA00..0x1FAFF
hw_in:{s} Input trigger tests. The string s is specific to the trace connection being used. For the ARM ETM, the following case-sensitive forms are defined:"Check Condition Code=s"
For instruction tracepoints, comparisons, check the instruction condition code against the specified value, and return True if it matches, where s is:Pass Trace only instructions that are executed.Fail Trace only instructions that are not executed.
ARM DUI 0175N Copyright © 2002-2011 ARM. All rights reserved. 2-308ID052111 Non-Confidential

RealView Debugger Commands
Ignore Security Level=Yes|No
Enables Secure World and Normal World data comparisons for processors that implement the TrustZone technology:Yes Match when the processor is in any mode. This is the
default.No Match only when the processor is in the mode
specified by the address suffix:• S:address indicates Secure World.• N:address indicates Normal World.
For example, to capture trace when an instruction is executed at the Secure World address 0x8000, enter the command:TRACEINSTREXEC,hw_in:{Ignore Security Level=No} S:0x8000.
Size of Data Access=s
This determines the following:• for data accesses, the size of the data transfer• for instruction accesses, the size of the instruction
accessed.The size s is one of:Any Depends on the implementation:
• halfword for Thumb code• word for ARM code.This is the default.
Halfword 16-bit accesses (Thumb code).Word 32-bit accesses (ARM code).
hw_not:{s} Use this qualifier to invert the sense of an address, data, or hw_and term specified in the same command. The argument s can be set to:addr Invert the tracepoint address value.data Invert the tracepoint value.then Invert an associated hw_and:{then} condition.For example, to capture trace when a data value does not match a mask, enter the command:TRACEINSTREXEC,hw_not:data,hw_dmask:0x00FF ...
The trace commands require an address value, and the addr variant of hw_not uses this address. For example, to trace execution at addresses other than the range 0x10040 to 0x10060, that is, exclude this region from the trace, enter the command:TRACEINSTREXEC,hw_not:addr 0x10040..0x10060
The hw_not:then variant of the command is used in conjunction with hw_and to form or and nand-then conditions.
hw_out:{s} Output trigger tests. The string s is specific to the trace connection being used. For the ARM ETM, the following case-sensitive forms are defined:"Tracepoint Type=s"
Specify the trace action when an instruction is executed in the specified range, where s depends on the target connection:• For an ETM-based hardware target, s is:
Trigger Output a trigger event to the TPA.Start Tracing Start trace capture.
ARM DUI 0175N Copyright © 2002-2011 ARM. All rights reserved. 2-309ID052111 Non-Confidential

RealView Debugger Commands
Stop Tracing Stop trace capture.Trace Instr Trace instructions only.Trace Instr and Data
Trace instructions and data.
Note An address range can be specified only for Trace Instr
and Trace Instr and Data.
• For an RVISS target, s is:Trigger Output a trigger event.Trace Start Point (Instruction Only)
Trace instructions only.Trace Start Point (Instruction and Data)
Trace instructions and data.Trace End Point Stop trace capture.
Note You cannot specify an address range with any of these
options.
For example, to trace only instructions when an instruction is executed at an address in the range 0x1E000-0x1FF00, enter the command:TRACEINSTREXEC,hw_out:"Tracepoint Type=Trace Instr" 0x1E00..0x1FF00
hw_passcount:(n) Specifies the number of times that the specified condition has to occur to trigger the tracepoint. You can use this option to set up and use the ARM ETM counter hardware, if the ETM has counters and there is one available for use. ETM counters are 32 bits.
modify:(n) Instead of creating a new tracepoint, modify the tracepoint with tracepoint ID number n by replacing the address expression and the qualifiers of the existing tracepoint to those specified in this command.
Note You cannot use this qualifier with the hw_and qualifier to change a
non-chained tracepoint to a chained tracepoint. However, you can modify a chained tracepoint with any other qualifier and also change the address expression.
Examples
The following examples show how to use TRACEINSTREXEC:
TRACEINSTREXEC \MATH_1\#449.3 Set a hardware tracepoint at statement 3 of line 449 in the file math.c.
TRACEINSTREXEC,hw_pass:(5) \MAIN_1\#35 Set a hardware tracepoint using an ETM counter to enable tracing the fifth time that execution reaches line 35 of main.c.
ARM DUI 0175N Copyright © 2002-2011 ARM. All rights reserved. 2-310ID052111 Non-Confidential

RealView Debugger Commands
Alias
TRCIEXEC is an alias of TRACEINSTREXEC.
See also• Specifying address ranges on page 2-2• ANALYZER on page 2-23• DTBREAK on page 2-126• DTRACE on page 2-130• ETM_CONFIG on page 2-143• TRACE on page 2-277• TRACEBUFFER on page 2-279• TRACEDATAACCESS on page 2-288• TRACEDATAREAD on page 2-293• TRACEDATAWRITE on page 2-298• TRACEEXTCOND on page 2-303• TRACEINSTRFETCH on page 2-312• the following in the RealView Debugger Trace User Guide:
— Chapter 6 Setting Unconditional Tracepoints— Chapter 7 Setting Conditional Tracepoints.
• Embedded Trace Macrocell Specification.
ARM DUI 0175N Copyright © 2002-2011 ARM. All rights reserved. 2-311ID052111 Non-Confidential

RealView Debugger Commands
2.3.146 TRACEINSTRFETCH
Enables you to set a tracepoint on instruction fetch from memory.
Note This command is valid only for ETM-based hardware targets.
Syntax
TRACEINSTRFETCH [,qualifier...] {address | address-range}
where:
qualifier Is an ordered list of zero or more qualifiers. The possible qualifiers are described in List of qualifiers.
address Specifies the address at which the tracepoint is placed.
address-range
Specifies the address range at which the tracepoint is placed.
Description
This command sets a tracepoint at the address or address range you specify that triggers when an instruction opcode is fetched from memory in the indicated address range.
Note Use this type of tracepoint with care, because not all instructions that are fetched are executed, and because the fetch from memory occurs several cycles before execution and possibly not in execution order.
The tracepoint type is by default to trigger, that is, start collecting trace information into the trace buffer. You can modify the action using the hw_out: qualifier to, for example, stop tracing.
List of qualifiers
The command qualifiers are as follows, but not all qualifiers are available for all of the supported trace targets:
hw_ahigh:(n) Specifies the high address for an address-range tracepoint. The low address is specified by the standard tracepoint address.For example, to set a tracepoint that triggers for any address in the range 0x1000-0x1200, enter the command:TRACEINSTRFETCH,hw_ahigh:0x1200 0x1000
This is equivalent to the command:TRACEINSTRFETCH 0x1000..0x1200
hw_and:{id | "then-id"} Perform an and or an and-then conjunction with an existing tracepoint. For example, hw_and:2, or hw_and:"then-2", where 2 is the tracepoint ID of another tracepoint.The parentheses are optional.
ARM DUI 0175N Copyright © 2002-2011 ARM. All rights reserved. 2-312ID052111 Non-Confidential

RealView Debugger Commands
In the and form, the conditions associated with both tracepoints are chained together, so that the action associated with the second tracepoint is performed only when both conditions match at the same time.In the and-then form, when the condition for the first tracepoint is met, the second tracepoint is enabled. When the second tracepoint condition is matched, even if the first condition no longer matches, the actions associated are performed.
Note You must include the quotes when using the and-then form.
Theid is one of:• the tracepoint list index of an existing of tracepoint• prev for the last tracepoint specified for this connection• next for the target of this condition.
hw_dhigh:(n) Specifies the high data value for a data-range tracepoint. The low data value is specified by the hw_dvalue qualifier.For example, to set a tracepoint that triggers when an instruction opcode in the range 0xEA000040-0xEA00004F is fetched from code in the range 0x1FA00-0x1FAFF, enter the command:TRACEINSTRFETCH,hw_dvalue:0xEA000040,hw_dhigh:0xEA00004F 0x1FA00..0x1FAFF
hw_dmask:(n) Specifies the data value mask for a data-range tracepoint. The data value to which the mask is applied is specified by the hw_dvalue qualifier. The data value range is determined by masking lower order bits out of the specified data value.For example, to set a tracepoint that triggers when an instruction having a basic opcode 0xEA000040 but with any value in bits [15:8] is fetched from addresses in the range 0x1FA00-0x1FAFF, enter the command:TRACEINSTRFETCH,hw_dvalue:0xEA000040,hw_dmask:0xFFFF00FF 0x1FA00..0x1FAFF
hw_dvalue:(n) Specifies a data value to be compared to values transmitted on the processor data bus.For example, to set a tracepoint that triggers when an instruction with an opcode of 0xEA000040 is fetched from an address in the range 0x1FA00-0x1FAFF, enter the command:TRACEINSTRFETCH,hw_dvalue:0xEA000040 0x1FA00..0x1FAFF
hw_in:{s} Input trigger tests. The string s is specific to the trace connection being used. For the ARM ETM, the following case-sensitive forms are defined:Ignore Security Level=Yes|No
Enables Secure World and Normal World data comparisons for processors that implement the TrustZone technology:Yes Match when the processor is in any mode. This is the
default.No Match only when the processor is in the mode
specified by the address suffix:• S:address indicates Secure World.• N:address indicates Normal World.
ARM DUI 0175N Copyright © 2002-2011 ARM. All rights reserved. 2-313ID052111 Non-Confidential

RealView Debugger Commands
For example, to capture trace when an instruction is fetched from the Secure World address 0x8000, enter the command:TRACEINSTRFETCH,hw_in:{Ignore Security Level=No} S:0x8000.
Size of Data Access=s
This determines the following:• for data accesses, the size of the data transfer• for instruction accesses, the size of the instruction
accessed.The size s is one of:Any Depends on the implementation:
• halfword for Thumb code• word for ARM code.This is the default.
Halfword 16-bit accesses (Thumb code).Word 32-bit accesses (ARM code).
hw_not:{s} Use this qualifier to invert the sense of an address, data, or hw_and term specified in the same command. The argument s can be set to:addr Invert the tracepoint address value.data Invert the tracepoint value.then Invert an associated hw_and:{then} condition.For example, to capture trace when a data value does not match a mask, enter the command:TRACEINSTRFETCH,hw_not:data,hw_dmask:0x00FF ...
The trace commands require an address value, and the addr variant of hw_not uses this address. For example, to trace execution at addresses other than the range 0x10040 to 0x10060, that is, exclude this region from the trace, enter the command:TRACEINSTRFETCH,hw_not:addr 0x10040..0x10060
The hw_not:then variant of the command is used in conjunction with hw_and to form or and nand-then conditions.
hw_out:{s} Output trigger tests. The string s is specific to the trace connection being used. For the ARM ETM, the following case-sensitive forms are defined:"Tracepoint Type=s"
Specify the trace action when an instruction is fetched from an address in the specified range, where s is:Trigger Output a trigger event to the TPA.Start Tracing Start trace capture.Stop Tracing Stop trace capture.Trace Instr Trace instructions only.Trace Instr and Data
Trace instructions and data.
Note An address range can be specified only for Trace Instr and Trace Instr
and Data.
ARM DUI 0175N Copyright © 2002-2011 ARM. All rights reserved. 2-314ID052111 Non-Confidential

RealView Debugger Commands
For example, to trace only instructions when an instruction is fetched from an address in the range 0x1E000-0x1FF00, enter the command:TRACEINSTRFETCH,hw_out:"Tracepoint Type=Trace Instr" 0x1E00..0x1FF00
hw_passcount:(n) Specifies the number of times that the specified condition has to occur to trigger the tracepoint. You can use this option to set up and use the ARM ETM counter hardware, if the ETM has counters and there is one available for use. ETM counters are 32 bits.
modify:(n) Instead of creating a new tracepoint, modify the tracepoint with tracepoint ID number n by replacing the address expression and the qualifiers of the existing tracepoint to those specified in this command.
Note You cannot use this qualifier with the hw_and qualifier to change a
non-chained tracepoint to a chained tracepoint. However, you can modify a chained tracepoint with any other qualifier and also change the address expression.
Alias
TRCIFETCH is an alias of TRACEINSTRFETCH.
See also• Specifying address ranges on page 2-2• ANALYZER on page 2-23• DTRACE on page 2-130• ETM_CONFIG on page 2-143• TRACE on page 2-277• TRACEBUFFER on page 2-279• TRACEDATAACCESS on page 2-288• TRACEDATAREAD on page 2-293• TRACEDATAWRITE on page 2-298• TRACEEXTCOND on page 2-303• TRACEINSTREXEC on page 2-307• the following in the RealView Debugger Trace User Guide:
— Chapter 6 Setting Unconditional Tracepoints— Chapter 7 Setting Conditional Tracepoints.
• Embedded Trace Macrocell Specification.
ARM DUI 0175N Copyright © 2002-2011 ARM. All rights reserved. 2-315ID052111 Non-Confidential

RealView Debugger Commands
2.3.147 UNLOAD
Unloads a specified file.
Syntax
UNLOAD [,qualifier] [{filename | file_num}] [=task]
where:
qualifier If specified, qualifier must be one of the following:all Unloads all the files in the file list.symbols_only
Unloads the symbols only, not the executable image.image_only
Unloads the executable image only, not the symbols.
filename | file_num
Specifies a file to be unloaded.Use the DTFILE command to list details of the file or files that are associated with the current connection. The details include:• the file number, which is shown at the start of the output by the text File
file_num
• the filename and path.
task Applicable only to OS-aware images, this specifies a task to be unloaded. Use this form of the command if you are running multiple tasks and want to unload only one of them.
Description
The UNLOAD command unloads a specified file. If you do not specify a file then all files are unloaded. If you specify a file, using either a filename or a file number, then only that file is unloaded. Any unloaded files remain in the file list and can be reloaded.
The effect of unloading the system file is defined by the Debug Interface. You can unload only symbols or only the image.
Note If you have specified any arguments for the image, these are lost when you unload the image. If you specified the arguments as part of the LOAD command, you must specify the arguments again when you load the image. Alternatively, after loading the image again, use the ARGUMENTS command to specify the arguments.
You do not have to unload an image to run it again. Use the RESTART command to reset the PC to the entry point, the use the GO command to run the image.
If you unload an image that has breakpoints set, and the auto save breakpoints feature is enabled, then the breakpoints are stored in a file. This file is saved in the same location as the image.
Restrictions on the use of UNLOAD
The UNLOAD command is not allowed in a macro.
ARM DUI 0175N Copyright © 2002-2011 ARM. All rights reserved. 2-316ID052111 Non-Confidential

RealView Debugger Commands
Examples
The following examples show how to use UNLOAD:
unload dhrystone.axf Unload the symbols (and macros, if any) for the dhrystone program from debugger.
See also• ADDFILE on page 2-19• DELFILE on page 2-111• DTFILE on page 2-128• LOAD on page 2-176• RELOAD on page 2-225• RESTART on page 2-230• the following in the RealView Debugger User Guide:
— Enabling the auto save breakpoints feature on page 11-12.
ARM DUI 0175N Copyright © 2002-2011 ARM. All rights reserved. 2-317ID052111 Non-Confidential

RealView Debugger Commands
2.3.148 UP
Moves up stack levels.
Syntax
UP [levels]
where:
levels Specifies the number of levels to climb. If you do not supply a parameter, you move up one level.
Description
The UP command moves up stack levels
Each time you move up one level you can see the source line to which you return when you complete execution of your current function or subroutine. At each level you can examine the values of variables and registers that are in scope.
If you are already at the top level a message reminds you that you cannot move up any more. When you have moved up one or more levels, you can use the DOWN command to move down. When you have moved up one or more levels, any STEPLINE or STEPINSTR command you issue is effective at the lowest level, not at the level currently in view.
See also• DOWN on page 2-124• CONTEXT on page 2-96• DTFILE on page 2-128.
ARM DUI 0175N Copyright © 2002-2011 ARM. All rights reserved. 2-318ID052111 Non-Confidential

RealView Debugger Commands
2.3.149 VA2PA
Converts a virtual address to a physical address.
Syntax
VA2PA [,force][,table] address
where:
force Force the conversion even if the attempt:• has an effect on cache• has an effect on memory• temporarily disables the MMU.This is required on processors that lack the CP15 conversion registers.
table Perform the conversion, even if the MMU is turned off (disabled).This is unavailable on processors where the conversion is performed using CP15 registers.
address The virtual address that is to be converted.
Description
The VA2PA command converts a virtual address into a physical address, and displays the physical address of a given virtual address. It is available on processors with an MMU subject to limitations. The MMU must be enabled.
Note Using the VA2PA command on OS-aware connections does not give details for the current thread shown in the Code window. Instead, the results are for the processor in general. Also, a warning message is displayed.
Examples
The following example shows how to use VA2PA:
va2pa,f 0x10002000
This attempts to convert the virtual address 0x10002000 into a physical address.
See also• CACHEFIND on page 2-81• CACHEINFO on page 2-82• CACHELINE on page 2-84.
ARM DUI 0175N Copyright © 2002-2011 ARM. All rights reserved. 2-319ID052111 Non-Confidential

RealView Debugger Commands
2.3.150 VCLEAR
Clears a user-defined window and sets the cursor to home.
Syntax
VCLEAR windowid
where:
windowid Specifies the window to be cleared. This must be a user-defined windowid.
Description
The VCLEAR command clears a user-defined window and sets the cursor to home.
Examples
The following example shows how to use VCLEAR:
vclear 50 Clear window number 50.
See also• Window and file numbers on page 1-5• PRINTF on page 2-205• VCLOSE on page 2-321• VOPEN on page 2-326• VSETC on page 2-328.
ARM DUI 0175N Copyright © 2002-2011 ARM. All rights reserved. 2-320ID052111 Non-Confidential

RealView Debugger Commands
2.3.151 VCLOSE
Removes and closes a user-defined window or file.
Syntax
VCLOSE {windowid | fileid}
where:
windowid | fileid
Specifies the window or file to be closed. This must be a user-defined windowid or fileid.
Description
The VCLOSE command removes and closes a user-defined window opened with VOPEN, or closes a user-defined file opened with FOPEN.
Examples
The following example shows how to use VCLOSE:
vclose 50 Close window number 50.
See also• Window and file numbers on page 1-5• FOPEN on page 2-154• PRINTF on page 2-205• VCLEAR on page 2-320• VOPEN on page 2-326• VSETC on page 2-328.
ARM DUI 0175N Copyright © 2002-2011 ARM. All rights reserved. 2-321ID052111 Non-Confidential

RealView Debugger Commands
2.3.152 VERIFYFILE
Compares the contents of a specified file with the contents of target memory.
Syntax
VERIFYFILE ,obj filename [[=]address]
VERIFYFILE ,{raw|raw8|raw16|raw32|ascii[,opts]} filename [=]address
VERIFYFILE ,ascii[,opts] filename [[=]address]
where:
obj The file is an executable file in the standard target format. For ARM targets, this is ARM-ELF.
raw Compare as raw data, using the most efficient access size for the target.
raw8 Compare as raw data, one byte for each byte of memory.
raw16 Compare as raw data, 16 bits for each 16 bits of memory.
raw32 Compare as raw data, 32 bits for each 32 bits of memory.
Note You must specify an address with all raw qualifiers.
ascii The file is a stream of ASCII digits separated by whitespace. The interpretation of the digits is specified by other qualifiers (see the opts qualifier). The starting address of the file must be specified in a one line header in one of the following ways:[start] The start address.[start,end] The start address, a comma, and the end address.[start,+len] The start address, a comma, and the length.[start,end,size] The start address, a comma, the end address, a comma, and
the size of each value (8, 16, and 32 bits).If the size of the items in the file is not specified, the debugger determines the size by examining the number of white-space separated significant digits in the first data value. For example, if the first data value is 00A0, the size is set to 16-bits.
opts Optional qualifiers available for use with the ascii qualifier:byte The file is a stream of 8-bit values that are written to target memory
without extra interpretation.half_word | word
The file is a stream of 16-bit values.long The file is a stream of 32-bit values.
filename Specifies the name of the file to be read.You can include one or more environment variables in the filename. For example, if MYPATH defines the location C:\Myimages, you can specify:verifyfile,raw "$MYPATH\\myimage.axf" 0x8000..0x8100
address Specifies the starting address in target memory for the comparison.
ARM DUI 0175N Copyright © 2002-2011 ARM. All rights reserved. 2-322ID052111 Non-Confidential

RealView Debugger Commands
Note For targets that support the TrustZone technology, you can prefix the address with
S: or N: to indicate Secure World or Normal World addresses.
Description
The VERIFYFILE command compares the contents of a specified file with the contents of target memory.
Data might be stored in a file in a variety of formats. You can specify the format by specifying the file type. The command then converts the data read from the file before performing the comparison.
The types of file and file formats supported depend on the target processor and any loaded DLLs. The type of memory assumed depends on the target processor. For example, ARM processors have byte addressable memory.
Examples
The following example shows how to use VERIFYFILE:
verifyfile,raw8 'c:\images\rom.dat' =0x8000 Verify that the ROM image file in rom.dat matches target memory starting at location 0x8000.
See also• READFILE on page 2-219• TEST on page 2-273• WRITEFILE on page 2-333.
ARM DUI 0175N Copyright © 2002-2011 ARM. All rights reserved. 2-323ID052111 Non-Confidential

RealView Debugger Commands
2.3.153 VMACRO
Attaches a macro to a user-defined window or file. Any output that is normally sent to the Cmd tab of the Output view is redirected to the specified window or file.
Syntax
VMACRO {windowid | fileid} [,macro_name(args)]
where:
windowid | fileid
Specifies the window of file to be associated with the macro. This must be a user-defined windowid or fileid.
macro_name Specifies the name and call arguments of the macro that is to send its output to the specified window or file. This happens whenever the macro runs, either directly from the CLI or a command script, or by a breakpoint being hit to which the macro is attached.
Description
The VMACRO command attaches a specified macro to a specified user-defined window or file. Any output that is normally sent to the Cmd tab of the Output view is redirected to the specified window or file whenever the macro is called.
Note If the attached macro contains any commands or predefined macros that use a different windowid or fileid, then they are not affected by the VMACRO command.
If you do not supply a macro name, the window or file is disassociated from any macro. The VMACRO command runs asynchronously.
Examples
The following examples show how to use VMACRO:
vmacro 50,showmyvars()
Use the macro showmyvars() to write formatted variables to window 50.
vmacro 50
Unbind all macros from user window 50.
fopen 100,'c:\myfiles\messages.txt'vmacro 100,showmyvars()showmyvars()vmacro 100vclose 100
Use the macro showmyvars() to write formatted variables to the file messages.txt, unbind the macro from the file, and finally close the file.
See also• Window and file numbers on page 1-5• BREAKACCESS on page 2-38• BREAKEXECUTION on page 2-47
ARM DUI 0175N Copyright © 2002-2011 ARM. All rights reserved. 2-324ID052111 Non-Confidential

RealView Debugger Commands
• BREAKINSTRUCTION on page 2-55• BREAKREAD on page 2-61• BREAKWRITE on page 2-70• DEFINE on page 2-105• FOPEN on page 2-154• FPRINTF on page 2-156• MONITOR on page 2-191• PRINTVALUE on page 2-211• VOPEN on page 2-326• VSETC on page 2-328• fclose on page 3-17• fopen on page 3-20• fputc on page 3-22• fwrite on page 3-25.
ARM DUI 0175N Copyright © 2002-2011 ARM. All rights reserved. 2-325ID052111 Non-Confidential

RealView Debugger Commands
2.3.154 VOPEN
Creates a user-defined window that you can use with commands that have a ;windowid parameter.
Syntax
VOPEN windowid [,screen_num,loc_top,loc_left,loc_bottom,loc_right]
where:
windowid Specifies a number to identify the new window. This must be a user-defined windowid.If a window already exists with the specified number the command fails.Use this value for the windowid parameter in commands that you want to display their output in this window.
screen_num This parameter is maintained for backward compatibility but is no longer used. If you want to specify the position and size of the new window, you must enter a screen_num value for the command to parse correctly.
loc_top Specifies the number of characters the upper edge of the window is positioned from the top of the screen.
loc_left Specifies the number of characters the left side of the window is positioned from the left side of the screen.
loc_bottom Specifies the number of characters the bottom row of the window is positioned from the top of the screen.
loc_right Specifies the number of characters the right side of the window is positioned from the left side of the screen.
Description
The VOPEN command creates a user-defined window. When you have created a window you can direct the output from various other commands to it. The commands that can have their output redirected are those that have an optional windowid parameter.
If you supply only the windowid parameter, a window is opened with default position and size of 10 rows of 33 characters. The size of a character is determined by the currently selected font so the size and placement of the window might appear to vary between machines and between sessions.
After opening a window you can move and resize it as required.
If the error message Bad size specification for window is displayed, check that:• loc_top is smaller than loc_bottom• loc_left is smaller than loc_right• loc_bottom and loc_right are smaller than the screen size.
Examples
The following examples show how to use VOPEN:
vopen 50 Open window number 50 at the default size of 10 rows of 33 characters.
ARM DUI 0175N Copyright © 2002-2011 ARM. All rights reserved. 2-326ID052111 Non-Confidential

RealView Debugger Commands
vopen 50,0,5,5,50,40 Open window number 50 at position (5,5) and 45 rows of 35 characters.
See also• Window and file numbers on page 1-5• FOPEN on page 2-154• FPRINTF on page 2-156• VCLOSE on page 2-321• VMACRO on page 2-324• WINDOW on page 2-332.
ARM DUI 0175N Copyright © 2002-2011 ARM. All rights reserved. 2-327ID052111 Non-Confidential

RealView Debugger Commands
2.3.155 VSETC
Positions the cursor in the specified user-defined window.
Syntax
VSETC windowid ,row ,column
where:
windowid Identifies the window that is to have its cursor positioned. This must be a user-defined windowid.
row Specifies the row number in the window, counting from 0, the number of the top row.
column Specifies the column number in the window, counting from 0, the number of the leftmost column.
Description
The VSETC command positions the cursor in the specified user-defined window. This defines where the next output to be directed to that window appears.
Example
The following example shows how to use VSETC:
vsetc 50,2,5fprintf 50,"Status: %d", status
Write Status: to window 50, starting from the third column of the sixth row.
See also• Window and file numbers on page 1-5• FOPEN on page 2-154• FPRINTF on page 2-156• VCLOSE on page 2-321.
ARM DUI 0175N Copyright © 2002-2011 ARM. All rights reserved. 2-328ID052111 Non-Confidential

RealView Debugger Commands
2.3.156 WAIT
Tells the debugger whether to wait for a command to complete before permitting another command to be issued.
Syntax
WAIT = [{ON | OFF}]
where:
ON specifies that all following commands are to run synchronously.
OFF specifies that following commands run according to their default behavior. This is the default.
Description
The WAIT command makes commands run synchronously. If WAIT is not used, commands use their default behavior.
All commands run from a macro run synchronously unless WAIT is set OFF.
Note This command requires that RealView Debugger is connected to a debug target.
Examples
The following examples show how to use WAIT:
• The following commands cause the debugger to fill memory synchronously, forcing you to wait until the fill is complete before accepting another command:wait onfill/b 0x8000..0x9FFF =0wait off
• In the following example, the CEXPRESSION command runs when the target next stops running (for example, if the breakpoint is hit):load /pd/r dhrystone.axfbreakexecution mainwait ongowait offcexpression @r0
See also• PAUSE on page 2-202.
ARM DUI 0175N Copyright © 2002-2011 ARM. All rights reserved. 2-329ID052111 Non-Confidential

RealView Debugger Commands
2.3.157 WARMSTART
WARMSTART is an alias of RESET.
See RESET on page 2-227.
ARM DUI 0175N Copyright © 2002-2011 ARM. All rights reserved. 2-330ID052111 Non-Confidential

RealView Debugger Commands
2.3.158 WHERE
Displays a call stack.
Syntax
WHERE [number_of_levels]
where:
number_of_levels
Specifies the number of levels you want to examine. If you do not supply this parameter, all levels are displayed.
Description
The WHERE command displays a call stack. This shows you the function that you are in, and the function that called that, and the function that called that, until the debugger cannot continue. A call stack is not a history of every function call in the life of the process.
The call stack requires debug information for every procedure called. If debug information is not available, the call stack stops. The call stack might also stop prematurely because the stack frames read by the debugger do not conform to the expected structure, for example if memory corruption has occurred, or if a scheduler has created new stack frames.
Examples
The following example shows how to use WHERE:
> where#0: (0x24000148) DHRY_2_1\\Proc_7 Line 79. File='C:\ProgramFiles\ARM\RVDS\Examples\...\...\...\...\main\dhrystone\dhry_2.c'#1: (0x24000674) DHRY_1_1\\main Line 164. File='C:\ProgramFiles\ARM\RVDS\Examples\...\...\...\...\main\dhrystone\dhry_1.c'
This shows a request for a full stack trace of the dhrystone program. The program was stopped at line 79 of procedure Proc_7(). The call stack tells you that this call of Proc_7() was made by code at line 164 of main().
The call stack does not tell you what called main(). Normally, there is bootstrap code in __main() that calls main, but because this code is not normally compiled with debug symbols included, this procedure is not shown in the call stack.
> where 1#0: (0x240002B8) DHRY_1_1\\Proc_3 Line 355. File='C:\ProgramFiles\ARM\RVDS\Examples\...\...\...\...\main\dhrystone\dhry_1.c'
This shows a request for a single level stack trace of the dhrystone program. The program was stopped at line 355 of procedure Proc_3(). Compare this to the output of CONTEXT at the same location:
At the PC: (0x240002B8): DHRY_1_1\Proc_3 Line 355
See also• CONTEXT on page 2-96• SCOPE on page 2-234• SETREG on page 2-242.
ARM DUI 0175N Copyright © 2002-2011 ARM. All rights reserved. 2-331ID052111 Non-Confidential

RealView Debugger Commands
2.3.159 WINDOW
Displays a list of open user-defined windows and files.
Syntax
WINDOW [{windowid | fileid | name}]
where
windowid | fileid
The user-defined windowid or fileid.
name The name of the window or file.
Description
The WINDOW command displays a list of the user-defined windows that you have opened with the VOPEN command, and a list of the user-defined files that you have opened with the FOPEN command.
Example
The following command shows a list of files and user-defined windows that are open:
> fopen 98,'c:\myfiles\myfile.txt'> vopen 99> windowNum Type Name 98 Files myfile.txt 99 User User99Available Terminal Window types: File, User
See also• Window and file numbers on page 1-5• FOPEN on page 2-154• VCLEAR on page 2-320• VCLOSE on page 2-321• VOPEN on page 2-326.• VSETC on page 2-328.
ARM DUI 0175N Copyright © 2002-2011 ARM. All rights reserved. 2-332ID052111 Non-Confidential

RealView Debugger Commands
2.3.160 WRITEFILE
Writes the contents of memory to a file, performing a format conversion if necessary.
Syntax
WRITEFILE ,{obj|raw|raw8|raw16|raw32} [,nowarn] filename [=]address-range
WRITEFILE ,ascii[,opts] [,nowarn] filename [=]address-range
Note You must specify an address range with all type qualifiers.
where:
obj Write the file in the standard executable target format. For ARM targets, this is ARM-ELF.
Note It is only valid to use obj if the area of target memory contains an executable
image. If no executable image is present, subsequent behavior is undefined.
raw Write the file as raw data, using the most efficient access size for the target.
raw8 Write the file as raw data, one byte for each byte of memory.
raw16 Write the file as raw data, 16 bits for each 16 bits of memory.
raw32 Write the file as raw data, 32 bits for each 32 bits of memory.
ascii Write the file as a stream of ASCII digits separated by whitespace. The exact format is specified by other qualifiers (see the opts qualifier). The file has a one line header that is compatible withthe READFILE and VERIFYFILE commands. This header has the following format:[start,end,size]
where:• start and end specifies the address range that is written• size indicates the size of each value (8, 16, or 32 bits).
opts Optional qualifiers available for use with the ascii qualifier:byte The file is a stream of 8-bit hexadecimal values that are written to the
file without extra interpretation.half_word | word
The file is a stream of 16-bit values.long The file is a stream of 32-bit hexadecimal values.
nowarn Suppress the display of the large file warning messages, such as:Downloading n bytes can take a long time. (Hint: Choosing a larger access
size may reduce this time) Do it anyway?
This also suppresses the warning if the file you are writing to already exists. In this case, the existing file is overwritten.
filename The name of the file to be written.
ARM DUI 0175N Copyright © 2002-2011 ARM. All rights reserved. 2-333ID052111 Non-Confidential

RealView Debugger Commands
You can include one or more environment variables in the filename. For example, if MYPATH defines the location C:\Myfiles, you can specify:writefile,raw "$MYPATH\\myfile.dat" 0x8000..0x8100
address-range
The address range in target memory to write to the file. Specify an address range as:• start_addr..end_addr, for example 0x8000..0x8FFF• start_addr..+length, for example 0x8000..+0x1000.
Note For targets that support the TrustZone technology, you can prefix the address
range with S: or N: to indicate Secure World or Normal World addresses.
Description
The WRITEFILE command writes the contents of memory to a file, performing a format conversion if necessary.
The type of memory assumed depends on the target processor. For example, ARM processors have byte addressable memory.
Examples
The following examples show how to use WRITEFILE:
writefile ,raw 'c:\temp\file.dat' =0x8000..0x8FFF Write the contents of the 4KB memory page at 0x8000 to the file c:\temp\file.dat, storing the data in raw, uninterpreted, form.
writefile ,ascii,long "c:\temp\file.txt" =0x8000..+0x1000 Write the contents of the 4KB memory page at 0x8000 to the file c:\temp\file.dat, storing it as 32-bit values in target memory endianness. For example, the file might look similar to this:[0x8000,0x8FFF,32]E28F8090 E898000F E0800008 E0811008 E0822008 E0833008 E240B001 E242C001 E1500001 0A00000E E8B00070 E1540005...
Note By writing a file as long values and reading it back as long values on a different
target, you can convert the endianness of the data in the file.
See also• FILL on page 2-149• LOAD on page 2-176• SETMEM on page 2-239• READFILE on page 2-219• TEST on page 2-273• VERIFYFILE on page 2-322.
ARM DUI 0175N Copyright © 2002-2011 ARM. All rights reserved. 2-334ID052111 Non-Confidential

RealView Debugger Commands
2.3.161 XTRIGGER
Controls whether stopping execution of one processor stops execution of other processors.
Syntax
XTRIGGER [,in_disable] [,in_enable] [,out_disable] [,out_enable] [,onhost] [[=]connections]
where:
in_disable Disable input triggering.
in_enable Enable input triggering.
out_disable Disable output triggering.
out_enable Enable output triggering.
onhost Implement in software. Use this if hardware support is possible, but you require software implementation nevertheless.
connections A comma-separated list of connection identifiers, of the form:connection-id [,connection-id,...]
where:connection-id The name of the target connection. If the connections have
unique names, then you have only to use the connection name. Otherwise, you must also specify the Debug Configuration name.
Description
The XTRIGGER command controls the cross-triggering of processor stops. Use it to specify whether stopping execution of one processor stops execution of other processors.
For tight synchronization, the target must support hardware cross triggering. If hardware cross triggering is not available, the debugger simulates cross triggering in software, but this is slower, and there might be a large delay between one processor stopping, and the debugger causing the other processors to stop.
If you issue the command with no arguments, it displays the cross-triggering state of all connections, for example:
> xtriggerARM940T_0: Input=Enabled OnHost. Output=Disabled OnHostARM_Cortex-A8_0: Input=Disabled OnHost. Output=Enabled OnHost
If you issue the command with qualifiers, you have to specify a list of one or more connections to act on. Input triggering means that the processor is stopped by others. Output triggering means that when the processor stops it stops others.
ARM DUI 0175N Copyright © 2002-2011 ARM. All rights reserved. 2-335ID052111 Non-Confidential

RealView Debugger Commands
Example
The following example shows how to use XTRIGGER:
xtrigger,in_enable @ARM_Cortex-A8_0@ISSM,@ARM_Cortex-A8_0@ISSM_1
xtrigger,out_enable @ARM940T_0 Stop both ARM Cortex-A8 targets when the ARM940T processor stops (no Debug Configuration is specified, because no other connection exists with this name).
See also
• CONNECT on page 2-93
• SYNCHACTION on page 2-269
• SYNCHEXEC on page 2-271
• the following in the RealView Debugger User Guide:— Chapter 7 Debugging Multiprocessor Applications.
ARM DUI 0175N Copyright © 2002-2011 ARM. All rights reserved. 2-336ID052111 Non-Confidential

Chapter 3 RealView Debugger Predefined Macros
This chapter describes available RealView® Debugger predefined macros. It contains the following sections:• Predefined macros listed by function on page 3-2• Alphabetical predefined macro reference on page 3-6.
ARM DUI 0175N Copyright © 2002-2011 ARM. All rights reserved. 3-1ID052111 Non-Confidential

RealView Debugger Predefined Macros
3.1 Predefined macros listed by functionThe following sections list the predefined macros according to their general function:• Access data values at an address• Flow control statements• File and window access• String manipulation on page 3-3• Memory manipulation on page 3-4• Cache statistics on page 3-4• User interaction macros on page 3-4• Miscellaneous on page 3-5.
3.1.1 Access data values at an address
Table 3-1 contains a summary of the predefined macros that return a data value at a given address.
3.1.2 Flow control statements
Table 3-2 contains a summary of the conditional statement macros.
3.1.3 File and window access
Table 3-3 contains a summary of the file and window access macros.
Table 3-1 Access data value macros
Description See
Returns a byte value from the specified address
byte on page 3-11
Returns a long value from the specified address
dword on page 3-14
Returns a word value at the specified address.
word on page 3-65
Table 3-2 Flow control statements
Description See
Breaks when an expression evaluates to True
until on page 3-63
Breaks when an expression evaluate to True. when on page 3-64
Table 3-3 File and window access macros
Description See
Closes a specified file fclose on page 3-17
Returns a byte from file or window fgetc on page 3-18
Opens a file for reading, writing, or both fopen on page 3-20
ARM DUI 0175N Copyright © 2002-2011 ARM. All rights reserved. 3-2ID052111 Non-Confidential

RealView Debugger Predefined Macros
3.1.4 String manipulation
Table 3-4 contains a summary of the string manipulation macros.
Writes the contents of next byte to a file fputc on page 3-22
Reads a file into a buffer fread on page 3-23
Writes a buffer to a file fwrite on page 3-25
Table 3-3 File and window access macros (continued)
Description See
Table 3-4 String manipulation
Description See
Converts a string to an integer atoi on page 3-8
Converts a string to a long integer atol on page 3-9
Converts a string to an unsigned long integer atoul on page 3-10
Checks if a character is digit isdigit on page 3-27
Checks if a character is lower case islower on page 3-28
Checks if a character is a printable char isprint on page 3-29
Checks if a character is space isspace on page 3-30
Checks if a character is upper case isupper on page 3-31
Converts an int to a string itoa on page 3-32
Concatenates two strings strcat on page 3-45
Locates the first occurrence of a character in a string
strchr on page 3-47
Compares two strings strcmp on page 3-49
Copies a string strcpy on page 3-51
Performs string comparison without case distinction
stricmp on page 3-53
Returns string length strlen on page 3-55
Performs limited comparison of two strings strncmp on page 3-56
Converts a string to lowercase characters strtolower on page 3-58
Converts a string to uppercase characters strtoupper on page 3-59
Removes any starting and trailing white spaces and tabs from a string
strtrim on page 3-60
Converts a character to lowercase tolower on page 3-61
Converts a character to uppercase toupper on page 3-62
ARM DUI 0175N Copyright © 2002-2011 ARM. All rights reserved. 3-3ID052111 Non-Confidential

RealView Debugger Predefined Macros
3.1.5 Memory manipulation
Table 3-5 contains a summary of the memory manipulation macros.
3.1.6 Cache statistics
Table 3-6 contains a summary of the macros used to gather statistics on caches.
3.1.7 User interaction macros
RealView Debugger provides several predefined macros that enable you to get user input or prompt the user to take action. User interaction macros can be used in expressions on the command line and can be called from macros that you create yourself.
Note Be careful when using these macros as part of test scripts. For example, if you attach the prompt_text macro to a breakpoint that is triggered frequently in your program, without testing the return value, it is possible that the debugger displays the prompt message repeatedly in an endless loop.
Table 3-7 contains a summary of the predefined user interaction macros.
Table 3-5 Memory Manipulation macros
Description See
Searches for a character in memory memchr on page 3-33
Clears memory values memclr on page 3-34
Copies characters from memory memcpy on page 3-35
Sets the value of characters in memory memset on page 3-36
Table 3-6 Cache statistics macros
Description See
Returns the set index associated with a specified address in the cache.
cache_find_set on page 3-12
Returns the way index associated with a specified address in the cache.
cache_find_way on page 3-13
Table 3-7 User interaction macros
Description See
Displays a file containing message text prompt_file on page 3-37
Displays a dialog box containing message text and a choice list
prompt_list on page 3-39
ARM DUI 0175N Copyright © 2002-2011 ARM. All rights reserved. 3-4ID052111 Non-Confidential

RealView Debugger Predefined Macros
3.1.8 Miscellaneous
Table 3-8 contains a summary of other predefined macros.
Displays a dialog box containing message text and buttons (Ok and Cancel)
prompt_text on page 3-40
Displays a dialog box containing question text and buttons (Yes and No)
prompt_yesno on page 3-42
Displays a dialog box containing question text and buttons (Yes, No and Cancel)
prompt_yesno_cancel on page 3-43
Table 3-7 User interaction macros (continued)
Description See
Table 3-8 Miscellaneous macros
Description See
Processes error message returned from macro
error on page 3-15
Returns a local string from an address getsym on page 3-26
Returns the value of a specified register reg_str on page 3-44
ARM DUI 0175N Copyright © 2002-2011 ARM. All rights reserved. 3-5ID052111 Non-Confidential

RealView Debugger Predefined Macros
3.2 Alphabetical predefined macro referenceThe following sections list in alphabetical order all the predefined macros that you can use at the RealView Debugger CLI, or within user-defined macros and scripts:• atoi on page 3-8• atol on page 3-9• atoul on page 3-10• byte on page 3-11• cache_find_set on page 3-12• cache_find_way on page 3-13• dword on page 3-14• error on page 3-15• fclose on page 3-17• fgetc on page 3-18• fopen on page 3-20• fputc on page 3-22• fread on page 3-23• fwrite on page 3-25• getsym on page 3-26• isdigit on page 3-27• islower on page 3-28• isprint on page 3-29• isspace on page 3-30• isupper on page 3-31• itoa on page 3-32• memchr on page 3-33• memclr on page 3-34• memcpy on page 3-35• memset on page 3-36• prompt_file on page 3-37• prompt_list on page 3-39• prompt_text on page 3-40• prompt_yesno on page 3-42• prompt_yesno_cancel on page 3-43• reg_str on page 3-44• strcat on page 3-45• strchr on page 3-47• strcmp on page 3-49• strcpy on page 3-51• stricmp on page 3-53• strlen on page 3-55• strncmp on page 3-56• strtolower on page 3-58• strtoupper on page 3-59• strtrim on page 3-60• tolower on page 3-61• toupper on page 3-62• until on page 3-63
ARM DUI 0175N Copyright © 2002-2011 ARM. All rights reserved. 3-6ID052111 Non-Confidential

RealView Debugger Predefined Macros
• when on page 3-64• word on page 3-65.
ARM DUI 0175N Copyright © 2002-2011 ARM. All rights reserved. 3-7ID052111 Non-Confidential

RealView Debugger Predefined Macros
3.2.1 atoi
Converts a string to an integer.
Syntax:
int atoi (str)char *str;
where:
str The string to be converted.
Description
This macro converts a string of numbers to the equivalent integer value.
Return value
The integer value of the converted string.
Example
add char strValue[10]cexpression strcpy(strValue,"10000")printf "%d", atoi(strValue)
See also• atol on page 3-9• atoul on page 3-10• itoa on page 3-32.
ARM DUI 0175N Copyright © 2002-2011 ARM. All rights reserved. 3-8ID052111 Non-Confidential

RealView Debugger Predefined Macros
3.2.2 atol
Converts a string to a long integer.
Syntax:
long atol (str)char *str;
where:
str The string to be converted.
Description
This macro converts a string of numbers to the equivalent long integer value.
Return value
The long integer value of the converted string.
Example
add char strValue[10]cexpression strcpy(strValue,"-1")printf "%d", atol(strValue)
See also• atoi on page 3-8• atoul on page 3-10• itoa on page 3-32.
ARM DUI 0175N Copyright © 2002-2011 ARM. All rights reserved. 3-9ID052111 Non-Confidential

RealView Debugger Predefined Macros
3.2.3 atoul
Converts a string to an unsigned long.
Syntax:
unsigned long atoul (str)char *str;
where:
str The string to be converted.
Description
This macro converts a string of numbers to the equivalent unsigned long integer value.
Return value
The unsigned long integer value of the converted string.
Example
add char strValue[10]cexpression strcpy(strValue,"-1")printf "%u", atoul(strValue)
See also• atoi on page 3-8• atol on page 3-9• itoa on page 3-32.
ARM DUI 0175N Copyright © 2002-2011 ARM. All rights reserved. 3-10ID052111 Non-Confidential

RealView Debugger Predefined Macros
3.2.4 byte
Returns a byte value from the specified address.
Syntax:
unsigned char byte (addr)void *addr;
where:
addr The address containing the value to be returned.
Description
This macro returns a value between 0 and 255, corresponding to the memory contents at the location specified by addr. The byte macro uses the indirection operator to obtain the value.
Return Value
unsigned char
The byte value located at the specified address.
Rules
The argument default type is specified by using the OPTION command:
OPTION radix = [ decimal | hex ]
Example
To display the contents of the hexadecimal address 0x8338, enter the following on the command line:
PRINTVALUE byte(0x8338)
See also• OPTION on page 2-195• dword on page 3-14• word on page 3-65.
ARM DUI 0175N Copyright © 2002-2011 ARM. All rights reserved. 3-11ID052111 Non-Confidential

RealView Debugger Predefined Macros
3.2.5 cache_find_set
Returns the set index associated with a specified address in the cache.
Syntax:
int cache_find_set (isInstruction, cacheLevel, addr)int isInstruction;int cacheLevel;ADDRESS addr;
where:
isInstruction
Identifies the type of cache to be searched:1 Search the instruction cache.0 Search the data cache.
cacheLevel The cache level to search.On the ARM1136 and ARM1156, only level 1 cache is accessible.On the Cortex-A8, both level 1 and 2 caches are accessible.
addr The address to find.
Description
Returns the set index associated with a specified address in the cache. This macro is supported on the following processors:• ARM1136 (only when the MMU is disabled)• ARM1156• Cortex-A8.
Return value
The return value is one of the following:• The set index, starting at zero.• -1 if the given address is not found.• -2 if the operation is not possible.
Example
To search the level 1 data cache on the Cortex-A8 for the set index associated with address S:0x00032F48, enter:
> ce cache_find_set(0, 1, S:0x00032F48) Result is: 61 0x0000003D '='
See also• CACHEFIND on page 2-81• CACHEINFO on page 2-82• CACHELINE on page 2-84• cache_find_way on page 3-13.
ARM DUI 0175N Copyright © 2002-2011 ARM. All rights reserved. 3-12ID052111 Non-Confidential

RealView Debugger Predefined Macros
3.2.6 cache_find_way
Returns the way index associated with a specified address in the cache.
Syntax:
int cache_find_way (isInstruction, cacheLevel, addr)int isInstruction;int cacheLevel;ADDRESS addr;
where:
isInstruction
Identifies the type of cache to be searched:1 Search the instruction cache.0 Search the data cache.
cacheLevel The cache level to search.On the ARM1136 and ARM1156, only level 1 cache is accessible.On the Cortex-A8 the level 2 cache is also available.
addr The address to find.
Description
Returns the way index associated with a specified address in the cache. This macro is supported on the following processors:• ARM1136 (only when the MMU is disabled)• ARM1156• Cortex-A8.
Return value
The return value is one of the following:• The way index, starting at zero.• -1 if the given address is not found.• -2 if the operation is not possible.
Example
To search the level 1 data cache on the Cortex-A8 for the way index associated with address S:0x00032F48, enter:
> ce cache_find_way(0, 1, S:0x00032F48) Result is: 0 0x00000000
See also• CACHEFIND on page 2-81• CACHEINFO on page 2-82• CACHELINE on page 2-84• cache_find_set on page 3-12.
ARM DUI 0175N Copyright © 2002-2011 ARM. All rights reserved. 3-13ID052111 Non-Confidential

RealView Debugger Predefined Macros
3.2.7 dword
Returns an unsigned long value from a specified address.
Syntax:
unsigned long dword (addr) void *addr;
where:
addr The address containing the value to be returned.
Description
This macro returns an unsigned long value, contained within four bytes of memory, corresponding to the memory contents at the location specified by addr. The dword macro uses the indirection operator to obtain the value.
Return Value
unsigned long
The four byte value located at the specified address.
Rules
The argument default type is specified by using the OPTION command:
OPTION radix = [ decimal | hex ]
Example
To display the contents of the hexadecimal address 0x8338, enter the following on the command line:
PRINTVALUE dword(0x8338)
See also
The following macros provide similar or related functionality:• OPTION on page 2-195• byte on page 3-11• word on page 3-65.
ARM DUI 0175N Copyright © 2002-2011 ARM. All rights reserved. 3-14ID052111 Non-Confidential

RealView Debugger Predefined Macros
3.2.8 error
Processes an error message returned from a macro.
Syntax:
int error (type, message, value)int type; char *message;long value;
where:
type Specifies the error class indicated by one of the predefined error codes listed in Table 3-9.
message Pointer to char. Points to the first character in a character string for the corresponding error message.The string can contain a single instance of the format specifier %d. In this case, value is printed in the string. If no format specifier is included in the string, value is ignored.
value Variable of type long.
Description
This macro processes an error messages returned from a macro. The error macro generates a call to the error processing function (_error). It handles messages from both predefined and user-specified macros.
The message and value parameters are formatted in standard PRINTF formats.
Return Value
int Indicates the error message that is displayed in the Cmd tab of the Code window.
Rules
Uses the same value formats as the PRINTF command.
Table 3-9 Error classes
Type Class Description
1 note message appears as a line with no prefix.In the GUI, the message appears in the Output view.
2 warning code message appears with the Warning: prefix.In the GUI, the message appears in the Output view and is also highlighted.
3 error code In the headless debugger message appears with the Error: prefix.In the GUI, message appears in an Error dialog without the prefix.
ARM DUI 0175N Copyright © 2002-2011 ARM. All rights reserved. 3-15ID052111 Non-Confidential

RealView Debugger Predefined Macros
Example
Do the following:
1. Define the following macro in a command script file, and load the file:DEFINE /R int odd(n) int n;{ if ((n & 0x1)==1) // check if number is odd, using // a bitwise AND, and checking for // nonzero result return (0); // zero is returned from this branch, // indicating: Yes, number is odd. else // no - number is even, not odd error (2, "number specified (%d) is not odd\n", n); // text msg displayed, %d in format // specifier used for int display, // as in printf() return (1); // 1 is returned when exiting this // branch}.
2. Enter the command:odd(6)
The following error message appears:Warning: number specified (6) is not odd
See also
• PRINTF on page 2-205.
ARM DUI 0175N Copyright © 2002-2011 ARM. All rights reserved. 3-16ID052111 Non-Confidential

RealView Debugger Predefined Macros
3.2.9 fclose
Closes a specified user-defined file.
Syntax
int fclose (fileid)int fileid;
where:
fileid The ID of an open file. This must be a user-defined fileid.
Description
This macro closes a file that has been opened with the fopen macro.
Example
Example on page 3-18 shows you how to use fclose in a macro.
See also• Window and file numbers on page 1-5• FOPEN on page 2-154• FPRINTF on page 2-156• VCLOSE on page 2-321• VMACRO on page 2-324• WINDOW on page 2-332• fgetc on page 3-18• fopen on page 3-20• fputc on page 3-22• fread on page 3-23• fwrite on page 3-25.
ARM DUI 0175N Copyright © 2002-2011 ARM. All rights reserved. 3-17ID052111 Non-Confidential

RealView Debugger Predefined Macros
3.2.10 fgetc
Reads a byte from a file.
Syntax
int fgetc (fileid)int fileid;
where:
fileid The ID of the file containing the next byte to be read. This must be a user-defined fileid.
Description
This macro returns the contents of the next byte from a file. The fgetc macro name is short for [file getc()], where file indicates that the macro operates on a file, and getc is the standard function for getting a character from a user defined file. This is distinct from the getchar function, which can only retrieve a character from the standard input, and is typically the keyboard.
fgetc returns the contents of the next memory location byte from the specified file. You define the identity of the file with the fopen macro, or the FOPEN command. Any file used to read, or get, the contents of the next byte, must be opened in read mode.
Return value
int Returns the contents of the next byte of memory from a user specified file. Returns the value -1 if either an end-of-file mark (EOF) or an error is encountered.
Rules
The file read from must be opened in read mode, for example:
fopen(100,"c:\\myfiles\\data_in.txt","r")
Example
This example shows how to use fgetc, together with fopen, fputc, and fclose:
define /R void copyFile(){ int retval; int ch; // Create data file to read retval = fopen(100,"c:\\myfiles\\data_in.txt","w"); if (retval < 0) error(2,"Cannot open file for writing!\n",101); else { retval = fwrite("1234567890\n1234567890\n1234567890", 1, 32, 100); fclose(100); fopen(100,"c:\\myfiles\\data_in.txt","r"); // open for read-only if (retval < 0) error(2,"Source file not opened!\n",101); else fopen(200,"c:\\myfiles\data_out.txt","w"); // open for writing if (retval < 0) error(2,"Destination file not opened!\n",101); else
ARM DUI 0175N Copyright © 2002-2011 ARM. All rights reserved. 3-18ID052111 Non-Confidential
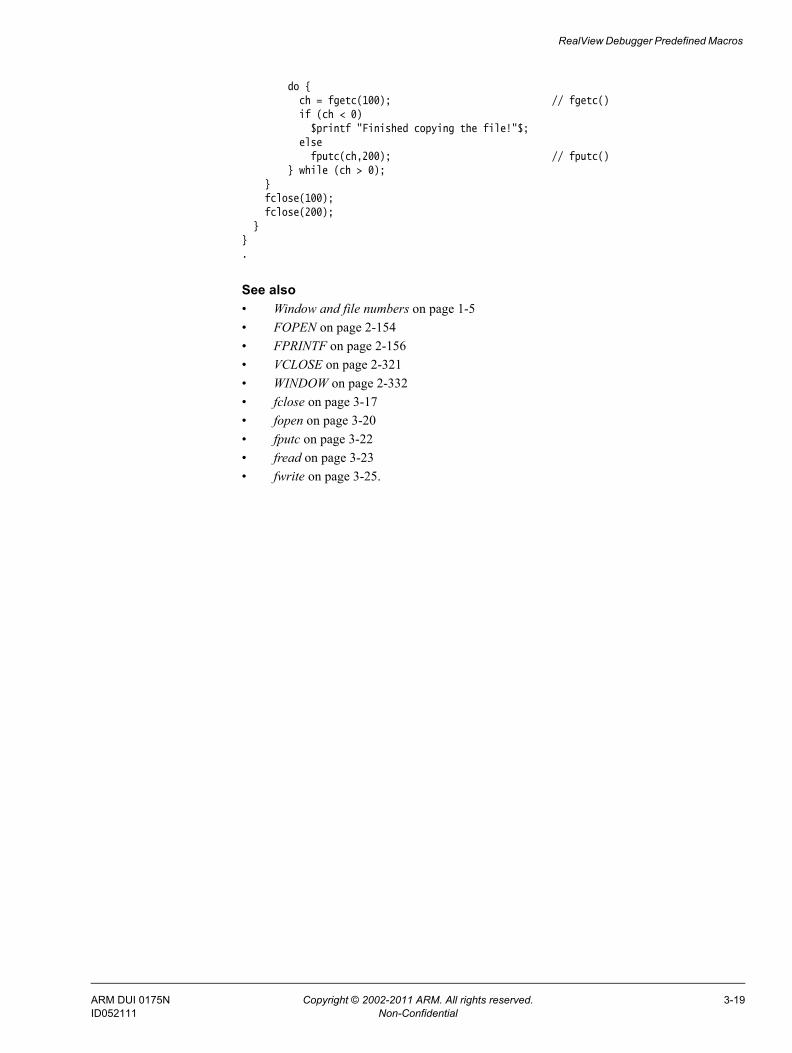
RealView Debugger Predefined Macros
do { ch = fgetc(100); // fgetc() if (ch < 0) $printf "Finished copying the file!"$; else fputc(ch,200); // fputc() } while (ch > 0); } fclose(100); fclose(200); }}.
See also• Window and file numbers on page 1-5• FOPEN on page 2-154• FPRINTF on page 2-156• VCLOSE on page 2-321• WINDOW on page 2-332• fclose on page 3-17• fopen on page 3-20• fputc on page 3-22• fread on page 3-23• fwrite on page 3-25.
ARM DUI 0175N Copyright © 2002-2011 ARM. All rights reserved. 3-19ID052111 Non-Confidential

RealView Debugger Predefined Macros
3.2.11 fopen
Opens a file for reading, writing, or both.
Syntax
int fopen (fileid, file_name, mode)int fileid;char *file_name;char *mode;
where:
fileid An ID number for the file that is opened. This must be a user-defined fileid.
file_name A string pointer identifying the name of the file you want to open. If you specify a hardcoded filename you must enclose it in double quotation marks. See Rules for specifying filenames for details on how to specify filenames that include a path.
mode Standard C-style file mode.
Description
This macro opens a file for reading, writing, or both.
Return value
int One of the following:-1 Failurefileid Success, the ID number of the opened file is returned.
Rules for specifying filenames
Follow these rules when specifying a filename:
• Filenames must be in double quotation marks, for example "myfiles/file".
• Filenames containing a backslash must be in double quotation marks, with each backslash escaped. For example, "c:\\myfiles\\file".
Example
Example on page 3-18 shows you how to use fopen in a macro.
See also• Window and file numbers on page 1-5• FOPEN on page 2-154• FPRINTF on page 2-156• VCLOSE on page 2-321• VMACRO on page 2-324• WINDOW on page 2-332• fclose on page 3-17• fgetc on page 3-18• fputc on page 3-22
ARM DUI 0175N Copyright © 2002-2011 ARM. All rights reserved. 3-20ID052111 Non-Confidential

RealView Debugger Predefined Macros
• fread on page 3-23• fwrite on page 3-25.
ARM DUI 0175N Copyright © 2002-2011 ARM. All rights reserved. 3-21ID052111 Non-Confidential

RealView Debugger Predefined Macros
3.2.12 fputc
Writes a byte to a file.
Syntax
int fputc (byte,fileid)int byte;int fileid;
where:
byte The byte to be written.
fileid The ID number of the file where the next byte is to be written. This must be a user-defined fileid.
Description
This macro writes the contents of the next byte to a file. You must define the identity of the file with either the fopen macro or the FOPEN command.
Return value
int Not used.
Rules
The file written to must be opened in write mode, for example:
fopen(100,"c:\\myfiles\\data_out.txt","w").
Example
Example on page 3-18 shows you how to use fputc in a macro.
See also• Window and file numbers on page 1-5• FOPEN on page 2-154• FPRINTF on page 2-156• VCLOSE on page 2-321• WINDOW on page 2-332• fclose on page 3-17• fgetc on page 3-18• fopen on page 3-20• fread on page 3-23• fwrite on page 3-25.
ARM DUI 0175N Copyright © 2002-2011 ARM. All rights reserved. 3-22ID052111 Non-Confidential

RealView Debugger Predefined Macros
3.2.13 fread
Reads the contents of a file into a buffer.
Syntax
int fread (buffer, count, size, fileid)void *buffer;unsigned count;unsigned size;int fileid;
where:
buffer Specifies the start of the area into which the data is written.
count Specifies the number of elements.
size Specifies the size of each element in bytes.
fileid The ID number of the file containing the data to be read. This must be a user-defined fileid.
Description
This macro reads the contents of a file into a buffer. You must define the identity of the file with either the fopen macro or the FOPEN command.
Return value
int The size of the data that is read, and is the same as size * count. However, it returns the value -1 if an end-of-file (EOF) or error occurs.
Rules
None
Example
This example shows how to use fread in a macro:
1. Create an INCLUDE file containing the following macro, for example, c:\myincludes\myfile.inc:define /R void readFile(nElements) int nElements;{ char buffer[37]; int nbytes; int recLen; recLen = 6; if (nElements > recLen) error(2,"Enter a number from 1 to %d.\n",recLen); else { strcpy(buffer,"One \nTwo \nThree\nFour \nFive \nSix \n"); fopen(100,"c:\\myfiles\\data.txt","w"); nbytes = fwrite(buffer, nElements, recLen, 100); $printf "%d bytes written\n",nbytes$; fclose(100); fopen(100,"c:\\myfiles\\data.txt","r"); memset(buffer,0,37);
ARM DUI 0175N Copyright © 2002-2011 ARM. All rights reserved. 3-23ID052111 Non-Confidential

RealView Debugger Predefined Macros
nbytes = fread(buffer, nElements, recLen, 100); if (nbytes == -1) error(3,"Failed to read from file.\n"); else { $printf "%d bytes read\n",nbytes$; $printf "Strings:\n%s",buffer$; fclose(100); } }}.
2. At the command line, include the file you created in step 1:include 'c:\myincludes\myfile.inc'
3. Run the macro, specifying a value from 1 to 6, for example:readFile(4)
See also• Window and file numbers on page 1-5• FOPEN on page 2-154• FPRINTF on page 2-156• VCLOSE on page 2-321• WINDOW on page 2-332• error on page 3-15• fclose on page 3-17• fgetc on page 3-18• fopen on page 3-20• fputc on page 3-22• fwrite on page 3-25.
ARM DUI 0175N Copyright © 2002-2011 ARM. All rights reserved. 3-24ID052111 Non-Confidential

RealView Debugger Predefined Macros
3.2.14 fwrite
Writes the contents of a buffer to a file or window.
Syntax
unsigned long fwrite (buffer, count, size, outputid)void *buffer;unsigned count;unsigned size;int outputid;
where:
buffer Specifies the start of the area from which the data is read.
count Specifies the number of elements.
size Specifies the size of each element in bytes.
outputid The ID number of a window or file where the data is to be written. This must be a user-defined windowid or fileid.
Description
This macro writes the contents of a buffer to a file or window. You must define the identity of the file with either the fopen macro or the FOPEN command.
Return value
unsigned long
The size of the data that is written, and is the same as size * count.
Rules
If you are writing to a file, it must be opened in write mode, for example: fopen(100,"c:\\myfiles\\data_out.txt","w").
Example
The example on page 3-23 also shows you how to use fwrite in a macro.
See Also• Window and file numbers on page 1-5• FOPEN on page 2-154• FPRINTF on page 2-156• VCLOSE on page 2-321• WINDOW on page 2-332• fclose on page 3-17• fgetc on page 3-18• fopen on page 3-20• fputc on page 3-22• fread on page 3-23.
ARM DUI 0175N Copyright © 2002-2011 ARM. All rights reserved. 3-25ID052111 Non-Confidential

RealView Debugger Predefined Macros
3.2.15 getsym
Returns a debugger symbol at a specified address.
Syntax
char *getsym (addr)void *addr;
where:
addr The address for which the associated symbol is to be returned.
Description
This macro returns a debugger symbol from a specified address. If no symbol exists at the address, a null string is returned
Return value
char * A pointer to the debugger symbol.
Rules
None
Example
This example shows how to use getsym on the command line:
> add char x[20]> strcpy(x,getsym(@pc))> pr x"__main"
> strcpy(x,getsym(0x8010))> pr x""
ARM DUI 0175N Copyright © 2002-2011 ARM. All rights reserved. 3-26ID052111 Non-Confidential

RealView Debugger Predefined Macros
3.2.16 isdigit
Checks if a character is a digit.
Syntax:
int isdigit (c)int c;
where:
c The character to be checked.
Description
This macro checks if a character is a digit.
Return value
int One of the following:0 Character is not a digit.>0 Character is a digit.
Example
define /R int chkDigit(myChar)char myChar;{ if (isdigit(myChar) > 0) $printf "digit character"$; else $printf "non-digit character"$;}.cexpression chkDigit('1')
See also• islower on page 3-28• isprint on page 3-29• isspace on page 3-30• isupper on page 3-31.
ARM DUI 0175N Copyright © 2002-2011 ARM. All rights reserved. 3-27ID052111 Non-Confidential

RealView Debugger Predefined Macros
3.2.17 islower
Checks if a character is lowercase.
Syntax:
int islower (c)int c;
where:
c The character to be checked.
Description
This macro checks if a character is lowercase.
Return value
int One of the following:0 Character is not lowercase.>0 Character is lowercase.
Example
define /R int chkLower(myChar)char myChar;{ if (islower(myChar) > 0) $printf "lowercase character"$; else $printf "non-lowercase character"$;}.cexpression chkLower('a')
See also• isdigit on page 3-27• isprint on page 3-29• isspace on page 3-30• isupper on page 3-31.
ARM DUI 0175N Copyright © 2002-2011 ARM. All rights reserved. 3-28ID052111 Non-Confidential

RealView Debugger Predefined Macros
3.2.18 isprint
Checks if a character is printable.
Syntax:
int isprint (c)int c;
where:
c The character to be checked.
Description
This macro checks if a character is printable.
Return value
int One of the following:0 Character is not printable.>0 Character is printable.
Example
define /R int chkPrint(myChar)char myChar;{ if (isprint(myChar) > 0) $printf "printable character"$; else $printf "non-printable character"$;}.cexpression chkPrint(0)
See also• isdigit on page 3-27• islower on page 3-28• isspace on page 3-30• isupper on page 3-31.
ARM DUI 0175N Copyright © 2002-2011 ARM. All rights reserved. 3-29ID052111 Non-Confidential

RealView Debugger Predefined Macros
3.2.19 isspace
Checks if a character is a space.
Syntax:
int isspace (c)int c;
where:
c The character to be checked.
Description
This macro checks if a character is a space.
Return value
int One of the following:0 Character is not a space.>0 Character is a space.
Example
define /R int chkSpace(myChar)char myChar;{ if (isspace(myChar) > 0) $printf "space character"$; else $printf "non-space character"$;}.cexpression chkSpace(' ')
See also• isdigit on page 3-27• islower on page 3-28• isprint on page 3-29• isupper on page 3-31.
ARM DUI 0175N Copyright © 2002-2011 ARM. All rights reserved. 3-30ID052111 Non-Confidential

RealView Debugger Predefined Macros
3.2.20 isupper
Checks if a character is upperspace.
Syntax:
int isupper (c)int c;
where:
c The character to be checked.
Description
This macro checks if a character is upperspace.
Return value
int One of the following:0 Character is not upperspace.>0 Character is upperspace.
Example
define /R int chkUpper(myChar)char myChar;{ if (isupper(myChar) > 0) $printf "uppercase character"$; else $printf "non-uppercase character"$;}.cexpression chkUpper('A')
See also• isdigit on page 3-27• islower on page 3-28• isprint on page 3-29• isspace on page 3-30.
ARM DUI 0175N Copyright © 2002-2011 ARM. All rights reserved. 3-31ID052111 Non-Confidential

RealView Debugger Predefined Macros
3.2.21 itoa
Converts an integer to a string.
Syntax:
char *itoa (iValue, str)int iValue;char *str;
where:
iValue The integer value to be converted.
str The converted string.
Description
This macro converts an integer value to the equivalent string.
Return value
char * A pointer to the first character of the converted string.
Example
add char strValue[10]cexpression itoa(10000,strValue)printf "%s", strValue
See also• atoi on page 3-8• atol on page 3-9• atoul on page 3-10.
ARM DUI 0175N Copyright © 2002-2011 ARM. All rights reserved. 3-32ID052111 Non-Confidential

RealView Debugger Predefined Macros
3.2.22 memchr
Searches for a character in memory.
Syntax
char *memchr (str1, byte_value, count)char *str1;char byte_value;int count;
where:
str1 A character pointer to the memory location of the first character byte in a string of characters contained in a file.
byte_value A character variable used to copy the memory contents of the character occupying a specific position in a character string.
count An integer variable that specifies the number of characters in str that are to be searched for the character specified by byte_value.
Description
This macro searches for a character in memory. The memchr macro locates the first occurrence of the character byte_value, that is contained in the first count bytes of memory area that begins with the memory location pointed to by the start variable, str1.
Return value
char * A pointer to the instance of the character being searched for, called byte_value, if one is found. If no instance of the character being searched for is found, then a NULL pointer is returned.
Rules
For debugger variables only, a -1 value (0xFFFFFFFF) is returned when byte_value does not occur in the memory searched on by memchr.
Example
This example shows how to use memchr:
define /R void memoryChr(){ char buff[37]; char *posn; strcpy(buff,"1234567890abcdefghijklmnopqrstuvwxyz"); posn = memchr(buff,'d',20); $printf "%s\n",posn$;}.
See Also• memclr on page 3-34• memcpy on page 3-35• memset on page 3-36.
ARM DUI 0175N Copyright © 2002-2011 ARM. All rights reserved. 3-33ID052111 Non-Confidential

RealView Debugger Predefined Macros
3.2.23 memclr
Clears memory contents in a specified range.
Syntax
char *memclr (str1, count)char *str1;int count;
where:
str1 A character pointer to the memory location of the first character byte in a string of characters that is replaced by the NUL character.
count A variable of integer type, used to specify the number of consecutive bytes of memory in a character string that are to be replaced by the NUL character.
Description
This macro replaces the specified number of characters in str1 with the NUL character '\0' starting at the beginning of str1. If count is less than the length of str1, the macro returns a pointer that points to the address of the character following the area that is cleared.
Return value
char * A pointer to the first character byte after the string of characters overwritten with the NUL character. This enables continuation of the writing process with perfect alignment of bytes for file erasure.
Rules
None
Example
This example shows how to use memclr:
define /R void memoryClr(){ char buff[37]; char *posn; strcpy(buff,"1234567890abcdefghijklmnopqrstuvwxyz"); posn = memclr(buff,20); $printf "%s\n",posn$;}.
See Also• memchr on page 3-33• memcpy on page 3-35• memset on page 3-36.
ARM DUI 0175N Copyright © 2002-2011 ARM. All rights reserved. 3-34ID052111 Non-Confidential

RealView Debugger Predefined Macros
3.2.24 memcpy
Copies a specified number of characters from a source memory area to a destination memory area.
Syntax
char *memcpy (dest, src, count)char *dest;char *src;int count;
where:
dest A character pointer that specifies the starting address for the destination memory area, to begin writing characters to.
src A character pointer that specifies the starting address for the source memory area, to begin copying characters from.
count An integer variable specifying the number of characters (bytes) to be copied, from the source location, to the destination location of memory.
Description
Copies count characters from the source memory area, pointed to by src, and writes this character string to a destination memory area, pointed to by dest.
Return value
char * A pointer to the destination location that is one byte beyond the last byte written to. This enables continuation of the writing process with perfect alignment of bytes for string concatenation of memory blocks.
Rules
None
Example
This example shows how to use memcpy:
define /R void memoryCpy(){ char buff1[37]; char buff2[37]; char *posn; strcpy(buff1,"1234567890abcdefghijklmnopqrstuvwxyz"); posn = memcpy(buff2,buff1,20); $printf "%s\n",buff2$;}.
See Also• memchr on page 3-33• memclr on page 3-34• memset on page 3-36.
ARM DUI 0175N Copyright © 2002-2011 ARM. All rights reserved. 3-35ID052111 Non-Confidential

RealView Debugger Predefined Macros
3.2.25 memset
Fills a specified area of memory with a character.
Syntax
char *memset (dest, byte_value, count)char *dest;char byte_value;int count;
where:
dest A character pointer to the memory location where the memset macro is to write a string of repeating characters.
byte_value A character variable used to specify the number of times that a character is written consecutively, beginning at the *dest address.
count An integer variable used to specify the number of times a particular character is to be written consecutively, beginning with the byte whose address is *dest.
Description
This macro writes a character in memory multiple times. The memset macro writes the character byte_value into the contents of the first count bytes in memory, beginning with the byte pointed to by dest. For example, write character 'X' consecutively, one hundred times, beginning at address 0x8f51fff4.
Return value
char * A pointer to the destination location that is one byte beyond the last byte written to. This enables continuation of the writing process with perfect alignment of bytes for string concatenation of memory blocks.
Rules
None
Example
This example shows how to use memset:
define /R void memorySet(){ char buff[37]; char *posn; posn = memset(buff,'@',20); $printf "%s\n",buff$;}.
See Also• memchr on page 3-33• memclr on page 3-34• memcpy on page 3-35.
ARM DUI 0175N Copyright © 2002-2011 ARM. All rights reserved. 3-36ID052111 Non-Confidential

RealView Debugger Predefined Macros
3.2.26 prompt_file
Displays an Open File dialog.
Note This macro is not available in the headless debugger.
Syntax
int prompt_file(title, buff)char *title;char *buff;
where:
title The text that appears in the title bar of the Open File dialog.
buff The filename that appears in the File name text box of the dialog. Assign an empty string to leave the File name text box blank.Contains the chosen path and filename of the opened file when the Open button is clicked.
Description
This macro displays an Open File dialog.
Assign an empty string to buff to leave the File name text box of the dialog blank.
Assign a filename, without a path, to buff before executing this macro, the filename appears in the File name text box of the dialog.
When you click Open, buff contains the chosen path and filename.
Return value
int One of the following:0 File opened.1 Cancel.
Rules
None
Example
This example shows how to use prompt_file in a macro:
define /R void openFile(){ char filename[100]; int retval; retval = prompt_file("Open File", filename); if (retval == 1) $printf "Open file cancelled!\n"$; else retval = fopen(100,filename,"r"); if (retval < 0) $printf "Could not open file: %s\n", filename$; else
ARM DUI 0175N Copyright © 2002-2011 ARM. All rights reserved. 3-37ID052111 Non-Confidential

RealView Debugger Predefined Macros
$printf "Opened file: %s\n", filename$;}.
See Also• prompt_list on page 3-39• prompt_text on page 3-40• prompt_yesno on page 3-42• prompt_yesno_cancel on page 3-43.
ARM DUI 0175N Copyright © 2002-2011 ARM. All rights reserved. 3-38ID052111 Non-Confidential

RealView Debugger Predefined Macros
3.2.27 prompt_list
Displays a dialog containing message text, a list of choices, and Ok, Cancel and Help buttons.
Note This macro is not available in the headless debugger.
Syntax
int prompt_list (message, buff)char *message;char *buff;
where:
message The message text that appears at the top of the dialog.
buff Initially, the list of choices that appear for selection in the dialog, separated by \n.
Description
This macro displays a dialog containing message text and a list of choices.
Return value
int One of the following:0 Canceln Index number of the chosen list item. The first item in the list has an
index of 1.
Rules
None
Example
This example shows how to use prompt_list on the command line:
> add char buff[15]> strcpy(buff, "one\ntwo\nthree")> ce prompt_list("Choose one:", buff) Result is: 3 0x00000003
See Also• prompt_file on page 3-37• prompt_text on page 3-40• prompt_yesno on page 3-42• prompt_yesno_cancel on page 3-43.
ARM DUI 0175N Copyright © 2002-2011 ARM. All rights reserved. 3-39ID052111 Non-Confidential

RealView Debugger Predefined Macros
3.2.28 prompt_text
Displays a dialog containing message text, and Ok and Cancel buttons.
Note This macro is not available in the headless debugger.
Syntax
int prompt_text (message, buff)char *message;char *buff;
where:
message The message text that appears at the top of the dialog.
buff The buffer that is to contain the user response.
Description
This macro displays a dialog containing message text, and Ok and Cancel buttons. The user response is entered into the buffer (local or target).
Return value
int One of the following:0 OK1 Cancel
Rules
None
Example
This example shows how to use prompt_text in a macro:
define /R int usrPrompt(){ char userPromptBuffer[100]; int retval; retval = prompt_text( "Please enter text", userPromptBuffer ); if (retval == 0) { $printf "Pressed OK\n"$; $printf "%s\n", userPromptBuffer$; } else $printf "Pressed Cancel\n"$; return retval;}.
See Also• prompt_file on page 3-37• prompt_list on page 3-39• prompt_yesno on page 3-42
ARM DUI 0175N Copyright © 2002-2011 ARM. All rights reserved. 3-40ID052111 Non-Confidential

RealView Debugger Predefined Macros
• prompt_yesno_cancel on page 3-43.
ARM DUI 0175N Copyright © 2002-2011 ARM. All rights reserved. 3-41ID052111 Non-Confidential

RealView Debugger Predefined Macros
3.2.29 prompt_yesno
Displays a dialog containing question text, and Yes and No buttons.
Note This macro is not available in the headless debugger.
Syntax
int prompt_yesno (message)char *message;
where:
message The text that you want to appear as a question on the dialog.
Description
This macro displays a dialog containing question text and two buttons (Yes and No) for the user reply.
Return value
int One of the following:0 Yes2 No
Rules
None
Example
This example shows how to use prompt_yesno on the command line:
> ce prompt_yesno("Is everything OK?") Result is: 0 0x00000000
See Also• prompt_file on page 3-37• prompt_list on page 3-39• prompt_text on page 3-40• prompt_yesno_cancel on page 3-43.
ARM DUI 0175N Copyright © 2002-2011 ARM. All rights reserved. 3-42ID052111 Non-Confidential

RealView Debugger Predefined Macros
3.2.30 prompt_yesno_cancel
Displays a dialog containing question text, and Yes, No and Cancel buttons.
Note This macro is not available in the headless debugger.
Syntax
int prompt_yesno_cancel (message)char *message;
where:
message The text that you want to appear as a question on the dialog.
Description
This macro displays a dialog containing question text and buttons (Yes, No and Cancel) for the user reply.
Return value
int One of the following:0 Yes1 Cancel2 No
Rules
None
Example
This example shows how to use prompt_yesno_cancel on the command line:
> ce prompt_yesno_cancel("Is everything OK?") Result is: 1 0x00000001
See Also• prompt_file on page 3-37• prompt_list on page 3-39• prompt_text on page 3-40• prompt_yesno on page 3-42.
ARM DUI 0175N Copyright © 2002-2011 ARM. All rights reserved. 3-43ID052111 Non-Confidential
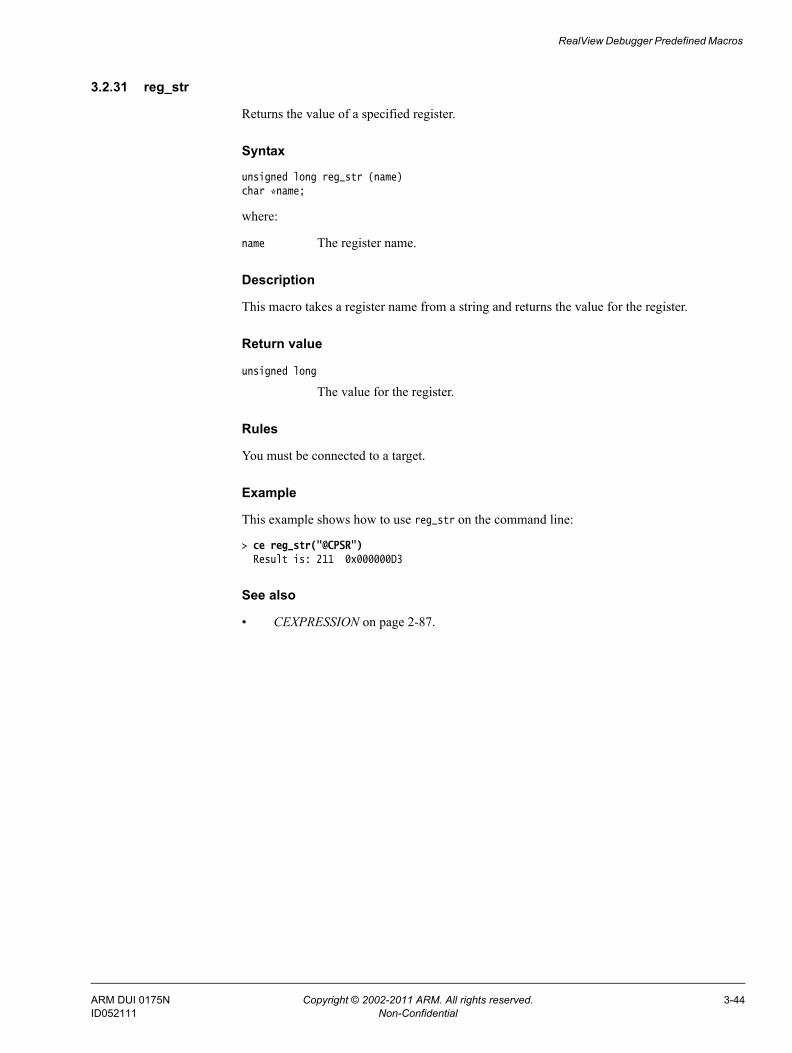
RealView Debugger Predefined Macros
3.2.31 reg_str
Returns the value of a specified register.
Syntax
unsigned long reg_str (name)char *name;
where:
name The register name.
Description
This macro takes a register name from a string and returns the value for the register.
Return value
unsigned long
The value for the register.
Rules
You must be connected to a target.
Example
This example shows how to use reg_str on the command line:
> ce reg_str("@CPSR") Result is: 211 0x000000D3
See also
• CEXPRESSION on page 2-87.
ARM DUI 0175N Copyright © 2002-2011 ARM. All rights reserved. 3-44ID052111 Non-Confidential

RealView Debugger Predefined Macros
3.2.32 strcat
Concatenates two strings.
Syntax
char *strcat (dest, src)char *dest;char *src;
where:
dest A character pointer, that specifies the starting address for the destination memory area. Characters from the src string are appended to the end of this string, starting where the NUL character previously terminated the string.
src A character pointer that specifies the starting address for the source memory area, to begin copying characters from, when appending to the end of the *dest string.
Description
This macro appends the src string to the end of the dest string, and then returns a pointer to the dest string. This macro behaves like the strcat function in the ANSI C string library.
Return value
char * A pointer to the first byte in the dest string.
Rules
This macro does not check to see whether the second string can fit in the first array, unless it is a debugger array. Failure to allot enough space for the first array causes excess characters to overflow into adjacent memory locations. Consider using the strlen macro first to confirm that there is enough length in dest, for the original dest and src together.
Example
This example shows how to use strcat on the command line:
> add char buff[15]> ce strcpy(buff,"12345") Result is: local address 0x10000> ce strcat(buff,"67890") Result is: local address 0x10000> printf "%s\n",buff1234567890
See Also• strchr on page 3-47• strcmp on page 3-49• strcpy on page 3-51• stricmp on page 3-53• strlen on page 3-55• strncmp on page 3-56• strtolower on page 3-58• strtoupper on page 3-59
ARM DUI 0175N Copyright © 2002-2011 ARM. All rights reserved. 3-45ID052111 Non-Confidential

RealView Debugger Predefined Macros
• strtrim on page 3-60• tolower on page 3-61• toupper on page 3-62.
ARM DUI 0175N Copyright © 2002-2011 ARM. All rights reserved. 3-46ID052111 Non-Confidential

RealView Debugger Predefined Macros
3.2.33 strchr
Locates the first occurrence of a character in a string.
Syntax
char *strchr (str1, byte_value)char *str1;char byte_value;
where:
str1 This is a character pointer to the memory location of the first character byte in a string of characters.
byte_value This is a variable of character type, used to specify the character that the strchr macro must search for. The terminating NUL character '\0' is part of the string, so it can be searched for.
Description
This macro locates the first occurrence of a character in a string.
Return value
char * Points to the first memory location of the first occurrence of the character byte_value byte. If no instance of the character being searched for is found, then a NULL pointer is returned.
Rules
For debugger variables only, a -1 value (0xFFFFFFFF) is returned, when byte_value does not occur in the string searched on by strchr.
Example
This example shows how to use strchr in a macro:
define /R void substr(character) char character;{ char *pos; pos = strchr("This is a string",character); $printf "position: %s\n",pos$;}.
See Also• strcat on page 3-45• strcmp on page 3-49• strcpy on page 3-51• stricmp on page 3-53• strlen on page 3-55• strncmp on page 3-56• strtolower on page 3-58• strtoupper on page 3-59
ARM DUI 0175N Copyright © 2002-2011 ARM. All rights reserved. 3-47ID052111 Non-Confidential

RealView Debugger Predefined Macros
• strtrim on page 3-60• tolower on page 3-61• toupper on page 3-62.
ARM DUI 0175N Copyright © 2002-2011 ARM. All rights reserved. 3-48ID052111 Non-Confidential

RealView Debugger Predefined Macros
3.2.34 strcmp
Compares two strings.
Syntax
unsigned long strcmp (str1, str2)char *str1;char *str2;
where:
str1 Variable of type pointer to char. Specifies the location in memory of the first byte of a character string.
str2 Variable of type pointer to char. Specifies the location in memory of the first byte of a character string.
Description
This macro compares two strings based on the internal machine representation of the characters.
For example, ASCII A has the value 41 in hexadecimal notation and ASCII B has the value 42 in hexadecimal notation. Therefore, A is less than B.
This macro behaves like the strcmp function in the ANSI C string library.
Return value
int One of the following:<0 Indicates that the second argument string value comes after the first
argument string value in the machine collating sequences, str1 < str2.0 Indicates that the two strings are identical in content.>0 Indicates that the first argument string value comes after the second
argument string value in the machine collating sequences, str2 < str1.
Rules• Strings are assumed to be NUL terminated or to fit within the array boundaries.• Comparisons are always signed, regardless of how the string is declared.
Example
This example shows how to use strcmp on the command line:
> ce strcmp("string1","string2") Result is: 4294967295 0xFFFFFFFF
See Also• strcat on page 3-45• strchr on page 3-47• strcpy on page 3-51• stricmp on page 3-53• strlen on page 3-55• strncmp on page 3-56• strtolower on page 3-58
ARM DUI 0175N Copyright © 2002-2011 ARM. All rights reserved. 3-49ID052111 Non-Confidential

RealView Debugger Predefined Macros
• strtoupper on page 3-59• strtrim on page 3-60• tolower on page 3-61• toupper on page 3-62.
ARM DUI 0175N Copyright © 2002-2011 ARM. All rights reserved. 3-50ID052111 Non-Confidential

RealView Debugger Predefined Macros
3.2.35 strcpy
Copies a source string into a destination string.
Syntax
char *strcpy (dest, src)char *dest;char *src;
where:
dest A character pointer, that specifies the starting address for the destination character string. Characters from the src string are copied to the dest string location.
src A character pointer that specifies the starting address for the source character string. This string is copied to the dest character string address.
Description
This macro writes the src string directly to the dest string address beginning at the first byte pointed to by dest. It writes until encountering a NUL character '\0', which designates the end of the src string. It returns a pointer to the dest string.
This macro behaves like the strcpy function in the ANSI C string library.
Return value
char * A pointer to the first byte in the string dest.
Rules
If the destination string is a debugger array, the macro checks the size of the array before copying. Otherwise this macro does not check to see whether the second string can fit in the first array. Failure to allocate enough space for the first array causes excess characters to overflow into adjacent memory locations. Consider using the strlen macro first to confirm that there is enough length in dest, for the src string.
Example
This example shows how to use strcpy on the command line:
add char buff[50]ce strcpy(buff,"source string")printf "%s\n",buff
See Also• strcat on page 3-45• strchr on page 3-47• strcmp on page 3-49• stricmp on page 3-53• strlen on page 3-55• strncmp on page 3-56• strtolower on page 3-58• strtoupper on page 3-59• strtrim on page 3-60
ARM DUI 0175N Copyright © 2002-2011 ARM. All rights reserved. 3-51ID052111 Non-Confidential

RealView Debugger Predefined Macros
• tolower on page 3-61• toupper on page 3-62.
ARM DUI 0175N Copyright © 2002-2011 ARM. All rights reserved. 3-52ID052111 Non-Confidential

RealView Debugger Predefined Macros
3.2.36 stricmp
Compares two strings without case distinction.
Syntax
int stricmp (str1, str2)char *str1;char *str2;
where:
str1 Variable of type pointer to char. Specifies the location in memory of the first byte of a character string.
str2 Variable of type pointer to char. Specifies the location in memory of the first byte of a character string.
Description
This macro performs string comparison without case distinction. The stricmp macro compares strings in ASCII sequence, ignoring case.
Return value
int
One of the following:<0 Indicates that the second argument string value comes after the first
argument string value in the machine collating sequences, independent of case distinction, str1 < str2.
0 Indicates that the two strings are identical in content, independent of case distinction.
>0 Indicates that the first argument string value comes after the second argument string value in the machine collating sequences, independent of case distinction, str2 < str1.
Rules• Strings are assumed to be NUL terminated or to fit within the array boundaries.• Comparisons are always signed, regardless of how the string is declared.
Example
This example shows how to use stricmp on the command line:
> ce stricmp("abcDEF","ABCdef") Result is: 0 0x00000000
See Also• strcat on page 3-45• strchr on page 3-47• strcmp on page 3-49• strcpy on page 3-51• strlen on page 3-55• strncmp on page 3-56
ARM DUI 0175N Copyright © 2002-2011 ARM. All rights reserved. 3-53ID052111 Non-Confidential

RealView Debugger Predefined Macros
• strtolower on page 3-58• strtoupper on page 3-59• strtrim on page 3-60• tolower on page 3-61• toupper on page 3-62.
ARM DUI 0175N Copyright © 2002-2011 ARM. All rights reserved. 3-54ID052111 Non-Confidential

RealView Debugger Predefined Macros
3.2.37 strlen
Returns the length or the specified string.
Syntax
unsigned long strlen (str1)char *str1;
where:
str1 Variable of type pointer to char. Specifies the location in memory of the first byte of a character string.
Description
This macro returns the string length. The strlen macro counts the number of characters in a string up to but not including the NUL terminating character.
This macro behaves like the strlen function in the ANSI C string library.
Return value
unsigned long
Return value is equal to the number of characters in the string pointed to by str1, not including the terminating NUL character.
Rules
• Strings are assumed to be NUL terminated.
• If str1 is not properly terminated by a NUL character, the length returned is invalid.
Example
This example shows how to use strlen on the command line:
> ce strlen("1234567890") Result is: 10 0x0000000A
See Also• strcat on page 3-45• strchr on page 3-47• strcmp on page 3-49• strcpy on page 3-51• stricmp on page 3-53• strncmp on page 3-56• strtolower on page 3-58• strtoupper on page 3-59• strtrim on page 3-60• tolower on page 3-61• toupper on page 3-62.
ARM DUI 0175N Copyright © 2002-2011 ARM. All rights reserved. 3-55ID052111 Non-Confidential

RealView Debugger Predefined Macros
3.2.38 strncmp
Performs a limited comparison of two strings.
Syntax
int strncmp (str1, str2, count)char *str1;char *str2;int count;
where:
str1 Variable of type pointer to char. Specifies the location in memory of the first byte of a character string.
str2 Variable of type pointer to char. Specifies the location in memory of the first byte of a character string.
count Variable of integer type. Specifies the length of characters in each string to compare, unless the NUL character is encountered in either string first.
Description
This macro performs limited comparison of two strings. The strncmp macro is used to compare strings in ASCII sequence, except that the comparison stops after count characters, or when the first NUL character is encountered, whichever comes first.
This macro behaves like the strncmp function in the ANSI C string library.
Return value
int One of the following:<0 Indicates that the second argument string value comes after the first
argument string value in the machine collating sequences, str1 < str2.0 Indicates that the two strings are identical in content.>0 Indicates that the first argument string value comes after the second
argument string value in the machine collating sequences, str2 < str1.
Rules
• Strings do not have to be NUL terminated or fit within the array boundaries because the comparison is limited to the number of stated characters.
• Less than count characters are compared if one of the strings is smaller than count characters.
• The comparison is always signed, regardless of how the string is declared.
Example
This example shows how to use strncmp in a macro:
define /R void checkfile(filename) char *filename;{ int retval; retval = strncmp(filename, "dhrystone", 4); if (retval == 0)
ARM DUI 0175N Copyright © 2002-2011 ARM. All rights reserved. 3-56ID052111 Non-Confidential

RealView Debugger Predefined Macros
$printf "%s belongs to the Dhrystone project\n",filename$; else $printf "%s belongs to another project\n",filename$;}.
See Also• strcat on page 3-45• strchr on page 3-47• strcmp on page 3-49• strcpy on page 3-51• stricmp on page 3-53• strlen on page 3-55• strtolower on page 3-58• strtoupper on page 3-59• strtrim on page 3-60• tolower on page 3-61• toupper on page 3-62.
ARM DUI 0175N Copyright © 2002-2011 ARM. All rights reserved. 3-57ID052111 Non-Confidential

RealView Debugger Predefined Macros
3.2.39 strtolower
Converts a string to lowercase.
Syntax:
char *strtolower (str)char *str;
where:
str The string to be converted.
Description
This macro converts a string to lowercase. The original string is changed.
Return value
char * A pointer to the first character of the converted string.
Example
add char myString[50]cexpression strcpy(myString, "A String with UPPERCASE characters.")cexpression strtolower(myString)printf "%s", myString
See also• strcat on page 3-45• strcat on page 3-45• strchr on page 3-47• strcmp on page 3-49• strcpy on page 3-51• stricmp on page 3-53• strlen on page 3-55• strncmp on page 3-56• strtoupper on page 3-59• strtrim on page 3-60• tolower on page 3-61• toupper on page 3-62.
ARM DUI 0175N Copyright © 2002-2011 ARM. All rights reserved. 3-58ID052111 Non-Confidential

RealView Debugger Predefined Macros
3.2.40 strtoupper
Converts a string to uppercase.
Syntax:
char *strtoupper (str)char *str;
where:
str The string to be converted.
Description
This macro converts a string to uppercase. The original string is changed.
Return value
char * A pointer to the first character of the converted string.
Example
add char myString[50]cexpression strcpy(myString, "A String with lowercase characters.")cexpression strtoupper(myString)printf "%s", myString
See also• strcat on page 3-45• strchr on page 3-47• strcmp on page 3-49• strcpy on page 3-51• stricmp on page 3-53• strlen on page 3-55• strncmp on page 3-56• strtolower on page 3-58• strtrim on page 3-60• tolower on page 3-61• toupper on page 3-62.
ARM DUI 0175N Copyright © 2002-2011 ARM. All rights reserved. 3-59ID052111 Non-Confidential

RealView Debugger Predefined Macros
3.2.41 strtrim
Trims the leading and trailing white spaces and tabs from a string.
Syntax:
char *strtrim (str)char *str;
where:
str The string to be converted.
Description
This macro trims the leading and trailing white spaces and tabs from a string. The original string is changed.
Return value
char * A pointer to the first character of the trimmed string.
Example
add char myString[50]cexpression strcpy(myString, " String with spaces before and after. ")cexpression strtrim(myString)printf "|%s|", myString
See also• strcat on page 3-45• strchr on page 3-47• strcmp on page 3-49• strcpy on page 3-51• stricmp on page 3-53• strlen on page 3-55• strncmp on page 3-56• strtolower on page 3-58• strtoupper on page 3-59• tolower on page 3-61• toupper on page 3-62.
ARM DUI 0175N Copyright © 2002-2011 ARM. All rights reserved. 3-60ID052111 Non-Confidential

RealView Debugger Predefined Macros
3.2.42 tolower
Converts a character to lowercase.
Syntax:
int tolower (c)int c;
where:
c The character to be converted.
Description
This macro converts a character to lowercase. The original character is unchanged.
Return value
int The converted character.
Example
add char myCharcexpression myChar='A'printf "%c", tolower(myChar)
See also• strcat on page 3-45• strchr on page 3-47• strcmp on page 3-49• strcpy on page 3-51• stricmp on page 3-53• strlen on page 3-55• strncmp on page 3-56• strtolower on page 3-58• strtoupper on page 3-59• strtrim on page 3-60• toupper on page 3-62.
ARM DUI 0175N Copyright © 2002-2011 ARM. All rights reserved. 3-61ID052111 Non-Confidential

RealView Debugger Predefined Macros
3.2.43 toupper
Converts a character to uppercase.
Syntax:
int toupper (c)int c;
where:
c The character to be converted.
Description
This macro converts a character to uppercase. The original character is unchanged.
Return value
int The converted character.
Example
add char myCharcexpression myChar='a'printf "%c", toupper(myChar)
See also• strcat on page 3-45• strchr on page 3-47• strcmp on page 3-49• strcpy on page 3-51• stricmp on page 3-53• strlen on page 3-55• strncmp on page 3-56• strtolower on page 3-58• strtoupper on page 3-59• strtrim on page 3-60• tolower on page 3-61.
ARM DUI 0175N Copyright © 2002-2011 ARM. All rights reserved. 3-62ID052111 Non-Confidential

RealView Debugger Predefined Macros
3.2.44 until
Breaks when a given expression evaluates to True.
Syntax
int until (expression)int expression;
where:
expression An expression that is evaluated to test if the result is nonzero.
Description
This macro causes execution to break when expression is True. The until macro evaluates its argument, expression, to determine if it is True (nonzero) or False (zero). This macro can only be used with the GO command and the GOSTEP command to:• halt execution when the expression passed is True• continue execution when the expression passed is False.
Return value
int One of the following:0 Indicates that expression is False (zero).1 Indicates that expression is True (nonzero).
Rules
Any C expression resulting in a value can be used as the argument, expression.
Example
Set temporary breakpoints at line numbers 3 and 17 in the current module, and at the entry point to the function printf. When any of these locations are encountered by the executing program, the debugger stops then checks the until conditional statements. If the variable i is equal to 3 or the variable x is less than y, a break occurs. Otherwise, program execution continues.
GO #3,#17,printf;until(i==3||x<y)
See also• GO on page 2-159• GOSTEP on page 2-161• when on page 3-64.
ARM DUI 0175N Copyright © 2002-2011 ARM. All rights reserved. 3-63ID052111 Non-Confidential
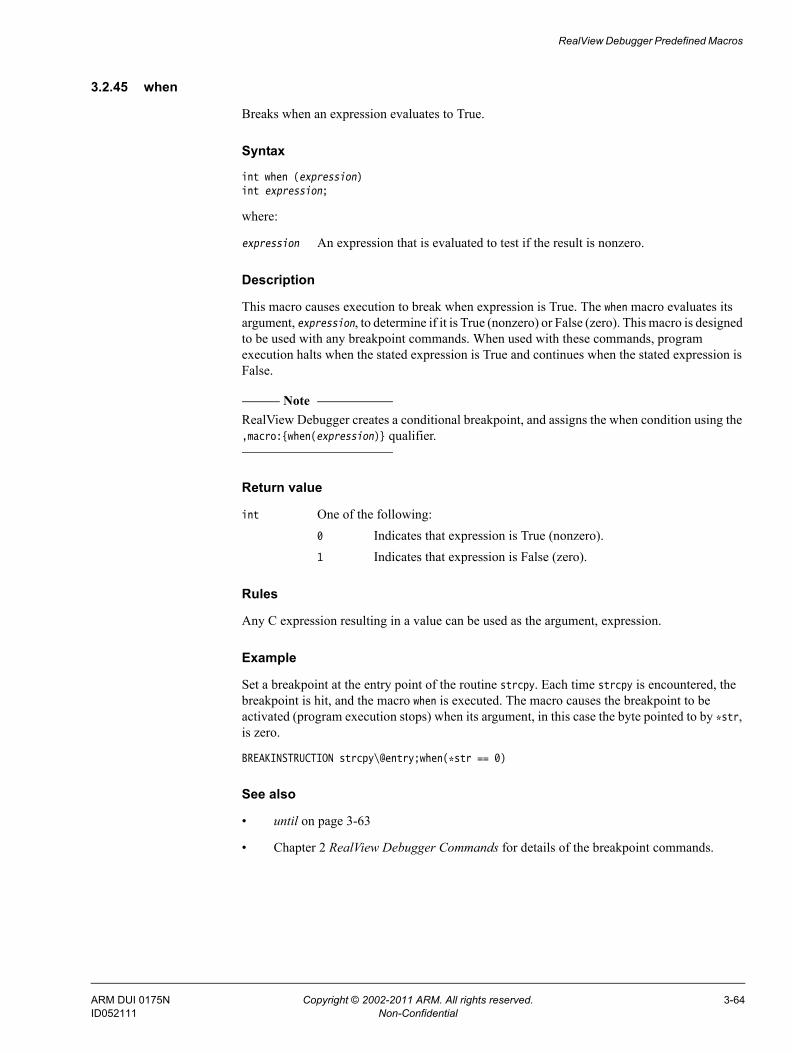
RealView Debugger Predefined Macros
3.2.45 when
Breaks when an expression evaluates to True.
Syntax
int when (expression)int expression;
where:
expression An expression that is evaluated to test if the result is nonzero.
Description
This macro causes execution to break when expression is True. The when macro evaluates its argument, expression, to determine if it is True (nonzero) or False (zero). This macro is designed to be used with any breakpoint commands. When used with these commands, program execution halts when the stated expression is True and continues when the stated expression is False.
Note RealView Debugger creates a conditional breakpoint, and assigns the when condition using the ,macro:{when(expression)} qualifier.
Return value
int One of the following:0 Indicates that expression is True (nonzero).1 Indicates that expression is False (zero).
Rules
Any C expression resulting in a value can be used as the argument, expression.
Example
Set a breakpoint at the entry point of the routine strcpy. Each time strcpy is encountered, the breakpoint is hit, and the macro when is executed. The macro causes the breakpoint to be activated (program execution stops) when its argument, in this case the byte pointed to by *str, is zero.
BREAKINSTRUCTION strcpy\@entry;when(*str == 0)
See also
• until on page 3-63
• Chapter 2 RealView Debugger Commands for details of the breakpoint commands.
ARM DUI 0175N Copyright © 2002-2011 ARM. All rights reserved. 3-64ID052111 Non-Confidential

RealView Debugger Predefined Macros
3.2.46 word
Returns a word value at the specified address.
Syntax
unsigned short int word (addr)void *addr;
where:
addr The address containing the value to be returned.
Description
This macro returns a word value at the specified address. The word macro returns an unsigned short integer value (a two byte word of memory value) for the contents of memory pointed to by the argument addr.
Return value
unsigned short int
The two byte value located at the specified address.
Rules
The argument default type is specified by using the OPTION command:
OPTION radix = [ decimal | hex ]
Example
To display the contents of the hexadecimal address 0x8338, enter the following on the command line:
> PRINTVALUE word(0x8338)0x00008338 = 16
See also
The following macros provide similar or related functionality:• OPTION on page 2-195• byte on page 3-11• dword on page 3-14.
ARM DUI 0175N Copyright © 2002-2011 ARM. All rights reserved. 3-65ID052111 Non-Confidential

Chapter 4 RealView Debugger Keywords
This chapter describes the available RealView® Debugger keywords. It contains the following sections:• Keywords listed by function on page 4-2• Alphabetical keyword reference on page 4-4.
ARM DUI 0175N Copyright © 2002-2011 ARM. All rights reserved. 4-1ID052111 Non-Confidential

RealView Debugger Keywords
4.1 Keywords listed by functionThe following sections list the keywords according to their general function:• Data type keywords• Conditional statement keywords• Flow control keywords on page 4-3• Miscellaneous keywords on page 4-3.
4.1.1 Data type keywords
Table 4-1 contains a summary of the data type keywords.
4.1.2 Conditional statement keywords
Table 4-2 contains a summary of the conditional statement keywords.
Table 4-1 Data type keywords
Description Keyword
Character variable char
Double floating variable double
Floating variable float
Integer variable int
Long variable long
Long long variable long long
Short variable short
Unsigned variable, defaults to unsigned int
unsigned
Table 4-2 Conditional statement keywords
Description Keyword See
Simplest form of a conditional statement. if if on page 4-10
Specify an alternative statement to execute when an if statement evaluates to False.
if-else if-else on page 4-11
ARM DUI 0175N Copyright © 2002-2011 ARM. All rights reserved. 4-2ID052111 Non-Confidential

RealView Debugger Keywords
4.1.3 Flow control keywords
Table 4-3 contains a summary of the conditional statement keywords.
4.1.4 Miscellaneous keywords
Table 4-4 contains a summary of other keywords.
You can also use these keywords on the command line by prefixing them with the CEXPRESSION command. For example:
> cexpression sizeof(int) Result is: 4 0x0000000000000004
See also
• CEXPRESSION on page 2-87.
Table 4-3 Flow control keywords
Description Keyword See
Exits from the current loop. break break on page 4-5
Ignores the remaining statements in the current loop and executes the next iteration of the loop.
continue continue on page 4-6
Executes a given statement one or more times until an expression evaluates to False.
do-while do-while on page 4-7
Executes a statement a given number of times.
for for on page 4-8
Evaluates an expression and executes the following statement or statements until the expression evaluates to False.
while while on page 4-15
Table 4-4 Miscellaneous keywords
Description Keyword See
Verifies that a symbol is currently active. isalive isalive on page 4-12
Returns the size of a data type. sizeof sizeof on page 4-14
ARM DUI 0175N Copyright © 2002-2011 ARM. All rights reserved. 4-3ID052111 Non-Confidential

RealView Debugger Keywords
4.2 Alphabetical keyword referenceThe following sections list in alphabetical order the keywords that you can use in macros:• break on page 4-5• continue on page 4-6• do-while on page 4-7• for on page 4-8• if on page 4-10• if-else on page 4-11• isalive on page 4-12• return on page 4-13• sizeof on page 4-14• while on page 4-15.
ARM DUI 0175N Copyright © 2002-2011 ARM. All rights reserved. 4-4ID052111 Non-Confidential

RealView Debugger Keywords
4.2.1 break
Exits the current loop immediately.
Syntax:
break;
Description
The break statement causes the innermost for, do-while, or while loop to be exited immediately.
Return Value
None
Rules
None
Example
See the example on page 4-8 to see how to use break in a for loop.
See also• do-while on page 4-7• for on page 4-8• while on page 4-15.
ARM DUI 0175N Copyright © 2002-2011 ARM. All rights reserved. 4-5ID052111 Non-Confidential

RealView Debugger Keywords
4.2.2 continue
Causes the next iteration of a loop to be executed, ignoring any remaining commands in the loop.
Syntax:
continue;
Description
The continue statement causes the remainder of the for, do-while, or while loop to be ignored and the next iteration of the loop to execute.
Return Value
None
Rules
None
Example
See the example on page 4-8 to see how to use continue in a for loop.
See also• do-while on page 4-7• for on page 4-8• while on page 4-15.
ARM DUI 0175N Copyright © 2002-2011 ARM. All rights reserved. 4-6ID052111 Non-Confidential

RealView Debugger Keywords
4.2.3 do-while
Executes one or more statements until an expression is False.
Syntax:
do { statement; /* execute this statement */ [statement;]... /* additional statements */} while (expression); /* while this expression is True */
where:
expression The expression to be evaluated at the end of each iteration of the loop.
Description
The do-while statement executes a given statement one or more times until an expression evaluates to False.
If you have more than one statement in the do-while loop these must be enclosed in curly braces ({}).
Return Value
None
Rules
None
Example
This example shows how to use do-while in a macro:
define /R void doloop(){ int i; i = 1; do { $printf "Iteration: %d\n", i$; i++; } while (i < 11);}.
See also• break on page 4-5• continue on page 4-6• for on page 4-8• while on page 4-15.
ARM DUI 0175N Copyright © 2002-2011 ARM. All rights reserved. 4-7ID052111 Non-Confidential

RealView Debugger Keywords
4.2.4 for
Executes one or more statements a given number of times.
Syntax:
for (expression_1; /* evaluate only once */ expression_2; /* evaluate before each iteration */ expression_3) /* evaluate after each iteration */{ statement; /* execute this statement */ /* while expression_2 is True */ [statement;]... /* additional statements */}
Description
The for statement is useful for executing a statement a given number of times. It evaluates expression_1 and then evaluates expression_2 to see if it is True, that is nonzero, or False, that is zero. If expression_2 evaluates to True, all statements are executed once.
Next expression_3 is evaluated, and expression_2 is evaluated again to see if it is True or False. If expression_2 is True, all statements are executed again and the cycle continues. If expression_2 is False, all statements are bypassed and execution continues at the next statement outside the for loop.
Where you have more than one statement in the for loop these must be enclosed by curly braces ({}).
The term expression_1 can be used to initialize a variable to be used in the loop. It is evaluated once, before the first iteration of the loop. The term expression_2 determines whether to execute or terminate the loop and is evaluated before each iteration. If the term expression_2 evaluates to True, that is nonzero, the loop is executed. If expression_2 is False, that is zero, the loop is terminated. The term expression_3 can be used to increment a loop counter, and is evaluated after each iteration.
Return Value
None
Rules
None
Example
This example shows how to use the for statement in a macro:
define /R void forloop(){ int i; for (i=0; i<11; i++) { if (i > 10) { $printf " Done!\n"$; break; } else if (i==5) { $printf " Halfway there...\n"$; continue;
ARM DUI 0175N Copyright © 2002-2011 ARM. All rights reserved. 4-8ID052111 Non-Confidential

RealView Debugger Keywords
} $printf "Iteration: %d\n", i$; }}.
See also• break on page 4-5• continue on page 4-6• do-while on page 4-7• while on page 4-15.
ARM DUI 0175N Copyright © 2002-2011 ARM. All rights reserved. 4-9ID052111 Non-Confidential

RealView Debugger Keywords
4.2.5 if
The simplest form of a macro conditional statement.
Syntax:
if (expression) /* If this expression is True */{ statement; /* execute this statement */ [statement;]... /* additional statements */}
Description
The if statement is the simplest form of a macro conditional statement. It is always followed by an expression enclosed in parentheses. If the expression evaluates to zero, that is False, the statement following the expression is bypassed. If the expression evaluates to a value other than zero, that is True, the statement following the expression is executed. If you have more than one statement in the if statement these must be enclosed in curly braces ({}).
Return Value
None
Rules
None
Example
This example shows how to use if in a macro:
if (n==0) strcpy(number,"zero");
See also• if-else on page 4-11.
ARM DUI 0175N Copyright © 2002-2011 ARM. All rights reserved. 4-10ID052111 Non-Confidential

RealView Debugger Keywords
4.2.6 if-else
Provides a way to specify an alternative statement to execute if the if statement evaluates to False.
Syntax:
if (expression) /* If expression is True */{ statement_1; /* execute statement_1 */ [statement;]... /* and these additional statements */}else /* If expression is False */{ statement_2; /* execute statement_2 */ [statement;]... /* and these additional statements */}
Description
The if-else statement provides a way to specify an alternative statement to execute if the if statement evaluates to False. If the expression evaluates to True, that is nonzero, statement_1 and any following statements are executed, but statement_2 and any following statements are not executed. If the expression evaluates to False, that is zero, statement_2 and any following statements are executed, but statement_1 and any following statements are not executed. If you have more than one statement in the if section or in the else section these must be enclosed in curly braces ({}).
Return Value
None
Rules
None
Example
This example shows how to use if-else in a macro:
if (n==0) strcpy(number,"zero");else strcpy(number,"nonzero");
See also• if on page 4-10.
ARM DUI 0175N Copyright © 2002-2011 ARM. All rights reserved. 4-11ID052111 Non-Confidential

RealView Debugger Keywords
4.2.7 isalive
Tests the status of the specified symbol.
Syntax
int isalive (symbol_name) symbol_name;
where:
symbol_name The variable name used for the symbol that isalive tests the scope of.
Description
The isalive keyword tests whether the specified symbol is in scope. It checks the status of the argument symbol_name, to see whether that variable is in scope, and whether it can be referenced. The value returned by isalive specifies whether the variable does not exist, is not in scope, is in scope inside the current active function, or is an external (global) variable, or a static variable on the stack but out of scope.
Return value
int One of the following values-1 Symbol does not exist.0 Symbol not currently active. It cannot be referenced because it is out
of scope.1 Symbol currently active. It is part of the local procedure, also called an
automatic variable.2 Available on the stack. The symbol is not part of local procedure, and
is also called an external (active), global (active), or static automatic variable (inactive, but containing stored memory contents).
Rules
The argument of isalive must be a variable that has no return value. The argument cannot be a function.
Example
You can use the following syntax for the isalive keyword when checking the status of a variable used in its argument.
CEXPRESSION isalive(xxx)/* Returns -1 if the symbol xxx does not exist. */ADD var1CE isalive(var1)/* Returns 1 since var1 is defined and active. */
Note The commands CEXPRESSION and CE are equivalent.
ARM DUI 0175N Copyright © 2002-2011 ARM. All rights reserved. 4-12ID052111 Non-Confidential

RealView Debugger Keywords
4.2.8 return
Returns a value from a macro.
Syntax:
return [(]expression[)];
Description
The return statement is used to return a value from a macro. The expression is evaluated, and the resulting value is returned to the caller. If a breakpoint macro returns a value of True, that is nonzero, program execution continues. If it returns a value of False, that is zero, program execution is halted. If a macro never returns a value, the macro_type must be declared as void when it is defined.
Return Value
None
Rules
None
Example
This example shows how to use return in a macro:
define /R int value(x) int x;{ if (x > 0) return (x); else return(-1);}.
ARM DUI 0175N Copyright © 2002-2011 ARM. All rights reserved. 4-13ID052111 Non-Confidential

RealView Debugger Keywords
4.2.9 sizeof
Returns the data type size in bytes.
Syntax
int sizeof(type_name)
where:
type_name The data type or variable for which the data size is to be determined.
Description
The sizeof keyword returns the data type size in bytes of a given variable or data type.
Return value
int The size of the data type in bytes.
Rules
None
Example
This example shows how to use sizeof in a macro:
define /R void saveData(){ char buffer[37]; int retval; strcpy(buffer,"One \nTwo \nThree\nFour \nFive \nSix \n"); fopen(100,"c:\\myfiles\\data.txt","w"); retval = fwrite(buffer, 1, sizeof(buffer)-1, 100); $printf "%d bytes written\n",retval$; $vclose 100$;}.
ARM DUI 0175N Copyright © 2002-2011 ARM. All rights reserved. 4-14ID052111 Non-Confidential

RealView Debugger Keywords
4.2.10 while
Evaluates an expression and executes one or more statements until the expression evaluates to False.
Syntax:
while (expression) /* while this expression is True */{ statement; /* execute this statement */ [statement;]... /* and these additional statements */}
where:
expression The expression to be evaluated at the start of each loop.
Description
The while statement evaluates an expression and executes the following statement or statements until the expression evaluates to False.
The while statement must be followed by an expression in parentheses. As long as the expression evaluates to True, all following statements are repeatedly executed. When the expression evaluates to False, all statements are bypassed and execution continues at the next statement outside the while loop. If you have more than one statement in the loop these must be enclosed in curly braces ({}).
Return Value
None
Rules
None
Example
This example shows how to use while in a macro:
define /R void whileloop(){ int x; x = 1; while (1) { $printf "Iteration: %d\n", x$; if (x > 10) { $printf "Done!\n"$; break; } else if (x==5) { $printf "Halfway there...\n"$; } x++; }}.
See also• break on page 4-5
ARM DUI 0175N Copyright © 2002-2011 ARM. All rights reserved. 4-15ID052111 Non-Confidential

RealView Debugger Keywords
• continue on page 4-6• do-while on page 4-7• for on page 4-8.
ARM DUI 0175N Copyright © 2002-2011 ARM. All rights reserved. 4-16ID052111 Non-Confidential