Embed Size (px)
Citation preview
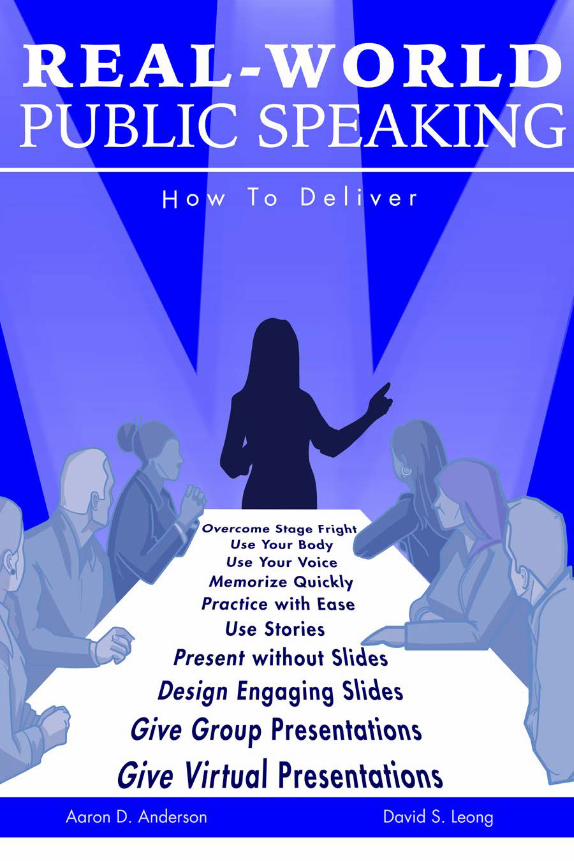

REAL-WORLD PUBLIC SPEAKING PART 1: HOW TO DELIVER
Aaron D. Anderson and David S. Leong
iii
Copyright Page
© Aaron D. Anderson & David S. Leong 2021
All rights reserved. No part of this publication may be reproduced, distributed, or transmitted in any form or by any means, including photocopying, recording, or other electronic or mechanical methods, without the prior written permission of the author, except in the case of brief quotations embodied in critical reviews and certain other noncommercial uses permitted by copyright law.
iv
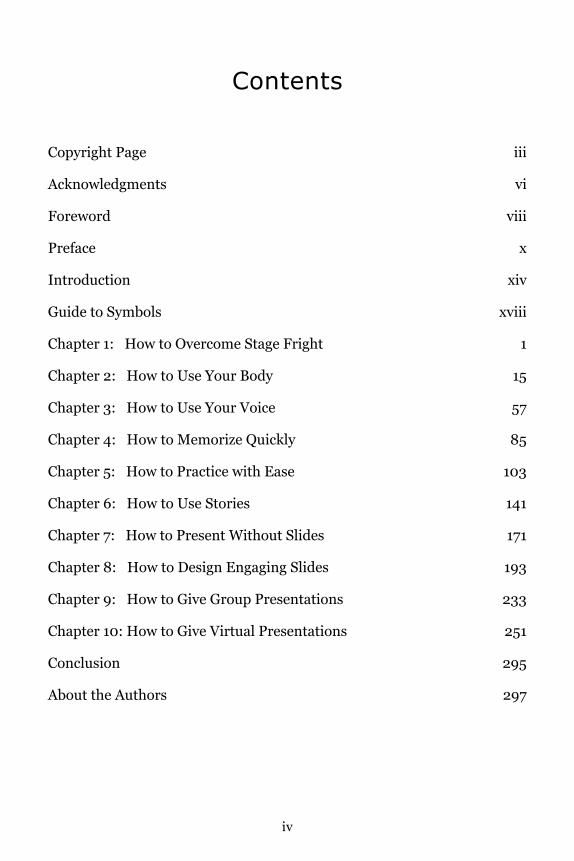
Contents
Copyright Page iii
Acknowledgments vi
Foreword viii
Preface x
Introduction xiv
Guide to Symbols xviii
Chapter 1: How to Overcome Stage Fright 1
Chapter 2: How to Use Your Body 15
Chapter 3: How to Use Your Voice 57
Chapter 4: How to Memorize Quickly 85
Chapter 5: How to Practice with Ease 103
Chapter 6: How to Use Stories 141
Chapter 7: How to Present Without Slides 171
Chapter 8: How to Design Engaging Slides 193
Chapter 9: How to Give Group Presentations 233
Chapter 10: How to Give Virtual Presentations 251
Conclusion 295
About the Authors 297

d
viii
Foreword
“You need to talk to David Leong and Aaron Anderson.”
This is some of the best advice I ever got. And yet at first I resisted. You see, the business faculty at VCU had decided that we needed to create a course to teach undergraduates how to give business presentations. And now, as associate dean, I was the one who had to figure out how to make that hap-pen. I was talking to my counterpart in the VCU School of the Arts, and she was encouraging me to talk to these two particular faculty members in their Department of Theatre. I had no idea why. I made the (incorrect) as-sumption that they didn’t know anything about business presentations and immediately had visions of our graduates delivering Shakespearean solilo-quies to bemused audiences in boardrooms around the country.
No, this will not work, I thought to myself.
That was eight years ago, and now I know better. A lot better. Our new course has transformed thousands of business students into confident, compelling presenters and has become one of the most memorable and be-loved courses we offer. And every bit of that success comes from relying on the expertise of our colleagues in theatre.
Consider what theatre teachers do best. They teach the art of presenta-tion . . . how to hook the audience, hold their attention, change their opin-ions, educate and even inspire them. Compare this to the vast majority of business presentations where the attendees busy themselves by checking their email, reading and sending texts, and occasionally glancing up to see a slide full of bullet points. Wouldn’t you like to be able to hold a room’s rapt attention instead of looking at the tops of people’s heads?
There is no cookie-cutter formula for teaching how to give a presentation, just as two actors are not alike. Following the advice in this book, you may experience some jitters (think of it as excitement!), but you’ll be comfort-able speaking in front of others because the presentation will feel authentic to you.
ix
And what about my original concern that our students would look foolish using theatre skills to deliver their business presentations? That was total-ly unfounded. Sure, Aaron and David have succeeded at the highest levels in show business, from Hollywood to Broadway. But they also train and coach CEOs, leaders, managers, politicians, scientists, engineers, doctors, and nurses. They’ve coached me and other faculty members to deliver pre-sentations using theatre techniques, and the results have always been com-pelling, natural, and effective.
In their travels around the world, people ask them same questions over and over: “What are your secrets? Will I ever be able to speak with confidence? Inspire an audience?” This book demystifies these skills and presents them in a simple, straightforward, and practical manner. Anyone can learn to stand up and deliver with confidence and purpose once they learn the same things that actors learn from day one. Now they can be yours. Get ready for an exciting journey!
Shannon K. Mitchell, Ph.D., Associate Dean for Undergraduate Studies, Associate Professor of Economics, School of Business, Vir-ginia Commonwealth University, 2020
x
Preface
In 2005, if you’d told us that within a year we’d be teaching doctors how to communicate with dying patients, and that within two years we’d be trav-elling the world teaching CEOs how to communicate with angry sharehold-ers, we’d have told you that you were crazy. But it happened.
How did a couple of theatre professors end up as international business consultants and executive coaches? As with many adventures, it started with a single conversation. In 2006, we found ourselves talking with Dr. Richard Wenzel, a prominent epidemiologist and noted medical educator, about a recent study suggesting that doctors had gotten so bad at talking to patients that patients were actually getting sicker.
Theatre artists know that a large part of actor training is teaching people how to listen actively, and as the conversation continued, it became clear that those same skills might also help doctors connect with patients in ways that mattered. This idea intrigued Dr. Wenzel so much that he proposed a study to see whether or not some basic theatre techniques could be used to teach doctors the skills of clinical empathy. Dr. Alan Dow, a leading re-searcher and hospitalist with Virginia Commonwealth University’s (VCU) Department of Internal Medicine, helped us design and conduct a rigorous year-long empirical study to test the effectiveness of the theory.
Did it work? Oh yeah! More than anyone could have predicted. It turns out that teaching people how to communicate effectively is pretty straightfor-ward. If you teach people a few basic skills, they get a lot better—no matter how much education they already have. Patients not only noticed the dif-ference, they significantly preferred the doctors who had been trained in theatre-based communication skills.
That study—as well as several others we did—was published in a number of prestigious medical journals and won us several awards for innovation in medical education. The studies also ended up generating a lot of worldwide attention in the lay press.
xi
One of those articles in The Washington Post caught the attention of the CEO of a major Fortune 500 company. That CEO contacted us to ask if we would teach his executives the same skills we taught doctors in the hope of improving communication across his company. By the end of the training, his executives did indeed get a lot better at communicating. And most im-portantly, they got a whole lot better at designing and delivering presenta-tions.
It turns out that being able to give an effective presentation is an essen-tial part of leadership, especially in big organizations. We didn’t recognize that immediately. Our clients slowly taught us how and why presentations work in the real world. They brought us into their boardrooms, shareholder meetings, and venture capital pitches. We sat in on everything from daily meetings with a few people to yearly updates in front of thousands. During those foundational years, we learned that business communication involves more than just delivering information: It also requires knowing your audi-ence and being able to craft a message that will persuade and motivate oth-ers to collective action. Over time, this unique combination of real-world business experience and theatre training led us to where we are now.
Since then, we’ve worked with literally thousands of students, doctors, law-yers, nurses, scientists, politicians, artists, and teachers to help them give presentations that get results. We’ve coached managers dealing with layers of international trade and small business owners just struggling to land their first client. We’ve helped scientists educate people about issues that were literally life and death and taught undergraduate students how to pre-pare for presentations that only felt like life and death. We didn’t invent the process of designing and delivering winning presentations—we just broke it down and explained it clearly.
You learn empathy—and any type of communication—the same way you learn acting. You develop skillsets and then practice them until you get bet-ter. Neither empathy nor persuasive communication are something you are born with (or without). You practice them the same way you practice a mu-sical instrument: sometimes focusing on the small details, and sometimes on the big picture. This book will show you how to accomplish this.
xii
Flash forward to 2015 when we were asked to study the effectiveness of the required public speaking textbooks across our university. VCU’s School of Business in particular was having difficulty identifying a course and text-book that was geared toward real-world application. As was true at oth-er universities, students complained that their public speaking textbooks were heavy on theory, filled with redundant information, and, worst of all, didn’t actually prepare them for the types of presentations they were asked to give in the real world.
With detailed advice from the professionals we coached in business, med-icine, nursing, allied health, education, and the arts, we set out to create a reader-friendly, visually-appealing, and highly-effective textbook filled with chapter summaries, stories, and, of course, practical exercises based on the types of presentations people actually give outside the college class-room.
In 2020, the e-book format became essential to faculty and students as the worldwide pandemic altered the way instructors taught. So to better prepare students for the real world outside of school, we wrote additional chapters on How to Deliver Virtual Presentations and began sending out weekly public speaking tips to all students enrolled in university public speaking courses.
Any public speaking course needs to teach at least two different but inter-twined skill sets: what to say (or not say) in a presentation, and how to say it effectively. Unfortunately, most public speaking textbooks relegate the skills of how to deliver to a single chapter or two and fail to provide teach-ers with observable, concrete skillsets with which to coach their students. Our e-books Real-World Public Speaking: What to Say and Real-World Public Speaking: How to Deliver solve those problems.
We wrote these books because we feel strongly that effective communica-tion can make the world a better place. It helps patients to get well and businesses to thrive. The need for these skills is greater than ever before.
We hope you find inspiration within these books to help you connect with others authentically, whether you are presenting to large groups of people

or simply talking with others on a one-to-one basis. Doing it right is easy if you know how. It took us years to learn what’s in this book.
Let our lifelong experience be your easy-to-use shortcut.
Aaron D. Anderson and David S. Leong, January 2021
xiv
Introduction
Real-World Public Speaking: How to Deliver is specifically designed as an e-book for ease of use and clarity of reading. Each chapter includes pub-lic speaking tips and tools, learning outcomes, practical exercises, real-life stories, a glossary of terms, and a test-your-knowledge section so you can measure your learning. Color photographs, illustrations, charts, and tables highlight the contents. By the end of this e-book, you will know how to
• Overcome stage fright.
• Use your body.
• Use your voice.
• Memorize quickly.
• Practice with ease.
• Use stories.
• Present without slides.
• Design engaging slides.
• Give group presentations.
• Give virtual presentations.
Those are the essential skills you need for knowing how to deliver any pre-sentation. For those who want to know what to say, the handy companion volume, Real-World Public Speaking: What to Say, will show you how to
• Connect with your audience.
• Develop your message.
• Build your outline.
• Create an informative presentation.
xv
• Create a persuasive presentation.
• Create an elevator pitch.
• Conduct a question-and-answer session.
• Introduce yourself and others.
• Interview successfully.
A Presentation Is a Form of Theatre
What do theatre and public speaking have in common? When presenters get nervous, they are said to experience “stage fright.” And indeed you are on stage presenting a show, which has a beginning, a middle, and an end, and it is up to you, the presenter, to let the audience know where they are on that journey.
When you present, you become the center of attention and have to hold your audience’s interest from the first word to the last. When you present, you have to remember what to say and be able to deliver your information in real time to a live audience who are all looking at you. And when you present virtually, you use the exact same skills that television and film ac-tors use to engage a viewing audience.
Preparing for your presentation is exactly the same as preparing to de-liver a theatrical performance. Whether you present to a boardroom full of CEOs, on a convention stage in front of hundreds of people, or in your boss’s office to an audience of one, everything you do needs to be planned, just like a theatre performance. When you’re asked to give a presentation, you instantly become playwright, designer, director, and actor. Real-World Public Speaking: How to Deliver will show you the secrets and techniques that the best theatrical performers use to hold their audience’s attention, overcome stage fright, and deliver the most effective presentation possible.
There are lots of books on public speaking. Most of them tell you what to do (for instance, make better slides, use vocal variety, smile, and write your words with your audience in mind). But telling you what to do won’t make
xvi
you a better speaker. You need to know the how. This book will teach you just that.
When actors train, they learn specific, simple techniques about how to use their body language for maximum effect, how to stand with poise and con-fidence, how to engage their audience, and how to speak with vocal variety. They learn practical ways to connect with people from any background, how to craft their words in ways that matter to their audience, and much, much more. Real-World Public Speaking: How to Deliver will give you those same skills and will show you how to use them to give a winning pre-sentation anytime, anywhere, and without it taking all your time to pre-pare.
How to Use This Book
The best way to learn how to put together a great presentation is to put to-gether a real one from beginning to end. You can learn a lot about present-ing just by reading through this book and thinking to yourself, Wow, yeah, I never thought about it like that, or Of course: that makes perfect sense! But the best way to get the most out of your time is to actually work through creating, rehearsing, and delivering a real presentation for a real audience.
xviii
Guide to Symbols
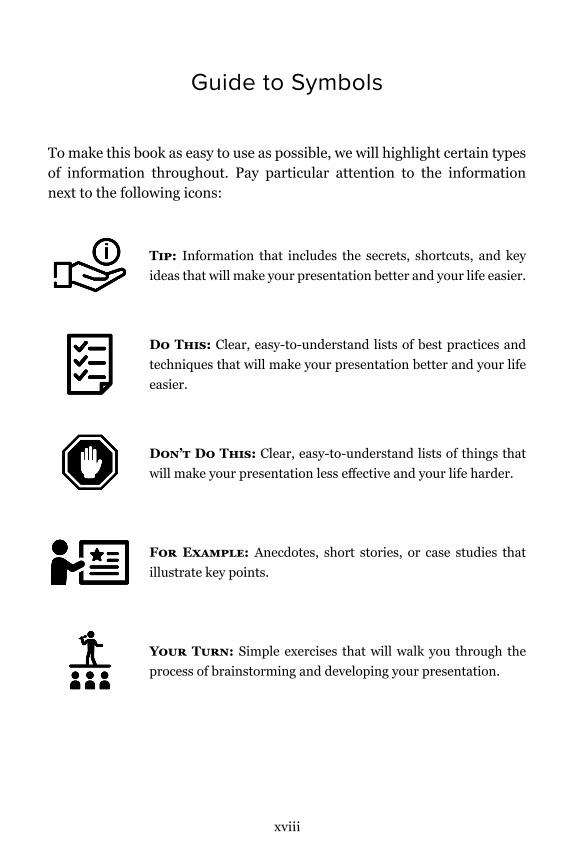
To make this book as easy to use as possible, we will highlight certain types of information throughout. Pay particular attention to the information next to the following icons:
Tip: Information that includes the secrets, shortcuts, and key ideas that will make your presentation better and your life easier.
Do This: Clear, easy-to-understand lists of best practices and techniques that will make your presentation better and your life easier.
Don’t Do This: Clear, easy-to-understand lists of things that will make your presentation less effective and your life harder.
For Example: Anecdotes, short stories, or case studies that illustrate key points.
Your Turn: Simple exercises that will walk you through the process of brainstorming and developing your presentation.
251
Chapter 10: How to Give Virtual Presentations
Everything has changed. Virtual is vital!
—Darren LaCroix, 2001 World Champion of Public Speaking
What You Will Learn in This Chapter
1. Why virtual presenting skills are important.
2. How to begin.
3. How to set up your space.
4. How to frame your shot.
5. How to set your acoustics.
6. How to set your lighting.
7. What to do when something goes wrong.
8. How to organize your content.
9. How to deliver.
Why Virtual Presenting Skills Are Important
The demand for virtual presentations has skyrocketed. Your ability to present over electronic media is a skill that will only grow in importance over the next few years. Everyone reading this book remembers that when COVID-19 emerged, it seemed as though the entire world scrambled to quickly transition from in-person meetings to virtual ones.
There were online meetings, webinars, and interviews before, but quaran-tine made everyone realize that lots of things they thought required in-per-son action could be done virtually, including giving and watching presenta-
252
tions. Watching online training sessions has also become the new normal. Your ability to communicate efficiently and effectively over electronic me-dia is now vitally important.
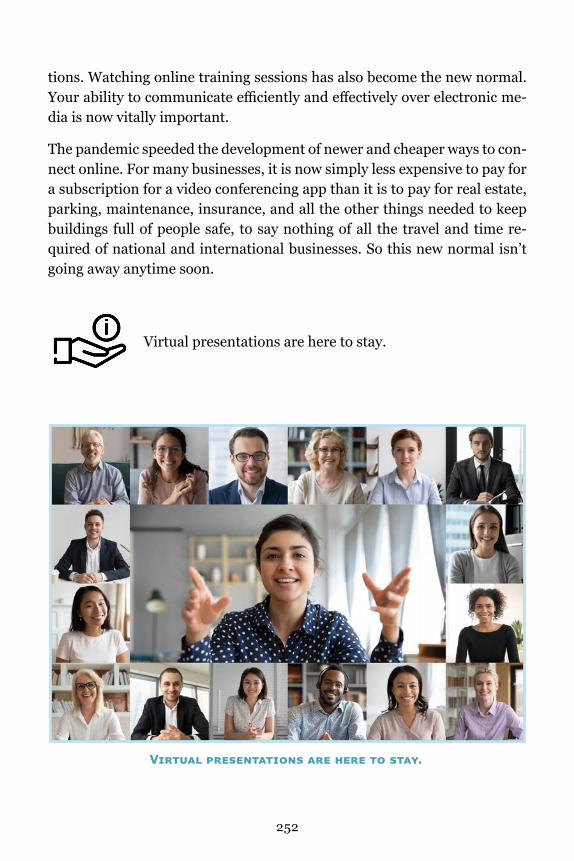
The pandemic speeded the development of newer and cheaper ways to con-nect online. For many businesses, it is now simply less expensive to pay for a subscription for a video conferencing app than it is to pay for real estate, parking, maintenance, insurance, and all the other things needed to keep buildings full of people safe, to say nothing of all the travel and time re-quired of national and international businesses. So this new normal isn’t going away anytime soon.
Virtual presentations are here to stay.
V y.
253
The problem is that from a communication standpoint, virtual meetings are usually less effective than in-person ones. How often does your mind wander when you are listening to an online meeting?
The answer for all of us is “most of the time.” But it’s not our fault. The human brain simply isn’t wired to focus on screens for prolonged periods. What this means for you as a presenter is that it takes more effort to hold your audience’s attention online than it does in person.
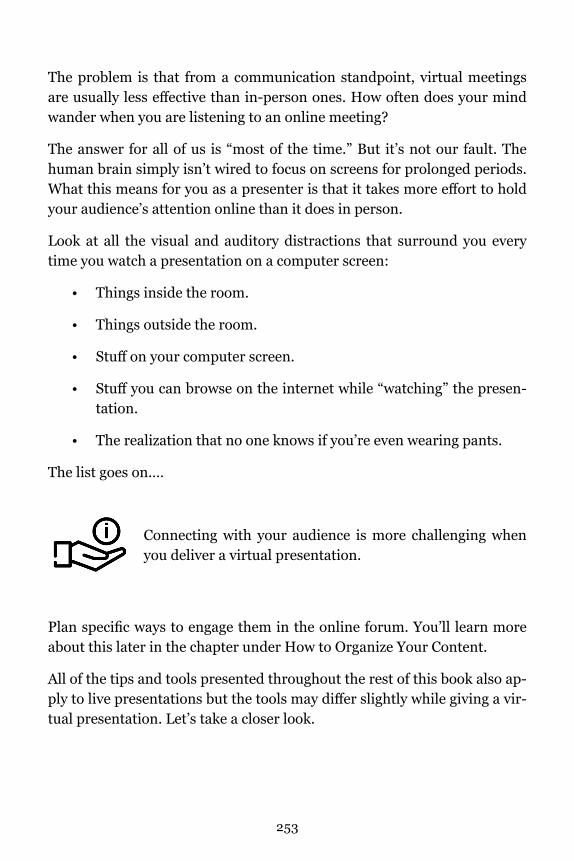
Look at all the visual and auditory distractions that surround you every time you watch a presentation on a computer screen:
• Things inside the room.
• Things outside the room.
• Stuff on your computer screen.
• Stuff you can browse on the internet while “watching” the presen-tation.
• The realization that no one knows if you’re even wearing pants.
The list goes on.…
Connecting with your audience is more challenging when you deliver a virtual presentation.
Plan specific ways to engage them in the online forum. You’ll learn more about this later in the chapter under How to Organize Your Content.
All of the tips and tools presented throughout the rest of this book also ap-ply to live presentations but the tools may differ slightly while giving a vir-tual presentation. Let’s take a closer look.
254
How to Begin
Before you give a virtual presentation, it’s important to learn the function-ality of your computer and how it interacts with your video conferencing platform.
Most people only learn how to use the basic options like chat, share screen, reactions, etc.
We recommend that you dig deeper and learn how to use all the options. Doing so will help you enrich both your content and delivery. If you need help, there are many instructional videos online. Find the relevant videos for the platform on which you will present and watch them!
D y .
255
There are lots of different platforms, such as Zoom, Skype, GotoMeeting, Google Hangouts, Google Meet, FaceTime, Facebook Live, and many more. Be aware that most online presentation applications digitally “compress” the signal coming out of your computer before broadcasting it. Artifacts of this process often cause distortions that can make your audio or video freeze or glitch from time to time. Assume that this will happen during your presentation (because it will).
How to Set Up Your Space
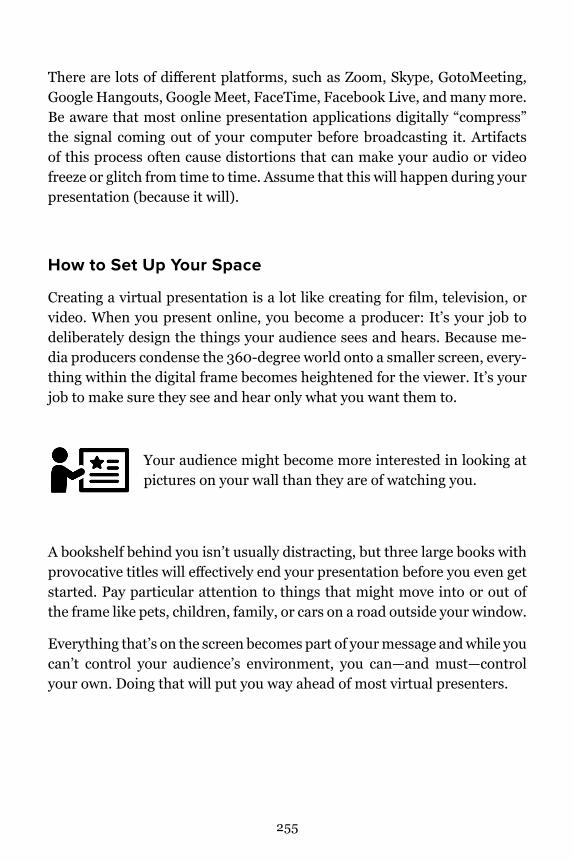
Creating a virtual presentation is a lot like creating for film, television, or video. When you present online, you become a producer: It’s your job to deliberately design the things your audience sees and hears. Because me-dia producers condense the 360-degree world onto a smaller screen, every-thing within the digital frame becomes heightened for the viewer. It’s your job to make sure they see and hear only what you want them to.
Your audience might become more interested in looking at pictures on your wall than they are of watching you.
A bookshelf behind you isn’t usually distracting, but three large books with provocative titles will effectively end your presentation before you even get started. Pay particular attention to things that might move into or out of the frame like pets, children, family, or cars on a road outside your window.
Everything that’s on the screen becomes part of your message and while you can’t control your audience’s environment, you can—and must—control your own. Doing that will put you way ahead of most virtual presenters.
256
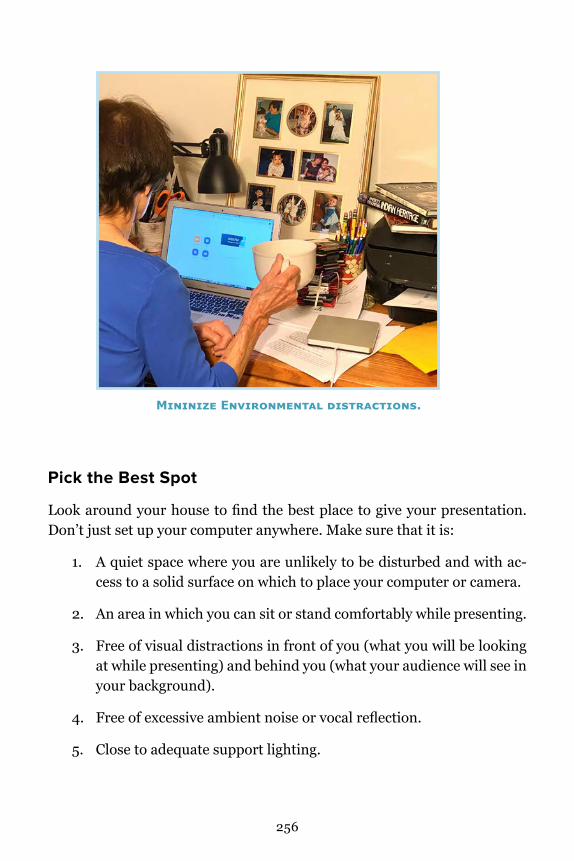
Pick the Best Spot
Look around your house to find the best place to give your presentation. Don’t just set up your computer anywhere. Make sure that it is:
1. A quiet space where you are unlikely to be disturbed and with ac-cess to a solid surface on which to place your computer or camera.
2. An area in which you can sit or stand comfortably while presenting.
3. Free of visual distractions in front of you (what you will be looking at while presenting) and behind you (what your audience will see in your background).
4. Free of excessive ambient noise or vocal reflection.
5. Close to adequate support lighting.
M z E .
257
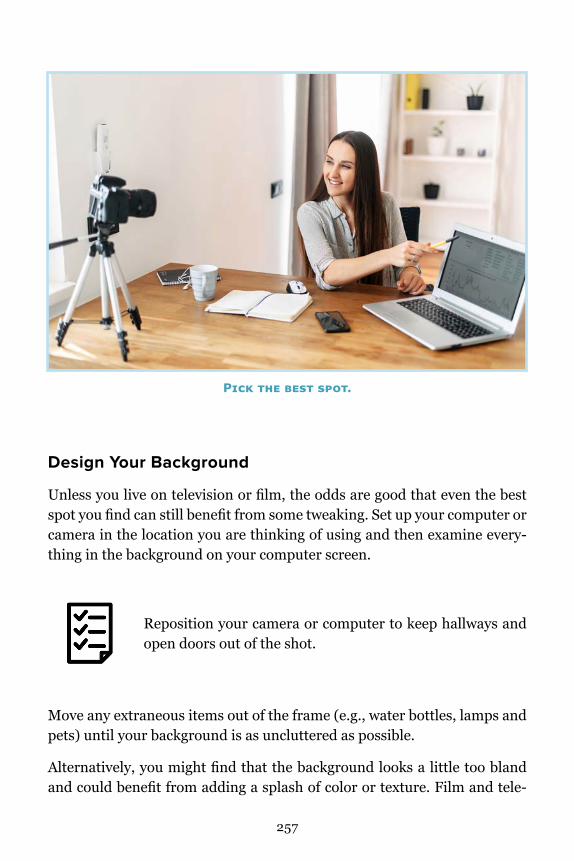
Design Your Background
Unless you live on television or film, the odds are good that even the best spot you find can still benefit from some tweaking. Set up your computer or camera in the location you are thinking of using and then examine every-thing in the background on your computer screen.
Reposition your camera or computer to keep hallways and open doors out of the shot.
Move any extraneous items out of the frame (e.g., water bottles, lamps and pets) until your background is as uncluttered as possible.
Alternatively, you might find that the background looks a little too bland and could benefit from adding a splash of color or texture. Film and tele-
P .
258
vision crews call this “dressing” the set, and it is an important step in most video productions. Uncluttered backgrounds always work best.
Your clothes are part of your background so decide in ad-vance what color and style of clothing to wear during your presentation.
Dress appropriately for the event and make sure the style and color en-hance you and your message and don’t distract the viewer.
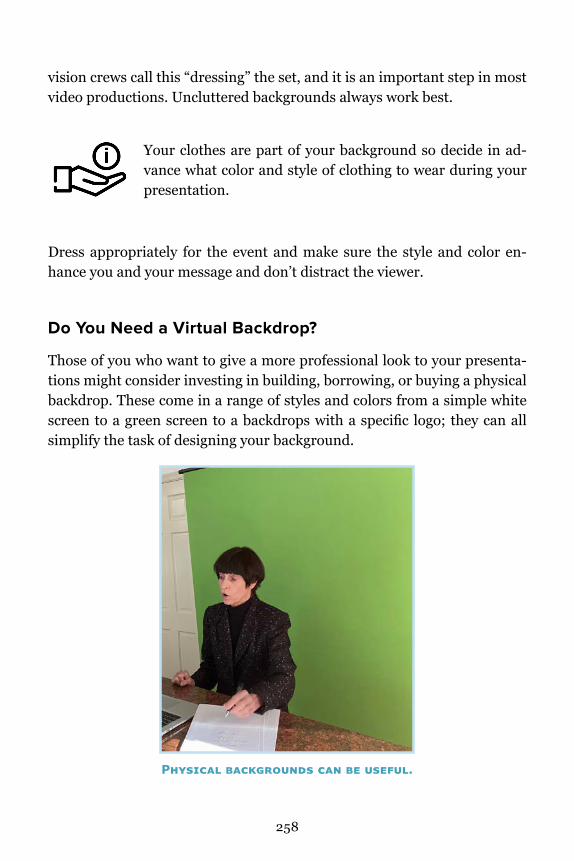
Do You Need a Virtual Backdrop?
Those of you who want to give a more professional look to your presenta-tions might consider investing in building, borrowing, or buying a physical backdrop. These come in a range of styles and colors from a simple white screen to a green screen to a backdrops with a specific logo; they can all simplify the task of designing your background.
P y .

259
Although computerized virtual backgrounds seem like a convenient or fun solution, digitized backgrounds are rarely the best choice to use while presenting.
No matter how fast your computer processor is, there are almost always ar-tifacts that create fuzzy or pixelated areas at the edges of your image, which can be distracting to your audience.
If you decide to use a virtual background, keep your audience in mind when selecting it. While it may be fun to place yourself on the Star Trek Starship Enterprise while talking to friends, it will be distracting if you are trying to deliver a serious training session to coworkers. And even though it can be playful to present in front of iconic images, the initial impact fades quickly. If you want to use iconic backgrounds, do so sparingly and deliberately for a specific desired effect.
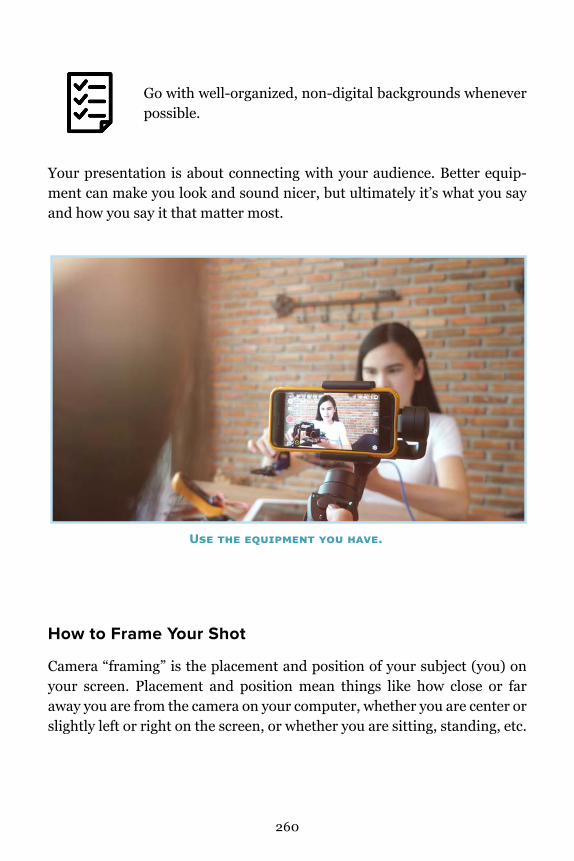
U y.
260
Go with well-organized, non-digital backgrounds whenever possible.
Your presentation is about connecting with your audience. Better equip-ment can make you look and sound nicer, but ultimately it’s what you say and how you say it that matter most.
How to Frame Your Shot
Camera “framing” is the placement and position of your subject (you) on your screen. Placement and position mean things like how close or far away you are from the camera on your computer, whether you are center or slightly left or right on the screen, or whether you are sitting, standing, etc.
U y .
261
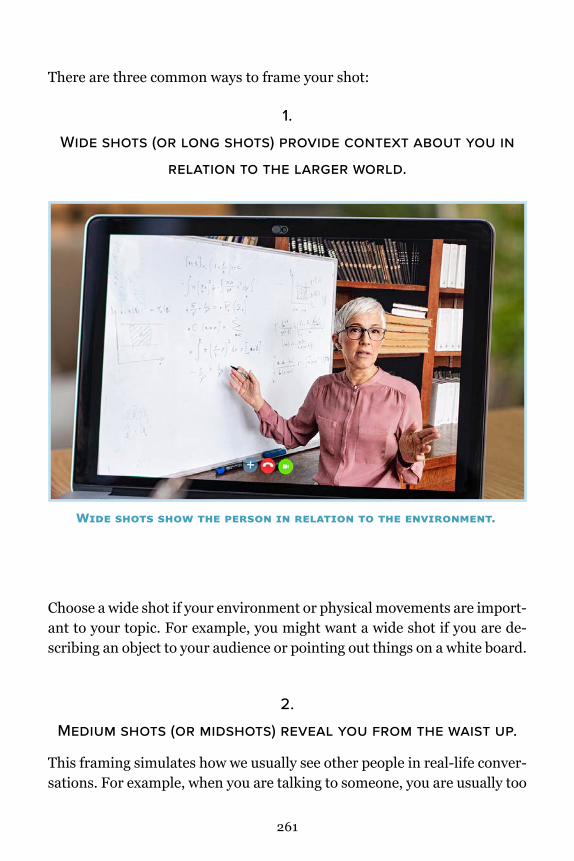
There are three common ways to frame your shot:
1. WIDE SHOTS (OR LONG SHOTS) PROVIDE CONTEXT ABOUT YOU IN
RELATION TO THE LARGER WORLD.
Choose a wide shot if your environment or physical movements are import-ant to your topic. For example, you might want a wide shot if you are de-scribing an object to your audience or pointing out things on a white board.
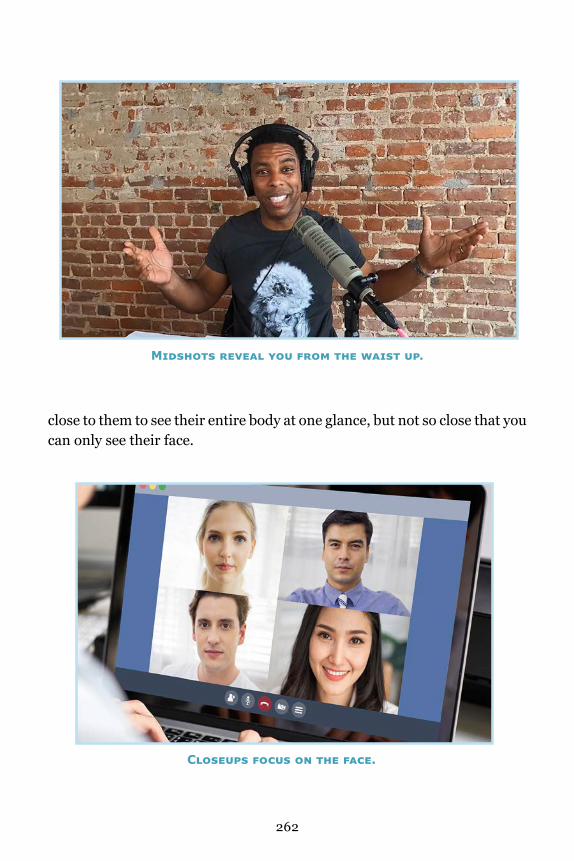
2. MEDIUM SHOTS (OR MIDSHOTS) REVEAL YOU FROM THE WAIST UP.
This framing simulates how we usually see other people in real-life conver-sations. For example, when you are talking to someone, you are usually too
W .
262
close to them to see their entire body at one glance, but not so close that you can only see their face.
M y .
C .
263
3. CLOSEUPS FOCUS ONLY ON THE FACE AND ARE USED TO CONVEY
IMMEDIACY, INTENSITY, OR EMOTION.
This is often the best choice if your presentation is about sharing a person-al story or revealing an emotional truth. Because closeups allows the audi-ence to see micro-gestures in the face, it is also a common framing for those attending online meetings.
Use a midshot for most presentations.
To set one up, place the bottom of your frame above your waist, close to your belly button but below your elbows as your arms relax at your side. Your eyeline should be positioned about one third of the way down from the top of the frame. From this position, you also have the ability to lean in closer to the camera (into a closeup) at key moments when you want to share a secret or make an emphatic point. This allows you to create emo-tional variety to better hold your audience’s attention.
Don’t frame your midshots too tightly.
Give yourself plenty of room to move around within the frame.
264
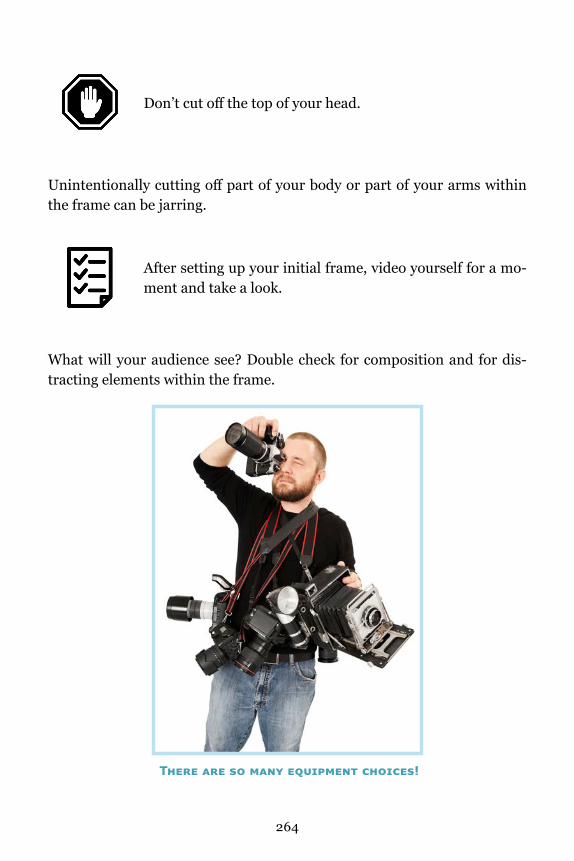
Don’t cut off the top of your head.
Unintentionally cutting off part of your body or part of your arms within the frame can be jarring.
After setting up your initial frame, video yourself for a mo-ment and take a look.
What will your audience see? Double check for composition and for dis-tracting elements within the frame.
T y !
265
Do You Need an External Camera?
The built-in camera on your computer is just fine for most people. It auto-matically selects your brightness, color, and focus, so most of your job is done for you.
However, if you want a more professional look to your presentations, you might consider using an external camera. The options are limitless and de-pending upon your budget, you can spend a lifetime figuring out which one to use.
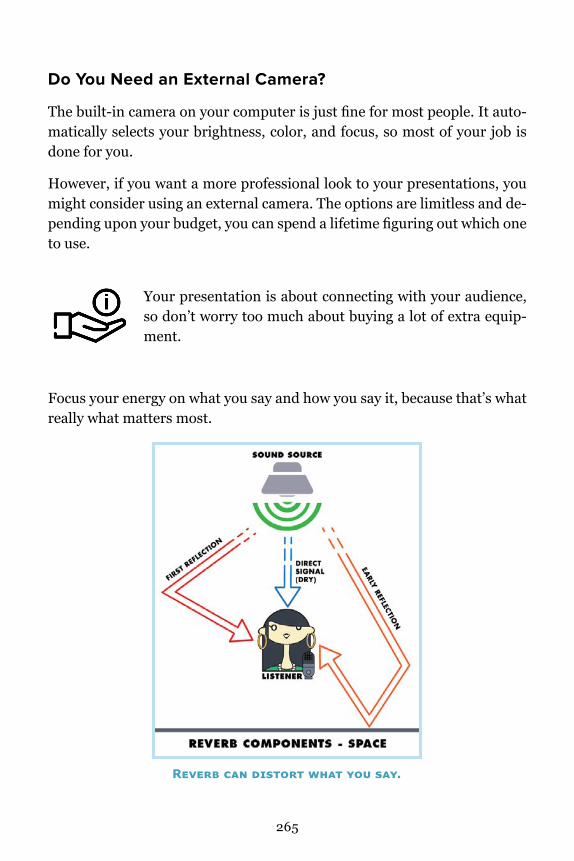
Your presentation is about connecting with your audience, so don’t worry too much about buying a lot of extra equip-ment.
Focus your energy on what you say and how you say it, because that’s what really what matters most.
R y y.
266
How to Set Your Acoustics
Acoustics are the science of sound. As your voice leaves your mouth, the sound radiates outward as a wave in the direction you are facing. A small part of it is picked up almost immediately by your microphone, but most of the sound waves continue radiating outward.
The most important thing to pay attention to in terms of acoustics are the number and location of reflective surfaces in your space. If the sound waves from your voice hit a hard surface, they can bounce back and get picked up again by your microphone a fraction of a second later. This is called “reverb,” and it can happen multiple times from a single sound source de-pending on the shape and size of your room. Most spaces have at least some reverb in them, and if it is severe enough, your presentation can become useless.
We “see” in part with our ears. Your audience will often for-give poor video quality as long as they can hear you well.
The opposite isn’t true at all: If they can see you clearly but can’t hear you, they’ll stop watching.
Go to the place you plan to present, clap your hands once, and listen to the time it takes for the sound to stop.
If your space is particularly reverberant, place some cushions, blankets, or acoustic foam around your location but outside of the camera frame to “soak up” some of the sound waves. This is called sound “absorption” and even a little bit can help a lot. Alternately (or in addition) consider placing different shaped objects in the space to break up the reflective patterns. This is called “diffusion” or “scattering” and can also be highly effective.
267
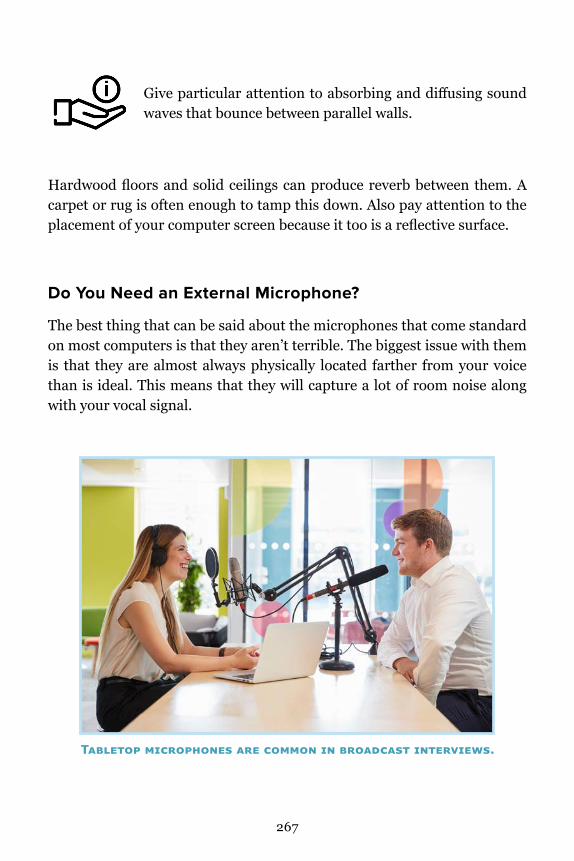
Give particular attention to absorbing and diffusing sound waves that bounce between parallel walls.
Hardwood floors and solid ceilings can produce reverb between them. A carpet or rug is often enough to tamp this down. Also pay attention to the placement of your computer screen because it too is a reflective surface.
Do You Need an External Microphone?
The best thing that can be said about the microphones that come standard on most computers is that they aren’t terrible. The biggest issue with them is that they are almost always physically located farther from your voice than is ideal. This means that they will capture a lot of room noise along with your vocal signal.
T .
268
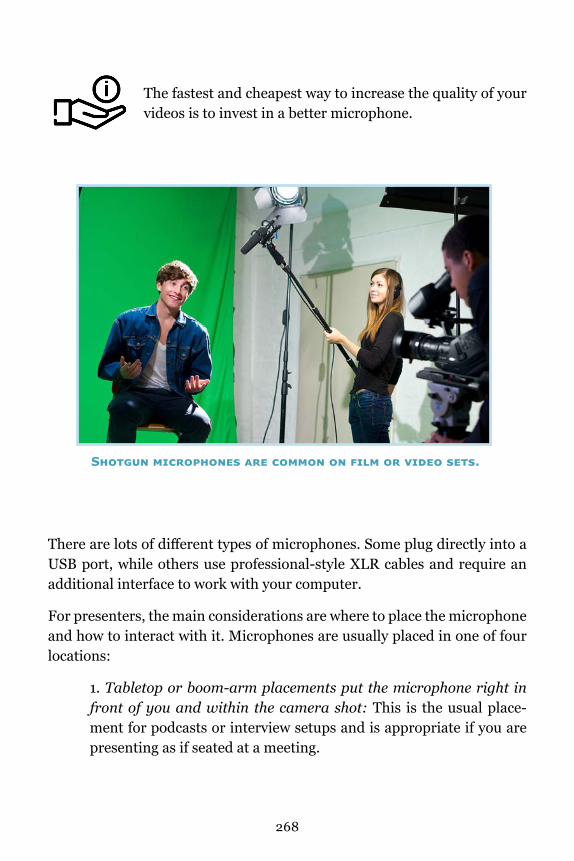
The fastest and cheapest way to increase the quality of your videos is to invest in a better microphone.
There are lots of different types of microphones. Some plug directly into a USB port, while others use professional-style XLR cables and require an additional interface to work with your computer.
For presenters, the main considerations are where to place the microphone and how to interact with it. Microphones are usually placed in one of four locations:
1. Tabletop or boom-arm placements put the microphone right in front of you and within the camera shot: This is the usual place-ment for podcasts or interview setups and is appropriate if you are presenting as if seated at a meeting.
S .
269
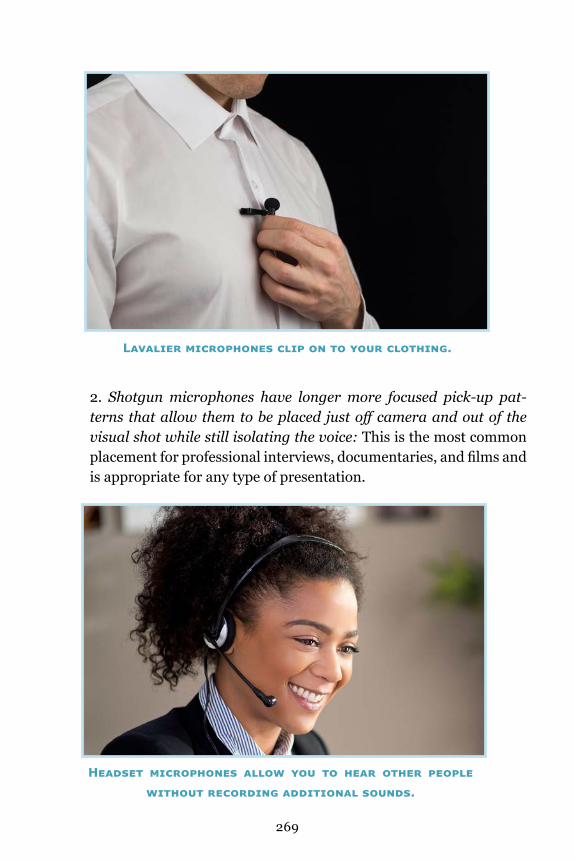
2. Shotgun microphones have longer more focused pick-up pat-terns that allow them to be placed just off camera and out of the visual shot while still isolating the voice: This is the most common placement for professional interviews, documentaries, and films and is appropriate for any type of presentation.
L y .
H y .
270
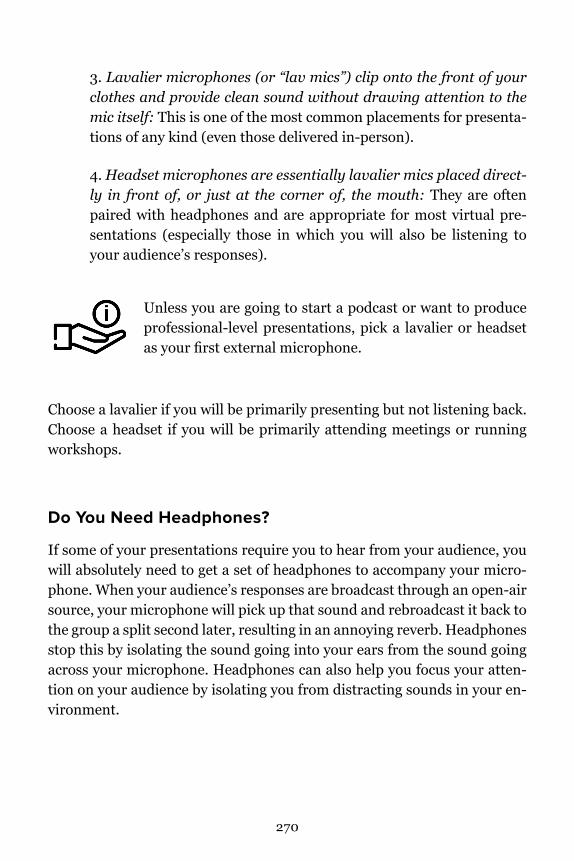
3. Lavalier microphones (or “lav mics”) clip onto the front of your clothes and provide clean sound without drawing attention to the mic itself: This is one of the most common placements for presenta-tions of any kind (even those delivered in-person).
4. Headset microphones are essentially lavalier mics placed direct-ly in front of, or just at the corner of, the mouth: They are often paired with headphones and are appropriate for most virtual pre-sentations (especially those in which you will also be listening to your audience’s responses).
Unless you are going to start a podcast or want to produce professional-level presentations, pick a lavalier or headset as your first external microphone.
Choose a lavalier if you will be primarily presenting but not listening back. Choose a headset if you will be primarily attending meetings or running workshops.
Do You Need Headphones?
If some of your presentations require you to hear from your audience, you will absolutely need to get a set of headphones to accompany your micro-phone. When your audience’s responses are broadcast through an open-air source, your microphone will pick up that sound and rebroadcast it back to the group a split second later, resulting in an annoying reverb. Headphones stop this by isolating the sound going into your ears from the sound going across your microphone. Headphones can also help you focus your atten-tion on your audience by isolating you from distracting sounds in your en-vironment.
271
How to Set Your Lighting
Lighting makes a huge difference in the quality of your presentation. If you don’t have enough light in the right places your video can look amateurish or difficult to see. Anyone who has taken a photography class will realize that lighting is a vast subject. However, even just paying attention to a few simple ideas can make your virtual presentation much better.
Before giving a virtual presentation, consider the effect you want to create.
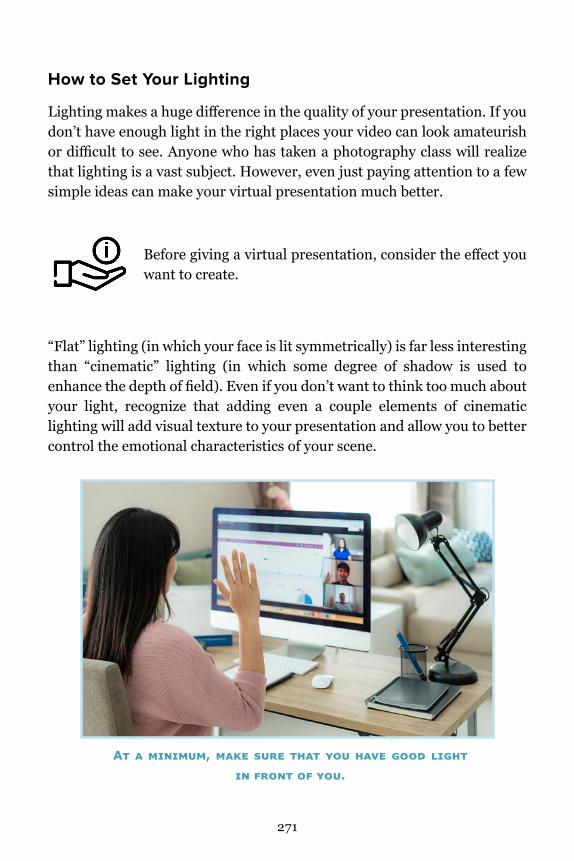
“Flat” lighting (in which your face is lit symmetrically) is far less interesting than “cinematic” lighting (in which some degree of shadow is used to enhance the depth of field). Even if you don’t want to think too much about your light, recognize that adding even a couple elements of cinematic lighting will add visual texture to your presentation and allow you to better control the emotional characteristics of your scene.
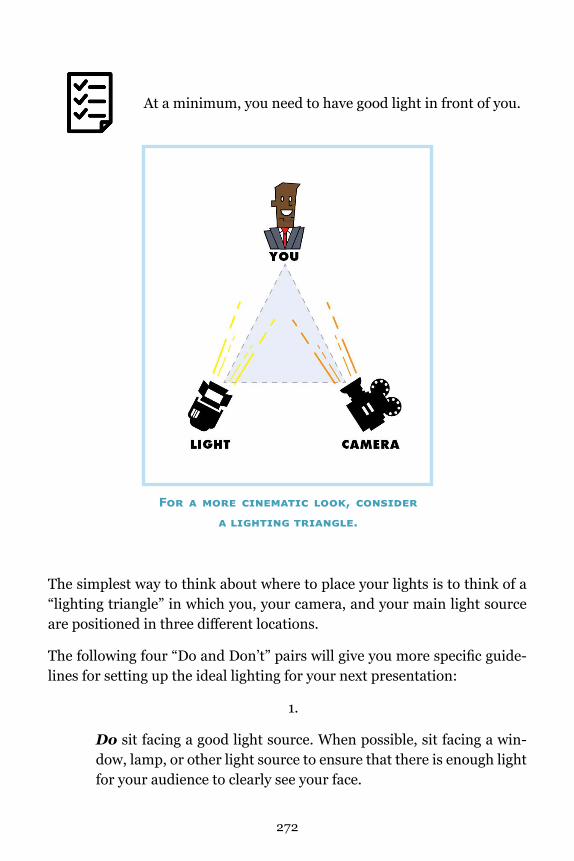
A , y y .
272
At a minimum, you need to have good light in front of you.
The simplest way to think about where to place your lights is to think of a “lighting triangle” in which you, your camera, and your main light source are positioned in three different locations.
The following four “Do and Don’t” pairs will give you more specific guide-lines for setting up the ideal lighting for your next presentation:
1.
Do sit facing a good light source. When possible, sit facing a win-dow, lamp, or other light source to ensure that there is enough light for your audience to clearly see your face.
F , .
273
Don’t sit with your back to a bright light. Too much light behind you will create distracting backlighting in which your face becomes too dark to see clearly.
2.
Do use sunlight as one of your light sources whenever possible. Our brains are wired to understand the color of natural sunlight as the most accurate and pleasing.
Don’t use bare bulbs and florescent lights if possible. Bare bulbs throw “hard” or sharply defined shadows, and the color of flores-cent lights is famously unflattering.
3.
Do diffuse bright light sources. Look at the edge of the shadows cast by your light. If the contrast is severe (or “hard”), soften it by cov-ering it with a lampshade or something translucent, or breaking up the light in some other way.
Don’t use an overhead light as your only light source. Light coming straight down from above casts shadows over your eyes (sometimes called “racoon eyes”) and beneath your nose (which can be distract-ing if the shadow goes across your mouth).
4.
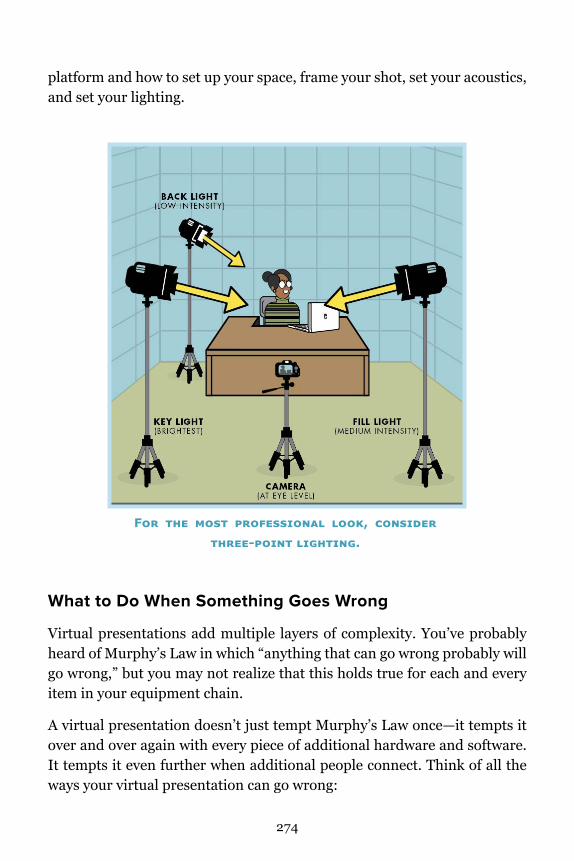
Do use multiple light sources whenever possible. Advanced users might consider using “three-point lighting” for their presentation with a main or “key” light, a secondary light to partially “fill” in some shadows, and possibly a “halo” or “hair” light from behind to separate the subject from the background.
Don’t use too much light. Cinematic lighting is characterized by the use of some degree of shadow to create depth of field within the frame.
In summary, when you know you have to give a virtual presentation, always prepare your space in advance. Learn how to use your video conferencing
274
platform and how to set up your space, frame your shot, set your acoustics, and set your lighting.
What to Do When Something Goes Wrong
Virtual presentations add multiple layers of complexity. You’ve probably heard of Murphy’s Law in which “anything that can go wrong probably will go wrong,” but you may not realize that this holds true for each and every item in your equipment chain.
A virtual presentation doesn’t just tempt Murphy’s Law once—it tempts it over and over again with every piece of additional hardware and software. It tempts it even further when additional people connect. Think of all the ways your virtual presentation can go wrong:
F , - .
275
• Your power can go out.
• Their power can go out.
• Your internet can go out.
• Their internet can go out.
• Your computer can fail.
• Their computer can fail.
When you present online, you have to do all the jobs that a television pro-duction would employ five different people to do. You are simultaneously the producer, the host, the camera operator, the lighting designer, the set designer, the sound operator, and all of the gaffers (the people who set up the cables and make sure the equipment works). If anything goes wrong, YOU are the one who has to fix it. When you give a presentation in person, there are other people in the room who can help, but when you present vir-tually, you are usually all alone.
Do these things to prepare for when things go wrong:
1. Learn everything you can about your existing equipment.
2. Before your next virtual presentation, do a dry run on the platform with a friend or family member to make sure that all the equipment works as you expect.
3. Deliberately screw something up at some point and practice fixing it. Try to fix a problem on both your end and on theirs. Say out loud how you will deal with it.
A little bit of extra time spent up front will pay huge dividends later when (not if) something goes wrong.

276
How to Organize Your Content
This section will provide you with the basic tools needed to organize con-tent for a virtual presentation. For more details about how to design and organize any presentation you’ll want to read our companion book, Re-al-World Public Speaking: How to Make Your Message Matter.
It’s hard to hold people’s attention even under the best of circumstances. Virtual presentations make everything harder. Their time is important to them. More than likely, they’d all rather be doing something other than lis-tening to you. So how can you make sure they don’t tune out?
Live Versus Virtual Presentations
If you’re giving a live presentation and see that your audience is losing in-terest, you can easily make an adjustment on the spot to get their attention back. In a live presentation, this is a straightforward process because you can see their body language and sense the energy of the room in real time. Even beginning speakers can usually recapture their audience with a slight change in their voice or the gesture of a hand.
T y .
277
But making adjustments is much harder during virtual presentations be-cause you’re not in the same space as them; you can’t read their body lan-guage or feel their energy. In fact, sometimes you can’t even see them. And to make matters even worse, your audience has easy access to thousands of other interesting things to see and do on their computer while you present.
Research shows that within the first 30 seconds of your presentation, your audience will make a decision about whether to continue listening or tune out. They won’t necessarily stop listening right away, but unless you grab their attention and hold it, their minds will easily begin to stray elsewhere. What this means is that your content must be exceptionally well-organized.
Set Up Housekeeping Rules Before You Start
Online presentations often involve lots of people using a single broadcast channel via lots of interlocking hardware and software parts. Because of this, it is important to relay all of your “housekeeping” rules early on.
Let your audience know in advance how long your presen-tation will run.
If you are running a small meeting with people who haven’t met, it will be useful to introduce everyone early on.
If you want your audience to participate, let them know how you want them to do that up front (raise their hand, respond via the “reaction” control, or enter questions via chat, etc.).
When relaying housekeeping rules, do so clearly and quickly so it won’t negatively impact the overall pacing of your pre-sentation.
278
The Two Main Ingredients
There are two main ingredients you need to keep in mind when organizing virtual presentations: Mix It Up and Make It Interactive.
MIX IT UP.
You’ve heard the proverb “variety is the spice of life.” If you start your pre-sentation with a story, don’t follow that up with another story. Live pre-sentations can get away with a little less variety, but think about what your audience sees when you tell a story via computer: your face on their screen. If the next thing they see also looks the same, even a fresh story will start to feel stale. In fact, if you talk for more than a few minutes without a visual or auditory change, your audience may begin to zone out.
Mix up your presentation: Follow your opening story with a chart, a graph, a picture, a video—anything that’s different from what they just saw. Mix-ing it up is also essential when giving a live presentation, but it is critically important when presenting virtually.
You might begin by telling a story about how you got a job in your field right out of college, then cut to a screen-shared graph accompanied by an expla-nation of the unlikely odds of getting that job, followed by a picture of you in your new office digs. Anything that mixes it up will help you keep your audience engaged.
Anything done twice in a row establishes a pattern of same-ness in the audience’s mind, which can encourage them to tune out.
Three of the same kind of thing in a row practically guarantees loss of at-tention. Mix it and keep them surprised!
279
MAKE IT INTERACTIVE.
World Championship of Public Speaking winners Darren LaCroix, Ed Tate, and Mark Brown all make a sizable part of their living giving virtual pre-sentations. All three of them emphasize that you must organize your virtual content so that it includes audience participation every few minutes. When it’s virtual, interaction is vital!
Below are a few examples of things you can do to make your next presen-tation interactive.
• Ask a question of your audience. (“Have you ever … ?” or “When is the last time you … ?”)
• If it’s a small group, ask specific questions to specific people. (“Tamir, what kinds of questions did they ask you at Verizon when you interviewed?”)
• Start with an ice breaker game or coach them through an exercise. (“I’ll give you 30 seconds to grab three objects that begin with the letter T.”)
• Have them write something down. (“Write down three jobs you’d like to step into right after graduation.”)
• Take a poll. (“Raise your hands if. . . .”)
• If you present on Zoom, ask your audience to use the reaction control at various points.
• On any platform, you can use the chat control for immediate re-sponse.
• Use the chat control to have them submit questions to you or to each other.
• Or ask your audience to submit questions in advance and then an-swer them at a certain point.
280
• If you are giving a training session, divide your audience into break-out rooms.
• Surprise them with an unannounced guest and give your audience the chance to submit questions to that person via chat or other means.
When possible, use a co-presenter.
This frees you up to concentrate on keeping the rhythm going. Your co-pre-senter can monitor the chat or do other things while you stay focused on keeping your audience engaged in the moment. One of the main strengths of having a co-presenter is that they can help make the overall time more efficient.
How to Deliver
When you deliver online, you use many of the same skills you do when de-livering in person. However, there are a few notable exceptions. Let’s look at them one at a time.
How to Use the Stage
The camera anchors you. You can’t move around very much, especially if you are framed in a midshot or in closeup. Any movements you make to the left or right or toward or away from the camera need to be subtle if you do them at all. Film actors learn that when the camera is in tight, “less is more.” What this means is that the tighter the shot, the more exaggerated any movement or expression appears within the frame.
In film and television, actors are assigned specific places on the set that they are supposed to be at certain times. These places are often marked on
281
the floor with pieces of tape. Actors use the term “hitting your mark” to de-scribe moving around the set in the right way at the right time.
If you stand during your presentation, you need to do the same thing: Mark out the places in your performance area where you want to be at certain times. If you are using a midshot or closeup, this will be a single location.
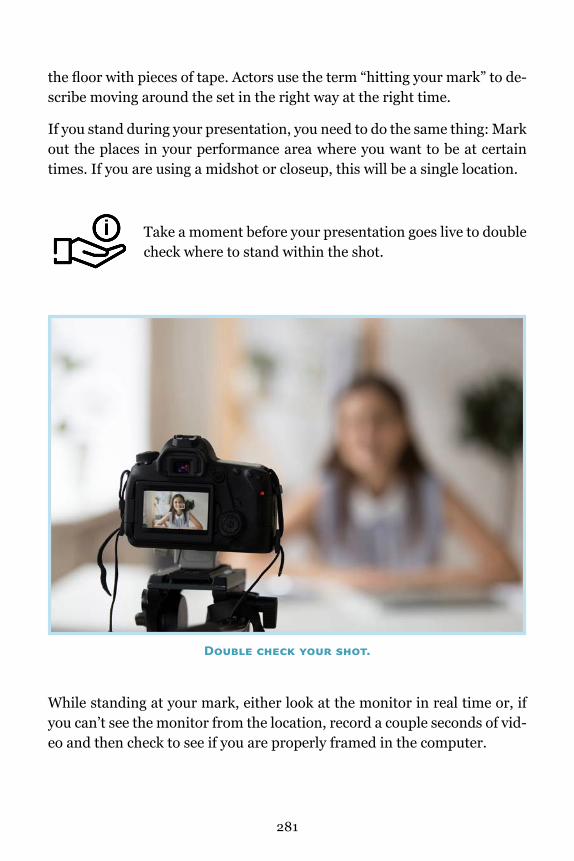
Take a moment before your presentation goes live to double check where to stand within the shot.
While standing at your mark, either look at the monitor in real time or, if you can’t see the monitor from the location, record a couple seconds of vid-eo and then check to see if you are properly framed in the computer.
D y .
282
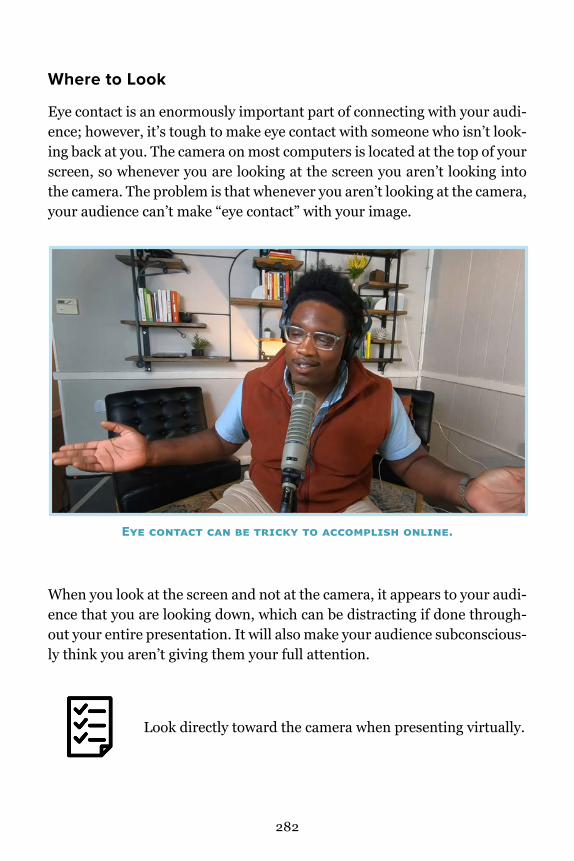
Where to Look
Eye contact is an enormously important part of connecting with your audi-ence; however, it’s tough to make eye contact with someone who isn’t look-ing back at you. The camera on most computers is located at the top of your screen, so whenever you are looking at the screen you aren’t looking into the camera. The problem is that whenever you aren’t looking at the camera, your audience can’t make “eye contact” with your image.
When you look at the screen and not at the camera, it appears to your audi-ence that you are looking down, which can be distracting if done through-out your entire presentation. It will also make your audience subconscious-ly think you aren’t giving them your full attention.
Look directly toward the camera when presenting virtually.
Ey y .
283
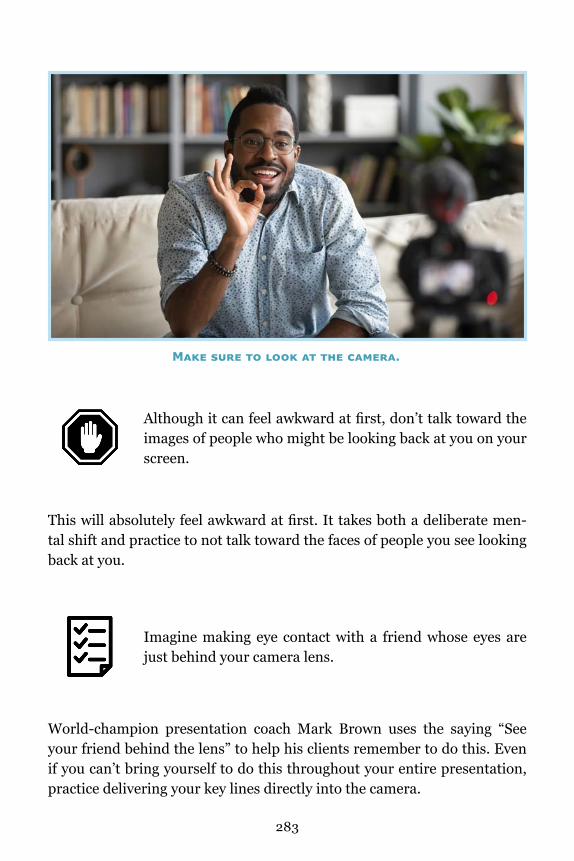
Although it can feel awkward at first, don’t talk toward the images of people who might be looking back at you on your screen.
This will absolutely feel awkward at first. It takes both a deliberate men-tal shift and practice to not talk toward the faces of people you see looking back at you.
Imagine making eye contact with a friend whose eyes are just behind your camera lens.
World-champion presentation coach Mark Brown uses the saying “See your friend behind the lens” to help his clients remember to do this. Even if you can’t bring yourself to do this throughout your entire presentation, practice delivering your key lines directly into the camera.
M .
284
Try not to blink very much when delivering key lines into the camera.
It may sound strange, but film actors sometimes train themselves not to blink when the camera is in tight. This is because all movements become exaggerated within the frame and blinking is a micro-gesture that can be easily misinterpreted as nervousness or untruthfulness.
When you think of your friend behind the camera lens, al-low yourself to smile slightly and focus on making sure that she or he understands the point you are trying to make.
This will help take your mental focus off of yourself and put more of your energy “into” the lens.
How to Use Your Hands
The only difference between using your hands in real life and using your hands for virtual presentations is that when you present online you have to pay attention to the size of your gestures in relation to the size of your frame.
Gestures in a wide shot or long shot read to your audience in exactly the same way as they do on stage or in real life. Your audience can interpret how “loud” each gesture is in relationship to your entire body (i.e., gestures that move above your head will seem “louder” than gestures that go only to your face level or below).
285
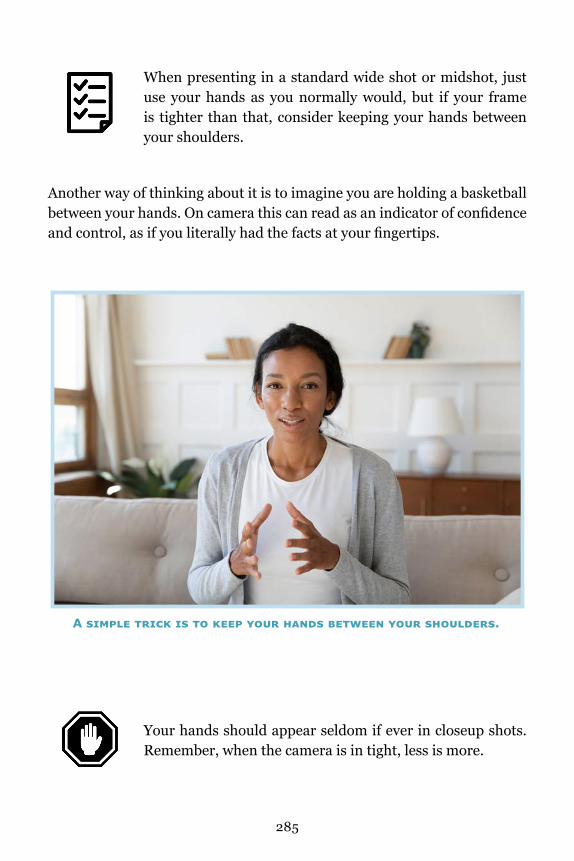
When presenting in a standard wide shot or midshot, just use your hands as you normally would, but if your frame is tighter than that, consider keeping your hands between your shoulders.
Another way of thinking about it is to imagine you are holding a basketball between your hands. On camera this can read as an indicator of confidence and control, as if you literally had the facts at your fingertips.
Your hands should appear seldom if ever in closeup shots. Remember, when the camera is in tight, less is more.
A y y .
286
However, even in closeup, not moving at all will make you seem lifeless and inauthentic.
Instead, imagine gesturing from “inside” your body. Actors call this “inter-nal” movement, and it is often the difference between a terrible screen per-formance and a great one.
How to Use Your Voice
Projecting your voice isn’t as important for virtual presentations as it is for giving presentations from a stage in person. Instead, when presenting vir-tually, you want to let your microphone do most of the work for you. When you speak to your friend behind the camera lens, your voice doesn’t need to go any farther than their ears.
If you watch a trained radio announcer or interviewer use a microphone, you will see that they speak very close to the mic (and/or hold their inter-view mic close to their subject). This allows them to record their voice at a much lower “gain” (how strong the signal from the microphone is), which creates a lower signal-to-noise ratio (voice versus other sounds) and thus produces a significantly cleaner sound.
Position your microphone close to your mouth. This will al-low you to speak at a natural volume as if you were in indi-vidual conversation with a single person near you.
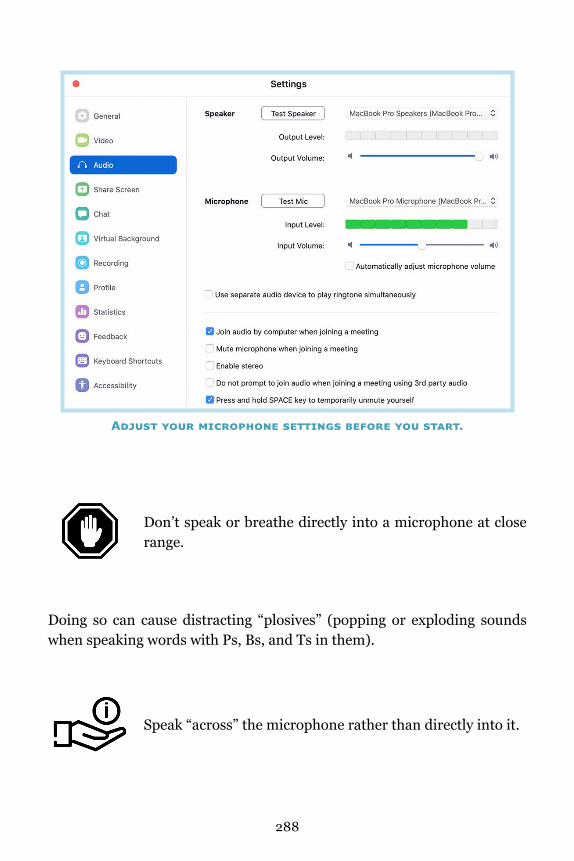
Before you give your presentation, adjust the gain settings (i.e., the input level) on your microphone so that your voice is registering clearly without distorting.
287
Because it is closer to your mouth, even the small micro-phones attached to wired earbuds will often produce better sounds than a microphone attached to a computer farther away.
For advanced presenters: Audio levels are measured on a scale from 0 decibels (the maximum before distortion) to negative infinity (the level at which no signal at all exists).
The ideal gain level for most digital recording is for your voice to peak somewhere between -6 and -18 as you are speaking normally. This pro-vides plenty of “head room” before distortion while also making sure that your recording isn’t too quiet.
Don’t worry if your computer software doesn’t list the exact decibel level of your recording.
Just look for a bar or graph that moves when you talk and make sure that the setting is neither too loud nor too soft.
Pay attention to your volume level if and when you lean in closer to the microphone.
The closer you are, the louder your voice will become. Also remember that many microphones are susceptible to the “proximity effect” (a “boom-y” or “bass-y” sound that occurs when you get too close to some microphones).
288
Don’t speak or breathe directly into a microphone at close range.
Doing so can cause distracting “plosives” (popping or exploding sounds when speaking words with Ps, Bs, and Ts in them).
Speak “across” the microphone rather than directly into it.
A y y .
289
When you talk, air is expelled from your mouth in a column. Positioning your microphone at about a 45-degree angle to your mouth will eliminate most plosives while still picking up the sounds you want.
Chapter Summary
The demand for virtual presentations has skyrocketed. Your ability to pres-ent over electronic media is a skill that will only grow in importance over the next few years. Giving and watching virtual training sessions has be-come a new normal, so your ability to communicate efficiently and effec-tively over electronic media is becoming more and more vital for any job you will have.
Before you give a virtual presentation, it’s important to first learn the func-tionality of your computer and how it interacts with your video conferenc-ing platform. There are many different online presentation platforms such as Zoom, Skype, GotoMeeting, Google Hangouts, Google Meet, FaceTime, Facebook Live, and many more. Become as familiar as you can with at least one of them.
Creating a virtual presentation is a lot like creating for film, television, or video. Everything in the frame is important so you need to intentionally design everything that does—and doesn’t—appear in it. Physical backdrops are useful tools for designing your background but are not absolutely es-sential. Virtual backgrounds can sometimes be useful a moment or two but are not recommended for an entire presentation. At a minimum, make sure your background is well organized or at least not distracting.
Camera “framing” is the placement and position of your subject on screen. There three most common ways you can frame your shot are the wide shot, the medium shot and the closeup.
Acoustics are the science of sound. We “see” in part with our ears. Your au-dience will sometimes forgive poor video quality as long as they can hear you well; but the opposite is not true: If they can see you clearly but can’t hear you, you will lose their attention. Pay attention to tips on how to set up your acoustics, the types and locations of external microphones, and why

290
and when to use headphones.
Lighting makes a huge difference in the quality of your presentation. If you don’t have light in the right places your video will be distracting. Four main “Do and Don’ts” for lighting your presentation are provided.
You’ve probably heard of “Murphy’s Law” in which “Anything that can go wrong probably will go wrong,” but you may not realize that this holds true for each and every item in your equipment chain. A virtual presentation doesn’t just tempt Murphy’s Law once; it tempts it over and over again with every piece of additional hardware and software. If anything goes wrong, you are the one who has to fix it. The chapter describes the three ways to prepare for when things go wrong.
In order to keep your audience engaged during a virtual presentation, you need to organize your content so that it includes two main ingredients of virtual presentations: Mix It Up and Make It Interactive.
Glossary of Key Terms
Acoustics. The science of sound. You as a presenter need to learn how sound affects the quality of your presentation.
Camera Framing. The placement and position of your subject (you) on screen. The three most common ways to frame your shot are the following:
Wide shots (or long shots) provide context about you in relation to the larger world.
Medium shots (or midshots) reveal you from the waist up. This framing simulates how we usually see other people in real-life conversations.
Closeups focus only on the face and are used to convey immediacy, in-tensity or emotion. An extreme closeup reveals only the eyes.
Microphone. A device that converts mechanical energy waves or sound into electrical signals. The four main locations to place your microphone are the following:
291
Tabletop or boom-arm placements put the microphone right in front of you and within the camera shot.
Shotgun microphones are placed just off camera and out of the visual shot while still isolating the voice. This is the most common placement for professional interviews, documentaries, and films and is appropri-ate for any type of presentation.
Lavalier microphones (or “lav mics”) clip onto the front of your clothes and allow for clean sound without drawing attention to the mic itself.
Headset mics are essentially lavalier mics placed directly in front of, or just at the corner of, the mouth. Headsets can come with or without headphones.
Virtual Presentation or Online Presentation. A presentation done remotely.
Video Conferencing Platform. This technology allows people to con-duct conferences, interviews, meetings, etc. face to face without having to be in the same room.
Exercises
1. Set up your computer in a place that is quiet and free of visual and audi-tory distractions.
2. Design your background according to the details discussed in this chapter.
3. Put on your presentation clothes and frame your shot(s).
4. Set your acoustics. Go to the place you plan to present, clap your hands, and listen to the time it takes for the sound to stop. If your space is partic-ularly reverberant, place some cushions, blankets, or acoustic foam around your location but outside of the camera frame to “soak up” some of sound waves.
292
5. If you use an external microphone, set it up and practice with it in ad-vance. Record yourself and check for the overall sound quality.
6. Set your lighting according to the details described in this chapter. Go back and review the four pairs of “Do’s and Don’ts” to optimize your light-ing set up.
7. Do a dry run on the platform with a friend or family member to make sure that all the equipment works as you expect.
8. Identify things that can go wrong on your end during your presentation. Practice out loud how to fix it
9. Identify things that can go wrong on their end during your presentation. Practice out loud how to help them fix it.
10. Practice out loud any housekeeping rules.
11. Brainstorm with a friend as many ways as possible you can mix it up (i.e., do different things throughout your presentation).
12. Brainstorm with a friend as many ways as possible how you can make your presentation interactive.
Test Your Knowledge
1. Which one is NOT correct? When you deliver, it’s always best to:
(a) look directly at the camera at least most of the time.
(b) talk really loud to make sure you can be easily heard.
(c) make sure your gestures stay with the frame.
(d) set housekeeping rules before you start.
(e) use a co-presenter when you can to keep things moving.

293
2. When you “mix it up,” it is most helpful for you to:
(a) do the same thing over and over so your audience can easily follow you.
(b) ask the audience to change seats many times during your presen-tation.
(c) use as much variety as possible to keep them engaged.
(d) present them with something completely off subject to keep them off guard.
(e) wear something with a zebra-striped pattern to help you stand out.
3. Which letter below is the best answer? When you set up your space, acoustics and lighting, always pick:
(a) a place free of visual distractions in front and behind you.
(b) a place with adequate support lighting.
(c) a place free of reflective surfaces.
(d) a place where you are unlikely to be disturbed.
(e) all of the above.
4. Which two are NOT correct? The most common ways to frame your shot are the following:
(a) Over-the-shoulder shot
(b) A closeup shot.
(c) A medium shot.
(d) A bird’s-eye shot.
(e) A wide shot.
294
5. Which one is NOT correct. The best ways to make your presentation in-teractive are the following:
(a) Have audience members write something down.
(b) Use a co-presenter.
(c) Answer questions that your audience submitted in advance.
(d) Take a poll.
(e) Text individual members of your audience from your phone.
Key to Test Your Knowledge: 1. b, 2. c, 3. e, 4. a, d, 5. e.
Additional Resources
Arthur, John. Improve Your Virtual Meetings: How to Communicate from Anywhere, Master Video and Conference Calls, and Collaborate Like a Pro. Amazon.com, 2020.
Fraidenburg, Michael. Mastering Online Meetings: 52 Step to Engage Your Audience and Get the Best Out of Your Virtual Meetings. CC Press, 2020.
Tiersky, Howard and Wisbach, Heidi. Impactful Online Meetings: How to Run Polished Virtual Working Sessions That are Engaging and Effective. North Carolina: Spiral Press., 2020.
Turmel, Wayne. 10 Steps to Successful Virtual Presentations. Alexandria, VA: Association for Talent Development, 2011.
295
Conclusion
Congratulations! Now you know the same tools that theatre artists, world-class speakers and presenters use to captivate, excite, and inspire their au-diences.
And there’s more good news: From this point on, your public speaking skills will keep getting better and better and better—because you practice your newfound skills every time you speak.
Each time you speak out loud, you give a kind of “mini-presentation.” You present when you go to the grocery store, when you talk to friends, and when you talk to family members. Every time you speak to someone else about anything, you develop and hone your speaking skills even more. That is how actors work. They practice the skills of being present not only when they’re working but also in everyday life.
It’s not rocket science. Every time you deliberately practice your skills, you get better. All that’s required is that you pay attention to what you’re doing and why. In no time at all, you’ll turn your skills into habits. And the more you do it the more effortless it becomes!
Since you now have the tools on the tip of your tongue, you can easily make a conscious effort to improve a little more each time. Test out a new intro-duction. Excite your friends with an engaging hook. Say goodbye to a friend with a warm and loving “closing statement.” You don’t have to tell anyone what you’re doing, but we encourage you to use each and every opportunity to master your newfound skills.
Now go out give a great presentation. Or better yet, give lots of them!

296
d
297
About the Authors
Aaron D. Anderson, PhD, credits the beginning of his hard-won experience to time spent as an Army Explosive Ordinance Specialist struggling to get out of a wheelchair after a year in a military hospital. Fast-forward to the present where Aaron is now probably the only person in the world to hold simultaneous university positions in Art, Business, and Medicine.
He holds an Interdisciplinary PhD in Culture from Northwestern University, an MFA in Acting from the University of Hawaii, and is one of the only non-physicians to have ever received an award for Innovation in Medical Education. His unique background has helped him found three successful companies, and, for the past 15 years, he has coached leaders on five continents, from congressional candidates and government officials to doctors, lawyers, and Fortune 500 CEOs.
David S. Leong, MFA, is an international consultant, speaker, author, and fight master and conflict resolution trainer. He is a Professor Emeritus from Virginia Commonwealth University, where he served as chair and full professor from 1993 to 2017. He is a member of the Board of Trustees of the College of Fellows of the American Theatre, whose purpose is to honor distinguished service and notable accomplishment by individuals of recognized national stature.
His 40-year career in higher education includes faculty appointments at the Juilliard School, Brandeis University, Northern Kentucky University, the University of Maryland, and the University of Montevallo. His Broadway and London West End fight choreography for plays and musicals has spanned over four decades. David has coached many TV, film, and theatre stars including Don Cheadle, Christopher Plummer, Woody Harrelson, Sigourney Weaver, Winona Ryder, Marisa Tomei, Joan Cusack, Frances McDormand, Raul Julia, Christopher Walken, and many more.