Embed Size (px)
Citation preview

When using electrical appliances, to reduce the risk of fire, electricshock, and/or injury to persons, basic safety precautions shouldalways be followed, including the following:
l READ ALL INSTRUCTIONS, PRODUCT LABELS ANDWARNINGS BEFORE USING THE BREADMAKER.
l Do not touch hot surfaces. Always use oven mitts whenhandling hot materials, and allow metal parts to cool beforecleaning. Allow the breadmaker to cool thoroughly beforeputting in or taking off parts.
l When unit is not in use and before cleaning, unplug thebreadmaker from wall outlet.
l To protect against risk of electrical shock, do not immerse theappliance or plugs in water or other liquids.
l Close supervision is always necessary when this or anyappliance is used by or near children, or incapacitatedpersons.
l Do not allow anything to rest on the power cord. Do not plugin cord where people may walk or trip on it.
l Do not operate this or any appliance with a frayed ordamaged cord, or plug, or after the appliance malfunctions oris dropped or has been damaged in any manner. Takeappliance to the nearest Authorized Service Facility forexamination, repair or electrical or mechanical adjustment.
l Do not let the cord dangle over the edge of a table or counteror touch hot surfaces. Do not place on an unsteady or cloth-covered surface.
l Avoid contact with moving parts.

l Do not use attachments not recommended by themanufacturer; they may cause fire, electric shock or injury.
l Do not use outdoors or for commercial purposes.
l Do not place the appliance near a hot gas or electric burner,or in a heated oven.
l To unplug, press the “STOP” button, grip plug and pu11 fromwall outlet. Never p u l l on the cord.
l Use of Extension Cords: A short power supply cord has beenprovided to reduce the risk of injury resulting from becomingentangled in or tripping over a longer cord. Extension cordsare available from hardware stores and may be used withcare. If used, the extensi’on cord must be at least 10 ampsand 120 volts. The cord should be arranged so that it will notdrape over the counter or tabletop where it can be pulled bychildren or tripped over accidentally. If the appliance is of thegrounded type, the extension cord should be grounding-type3-wire cord.
l Electrical Power: If electric circuit is overloaded with otherappliances, your breadmaker may not operate properly.The breadmaker should be operated on a separate electricalcircuit from other operating appliances.
l Do not use appliance for other than intended use, Thisappliance has a polarized plug (one blade is wider than theother). To reduce the risk of electric shock, this plug isintended to fit into a polarized outlet only one way. If the plugdoes not fit fully into the outlet, reverse the plug. If it stilldoes not fit, contact a qualified electrician. Do not attempt tomodify the plug in any way.
THIS BREADMAKER Is FOR HOUSEHOLD USE ONLY
SAVE THESE INSTRUCTIONS

Table of Contents
Important Safeguards . . . . . . . . . . . . . . . . . . . . . . . . . . . 2
Table of Contents.. . . . . . ... . . . . . . . . . . . . . . . . . . . . . . . 4
Overview of Breadmaker Features ..... . . . . . . . . . . . . . . . . . . 6-, .. .. . . . . .
Using the Delay Timer . . . . . . . . . . . . . . . . . . . . . . . . . . . . . 7
Breadmaker Settings . . . . . . . . . . . . . . . . . . . . . . . . . . . . . . . 8
Tips and Hints . . . . . . . . . . . . . . . . . . . . . . . . . . . . . . . . . . . . 9
Baking at High Altitudes . . . . . . . . . . . . . . . . . . . . . . . . . . . . 10
Learning About Your Breakmaker . . . . . . . . . . . . . . . . . . . . . . ... l l
Taking Care of Your Breadmaker . . . . . . . . . . . . . . . . . ....11
Troubleshooting . . . . . . . . . . . . . . . . . . . . . . . . . . . . . . . . . . . 12
Recipes . . . . . . . . . . . . . . . . . . . . . . . . . . . . . . . . . . . . . ...14
Basic . . . . . . . . . . . . . . . . . . . . . . . . . .... . . . . . . . . . . . . .14
ExpressBakee Setting: Bakiig Bread In Under 1 Hour . . . . . . 15. .. .
ExpressBakee . . . . . . . . . . . . . . . . . . . . . . . . . . . . . . . . . . . 17
Whole Wheat . . . . . . . . . . . . . . . . . . . . . . . . . . . . . . . . . . . 18.
French ........................19
Sweet....................................20
Quick . . . . . . . . . . . . . . . . . . . . . . . . . . . . . . . . . . . . . . .21
Dough . . . . . . . . . . . . . . . . . . . . . . . . . . . . . . . . . . . . ...22
Warranty Information . . . . . . . . . . . . . . . . .....................23

Learning About Your Breadmaker
2
4
6
7
8
. 9
. 10
. ll
. 11
, . 12
. . 14
. . 14
. . 1.5
. . 17
. .18
. . 19
. . .20
. ..21
. . .22
. . .23
1. Place the breadmaker on a counterwhere the plug will reach an outlet.DO NOT plug the machine into thewall outlet yet. You will be shown laterwhen to do this.
Make sure you can open the breadmakertop without hitting the top of kitchencabinets.
2. Open the lid and remove the bread pan.To do this, simply grasp the handle ofthe pan and pull straight up. Use a gentle,non-abrasive soap and wash, rinse anddry the pan thoroughly.
3. Attach the kneading blade to the bread pan,as shown. You will find the kneading bladein a small plastic wrap attached to thepower cord.
4. Set the bread pan aside. Do not yetplace the pan into the breadmaker.
Important After a baking cycle, thebread machine will notoperate until it has cooleddown.
Important The breadmaker has anautomatic “keep warm”setting that will keep yourbread warm for up to.one hour. To turn warmer off,press the “StartfStop” button and hold until you heara beep.
Important Do NOT press the “Start/Stop” button while thebreadmaker is making bread. This will causethe machine will turn off and you will need to startover again, from scratch.
Caution: The breadmaker is very hot. Do not handle the machinewhile it is operating. Do NOT lift the lid while thebreadmaker is baking bread.

Overview of Breadmaker Features
1 MenuPress this button to select the kind of bread you want to make.Each time you press the button you will hear a beep. The displayshows a number for each setting. For example, Basic is 1,Whole Wheat is 2, French is 3, etc.
2 Crust Color ButtonThe Crust Color button allows you to choose how light or dark tomake the crust of the bread. Each time you press the Crust Colorbutton the display will change as follows:
L-Light = L P-Medium = P H - D a r k = HIn addition, the display will show the cycle number before the crustcolor setting. For example, the Basic with a Medium crust reads “1P.”Or the French bread setting with a dark crust reads “3H.”
3 Display/
The Display shows the following settings:l The number of the bread setting cyclel The crust color settingl The time remaining while your bread is kneading or bakingOnce you press the “Start/Stop” button to begin, the display lwill show the remaining time until your bread is baked.When the display reads “0:OO” the bread is baked.
4 Timer Set ButtonsPress these buttons to delay the time for your breadmaker to start.For example, you can time your bread to be ready for dinner,or to bake while you are sleeping. You may delay up to 13 hours.
5 Start/Stop ButtonPress this button to start and stop your breadmaker or begincountdown for delayed baking bread. If delay bake is selected,the remaining time will count down in one minue increments.

Using the Delay Timer
You can delay the time your breadmaker starts to have fresh breadready when you get up in the morning or when you come from work.
We recommend that before you use the Delay Timer, you try out a fewrecipes. Use recipes that have produced good results for you in the past.
Important: You cannot use the Delay Timerfor ExpressBake@=’ settings.
Before Using the Delay Timer:
1. Add al1 recipe ingredients to the bread pan.
2. Select the correct setting for the kind of bread you are making.
3. Select the crust color.
Caution: Do not use recipes with ingredients that can spoillike eggs or milk.
4. Determine how many hours and minutes there are between nowand when you want final, baked bread.
5. Use the “Timer Up” button to advance the time in 10 minuteincrements. If necessary, use the “Timer Down” button to decreasethe time. (To advance the time quickly, simply press and holddown the “Timer Up/Down" buttons.)
Important: If you make a mistake or wish to start over, pressand hold down the "Start/Stop" button until youhear a beep. The display will show the originalsetting and cycle time. The Delay Timer is canceledand you can start again.
6. When the Delay Timer is set where you want it, make sure topress the “Start/Stop” button. The colon ( : ) will flash and yourbread will be ready when you planned.
Important: When using the Delay Timer during times of hotweather, you may wish to reduce the liquid in yourrecipe by 1 or 2 tablespoons. This is to prevent thedough from rising too much. You may also reducethe Salt by 1/8 or 1/4 teaspoon and try cutting theamount of sugar you use by 1/4 teaspoon at a time.

1 Basic (3 Hours)
This setting is probably used more than any other because it givesyou the best results with just about any recipe.
2 Whole Wheat (4 Hours, 10 Minutes)
The whole wheat setting offers a longer rise time for breads thatcontain more then 50% whole wheat flour.
3 French (3 Hours, 50 Minutes)/
Use this setting for making French breads. French bread takes longerto knead, rise and bake, providing a heartier crust.
4 Sweet (2 Hours, 50 Minutes)
The sweet setting is for baking breads with high amounts of sugar,fats and proteins, al1 of which tend to increase browning.
5 ExpressBake@ (58 Minutes)
Use this setting for baking bread in under 1 hour; this settingwill only bake 1.5lb. size loaves.
6 Quick (1 Hour, 43 Minutes)
Use this setting for recipes that contain baking powder or bakingsoda rather than yeast to make bread or cake rise; only speciallydesigned recipes are to be used for this setting.
7 Dough (1 Hour, 30 Minutes)
This setting lets you prepare dough for rolls, specialty breads, pizza, letc., which you shape by hand, allow to rise, then bakein a conventional oven.
8 Bake (1 Hour)
This setting is for baking dough that you may have prepared withoutusing the previous settings.

Tips and Hints
Experienced cooks consider breadmaking to be as much art as science.Keep in mind that some recipes may require a little experimentationbefore they are exactly the way you want them. Just dont give up.
Still, there are special hints to ensuring quality bread almost every time.
Use Exact Measurements
Leve1 off al1 dry ingredients and make surethat al1 liquid ingredients are measured in aglass cup with the markings clearly labeled onthe side.
Use Fresh Ingredients
You should always use fresh ingredients. The reasons are:
l Flour. If you have stored your flour for a long time, it may havebecome wet from absorbing moisture, or dry, depending on thearea of the country in which you live. We recommend using freshbread flour.
l Yeast. Fresh yeast is probably the most important ingredientin baking bread. If the yeast is not fresh, your bread may not rise.It is better to buy new yeast than to take a chance on yeast thathas been stored for a long time.
You can test the freshness of your yeast. Simply fil1 a cup withwarm water, then add and stir in 2 teaspoons of sugar.
Sprinkle a few teaspoons of yeast on the surface of the water andwait. After 15 minutes, the yeast should foam and there should bedistinct odor. If neither reaction happens, the yeast is old and shouldbe thrown away.

Add Ingredients in the order given according to the recipe.
Read al1 recipes from top to bottom, and remember:
- FIRST: liquid ingredients
- SECOND: dry ingredients
- LAST: yeast
Check the Doughball
You may need to adjust the consistency of the dough by adding alittle flour or a little water until the dough is just right. Check thebreadmaker when the clock reads 2:30. If the doughball appearssticky or too wet, sprinkle in a little flour, a tablespoon at a timeuntil the dough appears smooth. If the doughball is too dry,or you hear knocking sounds, sprinkle in water a teaspoonat a time until the doughball appears round and dry.
For Baking at High Altitudes
To compensate for high altitude baking, we recommendthe following:
If the Dough Is Too Dry
l increase the amount of water to the recipe, sometimes as muchas 2 - 4 Tbsp. per cup.
If the Bread Rises Too High
l reduce the amount of yeast. For each tsp. of yeast,try reducing the yeast by 1/8 to 114 tsp.
l reduce the amount of sugar. For each Tbsp. of sugar,reduce the amount by 1 to 2 tsp.

Taking Care of Your Bread Machine
General Cleaning
1. Remove all bread crumbs by wiping them away with a slightlydamp cloth.
2. DO NOT bend the heating element which is located on the insideof the breadmaker.
Cleaning the bread pan and Kneading Blade
1. Wipe the bread pan and kneading blade with a damp clothand dry completely.
2. DO NOT wash the pan or parts in the dishwasher. Surely thiswill damage the finish of the pan and the other parts.
Cautionr Do not put the breadmaker in water or in a dishwasher.Do not use benzene, scrubbing brushes or chemicalcleaners as these will damage the machine.
Use only a mild, non-abrasive cleanser to clean the breadmaker.
Caring for Your Breadmaker
1. Keep your breadmaker clean at all times.
Caution: Do not use metal utensils with the breadmaker.This will damage the non-stick pan and other parts.
2. Don’t worry if the color of the bread pan changes over time.The color change is a result of steam and other moistureand does not affect the machine’s performance.
3. If you have trouble removing the kneading blade, place warm waterin the bread pan for 10 - 15 minutes and this will loosen the blade.
Storing Your Breadmaker
1. Make sure the machine is clean and dry before storing.
2. Store the breadmaker with the lid closed.
3. Do not place heavy objects on the lid.
4. Remove the kneading blade and place inside the bread pan.

Troubleshooting
If you are unable to find a solution, please call our ConsumerRelations Department at l-800-458-8407.
burning odor from the backof the machine.
and into the machine itself. Stop the breadmakerff. Clean the breadmaker
rhe bread has a floured top.
rhe bread is too brown.
The bread is not brown enough
The sides of the bread collapseand the bottom of the breadis damp.
This is usually a result of using too much flouror not enough water. Try using less flour(a tsp. less at a time), or try using more water(1/4 tsp. more at a time).
This is usually the result of adding too muchsugar to the recipe. Try using less sugar( 1 Tbsp. at a time). You can also try selectinga lighter crust color selection.
This is usually the result of repeatedly liftingthe lid of the bread machine or leaving the lidopen while the bread is baking. Be sure thelid is shut while the breadmaker is in operation.You can also try selecting a darker crust colorselection.
There are several possible solutions. The breadmay have been left in the bread pan too longafter baking. Remove the bread from the pansooner and allow it to cool. Try using moreflour (a tsp. at a time), or less yeast (1/4 tsp.ata time), or less water or liquid (a tsp. at atime). This could also be the resultof forgetting to add salt to the recipe.

r
r
-
-
lid
In.Br
-!adw3an
3
-
‘he bread has a heavy,hick texture.
-he bread is not baked:ompletely in the center.
rhe bread has a coarse texture.
rhe bread rose too much.
‘he bread did not rise enough.
Try using less flour (a tsp. at a time), or moreyeast (1/4 tsp. at a time). This could also be theresult of using old flour or the wrong type offlour for the recipe.
Try using more flour (a tsp. more at a time),or less water or liquid (a tsp. less at a time).DO not lift the lid too often during baking.
This is usually the result of forgetting to addsalt to the recipe.
Try using less yeast (1/4 tsp. less at a time).This could also be the result of forgetting toadd salt to the recipe or forgetting to putthe kneading blade into the bread pan.
There are severa1 possible solutions. Try usingless flour (a tsp. less at a time), more yeast(1/4 tsp. more at a time), or less water (a tsp.less at a time). This could also be the result of:
l forgetting to add salt to the recipe
l using old flour or the wrong kind of flourfor the recipe
l using old yeast
l usíng water that is too hot (exceptotherwise noted in the r e c i p e s a n df o r ExpressBake” setting recipes).

Basic Setting RecipeHomestyle White Bread
MAKES ONE 1-lb LOAF
3/4 cup + 2 Tbsp. water (7585°F)
l-1/2 Tbsp. butter or margarme, softened
l-1/2 Tbsp. sugar
1 Tbsp. non-fat dry milk powder
l-1/2 tsp. salt
3 cups bread flour
l-1/2 tsp. bread machine yeast
1. Spray the bread pan and kneading blade with non-stick cooking spray.Attach the kneading blade in the bread pan. Place ingredients in the bread
pan in the following order: water, butter, sugar, milk powder, Salt and flour.
2. With finger, make a small indentation at one side of the flour.
Add yeast to indentation, making sure it does not come in’contact
with the liquid ingredients.
3. Insert bread pan into breadmaker; gently close lid. Plug the power cord into
a wall unit. Press the Menu Button until the “Basic” program is reached.Press the “Loaf” button and set it for l-1/2 lb. loaf. Press the “Crust Color”
button for the desired crust color. Press the Start button.
4. When the machine beeps, indicating that program has finished, lift the lid and,
using oven mitts, firmly grasp the bread pan handle and gently pull the panstraight up and out of the machine. Unplug the breadmaker and let cool.
cwc A U T I O N : The breadmaker and pan may be very hot!Always handle with care.
5. If needed, use a non-stick spatula to gently loosen the sides of the bread
from the pan; turn bread pan upside down onto a wire cooling rack and
gently shake until bread falls out onto rack.
6. Turn bread right-side up on rack and coo1 about 20 minutes before slicing.
IMPORTANT: After a baking cycle, the bread machine will not operate until
it has cooled down.

ix.
1to
or”
.nd,an
‘ES
il
ExpressBake@ Setting: Making BreadIn Under 1 Hour
Your OSTER” breadmaker canbake great bread in under 1 hour.This is called the “ExpressBake@”setting. ExpressBake@ loaves area little different from loaves bakedon other settings.
ExpressBake@ Setting:
l This setting can bake bread in 58 minutes. The bread is a littlemore dense in texture with this setting.
l The ExpressBake@ setting will only make a 1.5lb. loaf.
There are a few things you should know about the ExpressBake@settings that are different than the other settings.
l ExpressBakeB breads tend to have a darker, thicker crustthan other kinds of bread. Sometimes there will be a crack inthe top of the crust. This is because baking is done at highertemperatures. They also tend to be shorter, denser loaves.
l You CANNOT use the Delay Timer for the ExpressBake@ settings.This would cool the liquid ingredients and affect the way thatthe bread rises.
l You CANNOT use the “Crust Color” option for ExpressBake@breads.
. DO NOT open the cover while making ExpressBake@ breads.
l If the loaf is hard to remove from the pan, let it sit for about5 minutes to cool. Gently shake the bread out of the pan andwait for 15 minutes before slicing.
l If you wish to bake another loaf of bread, you must letthe breadmaker co01 for 20 minutes with the cover open.
l YOU CAN use standard bread mixes for ExpressBake@ breads,but the results may not be as good as the results when usingthe recipe within this manual.

Yeast
Always use a fast-rising yeast. DO NOT useactive dry yeast for ExpressBake@ settingsbecause the loaves will be much shorterwhen baked.
11)
1 5
Liquidsml
Always use hot water in the range of ll.S”-125”F/46”-52°C.You must use a cooking thermometer to gauge the temperature;hotter water can kill the yeast while cooler water may not activate it.
Salt
As a rule, you should use LESS salt for ExpressBakeB bread?.Less salt provides you with a higher loaf. Make sure to followthe recipe suggestions in this booklet for best results.
Other Ingredients
Make sure al1 other ingredients (like flour, sugar, dry milk, butter, etc.}are at room temperature.
Always use bread flour for the ExpressBake@ settinas.
Things You May Need to Buy
l You should only use “Bread Machine”flour for the ExpressBake@ recipes.
l You may need a cooking thermometerto measure the temperature of the wateryou use in these recipes. You shouldonly use hot water (between 115°Fand 125°F OY 46” and SZT)for ExpressBakeB recipes.
Although baking ExpressBake@ bread is alittle different, the results and convenienceare well Worth it.

ExpressBake’ Setting RecipeExpressBake@ Toasting-Style White Bread
MAKFS ONE 1.5Ib LOAF
The ExpressBake” program produces a slightly denser breadthat is perfect for toasting.
1 cup + 2 Tbsp. hot water (115125°F)
2 Tbsp. canola or vegetable oil
2 Tbsp. sugar
1 tsp. salt
3 cups bread flour
5 tsp. bread-machine yeast
1. Spray the bread pan and kneading blade with non-stick cooking spray.Attach the kneading blade in the bread pan. Place ingredients into the bread
pan in the following order: water, oil, sugar, salt and flour.
2. With finger, make a small indentation at one side of the flour. Add yeastto indentation, making sure it does not come in contact with the liquid
ingredients.
3. Insert bread pan into breadmaker; gently close lid. Plug the power cord
into a wall outlet. Press the Menu button until the “ExpressBake@”program is reached. Press the start button.
4. When the machine beeps, indicating that program has finished, lift the lid
and, using oven mitts, firmly grasp the bread pan handle and gently pull thepan straight up and out of the machine. Unplug the breadmaker and let cool.
@FCAUTION: The breadmaker and pan may be very hot!Always handle with care.
5. If needed, use a non-stick spatula to gently loosen the sides of the bread
from the pan; turn bread pan upside down onto a wire cooling rack and
gently shake until bread falls out onto rack.
6. Turn bread right-side up on rack and cool about 20 minutes before slicing.

Whole Wheat Setting RecipeWhole Wheat Bread
MAKES ONE 1.5lb LOAF
1 cup + 2 Tbsp. water (7585°F)
1 Tbsp. + l-1/2 tsp. butter or margarine, softened
1/4 cup firmly packed light brown sugar
l-1/4 tsp. salt
3-1/2 cups whole wheat flour
2-1/4 tsp. bread machine yeast
1. Spray bread pan and kneading blade with non-stick cooking spray.Attach the kneading blade in the bread pan. Place ingredients in bread pan
in the following order: water, butter, sugar, salt and flour.
2. With fingen make a small indentation at one side of the flour.Add yeast to indentation, making sure it does not come in contact
with the liquid ingredients.
3. Insert bread pan into breadmaker; gently close lid. Plug the power cord into
a wall outlet. Press the Menu Button until the “Whole Wheat” program
is reached. Press the “Loaf” button and set it for l-1/2 lb. loaf. Press the
“Crust Color” button for the desired crust color. Press the Start button.
4. When the machine beeps, indicating that program has finished, lift the lid
and, using oven mitts, firmly grasp the bread pan handle and gently pull
the pan straight up and out of the machine. Unplug the breadmakerand let cool.
IGFCA U T I O N : The breadmaker and pan may be very hot!Always handle with care.
5. If needed, use a non-stick spatula to gently loosen the sides of the breadfrom the pan; turn bread pan upside down onto a wire cooling rack and
gently shake until.bread falls out onto rack.
6. Turn bread right-side up on rack and cool about 20 minutes before slicing.
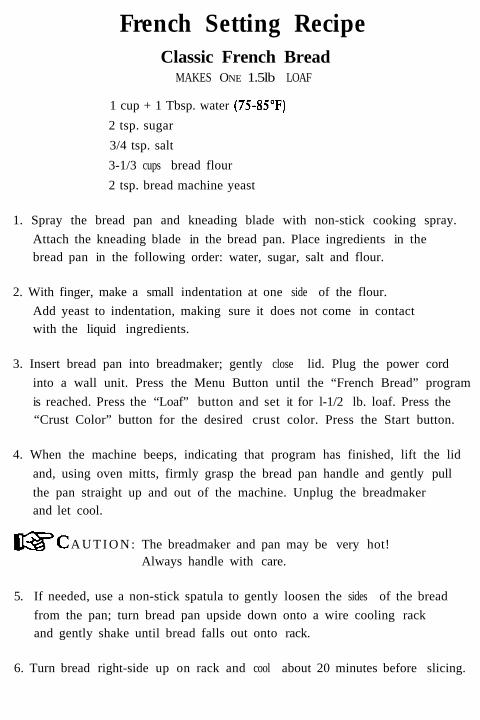
French Setting RecipeClassic French Bread
MAKES ONE 1.5lb LOAF
1 cup + 1 Tbsp. water (7585°F)
2 tsp. sugar
3/4 tsp. salt
3-1/3 cups bread flour
2 tsp. bread machine yeast
1. Spray the bread pan and kneading blade with non-stick cooking spray.
Attach the kneading blade in the bread pan. Place ingredients in thebread pan in the following order: water, sugar, salt and flour.
2. With finger, make a small indentation at one side of the flour.
Add yeast to indentation, making sure it does not come in contactwith the liquid ingredients.
3. Insert bread pan into breadmaker; gently close lid. Plug the power cord
into a wall unit. Press the Menu Button until the “French Bread” program
is reached. Press the “Loaf” button and set it for l-1/2 lb. loaf. Press the“Crust Color” button for the desired crust color. Press the Start button.
4. When the machine beeps, indicating that program has finished, lift the lid
and, using oven mitts, firmly grasp the bread pan handle and gently pull
the pan straight up and out of the machine. Unplug the breadmakerand let cool.
USCA U T I O N : The breadmaker and pan may be very hot!Always handle with care.
l 5. If needed, use a non-stick spatula to gently loosen the sides of the bread
from the pan; turn bread pan upside down onto a wire cooling rack/ and gently shake until bread falls out onto rack.
6. Turn bread right-side up on rack and cool about 20 minutes before before slicing.

Sweet Setting RecipeBanana-Pecan Bread
MAKES ONE 1.5lb LOAF
1/2 cup + 1 Tbsp. water (7585°F)
3/4 cup mashed ripe banana, about 2 medium bananas
2 Tbsp. butter or margarine, softened
1 large egg, lightly beatea
3 Tbsp. sugar
l-1/4 tsp. salt
3-1/4 cups bread flour
2-1/4 tsp. bread machine yeast
1/2 cup chopped pecans
1. Spray bread pan and kneading blade with non-stick cooking spray.
Attach the kneading blade in the bread pan. Place ingredients in bread pan
in the following order: water, banana, butter, egg, sugar, salt then flour.
2. With finger, make a small indentation at one side of the flour.Add yeast to indentation, making sure it does not come in contact
with the liquid ingredients. Sprinkle nuts over flour.
3. Insert bread pan into breadmaker; gently close lid. Plug the power cord
into a wall outlet. Press the Menu Button until the “Sweet Bread” program
is reached. Press the “Loaf” button and set it for l-l/2 lb. loaf. Press the
“Crust Color” button for the desired crust color. Press the Start button.
4. When the machine beeps, indicating that program has finished, lift the lid and,
using oven mitts, firmly grasp the bread-pan handle and gently pull the panstraight up and out of the machine. Unplug the breadmaker and let cool.
tWC A U T I O N : The breadmaker and pan may be very hot!Always handle with care.
5. If needed, use a non-stick spatula to gently loosen the sides of the breadfrom the pan; turn bread pan upside down onto a wire cooling rack
and gently shake until bread falls out onto rack.
6. Turn bread right-side up on rack and coo1 about 20 minutes before before slicing.

Quick Setting RecipeChock Full o’ Chocolate Walnut-Zucchini Bread
MAKES ONE 1.
1/2 cup chopped walnuts
l/2 cup semi-sweet chocolate pieces
2 cups all-purpose flour, divided
3 large eggs, lightly beaten
l/3 cup canola or vegetable oil
2 tsp. baking powder
1 tsp. baking soda
S-lb LOAF
3/4 cup sugar
1 tsp. ground cinnamon
1 tsp. grated orange pee1
1/2 tsp. salt
I/2 tsp. ground allspice
2-1/2 cups shredded zucchini,about 2 medium zucchini
1. In a small bowl, combine walnuts and chocolate pieces;add 2 Tbsp. of the flour and toss well; set aside.
2. Spray the bread pan and kneading blade with non-stick cooking spray.Attach the kneading blade in the bread pan. In the pan, place eggs, oil,the remaining flour, the baking powder, baking soda, sugar, cinnamon,orange peel, salt and allspice. Add zucchini, then the floured walnutsand chocolate pieces along with any flour remaining in the bowl.
3. Insert bread pan into breadmaker; gently close lid. Plug the power cordinto a wall outlet. Press the Menu Button until the “Quick Bread”program is reached. Press the Start button.
4. When the machine beeps, indicating that program has finished, lift the lidand, using oven mitts, firmly grasp the bread-pan handle and gently pull thepan straight up and out of the machine. Unplug the breadmaker and let cool.
( cwc AUTION: The breadmaker and pan may be very hot!Always handle with care.
5. If needed, use a non-stick spatula to gently loosen the sides of the breadfrom the pan; turn bread pan upside down onto a wire cooling rack andgently shake until bread falls out onto rack.
6. Turn bread right-side up on rack and cool about 20 minutes before before slicing.

Dough Setting RecipeBasic Pasta Dough
MAKES ABOUT I-lb.
2 cups al1 purpose flour
1 cup semolina flour
1 tsp. salt
1 Tbsp. olive or canola oil
3/4 cup + 2 Tbsp. water (75-85” F.)
1. Spray bread pan and kneading blade with non-stick cooking spray.Attach the kneading blade in the bread pan. Place ingredients in the bread
pan in the following order: flour and Salt.
2. With finger, make a small indentation at one side of the flour.
Add oil to indentation, then add water on top.
3. Insert bread pan into breadmaker; gently close lid. Plug the power cord intoa wall outlet. Press the Menu Button until the “Dough” prográm is reached.
Press the Start button, and let machine run for 10-12 minutes until ingredients
form a ball. If needed, use a rubber spatula to push any loose flour ordough scraps in the corners of pan toward the kneading blade.
4. Press the Stop button. Lift lid and remove dough to a large floured
cutting board.
I-SC A U T I O N : The breadmaker and pan may be very hot!Always handle with care.
5. Feed dough through a pasta machine or rol1 out to 1/8-inch thickness.If dough is sticky, dust lightly with flour.
6. If cutting by hand, cut into 1/8-inch strips for narrow pasta or I/4-inchstrips for wider pasta.
7. Place cut pasta on a rack or on semolina-dusted cutting board to dry,about 2 hours.
8. Cook pasta in a large pot of boiling, salted water for 3-5 minutes or until
of desired doneness.l
Two-Year Limited WarrantySunbeam Products, Inc. (“Sunbeam”) warrants that for a period oftwo years from the date of purchase, this product will be free fromdefects in material and workmanship. Sunbeam, at its option,will repair or replace this product or any component of the productfound to be defective during this warranty period. Replacementwill be made with a new or remanufactured product or component.If the product is no longer available, replacement may be made with asimilar product of equal or greater value. This is your exclusive warranty.
This warranty is valid for the original retail purchaser from the dateof initial retail purchase and is not transferable. Keep the original salesreceipt. Proof of purchase is required to obtain warranty performance.Sunbeam dealers, service centers or retail stores selling Sunbeam productsdo not have the right to aher, modify or in any way change the termsand conditions of this warranty.
This warranty does not cover normal wear of parts or damage resultingfrom any of the following: negligent use or misuse of the product, use on
, improper voltage or current, use contrary to the operating instructions,disassembly, repair or alteration by anyone other than Sunbeam oran Authorized Service Center. Further, the warranty does not cover
/ acts of nature, such as fire, flood, hurricanes and tornadoes.
Sunbeam shall not be hable for any incidental or consequentialdamages caused by the breach of any express or implied warranty.Except to the extent prohibited by applicable law, any implied warrantyof merchantability or fitness for a particular purpose is limited in durationto the duration of the above warranty. Some states, provinces orjurisdictions do not allow the exclusion or limitation of incidental orconsequential damages or limitations on how long an implied warranty
llasts, so the above limitations of exclusion may not apply to you.This warranty gives you specific legal rights, and you may also haveother rights that vary from state to state or province to province.
How to Obtain Warranty ServiceTake the product to an Authorized Sunbeam Service Center.You can find the nearest Authorized Sunbeam Service Centerby calling l-800-334-0759 or visit our Website at www.oster.com.
DO NOT RETURN THIS PRODUCT TO THE PLACE OF PURCHASE.

Do NOT SEND THIS PRODUCT TO THE PLACE OF PURCHASE
For product questions contact:Sunbeam Consumer Service
P.O. Box 948389Maitland, FL 32794-8389
1.800.334.0759
www.oster.com
DO NOT SEND PRODUCT TO THE ABOVE ADDRESS
02001 Sunbeam Products, Inc. All rights reserved.OSTER’ and ExpressBake” are registered trademarks of Sunbeam Products, Inc.
Distributed by Sunbeam Products, Inc.Boca Raton, FL 33431
Printed in China P.N.108727


![[CREATING LABELS] MAKING TEXT DESIGNING LABELS … · [CREATING LABELS] MAKING TEXT DESIGNING LABELS PRINTING LABELS COMPLETED LABELS USEFUL FUNCTIONS USER'S GUIDE / Español Printed](https://img.pdfslide.us/doc/110x75/5e718e59f26dfc19d238892e/creating-labels-making-text-designing-labels-creating-labels-making-text-designing.jpg)