Embed Size (px)
Citation preview

RAVEN STUDIO ONE 3 BASIC LAYOUT USER MANUAL |
1
RAVEN 3.1 USER MANUAL STUDIO ONE 3 – BASIC LAYOUT
RAVEN STUDIO ONE 3 BASIC LAYOUT USER MANUAL Version 3.1
Updated 3/29/2016

RAVEN STUDIO ONE 3 BASIC LAYOUT USER MANUAL
2
TABLE OF CONTENTS RAVEN DEFAULT PRE-PROGRAMED LAYOUTS .......................................................................................................... 4
RAVEN MTX/MTI STUDIO ONE 3 BASIC LAYOUT 1 OF 6 ............................................................................................ 6 LAYOUT 1.1 “CREATE TRACKS” ........................................................................................................................................... 6 LAYOUT 1.2 “NAMING – OPEN TRACK NAME” ....................................................................................................................... 7 LAYOUT 1.3 “VIDEO” ......................................................................................................................................................... 8 LAYOUT 1.4 “USER PRESET TRACKS” ................................................................................................................................... 9 LAYOUT 1.5 “QUICK RECORDING” ..................................................................................................................................... 10 LAYOUT 1.6 “WINDOWS” ................................................................................................................................................. 11 LAYOUT 1.7 “TRACK STATUS” ........................................................................................................................................... 11
RAVEN MTX/MTI STUDIO ONE 3 BASIC LAYOUT 2 OF 6 .......................................................................................... 13 LAYOUT 2.1 “WINDOWS” ................................................................................................................................................. 13 LAYOUT 2.2 “INSTANT SLATE PLUGINS” ............................................................................................................................. 14 LAYOUT 2.3 “INSTANT STUDIO ONE GUITAR PLUGINS” ........................................................................................................ 15 LAYOUT 2.4 “INSTANT S1 PLUGINS EQ DYN” ...................................................................................................................... 16 LAYOUT 2.5 “STORE PRESET CHAINS” ................................................................................................................................ 17 LAYOUT 2.6 “COMPING” .................................................................................................................................................. 17 LAYOUT 2.7 “QUICK RECORDING” ..................................................................................................................................... 18 LAYOUT 2.8 “WINDOWS” ................................................................................................................................................. 19 LAYOUT 2.9 “COPY PLUGINS NEXT PREVIOUS” ................................................................................................................... 20
RAVEN MTX/MTI STUDIO ONE 3 BASIC LAYOUT 3 OF 6 .......................................................................................... 22 LAYOUT 3.1 “LAYERS” ..................................................................................................................................................... 22 LAYOUT 3.2 “TRACK STATUS” ........................................................................................................................................... 23 LAYOUT 3.3 “WINDOWS” ................................................................................................................................................. 24 LAYOUT 3.4 “CLIP GAIN EDITING” ..................................................................................................................................... 25 LAYOUT 3.5 “EDITING FADES” .......................................................................................................................................... 26 LAYOUT 3.6 “EDITING AUDIOSUITE” ................................................................................................................................. 26 LAYOUT 3.7 “SPLIT” ........................................................................................................................................................ 27
RAVEN MTX/MTI STUDIO ONE 3 BASIC LAYOUT 4 OF 6 .......................................................................................... 29 LAYOUT 4.1 “JAZZ CHORDS” ............................................................................................................................................ 29 LAYOUT 4.2 “JAZZ MINOR CHORDS” ................................................................................................................................. 30 LAYOUT 4.3 “MAJOR POP CHORDS” .................................................................................................................................. 30 LAYOUT 4.5 “MINOR POP CHORDS CONTINUED” ................................................................................................................. 31 LAYOUT 4.6 “WINDOWS - TOOLS” ..................................................................................................................................... 31 LAYOUT 4.7 “FAVORITE INSTRUMENTS” ............................................................................................................................. 32 LAYOUT 4.8 “RENDER TRANSFORM” .................................................................................................................................. 33 LAYOUT 4.9 “TRACK STATUS” ........................................................................................................................................... 34 LAYOUT 4.10 “LAYERS” ................................................................................................................................................... 35
RAVEN MTX/MTI STUDIO ONE 3 BASIC LAYOUT 5 OF 6 .......................................................................................... 37 LAYOUT 5.1 “CREATE TRACKS” ......................................................................................................................................... 37 LAYOUT 5.2 “QUICK RECORDING” ..................................................................................................................................... 38 LAYOUT 5.3 “INSTANT STUDIO ONE PLUGINS” .................................................................................................................... 39 LAYOUT 5.4 “INSTANT LC FILTER” ..................................................................................................................................... 40 LAYOUT 5.5 “STORE PRESET CHAINS” ................................................................................................................................ 41 LAYOUT 5.6 “WINDOWS” ................................................................................................................................................. 41
RAVEN MTX/MTI STUDIO ONE 3 BASIC LAYOUT 6 OF 6 .......................................................................................... 43 LAYOUT 6.1 “INSTANT SENDS” ......................................................................................................................................... 43

RAVEN STUDIO ONE 3 BASIC LAYOUT USER MANUAL |
3
LAYOUT 6.2 “INSTANT S1 PLUGINS” .................................................................................................................................. 44 LAYOUT 6.3 “EFX PLUGINS” ............................................................................................................................................. 45 LAYOUT 6.4 “WINDOWS” ................................................................................................................................................. 46

RAVEN STUDIO ONE 3 BASIC LAYOUT USER MANUAL
4
RAVEN DEFAULT PRE-PROGRAMED LAYOUTS Users will need to import the “Raven Keys” custom key command file in order for many of the Batch Commands to function correctly.
RAVEN STUDIO ONE 3 BASIC LAYOUT USER MANUAL |
5
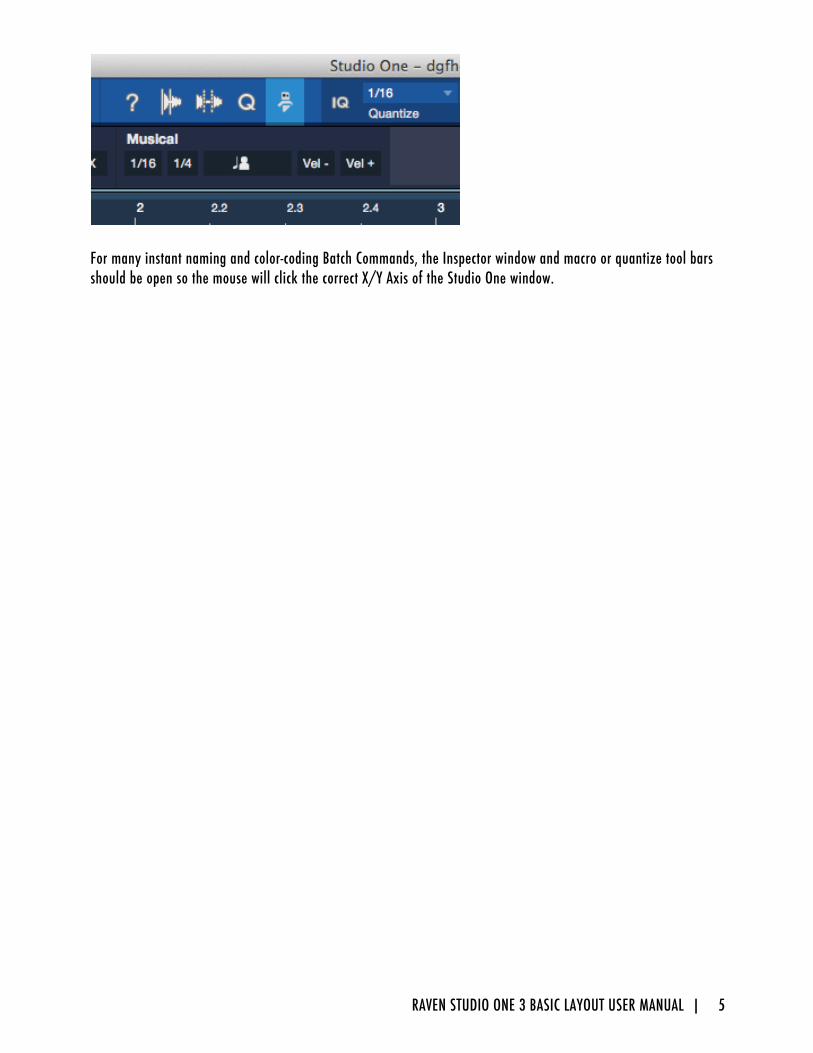
For many instant naming and color-coding Batch Commands, the Inspector window and macro or quantize tool bars should be open so the mouse will click the correct X/Y Axis of the Studio One window.

RAVEN STUDIO ONE 3 BASIC LAYOUT USER MANUAL
6
RAVEN MTX/MTi STUDIO ONE 3 BASIC LAYOUT 1 of 6
LAYOUT 1.1 “CREATE TRACKS”
CREATE MONO AUDIO TRACK In the Mix or Edit window, press CREATE MONO AUDIO TRACK to launch the key command to make a new mono audio track. CREATE INSTRUMENT TRACK In the Mix or Edit window, press CREATE INSTRUMENT TRACK to launch the key command to make a new instrument track. CREATE FX TRACK In the Mix or Edit window, press CREATE FX TRACK to launch the key command to make a new FX track. PACK SELECT INTO FOLDER In the Mix or Edit window, press PACK SELECT INTO FOLDER to launch the key command to move all selected tracks into a folder track.
RAVEN STUDIO ONE 3 BASIC LAYOUT USER MANUAL |
7
CREATE STEREO AUDIO TRACK In the Mix or Edit window, press CREATE STEREO AUDIO TRACK to launch the key command to make a new stereo audio track. BUS TRACK FOR SELECT In the Mix or Edit window, press BUS TRACK FOR SELECT to launch the key command to make a new output bus for the selected tracks. CREATE AUTOMATION TRACK In the Mix or Edit window, press CREATE AUTOMATION TRACK to launch the key command to make a new automation track. EXPAND FOLDERS In the Main window, press EXPAND FOLDER to launch the key command to expand all folder tracks in the session.
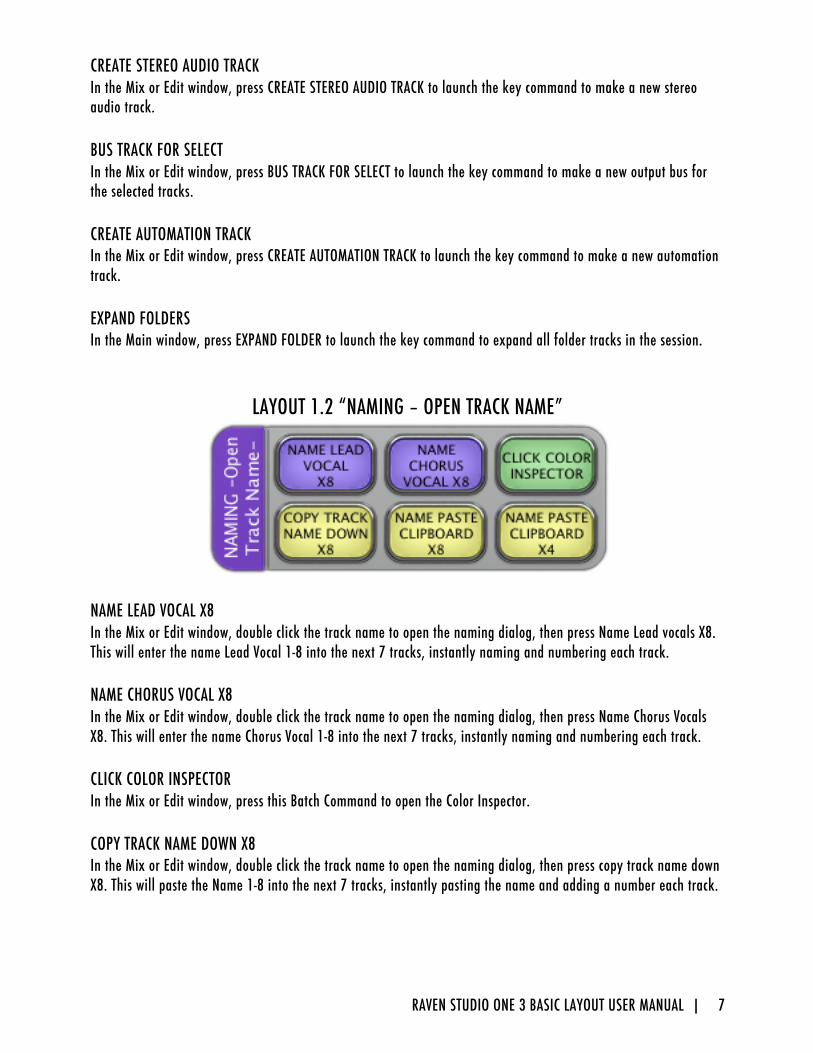
LAYOUT 1.2 “NAMING – OPEN TRACK NAME”
NAME LEAD VOCAL X8 In the Mix or Edit window, double click the track name to open the naming dialog, then press Name Lead vocals X8. This will enter the name Lead Vocal 1-8 into the next 7 tracks, instantly naming and numbering each track. NAME CHORUS VOCAL X8 In the Mix or Edit window, double click the track name to open the naming dialog, then press Name Chorus Vocals X8. This will enter the name Chorus Vocal 1-8 into the next 7 tracks, instantly naming and numbering each track. CLICK COLOR INSPECTOR In the Mix or Edit window, press this Batch Command to open the Color Inspector. COPY TRACK NAME DOWN X8 In the Mix or Edit window, double click the track name to open the naming dialog, then press copy track name down X8. This will paste the Name 1-8 into the next 7 tracks, instantly pasting the name and adding a number each track.

RAVEN STUDIO ONE 3 BASIC LAYOUT USER MANUAL
8
NAME PASTE CLIPBOARD X8 In the Mix or Edit window, double click the track name to open the naming dialog, then press NAME PASTE CLIPBOARD X8. This will open up a dialog when asking for user input, type the desired name into the widow and press ok. This will then paste the name into the next 7 tracks, instantly pasting the name and adding a number each track.
LAYOUT 1.3 “VIDEO”
CREATE 4 VOCAL BUSSED USER COLOR In the Mix or Edit window press create 4 vocal bussed color. This will create 4 new mono tracks and name them Lead vocal, then will highlight the tracks and send a mouse click to open the color palette, user then selects the desired color. Note: Inspector and Macro tab need to be open for the mouse to click the correct spot for the color palette. ADD PHASER Select a track and hit ADD PHASER to add a Studio One phaser plugin to the select track. PIPLEINE DRAGON – EQ – 1176 Select a track and press PIPELINE DRAGON EQ 1176 to add pipeline to the select track and open up the presets for EQ and 1176. ADD SLATE CHAIN Select a track and press ADD SLATE CHAIN to add Trigger, VTM, and VMR to the selected track. ALIGN WINDOW FOR CLICKS Press ALIGN WINDOW FOR CLICKS to align the window bounds to fit 1 toolbar and make sure the inspector and macro toolbars are showing. OPEN – CLOSE PLUGINS Press open close plugins to open and close the current open plugin. SNAP TRANSIENT TO GRID Select a region with some transients and press snap transient to grid to separate the region at the transients, quantize them and crossfade them.

RAVEN STUDIO ONE 3 BASIC LAYOUT USER MANUAL |
9
CLEAR INSERTS With a plugin open press clear inserts to send a mouse click to the channel editor drop menu and select remove from the list.
LAYOUT 1.4 “USER PRESET TRACKS”
4 MONO VOCAL USER PRESET Press 4 mono vocal user preset to open the new track window, name them lead vocal, tab to the next item and select mono from the lost, finally it will send a click to the preset menu. Note: User should add a line to the Batch command with the name of the desired preset, followed by another line programmed with the “enter” modifier. 4 MONO CH VOCAL USER PRESET Press 4 mono vocal user preset to open the new track window, name them lead vocal, tab to the next item and select mono from the lost, finally it will send a click to the preset menu. Note: User should add a line to the Batch command with the name of the desired preset, followed by another line programmed with the “enter” modifier. 8 DRUMS BUSSED COLOR Press 4 mono vocal user preset to open the new track window, name them lead vocal, tab to the next item and select mono from the lost, finally it will send a click to the preset menu. Note: User should add a line to the Batch command with the name of the desired preset, followed by another line programmed with the “enter” modifier. 8 MONO BG VOCAL USER PRESET Press 4 mono vocal user preset to open the new track window, name them lead vocal, tab to the next item and select mono from the lost, finally it will send a click to the preset menu. Note: User should add a line to the Batch command with the name of the desired preset, followed by another line programmed with the “enter” modifier. 4 STEREO SYNTH USER PRESET Press 4 mono vocal user preset to open the new track window, name them lead vocal, tab to the next item and select mono from the lost, finally it will send a click to the preset menu. Note: User should add a line to the Batch command with the name of the desired preset, followed by another line programmed with the “enter” modifier.

RAVEN STUDIO ONE 3 BASIC LAYOUT USER MANUAL
10
4 STEREO KEYS USER PRESET Press 4 mono vocal user preset to open the new track window, name them lead vocal, tab to the next item and select mono from the lost, finally it will send a click to the preset menu. Note: User should add a line to the Batch command with the name of the desired preset, followed by another line programmed with the “enter” modifier.
LAYOUT 1.5 “QUICK RECORDING”
NEW LAYER AND RECORD In the Main window with a track selected and record enabled, press NEW LAYER AND RECORD to create a new layer and restart the recording on the selected track. TOGGLE PRE-ROLL AND RECORD In the Main window with a track selected and record enabled, press TOGGLE PRE ROLL AND RECORD to toggle the pre roll on, restart the recording on the selected track and, toggle the pre roll back off, as to not have to turn the pre roll off when auditioning the take. TOGGLE RETURN START In the Main window, press TOGGLE RETURN START to toggle on/off the “return to start” option, so that when you finish a take, the playhead will return to the start of the take. UNDO AND RECORD In the Main window with a track selected and record enabled, press UNDO AND RECORD to undo the previous take and restart the recording on the selected track. TOGGLE LAYERS In the Main window with a track containing selected layers, press TOGGLE LAYERS to toggle open/close the layers view on the selected track. TOGGLE COUNT AND RECORD In the Main window with a track selected and record enabled, press TOGGLE COUNT AND RECORD to toggle the count-Off/On and restart the recording on the selected track.

RAVEN STUDIO ONE 3 BASIC LAYOUT USER MANUAL |
11
LAYOUT 1.6 “WINDOWS”
TRACKING WINDOW Press TRACKING WINDOW to set the Tracking window as the front window. EDITING WINDOW Press EDITING WINDOW to open the Editing window below the Tracking window. ALIGN 1 RACK Press ALIGN 1 RACK to align the front window bounds to fit 1 rack of the Batch Commander toolbar. MIXING WINDOW POP OUT In the Tracking window, press MIXING WINDOW POP OUT to open the Mixing window and then pop it out to a new window. EDIT AND MIXING In any window, press EDIT AND MIXING to open the Editing and Mixing windows. INSPECTOR In the Tracking window, press INSPECTOR to open the Inspector window.
LAYOUT 1.7 “TRACK STATUS”
MUTE SELECT With a track or tracks selected, press MUTE SELECT to toggle mute on/off on the selected tracks.

RAVEN STUDIO ONE 3 BASIC LAYOUT USER MANUAL
12
SOLO SELECT With a track or tracks selected, press SOLO SELECT to toggle solo on/off on the selected tracks. MONITOR ENABLE SELECT With a track or tracks selected, press MONITOR ENABLE SELECT to toggle enable input monitor on/off on the selected tracks. SET LOOP SELECT In the Main window, select an area of the timeline with the Range Tool and press SET LOOP SELECT to set the loop markers to the selection. RECORD ENABLE SELECT With a track or tracks selected, press RECORD ENABLE SELECT to toggle record enable on/off for the selected tracks TOGGLE MUTE EVENTS In the Project or Editor window with an event selected, press TOGGLE MUTE EVENTS to toggle the mute on/off for the selected event.

RAVEN STUDIO ONE 3 BASIC LAYOUT USER MANUAL |
13
RAVEN MTX/MTi STUDIO ONE 3 BASIC LAYOUT 2 of 6
LAYOUT 2.1 “WINDOWS”
TRACKING WINDOW Press TRACKING WINDOW to set the Tracking window as the front window. EDITING WINDOW Press EDITING WINDOW to open the editing window below the Tracking window. ALIGN MAIN WINDOW FOR SCENES In the Tracking window, press ALIGN Main window FOR SCENES to align the window bounds and open the Tracks List and Inspector to allow the mouse to click the correct area. MIXING WINDOW POP OUT In the Tracking window, press MIXING WINDOW POP OUT to open the Mixing window and then pop it out to a new window.

RAVEN STUDIO ONE 3 BASIC LAYOUT USER MANUAL
14
EDIT AND MIXING In any window, press EDIT AND MIXING to open the Editing and Mixing windows. INSPECTOR In the Tracking window, press INSPECTOR to open the Inspector window.
LAYOUT 2.2 “INSTANT SLATE PLUGINS”
ADD VMR In any window with a track selected, press ADD VMR to launch the key command to add a new insert and search the plugin list for “Virtual Mix Rack.” ADD VTM In any window with a track selected, press ADD VTM to launch the key command to add a new insert and search the plugin list for “Virtual Tape Machine.” ADD VBC GREY In any window with a track selected, press ADD VBC GREY to launch the key command to add a new insert and search the plugin list for “VBC Grey.” ADD TRIGGER In any window with a track selected, press ADD TRIGGER to launch the key command to add a new insert and search the plugin list for “Trigger.” ADD FGX In any window with a track selected, press ADD FGX to launch the key command to add a new insert and search the plugin list for “FG-X.” ADD VBC RED In any window with a track selected, press ADD VBC RED to launch the key command to add a new insert and search the plugin list for “VBC Red.”

RAVEN STUDIO ONE 3 BASIC LAYOUT USER MANUAL |
15
LAYOUT 2.3 “INSTANT STUDIO ONE GUITAR PLUGINS”
ADD TUNER In any window with a track selected, press ADD TUNER to launch the key command to add a new insert and search the plugin list for “Tuner.” ADD PHASER In any window with a track selected, press ADD Phaser to launch the key command to add a new insert and search the plugin list for “Phaser.” ADD AUTO FILTER In any window with a track selected, press ADD AUTOFILTER to launch the key command to add a new insert and search the plugin list for “Auto Filter.” ADD AMPIRE In any window with a track selected, press ADD AMPIRE to launch the key command to add a new insert and search the plugin list for “Ampire.” ADD REDLIGHT DIST In any window with a track selected, press ADD REDLIGHT DIST to launch the key command to add a new insert and search the plugin list for “Redlight Distortion.” ADD X-TREMELO In any window with a track selected, press ADD X-TREMELO to launch the key command to add a new insert and search the plugin list for “Tremelo.” ADD BITCRUSHER In any window with a track selected, press ADD BITCRUSHER to launch the key command to add a new insert and search the plugin list for “Bitcrusher.” ADD ROTOR In any window with a track selected, press ADD ROTOR to launch the key command to add a new insert and search the plugin list for “Rotor.”

RAVEN STUDIO ONE 3 BASIC LAYOUT USER MANUAL
16
LAYOUT 2.4 “INSTANT S1 PLUGINS EQ DYN”
ADD PIPELINE In any window with a track selected, press ADD PIPELINE to launch the key command to add a new insert and search the plugin list for “Pipeline.” ADD PRO EQ In any window with a track selected, press ADD PRO EQ to launch the key command to add a new insert and search the plugin list for “PRO EQ.” ADD FAT CHANNEL In any window with a track selected, press ADD FAT CHANNEL to launch the key command to add a new insert and search the plugin list for “Fat Channel.” ADD CHANNEL STRIP In any window with a track selected, press ADD CHANNEL STRIP to launch the key command to add a new insert and search the plugin list for “Channel Strip.” ADD COMPRESSOR In any window with a track selected, press ADD COMPRESSOR to launch the key command to add a new insert and search the plugin list for “Compressor.” ADD MULTI BAND DYN In any window with a track selected, press ADD MULTIBAND DYN to launch the key command to add a new insert and search the plugin list for “Multiband Dyn.”

RAVEN STUDIO ONE 3 BASIC LAYOUT USER MANUAL |
17
LAYOUT 2.5 “STORE PRESET CHAINS”
STORE CHANNEL STRIP In any window with the Channel Editor open, press STORE CHANNEL STRIP to send a mouse click to the Channel Editor drop menu and select “store” from the menu. STORE PRESET 1, (PRESET 2) In any window with the Channel Editor open, press STORE CHANNEL STRIP to send a mouse click to the Channel Editor drop menu and select “store” from the menu and rename preset 1-2. LOAD PRESET 1, (LOAD PRESET 2) In any window with the Channel Editor open, press LOAD CHANNEL STRIP to send a mouse click to the Channel Editor drop menu and select preset 1-2 from the menu. REMOVE INSERTS In any window with the Channel Editor open, press REMOVE INSERTS to send a mouse click to the Channel Editor drop menu and select remove from the menu.
LAYOUT 2.6 “COMPING”
NEW LAYER With a track selected in the Main window, press NEW LAYER to create a new layer on the selected track. DELETE LAYER With a track layer selected in the Main window, press DELETE LAYER to delete the selected layer. SOLO LAYER With the track expanded to show layers, select a layer and press SOLO LAYER to solo the selected layer.
RAVEN STUDIO ONE 3 BASIC LAYOUT USER MANUAL
18
EXPAND TOGGLE LAYERS In the Main window, select a track that contains layers and press EXPAND TOGGLE LAYERS to expand the layers of the selected track. RENAME LAYER KEEPER When comping layers together within the Main window, select a take of your choice and press RENAME LAYER KEEPER to instantly rename the layer “keeper,” in order to be able to decide which layers are keepers. RENAME LAYER GOOD When comping layers together within the Main window, select a take of your choice and press RENAME LAYER GOOD to instantly rename the layer “good,” in order to be able to decide which layers are good. RENAME LAYER JUST IN CASE When comping layers together within the Main window, select a take of your choice and press RENAME LAYER JUST IN CASE to instantly rename the layer “just in case,” in order to be able to decide which layers can be used later. RENAME LAYER NOT THE ONE When comping layers together within the Main window, select a take of your choice and press RENAME LAYER NOT THE ONE to instantly rename the layer “not the one,” in order to be able to decide which layers not to use later.
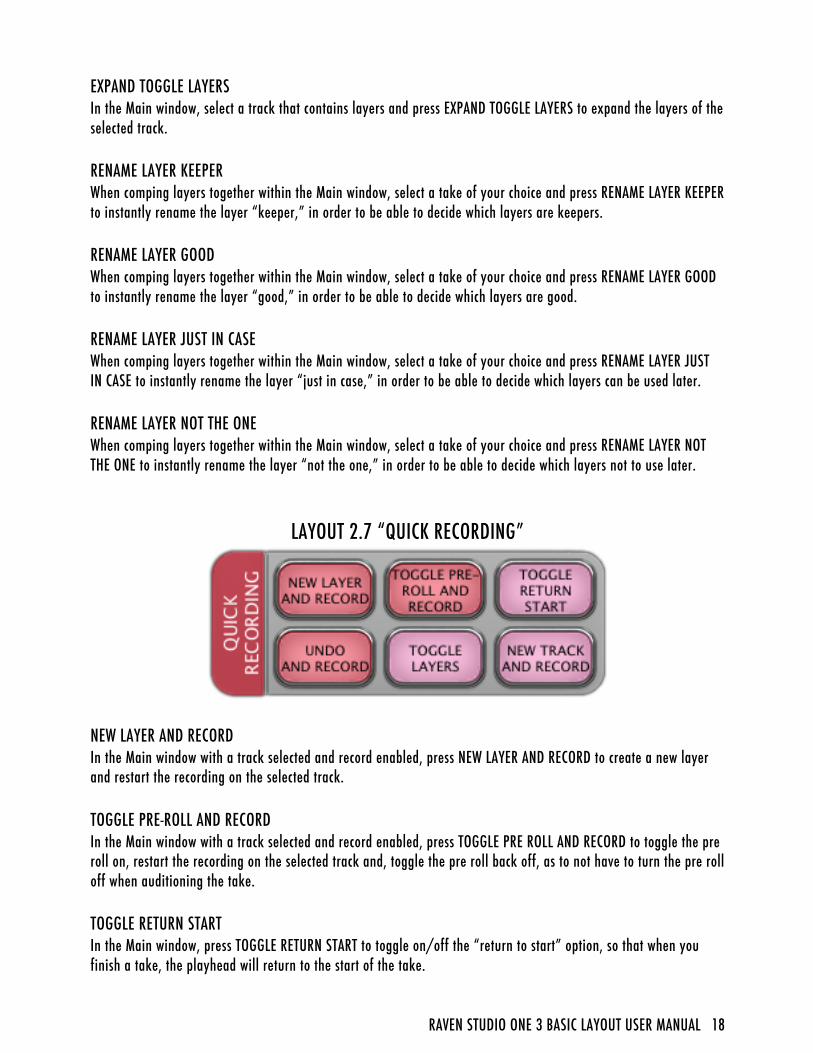
LAYOUT 2.7 “QUICK RECORDING”
NEW LAYER AND RECORD In the Main window with a track selected and record enabled, press NEW LAYER AND RECORD to create a new layer and restart the recording on the selected track. TOGGLE PRE-ROLL AND RECORD In the Main window with a track selected and record enabled, press TOGGLE PRE ROLL AND RECORD to toggle the pre roll on, restart the recording on the selected track and, toggle the pre roll back off, as to not have to turn the pre roll off when auditioning the take. TOGGLE RETURN START In the Main window, press TOGGLE RETURN START to toggle on/off the “return to start” option, so that when you finish a take, the playhead will return to the start of the take.

RAVEN STUDIO ONE 3 BASIC LAYOUT USER MANUAL |
19
UNDO AND RECORD In the Main window with a track selected and record enabled, press UNDO AND RECORD to undo the previous take and restart the recording on the selected track. TOGGLE LAYERS In the Main window with a track containing selected layers, press TOGGLE LAYERS to toggle open/close the layers view on the selected track. NEW TRACK AND RECORD Press NEW TRACK AND RECORD to add a new track and enable its record option.
LAYOUT 2.8 “WINDOWS”
TOGGLE CHANNEL EDITOR In the Mix or Edit window, press TOGGLE CHANNEL EDITOR to open and close the Channel Editor and open the plugins on the selected track. TOGGLE INSTRUMENT WINDOW In the Mix or Edit window with an audio or FX track selected, press TOGGLE INSTRUMENT WINDOW to open and close the Instrument window on the selected track. TOGGLE SCRATCH PAD In the Main window, press TOGGLE SCRATCH PAD to open and close the scratch pad window. COPY LOOP RANGE SCRATCH In the Main window with some events selected in the loop range, press COPY LOOP RANGE SCRATCH to copy the selected loop range to the scratch pad. TOGGLE MIXER Press TOGGLE MIXER to open the mixer. TOGGLE EDITOR Press TOGGLE EDITOR to open the audio editor.

RAVEN STUDIO ONE 3 BASIC LAYOUT USER MANUAL
20
SPLIT RANGE Press SPLIT RANGE to split the region at the range location SPLIT AT CURSOR Press SPLIT AT CURSOR to split the region at the cursor location
LAYOUT 2.9 “COPY PLUGINS NEXT PREVIOUS”
COPY OPEN INSERTS TO PREVIOUS/NEXT With a track selected, press COPY OPEN INSERTS TO PREVIOUS/NEXT to send a mouse click to the Channel Editor drop menu and store a preset called “copy.” Then scroll to the previous/next track and select the preset “copy” from the drop menu. COPY OPEN PLUGIN TO PREVIOUS With a track selected, press COPY OPEN PLUGIN TO PREVIOUS to copy the currently open plugin, and scroll to the previous track and paste the settings. COPY OPEN PLUGIN TO NEXT With a track selected, press COPY OPEN PLUGIN TO NEXT to copy the currently open plugin, and scroll to the next track and paste the settings. STORE PRESET CHAIN With the channel editor open press STORE PRESET CHAIN to send a mouse click to the top left drop menu and select store from the list. CLEAR OPEN INSERTS With the channel editor open press CLEAR OPEN INSERTS to send a mouse click to the top left drop menu and select remove from the list. ADD EQ TELEPHONE PRESET With a track selected, press ADD EQ TELEPHONE PRESET to add Pro EQ to the selected track and send a mouse click to the preset drop menu, then select “telephone” from the menu.

RAVEN STUDIO ONE 3 BASIC LAYOUT USER MANUAL |
21
ADD COMP DE-ESSER PRESET With a track selected, press ADD COMP DE-ESSER PRESET to add “Compressor” to the selected track and send a mouse click to the preset drop menu, then select “De-Esser” from the menu.

RAVEN STUDIO ONE 3 BASIC LAYOUT USER MANUAL
22
RAVEN MTX/MTi STUDIO ONE 3 BASIC LAYOUT 3 of 6
LAYOUT 3.1 “LAYERS”
NEW LAYER In the Main window with a track selected and record enabled, press NEW LAYER to create a new layer on the selected track. RENAME LAYER In the Main window with a track layer selected, press RENAME LAYER to rename the layer on the selected track. REMOVE LAYER In the Main window with a track layer selected, press REMOVE LAYER to remove the layer on the selected track. DUPLICATE LAYER In the Main window with a track layer selected, press DUPLICATE LAYER to duplicate the layer on the track.

RAVEN STUDIO ONE 3 BASIC LAYOUT USER MANUAL |
23
NEW LAYER AND RECORD In the Main window with a track selected and record enabled, press NEW LAYER AND RECORD to create a new layer and restart the recording on the selected track. TOGGLE PRE-ROLL AND RECORD In the Main window with a track selected and record enabled, press TOGGLE PRE ROLL AND RECORD to toggle the pre-roll on, initiate a recording on the selected track, and then toggle the pre-roll back off, as to not have to turn the pre-roll on when audition the take. TOGGLE RETURN START In the Main window, press TOGGLE RETURN START to toggle on/off the return to start option so when finishing a take the play head will return to the start of the take. UNDO AND RECORD In the Main window with a track selected and record enabled, press UNDO AND RECORD to undo the previous take and restart the recording on the selected track. TOGGLE LAYERS In the Main window with a track containing layers selected, press TOGGLE LAYERS to toggle open/close the layers view on the selected track. RECORD TAKES TO LAYER In the Main window with a track selected, press RECORD TAKES TO LAYERS to toggle on/off the recorded takes to layer option.
LAYOUT 3.2 “TRACK STATUS”
MUTE SELECT With a track or tracks selected, press MUTE SELECT to toggle mute on/off on the selected tracks. SOLO SELECT With a track or tracks selected, press SOLO SELECT to toggle solo on/off on the selected tracks.

RAVEN STUDIO ONE 3 BASIC LAYOUT USER MANUAL
24
MONITOR ENABLE SELECT With a track or tracks selected, press MONITOR ENABLE SELECT to toggle enable input monitor on/off on the selected tracks. SET LOOP SELECT In the Main window, select an area of the timeline with the Range Tool and press SET LOOP SELECT to set the loop markers to the selection. RECORD ENABLE SELECT With a track or tracks selected, press RECORD ENABLE SELECT to toggle record enable on/off for the selected tracks TOGGLE MUTE EVENTS In the Project or Editor window with an event selected, press TOGGLE MUTE EVENTS to toggle the mute on/off for the selected event.
LAYOUT 3.3 “WINDOWS”
TRACKING WINDOW Press TRACKING WINDOW to set the Tracking window as the front window. EDITING WINDOW Press EDITING WINDOW to open the editing window below the Tracking window. ALIGN MAIN WINDOW FOR SCENES In the Tracking window, press ALIGN MAIN WINDOW FOR SCENES to align the window bounds and open the Tracks List and Inspector to allow the mouse to click the correct area. MIXING WINDOW POP OUT In the Tracking window, press MIXING WINDOW POP OUT to open the Mixing window and then pop it out to a new window. EDIT AND MIXING In any window, press EDIT AND MIXING to open the Editing and Mixing windows.

RAVEN STUDIO ONE 3 BASIC LAYOUT USER MANUAL |
25
INSPECTOR In the Tracking window, press INSPECTOR to open the Inspector window.
LAYOUT 3.4 “CLIP GAIN EDITING”
INCREASE VOLUME 1 DB Press INCREASE VOLUME 1 DB to clip gain the currently selection region by 1dB. INCREASE VOLUME 3 DB Press INCREASE VOLUME 3 DB to clip gain the currently selection region by 3db. DECREASE VOLUME -1 DB Press DECREASE VOLUME -1 DB to clip gain the currently selection region by -1dB. DECREASE VOLUME -3 DB Press DECREASE VOLUME 3 DB to clip gain the currently selection region by -3dB. SHOW INSPECTOR Press SHOW INSPECTOR to open the Inspector Tab REVERSE SELECTION With an event selected, press REVERSE SELECTION to instantly reverse the selected event. BOUNCE SELECTION With an event selected, press BOUNCE SELECTION to bounce the selection in the place. BOUNCE TO NEW TRACK With an event selected, press BOUNCE TO NEW TRACK to bounce the selected event to a new audio track.
RAVEN STUDIO ONE 3 BASIC LAYOUT USER MANUAL
26
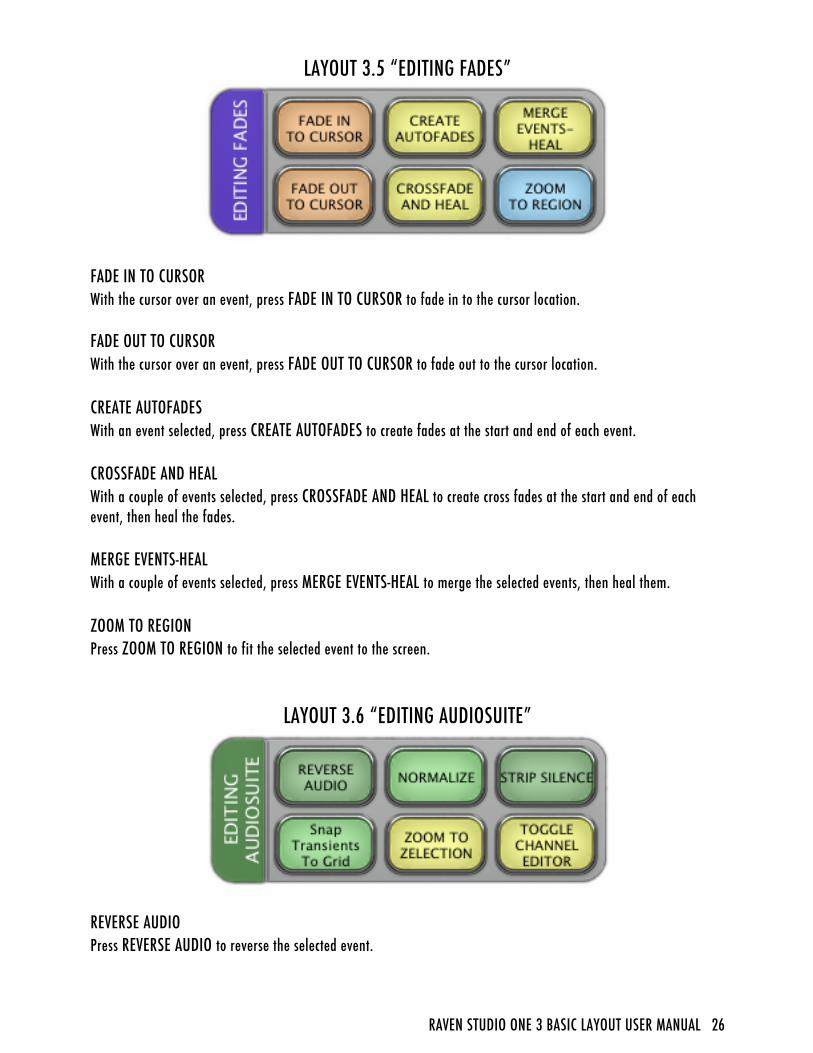
LAYOUT 3.5 “EDITING FADES”
FADE IN TO CURSOR With the cursor over an event, press FADE IN TO CURSOR to fade in to the cursor location. FADE OUT TO CURSOR With the cursor over an event, press FADE OUT TO CURSOR to fade out to the cursor location. CREATE AUTOFADES With an event selected, press CREATE AUTOFADES to create fades at the start and end of each event. CROSSFADE AND HEAL With a couple of events selected, press CROSSFADE AND HEAL to create cross fades at the start and end of each event, then heal the fades. MERGE EVENTS-HEAL With a couple of events selected, press MERGE EVENTS-HEAL to merge the selected events, then heal them. ZOOM TO REGION Press ZOOM TO REGION to fit the selected event to the screen.
LAYOUT 3.6 “EDITING AUDIOSUITE”
REVERSE AUDIO Press REVERSE AUDIO to reverse the selected event.

RAVEN STUDIO ONE 3 BASIC LAYOUT USER MANUAL |
27
NORMALIZE Press NORMALIZE to normalize the selected event. STRIP SILENCE Press STRIP SILENCE to strip the silence from the selected event SNAP TRANSIENTS TO GRID Select an Event and press SNAP TRANSIENTS TO GRID to quantize the transients, break the event at the transients, quantize them to the grid value, fade, and consolidate them to one event. ZOOM TO SELECTION Press ZOOM TO SELECTION to fit the selected event to the screen. TOGGLE CHANNEL EDITOR Press TOGGLE CHANNEL EDITOR to fit the selected event to the screen.
LAYOUT 3.7 “SPLIT”
CROP SELECTION In the Tracking or Editing window select a piece of an event and press CROP SELECTION to trim the start and end of the region to the selection. SPLIT AT CURSOR In the Tracking or Editing window, press SPLIT AT CURSOR to split the event at the cursor location. SPLIT AT TRANSIENT In the Tracking or Editing window with an event selected, press SPLIT AT TRANSIENTS to create new events from the transients. Note: The transient threshold can be set in the quantize panel. SPLIT AT RANGE In the Tracking or Editing window with an event selected, press SPLIT AT RANGE to split the selected event at the range border.

RAVEN STUDIO ONE 3 BASIC LAYOUT USER MANUAL
28
TRIM START TO CURSOR In the Tracking or Editing window, move the cursor over an event and press TRIM START TO CURSOR to trim the event start to the cursor location. TRIM END TO CURSOR In the Tracking or Editing window, move the cursor over an event and press TRIM END TO CURSOR to trim the event end to the cursor location.

RAVEN STUDIO ONE 3 BASIC LAYOUT USER MANUAL |
29
RAVEN MTX/MTi STUDIO ONE 3 BASIC LAYOUT 4 of 6
LAYOUT 4.1 “JAZZ CHORDS”
JAZZ CHORDS PANEL This batch command panel has a mixture of major 7, minor 7 and major 6 chords that are commonly used within the jazz genre. Note:
Major 7 Intervals: 1, 3, 5, 7 (Do, Mi, Sol, Ti) Minor 7 Intervals: 1, b3, 5, b7 (Do, Me, Sol, Te) Major 6 Intervals: 1, 3, 5, 6 (Do, Mi, Sol, La)
Note: Must setup QWERTY keys as a controller in the Studio One Preferences.

RAVEN STUDIO ONE 3 BASIC LAYOUT USER MANUAL
30
LAYOUT 4.2 “JAZZ MINOR CHORDS”
JAZZ MINOR CHORDS PANEL This batch command panel features minor 7 chords in several keys Note:
Minor 7 Intervals: 1, b3, 5, b7 (Do, Me, Sol, Te) Note: Must setup QWERTY keys as a controller in the Studio One Preferences.
LAYOUT 4.3 “MAJOR POP CHORDS”
MAJOR POP CHORDS PANEL This batch command panel features major triads in several keys. Note: Must setup QWERTY keys as a controller in the Studio One Preferences.
LAYOUT 4.4 “MINOR POP CHORDS”
MINOR POP CHORDS PANEL This batch command panel features minor triads in several keys. Note: Must setup QWERTY keys as a controller in the Studio One Preferences.

RAVEN STUDIO ONE 3 BASIC LAYOUT USER MANUAL |
31
LAYOUT 4.5 “MINOR POP CHORDS CONTINUED”
MINOR POP CHORDS PANEL This batch command panel features minor triads in several keys. Hold down the tab key on your QWERTY keyboard to allow longer sustain. Note: Must setup QWERTY keys as a controller in the Studio One Preferences.
LAYOUT 4.6 “WINDOWS - TOOLS”
TOGGLE CHANNEL EDITOR In the Mix or Edit window, press TOGGLE CHANNEL EDITOR to open and close the Channel Editor and open the plugins on the selected track. TOGGLE INSTRUMENT WINDOW In the Mix or Edit window with an audio or FX track selected, press TOGGLE INSTRUMENT WINDOW to open and close the Instrument window on the selected track. TOGGLE MIDI EDITOR Press TOGGLE MIDI EDITOR to toggle the MIDI Editor window open/closed. OPEN MIDI QWERTY KEYS Fill in text here ZOOM TO SELECTION Press ZOOM TO SELECTION to fit the selected event to the screen.

RAVEN STUDIO ONE 3 BASIC LAYOUT USER MANUAL
32
ZOOM OUT ALL Press ZOOM OUT ALL to fit all events in the session to the screen. TOGGLE SCRATCH PAD In the Main window, press TOGGLE SCRATCH PAD to open and close the scratch pad window. ADD INSTRUMENT TRACK Press ADD INSTRUMENT TRACK to add an instrument track into the session
LAYOUT 4.7 “FAVORITE INSTRUMENTS”
SEARCH ARP BROWSER In the Main window, press SEARCH ARP BROWSER to open up the search window in the browser and search for “ARP.” Drag the search results to any instrument track in the Tracking window. SEARCH CHORDER BROWSER In the Main window, press SEARCH CHORDER BROWSER to open up the search window in the browser and search for “CHORDER.” Drag the search results to any instrument track in the Tracking window. SEARCH REPEATER BROWSER In the Main window, press SEARCH ARP BROWSER to open up the search window in the browser and search for “REPEATER.” Drag the search results to any instrument track in the Tracking window. SSD4 BROWSER In the Main window, press SEARCH ARP BROWSER to open up the search window in the browser and search for “SSD4.” Drag the search results to any instrument track in the Tracking window. MAI TAI BROWSER In the Main window, press SEARCH ARP BROWSER to open up the search window in the browser and search for “MAI TAI.” Drag the search results to any instrument track in the Tracking window. IMPACT BROWSER In the Main window, press SEARCH IMPACT BROWSER to open up the search window in the browser and search for “IMPACT.” Drag the search results to any instrument track in the Tracking window.

RAVEN STUDIO ONE 3 BASIC LAYOUT USER MANUAL |
33
LAYOUT 4.8 “RENDER TRANSFORM”
TRANSFORM TO AUDIO TRACK In the Main window with a track or events selected, press TRANSORM TO AUDIO TRACK to render the track to a new audio track. TRANSFORM TO RENDERED AUDIO In the Main window with a track or events selected, press TRANSORM TO RENDERED AUDIO to render the track to a new audio region. TRANSFORM TO REALTIME AUDIO In the Main window with a track or events selected, press TRANSORM TO RENDERED AUDIO to render the track to a new audio region. TRANSFORM TO INST TRACK In the Main window with a track or events selected, press TRANSORM TO INSTRUMENT TRACK to change the audio to an instrument track. EXPORT MIXDOWN Press EXPORT MIXDOWN to export the session to a stereo bounce. EXPORT STEMS Press EXPORT STEMS to export the session stems to audio.
RAVEN STUDIO ONE 3 BASIC LAYOUT USER MANUAL
34
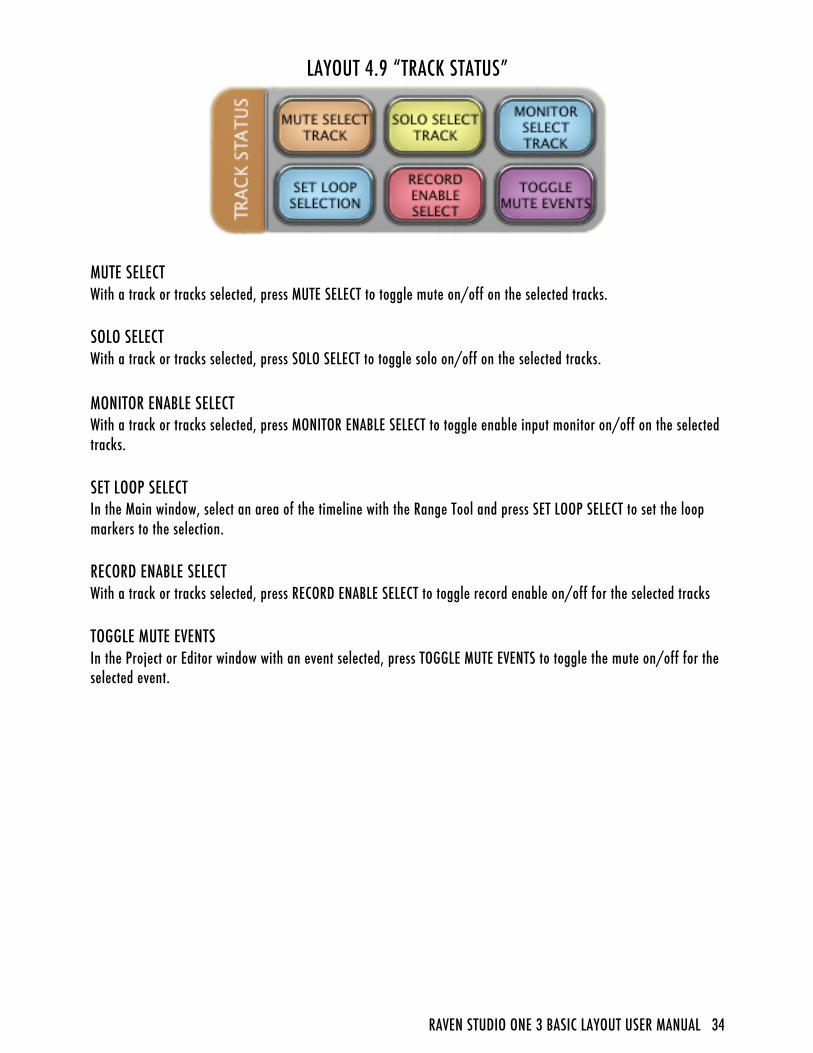
LAYOUT 4.9 “TRACK STATUS”
MUTE SELECT With a track or tracks selected, press MUTE SELECT to toggle mute on/off on the selected tracks. SOLO SELECT With a track or tracks selected, press SOLO SELECT to toggle solo on/off on the selected tracks. MONITOR ENABLE SELECT With a track or tracks selected, press MONITOR ENABLE SELECT to toggle enable input monitor on/off on the selected tracks. SET LOOP SELECT In the Main window, select an area of the timeline with the Range Tool and press SET LOOP SELECT to set the loop markers to the selection. RECORD ENABLE SELECT With a track or tracks selected, press RECORD ENABLE SELECT to toggle record enable on/off for the selected tracks TOGGLE MUTE EVENTS In the Project or Editor window with an event selected, press TOGGLE MUTE EVENTS to toggle the mute on/off for the selected event.

RAVEN STUDIO ONE 3 BASIC LAYOUT USER MANUAL |
35
LAYOUT 4.10 “LAYERS”
NEW LAYER In the Main window with a track selected and record enabled, press NEW LAYER to create a new layer on the selected track. RENAME LAYER In the Main window with a track layer selected, press RENAME LAYER to rename the layer on the selected track. REMOVE LAYER In the Main window with a track layer selected, press REMOVE LAYER to remove the layer on the selected track. DUPLICATE LAYER In the Main window with a track layer selected, press DUPLICATE LAYER to duplicate the layer on the track. NEW LAYER AND RECORD In the Main window with a track selected and record enabled, press NEW LAYER AND RECORD to create a new layer and restart the recording on the selected track. TOGGLE PRE-ROLL AND RECORD In the Main window with a track selected and record enabled, press TOGGLE PRE ROLL AND RECORD to toggle the pre-roll on, initiate a recording on the selected track, and then toggle the pre-roll back off, as to not have to turn the pre-roll on when audition the take. TOGGLE RETURN START In the Main window, press TOGGLE RETURN START to toggle on/off the return to start option so when finishing a take the play head will return to the start of the take. UNDO AND RECORD In the Main window with a track selected and record enabled, press UNDO AND RECORD to undo the previous take and restart the recording on the selected track. TOGGLE LAYERS In the Main window with a track containing layers selected, press TOGGLE LAYERS to toggle open/close the layers view on the selected track.

RAVEN STUDIO ONE 3 BASIC LAYOUT USER MANUAL
36
RECORD TAKES TO LAYER In the Main window with a track selected, press RECORD TAKES TO LAYERS to toggle on/off the recorded takes to layer option.

RAVEN STUDIO ONE 3 BASIC LAYOUT USER MANUAL |
37
RAVEN MTX/MTi STUDIO ONE 3 BASIC LAYOUT 5 of 6
LAYOUT 5.1 “CREATE TRACKS”
CREATE MONO AUDIO TRACK In the Mix or Edit window, press CREATE MONO AUDIO TRACK to launch the key command to make a new mono audio track. CREATE INSTRUMENT TRACK In the Mix or Edit window, press CREATE INSTRUMENT TRACK to launch the key command to make a new instrument track. CREATE FX TRACK In the Mix or Edit window, press CREATE FX TRACK to launch the key command to make a new FX track. PACK SELECT INTO FOLDER In the Mix or Edit window, press PACK SELECT INTO FOLDER to launch the key command to move all selected tracks into a folder track.

RAVEN STUDIO ONE 3 BASIC LAYOUT USER MANUAL
38
CREATE STEREO AUDIO TRACK In the Mix or Edit window, press CREATE STEREO AUDIO TRACK to launch the key command to make a new stereo audio track. BUS TRACK FOR SELECT In the Mix or Edit window, press BUS TRACK FOR SELECT to launch the key command to make a new output bus for the selected tracks. CREATE AUTOMATION TRACK In the Mix or Edit window, press CREATE AUTOMATION TRACK to launch the key command to make a new automation track. EXPAND FOLDERS In the Main window, press EXPAND FOLDER to launch the key command to expand all folder tracks in the session.
LAYOUT 5.2 “QUICK RECORDING”
NEW LAYER AND RECORD In the Main window with a track selected and record enabled, press NEW LAYER AND RECORD to create a new layer and restart the recording on the selected track. TOGGLE PRE-ROLL AND RECORD In the Main window with a track selected and record enabled, press TOGGLE PRE ROLL AND RECORD to toggle the pre roll on, restart the recording on the selected track and, toggle the pre roll back off, as to not have to turn the pre roll off when auditioning the take. TOGGLE RETURN START In the Main window, press TOGGLE RETURN START to toggle on/off the “return to start” option, so that when you finish a take, the playhead will return to the start of the take. UNDO AND RECORD In the Main window with a track selected and record enabled, press UNDO AND RECORD to undo the previous take and restart the recording on the selected track.
RAVEN STUDIO ONE 3 BASIC LAYOUT USER MANUAL |
39
TOGGLE LAYERS In the Main window with a track containing selected layers, press TOGGLE LAYERS to toggle open/close the layers view on the selected track. TOGGLE COUNT AND RECORD In the Main window with a track selected and record enabled, press TOGGLE COUNT AND RECORD to toggle the count-Off/On and restart the recording on the selected track.
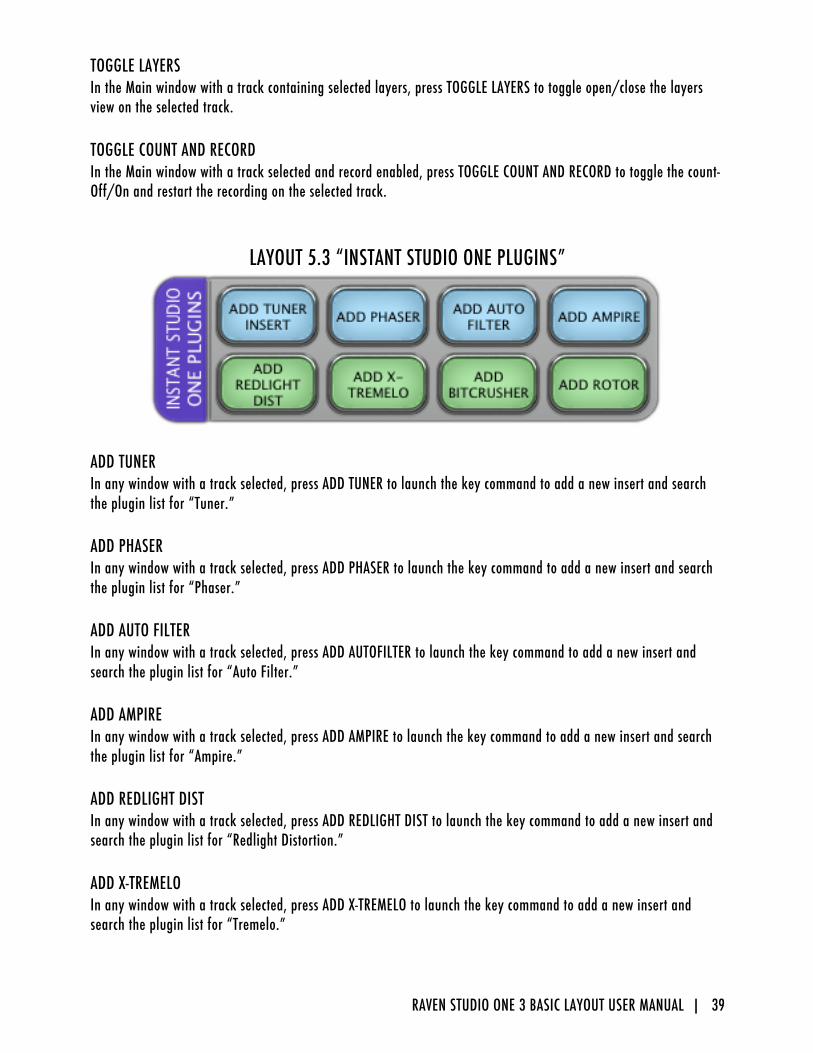
LAYOUT 5.3 “INSTANT STUDIO ONE PLUGINS”
ADD TUNER In any window with a track selected, press ADD TUNER to launch the key command to add a new insert and search the plugin list for “Tuner.” ADD PHASER In any window with a track selected, press ADD PHASER to launch the key command to add a new insert and search the plugin list for “Phaser.” ADD AUTO FILTER In any window with a track selected, press ADD AUTOFILTER to launch the key command to add a new insert and search the plugin list for “Auto Filter.” ADD AMPIRE In any window with a track selected, press ADD AMPIRE to launch the key command to add a new insert and search the plugin list for “Ampire.” ADD REDLIGHT DIST In any window with a track selected, press ADD REDLIGHT DIST to launch the key command to add a new insert and search the plugin list for “Redlight Distortion.” ADD X-TREMELO In any window with a track selected, press ADD X-TREMELO to launch the key command to add a new insert and search the plugin list for “Tremelo.”

RAVEN STUDIO ONE 3 BASIC LAYOUT USER MANUAL
40
ADD BITCRUSHER In any window with a track selected, press ADD BITCRUSHER to launch the key command to add a new insert and search the plugin list for “Bitcrusher.” ADD ROTOR In any window with a track selected, press ADD ROTOR to launch the key command to add a new insert and search the plugin list for “Rotor.”
LAYOUT 5.4 “INSTANT LC FILTER”
INSTANT PRO EQ LO HIGH PASS In the Tracking or Mixing window with a track selected, press INSTANT PRO EQ LOW PASS to open up the PRO EQ plugin and send a mouse click to LC. INSTANT PRO EQ HIGH PASS In the Tracking or Mixing window with a track selected, press INSTANT PRO EQ HIGH PASS to open up the PRO EQ plugin and send a mouse click to HC. INSTANT PHASE FLIP In the Tracking or Mixing window with a track selected, press INSTANT PHASE FLIP to open up the MIXER plugin and send a mouse click to phase flip. INSTANT COMP WITH SIDE CHAIN In the Tracking or Mixing window with a track selected, press INSTANT COMP WITH SIDE CHAIN to open up the Compressor plugin and send a mouse click to the sidechain. BYPASS OPEN PLUGIN With the Channel Editor window open, press BYPASS OPEN PLUGIN to send a mouse click to the activate button. CLEAR INSERTS With the Channel Editor window open, press CLEAR INSERTS to send a mouse click to the drop menu and select “reset” from the menu.

RAVEN STUDIO ONE 3 BASIC LAYOUT USER MANUAL |
41
LAYOUT 5.5 “STORE PRESET CHAINS”
STORE CHANNEL STRIP In any window with the Channel Editor open, press STORE CHANNEL STRIP to send a mouse click to the Channel Editor drop menu and select “store” from the menu. STORE PRESET 1, (PRESET 2) In any window with the Channel Editor open, press STORE CHANNEL STRIP to send a mouse click to the Channel Editor drop menu and select “store” from the menu and rename preset 1-2. LOAD PRESET 1, (LOAD PRESET 2) In any window with the Channel Editor open, press LOAD CHANNEL STRIP to send a mouse click to the Channel Editor drop menu and select preset 1-2 from the menu. REMOVE INSERTS In any window with the Channel Editor open, press REMOVE INSERTS to send a mouse click to the Channel Editor drop menu and select remove from the menu.
LAYOUT 5.6 “WINDOWS”
TRACKING WINDOW Press TRACKING WINDOW to set the Tracking window as the front window. EDITING WINDOW Press EDITING WINDOW to open the Editing window below the Tracking window.

RAVEN STUDIO ONE 3 BASIC LAYOUT USER MANUAL
42
TOGGLE CHANNEL EDITOR Press TOGGLE CHANNEL EDITOR to toggle the channel editor window open/closed. MIXING WINDOW POP OUT In the Tracking window, press MIXING WINDOW POP OUT to open the Mixing window and then pop it out to a new window. EDIT AND MIXING In any window, press EDIT AND MIXING to open the Editing and Mixing windows. INSPECTOR In the Tracking window, press INSPECTOR to open the Inspector window.

RAVEN STUDIO ONE 3 BASIC LAYOUT USER MANUAL |
43
RAVEN MTX/MTi STUDIO ONE 3 BASIC LAYOUT 6 of 6
LAYOUT 6.1 “INSTANT SENDS”
NEW SEND SELECT TRACK Press NEW SEND SELECT TRACK to open up the FX/SEND/BUS window and scroll to “new” and press enter. NEW BUS OUTPUTS SELECT Press NEW BUS OUTPUTS SELECT TRACK to bus the outputs of the selected track/s to a new bus. NEW BUS SEND SELECT TRACK Press NEW BUS SEND SELECT TRACK to open up the FX/SEND/BUS window and scroll to “Bus” and press enter. SEND SELECT TO LAST BUS Press SEND SELECT TO LAST BUS to open up the FX/SEND/BUS window and scroll to the last “bus” created and press enter.

RAVEN STUDIO ONE 3 BASIC LAYOUT USER MANUAL
44
SEND SELECT TRACK FX 1, 2, 3, 4 Press SEND SELECT TRACK FX 1,2,3,4 to open up the FX/SEND/BUS window and scroll to “send 1” and press enter then repeat for sends 2-4.
LAYOUT 6.2 “INSTANT S1 PLUGINS”
ADD PIPELINE In any window with a track selected, press ADD PIPELINE to launch the key command to add a new insert and search the plugin list for “Pipeline.” ADD PRO EQ In any window with a track selected, press ADD PRO EQ to launch the key command to add a new insert and search the plugin list for “PRO EQ.” ADD FAT CHANNEL In any window with a track selected, press ADD FAT CHANNEL to launch the key command to add a new insert and search the plugin list for “Fat Channel.” ADD CHANNEL STRIP In any window with a track selected, press ADD CHANNEL STRIP to launch the key command to add a new insert and search the plugin list for “Channel Strip.” ADD COMPRESSOR In any window with a track selected, press ADD COMPRESSOR to launch the key command to add a new insert and search the plugin list for “Compressor.” ADD MULTI BAND DYN In any window with a track selected, press ADD MULTIBAND DYN to launch the key command to add a new insert and search the plugin list for “Multiband Dyn.”

RAVEN STUDIO ONE 3 BASIC LAYOUT USER MANUAL |
45
LAYOUT 6.3 “EFX PLUGINS”
ADD ROOM REVERB With a track selected press ADD ROOM REVERB to open up the Plugin window and search for Room Reverb and add it to the insert. ADD PHASER With a track selected press ADD PHASER to open up the Plugin window and search for PHASER and add it to the insert. ADD FLANGER With a track selected press ADD FLANGER to open up the Plugin window and search for FLANGER and add it to the insert. ADD MIXVERB With a track selected press ADD MIXVERB to open up the Plugin window and search for MIXVERB and add it to the insert. ADD ANALOG DELAY With a track selected press ADD ANALOG DELAY to open up the Plugin window and search for ANALOG DELAY and add it to the insert. ADD GROVE DELAY With a track selected press ADD GROOVE DELAY to open up the Plugin window and search for GROOVE DELAY and add it to the insert.

RAVEN STUDIO ONE 3 BASIC LAYOUT USER MANUAL
46
LAYOUT 6.4 “WINDOWS”
TRACKING WINDOW Press TRACKING WINDOW to set the Tracking window as the front window. EDITING WINDOW Press EDITING WINDOW to open the editing window below the Tracking window. TOGGLE CHANNEL EDITOR In the Mix or Edit window, press TOGGLE CHANNEL EDITOR to open and close the Channel Editor and open the plugins on the selected track. MIXING WINDOW POP OUT In the Tracking window, press MIXING WINDOW POP OUT to open the Mixing window and then pop it out to a new window. EDIT AND MIXING In any window, press EDIT AND MIXING to open the Editing and Mixing windows. INSPECTOR In the Tracking window, press INSPECTOR to open the Inspector window.