Embed Size (px)
Citation preview

penguinpunk.net ravello systems – deploy ESXi 6 revision 0.1 synopsis The following is a simple document providing visual guidance on the process required to deploy an ESXi 6 image with ravello systems. The following article was used as the basis for this - https://www.ravellosystems.com/blog/create-esxi-5-5-iso-image/.
penguinpunk.net – ravello systems – deploy ESXi 6 - revision 0.1
table of contents overview ..................................................................................................................................... 3 process ...................................................................................................................................... 3
download ESXi iso ................................................................................................................ 3 create the ESXi shell ............................................................................................................. 3 upload ESXi iso ..................................................................................................................... 4 deploy ESXi image ................................................................................................................ 7 configure ESXi to run .......................................................................................................... 10 first boot and further configuration ...................................................................................... 13
table of figures Figure 1 – Create Application .................................................................................................... 3 Figure 2 – Import VM ................................................................................................................. 4 Figure 3 – Library – Disk Images ............................................................................................... 4 Figure 4 – Ravello VM Import Tool ............................................................................................ 5 Figure 5 – Ravello VM Import Tool – Upload ............................................................................ 5 Figure 6 – Ravello VM Import Tool – Options ........................................................................... 6 Figure 7 - Ravello VM Import Tool – Upload a Disk Image File (1) ........................................... 6 Figure 8 - Ravello VM Import Tool – Upload a Disk Image File (2) ........................................... 7 Figure 9 – Disk Image................................................................................................................ 7 Figure 10 – Browse Disk Image (1) ........................................................................................... 8 Figure 11 – Browse Disk Image (2) ........................................................................................... 8 Figure 12 – Browse Disk Image – Save .................................................................................... 9 Figure 13 – Publish Application ............................................................................................... 10 Figure 14 – Console ................................................................................................................ 11 Figure 15 – ESXi 6 Installer - Continue ................................................................................... 11 Figure 16 - ESXi 6 Installer – Disk Selection ........................................................................... 11 Figure 17 - ESXi 6 Installer – Root Password ......................................................................... 12 Figure 18 - ESXi 6 Installer – Installation Complete ................................................................ 12 Figure 19 – Eject Image .......................................................................................................... 13 Figure 20 – ESXi Loading ........................................................................................................ 13 Figure 21 – Enable SSH .......................................................................................................... 14 Figure 22 – Network Configuration .......................................................................................... 14 Figure 23 – Additional Ports .................................................................................................... 15
penguinpunk.net – ravello systems – deploy ESXi 6 - revision 0.1
overview
The process to deploy an ESXi 6 image on ravello systems is as follows: • Download ESXi ISO from VMware; • Create the ESXi VM shell; • Upload ESXi ISO to Ravello; • Install ESXi on Ravello; and • Configure ESXi to run on Ravello.
process
download ESXi iso
You’ll need to get this from VMware. This will require registration or a login of some kind. The image itself is about 350MB.
create the ESXi shell
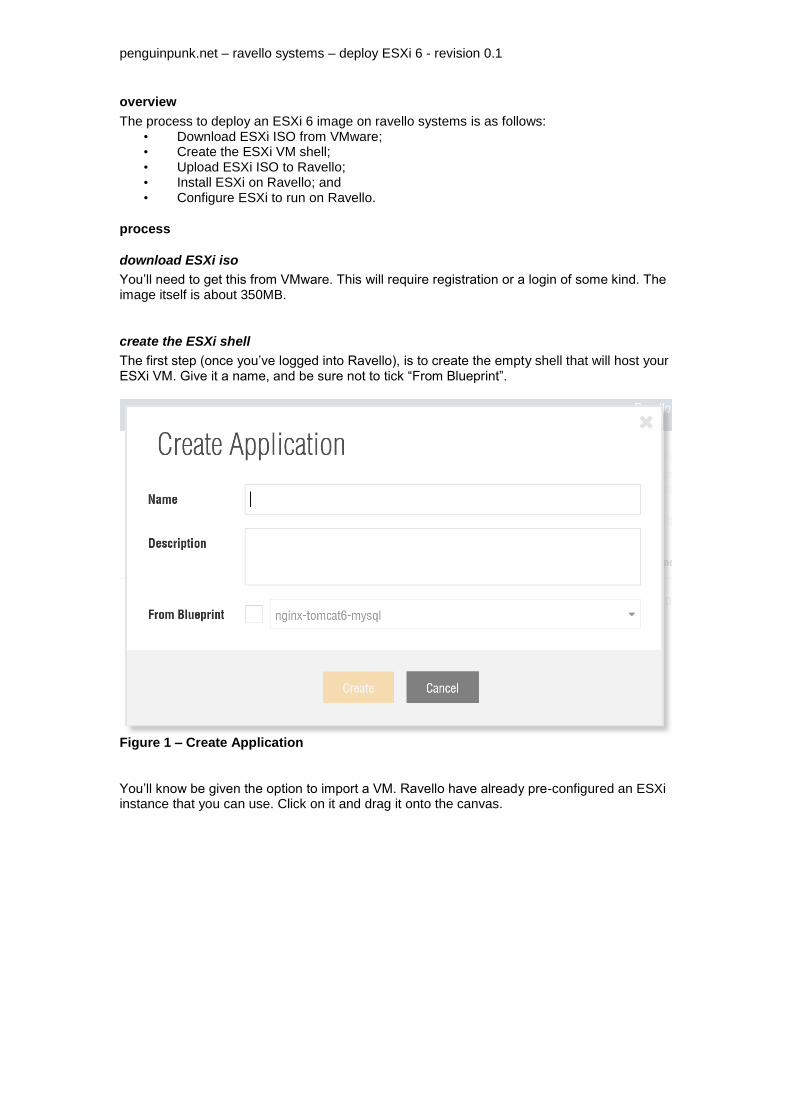
The first step (once you’ve logged into Ravello), is to create the empty shell that will host your ESXi VM. Give it a name, and be sure not to tick “From Blueprint”.
Figure 1 – Create Application You’ll know be given the option to import a VM. Ravello have already pre-configured an ESXi instance that you can use. Click on it and drag it onto the canvas.
penguinpunk.net – ravello systems – deploy ESXi 6 - revision 0.1
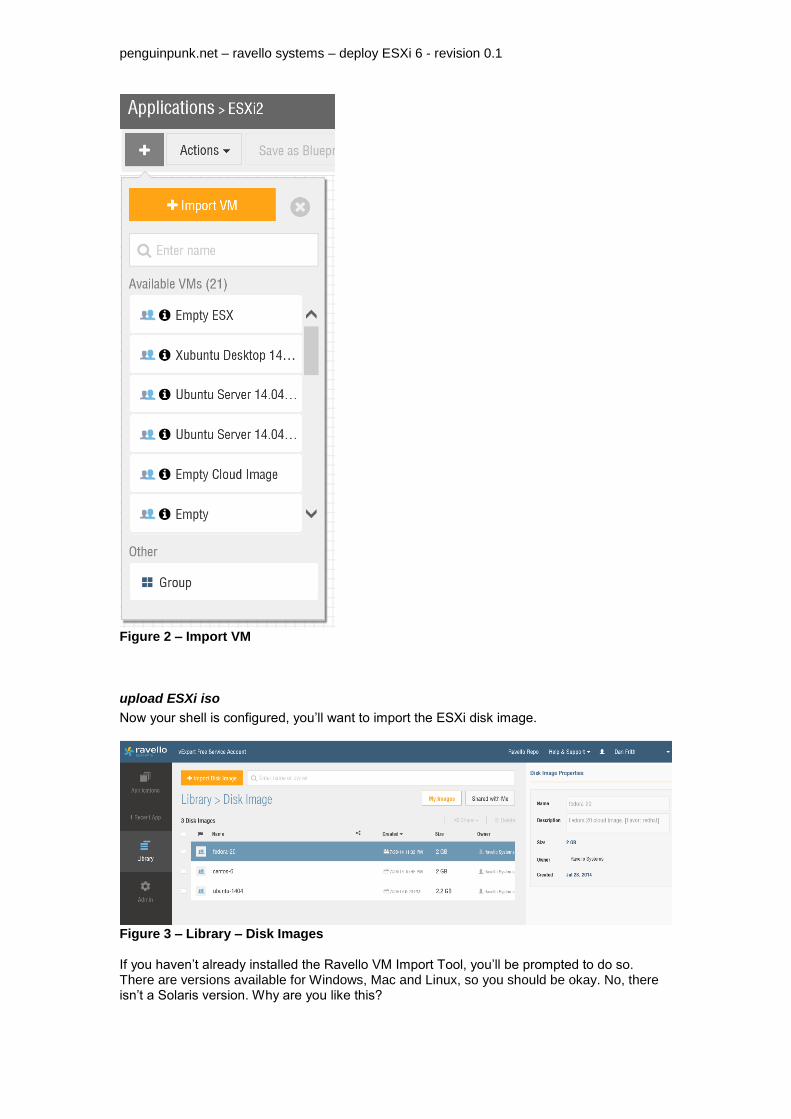
Figure 2 – Import VM
upload ESXi iso
Now your shell is configured, you’ll want to import the ESXi disk image.
Figure 3 – Library – Disk Images If you haven’t already installed the Ravello VM Import Tool, you’ll be prompted to do so. There are versions available for Windows, Mac and Linux, so you should be okay. No, there isn’t a Solaris version. Why are you like this?
penguinpunk.net – ravello systems – deploy ESXi 6 - revision 0.1
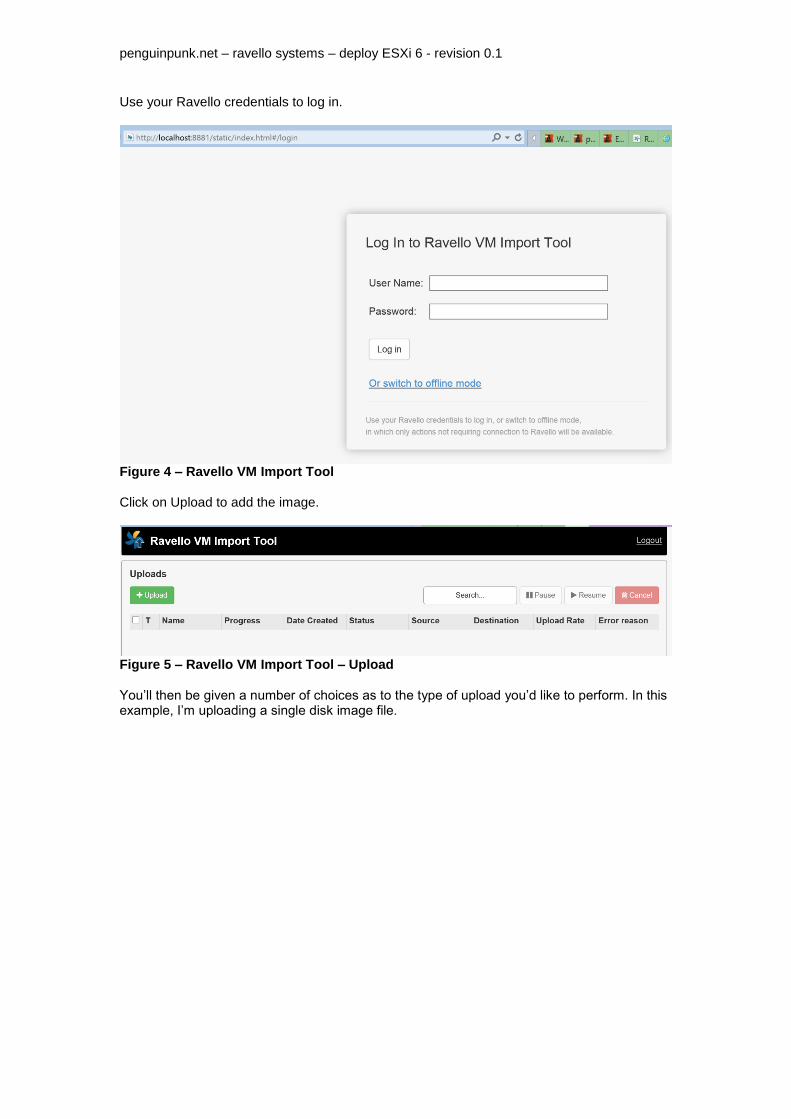
Use your Ravello credentials to log in.
Figure 4 – Ravello VM Import Tool Click on Upload to add the image.
Figure 5 – Ravello VM Import Tool – Upload You’ll then be given a number of choices as to the type of upload you’d like to perform. In this example, I’m uploading a single disk image file.
penguinpunk.net – ravello systems – deploy ESXi 6 - revision 0.1
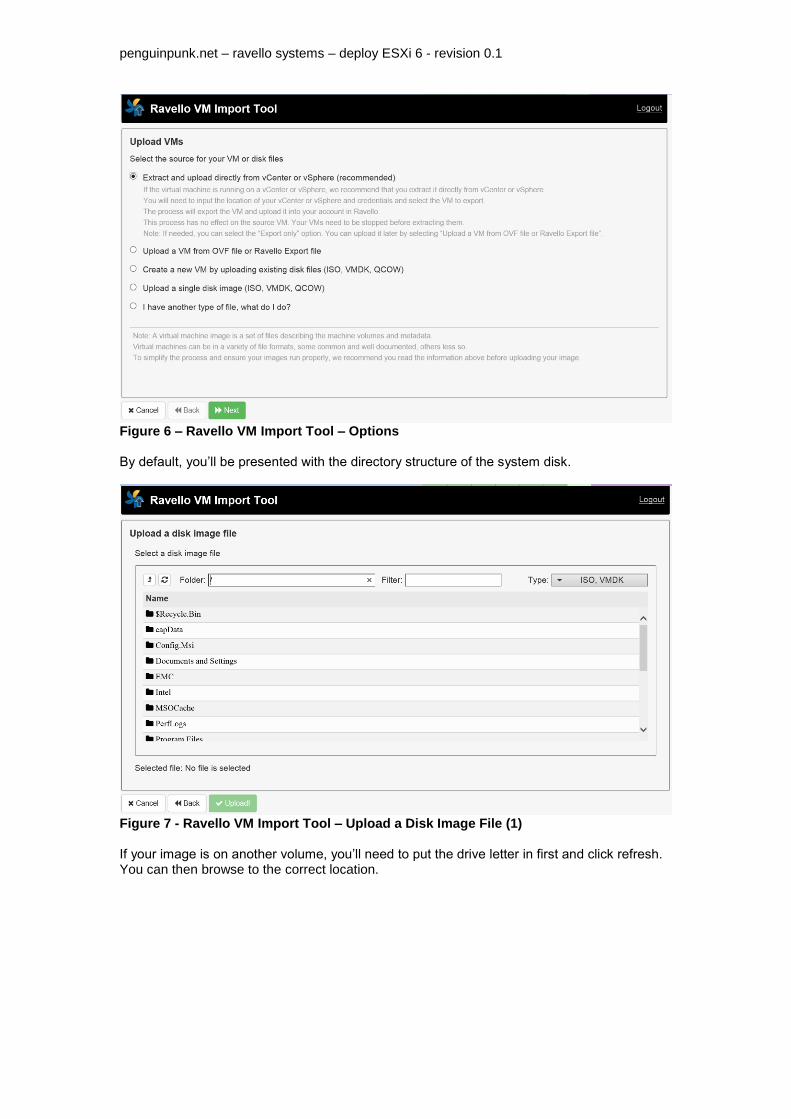
Figure 6 – Ravello VM Import Tool – Options By default, you’ll be presented with the directory structure of the system disk.
Figure 7 - Ravello VM Import Tool – Upload a Disk Image File (1) If your image is on another volume, you’ll need to put the drive letter in first and click refresh. You can then browse to the correct location.

penguinpunk.net – ravello systems – deploy ESXi 6 - revision 0.1
Figure 8 - Ravello VM Import Tool – Upload a Disk Image File (2) And now the image is uploaded.
Figure 9 – Disk Image
deploy ESXi image
So now you have your iso uploaded, you’ll want to actually deploy the ESXi image. Firstly, click on Disks and then click on Browse to look for the iso you uploaded.
penguinpunk.net – ravello systems – deploy ESXi 6 - revision 0.1
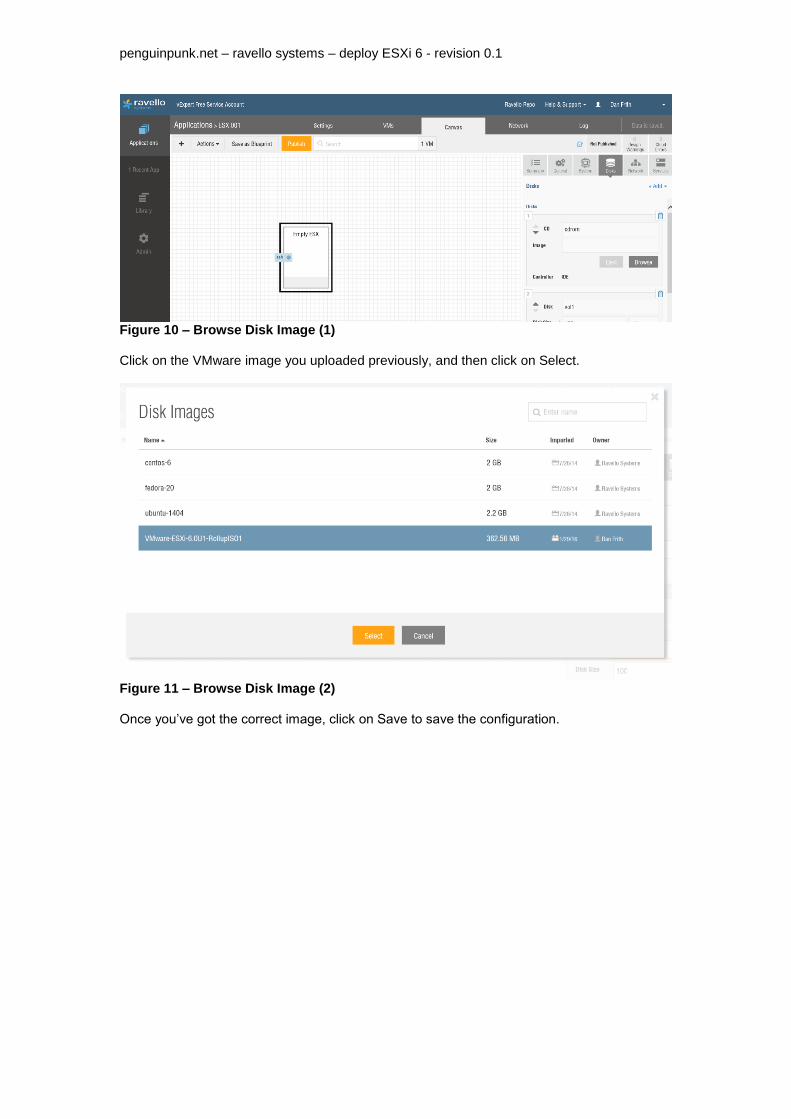
Figure 10 – Browse Disk Image (1) Click on the VMware image you uploaded previously, and then click on Select.
Figure 11 – Browse Disk Image (2) Once you’ve got the correct image, click on Save to save the configuration.
penguinpunk.net – ravello systems – deploy ESXi 6 - revision 0.1
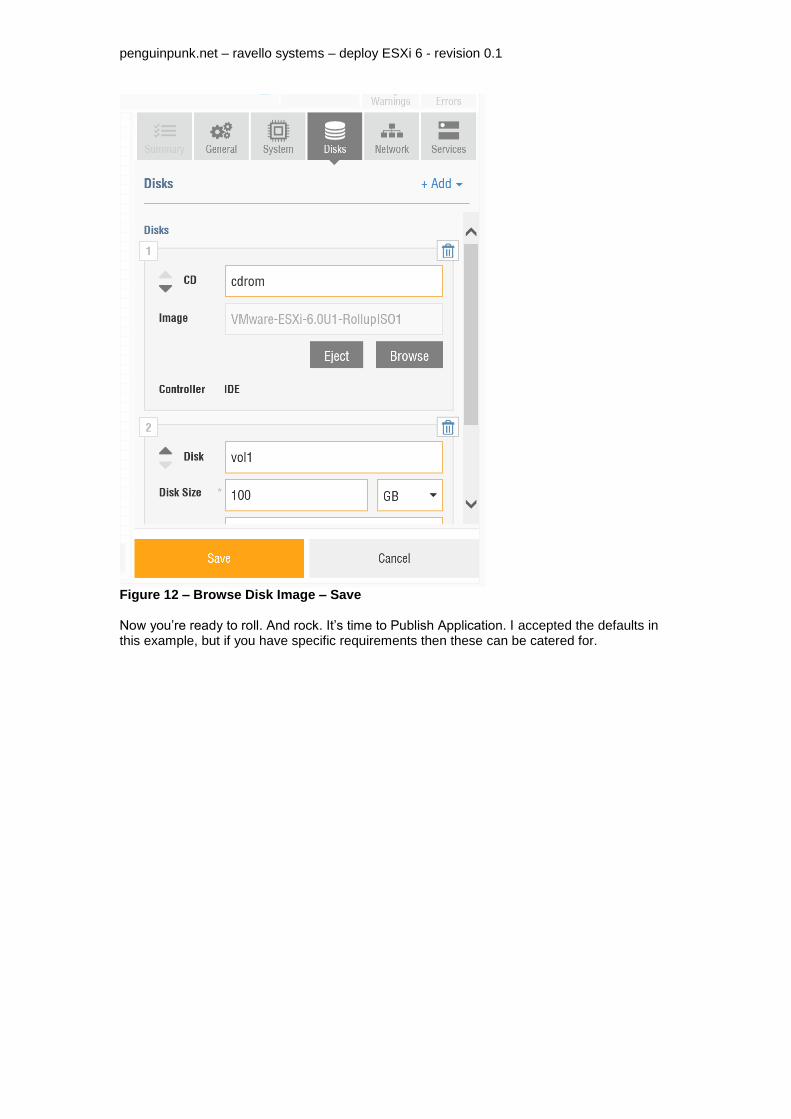
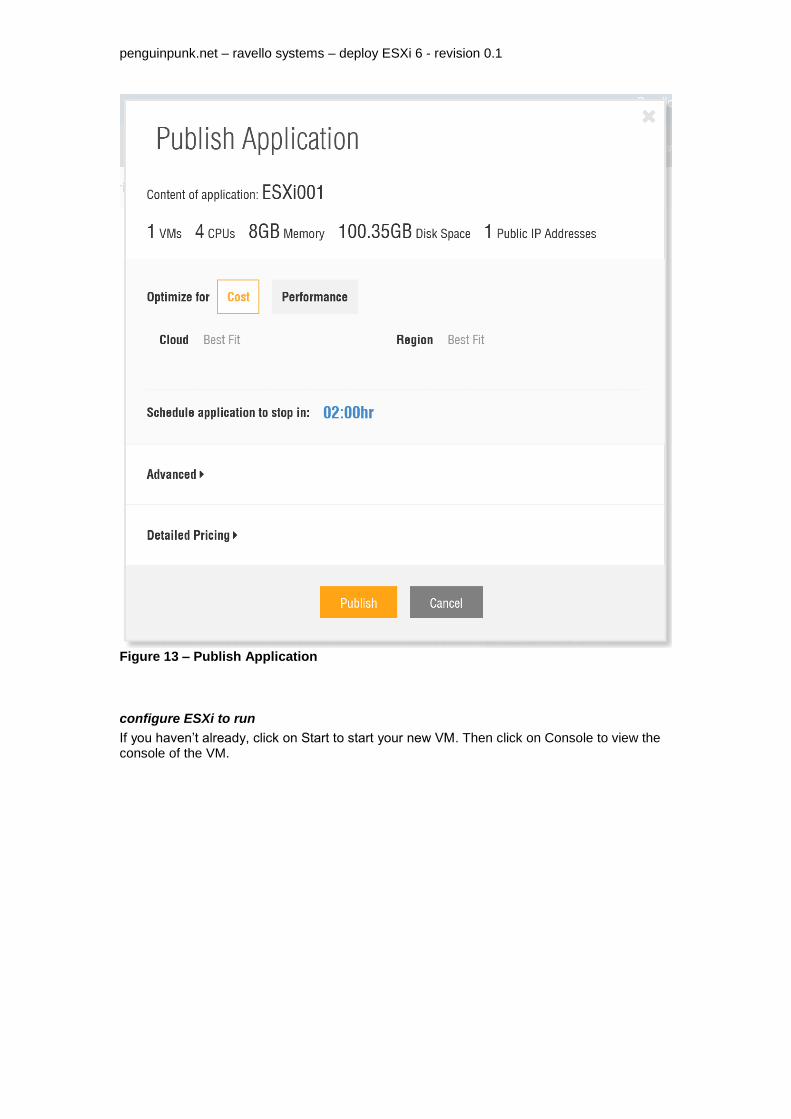
Figure 12 – Browse Disk Image – Save Now you’re ready to roll. And rock. It’s time to Publish Application. I accepted the defaults in this example, but if you have specific requirements then these can be catered for.
penguinpunk.net – ravello systems – deploy ESXi 6 - revision 0.1
Figure 13 – Publish Application
configure ESXi to run
If you haven’t already, click on Start to start your new VM. Then click on Console to view the console of the VM.
penguinpunk.net – ravello systems – deploy ESXi 6 - revision 0.1
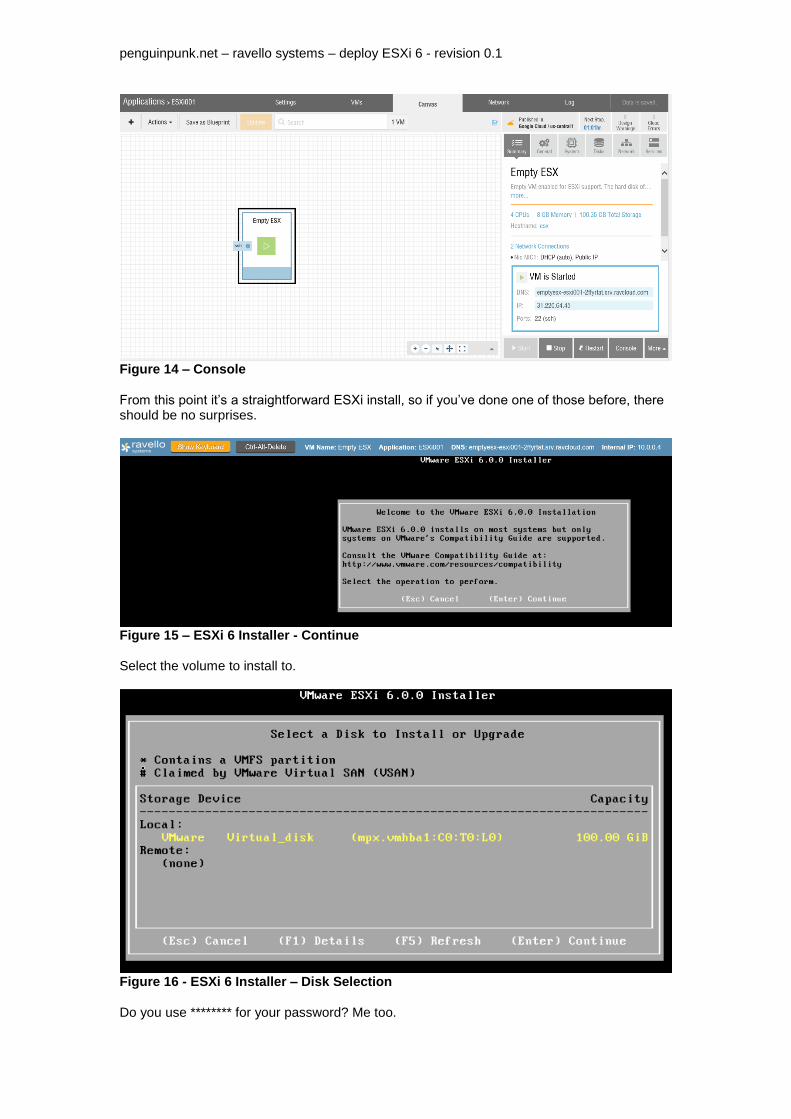
Figure 14 – Console From this point it’s a straightforward ESXi install, so if you’ve done one of those before, there should be no surprises.
Figure 15 – ESXi 6 Installer - Continue Select the volume to install to.
Figure 16 - ESXi 6 Installer – Disk Selection Do you use ******** for your password? Me too.

penguinpunk.net – ravello systems – deploy ESXi 6 - revision 0.1
Figure 17 - ESXi 6 Installer – Root Password At this point, ESXi has been installed successfully. Hooray. Don’t click on Reboot just yet though.
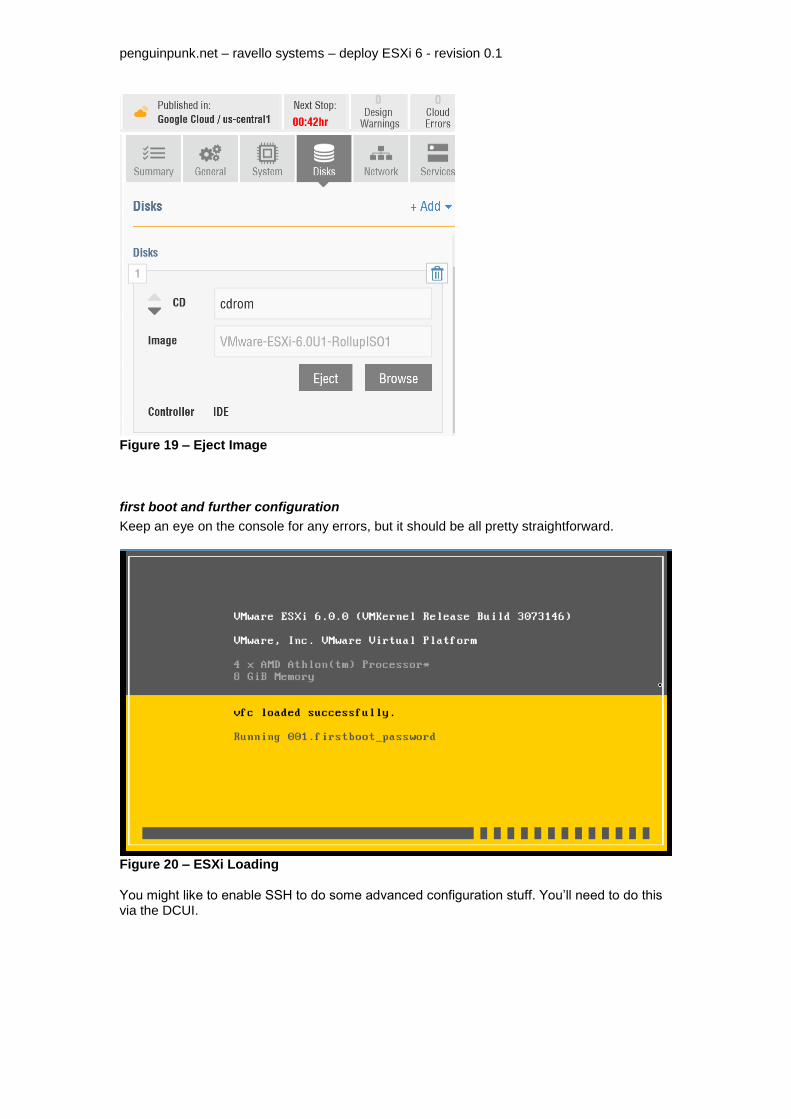
Figure 18 - ESXi 6 Installer – Installation Complete Take a breath, and go back to your VM’s Disks configuration. Eject the ESXi installation iso. Then Reboot.
penguinpunk.net – ravello systems – deploy ESXi 6 - revision 0.1
Figure 19 – Eject Image
first boot and further configuration
Keep an eye on the console for any errors, but it should be all pretty straightforward.
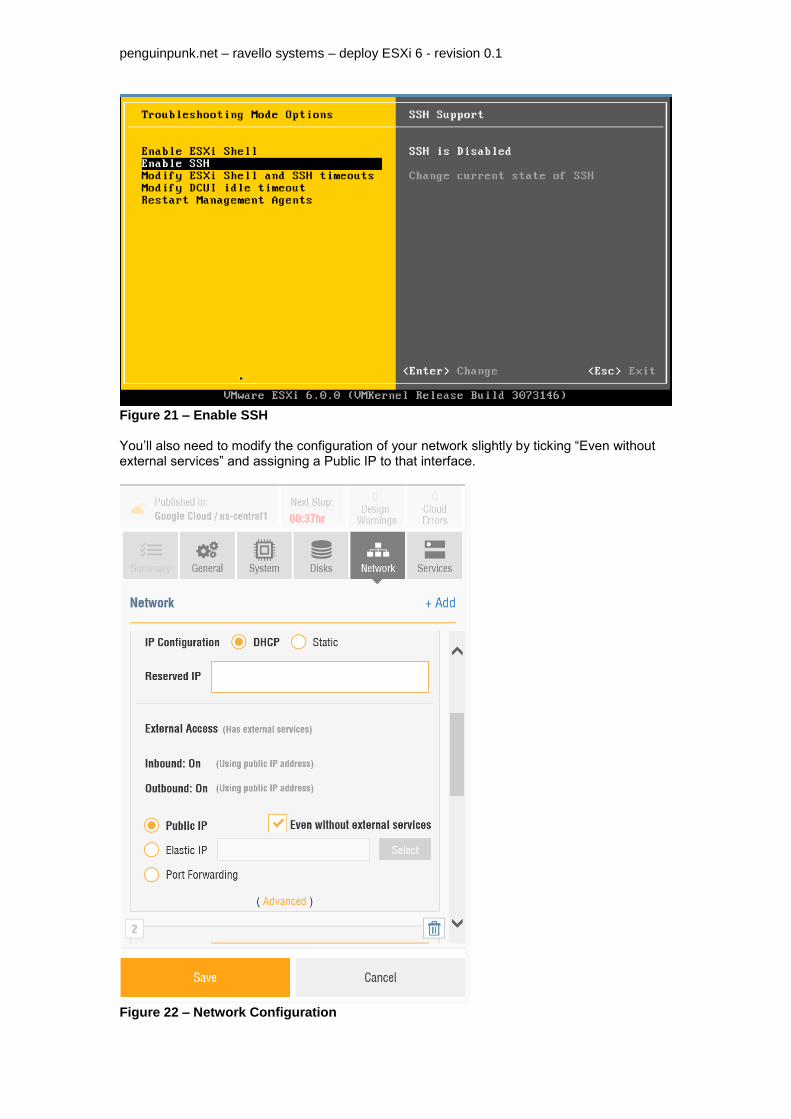
Figure 20 – ESXi Loading You might like to enable SSH to do some advanced configuration stuff. You’ll need to do this via the DCUI.
penguinpunk.net – ravello systems – deploy ESXi 6 - revision 0.1
Figure 21 – Enable SSH You’ll also need to modify the configuration of your network slightly by ticking “Even without external services” and assigning a Public IP to that interface.
Figure 22 – Network Configuration
penguinpunk.net – ravello systems – deploy ESXi 6 - revision 0.1
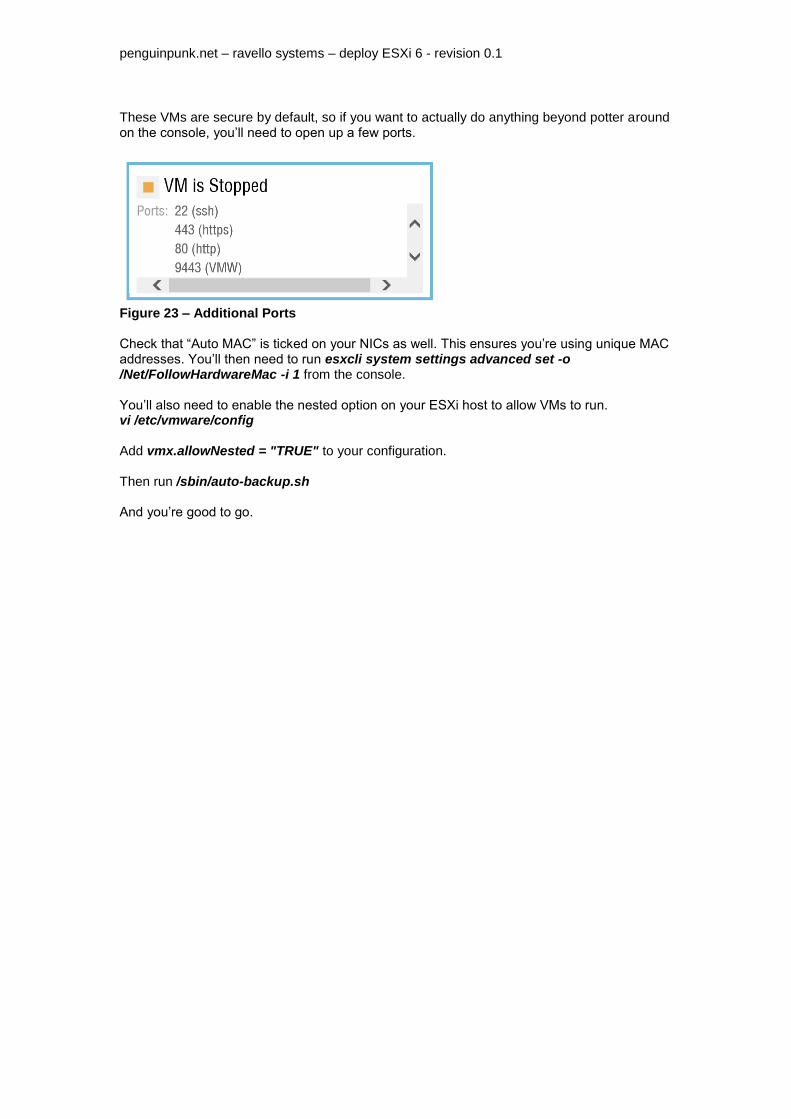
These VMs are secure by default, so if you want to actually do anything beyond potter around on the console, you’ll need to open up a few ports.
Figure 23 – Additional Ports Check that “Auto MAC” is ticked on your NICs as well. This ensures you’re using unique MAC addresses. You’ll then need to run esxcli system settings advanced set -o /Net/FollowHardwareMac -i 1 from the console. You’ll also need to enable the nested option on your ESXi host to allow VMs to run. vi /etc/vmware/config Add vmx.allowNested = "TRUE" to your configuration. Then run /sbin/auto-backup.sh And you’re good to go.