Embed Size (px)
Citation preview
1
RAS Central / Operations and Emory Business Intelligence [EBI]: Finance Effective Date: 17 November 2017 Version Information: 4 November 2021 Chelsea Long, Denise Ehlen, Tiffany Ennis-Henry, Amanda
Riley, Julie Anderson, and Brenda Huffman v18
2008 JOB AID: USING THE FINANCIAL OUTLOOK REPORTING TOOL [FORT] (SPONSORED VERSION) TO COMPLETE RECONCILIATIONS AND FAQS
TABLE OF CONTENTS
• Obtaining Access to FORT- page 3 o VPN basic access o VPN admin core access o Introduction to Emory Business Intelligence course o Installation of FinPro Client Excel Add-in o Labor access
• Getting Started - page 4
o Data refresh cycle o FORT Website o Downloading the latest template o Connecting to FinPro
• The Award Summary & The Project Summary - page 4
o Navigating the award summary page o Pulling up a PI portfolio o Navigating the project summary page o Drill to encumbrances o Opening a project worksheet
• Reconciling and Forecasting (Projecting) Expenditures - page 8
o Projecting labor and fringe (including Pediatric Institute employees) o Projecting other expenses o Reviewing questionable expense o Projecting F&A (including F&A for encumbrances) o Saving brief notes o Reviewing cash collected o Reviewing percentages of funds used (total, personnel, and other) o Uploading changes
• Engagement Tracker - page 13
o Entering header data o Entering action types o Functional information
• Resources - page 15
o Information about the resources page
• Tracking Action Items/Notes – page 16 o Information about the notes page
• FAQs - page 17
2
OBTAINING ACCESS TO FORT
The following steps are required in order to obtain access to FORT.
1. Request VPN: Basic Access by calling the IT Service Desk at 404-727-7777.
NOTE: The IT Service Desk will grant basic VPN authorization for new staff by phone ONLY. The user themselves must call in to be vetted by the service desk.
2. Request VPN: Admin Core Access. After Basic VPN access is obtained, supervisors must contact the IT
Service Desk (404-727-7777) or submit an IT Support Request (direct link to the Admin Core request form). The following information should be included in the Reason and/or justification for this access field of the IT Support Request:
• Resources needed: 10.231.48.160 (finpro.emory.edu)
• Access method: ms-sql-s
3. Complete Introduction to Emory Business Intelligence (ELMS course code 260744). Register in the
Emory Learning Management System (ELMS). Afterwards, complete an Online Access Request in Compass. Navigation: Main Menu > Employee Self-Service > Online Access Request [Emory Business Intelligence].
4. Work with your local IT support to coordinate installation of the FinPro Client Excel Add-in. Installation requires Microsoft Excel (32bit version only) and local IT support to authorize downloading the add-in. Instructions can be found here.
5. Request labor access by submitting an Online Access Request in Compass. Navigation: Main Menu > Employee Self-Service > Online Access Request [Labor].
3
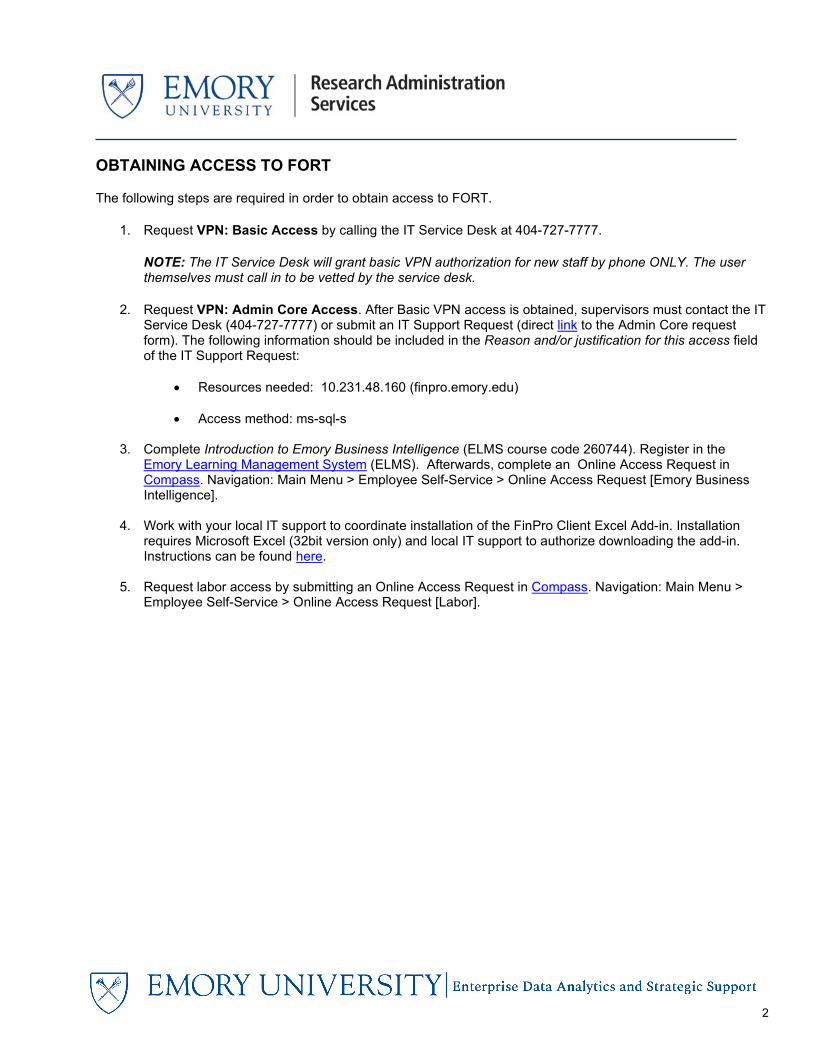
GETTING STARTED NOTE: The FinPro database is refreshed Saturday evening/Sunday morning and updated 1 business day after month close, which occurs on or around the 8th business day of the month. The current month is always a projection. The tool will be unavailable until 2pm on Sundays.
To ensure you are using the correct/current version, ALWAYS open/download the template each time you begin reconciliation for a PI. Do NOT use a locally saved version.
1. Navigate to the FORT website http://ebi.emory.edu/FORT and download the template. All FORT
enhancements are listed/described on the FORT website. You will also find download and installation instructions.
2. Log into VPN. We recommend you use the local VPN application on your computer, Big-IP Edge
Client.
3. Open the template. You must enable macros to use the FORT. If you receive the following error messages, select “Enable Content.”
4. Select the “Not Connected” icon on the FinPro FRP tab on the Excel ribbon to connect to the
FinPro database.
4
THE AWARD SUMMARY NEW as of November 2021 The award summary page displays information at the award level for the award PI and MPI including:
• Sponsor Name • Sponsor Reference • Contract Type • Project / Activity Count • Cash Collected • Award Total LTD Budget, Expenses (including projections), Encumbrances, and Balances
THE PROJECT SUMMARY
1. Type (if you must copy/paste, do so in the formula bar) the PI's 7-digit employee ID in cell D19 (in the upper left of the worksheet). You must enter any/all 0's that precede the ID.
• You can locate the PI’s employee ID in the Contract Workbench or Grants Quick View in Compass or by navigating to the Labor Report charged/managed page in EBI and using the employee prompt to search for the PI.
2. Select “Enter.” Excel will briefly lock while the following occurs: The “Summary” is populated based on
the PI entered. You can select the “+” sign above the “Project Name” and “Direct LTD Budget” columns for more project level details.
NOTE: You may notice an Excel “Not Responding” message in the ribbon. It can take time to connect to the database and load the PI data. Be patient; this message does not typically indicate Excel is locked or has stopped functioning unless it persists.
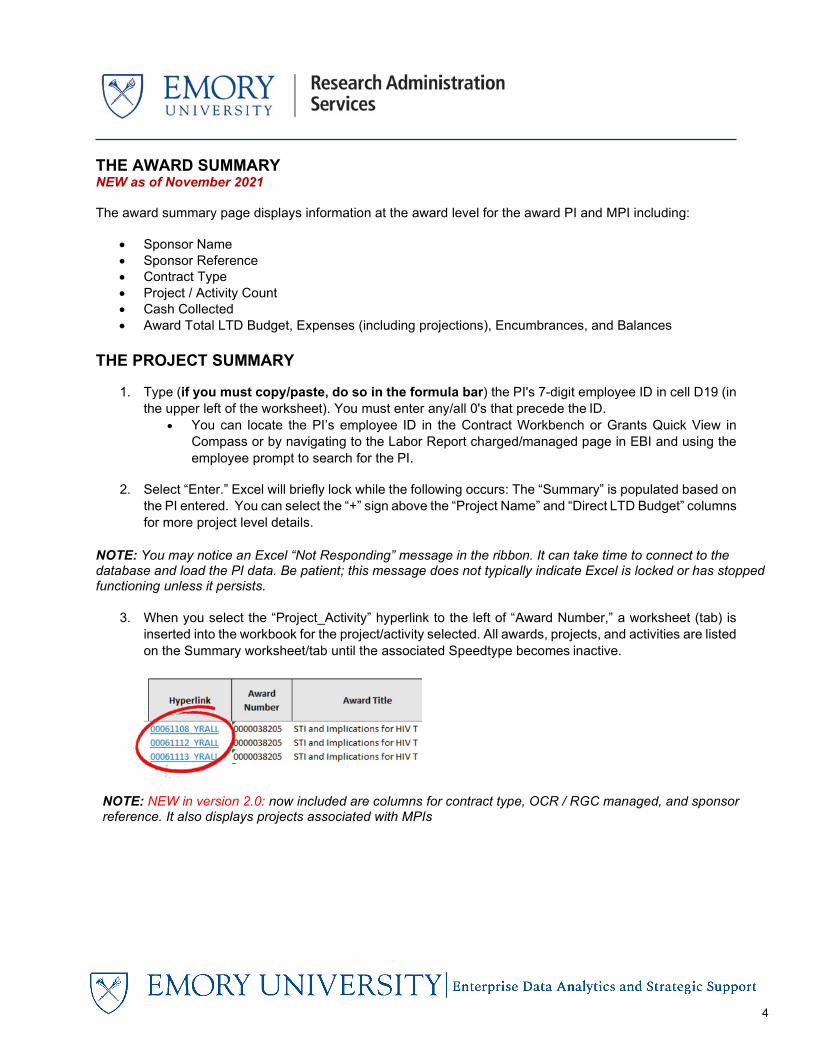
3. When you select the “Project_Activity” hyperlink to the left of “Award Number,” a worksheet (tab) is
inserted into the workbook for the project/activity selected. All awards, projects, and activities are listed on the Summary worksheet/tab until the associated Speedtype becomes inactive.
NOTE: NEW in version 2.0: now included are columns for contract type, OCR / RGC managed, and sponsor reference. It also displays projects associated with MPIs
5
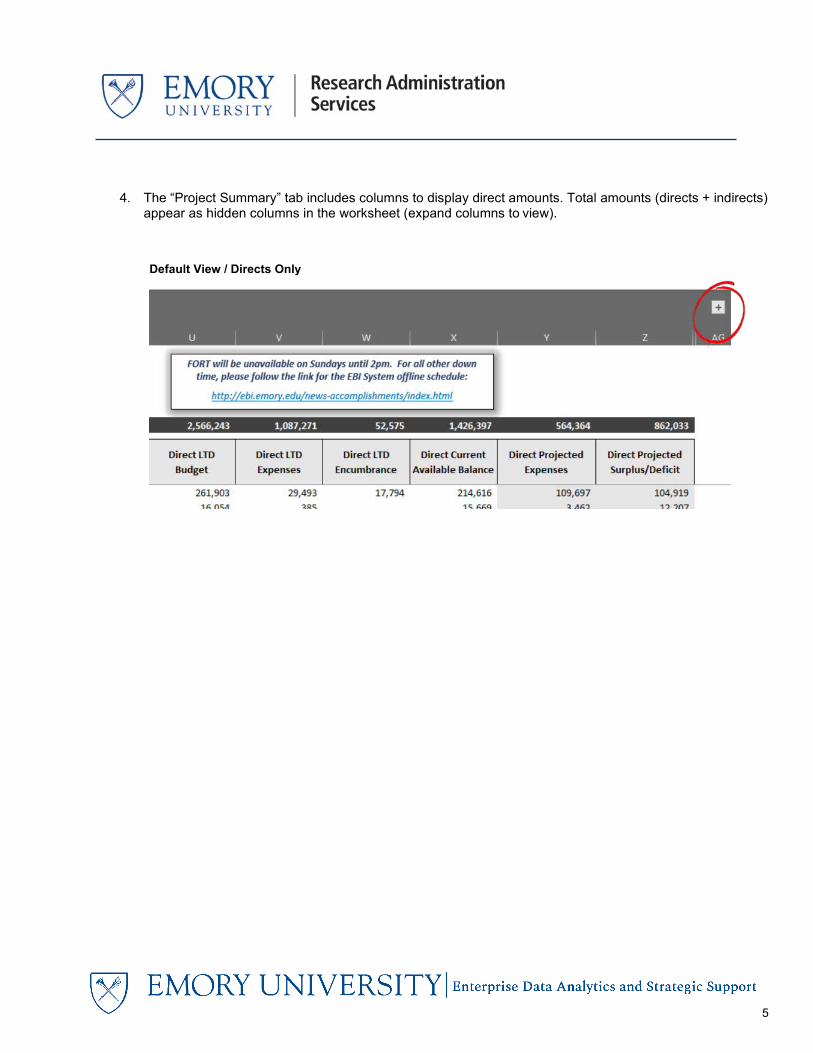
4. The “Project Summary” tab includes columns to display direct amounts. Total amounts (directs + indirects) appear as hidden columns in the worksheet (expand columns to view).
Default View / Directs Only
6
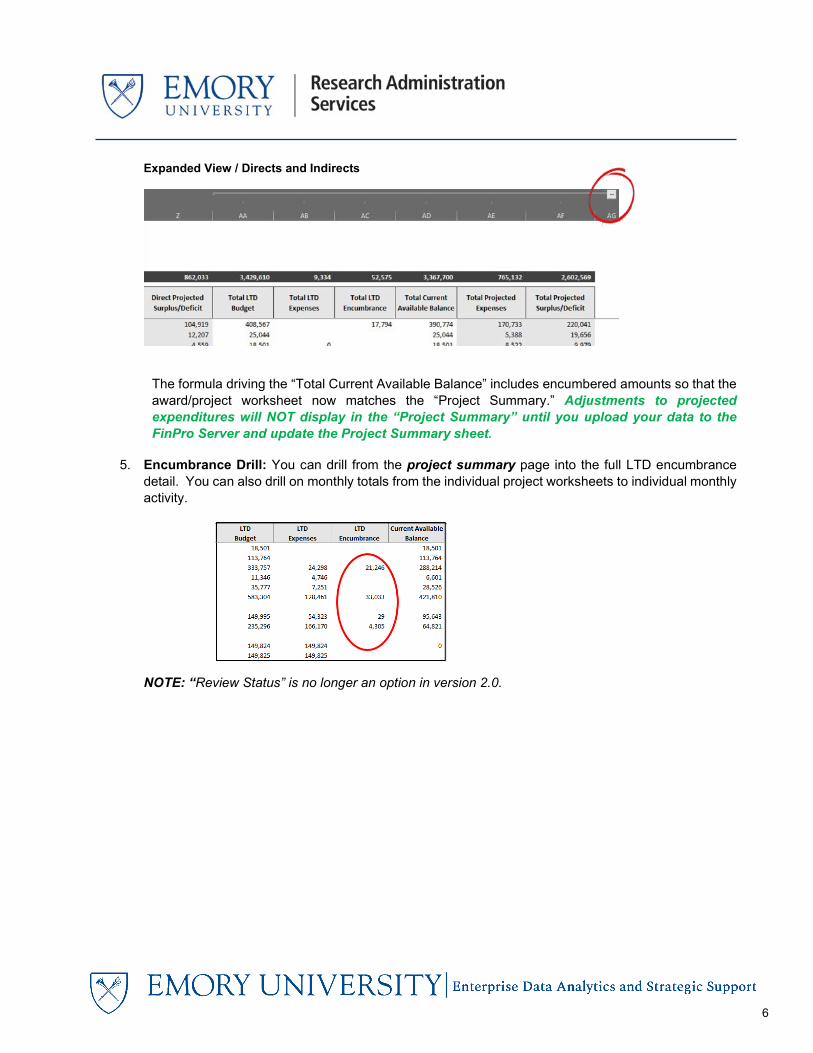
The formula driving the “Total Current Available Balance” includes encumbered amounts so that the award/project worksheet now matches the “Project Summary.” Adjustments to projected expenditures will NOT display in the “Project Summary” until you upload your data to the FinPro Server and update the Project Summary sheet.
5. Encumbrance Drill: You can drill from the project summary page into the full LTD encumbrance
detail. You can also drill on monthly totals from the individual project worksheets to individual monthly activity.
NOTE: “Review Status” is no longer an option in version 2.0.
Expanded View / Directs and Indirects
7
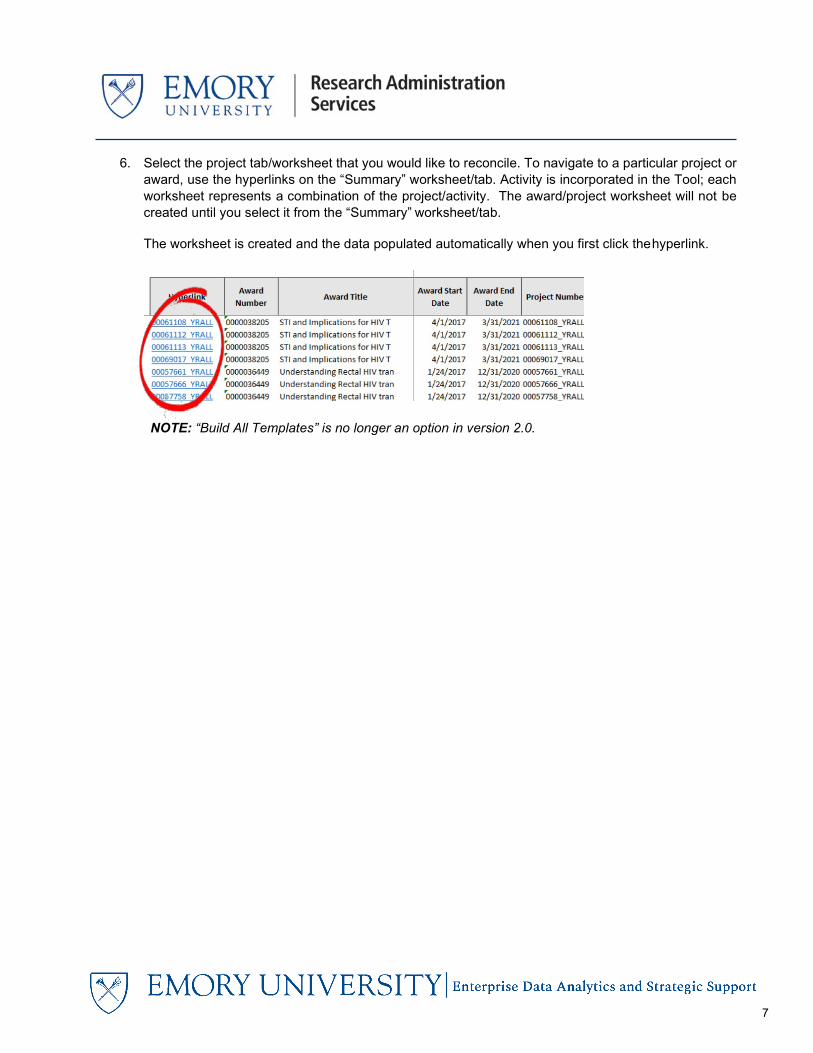
6. Select the project tab/worksheet that you would like to reconcile. To navigate to a particular project or
award, use the hyperlinks on the “Summary” worksheet/tab. Activity is incorporated in the Tool; each worksheet represents a combination of the project/activity. The award/project worksheet will not be created until you select it from the “Summary” worksheet/tab.
The worksheet is created and the data populated automatically when you first click the hyperlink.
NOTE: “Build All Templates” is no longer an option in version 2.0.
8
PROJECT DETAIL TAB(S) [RECONCILING AND FORECASTING (PROJECTING) EXPENDITURES]
1. The template will be loaded with base labor projections from the Emory EBI data warehouse. YOU
CAN EDIT THESE PROJECTIONS. Make changes to the projections by adjusting the values in the yellow cells. You can only edit/load data in yellow cells. All other cells include actual data from COMPASS/the EBI data warehouse and cannot be modified. You can use Excel formulas in the yellow cells. HOWEVER, your formulas will not be saved (to the system); only the value of the calculation is loaded to the database. NOTE: If salary projections in yellow cells are edited (and uploaded), FORT will not overwrite those changes unless the employee’s earnings distribution changes. For example, if you know an employee will no longer work on a grant after a given month and you remove the salary projection starting in that month, the system will not overwrite that change. However, if the employee's earnings distribution changes (e.g., 5% to 10%) during the months leading up to their departure, the system will overwrite the previous change and you will see projections for the remaining grant period. Similarly, if you update a future salary projection, but the earnings distribution changes in the months leading up to your update, the system will overwrite your change with the new earnings distribution percentage. If an earnings distribution update is made and then changed, depending on the timing of the change in HR PeopleSoft, it may not be reflected in FORT, as FORT only picks up changes over the weekend.
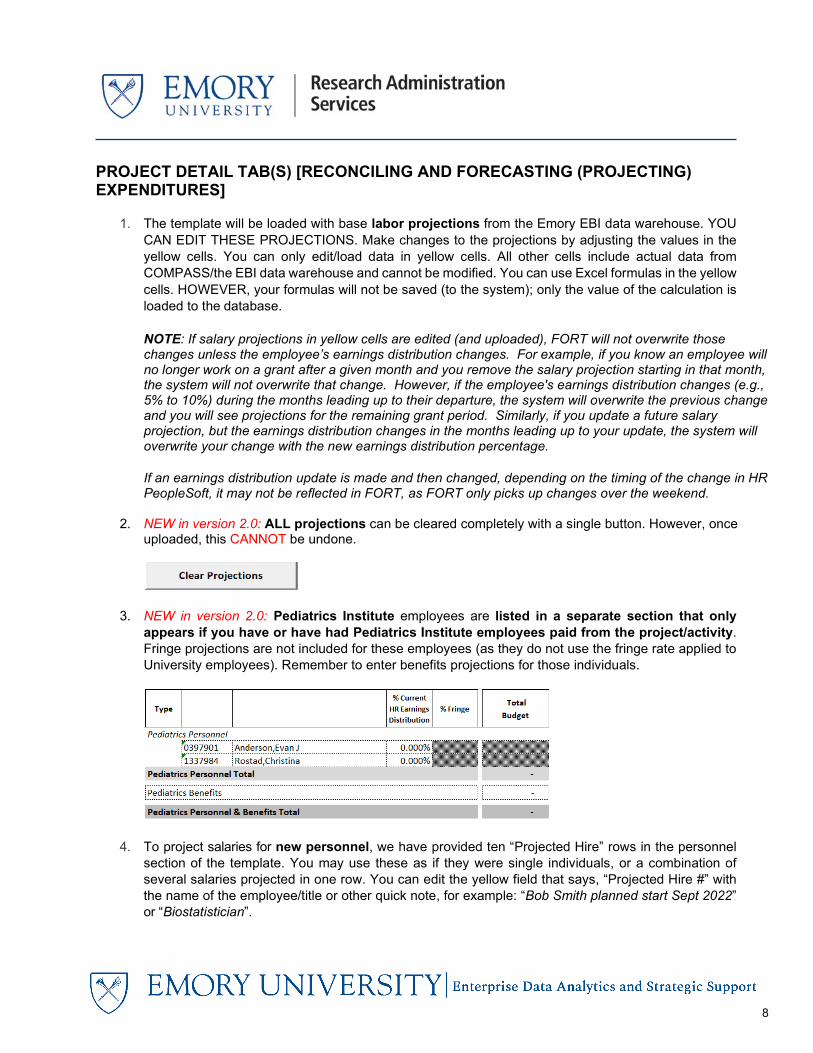
2. NEW in version 2.0: ALL projections can be cleared completely with a single button. However, once
uploaded, this CANNOT be undone.
3. NEW in version 2.0: Pediatrics Institute employees are listed in a separate section that only appears if you have or have had Pediatrics Institute employees paid from the project/activity. Fringe projections are not included for these employees (as they do not use the fringe rate applied to University employees). Remember to enter benefits projections for those individuals.
4. To project salaries for new personnel, we have provided ten “Projected Hire” rows in the personnel section of the template. You may use these as if they were single individuals, or a combination of several salaries projected in one row. You can edit the yellow field that says, “Projected Hire #” with the name of the employee/title or other quick note, for example: “Bob Smith planned start Sept 2022” or “Biostatistician”.
9
NOTE: When individuals are added to the project as actuals in future months, you will need to remember to go back and adjust your projections.
5. % Fringe by Person Column
• All university employees (excluding Pediatrics Institute) are loaded with the default fringe rate
(percentage), depending on whether the project is federal or non-federal. This percentage is used to automatically calculate the fringe amount for projected months in the template.
• You can edit the fringe % for projections when necessary. The template will automatically calculate the fringe for that employee based on the % entered.
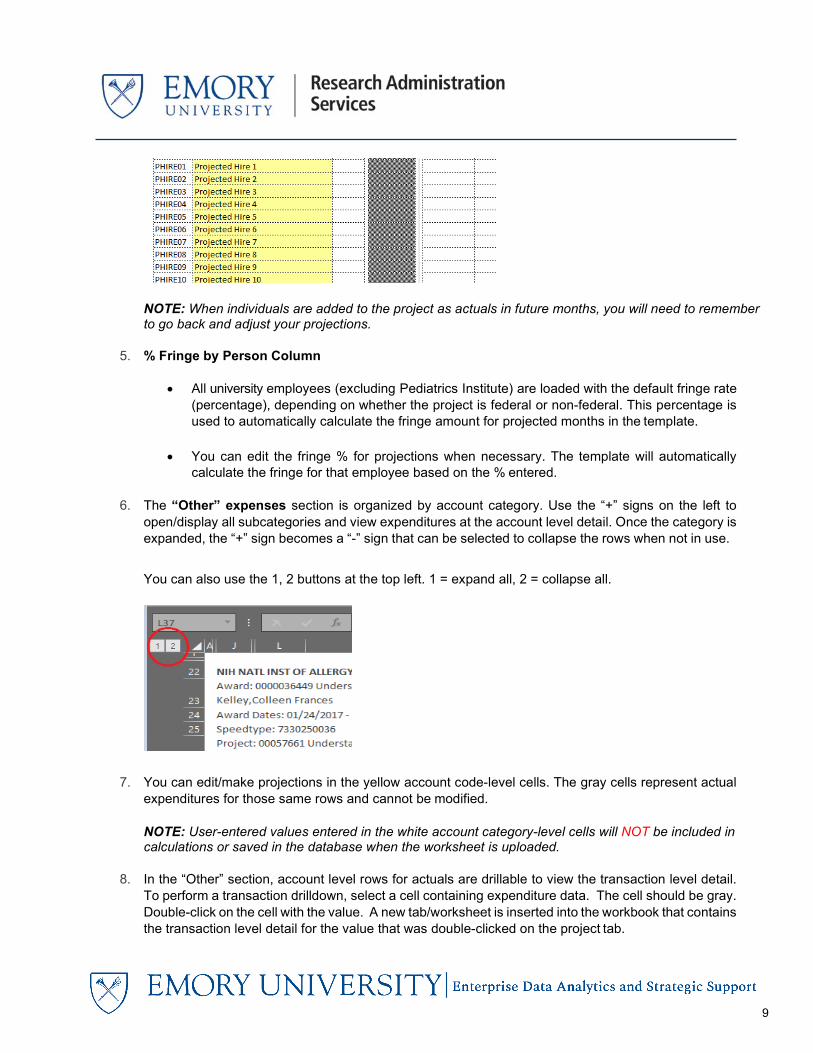
6. The “Other” expenses section is organized by account category. Use the “+” signs on the left to
open/display all subcategories and view expenditures at the account level detail. Once the category is expanded, the “+” sign becomes a “-” sign that can be selected to collapse the rows when not in use.
You can also use the 1, 2 buttons at the top left. 1 = expand all, 2 = collapse all.
7. You can edit/make projections in the yellow account code-level cells. The gray cells represent actual
expenditures for those same rows and cannot be modified.
NOTE: User-entered values entered in the white account category-level cells will NOT be included in calculations or saved in the database when the worksheet is uploaded.
8. In the “Other” section, account level rows for actuals are drillable to view the transaction level detail.
To perform a transaction drilldown, select a cell containing expenditure data. The cell should be gray. Double-click on the cell with the value. A new tab/worksheet is inserted into the workbook that contains the transaction level detail for the value that was double-clicked on the project tab.
10
Excel Tip:
• To get back to the Project Summary sheet, simply hover over the arrows in the lower left corner next to your worksheet tabs and hit Ctrl + right mouse click. This will take you back to the first tab in your workbook.
• Alternatively, you can hit Ctrl + left mouse click while hovering over the arrows and it will give you
a list of all the worksheets within your workbook. From there you can click on the project that you were working on, and it will navigate you directly to that worksheet.
9. Emory has a list of account codes that are identified as “questionable expenses” by sponsors.
These account codes and expenses are highlighted.
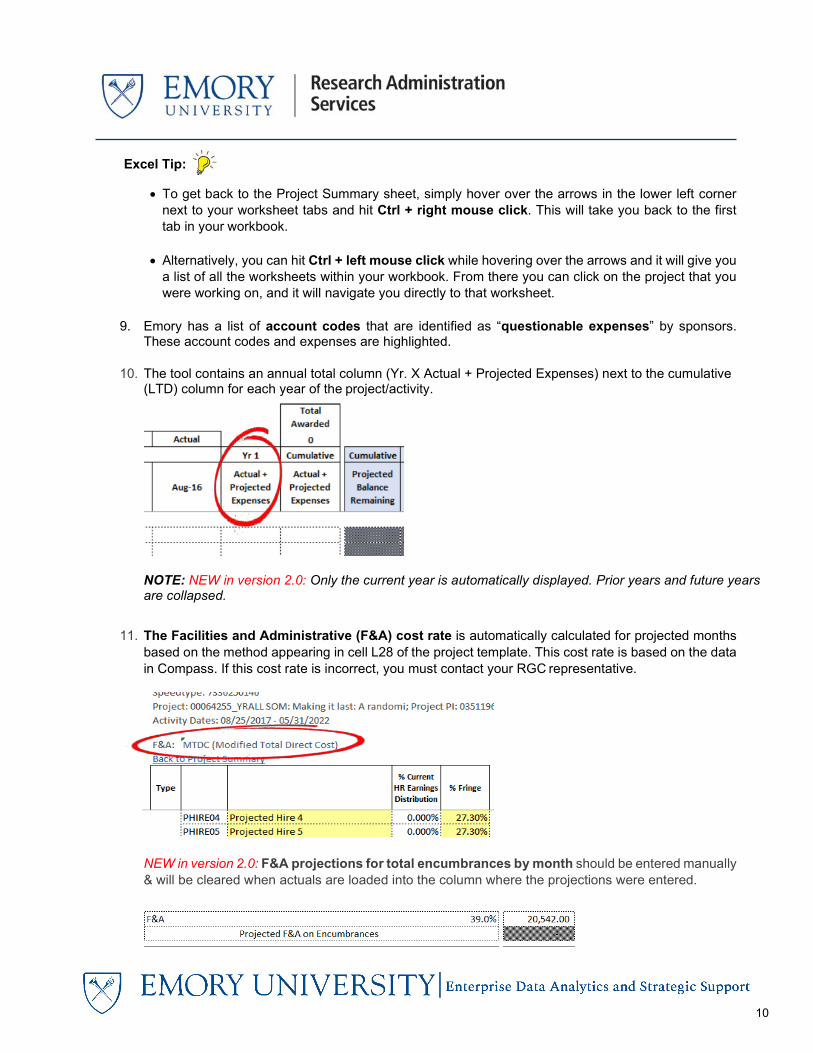
10. The tool contains an annual total column (Yr. X Actual + Projected Expenses) next to the cumulative (LTD) column for each year of the project/activity.
NOTE: NEW in version 2.0: Only the current year is automatically displayed. Prior years and future years are collapsed.
11. The Facilities and Administrative (F&A) cost rate is automatically calculated for projected months based on the method appearing in cell L28 of the project template. This cost rate is based on the data in Compass. If this cost rate is incorrect, you must contact your RGC representative.
NEW in version 2.0: F&A projections for total encumbrances by month should be entered manually & will be cleared when actuals are loaded into the column where the projections were entered.
11
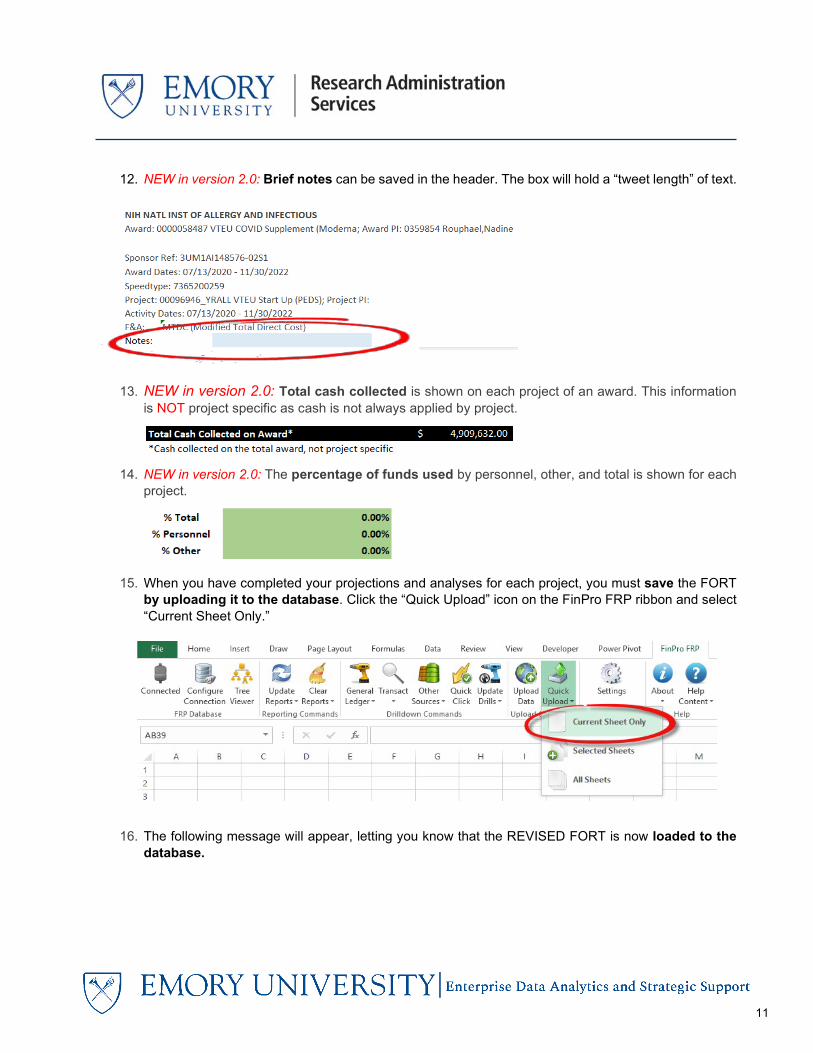
12. NEW in version 2.0: Brief notes can be saved in the header. The box will hold a “tweet length” of text.
13. NEW in version 2.0: Total cash collected is shown on each project of an award. This information is NOT project specific as cash is not always applied by project.
14. NEW in version 2.0: The percentage of funds used by personnel, other, and total is shown for each
project.
15. When you have completed your projections and analyses for each project, you must save the FORT
by uploading it to the database. Click the “Quick Upload” icon on the FinPro FRP ribbon and select “Current Sheet Only.”
16. The following message will appear, letting you know that the REVISED FORT is now loaded to the database.
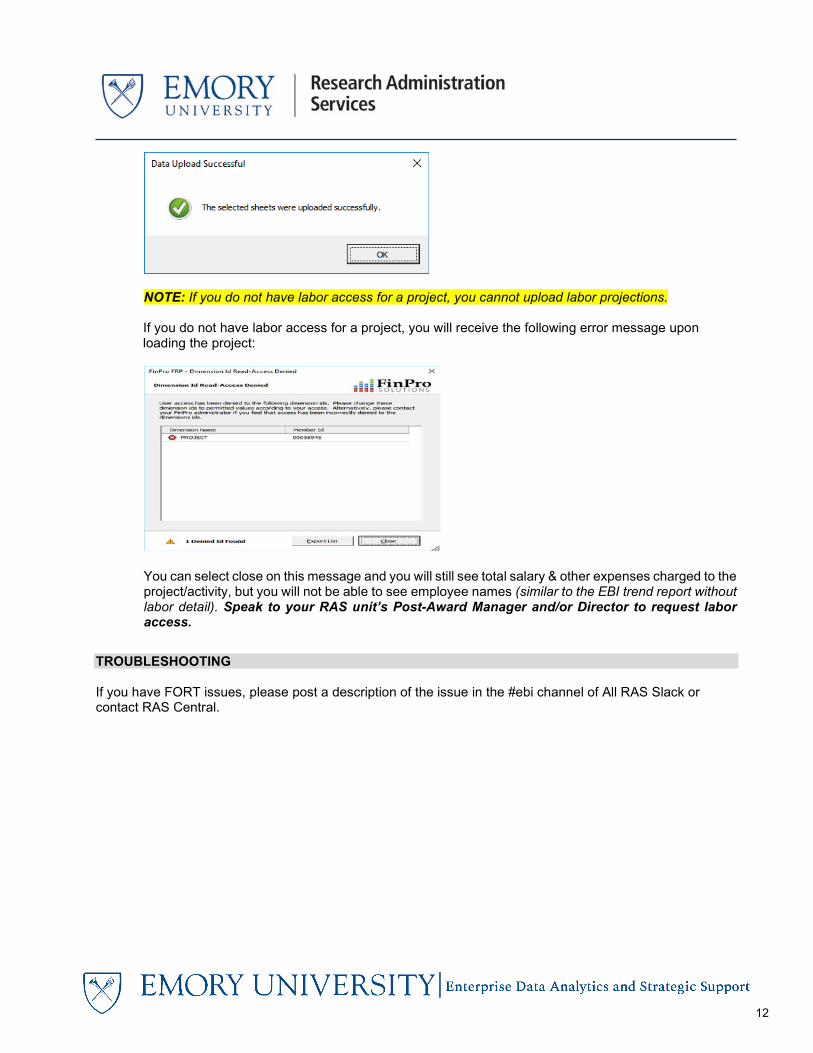
12
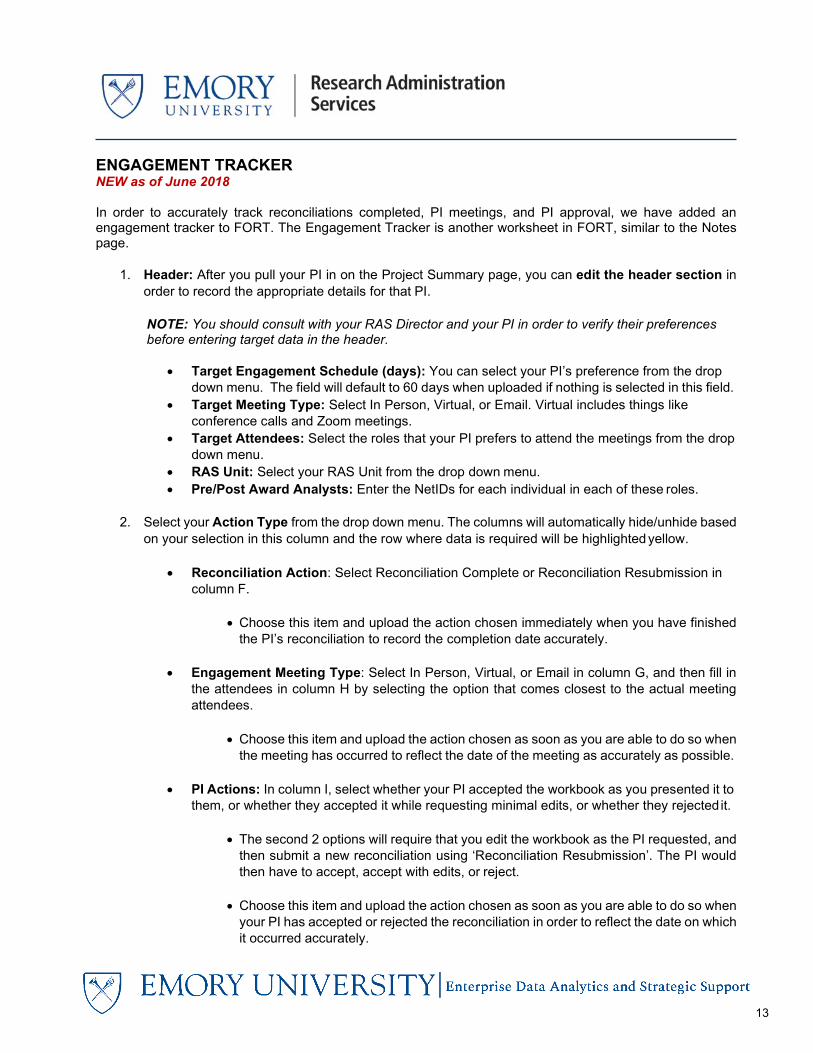
NOTE: If you do not have labor access for a project, you cannot upload labor projections.
If you do not have labor access for a project, you will receive the following error message upon loading the project:
You can select close on this message and you will still see total salary & other expenses charged to the project/activity, but you will not be able to see employee names (similar to the EBI trend report without labor detail). Speak to your RAS unit’s Post-Award Manager and/or Director to request labor access.
TROUBLESHOOTING
If you have FORT issues, please post a description of the issue in the #ebi channel of All RAS Slack or contact RAS Central.
13
ENGAGEMENT TRACKER NEW as of June 2018
In order to accurately track reconciliations completed, PI meetings, and PI approval, we have added an engagement tracker to FORT. The Engagement Tracker is another worksheet in FORT, similar to the Notes page.
1. Header: After you pull your PI in on the Project Summary page, you can edit the header section in
order to record the appropriate details for that PI.
NOTE: You should consult with your RAS Director and your PI in order to verify their preferences before entering target data in the header.
• Target Engagement Schedule (days): You can select your PI’s preference from the drop
down menu. The field will default to 60 days when uploaded if nothing is selected in this field. • Target Meeting Type: Select In Person, Virtual, or Email. Virtual includes things like
conference calls and Zoom meetings. • Target Attendees: Select the roles that your PI prefers to attend the meetings from the drop
down menu. • RAS Unit: Select your RAS Unit from the drop down menu. • Pre/Post Award Analysts: Enter the NetIDs for each individual in each of these roles.
2. Select your Action Type from the drop down menu. The columns will automatically hide/unhide based
on your selection in this column and the row where data is required will be highlighted yellow.
• Reconciliation Action: Select Reconciliation Complete or Reconciliation Resubmission in column F.
• Choose this item and upload the action chosen immediately when you have finished the PI’s reconciliation to record the completion date accurately.
• Engagement Meeting Type: Select In Person, Virtual, or Email in column G, and then fill in the attendees in column H by selecting the option that comes closest to the actual meeting attendees.
• Choose this item and upload the action chosen as soon as you are able to do so when the meeting has occurred to reflect the date of the meeting as accurately as possible.
• PI Actions: In column I, select whether your PI accepted the workbook as you presented it to
them, or whether they accepted it while requesting minimal edits, or whether they rejected it.
• The second 2 options will require that you edit the workbook as the PI requested, and then submit a new reconciliation using ‘Reconciliation Resubmission’. The PI would then have to accept, accept with edits, or reject.
• Choose this item and upload the action chosen as soon as you are able to do so when your PI has accepted or rejected the reconciliation in order to reflect the date on which it occurred accurately.
14
3. As noted above, the columns will auto-hide/un-hide based on your selections in column E “Action
Type”. In order to view the full worksheet, simply select columns E through J, right click, and select ‘unhide’.
4. Column K “NOTES”: You may add applicable comments that you would like to record about the Action
chosen in that column.
5. The date and user’s NetID are automatically recorded each time the worksheet is uploaded. Changes to the header will be effective dated as of the date that they are uploaded.

15
RESOURCES NEW as of November 2021
1. Access various resources in the “Resources” tab in the workbook.
16
TRACKING ACTION ITEMS/NOTES
2. Record all action items and other notes in the “Notes” tab in the workbook. Comments added to the other worksheets will NOT be saved to the database. To add a note, enter a project ID (required) in the first yellow column, you can then select a status and whether the “Note Type” is “Informational” or an “Action Item.” You can update the “Notes” as tasks are completed/resolved.
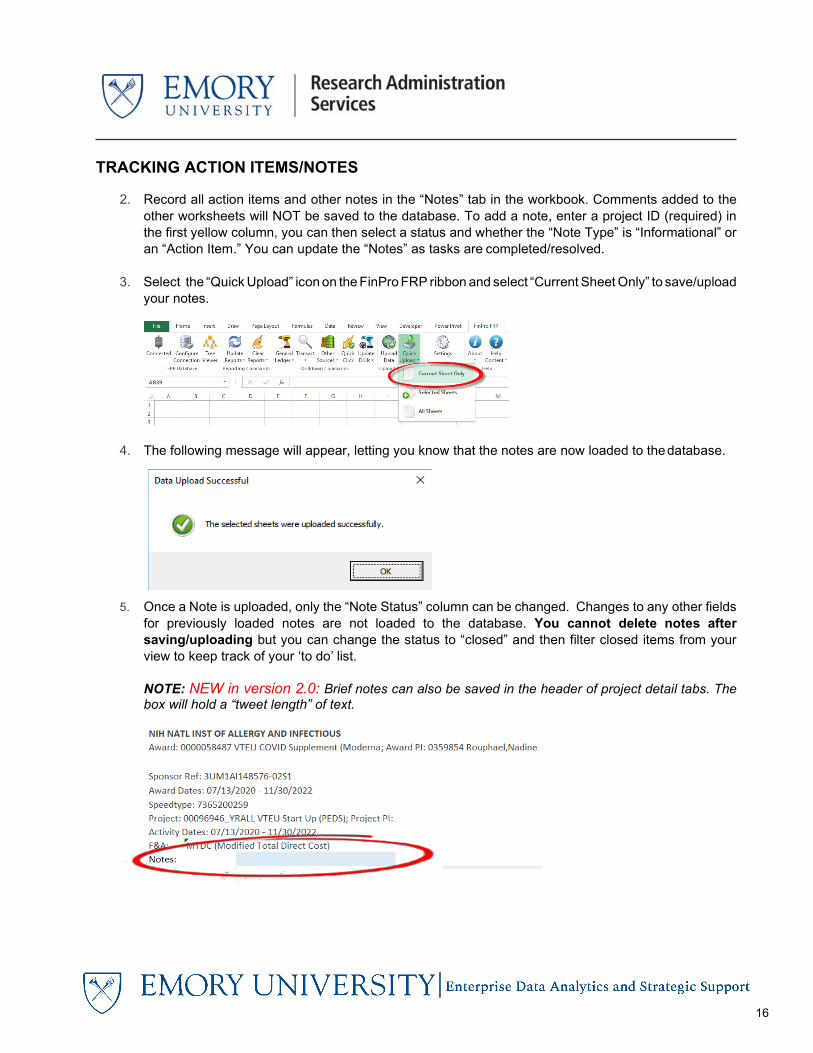
3. Select the “Quick Upload” icon on the FinPro FRP ribbon and select “Current Sheet Only” to save/upload
your notes.
4. The following message will appear, letting you know that the notes are now loaded to the database.
5. Once a Note is uploaded, only the “Note Status” column can be changed. Changes to any other fields for previously loaded notes are not loaded to the database. You cannot delete notes after saving/uploading but you can change the status to “closed” and then filter closed items from your view to keep track of your ‘to do’ list.
NOTE: NEW in version 2.0: Brief notes can also be saved in the header of project detail tabs. The box will hold a “tweet length” of text.
17
FREQUENTLY ASKED QUESTIONS [FAQs]
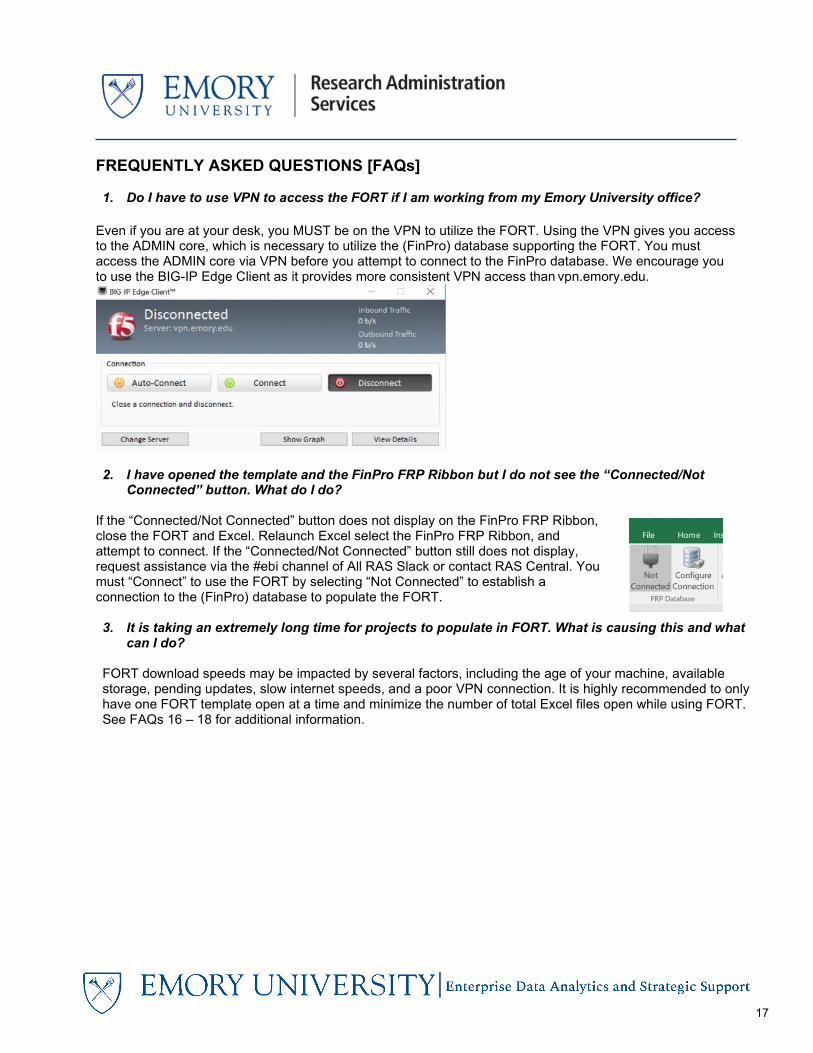
1. Do I have to use VPN to access the FORT if I am working from my Emory University office?
Even if you are at your desk, you MUST be on the VPN to utilize the FORT. Using the VPN gives you access to the ADMIN core, which is necessary to utilize the (FinPro) database supporting the FORT. You must access the ADMIN core via VPN before you attempt to connect to the FinPro database. We encourage you to use the BIG-IP Edge Client as it provides more consistent VPN access than vpn.emory.edu.
2. I have opened the template and the FinPro FRP Ribbon but I do not see the “Connected/Not Connected” button. What do I do?
If the “Connected/Not Connected” button does not display on the FinPro FRP Ribbon, close the FORT and Excel. Relaunch Excel select the FinPro FRP Ribbon, and attempt to connect. If the “Connected/Not Connected” button still does not display, request assistance via the #ebi channel of All RAS Slack or contact RAS Central. You must “Connect” to use the FORT by selecting “Not Connected” to establish a connection to the (FinPro) database to populate the FORT.
3. It is taking an extremely long time for projects to populate in FORT. What is causing this and what
can I do?
FORT download speeds may be impacted by several factors, including the age of your machine, available storage, pending updates, slow internet speeds, and a poor VPN connection. It is highly recommended to only have one FORT template open at a time and minimize the number of total Excel files open while using FORT. See FAQs 16 – 18 for additional information.

18
4. Why isn’t the budget, expense, and encumbrance data displaying on the Project Summary page?
You must type (do not copy and paste) the EMPLID to load the Project Summary.
If you have entered your EMPLID for a valid PI and still are not able to load details, request assistance via the #ebi channel of All RAS Slack or contact RAS Central.
5. What is the purpose/function of the “+” and “-” tabs at the top of the project summary page in the
workbook?
Use these buttons to expand and collapse columns in the project summary.
6. What is the purpose/function of the “1” and “2“ tabs at the top of the project summary page in the
workbook?
These tabs allow you expand and collapse columns in the project summary (same as “+” and “-“). These tabs also allow you to expand and collapse rows. Selecting “1” always returns you to the default view.
19
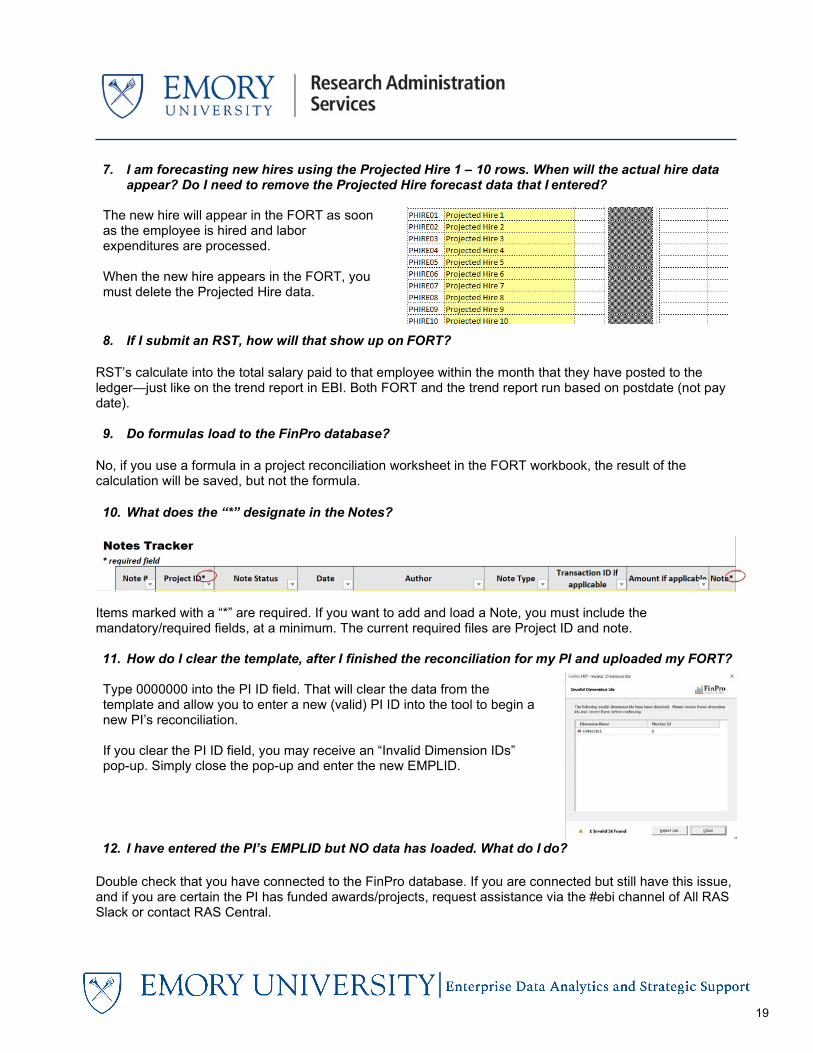
7. I am forecasting new hires using the Projected Hire 1 – 10 rows. When will the actual hire data
appear? Do I need to remove the Projected Hire forecast data that I entered?
The new hire will appear in the FORT as soon as the employee is hired and labor expenditures are processed.
When the new hire appears in the FORT, you must delete the Projected Hire data.
8. If I submit an RST, how will that show up on FORT?
RST’s calculate into the total salary paid to that employee within the month that they have posted to the ledger—just like on the trend report in EBI. Both FORT and the trend report run based on postdate (not pay date).
9. Do formulas load to the FinPro database?
No, if you use a formula in a project reconciliation worksheet in the FORT workbook, the result of the calculation will be saved, but not the formula.
10. What does the “*” designate in the Notes?
Items marked with a “*” are required. If you want to add and load a Note, you must include the mandatory/required fields, at a minimum. The current required files are Project ID and note.
11. How do I clear the template, after I finished the reconciliation for my PI and uploaded my FORT?
Type 0000000 into the PI ID field. That will clear the data from the template and allow you to enter a new (valid) PI ID into the tool to begin a new PI’s reconciliation.
If you clear the PI ID field, you may receive an “Invalid Dimension IDs” pop-up. Simply close the pop-up and enter the new EMPLID.
12. I have entered the PI’s EMPLID but NO data has loaded. What do I do?
Double check that you have connected to the FinPro database. If you are connected but still have this issue, and if you are certain the PI has funded awards/projects, request assistance via the #ebi channel of All RAS Slack or contact RAS Central.
20
13. Some of my PI’s projects are not displaying in FORT. Why not?
Projects will not display until a budget is loaded or expenses have hit. If the primary award is outside your department, Account Administrator assignments may need to be updated (which is required to allow the data to load into the FORT). Each RAS Director has access to update Account Administrator settings.
14. Does the FORT include projections for “Other” expenses?
You must manually calculate the projections for “Other” expenses. Only labor data will project automatically based on percentage earnings for the project period or termination date, whichever is sooner.
15. The F&A rate for the year looks wrong. How does the FORT calculate F&A on subcontracts?
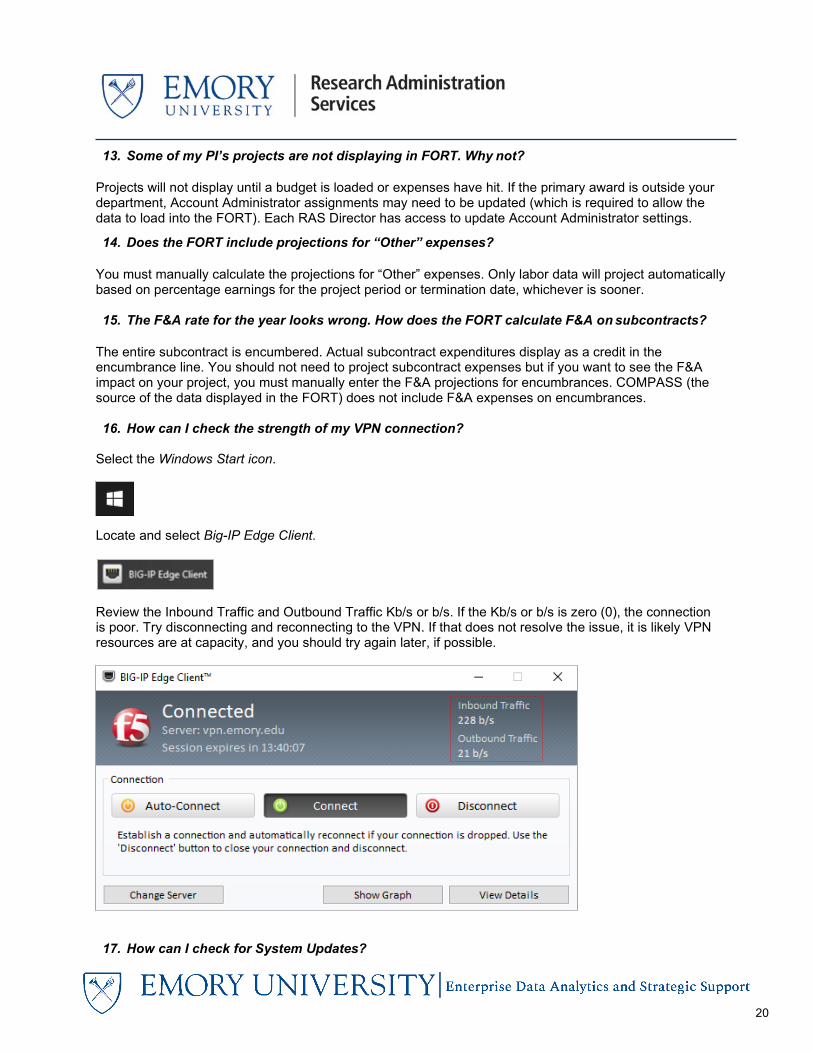
The entire subcontract is encumbered. Actual subcontract expenditures display as a credit in the encumbrance line. You should not need to project subcontract expenses but if you want to see the F&A impact on your project, you must manually enter the F&A projections for encumbrances. COMPASS (the source of the data displayed in the FORT) does not include F&A expenses on encumbrances. 16. How can I check the strength of my VPN connection?
Select the Windows Start icon.
Locate and select Big-IP Edge Client.
Review the Inbound Traffic and Outbound Traffic Kb/s or b/s. If the Kb/s or b/s is zero (0), the connection is poor. Try disconnecting and reconnecting to the VPN. If that does not resolve the issue, it is likely VPN resources are at capacity, and you should try again later, if possible.
17. How can I check for System Updates?
21
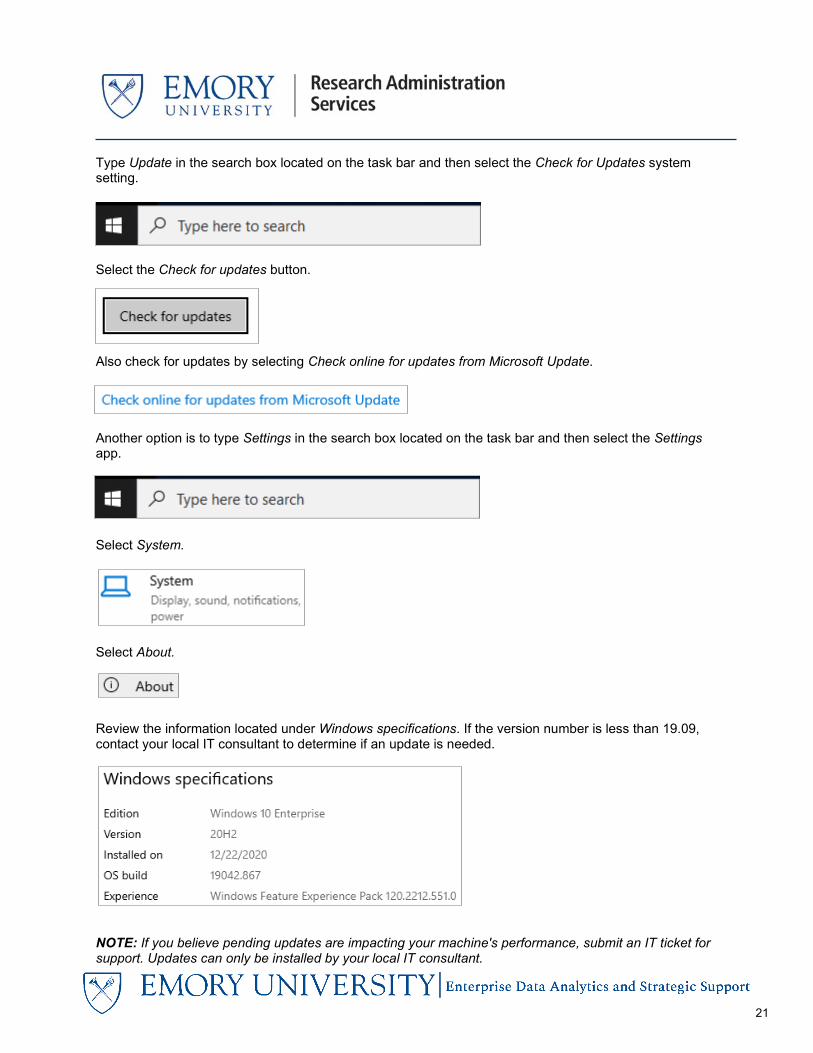
Type Update in the search box located on the task bar and then select the Check for Updates system setting.
Select the Check for updates button.
Also check for updates by selecting Check online for updates from Microsoft Update.
Another option is to type Settings in the search box located on the task bar and then select the Settings app.
Select System.
Select About.
Review the information located under Windows specifications. If the version number is less than 19.09, contact your local IT consultant to determine if an update is needed.
NOTE: If you believe pending updates are impacting your machine's performance, submit an IT ticket for support. Updates can only be installed by your local IT consultant.
22
18. How can I perform an Internet Speed Test?
Navigate to speakeasy.net. Select Go to Speed Test.
Select Start Test.
A download speed of 100 and an upload speed between 25 and 30 is desirable. A download speed of 45 and an upload speed between 10 and 20 will still provide acceptable performance. If your download and upload speeds aren't in this range you may be able to work with your Internet Service Provider (ISP) to increase your speeds.
19. Who do I contact if I have additional questions?
If you are having issues accessing/using the tool, post a description of your issue in the #ebi channel of All RAS Slack or contact RAS Central.


![SAB March 2017[2] - Emory University · 2017. 3. 27. · RAS Pre-Award Response to PIs -Summary 10 • Pre-Award Services –RAS Engagement Response Time • Definition:The time period](https://img.pdfslide.us/doc/110x75/60fbc977c2941032c67b9b76/sab-march-20172-emory-university-2017-3-27-ras-pre-award-response-to-pis.jpg)