Embed Size (px)
Citation preview
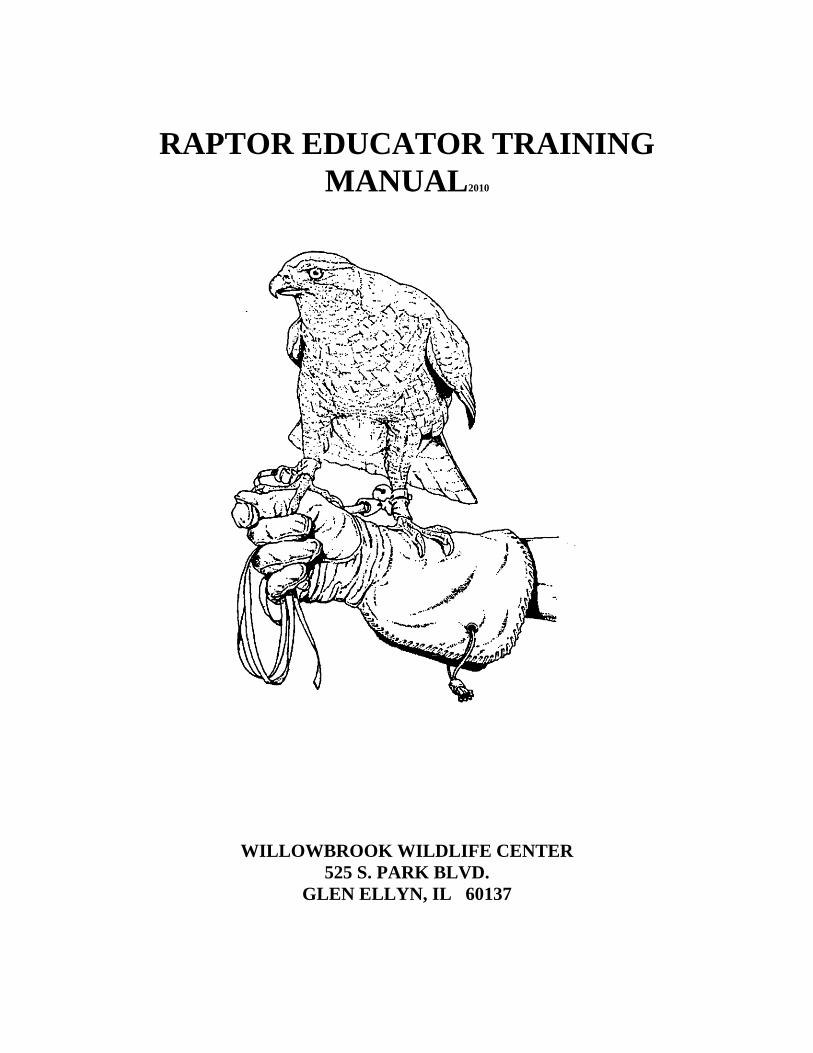
RAPTOR EDUCATOR TRAINING
MANUAL2010
WILLOWBROOK WILDLIFE CENTER
525 S. PARK BLVD.
GLEN ELLYN, IL 60137

Dear Volunteer,
Welcome to the Raptor Volunteer Interpreter program. This program started at
Willowbrook Wildlife Center in 1986 has continued to grow and thrive with the help of
dedicated, hard working volunteers like you. This program has become one of the more popular
and dynamic of all programs offered by Willowbrook Wildlife Center and the Forest Preserve
District of DuPage County.
Raptor Volunteer Interpreters are part of the team of Willowbrook Wildlife Center
volunteers who teach the public about our wildlife neighbors and how to peacefully coexist with
them. Your commitment of time, talents and energy, is essential for this popular program to
continue improving and better serve the people of DuPage County. Your work as a Willowbrook
Wildlife Center Raptor Volunteer Interpreter will hopefully be a long, pleasant one. I look
forward to working with you in the coming weeks and many years to come. Thank you again for
your continued enthusiasm and dedication to Willowbrook Wildlife Center and its mission.
Sincerely,
Ron Skleney
Naturalist

TABLE OF CONTENTS
Raptor Volunteer Interpreter Program
Philosophy………………….…..............................................….........................................1
History..…...........................…...............................................…...........................................2
Volunteer Information
Qualifications...........….....…................................................................................................3
Job Description...........……...............................................................................................….3
Expectations……………..………………………………………………………………….4
Raptor Programming
Program Descriptions………………………………………………………………………4
Program Preparation.......….....…….....................................................................................5
Raptor Outreach Program Outline Classroom Section….........…........................................6
Raptor Outreach Program Outline Laboratory Section.…..................................................10
Owl Program…………………………………………………..………………………….12
Trail Encounters..............................................................…......….....................................15
Signing Up to do a Program………………………………………………………………16
Bird of Prey Information
Introduction....................................................................................……............................17
Anatomy of a Raptor...........................................................................…...........................17
Types of Raptors.....................................................................................….......................18
Life Cycles.................................................................................................…....................19
Environmental Relationships........................................................................…................ 20
Natural Histories..............................................................................................…............. 20
Manning Information
Equipment..........................................................................................................................22
Leash......................................................................................................................22
Swivel......................................................................................................….......…22
Jess......................................................................................................................…23
Anklet.......................................................................................................…........…24
Perches...…................................................................................................…........ 24
Proper Jessing Technique…………………………………………………………………26
Daily Manning...................................................................................................................….27
Recertification…………………………………………………………………………….29

Do’s and Don’ts……….........................................................................................….……30
Terminology....………………........................................................................….....................…..31
Commonly Asked Questions.........................................................................….....................…....33
Self-Appraisal..............................................................................................….........................…..36
Additional Readings...................................................................................…........................…....38
Raptor Volunteer Interpreter Agreement………………………………….………………………39
Raptor Volunteer Interpreter Criteria and Expectations………………….…….………………….40
Appendix A..................................................................…...............................…......................…..43
Appendix B ...…….................................................….................................................................….44
Appendix C (Raptor fact sheets) ………………………………………………………………….45
Appendix D (Education Raptors Roster) …………………………………………………………..46

1
RAPTOR VOLUNTEER INTERPRETER
TRAINING PROGRAM
WILLOWBROOK WILDLIFE CENTER
ACKNOWLEDGEMENTS
Many thanks to the staff of Willowbrook Wildlife Center (WWC) for their support and
interest in this program. This eighth edition of the Raptor Volunteer Interpreter (RVI) Manual was
revised August, 2010. It is a combination of the manuals prepared by Nancy Pierson (Coons),
former wildlife specialist Richard Adams and current site manager Sandy Fejt. Additional sources of
information were used in the preparation of this manual. Consult the additional reading section for a
list of these sources.
PHILOSOPHY
Using live wild animals as part of a structured environmental education program can enhance
the effectiveness of the program. By using these animals, however, educators take on the
responsibility of controlling the message that is received by the public through what they see as well
as what they hear.
Three articles have been included at the end of this section (Appendix B). Each appeared in
past issues of Wildlife Rehabilitation, the annual proceedings of the National Wildlife Rehabilitation
Association. Each represents different practices and policies. The approach taken with our program
is one that best supports the ideals of Willowbrook Wildlife Center.
Any time an animal is handled before the public, state and federal laws regarding keeping
these animals as pets should be stated. Even if the animal appears "friendly", protective gear should
be worn to emphasize the potential danger in handling such an animal. At no time should an
individual be allowed to pet or touch an animal being used in a demonstration. Biofacts can be used
for a tactile experience.
Willowbrook Wildlife Center only uses visibly disabled animals (but not grotesquely
disfigured ones). This allows the educator to explain that the animal was not taken from the wild for
educational or entertainment purposes.
If such guidelines are followed, tremendous benefits in the educational process can be
obtained. Using a live animal in an educational demonstration enables the educator to accomplish
two goals. First, the animal grabs their attention, piques their curiosity, and motivates the visitors to
learn, thereby giving the educator a captive and eager audience. Second, seeing an animal up close
and learning that it has a history personalizes the experience. This type of program can evoke an

2
emotional response and leave a lasting impression in the mind of the visitor.
HISTORY
The Raptor Outreach Program was developed in 1986 by Mrs. Nancy Pierson (Coons) during
her tenure as a fellowship participant at Willowbrook Wildlife Center. The philosophy behind using
live raptors in education programming is to enhance the effectiveness and personal bonds that may
be developed between the audience and the program's content (e.g. message and messengers). The
initial program was approximately sixty minutes in duration and structured as an introduction to the
concepts of raptors and rehabilitation. Through the educational leadership of Naturalist Carl Strang
and former Willowbrook Wildlife Center volunteer Sally Baumgardner, the program built on the
original foundations and became an integral part in the educational offerings to DuPage County
Schools. The program continues to evolve into a popular outreach experience. What began as a
Raptor Outreach program format consisting of two one-hour sessions, has been augmented by a one
hour lecture only program and a special Owls program for younger audiences. The initial Raptor
Outreach lecture session continues the message and goals of the original program with emphasis on
the role of the human animal in the natural world and the consequences and responsibilities of our
actions. Optional activities and role playing are the carriers for the messages presented during the
second session, which we refer to as the “Lab”. Children discover the meaning and importance of
habitat in conjunction with building a concept of the predator/prey relationship through role playing
activities. The presentation concludes with a review of the information presented as well as a re-
emphasis of what role we, the human animals, play in the natural world.

3
Volunteer Information
Qualifications 1) Participants in the RVI Program must have completed at least one year (or equivalent of) as a
volunteer Interpreter in good standing at WWC. Persons interested in participation in the program must have the prior approval of the Volunteer Interpreter supervisor.
2) Until the time when each participant has completed his/her training, the Raptor Volunteer
Interpreter supervisor or an approved RVI must be present during each training (handling) session.
3.) Raptor Volunteer Interpreters must attend and complete ALL training sessions and be judged
competent at each level by program staff. Training sessions will include the introduction to equipment and equipment use, sessions on the natural and individual histories of the program birds, jessing, handling and transport of large and small raptors, presentation techniques and introduction and participation in the Raptor Programs.
4.) Raptor Volunteer Interpreters must follow the requirements outlined in the RVI Agreement.
Failure to abide by this will indicate the participant’s willful withdrawal from the
program.
5.) Raptor Outreach participants must abide by ALL state and federal laws regarding the use and
transportation of raptors. AT NO TIME is anyone, including raptor handlers, allowed to touch or “pet” the animal used in the educational programs.
6.) Raptor Volunteer Interpreters must be willing to undertake other duties related to raptor care
and maintenance including manning of new raptors, weekly manning of existing education birds, special request and trail encounters, cleaning and maintaining equipment, occasional cleaning of holding areas, and feeding.
Job Description Volunteer RVI’s work under the direction of the Raptor Volunteer Interpreter Supervisor, performing activities related to: educating the public about WWC’s mission and the birds of prey of DuPage County; manning the program birds on a weekly basis; maintaining weight and health records on the program birds; and assisting with cage cleaning, and equipment maintenance. Volunteer RVI’s are required to work one 4-hour shift per week, or flex their schedule to meet program demands, and to meet all of the program requirements established by staff. Volunteer RVI’s are afforded the same benefits and must adhere to all of the same requirements as all WWC volunteers. Volunteers are required to wear a green work shirt. WWC volunteer polo or sweatshirts are preferred and may be purchased from staff. Special volunteer shirt orders are placed twice a year.

4
Dark or tan long pants are preferred (dark colored jeans are acceptable). For safety reasons, closed-toed shoes are required. Shorts may be worn from mid-May through September and must not exceed 2” above the knee. Volunteer RVI’s must record the number of hours worked per shift in the time sheet computer program, located in the volunteer headquarters. Records of volunteer hours demonstrate public support for WWC, and insure your coverage by the Forest Preserve District’s worker’s compensation for on-the-job injuries. Expectations The job of a RVI at WWC is exactly what the title says, to educate the public on birds of prey. One necessary part of being a RVI is to man the program birds. This aspect of the position is very rewarding and fun, but remember that the real job is to educate the public. If any potential RVI just wants to man raptors and not talk with the public, they should not be part of the program. At the same time, if any RVI is found avoiding the public while manning birds they will be reprimanded
and may be asked to leave the program. It should also be noted that the RVI is responsible for
education pet care and signing up for non-raptor related programming. Although these
responsibilities may be shared with fellow education volunteer interpreters, the priority of
daily duties is 1) education programming (including non-raptor related programs), 2) daily
education pet care and 3) raptor handling. Other responsibilities of being a RVI include maintaining the raptor preparation areas and equipment, maintaining accurate records on the health and behavior of the program birds, making new equipment, and assisting in any projects related to the educational birds of prey. All unusual or note worthy observations about the program birds must be communicated to the RVI supervisor and the vet immediately. Communication between the RVI’s and their staff supervisor is crucial to the health and well being of the program birds and to the success of the raptor program. Failure to communicate these concerns to the RVI supervisor may result in removal from the program.
Raptor Programming
There are five different types of raptor programming done at Willowbrook. These include Raptor Outreach, Introduction to Birds of Prey, Owls, trail encounters and district events. Raptor Outreach
This is the program in which the birds are taken off-site and used in educational programming. It is available on any requested day throughout the school year. This program is designed for school children between the grades 3 through 6. The program is approximately 2-hours in length. Topics covered in this program include animal adaptations, natural history, individual animal history, ecology, predator/prey relationships, and habitat importance. Raptor Outreach can also be presented as Lecture Only, which consists of a 1-hour program giving the audience an introduction to the Birds of Prey.

5
Introduction to Birds of Prey
This program is very similar to the raptor outreach in structure, with a few variations. This program is presented on-site any time during the year. The program is presented primarily to scout groups, but is available to any group requesting the program. Topics covered in this program include animal adaptations, natural history, individual animal history, and ecology. Owl Program This program, developed by Sandy Fejt, is similar to the lecture-only version of the Raptor Outreach program. Geared to first and second graders, it focuses on basic raptor traits and specifically focuses on owls. The program duration is shorter (approximately 45 minutes) and incorporates concepts suitable for younger children. Trail Encounters
This type of programming is an informal program presented to the public visitors of Willowbrook Wildlife Center. This program is either done on the trail or in a designated area of the classroom. The topics covered in this program include animal adaptations, natural history, and individual animal history.
District Events
This is the program in which the birds are taken off-site and an informal program is
presented to the public visitors at district sponsored events. The topics covered in this program
include animal adaptations, natural history, and individual animal history.
Program Preparation When preparing for a program, a few things should be remembered:
1. Always be in a Forest Preserve District uniform (volunteer polo or oxford style shirt with
dark pants, and dark, closed-toe shoes). 2. Always show up to the program approximately 30 minutes early to allow for setup time. 3. Always check the Raptor Program Log, which is periodically e-mailed to you as a Raptor
Volunteer Interpreter, for the birds scheduled for your program. The following is a list of props required for both on and off-site raptor programs.
1. Biofacts box – either in education van (big blue portable box)or classroom 2. Carriers – located on the shelf, next to the coats. The carriers are species specific.
The small carriers with the owl on the front are to be used only with the screech owls. The small blue carrier with astroturf and the built-in perch inside is for the kestrels. The large carriers are to be used for red-tailed hawks, great horned and barred owls.
3. Four-wheel cart – (in van and used for off-site programs)

6
Raptor Outreach Program
The outline for the Raptor Outreach and Introduction to Birds of Prey is as follows: (parts of this outline are also used in the Trail Encounters)
Classroom Section (1-hour)
Introduction (5 minutes)
1. Introduce yourself and any assistants. Welcome them to Willowbrook Wildlife
Center if an on site program.
2. ASK: Has anyone been to Willowbrook Wildlife Center before?
3. ASK: Does anyone know what we do at Willowbrook Wildlife Center?
4. Introduce the concepts of wildlife rehabilitation and the fact that Willowbrook
only accepts WILD animals. Explain that Willowbrook only accepts wild animals
from DuPage County, except for three species. These species include the
European Starling, House Sparrow, and Rock Dove (Pigeon). We do not accept
domesticated or exotic animals.
4. Explain that not all of our animals survive and that we use their parts for educational
purposes. Show the audience the United States Fish and Wildlife permit. Explain that without this permit WWC would not be able to keep the birds or use them in educational programming. Tell the audience that it is against the law for anyone without a similar permit to possess any part or piece of any bird except the pigeon, house sparrow, and European starling.
5. ASK: Are we an animal? Explain that we are mammals and tell them this topic will
be covered later in the program.
Bird Wirds (15 minutes)
This is an activity to generate creative thought concerning the subject of birds. You will
notice that wirds is misspelled. That is intentional. Throughout this activity, words will be
misspelled to see if the kids are paying attention.
1. ASK: How many of you have seen a bird? Everyone should raise their hand.
2. Tell the audience that you will say the word "bird". You want them to tell you the
first word that comes to their mind when they hear the word "bird". You will
write each of these on the board as they are spoken. These words can be types of

7
birds or bird parts. You can misspell words on purpose and have fun with the
audience. Remember, to tell the audience that the best part of this activity is that
there are no wrong answers.
3. The key word you want the audience to come up with is FEATHERS. This is what will connect you with your next session. Make sure you have this word on the board.
4. When the board is full of bird words, circle the words that are bird parts. 5. When all of these words are circled, go through each one and ASK: are birds the only
animal with (circled word). For example, are birds the only animal with a beak? No, the snapping turtle has a beak. Ask them to think of animal (besides a bird) that has this particular part. Encourage their answers and give examples when necessary. Make sure that the word “feathers” is the last word that you cover. Feathers are what make a bird a bird. There are no other animals that have feathers on their bodies.
6. Tell them one word they did not come up with was teacher. Explain that the birds
they will see during the program are all teachers. Ask them if they know what you mean. Discuss the answers. Explain that all the birds they will see today are injured in such a way that they cannot be released into the wild and therefore will spend the rest of their days as a teacher at WWC. These birds teach us about the birds themselves, as well as how they have been impacted by humans. Nature is setup as a system. When one part of the system is adversely affected, different and distant parts of that system are also affected. Explain that touching is strictly prohibited.
Raptor Adaptations (10 – 15 minutes)
In this part of the program you will use the biofacts available to explain why birds are the unique animals that they are. They will have time at the end of the program to pick up and explore any and all items displayed if they wish.
Feathers
A. Down feathers – Light and fluffy, located next to the birds skin, not visible. Birds rouse their feathers, which lifts them slightly and the warm body heat from the bird is trapped and insulated. Works similar to when we have goose bumps. Compare to our wearing hats, gloves and scarves.
B. Body covering feathers – Feathers that are the most visible. Sizes vary, shape
is basic, non-descriptive. Depending on the size of the bird, there can be thousands on a bird’s body. Every feather overlaps one another, which protects the downy feathers, and also keeps the bird’s body dry.
C. Flight feathers – compare the shape of the flight feather compared to those
that cover the body. They are shaped differently and are located at the tip of

8
the birds’ wing. They are stiffer and are used primarily for getting lift and getting the bird off the ground.
D. Feathers and waterproofing – Birds keep waterproof through the feather’s
structure and its proper alignment with surrounding feathers. Birds may spend significant portions of their resting time in preening (grooming and combing) feathers in order to maintain this proper alignment and to restore the original interlocking feather structure. Feather alignment is what ensures the bird’s waterproofing. The preen (uropygial) gland secretes a waxy oil which when applied with the beak serves to condition feathers. This oil helps clean and moisturize the feathers, as well as extends the life of the feather. The preen gland can enhance feather condition but is not required for feather waterproofing.
E. Ask the students if they are good listeners and if they would like a challenge.
See if they can tell which would make more noise – one feather or a whole wing from an owl. Have them close their eyes. Take one turkey Vulture feather and move through the air. Keeping eyes closed, now move owl wing through the air. Open Eyes. Show hands for choice. Ask the audience if they know what a Turkey Vulture eats. Dead things. How fast does something dead move? It shouldn’t be moving at all! Ask what it would sound like to hear a Turkey Vulture flying over with a 5-foot wingspan and has all its feathers. Obviously you will be able to hear it flying. Because it eats dead things and is active during the day, it doesn’t need to sneak up on its prey. Wave feather through air again.
F. Ask the audience what an owl eats and when is it active? Can an owl make
as much noise as the Turkey Vulture? His food would hear him and take cover. Discuss that the structure of owl feathers is wispy, so the air falls off the feather and that gives them silent flight. Move the owl wing to compare to the sound of the Turkey Vulture.
PLEASE DO NOT LET STUDENTS HANDLE FEATHERS AND WINGS.
Skulls
A. Red-tailed Hawk – Explain the hawk skull is setup very similar to ours. The
hawk skull has relatively huge eye sockets to accommodate all the muscles attached to the eyeball. Hawks have 2 to 3 times greater resolving power than humans. Have them hold their chins and move their eyes all around. We can do this because we have a skull like that of the hawk. Visual hunters. (Depending on the size of the group and how well behaved they are, you may choose to pass the plastic-encased skull around the room.)
B. Great Horned Owl – The protruding eye sockets are there to help support the
owl’s eyes. Great Horned Owls have eyeballs approximately the size of an
9
adult human. Because their eyes are so big, there is no room for muscles to move the eyeball. In order to move their eyes, they must move their entire head. The owl is able to do this because they have 14 total cervical vertebrae. They can turn their head approximately 270, not 360 like most people think. Humans have seven cervical vertebrae and can turn their head about 180. Hunt primarily by listening – can catch a mouse under the snow. (Depending on the size of the group and how well behaved they are, you may choose to pass the plastic-encased skull around the room.)
Feet
A. Nails are called Talons – the tool the birds use to do their hunting and defend
themselves. (Depending on the size of the group and how well behaved they are, you may choose to pass the talons around the room.)
B. The term “raptor” means to grasp or seize.
C. Show the audience the hawk and owl talons. Tell them that the talons are real
and very sharp.
1. Owl feet have feathers all the way down to the nails. This is because the owl will penetrate the snow when hunting in the winter. The hawk talon does not have feathers down to the nails. The hawk will grab its food off the top of the snow.
2. Ask the audience if they think that birds of prey use a fork and knife
when they eat. Of course they don’t. They have a fork and knife already built in to their body. Their talons are their fork and their beak acts as a knife. They hold their food with their feet and tear it up with their beak.
3. Discuss the roughness on the bottom of the feet. Rough, bumpy
textured pads give them gripping power as they catch their prey. Both the owl and the hawk feet can be compared to the osprey feet. Osprey are fish eaters. Fish are very slippery and need the extra roughness to get a better grip on the fish.
Birds (15- 20 minutes)
A. Explain that each of the birds used in the program is injured in such a way that they cannot be released back into the wild.
B. We discussed earlier that these birds are Teachers. Ask them what each of these
birds can teach us.

10
C. Have them see if they can determine the injury of each bird. Have the audience take an inventory for each bird. See if each bird has two eyes, two feet, two wings and a beak.
D. Bring the birds out one at a time and show the audience.
E. Discuss the natural history of each bird as you are presenting to the audience.
F. Discuss the individual injury of the bird being presented to the audience after
everyone has had an opportunity to see it.
G. Solicit lessons we may learn from each individual, ie: kestrel teaches us patience, owls teach us the importance of camouflage and being quiet, and hawks teach us how to conserve energy. Discuss being disabled. Individuals work harder every day.
Question and Answer Period (5 - 10 minutes) Laboratory Section (1-hour) This section is only used in the Raptor Outreach program, not in the Introduction to Birds of Prey program. Begin this section the same way you did the last with the question – “Are you an animal?” Habitat of Rope
A. Ask if the audience is responsible for the well being of other creatures. B. Write the word HABITAT on the chalkboard and ask if anyone knows what the word
means. Discuss the responses. C. Habitat includes where plants and animals live and what it needs to survive. The
requirements of habitat include the following:
1. FOOD 2. WATER 3. SHELTER (clothing, house) 4. SPACE (all the air around)
D. Ask which of these components is the most important? Allow the student to
nominate one component at a time. Eventually the students will nominate all of the components. The students should eventually come to the conclusion that no one component is more important than any of the others.
E. Divide the audience into four groups. Each group will represent one component of
habitat.
F. Have them line up at even intervals around the rope. They should be in a straight line across from the other components, make a +.

11
G. Have them sit on the floor with their feet together and knees in front of them.
H. On the count of three, have the children stand up in unison by pulling on the rope.
They should not let go of the rope until everyone is up. Stress this is NOT tug-of-war.
I. Give a scenario where habitat is absent and have them try pulling up on the rope
without one of the four components of habitats. Give each component an opportunity to sit out. Then one final try with all four components together.
J. Explain that habitat depends on the cooperation and interplay of all four components.
Predator/Prey Activity
A. Ask the students if they know what a predator is, and what prey is.
1. A predator is an organism that eats another organism to survive.
2. Prey is the organism that the predator eats.
B. Explain that this is the law of nature: eat or be eaten.
C. Rules of the game:
1. There is to be no sliding, diving, pushing or shoving.
2. Nothing in nature is fair, no complaining; respect each other.
3. The students will be assigned roles by the instructor for the first round.
Approximately 1 hawk per 7-8 mice
4. The mice will have three safe areas to hide from the hawks to provide a safe
haven during foraging activities - 4 hoola-hoops which represent clumps of
bushes, food zone and home/shelter base.
5. The object of this activity is to have the mice forage for food (bottle caps) and
return to base without being eaten by soaring hawks.
6. Mice can only pick up one bottle cap per trip to the feeding area.
7. They must let their mouse tail hang low enough so every animal in the area
can determine what they are. (Between the knee and ankle)
8. The role of the hawks is to soar over the area and capture mice as they forage
for food.
9. When a hawk sees a mouse, they must take the tail from the student. This
ends the life of the mouse and they must leave the playing area (sidelines).
10. A hawk must have three mouse tails to survive the round.
11. Mice must acquire three food items to survive the round.
12. Let the game run for 2-3 minutes.
D. For the remaining rounds, let the students determine what they want to be, either a
mouse or a hawk. Run the activity and watch the results. Play until

12
approximately 10 minutes remains.
E. Use the results of the activity to discuss predator/prey relationships and the
unbalance that occurred. When there are more hawks than mice, nearly all living
things died due to the lack of food. This unbalance of food can occur in DuPage
County.
F. What can we do as the human animal to avoid this type of situation? Discuss our
responsibility for the well being of other creatures.
Owl Program - developed by Sandy Fejt
This program will be very similar to the Raptor Outreach/Introduction to Birds of Prey that we
currently teach. The vocabulary will be scaled down and will include more interaction with the
students. Hopefully, the students have been studying owls for several days and will be prepared
before we come. We will reinforce many of the concepts they have already learned. Some of
these topics include: compare/contrast owls with other birds – eyes, feathers, ears, feet and facial
discs; predator/prey relationships; habitats and food chains; wing spans; owl pellets; and general
owl behavior. You are already familiar with this information. We will be presenting it in a little
different format. Refer to your Raptor Volunteer Interpreters handbook for detailed information
on each topic.
Introduce yourself and discuss Willowbrook Wildlife Center, what we do and why we have the
birds/parts. Remind them that the birds are all disabled in some way and your challenge for them
today is to see if they can tell what each birds’ disability is. Tell them it’s kind of tricky because
we have been caring for them for some time now and they are healthy, but disabled. Please save
questions and stories until the end so everyone will have time to discover all of the biofacts.
Suggested Program Script:
I understand all of you are owl experts now! That’s just great. I’m going to quiz you along the
way as we present Willowbrook’s owl program to you to see how much you may have
remembered. What do birds have covering their body that we don’t have? Feathers! When you
find feathers down on the ground, we want you to pick them up and take a good look at them.
Feathers are very important to the birds. Have you ever seen a bird outside with a raincoat on, or
wearing hats, gloves and scarves? The down feathers (show Red-tailed Hawk tail and emphasize
the downy feathers) are located next to the birds skin and trap the warm air from their body to
help them to stay warm – similar to when you put your coat on. These are important feathers on
the bird that you can’t always see because they are under the body covering feathers. Body
Covering feathers (show several individual feathers) have a simple, rounded shape. Each feather
overlaps another, which protects the birds on the outside from rain and cold. What can birds do
that you and I can’t do? Fly! These feathers (hold up the flight feather from the Turkey Vulture)
are flight feathers and are located on the tip of the birds’ wing. They have an uneven shape and

13
are stiff, to help the birds get lift and get up off of the ground. Once you have taken a couple
minutes to examine the feathers you found outside, always remember to put things back in nature
where you found them, and then wash your hands.
Ask the students if they are good listeners. Tell them you are going to give them a challenge to
see if they can tell which makes more noise: a Turkey Vulture flight feather or a whole wing
from a Great Horned Owl. Ask them to lower their head down so that their chin is in their chest.
Close eyes – no peeking. Listen to sound number one and sound number two. Move each
through the air, doesn’t matter which order. OK – open your eyes. Now, by a show of hands,
how many thought the wing made more noise? How many thought the vulture feather? Ask for
reasons why. Discuss silent flight of the owls versus the vulture that can make a lot of noise
when he flies because he eats dead things that won’t be trying to escape from him. Many
students will know owls have silent flight, but they often don’t know why (structure of feather –
wispy along edges for silent flight). Show the owl wing. Show them the “fringed like” edges of
the feathers. Let them know they can see up close a little bit later. Bring a student up to the front
of the room and have them extend their arms out. Place the GHO wing in front of the student,
along their arm and compare the owls’ wingspan to their outstretched arms. Tell them an owls’
wingspan is almost as long across as they are tall. Thank the student for helping out and now
he/she can sit down.
Ask when owls are most active and do most of their hunting. What is the big word for animals
that are active at night? Nocturnal. Right. Owls need to be quiet so they can sneak up on their
prey. What other things can help an owl from having its prey know where he/she is? Guide the
questions for Camouflage. Hold up GHO wing again and talk about blending into nature. Ask
them if they would like another challenge. Tell them you are going to show them a picture of
birds’ nest and you want them to see how many birds do they see in the picture. Ask them not to
say anything, until everyone has had a chance to see the picture. Tell them they can show the
number on their hands by the number of fingers if that will help them to remember. Once
everyone has had a chance to see the picture ask: How many of you think that you saw one bird
in the picture, raise your hand. How about two birds? Three? Four or more? Isn’t camouflage
great?! We all looked at the same picture, yet we didn’t all see the same thing! Point out the
adult and the juvenile in the picture. Remind them they can take a closer look when they come
up to the table later. When they go walking outside in nature, they need to be good nature
detectives and look closely and listen to what’s going on around them. There may be an owl or
other animal watching them as they are walking by and they don’t know because they are
perfectly camouflaged.
Next look at the feet and beaks to tell where birds may live and what kind of foods they eat.
Hold up the RTH and GHO feet. Can anybody remember what the long nails on the end of their
toes are called? Talons. Very good. What do these birds use the talons for? To catch their food,
right. Where do you think this bird might live? All good answers. Hold up the gull/duck foot –
Where do you think this bird will spend most of its time? In the water! Very good. The
webbing between the toes might have been a good hint. Hold up the heron foot. What about this

14
bird? Actually this bird spends its time in water also, but at the edges of the lakes and marches.
Long toes with short nails help it to wade through mud and plants in the water. Same type of
habitat, but different areas of the pond/marsh. Be sure to get a good look at a birds feet and that
may help you determine where it may live or spend part of its time.
Hold up the RTH and GHO skulls. Do these two skulls look the same? Of course not. Let’s
compare. The eyes are the most noticeable aren’t they? When is an owl most active?
Nighttime. Owls need these large eyes to help it see at night. It has bony plates to help support
the large eyes. Hawks hunt during the day and have the muscles to move its eyes back forth,
where an owl cannot move its eyes left to right. What does an owl eat again? All kinds of live
critters, but they prefer to catch small mammals. The beak is curved and hooked to rip its prey
into small pieces. They use their beaks the way we use a knife. Hold up the duck skull and
compare to the owl. Do these two birds eat the same thing? No way. Ducks dabble under the
water for plants. The bottom of the bill has tiny holes along the edges to allow the water to drain,
and the plant material stays in its mouth. Very much like when your mom or dad makes
spaghetti, they pour everything from the pan into a strainer, the water drains out, and your dinner
is left inside. Hold up the heron skull and compare to the duck. Do these two birds eat the same
food? No way!! They live in the same kind of habitat, but eat different foods. Remember the
duck is a plant eater, and this bird, the Great Blue Heron is a fish eater. This beak is designed for
spearing fish.
See, you already know alot about birds. Now I am going to bring out the live birds I brought
with me today. Let’s see if you can tell what kind of bird it may be. Also, remember the birds
that live at Willowbrook are permanently disabled. We have cared for them for a long time, and
they are healthy. Let’s see if you can tell what its disability might be. But first, let’s go over a
few rules before the birds come out. You must remember to keep your hands down at your sides.
I will try my best to move around the room so that everyone can have an opportunity to see the
birds up close. Remember, no petting. As cute as they are, they are wild animals and can bite
you. The hardest part is to sit still. The less moving around you do, the more comfortable the
birds will be.
(This should have taken approximately 15-20 minutes.)
Slowly walk around the room and up and down the aisles with the small bird(s). Discuss each
individual’s natural history (species identifying features, weight, disability, etc). Now discuss in
detail the owls’ eyes – size/sockets, cervical vertebrae and rotation, feathered toes, facial
discs/ears/hearing, etc. Try to position the screech owl so that it will turn its head around for the
students to see. Ask a student to come to the front of the room and stand on your right side.
Ask their name. Let’s compare this GHO with Billy. Earlier we compared the wingspan of a
GHO to Suzy and remember how long those wings were?! Now let’s compare Billy’s body size
to GHO. Big difference in body size when wings/arms are outstretched and are about the same
size. Now let’s look at GHO eyes. GHO is just a tad smaller. Look at the size of the GHO skull.
Have Billy hold it next to his head (or you can hold it with your free hand). Go into detail about

15
owl eyes. Have Billy try to turn his head as far around as possible as you discuss the cervical
vertebrae of owls (they have 14, mammals have 7). Now compare Billy’s ears to that of the
GHO. Can you see the GHO ears? Well where did they go? Let students try to answer. They
should have already discussed this in class. Reinforce the location – one higher than the other,
each a hole in the side of the head, feather disks help to filter sound to the ear openings. Have
Billy point with his fingers to his head where the owls’ ears are compared to his. Owls hunt
primarily by listening. Their hearing is so good that they can catch a mouse from under the snow
in total darkness! Thank Billy for helping and have him sit down. Do a final wrap up of GHO.
Try to keep each bird out for approximately 10 minutes.
Screech owl(s) – either/or two color morphs (teach us importance of being quiet)
Red-Tailed Hawk or Kestrel (teach us importance of being patient)
Great Horned Owl (teach us the importance of camouflage)
All teach us about the word disabled. Disabled individuals have to work harder every day to do
what you and I do on a regular basis. ie – wheelchair bound person or a person on crutches
cannot easily get up over a curb where you and I just step up. Be considerate, ask to offer any
assistance. At Willowbrook, we set up the animals’ cages to accommodate each of their
disabilities.
Put the birds away and explain that everyone will have an opportunity to enjoy the skulls and
talons. (Do not pass around any wings or feathers.) Safety is first! Let them know to handle
everything with care and that they cannot use the talons on other students. Remind them to
keep quiet voices because the birds are still in the room. Check with the teachers and see how
they want to divide the class(s) for biofact discovery. Have one group come to the front and
explore the items on the table while you answer questions from those who are waiting to come up
to the table.
Try to make it as interactive as possible. Just as important, have fun!
Trail Encounters
The following rules are to be followed while doing trail encounters (impromptu programs): 1. All of the education raptors can be used for indoor trail encounters. The large raptors should
now enter and exit through the back door. Outdoor trail encounters should be presented behind the fence in a grassy area.
2. Indoor trail encounters will take place only in the classroom, due to the limited space and
activity levels in the lobby. 3. After the birds are safely put back into their permanent cages, please go over the classroom
and the route traveled to clean up any droppings that may have been deposited during the program. Clean up the bulk of the droppings with wet paper towels and then spray the area with Avinol-3 disinfectant (clean-up room) and let air dry.

16
4. Large and small raptors may still be used for formal programming in the classroom. These birds should enter the building through the back door. The staging area for the program is one of the carts near the X-Ray room. Once birds are placed in their carriers, they should be moved to the classroom and the door must be locked when you are not in attendance. No birds should be left in the classroom unattended unless the classroom door is securely locked. No bird should be left unattended for more than 20 minutes.
5. When presenting formal programs in the classroom, please use the drop cloth bed sheets
underneath the birds to catch all droppings. After the presentation, please take any soiled bed sheets into the clean-up room and deposit in one of the clothes hampers.
6. Volunteer Interpreters may assist in the cleaning phase if time is of the essence and another
group needs to use the classroom. However, the final responsibility for policing the area after a bird presentation is the RVI.
7. At no time should any cleaning be attempted while any bird is on the glove. Remember –
SAFETY FIRST!
Signing up to do a Program When a group registers for a program (on or off-site), a minimum of four weeks notice is required. As program requests are approved and scheduled, the RVI Supervisor will e-mail the RVI on that particular duty day and shift and invite that person to teach or co-teach the program. A Raptor Program Spreadsheet (in PDF format) is maintained and periodically e-mailed to all RVIs. All raptor related programs are listed on this spreadsheet. It is the responsibility of the RVI’s to check the Raptor Program Spreadsheet for accuracy. If there is a program scheduled for your manning day and you will be here, you are expected to present this program. Anybody may sign up for a program (regardless of the day and time) less than two weeks prior to the program date. When doing a program, RVI’s should arrive 30 minutes prior to the beginning of the program OR the designated departure time to ensure everything is ready before the program begins. Outreach programs are also listed on the Raptor Program Spreadsheet. The programs are listed in chronological order. Please sign your name on this sheet if you intend on assisting with the program. The majority of the time, the RVI’s will be assisting the Naturalist with the outreach programs. When an RVI has signed up to do an outreach program, the Naturalists will coordinate all the logistical needs of the program. The Naturalists will inform the RVI’s when to be at WWC prior to the program. For special events such as Fullersburg Woods Earth Day, etc, the Naturalists will be in charge of coordinating the program. The RVIs will be notified via e-mail to see if they are interested in participating in the special event. Please note that preference will be given to RVI’s scheduled on that particular day of the special event. These events are also listed on the Raptor Program Spreadsheet. In most cases, it is the responsibility of the RVI to find transportation to and from the program.

17
BIRD OF PREY INFORMATION
Introduction
Birds of prey, or raptors (from the Latin word raptus, meaning to grasp), are highly
specialized birds that kill and eat other birds and animals for food. The name raptors, comes from the fact that these birds use their feet to capture and kill their food. Female raptors are typically larger than their male counterparts. In the overall scheme of things, raptors play a very important part in keeping the natural balance. Anatomy of a Raptor
Birds of prey, as a group, have developed a specialized set of body parts for the art of
catching their food. These include eyes, feet, and bills. The eyes of raptors are what they rely on most in hunting. It is thought that they have the
keenest eyes in the animal kingdom. Hawks and eagles have approximately 2.5 to 3 times (Gill) the resolving power as man. This allows a hawk to detect prey moving at far greater distances than humans are capable of seeing. The eyes of these animals have muscles that aid in the rapid focusing needed during a high speed chase.
The feet of all birds of prey have very long, sharp talons attached to each of the four digits. The feet of hawks have three of these digits facing forward and one facing back, while owls have two facing each direction. Some raptors kill their prey with their feet by repeatedly opening and closing the foot until they don't feel anymore movement. The feet of raptors are the most dangerous parts of their body.
All raptors have hooked bills, which help them pull and tear bits and pieces of meat from
their prey. The raptors that don't use their feet to kill their prey, use their bill. They kill their prey by striking it at the base of the skull and breaking the prey's neck. This includes the falcons and some owls. Falcons have a notch in their bottom bill that aids in the breaking of their prey's neck. On the top of the bill of raptors is a ridge of soft tissue called the cere, which has two holes in it similar to our nostrils. These "nostrils" allow raptors to continue to breath even when in a steep dive towards prey.
All birds have a hollow skeletal system. These hollow bones are very strong and lightweight
which aid in flying. (Technically their bones have a pneumatic, lattice-like structure which is light but very strong.) They are also part of the respiratory and cooling systems for birds. Their flat ribs are jointed to aid in respiration and flight. The body temperature of birds is between 104
o and 106
o.
To maintain this high body temperature, a high metabolic rate must be maintained. Because of this high metabolic rate, there is a very high need for oxygen. Five pairs of airsacs allow one way flow of air through the respiratory system and deliver the oxygen needed. These airsacs are also necessary for the cooling system of birds. In order for this high amount of oxygen that is needed, the birds have a very strong, four-chambered heart. The heart rate of birds is very high to accommodate the

18
need for increased oxygen. The major muscle primarily used in flight is the pectoralis muscle. This is the large breast
muscle that pulls the wing down. The larger the bird, the faster it must fly to remain in the air. Therefore, the power required from each gram of muscle is greater in larger birds than in smaller ones. Since the power available is less, the larger birds flap less and soar more. Types of Raptors
Identification of the different types (species) of raptors can be accomplished through observation of their appearance and behavior. All species have ten primary feathers, located farthest out on the wing. These primaries are the feathers that give the bird the majority of the flying power it needs. The set of ten feathers just to the inside of the primaries are called secondaries. The secondaries are the feathers that aid in lift and stability during flight. The tail of raptors typically consists of ten to twelve feathers. The two middle feathers are called deck feathers, and aid the bird in maneuvering.
Hawks: The wings of hawks appear to be round on the ends due to the middle primaries being longer than the ones on either side of them. There are two major groups of hawks, the buteos and accipiters.
Buteos have longer wings and shorter tails than the accipiters. This allows the buteos to soar
on air thermals. Buteos will hunt either from riding these thermals or perched on a branch. The most common type of buteo in North America is the Red-tailed Hawk. This bird weighs between 1.5 (=681 grams or 24 ounces) and 4 pounds (=1816 grams or 64 ounces) and has between a two and three foot wing span. The characteristic red tail does not grow in until the birds second year. The eyes of young red-tailed hawks are light in color and darken as the bird gets older. These birds are typically found hunting in open areas.
Accipiters have short wings made for speed and long tails made for high maneuverability.
Accipiters will typically perch near the trunk of trees for more cover. The accipiters hunt in the deep
forests or along roads. The three accipiters found in North America include the Northern Goshawk,
Cooper's Hawk, and the Sharp-shinned Hawk. The goshawk is the largest and sharp-shinned is the smallest.
Eagles: The two species of eagles found in North America are the Golden and Bald Eagles. These birds appear similar to the hawks because their middle primaries are the longest. Eagles spend their days riding the thermals or perched out on branches or cliffs. The golden eagle preys on small mammals and rodents and is found in the eastern and western mountain ranges. The bald eagle is a fishing bird and found throughout North America, primarily near open waters.
Falcons: The falcons are distinguished from the other birds of prey by their pointed wings. Their wings appear to be pointed because the outermost primaries are the longest. The wings of the falcon allow it to reach high speeds in a dive, or stoop, and in a direct chase. The largest falcon in North America is the Gyrfalcon and the smallest is the American Kestrel.
Owls: The majority of owls are nocturnal, or night hunters. The tool of the owl’s attack is

19
surprise. Owls make no noise when flying due to the structure of their feathers. The ends of owl feathers are very soft. The owls have much larger eyes than the other species of raptors. The eye of a great horned owl is approximately the same size as a grown human's eye. Owls have no muscles attached to their eyes for movement. An owl’s eyes are held in place by a sclerotic ring which is formed by bony plates called ossical plates. Therefore, owls must turn their entire head to see to the side of itself. Owls can turn their heads approximately 270
o. They can do this because of their
fourteen cervical vertebrae. Humans only have seven cervical vertebrae, so we can only turn our heads approximately 180
o. In addition to sight, owls use their keen sense of hearing to locate prey.
The Barn Owl and Barred Owl have concentric discs on their faces that help direct sound back to their ears. The largest owl in North America is the Great Grey Owl of Canada and the extreme northern regions of the U.S. The Great Horned Owl is the second largest owl of North America. It is found throughout the continent. The smallest owl of North America is the Elf Owl of the Southwest. The most common small owl is the Eastern Screech Owl, which looks very similar to the great horned owl. The screech owl is found in two color morphs, gray and red. Some owls have ears that are asymmetrically placed. These include Barred and Barn Owls. Life Cycle
In the spring the raptors return to the area where they were hatched and find a mate. It is thought that this bond is a life-long one. Once the eggs are laid, they are incubated between twenty and fifty days, depending on the species. At birth, baby birds of prey have poor eyesight and are covered with thick white feathers called downy feathers. When the birds are approximately two to four weeks old they are four times the size they were at birth and are able to tear small pieces of meat from the prey the parents bring to the nest. Just as all their juvenile plumage has grown in, the young birds make their first attempt at flight. Some are successful on their first try, but most are not and learn to fly from the ground. The young birds still are not able to hunt and spend the next several months within their parent’s territory learning to hunt and being fed by their parents.
Different birds of prey build different types of nests. Some are very elaborate and large, like
the bald eagle. While some are just plain holes in trees, like many of the owls. Red-tailed hawks build their own nests from sticks while some species, like the great horned owl, just use abandoned hawk, crow or squirrel nests.
A few of the smaller species of raptors, like the American kestrel, reach sexual maturity in
their second year. Other species, like the bald eagle, don't reach sexual maturity until their fifth or sixth year, sometimes even longer.
Many birds of prey migrate to warmer climates during the winter. Some species that do this
include the red-tailed hawk, Cooper's hawk, and sharp-shinned hawk. It is thought that during their first year, 60-70% of young raptors will die, and half of the
surviving birds die in their second year. This may be due to starvation, predation, or colliding with various man made objects.

20
Environmental Relationship
As we all know, nature is built upon a series of food chains and food webs. In these chains and webs, the smaller forms are eaten by the larger forms. An example of this is the mouse eats grain and the owl eats the mouse. This is how population sizes in all life forms are naturally kept under control. The way in which these webs are setup can have various effects on raptor populations. An example of this is the DDT use of the 1950's and 60's. The smaller birds would eat the insects that had been sprayed with DDT and then the peregrine falcons would eat the birds. The small birds would eat so many of the insects the DDT would build up to high concentrations in their tissues. The falcon would then eat many of the small birds and the amount of DDT in the falcon's tissue would multiply. This increased level of DDT in the falcon weakened the shell of their eggs and the populations started to decrease. The Peregrine Falcon was extirpated east of the Mississippi river due to this reason. The effect of any deleterious materials in a food chain multiply greatly as these materials work up through the food chain. There is a direct relationship between the populations of prey species and the populations of raptors. As the mouse population drops, so will the raptor populations. Probably the most serious cause of decreased sizes of raptor populations is the encroachment of humans. As people put up buildings and take away the natural areas, the habitat for raptors is disappearing. Some species are very adaptable (e.g. the great horned owl), while others are not (e.g. the Northern Harrier).
Natural Histories
Red-tailed Hawk
Habitat: Deciduous forests and accompanying open country.
Nesting: 2 or 3 eggs in a nest of sticks, lined with shreds of bark and green vegetation.
Range: Alaska and Nova Scotia south to Panama.
Rhythms: Daytime hunter of small mammals, birds, reptiles, amphibians, insects, and
carrion when available. Hunts from either a perch or while riding thermals.
Great Horned Owl
Habitat: Coniferous or deciduous forests and woodlands, swamp, orchard, park, riparian
forest, semi-desert.
Nesting: 2 or 3 eggs in old red-tail nest, crotch of tree, or cavity in tree.
Range: Arctic North America to southern tip of South America.
Rhythms: Nocturnal hunter of small mammals, birds, amphibians, reptiles, occasional fish.
Only natural predator of the skunk.
Eastern Screech Owl
Habitat: Mixed woodlands and woodlots near permanent water.
Nesting: 4 or 5 eggs in a tree cavity or hollow stump. No nesting materials are brought in.
Range: Southern Canada through Eastern United States.
Rhythms: Nocturnal hunter of small mice (meadow vole and white footed mouse), shrews,
moles, small birds and insects. Also arthropods and sometimes fish.

21
American Kestrel
Habitat: Open or partly open country with scattered trees. Have adapted well to urban
environments.
Nesting: 4 or 5 eggs in a tree cavity or nest box.
Range: Found throughout North America during entire year. Will migrate to Alaska in
summer and into Central America in winter.
Rhythms: Daytime hunter of small mammals, insects, and occasionally birds.
Peregrine Falcon Habitat: Open spaces usually associated with high cliffs and bluffs overlooking rivers and coasts. Since the mid-1980’s, captive-bred peregrines have been reintroduced into urban areas throughout North America. They favor tall buildings with ledges that mimic the natural cliffs and bluffs. Nesting: The scrape may be 12 inches in diameter and 1-2 inches deep. It is simply a depression scraped in the earth or cliff ledge. April incubation of the 3-4 eggs, rounded, cream colored with brown /red blotches, lasts 28-33 days, followed by a fledgling phase of at least 6 weeks. (courtesy: Steve Dome fact sheet) Range: Peregrines nest on cliffs, ledges, and sometimes in a broken hollowed section of a tree top. They are found on every continent, except Antarctica. (courtesy: Steve Dome fact sheet) Rhythms: Diurnal hunter of birds on the wing
Barred Owl Habitat: A woodland owl preferring mature forest and heavily wooded swamps. Also associated with flood plains, river bottoms and lake margins. Nesting: 2-3 (rarely 4-5) eggs deposited in a cavity or old hawk or crow nests Range: Found in eastern United States, north into Canada and as far south as Florida and Texas. They appear to expanding range westward, overlapping with spotted owl habitat in the Pacific Northwest Rhythms: Nocturnal hunters of lizards, frogs, rodents and occasionally birds.

22
Manning Information
Equipment
The equipment used in manning the education birds include: leash, swivel, jesses, and anklets (bracelets), as well as heavy leather gloves.
Leash
The leash is the piece of equipment that is passed through the swivel up to the button and is
looped into the left fist of the handler’s glove, or fastened to the perch. There are many types of leashes. These include single strand nylon para-cord leashes, braided nylon para-cord leashes, leather leashes, and dog leashes. Probably the most unsafe type of leash is the dog leash. This is so because at the end of most dog leashes is a clip. If the handler is not paying attention and doesn't clip the leash all the way, the bird can escape. This seems like a very simple process, but it has happened before. Willowbrook no longer uses dog leases while manning the education birds.
If a bird does escape with all its hardware on, it will inevitably get tangled in a tree branch
and starve to death. The style of leash used commonly at Willowbrook is the nylon para-cord leashes. These allow the handler to keep his/her right hand free for emergencies and more breaks to keep the bird from getting away. The nylon used in these leashes has a bursting strength of about 650 pounds, so it is very unlikely that any bird is going to break it. The nylon leashes used at Willowbrook all have a leather button at one end and a loop at the other. The leather button prevents the leash from slipping through the swivel
Swivel
The swivel is the piece of equipment which goes between the leash and jesses and rotates as
the bird turns, and keeps the jesses from tangling. The size of the swivel depends on the size of the
bird to be manned. There are a number of different types of swivels that can be used, but only one
type should be used. This is the Sampo solid ring ball-bearing swivel. This swivel has solid welded
rings, which won't bend or break. Split rings (like those on key chains) have a tendency to bend
and/or break under the stress of a bating bird and therefore aren't used. The two rings swivel
independently of each other.

23
Jesses
The jesses are the pieces of equipment
which attach the birds legs to the swivel. The
leather used to make jesses is typically 1.5 to
2.0 ounce kangaroo hide. Kangaroo is used
because of the weight to strength ratio.
Kangaroo leather is very light weight, but very
strong. Cowhide can also be used, but this is
heavier and can be uncomfortable on the birds.
On one end of the jess is a knot (or button).
This prevents the jess from slipping through the
anklet (bracelet). On the other end of the jess is
a slit. This slit is what accepts the swivel. It is
important that the jesses be constantly
monitored for any drying, breaking or negative
impact they may be having on a bird. To
prevent the drying of jesses, a leather compound
(like jess grease or hide conditioner) should be
applied to the jesses on a regular basis to
maintain the moistness of the leather. Any
compound with waterproofing components
should not be used as these stiffen up the leather. The proper length for jesses
depends on the particular species.
There are patterns available for the making of jesses. To make jesses, start by tracing the jess
pattern onto a piece of kangaroo hide going against the hide grain. This is to prevent the jess from
stretching when a bird bates. With the pattern in place, mark the locations of the top and bottom slit
holes on the leather. Using the smallest setting on a leather punch, make the top and bottom slit
holes. With a hobby knife cut a slit connecting the two holes you just made. At the end with the slit,
make a point in the leather with a hobby knife. To make a button at the other end of the jess, fold the
end of the leather over three times. Each fold should be about 1/2 inch long for the big birds and
about 1/4 inch for the smaller birds. Using a leather punch, make a hole in the three folds of the
leather. Pass the pointed end of the jess through the hole and pull until the entire jess has passed
through the hole. You have now made a jess. See figure 1.

24
Anklets
The anklet, or bracelet, is the
piece of equipment that goes around
the bird’s leg and does the actual job
of holding the bird on the fist. It is
important that both legs have anklets
on them. If anklets are only placed on
one leg, there is a possibility of
breaking the bird’s leg when it bates.
There are two types of anklets used at
Willowbrook. These are the
traditionals and click-clocks. Both are
made from the same kangaroo hide as
the jesses. There are patterns
available for both types, but the
traditionals are the ones most often
used at Willowbrook. Both work well,
however the traditionals are easier and
safer to put onto the bird. The
traditionals are "tied" onto the bird's leg, and the click-clocks are "fastened" around the bird's leg.
The click-clock style of anklet is fastened around the bird's leg using grommets. These grommets
must be set, and to do this a hammer must be used in close proximity to the bird's leg. One slip with
the hammer and there is a possibility of hitting the bird's leg. The traditionals are much easier to
apply. It only takes approximately one minute to put anklets on both legs and no tools are needed.
See figure 2. There is one inherent danger when using traditional anklets. This is if the anklet is not
watched closely, it can stretch over time and there is a possibility of the bird getting its rear talon
caught in the grommet.
For either type of anklet, the leather must be maintained. As stated above, some kind of
leather treatment (e.g. mink oil) should be applied to prevent the leather from drying out. If allowed
to dry out, the leather can shrink and possibly constrict to tightly around the bird's leg, cutting off
circulation. Leather treatments with "waterproofing" elements should be avoided.
Perches
Different sizes and styles of perches can be used depending on the bird. The perches used by
falconers include the ring perch, bow perch, and block perch. Descriptions of these perches are as
follows:

25
1) Ring perch - This type of perch is simply a ring that swivels around a central pole. It
swivels to prevent tangling the leash when a bird bates. The bird is tethered to a solid
welded ring attached to the vertical pole. This type of perch is used with the hawks.
See figure 3A.
2) Bow perch - This type of perch is exactly what its name says. It is simply a bow
with a bar going through the middle of it. The bar is to prevent the bird from
crawling under the perch. A solid welded ring is attached to the perch and slides side
to side on the perch as the bird bates. This type of perch can be used with the hawks,
owls, or falcons. See figure 3B.
3) Block perch - This type of perch is a block of wood on which the bird stands. The
important thing about this style of perch is that it can't be any wider than the jesses
are long. If too short of jesses are used, the bird can be left dangling when it bates. If
too long of jesses are used, one jess can go to each side of the perch and the bird is
unable to move. See figure 3C.

26
On all perches used, the surface of the perch must be covered with some material. These include rope, trapper mat, or long-blade astroturf. When rope is used, different sizes should be used depending on the bird. Smaller rope for smaller birds. The purpose of using these materials on perches is to prevent a medical condition in birds called bumblefoot. Bumblefoot is similar to bed sores, only on the feet. This condition is difficult to manage and all measures should be taken to avoid it. Bumblefoot is caused when one spot on the foot is repeatedly in contact with the perch. Which is the case with smooth perches. The materials listed above all provide various surfaces for the bird’s feet, therefore no one spot on the foot is in constant contact with the perch. These materials are also very easy to clean.
The size of the bird to be using a perch will determine the size of the perch. If a bird’s foot is to big for a perch, bumblefoot or other injuries may result. If a birds foot is too small for a perch, muscle and tendon damage may result (this more important in the hawks than in the falcons). Therefore, it is very important to know which bird goes on which perch. For example, on the ring perches used, the total diameter of the used part of the perch is 2.5 inches to accommodate the foot of a red-tailed hawk. The perch itself is 1/2 inch steel rod. On top of this is wrapped 1/4 inch sisal rope, and then wrapped again with 1/2 inch sisal rope. See figure 4. In comparison to this, the bow perch for the kestrels was made with 1/2 inch steel rod wrapped only with 1/4 inch sisal rope, for a total diameter of 1 inch. Proper Jessing Technique
The following procedures cover the correct jessing techniques once a bird is on the glove. It should be noted that each of the education raptors at Willowbrook have different personalities, and the procedures for manning each one may be a little different. The jessing techniques are all the same (e.g. when manning Tonka, a glove must be worn on the right hand to assist her return to the glove after a bate).
The equipment needed each time a bird is manned include: 1) a raptor gloves 2) a pair of
jesses, 3) one swivel, 4) one leash. The jessing procedures used at Willowbrook are as follows:
1) When jessing a bird, make sure that your back is to a perch. This will decrease the likelihood of the bird jumping off the glove and onto a perch.
2) Make sure that your fist is higher than your elbow. The bird will want to perch on
the highest point. You want to make sure the bird perches on your fist and not your wrist or elbow.
3) Pass the jess through the anklet grommet on the inside leg (the one closest to your
shoulder). While passing the jess through the grommet, make sure to pass it slowly and not pull to hard as to be tugging on the bird's leg. This may cause the bird to
bate. Use your fingers as a guide. Flip to the front from the outside.
4) Pass the other jess through the anklet grommet on the outside leg.
5) Pinch both jesses together between your thumb and index finger. This is your first
break. DO NOT pinch just one jess between your thumb and index finger. If
the bird would bate in this situation, it could break its leg.

27
6) Adjust the jesses so the pointed ends are in the same position. Now pass both jesses through the loop on the fat end of the swivel. Then pass the swivel through the slit in both jesses, and pull slightly on the swivel. The phrase to remember for this procedure is: Jess through swivel, swivel through jess.
7) Pass the leash through the bottom loop of the swivel.
8) When using the braided nylon leashes, up to five more breaks are made. The second, third and fourth breaks are made by looping the leash through the middle and index fingers three times. Then loop the circles between the ring and middle fingers.
Daily Manning
Under the best of cases, there should be two RVI’s every day of the week. The way that the
RVI’s on a specific day set up who is going to man what bird(s) is up to the RVI’s on that day.
There are two reasons for manning the raptors on a regular basis, 1) to monitor the weight of the birds, and 2) to maintain a good working relationship between the RVI and the birds. Any abnormalities observed in the raptors (feathers, feet, mute color, blood) should be reported to the RVI supervisor or Animal Keeper Staff immediately. Any food which is left in the cage should be noted in the Area Report Book located in the Animal Care Kitchen. The weighing of the birds always takes place in the designated hallway area in raptor dorms or on the digital scale in the main building. The following procedures should be followed when weighing the birds.
Before getting the bird:
1. Make sure the scale is on the cart in the hallway. If it is not, contact the RVI
supervisor or one of the animal keeping staff. Check that the scale is balanced on “0”
2. You should place a paper towel under the perch to catch all mutes and help with clean up.
3. Make sure that you have a "Raptor Daily Log" sheet from the log book located in the
basement of the house. Be sure to look at the log sheets filed for the days since you last manned birds to see the comments of other Raptor Educators.
Once you have the bird on the glove:
1. Follow proper procedures as described in training when placing a bird on the perch.
2. To get a more accurate weight reading, hold the leash level with the birds anklets to ensure the weight of the jesses, swivel, and leash are not included in the registered weight.
3. Write the weight of the bird on the log sheet as soon as possible after weighing the
bird, so the weight is not forgotten. To learn to use the clinic scale, refer to the terminology below.

28
ON - Push this part of the push bar to turn the scale on. If there is an "*" on the screen, the scale is off. If there is a "0g" on the screen, the scale is on. MENU - Disregard this option, it is not used when weighing the birds. RE-ZERO - Push this to re-zero the scale after the scale has been turned on and the perch put on the scale. PRINT - Use this button when the bird is continuously moving around on the perch. This will take an average weight and show it on the screen.
When the birds are weighed each day, a "Raptor Daily Log" sheet should be used. These are located on clipboards in the raptor dorms and next to the electronic scale in the main building. A copy of this form is included in Appendix A. The Raptor Educator(s) manning the birds should put their name and the date on the log sheet each time manning a bird. Each type of bird (owl, falcon, hawk) has a section on this form. These sections are:
1. Date - the date of weighing should be written here.
2. Time - the approximate time of day the bird was weighed should be written here.
This is important so that it can be determined if the bird had eaten before being weighed.
3. Weight - the registered weight of the bird in pounds and ounces.
4. General Health - this is where the overall appearance of the bird is written. If there is
a problem observed with a bird, write it here and tell the RVI supervisor and Staff Veterinarian.
5. Encounters - the number of groups the Raptor Educator and bird encountered either
on the trail or in the theater. Write Program if the bird is used for an educational program.
6. General Comments – any comments the Raptor Educator(s) want to pass on to the other Raptor Educators or RVI supervisor.
In the event that we are asked to clean cage(s) in raptor dorms, here are the proper cleaning
procedures:
Disinfection Procedure:
A. If spot cleaning, remove item to be disinfected. Do not use either product if an
animal will come into contact with the surface you are disinfecting before it has had
time to dry. Exhibit animal housing can be wiped with a sponge if necessary, while
the animal remains in the cage.

29
B. Remove all feces, dirt, and other organic material from surface (i.e. scrape). Not
doing so decreases the disinfectant’s effectiveness.
C. Clean cage with soap and water or hose the surface to remove stains, dried foods, etc.
D. Apply Avinol-3 to surface with a sponge (used only with disinfectant), spray bottle or
mechanical sprayer (only a light misting). Avinol-3 is a germicidal detergent
especially developed for use with avian housing, utensils, etc. We have purchased
this specifically for its effectiveness against Aspergillus, the fungus that often causes
sickness and death in captive wild birds.
E. Allow the surface to dry, approximately 5-10 minutes. Utensils, perches, aquariums,
etc. can be left out in the sun.
Safety Precautions:
A. Avinol-3 is an eye and skin irritant, and may be irritating to those users with
respiratory conditions.
B. Always wear smocks and rubber gloves when working with these compounds. Wear
goggles when doing large jobs and spraying often. Face masks are available in clinic
if you desire. Never use bare hands when cleaning cages!
C. First aid for exposure or irritation events should include flushing the affected area
with clean water for 15 minutes. An eye wash station is located in the X-Ray Room
and the Utility Room. Be sure to advise the RVI supervisor should any first aid be
required.
Recertification
Periodically, the Raptor Volunteer Interpreter will undergo a technical review of their
manning technique. We recognize that manning our birds is an ongoing learning process.
Because of their disability, some birds require specialized equipment or safety considerations
(i.e. a safety glove for the free hand). In some instances, we develop habits that may not be
appropriate. A periodic technical review will ensure that all raptor handlers are using
consistent and safe techniques.

30
DO'S AND DON'TS
The following is a quick list of the do's and don'ts of handling raptors.
1. DO enter the cage slowly, pulling the door behind you.
2. DON'T turn your back on the bird.
3. DON’T look up when a bird decides to hang from top of cage. Keep your head protected!
4. DO raise your hand in front of the bird to pick it up and lower your hand to set the bird onto its perch.
5. DO jess the inside leg (the leg closest to your shoulder) first.
6. DON'T leave cage until you have the bird totally under control.
7. DO keep forearm parallel to the ground. Walk slowly absorbing shock with your shoulder.
8. DON'T continue to walk when a bird has bated. STOP, regain control of the bird, then continue.
9. DON'T attempt any techniques you have not been shown or attempt anything on your own without the approval of the RVI supervisor. (e.g. outdoor perches)
10. DON'T attempt to pet the birds or allow anyone to touch them.
11. DO unjess the outside leg first.
12. DO try to share information with casual visitors any time you are working with the birds. Remember you are Raptor Educators not just Raptor Handlers.
31
TERMINOLOGY
The following terms are the ones most used in this type of programming. Please take time to learn them thoroughly. Almyrie: Jess and anklet (bracelet) system for jessing a raptor. This is a two piece
system as opposed to the traditional one piece system. The Traditional system is federally prohibited in the United States. The word almyrie is the name of the falconer who designed them.
Anklet (bracelet): This is the leather strap around each leg of the bird. Arm Protector: The leather sleeve worn by Raptor Educators. Bate: An attempt to fly off the fist or perch. Binocular or Stereoscopic Vision: Two eyes placed on the front of the head to provide
overlapping vision. Having both eyes see the same thing allows increased depth perception. Usually a characteristic of predators.
Break: Points along the length of the tether at which techniques are used to prevent
a bird from escaping Casting: Indigestible material which is regurgitated in pellet form. The act of
regurgitating the pellet. Disability: Physical or behavioral incapacity that makes survival in the wild difficult or
impossible. Ecosystem: Both biotic community and the physical environment in the area interacting
dynamically. Endangered: Likely to become extinct in the near future. Environment: Biotic (living), geologic, and climatic factors that act upon an organism or
An ecological community and thereby determine its form and survival. Extinct: Species no longer exists. All members of the species have died. Facial Disc: Ring of stiff feathers surrounding an owl’s face. Funnels sound to inner ear. Falconry: The art of hunting with birds of prey. Many raptor rehabilitators use falconry
techniques in their work. This type of hunting is regulated by very strict laws.
Foot: When a raptor grabs the handler with its feet. An aggressive movement by
the bird.

32
Gauntlet: The leather arm protector worn by Raptor Educators. Grommet: This is the metal eye in the anklet. Habitat: Place, type of site where a plant or animal lives. The habitat contains or
Meets all the organisms' requirements for survival. Habituation: A gradual loss of response to "insignificant" stimuli that occur repeatedly
without reward or punishment. In effect, it is learning to ignore a stimulus. Hood: A leather "helmet" used to cover the head and eyes of the bird. Used at
Willowbrook only in the in-house transfer or during a clinical exam of a bird of prey. Not available for owls.
Imprinting: Animal learns to make a strong association with another organism or object.
Important role in establishing proper species recognition and interaction especially in regard to choice of mate. Different from other types of learning in three ways, 1) never forgotten, 2) learned during a specific time during development, 3) What is learned is narrowly defined by instinct.
Jess: Leather straps attached to the bird's anklet. The jess is tied in a knot at one
end and pointed at the other with a slit running the length of the jess at the pointed end.
Leash: To restrain the bird by a detachable nylon braided or leather strap. Leash Extender: A strap of leather between the jesses and swivel used to extend the leash to
protect the tail. Mews: House or enclosure where the raptors are kept. Mute: Raptor excretement. Operant Conditioning: The learning process by which free operant behavior becomes attached to a
specific stimulus. The fundamental principle of operant conditioning is that behavior is determined by its consequences. This idea implies that the persistence of a response depends upon that response’s effect on the environment. The conditioning procedure therefore involves presenting an organism with a reinforcing stimulus immediately after the occurrence of a given response.
Positive Reinforcement: An increase in the frequency of a response which is the direct result of a positive reinforcer. A positive reinforcer is an event which, when presented, increases the probability of a response to follow. The presentation of a reinforcer following the performance of a correct response increases the probability that the response will occur in the future.

33
Predator: Animals that kill other animals for food. Prey: Animal hunted by a predator. Raptor: Term used to refer to any bird of prey. Swivel: Metal device attached to jesses and then to a leash. Tether: The equipment used to hold a bird on the fist. Includes the jesses, swivel, and
leash. Territory: Area actively defended by an animal against members of its own species or
other animals it views as a threat. Threatened: Likely to become endangered in the near future. Tiercel: The male of any raptor. Wildlife Rehabilitation: Caring for injured, sick, and orphaned wildlife and returning those
who have recovered adequately to be self-supporting back to the wild.
Weight: There are two categories of weight. Winter weight is the weight the bird
should maintain during colder months. Summer weight is the weight the bird should maintain during the summer. The winter weight is typically higher than the summer weight.
Commonly Asked Questions
In addition to the questions asked about education birds, the following is a list of questions
commonly asked by the audience of any of the three programs listed previously.
What can I do for a baby bird that I found in my yard?
If the parent birds are around, leave it to their care. They will bring it food and offer protection for
the few days before it’s able to fly up to a low branch.
If it is a featherless nestling or it is just partially feathered out, locate the nest by observing the
activity of the adult birds who are bringing food to the nest tree. Birds have a poorly developed
sense of smell and cannot detect odors on their young. You can place the nestling back in the nest.
If the nest cannot be located or it has been destroyed, put the nesting material into a hanging flower
basket. Watch the nest to determine if the parents return to the nest. If after several hours they don’t
return, bring the bird(s) to WWC for evaluation.

34
How can I stop a bird from constantly hitting my window?
The bird is responding to its reflection on the outside of the glass. It is acting defensively to ward off
an intruder, or trying to respond to a possible mate. Place a hanging mobile in front of the glass, or
strips of aluminum, or cover the glass temporarily with newspaper or a plastic garbage bag on the
outside surface. Soaping windows or placing decals close together on the windows will also help.
In the spring and fall, during the migration times of most birds, WWC will receive numerous birds
that have flown into windows. The birds are seeing a reflection of the sky and environment and
think that the window is simply a continuation of the outside world. To prevent this, follow the same
procedures listed in the paragraph above. For both cases, the rule to follow is that anything put on
the windows on the outside surface will help to cut down on reflection.
I feed the birds all year. Is this harmful?
There has been no hard and fast scientific evidence showing that this common practice is harmful.
However, there has been some research showing that some behavioral and reproductive traits are
modified because of supplemental feeding. In our experience at WWC, we believe that feeding of
wild animals is unnecessary.
It is important that once you start to feed wild birds, that you don’t one day decide you don’t want to
do it anymore. Over time, the birds have learned that site as a food source. If you suddenly don’t
feed the birds it may have adverse effects. It is better to gradually reduce the amounts of food
offered to the birds.
It is also important that you keep the area around the bird feeders clean. By not keeping the area
clean, you introduce a potential for disease and attracting unwanted animals. Because the birds are
in such concentrated numbers around feeders, disease can be easily spread.
Just because there doesn’t seem to be any adverse effects to feeding the birds, there are some very
definite negative effects on feeding wildlife in general. By feeding animals such as geese, mallards,
raccoons, opossums, etc., you can be creating abnormally large concentrations of animals. There are
numerous effects this has on the local environment and the inhabitants of that environment, for both
the human animal and wild animal. First of all, an increase in the number of already nuisance
species such as raccoons or opossums can create an even greater problem for the person feeding the
animals and their neighbors. Another example is that of waterfowl. Each spring WWC receives
calls about male mallards raping female mallards. This is partly because of the abnormal numbers of
males in the area due to the constant presence of food. When it comes time for mating, all the males
want to mate with the females in the area. These females can actually drown when approached by
too many males.
I have many bird feeders in my yard. Recently, I have noticed a hawk coming around and chasing
35
the birds away. How can I get rid of this hawk?
The hawk is responding to a wonderful, plentiful source of food. By setting out many bird feeders,
you have inadvertently created a feeding station for the hawk. To save the birds from predation,
eliminate the food supply and the birds will disperse, as will the hawk.
We just found a baby bird and can’t get it back to its nest. What can we feed it until we can get it
over to you?
Keep the bird warm and do not feed it anything. Water isn’t necessary and milk will do more harm
than good. Stress that the best thing for the bird is to return it to the nest and let its parents take care
of it. Also stress that it is illegal for anyone without a rehabilitation permit to care for any bird
except European starling, house sparrow and pigeon.

36
Self-appraisal
The following questions are part of a self-appraisal form for oral presenters developed by the
National Park Service. The purpose of this form is to encourage those speaking to groups to review
their performance, to be their own critic in detecting rough spots that need polishing.
PREPARATION OF THE TALK
Do you schedule your time so that you have the opportunity to regularly prepare your subject?
Do you organize your thoughts so that the important points are covered in an orderly, concise
manner?
Do you vary the outline of your talk with new concepts and new illustrations occasionally?
Do you find yourself using too much technical language?
Do you memorize your talk? (generally not encouraged)
Do you have a planned beginning and a planned end to your talk, even though it is a brief and
informal presentation?
DELIVERY OF THE TALK
Do you use a friendly, conversational tone?
Do you speak loud enough to be heard with ease? How do you check this?
Do you talk with enthusiasm? Do you talk distinctly?
What words do you slur? Do you run your sentences together with “uh” or “ and ah” instead of
having clean breaks between sentences?
Do you pause to emphasize important points?
How is your eye contact – front row, one or two people, or do you cover the field and make everyone
feel included?
Do you periodically check your rate of talking?
Do you vary the rate of talking as a means of keeping visitor interest and stressing important ideas?
Do you modulate your voice to avoid a monotone?
37
Are you over-serious in your talk?
Is your manner friendly?
Do you use objects, or exhibits in your talks? If so, how effectively do you use them?
Do you use a tape recorder or other mechanical devices to periodically check on your rate of speech,
enunciation, and modulation?
Do you listen regularly to the better radio or TV speakers to note in particular their style of delivery?
Do you read aloud regularly to get accustomed to the sound of your voice and also to improve your
enunciation?
Do you invite someone (fellow employee, spouse, or friend) interested in your self-improvement to
give you candid criticism?
Do you conscientiously try to improve your use of the English language?
ATTITUDE TOWARDS THE AUDIENCE
Do you enjoy speaking to people?
Do you enjoy talking about the features of this area?
Do you keep the attention of the visitor?
Are you more interested in the subject matter or the audience?
GENERAL APPEARANCE
Is your uniform well-fitting, clean, pressed, and in good condition?
Do the accessories conform with the dress code?
Do you stand erect and poised before a group?
Do you have nervous mannerisms that distract attention?

38
Additional Readings
The following references should be used in addition to this manual as sources of information
about birds of prey. Just about all are available at most large libraries.
1. Owls of the World: Their Evolution, Structure and Ecology. Edited by John A. Burton.
2. Owls. Written by Tony Angell
3. A Dictionary of Birds. Edited by Bruce Campbell and Elizabeth Lack.
4. The Audubon Society Encyclopedia of North American Birds. Written by John K. Terres.
5. Grzimek’s Animal Life Encyclopedia, volumes 7 & 8. Edited by Dr. Bernhard Grzime.
6. Birds of the World. Written by Gianfrance Bologna.
7. The Hunters. Written by Philip Whitefield.
8. The Encyclopedia of Birds. Edited by Dr. Christopher M. Perrins and Dr. Alex L.A.
Middleton.
9. North American Birds of Prey. Written by William Mansell and Gary Low.
10. North American Owls. Written by Paul A. Johnsgard.*
11. Hawks in Flight. Written by David Sibley and Clay Sutton.
12. Falconry and Hawking. Written by Phillip Glasier.*
13. Great Lake Falconry Association Education Handbook. Available from the GLFA for $15.*
14. The Birder’s Handbook. Written by Paul Ehrlich, Daavid S. Dobkin, and Darrel Wheye.
15. American Nature Guides: Birds of Prey. Written by Phillip Burton.
16. The Complete Falconer. Written by Frank L. Beebe.*
17. Owls: Their Life and Behavior. Written by Art Wolfe and Julio De La Torre.
18. Birds of Prey. Edited by Dr. Ian Newton.
19. Owls and Their World. Written by Rob Hume.
20. The Enchanting Owl. Written by Connie Toops.
21. The Life Histories of North American Birds of Prey. Written by Arthur Cleveland Bent.*
22. North American Falconry and Hunting. Written by Hal Webster.*
23. The raptor papers listed in the WWC Volunteer Handbook.
24. Any raptor related paper in any National Wildlife Rehabilitators Association symposium
proceedings.
25. Care and Management of Captive Raptors. Written by Lori Arent and Mark Martell.
* used in the development of this manual
39
RAPTOR VOLUNTEER INTERPRETER AGREEMENT
The following requirements must be met in order to maintain your status as a
Raptor Volunteer Interpreter:
1) Each Raptor Volunteer Interpreter will be required to present at least one raptor
program (either on or off site) per quarter (a total of four per year). At least one of
these programs must be a Raptor Outreach of some sort.
2) Assist with education pet care when necessary and assist and teach non-raptor
related programs when necessary.
3) Maintain a consistent weekly raptor manning schedule.
4) If a Raptor Volunteer Interpreter misses eight (8) consecutive weeks of manning
the birds, they will be required to go through training again before continuing to handle
the birds.
5) Periodically, the Raptor Volunteer Interpreter will undergo a technical
recertification of their manning technique and skills.
By signing below, I acknowledge that I have read and agree to follow the Raptor
Educator requirements outlined above.
_______________________________ _____________________________
Raptor Volunteer Interpreter Ron Skleney, Naturalist

40
RAPTOR VOLUNTEER INTERPRETER CRITERIA AND EXPECTATIONS ANIMAL RELATED 1. All RVIs must realize that the health and welfare of each raptor in the Education Collection
is a primary concern of the volunteer. 2. Raptor Volunteer Interpreters must fulfill a 4-hour per week obligation to raptor manning,
programming, and equipment maintenance. 3. Raptor Volunteer Interpreters must exhibit non-aggressive/humane manning techniques with
each bird in the collection – thus facilitating a comfortable working rapport with each bird. 4. Raptor Volunteer Interpreters must utilize safe manning techniques to prevent injury to the
bird, as well as, ensuring the safety of the public, co-workers, and themselves. 5. Raptor Volunteer Interpreters must be observant regarding identification of potential health
problems. Communicate potential health problems to the RVI supervisor immediately. In the absence of the RVI supervisor, notify the staff veterinarian or keeper staff. All health related observations should be noted in the raptor daily log book.
6. Raptor Volunteer Interpreters will assist with the feeding and housing maintenance of all
birds in the collection.
7. Raptor Volunteer Interpreters will assist with the feeding and cage cleaning of the education
pets when required. 8. Raptor Volunteer Interpreters will assist with the implementation of prescribed medical
regimes when required. 9. Raptor Volunteer Interpreters will be responsible for the completion of all records related to
manning activities. PROGRAM RELATED 1. Raptor Volunteer Interpreters will be responsible for the safety of all program participants
during the program presentation. 2. Raptor Volunteer Interpreters will become familiar with the natural history and individual
case histories of each bird in the collection. 3. Raptor Volunteer Interpreters will exhibit a professional image when representing WWC and
the Forest Preserve District of DuPage County. The professional image includes both physical and behavioral components.

41
4. Raptor Volunteer Interpreters will assist in the creation of a nurturing classroom environment to facilitate learning of all participants.
5. Raptor Volunteer Interpreters will present a minimum of four (4) raptor programs during the
programming year.
6. Raptor Volunteer Interpreters will become proficient in and teach non-raptor related
programs where required. 7. Raptor Volunteer Interpreters will be responsible for all program prep and clean-up activities. 8. Raptor Volunteer Interpreters will be responsible for the completion of all records related to
programming activities. 9. Raptor Volunteer Interpreters are expected to provide trail encounters for the public during
their weekly 4-hour shift. PUBLIC RELATED 1. Raptor Volunteer Interpreters will be responsible for the safety and well being of all public
during scheduled and non-scheduled activities when the birds are present. 2. Raptor Volunteer Interpreters will present a pleasant and patient attitude when in contact
with the general public in both scheduled and non-scheduled programs. 3. Raptor Volunteer Interpreters will be responsible for the dissemination of accurate and
current information concerning birds in the education collection in addition to raptors in general.
4. Raptor Volunteer Interpreters will provide access to programming through special request or
trail encounters to the general public whenever feasible. STAFF RELATED 1. Raptor Volunteer Interpreters work under the direct supervision of the RVI supervisor. 2. Raptor Volunteer Interpreters will establish and execute a professional working relationship
with staff and other volunteers. 3. Raptor Volunteer Interpreters will notify the RVI supervisor and other appropriate staff
members immediately to potential health and safety problems regarding both bird and human conditions.
4. Raptor Volunteer Interpreters will notify the RVI supervisor of schedule changes by updating
the working calendar in the volunteer headquarters and calling in to advise of any necessary absences.

42
ELIGIBILITY FOR THE PROGRAM 1. Adult volunteers with one (1) year of experience (or the equivalent of) as a Volunteer
Interpreter at WWC. 2. Approval and recommendation from Volunteer Interpreter supervisor. 3. Satisfactory attendance record. 4. Ability to meet the physical requirements of all Raptor Volunteer Interpreter expectations. 5. Ability and desire to interact with the public in formal and informal teaching situations. 6. Ability to work cooperatively with all WWC staff and volunteers. TERMINATION FROM THE PROGRAM 1. Raptor Volunteer Interpreters may be terminated from the program for failure to abide by
safety regulations which may endanger the birds, the public or the volunteer and co-workers as outlined in the WWC Volunteer Handbook.
2. Raptor Volunteer Interpreters may be terminated from the program for failure to maintain a
professional image in the presence of public and staff. 3. Raptor Volunteer Interpreters may be terminated from the program for failure to abide by the
manning and program requirements. 4. Acceptance and continuation in the Raptor Volunteer Interpreter program is first and
foremost a privilege, and is not guaranteed and is dependent upon the discretion of the RVI supervisor and the Site Manager.

43
APPENDIX A

44
APPENDIX B

45
APPENDIX C

46
Appendix D