Embed Size (px)
Citation preview
Rainbow Chakra LED HoodieCreated by Erin St Blaine
Last updated on 2016-11-25 07:38:21 PM UTC
2333
444555
6688999
11161920202222
424444
Guide Contents
Guide ContentsIntroductionMaterials
Tools & Crafting Materials
Design and LayoutMicrocontrollerLED Style & NumberControls PlacementBattery & PowerFailing Gracefully
LED TesterIf this is your first time using ArduinoWiring Diagram
Switch WiringMetro WiringNeopixel WiringButton Wiring
Neopixel Strip AssemblyNeopixel Singles AssemblyMicrocontroller AssemblySwitch WiringMetro WiringThe Code
Software Setup
TroubleshootingFinishing
Care and Feeding
© Adafruit Industries https://learn.adafruit.com/rainbow-chakra-led-hoodie Page 2 of 45
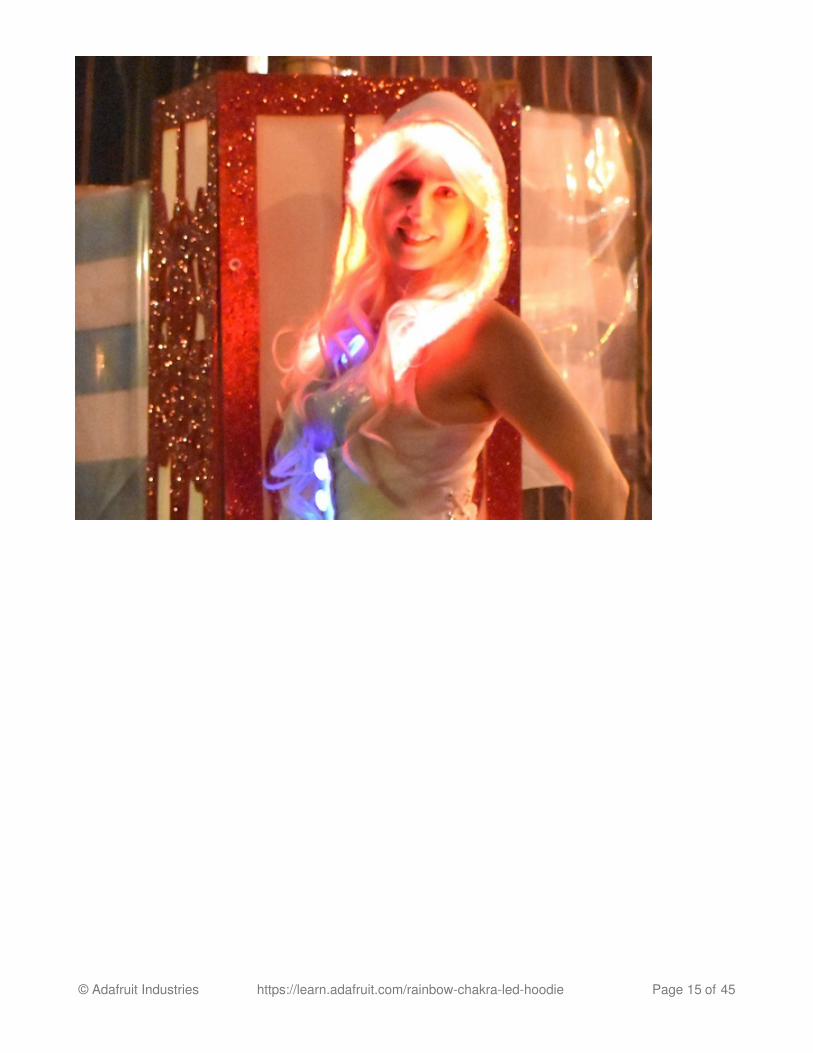
IntroductionFestivals and events can get chilly at night. What better way to warm up than with a glowing hoodie --especially one with interactive buttons that engage everyone you meet and offer conversations andconnection, ooh's and aah's, and plenty of light to find your way home.
This glowing hoodie is controlled by seven 3D printed buttons along the front, each corresonding to oneof the seven chakras. When a colored button is pressed, the Neopixel strip lining the hood and theindividual neopixels on the tail animate in that chakra's color.
I started with a gorgeous handmade hoodie from Kinetic Couture (http://adafru.it/peq), but any hoodie,vest, or furry muppet coat will work well with all the techniques in this guide. Let your imagination runwild!
Before you start: This project is fairly complex and involved, and refers to several other guides fortechniques and ideas. It's really meant to inspire you to create your own unique light-up clothing. Besure to read through the whole guide and let the ideas rattle around for a while before jumping in!
MaterialsThis project builds on the Neopixel Tactile Switch buttons guide (http://adafru.it/per), adding two types ofLED strands for two very different effects.
7 Neopixel Tactile Switch Buttons (http://adafru.it/per)1 Adafruit Metro Mini (http://adafru.it/fto)1 meter of 60/m NeoPixel Strip in white (http://adafru.it/1138)30-50 individual NeoPixels (http://adafru.it/1559)JST on/off breakout switch (http://adafru.it/1863)2500mAH LiPoly battery (http://adafru.it/328) (get a charger too (http://adafru.it/1304))30awg wire in at least 3 colors (http://adafru.it/2051)
Tools & Crafting Materials
Needle & threadFabric glueInterfacing and / or lining fabricSewing machine (helpful but not necessary)Soldering iron & heat shrinkFun fur or other diffusion material
© Adafruit Industries https://learn.adafruit.com/rainbow-chakra-led-hoodie Page 3 of 45

Design and LayoutThis project starts when you find the perfect hoodie or coat to light up. Find yourstyle (http://adafru.it/pes) and use something that you'll want to wear even during the daytime.
Now it's time to do some sketches. My favorite way to do this is to print out a photo of the hoodie anddraw on it with a sharpie. Here are some things you'll want to plan:
Microcontroller
What microcontroller should you use? There are so many pros and cons to every controller out there. I'm using the Metro Mini because:
Lots of memory means I can upload lots of patternsIt has 8+ available digital I/O holes in a row and I need that for my 7 buttonsIt's fast, so, better able to handle interrupts to the code from the buttons
If you're planning to add bluetooth or wifi control, look for a board that has that built in (check out theFeather line).
Think about where the microcontroller will be attached. You'll want it someplace that won't get toosweaty if you're dancing (so, maybe avoid armpits, or your hoodie will short out as soon as the funstarts) but close enough to all your LEDs to avoid super long wire runs.
LED Style & Number
How many LEDs do you want to add? Many microcontrollers have limits to how many LEDs they candrive from one pin. Do some research -- although if you keep the LEDs to less than 100-125 you'll befine with just about any microcontroller.
Remember, more lights will translate to a shorter battery life, so find the smallest number you can behappy with and go from there.
The 144/m neopixel strips make for a buttery smooth animation, but don't cover a lot of area. The 30/mones look a little spotty, so for my project, the 60/m seem to be just right.
For the back of my hoodie I wanted a starry-night style random scattering of LEDs, so I used individualneopixels. I get a large area lit without so much power draw overhead.
This technique is a bit more work to install. But it's worth it.
© Adafruit Industries https://learn.adafruit.com/rainbow-chakra-led-hoodie Page 4 of 45
Controls Placement
Where will the on/off switch go? Put it someplace you can reach it easily, but where it won't getswitched off accidentally if someone hugs you or bumps into you on the dance floor.
If you're using tactile switch buttons, how many do you want to use, and where will you place them?
Battery & Power
Will this hoodie be worn by a kid? If so, a AAA battery pack is the safest and simplest option.
LiPoly batteries are smaller, lighter, and last longer but they do have their dangers, so know aboutthem (http://adafru.it/pet) before you strap one to your body.
Where will the battery live? Pockets are often great for holding batteries, but if your hoodie doesn'thave pockets, or if it's form fitting, find a place where the battery will be safe and unobtrusive.
Failing Gracefully
LED strands and wires are delicate, finnicky creatures. Even with all the strain relief and hot glue in theworld, your hoodie is likely to break at some point during its lifetime, probably (if you're like me) rightbefore your big stage debut.
One trouble with Neopixels is that when a strand breaks, a pixel goes bad, or a wire gets pulled out,every pixel "downstream" of the break goes dark.
There are a few things you can do to help minimize the number of dark pixels if something goes wrong.
1. Connect power and ground to both the "in" and the "out" end of your strip. That way if one powerwire breaks, you're still getting power to your pixels.
2. Split the pixels into multiple data paths. My design mirrors the left side and the right side, so ifone side loses power or data, at least the other side stays on.
3. Place high-stress pixels at the tail end of the design. If a pixel is in a bendy place like an elbow, orsomeplace where it's going to get sat upon, make it the last pixel in line so that when it breaks, itwon't ruin the fun for every other pixel.
© Adafruit Industries https://learn.adafruit.com/rainbow-chakra-led-hoodie Page 5 of 45
LED Tester
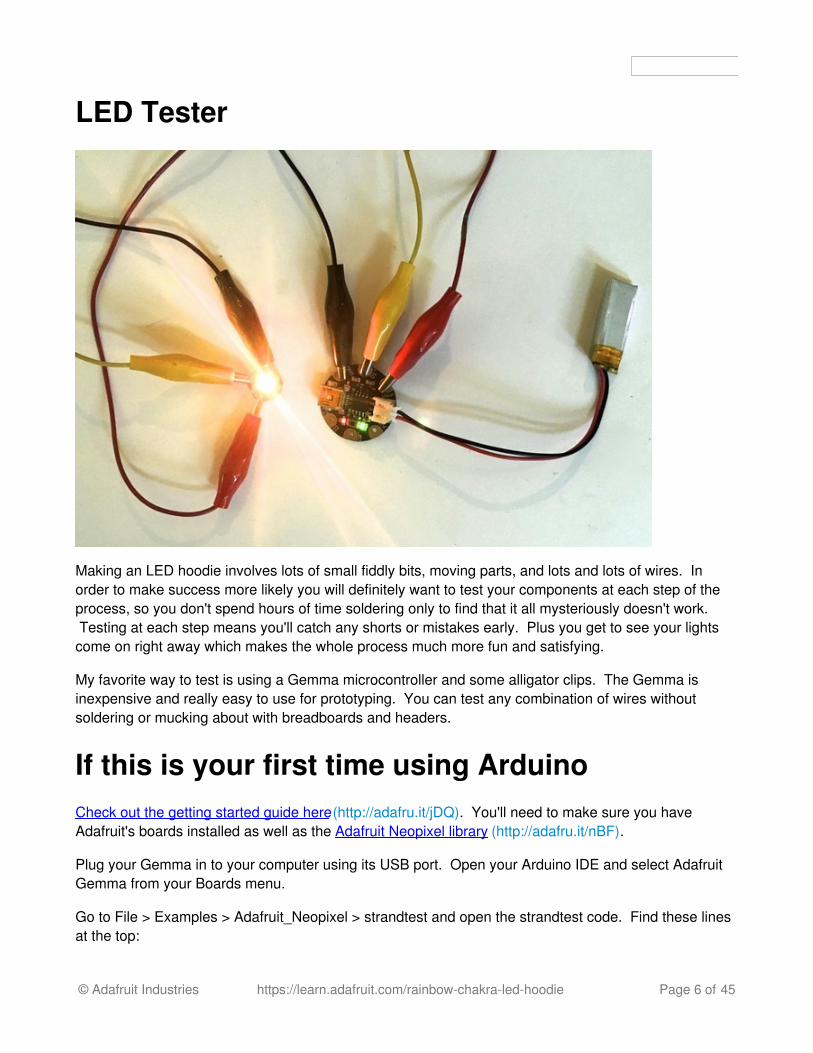
Making an LED hoodie involves lots of small fiddly bits, moving parts, and lots and lots of wires. Inorder to make success more likely you will definitely want to test your components at each step of theprocess, so you don't spend hours of time soldering only to find that it all mysteriously doesn't work. Testing at each step means you'll catch any shorts or mistakes early. Plus you get to see your lightscome on right away which makes the whole process much more fun and satisfying.
My favorite way to test is using a Gemma microcontroller and some alligator clips. The Gemma isinexpensive and really easy to use for prototyping. You can test any combination of wires withoutsoldering or mucking about with breadboards and headers.
If this is your first time using ArduinoCheck out the getting started guide here (http://adafru.it/jDQ). You'll need to make sure you haveAdafruit's boards installed as well as the Adafruit Neopixel library (http://adafru.it/nBF).
Plug your Gemma in to your computer using its USB port. Open your Arduino IDE and select AdafruitGemma from your Boards menu.
Go to File > Examples > Adafruit_Neopixel > strandtest and open the strandtest code. Find these linesat the top:
© Adafruit Industries https://learn.adafruit.com/rainbow-chakra-led-hoodie Page 6 of 45
#define PIN 6
Change PIN to 1.
Change the first parameter in your strip definition to reflect the number of pixels you are planning touse:
Adafruit_Neopixel strip = Adafruit_Neopixel(YourNumberHere, PIN, NEO_GRB...)
Press the Reset button on the Gemma to get it into bootloader mode, and then immediately press theupload button in Arduino to upload the code.
Then, get your alligator clips out and hook them up thusly:
Red > Gemma VoutBlack > Gemma GYellow > Gemma D1
The clips' colors will correspond to the wire colors used in the rest of this project. You can power theGemma from the USB port or plug a battery in to the JST connector.
Use the tester at every step of the way. Use it to test a neopixel strand right out of the box to be sure allthe pixels work. Use it whenever you finish soldering together a batch of pixels. Catch any mistakesearly!
© Adafruit Industries https://learn.adafruit.com/rainbow-chakra-led-hoodie Page 7 of 45
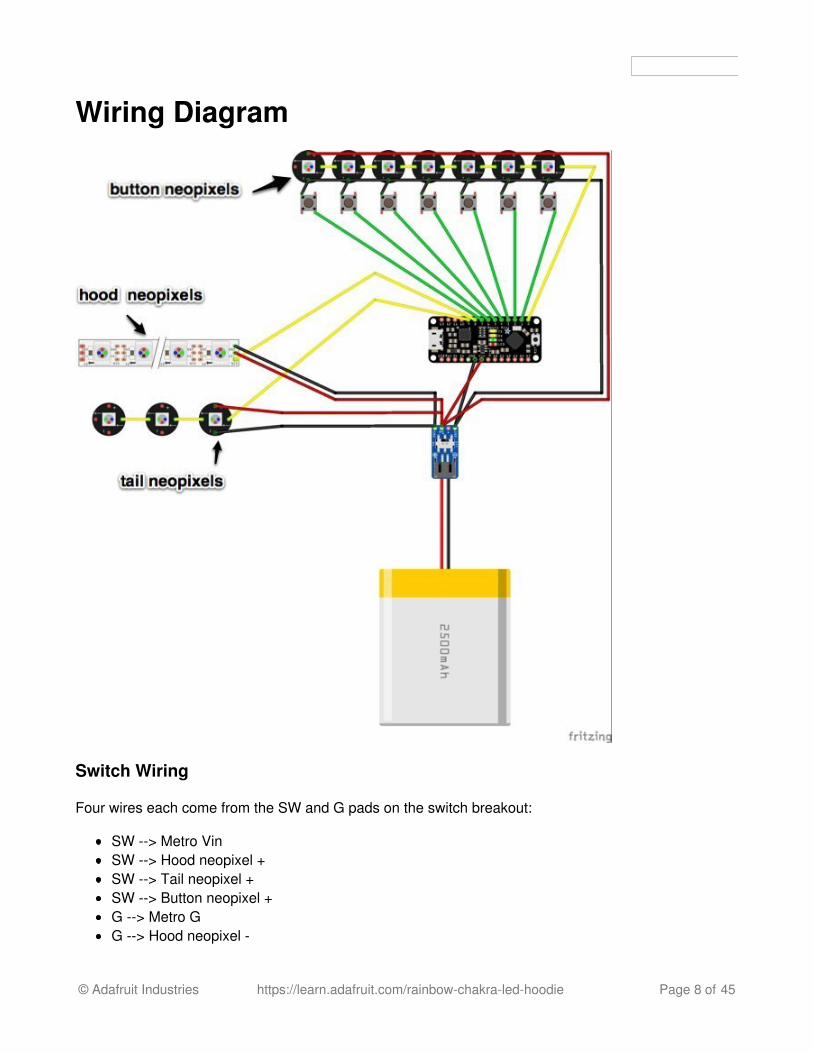
Wiring Diagram
Switch Wiring
Four wires each come from the SW and G pads on the switch breakout:
SW --> Metro VinSW --> Hood neopixel +SW --> Tail neopixel +SW --> Button neopixel +G --> Metro GG --> Hood neopixel -
© Adafruit Industries https://learn.adafruit.com/rainbow-chakra-led-hoodie Page 8 of 45
G --> Tail neopixel -G --> Button neopixel -
Metro Wiring
In addition to the power wires from the switch, we have 3 data wires (one for each neopixel strand) and7 button wires (one for each button).
Metro 0 --> Button neopixel INMetro 1 --> Button 1 Metro 2 --> Button 2Metro 3 --> Button 3Metro 4 --> Button 4Metro 5 --> Button 5Metro 6 --> Button 6Metro 7 --> Button 7Metro 8 --> Hood neopixel INMetro 9 --> Tail neopixel IN
Neopixel Wiring
Connect power, ground and data wires for each individual neopixel breakout.
Button Wiring
As shown in this illuminated push button guide (http://adafru.it/scL).
© Adafruit Industries https://learn.adafruit.com/rainbow-chakra-led-hoodie Page 9 of 45
© Adafruit Industries https://learn.adafruit.com/rainbow-chakra-led-hoodie Page 10 of 45
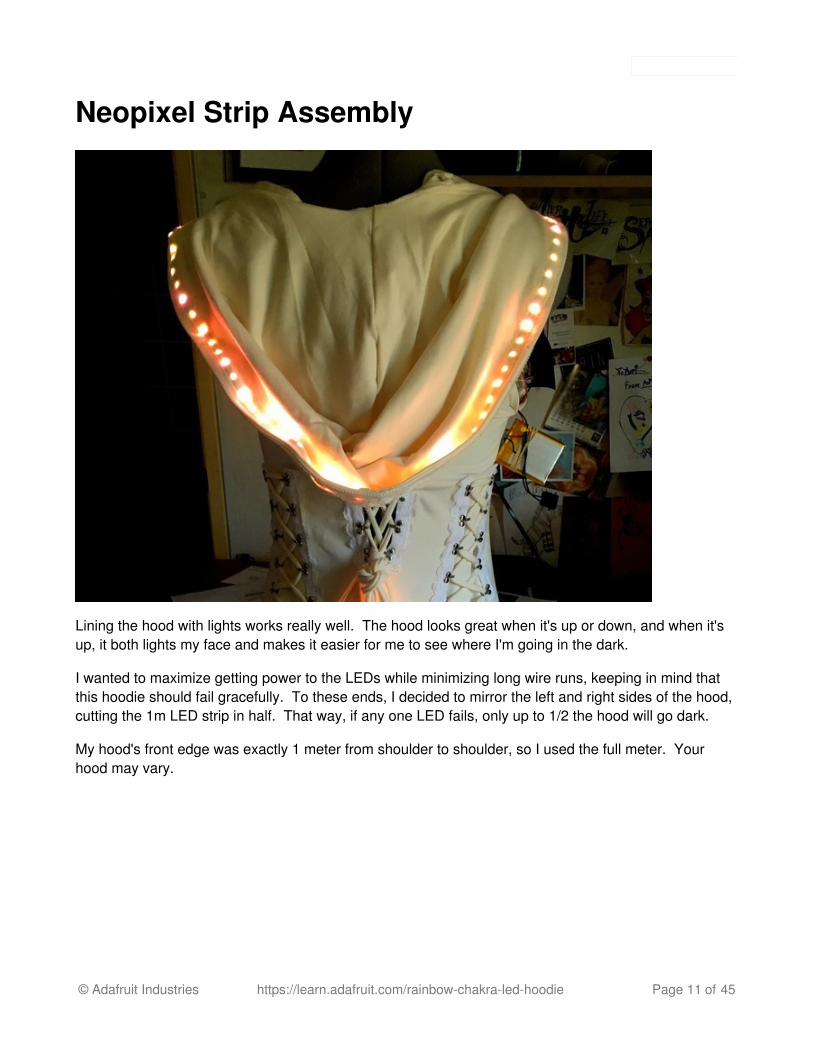
Neopixel Strip Assembly
Lining the hood with lights works really well. The hood looks great when it's up or down, and when it'sup, it both lights my face and makes it easier for me to see where I'm going in the dark.
I wanted to maximize getting power to the LEDs while minimizing long wire runs, keeping in mind thatthis hoodie should fail gracefully. To these ends, I decided to mirror the left and right sides of the hood,cutting the 1m LED strip in half. That way, if any one LED fails, only up to 1/2 the hood will go dark.
My hood's front edge was exactly 1 meter from shoulder to shoulder, so I used the full meter. Yourhood may vary.
© Adafruit Industries https://learn.adafruit.com/rainbow-chakra-led-hoodie Page 11 of 45
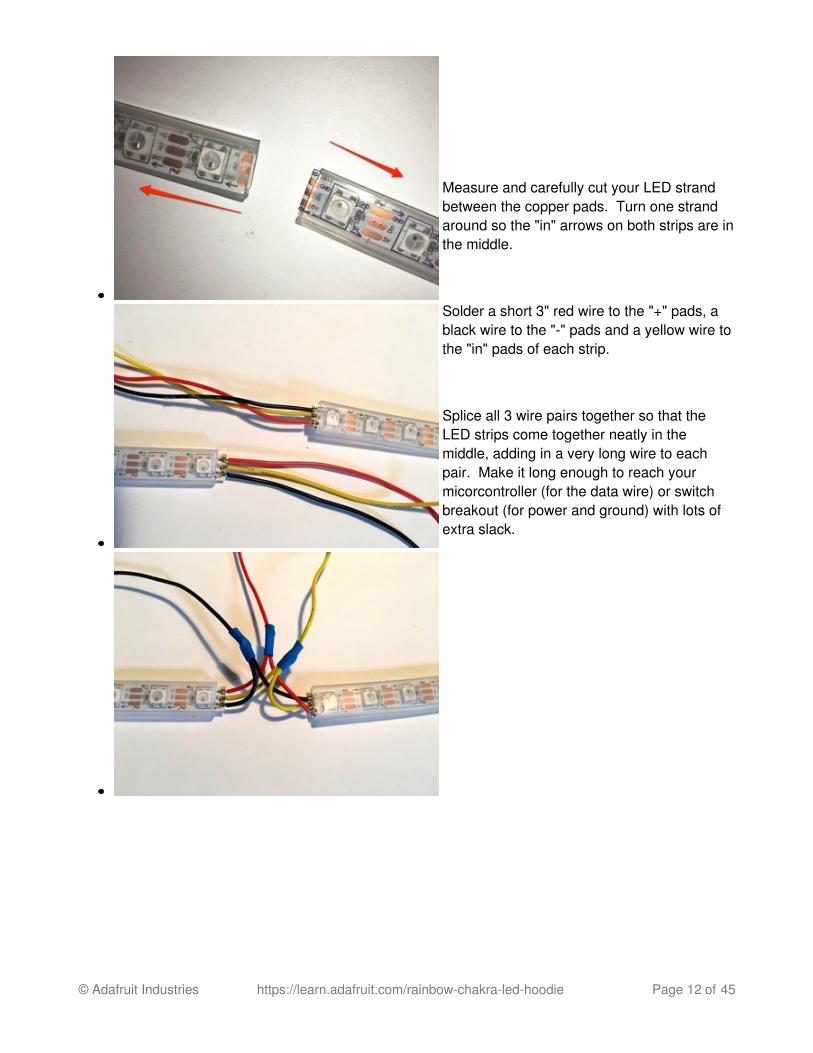
Measure and carefully cut your LED strandbetween the copper pads. Turn one strandaround so the "in" arrows on both strips are inthe middle.
Solder a short 3" red wire to the "+" pads, ablack wire to the "-" pads and a yellow wire tothe "in" pads of each strip.
Splice all 3 wire pairs together so that theLED strips come together neatly in themiddle, adding in a very long wire to eachpair. Make it long enough to reach yourmicorcontroller (for the data wire) or switchbreakout (for power and ground) with lots ofextra slack.
© Adafruit Industries https://learn.adafruit.com/rainbow-chakra-led-hoodie Page 12 of 45
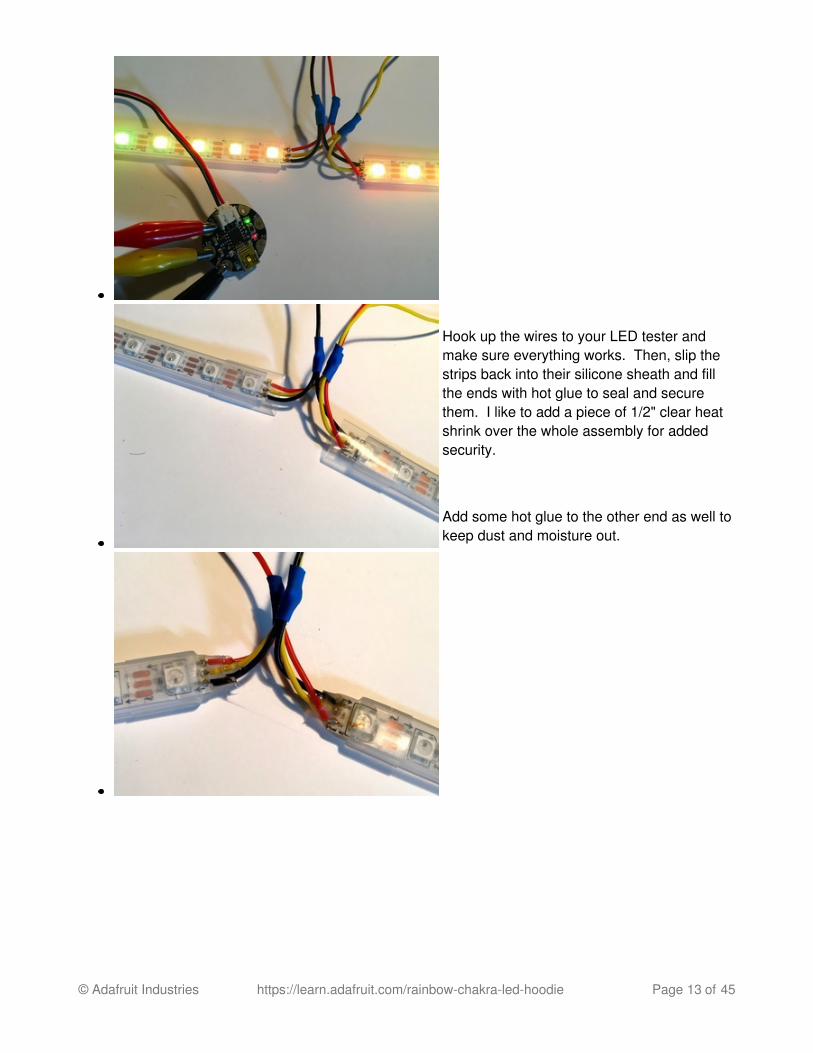
Hook up the wires to your LED tester andmake sure everything works. Then, slip thestrips back into their silicone sheath and fillthe ends with hot glue to seal and securethem. I like to add a piece of 1/2" clear heatshrink over the whole assembly for addedsecurity.
Add some hot glue to the other end as well tokeep dust and moisture out.
© Adafruit Industries https://learn.adafruit.com/rainbow-chakra-led-hoodie Page 13 of 45
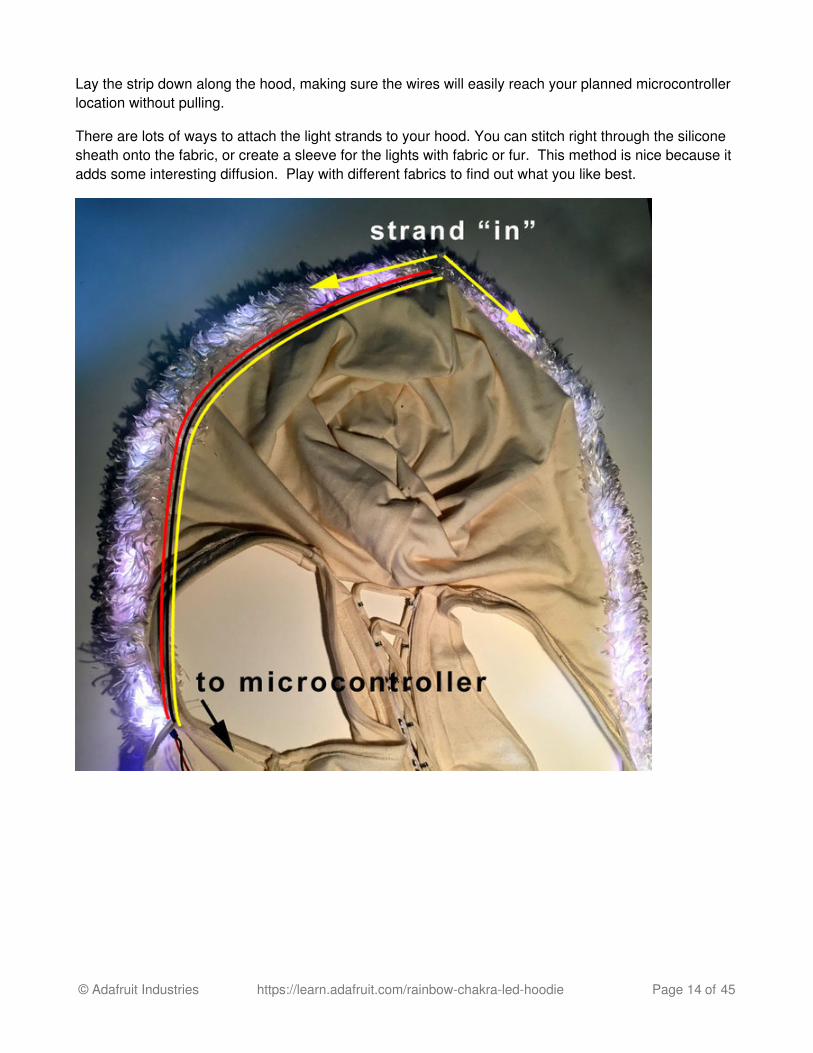
Lay the strip down along the hood, making sure the wires will easily reach your planned microcontrollerlocation without pulling.
There are lots of ways to attach the light strands to your hood. You can stitch right through the siliconesheath onto the fabric, or create a sleeve for the lights with fabric or fur. This method is nice because itadds some interesting diffusion. Play with different fabrics to find out what you like best.
© Adafruit Industries https://learn.adafruit.com/rainbow-chakra-led-hoodie Page 14 of 45
© Adafruit Industries https://learn.adafruit.com/rainbow-chakra-led-hoodie Page 15 of 45
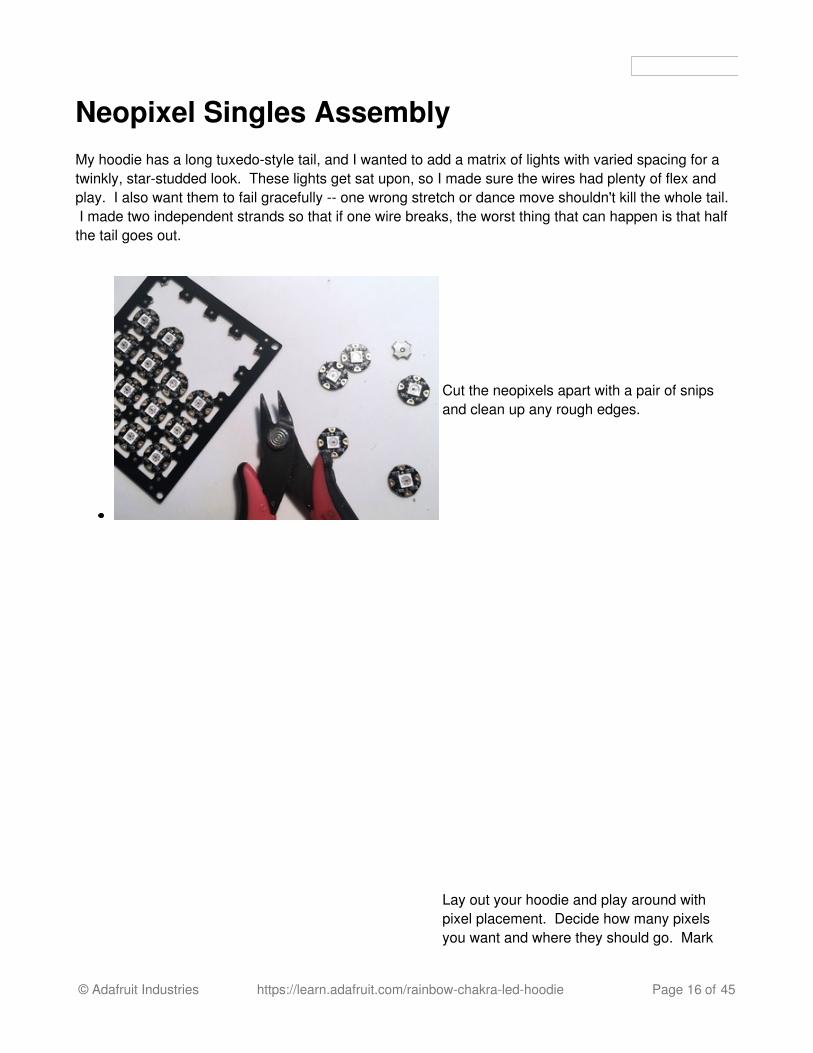
Neopixel Singles AssemblyMy hoodie has a long tuxedo-style tail, and I wanted to add a matrix of lights with varied spacing for atwinkly, star-studded look. These lights get sat upon, so I made sure the wires had plenty of flex andplay. I also want them to fail gracefully -- one wrong stretch or dance move shouldn't kill the whole tail. I made two independent strands so that if one wire breaks, the worst thing that can happen is that halfthe tail goes out.
Cut the neopixels apart with a pair of snipsand clean up any rough edges.
Lay out your hoodie and play around withpixel placement. Decide how many pixelsyou want and where they should go. Mark
© Adafruit Industries https://learn.adafruit.com/rainbow-chakra-led-hoodie Page 16 of 45
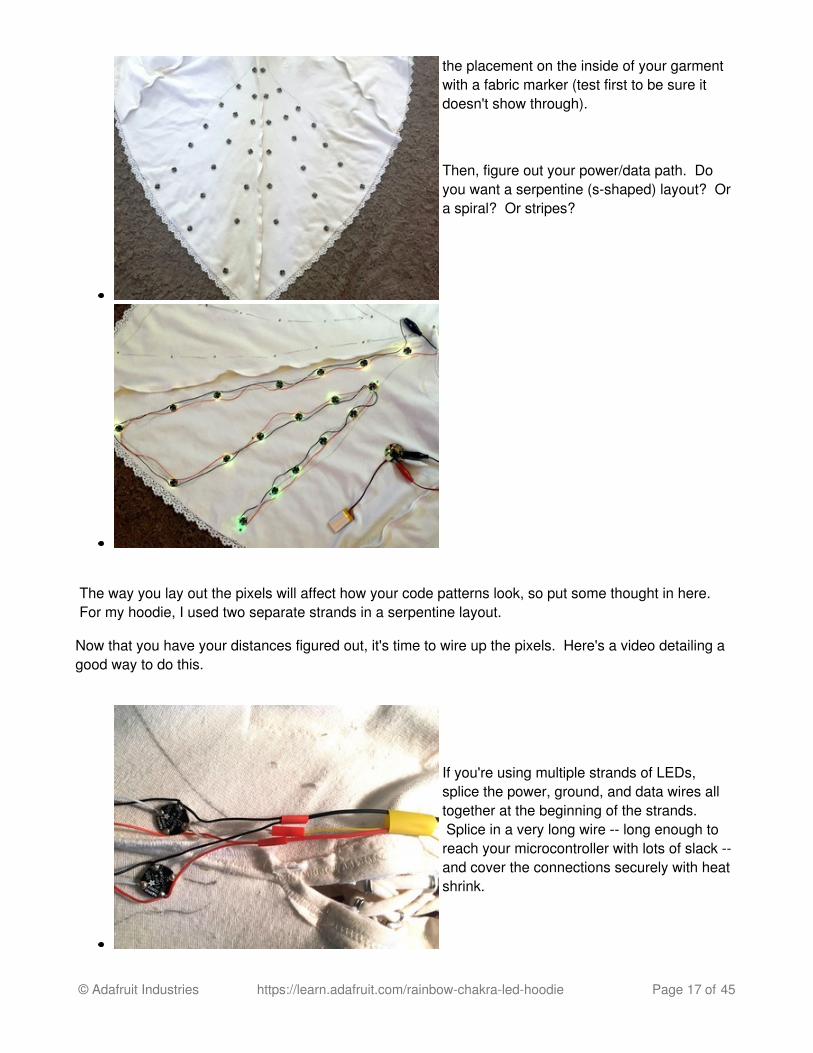
the placement on the inside of your garmentwith a fabric marker (test first to be sure itdoesn't show through).
Then, figure out your power/data path. Doyou want a serpentine (s-shaped) layout? Ora spiral? Or stripes?
The way you lay out the pixels will affect how your code patterns look, so put some thought in here. For my hoodie, I used two separate strands in a serpentine layout.
Now that you have your distances figured out, it's time to wire up the pixels. Here's a video detailing agood way to do this.
If you're using multiple strands of LEDs,splice the power, ground, and data wires alltogether at the beginning of the strands. Splice in a very long wire -- long enough toreach your microcontroller with lots of slack --and cover the connections securely with heatshrink.
© Adafruit Industries https://learn.adafruit.com/rainbow-chakra-led-hoodie Page 17 of 45
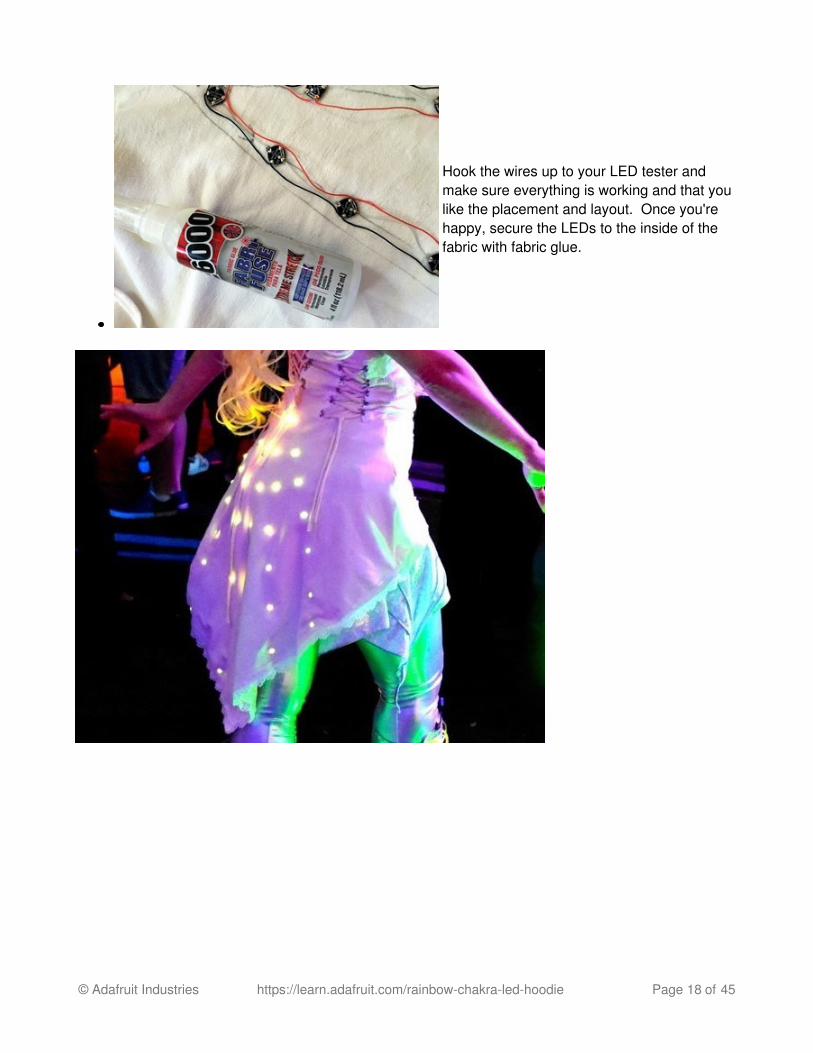
Hook the wires up to your LED tester andmake sure everything is working and that youlike the placement and layout. Once you'rehappy, secure the LEDs to the inside of thefabric with fabric glue.
© Adafruit Industries https://learn.adafruit.com/rainbow-chakra-led-hoodie Page 18 of 45
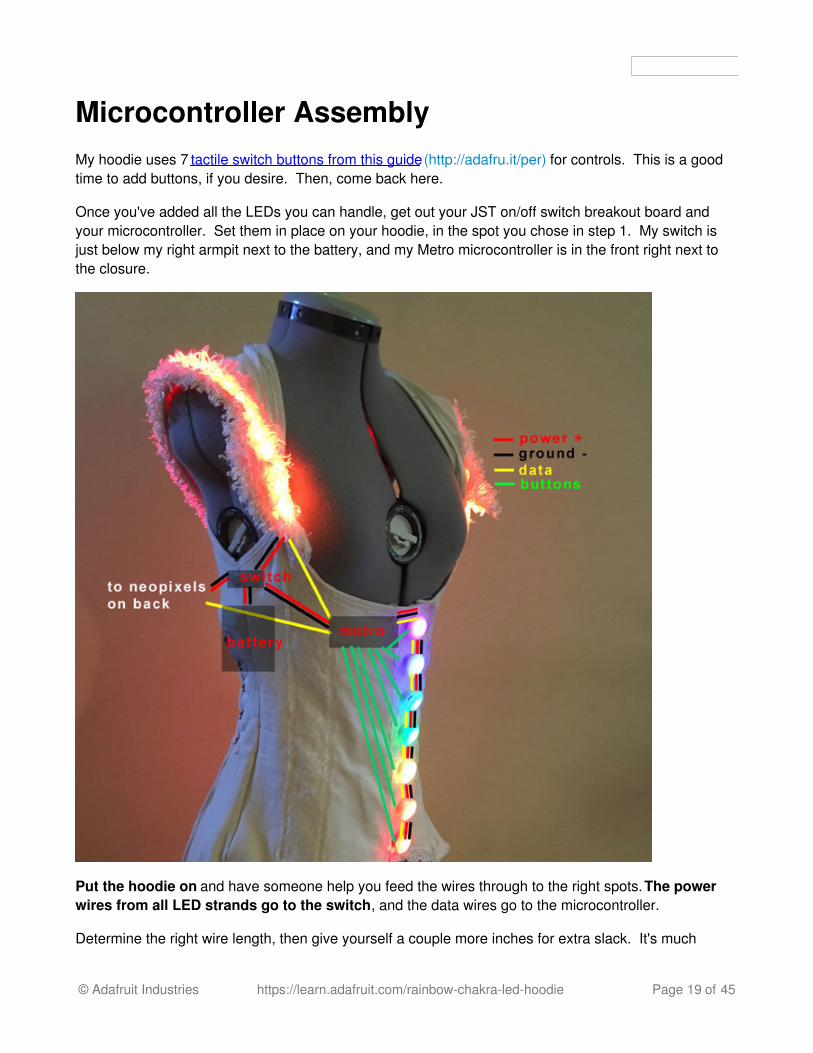
Microcontroller AssemblyMy hoodie uses 7 tactile switch buttons from this guide (http://adafru.it/per) for controls. This is a goodtime to add buttons, if you desire. Then, come back here.
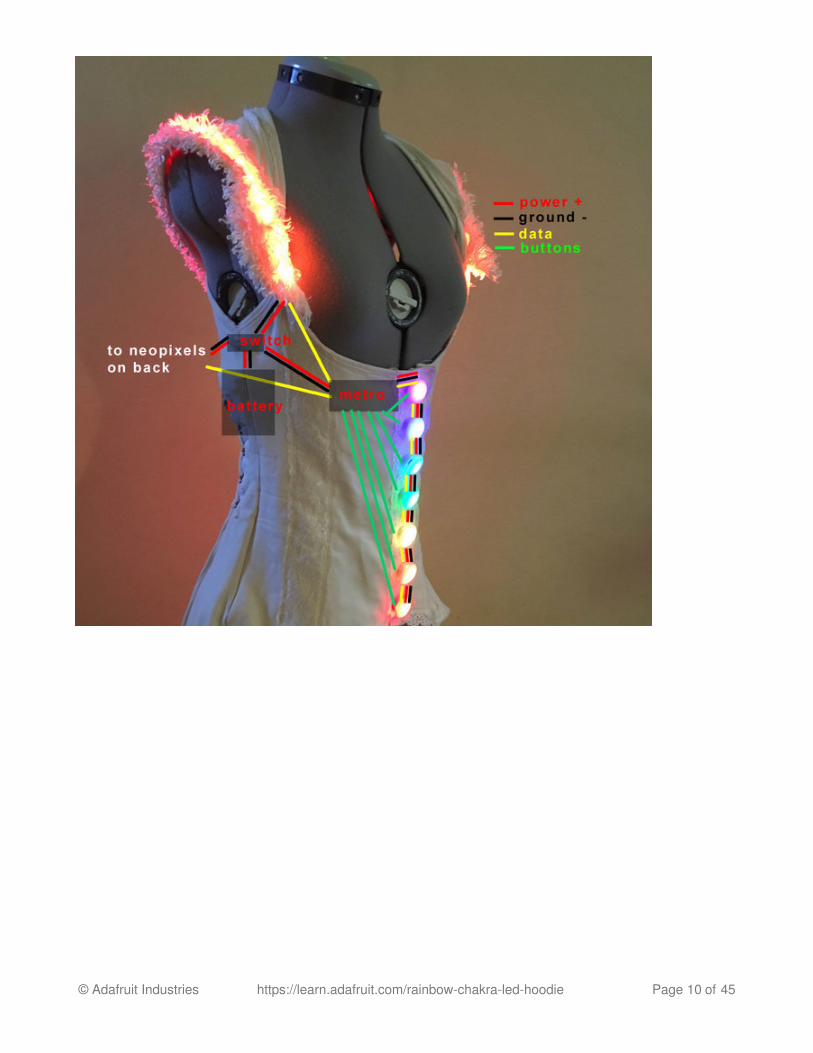
Once you've added all the LEDs you can handle, get out your JST on/off switch breakout board andyour microcontroller. Set them in place on your hoodie, in the spot you chose in step 1. My switch isjust below my right armpit next to the battery, and my Metro microcontroller is in the front right next tothe closure.
Put the hoodie on and have someone help you feed the wires through to the right spots. The powerwires from all LED strands go to the switch, and the data wires go to the microcontroller.
Determine the right wire length, then give yourself a couple more inches for extra slack. It's much
© Adafruit Industries https://learn.adafruit.com/rainbow-chakra-led-hoodie Page 19 of 45
easier to manage too-long wires than it is to deal with wires that are slightly too short.
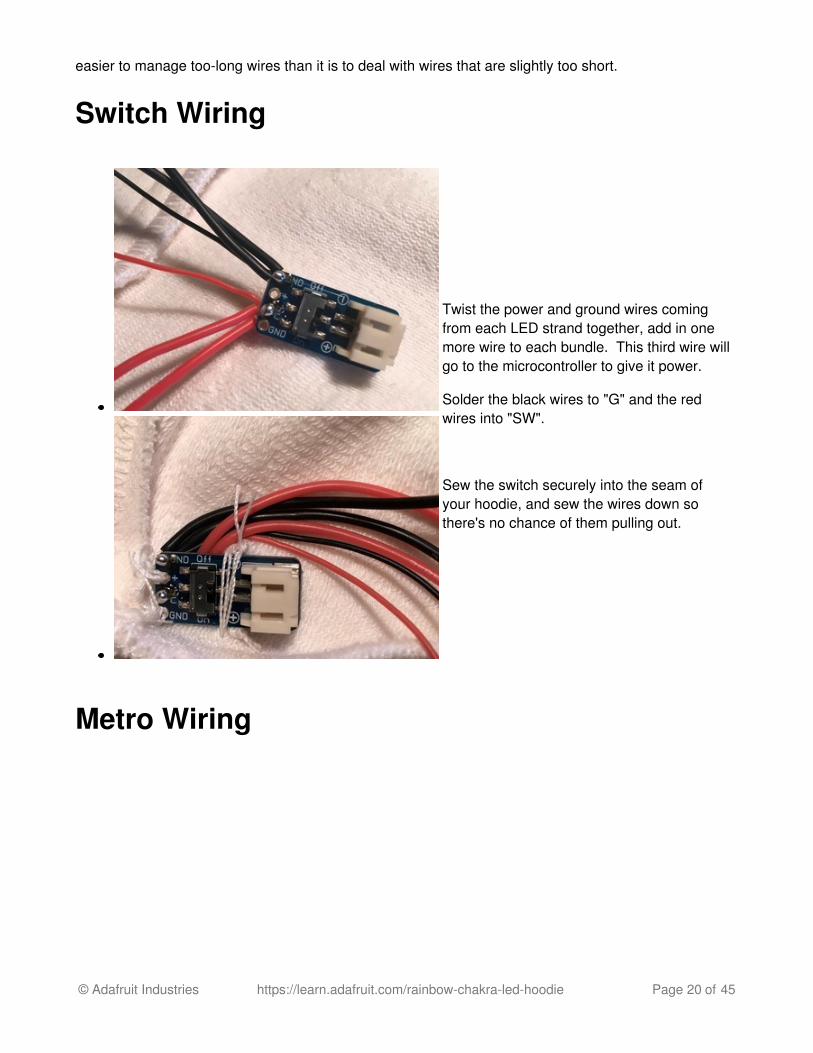
Switch Wiring
Twist the power and ground wires comingfrom each LED strand together, add in onemore wire to each bundle. This third wire willgo to the microcontroller to give it power.
Solder the black wires to "G" and the redwires into "SW".
Sew the switch securely into the seam ofyour hoodie, and sew the wires down sothere's no chance of them pulling out.
Metro Wiring
© Adafruit Industries https://learn.adafruit.com/rainbow-chakra-led-hoodie Page 20 of 45
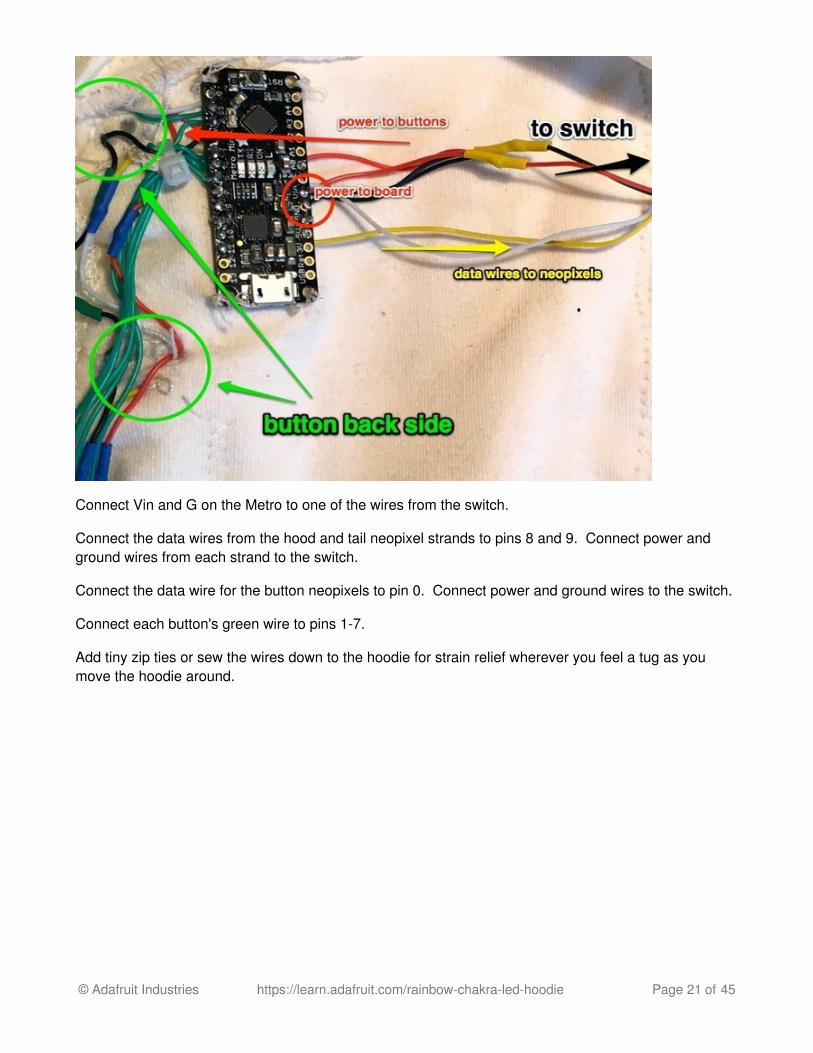
Connect Vin and G on the Metro to one of the wires from the switch.
Connect the data wires from the hood and tail neopixel strands to pins 8 and 9. Connect power andground wires from each strand to the switch.
Connect the data wire for the button neopixels to pin 0. Connect power and ground wires to the switch.
Connect each button's green wire to pins 1-7.
Add tiny zip ties or sew the wires down to the hoodie for strain relief wherever you feel a tug as youmove the hoodie around.
© Adafruit Industries https://learn.adafruit.com/rainbow-chakra-led-hoodie Page 21 of 45
The CodeWhen you first turn this hoodie on, it will default to a rainbow palette mode. As soon as one of thecolored buttons are pressed, the hood and tail neopixels will shift to a gradient based on that color. It'snot too hard to change the colors around in the code -- experiment and make it your own.
To learn more about how to create your own custom color palettes using FastLED, head over to thisLED Parasol guide. (http://adafru.it/scM)
Software Setup
If this is your first time using an Adafruit Metro Mini, take a look at this guide to learn about Adafruitboard installation (http://adafru.it/jAc). This walks you through installing the software necessary to usethis board. Get the starter “blink” sketch working to confirm that the Arduino IDE is properly set up andspeaking to the board.
Once you've got your Metro Mini up and running with Arduino (http://adafru.it/dgt), you'll need to installthe FastLED library.
FastLED is a fast, efficient, easy-to-use Arduino library for programming addressable LED strips andpixels. It has a lot of features to get your animations up and running fast -- and it has a lot of codesamples available if you're just learning to code.
Use the Library Manager in the Arduino IDE to install this (Sketch→Include Library→ManageLibraries…). Scroll down or use the search field to locate FastLED.
All about Arduino Libraries (http://adafru.it/dNR) will tell you everything you ever wanted to know aboutlibraries, including more detailed installation instructions.
Once your curiosity is satiated and the FastLED library is installed, copy and paste the code below intoyour Arduino window.
Go to the Tools menu and select "Adafruit Metro" from the list of boards. (If you don't see it there, headover to this guide to install Adafruit board support in Arduino (http://adafru.it/jAc)).
Plug your Metro Mini into your computer via the onboard USB port. Press the "reset" button on yourMetro Mini and wait for the blinky red light, then click the upload button in Arduino.
#include <FastLED.h>// Because conditional #includes don't work w/Arduino sketches...//#include <SPI.h> // COMMENT OUT THIS LINE FOR GEMMA OR TRINKET#include <avr/power.h> // ENABLE THIS LINE FOR GEMMA OR TRINKET
#define DATAPINtail 8#define DATAPINhood 9#define BUTTON_PIN 0#define COLOR_ORDER GRB#define NUM_LEDS 30
© Adafruit Industries https://learn.adafruit.com/rainbow-chakra-led-hoodie Page 22 of 45
#define DEBOUNCE 10 // button debouncer, how many ms to debounce, 5+ ms is usually plenty#define NUM_BUTTONS 7
int SATURATION=255;int BRIGHTNESS=255;int SPEEDO=25;int HUE=0;int STEPS=10;int glitter = 0;int ledMode=8;int palettenumber=1;
CRGB leds[NUM_LEDS];CRGB buttonleds[NUM_BUTTONS];
TBlendType currentBlending;CRGBPalette16 currentPalette;
// here is where we define the buttons that we'll use. button "1" is the first, button "6" is the 6th, etcbyte buttons[] = {1,2,3,4,5,6,7}; // the analog 0-5 pins are also known as 14-19// This handy macro lets us determine how big the array up above is, by checking the size#define NUMBUTTONS sizeof(buttons)// we will track if a button is just pressed, just released, or 'currently pressed' byte pressed[NUMBUTTONS], justpressed[NUMBUTTONS], justreleased[NUMBUTTONS];
void setup() { byte i; // Make input & enable pull-up resistors on switch pins for (i=0; i<NUMBUTTONS; i++){ pinMode(buttons[i], INPUT_PULLUP); } // pin13 LED pinMode(13, OUTPUT); //FastLED.setMaxPowerInVoltsAndMilliamps( VOLTS, MAX_MA); FastLED.addLeds<WS2812B,DATAPINtail,COLOR_ORDER>(leds, NUM_LEDS).setCorrection(TypicalLEDStrip); FastLED.addLeds<WS2812B,DATAPINhood,COLOR_ORDER>(leds, NUM_LEDS).setCorrection(TypicalLEDStrip); FastLED.addLeds<WS2812B,BUTTON_PIN,COLOR_ORDER>(buttonleds, NUM_BUTTONS).setCorrection(TypicalLEDStrip);
}
void loop() {Button_Rainbow();digitalWrite(13, LOW);
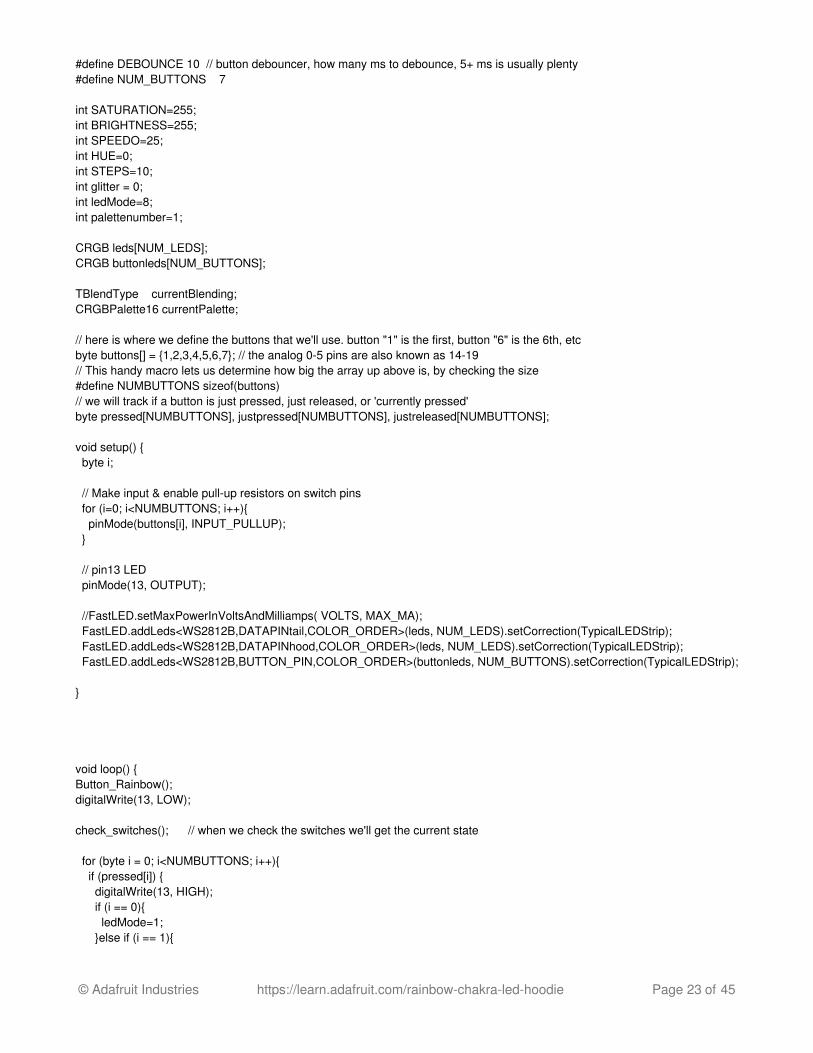
check_switches(); // when we check the switches we'll get the current state for (byte i = 0; i<NUMBUTTONS; i++){ if (pressed[i]) { digitalWrite(13, HIGH); if (i == 0){ ledMode=1; }else if (i == 1){
© Adafruit Industries https://learn.adafruit.com/rainbow-chakra-led-hoodie Page 23 of 45
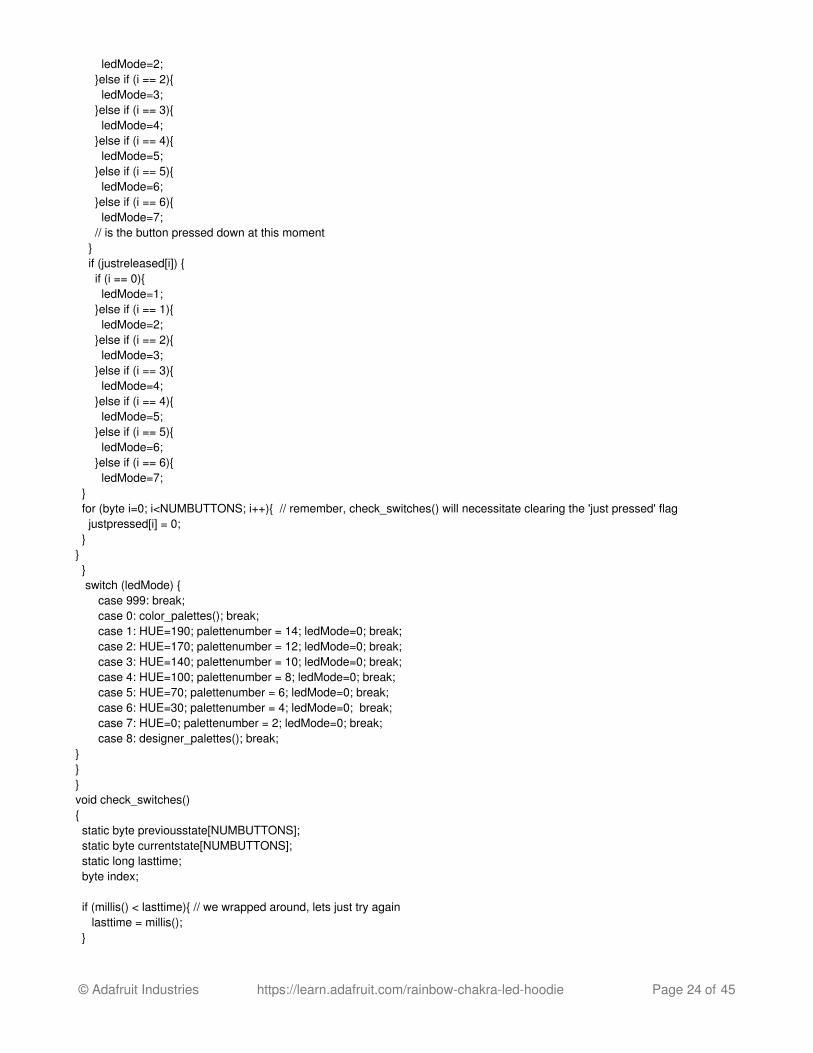
ledMode=2; }else if (i == 2){ ledMode=3; }else if (i == 3){ ledMode=4; }else if (i == 4){ ledMode=5; }else if (i == 5){ ledMode=6; }else if (i == 6){ ledMode=7; // is the button pressed down at this moment } if (justreleased[i]) { if (i == 0){ ledMode=1; }else if (i == 1){ ledMode=2; }else if (i == 2){ ledMode=3; }else if (i == 3){ ledMode=4; }else if (i == 4){ ledMode=5; }else if (i == 5){ ledMode=6; }else if (i == 6){ ledMode=7; } for (byte i=0; i<NUMBUTTONS; i++){ // remember, check_switches() will necessitate clearing the 'just pressed' flag justpressed[i] = 0; }} } switch (ledMode) { case 999: break; case 0: color_palettes(); break; case 1: HUE=190; palettenumber = 14; ledMode=0; break; case 2: HUE=170; palettenumber = 12; ledMode=0; break; case 3: HUE=140; palettenumber = 10; ledMode=0; break; case 4: HUE=100; palettenumber = 8; ledMode=0; break; case 5: HUE=70; palettenumber = 6; ledMode=0; break; case 6: HUE=30; palettenumber = 4; ledMode=0; break; case 7: HUE=0; palettenumber = 2; ledMode=0; break; case 8: designer_palettes(); break;}}}void check_switches(){ static byte previousstate[NUMBUTTONS]; static byte currentstate[NUMBUTTONS]; static long lasttime; byte index;
if (millis() < lasttime){ // we wrapped around, lets just try again lasttime = millis(); }
© Adafruit Industries https://learn.adafruit.com/rainbow-chakra-led-hoodie Page 24 of 45
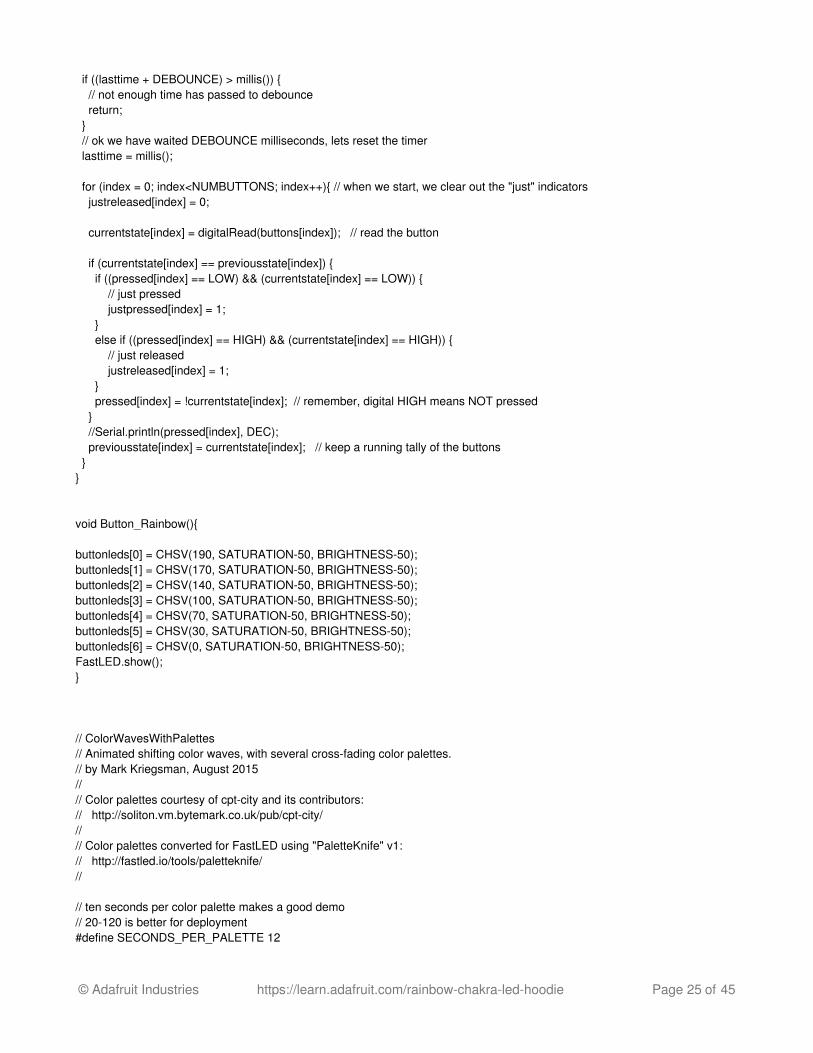
if ((lasttime + DEBOUNCE) > millis()) { // not enough time has passed to debounce return; } // ok we have waited DEBOUNCE milliseconds, lets reset the timer lasttime = millis(); for (index = 0; index<NUMBUTTONS; index++){ // when we start, we clear out the "just" indicators justreleased[index] = 0; currentstate[index] = digitalRead(buttons[index]); // read the button if (currentstate[index] == previousstate[index]) { if ((pressed[index] == LOW) && (currentstate[index] == LOW)) { // just pressed justpressed[index] = 1; } else if ((pressed[index] == HIGH) && (currentstate[index] == HIGH)) { // just released justreleased[index] = 1; } pressed[index] = !currentstate[index]; // remember, digital HIGH means NOT pressed } //Serial.println(pressed[index], DEC); previousstate[index] = currentstate[index]; // keep a running tally of the buttons }}
void Button_Rainbow(){ buttonleds[0] = CHSV(190, SATURATION-50, BRIGHTNESS-50); buttonleds[1] = CHSV(170, SATURATION-50, BRIGHTNESS-50); buttonleds[2] = CHSV(140, SATURATION-50, BRIGHTNESS-50); buttonleds[3] = CHSV(100, SATURATION-50, BRIGHTNESS-50); buttonleds[4] = CHSV(70, SATURATION-50, BRIGHTNESS-50); buttonleds[5] = CHSV(30, SATURATION-50, BRIGHTNESS-50); buttonleds[6] = CHSV(0, SATURATION-50, BRIGHTNESS-50); FastLED.show();}
// ColorWavesWithPalettes// Animated shifting color waves, with several cross-fading color palettes.// by Mark Kriegsman, August 2015//// Color palettes courtesy of cpt-city and its contributors:// http://soliton.vm.bytemark.co.uk/pub/cpt-city///// Color palettes converted for FastLED using "PaletteKnife" v1:// http://fastled.io/tools/paletteknife///
// ten seconds per color palette makes a good demo// 20-120 is better for deployment#define SECONDS_PER_PALETTE 12
© Adafruit Industries https://learn.adafruit.com/rainbow-chakra-led-hoodie Page 25 of 45
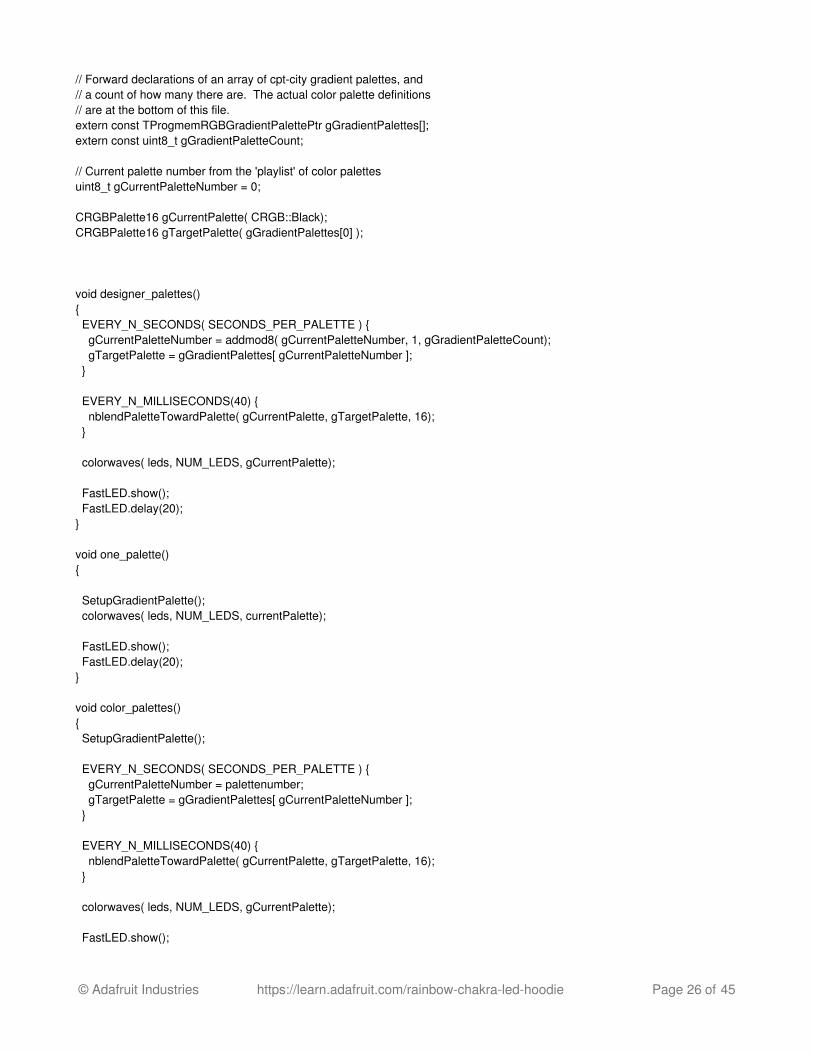
// Forward declarations of an array of cpt-city gradient palettes, and // a count of how many there are. The actual color palette definitions// are at the bottom of this file.extern const TProgmemRGBGradientPalettePtr gGradientPalettes[];extern const uint8_t gGradientPaletteCount;
// Current palette number from the 'playlist' of color palettesuint8_t gCurrentPaletteNumber = 0;
CRGBPalette16 gCurrentPalette( CRGB::Black);CRGBPalette16 gTargetPalette( gGradientPalettes[0] );
void designer_palettes(){ EVERY_N_SECONDS( SECONDS_PER_PALETTE ) { gCurrentPaletteNumber = addmod8( gCurrentPaletteNumber, 1, gGradientPaletteCount); gTargetPalette = gGradientPalettes[ gCurrentPaletteNumber ]; }
EVERY_N_MILLISECONDS(40) { nblendPaletteTowardPalette( gCurrentPalette, gTargetPalette, 16); } colorwaves( leds, NUM_LEDS, gCurrentPalette);
FastLED.show(); FastLED.delay(20);}
void one_palette(){
SetupGradientPalette(); colorwaves( leds, NUM_LEDS, currentPalette);
FastLED.show(); FastLED.delay(20);}
void color_palettes(){ SetupGradientPalette(); EVERY_N_SECONDS( SECONDS_PER_PALETTE ) { gCurrentPaletteNumber = palettenumber; gTargetPalette = gGradientPalettes[ gCurrentPaletteNumber ]; }
EVERY_N_MILLISECONDS(40) { nblendPaletteTowardPalette( gCurrentPalette, gTargetPalette, 16); } colorwaves( leds, NUM_LEDS, gCurrentPalette); FastLED.show();
© Adafruit Industries https://learn.adafruit.com/rainbow-chakra-led-hoodie Page 26 of 45
FastLED.delay(20);}
// This function draws color waves with an ever-changing,// widely-varying set of parameters, using a color palette.void colorwaves( CRGB* ledarray, uint16_t numleds, CRGBPalette16& palette) { static uint16_t sPseudotime = 0; static uint16_t sLastMillis = 0; static uint16_t sHue16 = 0; uint8_t sat8 = beatsin88( 87, 220, 250); uint8_t brightdepth = beatsin88( 341, 96, 224); uint16_t brightnessthetainc16 = beatsin88( 203, (25 * 256), (40 * 256)); uint8_t msmultiplier = beatsin88(147, 23, 60);
uint16_t hue16 = sHue16;//gHue * 256; uint16_t hueinc16 = beatsin88(113, 300, 1500); uint16_t ms = millis(); uint16_t deltams = ms - sLastMillis ; sLastMillis = ms; sPseudotime += deltams * msmultiplier; sHue16 += deltams * beatsin88( 400, 5,9); uint16_t brightnesstheta16 = sPseudotime; for( uint16_t i = 0 ; i < numleds; i++) { hue16 += hueinc16; uint8_t hue8 = hue16 / 256; uint16_t h16_128 = hue16 >> 7; if( h16_128 & 0x100) { hue8 = 255 - (h16_128 >> 1); } else { hue8 = h16_128 >> 1; }
brightnesstheta16 += brightnessthetainc16; uint16_t b16 = sin16( brightnesstheta16 ) + 32768;
uint16_t bri16 = (uint32_t)((uint32_t)b16 * (uint32_t)b16) / 65536; uint8_t bri8 = (uint32_t)(((uint32_t)bri16) * brightdepth) / 65536; bri8 += (255 - brightdepth); uint8_t index = hue8; //index = triwave8( index); index = scale8( index, 240);
CRGB newcolor = ColorFromPalette( palette, index, bri8);
uint16_t pixelnumber = i; pixelnumber = (numleds-1) - pixelnumber; nblend( ledarray[pixelnumber], newcolor, 128); }}
// Alternate rendering function just scrolls the current palette
© Adafruit Industries https://learn.adafruit.com/rainbow-chakra-led-hoodie Page 27 of 45
// across the defined LED strip.void palettetest( CRGB* ledarray, uint16_t numleds, const CRGBPalette16& gCurrentPalette){ static uint8_t startindex = 0; startindex--; fill_palette( ledarray, numleds, startindex, (256 / NUM_LEDS) + 1, gCurrentPalette, 255, LINEARBLEND);}
// Gradient Color Palette definitions for 33 different cpt-city color palettes.// 956 bytes of PROGMEM for all of the palettes together,// +618 bytes of PROGMEM for gradient palette code (AVR).// 1,494 bytes total for all 34 color palettes and associated code.
// Gradient palette "ib_jul01_gp", originally from// http://soliton.vm.bytemark.co.uk/pub/cpt-city/ing/xmas/tn/ib_jul01.png.index.html// converted for FastLED with gammas (2.6, 2.2, 2.5)// Size: 16 bytes of program space.
DEFINE_GRADIENT_PALETTE( ib_jul01_gp ) { 0, 194, 1, 1, 94, 1, 29, 18, 132, 57,131, 28, 255, 113, 1, 1};
// Gradient palette "es_vintage_57_gp", originally from// http://soliton.vm.bytemark.co.uk/pub/cpt-city/es/vintage/tn/es_vintage_57.png.index.html// converted for FastLED with gammas (2.6, 2.2, 2.5)// Size: 20 bytes of program space.
DEFINE_GRADIENT_PALETTE( es_vintage_57_gp ) { 0, 2, 1, 1, 53, 18, 1, 0, 104, 69, 29, 1, 153, 167,135, 10, 255, 46, 56, 4};
// Gradient palette "es_vintage_01_gp", originally from// http://soliton.vm.bytemark.co.uk/pub/cpt-city/es/vintage/tn/es_vintage_01.png.index.html// converted for FastLED with gammas (2.6, 2.2, 2.5)// Size: 32 bytes of program space.
DEFINE_GRADIENT_PALETTE( es_vintage_01_gp ) { 0, 4, 1, 1, 51, 16, 0, 1, 76, 97,104, 3, 101, 255,131, 19, 127, 67, 9, 4, 153, 16, 0, 1, 229, 4, 1, 1, 255, 4, 1, 1};
// Gradient palette "es_rivendell_15_gp", originally from// http://soliton.vm.bytemark.co.uk/pub/cpt-city/es/rivendell/tn/es_rivendell_15.png.index.html// converted for FastLED with gammas (2.6, 2.2, 2.5)// Size: 20 bytes of program space.
DEFINE_GRADIENT_PALETTE( es_rivendell_15_gp ) { 0, 1, 14, 5,
© Adafruit Industries https://learn.adafruit.com/rainbow-chakra-led-hoodie Page 28 of 45
101, 16, 36, 14, 165, 56, 68, 30, 242, 150,156, 99, 255, 150,156, 99};
// Gradient palette "rgi_15_gp", originally from// http://soliton.vm.bytemark.co.uk/pub/cpt-city/ds/rgi/tn/rgi_15.png.index.html// converted for FastLED with gammas (2.6, 2.2, 2.5)// Size: 36 bytes of program space.
DEFINE_GRADIENT_PALETTE( rgi_15_gp ) { 0, 4, 1, 31, 31, 55, 1, 16, 63, 197, 3, 7, 95, 59, 2, 17, 127, 6, 2, 34, 159, 39, 6, 33, 191, 112, 13, 32, 223, 56, 9, 35, 255, 22, 6, 38};
// Gradient palette "retro2_16_gp", originally from// http://soliton.vm.bytemark.co.uk/pub/cpt-city/ma/retro2/tn/retro2_16.png.index.html// converted for FastLED with gammas (2.6, 2.2, 2.5)// Size: 8 bytes of program space.
DEFINE_GRADIENT_PALETTE( retro2_16_gp ) { 0, 188,135, 1, 255, 46, 7, 1};
// Gradient palette "Analogous_1_gp", originally from// http://soliton.vm.bytemark.co.uk/pub/cpt-city/nd/red/tn/Analogous_1.png.index.html// converted for FastLED with gammas (2.6, 2.2, 2.5)// Size: 20 bytes of program space.
DEFINE_GRADIENT_PALETTE( Analogous_1_gp ) { 0, 3, 0,255, 63, 23, 0,255, 127, 67, 0,255, 191, 142, 0, 45, 255, 255, 0, 0};
// Gradient palette "es_pinksplash_08_gp", originally from// http://soliton.vm.bytemark.co.uk/pub/cpt-city/es/pink_splash/tn/es_pinksplash_08.png.index.html// converted for FastLED with gammas (2.6, 2.2, 2.5)// Size: 20 bytes of program space.
DEFINE_GRADIENT_PALETTE( es_pinksplash_08_gp ) { 0, 126, 11,255, 127, 197, 1, 22, 175, 210,157,172, 221, 157, 3,112, 255, 157, 3,112};
// Gradient palette "es_pinksplash_07_gp", originally from// http://soliton.vm.bytemark.co.uk/pub/cpt-city/es/pink_splash/tn/es_pinksplash_07.png.index.html// converted for FastLED with gammas (2.6, 2.2, 2.5)// Size: 28 bytes of program space.
© Adafruit Industries https://learn.adafruit.com/rainbow-chakra-led-hoodie Page 29 of 45
DEFINE_GRADIENT_PALETTE( es_pinksplash_07_gp ) { 0, 229, 1, 1, 61, 242, 4, 63, 101, 255, 12,255, 127, 249, 81,252, 153, 255, 11,235, 193, 244, 5, 68, 255, 232, 1, 5};
// Gradient palette "Coral_reef_gp", originally from// http://soliton.vm.bytemark.co.uk/pub/cpt-city/nd/other/tn/Coral_reef.png.index.html// converted for FastLED with gammas (2.6, 2.2, 2.5)// Size: 24 bytes of program space.
DEFINE_GRADIENT_PALETTE( Coral_reef_gp ) { 0, 40,199,197, 50, 10,152,155, 96, 1,111,120, 96, 43,127,162, 139, 10, 73,111, 255, 1, 34, 71};
// Gradient palette "es_ocean_breeze_068_gp", originally from// http://soliton.vm.bytemark.co.uk/pub/cpt-city/es/ocean_breeze/tn/es_ocean_breeze_068.png.index.html// converted for FastLED with gammas (2.6, 2.2, 2.5)// Size: 24 bytes of program space.
DEFINE_GRADIENT_PALETTE( es_ocean_breeze_068_gp ) { 0, 100,156,153, 51, 1, 99,137, 101, 1, 68, 84, 104, 35,142,168, 178, 0, 63,117, 255, 1, 10, 10};
// Gradient palette "es_ocean_breeze_036_gp", originally from// http://soliton.vm.bytemark.co.uk/pub/cpt-city/es/ocean_breeze/tn/es_ocean_breeze_036.png.index.html// converted for FastLED with gammas (2.6, 2.2, 2.5)// Size: 16 bytes of program space.
DEFINE_GRADIENT_PALETTE( es_ocean_breeze_036_gp ) { 0, 1, 6, 7, 89, 1, 99,111, 153, 144,209,255, 255, 0, 73, 82};
// Gradient palette "departure_gp", originally from// http://soliton.vm.bytemark.co.uk/pub/cpt-city/mjf/tn/departure.png.index.html// converted for FastLED with gammas (2.6, 2.2, 2.5)// Size: 88 bytes of program space.
DEFINE_GRADIENT_PALETTE( departure_gp ) { 0, 8, 3, 0, 42, 23, 7, 0, 63, 75, 38, 6, 84, 169, 99, 38, 106, 213,169,119,
© Adafruit Industries https://learn.adafruit.com/rainbow-chakra-led-hoodie Page 30 of 45
116, 255,255,255, 138, 135,255,138, 148, 22,255, 24, 170, 0,255, 0, 191, 0,136, 0, 212, 0, 55, 0, 255, 0, 55, 0};
// Gradient palette "es_landscape_64_gp", originally from// http://soliton.vm.bytemark.co.uk/pub/cpt-city/es/landscape/tn/es_landscape_64.png.index.html// converted for FastLED with gammas (2.6, 2.2, 2.5)// Size: 36 bytes of program space.
DEFINE_GRADIENT_PALETTE( es_landscape_64_gp ) { 0, 0, 0, 0, 37, 2, 25, 1, 76, 15,115, 5, 127, 79,213, 1, 128, 126,211, 47, 130, 188,209,247, 153, 144,182,205, 204, 59,117,250, 255, 1, 37,192};
// Gradient palette "es_landscape_33_gp", originally from// http://soliton.vm.bytemark.co.uk/pub/cpt-city/es/landscape/tn/es_landscape_33.png.index.html// converted for FastLED with gammas (2.6, 2.2, 2.5)// Size: 24 bytes of program space.
DEFINE_GRADIENT_PALETTE( es_landscape_33_gp ) { 0, 1, 5, 0, 19, 32, 23, 1, 38, 161, 55, 1, 63, 229,144, 1, 66, 39,142, 74, 255, 1, 4, 1};
// Gradient palette "rainbowsherbet_gp", originally from// http://soliton.vm.bytemark.co.uk/pub/cpt-city/ma/icecream/tn/rainbowsherbet.png.index.html// converted for FastLED with gammas (2.6, 2.2, 2.5)// Size: 28 bytes of program space.
DEFINE_GRADIENT_PALETTE( rainbowsherbet_gp ) { 0, 255, 33, 4, 43, 255, 68, 25, 86, 255, 7, 25, 127, 255, 82,103, 170, 255,255,242, 209, 42,255, 22, 255, 87,255, 65};
// Gradient palette "gr65_hult_gp", originally from// http://soliton.vm.bytemark.co.uk/pub/cpt-city/hult/tn/gr65_hult.png.index.html// converted for FastLED with gammas (2.6, 2.2, 2.5)// Size: 24 bytes of program space.
DEFINE_GRADIENT_PALETTE( gr65_hult_gp ) { 0, 247,176,247,
© Adafruit Industries https://learn.adafruit.com/rainbow-chakra-led-hoodie Page 31 of 45
48, 255,136,255, 89, 220, 29,226, 160, 7, 82,178, 216, 1,124,109, 255, 1,124,109};
// Gradient palette "gr64_hult_gp", originally from// http://soliton.vm.bytemark.co.uk/pub/cpt-city/hult/tn/gr64_hult.png.index.html// converted for FastLED with gammas (2.6, 2.2, 2.5)// Size: 32 bytes of program space.
DEFINE_GRADIENT_PALETTE( gr64_hult_gp ) { 0, 1,124,109, 66, 1, 93, 79, 104, 52, 65, 1, 130, 115,127, 1, 150, 52, 65, 1, 201, 1, 86, 72, 239, 0, 55, 45, 255, 0, 55, 45};
// Gradient palette "GMT_drywet_gp", originally from// http://soliton.vm.bytemark.co.uk/pub/cpt-city/gmt/tn/GMT_drywet.png.index.html// converted for FastLED with gammas (2.6, 2.2, 2.5)// Size: 28 bytes of program space.
DEFINE_GRADIENT_PALETTE( GMT_drywet_gp ) { 0, 47, 30, 2, 42, 213,147, 24, 84, 103,219, 52, 127, 3,219,207, 170, 1, 48,214, 212, 1, 1,111, 255, 1, 7, 33};
// Gradient palette "ib15_gp", originally from// http://soliton.vm.bytemark.co.uk/pub/cpt-city/ing/general/tn/ib15.png.index.html// converted for FastLED with gammas (2.6, 2.2, 2.5)// Size: 24 bytes of program space.
DEFINE_GRADIENT_PALETTE( ib15_gp ) { 0, 113, 91,147, 72, 157, 88, 78, 89, 208, 85, 33, 107, 255, 29, 11, 141, 137, 31, 39, 255, 59, 33, 89};
// Gradient palette "Fuschia_7_gp", originally from// http://soliton.vm.bytemark.co.uk/pub/cpt-city/ds/fuschia/tn/Fuschia-7.png.index.html// converted for FastLED with gammas (2.6, 2.2, 2.5)// Size: 20 bytes of program space.
DEFINE_GRADIENT_PALETTE( Fuschia_7_gp ) { 0, 43, 3,153, 63, 100, 4,103, 127, 188, 5, 66, 191, 161, 11,115,
© Adafruit Industries https://learn.adafruit.com/rainbow-chakra-led-hoodie Page 32 of 45
255, 135, 20,182};
// Gradient palette "es_emerald_dragon_08_gp", originally from// http://soliton.vm.bytemark.co.uk/pub/cpt-city/es/emerald_dragon/tn/es_emerald_dragon_08.png.index.html// converted for FastLED with gammas (2.6, 2.2, 2.5)// Size: 16 bytes of program space.
DEFINE_GRADIENT_PALETTE( es_emerald_dragon_08_gp ) { 0, 97,255, 1, 101, 47,133, 1, 178, 13, 43, 1, 255, 2, 10, 1};
// Gradient palette "lava_gp", originally from// http://soliton.vm.bytemark.co.uk/pub/cpt-city/neota/elem/tn/lava.png.index.html// converted for FastLED with gammas (2.6, 2.2, 2.5)// Size: 52 bytes of program space.
DEFINE_GRADIENT_PALETTE( lava_gp ) { 0, 0, 0, 0, 46, 18, 0, 0, 96, 113, 0, 0, 108, 142, 3, 1, 119, 175, 17, 1, 146, 213, 44, 2, 174, 255, 82, 4, 188, 255,115, 4, 202, 255,156, 4, 218, 255,203, 4, 234, 255,255, 4, 244, 255,255, 71, 255, 255,255,255};
// Gradient palette "fire_gp", originally from// http://soliton.vm.bytemark.co.uk/pub/cpt-city/neota/elem/tn/fire.png.index.html// converted for FastLED with gammas (2.6, 2.2, 2.5)// Size: 28 bytes of program space.
DEFINE_GRADIENT_PALETTE( fire_gp ) { 0, 1, 1, 0, 76, 32, 5, 0, 146, 192, 24, 0, 197, 220,105, 5, 240, 252,255, 31, 250, 252,255,111, 255, 255,255,255};
// Gradient palette "Colorfull_gp", originally from// http://soliton.vm.bytemark.co.uk/pub/cpt-city/nd/atmospheric/tn/Colorfull.png.index.html// converted for FastLED with gammas (2.6, 2.2, 2.5)// Size: 44 bytes of program space.
DEFINE_GRADIENT_PALETTE( Colorfull_gp ) { 0, 10, 85, 5, 25, 29,109, 18, 60, 59,138, 42, 93, 83, 99, 52, 106, 110, 66, 64,
© Adafruit Industries https://learn.adafruit.com/rainbow-chakra-led-hoodie Page 33 of 45
109, 123, 49, 65, 113, 139, 35, 66, 116, 192,117, 98, 124, 255,255,137, 168, 100,180,155, 255, 22,121,174};
// Gradient palette "Magenta_Evening_gp", originally from// http://soliton.vm.bytemark.co.uk/pub/cpt-city/nd/atmospheric/tn/Magenta_Evening.png.index.html// converted for FastLED with gammas (2.6, 2.2, 2.5)// Size: 28 bytes of program space.
DEFINE_GRADIENT_PALETTE( Magenta_Evening_gp ) { 0, 71, 27, 39, 31, 130, 11, 51, 63, 213, 2, 64, 70, 232, 1, 66, 76, 252, 1, 69, 108, 123, 2, 51, 255, 46, 9, 35};
// Gradient palette "Pink_Purple_gp", originally from// http://soliton.vm.bytemark.co.uk/pub/cpt-city/nd/atmospheric/tn/Pink_Purple.png.index.html// converted for FastLED with gammas (2.6, 2.2, 2.5)// Size: 44 bytes of program space.
DEFINE_GRADIENT_PALETTE( Pink_Purple_gp ) { 0, 19, 2, 39, 25, 26, 4, 45, 51, 33, 6, 52, 76, 68, 62,125, 102, 118,187,240, 109, 163,215,247, 114, 217,244,255, 122, 159,149,221, 149, 113, 78,188, 183, 128, 57,155, 255, 146, 40,123};
// Gradient palette "Sunset_Real_gp", originally from// http://soliton.vm.bytemark.co.uk/pub/cpt-city/nd/atmospheric/tn/Sunset_Real.png.index.html// converted for FastLED with gammas (2.6, 2.2, 2.5)// Size: 28 bytes of program space.
DEFINE_GRADIENT_PALETTE( Sunset_Real_gp ) { 0, 120, 0, 0, 22, 179, 22, 0, 51, 255,104, 0, 85, 167, 22, 18, 135, 100, 0,103, 198, 16, 0,130, 255, 0, 0,160};
// Gradient palette "es_autumn_19_gp", originally from// http://soliton.vm.bytemark.co.uk/pub/cpt-city/es/autumn/tn/es_autumn_19.png.index.html// converted for FastLED with gammas (2.6, 2.2, 2.5)// Size: 52 bytes of program space.
© Adafruit Industries https://learn.adafruit.com/rainbow-chakra-led-hoodie Page 34 of 45
DEFINE_GRADIENT_PALETTE( es_autumn_19_gp ) { 0, 26, 1, 1, 51, 67, 4, 1, 84, 118, 14, 1, 104, 137,152, 52, 112, 113, 65, 1, 122, 133,149, 59, 124, 137,152, 52, 135, 113, 65, 1, 142, 139,154, 46, 163, 113, 13, 1, 204, 55, 3, 1, 249, 17, 1, 1, 255, 17, 1, 1};
// Gradient palette "BlacK_Blue_Magenta_White_gp", originally from// http://soliton.vm.bytemark.co.uk/pub/cpt-city/nd/basic/tn/BlacK_Blue_Magenta_White.png.index.html// converted for FastLED with gammas (2.6, 2.2, 2.5)// Size: 28 bytes of program space.
DEFINE_GRADIENT_PALETTE( BlacK_Blue_Magenta_White_gp ) { 0, 0, 0, 0, 42, 0, 0, 45, 84, 0, 0,255, 127, 42, 0,255, 170, 255, 0,255, 212, 255, 55,255, 255, 255,255,255};
// Gradient palette "BlacK_Magenta_Red_gp", originally from// http://soliton.vm.bytemark.co.uk/pub/cpt-city/nd/basic/tn/BlacK_Magenta_Red.png.index.html// converted for FastLED with gammas (2.6, 2.2, 2.5)// Size: 20 bytes of program space.
DEFINE_GRADIENT_PALETTE( BlacK_Magenta_Red_gp ) { 0, 0, 0, 0, 63, 42, 0, 45, 127, 255, 0,255, 191, 255, 0, 45, 255, 255, 0, 0};
// Gradient palette "BlacK_Red_Magenta_Yellow_gp", originally from// http://soliton.vm.bytemark.co.uk/pub/cpt-city/nd/basic/tn/BlacK_Red_Magenta_Yellow.png.index.html// converted for FastLED with gammas (2.6, 2.2, 2.5)// Size: 28 bytes of program space.
DEFINE_GRADIENT_PALETTE( BlacK_Red_Magenta_Yellow_gp ) { 0, 0, 0, 0, 42, 42, 0, 0, 84, 255, 0, 0, 127, 255, 0, 45, 170, 255, 0,255, 212, 255, 55, 45, 255, 255,255, 0};
// Gradient palette "Blue_Cyan_Yellow_gp", originally from// http://soliton.vm.bytemark.co.uk/pub/cpt-city/nd/basic/tn/Blue_Cyan_Yellow.png.index.html// converted for FastLED with gammas (2.6, 2.2, 2.5)
© Adafruit Industries https://learn.adafruit.com/rainbow-chakra-led-hoodie Page 35 of 45
// Size: 20 bytes of program space.
DEFINE_GRADIENT_PALETTE( Blue_Cyan_Yellow_gp ) { 0, 0, 0,255, 63, 0, 55,255, 127, 0,255,255, 191, 42,255, 45, 255, 255,255, 0};
// Gradient palette "bhw1_28_gp", originally from// http://soliton.vm.bytemark.co.uk/pub/cpt-city/bhw/bhw1/tn/bhw1_28.png.index.html// converted for FastLED with gammas (2.6, 2.2, 2.5)// Size: 32 bytes of program space.
DEFINE_GRADIENT_PALETTE( bhw1_28_gp ) { 0, 75, 1,221, 30, 252, 73,255, 48, 169, 0,242, 119, 0,149,242, 170, 43, 0,242, 206, 252, 73,255, 232, 78, 12,214, 255, 0,149,242};
// Gradient palette "bhw1_justducky_gp", originally from// http://soliton.vm.bytemark.co.uk/pub/cpt-city/bhw/bhw1/tn/bhw1_justducky.png.index.html// converted for FastLED with gammas (2.6, 2.2, 2.5)// Size: 16 bytes of program space.
DEFINE_GRADIENT_PALETTE( yellow_gp ) { 0, 47, 28, 2, 76, 229, 73, 1, 163, 255,255, 0, 255, 229, 73, 1};
// Gradient palette "bhw2_50_gp", originally from// http://soliton.vm.bytemark.co.uk/pub/cpt-city/bhw/bhw2/tn/bhw2_50.png.index.html// converted for FastLED with gammas (2.6, 2.2, 2.5)// Size: 20 bytes of program space.
DEFINE_GRADIENT_PALETTE( indigo_gp ) { 0, 8, 2, 23, 84, 47, 7,102, 138, 16, 46,147, 173, 2,127,203, 255, 1, 7, 11};
// Gradient palette "Greens_09_gp", originally from// http://soliton.vm.bytemark.co.uk/pub/cpt-city/cb/seq/tn/Greens_09.png.index.html// converted for FastLED with gammas (2.6, 2.2, 2.5)// Size: 72 bytes of program space.
DEFINE_GRADIENT_PALETTE( green_gp ) { 0, 234,248,230, 28, 234,248,230,
© Adafruit Industries https://learn.adafruit.com/rainbow-chakra-led-hoodie Page 36 of 45
28, 192,233,184, 56, 192,233,184, 56, 133,209,125, 84, 133,209,125, 84, 77,178, 73, 113, 77,178, 73, 113, 32,142, 37, 141, 32,142, 37, 141, 7,105, 20, 170, 7,105, 20, 170, 1, 67, 9, 198, 1, 67, 9, 198, 0, 39, 3, 226, 0, 39, 3, 226, 0, 13, 1, 255, 0, 13, 1};
// Gradient palette "blueice_gp", originally from// http://soliton.vm.bytemark.co.uk/pub/cpt-city/neota/elem/tn/blueice.png.index.html// converted for FastLED with gammas (2.6, 2.2, 2.5)// Size: 220 bytes of program space.
DEFINE_GRADIENT_PALETTE( blue_gp ) { 0, 0, 0, 0, 31, 1, 2, 15, 63, 1, 10, 89, 66, 1, 12, 93, 68, 1, 13, 96, 71, 1, 15,100, 73, 1, 16,105, 76, 1, 18,108, 78, 1, 20,112, 81, 1, 22,115, 83, 1, 23,120, 86, 1, 26,123, 88, 1, 29,128, 91, 1, 31,132, 93, 1, 33,137, 96, 1, 36,140, 98, 1, 40,145, 101, 1, 43,151, 103, 1, 46,155, 106, 1, 50,160, 108, 1, 54,164, 111, 1, 56,166, 113, 1, 60,170, 116, 1, 65,172, 118, 1, 69,174, 121, 1, 72,178, 123, 1, 77,180, 126, 1, 81,182, 128, 1, 86,184, 131, 1, 91,188, 134, 1, 96,190, 136, 1,101,192, 139, 1,107,197, 141, 1,112,199,
© Adafruit Industries https://learn.adafruit.com/rainbow-chakra-led-hoodie Page 37 of 45
144, 1,118,201, 146, 1,124,203, 149, 1,130,207, 151, 1,138,210, 154, 1,144,212, 156, 1,151,214, 159, 1,159,219, 161, 1,166,221, 164, 1,173,223, 166, 1,182,228, 169, 1,189,230, 171, 1,199,233, 174, 1,207,235, 176, 1,217,240, 179, 1,225,242, 181, 1,235,245, 184, 2,246,247, 186, 2,252,247, 189, 2,255,242, 222, 61,255,247, 255, 255,255,255};
// Gradient palette "crisp_ice_gp", originally from// http://soliton.vm.bytemark.co.uk/pub/cpt-city/neota/elem/tn/crisp-ice.png.index.html// converted for FastLED with gammas (2.6, 2.2, 2.5)// Size: 28 bytes of program space.
DEFINE_GRADIENT_PALETTE( purple_gp ) { 0, 1, 55,142, 31, 4, 86,194, 63, 13,124,255, 95, 56,139,255, 127, 142,156,255, 191, 194,203,255, 255, 255,255,255}; // Gradient palette "bhw1_sunset3_gp", originally from// http://soliton.vm.bytemark.co.uk/pub/cpt-city/bhw/bhw1/tn/bhw1_sunset3.png.index.html// converted for FastLED with gammas (2.6, 2.2, 2.5)// Size: 28 bytes of program space.
DEFINE_GRADIENT_PALETTE( orange_gp ) { 0, 227,237, 56, 33, 186, 67, 1, 71, 163, 21, 1, 81, 157, 13, 1, 188, 39, 21, 18, 234, 12, 7, 4, 255, 12, 7, 4};
// Gradient palette "bhw1_purplered_gp", originally from// http://soliton.vm.bytemark.co.uk/pub/cpt-city/bhw/bhw1/tn/bhw1_purplered.png.index.html// converted for FastLED with gammas (2.6, 2.2, 2.5)// Size: 8 bytes of program space.
DEFINE_GRADIENT_PALETTE( red_gp ) { 0, 255, 0, 0, 255, 107, 1,205};
© Adafruit Industries https://learn.adafruit.com/rainbow-chakra-led-hoodie Page 38 of 45
// Gradient palette "hsv_gp", originally from// http://soliton.vm.bytemark.co.uk/pub/cpt-city/h5/tn/hsv.png.index.html// converted for FastLED with gammas (2.6, 2.2, 2.5)// Size: 256 bytes of program space.
DEFINE_GRADIENT_PALETTE( hsv_gp ) { 0, 255, 0, 0, 4, 255, 1, 0, 8, 255, 6, 0, 12, 255, 15, 0, 16, 255, 29, 0, 20, 255, 47, 0, 24, 255, 71, 0, 28, 255,100, 0, 32, 255,135, 0, 36, 255,175, 0, 40, 255,221, 0, 44, 234,255, 0, 48, 179,255, 0, 52, 133,255, 0, 56, 95,255, 0, 60, 65,255, 0, 64, 41,255, 0, 68, 24,255, 0, 72, 12,255, 0, 76, 4,255, 0, 80, 1,255, 0, 84, 1,255, 0, 89, 0,255, 1, 93, 0,255, 2, 97, 0,255, 7, 101, 0,255, 17, 105, 0,255, 31, 109, 0,255, 52, 113, 0,255, 78, 117, 0,255,111, 121, 0,255,151, 125, 0,255,199, 129, 0,255,255, 133, 0,205,255, 137, 0,161,255, 141, 0,122,255, 145, 0, 90,255, 149, 0, 62,255, 153, 0, 40,255, 157, 0, 23,255, 161, 0, 11,255, 165, 0, 4,255, 170, 0, 1,255, 174, 1, 0,255, 178, 1, 0,255, 182, 4, 0,255, 186, 12, 0,255, 190, 24, 0,255, 194, 41, 0,255, 198, 65, 0,255, 202, 95, 0,255,
© Adafruit Industries https://learn.adafruit.com/rainbow-chakra-led-hoodie Page 39 of 45
206, 133, 0,255, 210, 179, 0,255, 214, 234, 0,255, 218, 255, 0,216, 222, 255, 0,166, 226, 255, 0,123, 230, 255, 0, 88, 234, 255, 0, 60, 238, 255, 0, 37, 242, 255, 0, 21, 246, 255, 0, 10, 250, 255, 0, 3, 255, 255, 0, 1};
// Single array of defined cpt-city color palettes.// This will let us programmatically choose one based on// a number, rather than having to activate each explicitly // by name every time.// Since it is const, this array could also be moved // into PROGMEM to save SRAM, but for simplicity of illustration// we'll keep it in a regular SRAM array.//// This list of color palettes acts as a "playlist"; you can// add or delete, or re-arrange as you wish.const TProgmemRGBGradientPalettePtr gGradientPalettes[] = { hsv_gp, red_gp, rainbowsherbet_gp, orange_gp, bhw1_28_gp, yellow_gp, Sunset_Real_gp, green_gp, es_rivendell_15_gp, blue_gp, es_ocean_breeze_036_gp, indigo_gp, rgi_15_gp, purple_gp, retro2_16_gp, Analogous_1_gp, es_pinksplash_08_gp, Coral_reef_gp, es_ocean_breeze_068_gp, es_pinksplash_07_gp, es_vintage_01_gp, departure_gp, es_landscape_64_gp, es_landscape_33_gp, gr65_hult_gp, gr64_hult_gp, GMT_drywet_gp, ib_jul01_gp, es_vintage_57_gp, ib15_gp, Fuschia_7_gp, es_emerald_dragon_08_gp, lava_gp,
© Adafruit Industries https://learn.adafruit.com/rainbow-chakra-led-hoodie Page 40 of 45
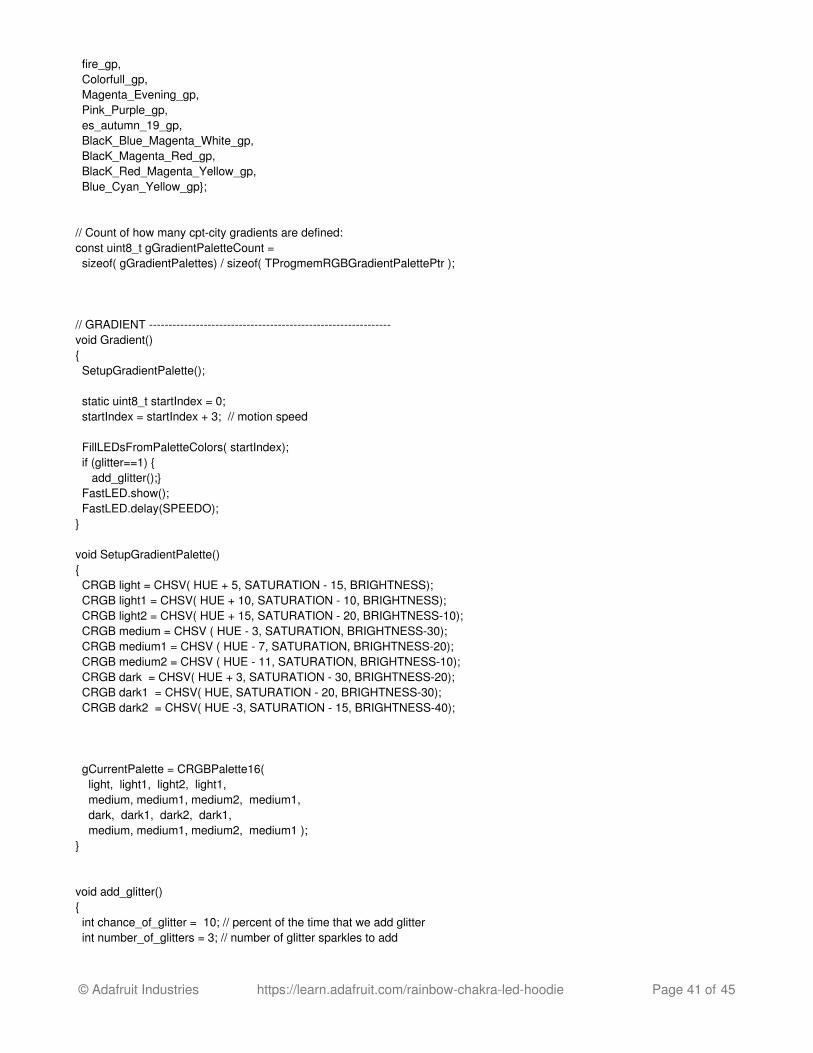
fire_gp, Colorfull_gp, Magenta_Evening_gp, Pink_Purple_gp, es_autumn_19_gp, BlacK_Blue_Magenta_White_gp, BlacK_Magenta_Red_gp, BlacK_Red_Magenta_Yellow_gp, Blue_Cyan_Yellow_gp};
// Count of how many cpt-city gradients are defined:const uint8_t gGradientPaletteCount = sizeof( gGradientPalettes) / sizeof( TProgmemRGBGradientPalettePtr );
// GRADIENT --------------------------------------------------------------void Gradient(){ SetupGradientPalette();
static uint8_t startIndex = 0; startIndex = startIndex + 3; // motion speed
FillLEDsFromPaletteColors( startIndex); if (glitter==1) { add_glitter();} FastLED.show(); FastLED.delay(SPEEDO);}
void SetupGradientPalette(){ CRGB light = CHSV( HUE + 5, SATURATION - 15, BRIGHTNESS); CRGB light1 = CHSV( HUE + 10, SATURATION - 10, BRIGHTNESS); CRGB light2 = CHSV( HUE + 15, SATURATION - 20, BRIGHTNESS-10); CRGB medium = CHSV ( HUE - 3, SATURATION, BRIGHTNESS-30); CRGB medium1 = CHSV ( HUE - 7, SATURATION, BRIGHTNESS-20); CRGB medium2 = CHSV ( HUE - 11, SATURATION, BRIGHTNESS-10); CRGB dark = CHSV( HUE + 3, SATURATION - 30, BRIGHTNESS-20); CRGB dark1 = CHSV( HUE, SATURATION - 20, BRIGHTNESS-30); CRGB dark2 = CHSV( HUE -3, SATURATION - 15, BRIGHTNESS-40);
gCurrentPalette = CRGBPalette16( light, light1, light2, light1, medium, medium1, medium2, medium1, dark, dark1, dark2, dark1, medium, medium1, medium2, medium1 );}
void add_glitter(){ int chance_of_glitter = 10; // percent of the time that we add glitter int number_of_glitters = 3; // number of glitter sparkles to add
© Adafruit Industries https://learn.adafruit.com/rainbow-chakra-led-hoodie Page 41 of 45
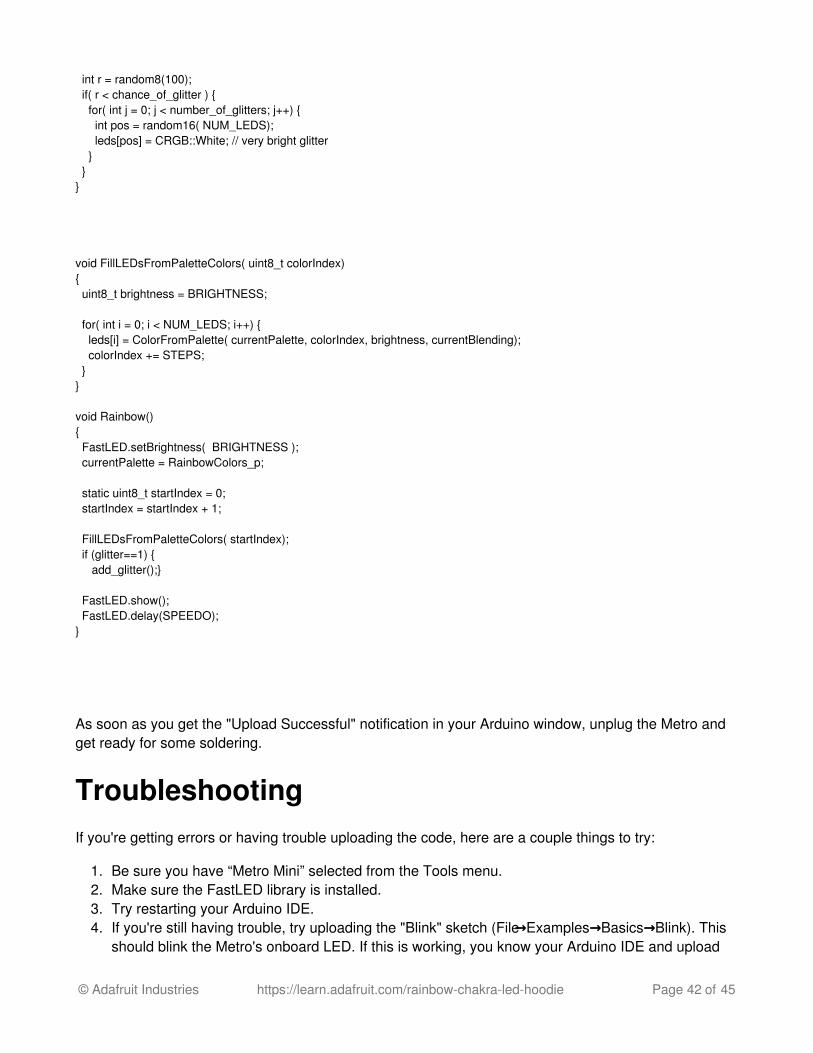
int r = random8(100); if( r < chance_of_glitter ) { for( int j = 0; j < number_of_glitters; j++) { int pos = random16( NUM_LEDS); leds[pos] = CRGB::White; // very bright glitter } }}
void FillLEDsFromPaletteColors( uint8_t colorIndex){ uint8_t brightness = BRIGHTNESS; for( int i = 0; i < NUM_LEDS; i++) { leds[i] = ColorFromPalette( currentPalette, colorIndex, brightness, currentBlending); colorIndex += STEPS; }}
void Rainbow(){ FastLED.setBrightness( BRIGHTNESS ); currentPalette = RainbowColors_p; static uint8_t startIndex = 0; startIndex = startIndex + 1;
FillLEDsFromPaletteColors( startIndex); if (glitter==1) { add_glitter();} FastLED.show(); FastLED.delay(SPEEDO); }
As soon as you get the "Upload Successful" notification in your Arduino window, unplug the Metro andget ready for some soldering.
TroubleshootingIf you're getting errors or having trouble uploading the code, here are a couple things to try:
1. Be sure you have “Metro Mini” selected from the Tools menu.2. Make sure the FastLED library is installed.3. Try restarting your Arduino IDE.4. If you're still having trouble, try uploading the "Blink" sketch (File→Examples→Basics→Blink). This
should blink the Metro's onboard LED. If this is working, you know your Arduino IDE and upload
© Adafruit Industries https://learn.adafruit.com/rainbow-chakra-led-hoodie Page 42 of 45

sequence are working, and that the problem lies elsewhere (e.g. missing library, or syntax error inthe code).
© Adafruit Industries https://learn.adafruit.com/rainbow-chakra-led-hoodie Page 43 of 45
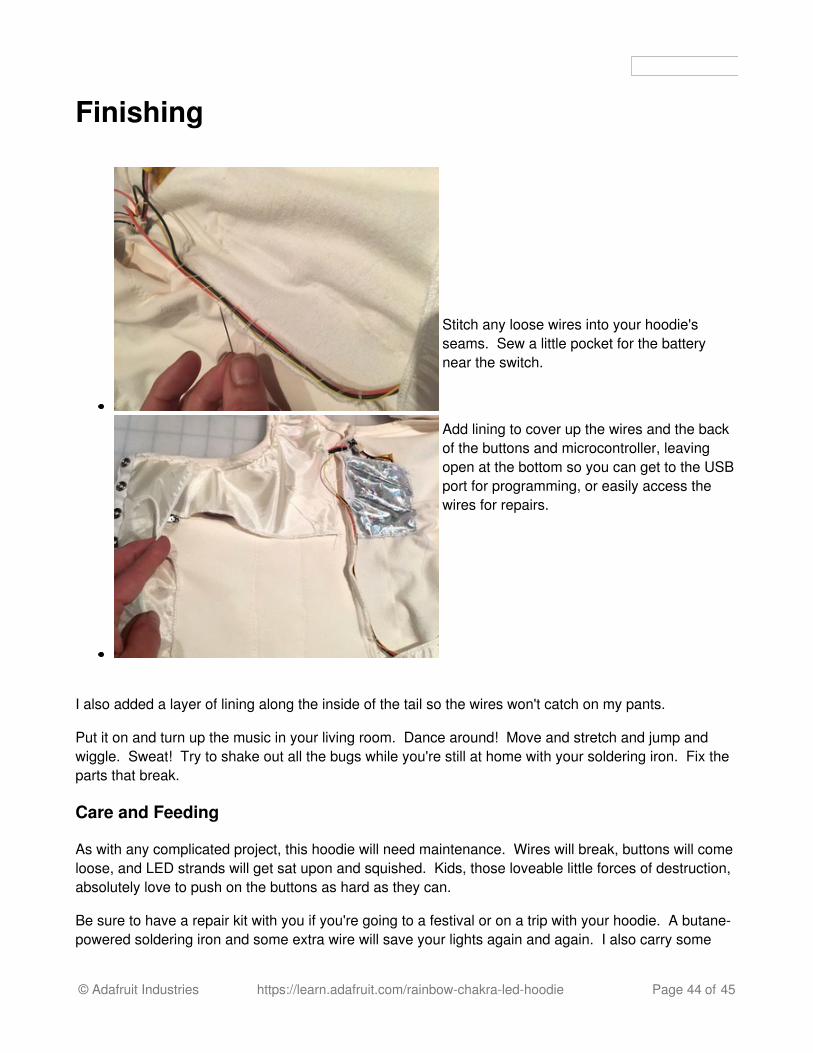
Finishing
Stitch any loose wires into your hoodie'sseams. Sew a little pocket for the batterynear the switch.
Add lining to cover up the wires and the backof the buttons and microcontroller, leavingopen at the bottom so you can get to the USBport for programming, or easily access thewires for repairs.
I also added a layer of lining along the inside of the tail so the wires won't catch on my pants.
Put it on and turn up the music in your living room. Dance around! Move and stretch and jump andwiggle. Sweat! Try to shake out all the bugs while you're still at home with your soldering iron. Fix theparts that break.
Care and Feeding
As with any complicated project, this hoodie will need maintenance. Wires will break, buttons will comeloose, and LED strands will get sat upon and squished. Kids, those loveable little forces of destruction,absolutely love to push on the buttons as hard as they can.
Be sure to have a repair kit with you if you're going to a festival or on a trip with your hoodie. A butane-powered soldering iron and some extra wire will save your lights again and again. I also carry some
© Adafruit Industries https://learn.adafruit.com/rainbow-chakra-led-hoodie Page 44 of 45
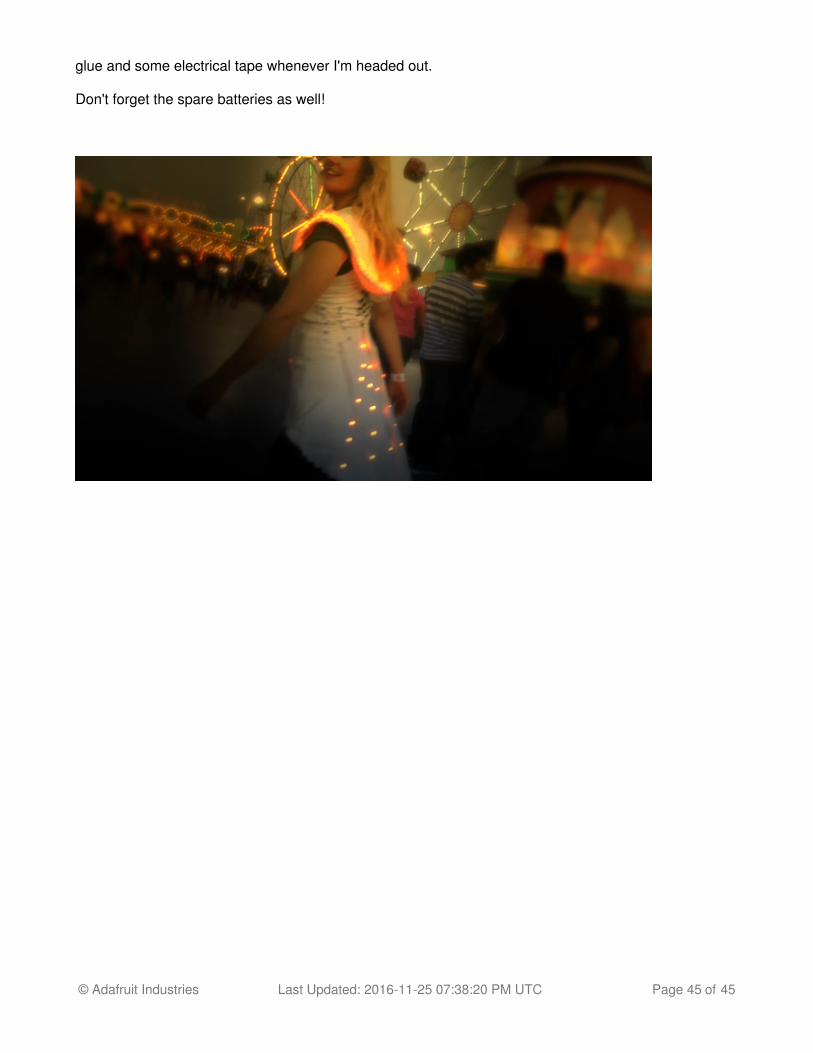
glue and some electrical tape whenever I'm headed out.
Don't forget the spare batteries as well!
© Adafruit Industries Last Updated: 2016-11-25 07:38:20 PM UTC Page 45 of 45