Embed Size (px)
Citation preview
Module 9Culture 2 (Zoology, Botany & Science Experiments)
MontituteR
Please visit to get the full version.www.montitute.com
(Sample)
Material· A table equipped with the following;
§ A few objects from the natural world, such as shells, bird feathers, sheep wool, nests, vase of flowers, leaves, a colored leaf in the fall, or a plant etc.
§ A magnifying glass.
Purpose· To motivate the children to take interest in the
natural world.· To provide children with opportunities to
carefully examine and explore natural objects.
Presentation1. Invite a small group of children to work with
you. 2. Select one object and introduce it to the
children, providing some basic interesting information about the object.
3. Show the children how to carefully hold the objects and examine them with the naked eye and also with the magnifying glass for details.
4. Regularly change the objects on the nature table to keep the interest of the children alive.
5. Do not stack the table with too many objects at one time, rather keep just a few.
6. The table and the objects require cleaning, dusting and rearrangement of objects. Engaging the children in these tasks gives the child the feeling of not just looking at those objects but really caring for them.
7. Also encourage the children to bring their own objects from the natural world and display them on the table.
Age: 2.5 years onwards
Chapter 1
5
Exercise 3 Nature Table
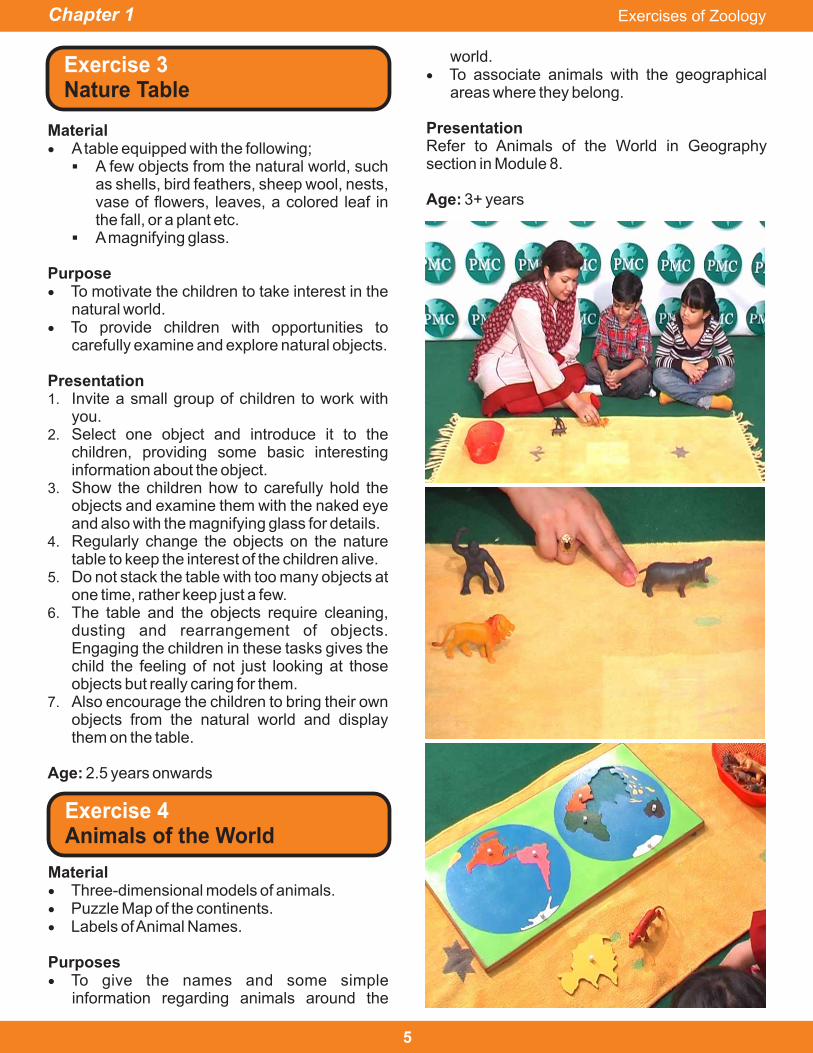
Exercise 4 Animals of the World
world.· To associate animals with the geographical
areas where they belong.
PresentationRefer to Animals of the World in Geography section in Module 8.
Age: 3+ years
Material· Three-dimensional models of animals. · Puzzle Map of the continents.· Labels of Animal Names.
Purposes· To give the names and some simple
information regarding animals around the
Exercises of Zoology
Chapter 1
6
Material· Pictures of living and non living objects coded
on the back. · A box with two compartments labelled "Living"
and "Non-Living" for sorting (optional).
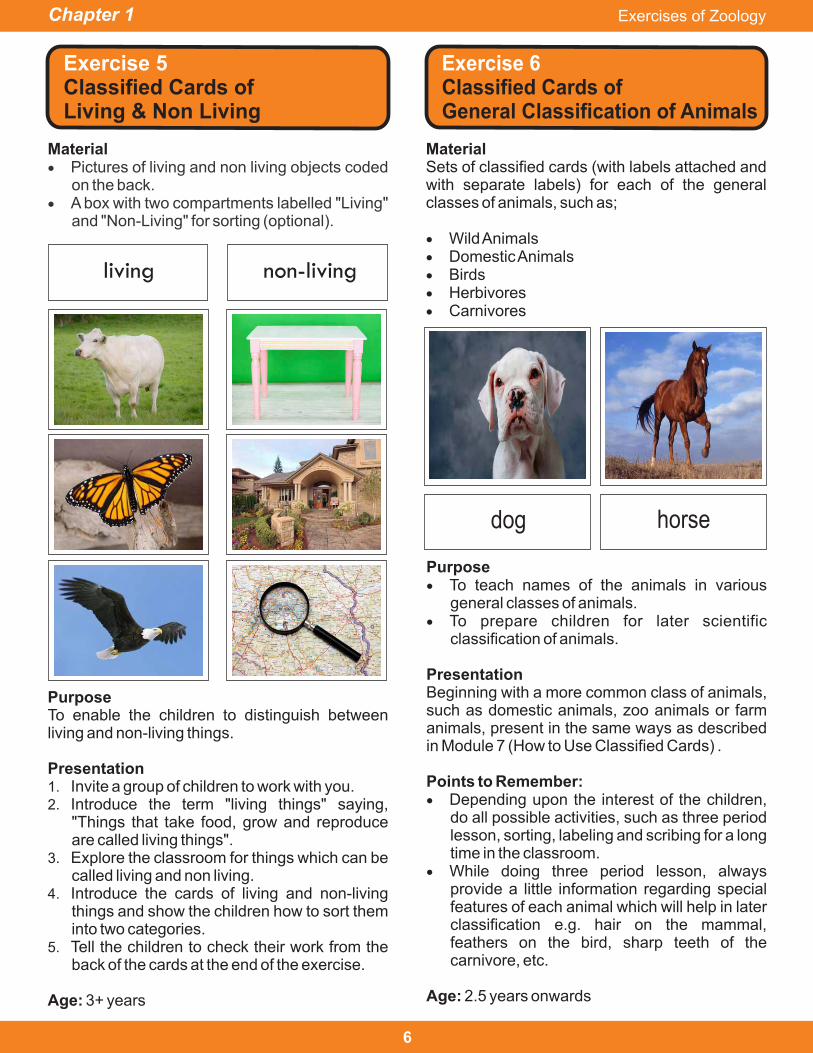
Exercise 5Classified Cards ofLiving & Non Living
PurposeTo enable the children to distinguish between living and non-living things.
Presentation1. Invite a group of children to work with you.2. Introduce the term "living things" saying,
"Things that take food, grow and reproduce are called living things".
3. Explore the classroom for things which can be called living and non living.
4. Introduce the cards of living and non-living things and show the children how to sort them into two categories.
5. Tell the children to check their work from the back of the cards at the end of the exercise.
Age: 3+ years
living non-living
Exercise 6Classified Cards ofGeneral Classification of Animals
MaterialSets of classified cards (with labels attached and with separate labels) for each of the general classes of animals, such as;
· Wild Animals· Domestic Animals· Birds· Herbivores· Carnivores
Purpose· To teach names of the animals in various
general classes of animals.· To prepare children for later scientific
classification of animals.
PresentationBeginning with a more common class of animals, such as domestic animals, zoo animals or farm animals, present in the same ways as described in Module 7 (How to Use Classified Cards) .
Points to Remember:· Depending upon the interest of the children,
do all possible activities, such as three period lesson, sorting, labeling and scribing for a long time in the classroom.
· While doing three period lesson, always provide a little information regarding special features of each animal which will help in later classification e.g. hair on the mammal, feathers on the bird, sharp teeth of the carnivore, etc.
Age: 2.5 years onwards
dog horse
Exercises of Zoology
Chapter 1
7
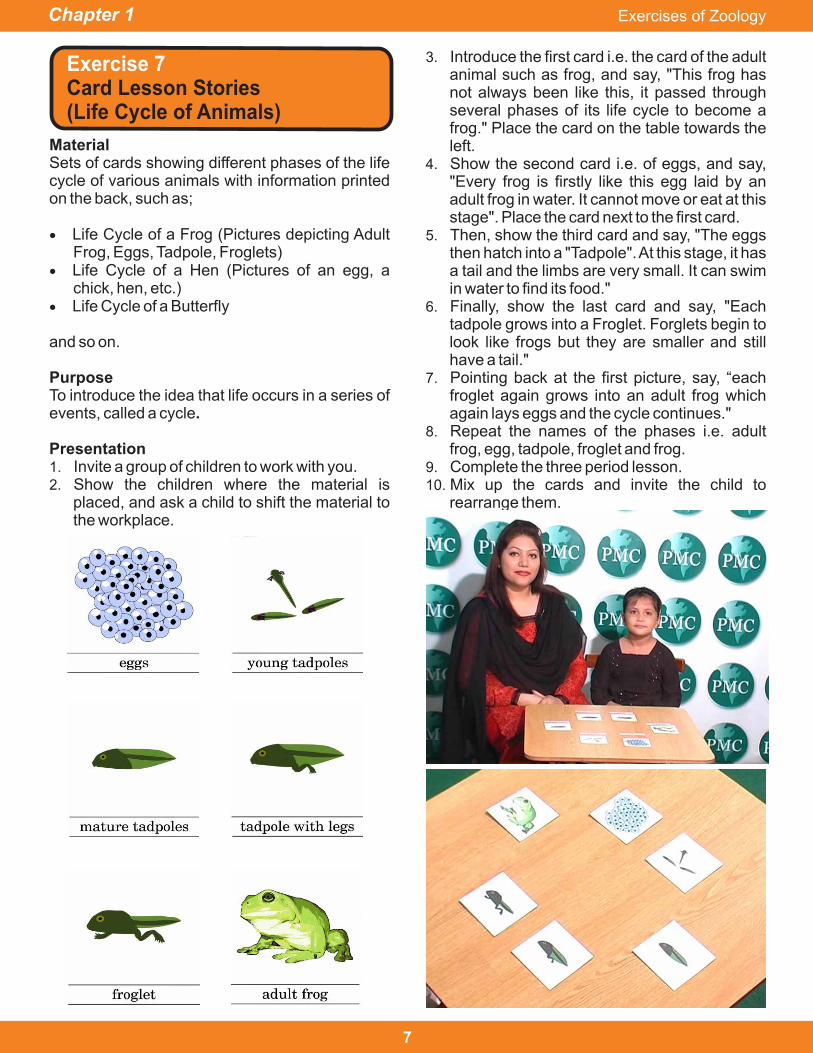
MaterialSets of cards showing different phases of the life cycle of various animals with information printed on the back, such as;
· Life Cycle of a Frog (Pictures depicting Adult Frog, Eggs, Tadpole, Froglets)
· Life Cycle of a Hen (Pictures of an egg, a chick, hen, etc.)
· Life Cycle of a Butterfly
and so on.
PurposeTo introduce the idea that life occurs in a series of events, called a cycle.
Presentation1. Invite a group of children to work with you.2. Show the children where the material is
placed, and ask a child to shift the material to the workplace.
Exercise 7Card Lesson Stories(Life Cycle of Animals)
3. Introduce the first card i.e. the card of the adult animal such as frog, and say, "This frog has not always been like this, it passed through several phases of its life cycle to become a frog." Place the card on the table towards the left.
4. Show the second card i.e. of eggs, and say, "Every frog is firstly like this egg laid by an adult frog in water. It cannot move or eat at this stage". Place the card next to the first card.
5. Then, show the third card and say, "The eggs then hatch into a "Tadpole". At this stage, it has a tail and the limbs are very small. It can swim in water to find its food."
6. Finally, show the last card and say, "Each tadpole grows into a Froglet. Forglets begin to look like frogs but they are smaller and still have a tail."
7. Pointing back at the first picture, say, “each froglet again grows into an adult frog which again lays eggs and the cycle continues."
8. Repeat the names of the phases i.e. adult frog, egg, tadpole, froglet and frog.
9. Complete the three period lesson.10. Mix up the cards and invite the child to
rearrange them.
Exercises of Zoology
Material· A three dimensional
model of vertebral column.
· Sets of pictures of vertebrate and invertebrate animals.
Purpose· To enable the children to
distinguish between vertebrates and invertebrates.
· To give vocabulary to the children, and establish the importance of backbone.
Chapter 1
8
Exercise 8Scientific Classification(Vertebrates and Invertebrates)
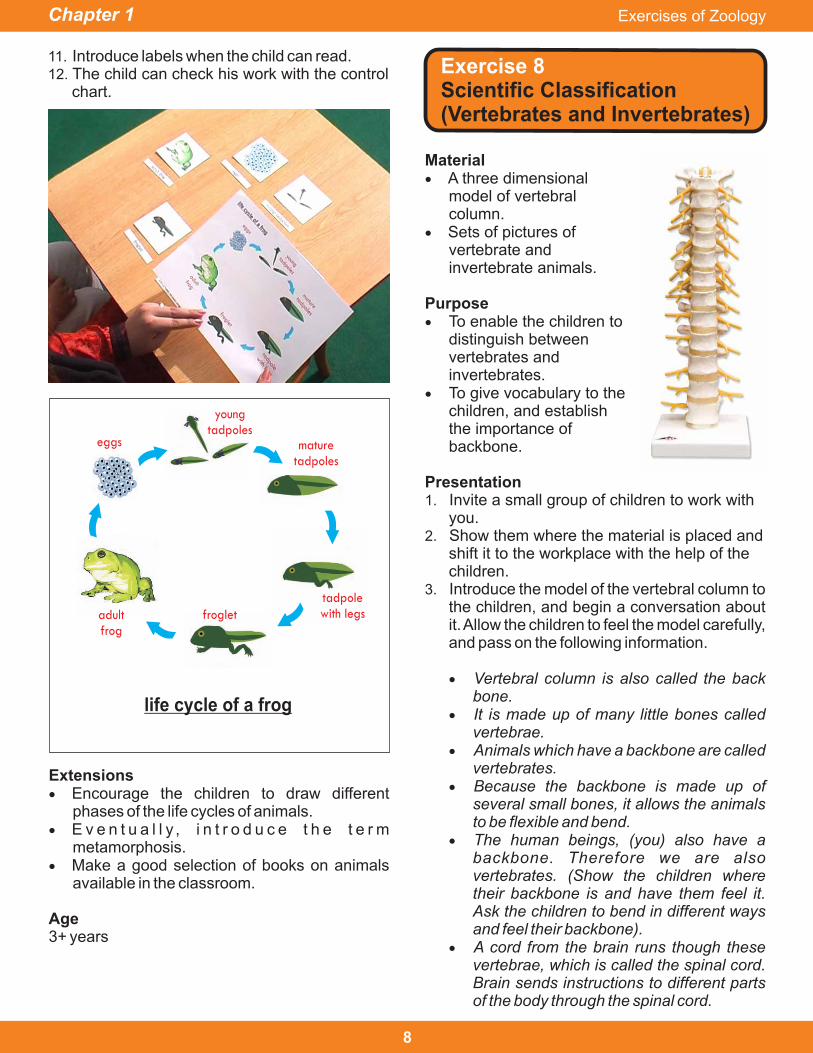
11. Introduce labels when the child can read.12. The child can check his work with the control
chart.
Extensions· Encourage the children to draw different
phases of the life cycles of animals.· E v e n t u a l l y , i n t r o d u c e t h e t e r m
metamorphosis. · Make a good selection of books on animals
available in the classroom.
Age3+ years
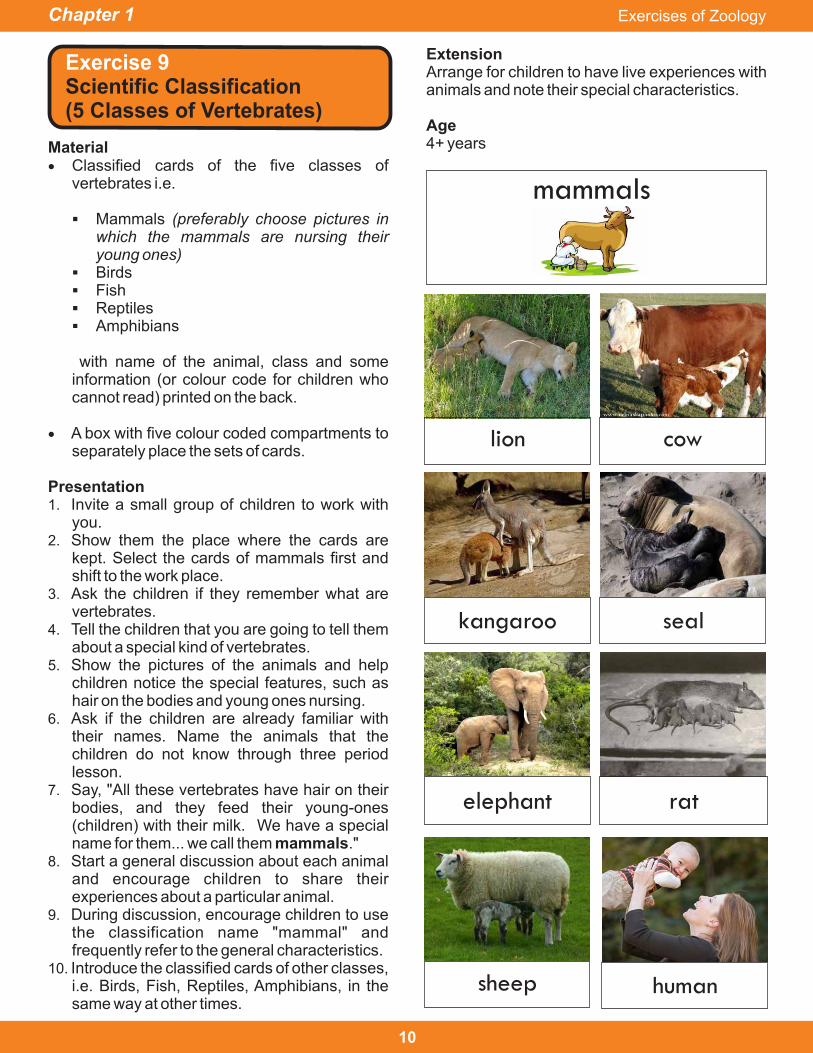
life cycle of a frog
eggs
young tadpoles
mature tadpoles
tadpolewith legsfrogletadult
frog
Presentation1. Invite a small group of children to work with
you.2. Show them where the material is placed and
shift it to the workplace with the help of the children.
3. Introduce the model of the vertebral column to the children, and begin a conversation about it. Allow the children to feel the model carefully, and pass on the following information.
· Vertebral column is also called the back bone.
· It is made up of many little bones called vertebrae.
· Animals which have a backbone are called vertebrates.
· Because the backbone is made up of several small bones, it allows the animals to be flexible and bend.
· The human beings, (you) also have a backbone. Therefore we are also vertebrates. (Show the children where their backbone is and have them feel it. Ask the children to bend in different ways and feel their backbone).
· A cord from the brain runs though these vertebrae, which is called the spinal cord. Brain sends instructions to different parts of the body through the spinal cord.
Exercises of Zoology

Chapter 1
4. Show the pictures of some vertebrate animals, and tell them that these are all vertebrates because they all have a backbone.
5. Ask if the children are already familiar with their names. Name the animals that the children do not know through three period lesson.
invertebratesvertebrates
fish
frog
snake
lizard
bird
grass hoper
earthworm
fly
starfish
butterfly
6. If the children are interested introduce the term "invertebrates", else continue at another time as described below.
7. Ask the children if they remember what are vertebrates.
8. On getting the answer say, "yes, animals which have a backbone are called vertebrates, but the animals without a backbone are called invertebrates".
9. Introduce the pictures of invertebrates in the same way as the pictures of vertebrates.
10. Mix up the pictures of both the sets. Place a picture representing vertebrates towards top of the table. Then, take a picture representing invertebrates and place next to the first picture.
11. Ask the children to look at all the pictures and place the vertebrate under the first picture and the invertebrates under the second picture.
12. When finished the children can check their work by the coding on the back.
Age4+ years
9
Exercises of Zoology
Chapter 1
7
Material· Classified cards of the five classes of
vertebrates i.e.
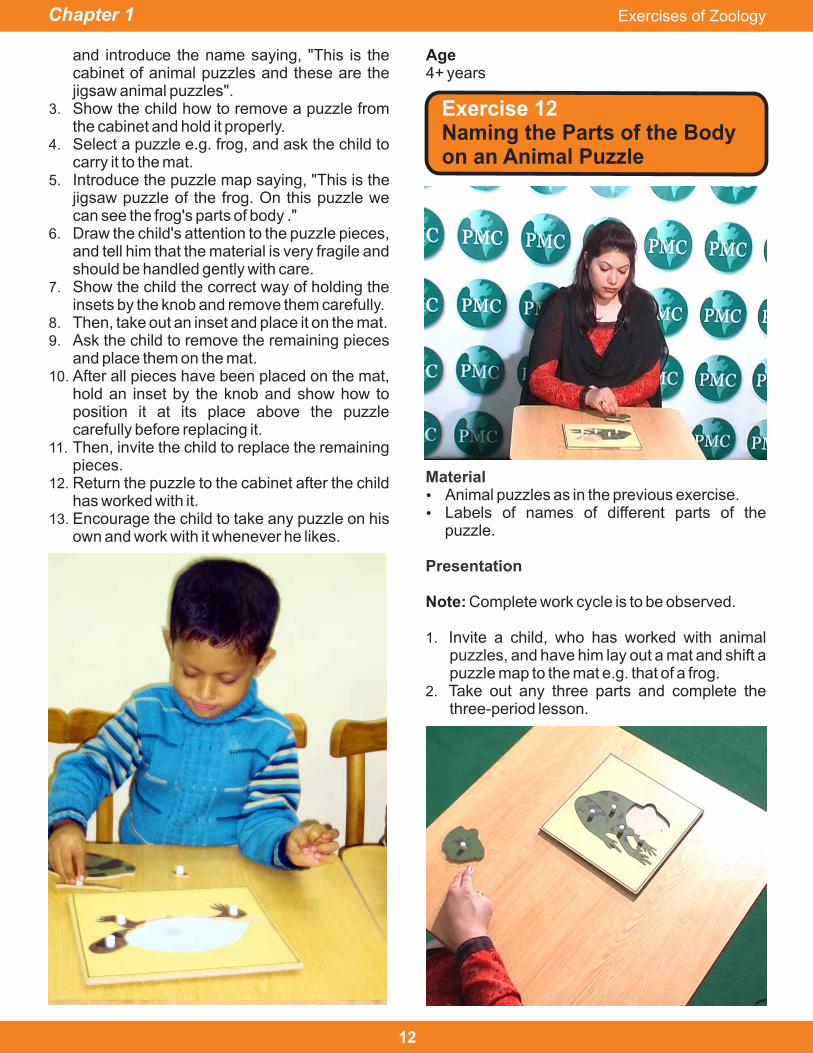
§ Mammals (preferably choose pictures in which the mammals are nursing their young ones)
§ Birds§ Fish§ Reptiles§ Amphibians
with name of the animal, class and some information (or colour code for children who cannot read) printed on the back.
· A box with five colour coded compartments to separately place the sets of cards.
Presentation1. Invite a small group of children to work with
you.2. Show them the place where the cards are
kept. Select the cards of mammals first and shift to the work place.
3. Ask the children if they remember what are vertebrates.
4. Tell the children that you are going to tell them about a special kind of vertebrates.
5. Show the pictures of the animals and help children notice the special features, such as hair on the bodies and young ones nursing.
6. Ask if the children are already familiar with their names. Name the animals that the children do not know through three period lesson.
7. Say, "All these vertebrates have hair on their bodies, and they feed their young-ones (children) with their milk. We have a special name for them... we call them mammals."
8. Start a general discussion about each animal and encourage children to share their experiences about a particular animal.
9. During discussion, encourage children to use the classification name "mammal" and frequently refer to the general characteristics.
10. Introduce the classified cards of other classes, i.e. Birds, Fish, Reptiles, Amphibians, in the same way at other times.
ExtensionArrange for children to have live experiences with animals and note their special characteristics.
Age4+ years
Exercise 9Scientific Classification(5 Classes of Vertebrates)
cow
seal
lion
kangaroo
sheep human
ratelephant
mammals
10
Exercises of Zoology

Chapter 1
Exercise 10Animals Sorting Game
MaterialSame as in the previous exercise
PurposeTo enable children to sort the vertebrates into their zoological classification.
PresentationMix pictures of two different classes of vertebrates, e.g. mammals and reptiles, and then ask the children to sort out the pictures into two groups. Initially, ask the children to sort cards of two classes, then three, four and finally of all the five. The children may sort and place the pictures in appropriate boxes or arrange in columns. The children can check their work by looking at the color coding on the back of the cards.
Age4+ years
Material5 jigsaw puzzles of typical animals of each class of vertebral animals, including;
a. Horse (mammal)b. Birdc. Fishd. Frog (amphibian)e. Tortoise (reptile)
Exercise 11 Animals Jigsaw Puzzles
Purposes
Presentation
· To introduce names of the parts of typical animals of each class of vertebrates and give special information about the parts of animals.
· To enable the child to compare the morphology of animals with that of humans.
Note: Complete work cycle is to be observed.
1. Invite a child to work with you.2. Take the child to the cabinet of animal puzzles
11
Exercises of Zoology
Chapter 1
Age4+ years
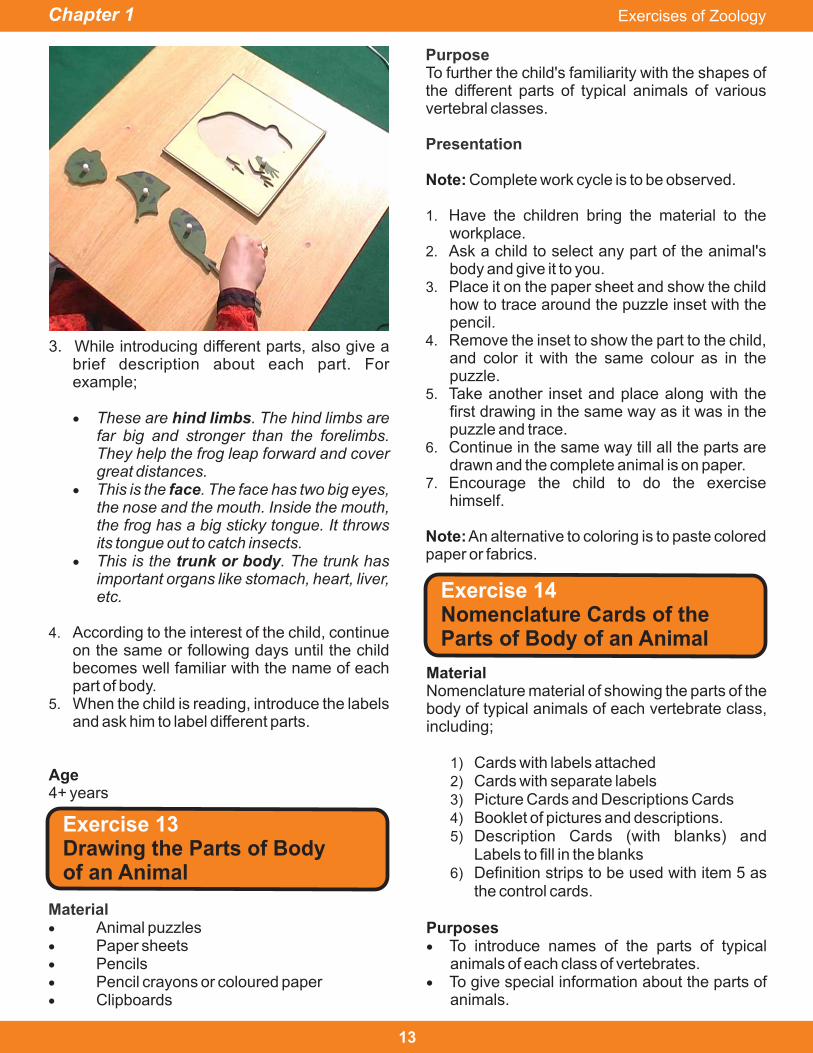
Exercise 12 Naming the Parts of the Body on an Animal Puzzle
Material
Presentation
Ÿ Animal puzzles as in the previous exercise.Ÿ Labels of names of different parts of the
puzzle.
Note: Complete work cycle is to be observed.
1. Invite a child, who has worked with animal puzzles, and have him lay out a mat and shift a puzzle map to the mat e.g. that of a frog.
2. Take out any three parts and complete the three-period lesson.
and introduce the name saying, "This is the cabinet of animal puzzles and these are the jigsaw animal puzzles".
3. Show the child how to remove a puzzle from the cabinet and hold it properly.
4. Select a puzzle e.g. frog, and ask the child to carry it to the mat.
5. Introduce the puzzle map saying, "This is the jigsaw puzzle of the frog. On this puzzle we can see the frog's parts of body ."
6. Draw the child's attention to the puzzle pieces, and tell him that the material is very fragile and should be handled gently with care.
7. Show the child the correct way of holding the insets by the knob and remove them carefully.
8. Then, take out an inset and place it on the mat. 9. Ask the child to remove the remaining pieces
and place them on the mat. 10. After all pieces have been placed on the mat,
hold an inset by the knob and show how to position it at its place above the puzzle carefully before replacing it.
11. Then, invite the child to replace the remaining pieces.
12. Return the puzzle to the cabinet after the child has worked with it.
13. Encourage the child to take any puzzle on his own and work with it whenever he likes.
12
Exercises of Zoology
Chapter 1
3. While introducing different parts, also give a brief description about each part. For example;
· These are hind limbs. The hind limbs are far big and stronger than the forelimbs. They help the frog leap forward and cover great distances.
· This is the face. The face has two big eyes, the nose and the mouth. Inside the mouth, the frog has a big sticky tongue. It throws its tongue out to catch insects.
· This is the trunk or body. The trunk has important organs like stomach, heart, liver, etc.
4. According to the interest of the child, continue on the same or following days until the child becomes well familiar with the name of each part of body.
5. When the child is reading, introduce the labels and ask him to label different parts.
Age4+ years
Exercise 13Drawing the Parts of Body of an Animal
Purpose
Presentation
To further the child's familiarity with the shapes of the different parts of typical animals of various vertebral classes.
Note: Complete work cycle is to be observed.
1. Have the children bring the material to the workplace.
2. Ask a child to select any part of the animal's body and give it to you.
3. Place it on the paper sheet and show the child how to trace around the puzzle inset with the pencil.
4. Remove the inset to show the part to the child, and color it with the same colour as in the puzzle.
5. Take another inset and place along with the first drawing in the same way as it was in the puzzle and trace.
6. Continue in the same way till all the parts are drawn and the complete animal is on paper.
7. Encourage the child to do the exercise himself.
Note: An alternative to coloring is to paste colored paper or fabrics.
Material· Animal puzzles· Paper sheets· Pencils· Pencil crayons or coloured paper· Clipboards
Exercise 14Nomenclature Cards of theParts of Body of an Animal
MaterialNomenclature material of showing the parts of the body of typical animals of each vertebrate class, including;
1) Cards with labels attached 2) Cards with separate labels 3) Picture Cards and Descriptions Cards4) Booklet of pictures and descriptions.5) Description Cards (with blanks) and
Labels to fill in the blanks6) Definition strips to be used with item 5 as
the control cards.
Purposes· To introduce names of the parts of typical
animals of each class of vertebrates.· To give special information about the parts of
animals.
13
Exercises of Zoology
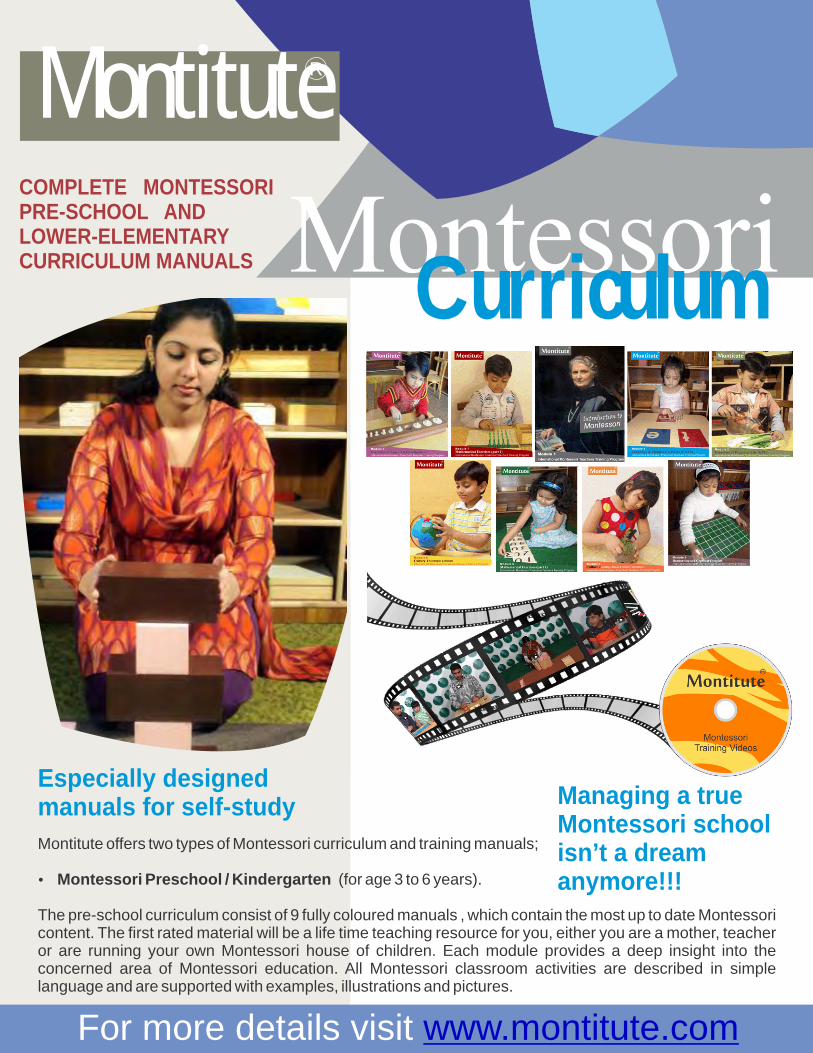
Montitute offers two types of Montessori curriculum and training manuals;
Montessori Preschool / Kindergarten (for age 3 to 6 years).Ÿ
The pre-school curriculum consist of 9 fully coloured manuals , which contain the most up to date Montessori content. The first rated material will be a life time teaching resource for you, either you are a mother, teacher or are running your own Montessori house of children. Each module provides a deep insight into the concerned area of Montessori education. All Montessori classroom activities are described in simple language and are supported with examples, illustrations and pictures.
Curriculum
COMPLETE MONTESSORIPRE-SCHOOL ANDLOWER-ELEMENTARYCURRICULUM MANUALS
For more details visit www.montitute.com
Managing a true Montessori schoolisn’t a dreamanymore!!!
Especially designed manuals for self-study
MontituteMontituteR