Embed Size (px)
Citation preview
QWAT DocumentationRelease 1.3.2
QWAT Team
May 03, 2018

Contents
1 Context 31.1 QWAT features . . . . . . . . . . . . . . . . . . . . . . . . . . . . . . . . . . . . . . . . . . . . . . 31.2 QWAT Installation Guide . . . . . . . . . . . . . . . . . . . . . . . . . . . . . . . . . . . . . . . . 31.3 QWAT User Guide . . . . . . . . . . . . . . . . . . . . . . . . . . . . . . . . . . . . . . . . . . . . 71.4 Admin Guide . . . . . . . . . . . . . . . . . . . . . . . . . . . . . . . . . . . . . . . . . . . . . . . 261.5 Contributor’s guide . . . . . . . . . . . . . . . . . . . . . . . . . . . . . . . . . . . . . . . . . . . . 491.6 Developer’s guide . . . . . . . . . . . . . . . . . . . . . . . . . . . . . . . . . . . . . . . . . . . . 511.7 Demo data and project . . . . . . . . . . . . . . . . . . . . . . . . . . . . . . . . . . . . . . . . . . 571.8 FAQ . . . . . . . . . . . . . . . . . . . . . . . . . . . . . . . . . . . . . . . . . . . . . . . . . . . . 591.9 Glossary . . . . . . . . . . . . . . . . . . . . . . . . . . . . . . . . . . . . . . . . . . . . . . . . . 591.10 Translation . . . . . . . . . . . . . . . . . . . . . . . . . . . . . . . . . . . . . . . . . . . . . . . . 59
2 Indices and tables 61
i

ii
QWAT Documentation, Release 1.3.2
This is QWAT’s project main knowledge base.
For general information about the project, please visit http://qwat.org/
Contents 1
QWAT Documentation, Release 1.3.2
2 Contents
CHAPTER 1
Context
QWAT is a GIS application developp to manage Drinkable Water networks. It relies on QGIS and postgreSQL. Allsources are avalaible at https://github.com/qwat/QWAT.
1.1 QWAT features
1.2 QWAT Installation Guide
This will guide you through the setup of required applications and services to get your system ready for runningQWAT.
1.2.1 Setup database server
If you expect to access the data from several different workstations, you can install the database on a network accessibleserver. If it is just a single desktop you are working on, this can be installed on the same machine.
Required Software
Server installation
Server side software components are:
• PostgreSQL (> 9.3)
• PostGIS, the spatial extension (> 2.1)
• Python, for installation and update (> 3.5)
• PUM for upgrade
3
QWAT Documentation, Release 1.3.2
Supported and tested versions are PostgreSQL 9.6 and Postgis 2.3.
The exact required hardware configuration is very dependant on the data sizes. However, water network data tend notto be huge volumes, and the minimal required configuration is very low.
A comfortable configuration would be the following:
• 4x Core Intel
• >= 8GB RAM
• SSD Storage (40GB+) with Raid capabilities for data redundancy
We recommend using Linux as Operating System when running PostgreSQL, for performance and stability.
In order to benefit fully from your hardware, PostgreSQL should be configured correctly. You can use the followingapplication to have a basic configuration better than default values : http://pgtune.leopard.in.ua/
Choose the following parameters:
• DB Version : your PostgreSQL database version
• OS Type : your Operating System
• DB Type : “Mixed type of applications”
• Total memory : how much memory is installed on your server
• Number of connections : how many concurrent users you want to allow (as a maximum). Optional parameter
The application should give you the settings to adapt in the postgresql.conf configuration file.
Note: In a single desktop environment (no network database server) you can set up your database to trust localconnections.
This way, the database won’t ask for a password if you’re connecting from your local workstation while no passwordis written anywhere. You even can do with no database password at all.
This can be done by editing the database access configuration file pg_hba.conf and set the auth-options from md5 totrust. A database service reload is required to activate changes.
1.2.2 Database initialization
Note that installing QWAT using the initialization script is only required for contributing to the model or extendingthe model. If you only need to test a demo or use a production database, a regular postgreSQL dump is enough. SeeDemo page for that.
Process
Assuming you have installed a postgresql server. In a shell:
git clone https://github.com/qwat/qwatcd qwat
Update data-model submodule:
git submodule update --init --recursive
In order to create the database model you need to create a postgresql database. Do to this you may execute for example:
4 Chapter 1. Context
QWAT Documentation, Release 1.3.2
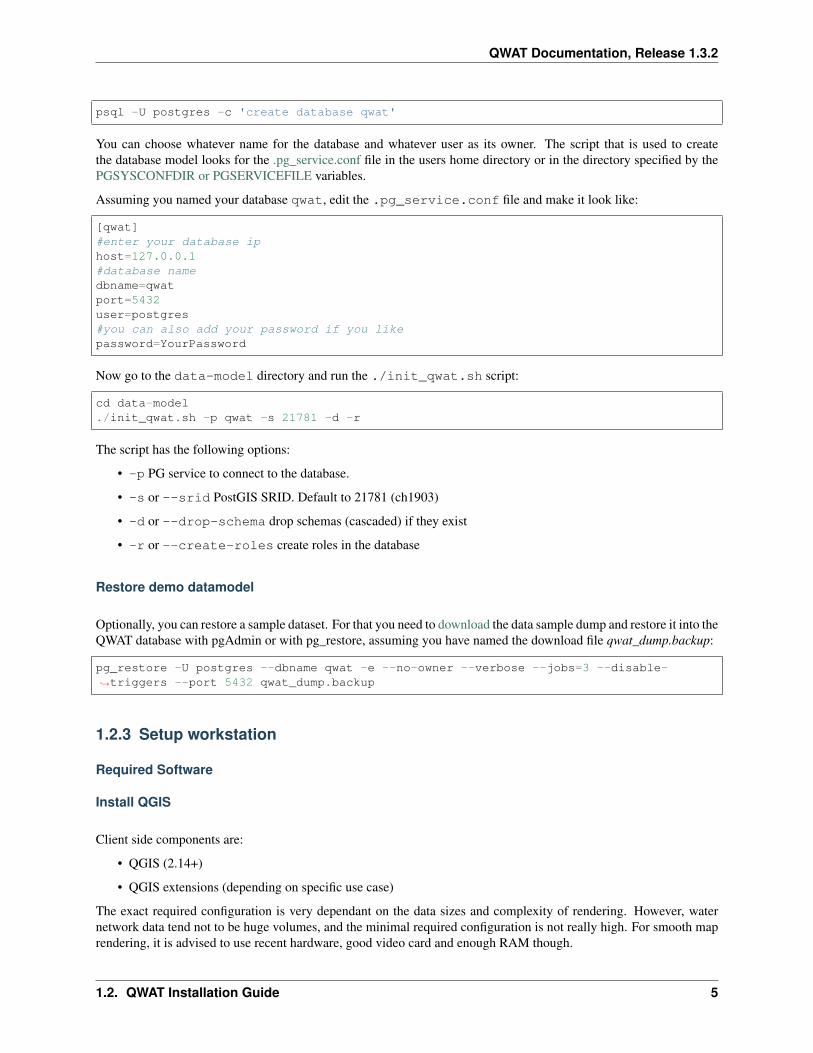
psql -U postgres -c 'create database qwat'
You can choose whatever name for the database and whatever user as its owner. The script that is used to createthe database model looks for the .pg_service.conf file in the users home directory or in the directory specified by thePGSYSCONFDIR or PGSERVICEFILE variables.
Assuming you named your database qwat, edit the .pg_service.conf file and make it look like:
[qwat]#enter your database iphost=127.0.0.1#database namedbname=qwatport=5432user=postgres#you can also add your password if you likepassword=YourPassword
Now go to the data-model directory and run the ./init_qwat.sh script:
cd data-model./init_qwat.sh -p qwat -s 21781 -d -r
The script has the following options:
• -p PG service to connect to the database.
• -s or --srid PostGIS SRID. Default to 21781 (ch1903)
• -d or --drop-schema drop schemas (cascaded) if they exist
• -r or --create-roles create roles in the database
Restore demo datamodel
Optionally, you can restore a sample dataset. For that you need to download the data sample dump and restore it into theQWAT database with pgAdmin or with pg_restore, assuming you have named the download file qwat_dump.backup:
pg_restore -U postgres --dbname qwat -e --no-owner --verbose --jobs=3 --disable-→˓triggers --port 5432 qwat_dump.backup
1.2.3 Setup workstation
Required Software
Install QGIS
Client side components are:
• QGIS (2.14+)
• QGIS extensions (depending on specific use case)
The exact required configuration is very dependant on the data sizes and complexity of rendering. However, waternetwork data tend not to be huge volumes, and the minimal required configuration is not really high. For smooth maprendering, it is advised to use recent hardware, good video card and enough RAM though.
1.2. QWAT Installation Guide 5
QWAT Documentation, Release 1.3.2
A comfortable configuration would be:
• 4x core Intel processor
• 8GB of RAM
• SSD storage
• Good video card (recent onboard Intel are ok, or dedicated NVidia/AMD)
• Minimum requirement 2.14
Note: We recommend using the latest LTR version: 2.18. which often offers a better experience in combination withQWAT. For Windows installation, download the OSGeo4W Installer
Database configuration
To tell a workstation, where the database is (on the local system or on a network server) you will have to create somefiles initially on every device on which you will have QGIS/QWAT running. It is not required to do that on the serveritself.
These instructions depend on your operating system.
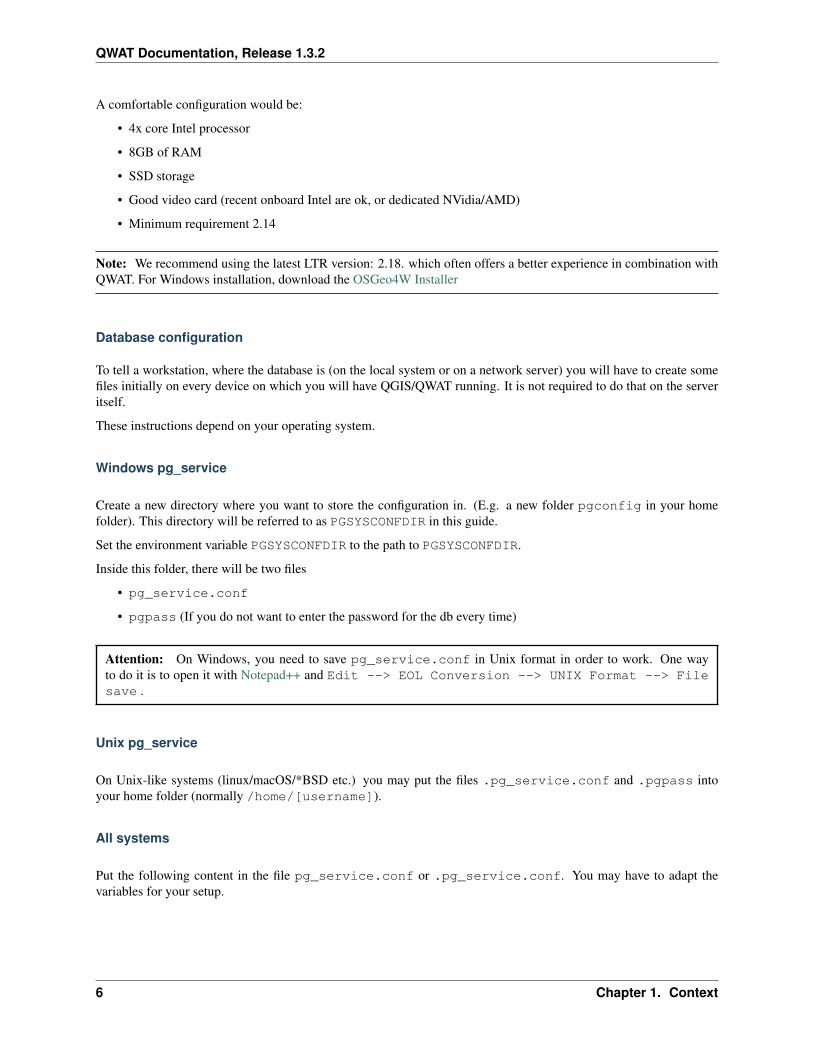
Windows pg_service
Create a new directory where you want to store the configuration in. (E.g. a new folder pgconfig in your homefolder). This directory will be referred to as PGSYSCONFDIR in this guide.
Set the environment variable PGSYSCONFDIR to the path to PGSYSCONFDIR.
Inside this folder, there will be two files
• pg_service.conf
• pgpass (If you do not want to enter the password for the db every time)
Attention: On Windows, you need to save pg_service.conf in Unix format in order to work. One wayto do it is to open it with Notepad++ and Edit --> EOL Conversion --> UNIX Format --> Filesave .
Unix pg_service
On Unix-like systems (linux/macOS/*BSD etc.) you may put the files .pg_service.conf and .pgpass intoyour home folder (normally /home/[username]).
All systems
Put the following content in the file pg_service.conf or .pg_service.conf. You may have to adapt thevariables for your setup.
6 Chapter 1. Context
QWAT Documentation, Release 1.3.2
[qwat]host=localhostport=5432dbname=qwatuser=qwatuser
To save the password as well on the system you may use the file pgpass.
localhost:5432:*:qwatuser:password
Note: If you don’t have the database on your local machine replace any occurence of localhost with the networkaddress of your database server.
1.3 QWAT User Guide
This represents a guide on how to collect data in QWAT (digitizing), edit existing data and use various tools.
At the open of the projet, a message appear. You must activate macro. Since QWAT have a lot of triggers and relations,some actions are generated with python in QGIS.
1.3.1 Structuration du réseau d’Eau Potable sur QWAT
Ordre de saisie des différents type d’objets
La mise à jour sur QWAT se fait dans l’ordre suivant:
• 1. Points de construction qwat_od.node, pour tous les:
– points de construction
– Té
– Bouchon
– Changement de matériau
– Changement d’année
– Changement de diamètre
• 2. Création des conduites qwat_od.pipe, pour toutes les:
– Conduites principales (réseau)
– Conduites hydrantes
– Conduites de branchement
– Conduites de branch. secondaire
– Conduites de transport
– Conduites d’arrosage
• 3. Création des pièces d’installation qwat_od.vw_element_part, pour tous les:
1.3. QWAT User Guide 7
QWAT Documentation, Release 1.3.2
– Croix
– Changement de pente
– Coude
– Manchon
– Collier de prise
– Bouchon
– Bouches d’arrosage
– Autres pièces diverses
• 4. Création des points d’introduction, pour tous les:
– Points d’introduction
• 5. Création des vannes qwat_od.valve, pour toutes les:
– Vannes réseau
– Vannes hydrant
– Vannes de prise
– Vannes de prise secondaire
– Vannes de régulation
– Purge
– Vannes de vidange automatique
• 6. Création des bornes hydrantes qwat_od.vw_element_hydrant, pour toutes les:
– Bornes hydrant
• 7. Création des manchons de réparation, pour tous les:
– Manchon de réparation
• 8. Création des ouvrages, pour tous les:
– Ouvrages qwat_od.vw_element_installation
– Couvercles qwat_od.cover
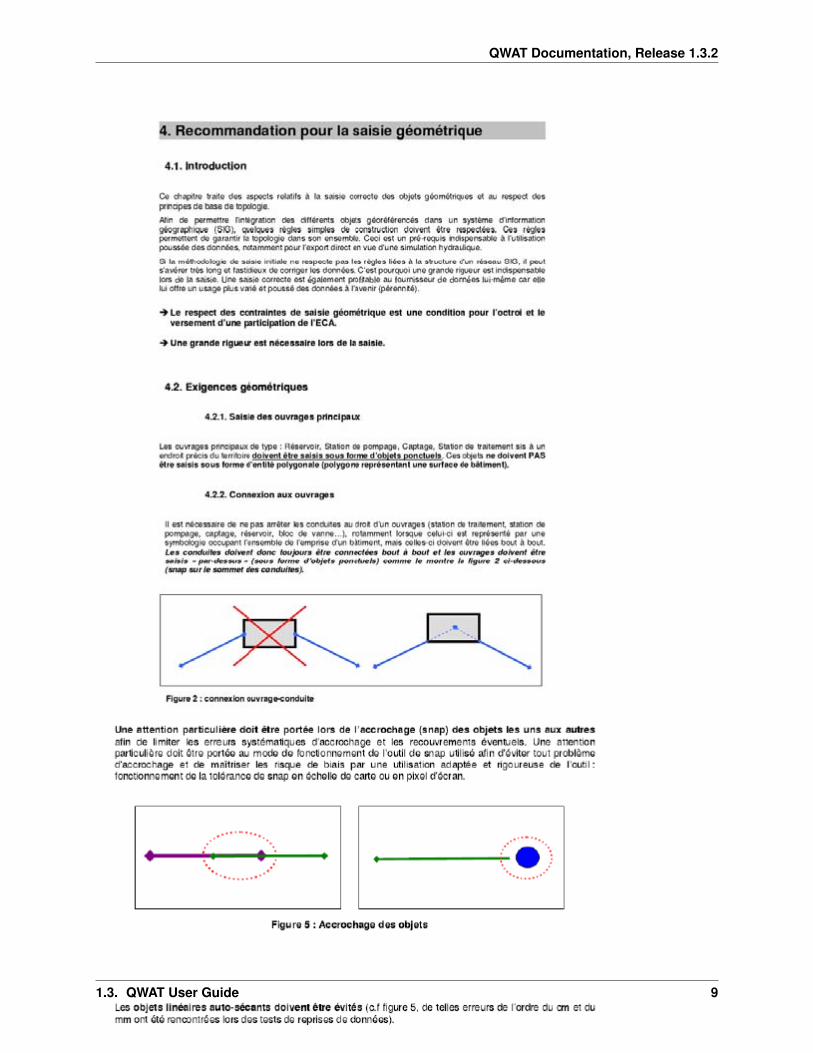
Directive de saisie des conduites
Warning: Cette partie est susceptible de changer en fonction du développement de QWAT. Le projet étantinité par les communes vaudoises (CH), elle se base sur les directives du SIRE. En la matière, il existe plusieursnumérisations possibles des réseaux d’eaux. Des modifications pourront être apportées suivant l’évolution duprojet et des règles en vigueur.
La saisie du réseau doit être effectuée en respectant les directives fixées par SIRE, selon les exemples ciaprès.
8 Chapter 1. Context
QWAT Documentation, Release 1.3.2
1.3. QWAT User Guide 9
QWAT Documentation, Release 1.3.2
1.3.2 Création d’objets dans QWAT
Ce guide se veut un résumé des fonctionnalités de créations des données adaptées au besoin de QWAT dans QGIS.
Il ne saurait remplacer la lecture du manuel de QGIS expliquant en détail les différentes commandes. Le dessinateurest libre d’utiliser les plugins de dessin pour enrichir sa palette d’outils.
Importation des points relevés
Pour importer des points dans QWAT, il faut cliquer sur l’icône « EasyImport »
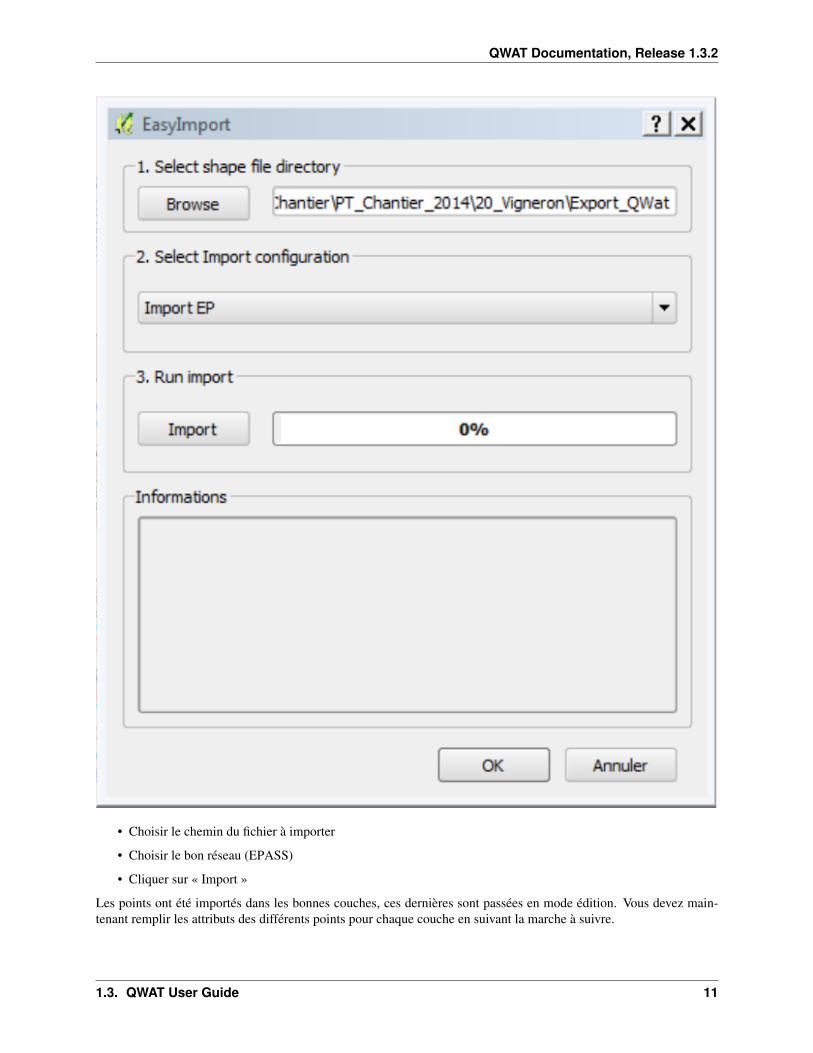
La fenêtre suivante s’ouvre :
10 Chapter 1. Context
QWAT Documentation, Release 1.3.2
• Choisir le chemin du fichier à importer
• Choisir le bon réseau (EPASS)
• Cliquer sur « Import »
Les points ont été importés dans les bonnes couches, ces dernières sont passées en mode édition. Vous devez main-tenant remplir les attributs des différents points pour chaque couche en suivant la marche à suivre.
1.3. QWAT User Guide 11
QWAT Documentation, Release 1.3.2
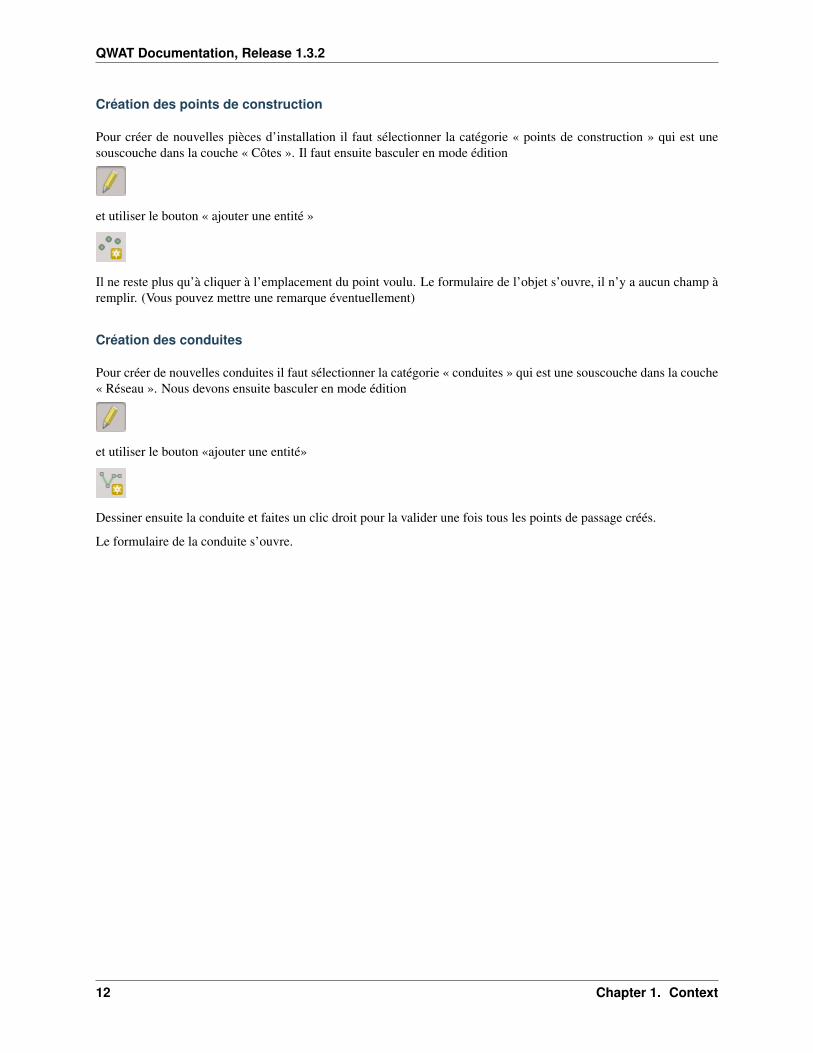
Création des points de construction
Pour créer de nouvelles pièces d’installation il faut sélectionner la catégorie « points de construction » qui est unesouscouche dans la couche « Côtes ». Il faut ensuite basculer en mode édition
et utiliser le bouton « ajouter une entité »
Il ne reste plus qu’à cliquer à l’emplacement du point voulu. Le formulaire de l’objet s’ouvre, il n’y a aucun champ àremplir. (Vous pouvez mettre une remarque éventuellement)
Création des conduites
Pour créer de nouvelles conduites il faut sélectionner la catégorie « conduites » qui est une souscouche dans la couche« Réseau ». Nous devons ensuite basculer en mode édition
et utiliser le bouton «ajouter une entité»
Dessiner ensuite la conduite et faites un clic droit pour la valider une fois tous les points de passage créés.
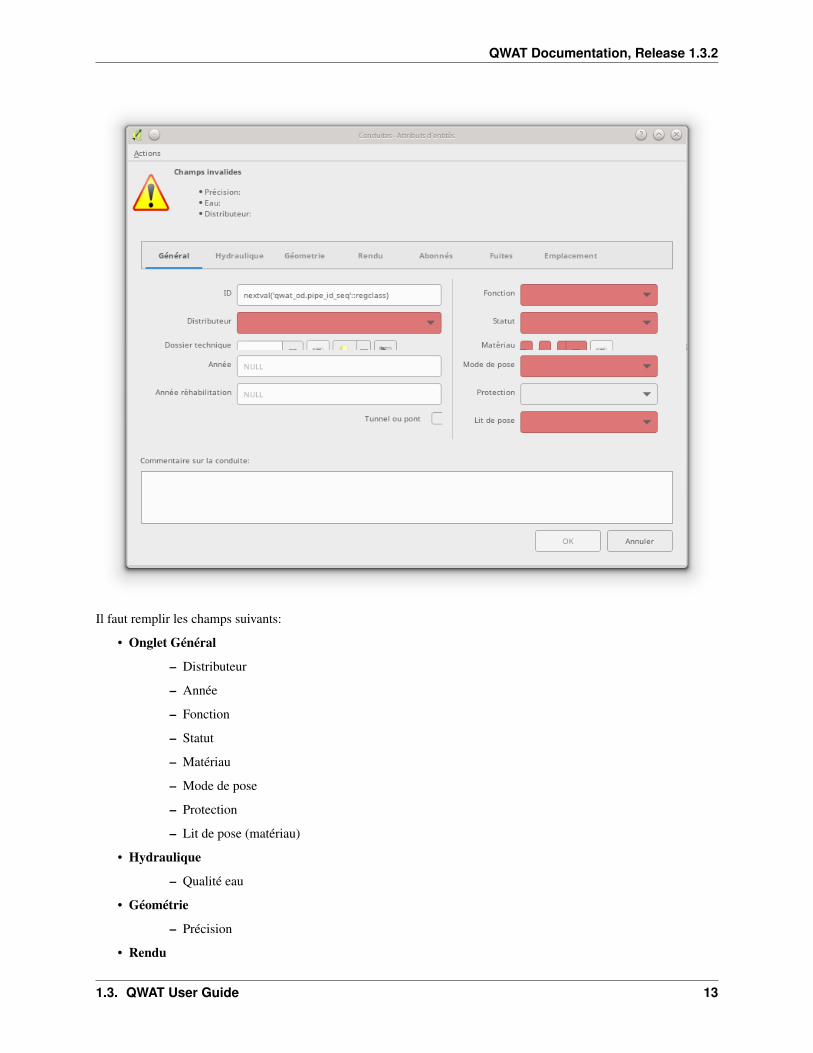
Le formulaire de la conduite s’ouvre.
12 Chapter 1. Context
QWAT Documentation, Release 1.3.2
Il faut remplir les champs suivants:
• Onglet Général
– Distributeur
– Année
– Fonction
– Statut
– Matériau
– Mode de pose
– Protection
– Lit de pose (matériau)
• Hydraulique
– Qualité eau
• Géométrie
– Précision
• Rendu
1.3. QWAT User Guide 13
QWAT Documentation, Release 1.3.2
– « Schématique » à cocher si on veut que la conduite apparaisse sur la schématique
• Fuites
– Liaison avec les manchons de fuites à faire si besoin (cf partie sur les fuites)
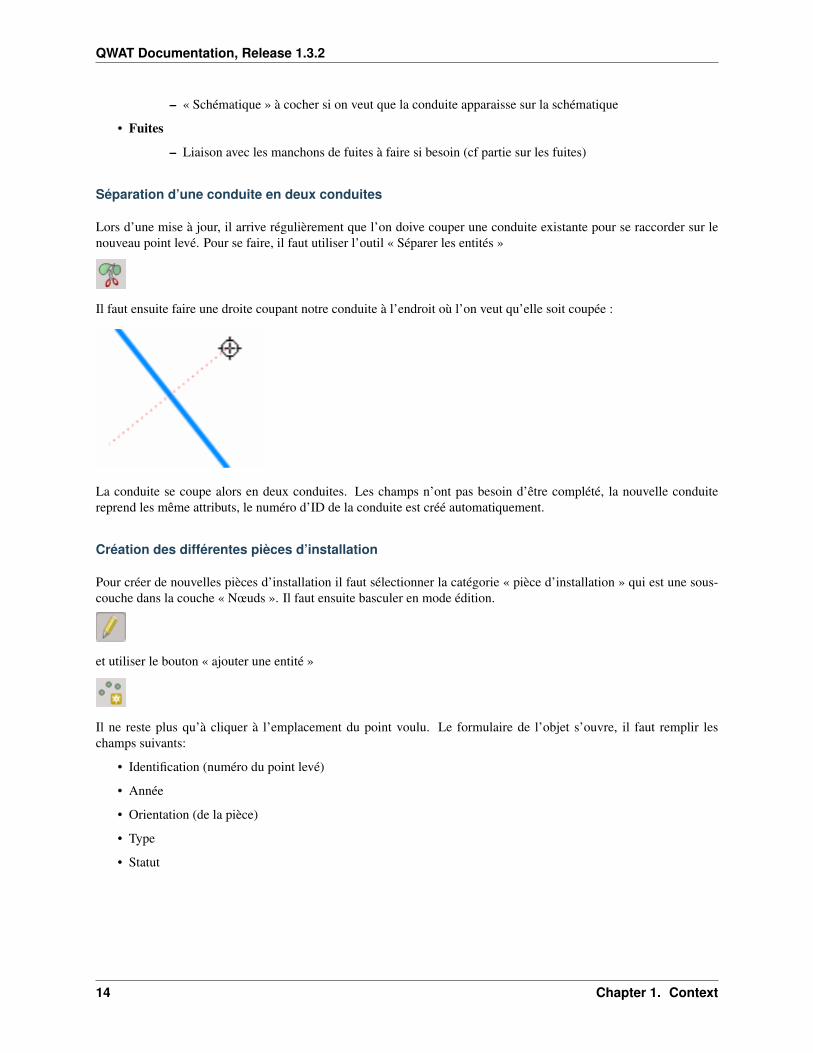
Séparation d’une conduite en deux conduites
Lors d’une mise à jour, il arrive régulièrement que l’on doive couper une conduite existante pour se raccorder sur lenouveau point levé. Pour se faire, il faut utiliser l’outil « Séparer les entités »
Il faut ensuite faire une droite coupant notre conduite à l’endroit où l’on veut qu’elle soit coupée :
La conduite se coupe alors en deux conduites. Les champs n’ont pas besoin d’être complété, la nouvelle conduitereprend les même attributs, le numéro d’ID de la conduite est créé automatiquement.
Création des différentes pièces d’installation
Pour créer de nouvelles pièces d’installation il faut sélectionner la catégorie « pièce d’installation » qui est une sous-couche dans la couche « Nœuds ». Il faut ensuite basculer en mode édition.
et utiliser le bouton « ajouter une entité »
Il ne reste plus qu’à cliquer à l’emplacement du point voulu. Le formulaire de l’objet s’ouvre, il faut remplir leschamps suivants:
• Identification (numéro du point levé)
• Année
• Orientation (de la pièce)
• Type
• Statut
14 Chapter 1. Context
QWAT Documentation, Release 1.3.2
Création des points d’introduction
Le point d’introduction se crée en créant une pièce d’installation ayant comme « Type » = « point d’introduction ».Une fois cela fait, un point d’introduction sera automatiquement crée dans la couche « Nœuds » lors de la générationdes nœuds (voir les explications ci-dessous).
Création des vannes
Pour créer de nouvelles vannes il faut sélectionner la catégorie « vannes » qui est une souscouche dans la couche «Réseau ». Il faut ensuite basculer en mode édition
et utiliser le bouton « ajouter une entité ».
Il ne reste plus qu’à cliquer à l’emplacement du point voulu. Le formulaire de l’objet s’ouvre, il faut remplir leschamps suivants:
• Onglet Général
– Année
– Fermée (à cocher si c’est le cas)
– Type
– Fonction
– Statut
– Maintenance (si défaut)
• Géométrie
– Altitude réelle (coordonnée Z du point)
– Précision alti.
– Précision (planimétrique)
• Rendu
– Schématique à cocher si on veut que la conduite apparaisse sur la schématique
Création des bornes hydrantes
Pour créer de nouvelles bornes hydrantes il faut sélectionner la catégorie « hydrantes » qui est une souscouche dans lacouche « Réseau ».
Il faut ensuite basculer en mode édition
et utiliser le bouton « ajouter une entité ».
1.3. QWAT User Guide 15
QWAT Documentation, Release 1.3.2
Il ne reste plus qu’à cliquer à l’emplacement du point voulu. Le formulaire de l’objet s’ouvre, il faut remplir leschamps suivants:
• Onglet Général
– Année
– Distributeur
– Etat
– Fournisseur
– Souterraine (à cocher si c’est le cas)
• Géométrie
– Altitude réelle (coordonnée Z du point)
– Précision alti.
– Précision (planimétrique)
• Hydraulique
– Pression statique
– Pression dynamique
– Débit
– Mesuré le
– Mesuré par
Création d’un manchon de réparation
Pour créer un nouveau manchon de réparation il faut sélectionner la catégorie « fuites » qui est une souscouche dansla couche « Réseau ». Il faut ensuite basculer en mode édition
et utiliser le bouton « ajouter une entité ».
Il ne reste plus qu’à cliquer à l’emplacement du point voulu. Le formulaire de l’objet s’ouvre, il faut remplir leschamps suivants:
• « réparée »
– à cocher si la fuite est réparée
• détection
– date de détection de la fuite
• adresse
– endroit où a eu lieu la fuite
• Description
• Type
– Type de dégâts
16 Chapter 1. Context
QWAT Documentation, Release 1.3.2
• Cause
– Cause de la fuite
• Dommage
– Gravité des dégâts
• « Conduite remplacée »
– à cocher si un bout de conduite a été changé
• Réparation
– Pièce utilisée pour la réparation
• Date réparation
Pour que la liaison avec la conduite se fasse automatiquement, il faut enregistrer la conduite une fois le manchon crée.
Création d’ouvrages ainsi que de tous leurs détails
Les ouvrages et leurs détails sont contenus dans plusieurs couches:
• Le points principal se trouve dans la souscouche « ouvrage général »
• Le couvercle de l’ouvrage, si il y en a un, se trouve dans la souscouche « couvercle »
• L’emprise réelle de l’ouvrage se trouve dans la souscouche « ouvrage – polygones »
• Les points de détail des ouvrages (par exemple les vannes d’une chambre de vannes) se trouvent dans la sous-couche « détail ».
Création de l’ouvrage général
Pour créer le point d’ouvrage, il faut sélectionner la catégorie « ouvrage général » qui est une souscouche dans lacouche « ouvrages ». Il faut ensuite basculer en mode édition
et utiliser le bouton « ajouter une entité ».
Il ne reste plus qu’à cliquer à l’emplacement du point voulu. Le formulaire de l’objet s’ouvre, il faut remplir leschamps suivants:
• Nom (composé d’une lettre suivi d’un nombre)
• Statut
• « Visible schéma » à cocher si on veut que la conduite apparaisse sur la schématique
• Année
• Type
1.3. QWAT User Guide 17
QWAT Documentation, Release 1.3.2
Création du couvercle de l’ouvrage
Pour créer le couvercle de l’ouvrage, il faut sélectionner la catégorie « couvercles » qui est une souscouche dans lacouche « ouvrages ». Il faut ensuite basculer en mode édition
et utiliser le bouton « ajouter une entité ».
Il ne reste plus qu’à cliquer à l’emplacement du point voulu. Le formulaire de l’objet s’ouvre, il faut remplir leschamps suivants:
• identification (identique au champ « Nom » de l’ouvrage)
• Diamètre (en mm)
• Altitude
• Type
• « Circulaire » à cocher si le couvercle est rond
• Ouvrage
– Il faut lier l’ouvrage principal au couvercle. Pour se faire, cliquez sur le bouton
et ensuite aller cliquez sur le point principal de l’ouvrage (sur le plan). Le champ a du se remplir avec lenom de l’ouvrage.
Création de l’emprise de l’ouvrage
Pour créer le point d’ouvrage, il faut sélectionner la catégorie « ouvrage général » qui est une souscouche dans lacouche « ouvrages ». Il faut ensuite basculer en mode édition
et utiliser le bouton « ajouter une entité ».
Il ne reste plus qu’à digitaliser l’emprise de l’ouvrage. Une fois le polygone crée, faites un clicdroit pour arrêter lasaisie. Le formulaire s’ouvre, il faut remplir les champs suivants:
• name (identique au champ « Nom » de l’ouvrage)
• id_type
• Year
18 Chapter 1. Context
QWAT Documentation, Release 1.3.2
Création des détails de l’ouvrage
Pour créer les détails de l’ouvrage, il faut sélectionner la catégorie du détail voulu qui est une souscouche dans lacouche « détail ». Il faut ensuite basculer en mode édition
et utiliser le bouton « ajouter une entité ».
Il ne reste plus qu’à cliquer à l’emplacement du point voulu. Le formulaire de l’objet s’ouvre, il faut remplir lesattributs selon le type de détail que l’on a créé (réservoirs, sources etc..).
1.3.3 Règles de base pour la mise à jour sur QWAT
• A chaque entité créée ou supprimée, enregistrez pour voir si un message d’erreur apparait et ainsi pouvoirrésoudre ces erreurs de saisie beaucoup plus facilement sans devoir chercher sur quel objet se trouve quelleerreur.
• Quand vous changez de catégorie d’objet, n’oubliez pas de fermer le mode édition des autres catégories ets’assurer ainsi que tout a été mis à jour avant d’aller plus loin.
• Comme tout programme informatique, n’oubliez pas d’enregistrer régulièrement votre projet.
Commandes de base
• Pour créer de nouveaux objets, utilisez le bouton « basculer en mode édition »
– Si c’est une catégorie de type point, vous aurez le symbole suivant:
– Si c’est une catégorie de type ligne, vous aurez le symbole suivant:
– Enfin, si c’est une catégorie de type polygone, vous aurez le symbole suivant:
• Pour enregistrer les dernière modifications de la catégorie sélectionnée uniquement, cliquez sur le bouton «sauvegarder les modifications ».
• Pour ouvrir les différents masques de nos objets, utilisez le bouton « identifier les entités ».
1.3. QWAT User Guide 19
QWAT Documentation, Release 1.3.2
• Pour sélectionner des objets, utilisez le bouton
• Pour désélectionner des objets, utilisez le bouton
• Pour supprimer les objets sélectionnés, utilisez le bouton
Ces informations ne sauraient remplacer la lecture du manuel de QGIS expliquant en détail les différentes commandes.
1.3.4 Suppression d’objets dans QWAT
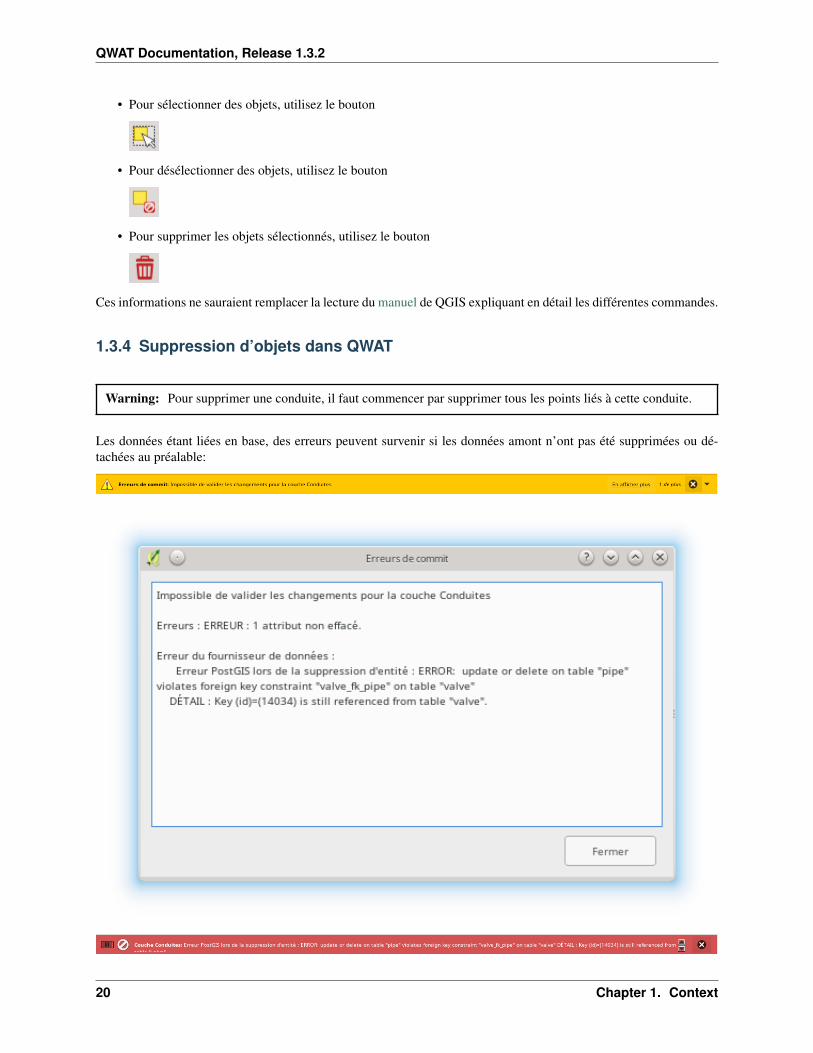
Warning: Pour supprimer une conduite, il faut commencer par supprimer tous les points liés à cette conduite.
Les données étant liées en base, des erreurs peuvent survenir si les données amont n’ont pas été supprimées ou dé-tachées au préalable:
20 Chapter 1. Context
QWAT Documentation, Release 1.3.2
Suppression des pièces d’installation / points d’introduction / vannes / bornes hydrantes / man-chons de réparation et conduites
Commencer par aller sur la couche de l’objet que vous voulez effacer et basculer en mode édition.
Sélectionner ensuite le point avec l’outil de sélection. Vous pouvez soit faire une zone de sélection ou tout simplementcliquer sur le point à effacer.
Warning: À ce moment, soyez attentif au fait de n’avoir que les points désirés à effacer, sinon tous les pointssélectionnés seront effacés.
Pour voir quels objets sont selectionnés, il faut ouvrir la table d’attributs.
Un tableau s’ouvre. En bas à gauche de ce tableau se trouve une fenêtre à choix multiples où il faut choisir « nemontrer que les entités selectionnées ». Il ne reste dans votre tableau, normalement, que les objets que vous voulezeffacer!
Si des objets supplémentaires apparaissent, cliquez sur le bouton « tout désélectionner »
Fermez le tableau et recommencez votre sélection. Une fois que vous n’avez que les points à effacer de sélectionnés,cliquez sur le bouton « supprimer les entités sélectionnées ».
1.3.5 Liaisons des différents objets dans QWAT
Dans QWAT il n’y a que 2 types de liaison à créer manuellement, à savoir:
• les liaisons parentsenfants des conduites (cela permet de lier 2 conduites adjacentes ayant les même attributs,qui seront agrégées en un seul objet dans les vues schématiques)
• Les liaisons fuitesconduites (Afin de relier une fuite à la conduite sur laquelle elle se trouve)
Création des relations parentsenfants des conduites
Pour créer une relation parentenfant, il faut sélectionner la catégorie « conduites » qui est une souscouche dans lacouche « Réseau ». Basculer en mode édition.
Sélectionner la conduite enfant (celle qui va reprendre les attributs de la conduite parent) avec le bouton « identifierles entités ».
1.3. QWAT User Guide 21
QWAT Documentation, Release 1.3.2
Le masque de l’objet s’ouvre. Il faut ensuite aller dans l’onglet « Rendu ». Vous avez un champ « Parent » qui indiquele numéro de la conduite parent, si il y en a une. Pour rajouter une conduite parent, il faut cliquer sur le bouton
et ensuite aller cliquez sur notre conduite parent (sur le plan). Le champ parent a du se remplir.
Suppression des relations parentsenfants des conduites
Pour supprimer une relation parentenfant, il faut sélectionner la catégorie « conduites » qui est une souscouche dansla couche « Réseau ». Basculer en mode édition
Sélectionner la conduite enfant (celle qui va reprendre les attributs de la conduite parent) avec le bouton « identifierles entités ».
Le masque de l’objet s’ouvre. Il faut ensuite aller dans l’onglet « Rendu ». Vous avez un champ « Parent » qui indiquele numéro de la conduite parent. Pour supprimer ce numéro, cliquez sur le bouton
Le numéro a du s’effacer et il doit y avoir à la place « NULL (pas de sélection) ».
Création des relations fuitesconduites
Une fois le manchon de réparation crée, il faut faire passer la conduite par ce manchon. Pour se faire, utiliser « l’outilde nœud »
et double cliquer sur la conduite à un endroit proche du manchon de réparation. Déplacer le point nouvellement créeravec le même outil. Ouvrir le masque de la conduite, aller sous l’onglet « fuite » et créer la liaison en activant l’éditionde donnée
Cliquer ensuite sur:
Un tableau de toutes les fuites apparait, trouver celle qui nous concerne et sélectionnerla en cliquant sur le numéro deligne correspondant. Cliquer ensuite sur « OK », vous êtes ramenés dans le masque de la conduite avec normalementle numéro ID du manchon de réparation indiqué en rouge.
Désactiver ensuite l’éditeur de donnée, on vous demande si vous voulez sauver les modifications de la couche « fuites». Cliquer sur enregistrer. Le numéro doit être passé en noir.
22 Chapter 1. Context
QWAT Documentation, Release 1.3.2
1.3.6 Impression dans QWAT
Impression de plans divers
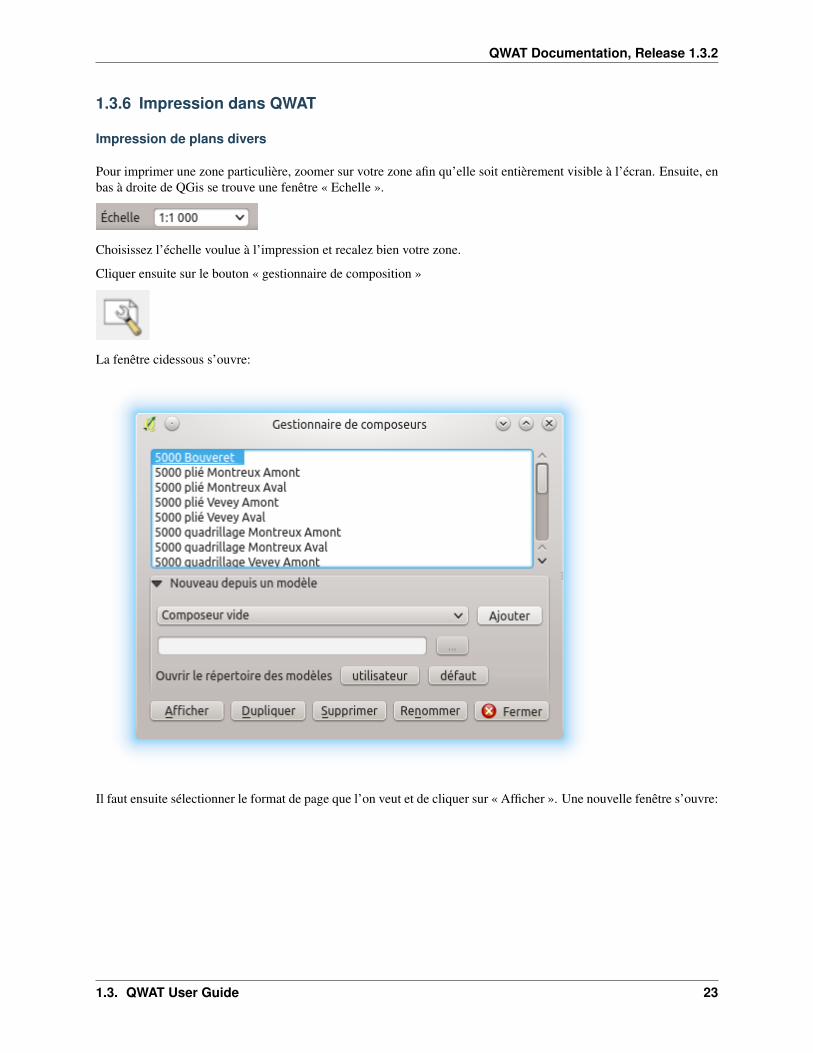
Pour imprimer une zone particulière, zoomer sur votre zone afin qu’elle soit entièrement visible à l’écran. Ensuite, enbas à droite de QGis se trouve une fenêtre « Echelle ».
Choisissez l’échelle voulue à l’impression et recalez bien votre zone.
Cliquer ensuite sur le bouton « gestionnaire de composition »
La fenêtre cidessous s’ouvre:
Il faut ensuite sélectionner le format de page que l’on veut et de cliquer sur « Afficher ». Une nouvelle fenêtre s’ouvre:
1.3. QWAT User Guide 23
QWAT Documentation, Release 1.3.2
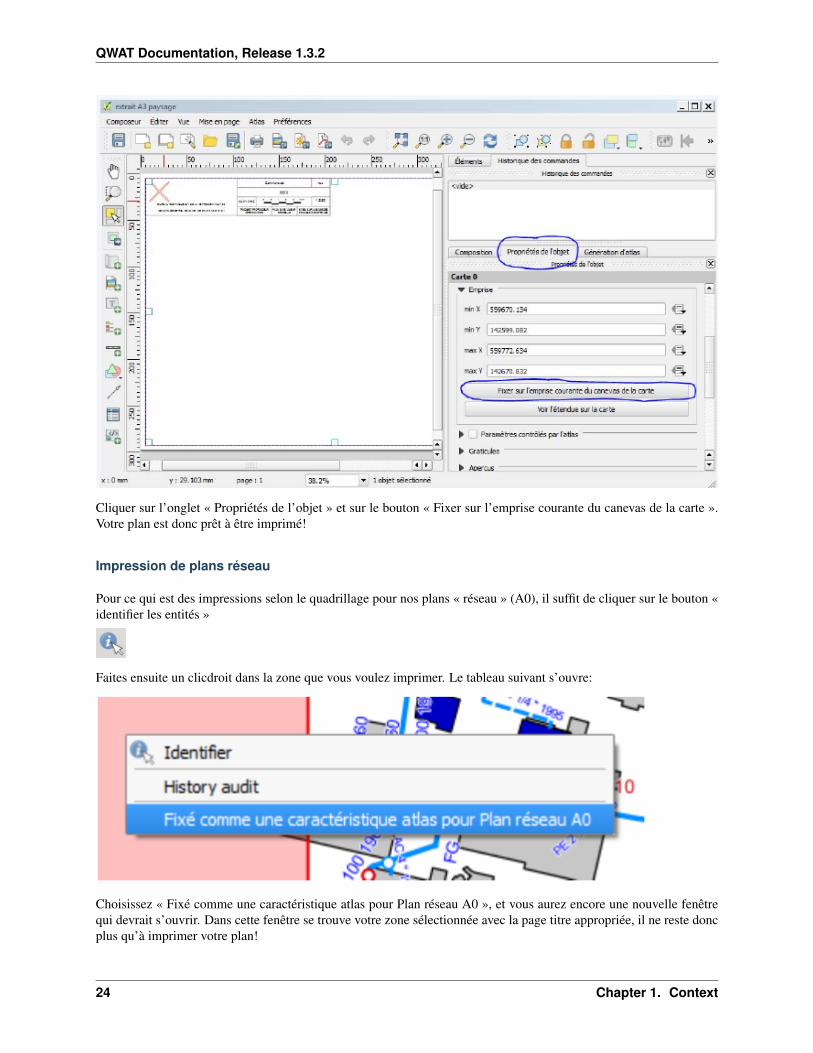
Cliquer sur l’onglet « Propriétés de l’objet » et sur le bouton « Fixer sur l’emprise courante du canevas de la carte ».Votre plan est donc prêt à être imprimé!
Impression de plans réseau
Pour ce qui est des impressions selon le quadrillage pour nos plans « réseau » (A0), il suffit de cliquer sur le bouton «identifier les entités »
Faites ensuite un clicdroit dans la zone que vous voulez imprimer. Le tableau suivant s’ouvre:
Choisissez « Fixé comme une caractéristique atlas pour Plan réseau A0 », et vous aurez encore une nouvelle fenêtrequi devrait s’ouvrir. Dans cette fenêtre se trouve votre zone sélectionnée avec la page titre appropriée, il ne reste doncplus qu’à imprimer votre plan!
24 Chapter 1. Context
QWAT Documentation, Release 1.3.2
1.3.7 Elevation
Managing Z values in a water distribution network is important and has to be treated carefully. We have to followconventions and principles to ensure that we keep precision, measurements sources, and providing useful and easyway of managing the elevation information.
This page details how elevation is managed in the QWAT project.
Principles
• Reference altitude values are stored in nodes and survey points. They may have been set manually, or set fromfield measurements
• 3D geometries for pipes are automatically recomputed, and the Z value of the pipe’s vertices should not be setmanually. The 3D geometry is recomputed from nodes and survey points by interpolating the values.
• Nodes and survey points tables feature informations on the precision, as well as source of measure (gps, inter-polation, dtm, etc..). The following attributes are stored :
– precision_plani : planimetric precision
– precision_alt : altimetric precision
– zsource : source of measure
• A survey point does not necessarily correspond to a node. If the survey point spatially corresponds to a vertex,the value will also be used for interpolating the 3D geometry of the pipe.
• Each location where altitude are known (measured) has a corresponding survey point or node
• 3D pipe geometry is always recomputed as a whole
• Default altitude is 0.0, as 3D geometries in PostGIS do not support null values for Z coordinate. Elevation valuesat 0.0 should not be manually set. Instead use the real field value, which should not be strictly equal to zero.
Behaviours
• If we move an element of the network (valve, part, hydrant . . . ) then attached pipe’s geometries are recomputedwith 3D information
• Any modification of a pipe’s geometry will trigger recomputation of its 3D geometry with calculated interpolatedelevation
• If a new vertex is created for a pipe, or a vertex is moved, the elevation value for this vertex is nulled (set to 0)and will be automatically recomputed
• If we want to insert a node on a pipe and we do not know the elevation for this node, we should create the node,use the tool to compute an interpolated value on this node, and connect the pipe
Needed tools
• A tool to compute interpolated elevation for specific network element (valve, hydrant..). It uses the N nearestnodes and survey points to interpolate the altitude. N can be chosen in QGIS GUI.
• Tool to compute interpolated elevation for specific network elements by pointing to a pipe
• A tool to computed interpolated altitudes for a selection of objects (e.g. construction points over which a pipepasses), given a set of reference points (e.g. 3 surveys points)
1.3. QWAT User Guide 25
QWAT Documentation, Release 1.3.2
• A tool to create a node or a survey point at a specific pipe vertex, asking the user for elevation value andprecision, with default value being the pipe’s vertex interpolated elevation value.
Open Issues
• How to compute the precision for a pipe given the precision for nodes ? Where to store this computed informa-tion ?
• When interpolating the pipe’s elevation, is there any parameter we want to set ? There should’nt be, but thebuffer around the pipe to take survey points into account looks like an important parameter.
Références
• https://github.com/qwat/QWAT/issues/93
• https://github.com/qwat/qwat-data-model/issues/82
1.4 Admin Guide
This represents a guide on how to administrate the database, customize, import/export, upgrade it and understand isconception.
1.4.1 Data manager
How to import and export data, backup and restore, etc
Import data from Topobase
• describe the process and tools
• describe the automated and manual checks to do
• mention specific point of attention
Export data to SIRE
• describe the process and tools
• describe the automated and manual checks to do
• mention specific point of attention
Backup the data
• Use PostgreSQL backups
• points of attention (PG versions. . . )
26 Chapter 1. Context
QWAT Documentation, Release 1.3.2
Restoring the data
• Use PostgreSQL backups
• points of attention
QWAT analysis tools
• Where to find data analysis scripts
• How to use them
1.4.2 Triggers
Most of the triggers are located in the qwat_od schema.
We can classify the triggers in 3 categories:
1. specific behaviour triggers
2. audit triggers
3. redirection triggers (triggers on view)
Note: In the description below, triggers’s name which are not prefixed with the schema name are contained in qwat_odschema.
Behaviour Trigger functions
ft_geom3d_altitude
• UPDATE altitude
• UPDATE geometry
Altitude is prioritary on Z value of the geometry (if both changed, only altitude is taken into account)
ft_controled_crossing
• UPDATE controled = True
ft_leak_pipe
• UPDATE fk_pipe = fn_pipe_get_id
ft_leak_repaired
• UPDATE _repaired
1.4. Admin Guide 27
QWAT Documentation, Release 1.3.2
ft_node_add_pipe_vertex
Add a vertex to the corresponding pipe if it intersects. When the node is close enough to the pipe (< 1 micrometer) thenode is considered to intersect the pipe It allows to deal with intersections that cannot be represented by floating pointnumbers
• UPDATE pipe (geometry) using St_Snap
ft_geometry_alternative_aux
• Update table fields
ft_geometry_alternative_main
• Update table fields
ft_node_geom
• Update table fields
• fn_get_district
• fn_get_pressurezone
• fn_get_printmap_id
• fn_get_printmaps
ft_pipe_node_moved
Update pipe’s nodes extremities by creating new nodes, or taking existing ones.
• UPDATE pipe (fk_node_a, fk_node_b) using fn_node_create
ft_pipe_geom
• Update table fields
• fn_node_create
ft_pipe_node_type
• Update table fields
• fn_node_set_type
28 Chapter 1. Context
QWAT Documentation, Release 1.3.2
ft_pipe_tunnelbridge
Warning: to be completed
ft_valve_pipe_update
Warning: to be completed
ft_tank
• Update table fields
• fn_litres_per_cm
ft_valve_update
• fn_pipe_update_valve
• UPDATE pipe
ft_valve_handle_altitude
• Update table fields
ft_valve_node_set_type
• fn_node_set_type
qwat_sys.if_modified_func
• Audit trigger
Add a new record in qwat_sys.logged_actions (schema, table, user, time. . . ).
Redirection trigger functions
ft_element_hydrant_delete
• DELETE hydrant
• DELETE vw_node_element
1.4. Admin Guide 29
QWAT Documentation, Release 1.3.2
ft_element_hydrant_insert
• INSERT vw_node_element
• INSERT hydrant
ft_element_hydrant_update
• UPDATE vw_node_element
• UPDATE hydrant
ft_element_installation_delete
• DELETE vw_qwat_installation
• DELETE vw_node_element
ft_element_installation_insert
• INSERT vw_node_element
• INSERT vw_qwat_installation
ft_element_installation_update
• UPDATE vw_node_element
• UPDATE vw_qwat_installation
ft_element_meter_delete
• DELETE meter
• DELETE vw_node_element
ft_element_meter_insert
• INSERT vw_node_element
• INSERT meter
ft_element_meter_update
• UPDATE vw_node_element
• UPDATE meter
30 Chapter 1. Context
QWAT Documentation, Release 1.3.2
ft_element_part_delete
• DELETE part
• DELETE vw_node_element
ft_element_part_insert
• INSERT vw_node_element
• INSERT part
ft_element_part_update
• UPDATE vw_node_element
• UPDATE part
ft_element_samplingpoint_delete
• DELETE samplingpoint
• DELETE vw_node_element
ft_element_samplingpoint_insert
• INSERT vw_node_element
• INSERT samplingpoint
ft_element_samplingpoint_update
• UPDATE vw_node_element
ft_element_subscriber_delete
• DELETE subscriber
• DELETE vw_node_element
ft_element_subscriber_insert
• INSERT vw_node_element
• INSERT subscriber
ft_element_subscriber_update
• UPDATE vw_node_element
1.4. Admin Guide 31
QWAT Documentation, Release 1.3.2
ft_element_valve_delete
• DELETE valve
• DELETE vw_node_element
ft_element_valve_insert
• INSERT vw_node_element
• INSERT valve
ft_element_valve_update
• UPDATE vw_node_element
• UPDATE valve
ft_installation_chamber_delete
• DELETE chamber
• DELETE installation
ft_installation_chamber_insert
• INSERT installation
• INSERT chamber
ft_installation_chamber_update
• UPDATE installation
• UPDATE chamber
ft_installation_pressurecontrol_delete
• DELETE pressurecontrol
• DELETE installation
ft_installation_pressurecontrol_insert
• INSERT installation
• INSERT pressurecontrol
32 Chapter 1. Context
QWAT Documentation, Release 1.3.2
ft_installation_pressurecontrol_update
• UPDATE installation
• UPDATE pressurecontrol
ft_installation_pump_delete
• DELETE pump
• DELETE installation
ft_installation_pump_insert
• INSERT installation
• INSERT pump
ft_installation_pump_update
• UPDATE installation
• UPDATE pump
ft_installation_source_delete
• DELETE source
• DELETE installation
ft_installation_source_insert
• INSERT installation
• INSERT source
ft_installation_source_update
• UPDATE installation
• UPDATE source
ft_installation_tank_delete
• DELETE tank
• DELETE installation
1.4. Admin Guide 33
QWAT Documentation, Release 1.3.2
ft_installation_tank_insert
• INSERT installation
• INSERT tank
ft_installation_tank_update
• UPDATE installation
• UPDATE tank
ft_installation_treatment_delete
• DELETE treatment
• DELETE installation
ft_installation_treatment_insert
• INSERT installation
• INSERT treatment
ft_installation_treatment_update
• UPDATE installation
• UPDATE treatment
ft_node_element_delete
• DELETE network_element
• fn_node_set_type
ft_node_element_insert
• Update table fields
• fn_node_create
• INSERT network_element
ft_node_element_update
• UPDATE node
• UPDATE network_element
34 Chapter 1. Context
QWAT Documentation, Release 1.3.2
ft_vw_all_nodes_delete
• DELETE network_element
• fn_node_set_type
ft_vw_all_nodes_insert
• Update table fields
• fn_node_create
• UPDATE node
• UPDATE network_element
ft_vw_all_nodes_update
• Update table fields
• UPDATE node
• UPDATE network_element
ft_vw_qwat_installation_delete
• DELETE source
• DELETE pump
• DELETE tank
• DELETE treatment
• DELETE chamber
• DELETE pressurecontrol
• DELETE installation
ft_vw_qwat_installation_insert
• INSERT installation
• INSERT source
• INSERT pump
• INSERT tank
• INSERT treatment
• INSERT chamber
• INSERT pressurecontrol
1.4. Admin Guide 35
QWAT Documentation, Release 1.3.2
ft_vw_qwat_installation_update
• UPDATE installation
• UPDATE source
• UPDATE pump
• UPDATE tank
• UPDATE treatment
• UPDATE chamber
• UPDATE pressurecontrol
ft_vw_qwat_network_element_delete
• DELETE subscriber
• DELETE part
• DELETE vw_qwat_installation
• DELETE hydrant
• DELETE samplingpoint
• DELETE valve
• DELETE meter
• DELETE vw_node_element
ft_vw_qwat_network_element_insert
• INSERT vw_node_element
• INSERT subscriber
• INSERT part
• INSERT vw_qwat_installation
• INSERT hydrant
• INSERT samplingpoint
• INSERT valve
• INSERT meter
ft_vw_qwat_network_element_update
• UPDATE vw_node_element
• UPDATE subscriber
• UPDATE part
• UPDATE vw_qwat_installation
• UPDATE hydrant
36 Chapter 1. Context
QWAT Documentation, Release 1.3.2
• UPDATE valve
• UPDATE meter
Functions
fn_get_district
Returns the id of the first overlapping district.
Params:
• geom
Perform an intersection between the geom and district.
fn_get_pressurezone
Returns the id of the first overlapping pressurezone.
Params:
• geom
Perform an intersection between the geom and the pressurezone geometry.
fn_get_printmap_id
Returns the id of the first overlapping printmap.
Params:
• geom
Perform an intersection between the geom and printmap geometry.
fn_get_printmaps
Returns a string contaning all the short names of the polygons in table printmap which overlap the given geometry.
Params:
• geom
• result
Perform an intersection between the geom and the printmap geometry.
fn_litres_per_cm
Calculate the litres_per_cm of a tank cistern.
Params:
• fk_type
• dim1
1.4. Admin Guide 37
QWAT Documentation, Release 1.3.2
• dim2
Perform a calculation with dim1 & dim2.
fn_node_create
Returns the node for a given geometry (point). If node does not exist, create it.
Params:
• _point (geometry)
• deactivate_node_add_pipe_vertex
Behaviour:
• Search for a node a the _point location.
• If a node if found
– Deactivate the node_add_pipe_vertex_insert trigger if needed
– INSERT into node
– Reactivate the node_add_pipe_vertex_insert trigger if needed
fn_node_get_ids
Returns a list of node IDs contained a given extent.
Params:
• extent
Perform a selection on node with the given extent. If no extent is provided, return all ids.
fn_node_set_type[]
Set the type and orientation for node. If three pipe arrives at the node: intersection. If one pipe: end. If two: dependson characteristics of pipe: year (is different), material (and year), diameter(and material/year).
Params:
• _node_ids[]
Perform fn_node_set_type for each node given in param. If no ids are given, the process is perform on all node ids.
fn_node_set_type
Set the orientation and type for a node. If three pipe arrives at the node: intersection. If one pipe: end. If two: dependson characteristics of pipe: year (is different), material (and year), diameter(and material/year).
Params:
• _node_id
Perform a lot of processing:
• Count the active pipes associated to this node (by joining tables from qwat_vlstatus &qwat_vl_pipe_function)
38 Chapter 1. Context
QWAT Documentation, Release 1.3.2
• If count = 0:
– If _node_id not on a pipe extremity (fk_node_a, fk_node_b)
* If this is really a node, delete it from node
* Else, the node must be on the pipe vertex
· Get geometry of the pipe
· If the geometry is null: raise an error
· Else calculate the orientation of the pipe
• If count = 1 or 2
– Loop over them, and take the 2 first/last vertices of the pipe to determine orientation (used forsymbology)
• If count > 2
– Nothing to do
• UPDATE node (_pipe_node_type, _pipe_orientation, _pipe_schema_visible)
fn_node_update_id
Not used anymore ?
Warning: to be completed
fn_pipe_get_id
Returns the pipe at a given position. If geometry is a point, do not return a pipe which ends on it.
Params:
• geometry
Perform an intersection between the geometry and the pipe geometries.
fn_pipe_update_valve
Update pipe valves informations.
Params:
• _pipe_id
Perform an update on pipe (_valve_count, _valve_closed) by joining valve.
fn_update_pipe_crossing
Params:
• update_existing
• delete_unused
1.4. Admin Guide 39
QWAT Documentation, Release 1.3.2
Process:
• Get all crossing points (by performing intersections between pipes)
• For each point
– If point is at the end of a pipe: do nothing
– Else, for the 2 crossing pipes :
* Perform azimuth for all segments of the pipes with the corresponding linear refer-encing
* Find the correct segment according to linear referencing of the crossing point
* Get the corresponding azimuth according to segment id
* Reports errors if azimuth are null
* If the crossing is already existing: update it (_pipe1_id, _pipe1_angle, _pipe2_id,_pipe2_angle,geometry)
* Else: create it
– Delete the old crossing
Warning: This trigger use a fixed fk_status values = 1301
fn_update_sequences
Update a specific sequence.
Params:
• none
For all columns in the DB associated to a sequence, calculate the max value + 1 for the column, and reassociate thenext value of the sequence to that max.
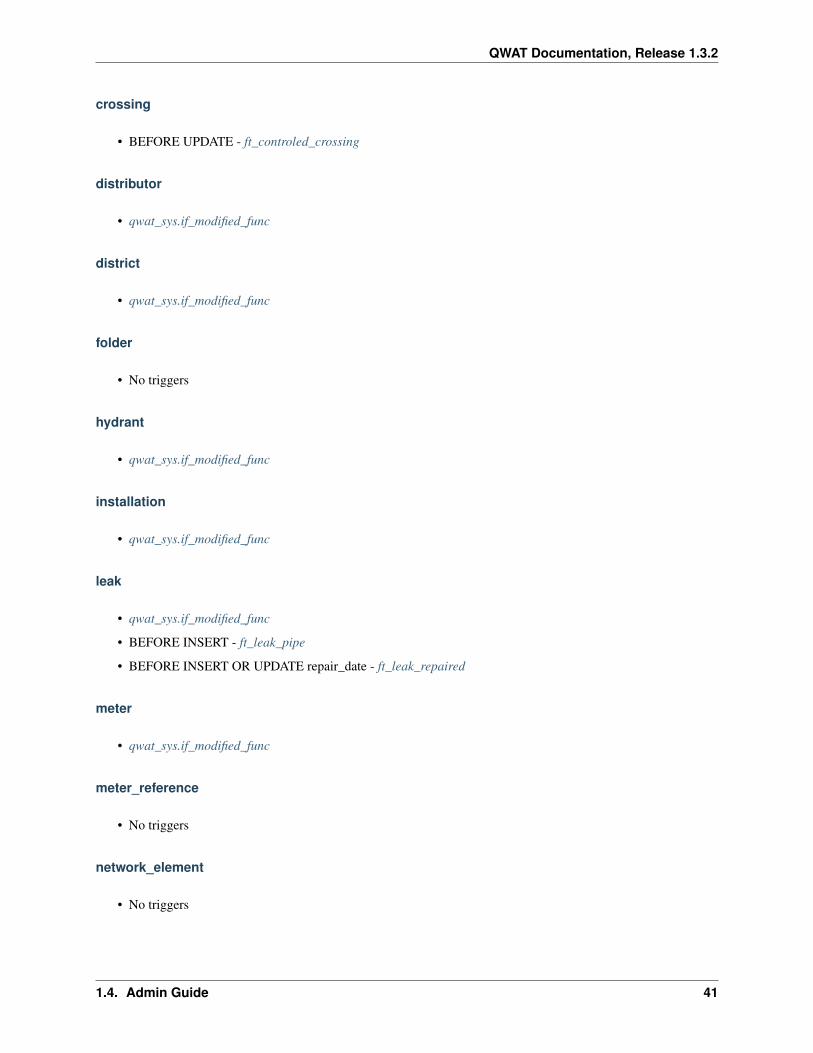
Tables
chamber
• qwat_sys.if_modified_func
consumptionzone
No triggers
cover
• BEFORE INSERT - ft_geom3d_altitude
• BEFORE UPDATE altitude, geometry - ft_geom3d_altitude
40 Chapter 1. Context
QWAT Documentation, Release 1.3.2
crossing
• BEFORE UPDATE - ft_controled_crossing
distributor
• qwat_sys.if_modified_func
district
• qwat_sys.if_modified_func
folder
• No triggers
hydrant
• qwat_sys.if_modified_func
installation
• qwat_sys.if_modified_func
leak
• qwat_sys.if_modified_func
• BEFORE INSERT - ft_leak_pipe
• BEFORE INSERT OR UPDATE repair_date - ft_leak_repaired
meter
• qwat_sys.if_modified_func
meter_reference
• No triggers
network_element
• No triggers
1.4. Admin Guide 41
QWAT Documentation, Release 1.3.2
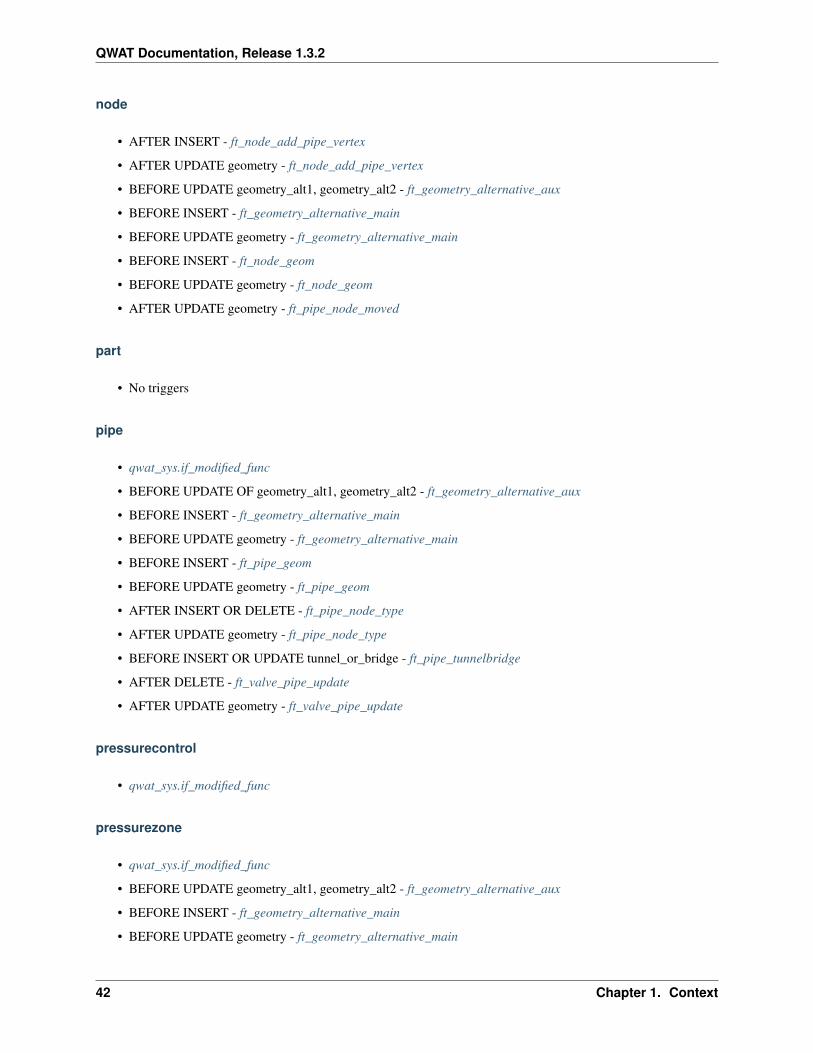
node
• AFTER INSERT - ft_node_add_pipe_vertex
• AFTER UPDATE geometry - ft_node_add_pipe_vertex
• BEFORE UPDATE geometry_alt1, geometry_alt2 - ft_geometry_alternative_aux
• BEFORE INSERT - ft_geometry_alternative_main
• BEFORE UPDATE geometry - ft_geometry_alternative_main
• BEFORE INSERT - ft_node_geom
• BEFORE UPDATE geometry - ft_node_geom
• AFTER UPDATE geometry - ft_pipe_node_moved
part
• No triggers
pipe
• qwat_sys.if_modified_func
• BEFORE UPDATE OF geometry_alt1, geometry_alt2 - ft_geometry_alternative_aux
• BEFORE INSERT - ft_geometry_alternative_main
• BEFORE UPDATE geometry - ft_geometry_alternative_main
• BEFORE INSERT - ft_pipe_geom
• BEFORE UPDATE geometry - ft_pipe_geom
• AFTER INSERT OR DELETE - ft_pipe_node_type
• AFTER UPDATE geometry - ft_pipe_node_type
• BEFORE INSERT OR UPDATE tunnel_or_bridge - ft_pipe_tunnelbridge
• AFTER DELETE - ft_valve_pipe_update
• AFTER UPDATE geometry - ft_valve_pipe_update
pressurecontrol
• qwat_sys.if_modified_func
pressurezone
• qwat_sys.if_modified_func
• BEFORE UPDATE geometry_alt1, geometry_alt2 - ft_geometry_alternative_aux
• BEFORE INSERT - ft_geometry_alternative_main
• BEFORE UPDATE geometry - ft_geometry_alternative_main
42 Chapter 1. Context
QWAT Documentation, Release 1.3.2
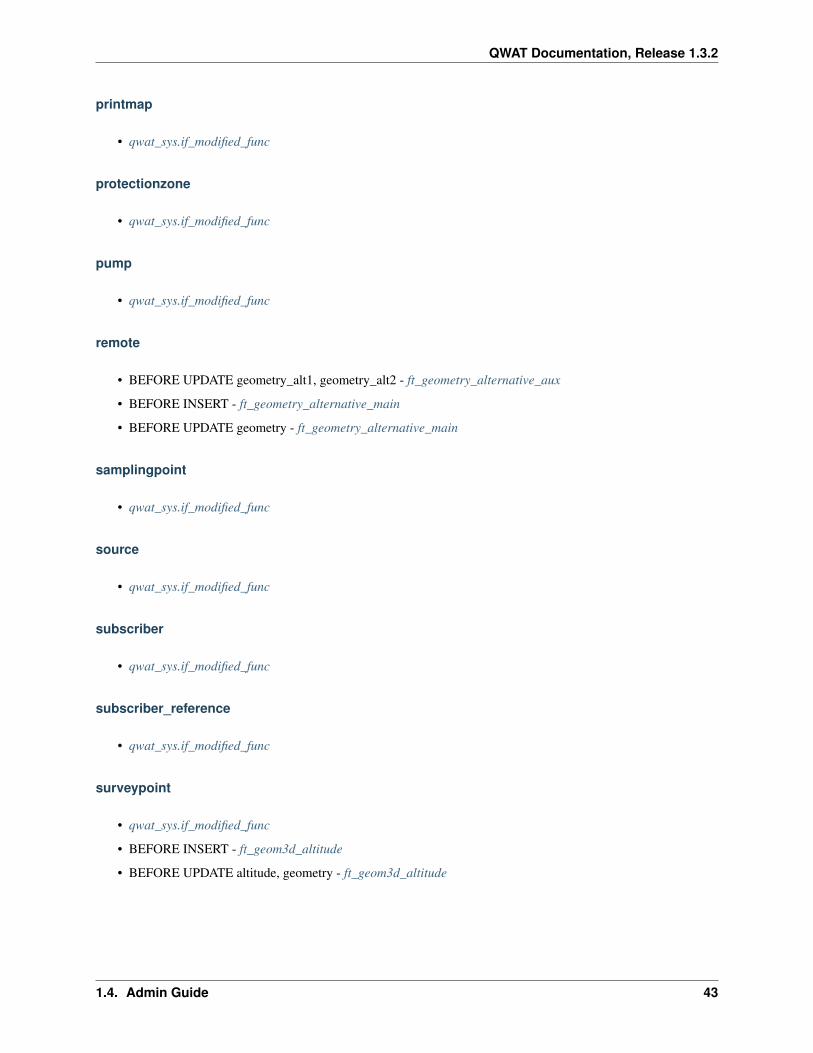
printmap
• qwat_sys.if_modified_func
protectionzone
• qwat_sys.if_modified_func
pump
• qwat_sys.if_modified_func
remote
• BEFORE UPDATE geometry_alt1, geometry_alt2 - ft_geometry_alternative_aux
• BEFORE INSERT - ft_geometry_alternative_main
• BEFORE UPDATE geometry - ft_geometry_alternative_main
samplingpoint
• qwat_sys.if_modified_func
source
• qwat_sys.if_modified_func
subscriber
• qwat_sys.if_modified_func
subscriber_reference
• qwat_sys.if_modified_func
surveypoint
• qwat_sys.if_modified_func
• BEFORE INSERT - ft_geom3d_altitude
• BEFORE UPDATE altitude, geometry - ft_geom3d_altitude
1.4. Admin Guide 43
QWAT Documentation, Release 1.3.2
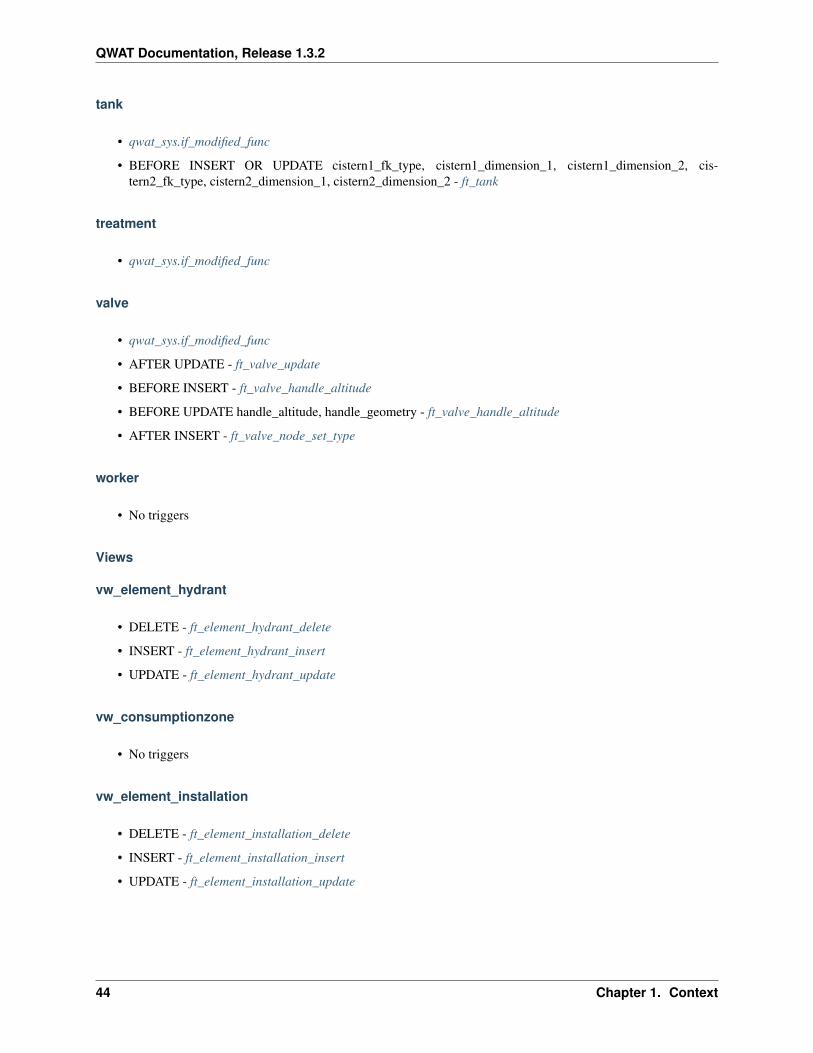
tank
• qwat_sys.if_modified_func
• BEFORE INSERT OR UPDATE cistern1_fk_type, cistern1_dimension_1, cistern1_dimension_2, cis-tern2_fk_type, cistern2_dimension_1, cistern2_dimension_2 - ft_tank
treatment
• qwat_sys.if_modified_func
valve
• qwat_sys.if_modified_func
• AFTER UPDATE - ft_valve_update
• BEFORE INSERT - ft_valve_handle_altitude
• BEFORE UPDATE handle_altitude, handle_geometry - ft_valve_handle_altitude
• AFTER INSERT - ft_valve_node_set_type
worker
• No triggers
Views
vw_element_hydrant
• DELETE - ft_element_hydrant_delete
• INSERT - ft_element_hydrant_insert
• UPDATE - ft_element_hydrant_update
vw_consumptionzone
• No triggers
vw_element_installation
• DELETE - ft_element_installation_delete
• INSERT - ft_element_installation_insert
• UPDATE - ft_element_installation_update
44 Chapter 1. Context
QWAT Documentation, Release 1.3.2
vw_element_meter
• DELETE - ft_element_meter_delete
• INSERT - ft_element_meter_insert
• UPDATE - ft_element_meter_update
vw_element_part
• DELETE - ft_element_part_delete
• INSERT - ft_element_part_insert
• UPDATE - ft_element_part_update
vw_element_samplingpoint
• DELETE - ft_element_samplingpoint_delete
• INSERT - ft_element_samplingpoint_insert
• UPDATE - ft_element_samplingpoint_update
vw_element_subscriber
• DELETE - ft_element_subscriber_delete
• INSERT - ft_element_subscriber_insert
• UPDATE - ft_element_subscriber_update
vw_export_hydrant
• No triggers
vw_export_installation
• No triggers
vw_export_meter
• No triggers
vw_export_part
• No triggers
1.4. Admin Guide 45
QWAT Documentation, Release 1.3.2
vw_export_subscriber
• No triggers
vw_export_valve
• No triggers
vw_element_valve
• DELETE - ft_element_valve_delete
• INSERT - ft_element_valve_insert
• UPDATE - ft_element_valve_update
vw_installation_chamber
• DELETE - ft_installation_chamber_delete
• INSERT - ft_installation_chamber_insert
• UPDATE - ft_installation_chamber_update
vw_installation_pressurecontrol
• DELETE - ft_installation_pressurecontrol_delete
• INSERT - ft_installation_pressurecontrol_insert
• UPDATE - ft_installation_pressurecontrol_update
vw_installation_pump
• DELETE - ft_installation_pump_delete
• INSERT - ft_installation_pump_insert
• UPDATE - ft_installation_pump_update
vw_installation_source
• DELETE - ft_installation_source_delete
• INSERT - ft_installation_source_insert
• UPDATE - ft_installation_source_update
46 Chapter 1. Context
QWAT Documentation, Release 1.3.2
vw_installation_tank
• DELETE - ft_installation_tank_delete
• INSERT - ft_installation_tank_insert
• UPDATE - ft_installation_tank_update
vw_installation_treatment
• DELETE - ft_installation_treatment_delete
• INSERT - ft_installation_treatment_insert
• UPDATE - ft_installation_treatment_update
vw_leak
• No triggers
vw_node_element
• DELETE - ft_node_element_delete
• INSERT - ft_node_element_insert
• UPDATE - ft_node_element_update
vw_pipe
• No triggers
vw_pipe_child_parent
• No triggers
vw_pipe_schema
• RULE - UPDATE pipe
vw_pipe_schema_error
• No triggers
vw_pipe_schema_merged
• No triggers
1.4. Admin Guide 47
QWAT Documentation, Release 1.3.2
vw_pipe_schema_visibleitems
• RULE - DELETE / UPDATE pipe
• RULE - UPDATE / UPDATE pipe
vw_printmap
• No triggers
vw_protectionzone
• No triggers
vw_qwat_installation
• DELETE - ft_vw_qwat_installation_delete
• INSERT - ft_vw_qwat_installation_insert
• UPDATE - ft_vw_qwat_installation_update
vw_qwat_network_element
• DELETE - ft_vw_qwat_network_element_delete
• INSERT - ft_vw_qwat_network_element_insert
• UPDATE - ft_vw_qwat_network_element_update
vw_all_nodes
• DELETE - ft_vw_all_nodes_delete
• INSERT - ft_vw_all_nodes_insert
• UPDATE - ft_vw_all_nodes_update
vw_remote
• No triggers
vw_search_view
• No triggers
vw_subscriber_pipe_relation
• No triggers
48 Chapter 1. Context
QWAT Documentation, Release 1.3.2
vw_valves_lines
• No triggers
1.5 Contributor’s guide
How to contribute to QWAT and collaborate with developers.
This guide is dedicated to anyone willing to contribute to QWAT. From sending a data sample to giving advices onfeatures, or contributing to documentation, you will find useful informations here.
If you want to go further, you can look at the Developer’s Guide
1.5.1 Prerequisites
You will need a GitHub account. Please create one here : https://github.com/join.
1.5.2 Discussing features
Bug reports, feature demand, feature specifications and all collaboration on QWAT takes place first in QWAT issues :
• https://github.com/qwat/QWAT/issues
This is the starting place for all demands. If other modules are impacted (QGIS core, data model, plugins), thenadditional tickets in respective projects are created.
Read below advices on how to contribute.
I found a bug in QWAT, what do I do ?
• If the bug you find is a QGIS issue, please search if it doesn’t exist upstream at https://issues.qgis.org/projects/qgis/issues/ and add one if needed
• Create a new issue here : https://github.com/qwat/QWAT/issues. Reference any upstream issue there.
• Be sure to include all relevant information to reproduce the bug : minimal steps to follow, sample data, QGISversion, options used. . .
• Be clear and concise. Any screencast or screenshot will help a lot.
• Tag your issue as “Bug”
• Keep an eye on the following discussion to give additional informations if needed
I found a bug in the data model, what do I do ?
• Open a new issue here as well : https://github.com/qwat/QWAT/issues
• If you are 100% sure that it is a data model bug :
– tag your issue as “Data model”
– open a new issue here : https://github.com/qwat/qwat-data-model/issues
– reference this new issue in the QWAT issue originally created
1.5. Contributor’s guide 49
QWAT Documentation, Release 1.3.2
• If unsure, help developers to qualify the bug
I want a new feature in QWAT, what do I do ?
• Open a new issue here : https://github.com/qwat/QWAT/issues
• Describe carefully the feature with details, include images and mockups if needed
• Tag the issue as “Enhancement”
• Consider funding the development
I want to collaborate on feature specs, what do I do ?
• Check the existing issues here
• Add comments to the discussion
1.5.3 Data model changes
I need a change in the data model, what is the process ?
• be sure that the required feature is really a change in the data model itself and not the application
• open an issue on GitHub in the data model project (https://github.com/qwat/qwat-data-model/issues)
• include in your issues a clear and concise explanation of the reasons for the change
• allow some time for others to reply
• participate in the discussion
• do not hesitate to mention concerned people (like @vpicavet for example) to notify them of the discussion
• when the discussion converges, a decision is taken by commiters to go for this modification or not
• OSLANDIA, on behalf of the PSC, is the data model release manager and will have final word in case of uncleartrend
My change demand has been considered valid. What is next ?
• Two cases : you can write the change, or you want somedy else to do it.
I can write the patch myself, what do I do ?
• Read the developer’s guide
• Write the patch
• send a pull request to the qwat-data-model repository
• commiters will review and merge it
Note that a continuous integration tool will automatically run functional tests and conformity tests on your pull request.Please note that a patch must be done in two parts: the core model files used for initialization, and the delta files used tomigrate existing database versions. A patch must lead to the exactly the same state between initialization and migrationprocess to be valid.
50 Chapter 1. Context
QWAT Documentation, Release 1.3.2
I want someone to write the modifications, what is the process ?
• a specification is written as new comment to the issue (by you or someone else)
• impacts on other parts of QWAT are studied, and corresponding issues are opened (on qwat/QWAT projectnamely)
• a required funding estimation is done
• funding is found
• development takes place
• a PR is created on the qwat-data-model repository
• commiters will review and merge it
I want to add some custom fields/table to the model, how do I do ?
• See the Developer’s Guide and customization guidelines
1.6 Developer’s guide
How to develop QWAT core datamodel.
1.6.1 QWAT Development Overview
Prerequisites
In order to develop for QWAT, the following skills may be required :
• Good general knowledge of GIS
• Good general knowledge of QGIS
• Skills in relational databases and PostgreSQL/PostGIS specifically
• Skills in Python
Environment
• You will need to install and configure Git and GitHub
• Have python 3 installed and as your default python. In case it is not, use a virtual environment
• have a bash shell
• have admin rights to create and drop PostgreSQL databases
QWAT architecture
• Describe here various parts of QWAT
• Describe relation to other projects (plugins, qgis core)
1.6. Developer’s guide 51

QWAT Documentation, Release 1.3.2
Roles
• Commiters have access to QWAT code repositories and can push to them. It means they control the evolution ofthe software
• contributors can provide information, code, documentation to the project. They do not have direct accessfor modifications and must go through the commiters to get their modifications applied. See the [[Contribu-tors_guide]] for more information and processes.
• The release manager is in charge of deciding when a new version of the software is published, and to actuallypublish the release. Current release manager is Régis Haubourg (OSLANDIA) on behalf of the QWAT’s group.
Release cycles and versioning
New releases for QWAT are published on a regular basis, but non-fixed frequency. The release manager decides whena new version is published.
You can find the installed version number in the data model, in the qwat_sys.info table.
Version and release management policy
• Version numbers follows the semantic versioning approach.
• Version Roadmap for new features must be shared on the tracker and with the general committee. Issues mustbe opened and tagged using labels (1.4 , 1.5).
• Do not create a version for each code change.
• Versions will group different code change and must be discussed with the released manager.
• It is possible to multiple Delta files for one version-release Ex: delta_1.3.2_0001_one_change,delta_1.3.2_0002_another_change
• Each new version will systematically have a release. A release is materialized by a git tag
• travis-CI automatically deploys a release when the tag is pushed AND the tests succeed
• Data administrators must NEVER work on master branch, but use release. The rationale behind that is that thelatest version in master branch changes until the release, so it is not a reliable version tag . This means for gituser they ahve to fetch remote tags and checkout to the desired release using git checkout tag_number
Release process
The release process for QWAT is the following :
• Issues are triaged with milestones for next versions
• The release manager decides when the next release will be made, in accordance with the community needs
• He announces the estimated release date in advance (at least 1 week)
• Issues are re-triaged and the date can be moved according to how the work progresses
• CHANGES.md is checked to be sure that it contains a description of changes for this version
• When ready (all due tickets closed), the release manager add version metadata to the project and tags theproject(s) to release (data model, QWAT project) with the new version,
• The release manager announces the new version (mailing lists, IRC, twitter. . . )
52 Chapter 1. Context
QWAT Documentation, Release 1.3.2
Additional dependencies
QWAT Project has several dependencies on different submodules
• Fetching their content is achieved with a specific git command
Versioning your extensions
Before QWAT 1.3.0 data model, version was tracked in the qwat_sys.versions that contributors had to maintain manu-ally. After that PUM module is taking care of raising and keeping track of versions automatically using core delta filenaming convention. However, we recommend using only one customization SQL script, with no version in its name.You can version it in a separate git or SVN repository, but mixing local and core version might lead to a very complexsystem.
Developing the core data model
To keep a controlled process over versioning, we have the following system :
• The SQL files corresponding to the creation of the core data model
• SQL files corresponding to the modifications from version X to version X+1 (“diff SQL”)
Diff files are located in the repository in the “delta” directory. Their name has this convention, which is used by PUMmodule :
• delta_1.3.2_0001_one_change.sql
Deploying a model for a specific version and applying the diff files successively to reach another version should leadto the exact same model as deploying this latter version. The QWAT project will have tools to test for this compliance.
It is advised to write the diff files at the same time as the model modification, but this is not mandatory. Diff files mustbe complete and uptodate when a new model version is released. Before releasing a new model version, the diff filesshould therefore be analyzed and completed. Some code can also be refactored to simplify the diff files (e.g. multiplemodification to the same field between two version)
Some delta file are simple, like new tables and views. Some are more more complex since they are exposed via views.Most views in QWAT are autogenerated by the meta-project module. That means that adding user fields (in elementsor pipes for instance), will require additional instructions to drop and recreate the views before / after applying youdelta file. PUM allows to add pre and post files, either in python or sql for each update, see delta.1.2.8 for exemples.
As a consequence, when developing the core data model, you should :
• Put your modifications to the core model SQL files
• Add your modifications to the correct diff file.
Your pull request should be complete with these elements, or you have to be ready to review the diff SQL files beforethe release to ensure that the diff are uptodate.
Developing a QGIS project
• How to modify default project or create a new one
• How to share these modifications
1.6. Developer’s guide 53
QWAT Documentation, Release 1.3.2
Adding new features to QWAT
• see contributor’s guide for discussion process & issue management
• creating a specific plugin
• contributing to QGIS core
1.6.2 Customize local DB models
Since QWAT 1.3.2, customization process and extension have been formalised.
An extension is a core data model customization that is part of the core. It can be activated at any time, using itsown initialization script. An extension follows the core data model life cycle, which means that fixing or improving acore extension will require a QWAT update. Currently, the only existing extension is the SIRE export extension. Notethat it extends the value lists and is not totally separated from the core right now.
A local customization will follow exactly the same developpement rules as an extension, except that it must be storedin a separate repository, apart from QWAT core directories. local customizations must be first initialized manually andthen applied in QWAT migration process using upgrade_db.sh specific option to add additional directories.
Both extension and customizations require the following :
• a init script, adding the necessary informations to the model
• a set of update scripts used when upgrading QWAT core data model :
– a pre-all.py script wich will eventually drop all additionnal views, trigger function or any dependencieslocking the data model upgrade
– a set of SQL files prefixed with a version number inlined with QWAT core data model versions (ex:1.3.1.001_local_Pully_script)
– a post-all.py script restoring the necessary dependencies once the core model and the exten-sion/customization have been applied
A full example is provided in the .build/customizations/sigip folder
Customizing the data model
This part concerns the modification of the data model to add specific objects, on top on QWAT core data model. Whilethere is full freedom for using PostGIS and PostgreSQL capabilities, here are the conventions and good practices forthe QWAT project.
Allowed customization for QWAT are :
• Adding a custom field
• Adding a custom table
No change of the core data model is allowed (field names, types, constraints. . . ), or you should ask for the QWAT datamodel to be modified centrally.
Adding a field
If you want to add a field to one of the core data model tables, follow these steps
• Store all modifications as separate SQL scripts. NEVER modify directly your database structure.
• Any added field or table must have the prefix usr_
54 Chapter 1. Context
QWAT Documentation, Release 1.3.2
• keep in mind that most views are generated by the initialization script. The field will be automatically added tothe views if you use the initialization process and include pre and post file to drop and recreate the views.
• The simplest approach is to keep one unique SQL script applied after all core delta upgrade files. Currently(1.3.0) the file must named like vx.x.x and version number must be higher than latest core data model.
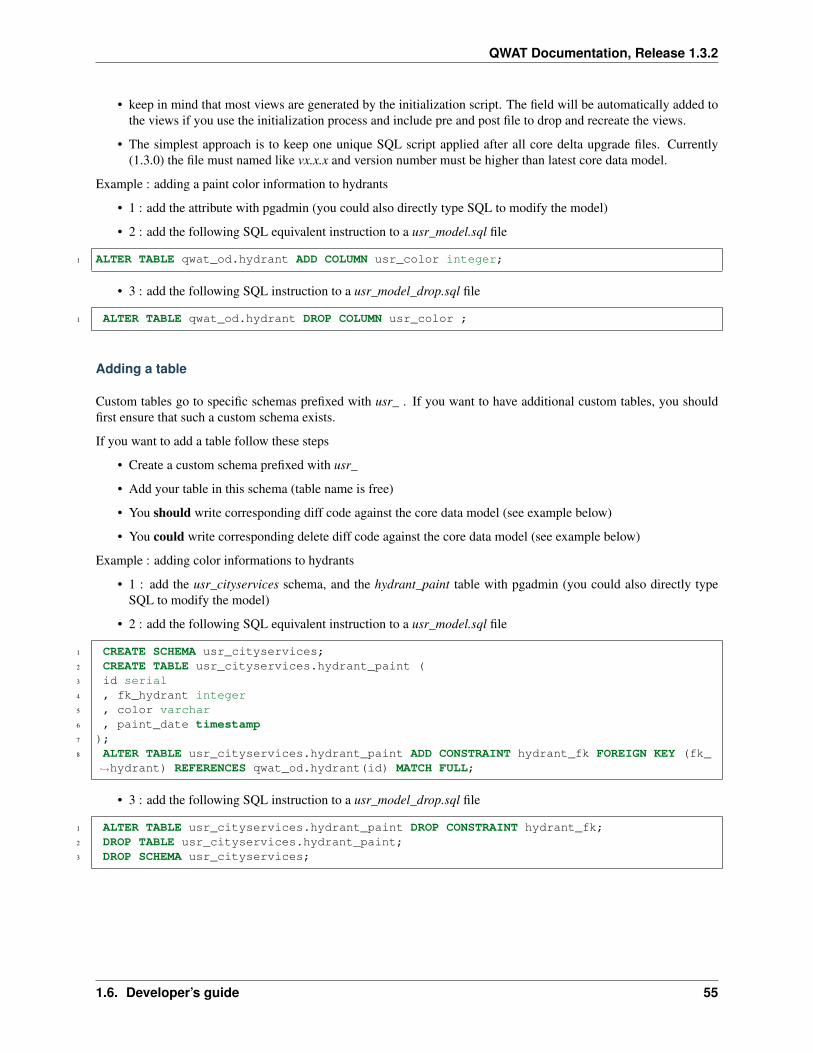
Example : adding a paint color information to hydrants
• 1 : add the attribute with pgadmin (you could also directly type SQL to modify the model)
• 2 : add the following SQL equivalent instruction to a usr_model.sql file
1 ALTER TABLE qwat_od.hydrant ADD COLUMN usr_color integer;
• 3 : add the following SQL instruction to a usr_model_drop.sql file
1 ALTER TABLE qwat_od.hydrant DROP COLUMN usr_color ;
Adding a table
Custom tables go to specific schemas prefixed with usr_ . If you want to have additional custom tables, you shouldfirst ensure that such a custom schema exists.
If you want to add a table follow these steps
• Create a custom schema prefixed with usr_
• Add your table in this schema (table name is free)
• You should write corresponding diff code against the core data model (see example below)
• You could write corresponding delete diff code against the core data model (see example below)
Example : adding color informations to hydrants
• 1 : add the usr_cityservices schema, and the hydrant_paint table with pgadmin (you could also directly typeSQL to modify the model)
• 2 : add the following SQL equivalent instruction to a usr_model.sql file
1 CREATE SCHEMA usr_cityservices;2 CREATE TABLE usr_cityservices.hydrant_paint (3 id serial4 , fk_hydrant integer5 , color varchar6 , paint_date timestamp7 );8 ALTER TABLE usr_cityservices.hydrant_paint ADD CONSTRAINT hydrant_fk FOREIGN KEY (fk_
→˓hydrant) REFERENCES qwat_od.hydrant(id) MATCH FULL;
• 3 : add the following SQL instruction to a usr_model_drop.sql file
1 ALTER TABLE usr_cityservices.hydrant_paint DROP CONSTRAINT hydrant_fk;2 DROP TABLE usr_cityservices.hydrant_paint;3 DROP SCHEMA usr_cityservices;
1.6. Developer’s guide 55
QWAT Documentation, Release 1.3.2
1.6.3 Upgrade database
Create a new upgrade delta
• First create a new branch for your modification on the model
• Modify the SQL creation code at your convenience
• Create the corresponding SQL delta file in data-model/update/delta. * file must be named :delta_{tag_number}_{increment}_{short description}.sql see Release cycles and versioning.
• Push your branch, and check travis result
• If travis test is OK, then you can create a pull request to merge your modifications in master
Note: Data model should be TAGGED. Tag should respect the following syntax like this: x.x.x. For each majorversion, the tag MUST be called x.0.0.
Migrate an existing database
If you use an old version of QWAT model, you can upgrade it by following the instructions bellow:
Warning: You should always save you current database before upgrading
• Open a terminal, and move to qwat_project/data-model/update
• Launch upgrade command: ./upgrade_db.sh
– This will test the migration process
• If the migration process is OK, then launch again the command with the parameter to upgrade the real DB :./upgrade_db.sh --upgrade yes
Note: Your .pg_service.conf must contain connexions to qwat, qwat_test and qwat_conform DB
The way it works
We’ve got a tag for version x.0
In /update/delta/ directory, we find the SQL files list which contain the current evolutions (delta). If we executeinit_qwat.sh in the current git repository, we should have the same DB than if we execute init_qwat.sh of the x.0version. The contributor who add a new delta SQL file must also update the DB creation SQL script.
For a user, the migration process consists in :
• Get the version of his base (should be given in QWAT the system schema).
• Execute the migration script, which take in parameter that version number. The script execute the following tasks :
– pg_dump of the QWAT DB
– pg_restore of the previous dump in a test DB (qwat_test)
56 Chapter 1. Context
QWAT Documentation, Release 1.3.2
– Execute on test DB all SQL delta above or equals to the version number (sql deltas must be nameddelta_{tag_number}_{increment}_{short description}.sql)
– Execute conformity test script:
* Create a new DB: qwat_test_conform
* Produce the reference file (result from the DB test sql)
* Comparison of that reference file with the one produced by the qwat_test DB previouslycreated
* If all is OK, user is invited to launch the migration on his real DB
* If errors occur, the user has to debug himself or contact the QWAT team
1.7 Demo data and project
QWAT can be tested by downloading the QGS project repository here and restoring the latestdata_and_structure_sample.backup in PostgreSQL (+ extension PostGIS and hstore).
On the download page you can find theses backups:
• qwat_vX.X.X_data_and_structure_sample.backup: Restore the QWAT schema plus the sample dataset
• qwat_vX.X.X_structure_only.backup: Restore only the QWAT schema only. In addition you’ll also need torestore the value_list_data_only dump
• qwat_vX.X.X_value_list_data_only.backup: Restore the value list of QWAT demo project
• qwat_vX.X.X_data_only_sample.backup: Restore the sample dataset (the init_qwat.sh script should be run priorto restoring the sample dataset)
More detailed instructions:
How to install the data sample from the QWAT Water distribution management project.
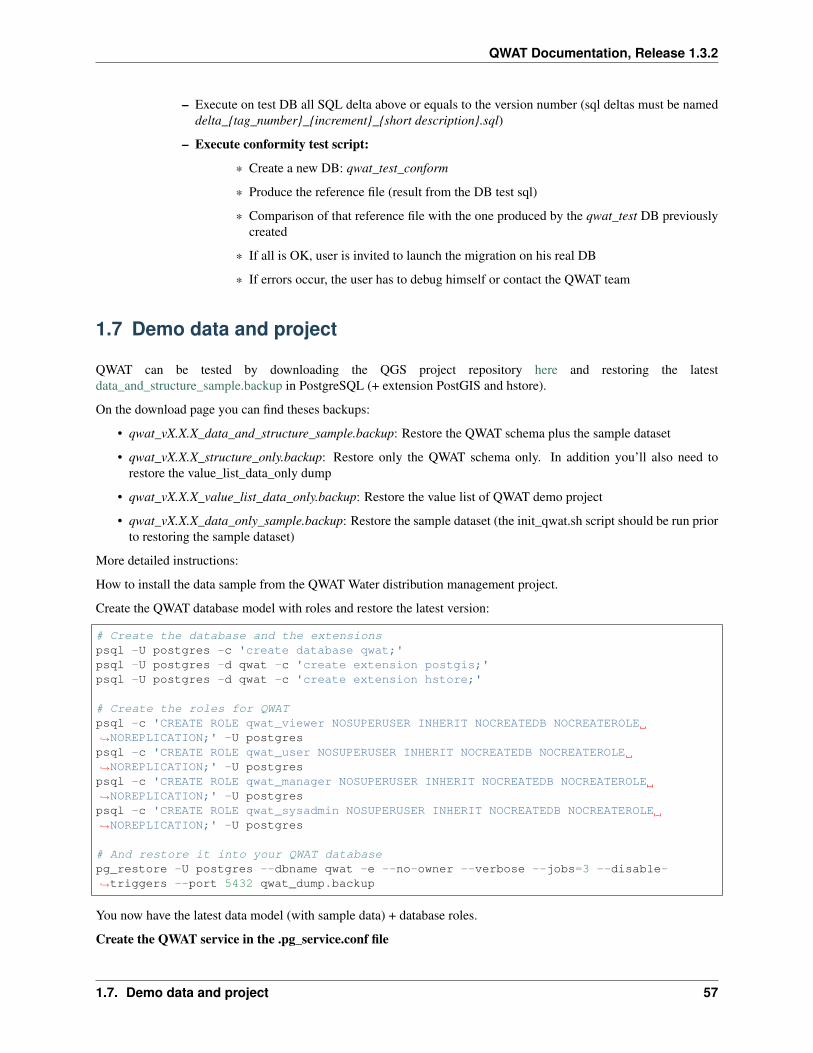
Create the QWAT database model with roles and restore the latest version:
# Create the database and the extensionspsql -U postgres -c 'create database qwat;'psql -U postgres -d qwat -c 'create extension postgis;'psql -U postgres -d qwat -c 'create extension hstore;'
# Create the roles for QWATpsql -c 'CREATE ROLE qwat_viewer NOSUPERUSER INHERIT NOCREATEDB NOCREATEROLE→˓NOREPLICATION;' -U postgrespsql -c 'CREATE ROLE qwat_user NOSUPERUSER INHERIT NOCREATEDB NOCREATEROLE→˓NOREPLICATION;' -U postgrespsql -c 'CREATE ROLE qwat_manager NOSUPERUSER INHERIT NOCREATEDB NOCREATEROLE→˓NOREPLICATION;' -U postgrespsql -c 'CREATE ROLE qwat_sysadmin NOSUPERUSER INHERIT NOCREATEDB NOCREATEROLE→˓NOREPLICATION;' -U postgres
# And restore it into your QWAT databasepg_restore -U postgres --dbname qwat -e --no-owner --verbose --jobs=3 --disable-→˓triggers --port 5432 qwat_dump.backup
You now have the latest data model (with sample data) + database roles.
Create the QWAT service in the .pg_service.conf file
1.7. Demo data and project 57
QWAT Documentation, Release 1.3.2
If you already have the service defined you can skip this step, else edit the .pg_service.conf file and make itlook like:
[qwat]#enter your database iphost=127.0.0.1#database namedbname=qwatport=5432user=postgres#you can also add your password if you likepassword=YourPassword
[qwat_prod]#enter your database iphost=127.0.0.1#database namedbname=qwatport=5432user=postgres#you can also add your password if you likepassword=YourPassword
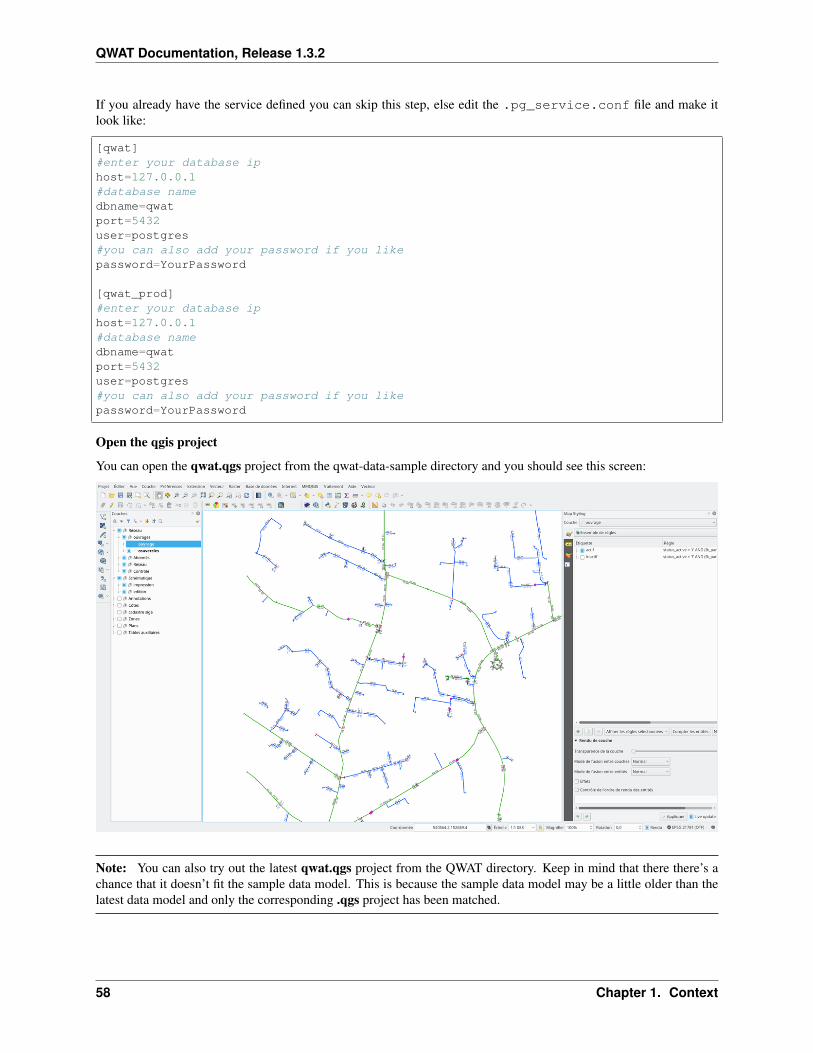
Open the qgis project
You can open the qwat.qgs project from the qwat-data-sample directory and you should see this screen:
Note: You can also try out the latest qwat.qgs project from the QWAT directory. Keep in mind that there there’s achance that it doesn’t fit the sample data model. This is because the sample data model may be a little older than thelatest data model and only the corresponding .qgs project has been matched.
58 Chapter 1. Context
QWAT Documentation, Release 1.3.2
1.8 FAQ
1.8.1 What is QWAT ?
It is a set of software components (QGIS, PostGIS. . . ) providing a solution to water distribution network management
1.9 Glossary
1.9.1 A
1.9.2 B
1.9.3 C
• Coating : A layer of any substance used as cover, decoration, or finish. (Source : GDT)
1.9.4 D
1.9.5 Z
1.10 Translation
1.10.1 English -> French translation
A
P
• pipe : canalisation
V
• valve : vanne
And you will find a glossary if some terms sound obscure to you.
For non-native english speakers, translation of recurrent terms are available.
1.8. FAQ 59
QWAT Documentation, Release 1.3.2
60 Chapter 1. Context
CHAPTER 2
Indices and tables
• genindex
• modindex
• search
61