Embed Size (px)
Citation preview

GGF Summer School VDS Tutorial 1
Quick Guide
GriPhyN Virtual Data System. Ewa Deelman, Gaurang Mehta, Karan Vahi (deelman,gmehta,[email protected])
Jens Voeckler, Mike Wilde([email protected],[email protected])
Version - 1.0
The quick guide helps you set up the GriPhyN virtual data system and run a small example with minimum effort.
Table of Contents • Part I: Getting set up • Part II: Black Diamond • Part III: Setting up Catalogs in VDS • Part IV: Generating a workflow in VDL • Part V: Planning the workflow for the Grid • Part VI: Deferred Planning in Pegasus

GGF Summer School VDS Tutorial 2
Part I: Getting set up First, get set up to use the VDS
Download the latest stable release of VDS from http://www.griphyn.org/workspace/VDS/snapshots.php
Untar the distribution.
$ gtar zxvf vds-<version>.tar.gz
This guide assumes you're using a Bourne Shell derived shell, typically /bin/sh or /bin/bash. If you've changed to a csh derived shell, you'll need to slightly modify the examples. Whenever you are asked to source setup.sh, there will also be a setup.csh for csh users. For simplicity you may want to use /bin/sh or /bin/bash. Now check that the setup worked:
Set VDS_HOME environment variable
$ unset VDS_HOME $ declare -x VDS_HOME=/home/home1/test/vds/default
Set up the VDS user environment
$ unset CLASSPATH $ source $VDS_HOME/setup-user-env.sh $ declare –x PATH=$VDS_HOME/bin/:$PATH
Check Java version
$ java –version Java(TM) 2 Runtime Environment, Standard Edition (build 1.4.2_04-b05) Java HotSpot(TM) Client VM (build 1.4.2_04-b05, mixed mode)
Check if you GLOBUS_LOCATION is set $ echo $GLOBUS_LOCATION
If its not set then ask you administrator for the information and set the environment variable. Then set the globus environment

GGF Summer School VDS Tutorial 3
$ source $GLOBUS_LOCATION/etc/globus-user-env.sh
Now generate a proxy certificate from you X509 credentials.
$ grid-proxy-init -old
Manually test if you can authenticate to the grid resource that you are trying to submit your jobs to.
$ globusrun –a –r <hostname>/jobmanager-fork
If you get an authentication error check the /etc/grid-security/grid-map file on the machine you are trying to authenticate to and see if your x509 cert DN is mapped to you user. If not ask your administrator to add you to the mapfile.
Make sure you can submit jobs into condor. Try checking the status of the condor queue
$ condor_q
If the above tests work all is fine, otherwise please contact your friendly neighborhood administrator.
Create the following directories in your home directory
$ mkdir $HOME/workdir $ mkdir $HOME/storage $ mkdir $HOME/workdir-clus1 $mkdir $HOME/storage-clus1 $mkdir $HOME/config $mkdir $HOME/tutorial

GGF Summer School VDS Tutorial 4
Part II: Black Diamond
Shown above is the workflow of what we call the “diamond” DAG. The “document” symbols represent logical files (f.a, f.b.1, etc), and the bubbles represent jobs. The derivation name is printed bold while the transformation name is printed below. The workflow illustrates the fanning in and fanning out of data, for example, for the parallel execution and reuse of transformations for similar computations. The workflow uses one input file (f.a), which must be registered with the replica manager. Note that “replica manager” here is an abstract term for the mechanism that maps between logical and physical filenames.
f.a
f.b1
f.b2
f.d
f.c1
f.c2
top preprocess
right findrange
left findrange
bottom analyze

GGF Summer School VDS Tutorial 5
Part III: Setting up Catalogs in VDS
Properties:
The properties file is a configuration file used by the Virtual Data System to change its configuration and pick different catalogs and their locations etc. The default properties file is in $VDS_HOME/etc/properties. This properties file can be overridden by a file named “.chimerarc” in your home directory. The “.chimerarc” file can be overridden by specifying a
-D<propertyname>=<propertyvalue> argument to most of the VDS tools. In this section we will create a .chimerarc file in the home directory and add entries to if for the various catalogs.
The following catalogs are required for the Virtual Data System.
VDC – Virtual Data Catalog:
This catalog holds information about transformation templates and derviations and is used to generate the abstract workflow (DAX). By default, it is assumed that the VDC resides in a file with the prefix $VDS_HOME/var/vdc.db inside your VDS distribution. However, it is best to set up some Java properties to point the VDC file to a location that you own alone in the properties file
The VDS property vds.db.vdc.schema.file.store specifies the location of the file. You can provide properties temporarily on the command line of the various VDS tools, as shown in this section, or permanently in property files. Add the following entries in the $HOME/.chimerarc file.
# $HOME/.chimerarc vds.db.vdc.schema.file.store $HOME/config/vdc.db
When using the file-based VDC illustrated here, the VDS commands read and if updating, re-write the entire file completely with each VDS command. Thus it is rather slow, and should not be used for more than ~1000 definitions. A rDBMS-based VDC is available and explained in the Main User Guide, but this simple file-based database is useful for quick experiments or when a real database is not available or convenient.
POOL CONFIG:
VDS allows you to execute workflows on the grid. We have to describe the clusters that we intend to run the workflow upon and a few more things to knit together your workflow to make it run in the grid. Among those are the contact for batch (compute)

GGF Summer School VDS Tutorial 6
jobs, the contact for transfer (fork) jobs, the gridftp server of the site, the working directory and more. The user guide in $VDS_HOME/doc provides details.
The format for the file is as follows
pool site_name { lrc “rls://someurl” workdir “path/to/a/tmp/shared/file/sytem/” gridftp “gsiftp://hostname/mountpoint” “GLOBUS VERSION” universe transfer “hostname/jobmanager-<scheduler>” “GLOBUS VERSION” universe vanilla “hostname/jobmanager-<scheduler>” “GLOBUS VERSION” #optional gridlaunch “/path/to/gridlaunch/executable” #optional profile namespace “key” “value” }
The gridlaunch and profile entries are optional. All the rest are required for each pool. Also the transfer and vanilla universe are mandatory. You can add multiple transfer and vanilla universe if you have more then one head node on the cluster. The entries in the (PC) have the following meaning:
1. pool site - A pool nickname. 2. lrc – URL for a local replica catalog (LRC) to register your files in. 3. workdir – A remote working directory (Should be on a shared file system) 4. gridftp – A url prefix for a remote storage location. 5. universe – Different universes are supported which map to different batch
jobmanagers. “vanilla” for compute jobs and “transfer” for transfer jobs are mandatory. Generally a transfer universe should map to the fork jobmanager unless you know what you are doing.
6. gridlaunch – Path to the remote kickstart tool (provenance tracking) 7. Profiles – One or many profiles can be attached to a pool. One example is the
environments to be set on a remote pool.
For more details please see the full User Guide.
Create a file called pool.config.txt and edit the contents. Remember to replace ‘$HOME’ in the example the actual path to your home directory throughout the examples.
$ emacs $HOME/config/pool.config.txt
Let’s say you have one cluster available to run your jobs called clus1. You need to add 2 sections in the pool.config.txt file, one for the cluster and one for the local machine. The local entry is mandatory to determine a local working directory to run “scheduler universe”.

GGF Summer School VDS Tutorial 7
pool local { lrc “rlsn://smarty.isi.edu” workdir “$HOME/workdir” gridftp “gsiftp://localhost/$HOME/storage” “2.4” universe transfer “localhost/jobmanager-fork” “2.4” universe vanilla “localhost/jobmanager-fork” “2.4” gridlaunch “/home/home1/test/vds/default/bin/kickstart” profile env “VDS_HOME” “/home/home1/test/vds/default” profile env “GLOBUS_LOCATION” “/vdt/globus” profile env “LD_LIBRARY_PATH” “/vdt/globus/lib” profile env “JAVA_HOME” /opt/java/j2sdk1.4.2_05 } pool clus1 { lrc “rlsn://smarty.isi.edu” workdir “$HOME/workdir-clus1” gridftp “gsiftp://server1.gs.unina.it/jobmanager-fork” “2.4.3” universe transfer “server1.gs.unina.it/jobmanager-fork” “2.4.3” universe transfer “server2.gs.unina.it/jobmanager-fork” “2.4.3” universe transfer “server3.gs.unina.it/jobmanager-fork” “2.4.3” universe vanilla “server1.gs.unina.it/jobmanager-fork” “2.4.3” universe vanilla “server2.gs.unina.it/jobmanager-fork” “2.4.3” universe vanilla “server3.gs.unina.it/jobmanager-fork” “2.4.3” gridlaunch “/home/home1/test/vds/default/bin/kickstart” profile env “GLOBUS_LOCATION” “/vdt/globus” profile env “LD_LIBRARY_PATH” “/vdt/globus/lib” }
This file needs to be converted to XML so that Pegasus can utilize it. The tool to do this is called genpoolconfig
$ genpoolconfig --poolconfig $HOME/config/pool.config.txt --output $HOME/config/pool.config.xml
If the client didn’t throw any error then an xml file should be generated. Check the file to see if everything is ok.
Now to tell Pegasus to pick up this pool config file we need to add some properties in the $HOME/.chimerarc file we created earlier.
Edit the $HOME/.chimerarc file and add
Replace $HOME with the full path to your home directory
# $HOME/.chimerarc vds.db.vdc.schema.file.store $HOME/config/vdc.db vds.pool.mode xml vds.pool.file $HOME/config/pool.config.xml

GGF Summer School VDS Tutorial 8
The Pool config XML file can also be generated dynamically by querying a site’s MDS installation configured with Pegasus Information providers. For more details please read the VDS User Guide.
TRANSFORMATION CATALOG:
The transformation catalog maps logical transformations to physical executables on the system. We need to map our declared transformations (preprocess, findranage, and analyze) to a simple “mock application” name “keg” (“canonical example for the grid”) which reads input files designated by arguments, writes them back onto output files, and produces on stdout a summary of where and when it was run. Keg has proved to be a useful tool in the VDS development process.
Run keg on the command line to see how it works. $ keg –o /dev/fd/1 Timestamp Today: 20040624T054607-05:00 (1088073967.418;0.022) Applicationname: keg @ 10.10.0.11 (VPN) Current Workdir: /home/unique-name Systemenvironm.: i686-Linux 2.4.18-3 Processor Info.: 1 x Pentium III (Coppermine) @ 797.425 Output Filename: /dev/fd/1
Now we need to map all 3 transformations onto the “keg” executable. We place these mappings in our textual transformation catalog.
We will run the executable on the local workstation and on cluster “clus1”. We also need to add entries for the replica registration tool and the transfer tool used by Pegasus.
Create a file called $HOME/config/tc.data and edit the contents to be as follows
#POOL LFN PFN ENV #these are the workflow executables local tut::preprocess /home/home1/test/vds/default/bin/keg local tut::findrange /home/home1/test/vds/default/bin/keg local tut::analyze /home/home1/test/vds/default/bin/keg #this executable helps create random directories local makedir /home/home1/test/vds/default/bin/makedir # this is a wrapper around globus-url-copy tool local transfer /home/home1/test/vds/default/bin/transfer #this is a replica registration tool required on the local pool by Pegasus local RLS_Client /home/home1/test/vds/default/bin/rls-client CLASSPATH=/home/home1/test/vds/default/lib/gvds.jar:/home/home1/test/vds/default/lib/rls.jar: /home/home1/test/vds/default/lib/java-getopt-1.0.9.jar #add entries for the cluster clus1 tut::preprocess home/home1/test/vds/default/bin/keg

GGF Summer School VDS Tutorial 9
clus1 tut::findrange home/home1/test/vds/default/bin/keg
clus1 tut::analyze home/home1/test/vds/default/bin/keg
clus1 makedir home/home1/test/vds/default/bin/makedir clus1 transfer home/home1/test/vds/default/bin/transfer
The format of the file is:
1. Pool – The nick name for the cluster 2. LFN – The logical name for the transformation 3. PFN – The physical location of the transformation 4. ENV – Any environment variables to be associated with the transformation
We need to specify where to find the tc.data file. This can be done by setting a property in the previously created $HOME/.chimerarc file.
Edit the $HOME/.chimerarc and add the following entries.
Replace $HOME with the full path to your home directory.
# $HOME/.chimerarc vds.db.vdc.schema.file.store $HOME/config/vdc.db vds.pool.mode xml vds.pool.file $HOME/config/pool.config.xml vds.tc.mode single vds.tc.file /$HOME/config/tc.data
There is a rDBMS based Transformation Catalog starting with VDS-1.3.0. For more details check the Full user Guide.
Replica Mechanism:
The black diamond example takes one input file, which we will have to tell the replica manager. Replace unique-name with your own user id.
$ date > $HOME/unique-name.f.a
This file “unique-name.f.a” needs to reside on a grid site to be available for our grid computing. Upload the file to a gridftp server location and register that location in a Replica Catalog. Currently the only supported Catalog is the RLS (Replica Location Service).
To set up the RLS either contact you friendly neighborhood administrator or check out www.globus.org/rls

GGF Summer School VDS Tutorial 10
The backslash-before-linefeed is a shell construct to split an input line over multiple lines. You can type it into one line, leaving out the backslash, but not the white space between.
$ globus-url-copy –vb file://$HOME/unique-name.f.a \ gsiftp://localhost/$HOME/storage/unique-name.f.a
Note: In actual life, many users have set up their submit machine with an active gridftp server. Thus, they can refer to the file on their local machine via a gridftp URL instead of having to upload it into an arbitrary grid site, and refer to it there.
In the next step, we need to tell our replica mechanism where to find this file.
While globus-rls-cli suffices to add the entry, there exists a wrapper around RLS. The wrapper adds RLS attributes to the file. However, the attributes, while helpful in decision making, are optional. Nevertheless, we recommend the usage of rls-client to insert LFNs into RLS for Pegasus.
$ rls-client --lrc=rlsn://smarty.isi.edu --pool=clus1 --delimiter=@ --verbose \ --mappings=unique-name.f.a,gsiftp://localhost/~/storage/uniquename.f.a Registered: unique-name.f.a gsiftp://localhost/~/unique-name.f.a clus1 $ echo $? 0
You may first want to check, if the file made it into the replica catalog. The RLS is a hierarchy of local replica catalogs (LRC) and replica location index servers (RLI).To check, you can use rls-query-client from the VDS tools. However, it is also permitted to use the lower-level rls tool you learned about:
$ globus-rls-cli query lrc lfn unique-name.f.a rlsn://smarty.isi.edu
The file should immediately visible in the LRC. The update of the RLI will take ~30 seconds. You can check with the RLI later on before you try to run the concrete planner to see if the file has appeared:
Pegasus needs to query RLS when it converts the abstract workflow to a concrete one. For this we need to add a couple of more properties in the $HOME/.chimerarc file.
Replace $HOME with the full path to your home directory
# $HOME/.chimerarc vds.db.vdc.schema.file.store $HOME/config/vdc.db

GGF Summer School VDS Tutorial 11
vds.pool.mode xml vds.pool.file $HOME/config/pool.config.xml vds.tc.mode single vds.tc.file $HOME/config/tc.data vds.rls.url rlsn://smarty.isi.edu vds.replica.mode rls vds.exitcode.mode all vds.transfer.mode multiple
USING TEMPLATE TO GENERATE CONFIGURATION FILES
If you are facing problems in writing out any of the above files for you. You can use the templates to do the needful.
$ cp /home/home1/test/vds-tutorial/templates/chimerarc.template $HOME/.chimerarc $ cp /home/home1/test/vds-tutorial/templates/pool.config.template $HOME/config/pool.config.txt $ cp /home/home1/test/vds-tutorial/templates/tc.data.template $HOME/config/tc.data
REPLACE “$HOME” WITH FULL PATH TO YOUR HOME DIRECTORY IN
$HOME/.chimerarc
$HOME/config/pool.config.txt
$ genpoolconfig --poolconfig $HOME/config/pool.config.txt --output $HOME/config/pool.config.xml

GGF Summer School VDS Tutorial 12
Part IV: Generating a Workflow in VDL In this section we will try to write the diamond workflow in VDL. Create a file $HOME/tutorial/diamond.vdl and add the following 3 transformation and 4 derviations in the file.
The first transformation “preprocess” takes one input file, and turns it into two output files. To illustrate advanced VDL features, we will use the list to describe output files. Lists can have any number of elements, from zero to whatever your computer is capable of processing (note: there are usually Condor-G and command-line limits).
TR tut::preprocess( output b[], input a ) { argument = "-a top"; argument = " –i "${input:a}; argument = " –o " ${output:b}; }
The next transformation “findrange” is used by two derivations “left” and “right”. The transformation itself reads from two files and produces one file. The transformation below shows the advanced VDL-feature of default arguments. Any default argument may be overwritten by a derivation.
TR tut::findrange( output b, input a1, input a2, none name="findrange", none p="0.0" ) { argument = "-a "${name}; argument = " –i " ${a1} " " ${a2}; argument = " –o " ${b}; argument = " –p " ${p}; }
Alternatively, we could also have used the list feature for input instead of specifying input a1 and a2
GGF Summer School VDS Tutorial 13
The final transformation “analyze” reads input files to produce one result.
TR tut::analyze( output b, input a[] ) { argument = "-a bottom"; argument = " –i " ${a}; argument = " –o " ${b}; }
Together, these three transformations make up the back-bone of the black diamond. In the next step, we need to invoke the transformations in a manner that products of a previous step become input for the next step.
DV tut::top->tut::preprocess( b=[ @{out:"unique-name.f.b1"}, @{out:"unique-name.f.b2"} ], a=@{in:"unique-name.f.a"} ); DV tut::left->tut::findrange( b=@{out:"unique-name.f.c1"}, a2=@{in:"unique-name.f.b2"}, a1=@{in:"unique-name.f.b1"}, name="left", p="0.5" ); DV tut::right->tut::findrange( b=@{out:"unique-name.f.c2"}, a2=@{in:"unique-name.f.b2"}, a1=@{in:"unique-name.f.b1"}, name="right" ); DV tut::bottom->tut::analyze( b=@{out:"unique-name.f.d"}, a=[ @{in:"unique-name.f.c1"}, @{in:"unique-name.f.c2"} ] );
Together, these seven definitions make up the “diamond” workflow. You will need to replace the “unique-name” again with your own username to avoid clashes in the replica manager later.
USING TEMPLATE TO GENERATE VDL FILES
If you are facing problems in writing out any of the above files for you. You can use the templates to do the needful.
# In the following command replace $USER and $HOME with actual values of these environment variables
$ cp /home/home1/test/vds-tutorial/templates/diamond.vdl.template $HOME/tutorial/diamond.vdl $ perl –pi –e ‘s/unique-name/$USER/g’ $HOME/tutorial/diamond.vdl

GGF Summer School VDS Tutorial 14
Now, convert the textual VDL above into its XML equivalent:
$ cd $HOME/tutorial $ vdlt2vdlx diamond.vdl diamond.xml
If your VDL was syntactically correct, this command is silent. Otherwise, you will see syntax error messages to indicate approximately where in the input file the error occurred.
The next step is to insert the VDL definitions into your VDC – your virtual data catalog.
You have the choice between insertvdc and updatevdc. You should prefer insertvdc whenever possible, as it is faster. However, you can only insert definitions (TR or DV) that did not previously exist.
$ insertvdc diamond.xml 2004.06.24 05:38:49.460 CDT: [app] parsing "diamond.xml" 2004.06.24 05:38:51.578 CDT: [app] Trying to add tut::preprocess 2004.06.24 05:38:51.610 CDT: [app] Trying to add tut::findrange 2004.06.24 05:38:51.647 CDT: [app] Trying to add tut::analyze 2004.06.24 05:38:51.674 CDT: [app] Trying to add tut::top 2004.06.24 05:38:51.699 CDT: [app] Trying to add tut::left 2004.06.24 05:38:51.728 CDT: [app] Trying to add tut::right 2004.06.24 05:38:51.750 CDT: [app] Trying to add tut::bottom 2004.06.24 05:38:51.765 CDT: [app] modified 7 definitions 2004.06.24 05:38:51.766 CDT: [app] rejected 0 definitions
You can now query the database for anything in the “tut” namespace, to see that everything made it. By default, it will just display the fully-qualified definition name.
$ searchvdc -n tut 2004.06.24 05:39:20.621 CDT: [app] searching the database tut::preprocess tut::findrange tut::analyze tut::top->tut::preprocess tut::left->tut::findrange tut::right->tut::findrange tut::bottom->tut::analyze
In order to obtain a workflow, the dependencies have to be converted into an “abstract DAG in XML” (DAX file). The DAX contains logical descriptions of jobs to run and files to transfer, but no concrete information like the application name or the physical filename.

GGF Summer School VDS Tutorial 15
The DAX generator is called gendax. You can ask gendax to produce a DAX file either based on the logical filename that is produced, or on a certain derivation. Gendax is also capable of processing lists of each, producing disconnected graphs if necessary. Such a bulk processing mode is a speed-advantage.
$ gendax –l diamond –o diamond.dax –f unique-name.f.d 2004.06.24 05:52:40.559 CDT: [app] saving output to diamond.dax

GGF Summer School VDS Tutorial 16
V: Planning for Execution in Grids (Pegasus) Now we shall take the generated abstract diamond workflow and generate a plan to run it on the grid.
We should now check if the file that we registered into the RLS is available in the RLI.
$ globus-rls-cli query rli lfn unique-name.f.a rlsn://smarty.isi.edu
If the command above returns with a result then we can go ahead.
We are now poised to run on the grid. We will start right away with the DAX file for the black diamond.
Pegasus is inside the highly flexible gencdag program. We need to tell it which DAX file to parse (--dax). Each workflow will be expanded into several Condor, DAGMan and auxiliary files. Thus, each workflow should go into a directory of its own (--dir). Pegasus will want to know in which subset of your sites you want to run (--pools). You can tell Pegasus to transfer all data products to one grid site (--output). And finally, for tracking errors, it is nice to see what Pegasus does, so we tell it to be verbose (-v).
$ cd $HOME/tutorial $ gencdag --dax diamond.dax --dir diamond.dir --pools clus1 --output clus1 –v -a
After the workflow was produced, we can change into the directory, and run the workflow through DAGMan.
$ cd diamond.dir $ condor_submit_dag diamond-0.dag
Now to see the progress of your dag you can try one or all of the following approaches
1. tail –f diamond-0.dag.dagman. 2. watch condor_q
Most likely, you will run into a grid or software failure, and your workflow will stop without being done. Remember that grid computing is still in its infancy. There are various methods to detect the error.
• If you look into the DAGMan out file above, it should tell you clearly which command it attempted to run, and why it thinks it failed.

GGF Summer School VDS Tutorial 17
• There is also the workflow log file diamond-0.log which stores the simpler progress of jobs states.
The final data product should show up on “clus1”. Find out where it resides, and retrieve it with globus-url-copy. Look into the file. Here the first step (finding where it resides):
$ globus-rls-cli query wildcard lrc lfn "unique-name.*" rlsn:// smarty.isi.edu

GGF Summer School VDS Tutorial 18
VI: Deferred Planning in Pegasus So far in Pegasus, you have seen full ahead planning in which the decision of where to run the job is decided at the time of submission of dag. However, it is also possible to delay this decision of site mapping to as late as the time when a job is ready to run. Pegasus allows you to defer the planning till a particular job is ready to run or a particular set (partition) of jobs is ready to run. At the heart of this, is the concept of partitioning the dax into partitions where each partition can be as big as the whole dax or as small as one job (late planning). In between you have partitions corresponding to the levels in the dax (all the jobs in one BFS level, are construed as one partition). Thus, how late you want to delay the job mapping is decided by the granularity of the partitions.
Deferred planning is done in two steps. In the first step, you have to run the partitioner to chop up the dax into smaller daxes (each partition corresponds to one of the smaller daxes). In the second step you run gencdag to create a megadag, and depending on the mode, dagman, noop or dagman lite jobs are created. When this megadag is submitted, Pegasus is run as a prescript or a separate job whenever a partition is ready to run , to generate the appropriate submit files corresponding to the partition.
Partitioner:
Currently partitioner supports two modes for chopping up the dax. In the BFS mode, partitions are created level wise while in the One2One mode, partitions are created per job in dax.
The tool to run for partitioning the dax is partitiondax.
Usage: partitiondax -d <dax file> [-D <dir for partitioned daxes>] -t <BFS|One2One (type of partitioning to be used)> [-v] [-V] [-h]
For running, we have 2 directories. In the first directory the partitioned daxes and the pdax file are created. In the second directory, the submit files are generated when gencdag is run to create the megadag. For purposes, of this class let us name the first directory as pdags and the second directory as dags.
partitiondax –d blackdiamond.dax –D ./pdags –t One2One –v
On running the above command, you should see a 5 files in the pdags directory. The blackdiamond.pdax file contains the structure of the partition graph and identifies the jobs making up the partition. There would be 4 other .dax files that contain the dax corresponding to each partition.

GGF Summer School VDS Tutorial 19
MEGADAG Generation:
The next step is generating the megadag that is used to submit the dag which invokes Pegasus at various intervals, when a partition is about to run. Since in our case, each partition (One2One mode while running partitiondax) contains only one job, Pegasus is invoked whenever a job is ready to run.
gencdag --pdax ./pdags/blackdiamond.pdax --pools <exec-pool> --o <output-pool> --megadag daglite --verbose --dir ./dags/
Notice, that you are using gencdag but instead of dax option , you specify the pdax option. There is an extra option (--megadag) specified, that specifies the megadag mode to be used.
If all goes well, in the dags directory you should see 4 submit files and one .dag file. The submit files will be starting with the prefix daglite_.
Before submitting the megadag, there are a few steps that *must* be done. These are necessary as Pegasus is run as a prescript and takes in VDS_HOME, LD_LIBRARY_PATH and CLASSPATH from shell.
cd ./dags setenv $DAGDIR `pwd` cd <directory where you untarred the vds binary bundle) setenv VDS_HOME `pwd` unsetenv CLASSPATH source setup-user-env.csh setenv LD_LIBRARY_PATH $GLOBUS_LOCATION/lib
Now we can submit the megadag we generated.
cd $DAGDIR condor_submit_dag black-diamond_0.dag
You can track the progress of the dag by doing condor_q <your username>.
As, the megadag is generated the condor submit files for each partition would be generated as the partition comes up for execution.

GGF Summer School VDS Tutorial 20
Terminology A few terms that we will use here include:
Abstract workflow – In the VDS: a workflow in which transformations and files are represented as logical names, and in which the location at which to run each transformation is not yet determined.
Chimera – A project name for the virtual data language toolset.
Concrete workflow – In the VDS: a workflow in which files are represented by physical filenames, and in which sites or hosts have been selected for running each task.
DAG – Directed Acyclic Graph – a graph in which all the arcs (connections) are unidirectional, and which has no loops (cycles). In other words, control can only flow through the graph in one direction, from its start towards its end. Often, in the VDS, when we say “DAG” we mean a file in Condor “DAGman” input format.
DAX – DAG in Xml format – the DAG format produced by the “gendax” tool as it traverses a Virtual Data Catalog to produce a derivation.
Deferred Planning – Planning mode - In this mode, instead of mapping the job at submit time, the decision of mapping a job to a site is deferred till a later point, when the job is about to be run or near to run.
DV – Derivation – a call to a transformation, with actual arguments specified (constants and logical files)
Full Ahead Planning – Planning mode – In this mode, all the jobs are mapped before submitting the workflow for execution to the grid.
Graph – (informally) in computer science and discrete mathematics, a data structure consisting of linked nodes.
LFN – Logical File Name – the name of a set of replicas of a given file, each of which may have a unique physical file name on system on which it resides.
MEGADAG – the dag that is generated during deferred planning, which invokes Pegasus at various points during it’s execution.
PFN – Physical File Name – the physical file name of the LFN.
Partitioner – a tool, that chops up the dax into smaller daxes for deferred planning.
GGF Summer School VDS Tutorial 21
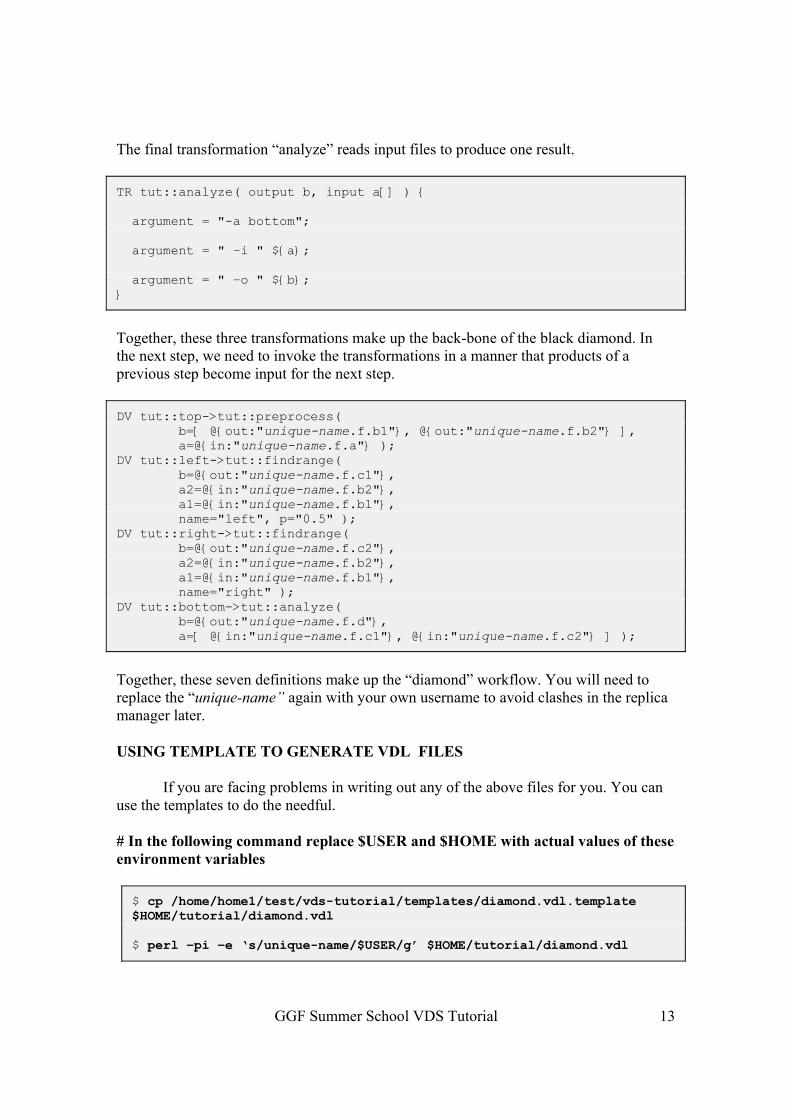
Pegasus – a project name for the concrete planner, which maps the abstract workflow into a concrete workflow to run on the grid.
Planner – In the VDS, a tool that converts a workflow graph to a form “more ready” for execution. It makes “plans” for where, how, and when the actions of the workflow should take place.
Replica catalog - a catalog that maps logical file names on to physical file names
Replica Location Service – a globus service that is used to maintain the lfn to pfn mappings.
Shell planner – a planner (“shplan”) that converts a workflow in the form of a VDL “DAX” to a simple, sequential shell script, for execution. It honors all the dependencies in the original VDL.
TR – Transformation – an application program whose input and out files and parameters are described in VDL
Transformation catalog – a catalog that maps transformation names onto the physical pathname of the transformation at a given gird site or local test machine.
VDC – Virtual Data Catalog – a database that holds VDL definitions. The VDC can be a plain file of XML or a relational database. PostgreSQL and MySQL are supported.
VDL – Virtual Data Language – a language that declares the inputs and outputs of executable programs (“Transformations”) and how specific calls to them are chained together into “workflow graphs”
VDLt – a textual version of VDL, loosely inspired by C
VDLx – an XML version of VDL
VDS – Virtual Data System – the set of tools used to process VDL statements into a form in which they can be executed on the Grid, or tested locally.
Workflow – a graph consisting of tasks, often represented as a DAG.


![Applying Chimera Virtual Data Concepts to Cluster Finding ... · The current GriPhyN toolkit (VDT V1.0) includes the Globus ToolkitTM [18], Condor and Condor-G [19, 20], and the Grid](https://img.pdfslide.us/doc/110x75/604557b0b3c0da70e830302d/applying-chimera-virtual-data-concepts-to-cluster-finding-the-current-griphyn.jpg)