Embed Size (px)
Citation preview
89BBKA News Incorporating e British Bee Journal March 2017
Queen RearingSimplified
By Jeroen Vorstman, Holland
There is a lot of misunderstandingabout queen rearing. Mostbeekeepers find it difficult, or
impossible to combine with their normalbeekeeping practice. Some queen breedersadvocate separating queen rearingoperations from honey productioncolonies. But there is a way to integratequeen rearing in your normal beekeepingpractice. I will tell you how I do it in fivesteps.
My method is based on your standardhive; there is no use of special mating nucslike Apideas or Mini Plus hives. is has anumber advantages, including:n You use the same frame size as your
standard hives.n ere is no need for special hives
(saves money and time).n It is easier and safer to introduce a
queen once she has mated by unitingthan introducing her using anintroduction cage.
n More bees means better queens.n On standard frames it is easier to tell if
a queen is of good quality.
Perhaps I need to explain the lastadvantage. If you let your queens mate inan Apidea mating nucleus for example,how can you tell if a queen is good or not?An Apidea, like most mating nuclei, hasonly three small frames to lay on. Even abad queen is capable of filling these smallcombs with eggs, like a good queen does. Icannot tell the difference! Can you?
Another disadvantage of using smallmating nucs is their size; a tiny colonystruggles to stay alive. It is recommendedto fill one coffee cup with young bees andput these in an Apidea. You therefore haveto let one coffee cup with unexperiencedyoung bees care for a virgin queen. Youhave to watch over the nuc almost everyday. ey are too small to gather their ownfood, so you have to feed them constantlywith sugar patties. at is not the best foodfor a bee nor a queen. ey are vulnerableto robbery and wasp attack. If the colony
grows, the space is too small for expansion.How can you expect such a small colony toproduce a good queen?
I rejected all small mating nuclei on mybee farm and rear my queens on standardframes only. Since then, the losses duringthe mating period completely vanished!Still, I hear a lot of beekeepers complainingevery year about their queen losses. eyblame the weather or the birds, but nevertheir fancy mini nucs! erefore, I wouldlike to advise you to rear your queens onyour full-size standard frames and see itfor yourself. It does not matter if you areusing National, Commercial or Dadant.My way of queen rearing accepts all theseframe sizes.
What is queen rearing about?Queen rearing is all about breeding thebest quality queens, which are physicallyperfect and have the characteristics youlike. e most important characteristics Iwould like to see in my colonies aregentleness and varroa resistance. Lowtendency for swarming and honey cropcomes third and fourth. Every year I useyoung queens to restock productioncolonies, to expand the number of mycolonies. I believe queen rearing is the keyto successful beekeeping!
Breeder colonye mother colony should have goodcharacteristics. If you have a colony thatexcels in honey crop, low swarm tendencyor any other trait you like, then breed fromthat colony. is colony we call the breedercolony. If you do not have the right breedercolony then ask another beekeeper or buylarvae from a queen breeder. ese larvaeare fated to become queens.
Starter-finisher colonyTo produce good quality queens theselarvae need the best care in a colony withlots and lots of nurse bees. is colony wecall the starter-finisher, because in thiscolony the bees start and finish queen cellbuilding. It happens all in the same hive.
If you have been putoff queen rearingbecause you do nothave special matingnucs, or you find thewhole operation a bitfiddly, then JeroenVorstman may beable to change yourmind with his simpleand efficient method.
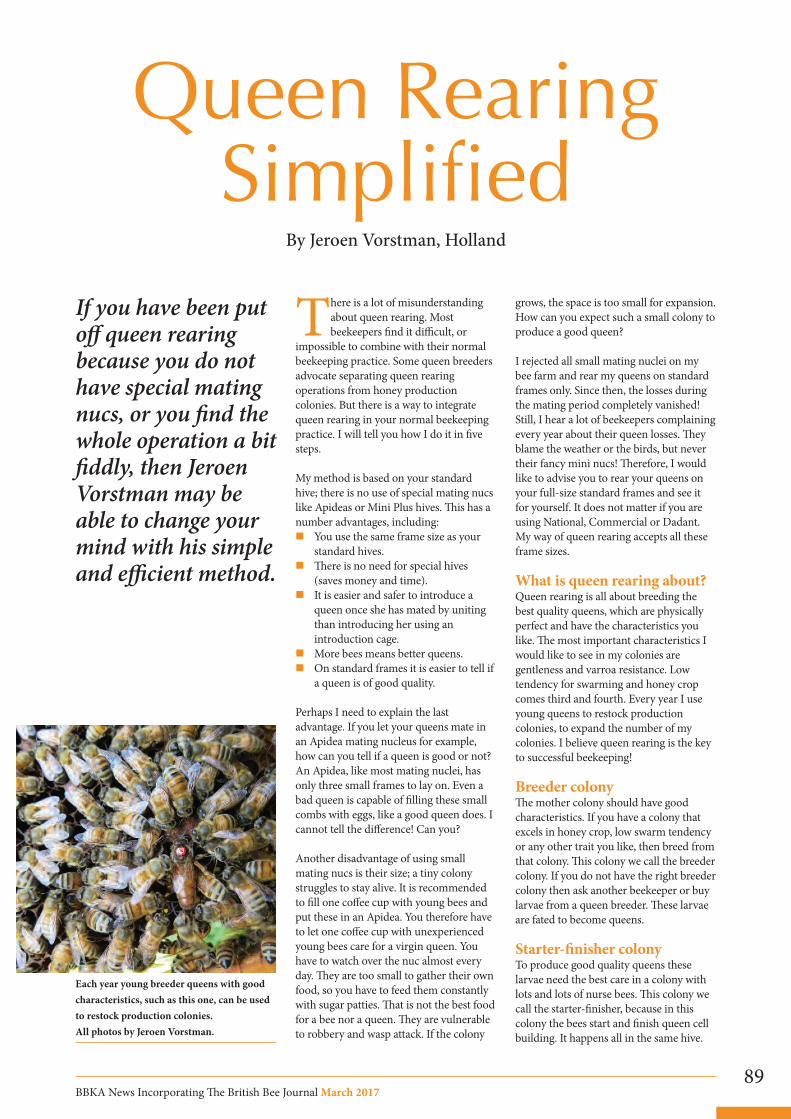
Each year young breeder queens with goodcharacteristics, such as this one, can be usedto restock production colonies. All photos by Jeroen Vorstman.

90BBKA News Incorporating e British Bee Journal March 2017
When the apple trees are flowering, at the beginning of May, youmake a starter-finisher colony. erefore, you will need frameswith brood and bees from the production hives. When you takeone to two frames from each hive you will not notice any declinein honey production, but it will reduce their will to swarmeffectively.
Breeding calendarWhen you want to breed queens you have to stick to a timetable;the ‘breeding calendar’. e day of graing one-day-old larvae is‘day 0’. Days with a ‘–’ (minus sign) are days of preparation beforeyou start breeding. Days that start with a ‘+’ (plus sign) are thedays aer graing. is is how the schedule looks:
Day -7/-9 Make a starter-finisher colony.Day 0 Start of queen rearing: graing.Day +10 Caging ripe queen cells.Day +12 Making nucleus.Day +30 Young queens are laying eggs!
Enough theory for now; it is time to look at the five steps tosuccessfully breed good quality queens!
Queen rearing in five stepsStep 1. Make a starter-finisher colony (day -7/-9)On a warm day at the end of April, beginning of May, you start thepreparations. Put together an empty beehive with a floor, onebroodbox, two frames full of honey, cover board, roof, hive strapand eight to nine frames with drawn comb or foundation or amixture of both. You will need these eight to nine spare frames toswap with the frames of brood and bees you take from theproduction hives. e two frames with honey will stay at each sidein the starter-finisher colony. e entrance stays closed.
Open the first production hive and take one or two frames. Mainlywith sealed worker brood and hang it, still with the bees, in the
empty hive you just put together. Be careful that the queen is noton the frames! If she is, put her back in her hive. Put the frames inthe production hive back together, fill the space with the spareframes and close the hive.
Do the same with three to eight production colonies until thestarter-finisher hive is full with frames. When you are ready, closethe hive and take it somewhere out of the range of the donor hives;about three miles away. Open the entrance and leave this hivealone for seven to nine days. is new colony is queenless and willstart emergency cells. Although you took frames with mainlysealed worker brood, there should be enough young larvae for thebees to start emergency cells on.
Step 2: Graing (day 0)Seven to nine days aer you made the starter-finisher colony youhave to destroy all emergency cells in it. And I mean ALL of them.
is is an example of a good frame to make a cell starter-finisher.
Choose frames with mainly sealed worker brood.

91BBKA News Incorporating e British Bee Journal March 2017
e best way for you not to overlook asingle one, is to clear the frames of bees. So,shake the bees from the frames so you havea clear view of each frame. If there is evenone emergency cell le queen breeding willfail.
Remove one frame in the middle to makeroom for the frame with selected larvae.Put the frame you removed in anothercolony. Now it is time to collect younglarvae from your breeder colony.
Gra twenty to thirty larvae from your bestcolony and put the frame with the cell cupsand young larvae in the middle of thestarter-finisher. Close the hive and leave itfor ten days.
Step 3: Cage ripe queen cells (day+10)Ten days aer you hung the frame withyoung larvae in the starter-finisher colonythe queen cells are ready to be caged. Putfive young nurse bees in every cage to carefor the queen as she emerges.
Step 4: Making a mating nucleus(day +12)Two days aer you caged the queen cells,the queens emerge. Put together as manymating nuclei as there are queens. In everynucleus, hang one frame with bees fromthe starter-finisher colony, one frame filledwith honey and the rest should be frameswith foundation. Every nucleus gets avirgin queen. Is she run in or introduced inan introduction cage? Place the nuclei outof the range of the starter-finisher colony.Leave the nuclei for about two weeks. Becareful not to disturb them.
If you need more frames than there are in
Tip: Make sure to gra larvae notolder than one day. erefore, fourdays before graing, put a frame withempty comb in the middle of thebrood nest of the breeder colony. equeen will soon start laying eggs inthe empty cells and three days laterthe eggs hatch. One day aer theyhave hatched they are the right agefor graing.
Top: A cell cup with a one-day-old larva in it;Graed worker larvae will become queenswith the right care.Bottom: Nurse bees feed developing queenlarvae in a cell-builder.
Shake the bees from the frames to find theemergency cells.

the starter-finisher, take frames with sealed worker brood fromstrong production hives. Let the old bees fly off. If you do not letthe old bees fly off, this increases the chances of the young queenbeing killed. Put this frame, together with a frame of honey intothe nucleus and fill the rest of the nucleus with frames withfoundation. Leave the hive for one or two hours. Aer that the beesare aware that they are queenless and are more willing to accept ayoung virgin queen. Introduce the cage with the queen and herattendants.
Step 5: Inspect the mating nucs (day +30)Two weeks aer you made the mating nucleus, most young queenswill be laying eggs. Nucleus colonies without brood have to bechecked again one week later. If there is still no brood, they arelost. Shake the bees from the frames and take the nucleus away.Nucleus colonies with brood have to be fed, so feed them as long asthey are working on the foundation. Give them room as soon as
becomes necessary. When summer comes to an end, the nucleusshould have grown to at least a full broodbox.
If you want you can requeen an old or bad queen with a young oneyou reared very easily. Just remove the old queen, put a sheet ofnewspaper with a queen excluder on top. e excluder will preventthe newspaper from blowing away. On the excluder you put thebroodbox of the colony with the young queen. Close the hive andleave it for a week or two. Aer two weeks you remove the queenexcluder and the newspaper (if there is any le).
If you use five or six frame nucleus colonies for queen rearing,simply put an empty broodbox on the queen excluder and hangthe frames with the young queen in it. Aer two weeks you have torearrange the frames to form one broodnest. Requeening byuniting is the safest way to introduce a young queen in anothercolony.
I hope you will try my way of breeding queens. It is fun to do andyoung queens of premium quality is the basis of successfulbeekeeping. Good luck!
Editor’s note: is article is based on a talk that Jeroem gave at theBIBBA Conference in September 2016.
92BBKA News Incorporating e British Bee Journal March 2017
Give every nucleus a frame full of honey; a super, such as this, filledwith capped honey stores is perfect for a nuc.
Young, unmarked virgin queen on a frame of foundation in a nucleus.
“Queen rearing is all aboutbreeding the best qualityqueens, which are physicallyperfect and havecharacteristics you like.”