Embed Size (px)
Citation preview

Winter 2015/2016 - Vol. 14, Issue 1 All contents © 2015 E.J. Peiker
Welcome to the quarterly newsletter from E.J. Peiker, Nature Photographer and www.EJPhoto.com. In this quarterly publication, I share with fellow photographers my photographic experiences, photo equipment reviews, photo and processing tips, and industry news. I also inform subscribers about upcoming workshops and products that I offer. Please feel free to forward this to other photographers and interested parties but please do so only by forwarding this newsletter in its entirety. All content is copyrighted by E.J. Peiker and may not be reproduced. If you would like to be added to the mailing list, unsubscribe, or access back issues, please visit: www.ejphoto.com/newsletter.htm
Buachaille Etive Mor, Scotland (Sony a7R II, 16-35mm)

A Return To Scotland A year ago I visited the Isle of Skye in Scotland and was blown away by the spectacular beauty of this place and the British Isles in general. I had previously been to Ireland on the Emerald Isle but not Great Britain. It left such an impression on me that I decided to return this year. I had heard many great things about the Glencoe area of Scotland from my UK photographer friends so that is where I concentrated this year’s visit. I did a lot of research before going because, unlike last year where I was with a group that had experience in the area, this would be a solo trip. Fortunately I am part of a huge network of nature photographers that span the globe so I contacted my favorite Scottish photographer, Alister Benn, to get tips as well as information from others, books, and lots of online research. I easily put in 40 hours of preparation prior to leaving and even refreshed my right hand drive car driving skills on a simulator. That first hour of driving in Scotland on the sometimes insanely narrow two way streets that are barely wide enough for a subcompact car can be very dangerous if you haven't driven on the other side of the road and on the opposite side of a car in years, especially after a long overnight flight where one never gets enough rest. All of the trip preparation paid off and I was very pleased that I was able to photograph almost everything I wanted to, not always
in perfect light, but enough of it in interesting conditions to make the trip a great success. The Glencoe area consists of two primary glens or mountain valleys - one has the river Coe running through it, thus Glencoe, the other has the river Etive running through it, thus Glen Etive. Standing watch at the entrance to the area is the iconic and impressive Buachaille Etive Mor Mountain (see cover photo above) which found its way into the backdrop for many of my photos from the area. There are seemingly an infinite number of great compositions that include this mountain. I explored these two glens extensively both by car and I also logged an average of 7 miles of hiking a day for 8 days with a peak of 11 miles and one low day of just 3 miles due to heavy rain. Prior to leaving the USA, the weather forecast was terrible for the week I was to be there but it turned out to be fairly nice with just one 18 hour period of unshootable windy and wet conditions. Fortunately, the aftermath of Hurricane Joaquin, which was forecast to hit the UK took a much more southerly track affecting southern Europe and leaving Northern Europe with better weather than anticipated. There were even two nights of relatively clear skies which coincided with a solar storm resulting in some opportunities to photograph Aurora Borealis. I had hoped for the possibility and packed my 21mm, 25mm and 35mm fast prime lenses just in case... In addition to the Glencoe area I also took a day drive through the western most parts of the main island of Great Britain that much of Scotland sits on and also visited several castles. The overall photography experience was outstanding. The best tip I received, other than the obvious location suggestions was to bring rubber boots, or Wellies as they call them in the UK. Some of the areas I photographed simply would not have been possible without them due to the very mossy, highly saturated grounds that make up much of the area.
Inveraray Castle (a7R II, 16-35mm)
Aurora Borealis over Glencoe (a7R II, Zeiss 25mm ZF.2)
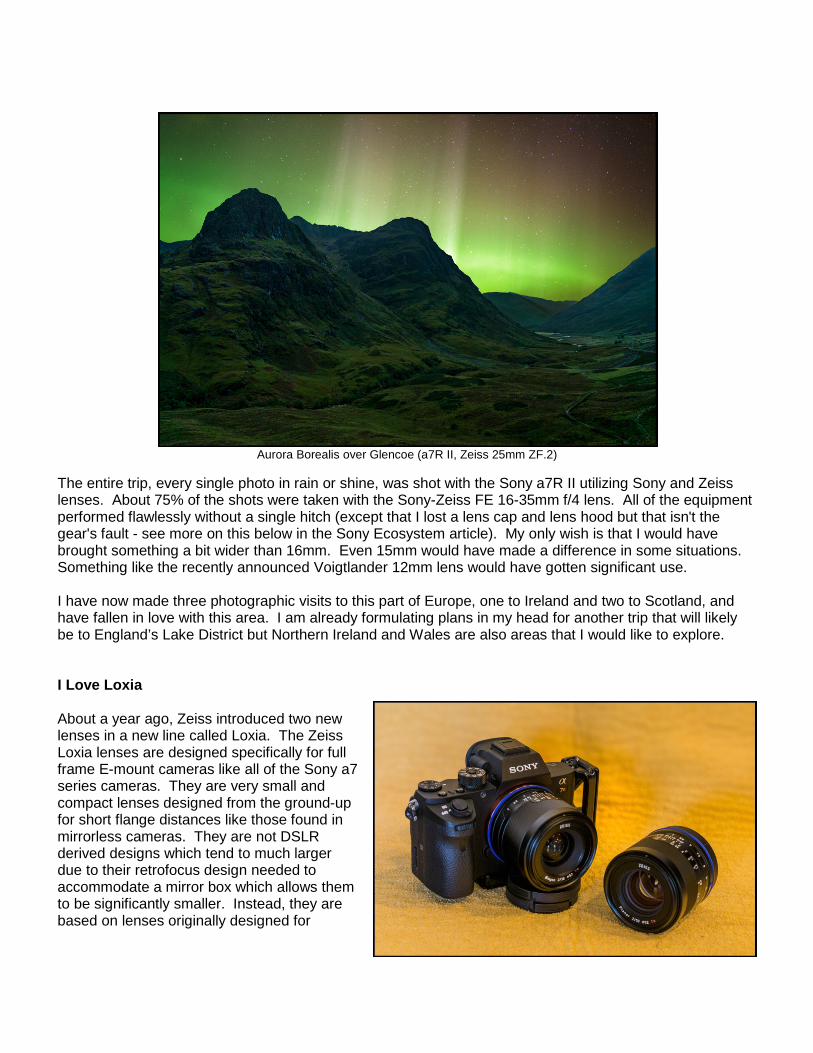
The entire trip, every single photo in rain or shine, was shot with the Sony a7R II utilizing Sony and Zeiss lenses. About 75% of the shots were taken with the Sony-Zeiss FE 16-35mm f/4 lens. All of the equipment performed flawlessly without a single hitch (except that I lost a lens cap and lens hood but that isn't the gear's fault - see more on this below in the Sony Ecosystem article). My only wish is that I would have brought something a bit wider than 16mm. Even 15mm would have made a difference in some situations. Something like the recently announced Voigtlander 12mm lens would have gotten significant use. I have now made three photographic visits to this part of Europe, one to Ireland and two to Scotland, and have fallen in love with this area. I am already formulating plans in my head for another trip that will likely be to England’s Lake District but Northern Ireland and Wales are also areas that I would like to explore. I Love Loxia About a year ago, Zeiss introduced two new lenses in a new line called Loxia. The Zeiss Loxia lenses are designed specifically for full frame E-mount cameras like all of the Sony a7 series cameras. They are very small and compact lenses designed from the ground-up for short flange distances like those found in mirrorless cameras. They are not DSLR derived designs which tend to much larger due to their retrofocus design needed to accommodate a mirror box which allows them to be significantly smaller. Instead, they are based on lenses originally designed for
Leica's M-mount but they have been modified for the thicker Sony sensor stack. I recently took delivery of both of the Loxia lenses produced to date - the 35mm f/2 Biogon and the 50mm f/2 Planar. A third Loxia will join these two at the end of 2015 - a 21mm f/2.8 Distagon that is approximately the same size. It is a new design that has been corrected to solve some of the corner smearing and color-shift problems associated with wide angle M-mount lenses that have been adapted to FE mount. All of the lenses feature a very economical 52mm filter thread. They are manual focus but employ full electronic coupling which means that, if the camera is configured properly, as soon as you move the focus ring, the camera automatically shows you a zoomed in view in the viewfinder. The lenses, use the powers of an electronic viewfinder (EVF) to make manual focus almost as simple as autofocus. You can of course move the zoom view to anywhere in the frame should you want to focus in a different area than what is initially shown. This is the manual focus version of moving your autofocus point. If you couple this with focus peaking set to the High setting, critical focus is very easy to achieve, and in many respects more precise than autofocus albeit a bit slower, but with practice this can be minimized. The lenses are robust metal
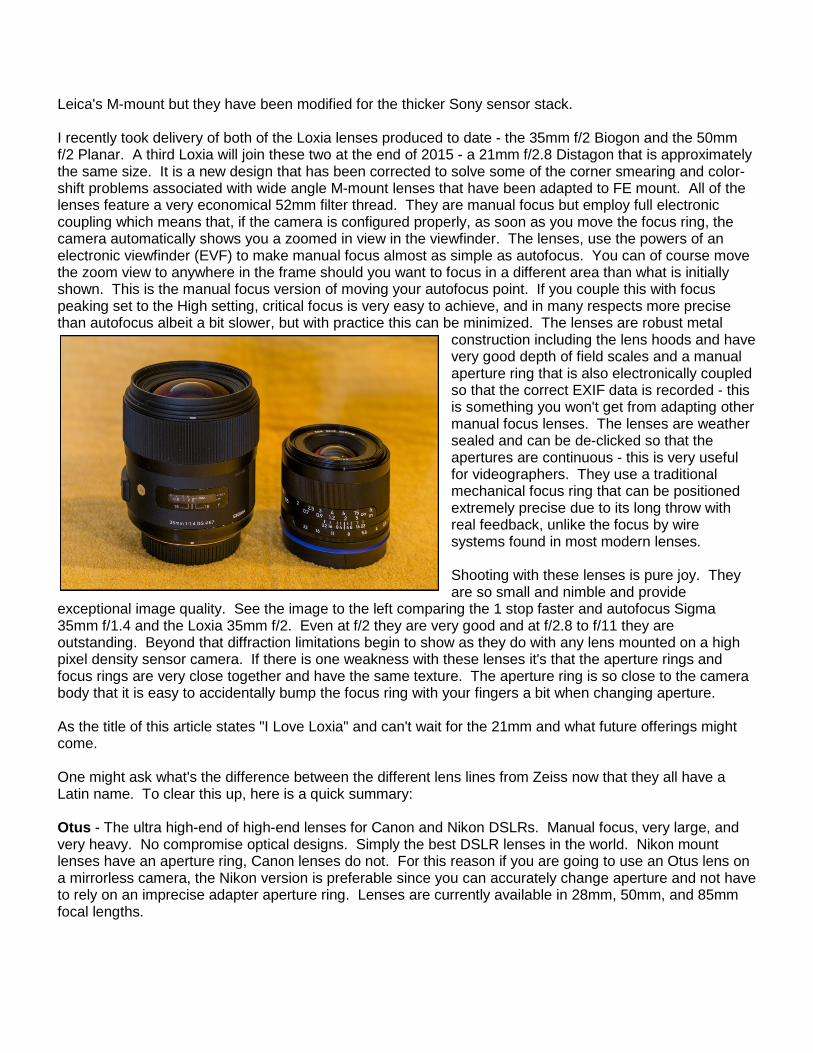
construction including the lens hoods and have very good depth of field scales and a manual aperture ring that is also electronically coupled so that the correct EXIF data is recorded - this is something you won't get from adapting other manual focus lenses. The lenses are weather sealed and can be de-clicked so that the apertures are continuous - this is very useful for videographers. They use a traditional mechanical focus ring that can be positioned extremely precise due to its long throw with real feedback, unlike the focus by wire systems found in most modern lenses. Shooting with these lenses is pure joy. They are so small and nimble and provide
exceptional image quality. See the image to the left comparing the 1 stop faster and autofocus Sigma 35mm f/1.4 and the Loxia 35mm f/2. Even at f/2 they are very good and at f/2.8 to f/11 they are outstanding. Beyond that diffraction limitations begin to show as they do with any lens mounted on a high pixel density sensor camera. If there is one weakness with these lenses it's that the aperture rings and focus rings are very close together and have the same texture. The aperture ring is so close to the camera body that it is easy to accidentally bump the focus ring with your fingers a bit when changing aperture. As the title of this article states "I Love Loxia" and can't wait for the 21mm and what future offerings might come. One might ask what's the difference between the different lens lines from Zeiss now that they all have a Latin name. To clear this up, here is a quick summary: Otus - The ultra high-end of high-end lenses for Canon and Nikon DSLRs. Manual focus, very large, and very heavy. No compromise optical designs. Simply the best DSLR lenses in the world. Nikon mount lenses have an aperture ring, Canon lenses do not. For this reason if you are going to use an Otus lens on a mirrorless camera, the Nikon version is preferable since you can accurately change aperture and not have to rely on an imprecise adapter aperture ring. Lenses are currently available in 28mm, 50mm, and 85mm focal lengths.

Milvus - This line replaces the ZF.2 and ZE DSLR lens lines of premium manual focus lenses for Nikon and Canon. These are exceptional lenses at a premium price but not quite at the level of the Otus lenses in size, weight, or price. Nikon mount lenses have an aperture ring, Canon lenses do not. For this reason if you are going to use a Milvus lens on a mirrorless camera, the Nikon version is preferable since you can accurately change aperture. These lenses are currently availalbe in 21mm, 35mm, 50mm, 85mm, 50mm macro, and 100mm macro, versions. Batis - Premium autofocus lenses for the Sony FE mount with a built in OLED distance/depth-of field scale and an aperture ring. The lenses are similar in size to DSLR lenses of the same focal length and aperture and are actually based on those designs but with the same styling as the Milvus and Otus lenses. Focal lengths available are currently 25mm and 85mm. Loxia - Compact premium all metal construction manual focus lenses designed to give top notch optical performance in as small of a package as possible. The lenses are all similar form factor and share a 52mm filter thread. The lenses are electronically coupled to provide all of the advantages of an EVF such as automatic focus magnification. Focal lengths available are 21mm, 35mm, and 50mm. Touit - Premium autofocus lenses designed for mirrorless APS-C from Sony and Fuji. There are no plans to expand the line beyond the three lenses currently available which are 12mm, 32mm, and a 50mm macro. Sony a7R II Update In the last issue of this newsletter I reviewed the Sony a7R II and stated that it has become my primary landscape photography camera replacing the Nikon D810. Nothing has changed in that regard since then but I do have a couple of updates. First, one of my major complaints about the camera has been addressed via a firmware update. Up until now, all Sony a7 series cameras and even most of their Alpha Mount cameras have utilized a compressed RAW format that actually threw away real image data. This became most noticeable at very high contrast edges, especially when pushing the shadows to brighter levels. Sony has recently released a firmware update for the a7R II and ships the a7S II with a new Uncompressed RAW option. In this new true 14 bit image format, no image data is compromised. Unfortunately Sony did not provide a lossless compressed RAW file, like all other manufacturers do, so the file sizes are huge at nearly 85MB per image - about the same as a Phase One 80 megapixel digital back file despite having about half the pixels!. But at least it now gives the photographer the option of having RAW files that haven't been needlessly compromised.
YS Falls, Jamaica (a6000, 16-70mm)
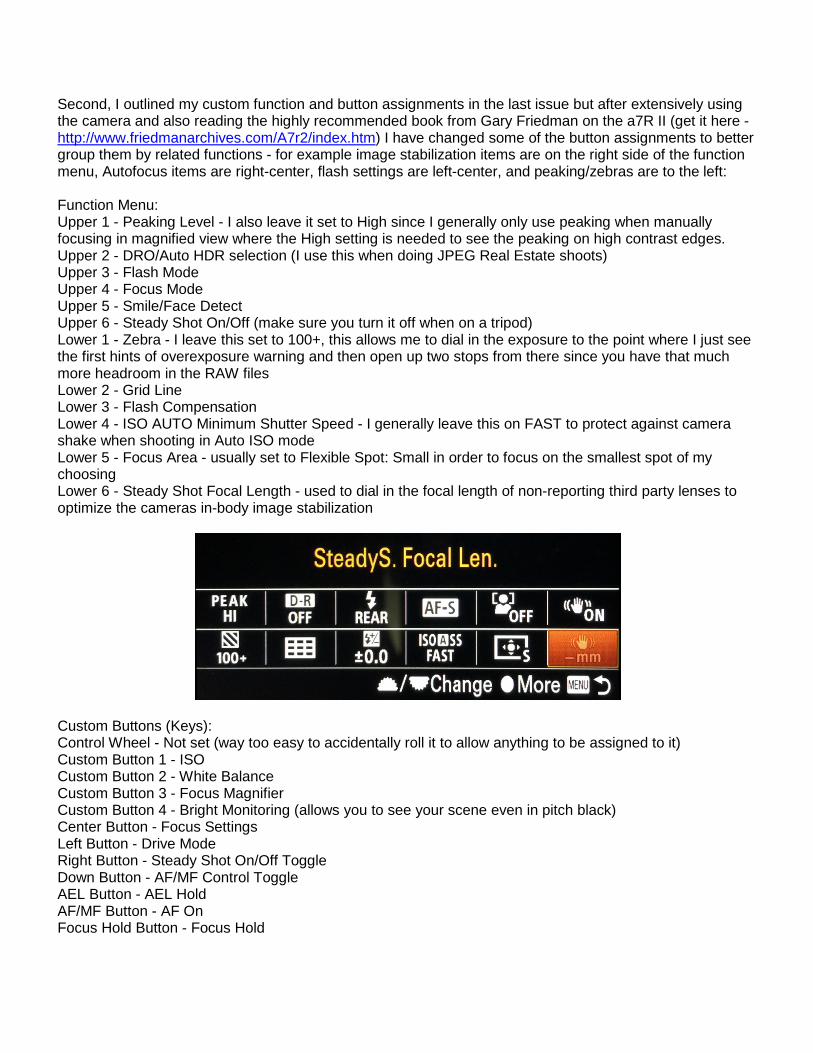
Second, I outlined my custom function and button assignments in the last issue but after extensively using the camera and also reading the highly recommended book from Gary Friedman on the a7R II (get it here - http://www.friedmanarchives.com/A7r2/index.htm) I have changed some of the button assignments to better group them by related functions - for example image stabilization items are on the right side of the function menu, Autofocus items are right-center, flash settings are left-center, and peaking/zebras are to the left: Function Menu: Upper 1 - Peaking Level - I also leave it set to High since I generally only use peaking when manually focusing in magnified view where the High setting is needed to see the peaking on high contrast edges. Upper 2 - DRO/Auto HDR selection (I use this when doing JPEG Real Estate shoots) Upper 3 - Flash Mode Upper 4 - Focus Mode Upper 5 - Smile/Face Detect Upper 6 - Steady Shot On/Off (make sure you turn it off when on a tripod) Lower 1 - Zebra - I leave this set to 100+, this allows me to dial in the exposure to the point where I just see the first hints of overexposure warning and then open up two stops from there since you have that much more headroom in the RAW files Lower 2 - Grid Line Lower 3 - Flash Compensation Lower 4 - ISO AUTO Minimum Shutter Speed - I generally leave this on FAST to protect against camera shake when shooting in Auto ISO mode Lower 5 - Focus Area - usually set to Flexible Spot: Small in order to focus on the smallest spot of my choosing Lower 6 - Steady Shot Focal Length - used to dial in the focal length of non-reporting third party lenses to optimize the cameras in-body image stabilization
Custom Buttons (Keys): Control Wheel - Not set (way too easy to accidentally roll it to allow anything to be assigned to it) Custom Button 1 - ISO Custom Button 2 - White Balance Custom Button 3 - Focus Magnifier Custom Button 4 - Bright Monitoring (allows you to see your scene even in pitch black) Center Button - Focus Settings Left Button - Drive Mode Right Button - Steady Shot On/Off Toggle Down Button - AF/MF Control Toggle AEL Button - AEL Hold AF/MF Button - AF On Focus Hold Button - Focus Hold

Additionally I have turned off the AF function on the shutter button by Setting AF w/ shutter to OFF. This allows the camera to operate just like a DSLR with back button focus using the button in the AF/MF control, right under your thumb to perform autofocus functions independent of the shutter button - my preferred way of shooting landscapes.
Glen Etive, Scotland (a7R II, 16-35mm)
The Sony Ecosystem - What's Missing? For the last two years, I have been using the Sony a7R (my review can be found here: http://www.ejphoto.com/Quack%20PDF/Quack%20Autumn%202015.pdf) and more recently the Sony a7R II as my primary landscape photography bodies with Sony, Sony-Zeiss, Carl Zeiss, Sigma, and Nikon lenses on these bodies with excellent results. I am now to the point where the only time I use my much bulkier, larger and harder to travel with Nikon bodies is for wildlife photography. During my recent trip to Scotland, where I only used the Sony a7R II and the lenses mentioned above, I lost the lens hood for my Sony Zeiss 24-70mm f/4; “not a big deal, I’ll order one when I get back to my hotel room and it will be waiting for me when I get home” or so I thought. Back in the hotel room, I went on the B&H site and this lens hood was nowhere to be found. Similar results at Adorama and every other supplier. Since I was in the UK, I also tried several UK retailers with the thought that they could ship it to the hotel since I had nearly a week left in Scotland when this loss occurred - again, no luck. A further search resulted in nothing in the EU or all of the Americas - Sony does not export this part. The part isn't even listed in the Sony USA or Sony EU parts list. I have never had a problem getting a common replacement part like this for Nikon, Canon, Sigma, Zeiss or anyone else, just Sony. I had to finally get one through a third party importer that buys the item in China. They add their own markup, and deal with the shipping, importing and customs clearance of the item. It takes 4 to 10 weeks for delivery and the total price was about $100 for an item that would sell for about $20 if Sony exported this common item. This episode had me thinking about why Sony, despite making the best sensors in the world and some of the best camera bodies in the world, cannot yet be taken seriously as a professional camera supplier. If they don’t make available simple replaceable things like a snap on plastic lens hood, one wonders what
other gotchas there are when committing to Sony. Here are some other thoughts on what Sony must do if they ever want to be taken seriously as a true full system professional camera supplier 1. As stated, parts for simple user replaceable things like lens hoods, plastic covers, etc must be exported
and available from the regular suppliers of gear for pros and serious amateur photographers. 2. Service, at least in the USA is subpar. Sony outsources all repair to a company called Precision
Camera Repair and their record is shaky. They seem to treat expensive professional level gear as if it were throw away consumer electronics. Often things like an AF motor replacement or stabilization unit, aligning lens elements, cleaning internal optics, and other common failures are deemed unrepairable for no apparent reason. This is fine for a $50 DVD player but not for cameras and lenses costing thousands of dollars. The horror stories of camera and lens repair in the US on Sony products is long and sordid. And even if they decide to fix it, plan on being without your gear for as much as 3 months.
3. While Sony has finally started a professional services in the USA (similar to the pay model that Canon uses), it is a mystery on how to become a member. I easily qualify for their professional services from both an equipment and published works perspective so I applied. For $100 a year, expedited service and some other benefits such as loaners during the repair period are promised. I filled out all of the paperwork and sent it to the specified email address... twice... it has now been two months and I have yet to receive as much as an acknowledgement that the paperwork was received. I don't think there is anyone actually monitoring this on Sony's end. This does not instill confidence and has professionals that want to use Sony products thinking twice...
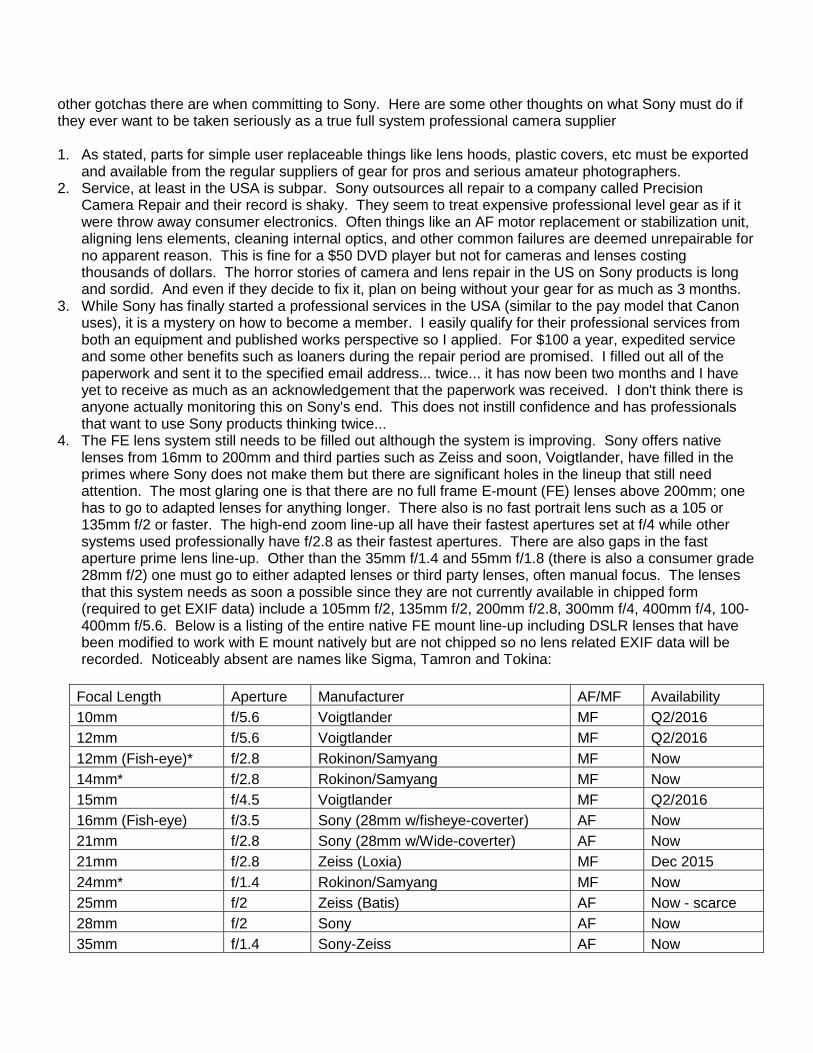
4. The FE lens system still needs to be filled out although the system is improving. Sony offers native lenses from 16mm to 200mm and third parties such as Zeiss and soon, Voigtlander, have filled in the primes where Sony does not make them but there are significant holes in the lineup that still need attention. The most glaring one is that there are no full frame E-mount (FE) lenses above 200mm; one has to go to adapted lenses for anything longer. There also is no fast portrait lens such as a 105 or 135mm f/2 or faster. The high-end zoom line-up all have their fastest apertures set at f/4 while other systems used professionally have f/2.8 as their fastest apertures. There are also gaps in the fast aperture prime lens line-up. Other than the 35mm f/1.4 and 55mm f/1.8 (there is also a consumer grade 28mm f/2) one must go to either adapted lenses or third party lenses, often manual focus. The lenses that this system needs as soon a possible since they are not currently available in chipped form (required to get EXIF data) include a 105mm f/2, 135mm f/2, 200mm f/2.8, 300mm f/4, 400mm f/4, 100-400mm f/5.6. Below is a listing of the entire native FE mount line-up including DSLR lenses that have been modified to work with E mount natively but are not chipped so no lens related EXIF data will be recorded. Noticeably absent are names like Sigma, Tamron and Tokina:
Focal Length Aperture Manufacturer AF/MF Availability 10mm f/5.6 Voigtlander MF Q2/2016 12mm f/5.6 Voigtlander MF Q2/2016 12mm (Fish-eye)* f/2.8 Rokinon/Samyang MF Now 14mm* f/2.8 Rokinon/Samyang MF Now 15mm f/4.5 Voigtlander MF Q2/2016 16mm (Fish-eye) f/3.5 Sony (28mm w/fisheye-coverter) AF Now 21mm f/2.8 Sony (28mm w/Wide-coverter) AF Now 21mm f/2.8 Zeiss (Loxia) MF Dec 2015 24mm* f/1.4 Rokinon/Samyang MF Now 25mm f/2 Zeiss (Batis) AF Now - scarce 28mm f/2 Sony AF Now 35mm f/1.4 Sony-Zeiss AF Now

35mm* f/1.4 Rokinon/Samyang MF Now 35mm f/2 Zeiss (Loxia) MF Now 35mm f/2.8 Sony-Zeiss AF Now 50mm* f/0.95 Mitagon MF Now 50mm* f/1.4 Rokinon/Samyang MF Now 50mm f/2 Zeiss (Loxia) MF Now 55mm f/1.8 Sony-Zeiss MF Now 85mm* f/1.2 Mitagon MF Now 85mm* f/1.4 Rokinon/Samyang MF Now 85mm f/1.8 Zeiss (Batis) AF Now - scarce 90mm (Macro) f/2.8 Sony AF Now 100mm (Macro)* f/2.8 Rokinon/Samyang MF Now 135mm* f/2 Rokinon/Samyang MF Now 16-35mm f/4 Sony-Zeiss AF Now 24-70mm f/4 Sony-Zeiss AF Now 28-70mm f/3.5-5.6 Sony AF Now 70-200 f/4 Sony AF Now * Rokinon/Samyang and Mitagon lenses are DSLR lenses with an extended barrel to accommodate the different flange distance of Sony E-mount and are not chipped so no EXIF data will be recorded. Essentially they just have the lens adapter built in.
5. The Sony flash system leaves a lot to be desired with no appropriately sized yet powerful flashes. Third parties have come to the rescue here so this isn’t a huge problem but Sony’s own flash system is just not ready for prime time and it needs to include things like radio triggers.
Sony now makes, what are among the very best cameras in the world and are the undisputed number one manufacturer of digital sensors but the ecosystem around these cameras needs continuous focus if they plan on capitalizing on the success of the a7 series of bodies among professionals and advanced amateurs. Software News I am not a fan of Adobe's subscription model for Creative Cloud applications like Photoshop. I simply cannot succumb to a commitment to pay a company every month for the rest of my life to simply work on my own photos. For this reason, I have continued to use Photoshop CS6 and the final version of Adobe Camera RAW for CS6 or ACR 9.1.1. Photoshop CS6 does everything I need it to do even though there are some desirable functions in the newer CC versions such as dehaze and some other more obscure features that aid in stacking multiple images taken seconds apart to eliminate people as they move through the frame in a photograph. These items can, however, be accomplished using other means. The real problem with my refusal to enter Adobe's lifelong pay every month like a utility approach, is that ACR 9.1.1 is now old enough that it is not supporting newer cameras and lenses from a RAW conversion and lens profile standpoint. Using Lightroom 6 for RAW processing is a solution but it is not an option as it simply does not work the way I work and I am not at all a fan of Adobe's catalogue model for image management. Additionally, all signs point to Adobe taking Lightroom to a subscription only model as well as there are now features in Lightroom CC that are not in the latest version of Lightroom 6. So, what to do?
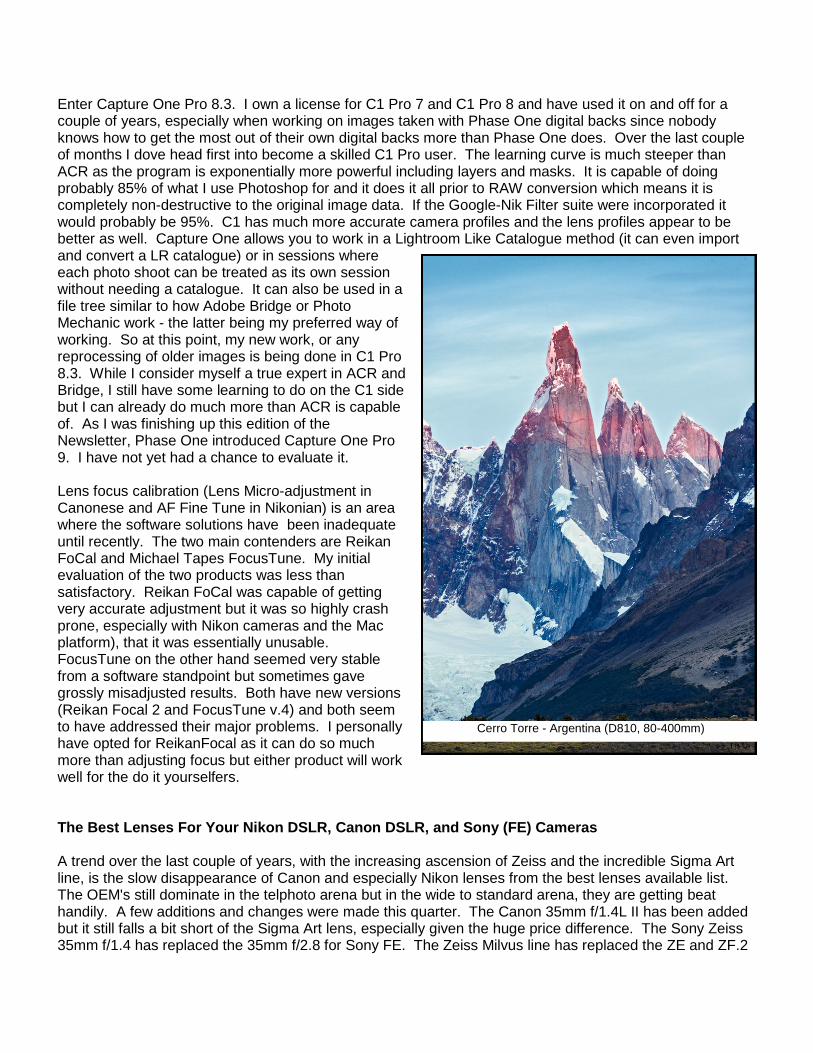
Enter Capture One Pro 8.3. I own a license for C1 Pro 7 and C1 Pro 8 and have used it on and off for a couple of years, especially when working on images taken with Phase One digital backs since nobody knows how to get the most out of their own digital backs more than Phase One does. Over the last couple of months I dove head first into become a skilled C1 Pro user. The learning curve is much steeper than ACR as the program is exponentially more powerful including layers and masks. It is capable of doing probably 85% of what I use Photoshop for and it does it all prior to RAW conversion which means it is completely non-destructive to the original image data. If the Google-Nik Filter suite were incorporated it would probably be 95%. C1 has much more accurate camera profiles and the lens profiles appear to be better as well. Capture One allows you to work in a Lightroom Like Catalogue method (it can even import and convert a LR catalogue) or in sessions where each photo shoot can be treated as its own session without needing a catalogue. It can also be used in a file tree similar to how Adobe Bridge or Photo Mechanic work - the latter being my preferred way of working. So at this point, my new work, or any reprocessing of older images is being done in C1 Pro 8.3. While I consider myself a true expert in ACR and Bridge, I still have some learning to do on the C1 side but I can already do much more than ACR is capable of. As I was finishing up this edition of the Newsletter, Phase One introduced Capture One Pro 9. I have not yet had a chance to evaluate it. Lens focus calibration (Lens Micro-adjustment in Canonese and AF Fine Tune in Nikonian) is an area where the software solutions have been inadequate until recently. The two main contenders are Reikan FoCal and Michael Tapes FocusTune. My initial evaluation of the two products was less than satisfactory. Reikan FoCal was capable of getting very accurate adjustment but it was so highly crash prone, especially with Nikon cameras and the Mac platform), that it was essentially unusable. FocusTune on the other hand seemed very stable from a software standpoint but sometimes gave grossly misadjusted results. Both have new versions (Reikan Focal 2 and FocusTune v.4) and both seem to have addressed their major problems. I personally have opted for ReikanFocal as it can do so much more than adjusting focus but either product will work well for the do it yourselfers. The Best Lenses For Your Nikon DSLR, Canon DSLR, an d Sony (FE) Cameras A trend over the last couple of years, with the increasing ascension of Zeiss and the incredible Sigma Art line, is the slow disappearance of Canon and especially Nikon lenses from the best lenses available list. The OEM's still dominate in the telphoto arena but in the wide to standard arena, they are getting beat handily. A few additions and changes were made this quarter. The Canon 35mm f/1.4L II has been added but it still falls a bit short of the Sigma Art lens, especially given the huge price difference. The Sony Zeiss 35mm f/1.4 has replaced the 35mm f/2.8 for Sony FE. The Zeiss Milvus line has replaced the ZE and ZF.2
Cerro Torre - Argentina (D810, 80-400mm)
variants and the Otus 28mm has been added. Finally, the new Nikon 200-500 has been added in the Super Telephoto zoom category - an very good lens at an excellent price. Lens Category Canon EF Mount Nikon F Mount Sony (F)E Mount Ultra Wide Prime Zeiss 15mm f/2.8 ZE
Canon TS-E 17mm f/4 Zeiss 15mm f/2.8 ZF.2 N/A
Extra Wide Prime Zeiss Milvus 21mm f/2.8 Sigma 20mm f/1.4
Zeiss Milvus 21mm f/2.8 Sigma 20mm f/1.4
Zeiss Loxia 21mm f/2.8
Standard Wide Prime Sigma 24mm f/1.4 Art Zeiss Milvus 25mm f/2
Sigma 24mm f/1.4 Art Zeiss Milvus 25mm f/2
Zeiss Batis 2/25 Sony 28mm f/2
Moderate Wide Prime Sigma 35mm f/1.4 Canon 35mm f/1.4L II
Sigma 35mm f/1.4 Tamron 35mm f/1.8
Sony-Zeiss 35mm f/1.4 Zeiss Loxia 2/35
Standard Prime Zeiss 55mm f/1.4 Otus Sigma 50mm f/1.4 DG Art
Zeiss 55mm f/1.4 Otus Sigma 50mm f/1.4 DG Art
Sony-Zeiss 55mm f/1.8 Zeiss Loxia 2/50
Portrait Prime (short telephoto)
Zeiss 85mm f/1.4 Otus Canon 85mm f/1.2L II
Zeiss 85mm f/1.4 Otus Nikon 85mm f/1.8G
Zeiss Batis 1.8/85 Sony FE 90mm f/2.8 Macro
Medium Telephoto Zeiss 135mm f/2 Apo Sonnar ZE Canon 135mm f/2L
Zeiss 135mm f/2 Apo Sonnar ZF.2 Sigma 150mm f/2.8 Macro OS
N/A
200mm Prime Canon 200mm f/2L Canon 200mm f/2.8L II
Nikon 200mm f/2G Nikon Micro Nikkor 200mm f/4ED
N/A
300mm Prime Canon 300mm f/2.8L IS II Nikon 300mm f/2.8G VR Nikon 300mm f/4 PF
N/A
400mm Prime Canon 400mm f/2.8L IS II Canon 400mm f/4 DO II
Nikon 400mm f/2.8E VR N/A
500mm Prime Canon 500mm f/4L IS II Nikon 500mm f/4E VR N/A 600mm Prime Canon 600mm f/4L IS II Nikon 600mm f/4E VR N/A 800mm Prime Canon 800mm f/5.6L IS
Sigma 800mm f/5.6APO DG Nikon 800mm f/5.6E VR Sigma 800mm f/5.6APO DG
N/A
Wide Angle Zoom Canon 11-24mm f/4L Canon 16-35mm f/4L IS
Nikon 14-24mm f/2.8G Tamron 15-30mm f/2.8 Di VC
Sony-Zeiss 16-35 f/4
Standard Zoom Canon 24-70mm f/2.8L II Tamron 24-70mm f/2.8 Di VC
Tamron 24-70mm f/2.8 Di VC Nikon 24-70mm f/2.8E VR
Sony-Zeiss 24-70 f/4
Telephoto Zoom Canon 70-200mm f/2.8L IS II Canon 70-200mm f/4L IS
Nikon 70-200mm f/4G VR Nikon 70-200mm f/2.8L VR II
Sony 70-200 f/4 G
Super Telephoto Zoom Canon 200-400mm f/4L 1.4x Ext Canon 100-400 f/4.5-5.6 II
Sigma 150-600 f/4.5-6.3 Sport Nikon 200-500 f/5.6 VR
Long Macro Sigma 150mm f/2.8 Macro OS Nikon Micro Nikkor 200mm f/4ED
Sony 90mm f/2.8 Macro
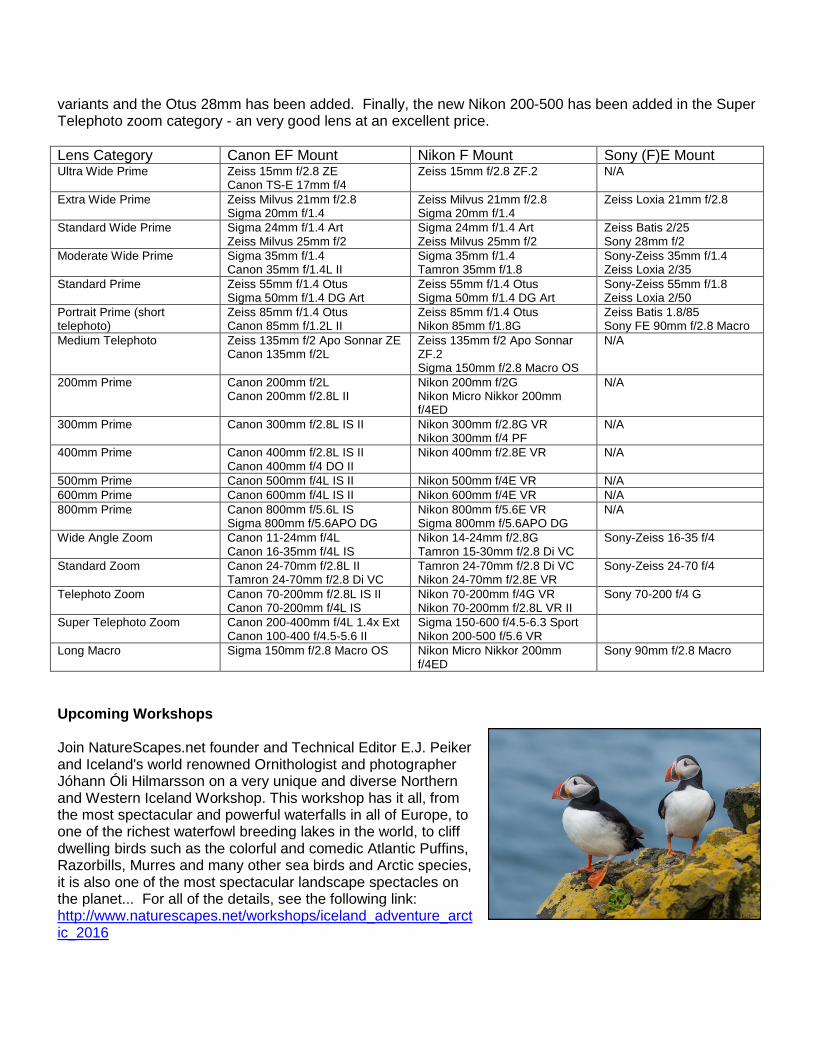
Upcoming Workshops Join NatureScapes.net founder and Technical Editor E.J. Peiker and Iceland's world renowned Ornithologist and photographer Jóhann Óli Hilmarsson on a very unique and diverse Northern and Western Iceland Workshop. This workshop has it all, from the most spectacular and powerful waterfalls in all of Europe, to one of the richest waterfowl breeding lakes in the world, to cliff dwelling birds such as the colorful and comedic Atlantic Puffins, Razorbills, Murres and many other sea birds and Arctic species, it is also one of the most spectacular landscape spectacles on the planet... For all of the details, see the following link: http://www.naturescapes.net/workshops/iceland_adventure_arctic_2016
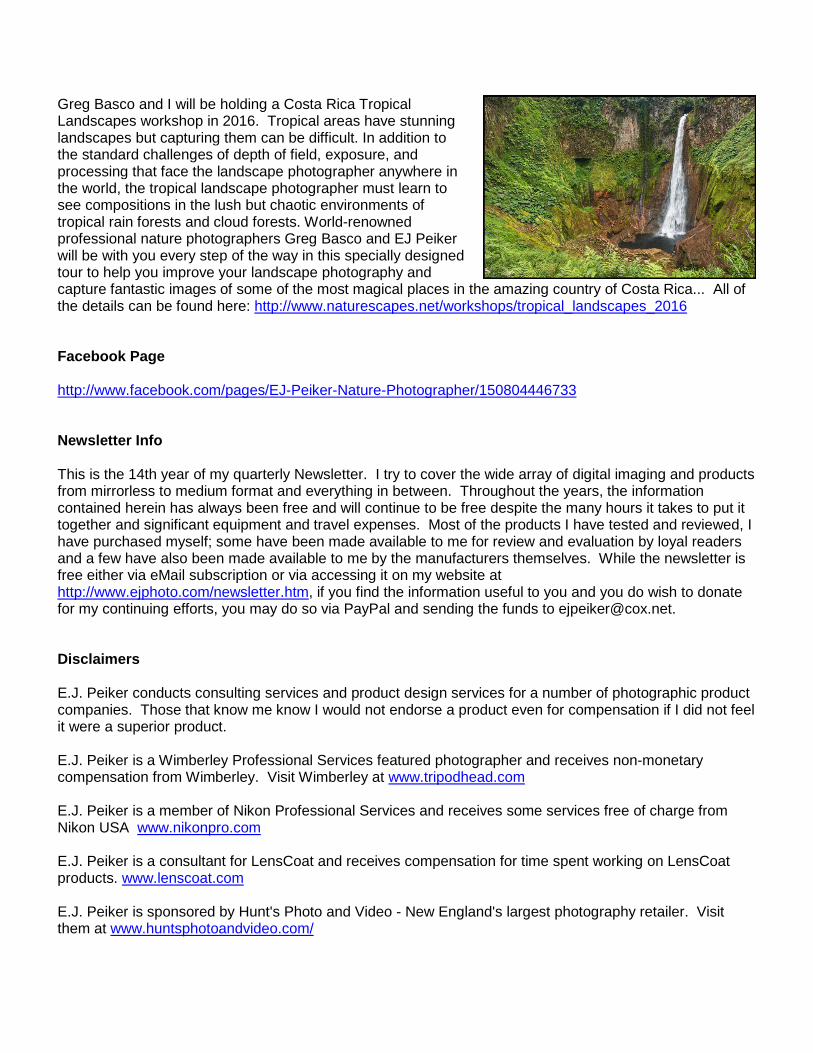
Greg Basco and I will be holding a Costa Rica Tropical Landscapes workshop in 2016. Tropical areas have stunning landscapes but capturing them can be difficult. In addition to the standard challenges of depth of field, exposure, and processing that face the landscape photographer anywhere in the world, the tropical landscape photographer must learn to see compositions in the lush but chaotic environments of tropical rain forests and cloud forests. World-renowned professional nature photographers Greg Basco and EJ Peiker will be with you every step of the way in this specially designed tour to help you improve your landscape photography and capture fantastic images of some of the most magical places in the amazing country of Costa Rica... All of the details can be found here: http://www.naturescapes.net/workshops/tropical_landscapes_2016 Facebook Page http://www.facebook.com/pages/EJ-Peiker-Nature-Photographer/150804446733 Newsletter Info This is the 14th year of my quarterly Newsletter. I try to cover the wide array of digital imaging and products from mirrorless to medium format and everything in between. Throughout the years, the information contained herein has always been free and will continue to be free despite the many hours it takes to put it together and significant equipment and travel expenses. Most of the products I have tested and reviewed, I have purchased myself; some have been made available to me for review and evaluation by loyal readers and a few have also been made available to me by the manufacturers themselves. While the newsletter is free either via eMail subscription or via accessing it on my website at http://www.ejphoto.com/newsletter.htm, if you find the information useful to you and you do wish to donate for my continuing efforts, you may do so via PayPal and sending the funds to [email protected]. Disclaimers E.J. Peiker conducts consulting services and product design services for a number of photographic product companies. Those that know me know I would not endorse a product even for compensation if I did not feel it were a superior product. E.J. Peiker is a Wimberley Professional Services featured photographer and receives non-monetary compensation from Wimberley. Visit Wimberley at www.tripodhead.com E.J. Peiker is a member of Nikon Professional Services and receives some services free of charge from Nikon USA www.nikonpro.com E.J. Peiker is a consultant for LensCoat and receives compensation for time spent working on LensCoat products. www.lenscoat.com E.J. Peiker is sponsored by Hunt's Photo and Video - New England's largest photography retailer. Visit them at www.huntsphotoandvideo.com/

E.J. Peiker is a co-founder of www.Naturescapes.net and leads photographic workshops under the NatureScapes Certified Workshops banner Legal Notice: Written and Photographic Content ©2015 E.J. Peiker, Nature Photographer. The text and photographs contained herein may not be copied or reproduced without written consent. This newsletter may be forwarded without restriction unaltered and in its entirety only.
Torres del Paine (D810, 24-70mm)