Embed Size (px)
DESCRIPTION
QRadar 7.2.2 HA Documentation
Citation preview

Note: Before using this information and the product that it supports, read the information in Notices and Trademarks on page 47.
© Copyright IBM Corp. 2012, 2014 All Rights Reserved US Government Restricted Rights - Use, duplication or disclosure restricted by GSA ADP Schedule Contract with IBM Corp.
CONTENTS
INTRODUCTION TO IBM SECURITY QRADAR HIGH AVAILABILITY
Intended audience . . . . . . . . . . . . . . . . . . . . . . . . . . . . . . . . . . . . . . . . . . . . . . . . . . . . 1
Technical documentation . . . . . . . . . . . . . . . . . . . . . . . . . . . . . . . . . . . . . . . . . . . . . . . 1
Contacting customer support . . . . . . . . . . . . . . . . . . . . . . . . . . . . . . . . . . . . . . . . . . . . 1
Statement of good security practices . . . . . . . . . . . . . . . . . . . . . . . . . . . . . . . . . . . . . . 1
1 HIGH-AVAILABILITY OVERVIEW
High-availability data consistency . . . . . . . . . . . . . . . . . . . . . . . . . . . . . . . . . . . . . . . . 3
Real-time data synchronization. . . . . . . . . . . . . . . . . . . . . . . . . . . . . . . . . . . . . . . . 4
Post-failover data synchronization . . . . . . . . . . . . . . . . . . . . . . . . . . . . . . . . . . . . . 4
High-availability clusters . . . . . . . . . . . . . . . . . . . . . . . . . . . . . . . . . . . . . . . . . . . . . . . 5
Primary HA host . . . . . . . . . . . . . . . . . . . . . . . . . . . . . . . . . . . . . . . . . . . . . . . . . . . 5
Secondary HA host. . . . . . . . . . . . . . . . . . . . . . . . . . . . . . . . . . . . . . . . . . . . . . . . . 5
Cluster virtual IP address . . . . . . . . . . . . . . . . . . . . . . . . . . . . . . . . . . . . . . . . . . . . 5
HA wizard . . . . . . . . . . . . . . . . . . . . . . . . . . . . . . . . . . . . . . . . . . . . . . . . . . . . . . . . 5
HA failovers . . . . . . . . . . . . . . . . . . . . . . . . . . . . . . . . . . . . . . . . . . . . . . . . . . . . . . . . . 6
Primary HA host failure. . . . . . . . . . . . . . . . . . . . . . . . . . . . . . . . . . . . . . . . . . . . . . 6
Secondary HA host failure . . . . . . . . . . . . . . . . . . . . . . . . . . . . . . . . . . . . . . . . . . . 6
Non-failover scenarios . . . . . . . . . . . . . . . . . . . . . . . . . . . . . . . . . . . . . . . . . . . . . . 6
HA failover event sequence . . . . . . . . . . . . . . . . . . . . . . . . . . . . . . . . . . . . . . . . . . 7
Network connectivity tests . . . . . . . . . . . . . . . . . . . . . . . . . . . . . . . . . . . . . . . . . . . 7
Heartbeat ping tests . . . . . . . . . . . . . . . . . . . . . . . . . . . . . . . . . . . . . . . . . . . . . . . . 7
Primary disk failure . . . . . . . . . . . . . . . . . . . . . . . . . . . . . . . . . . . . . . . . . . . . . . . . . 7
Manual failovers . . . . . . . . . . . . . . . . . . . . . . . . . . . . . . . . . . . . . . . . . . . . . . . . . . . 7
2 PLAN YOUR HIGH-AVAILABILITY DEPLOYMENT
QRadar software installations for HA and XFS file systems . . . . . . . . . . . . . . . . . . . . 9
Appliance requirements . . . . . . . . . . . . . . . . . . . . . . . . . . . . . . . . . . . . . . . . . . . . . . . . 9
Software and virtual appliance requirements . . . . . . . . . . . . . . . . . . . . . . . . . . . . 10
IP addressing and subnets . . . . . . . . . . . . . . . . . . . . . . . . . . . . . . . . . . . . . . . . . . . . 11
Link bandwidth and latency . . . . . . . . . . . . . . . . . . . . . . . . . . . . . . . . . . . . . . . . . . . . 11
Backup considerations. . . . . . . . . . . . . . . . . . . . . . . . . . . . . . . . . . . . . . . . . . . . . . . . 11
Offboard storage requirements for high-availability . . . . . . . . . . . . . . . . . . . . . . . . . . 12
3 HIGH-AVAILABILITY MANAGEMENT
Monitor the High-availability hosts status. . . . . . . . . . . . . . . . . . . . . . . . . . . . . . . . . . 13
Displaying HA cluster IP addresses . . . . . . . . . . . . . . . . . . . . . . . . . . . . . . . . . . . . . .15
Creating an HA cluster . . . . . . . . . . . . . . . . . . . . . . . . . . . . . . . . . . . . . . . . . . . . . . . .15
Disconnecting an HA cluster . . . . . . . . . . . . . . . . . . . . . . . . . . . . . . . . . . . . . . . . . . .17
Updating the /etc/fstab file. . . . . . . . . . . . . . . . . . . . . . . . . . . . . . . . . . . . . . . . . . .17
Editing an HA cluster . . . . . . . . . . . . . . . . . . . . . . . . . . . . . . . . . . . . . . . . . . . . . . . . .18
Setting an HA host offline . . . . . . . . . . . . . . . . . . . . . . . . . . . . . . . . . . . . . . . . . . . . . .18
Setting an HA host online. . . . . . . . . . . . . . . . . . . . . . . . . . . . . . . . . . . . . . . . . . . . . .19
Switching a primary HA host to active . . . . . . . . . . . . . . . . . . . . . . . . . . . . . . . . . . . .19
4 TUNE HIGH-AVAILABILITY
Partition splitting . . . . . . . . . . . . . . . . . . . . . . . . . . . . . . . . . . . . . . . . . . . . . . . . . . . . .21
Prepare for HA partition splitting. . . . . . . . . . . . . . . . . . . . . . . . . . . . . . . . . . . . . . . . .22
Estimating partition sizes. . . . . . . . . . . . . . . . . . . . . . . . . . . . . . . . . . . . . . . . . . . .22
Partitioning a primary and secondary HA host . . . . . . . . . . . . . . . . . . . . . . . . . . .22
HA crossover cables. . . . . . . . . . . . . . . . . . . . . . . . . . . . . . . . . . . . . . . . . . . . . . . . . .24
Prepare for HA crossover . . . . . . . . . . . . . . . . . . . . . . . . . . . . . . . . . . . . . . . . . . . . . .24
Configuring crossover cable between HA hosts . . . . . . . . . . . . . . . . . . . . . . . . . .24
5 REINSTALL OR RECOVER QRADAR HIGH-AVAILABILITY APPLIANCES
QRadar activation keys . . . . . . . . . . . . . . . . . . . . . . . . . . . . . . . . . . . . . . . . . . . . . . .27
QRadar build versions . . . . . . . . . . . . . . . . . . . . . . . . . . . . . . . . . . . . . . . . . . . . . . . .27
Notebook hyperterminal connections . . . . . . . . . . . . . . . . . . . . . . . . . . . . . . . . . . . . .28
QRadar network connections . . . . . . . . . . . . . . . . . . . . . . . . . . . . . . . . . . . . . . . . . . .28
Recovering a secondary HA console or non-console. . . . . . . . . . . . . . . . . . . . . . . . .29
Recovering a failed primary HA appliance . . . . . . . . . . . . . . . . . . . . . . . . . . . . . . . . .30
Recovering a failed secondary HA host to QRadar 7.1 . . . . . . . . . . . . . . . . . . . . . . .31
Recovering a failed secondary HA Host to QRadar 7.1 (MR2) . . . . . . . . . . . . . . . . .32
Recovering a failed primary HA QFlow appliance . . . . . . . . . . . . . . . . . . . . . . . . . . .33
Recovering QRadar on a secondary HA console or non-console system . . . . . . . . .34
Recovering QRadar on a failed primary HA console or non-console . . . . . . . . . . . . .36
Recovering a secondary HA host to a previous version or factory default . . . . . . . . .37
6 TROUBLESHOOT QRADAR HIGH-AVAILABILITY
High-availability status overview. . . . . . . . . . . . . . . . . . . . . . . . . . . . . . . . . . . . . . . . .39
Verifying that the secondary HA host is operational . . . . . . . . . . . . . . . . . . . . . . . . . .40
Restoring a failed secondary HA host . . . . . . . . . . . . . . . . . . . . . . . . . . . . . . . . . .40
Verifying that the primary HA host is operational . . . . . . . . . . . . . . . . . . . . . . . . . . . .41
Restoring a failed primary HA host . . . . . . . . . . . . . . . . . . . . . . . . . . . . . . . . . . . .41
Verifying the status of primary and secondary hosts . . . . . . . . . . . . . . . . . . . . . . . . .43
Identifying the recently active HA host in your HA cluster. . . . . . . . . . . . . . . . . . .44
Setting a primary host online . . . . . . . . . . . . . . . . . . . . . . . . . . . . . . . . . . . . . . . . . . .45
A NOTICES AND TRADEMARKS
Notices . . . . . . . . . . . . . . . . . . . . . . . . . . . . . . . . . . . . . . . . . . . . . . . . . . . . . . . . . . . .47
Trademarks . . . . . . . . . . . . . . . . . . . . . . . . . . . . . . . . . . . . . . . . . . . . . . . . . . . . . . . .49
Privacy policy considerations . . . . . . . . . . . . . . . . . . . . . . . . . . . . . . . . . . . . . . . . . . .49

INDEX

INTRODUCTION TO IBM SECURITY QRADAR HIGH AVAILABILITY
This information is intended for use with IBM® Security QRadar® and provides information on how to protect your QRadar data by implementing a High Availability (HA) solution.
Unless otherwise noted, all references to QRadar refer to IBM Security QRadar SIEM and IBM Security QRadar Log Manager.
Intended audience System administrators responsible for configuring high availability must have administrative access to IBM Security QRadar and your network devices and firewalls. The system administrator must have knowledge of your corporate network and networking technologies.
Technical documentation
For information on how to access more technical documentation, technical notes, and release notes, see the Accessing IBM Security QRadar Documentation Technical Note. (http://www.ibm.com/support/docview.wss?rs=0&uid=swg21612861)
Contacting customer support
For information on contacting customer support, see the Support and Download Technical Note. (http://www.ibm.com/support/docview.wss?rs=0&uid=swg21612861)
Statement of good security practices
IT system security involves protecting systems and information through prevention, detection and response to improper access from within and outside your enterprise. Improper access can result in information being altered, destroyed, misappropriated or misused or can result in damage to or misuse of your systems, including for use in attacks on others. No IT system or product should be considered completely secure and no single product, service or security measure can be completely effective in preventing improper use or access. IBM systems, products and services are designed to be part of a comprehensive security approach, which will necessarily involve additional operational procedures, and may require other systems, products or services to be most effective. IBM DOES NOT WARRANT THAT ANY SYSTEMS, PRODUCTS OR
IBM Security QRadar High Availability Guide

2 INTRODUCTION TO IBM SECURITY QRADAR HIGH AVAILABILITY
SERVICES ARE IMMUNE FROM, OR WILL MAKE YOUR ENTERPRISE IMMUNE FROM, THE MALICIOUS OR ILLEGAL CONDUCT OF ANY PARTY.
IBM Security QRadar High Availability Guide
1
HIGH-AVAILABILITY OVERVIEWIf your hardware or network fails, then IBM Security QRadar continues to collect, store, and process event and flow data, by using high-availability (HA) appliances.
To enable HA, QRadar connects a primary HA host with a secondary HA host to create an HA cluster. For more information, see High-availability clusters.
If a primary HA host fails, then the secondary HA host maintains access to the same data as the primary by using data synchronization or shared external storage. For information, see High-availability data consistency.
For more information about using shared external storage with HA, for example iSCSI, Fibre Channel, or NFS, see the IBM Security QRadar Offboard Storage Guide.
Unless otherwise noted, all references to QRadar refer to IBM Security QRadar SIEM and IBM Security QRadar Log Manager.
High-availability data consistency
When there is an HA failover, QRadar ensures the consistency of your data.
The type of storage that you use determines how HA data consistency is maintained. If you configure HA with external storage, data consistency is maintained by using a component such as an iSCSI or Fibre Channel external storage device. For more information, see Offboard storage requirements for high-availability.
If you do not use external storage devices, then QRadar HA maintains data consistency between a primary and secondary HA host by using Distributed Replicated Block Device (DRBD).
DRBD is not enabled by default for IBM Security QRadar QFlow Collectors. To synchronize QRadar QFlow data, you must configure an HA cluster by using the console or managed host that is collecting QRadar QFlow data.
In an HA environment, data synchronization is performed in the following situations:
• When you initially configure an HA cluster.
IBM Security QRadar High Availability Guide
4 HIGH-AVAILABILITY OVERVIEW
• When a primary HA host is restored after a failover.
• During normal HA operation, data is synchronized in real-time between the primary and secondary host.
Note: The Asset Profiler can impact the speed of DRBD synchronization if the asset profiler is running a large number of assets. If DRBD synchronization is slow, stop both event and flow traffic that generate assets.
Real-time datasynchronization
When you configure an HA cluster, the /store file system on the primary HA host is automatically synchronized with the /store partition on the secondary HA host by using DRBD.
Depending on the size of the primary /store partition and performance, disk synchronization can take an extended time period. Ensure that the connection between the primary and secondary HA host has a minimum bandwidth of 1 gigabits per second (Gbps). It might take 24 hours or more for the data on the primary HA host /store partition to initially synchronize with the secondary HA host.
If the primary HA host fails over, the /store file system on the secondary HA host is automatically mounted to its local disk, where it continues to read from and write to the data received by the primary HA host before the failover.
After synchronization is complete, the secondary HA host assumes a status of standby. For more information about the status of the hosts in your HA cluster, see Monitor the High-availability hosts status.
Post-failover datasynchronization
Data that is collected by a primary HA host up to the point of failover is maintained virtually, in real time, by the secondary HA host by using DRBD.
When restored from a failover, the primary HA host assumes a status of offline. You must set the primary HA host to the online state before it becomes the active host. Disk replication with the secondary HA host is enabled while the primary HA host remains offline. For more information about setting the primary HA host online, see Setting an HA host online.
When the primary HA host is restored, only the data that is collected by the secondary HA host in the intervening period is synchronized with the primary HA host. Therefore, post-failover disk synchronization is faster than initial disk synchronization, unless the disk on the primary HA host was replaced or reformatted when the host was manually repaired.
IBM Security QRadar High Availability Guide

High-availability clusters 5
High-availability clusters
An HA cluster consists of a primary HA host, a secondary HA host, and cluster virtual IP address.
For more information about creating an HA cluster, see Creating an HA cluster.
Primary HA host The primary HA host is any console or managed host in your QRadar deployment that requires protection from data loss in the event of a failure.
When you create an HA cluster, the IP address of the primary HA host is automatically reassigned to a cluster virtual IP address. Therefore, you must assign an unused IP address to the primary HA host. For more information, see Creating an HA cluster.
The primary HA host can act as a standby system for the secondary HA host. For example, if the primary HA host is repaired after a failover, it assumes a standby status. For more information, see Primary HA host failure.
Secondary HA host The secondary HA host is the standby system for the primary HA host.
If the primary HA host fails, the secondary HA host automatically assumes all the responsibilities of the primary HA host.
Cluster virtual IPaddress
When you create an HA cluster, the cluster virtual IP address assumes the IP address of the primary HA host.
The cluster virtual IP address is used by the host in your HA deployment that has a status of active. For more information, see Monitor the High-availability hosts status.
HA wizard Use the HA wizard to configure the primary host, secondary host, and cluster virtual IP address.
For more information about creating an HA cluster, see Creating an HA cluster.
The following validation is performed by the HA wizard:
• Verification that the secondary HA host has a valid HA activation key.
• Verification that the secondary HA host is not part of another HA cluster.
• Verification that the software versions on the primary and secondary HA hosts are the same.
• Detects if the primary HA host is configured with an external storage device. If successful, the HA wizard attempts to verify that the secondary HA host is configured to access the same external storage device.
• Verifies that the primary and secondary HA hosts support the same Device Support Module (DSM), scanner, and protocol RPMs.
IBM Security QRadar High Availability Guide
6 HIGH-AVAILABILITY OVERVIEW
HA failovers When a primary or secondary HA host fails, QRadar maintains data consistency.
Scenarios that cause failover include:
• A power supply failure.
• A network failure that is detected by network connectivity tests, see Network connectivity tests.
• An operating system malfunction that delays or stops the heartbeat ping tests, see Heartbeat ping tests.
• A complete Redundant Array of Independent Disks (RAID) failure on the primary HA host.
• A manual failover. For more information, see Manual failovers.
• A management interface failure on the primary HA host.
Primary HA hostfailure
If the secondary HA host detects a primary failure, it automatically assumes the responsibilities of the primary HA host and becomes the active system.
When a primary HA host is recovered from a failover, it does not automatically assume the active status in the HA cluster. Instead, the secondary HA host remains the active system and the primary host acts as the standby system.
You must switch the primary back to the active status, after successfully recovering from a primary failure. For more information, see Switching a primary HA host to active.
Secondary HA hostfailure
If the primary HA host detects a secondary failure, it automatically assumes the responsibilities of the secondary HA host and becomes the active system.
Non-failoverscenarios
HA failover is not performed when QRadar detects software errors or disk capacity issues.
The following scenarios do not cause an automatic HA failover:
• If a QRadar process develops an error, stops functioning, or exits with an error.
• If a disk on your primary HA host reaches 95% capacity, QRadar data collection stops, but the primary HA host continues to function.
IBM Security QRadar High Availability Guide
HA failovers 7
HA failover eventsequence
QRadar initiates a sequence of events when a primary HA host fails.
During failover, the secondary HA host assumes the responsibilities of the primary HA host by performing the following actions in sequence:
1 If configured, external shared storage devices are detected and the file systems are mounted. For more information, see the IBM Security QRadar Offboard Storage Guide.
2 A management interface network alias is created. For example, the network alias for eth0 is eth0:0.
3 The cluster virtual IP address is assigned to the network alias.
4 All QRadar services are started.
5 The secondary HA host connects to the console and downloads configuration files.
Network connectivitytests
To test network connectivity, the primary HA host automatically pings all existing managed hosts in your QRadar deployment.
If the primary HA host loses network connectivity to a managed host, but the connection to the secondary HA host remains intact, the secondary HA host performs another network connectivity test with the managed hosts. If the test succeeds, the primary HA host performs a controlled failover to the secondary HA host. If the test fails, HA failover is not performed because the secondary HA host might also be experiencing network connectivity problems.
For information about configuring HA network connectivity tests, see Creating an HA cluster.
Heartbeat ping tests You can test the operation of the primary HA host by configuring the time interval of heartbeat ping tests.
If the secondary HA host does not receive a response from the primary HA host within a preconfigured time period, automatic failover to the secondary HA host is performed. For information about configuring heartbeat ping time intervals, see Creating an HA cluster.
Primary disk failure If RAID completely fails and all disks are unavailable, the primary HA host performs a shutdown and fails over to the secondary HA host.
After a failover, the primary HA host assumes a status of Failed. For information about the status of the hosts in your HA cluster, see Monitor the High-availability hosts status.
Manual failovers You can manually force a failover from a primary HA host to a secondary HA host.
IBM Security QRadar High Availability Guide

8 HIGH-AVAILABILITY OVERVIEW
This is useful for planned hardware maintenance on a console or managed host. Before you perform a manual failover, you must ensure that:
• The primary and secondary HA hosts are synchronized.
• The secondary HA host has a status of standby.
To perform hardware maintenance on a primary and secondary HA host while the secondary HA host is in standby, set the secondary HA host offline and power off the primary HA host. If the primary and secondary HA hosts are synchronizing, power off the primary.
For more information about manual failovers, see Setting an HA host offline.
Attention: Do not manually force a failover on a primary HA host when you install patches or perform software upgrades. For more information, see the IBM Security QRadar SIEM Upgrade Guide or the IBM Security QRadar Log Manager Upgrade Guide.
IBM Security QRadar High Availability Guide
2
PLAN YOUR HIGH-AVAILABILITY DEPLOYMENTBefore you implement high-availability (HA), you must review all the requirements in this section to understand and prepare your IBM Security QRadar deployment.
QRadar software installations for HA and XFS file systems
As part of configuring high availability (HA), the QRadar installer requires a minimal amount of free space in the storage file system, /store/, for replication processes. Space must be allocated in advance because XFS file systems cannot be reduced in size after they are formatted.
For more information, see the IBM Security QRadar Installation Guide.
Appliance requirements
Before you add a secondary host to your QRadar Console, you must review the hardware configuration differences between your primary and secondary appliances.
Appliances that you order as primary and secondary HA pairs are matched to ensure compatibility. However, replacing an appliance or adding HA to an older Console with a different hardware configuration can lead to data replication issues. This can occur when you replace end-of-life hardware or create primary and secondary HA pairs using appliances from different manufacturers.
High-availability appliance requirements:
• The file system of the /store partition must match between your primary and secondary host.
For example, if the /store partition on the primary uses ext-3 as the file system, then your secondary must also use ext-3 for /store. A mismatch of the file system for the /store partition is not allowed.
• The size of the /store partition on the secondary must be equal to or larger than the /store partition of the primary.
For example, do not pair a primary host that uses a 3 TB /store partition to a secondary host that has a 2 TB /store partition.
Storage requirements when you replace an appliance:
- Ensure the replacement appliance includes storage capacity equal to or greater than the original hardware you replace.
IBM Security QRadar High Availability Guide
10 PLAN YOUR HIGH-AVAILABILITY DEPLOYMENT
- Secondary replacement appliances can have larger storage capacity than the primary appliance. When this occurs, partitions on the secondary are resized to match the storage capacity of the primary appliance when you configure the HA pair.
- Primary replacement appliances can have larger storage capacity than the secondary appliance. When this occurs, partitions on the primary are resized to match the storage capacity of the secondary appliance when you configure the HA pair.
- If you replace both primary and secondary appliances, then the system resizes the storage partition based on the appliance with the smallest capacity.
• The primary host should not contain more physical interfaces than the secondary.
In the event of a failover, the network configuration of the primary is replicated to the secondary host. If the primary is configured with more interfaces, any additional interfaces cannot be replicated to the secondary during a failover.
• The secondary host must use the same management interface as the primary HA host.
For example, if the primary HA host uses ETH0 as the management interface, the secondary HA host must also use ETH0.
• The management interface supports one cluster virtual IP address.
• TCP port 7789 must be open and allow communication between the primary and secondary for Distributed Replicated Block Device (DRBD) traffic.
DRBD traffic is responsible for disk replication and is bidirectional between the primary and secondary host.
• You must ensure the QRadar software version is identical between the primary and secondary host before you pair a primary to a secondary appliance for the first time.
For example, a primary host with QRadar software 7.1.0.495292 can only be paired to a secondary host with QRadar 7.1.0.495292 installed. If the QRadar version between your primary and secondary differ, you must patch either the primary or secondary appliance to ensure both appliances use the same software version.
After the primary and secondary appliances are paired together, disk replication ensures any additional software updates are also applied to the secondary.
• Ensure the secondary host has a valid HA activation key.
Software and virtualappliance
requirements
If you install QRadar software on your own hardware or use virtual appliances, you must review the following requirements before you attempt to configure HA.
IBM Security QRadar High Availability Guide
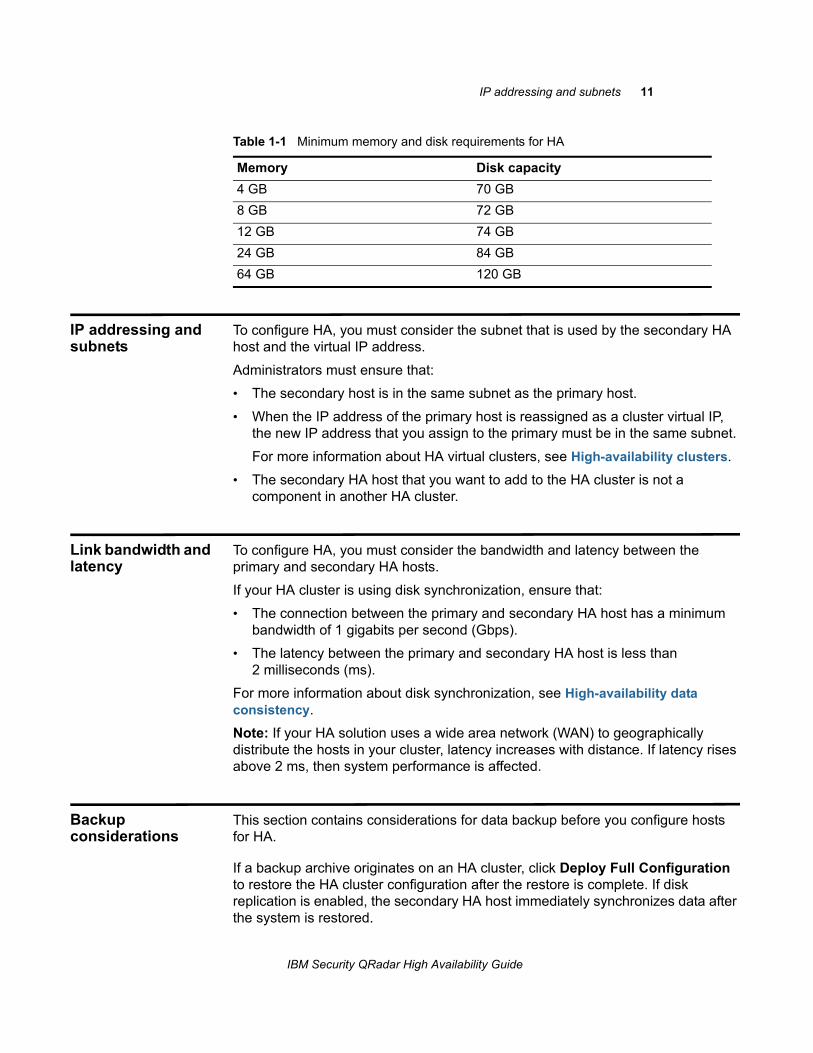
IP addressing and subnets 11
IP addressing and subnets
To configure HA, you must consider the subnet that is used by the secondary HA host and the virtual IP address.
Administrators must ensure that:
• The secondary host is in the same subnet as the primary host.
• When the IP address of the primary host is reassigned as a cluster virtual IP, the new IP address that you assign to the primary must be in the same subnet.
For more information about HA virtual clusters, see High-availability clusters.
• The secondary HA host that you want to add to the HA cluster is not a component in another HA cluster.
Link bandwidth and latency
To configure HA, you must consider the bandwidth and latency between the primary and secondary HA hosts.
If your HA cluster is using disk synchronization, ensure that:
• The connection between the primary and secondary HA host has a minimum bandwidth of 1 gigabits per second (Gbps).
• The latency between the primary and secondary HA host is less than 2 milliseconds (ms).
For more information about disk synchronization, see High-availability data consistency.
Note: If your HA solution uses a wide area network (WAN) to geographically distribute the hosts in your cluster, latency increases with distance. If latency rises above 2 ms, then system performance is affected.
Backup considerations
This section contains considerations for data backup before you configure hosts for HA.
If a backup archive originates on an HA cluster, click Deploy Full Configuration to restore the HA cluster configuration after the restore is complete. If disk replication is enabled, the secondary HA host immediately synchronizes data after the system is restored.
Table 1-1 Minimum memory and disk requirements for HA
Memory Disk capacity
4 GB 70 GB
8 GB 72 GB
12 GB 74 GB
24 GB 84 GB
64 GB 120 GB
IBM Security QRadar High Availability Guide
12 PLAN YOUR HIGH-AVAILABILITY DEPLOYMENT
If the secondary HA host is removed from the deployment after a backup is performed, the secondary HA host displays a Failed status on the System and License Management window.
For more information about restoring backup archives in an HA environment, see the IBM Security QRadar SIEM Administration Guide.
Offboard storage requirements for high-availability
You can implement HA when the QRadar /store partition is mounted to an external storage solution, such as an iSCSI or Fibre Channel device.
If you implement an external storage solution, the data that is received by the primary HA host is automatically migrated to the external device, but remains accessible for searching and reporting.
If a failover occurs, the /store partition on the secondary HA host is automatically mounted to the external device, where it continues to read and write to the data received by the primary HA host before failover.
For more information about configuring shared external storage with HA, see the IBM Security QRadar Offboard Storage Guide.
Administrators must review the following HA requirements before implementing an offboard storage device:
• The primary HA host must be configured to communicate with the external device and the data in the /store partition of the local disk must be migrated to the external storage device.
• The secondary HA host must be configured to communicate with the external device, so that when a primary HA host fails over, the secondary HA host can detect the external storage device.
• You must create an HA cluster only after the secondary HA host is configured to access the same external storage device.
• If you have to reconfigure your external storage device or HA cluster settings, you must remove the HA cluster between the primary and secondary HA host. For more information, see Disconnecting an HA cluster.
• Ensure that there is at least a 1 Gbps connection between each HA host and your external device.
Important: During an upgrade to QRadar, you must reconfigure the external storage device connections to the hosts in your HA cluster. For more information, see the Reconfiguring Offboard Storage During a QRadar Upgrade Technical Note.
IBM Security QRadar High Availability Guide

3
HIGH-AVAILABILITY MANAGEMENTIf you are required to tune, troubleshoot, or update your HA settings, you have to use the System and License Management window on the IBM Security QRadar Admin tab.
Administrators can use the System and License management window to perform the following HA tasks:
• Monitor the state of an HA cluster.
• Force the manual failover of a primary HA host to perform maintenance on the primary host.
• Disconnect an HA cluster to alter the partitions of the primary and secondary HA hosts.
• Configure the ping test time period after which automatic failover to a secondary HA host occurs.
• Modify the HA cluster settings that are used to control network connectivity testing.
Monitor the High-availability hosts status
You can review the status of the primary and secondary host in your HA cluster.
The following table describes the status of each host that is displayed in the System and License Management window:
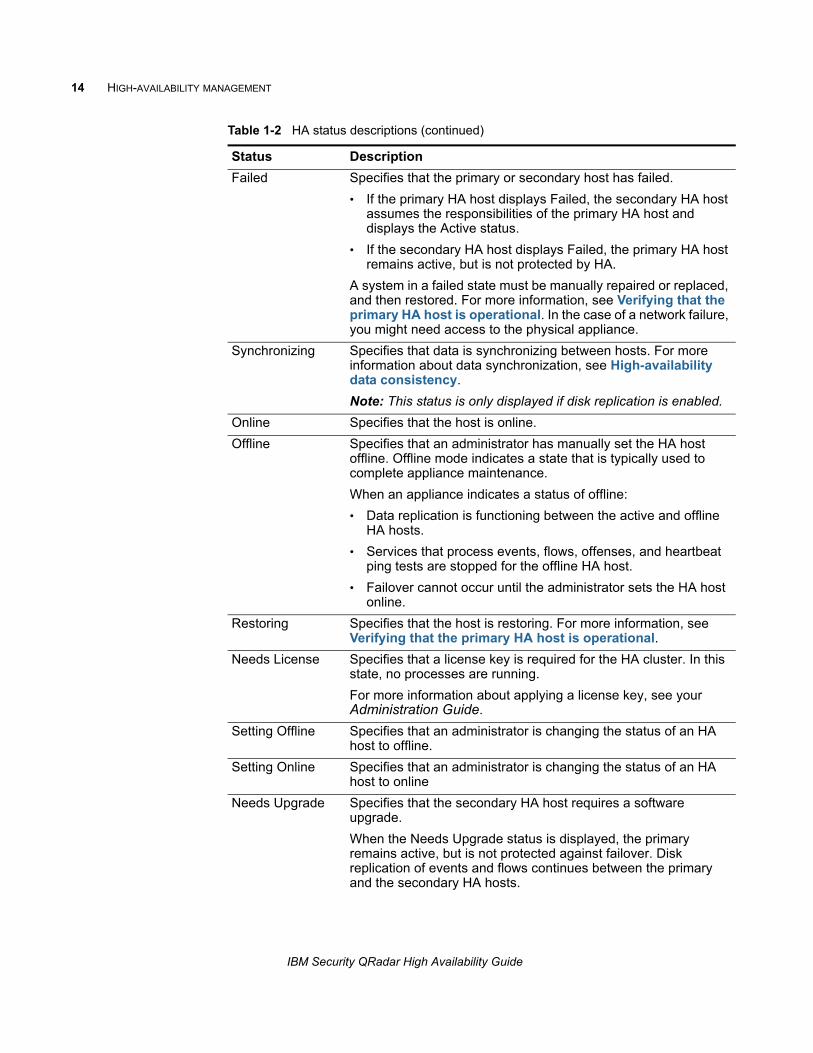
Table 1-2 HA status descriptions
Status Description
Active Specifies that the host is the active system and that all services are running normally. The primary or secondary HA host can display the active status.
Note: If the secondary HA host displays the active status, the primary HA host has failed.
Standby Specifies that the host is acting as the standby system. In the standby state, no services are running but data is synchronized if disk replication is enabled. If the primary or secondary HA host fails, the standby system automatically becomes the active system.
IBM Security QRadar High Availability Guide
14 HIGH-AVAILABILITY MANAGEMENT
Failed Specifies that the primary or secondary host has failed.
• If the primary HA host displays Failed, the secondary HA host assumes the responsibilities of the primary HA host and displays the Active status.
• If the secondary HA host displays Failed, the primary HA host remains active, but is not protected by HA.
A system in a failed state must be manually repaired or replaced, and then restored. For more information, see Verifying that the primary HA host is operational. In the case of a network failure, you might need access to the physical appliance.
Synchronizing Specifies that data is synchronizing between hosts. For more information about data synchronization, see High-availability data consistency.
Note: This status is only displayed if disk replication is enabled.
Online Specifies that the host is online.
Offline Specifies that an administrator has manually set the HA host offline. Offline mode indicates a state that is typically used to complete appliance maintenance.
When an appliance indicates a status of offline:
• Data replication is functioning between the active and offline HA hosts.
• Services that process events, flows, offenses, and heartbeat ping tests are stopped for the offline HA host.
• Failover cannot occur until the administrator sets the HA host online.
Restoring Specifies that the host is restoring. For more information, see Verifying that the primary HA host is operational.
Needs License Specifies that a license key is required for the HA cluster. In this state, no processes are running.
For more information about applying a license key, see your Administration Guide.
Setting Offline Specifies that an administrator is changing the status of an HA host to offline.
Setting Online Specifies that an administrator is changing the status of an HA host to online
Needs Upgrade Specifies that the secondary HA host requires a software upgrade.
When the Needs Upgrade status is displayed, the primary remains active, but is not protected against failover. Disk replication of events and flows continues between the primary and the secondary HA hosts.
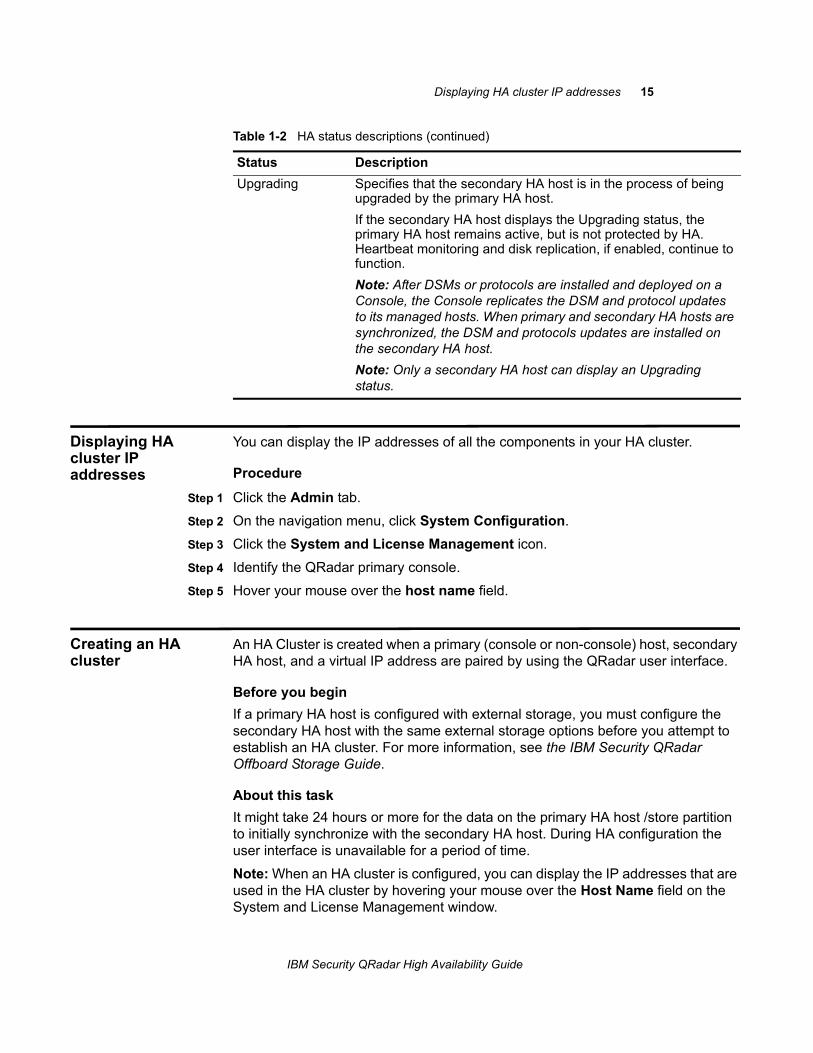
Table 1-2 HA status descriptions (continued)
Status Description
IBM Security QRadar High Availability Guide
Displaying HA cluster IP addresses 15
Displaying HA cluster IP addresses
You can display the IP addresses of all the components in your HA cluster.
Procedure
Step 1 Click the Admin tab.
Step 2 On the navigation menu, click System Configuration.
Step 3 Click the System and License Management icon.
Step 4 Identify the QRadar primary console.
Step 5 Hover your mouse over the host name field.
Creating an HA cluster
An HA Cluster is created when a primary (console or non-console) host, secondary HA host, and a virtual IP address are paired by using the QRadar user interface.
Before you begin
If a primary HA host is configured with external storage, you must configure the secondary HA host with the same external storage options before you attempt to establish an HA cluster. For more information, see the IBM Security QRadar Offboard Storage Guide.
About this task
It might take 24 hours or more for the data on the primary HA host /store partition to initially synchronize with the secondary HA host. During HA configuration the user interface is unavailable for a period of time.
Note: When an HA cluster is configured, you can display the IP addresses that are used in the HA cluster by hovering your mouse over the Host Name field on the System and License Management window.
Upgrading Specifies that the secondary HA host is in the process of being upgraded by the primary HA host.
If the secondary HA host displays the Upgrading status, the primary HA host remains active, but is not protected by HA. Heartbeat monitoring and disk replication, if enabled, continue to function.
Note: After DSMs or protocols are installed and deployed on a Console, the Console replicates the DSM and protocol updates to its managed hosts. When primary and secondary HA hosts are synchronized, the DSM and protocols updates are installed on the secondary HA host.
Note: Only a secondary HA host can display an Upgrading status.
Table 1-2 HA status descriptions (continued)
Status Description
IBM Security QRadar High Availability Guide
16 HIGH-AVAILABILITY MANAGEMENT
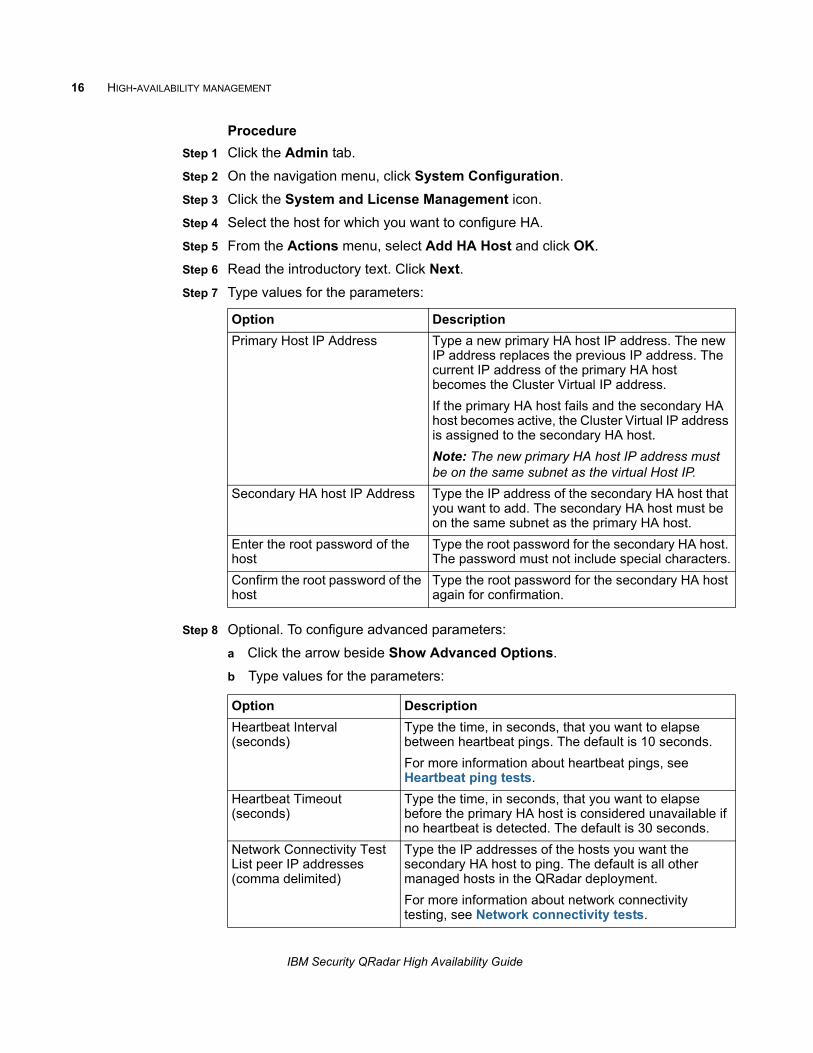
Procedure
Step 1 Click the Admin tab.
Step 2 On the navigation menu, click System Configuration.
Step 3 Click the System and License Management icon.
Step 4 Select the host for which you want to configure HA.
Step 5 From the Actions menu, select Add HA Host and click OK.
Step 6 Read the introductory text. Click Next.
Step 7 Type values for the parameters:
Step 8 Optional. To configure advanced parameters:
a Click the arrow beside Show Advanced Options.
b Type values for the parameters:
Option Description
Primary Host IP Address Type a new primary HA host IP address. The new IP address replaces the previous IP address. The current IP address of the primary HA host becomes the Cluster Virtual IP address.
If the primary HA host fails and the secondary HA host becomes active, the Cluster Virtual IP address is assigned to the secondary HA host.
Note: The new primary HA host IP address must be on the same subnet as the virtual Host IP.
Secondary HA host IP Address Type the IP address of the secondary HA host that you want to add. The secondary HA host must be on the same subnet as the primary HA host.
Enter the root password of the host
Type the root password for the secondary HA host. The password must not include special characters.
Confirm the root password of the host
Type the root password for the secondary HA host again for confirmation.
Option Description
Heartbeat Interval (seconds)
Type the time, in seconds, that you want to elapse between heartbeat pings. The default is 10 seconds.
For more information about heartbeat pings, see Heartbeat ping tests.
Heartbeat Timeout (seconds)
Type the time, in seconds, that you want to elapse before the primary HA host is considered unavailable if no heartbeat is detected. The default is 30 seconds.
Network Connectivity TestList peer IP addresses (comma delimited)
Type the IP addresses of the hosts you want the secondary HA host to ping. The default is all other managed hosts in the QRadar deployment.
For more information about network connectivity testing, see Network connectivity tests.
IBM Security QRadar High Availability Guide

Disconnecting an HA cluster 17
c Click Next.
Step 9 Click Finish.
Disconnecting an HA cluster
You can disconnect a primary and secondary HA host cluster.
Before you begin
If you migrated the /store file system to a Fibre Channel device, you must modify the /etc/fstab file before you disconnect the HA cluster. For more information, see Updating the /etc/fstab file.
About this task
By disconnecting an HA cluster, the data on your primary HA console or managed host is not protected against network or hardware failure.
Procedure
Step 1 Click the Admin tab.
Step 2 On the navigation menu, click System Configuration.
Step 3 Click the System and License Management icon.
Step 4 Select the HA host that you want to remove.
Step 5 From the toolbar, select High Availability > Remove HA Host.
Step 6 Click OK.
Note: When you remove an HA host, the host restarts.
Updating the/etc/fstab file
Before you disconnect a Fibre Channel HA cluster, you must modify the /store and /store/tmp mount lines in the /etc/fstab file.
About this task
You must update the /etc/fstab file on the primary HA host and the secondary HA host.
Procedure
Step 1 Using SSH, log in to your QRadar host as the root user:
Username: root
Password: <password>
Disk Synchronization Rate (MB/s)
Type or select the disk synchronization rate. The default is 100 MB/s.
Disable Disk Replication Select this option to disable disk replication.
Note: This option is only displayed if you are configuring an HA cluster using a managed host.
Option Description
IBM Security QRadar High Availability Guide
18 HIGH-AVAILABILITY MANAGEMENT
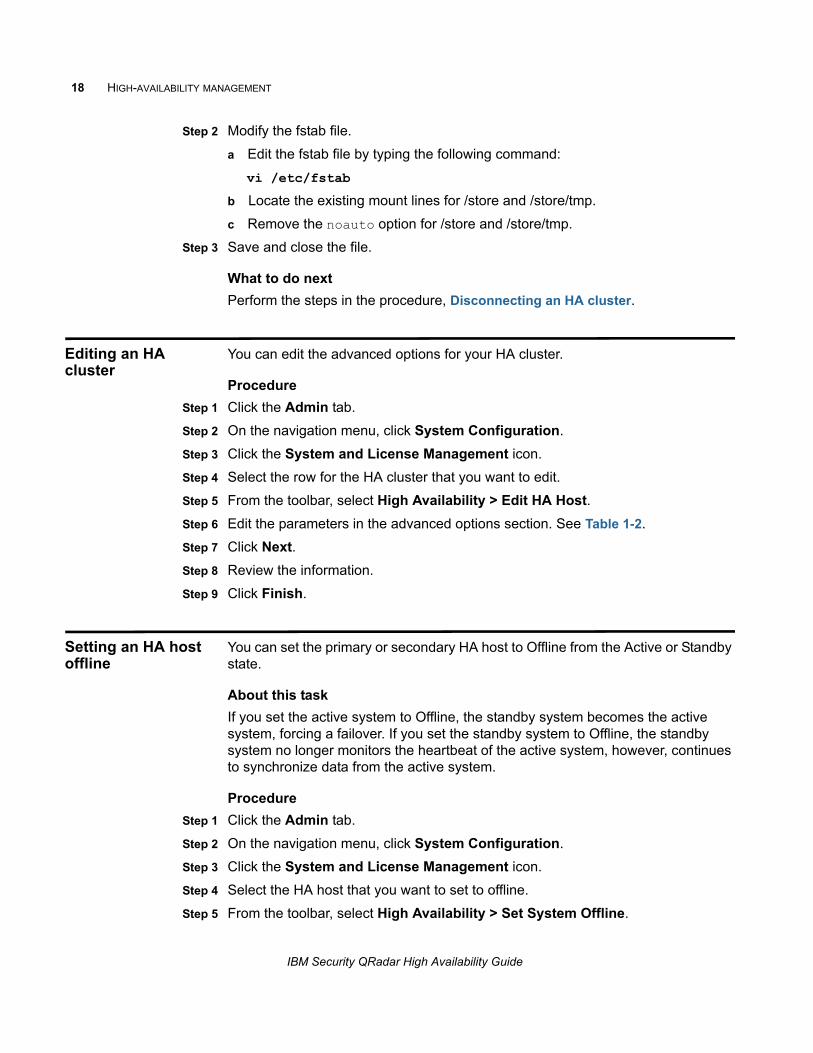
Step 2 Modify the fstab file.
a Edit the fstab file by typing the following command:
vi /etc/fstab
b Locate the existing mount lines for /store and /store/tmp.
c Remove the noauto option for /store and /store/tmp.
Step 3 Save and close the file.
What to do next
Perform the steps in the procedure, Disconnecting an HA cluster.
Editing an HA cluster
You can edit the advanced options for your HA cluster.
Procedure
Step 1 Click the Admin tab.
Step 2 On the navigation menu, click System Configuration.
Step 3 Click the System and License Management icon.
Step 4 Select the row for the HA cluster that you want to edit.
Step 5 From the toolbar, select High Availability > Edit HA Host.
Step 6 Edit the parameters in the advanced options section. See Table 1-2.
Step 7 Click Next.
Step 8 Review the information.
Step 9 Click Finish.
Setting an HA host offline
You can set the primary or secondary HA host to Offline from the Active or Standby state.
About this task
If you set the active system to Offline, the standby system becomes the active system, forcing a failover. If you set the standby system to Offline, the standby system no longer monitors the heartbeat of the active system, however, continues to synchronize data from the active system.
Procedure
Step 1 Click the Admin tab.
Step 2 On the navigation menu, click System Configuration.
Step 3 Click the System and License Management icon.
Step 4 Select the HA host that you want to set to offline.
Step 5 From the toolbar, select High Availability > Set System Offline.
IBM Security QRadar High Availability Guide
Setting an HA host online 19
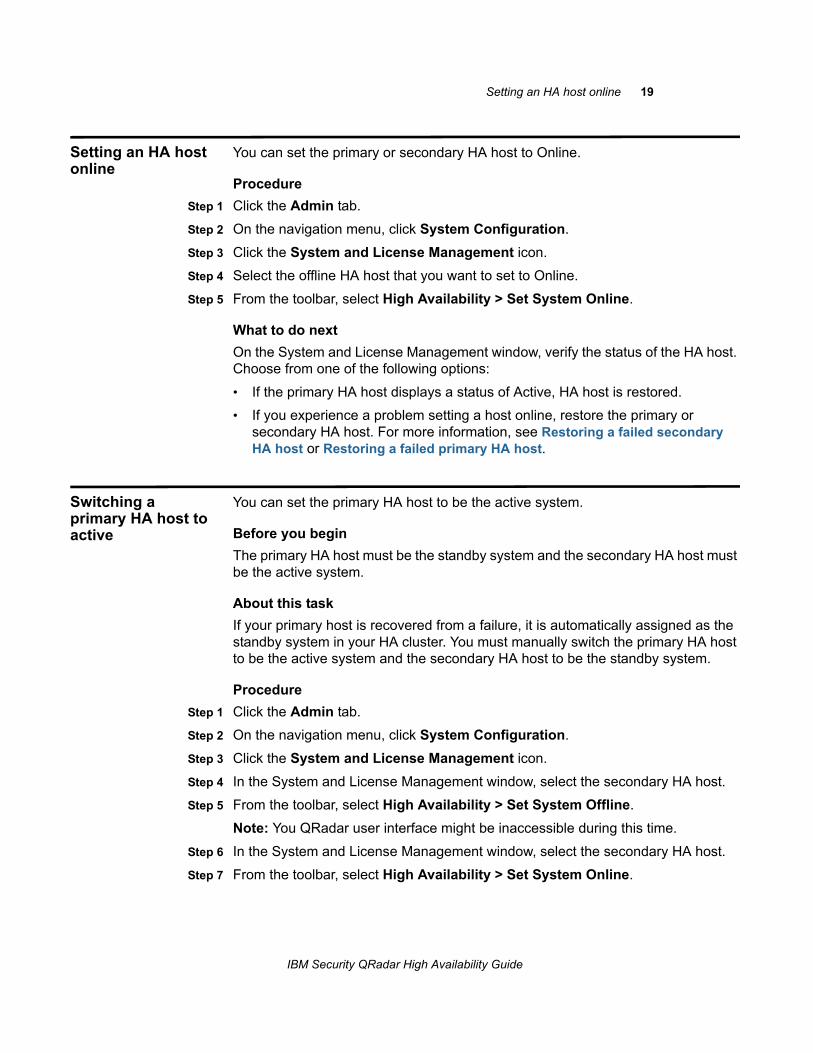
Setting an HA host online
You can set the primary or secondary HA host to Online.
Procedure
Step 1 Click the Admin tab.
Step 2 On the navigation menu, click System Configuration.
Step 3 Click the System and License Management icon.
Step 4 Select the offline HA host that you want to set to Online.
Step 5 From the toolbar, select High Availability > Set System Online.
What to do next
On the System and License Management window, verify the status of the HA host. Choose from one of the following options:
• If the primary HA host displays a status of Active, HA host is restored.
• If you experience a problem setting a host online, restore the primary or secondary HA host. For more information, see Restoring a failed secondary HA host or Restoring a failed primary HA host.
Switching a primary HA host to active
You can set the primary HA host to be the active system.
Before you begin
The primary HA host must be the standby system and the secondary HA host must be the active system.
About this task
If your primary host is recovered from a failure, it is automatically assigned as the standby system in your HA cluster. You must manually switch the primary HA host to be the active system and the secondary HA host to be the standby system.
Procedure
Step 1 Click the Admin tab.
Step 2 On the navigation menu, click System Configuration.
Step 3 Click the System and License Management icon.
Step 4 In the System and License Management window, select the secondary HA host.
Step 5 From the toolbar, select High Availability > Set System Offline.
Note: You QRadar user interface might be inaccessible during this time.
Step 6 In the System and License Management window, select the secondary HA host.
Step 7 From the toolbar, select High Availability > Set System Online.
IBM Security QRadar High Availability Guide

20 HIGH-AVAILABILITY MANAGEMENT
What to do next
When you can access the System and License Management window, check the status column to ensure that the primary HA host is the active system and the secondary HA host is the standby system.
IBM Security QRadar High Availability Guide

4
TUNE HIGH-AVAILABILITYIn IBM Security QRadar, if your console is under heavy load or there is a high volume of data synchronization, you can tune your high availability environment.
Partition splitting The ariel database saves temporary search results to /store/ariel/persistent_data. If the console is under heavy load and performance is impacted, persistent data can be excluded from synchronizing with the secondary HA host, by moving it to a separate partition.
Important: If you install QRadar 7.2.1, /store/ariel/persistent_data is mounted to a seperate partition and uses the xfs file system. Therefore, you are not required to run the partition splitting script. The partition splitting script can be applied if you upgrade QRadar from any version before 7.2.1.
The partition splitting script performs the following actions:
• Changes the size of the /store partition.
• Creates a partition.
• Mounts the /store/ariel/persistent_data file system to the new partition.
Attention: This script might take several hours to complete. When you run the script on the secondary HA host, the primary host continues to collect data and remains available through the user interface. When you run the script on the primary HA host, the system is not active and the user interface is not available.
There are potential risks that are involved with running the partition script.
Before you run the partition splitting script, review the following information:
• Determine the cause of your performance issues. Partitioning and migrating the /store location might resolve throttling issues where HA data replication causes performance degradation.
• Determine the /store partition disk capacity. When you add a partition, you must specify a partition size that is approximately 25% of the capacity of the /store partition.
Important: The script does not validate incorrect size values. For more information, see Estimating partition sizes.
IBM Security QRadar High Availability Guide
22 TUNE HIGH-AVAILABILITY
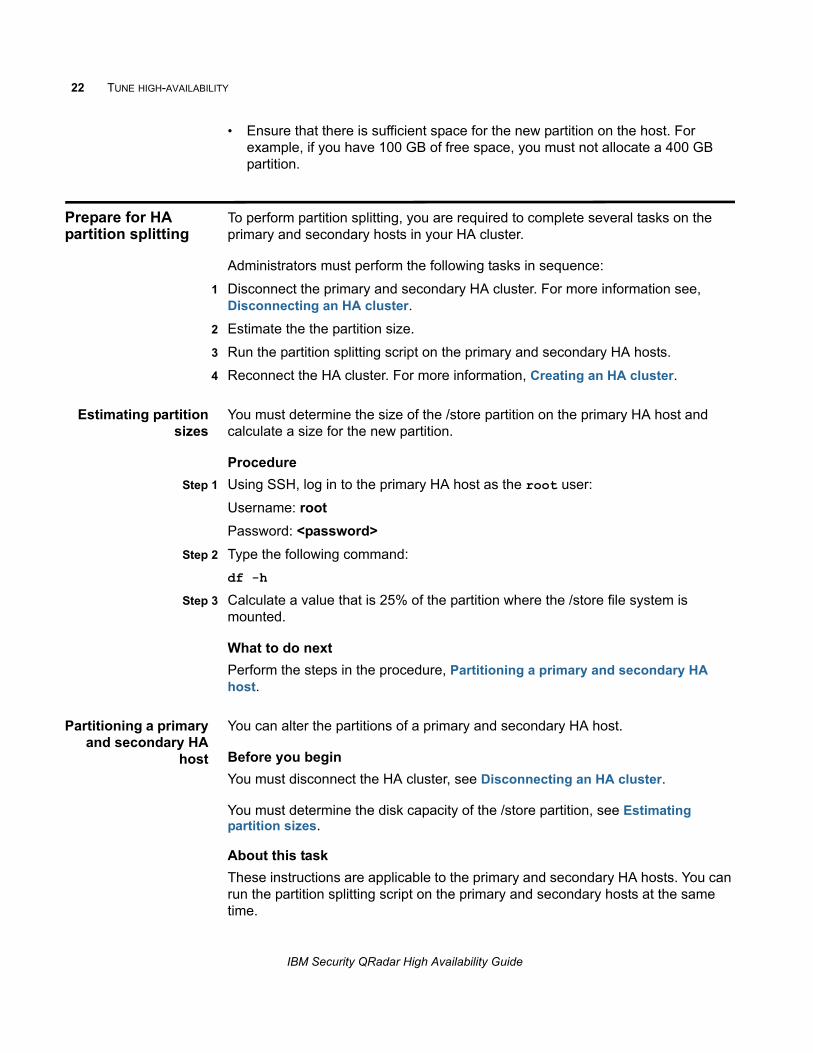
• Ensure that there is sufficient space for the new partition on the host. For example, if you have 100 GB of free space, you must not allocate a 400 GB partition.
Prepare for HA partition splitting
To perform partition splitting, you are required to complete several tasks on the primary and secondary hosts in your HA cluster.
Administrators must perform the following tasks in sequence:
1 Disconnect the primary and secondary HA cluster. For more information see, Disconnecting an HA cluster.
2 Estimate the the partition size.
3 Run the partition splitting script on the primary and secondary HA hosts.
4 Reconnect the HA cluster. For more information, Creating an HA cluster.
Estimating partitionsizes
You must determine the size of the /store partition on the primary HA host and calculate a size for the new partition.
Procedure
Step 1 Using SSH, log in to the primary HA host as the root user:
Username: root
Password: <password>
Step 2 Type the following command:
df -h
Step 3 Calculate a value that is 25% of the partition where the /store file system is mounted.
What to do next
Perform the steps in the procedure, Partitioning a primary and secondary HA host.
Partitioning a primaryand secondary HA
host
You can alter the partitions of a primary and secondary HA host.
Before you begin
You must disconnect the HA cluster, see Disconnecting an HA cluster.
You must determine the disk capacity of the /store partition, see Estimating partition sizes.
About this task
These instructions are applicable to the primary and secondary HA hosts. You can run the partition splitting script on the primary and secondary hosts at the same time.
IBM Security QRadar High Availability Guide
Prepare for HA partition splitting 23
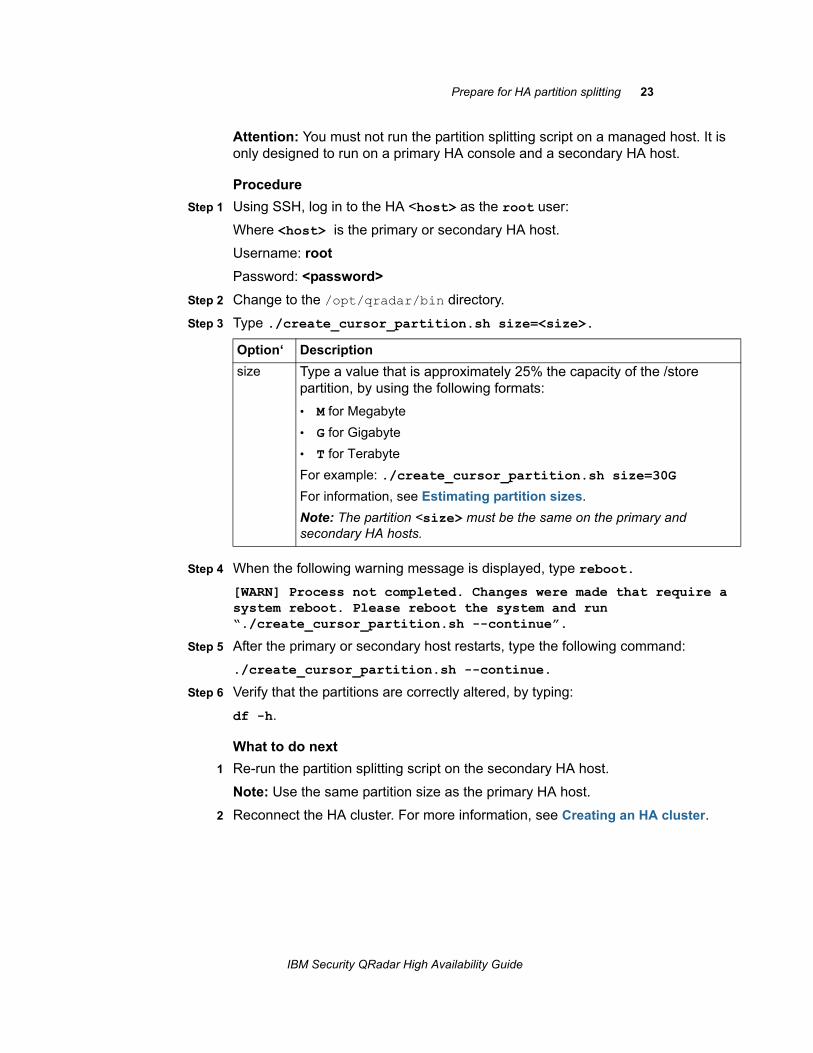
Attention: You must not run the partition splitting script on a managed host. It is only designed to run on a primary HA console and a secondary HA host.
Procedure
Step 1 Using SSH, log in to the HA <host> as the root user:
Where <host> is the primary or secondary HA host.
Username: root
Password: <password>
Step 2 Change to the /opt/qradar/bin directory.
Step 3 Type ./create_cursor_partition.sh size=<size>.
Step 4 When the following warning message is displayed, type reboot.
[WARN] Process not completed. Changes were made that require a system reboot. Please reboot the system and run “./create_cursor_partition.sh --continue”.
Step 5 After the primary or secondary host restarts, type the following command:
./create_cursor_partition.sh --continue.
Step 6 Verify that the partitions are correctly altered, by typing:
df -h.
What to do next
1 Re-run the partition splitting script on the secondary HA host.
Note: Use the same partition size as the primary HA host.
2 Reconnect the HA cluster. For more information, see Creating an HA cluster.
Option‘ Description
size Type a value that is approximately 25% the capacity of the /store partition, by using the following formats:
• M for Megabyte
• G for Gigabyte
• T for Terabyte
For example: ./create_cursor_partition.sh size=30G
For information, see Estimating partition sizes.
Note: The partition <size> must be the same on the primary and secondary HA hosts.
IBM Security QRadar High Availability Guide
24 TUNE HIGH-AVAILABILITY
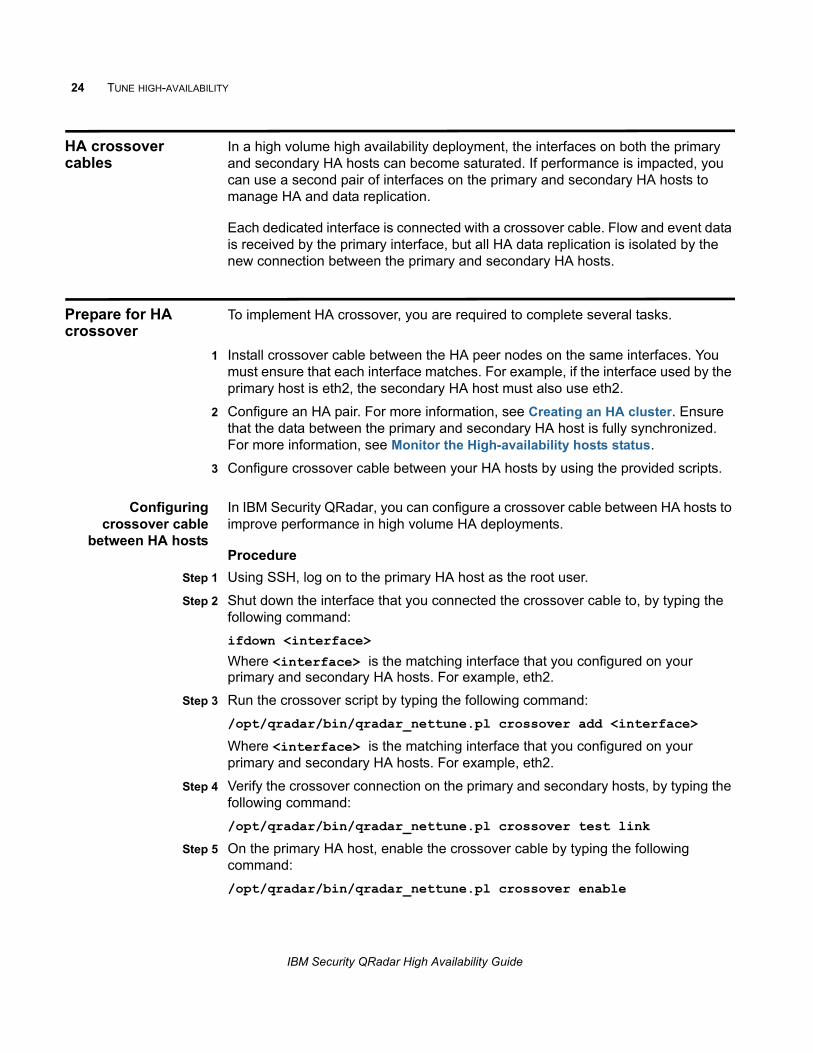
HA crossover cables
In a high volume high availability deployment, the interfaces on both the primary and secondary HA hosts can become saturated. If performance is impacted, you can use a second pair of interfaces on the primary and secondary HA hosts to manage HA and data replication.
Each dedicated interface is connected with a crossover cable. Flow and event data is received by the primary interface, but all HA data replication is isolated by the new connection between the primary and secondary HA hosts.
Prepare for HA crossover
To implement HA crossover, you are required to complete several tasks.
1 Install crossover cable between the HA peer nodes on the same interfaces. You must ensure that each interface matches. For example, if the interface used by the primary host is eth2, the secondary HA host must also use eth2.
2 Configure an HA pair. For more information, see Creating an HA cluster. Ensure that the data between the primary and secondary HA host is fully synchronized. For more information, see Monitor the High-availability hosts status.
3 Configure crossover cable between your HA hosts by using the provided scripts.
Configuringcrossover cable
between HA hosts
In IBM Security QRadar, you can configure a crossover cable between HA hosts to improve performance in high volume HA deployments.
Procedure
Step 1 Using SSH, log on to the primary HA host as the root user.
Step 2 Shut down the interface that you connected the crossover cable to, by typing the following command:
ifdown <interface>
Where <interface> is the matching interface that you configured on your primary and secondary HA hosts. For example, eth2.
Step 3 Run the crossover script by typing the following command:
/opt/qradar/bin/qradar_nettune.pl crossover add <interface>
Where <interface> is the matching interface that you configured on your primary and secondary HA hosts. For example, eth2.
Step 4 Verify the crossover connection on the primary and secondary hosts, by typing the following command:
/opt/qradar/bin/qradar_nettune.pl crossover test link
Step 5 On the primary HA host, enable the crossover cable by typing the following command:
/opt/qradar/bin/qradar_nettune.pl crossover enable
IBM Security QRadar High Availability Guide

Prepare for HA crossover 25
Step 6 To verify that the route was added between the interface on the primary and secondary HA hosts, type the following command:
route -n
Step 7 To check for incrementing byte and packet counts between the interfaces that are using the crossover link, type the following command:
ifconfig <interface>
Where <interface> is the matching interface that you configured on your primary and secondary HA hosts. For example, eth2.
IBM Security QRadar High Availability Guide

5
REINSTALL OR RECOVER QRADAR HIGH-AVAILABILITY APPLIANCESAdministrators might need to recover a failed primary or secondary HA appliance.
Attention: If your HA cluster uses shared storage, you must manually configure your external storage device. For more information, see the IBM Security QRadar Offboard Storage Guide.
QRadar activation keys
To recover a primary or secondary console or non-console HA appliance or reinstall QRadar software you must have a valid activation key.
The activation key is a 24-digit, four-part, alphanumeric value. You can find the activation key:
• Printed on a sticker and physically placed on your appliance.
• Included with the packing slip. All appliances are listed along with their associated keys.
Note: The letter I and the number 1 (one) are treated the same, as are the letter O and the number 0 (zero).
QRadar build versions
If you need to reinstall QRadar on a failed primary HA host, you must consider the build version of the secondary HA host.
The build version of the primary HA host must be the same as the QRadar build version installed on the secondary HA host.
Note: The secondary or primary HA host must be patched to the correct build version before configuring an HA cluster. For more information, see the IBM Security QRadar SIEM Upgrade Guide or the IBM Security QRadar Log Manager Upgrade Guide.
IBM Security QRadar High Availability Guide
28 REINSTALL OR RECOVER QRADAR HIGH-AVAILABILITY APPLIANCES
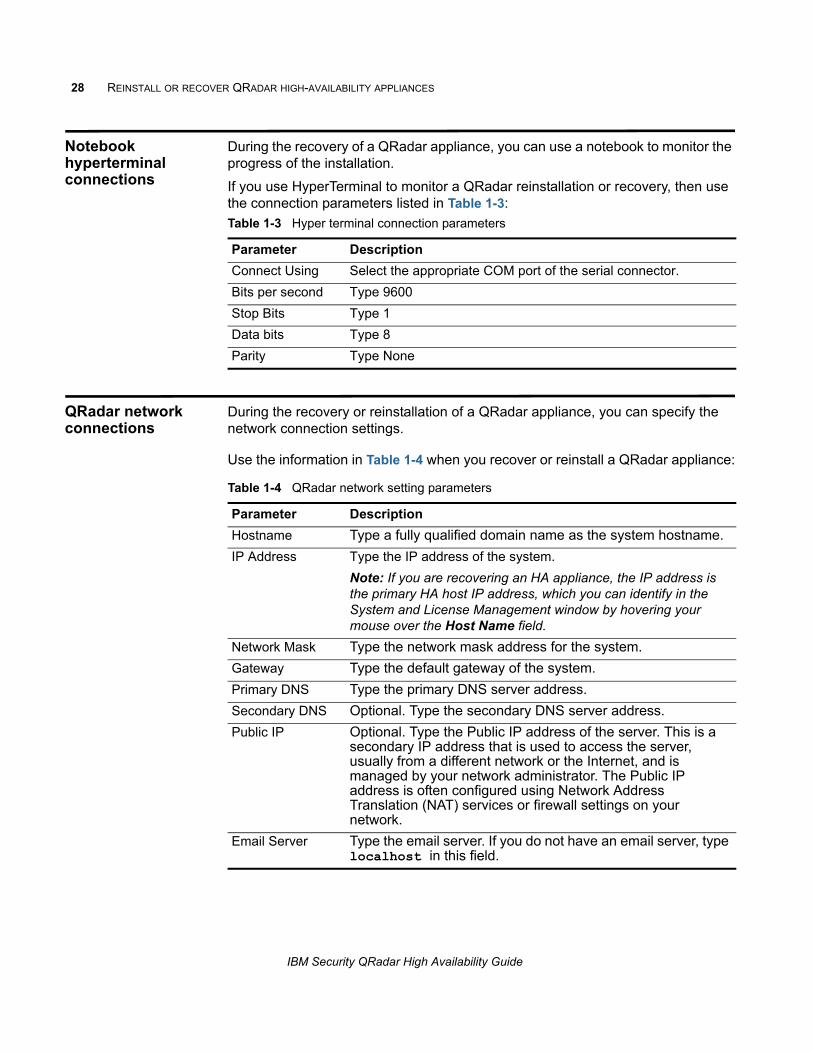
Notebook hyperterminal connections
During the recovery of a QRadar appliance, you can use a notebook to monitor the progress of the installation.
If you use HyperTerminal to monitor a QRadar reinstallation or recovery, then use the connection parameters listed in Table 1-3:
QRadar network connections
During the recovery or reinstallation of a QRadar appliance, you can specify the network connection settings.
Use the information in Table 1-4 when you recover or reinstall a QRadar appliance:
Table 1-3 Hyper terminal connection parameters
Parameter Description
Connect Using Select the appropriate COM port of the serial connector.
Bits per second Type 9600
Stop Bits Type 1
Data bits Type 8
Parity Type None
Table 1-4 QRadar network setting parameters
Parameter Description
Hostname Type a fully qualified domain name as the system hostname.
IP Address Type the IP address of the system.
Note: If you are recovering an HA appliance, the IP address is the primary HA host IP address, which you can identify in the System and License Management window by hovering your mouse over the Host Name field.
Network Mask Type the network mask address for the system.
Gateway Type the default gateway of the system.
Primary DNS Type the primary DNS server address.
Secondary DNS Optional. Type the secondary DNS server address.
Public IP Optional. Type the Public IP address of the server. This is a secondary IP address that is used to access the server, usually from a different network or the Internet, and is managed by your network administrator. The Public IP address is often configured using Network Address Translation (NAT) services or firewall settings on your network.
Email Server Type the email server. If you do not have an email server, type localhost in this field.
IBM Security QRadar High Availability Guide

Recovering a secondary HA console or non-console 29
Recovering a secondary HA console or non-console
You can install or recover a secondary HA QRadar console or non-console (managed host) appliance.
Before you begin
These instructions are applicable to the installation or recovery of a QRadar console and non-console. You must choose different options according to the appliance you are installing or recovering.
Ensure that you have a QRadar activation key. For information, see QRadar activation keys.
Procedure
Step 1 Prepare your appliance.
a Install all necessary hardware.
b Choose one of the following options:
- Connect a notebook to the serial port on the rear of the appliance. For more information, see Notebook hyperterminal connections.
- Connect a keyboard and monitor to their respective ports.
For more information on your QRadar appliance or appliance ports, see the IBM Security QRadar Hardware Guide.
c Power on the system and log in:
Username: root
Note: The username is case sensitive.
d Press Enter.
e Press the Spacebar to advance each window then type yes to accept the agreement and press Enter.
f Type your activation key and press Enter.
Step 2 Choose one of the following options:
• If you are installing a console, select This system is a stand-by for a console, then select Next and press Enter.
• If you are installing a non-console, select This system is a stand-by for a non-console, then select Next and press Enter. Go to Step 4.
Step 3 Choose one of the following options:
• Manual - Type the current date and time, then select Next and press Enter. Go to Step 6.
• Server - In the Time server field, type the time server name or IP address, then select Next and press Enter.
Step 4 Select your time zone continent or area, then select Next and press Enter.
Step 5 Select your time zone region, then select Next and press Enter.
IBM Security QRadar High Availability Guide

30 REINSTALL OR RECOVER QRADAR HIGH-AVAILABILITY APPLIANCES
Step 6 Select IPv4, then select Next and press Enter.
Note: Each interface with a physical link is denoted with a plus (+) symbol.
Step 7 Select the management interface, then select Next and press Enter.
Step 8 Configure the QRadar network settings. For information, see QRadar network connections.
Step 9 Select Next and press Enter.
Note: If you are changing network settings using qchange_netsetup, select Finish and press Enter. For more information, see the IBM Security QRadar SIEM Installation Guide or the IBM Security QRadar Log Manager Installation Guide.
Step 10 Configure the QRadar root password:
a Type your password, then select Next and press Enter.
b Retype your new password, then select Finish and press Enter.
Note: This process can take several minutes.
c Press Enter to select OK.
Step 11 Log in to the QRadar user interface.
Step 12 Configure your HA cluster. For more information on configuring your HA cluster, see Creating an HA cluster.
Recovering a failed primary HA appliance
You can recover a failed primary HA QRadar appliance.
Before you begin
Ensure that you have a QRadar activation key. For more information, see QRadar activation keys.
Procedure
Step 1 Install all necessary hardware.
Step 2 Choose one of the following options:
• Connect a notebook to the serial port on the rear of the appliance. For more information, see Notebook hyperterminal connections.
• Connect a keyboard and monitor to their respective ports.
Step 3 Power on the system and log in:
Username: root
Step 4 Press Enter.
Step 5 Press the Spacebar to advance each window then type yes to accept the agreement and press Enter.
Step 6 Type your activation key and press Enter.
Step 7 Select HA Recovery Setup, then select Next and press Enter.
Step 8 Choose one of the following options:
IBM Security QRadar High Availability Guide
Recovering a failed secondary HA host to QRadar 7.1 31
• Manual - Type the current date and time, then select Next and press Enter. Go to Step 11.
• Server - In the Time server field, type the time server name or IP address, then select Next and press Enter.
Step 9 Select your time zone continent or area, then select Next and press Enter.
Step 10 Select your time zone region, then select Next and press Enter.
Step 11 Select IPv4, then select Next and press Enter.
Note: Each interface with a physical link is denoted with a plus (+) symbol.
Step 12 Select the management interface, then select Next and press Enter.
Step 13 Type the Cluster Virtual IP address, then select Next and press Enter. For information on your cluster IP address, see Displaying HA cluster IP addresses.
Step 14 Configure the QRadar network settings. For information, see QRadar network connections.
Step 15 Select Next and press Enter.
Step 16 Configure the QRadar root password:
a Type your password, then select Next and press Enter.
b Retype your new password, then select Finish and press Enter.
Note: This process can take several minutes.
c Press Enter to select OK.
Step 17 Log in to the QRadar user interface.
Step 18 Restore the failed primary HA host. For more information, see Verifying that the primary HA host is operational.
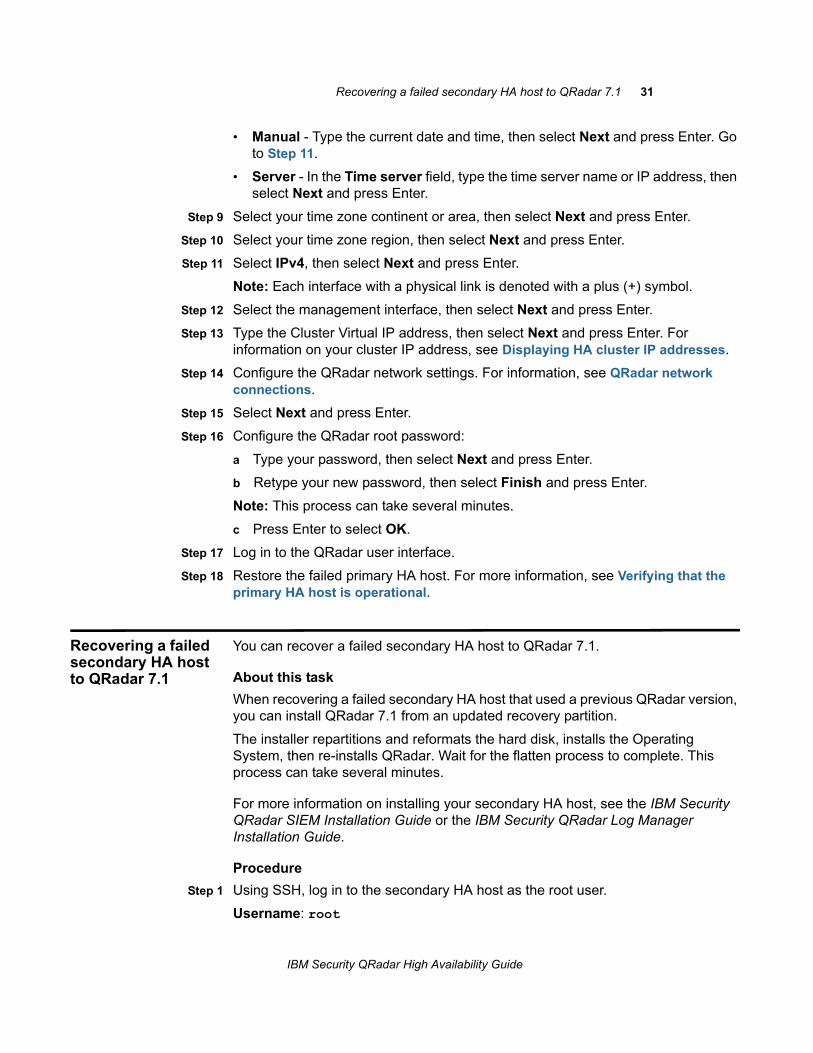
Recovering a failed secondary HA host to QRadar 7.1
You can recover a failed secondary HA host to QRadar 7.1.
About this task
When recovering a failed secondary HA host that used a previous QRadar version, you can install QRadar 7.1 from an updated recovery partition.
The installer repartitions and reformats the hard disk, installs the Operating System, then re-installs QRadar. Wait for the flatten process to complete. This process can take several minutes.
For more information on installing your secondary HA host, see the IBM Security QRadar SIEM Installation Guide or the IBM Security QRadar Log Manager Installation Guide.
Procedure
Step 1 Using SSH, log in to the secondary HA host as the root user.
Username: root
IBM Security QRadar High Availability Guide

32 REINSTALL OR RECOVER QRADAR HIGH-AVAILABILITY APPLIANCES
Password: <password>
Step 2 Obtain the QRadar software from the following location:
http://www.ibm.com/support
Step 3 Copy the QRadar 7.1 ISO to the secondary HA host by typing the following command:
scp <iso file name> root@<ip_address>:/root
Important: If you are installing QRadar 7.0 and above, Step 4 through Step 5 are not required because the recovery script is placed in /opt/qradar/bin during the installation.
Step 4 Mount the ISO by typing the following command:
mount -o loop <iso_file_name> /media/cdrom/
Step 5 Copy the recovery script into the root directory by typing the following command:
cp /media/cdrom/post/recovery.py /root
Step 6 Unmount the ISO by typing the following command:
umount /media/cdrom/
Step 7 If the host is a non-console, stop the IPTables service to enable SCP. Type the following command:
service tables stop.
Step 8 Start the extracted recovery script by typing the following command:
./recovery.py -r --default --reboot <iso_file_name>
Step 9 When prompted, press Enter to reboot the appliance.
Step 10 When prompted, type flatten and press Enter.
Step 11 When the installation completes, type SETUP and log in to the system as the root user.
Recovering a failed secondary HA Host to QRadar 7.1 (MR2)
When you recover a failed secondary HA host that used a previous QRadar version, you can install QRadar 7.0 from an updated recovery partition.
Procedure
Step 1 Using SSH, log in to the secondary HA host as the root user.
Username: root
Password: <password>
Step 2 Obtain the QRadar software from the following location:
http://www.ibm.com/support
Step 3 Copy the QRadar 7.0 ISO to the secondary HA host, type the following command:
scp <iso file name> root@<ip_address>:/root
IBM Security QRadar High Availability Guide

Recovering a failed primary HA QFlow appliance 33
Step 4 If the host is a non-Console, stop the IPTables service to allow SCP. Type the following command:
service iptables stop.
Step 5 Start the extracted recovery script by typing the following command:
./recovery.py -r --default --reboot <iso_file_name>
Step 6 When prompted, press Enter to reboot the appliance.
Step 7 When prompted, type flatten and press Enter.
Results
The installer repartitions and reformats the hard disk, installs the Operating System, and then re-installs QRadar SIEM. Wait for the flatten process to complete. This process can take up to several minutes, depending on your system. When this process is complete, the normal installation process proceeds.
Recovering a failed primary HA QFlow appliance
You can recover a failed primary HA QRadar QFlow appliance.
Before you begin
Ensure that you have a QRadar activation key. For more information, see QRadar activation keys.
Procedure
Step 1 Install all necessary hardware.
Step 2 Choose one of the following options:
• Connect a notebook to the serial port on the rear of the appliance. For more information, see Notebook hyperterminal connections.
• Connect a keyboard and monitor to their respective ports.
Step 3 Power on the system and log in:
Username: root
Step 4 Press Enter.
Step 5 Press the Spacebar to advance each window then type yes to accept the agreement and press Enter.
Step 6 Type your activation key and press Enter.
Step 7 Select HA Recovery Setup, then select Next and press Enter.
Step 8 Select your time zone continent or area, then select Next and press Enter.
Step 9 Select your time zone region, then select Next and press Enter.
Step 10 Select IPv4, then select Next and press Enter.
Note: Each interface with a physical link is denoted with a plus (+) symbol.
Step 11 Select the management interface, then select Next and press Enter.
IBM Security QRadar High Availability Guide

34 REINSTALL OR RECOVER QRADAR HIGH-AVAILABILITY APPLIANCES
Step 12 Type the Cluster Virtual IP address, then select Next and press Enter. For more information, see Displaying HA cluster IP addresses.
Step 13 Configure the QRadar network settings. For information, see QRadar network connections.
Step 14 Select Next and press Enter.
Step 15 Configure the QRadar root password:
a Type your password, then select Next and press Enter.
b Retype your password, then select Finish and press Enter.
Note: This process can take several minutes.
c Press Enter to select OK.
Step 16 Log in to the QRadar user interface.
Step 17 Restore the failed primary HA host. For more information on restoring a failed primary HA host, see Verifying that the primary HA host is operational.
Recovering QRadar on a secondary HA console or non-console system
You can install or recover QRadar console or non-console (managed host) software on your secondary HA system.
Before you begin
These instructions are applicable to the installation or recovery of a QRadar console and non-console. You must choose different options according to the appliance you are installing or recovering.
Ensure that you have a QRadar activation key. For more information, see QRadar activation keys.
Procedure
Step 1 Install the necessary hardware.
Step 2 Obtain the Red Hat Enterprise Linux 6.4 operating system and install it on your hardware.
For instructions on how to install and configure the Red Hat Enterprise Linux 6.2 operating system, see the IBM Security QRadar SIEM Installation Guide or the IBM Security QRadar Log Manager Installation Guide.
Step 3 Log in as root.
Step 4 Create the /media/cdrom directory by typing the following command:
mkdir /media/cdrom
Step 5 Obtain the QRadar software from the following location:
http://www.ibm.com/support
Step 6 Mount the QRadar 7.1 ISO by typing the following command:
mount -o loop <path to the QRadar ISO> /media/cdrom
Step 7 Begin the installation by typing the following command:
IBM Security QRadar High Availability Guide

Recovering QRadar on a secondary HA console or non-console system 35
/media/cdrom/setup
Note: If a warning message is displayed that the MD5 checksum failed, download QRadar software again and start over.
Step 8 Press the Spacebar to advance each window then type yes to accept the agreement and press Enter.
Step 9 Type your activation key and press Enter.
Step 10 Choose one of the following options:
• If you are installing a console, select This system is a stand-by for a console, then select Next and press Enter.
• If you are installing a non-console, select This system is a stand-by for a non-console, then select Next and press Enter. Go to Step 12.
Step 11 Choose one of the following options:
• Manual - Type the current date and time, then select Next and press Enter. Go to Step 14.
• Server - In the Time server field, type the time server name or IP address, then select Next and press Enter.
Step 12 Select your time zone continent or area, then select Next and press Enter.
Step 13 Select your time zone region, then select Next and press Enter.
Step 14 Select IPv4, then select Next and press Enter.
Note: Each interface with a physical link is denoted with a plus (+) symbol.
Step 15 Select management interface, then select Next and press Enter.
Step 16 Configure the QRadar network settings. For information, see QRadar network connections.
Step 17 Select Next and press Enter.
Note: If you are changing network settings using qchange_netsetup, select Finish and press Enter. For more information, see the IBM Security QRadar SIEM Installation Guide or the IBM Security QRadar Log Manager Installation Guide.
Step 18 To configure the QRadar root password:
a Type your password, then select Next and press Enter.
b Retype your new password, then select Finish and press Enter.
Note: This process can take several minutes.
The Configuration is Complete window is displayed.
c Press Enter to select OK.
Step 19 Log in to the QRadar user interface.
Step 20 Configure your HA cluster. For more information on configuring your HA cluster, see Creating an HA cluster.
IBM Security QRadar High Availability Guide

36 REINSTALL OR RECOVER QRADAR HIGH-AVAILABILITY APPLIANCES
Recovering QRadar on a failed primary HA console or non-console
You can recover QRadar console or non-console (managed host) software on your failed primary HA host.
Before you begin
These instructions are applicable to the installation or recovery of QRadar on a primary console and non-console. You must choose different options according to the appliance you are installing or recovering.
Ensure that you have a QRadar activation key. For more information, see QRadar activation keys.
Procedure
Step 1 Install the necessary hardware.
Step 2 Obtain the Red Hat Enterprise Linux 6.2 operating system and install it on your hardware.
For instructions on how to install and configure the Red Hat Enterprise Linux 6.2 operating system, see the IBM Security QRadar SIEM Installation Guide or the IBM Security QRadar Log Manager Installation Guide.
Step 3 Log in as root.
Step 4 Create the /media/cdrom directory by typing the following command:
mkdir /media/cdrom
Step 5 Obtain the QRadar software from the following location:
http://www.ibm.com/support
Step 6 Mount the QRadar 7.1 ISO by typing the following command:
mount -o loop <path to the QRadar ISO> /media/cdrom
Step 7 Begin the installation by typing the following command:
/media/cdrom/setup
Note: QRadar verifies the integrity of the media before installation by checking the MD5 sum. If a warning message is displayed, that the MD5 checksum failed, redownload QRadar. For further assistance, contact Customer Support.
Step 8 Press the Spacebar to advance each window then type yes to accept the agreement and press Enter.
Step 9 Type your activation key and press Enter.
Step 10 Choose one of the following options:
• If you are installing a console, select HA Recovery Setup, then select Next and press Enter. Step 11.
• If you are installing a non-console, select HA Recovery Setup, then select Next and press Enter. Go to Step 12.
Step 11 Choose one of the following options:
IBM Security QRadar High Availability Guide

Recovering a secondary HA host to a previous version or factory default 37
• Manual - Type the current date and time, then select Next and press Enter. Go to Step 14.
• Server - In the Time server field, type the time server name or IP address, then select Next and press Enter.
Step 12 Select your time zone continent or area, then select Next and press Enter.
Step 13 Select your time zone region, then select Next and press Enter.
Step 14 Select IPv4, then select Next and press Enter.
Note: The window displays a maximum of four interfaces. Each interface with a physical link is denoted with a plus (+) symbol.
Step 15 Select the management interface, then select Next and press Enter.
Step 16 Type the Cluster Virtual IP address, then select Next and press Enter. For more information about the cluster IP address, see Displaying HA cluster IP addresses.
Step 17 Configure the QRadar network settings. For more information, see QRadar network connections.
Step 18 Select Next and press Enter.
Step 19 To configure the QRadar root password:
a Type your password, then select Next and press Enter.
b Retype your new password, then select Finish and press Enter.
A series of messages is displayed as QRadar continues with the installation. This process can take several minutes.
c Press Enter to select OK.
Step 20 Log in to the QRadar user interface.
Step 21 Restore the failed primary HA host. For more information on restoring a failed primary HA host, see Verifying that the primary HA host is operational.
Recovering a secondary HA host to a previous version or factory default
You can recover a QRadar secondary HA host to a previous version or factory default.
About this task
Use this procedure to recover a failed QRadar secondary HA host, that does not include a recovery partition or a USB port, to a previous version or restore the system to factory defaults. When you recover the failed secondary HA host, all data removed and the factory default configuration is restored on the host.
Procedure
Step 1 Using SSH, log in to the Console as the root user.
Step 2 Using SCP, copy the recovery.py script from the Console to the failed secondary HA host.
By default, the recovery.py script is downloaded to the /root directory if you do not specify a location.
IBM Security QRadar High Availability Guide

38 REINSTALL OR RECOVER QRADAR HIGH-AVAILABILITY APPLIANCES
Step 3 Obtain the QRadar ISO from the following location:
http://www.ibm.com/support
Step 4 Using SCP, copy the ISO to the target QRadar host.
Step 5 Using SSH, log in to the secondary HA host.
Step 6 Type the following commands:
chmod 755 recovery.py
./recovery.py -r --default --reboot <iso_file_name>
Step 7 Press Enter when prompted to reboot the system.
Step 8 When prompted, type flatten and press Enter.
Results
The installer repartitions and reformats the hard disk, installs the Operating System, and then installs QRadar. Wait for the flatten process to complete. This process can take up to several minutes. When this process is complete the normal installation process continues.
IBM Security QRadar High Availability Guide

6
TROUBLESHOOT QRADAR HIGH-AVAILABILITYIn IBM Security QRadar, the System and License Management window displays the status of the hosts in your high-availability deployment.
High-availability status overview
The following table describes possible primary and secondary HA host statuses. Each status combination requires a different troubleshooting approach:
If the secondary HA host displays a status of Unknown or Failed, verify that the host is operational, then restore the secondary HA host. For more information, see Verifying that the secondary HA host is operational.
If the primary HA host displays a status of Unknown or Failed, verify that the host is operational, then restore the primary HA host. For more information, see Verifying that the primary HA host is operational.
If the status of both the primary and secondary HA host is Unknown, identify which host was Active before each HA host displayed a status of Unknown. For more information, see Verifying the status of primary and secondary hosts.
If the primary HA host displays a status of Offline, set the primary HA host Online. For more information, see Setting an HA host online.
Table 1-5 System and license management window host statuses
Primary HA Host Status Secondary HA Host Status
Active Failed or Unknown
Failed or Unknown Active
Unknown Unknown
Offline Active
IBM Security QRadar High Availability Guide
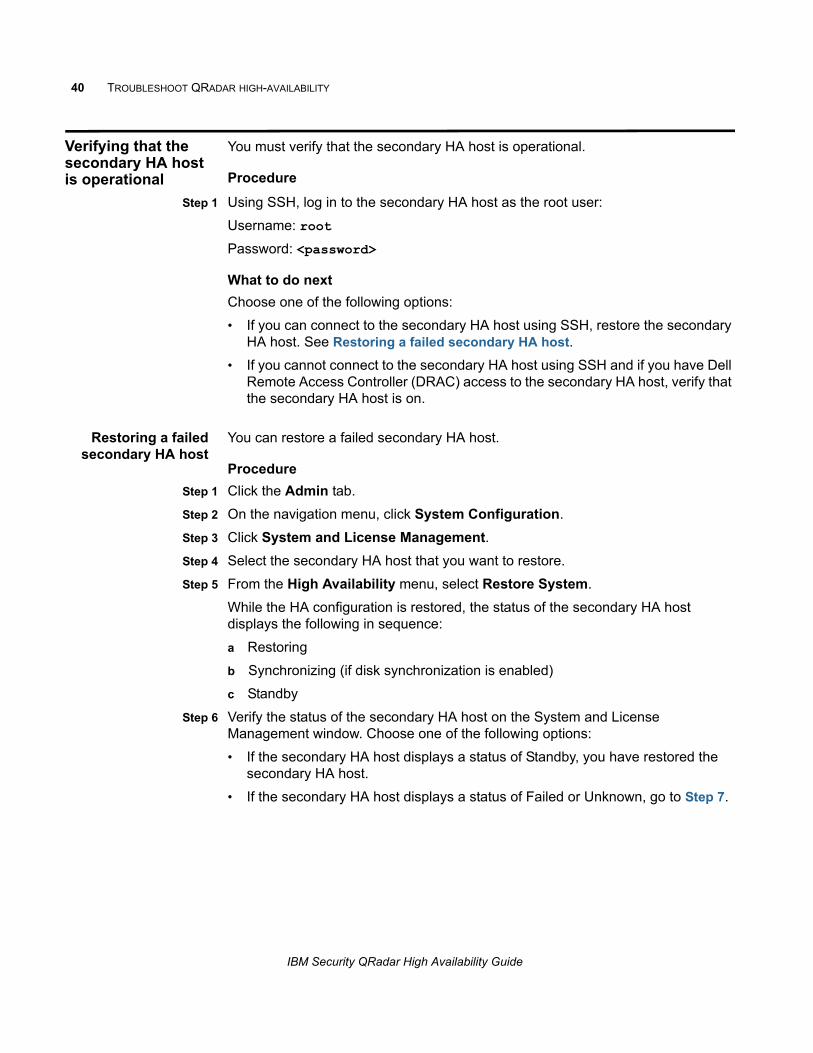
40 TROUBLESHOOT QRADAR HIGH-AVAILABILITY
Verifying that the secondary HA host is operational
You must verify that the secondary HA host is operational.
Procedure
Step 1 Using SSH, log in to the secondary HA host as the root user:
Username: root
Password: <password>
What to do next
Choose one of the following options:
• If you can connect to the secondary HA host using SSH, restore the secondary HA host. See Restoring a failed secondary HA host.
• If you cannot connect to the secondary HA host using SSH and if you have Dell Remote Access Controller (DRAC) access to the secondary HA host, verify that the secondary HA host is on.
Restoring a failedsecondary HA host
You can restore a failed secondary HA host.
Procedure
Step 1 Click the Admin tab.
Step 2 On the navigation menu, click System Configuration.
Step 3 Click System and License Management.
Step 4 Select the secondary HA host that you want to restore.
Step 5 From the High Availability menu, select Restore System.
While the HA configuration is restored, the status of the secondary HA host displays the following in sequence:
a Restoring
b Synchronizing (if disk synchronization is enabled)
c Standby
Step 6 Verify the status of the secondary HA host on the System and License Management window. Choose one of the following options:
• If the secondary HA host displays a status of Standby, you have restored the secondary HA host.
• If the secondary HA host displays a status of Failed or Unknown, go to Step 7.
IBM Security QRadar High Availability Guide
Verifying that the primary HA host is operational 41
Step 7 Using SSH, log in to the Secondary HA host as the root user:
Username: root
Password: <password>
Step 8 Restart the secondary HA host. Type reboot.
What to do next
After the system is restarted, verify the status of the secondary HA host on the System and License Management window. Choose one of the following options:
• If the secondary HA host displays a status of Standby, you have restored the secondary HA host.
• If the secondary HA host displays a status of Failed or Unknown, repeat Step 5.
Verifying that the primary HA host is operational
You must verify that the primary HA host is operational.
Procedure
Step 1 Using SSH, log in to the primary HA host as the root user:
Username: root
Password: <password>
What to do next
Choose one of the following options:
• If you can connect to the primary HA host using SSH, restore the primary HA host. See Restoring a failed primary HA host.
• If you cannot connect to the primary HA host using SSH and if you have Dell Remote Access Controller (DRAC) access to the primary HA host, verify that the primary HA host is on.
Restoring a failedprimary HA host
You can restore a failed primary HA host.
Procedure
Step 1 Click the Admin tab.
Step 2 On the navigation menu, click System Configuration.
Step 3 Click System and License Management.
Step 4 Select the primary HA host that you want to restore.
IBM Security QRadar High Availability Guide

42 TROUBLESHOOT QRADAR HIGH-AVAILABILITY
Step 5 From the High Availability menu, select Restore System.
While the HA configuration is restoring, the status of the primary HA host displays the following in sequence:
a Restoring
b Synchronizing (if disk synchronization is enabled)
c Offline
Step 6 Verify the status of the primary HA host. For more information, see Monitor the High-availability hosts status.
Step 7 Choose one of the following options:
• If the primary HA host displays a status of Offline, go to Step 8.
• If the primary HA host displays a status of Failed or Unknown, go to Step 10.
Step 8 From the System and License Management window, select High Availability > Set System Online.
Step 9 On the System and License Management window, verify the status of the primary HA host. Choose one of the following options:
• If the primary HA host displays a status of Active, you have restored the primary HA host.
• If the primary HA host displays a status of Failed or Unknown, go to Step 10.
Step 10 Using SSH, log in to the primary HA host as the root user:
Username: root
Password: <password>
Step 11 Restart the primary HA host by typing the following command:
reboot
What to do next
Monitor the High-availability hosts status then choose one of the following options:
• If the primary HA host displays a status of Offline, go to Step 8.
• If the primary HA host displays a status of Failed or Unknown, repeat Step 5.
IBM Security QRadar High Availability Guide
Verifying the status of primary and secondary hosts 43
Verifying the status of primary and secondary hosts
You must verify that the primary and secondary HA hosts are operational.
Procedure
Step 1 Identify if the primary HA host was configured as a console or managed host. Choose from one of the following options:
• If your primary HA host was configured as a Console, go to Step 2.
• If you primary HA host was configured as a managed host, go to Step 3.
Step 2 Using SSH, log in to the Cluster Virtual IP address as the root user:
Username: root
Password: <password>
Choose from one of the following options:
• If you can connect to the Cluster Virtual IP address, restore access to the QRadar user interface. For more information, see the IBM Security QRadar SIEM Troubleshooting Guide.
• If you cannot connect to the Cluster Virtual IP address, go to Step 3.
Repeat the following procedure for the primary and secondary HA host IP addresses:
Step 3 Using SSH, log in to the secondary HA host as the root user:
Username: root
Password: <password>
What to do next
Choose one of the following options:
• If you cannot connect to the primary or secondary HA host using SSH, ensure that your network and hardware configuration is operational.
• If can connect to the primary and secondary HA host, identify the most recently Active HA host in your HA cluster, see Identifying the recently active HA host in your HA cluster.
IBM Security QRadar High Availability Guide

44 TROUBLESHOOT QRADAR HIGH-AVAILABILITY
Identifying therecently active HA
host in your HAcluster
You can identify the most recently Active host in your HA cluster.
Procedure
Step 1 Using SSH, log in to the primary HA host as the root user:
Username: root
Password: <password>
Step 2 Display the HA cluster configuration by typing the following command:
cat /proc/drbd
Step 3 Review the following line in the output:
0: cs:Connected ro:Primary/Secondary ds:UpToDate/UpToDate
Choose from one of the following options:
• If the line does not display: cs:Connected, then determine the most recently Active HA host in your cluster.
• If the line displays ro:Primary/Secondary, the Primary HA host is the Active system, go to Step 5.
• If the line displays ro:Secondary/Primary, the secondary HA host is the Active system, go to Step 5.
• If the line displays ro:Secondary/Secondary, go to Step 4.
Step 4 Review the following line in the output:
0: cs:Connected ro:Secondary/Secondary
Choose one of the following options:
• If the line displays: ds:< >/< >,determine the most recently Active HA host in your HA cluster.
• If the line displays: ds:< >/UpToDate, the Secondary HA Host is the Active system, go to Step 5.
• If the line displays: ds:UpToDate/< >, the Primary HA Host is the Active system, go to Step 5.
• If the line displays: ds:UpToDate/UpToDate, determine the most recently Active HA host in your HA cluster.
Step 5 Contact Customer Support for assistance with restoring your Active HA host.
IBM Security QRadar High Availability Guide

Setting a primary host online 45
Setting a primary host online
On the System and License Management window, if the primary HA host displays a status of Offline, set the primary HA host Online.
Procedure
Step 1 Click the Admin tab.
Step 2 On the navigation menu, click System Configuration.
Step 3 Click System and License Management.
Step 4 Select the primary HA host that you want to restore.
Step 5 From the High Availability menu, select Set System Online.
Step 6 On the System and License Management window, verify the status of the primary HA host. Choose from one of the following options:
• If the primary HA host displays a status of Active, you have restored the primary HA host.
• If the primary HA host displays a status of Offline, restore the primary HA host. For more information, see Restoring a failed primary HA host.
IBM Security QRadar High Availability Guide

A
NOTICES AND TRADEMARKSWhat’s in this appendix:
• Notices
• Trademarks
This section describes some important notices, trademarks, and compliance information.
Notices This information was developed for products and services offered in the U.S.A.
IBM may not offer the products, services, or features discussed in this document in other countries. Consult your local IBM representative for information on the products and services currently available in your area. Any reference to an IBM product, program, or service is not intended to state or imply that only that IBM product, program, or service may be used. Any functionally equivalent product, program, or service that does not infringe any IBM intellectual property right may be used instead. However, it is the user's responsibility to evaluate and verify the operation of any non-IBM product, program, or service.
IBM may have patents or pending patent applications covering subject matter described in this document. The furnishing of this document does not grant you any license to these patents. You can send license inquiries, in writing, to:
IBM Director of Licensing IBM Corporation North Castle Drive Armonk, NY 10504-1785 U.S.A.
For license inquiries regarding double-byte character set (DBCS) information, contact the IBM Intellectual Property Department in your country/region or send inquiries, in writing, to:
Intellectual Property Licensing Legal and Intellectual Property Law IBM Japan Ltd. 19-21, Nihonbashi-Hakozakicho, Chuo-kuTokyo 103-8510, Japan
The following paragraph does not apply to the United Kingdom or any other country/region where such provisions are inconsistent with local law:
IBM Security QRadar High Availability Guide

48
INTERNATIONAL BUSINESS MACHINES CORPORATION PROVIDES THIS PUBLICATION "AS IS" WITHOUT WARRANTY OF ANY KIND, EITHER EXPRESS OR IMPLIED, INCLUDING, BUT NOT LIMITED TO, THE IMPLIED WARRANTIES OF NON-INFRINGEMENT, MERCHANTABILITY OR FITNESS FOR A PARTICULAR PURPOSE. Some states do not allow disclaimer of express or implied warranties in certain transactions, therefore, this statement may not apply to you.
This information could include technical inaccuracies or typographical errors. Changes are periodically made to the information herein; these changes will be incorporated in new editions of the publication. IBM may make improvements and/or changes in the product(s) and/or the program(s) described in this publication at any time without notice.
Any references in this information to non-IBM Web sites are provided for convenience only and do not in any manner serve as an endorsement of those Web sites. The materials at those Web sites are not part of the materials for this IBM product and use of those Web sites is at your own risk.
IBM may use or distribute any of the information you supply in any way it believes appropriate without incurring any obligation to you.
Licensees of this program who wish to have information about it for the purpose of enabling: (i) the exchange of information between independently created programs and other programs (including this one) and (ii) the mutual use of the information which has been exchanged, should contact:
IBM Corporation170 Tracer Lane, Waltham MA 02451, USA
Such information may be available, subject to appropriate terms and conditions, including in some cases, payment of a fee.
The licensed program described in this document and all licensed material available for it are provided by IBM under terms of the IBM Customer Agreement, IBM International Program License Agreement or any equivalent agreement between us.
Any performance data contained herein was determined in a controlled environment. Therefore, the results obtained in other operating environments may vary significantly. Some measurements may have been made on development-level systems and there is no guarantee that these measurements will be the same on generally available systems. Furthermore, some measurements may have been estimated through extrapolation. Actual results may vary. Users of this document should verify the applicable data for their specific environment.
Information concerning non-IBM products was obtained from the suppliers of those products, their published announcements or other publicly available sources. IBM has not tested those products and cannot confirm the accuracy of performance, compatibility or any other claims related to non-IBM products. Questions on the
IBM Security QRadar High Availability Guide

Trademarks 49
capabilities of non-IBM products should be addressed to the suppliers of those products.
All statements regarding IBM's future direction or intent are subject to change or withdrawal without notice, and represent goals and objectives only.
All IBM prices shown are IBM's suggested retail prices, are current and are subject to change without notice. Dealer prices may vary.
This information contains examples of data and reports used in daily business operations. To illustrate them as completely as possible, the examples include the names of individuals, companies, brands, and products. All of these names are fictitious and any similarity to the names and addresses used by an actual business enterprise is entirely coincidental.
If you are viewing this information softcopy, the photographs and color illustrations may not appear.
Trademarks IBM, the IBM logo, and ibm.com are trademarks or registered trademarks of International Business Machines Corp., registered in many jurisdictions worldwide. Other product and service names might be trademarks of IBM or other companies. A current list of IBM trademarks is available on the Web at “Copyright and trademark information” at www.ibm.com/legal/copytrade.shtml.
The following terms are trademarks or registered trademarks of other companies:
Linux is a registered trademark of Linus Torvalds in the United States, other countries, or both.
Privacy policy considerations
IBM Software products, including software as a service solutions, (“Software Offerings”) may use cookies or other technologies to collect product usage information, to help improve the end user experience, to tailor interactions with the end user or for other purposes. In many cases no personally identifiable information is collected by the Software Offerings. Some of our Software Offerings can help enable you to collect personally identifiable information. If this Software Offering uses cookies to collect personally identifiable information, specific information about this offering’s use of cookies is set forth below.
Depending upon the configurations deployed, this Software Offering may use session cookies that collect each user’s session id for purposes of session management and authentication. These cookies can be disabled, but disabling them will also eliminate the functionality they enable.
If the configurations deployed for this Software Offering provide you as customer the ability to collect personally identifiable information from end users via cookies and other technologies, you should seek your own legal advice about any laws
IBM Security QRadar High Availability Guide

50
applicable to such data collection, including any requirements for notice and consent.
For more information about the use of various technologies, including cookies, for these purposes, See IBM’s Privacy Policy at http://www.ibm.com/privacy and IBM’s Online Privacy Statement at http://www.ibm.com/privacy/details the section entitled “Cookies, Web Beacons and Other Technologies” and the “IBM Software Products and Software-as-a-Service Privacy Statement” at http://www.ibm.com/software/info/product-privacy.
IBM Security QRadar High Availability Guide

INDEX
Aactivation keys
QRadar 27
Bbuild versions
QRadar 27
Ccluster virtual IP address
HA clustering 5clustering
HA 5crossover cables
tuning HA 24
Ddisconnecting a cluster
updating /etc/fstab 17disk synchronization
post-failover synchronization 4
Ffailovers
HA 6manually enforced failover 7primary disk failure 7
HHA
clustering 5editing a cluster 18non fail-over scenarios 6storage options 11
HA clusterdisconnecting 17updating /etc/fstab 17
HA clustering 5cluster virtual IP address 5HA wizard 5primary HA host 5secondary HA host 5
HA clustersdisplaying IP addresses 15
HA data consistencymaintaining 3offboard storage 12
IBM Security QRadar H
HA disk synchronizationreal-time synchronization 4
HA failovers 6event sequence 7heartbeat ping tests 7network connectivity tests 7primary disk failure 7
HA host statuses 13HA hosts
status information 13HA replication
improving performance 24HA wizard
HA clustering 5
Iinstallation and recovery
QRadar console software on a failed primary HA host 36intended audience 1
LLaptop hyperterminal connections 28
Mmaintaining
HA data consistency 3managing HA
adding an HA cluster 15disconnecting an HA cluster 17editing an HA cluster 18setting a host offline 18setting a host online 19
Nnetwork connections
QRadar 28
Ooffboard storage
solutions 12
Ppartition splitting
estimating partition sizes 22primary and secondary HA hosts 22risks 21
igh Availability Guide

planning for HAappliance guidelines 9backup considerations 11IP addressing 11link bandwidth 11storage guidelines 11subnets 11
primary HA hostHA clustering 5
QQRadar
activation keys 27build versions 27network connections 28
RRecovery
secondary HA console or non-console 29recovery
failed primary HA appliance 30failed primary HA QFlow appliance 33
riskspartition splitting 21
Ssecondary HA host
HA clustering 5
Ttroubleshooting HA
active primary and failed secondary 39are the primary and secondary hosts operational 43identifying the recently active host in your HA cluster 44is the primary host operational 41is the secondary host operational 40offline primary and active secondary 45restoring a failed primary host 41restoring a secondary host 40
tuning HAcrossover cables 24estimating partition sizes 22partition splitting 22partition splitting risks 21partitioning a primary and secondary host 22