Embed Size (px)
Citation preview
Pymunk tutorialRelease 2019
Dec 26, 2019

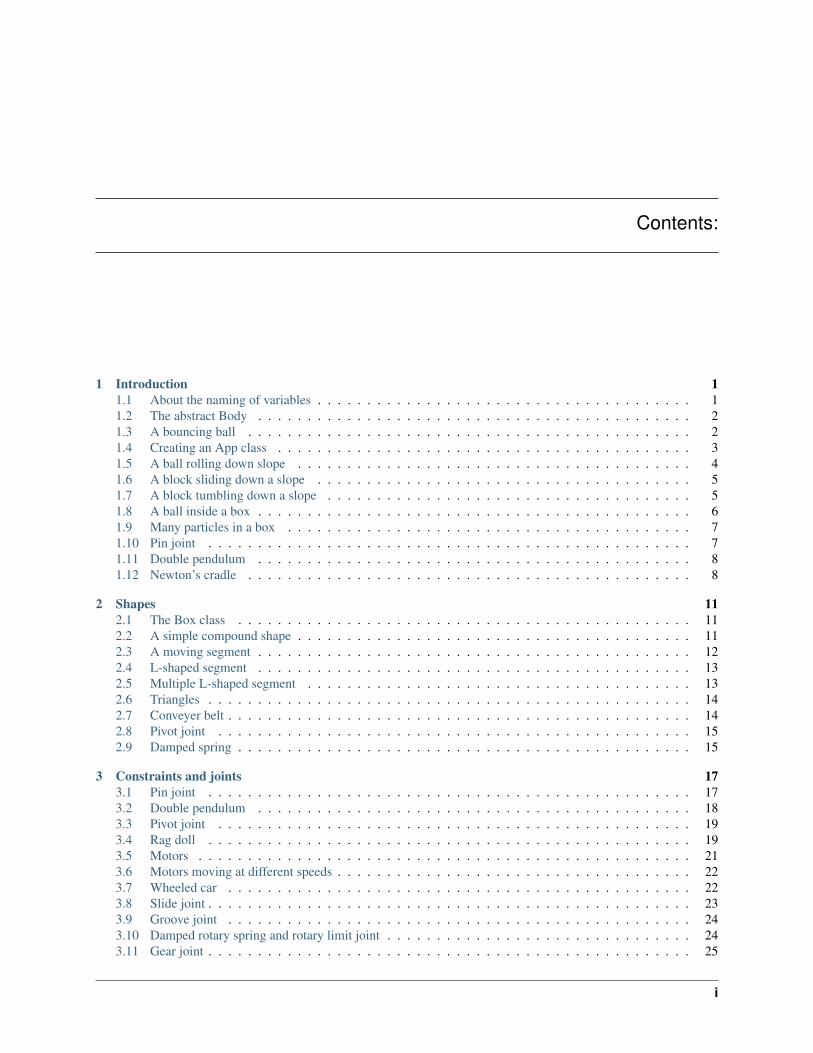
Contents:
1 Introduction 11.1 About the naming of variables . . . . . . . . . . . . . . . . . . . . . . . . . . . . . . . . . . . . . . 11.2 The abstract Body . . . . . . . . . . . . . . . . . . . . . . . . . . . . . . . . . . . . . . . . . . . . 21.3 A bouncing ball . . . . . . . . . . . . . . . . . . . . . . . . . . . . . . . . . . . . . . . . . . . . . 21.4 Creating an App class . . . . . . . . . . . . . . . . . . . . . . . . . . . . . . . . . . . . . . . . . . 31.5 A ball rolling down slope . . . . . . . . . . . . . . . . . . . . . . . . . . . . . . . . . . . . . . . . 41.6 A block sliding down a slope . . . . . . . . . . . . . . . . . . . . . . . . . . . . . . . . . . . . . . 51.7 A block tumbling down a slope . . . . . . . . . . . . . . . . . . . . . . . . . . . . . . . . . . . . . 51.8 A ball inside a box . . . . . . . . . . . . . . . . . . . . . . . . . . . . . . . . . . . . . . . . . . . . 61.9 Many particles in a box . . . . . . . . . . . . . . . . . . . . . . . . . . . . . . . . . . . . . . . . . 71.10 Pin joint . . . . . . . . . . . . . . . . . . . . . . . . . . . . . . . . . . . . . . . . . . . . . . . . . 71.11 Double pendulum . . . . . . . . . . . . . . . . . . . . . . . . . . . . . . . . . . . . . . . . . . . . 81.12 Newton’s cradle . . . . . . . . . . . . . . . . . . . . . . . . . . . . . . . . . . . . . . . . . . . . . 8
2 Shapes 112.1 The Box class . . . . . . . . . . . . . . . . . . . . . . . . . . . . . . . . . . . . . . . . . . . . . . 112.2 A simple compound shape . . . . . . . . . . . . . . . . . . . . . . . . . . . . . . . . . . . . . . . . 112.3 A moving segment . . . . . . . . . . . . . . . . . . . . . . . . . . . . . . . . . . . . . . . . . . . . 122.4 L-shaped segment . . . . . . . . . . . . . . . . . . . . . . . . . . . . . . . . . . . . . . . . . . . . 132.5 Multiple L-shaped segment . . . . . . . . . . . . . . . . . . . . . . . . . . . . . . . . . . . . . . . 132.6 Triangles . . . . . . . . . . . . . . . . . . . . . . . . . . . . . . . . . . . . . . . . . . . . . . . . . 142.7 Conveyer belt . . . . . . . . . . . . . . . . . . . . . . . . . . . . . . . . . . . . . . . . . . . . . . . 142.8 Pivot joint . . . . . . . . . . . . . . . . . . . . . . . . . . . . . . . . . . . . . . . . . . . . . . . . 152.9 Damped spring . . . . . . . . . . . . . . . . . . . . . . . . . . . . . . . . . . . . . . . . . . . . . . 15
3 Constraints and joints 173.1 Pin joint . . . . . . . . . . . . . . . . . . . . . . . . . . . . . . . . . . . . . . . . . . . . . . . . . 173.2 Double pendulum . . . . . . . . . . . . . . . . . . . . . . . . . . . . . . . . . . . . . . . . . . . . 183.3 Pivot joint . . . . . . . . . . . . . . . . . . . . . . . . . . . . . . . . . . . . . . . . . . . . . . . . 193.4 Rag doll . . . . . . . . . . . . . . . . . . . . . . . . . . . . . . . . . . . . . . . . . . . . . . . . . 193.5 Motors . . . . . . . . . . . . . . . . . . . . . . . . . . . . . . . . . . . . . . . . . . . . . . . . . . 213.6 Motors moving at different speeds . . . . . . . . . . . . . . . . . . . . . . . . . . . . . . . . . . . . 223.7 Wheeled car . . . . . . . . . . . . . . . . . . . . . . . . . . . . . . . . . . . . . . . . . . . . . . . 223.8 Slide joint . . . . . . . . . . . . . . . . . . . . . . . . . . . . . . . . . . . . . . . . . . . . . . . . . 233.9 Groove joint . . . . . . . . . . . . . . . . . . . . . . . . . . . . . . . . . . . . . . . . . . . . . . . 243.10 Damped rotary spring and rotary limit joint . . . . . . . . . . . . . . . . . . . . . . . . . . . . . . . 243.11 Gear joint . . . . . . . . . . . . . . . . . . . . . . . . . . . . . . . . . . . . . . . . . . . . . . . . . 25
i
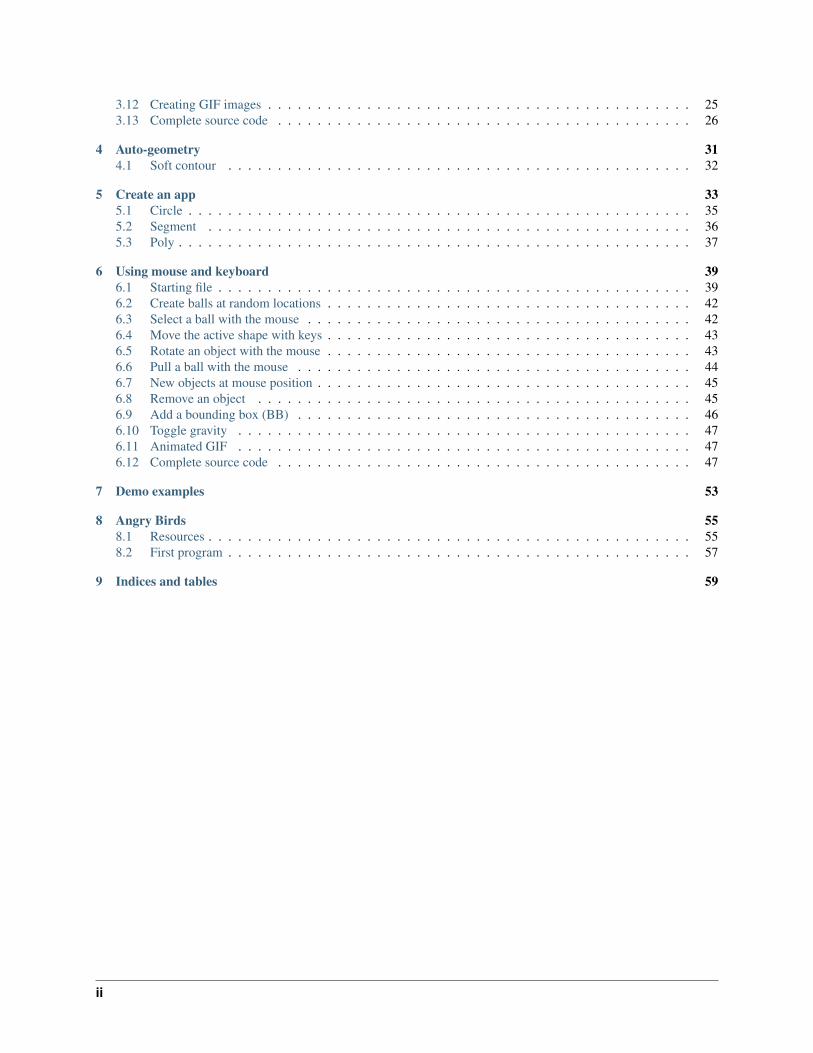
3.12 Creating GIF images . . . . . . . . . . . . . . . . . . . . . . . . . . . . . . . . . . . . . . . . . . . 253.13 Complete source code . . . . . . . . . . . . . . . . . . . . . . . . . . . . . . . . . . . . . . . . . . 26
4 Auto-geometry 314.1 Soft contour . . . . . . . . . . . . . . . . . . . . . . . . . . . . . . . . . . . . . . . . . . . . . . . 32
5 Create an app 335.1 Circle . . . . . . . . . . . . . . . . . . . . . . . . . . . . . . . . . . . . . . . . . . . . . . . . . . . 355.2 Segment . . . . . . . . . . . . . . . . . . . . . . . . . . . . . . . . . . . . . . . . . . . . . . . . . 365.3 Poly . . . . . . . . . . . . . . . . . . . . . . . . . . . . . . . . . . . . . . . . . . . . . . . . . . . . 37
6 Using mouse and keyboard 396.1 Starting file . . . . . . . . . . . . . . . . . . . . . . . . . . . . . . . . . . . . . . . . . . . . . . . . 396.2 Create balls at random locations . . . . . . . . . . . . . . . . . . . . . . . . . . . . . . . . . . . . . 426.3 Select a ball with the mouse . . . . . . . . . . . . . . . . . . . . . . . . . . . . . . . . . . . . . . . 426.4 Move the active shape with keys . . . . . . . . . . . . . . . . . . . . . . . . . . . . . . . . . . . . . 436.5 Rotate an object with the mouse . . . . . . . . . . . . . . . . . . . . . . . . . . . . . . . . . . . . . 436.6 Pull a ball with the mouse . . . . . . . . . . . . . . . . . . . . . . . . . . . . . . . . . . . . . . . . 446.7 New objects at mouse position . . . . . . . . . . . . . . . . . . . . . . . . . . . . . . . . . . . . . . 456.8 Remove an object . . . . . . . . . . . . . . . . . . . . . . . . . . . . . . . . . . . . . . . . . . . . 456.9 Add a bounding box (BB) . . . . . . . . . . . . . . . . . . . . . . . . . . . . . . . . . . . . . . . . 466.10 Toggle gravity . . . . . . . . . . . . . . . . . . . . . . . . . . . . . . . . . . . . . . . . . . . . . . 476.11 Animated GIF . . . . . . . . . . . . . . . . . . . . . . . . . . . . . . . . . . . . . . . . . . . . . . 476.12 Complete source code . . . . . . . . . . . . . . . . . . . . . . . . . . . . . . . . . . . . . . . . . . 47
7 Demo examples 53
8 Angry Birds 558.1 Resources . . . . . . . . . . . . . . . . . . . . . . . . . . . . . . . . . . . . . . . . . . . . . . . . . 558.2 First program . . . . . . . . . . . . . . . . . . . . . . . . . . . . . . . . . . . . . . . . . . . . . . . 57
9 Indices and tables 59
ii

CHAPTER 1
Introduction
This tutorial shows how to make applications with the 2D physics framework Pymunk in an object-oriented program-ming style.
1.1 About the naming of variables
Before we get started, get familiar with some conventions used in this tutorial. In order to make the programs simpleand short, we will use short variable names.
• b stands for Body
• c stands for Constraint
• s stands for Shape
An important class is the Vec2d class which indicates either the absolute position of a point in space, or the directionvector between two points.
• p stands for position
• v stands for vector
We could define a vector as the difference between two points in space:
v = p1 - p0
A final s serves as a plural marker.
• bs is a list of bodies
• ps is a list of positions
• vs is a list of vectors
We can use the plural marker in a loop structure such as:
1
Pymunk tutorial, Release 2019
for b in bs:print(b)
The static body is used frequently, so we give it the short name b0
b0 = space.static_body
1.2 The abstract Body
The Body class describes the physical aspects of an objects. These aspects cannot be seen, but describe how it moves.Six properties describe the state of a body
• mass - how heavy it is
• moment - it’s resistance to rotation
• position - it’s spatial location
• angle - the current orientation
• velocity - how fast and in which direction it is moving
• angular_velocity - how fast in which direction it is rotatting
1.3 A bouncing ball
We start this tutorial with a simple bouncing ball simulation. The first thing we need to do is to import the pymunkand the pygame module:
import pymunkimport pymunk.pygame_utilimport pygame
Then we initialize the Pygame module and define the screen surface where we are going to draw the simulationresult. Pymunk comes with a simple draw option which can be used for quick prototyping:
pygame.init()size = 640, 240screen = pygame.display.set_mode(size)draw_options = pymunk.pygame_util.DrawOptions(screen)
The 2D physics simulation takes place in a Space object. We define space as a global variable and assign it agravity vector:
space = pymunk.Space()space.gravity = 0, -900
To create a fixed ground for our object we create a Segment shape attached to the static body b0. In order to makethe ball bounce, we give it an elasticity of 1:
b0 = space.static_bodysegment = pymunk.Segment(b0, (0, 0), (640, 0), 4)segment.elasticity = 1
Next, we create a dynamic body and give it a mass, moment and position:
2 Chapter 1. Introduction

Pymunk tutorial, Release 2019
body = pymunk.Body(mass=1, moment=10)body.position = 100, 200
Then we create a Circle shape and attach it to the body:
circle = pymunk.Circle(body, radius=20)circle.elasticity = 0.95
Finally we add the body, circle and segment to the space. Now we are ready for simulation:
space.add(body, circle, segment)
In the last part we start the Pygame event loop. The only event we are going to detect is the QUIT event:
running = Truewhile running:
for event in pygame.event.get():if event.type == pygame.QUIT:
running = False
In the latter part of the event loop we draw the obejcts. First we fill the screen with a gray background color. Then wedraw the two objects with the space.debug_draw() function, call the display update function, and finally stepthe simulation forward by 0.01 time units:
screen.fill(GRAY)space.debug_draw(draw_options)pygame.display.update()space.step(0.01)
pygame.quit()
intro1.py
1.4 Creating an App class
To simplfy the tutorial examples we will create a reusable App class which will run the simulation. This class will:
• initialize Pygame
• create a screen object
1.4. Creating an App class 3
Pymunk tutorial, Release 2019
• create a space object
• set the draw option
• run the event loop
• draw the objects to the screen
Here is the class definition with the constructor method:
class App:def __init__(self):
pygame.init()self.screen = pygame.display.set_mode((700, 240))self.draw_options = pymunk.pygame_util.DrawOptions(self.screen)self.running = True
The App class has a run() method which runs the Pygame event loop:
def run(self):while self.running:
for event in pygame.event.get():if event.type == pygame.QUIT:
self.running = Falsepygame.image.save(self.screen, 'intro.png')
self.screen.fill((220, 220, 220))space.debug_draw(self.draw_options)pygame.display.update()space.step(0.01)
pygame.quit()
intro.py
1.5 A ball rolling down slope
We can now import pymunk, space and the App class:
from intro import pymunk, space, App
Let’s define an inclined segment and give it friction:
segment = pymunk.Segment(space.static_body, (20, 120), (400, 20), 1)segment.elasticity = 0.5segment.friction = 0.5
The circle shape also needs friction, in order to roll. Whithout friction it would just glide down the slope:
circle = pymunk.Circle(body, radius=20)circle.elasticty = 0.5circle.friction = 0.5space.add(body, circle, segment)
Finally we instantiate the app and call the run() method:
App().run()
4 Chapter 1. Introduction

Pymunk tutorial, Release 2019
intro2.py
1.6 A block sliding down a slope
The Poly class has a method to create box shapes. Without elasticity it slides down the slope:
box = pymunk.Poly.create_box(body, (50, 50))space.add(body, box, segment)
intro3.py
1.7 A block tumbling down a slope
Now we add elasticity to the box shape. It tumbles down the slope:
box = pymunk.Poly.create_box(body, (50, 50))box.elasticity = 0.95space.add(body, box, segment)
1.6. A block sliding down a slope 5
Pymunk tutorial, Release 2019
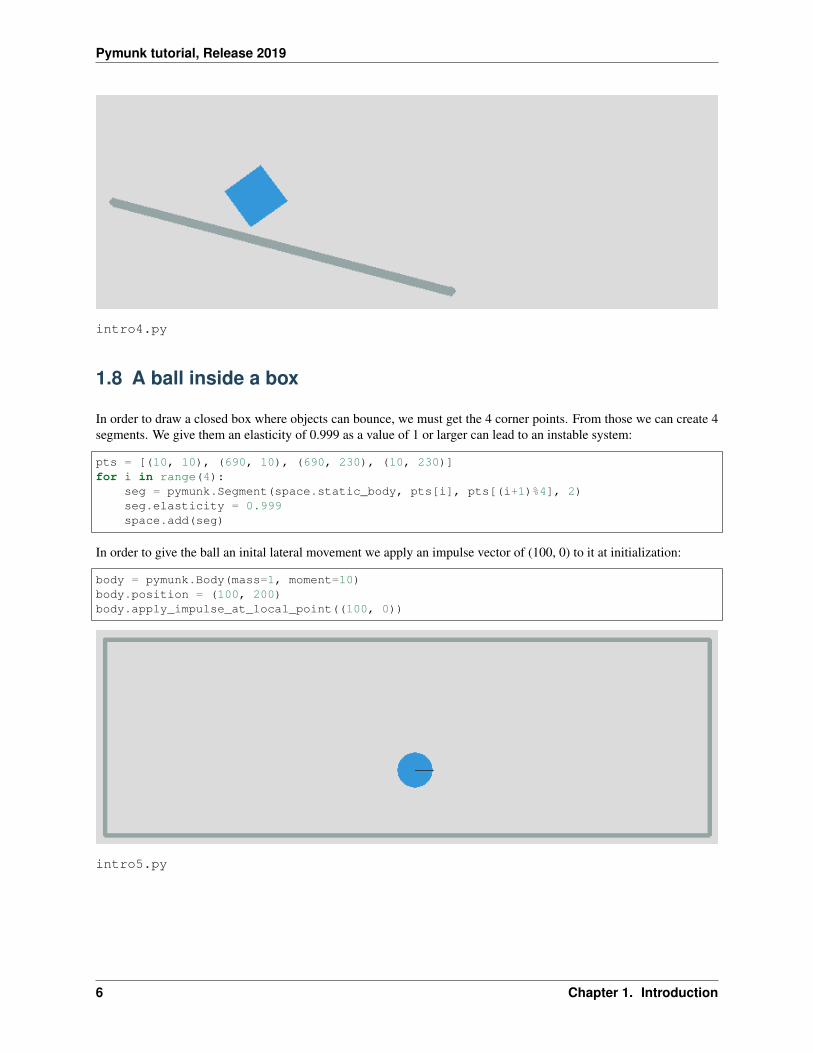
intro4.py
1.8 A ball inside a box
In order to draw a closed box where objects can bounce, we must get the 4 corner points. From those we can create 4segments. We give them an elasticity of 0.999 as a value of 1 or larger can lead to an instable system:
pts = [(10, 10), (690, 10), (690, 230), (10, 230)]for i in range(4):
seg = pymunk.Segment(space.static_body, pts[i], pts[(i+1)%4], 2)seg.elasticity = 0.999space.add(seg)
In order to give the ball an inital lateral movement we apply an impulse vector of (100, 0) to it at initialization:
body = pymunk.Body(mass=1, moment=10)body.position = (100, 200)body.apply_impulse_at_local_point((100, 0))
intro5.py
6 Chapter 1. Introduction

Pymunk tutorial, Release 2019
1.9 Many particles in a box
In order to simulate many particles in a box, we first turn off gravity. The we create a large number of particles atrandom location and give them random impulses as a starting movement:
space.gravity = 0, 0for i in range(40):
body = pymunk.Body(mass=1, moment=10)body.position = randint(40, 660), randint(40, 200)impulse = randint(-100, 100), randint(-100, 100)body.apply_impulse_at_local_point(impulse)circle = pymunk.Circle(body, radius=10)circle.elasticity = 0.999circle.friction = 0.5space.add(body, circle)
intro6.py
1.10 Pin joint
A PinJoint links two bodies with a solid link or pin. For all static points of attachement we use the same space.static_body which has its default position at (0, 0):
b0 = space.static_body
As the dynamic body we place a sphere at (100, 100):
body = pymunk.Body(mass=1, moment=10)body.position = (100, 100)circle = pymunk.Circle(body, radius=20)
The PinJoint methode takes 2 bodies and their local positions as argument. We place the static body b0’s anchorat (200, 200) and leave the dynamic body at its default anchor of (0, 0). This creates a pin between static point (200,200) and dynamic point (100, 100):
joint = pymunk.constraint.PinJoint(b0, body, (200, 200))
Due to gravity, the pendulum starts swinging.
1.9. Many particles in a box 7

Pymunk tutorial, Release 2019
intro7.py
1.11 Double pendulum
If a moving eleastic pendulum hits another pendulum of the same mass, the energy is entirely transferred to the secondobject.
intro8.py
1.12 Newton’s cradle
Newton’s cradle is a device that demonstrates conservation of momentum and energy using a series of swingingspheres.
8 Chapter 1. Introduction

Pymunk tutorial, Release 2019
intro9.py
1.12. Newton’s cradle 9
Pymunk tutorial, Release 2019
10 Chapter 1. Introduction

CHAPTER 2
Shapes
In this section we look at different shapes. Shapes are attached to bodies. There are three basic shape classes:
• Circle
• Segment
• Poly
2.1 The Box class
Many of the simulations require a static box to contain the dynamic elements. So let’s define the Box class whichtakes 2 diagonal end points to define a box:
class Box:def __init__(self, p0=(10, 10), p1=(690, 230), d=2):
x0, y0 = p0x1, y1 = p1pts = [(x0, y0), (x1, y0), (x1, y1), (x0, y1)]for i in range(4):
segment = pymunk.Segment(space.static_body, pts[i], pts[(i+1)%4], d)segment.elasticity = 1segment.friction = 1space.add(segment)
The new class library for this section can be found here:
shape.py
2.2 A simple compound shape
Two separate shapes can be attached to a body. To distinguish them we give them different colors.
11

Pymunk tutorial, Release 2019
shape1.py
2.3 A moving segment
Segments are linear elements which have a radius. The following code represents a segment of length 100 with itscenter of gravity at the center:
body = pymunk.Body(mass=1, moment=1000)body.position = (100, 200)body.apply_impulse_at_local_point((100, 0), (0, 1))
shape = pymunk.Segment(body, (-50, 0), (50, 0), radius=10)shape.elasticity = 0.999space.add(body, shape)
shape2.py
12 Chapter 2. Shapes
Pymunk tutorial, Release 2019
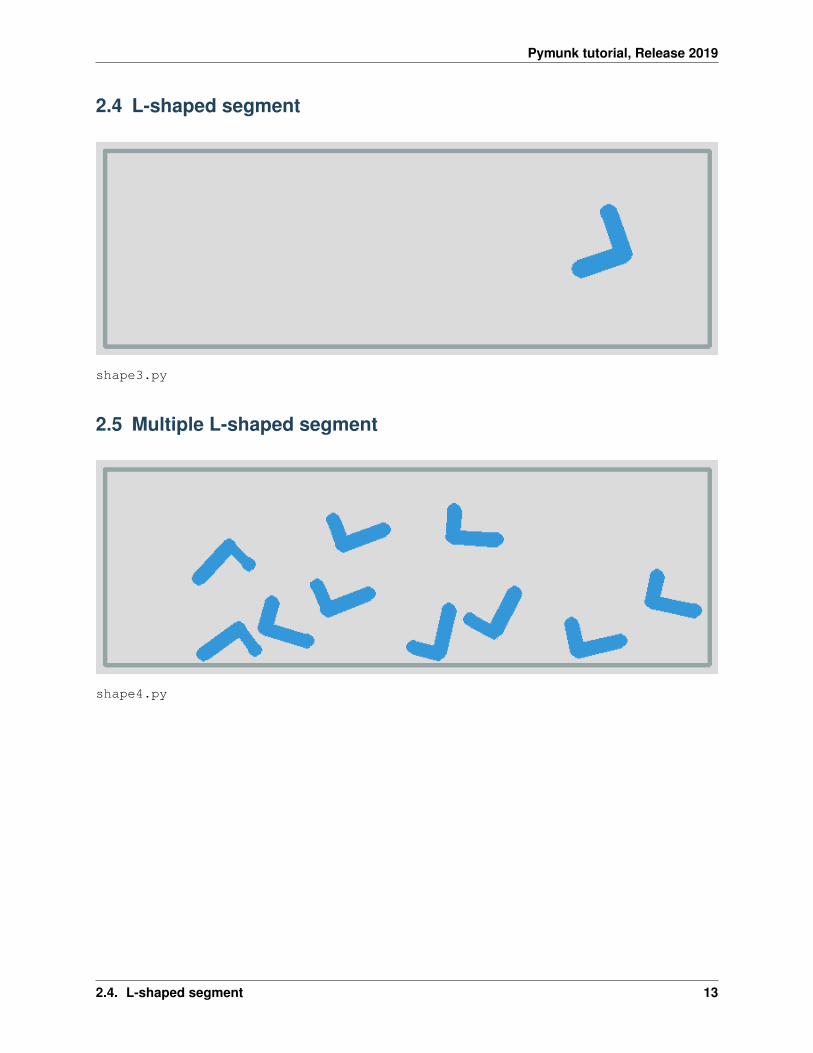
2.4 L-shaped segment
shape3.py
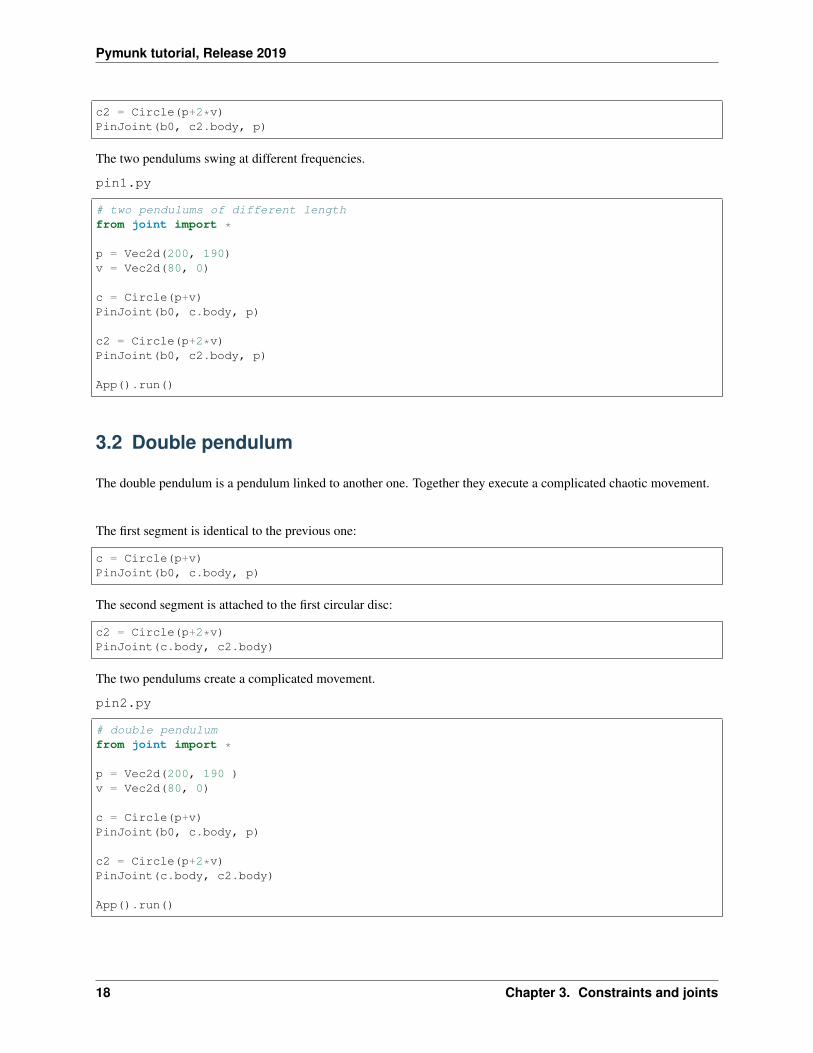
2.5 Multiple L-shaped segment
shape4.py
2.4. L-shaped segment 13

Pymunk tutorial, Release 2019
2.6 Triangles
shape6.py
2.7 Conveyer belt
shape7.py
14 Chapter 2. Shapes

Pymunk tutorial, Release 2019
2.8 Pivot joint
shape8.py
2.9 Damped spring
shape9.py
2.8. Pivot joint 15

Pymunk tutorial, Release 2019
16 Chapter 2. Shapes

CHAPTER 3
Constraints and joints
A constraint describes how two bodies interact with each other. Constraints can be simple joints, which allow bodiesto pivot around each other, as well as springs, grooves or motors.
3.1 Pin joint
The pin joint links two bodies with a solid bar or pin.
We create a new PinJoint class which connects the two bodies b and b2 at their anchor points a and a2 via a pinjoint. By adding the new joint directly to space, we save one line of code.
class PinJoint:def __init__(self, b, b2, a=(0, 0), a2=(0, 0)):
joint = pymunk.constraint.PinJoint(b, b2, a, a2)space.add(joint)
We define the static body b0 which will be used for everything static:
b0 = space.static_body
We will label position points with p and vectors with v. The suspension point for the pendulum is p and the initial pinvector is v:
p = Vec2d(200, 190)v = Vec2d(80, 0)
Now we can define the first circular body c and attach it with a pin joint to the static body b0 at position p:
c = Circle(p+v)PinJoint(b0, c.body, p)
A second circular body c2 is placed at twice the vector distance:
17
Pymunk tutorial, Release 2019
c2 = Circle(p+2*v)PinJoint(b0, c2.body, p)
The two pendulums swing at different frequencies.
pin1.py
# two pendulums of different lengthfrom joint import *
p = Vec2d(200, 190)v = Vec2d(80, 0)
c = Circle(p+v)PinJoint(b0, c.body, p)
c2 = Circle(p+2*v)PinJoint(b0, c2.body, p)
App().run()
3.2 Double pendulum
The double pendulum is a pendulum linked to another one. Together they execute a complicated chaotic movement.
The first segment is identical to the previous one:
c = Circle(p+v)PinJoint(b0, c.body, p)
The second segment is attached to the first circular disc:
c2 = Circle(p+2*v)PinJoint(c.body, c2.body)
The two pendulums create a complicated movement.
pin2.py
# double pendulumfrom joint import *
p = Vec2d(200, 190 )v = Vec2d(80, 0)
c = Circle(p+v)PinJoint(b0, c.body, p)
c2 = Circle(p+2*v)PinJoint(c.body, c2.body)
App().run()
18 Chapter 3. Constraints and joints

Pymunk tutorial, Release 2019
3.3 Pivot joint
A pivot joint allows two objects to pivot about a single point.
We define a new PivotJoint class which connects the two bodies b and b2 at their anchor points a and a2 via apivot joint. By adding the new joint directly to space, we save one line of code.
class PivotJoint:def __init__(self, b, b2, a=(0, 0), a2=(0, 0), collide=True):
joint = pymunk.constraint.PinJoint(b, b2, a, a2)joint.collide_bodies = collidespace.add(joint)
We define the first segment with its position point p and its direction vector v. Then we define a pivot joint in the staticbody b0 located at position p:
segment = Segment(p, v)PivotJoint(b0, segment.body, p)
A bit to the right, we create another segment, twice the length of the first:
segment = Segment(p+3*v, 2*v)PivotJoint(b0, segment.body, p+3*v)
To this longer segment we attach a shorter one to create a double pendulum:
segment2 = Segment(p+5*v, v)PivotJoint(segment.body, segment2.body, 2*v)
joint1.py
# pivot pointfrom joint import *
p = Vec2d(70, 190)v = Vec2d(60, 0)
segment = Segment(p, v)PivotJoint(b0, segment.body, p)
segment = Segment(p+3*v, 2*v)PivotJoint(b0, segment.body, p+3*v)
segment2 = Segment(p+5*v, v)PivotJoint(segment.body, segment2.body, 2*v)
App().run()
3.4 Rag doll
In a rag doll, the different elements of the body (torso, arm, forarm, leg) can cross, without creating collisions. This ispossible when the shapes belong to the same group:
3.3. Pivot joint 19
Pymunk tutorial, Release 2019
shape.filter = pymunk.ShapeFilter(group=1)
We define the torse by it’s center point p0 and the 4 vertices:
p0 = Vec2d(200, 150)vs = [(-30, 50), (30, 50), (40, -50), (-40, -50)]v0, v1, v2, v3 = vstorso = Poly(p0, vs)c = pymunk.Circle(torso.body, 20, (0, 70))space.add(c)
Then we attach the left arm to the torso:
arm = Segment(p0+v0, -v)PivotJoint(torso.body, arm.body, v0, (0, 0))
and then the left forearm to the upper arm:
forearm = Segment(p0+v0-v, -v)PivotJoint(arm.body, forearm.body, -v, (0, 0))
We do the same on the right side, and finally attach the two legs:
leg = Segment(p0+v2, (20, -100))PivotJoint(torso.body, leg.body, v2, (0, 0))
joint2.py
# rag dollfrom joint import *
Box()
p = Vec2d(200, 120)vs = [(-30, 40), (30, 40), (40, -40), (-40, -40)]v0, v1, v2, v3 = vstorso = Poly(p, vs)
c = pymunk.Circle(torso.body, 20, (0, 60))space.add(c)
v = Vec2d(60, 0)arm = Segment(p+v0, -v)PivotJoint(torso.body, arm.body, v0, (0, 0))
forearm = Segment(p+v0-v, -v)PivotJoint(arm.body, forearm.body, -v, (0, 0))
arm = Segment(p+v1, v)PivotJoint(torso.body, arm.body, v1, (0, 0))
forearm = Segment(p+v1+v, v)PivotJoint(arm.body, forearm.body, v, (0, 0))
leg = Segment(p+v2, (20, -100))
(continues on next page)
20 Chapter 3. Constraints and joints
Pymunk tutorial, Release 2019
(continued from previous page)
PivotJoint(torso.body, leg.body, v2, (0, 0))
leg = Segment(p+v3, (-10, -100))PivotJoint(torso.body, leg.body, v3, (0, 0))
App().run()
3.5 Motors
The SimpleMotor class keeps the relative angular velocity between two bodies at a constant rate.
class SimpleMotor:def __init__(self, b, b2, rate):
joint = pymunk.constraint.SimpleMotor(b, b2, rate)space.add(joint)
In the following example code we have 3 constraints:
• a pivot joint makes a segment rotation around a point
• a pivot + motor joint, makes a rotation around a pivot point at a constant angular speed (10 radians/s)
• a motor joint, makes a freely moving segment follow the motor angle
This is the passive pivot joint:
p = 100, 120v = 80,10arm = Segment(p, v)PivotJoint(b0, arm.body, p)
This is the motorized pivot joint:
p1 = 200, 120arm = Segment(p1, v)PivotJoint(b0, arm.body, p1)SimpleMotor(b0, arm.body, 10)
This is the motor joint without a pivot:
p2 = 300, 120arm = Segment(p2, v)SimpleMotor(b0, arm.body, 10)
joint3.py
# motorsfrom joint import *Box()
p = 100, 120v = 60,10arm = Segment(p, v)PivotJoint(b0, arm.body, p)
(continues on next page)
3.5. Motors 21

Pymunk tutorial, Release 2019
(continued from previous page)
p1 = 200, 120arm = Segment(p1, v)PivotJoint(b0, arm.body, p1)SimpleMotor(b0, arm.body, 10)
p2 = 300, 120arm = Segment(p2, v)SimpleMotor(b0, arm.body, 10)
App().run()
3.6 Motors moving at different speeds
In the following example 3 segments move at 3 different rotation rates. The first motor moves at speed 1:
arm = Segment(p, v)PivotJoint(b0, arm.body, p)SimpleMotor(b0, arm.body, 1)
The second motor moves at speed 3 and the last one at speed 6, which means about one rotation per second.
joint4.py
# different rotation speedsfrom joint import *
p = 100, 100v = 80, 0arm = Segment(p, v)PivotJoint(b0, arm.body, p)SimpleMotor(b0, arm.body, 1)
p = 200, 100arm = Segment(p, v)PivotJoint(b0, arm.body, p)SimpleMotor(b0, arm.body, 5)
p = 300, 100arm = Segment(p, v)PivotJoint(b0, arm.body, p)SimpleMotor(b0, arm.body, 10)
App().run()
3.7 Wheeled car
To create a simplistic car we attach 2 wheels to a rectangular chassis, based on a central position point and a vertexlist:
22 Chapter 3. Constraints and joints
Pymunk tutorial, Release 2019
p = Vec2d(200, 150)vs = [(-50, -30), (50, -30), (50, 30), (-50, 30)]v0, v1, v2, v3 = vschassis = Poly(p, vs)
We place the wheels to the lower left and right corners of the chassis:
wheel1 = Circle(p+v0)wheel2 = Circle(p+v1)
Both wheels are then motorized at the same speed:
PivotJoint(chassis.body, wheel1.body, v0, (0, 0))SimpleMotor(chassis.body, wheel1.body, 5)
joint5.py
# car with pivot and motor jointfrom joint import *
Box()
p = Vec2d(200, 150)vs = [(-50, -30), (50, -30), (50, 30), (-50, 30)]v0, v1, v2, v3 = vschassis = Poly(p, vs)
wheel1 = Circle(p+v0)wheel2 = Circle(p+v1)
PivotJoint(chassis.body, wheel1.body, v0, (0, 0), False)SimpleMotor(chassis.body, wheel1.body, 5)
PivotJoint(chassis.body, wheel2.body, v1, (0, 0), False)SimpleMotor(chassis.body, wheel2.body, 5)
App().run()
3.8 Slide joint
A slide joint is like a pin joint, but instead of having a fixed distance, the distance between the two anchor pointscan vary between a minimum and maximum distance. First we define a rotating arm created from a Segment. Thesegment is placed at position p0 and has a direction vector v:
p = Vec2d(200, 120)v = Vec2d(80, 0)arm = Segment(p, v)
In order to rotate the arm, we add to joints: a pivot joint and a simple motor joint:
PivotJoint(b0, arm.body, p)SimpleMotor(b0, arm.body, 1)
The we create a ball from the Circle class and attach with a SlideJoint to the rotating arm:
3.8. Slide joint 23

Pymunk tutorial, Release 2019
ball = Circle(p+v+(40, 0), r)SlideJoint(arm.body, ball.body, v, (-r, 0), min, max)
In this case the arm and the ball do collide. Now we create a second arm-and-ball mechanism, and this time don’tallow bodies to collide:
ball = Circle(p+v+(40, 0), r)SlideJoint(arm.body, ball.body, v, (-r, 0), min, max, False)
This is the simulation result. The first ball collides with the arm. The second ball does not collide with the movingarm.
joint6.py
3.9 Groove joint
GrooveJoint is similar to a PivotJoint, but with a linear slide. First we create a rotating arm:
arm = Segment(p, v)PivotJoint(b0, arm.body, p)SimpleMotor(b0, arm.body, 1)
Then we create a circle and attach it to a groove joint:
ball = Circle(p+v, 20)GrooveJoint(arm.body, ball.body, (0, 0), v, (0, 0))
joint7.py
3.10 Damped rotary spring and rotary limit joint
To simplify its use we define again two new classes.
class DampedRotarySpring:def __init__(self, b, b2, angle, stiffness, damping):
joint = pymunk.constraint.DampedRotarySpring(b, b2, angle, stiffness, damping)
space.add(joint)
and
class RotaryLimitJoint:def __init__(self, b, b2, min, max, collide=True):
joint = pymunk.constraint.RotaryLimitJoint(b, b2, min, max)joint.collide_bodies = collidespace.add(joint)
Then we define a rotary segment:
24 Chapter 3. Constraints and joints

Pymunk tutorial, Release 2019
arm = Segment(p0, v)PivotJoint(b0, arm.body, p0)SimpleMotor(b0, arm.body, 1)
We attache a second arm segment via a damped rotary spring:
arm2 = Segment(p0+v, v)PivotJoint(arm.body, arm2.body, v, (0, 0))DampedRotarySpring(arm.body, arm2.body, 0, 10000000, 10000)
joint8.py
3.11 Gear joint
A gear joint keeps the angular velocity ratio of a pair of bodies constant.
We define two wheels who touch:
p0 = Vec2d(200, 120)r1, r2 = 40, 80v = Vec2d(r1+r2, 0)wheel1 = Circle(p0, r1)wheel2 = Circle(p0+v, r2)
Then we motorize the first wheel, place a pivot on both bodies, and add a gear joint with a ratio of -r2/r1:
SimpleMotor(b0, wheel1.body, 5)PivotJoint(b0, wheel1.body, p0)PivotJoint(b0, wheel2.body, p0+v)GearJoint(wheel1.body, wheel2.body, 0, -r2/r1)
joint10.py
3.12 Creating GIF images
We can use the PIL library to create an animated GIF.
def make_gif(self):if self.gif > 0:
strFormat = 'RGBA'raw_str = pygame.image.tostring(self.screen, strFormat, False)image = Image.frombytes(
strFormat, self.screen.get_size(), raw_str)self.images.append(image)self.gif -= 1if self.gif == 0:
self.images[0].save('joint.gif',save_all=True, append_images=self.images[1:],optimize=True, duration=1000//fps, loop=0)
self.images = []
3.11. Gear joint 25

Pymunk tutorial, Release 2019
3.13 Complete source code
joint.py
import pymunkfrom pymunk.pygame_util import *from pymunk.vec2d import Vec2d
import pygamefrom pygame.locals import *
import mathfrom PIL import Image
space = pymunk.Space()space.gravity = 0, -900b0 = space.static_body
size = w, h = 400, 200fps = 30steps = 10
BLACK = (0, 0, 0)GRAY = (220, 220, 220)WHITE = (255, 255, 255)
class PinJoint:def __init__(self, b, b2, a=(0, 0), a2=(0, 0)):
joint = pymunk.constraint.PinJoint(b, b2, a, a2)space.add(joint)
class PivotJoint:def __init__(self, b, b2, a=(0, 0), a2=(0, 0), collide=True):
joint = pymunk.constraint.PinJoint(b, b2, a, a2)joint.collide_bodies = collidespace.add(joint)
class SlideJoint:def __init__(self, b, b2, a=(0, 0), a2=(0, 0), min=50, max=100, collide=True):
joint = pymunk.constraint.SlideJoint(b, b2, a, a2, min, max)joint.collide_bodies = collidespace.add(joint)
class GrooveJoint:def __init__(self, a, b, groove_a, groove_b, anchor_b):
joint = pymunk.constraint.GrooveJoint(a, b, groove_a, groove_b, anchor_b)
joint.collide_bodies = Falsespace.add(joint)
class DampedRotarySpring:def __init__(self, b, b2, angle, stiffness, damping):
(continues on next page)
26 Chapter 3. Constraints and joints

Pymunk tutorial, Release 2019
(continued from previous page)
joint = pymunk.constraint.DampedRotarySpring(b, b2, angle, stiffness, damping)
space.add(joint)
class RotaryLimitJoint:def __init__(self, b, b2, min, max, collide=True):
joint = pymunk.constraint.RotaryLimitJoint(b, b2, min, max)joint.collide_bodies = collidespace.add(joint)
class RatchetJoint:def __init__(self, b, b2, phase, ratchet):
joint = pymunk.constraint.GearJoint(b, b2, phase, ratchet)space.add(joint)
class SimpleMotor:def __init__(self, b, b2, rate):
joint = pymunk.constraint.SimpleMotor(b, b2, rate)space.add(joint)
class GearJoint:def __init__(self, b, b2, phase, ratio):
joint = pymunk.constraint.GearJoint(b, b2, phase, ratio)space.add(joint)
class Segment:def __init__(self, p0, v, radius=10):
self.body = pymunk.Body()self.body.position = p0shape = pymunk.Segment(self.body, (0, 0), v, radius)shape.density = 0.1shape.elasticity = 0.5shape.filter = pymunk.ShapeFilter(group=1)shape.color = (0, 255, 0, 0)space.add(self.body, shape)
class Circle:def __init__(self, pos, radius=20):
self.body = pymunk.Body()self.body.position = posshape = pymunk.Circle(self.body, radius)shape.density = 0.01shape.friction = 0.5shape.elasticity = 1space.add(self.body, shape)
class Box:def __init__(self, p0=(0, 0), p1=(w, h), d=4):
x0, y0 = p0x1, y1 = p1
(continues on next page)
3.13. Complete source code 27
Pymunk tutorial, Release 2019
(continued from previous page)
pts = [(x0, y0), (x1, y0), (x1, y1), (x0, y1)]for i in range(4):
segment = pymunk.Segment(space.static_body, pts[i], pts[(i+1) % 4], d)
segment.elasticity = 1segment.friction = 0.5space.add(segment)
class Poly:def __init__(self, pos, vertices):
self.body = pymunk.Body(1, 100)self.body.position = pos
shape = pymunk.Poly(self.body, vertices)shape.filter = pymunk.ShapeFilter(group=1)shape.density = 0.01shape.elasticity = 0.5shape.color = (255, 0, 0, 0)space.add(self.body, shape)
class Rectangle:def __init__(self, pos, size=(80, 50)):
self.body = pymunk.Body()self.body.position = pos
shape = pymunk.Poly.create_box(self.body, size)shape.density = 0.1shape.elasticity = 1shape.friction = 1space.add(self.body, shape)
class App:def __init__(self):
pygame.init()self.clock = pygame.time.Clock()self.screen = pygame.display.set_mode(size)self.draw_options = DrawOptions(self.screen)self.running = Trueself.gif = 0self.images = []
def run(self):while self.running:
for event in pygame.event.get():self.do_event(event)
self.draw()self.clock.tick(fps)
for i in range(steps):space.step(1/fps/steps)
pygame.quit()
(continues on next page)
28 Chapter 3. Constraints and joints

Pymunk tutorial, Release 2019
(continued from previous page)
def do_event(self, event):if event.type == QUIT:
self.running = False
if event.type == KEYDOWN:if event.key in (K_q, K_ESCAPE):
self.running = False
elif event.key == K_p:pygame.image.save(self.screen, 'joint.png')
elif event.key == K_g:self.gif = 60
def draw(self):self.screen.fill(GRAY)space.debug_draw(self.draw_options)pygame.display.update()
text = f'fpg: {self.clock.get_fps():.1f}'pygame.display.set_caption(text)self.make_gif()
def make_gif(self):if self.gif > 0:
strFormat = 'RGBA'raw_str = pygame.image.tostring(self.screen, strFormat, False)image = Image.frombytes(
strFormat, self.screen.get_size(), raw_str)self.images.append(image)self.gif -= 1if self.gif == 0:
self.images[0].save('joint.gif',save_all=True, append_images=self.images[1:],optimize=True, duration=1000//fps, loop=0)
self.images = []
if __name__ == '__main__':Box()p = 100, 180c = Circle(p)c.body.apply_impulse_at_local_point((10000, 0))App().run()
3.13. Complete source code 29
Pymunk tutorial, Release 2019
30 Chapter 3. Constraints and joints

CHAPTER 4
Auto-geometry
The autogeometry module contains functions for automatic generation of geometry. This can be used to create asegment line or a polygon.
Lets give an example with a 7x7 pixel image:
img = """........xxx....xxx.....xx.....xxxx...xxxx........""".split()
Which produces this list:
['.......', '.xxx...', '.xxx...', '..xx...', '..xxxx.', '..xxxx.', '.......']
Then we prepare an empty segment list and define two functions needed for the segmentation algorithm:
segments = []
def segment_func(p0, p1):segments.append((p0, p1))
def sample_func(point):x = int(point.x)y = 6-int(point.y)return 1 if img[y][x] == 'x' else 0
Now we can call the march_hard segmentation algorithm:
31
Pymunk tutorial, Release 2019
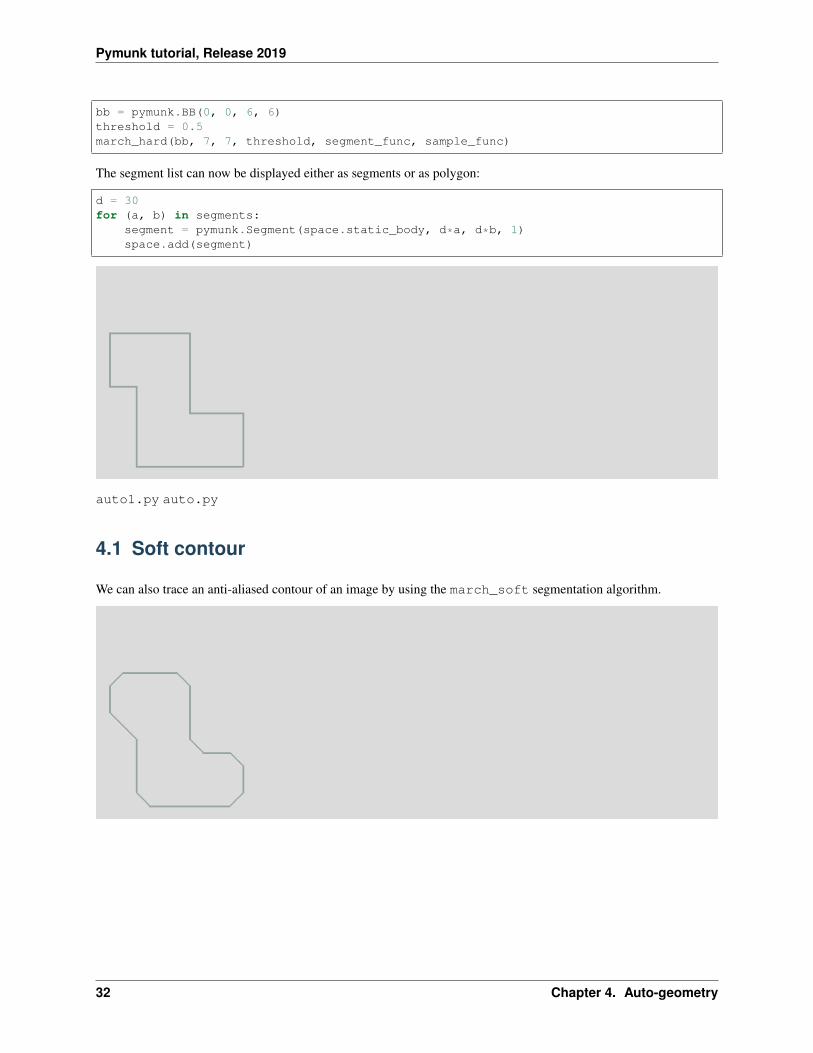
bb = pymunk.BB(0, 0, 6, 6)threshold = 0.5march_hard(bb, 7, 7, threshold, segment_func, sample_func)
The segment list can now be displayed either as segments or as polygon:
d = 30for (a, b) in segments:
segment = pymunk.Segment(space.static_body, d*a, d*b, 1)space.add(segment)
auto1.py auto.py
4.1 Soft contour
We can also trace an anti-aliased contour of an image by using the march_soft segmentation algorithm.
32 Chapter 4. Auto-geometry
CHAPTER 5
Create an app
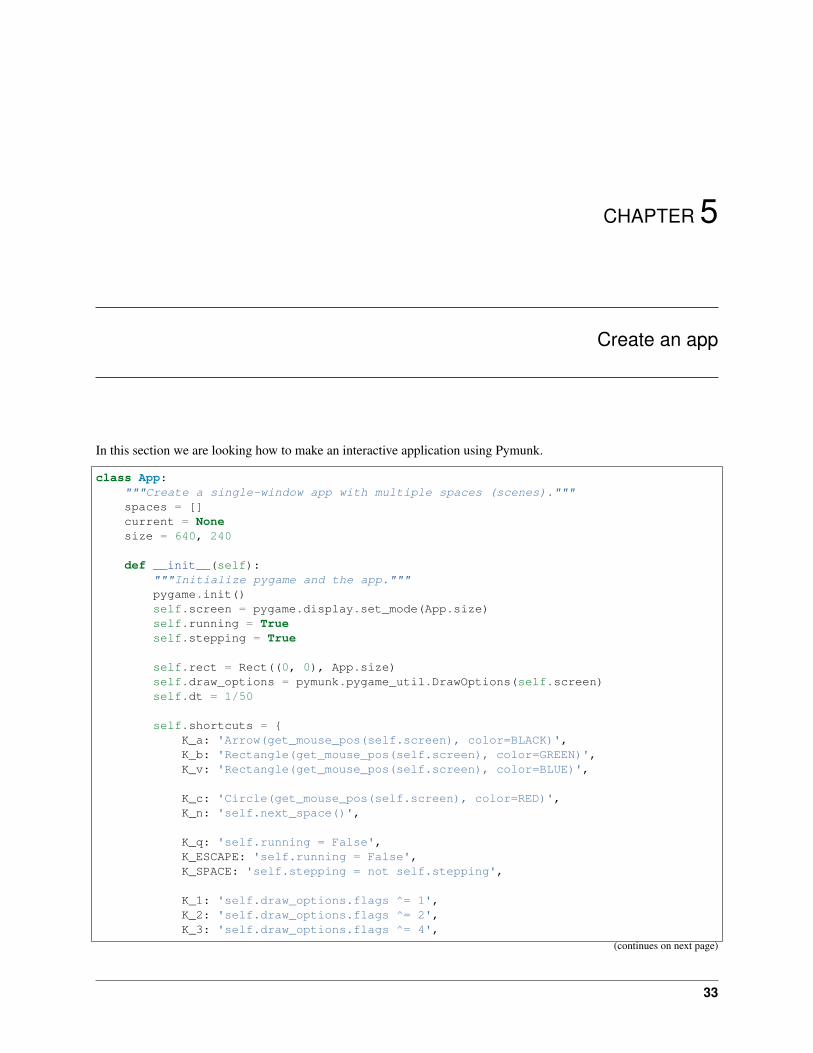
In this section we are looking how to make an interactive application using Pymunk.
class App:"""Create a single-window app with multiple spaces (scenes)."""spaces = []current = Nonesize = 640, 240
def __init__(self):"""Initialize pygame and the app."""pygame.init()self.screen = pygame.display.set_mode(App.size)self.running = Trueself.stepping = True
self.rect = Rect((0, 0), App.size)self.draw_options = pymunk.pygame_util.DrawOptions(self.screen)self.dt = 1/50
self.shortcuts = {K_a: 'Arrow(get_mouse_pos(self.screen), color=BLACK)',K_b: 'Rectangle(get_mouse_pos(self.screen), color=GREEN)',K_v: 'Rectangle(get_mouse_pos(self.screen), color=BLUE)',
K_c: 'Circle(get_mouse_pos(self.screen), color=RED)',K_n: 'self.next_space()',
K_q: 'self.running = False',K_ESCAPE: 'self.running = False',K_SPACE: 'self.stepping = not self.stepping',
K_1: 'self.draw_options.flags ^= 1',K_2: 'self.draw_options.flags ^= 2',K_3: 'self.draw_options.flags ^= 4',
(continues on next page)
33
Pymunk tutorial, Release 2019
(continued from previous page)
K_p: 'self.capture()',K_s: 'App.current.space.step(self.dt)',K_z: 'App.current.remove_all()',K_g: 'App.current.space.gravity = 0, 0',
}
def run(self):"""Run the main event loop."""while self.running:
for event in pygame.event.get():if event.type == QUIT:
self.running = False
elif event.type == KEYDOWN:self.do_shortcut(event)
App.current.do_event(event)
for s in App.current.space.shapes:if s.body.position.y < -100:
App.current.space.remove(s)
self.draw()
if self.stepping:App.current.space.step(self.dt)
pygame.quit()
def draw(self):self.screen.fill(App.current.color)
for obj in App.current.objects:obj.draw()
App.current.space.debug_draw(self.draw_options)self.draw_cg()App.current.draw()
rect = App.current.sel_rectpygame.draw.rect(self.screen, GREEN, rect, 1)pygame.display.update()
def draw_cg(self):"""Draw the center of gravity."""screen = pygame.display.get_surface()for b in App.current.space.bodies:
cg = b.position + b.center_of_gravityp = to_pygame(cg, screen)pygame.draw.circle(screen, BLUE, p, 5, 1)
def do_shortcut(self, event):"""Find the key/mod combination and execute the cmd."""k = event.key
(continues on next page)
34 Chapter 5. Create an app

Pymunk tutorial, Release 2019
(continued from previous page)
m = event.modcmd = ''if k in self.shortcuts:
cmd = self.shortcuts[k]elif (k, m) in self.shortcuts:
cmd = self.shortcuts[k, m]if cmd != '':
try:exec(cmd)
except:print(f'cmd error: <{cmd}>')
def next_space(self):d = 1if pygame.key.get_mods() & KMOD_SHIFT:
d = -1n = len(App.spaces)i = App.spaces.index(App.current)i = (i+d) % nApp.current = App.spaces[i]pygame.display.set_caption(App.current.caption)
for s in App.current.space.shapes:print(s, s.bb)
def draw_positions(self):for body in App.current.space.bodies:
print(body.mass)
def capture(self):"""Save a screen capture to the directory of the calling class"""name = type(self).__name__module = sys.modules['__main__']path, name = os.path.split(module.__file__)name, ext = os.path.splitext(name)filename = path + '/' + name + '.png'pygame.image.save(self.screen, filename)
5.1 Circle
The Circle class creates a body with an attached circle shape.
class Circle:def __init__(self, p0, radius=10, color=None):
self.body = pymunk.Body()self.body.position = p0shape = pymunk.Circle(self.body, radius)shape.density = 0.01shape.elasticity = 0.5shape.friction = 0.5if color != None:
shape.color = colorApp.current.space.add(self.body, shape)
5.1. Circle 35

Pymunk tutorial, Release 2019
This is an exemple of three circles placed in a no-gravity space:
p0 = Vec2d(200, 120)v = Vec2d(100, 0)
Space('Cercle', GRAY, gravity=(0, 0))Circle(p0)Circle(p0+v, 20)Circle(p0+2*v, 50, RED)
app.py
5.2 Segment
The Segment class creates a linear segment starting at position p0 having a direction vector v, a radius and a color.
class Segment:def __init__(self, p0, v, radius=10, color=None):
self.body = pymunk.Body()self.body.position = p0shape = pymunk.Segment(self.body, (0, 0), v, radius)shape.density = 0.01shape.elasticity = 0.5shape.friction = 0.5if color != None:
shape.color = colorApp.current.space.add(self.body, shape)
This is an example of two segments of different radius, length and color:
Space('Segment', gravity=(0, 0))Segment(p0, v)Segment(p0+(50, 50), 2*v, 5, RED)
36 Chapter 5. Create an app

Pymunk tutorial, Release 2019
5.3 Poly
The Poly class creates a filled polygon placed at position p0 with the vertices v given with a vertex list.
class Poly:def __init__(self, p0, vertices, color=None):
self.body = pymunk.Body()self.body.position = p0self.shape = pymunk.Poly(self.body, vertices)self.shape.density = 0.01self.shape.elasticity = 0.5self.shape.friction = 0.5if color != None:
self.shape.color = colorApp.current.space.add(self.body, self.shape)
This is an example of creating a triangle and a square polygon:
Space('Poly', gravity=(0, 0))triangle = [(-30, -30), (30, -30), (0, 30)]Poly(p0, triangle)square = [(-30, -30), (30, -30), (30, 30), (-30, 30)]Poly(p0+v, square)
5.3. Poly 37

Pymunk tutorial, Release 2019
38 Chapter 5. Create an app
CHAPTER 6
Using mouse and keyboard
In this section we look at using the mouse and keyboard to interact with shapes and bodies.
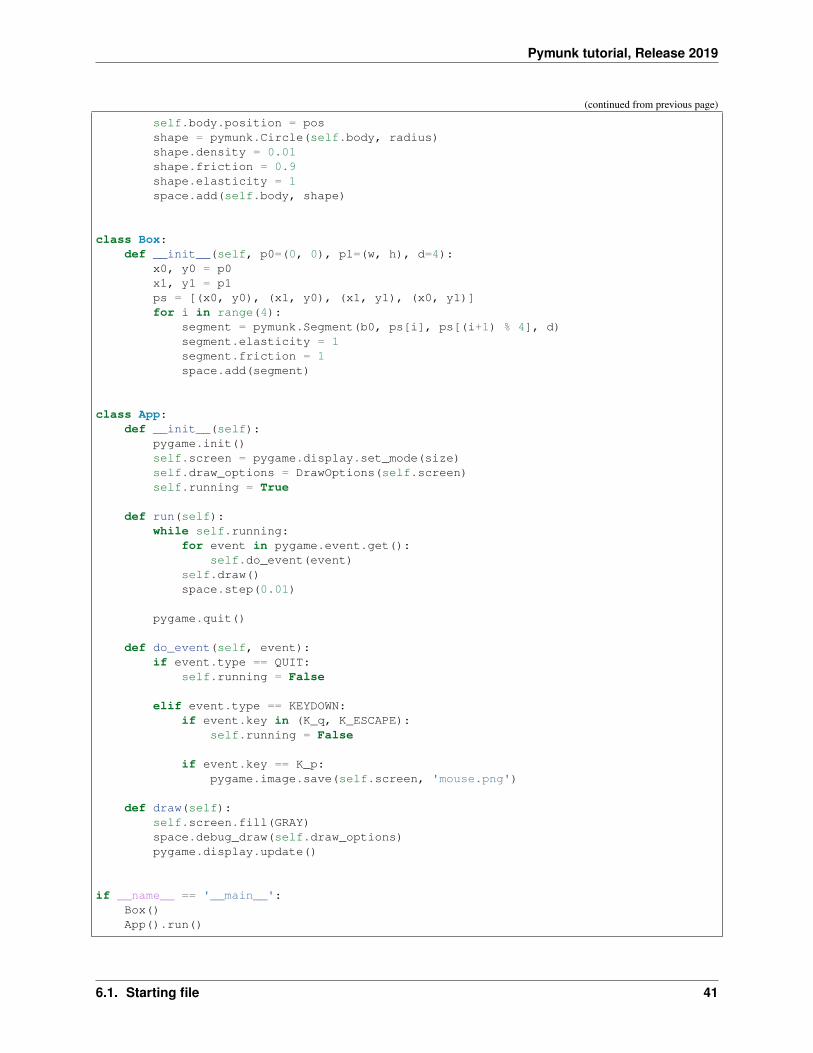
6.1 Starting file
Our starting point is a file which alreaday has the:
• App class to create the application
• Box class to draw a static rectangular segment box
• Circle class to create dynamic circles
The Box class takes 2 diagonal points p0 and p1 and creates 4 static segments. The default is to place a box aroundthe screen.
class Box:def __init__(self, p0=(0, 0), p1=(w, h), d=4):
x0, y0 = p0x1, y1 = p1ps = [(x0, y0), (x1, y0), (x1, y1), (x0, y1)]for i in range(4):
segment = pymunk.Segment(b0, ps[i], ps[(i+1) % 4], d)segment.elasticity = 1segment.friction = 1space.add(segment)
The program reacts to the
• QUIT button to close the window
• Q and ESCAPE key to end the application
• P key to save a screen capture under the name mouse.png
39
Pymunk tutorial, Release 2019
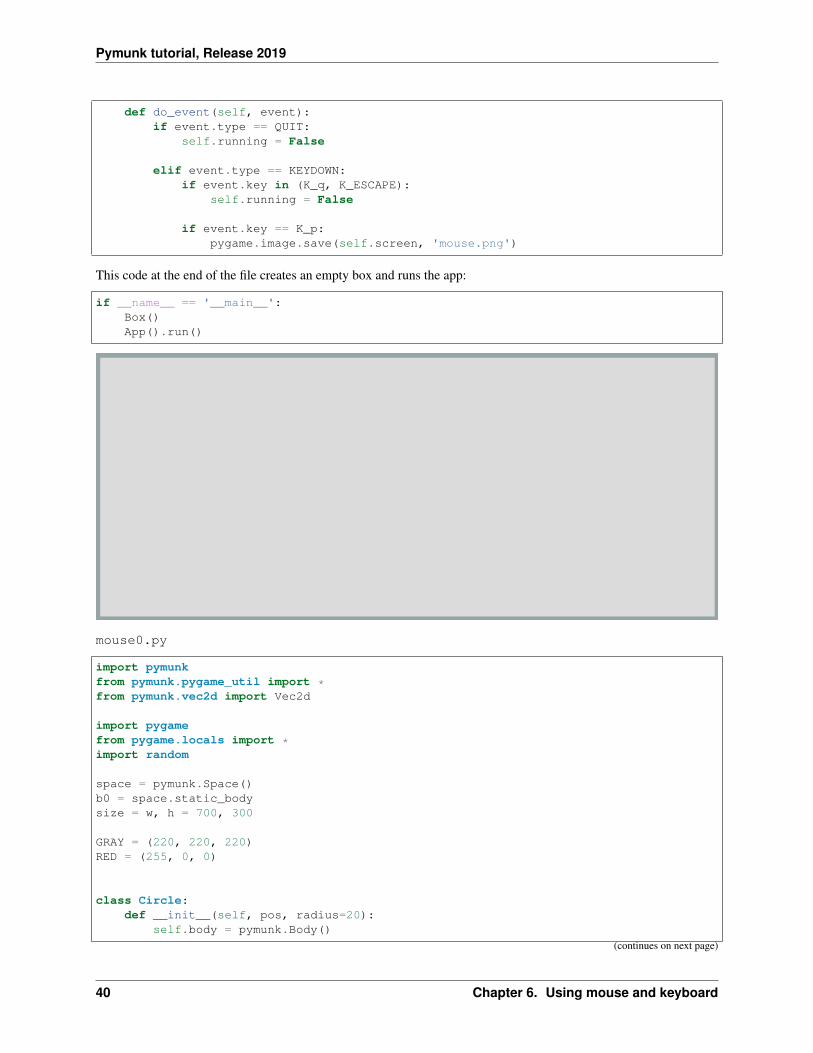
def do_event(self, event):if event.type == QUIT:
self.running = False
elif event.type == KEYDOWN:if event.key in (K_q, K_ESCAPE):
self.running = False
if event.key == K_p:pygame.image.save(self.screen, 'mouse.png')
This code at the end of the file creates an empty box and runs the app:
if __name__ == '__main__':Box()App().run()
mouse0.py
import pymunkfrom pymunk.pygame_util import *from pymunk.vec2d import Vec2d
import pygamefrom pygame.locals import *import random
space = pymunk.Space()b0 = space.static_bodysize = w, h = 700, 300
GRAY = (220, 220, 220)RED = (255, 0, 0)
class Circle:def __init__(self, pos, radius=20):
self.body = pymunk.Body()
(continues on next page)
40 Chapter 6. Using mouse and keyboard
Pymunk tutorial, Release 2019
(continued from previous page)
self.body.position = posshape = pymunk.Circle(self.body, radius)shape.density = 0.01shape.friction = 0.9shape.elasticity = 1space.add(self.body, shape)
class Box:def __init__(self, p0=(0, 0), p1=(w, h), d=4):
x0, y0 = p0x1, y1 = p1ps = [(x0, y0), (x1, y0), (x1, y1), (x0, y1)]for i in range(4):
segment = pymunk.Segment(b0, ps[i], ps[(i+1) % 4], d)segment.elasticity = 1segment.friction = 1space.add(segment)
class App:def __init__(self):
pygame.init()self.screen = pygame.display.set_mode(size)self.draw_options = DrawOptions(self.screen)self.running = True
def run(self):while self.running:
for event in pygame.event.get():self.do_event(event)
self.draw()space.step(0.01)
pygame.quit()
def do_event(self, event):if event.type == QUIT:
self.running = False
elif event.type == KEYDOWN:if event.key in (K_q, K_ESCAPE):
self.running = False
if event.key == K_p:pygame.image.save(self.screen, 'mouse.png')
def draw(self):self.screen.fill(GRAY)space.debug_draw(self.draw_options)pygame.display.update()
if __name__ == '__main__':Box()App().run()
6.1. Starting file 41
Pymunk tutorial, Release 2019
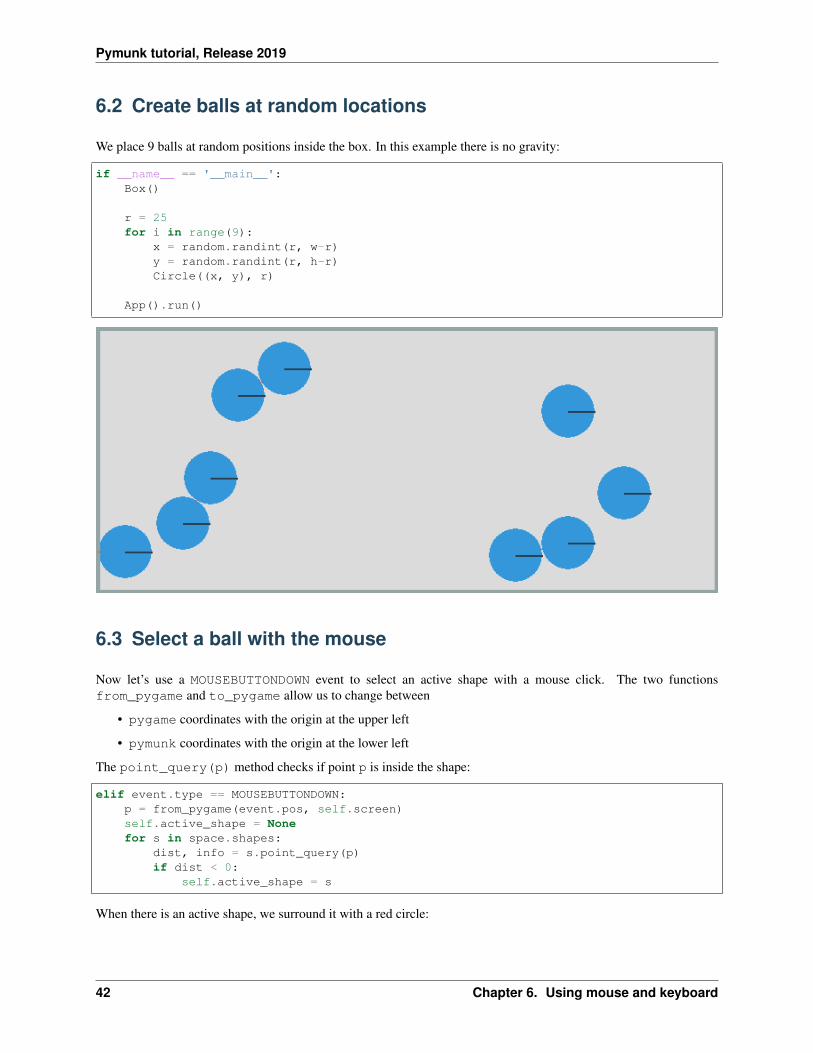
6.2 Create balls at random locations
We place 9 balls at random positions inside the box. In this example there is no gravity:
if __name__ == '__main__':Box()
r = 25for i in range(9):
x = random.randint(r, w-r)y = random.randint(r, h-r)Circle((x, y), r)
App().run()
6.3 Select a ball with the mouse
Now let’s use a MOUSEBUTTONDOWN event to select an active shape with a mouse click. The two functionsfrom_pygame and to_pygame allow us to change between
• pygame coordinates with the origin at the upper left
• pymunk coordinates with the origin at the lower left
The point_query(p) method checks if point p is inside the shape:
elif event.type == MOUSEBUTTONDOWN:p = from_pygame(event.pos, self.screen)self.active_shape = Nonefor s in space.shapes:
dist, info = s.point_query(p)if dist < 0:
self.active_shape = s
When there is an active shape, we surround it with a red circle:
42 Chapter 6. Using mouse and keyboard
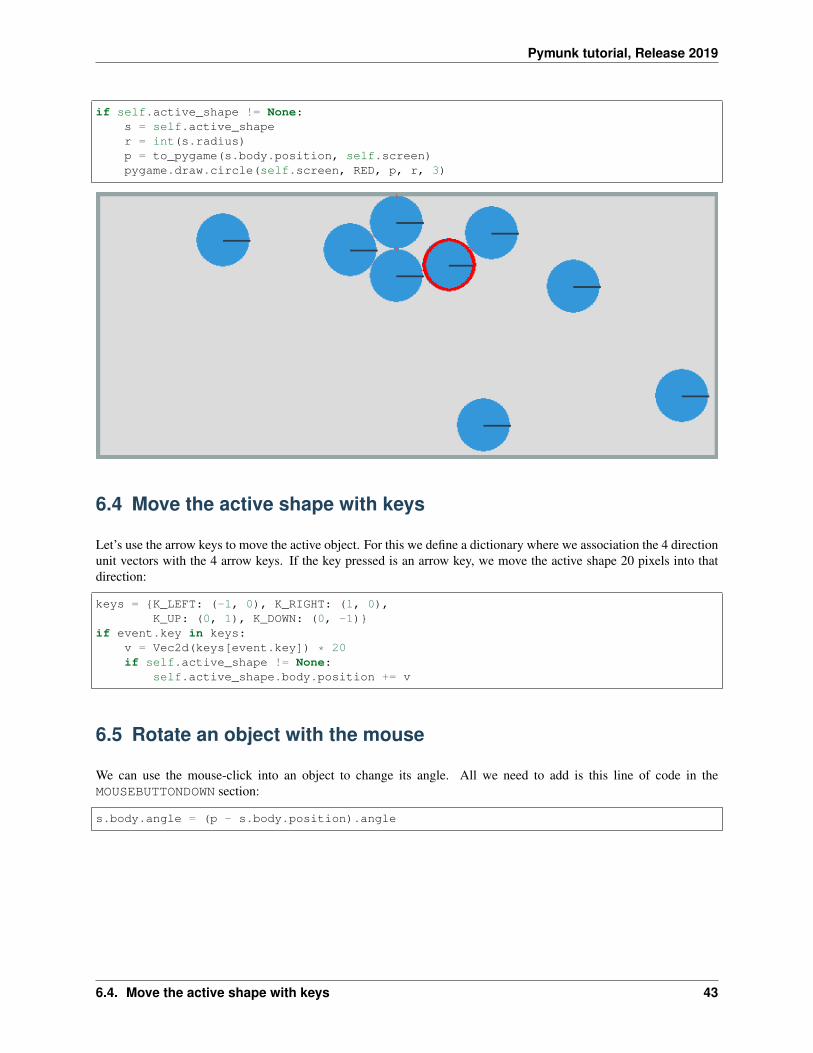
Pymunk tutorial, Release 2019
if self.active_shape != None:s = self.active_shaper = int(s.radius)p = to_pygame(s.body.position, self.screen)pygame.draw.circle(self.screen, RED, p, r, 3)
6.4 Move the active shape with keys
Let’s use the arrow keys to move the active object. For this we define a dictionary where we association the 4 directionunit vectors with the 4 arrow keys. If the key pressed is an arrow key, we move the active shape 20 pixels into thatdirection:
keys = {K_LEFT: (-1, 0), K_RIGHT: (1, 0),K_UP: (0, 1), K_DOWN: (0, -1)}
if event.key in keys:v = Vec2d(keys[event.key]) * 20if self.active_shape != None:
self.active_shape.body.position += v
6.5 Rotate an object with the mouse
We can use the mouse-click into an object to change its angle. All we need to add is this line of code in theMOUSEBUTTONDOWN section:
s.body.angle = (p - s.body.position).angle
6.4. Move the active shape with keys 43
Pymunk tutorial, Release 2019
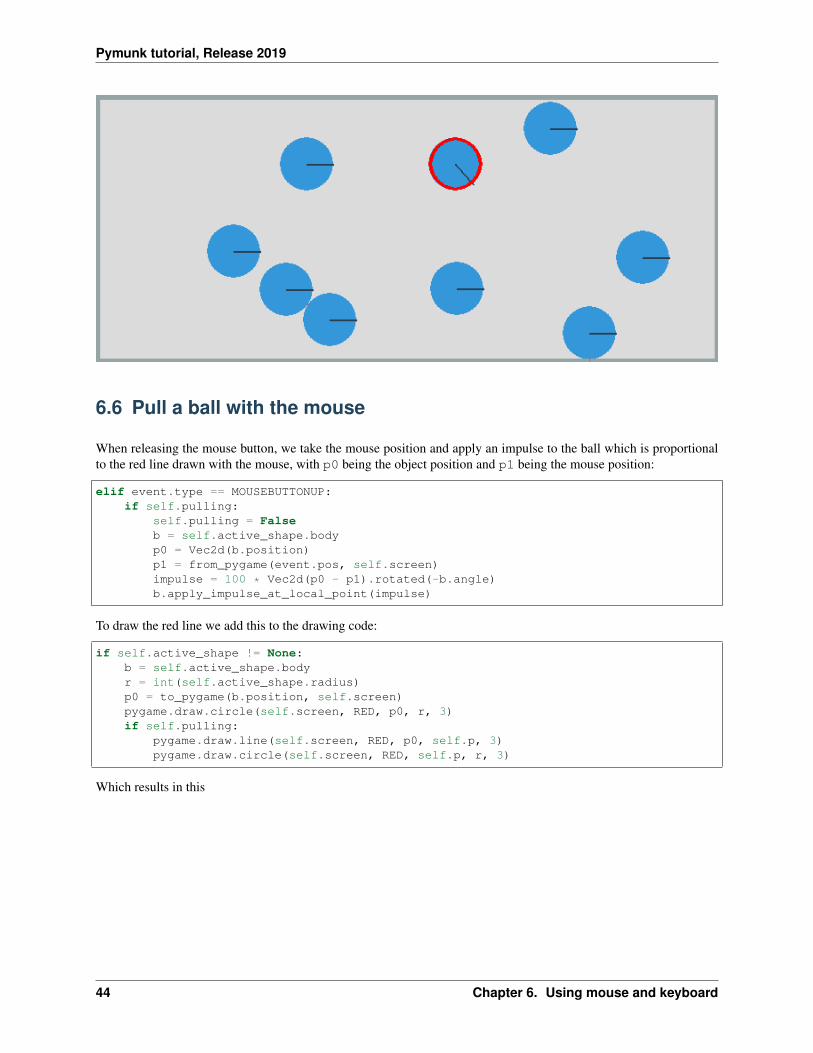
6.6 Pull a ball with the mouse
When releasing the mouse button, we take the mouse position and apply an impulse to the ball which is proportionalto the red line drawn with the mouse, with p0 being the object position and p1 being the mouse position:
elif event.type == MOUSEBUTTONUP:if self.pulling:
self.pulling = Falseb = self.active_shape.bodyp0 = Vec2d(b.position)p1 = from_pygame(event.pos, self.screen)impulse = 100 * Vec2d(p0 - p1).rotated(-b.angle)b.apply_impulse_at_local_point(impulse)
To draw the red line we add this to the drawing code:
if self.active_shape != None:b = self.active_shape.bodyr = int(self.active_shape.radius)p0 = to_pygame(b.position, self.screen)pygame.draw.circle(self.screen, RED, p0, r, 3)if self.pulling:
pygame.draw.line(self.screen, RED, p0, self.p, 3)pygame.draw.circle(self.screen, RED, self.p, r, 3)
Which results in this
44 Chapter 6. Using mouse and keyboard

Pymunk tutorial, Release 2019
6.7 New objects at mouse position
Inside the do_event() section we add the following code:
if event.key == K_c:p = from_pygame(pygame.mouse.get_pos(), self.screen)Circle(p, radius=20)
This will add smaller circles at the mouse position.
6.8 Remove an object
To remove the active object we add the following code:
6.7. New objects at mouse position 45

Pymunk tutorial, Release 2019
if event.key == K_BACKSPACE:s = self.active_shapeif s != None:
space.remove(s, s.body)self.active_shape = None
6.9 Add a bounding box (BB)
Inside the MOUSEBUTTONDOWN section if clicking inside a shape, we add the following test to add the shape to thecurrent selection if the cmd key is pressed:
if pygame.key.get_mods() & KMOD_META:self.selected_shapes.append(s)print(self.selected_shapes)
else:self.selected_shapes = []
In order to draw a shape’s bounding box (BB) we add the following method.
def draw_bb(self, shape):pos = shape.bb.left, shape.bb.topw = shape.bb.right - shape.bb.lefth = shape.bb.top - shape.bb.bottomp = to_pygame(pos, self.screen)pygame.draw.rect(self.screen, BLUE, (*p, w, h), 1)
In the App’s draw() section we add:
for s in self.selected_shapes:self.draw_bb(s)
This shows the currently selected objects with a bounding box.
46 Chapter 6. Using mouse and keyboard
Pymunk tutorial, Release 2019
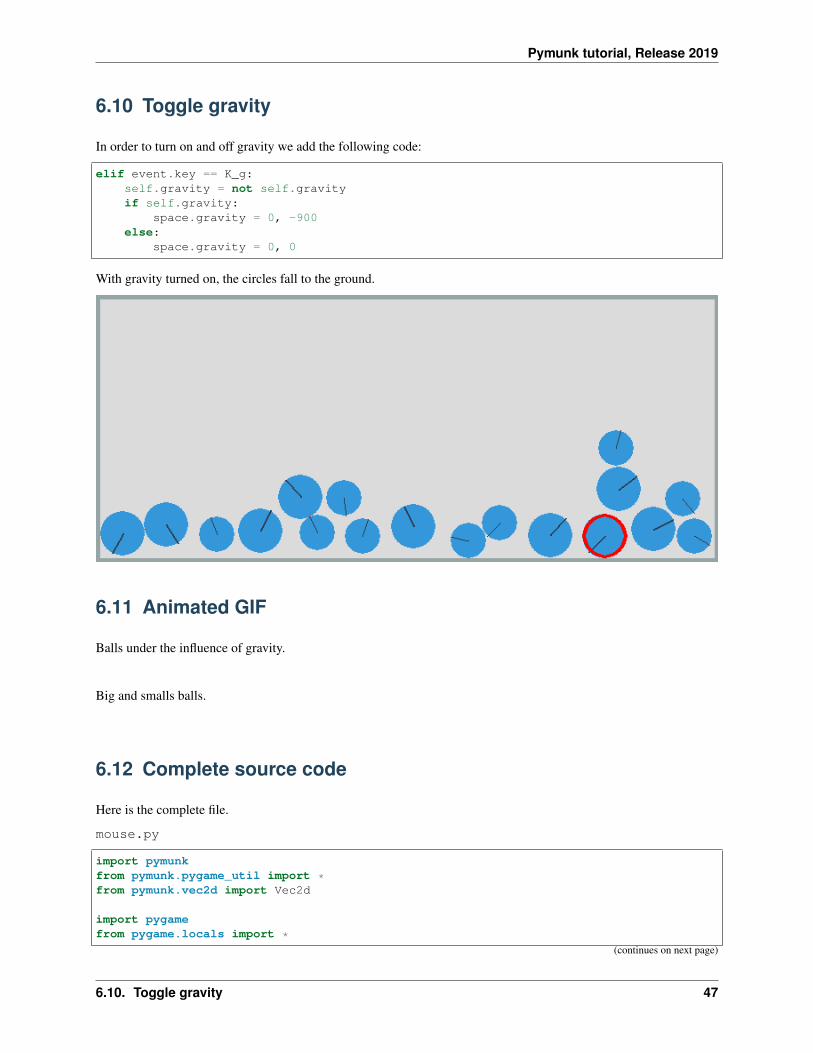
6.10 Toggle gravity
In order to turn on and off gravity we add the following code:
elif event.key == K_g:self.gravity = not self.gravityif self.gravity:
space.gravity = 0, -900else:
space.gravity = 0, 0
With gravity turned on, the circles fall to the ground.
6.11 Animated GIF
Balls under the influence of gravity.
Big and smalls balls.
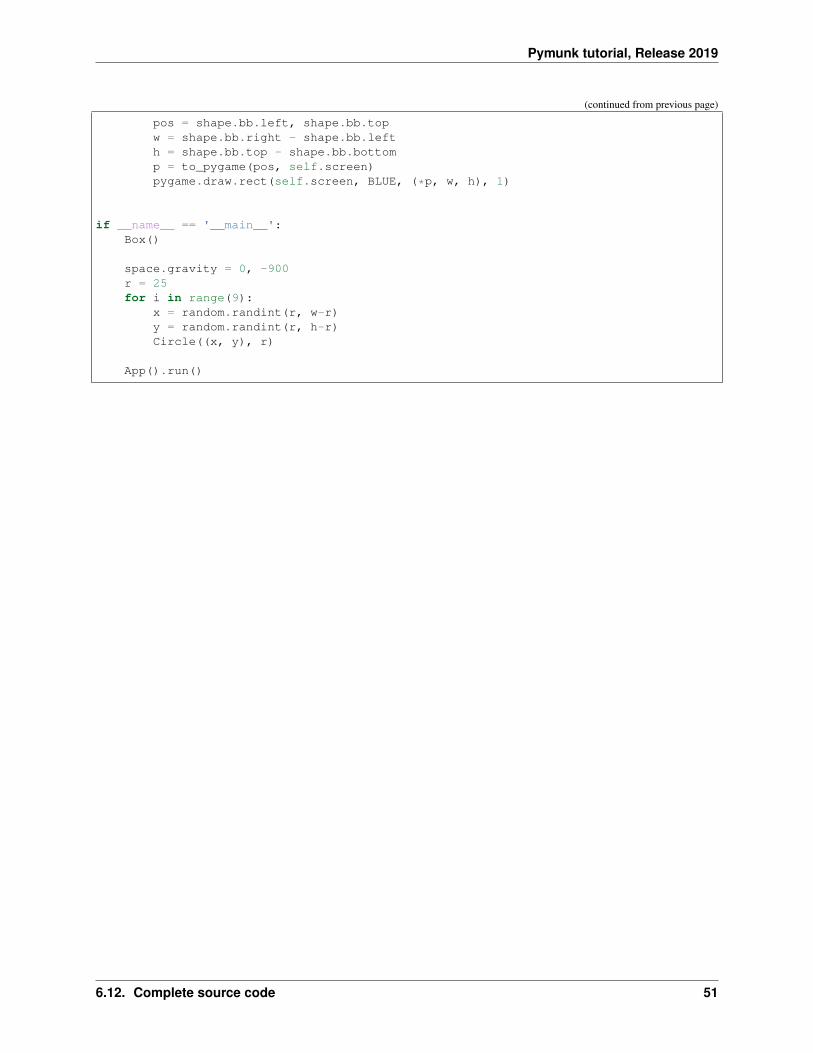
6.12 Complete source code
Here is the complete file.
mouse.py
import pymunkfrom pymunk.pygame_util import *from pymunk.vec2d import Vec2d
import pygamefrom pygame.locals import *
(continues on next page)
6.10. Toggle gravity 47

Pymunk tutorial, Release 2019
(continued from previous page)
import mathimport randomfrom PIL import Image
space = pymunk.Space()b0 = space.static_bodysize = w, h = 700, 300
GRAY = (220, 220, 220)RED = (255, 0, 0)BLUE = (0, 0, 255)
class Segment:def __init__(self, p0, v, radius=10):
self.body = pymunk.Body()self.body.position = p0shape = pymunk.Segment(self.body, (0, 0), v, radius)shape.density = 0.1shape.elasticity = 0.5shape.filter = pymunk.ShapeFilter(group=1)shape.color = (0, 255, 0, 0)space.add(self.body, shape)
class Circle:def __init__(self, pos, radius=20):
self.body = pymunk.Body()self.body.position = posshape = pymunk.Circle(self.body, radius)shape.density = 0.01shape.friction = 0.9shape.elasticity = 1space.add(self.body, shape)
class Box:def __init__(self, p0=(0, 0), p1=(w, h), d=4):
x0, y0 = p0x1, y1 = p1ps = [(x0, y0), (x1, y0), (x1, y1), (x0, y1)]for i in range(4):
segment = pymunk.Segment(b0, ps[i], ps[(i+1) % 4], d)segment.elasticity = 1segment.friction = 1space.add(segment)
class App:def __init__(self):
pygame.init()self.screen = pygame.display.set_mode(size)self.draw_options = DrawOptions(self.screen)self.active_shape = Noneself.selected_shapes = []self.pulling = False
(continues on next page)
48 Chapter 6. Using mouse and keyboard

Pymunk tutorial, Release 2019
(continued from previous page)
self.running = Trueself.gravity = Falseself.images = []self.image_nbr = 60
def run(self):while self.running:
for event in pygame.event.get():self.do_event(event)
self.draw()space.step(0.01)
pygame.quit()
def do_event(self, event):if event.type == QUIT:
self.running = False
elif event.type == KEYDOWN:if event.key in (K_q, K_ESCAPE):
self.running = False
elif event.key == K_p:pygame.image.save(self.screen, 'mouse.png')
keys = {K_LEFT: (-1, 0), K_RIGHT: (1, 0),K_UP: (0, 1), K_DOWN: (0, -1)}
if event.key in keys:v = Vec2d(keys[event.key]) * 20if self.active_shape != None:
self.active_shape.body.position += v
elif event.key == K_c:p = from_pygame(pygame.mouse.get_pos(), self.screen)Circle(p, radius=20)
elif event.key == K_BACKSPACE:s = self.active_shapeif s != None:
space.remove(s, s.body)self.active_shape = None
elif event.key == K_h:self.gravity = not self.gravityif self.gravity:
space.gravity = 0, -900else:
space.gravity = 0, 0
elif event.key == K_g:self.image_nbr = 60
elif event.type == MOUSEBUTTONDOWN:p = from_pygame(event.pos, self.screen)self.active_shape = Nonefor s in space.shapes:
(continues on next page)
6.12. Complete source code 49

Pymunk tutorial, Release 2019
(continued from previous page)
dist, info = s.point_query(p)if dist < 0:
self.active_shape = sself.pulling = True
s.body.angle = (p - s.body.position).angle
if pygame.key.get_mods() & KMOD_META:self.selected_shapes.append(s)print(self.selected_shapes)
else:self.selected_shapes = []
elif event.type == MOUSEMOTION:self.p = event.pos
elif event.type == MOUSEBUTTONUP:if self.pulling:
self.pulling = Falseb = self.active_shape.bodyp0 = Vec2d(b.position)p1 = from_pygame(event.pos, self.screen)impulse = 100 * Vec2d(p0 - p1).rotated(-b.angle)b.apply_impulse_at_local_point(impulse)
def draw(self):self.screen.fill(GRAY)space.debug_draw(self.draw_options)
if self.active_shape != None:s = self.active_shaper = int(s.radius)p = to_pygame(s.body.position, self.screen)pygame.draw.circle(self.screen, RED, p, r, 3)if self.pulling:
pygame.draw.line(self.screen, RED, p, self.p, 3)pygame.draw.circle(self.screen, RED, self.p, r, 3)
for s in self.selected_shapes:self.draw_bb(s)
if self.image_nbr > 0:strFormat = 'RGBA'raw_str = pygame.image.tostring(self.screen, strFormat, False)image = Image.frombytes(strFormat, self.screen.get_size(), raw_str)self.images.append(image)self.image_nbr -= 1if self.image_nbr == 0:
self.images[0].save('pillow.gif',save_all=True, append_images=self.images[1:], optimize=False,
→˓duration=40, loop=0)self.images = []
pygame.display.update()
def draw_bb(self, shape):(continues on next page)
50 Chapter 6. Using mouse and keyboard
Pymunk tutorial, Release 2019
(continued from previous page)
pos = shape.bb.left, shape.bb.topw = shape.bb.right - shape.bb.lefth = shape.bb.top - shape.bb.bottomp = to_pygame(pos, self.screen)pygame.draw.rect(self.screen, BLUE, (*p, w, h), 1)
if __name__ == '__main__':Box()
space.gravity = 0, -900r = 25for i in range(9):
x = random.randint(r, w-r)y = random.randint(r, h-r)Circle((x, y), r)
App().run()
6.12. Complete source code 51

Pymunk tutorial, Release 2019
52 Chapter 6. Using mouse and keyboard

CHAPTER 7
Demo examples
In this section we look at some games and examples inspired by the official Pymunk exemples (http://www.pymunk.org/en/latest/examples.html)
These are some of the topics to explore
• move a kinetic body with mouse/keys
• rotate a kinetic body with mouse/keys
• shoot balls in a specific direction
• make balls stick to objects
• make a player walk and jump
• make bricks disappear
• use mouse to give an impulse to a ball
53

Pymunk tutorial, Release 2019
54 Chapter 7. Demo examples
CHAPTER 8
Angry Birds
This section shows how to make a simple and extensible version of Angry Birds using the 2D physics simulaitonpackage Pymunk and the Multi-media package Pygame.
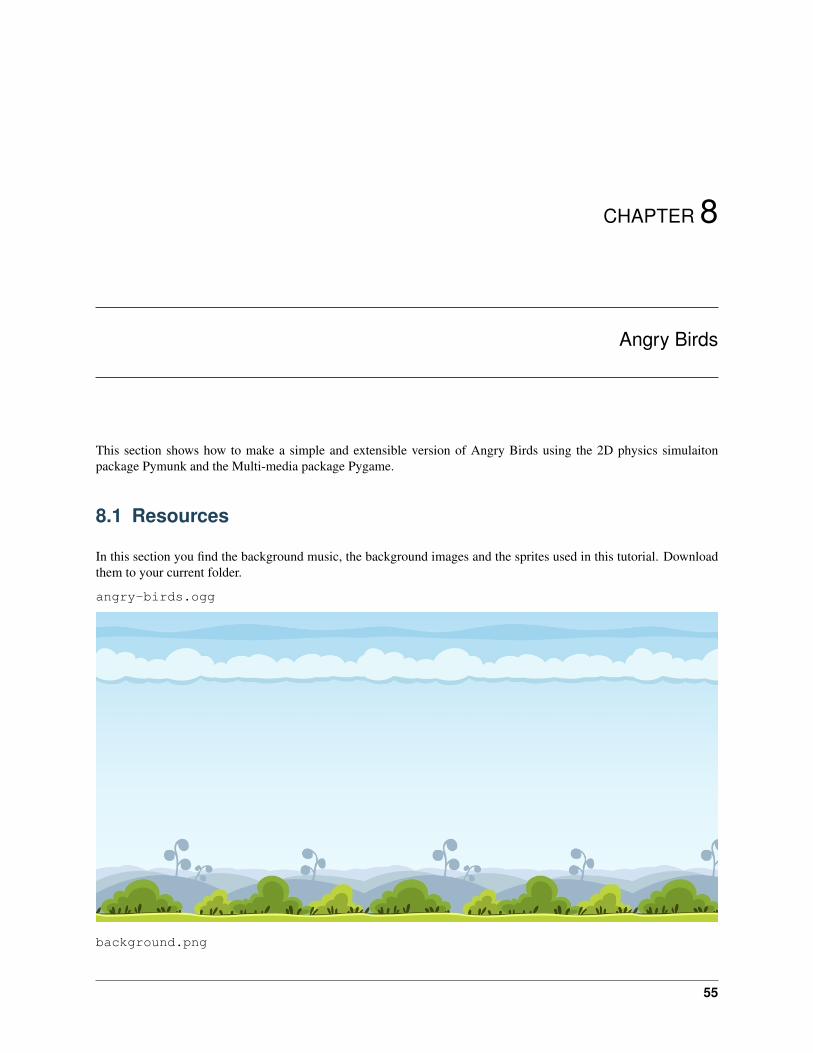
8.1 Resources
In this section you find the background music, the background images and the sprites used in this tutorial. Downloadthem to your current folder.
angry-birds.ogg
background.png
55

Pymunk tutorial, Release 2019
bird.png
sling.png
sling2.png
pig.png
beam.png
56 Chapter 8. Angry Birds

Pymunk tutorial, Release 2019
column.png
The class definitions are here:
classes.py
8.2 First program
The first step will be to create the background image and the background music.
8.2. First program 57

Pymunk tutorial, Release 2019
58 Chapter 8. Angry Birds

CHAPTER 9
Indices and tables
• genindex
• modindex
• search
59