Embed Size (px)
Citation preview
In-the-Hoop Purses
file:///fileserver/Files/Source/ELProjects/html/PR1240.html[11/4/2016 11:49:58 AM]
Purses, In-the-Hoop
These in-the-hoop purses are a stunning addition to any wardrobe! The fun embroidery and fabric give it apersonalized look to match your style.
Project Needs & Notes
- 1/4 yard quilter's cotton or twill fabric for front of purse- 1/4 yard quilter's cotton fabric for back of purse- 1/4 yard quilter's cotton fabric for lining- 42" of cording for purse strap- Tear-away stabilizer- Temporary spray adhesive (like Gunold KK100)- 5/8" button- Craft knife and cutting pad- Needle and thread to sew the button
Designs in this tutorial include X3042, Cool Girl Flower Purse.
In-the-hoop purse designs haveone full embroidery file and twodielines. One dieline is for thefront, and the other is for theback.
Dieline files are marked with theletters DL. They're used to cutthe fabric to the proper shapeand size.
Open the dieline files withembroidery software and printeach twice.
In-the-Hoop Purses
file:///fileserver/Files/Source/ELProjects/html/PR1240.html[11/4/2016 11:49:58 AM]
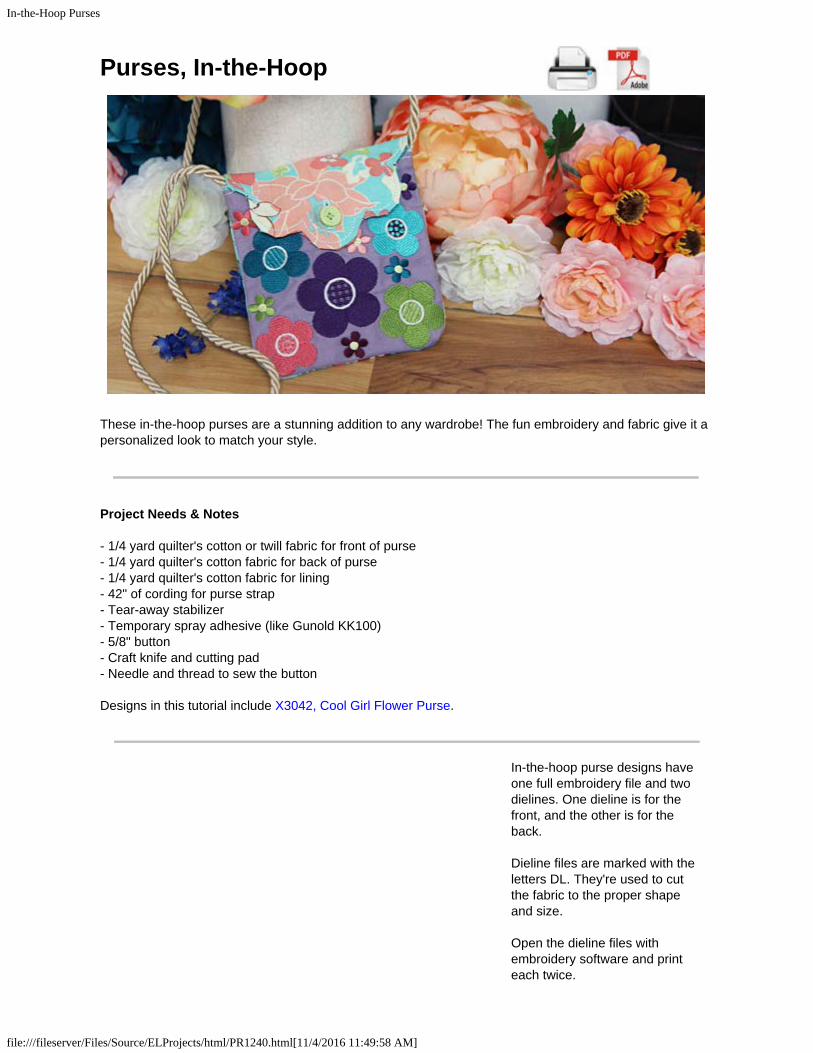
If you do not have embroiderysoftware, Wilcom's TrueSizer is a free program to use.
Spray a front dieline printout witha small amount of temporaryadhesive.
Smooth that onto the fabric thatyou've selected for the outside ofthe purse.
Cut out the shape. Leave theprinted dieline on top of the fabricpiece.
Spray the other front dielineprintout with a small amount oftemporary adhesive.
Smooth that on top of the liningfabric.
Cut out the shape. Leave theprinted dieline on top of the fabricpiece.
In-the-Hoop Purses
file:///fileserver/Files/Source/ELProjects/html/PR1240.html[11/4/2016 11:49:58 AM]
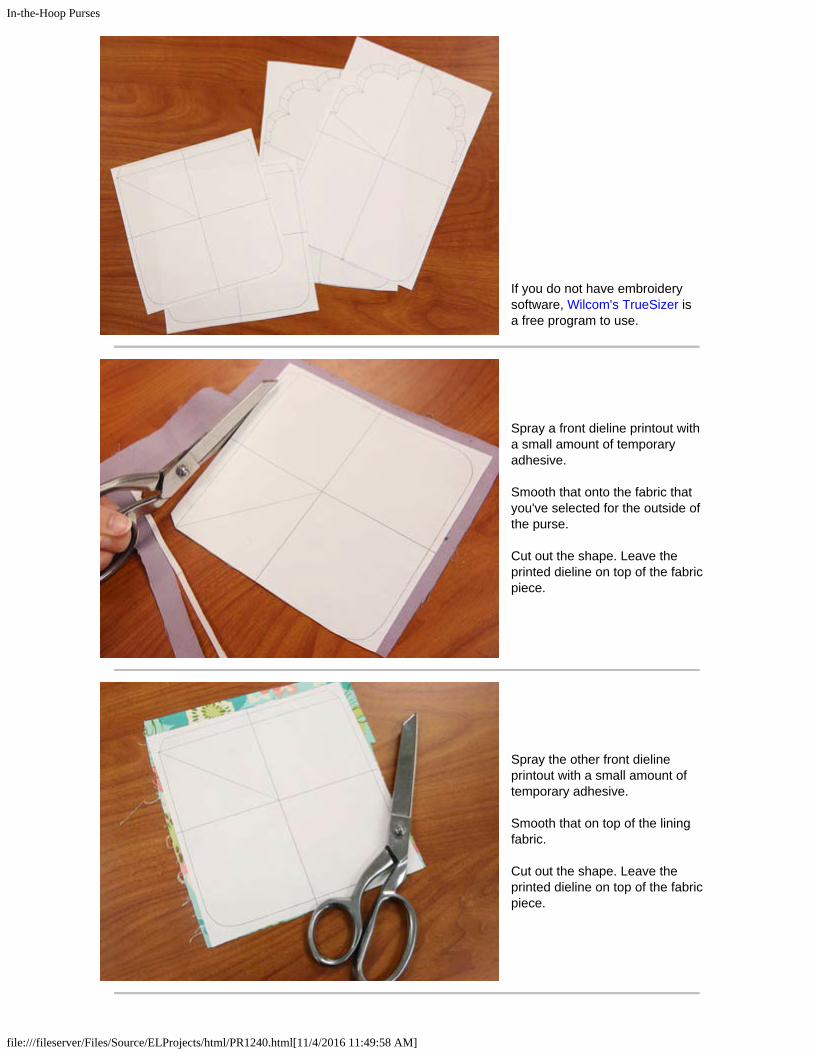
Spray a back dieline printout witha small amount of temporaryadhesive.
Place the printed dieline for theback onto the fabric for theoutside of the purse.
Cut out the shape. Leave theprinted dieline on top of the fabricpiece.
Spray the other back dielineprintout with a small amount oftemporary adhesive.
Place the printed dieline for theback onto the lining fabric.
Cut out the shape. Leave theprinted dieline on top of the fabricpiece.
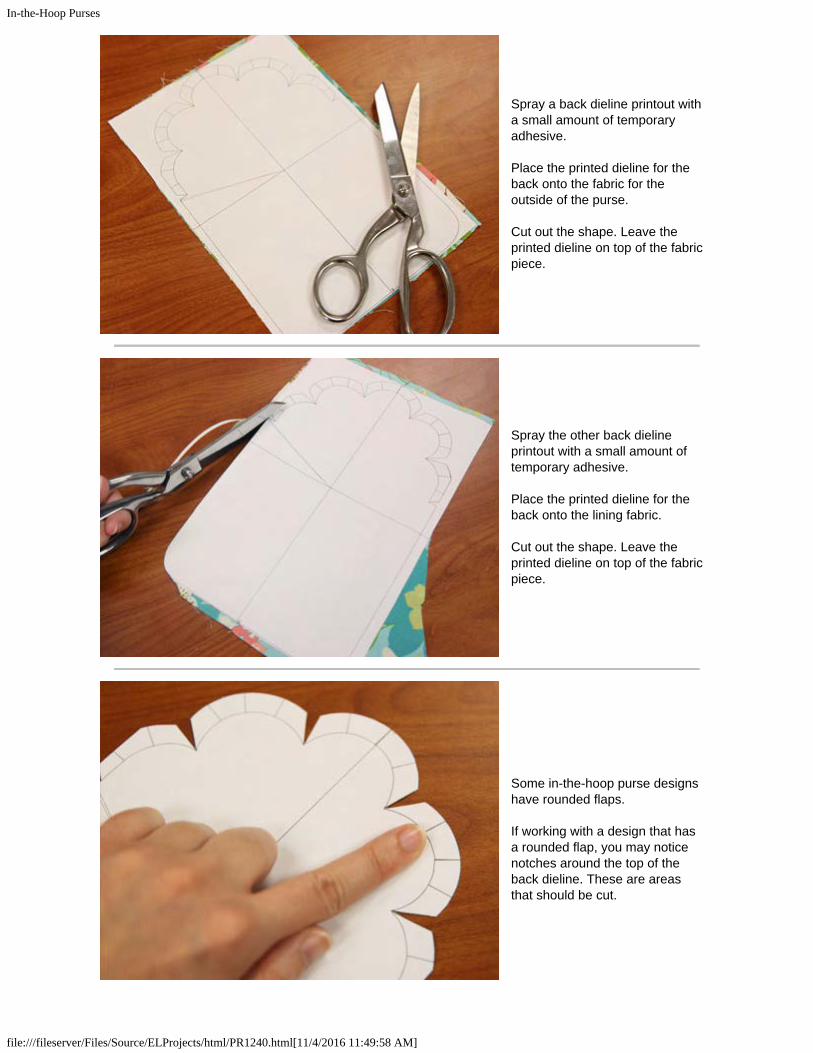
Some in-the-hoop purse designshave rounded flaps.
If working with a design that hasa rounded flap, you may noticenotches around the top of theback dieline. These are areasthat should be cut.
In-the-Hoop Purses
file:///fileserver/Files/Source/ELProjects/html/PR1240.html[11/4/2016 11:49:58 AM]
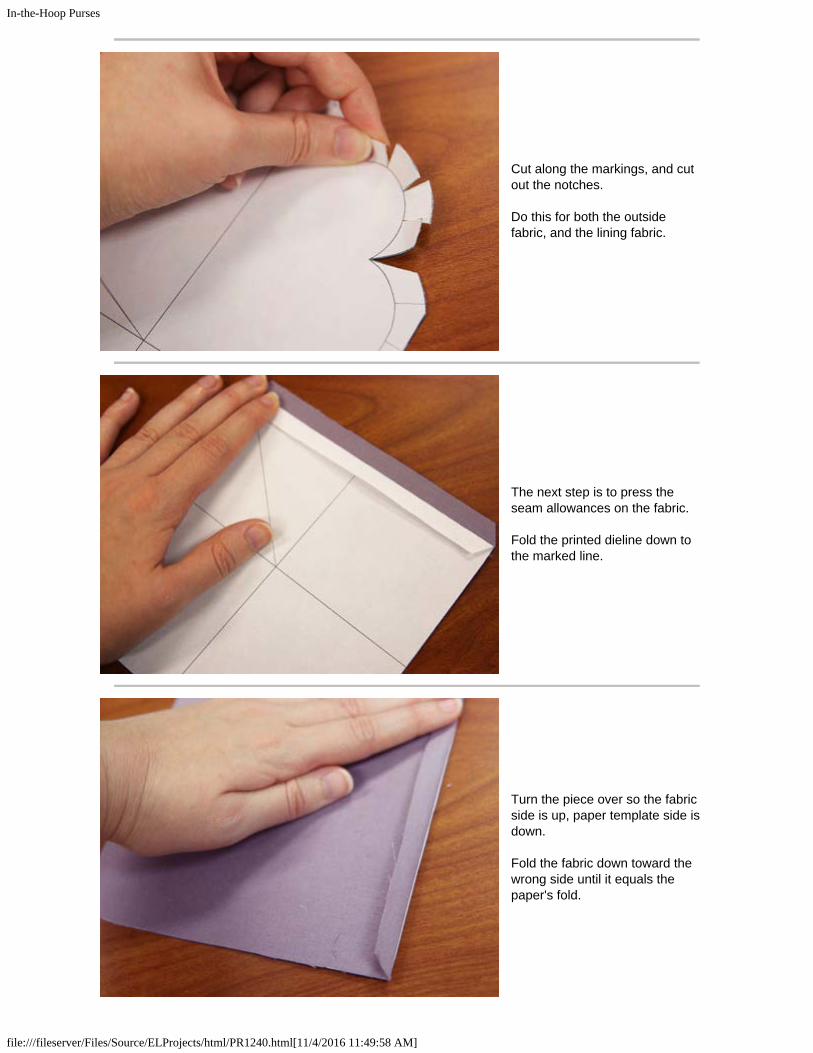
Cut along the markings, and cutout the notches.
Do this for both the outsidefabric, and the lining fabric.
The next step is to press theseam allowances on the fabric.
Fold the printed dieline down tothe marked line.
Turn the piece over so the fabricside is up, paper template side isdown.
Fold the fabric down toward thewrong side until it equals thepaper's fold.
In-the-Hoop Purses
file:///fileserver/Files/Source/ELProjects/html/PR1240.html[11/4/2016 11:49:58 AM]
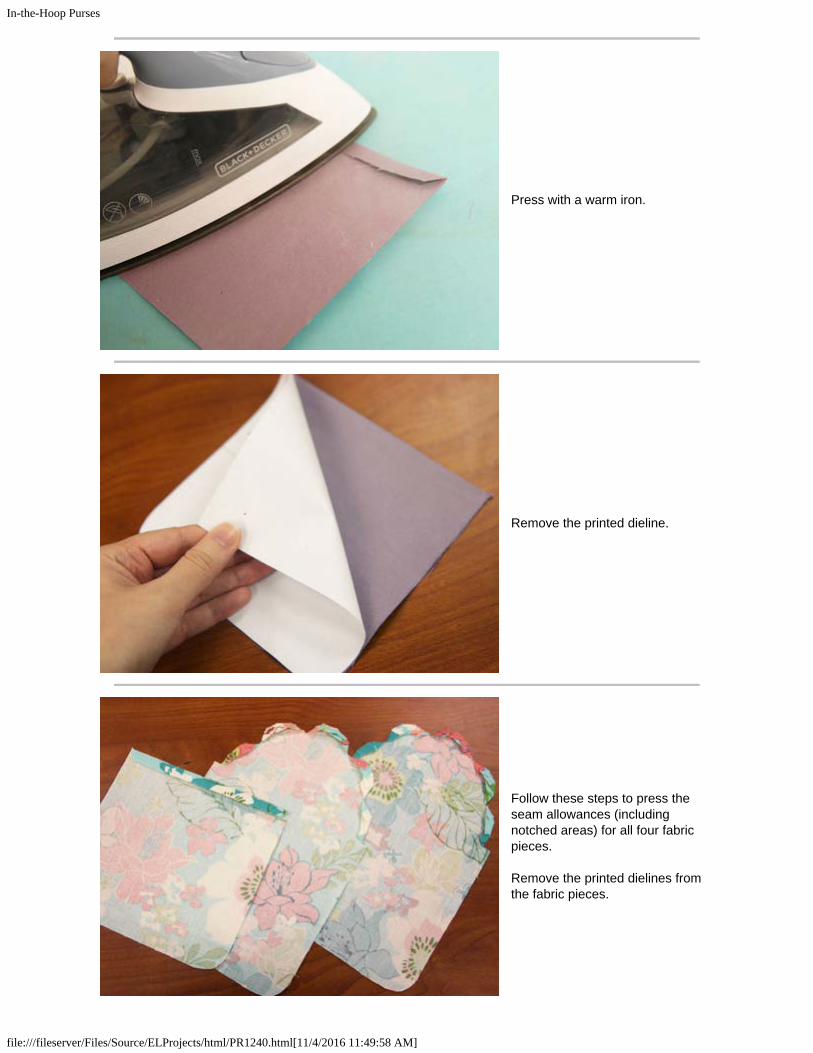
Press with a warm iron.
Remove the printed dieline.
Follow these steps to press theseam allowances (includingnotched areas) for all four fabricpieces.
Remove the printed dielines fromthe fabric pieces.
In-the-Hoop Purses
file:///fileserver/Files/Source/ELProjects/html/PR1240.html[11/4/2016 11:49:58 AM]
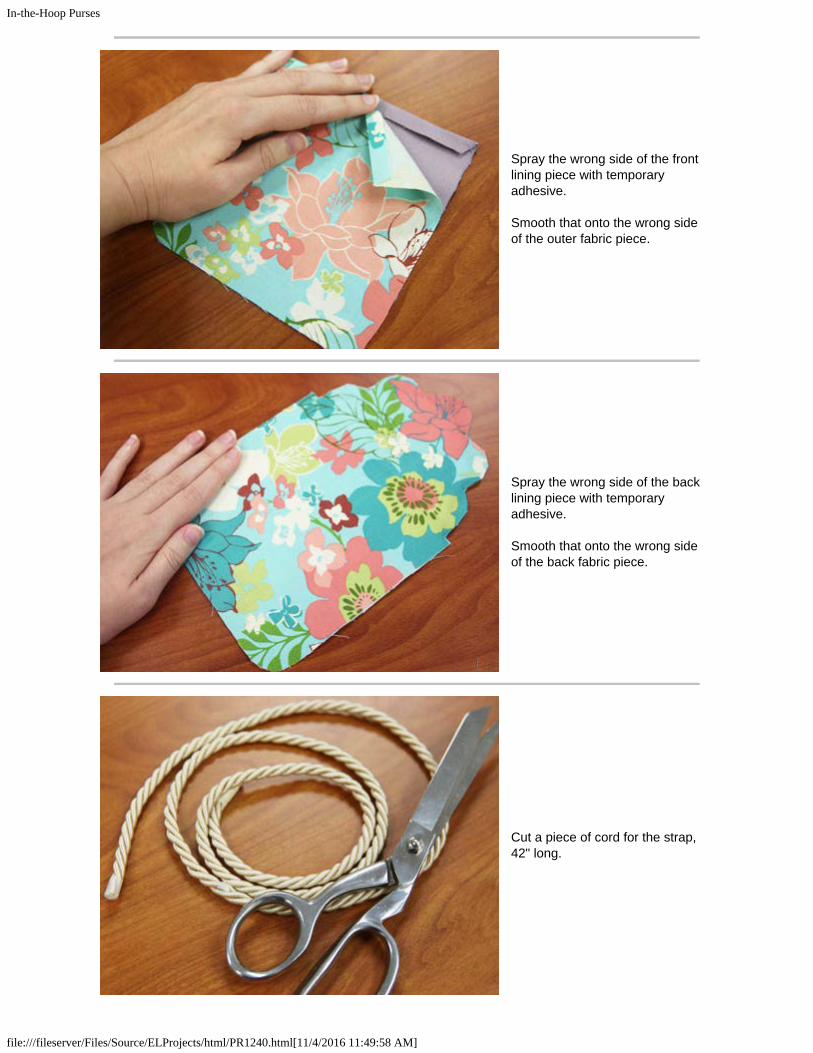
Spray the wrong side of the frontlining piece with temporaryadhesive.
Smooth that onto the wrong sideof the outer fabric piece.
Spray the wrong side of the backlining piece with temporaryadhesive.
Smooth that onto the wrong sideof the back fabric piece.
Cut a piece of cord for the strap,42" long.
In-the-Hoop Purses
file:///fileserver/Files/Source/ELProjects/html/PR1240.html[11/4/2016 11:49:58 AM]
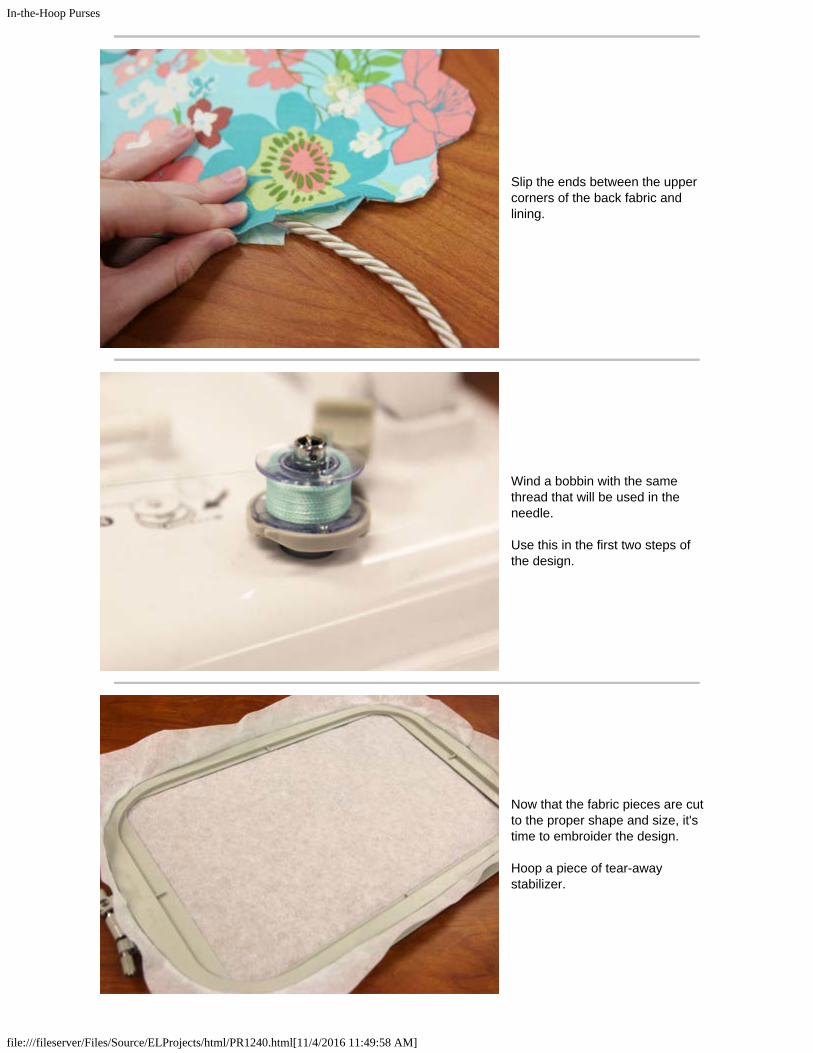
Slip the ends between the uppercorners of the back fabric andlining.
Wind a bobbin with the samethread that will be used in theneedle.
Use this in the first two steps ofthe design.
Now that the fabric pieces are cutto the proper shape and size, it'stime to embroider the design.
Hoop a piece of tear-awaystabilizer.
In-the-Hoop Purses
file:///fileserver/Files/Source/ELProjects/html/PR1240.html[11/4/2016 11:49:58 AM]
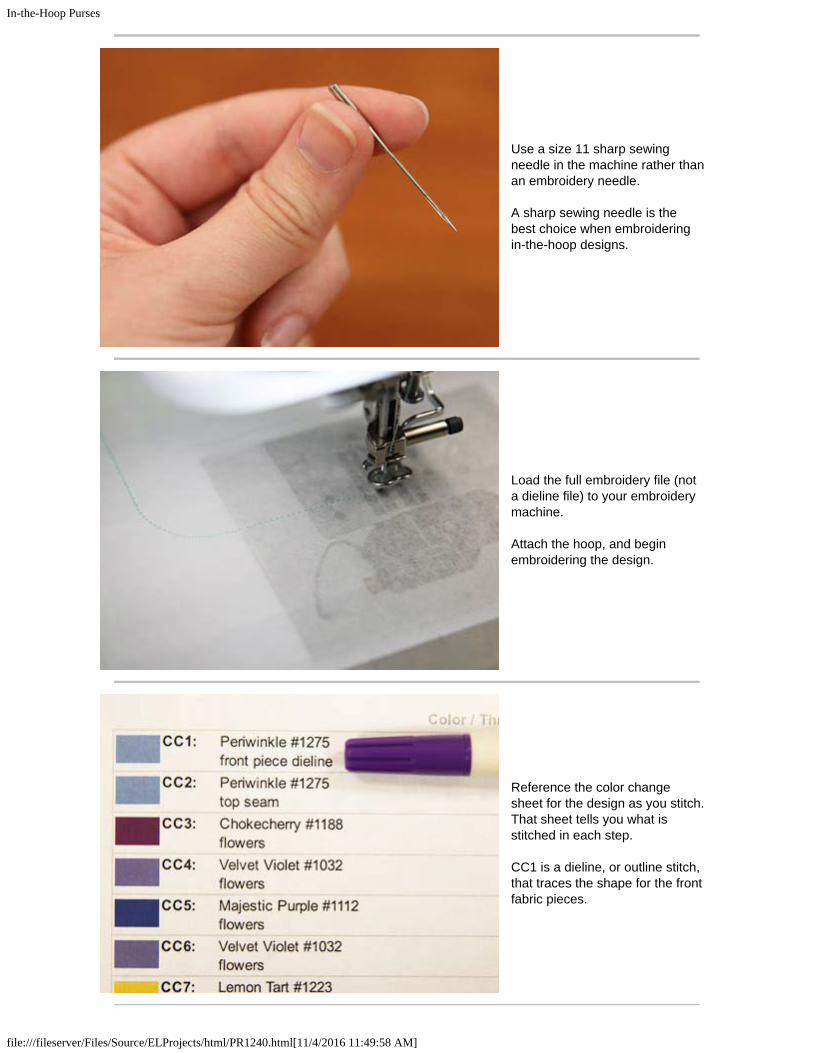
Use a size 11 sharp sewingneedle in the machine rather thanan embroidery needle.
A sharp sewing needle is thebest choice when embroideringin-the-hoop designs.
Load the full embroidery file (nota dieline file) to your embroiderymachine.
Attach the hoop, and beginembroidering the design.
Reference the color changesheet for the design as you stitch.That sheet tells you what isstitched in each step.
CC1 is a dieline, or outline stitch,that traces the shape for the frontfabric pieces.
In-the-Hoop Purses
file:///fileserver/Files/Source/ELProjects/html/PR1240.html[11/4/2016 11:49:58 AM]
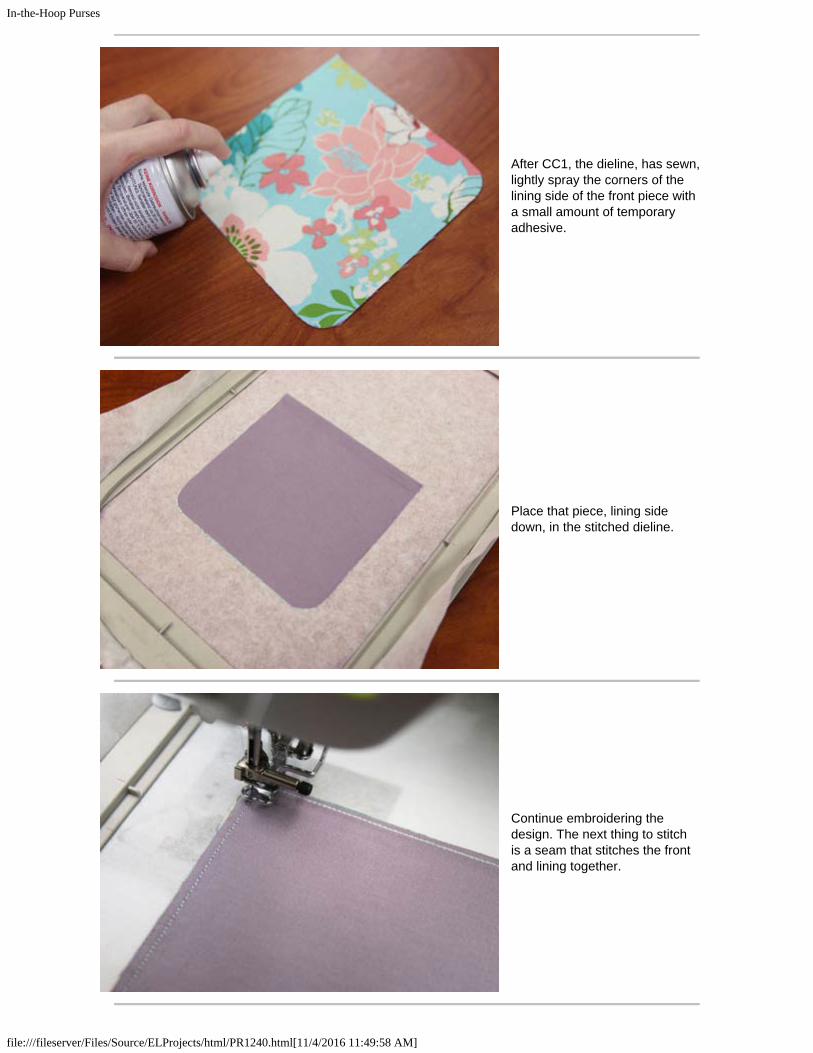
After CC1, the dieline, has sewn,lightly spray the corners of thelining side of the front piece witha small amount of temporaryadhesive.
Place that piece, lining sidedown, in the stitched dieline.
Continue embroidering thedesign. The next thing to stitch is a seam that stitches the frontand lining together.
In-the-Hoop Purses
file:///fileserver/Files/Source/ELProjects/html/PR1240.html[11/4/2016 11:49:58 AM]
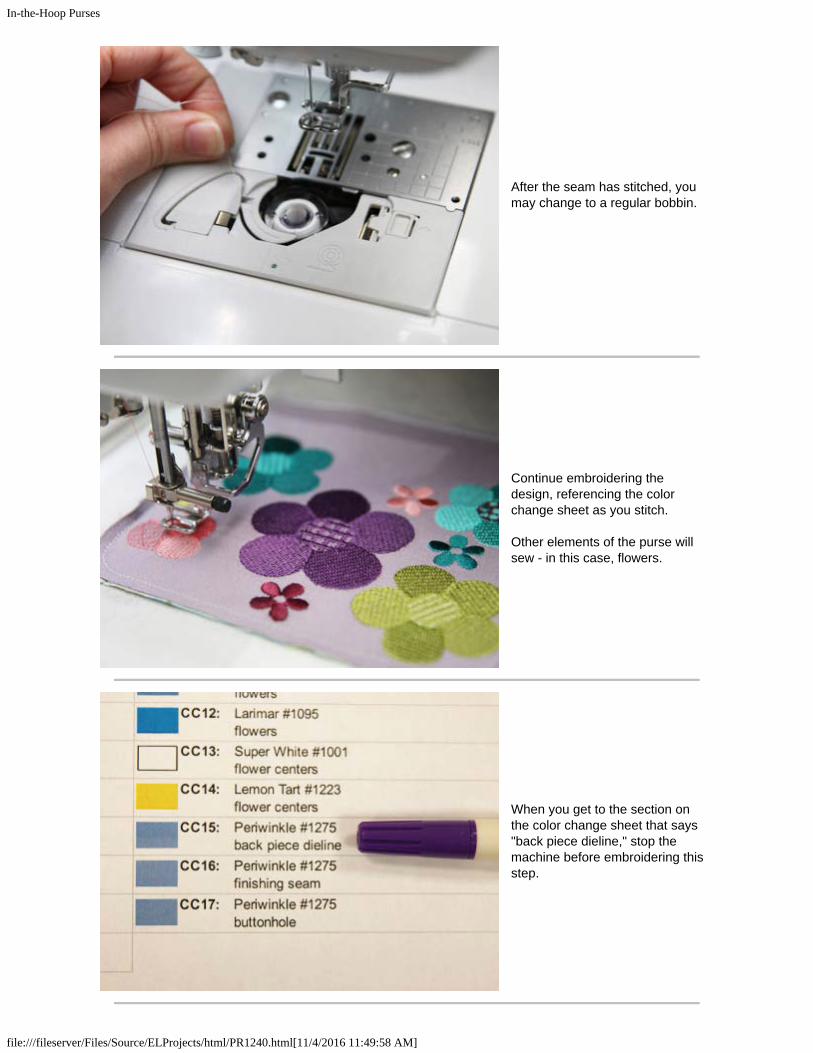
After the seam has stitched, youmay change to a regular bobbin.
Continue embroidering thedesign, referencing the colorchange sheet as you stitch.
Other elements of the purse willsew - in this case, flowers.
When you get to the section onthe color change sheet that says"back piece dieline," stop themachine before embroidering thisstep.
In-the-Hoop Purses
file:///fileserver/Files/Source/ELProjects/html/PR1240.html[11/4/2016 11:49:58 AM]
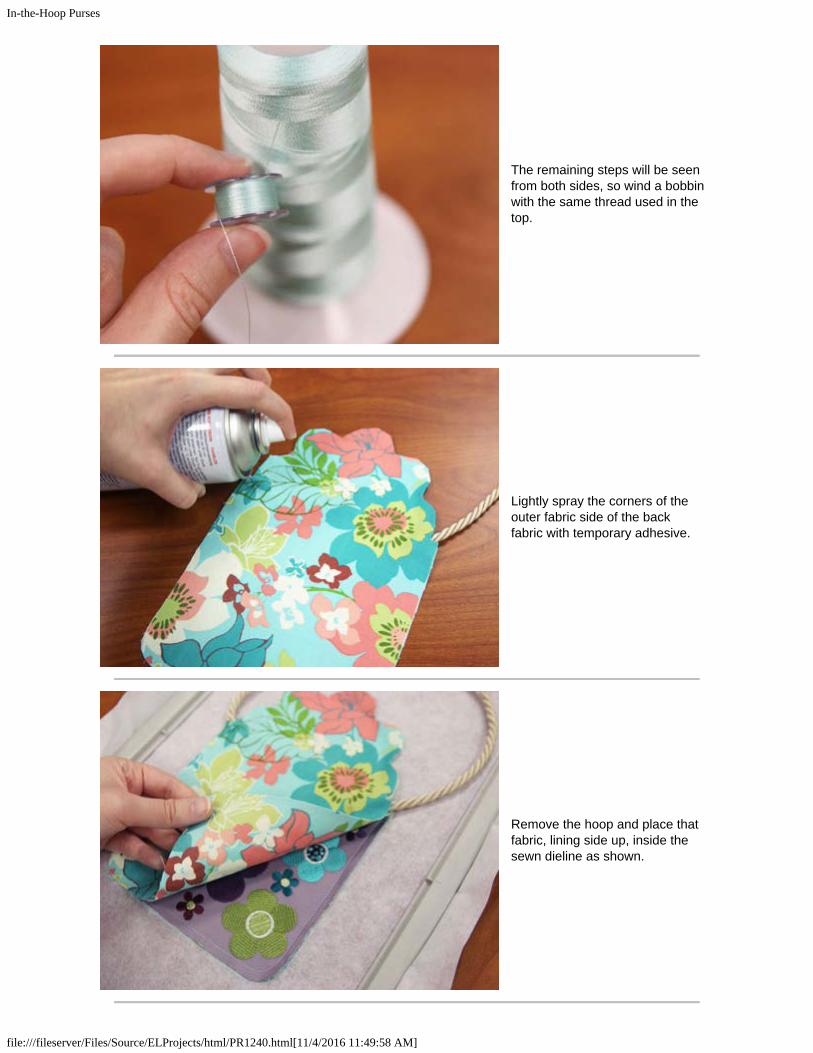
The remaining steps will be seenfrom both sides, so wind a bobbinwith the same thread used in thetop.
Lightly spray the corners of theouter fabric side of the backfabric with temporary adhesive.
Remove the hoop and place thatfabric, lining side up, inside thesewn dieline as shown.
In-the-Hoop Purses
file:///fileserver/Files/Source/ELProjects/html/PR1240.html[11/4/2016 11:49:58 AM]
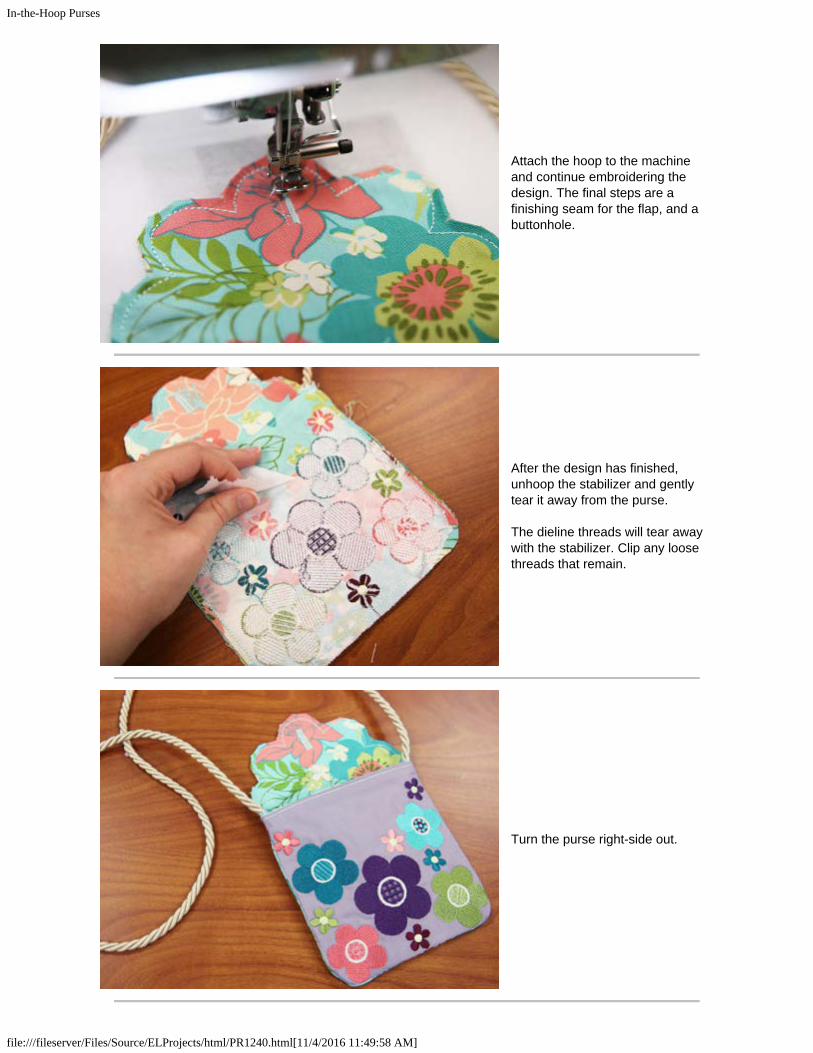
Attach the hoop to the machineand continue embroidering thedesign. The final steps are afinishing seam for the flap, and abuttonhole.
After the design has finished,unhoop the stabilizer and gentlytear it away from the purse.
The dieline threads will tear awaywith the stabilizer. Clip any loosethreads that remain.
Turn the purse right-side out.
In-the-Hoop Purses
file:///fileserver/Files/Source/ELProjects/html/PR1240.html[11/4/2016 11:49:58 AM]
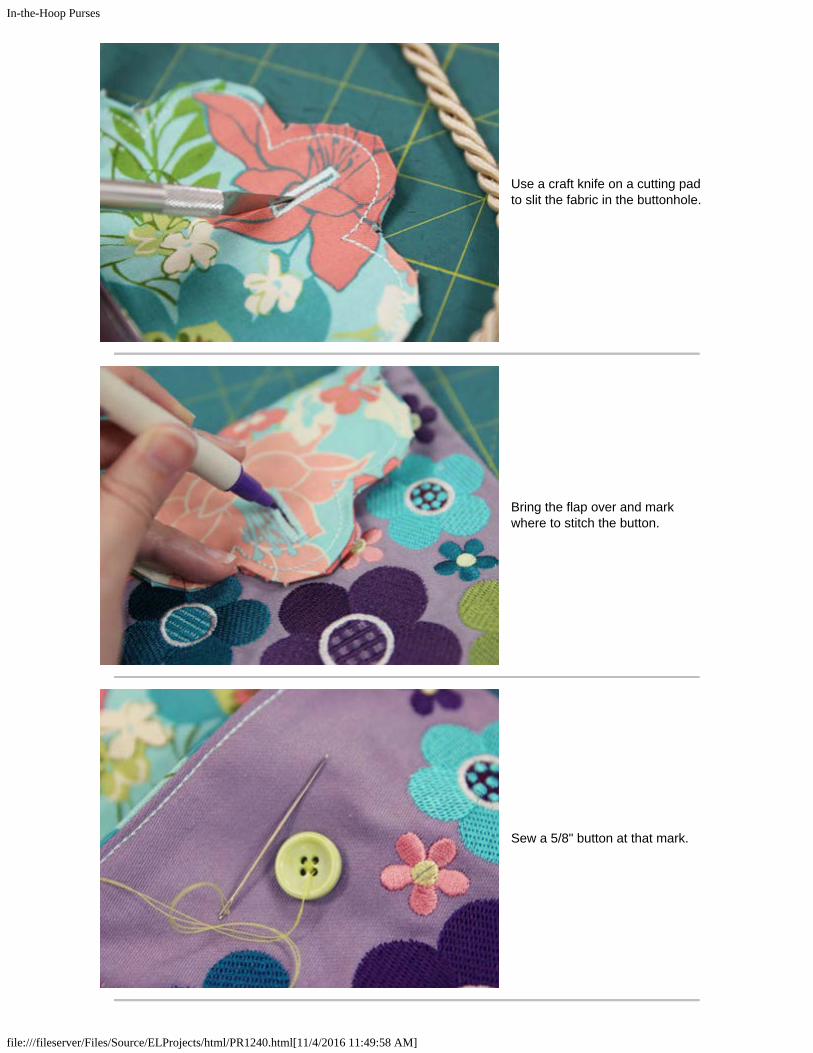
Use a craft knife on a cutting padto slit the fabric in the buttonhole.
Bring the flap over and markwhere to stitch the button.
Sew a 5/8" button at that mark.
In-the-Hoop Purses
file:///fileserver/Files/Source/ELProjects/html/PR1240.html[11/4/2016 11:49:58 AM]
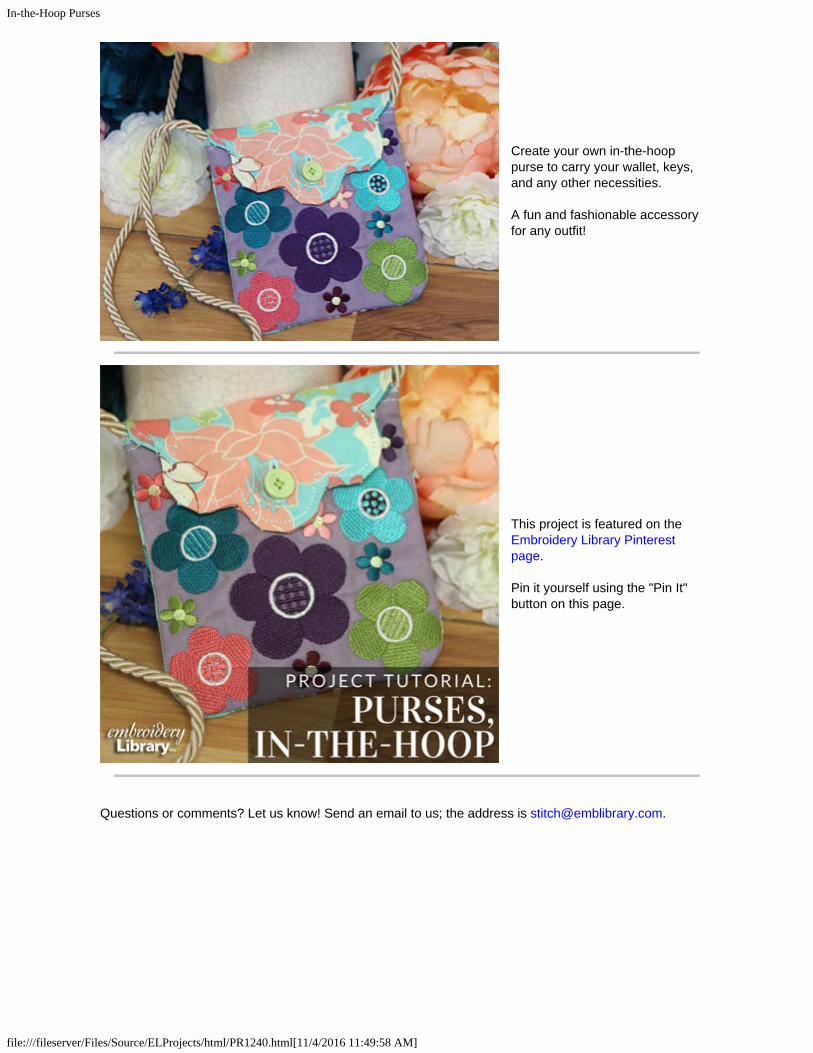
Create your own in-the-hooppurse to carry your wallet, keys,and any other necessities.
A fun and fashionable accessoryfor any outfit!
This project is featured on theEmbroidery Library Pinterestpage.
Pin it yourself using the "Pin It"button on this page.
Questions or comments? Let us know! Send an email to us; the address is [email protected].