Embed Size (px)
Citation preview
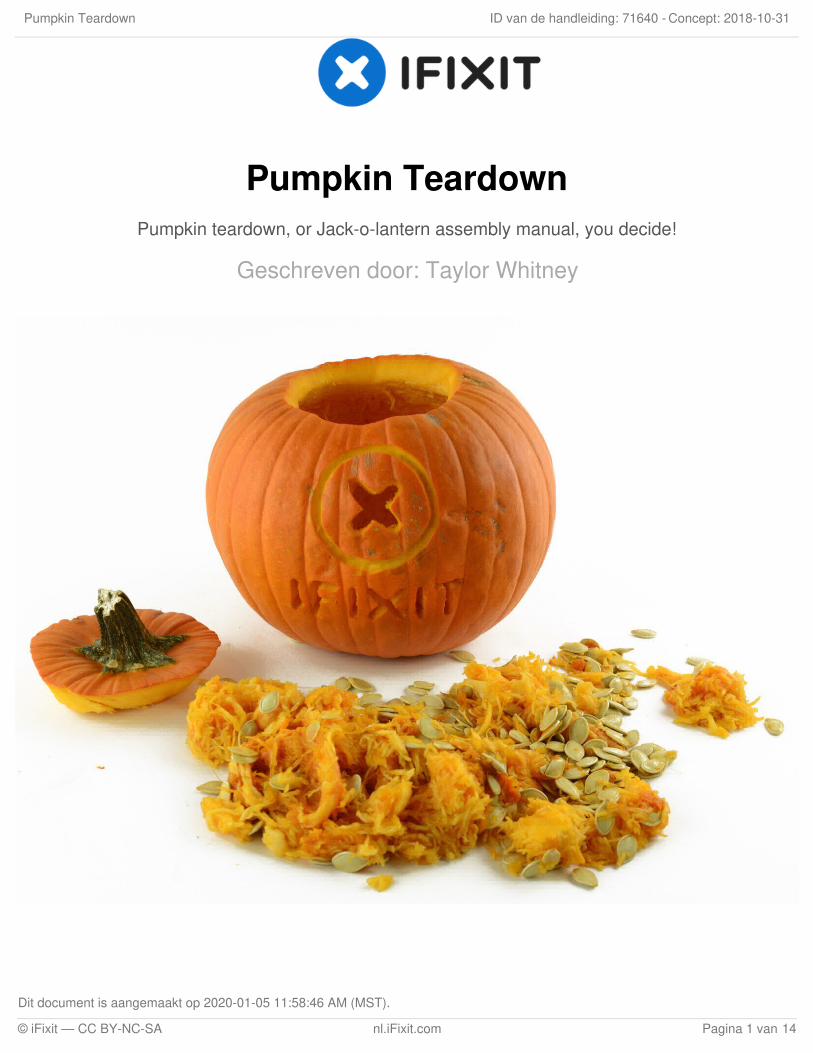
Pumpkin TeardownPumpkin teardown, or Jack-o-lantern assembly manual, you decide!
Geschreven door: Taylor Whitney
Pumpkin Teardown Concept: 2018-10-31ID van de handleiding: 71640 -
Dit document is aangemaakt op 2020-01-05 11:58:46 AM (MST).
© iFixit — CC BY-NC-SA nl.iFixit.com Pagina 1 van 14
INTRODUCTIE
Once upon a midnight dreary, while we pondered, weak and weary, over many quaint and curiousvolumes of service manual lore—while we pondered, nearly napping, suddenly there came atapping, as of some one gently rapping, rapping at our teardown door.
“’Tis some pumpkin,” we did mutter, “rapping at our teardown door—
Only this and nothing more.”
GEREEDSCHAPPEN:Jimmy (1)iOpener (1)Spudger (1)Sewing Pins (1)Marker (1)Cordless Drill (1)Precision Utility Knife (1)
Pumpkin Teardown Concept: 2018-10-31ID van de handleiding: 71640 -
Dit document is aangemaakt op 2020-01-05 11:58:46 AM (MST).
© iFixit — CC BY-NC-SA nl.iFixit.com Pagina 2 van 14

Stap 1 — Pumpkin Teardown
Pumpkin: this fall's must-have device. Despite a yearly release cycle, our Late 2016 Pumpkindoesn't sport any major upgrades from last year's model.
It's scratchgate all over again! Our brand-new Pumpkin came with a few dents and dings. Thiscould haunt Pumpkin's durability over time.
Here're some specs on Pumpkin:
Pumpkin comes in several stunning finishes: Really Orange, Space Orange, and AnnoyingOrange. Jet Orange is currently sold out.
This model is marketed primarily as decorative, lacking the necessary features (e.g. heatsensitive material) for models used in pie-making.
No operating system is required
Pumpkin Teardown Concept: 2018-10-31ID van de handleiding: 71640 -
Dit document is aangemaakt op 2020-01-05 11:58:46 AM (MST).
© iFixit — CC BY-NC-SA nl.iFixit.com Pagina 3 van 14
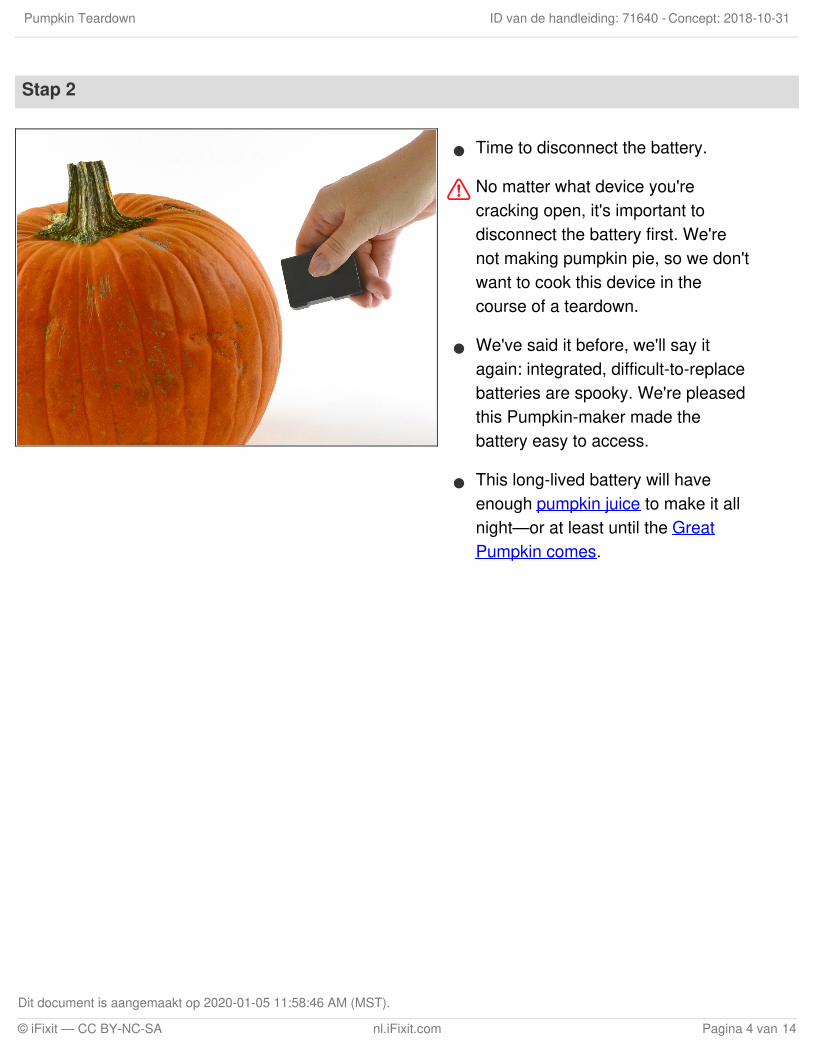
Stap 2
Time to disconnect the battery.
No matter what device you'recracking open, it's important todisconnect the battery first. We'renot making pumpkin pie, so we don'twant to cook this device in thecourse of a teardown.
We've said it before, we'll say itagain: integrated, difficult-to-replacebatteries are spooky. We're pleasedthis Pumpkin-maker made thebattery easy to access.
This long-lived battery will haveenough pumpkin juice to make it allnight—or at least until the GreatPumpkin comes.
Pumpkin Teardown Concept: 2018-10-31ID van de handleiding: 71640 -
Dit document is aangemaakt op 2020-01-05 11:58:46 AM (MST).
© iFixit — CC BY-NC-SA nl.iFixit.com Pagina 4 van 14
Stap 3
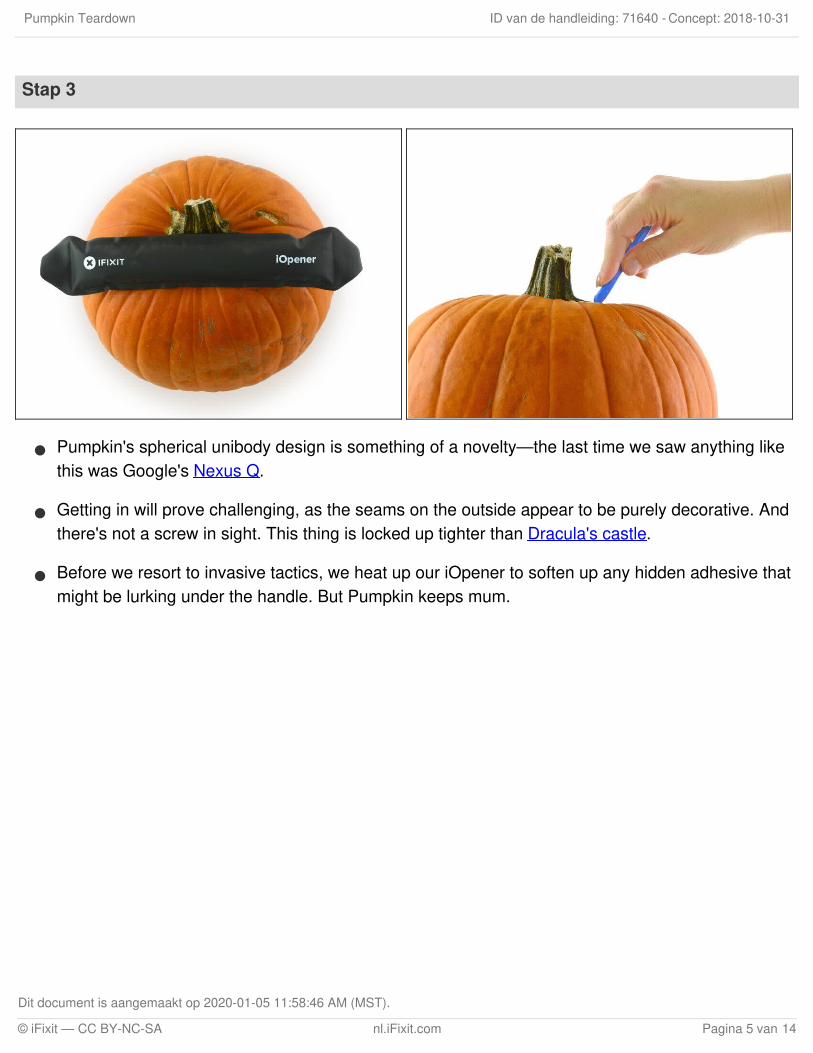
Pumpkin's spherical unibody design is something of a novelty—the last time we saw anything likethis was Google's Nexus Q.
Getting in will prove challenging, as the seams on the outside appear to be purely decorative. Andthere's not a screw in sight. This thing is locked up tighter than Dracula's castle.
Before we resort to invasive tactics, we heat up our iOpener to soften up any hidden adhesive thatmight be lurking under the handle. But Pumpkin keeps mum.
Pumpkin Teardown Concept: 2018-10-31ID van de handleiding: 71640 -
Dit document is aangemaakt op 2020-01-05 11:58:46 AM (MST).
© iFixit — CC BY-NC-SA nl.iFixit.com Pagina 5 van 14
Stap 4
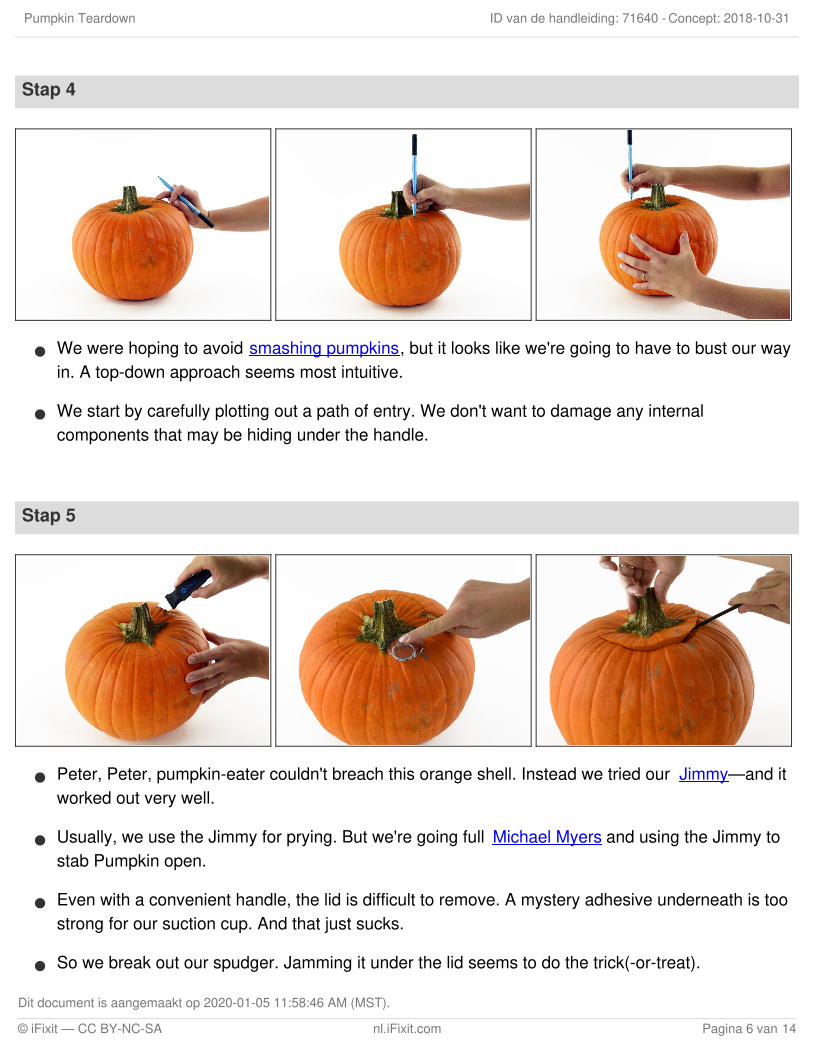
We were hoping to avoid smashing pumpkins, but it looks like we're going to have to bust our wayin. A top-down approach seems most intuitive.
We start by carefully plotting out a path of entry. We don't want to damage any internalcomponents that may be hiding under the handle.
Stap 5
Peter, Peter, pumpkin-eater couldn't breach this orange shell. Instead we tried our Jimmy—and itworked out very well.
Usually, we use the Jimmy for prying. But we're going full Michael Myers and using the Jimmy tostab Pumpkin open.
Even with a convenient handle, the lid is difficult to remove. A mystery adhesive underneath is toostrong for our suction cup. And that just sucks.
So we break out our spudger. Jamming it under the lid seems to do the trick(-or-treat).
Pumpkin Teardown Concept: 2018-10-31ID van de handleiding: 71640 -
Dit document is aangemaakt op 2020-01-05 11:58:46 AM (MST).
© iFixit — CC BY-NC-SA nl.iFixit.com Pagina 6 van 14
Stap 6
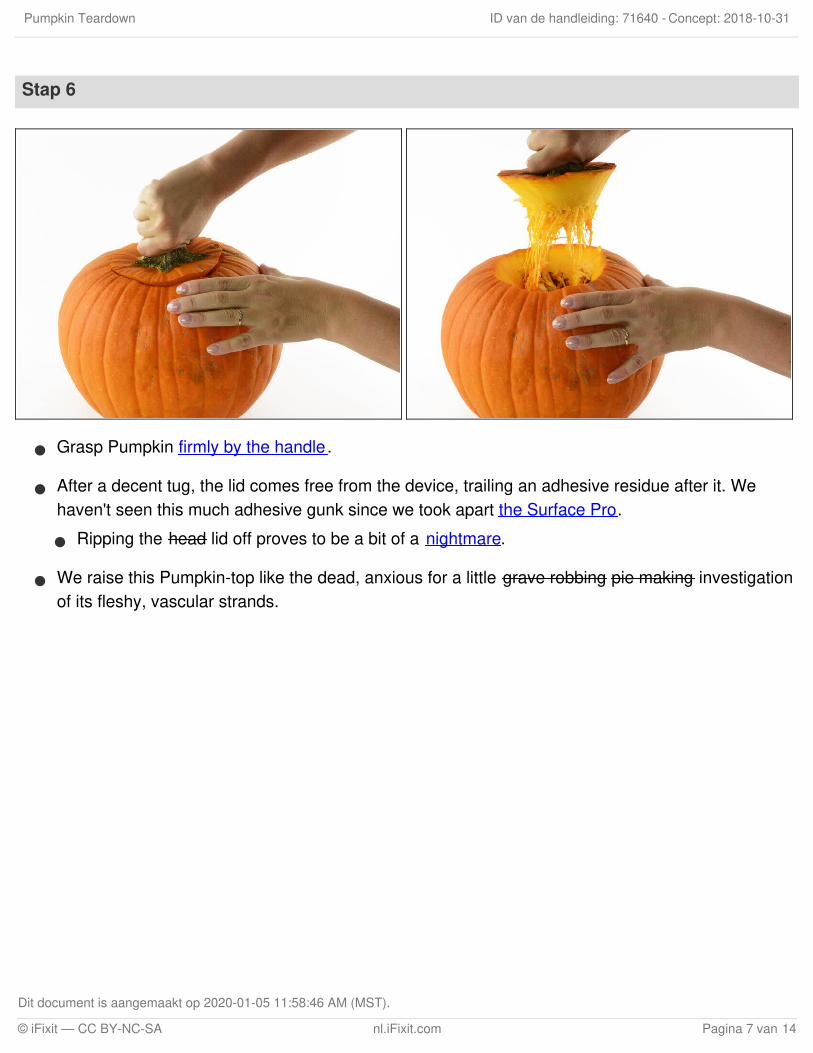
Grasp Pumpkin firmly by the handle.
After a decent tug, the lid comes free from the device, trailing an adhesive residue after it. Wehaven't seen this much adhesive gunk since we took apart the Surface Pro.
Ripping the head lid off proves to be a bit of a nightmare.
We raise this Pumpkin-top like the dead, anxious for a little grave robbing pie making investigationof its fleshy, vascular strands.
Pumpkin Teardown Concept: 2018-10-31ID van de handleiding: 71640 -
Dit document is aangemaakt op 2020-01-05 11:58:46 AM (MST).
© iFixit — CC BY-NC-SA nl.iFixit.com Pagina 7 van 14
Stap 7
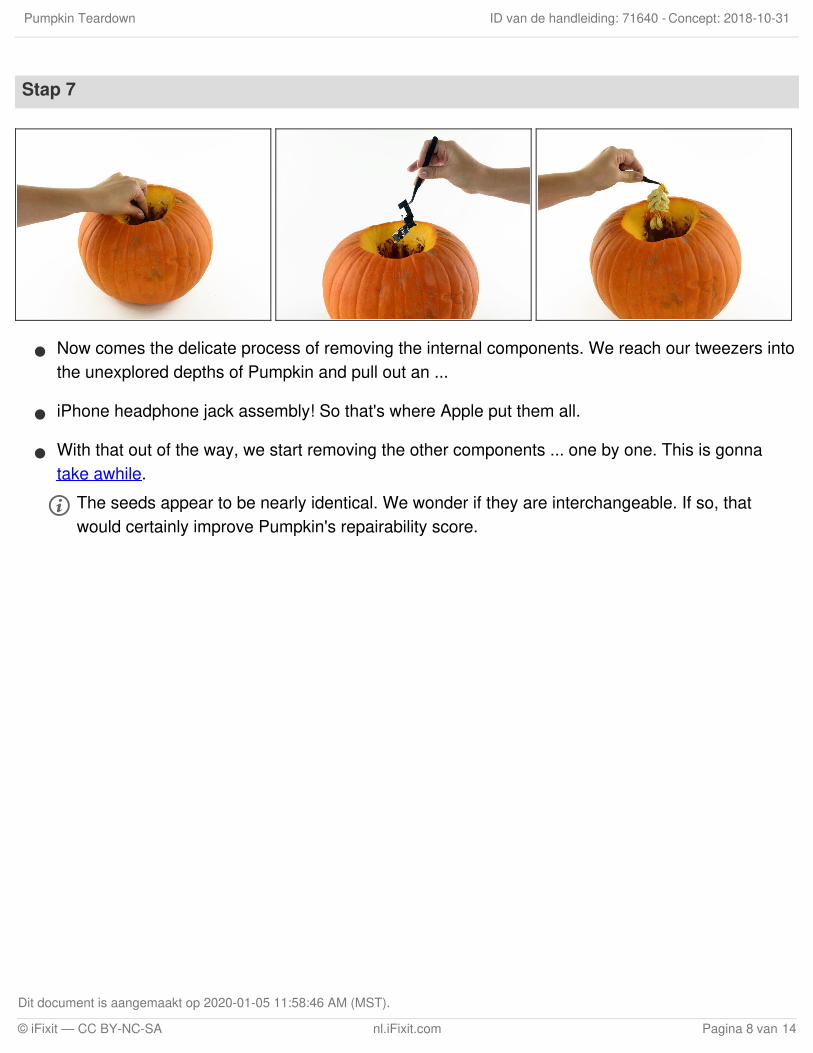
Now comes the delicate process of removing the internal components. We reach our tweezers intothe unexplored depths of Pumpkin and pull out an ...
iPhone headphone jack assembly! So that's where Apple put them all.
With that out of the way, we start removing the other components ... one by one. This is gonnatake awhile.
The seeds appear to be nearly identical. We wonder if they are interchangeable. If so, thatwould certainly improve Pumpkin's repairability score.
Pumpkin Teardown Concept: 2018-10-31ID van de handleiding: 71640 -
Dit document is aangemaakt op 2020-01-05 11:58:46 AM (MST).
© iFixit — CC BY-NC-SA nl.iFixit.com Pagina 8 van 14
Stap 8
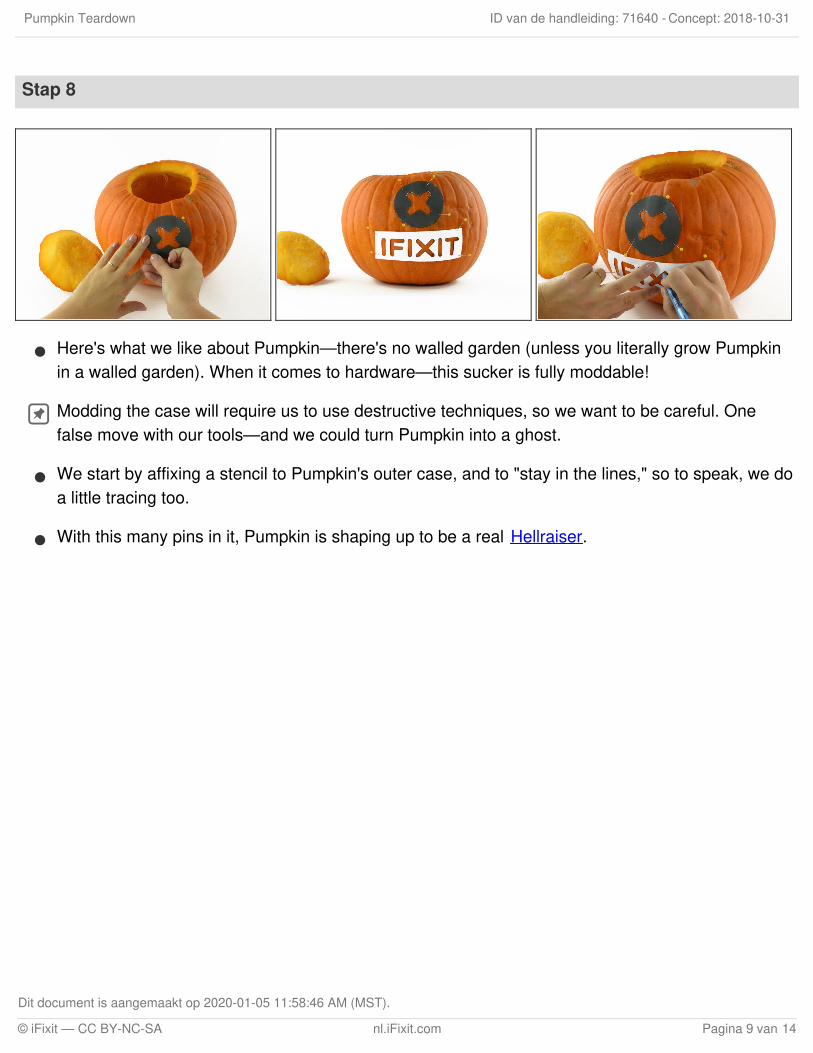
Here's what we like about Pumpkin—there's no walled garden (unless you literally grow Pumpkinin a walled garden). When it comes to hardware—this sucker is fully moddable!
Modding the case will require us to use destructive techniques, so we want to be careful. Onefalse move with our tools—and we could turn Pumpkin into a ghost.
We start by affixing a stencil to Pumpkin's outer case, and to "stay in the lines," so to speak, we doa little tracing too.
With this many pins in it, Pumpkin is shaping up to be a real Hellraiser.
Pumpkin Teardown Concept: 2018-10-31ID van de handleiding: 71640 -
Dit document is aangemaakt op 2020-01-05 11:58:46 AM (MST).
© iFixit — CC BY-NC-SA nl.iFixit.com Pagina 9 van 14
Stap 9
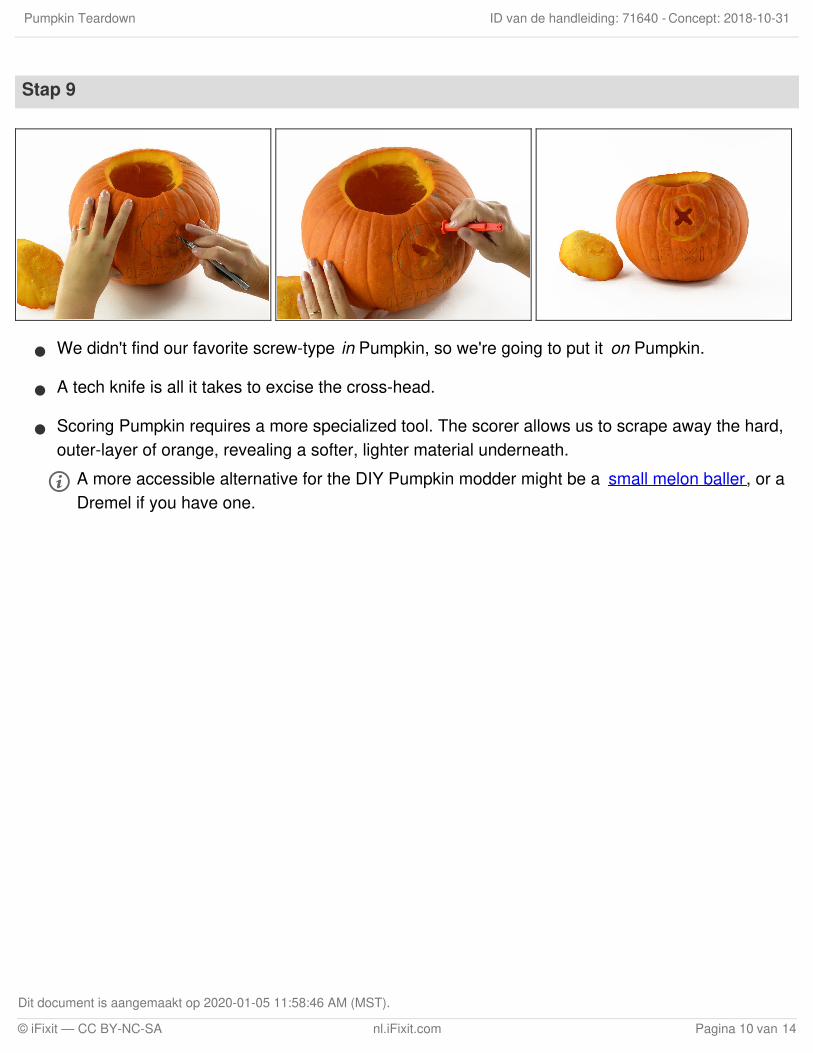
We didn't find our favorite screw-type in Pumpkin, so we're going to put it on Pumpkin.
A tech knife is all it takes to excise the cross-head.
Scoring Pumpkin requires a more specialized tool. The scorer allows us to scrape away the hard,outer-layer of orange, revealing a softer, lighter material underneath.
A more accessible alternative for the DIY Pumpkin modder might be a small melon baller, or aDremel if you have one.
Pumpkin Teardown Concept: 2018-10-31ID van de handleiding: 71640 -
Dit document is aangemaakt op 2020-01-05 11:58:46 AM (MST).
© iFixit — CC BY-NC-SA nl.iFixit.com Pagina 10 van 14

Stap 10
Doing some custom lettering on Pumpkin requires us to break out the big guns.
It's possible this thick case material serves as some sort of heat shield for the heating accesoryoften used in tandem with Pumpkin.
Of course, this kind of mod will likely compromise the device's waterproofing.
But the final result is just too good to pass on. We'll just avoid using Pumpkin anywhere near atoilet.
Pumpkin Teardown Concept: 2018-10-31ID van de handleiding: 71640 -
Dit document is aangemaakt op 2020-01-05 11:58:46 AM (MST).
© iFixit — CC BY-NC-SA nl.iFixit.com Pagina 11 van 14
Stap 11
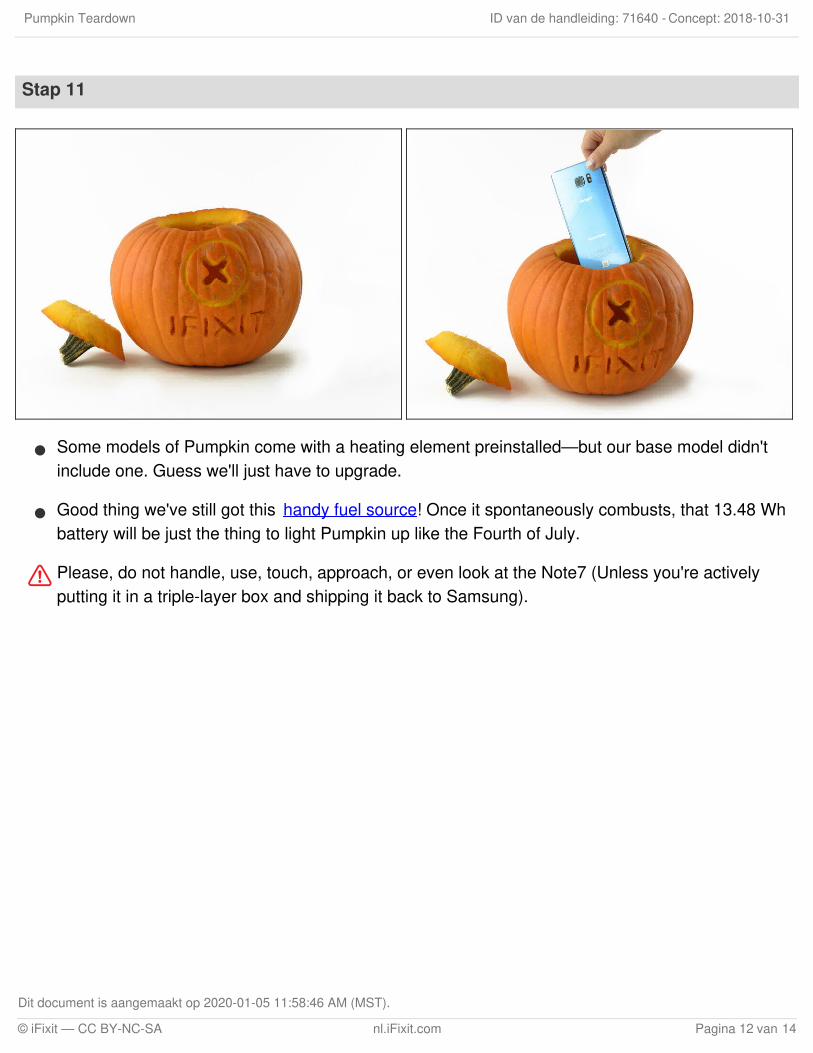
Some models of Pumpkin come with a heating element preinstalled—but our base model didn'tinclude one. Guess we'll just have to upgrade.
Good thing we've still got this handy fuel source! Once it spontaneously combusts, that 13.48 Whbattery will be just the thing to light Pumpkin up like the Fourth of July.
Please, do not handle, use, touch, approach, or even look at the Note7 (Unless you're activelyputting it in a triple-layer box and shipping it back to Samsung).
Pumpkin Teardown Concept: 2018-10-31ID van de handleiding: 71640 -
Dit document is aangemaakt op 2020-01-05 11:58:46 AM (MST).
© iFixit — CC BY-NC-SA nl.iFixit.com Pagina 12 van 14
Stap 12
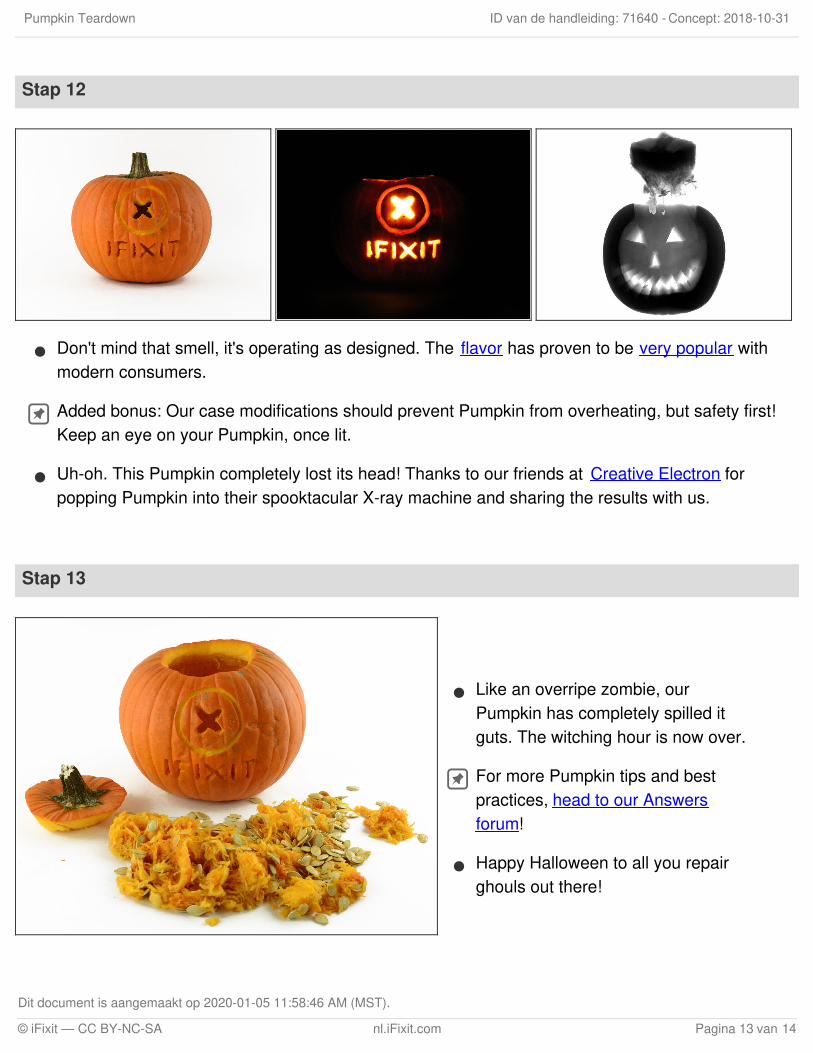
Don't mind that smell, it's operating as designed. The flavor has proven to be very popular withmodern consumers.
Added bonus: Our case modifications should prevent Pumpkin from overheating, but safety first!Keep an eye on your Pumpkin, once lit.
Uh-oh. This Pumpkin completely lost its head! Thanks to our friends at Creative Electron forpopping Pumpkin into their spooktacular X-ray machine and sharing the results with us.
Stap 13
Like an overripe zombie, ourPumpkin has completely spilled itguts. The witching hour is now over.
For more Pumpkin tips and bestpractices, head to our Answersforum!
Happy Halloween to all you repairghouls out there!
Pumpkin Teardown Concept: 2018-10-31ID van de handleiding: 71640 -
Dit document is aangemaakt op 2020-01-05 11:58:46 AM (MST).
© iFixit — CC BY-NC-SA nl.iFixit.com Pagina 13 van 14

Pumpkin Teardown Concept: 2018-10-31ID van de handleiding: 71640 -
Dit document is aangemaakt op 2020-01-05 11:58:46 AM (MST).
© iFixit — CC BY-NC-SA nl.iFixit.com Pagina 14 van 14