Embed Size (px)
Citation preview
Proposal Proposal Instructions for Instructions for Sponsor Specific Sponsor Specific
IDC Rates/Proposals IDC Rates/Proposals That Include GRA That Include GRA
SupportSupport
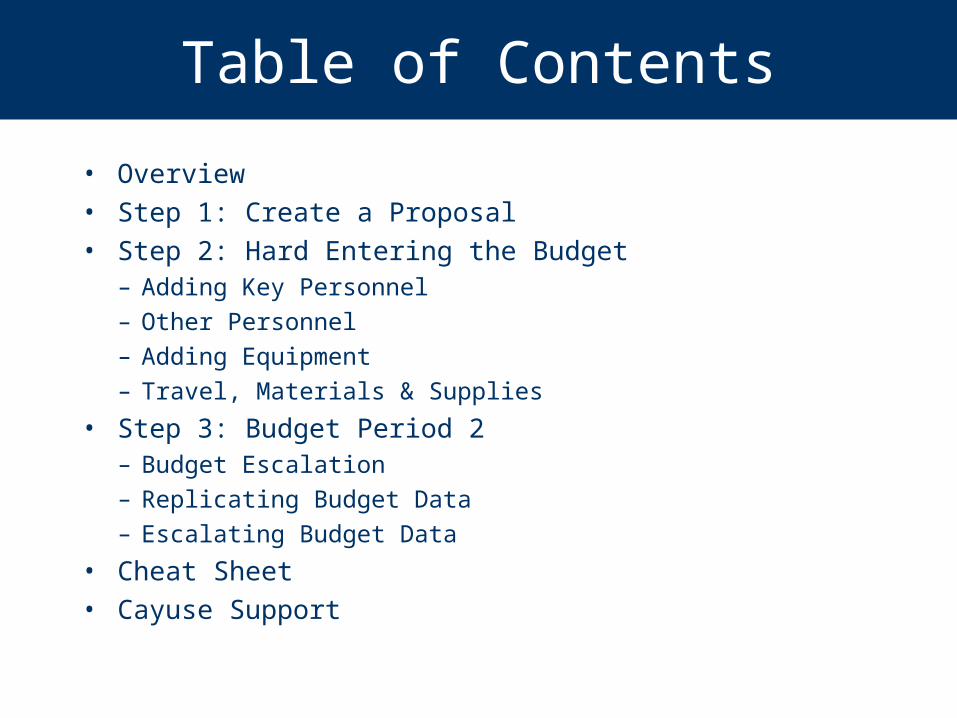
Table of Contents
• Overview• Step 1: Create a Proposal• Step 2: Hard Entering the Budget
– Adding Key Personnel– Other Personnel– Adding Equipment– Travel, Materials & Supplies
• Step 3: Budget Period 2– Budget Escalation– Replicating Budget Data– Escalating Budget Data
• Cheat Sheet• Cayuse Support
Overview
• Often a proposal will have a Sponsor Specific IDC rate that is outside the NAU standard rates and even more often a proposal’s budget will included GRA support.
• If your proposal has any of these two components you will need to “hard enter” the budget.
• The following slides provide step-by-step instructions, guiding you through the process which will result in saving time associated with preparing your proposal in the Cayuse System.
Step 1
Create a ProposalCreate a Proposal
Step 1: Create a Proposal
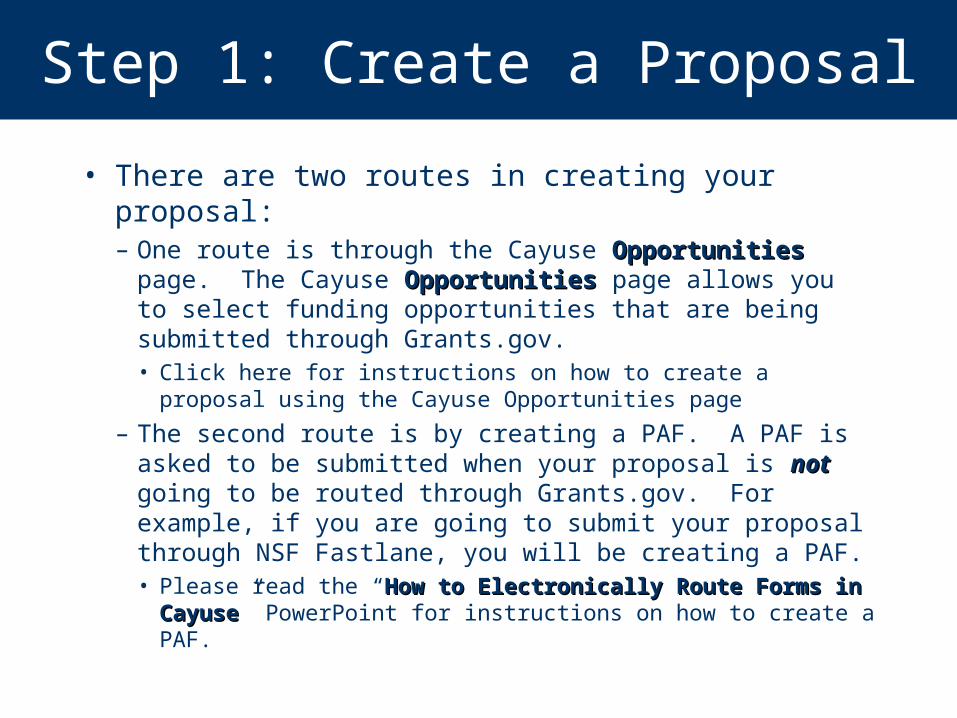
• There are two routes in creating your proposal:– One route is through the Cayuse OpportunitiesOpportunities
page. The Cayuse OpportunitiesOpportunities page allows you to select funding opportunities that are being submitted through Grants.gov.• Click here for instructions on how to create a proposal
using the Cayuse Opportunities page
– The second route is by creating a PAF. A PAF is asked to be submitted when your proposal is notnot going to be routed through Grants.gov. For example, if you are going to submit your proposal through NSF Fastlane, you will be creating a PAF.• Please read the “How to Electronically Route Forms in How to Electronically Route Forms in
CayuseCayuse” PowerPoint for instructions on how to create a PAF.
Step 1: Create a Proposal
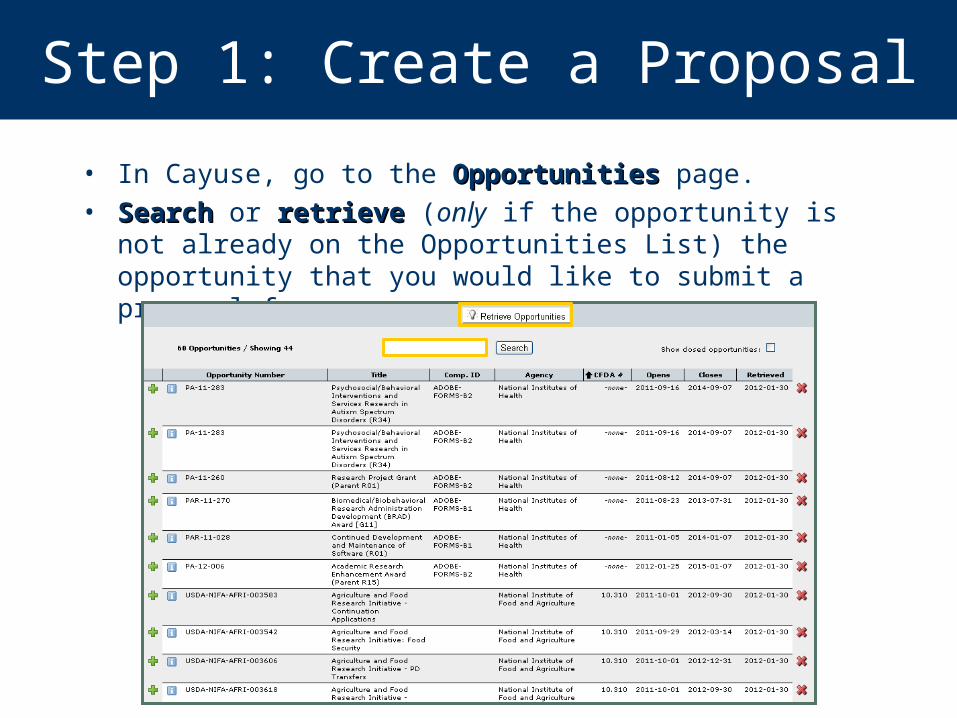
• In Cayuse, go to the Opportunities Opportunities page.• SearchSearch or retrieveretrieve (only if the opportunity is not
already on the Opportunities List) the opportunity that you would like to submit a proposal for.
Step 1: Create a Proposal
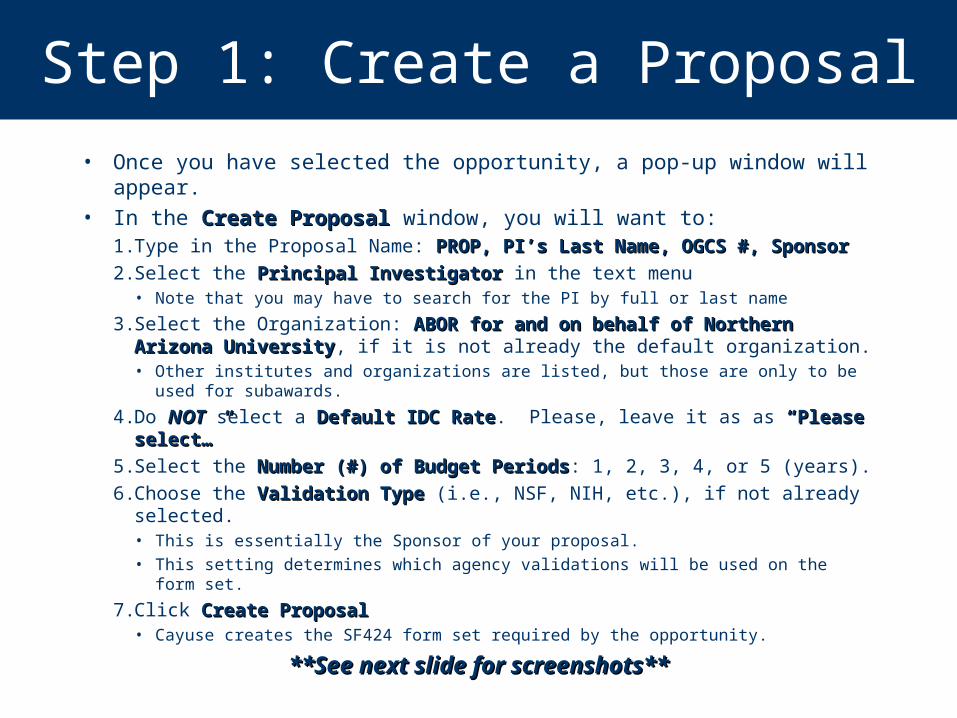
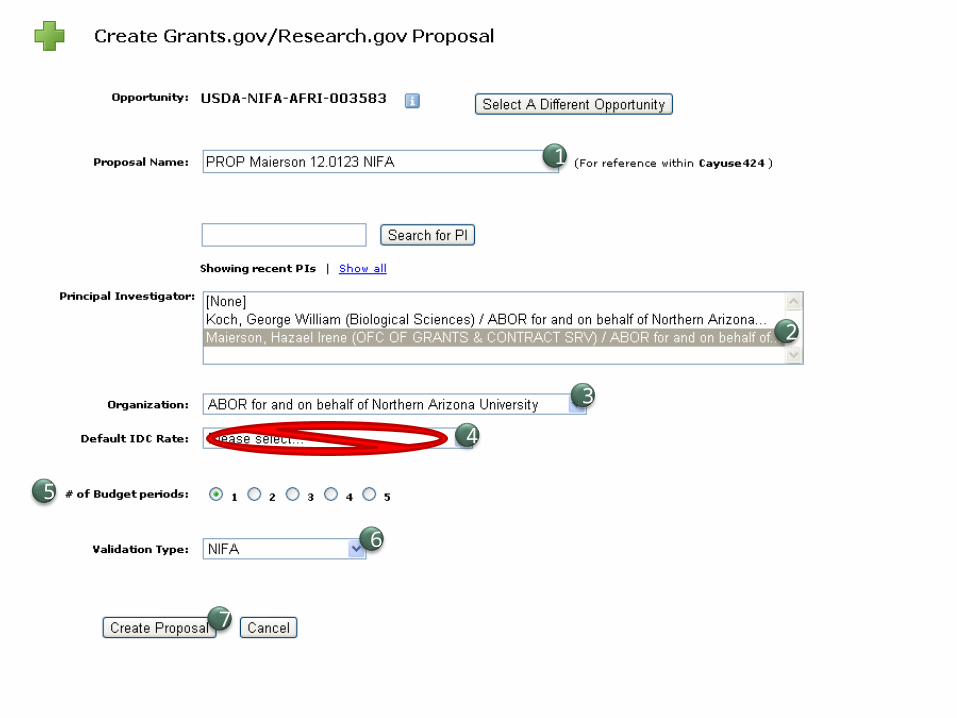
• Once you have selected the opportunity, a pop-up window will appear.
• In the Create Proposal Create Proposal window, you will want to:1. Type in the Proposal Name: PROP, PI’s Last Name, OGCS #, SponsorPROP, PI’s Last Name, OGCS #, Sponsor2. Select the Principal InvestigatorPrincipal Investigator in the text menu
• Note that you may have to search for the PI by full or last name
3. Select the Organization: ABOR for and on behalf of Northern Arizona ABOR for and on behalf of Northern Arizona UniversityUniversity, if it is not already the default organization.• Other institutes and organizations are listed, but those are only to be used for
subawards.
4. Do NOTNOT select a Default IDC RateDefault IDC Rate. Please, leave it as as “Please “Please select…”select…”
5. Select the Number (#) of Budget PeriodsNumber (#) of Budget Periods: 1, 2, 3, 4, or 5 (years).6. Choose the Validation Type Validation Type (i.e., NSF, NIH, etc.), if not already selected.
• This is essentially the Sponsor of your proposal.• This setting determines which agency validations will be used on the form set.
7. Click Create ProposalCreate Proposal• Cayuse creates the SF424 form set required by the opportunity.
**See next slide for screenshots****See next slide for screenshots**
2
1
3
4
5
6
7
Step 1: Create a Proposal
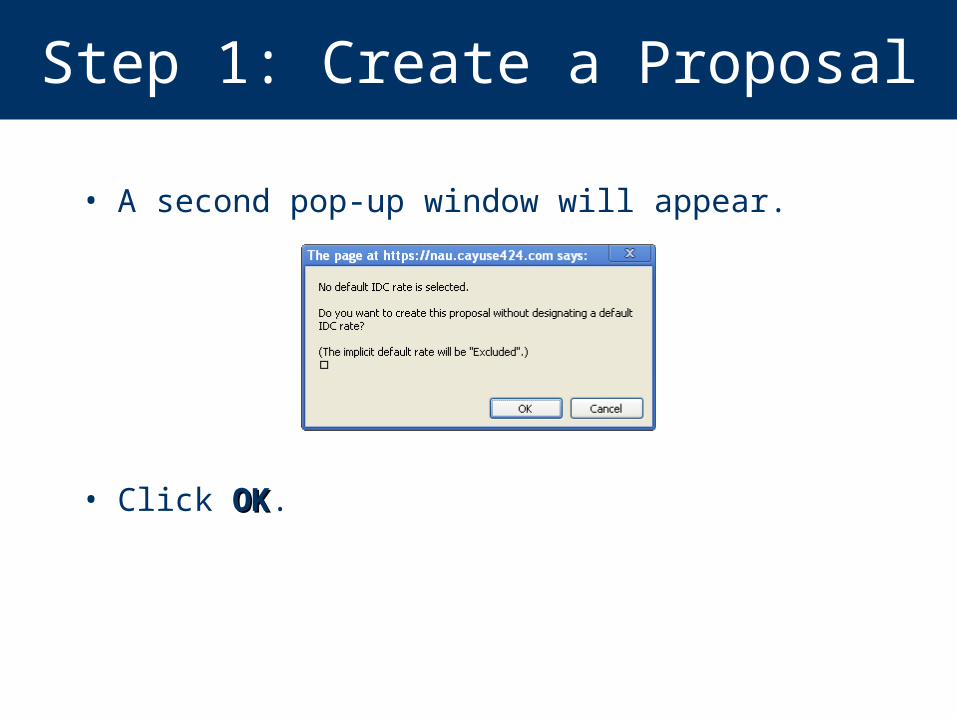
• A second pop-up window will appear.
• Click OKOK.
Step 2
Hard-Entering the Hard-Entering the BudgetBudget
Step 2: Hard-Entering the Budget
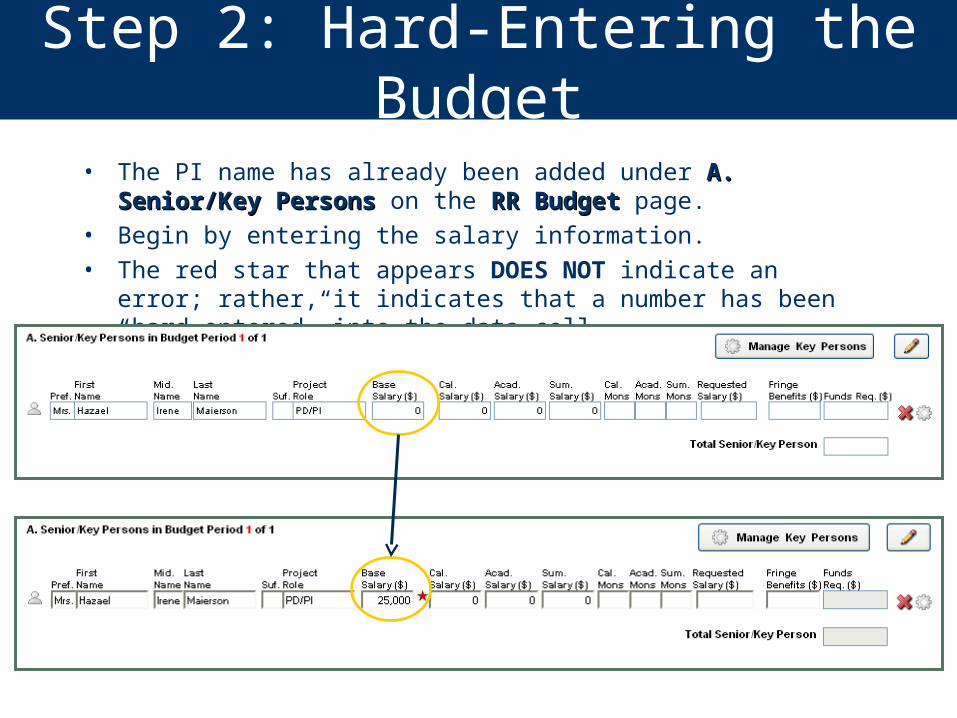
• The PI name has already been added under A. Senior/Key A. Senior/Key PersonsPersons on the RR BudgetRR Budget page.
• Begin by entering the salary information. • The red star that appears DOES NOT indicate an error; rather,
it indicates that a number has been “hard-entered” into the data cell.
Step 2: Hard-Entering the Budget
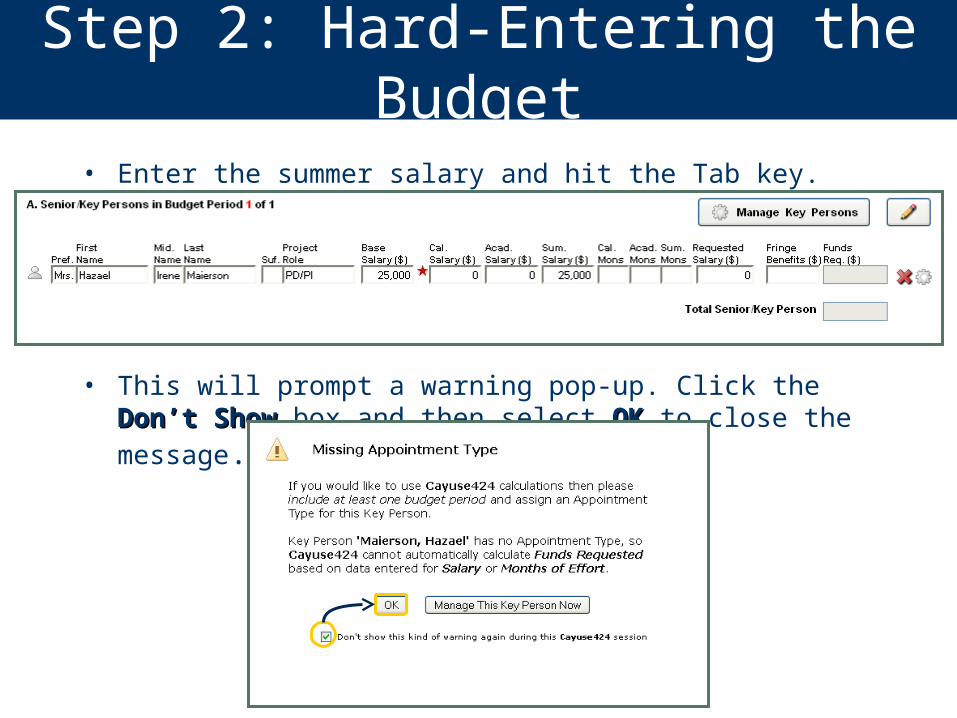
• Enter the summer salary and hit the Tab key.
• This will prompt a warning pop-up. Click the Don’t Don’t ShowShow box and then select OKOK to close the message.
Step 2: Hard-Entering the Budget
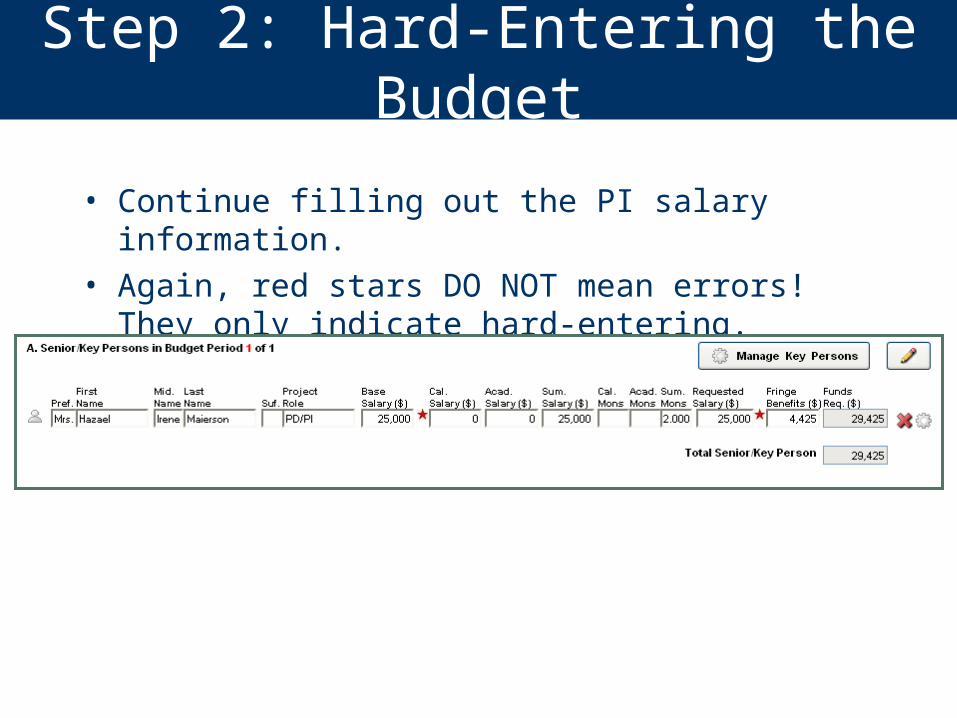
• Continue filling out the PI salary information. • Again, red stars DO NOT mean errors! They
only indicate hard-entering.
Step 2A: Adding Key Personnel
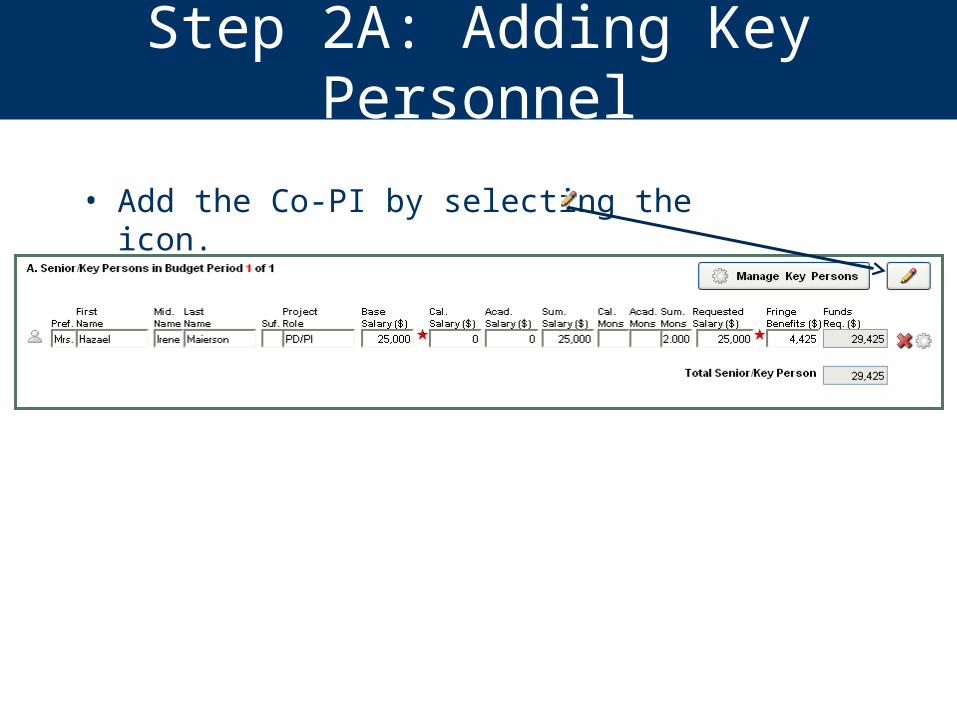
• Add the Co-PI by selecting the icon.
Step 2A: Adding Key Personnel
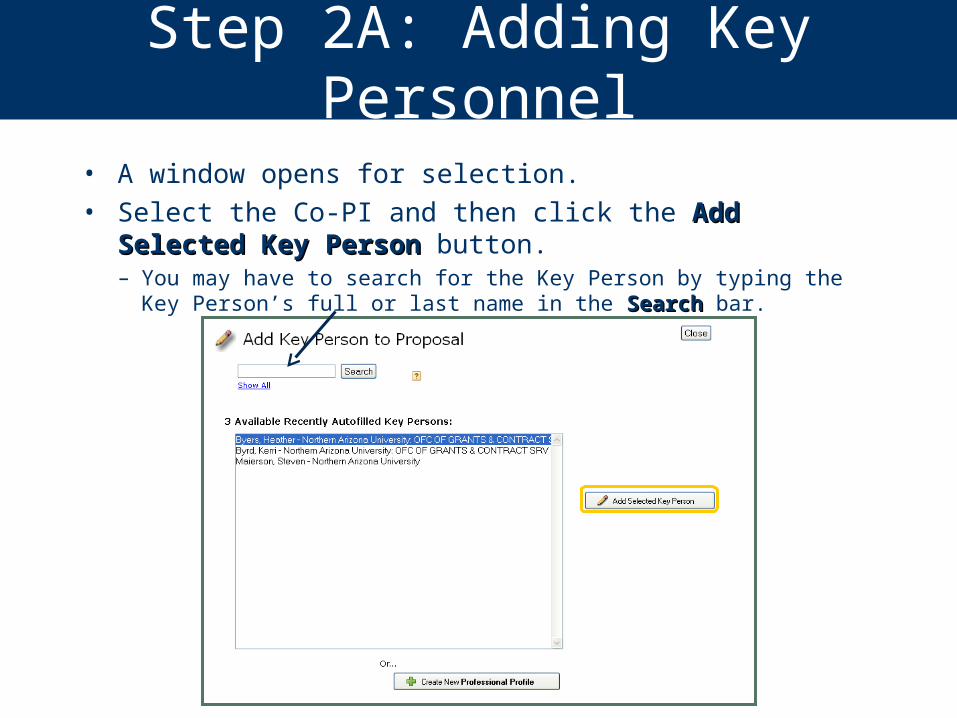
• A window opens for selection. • Select the Co-PI and then click the Add Selected Key Add Selected Key
PersonPerson button. – You may have to search for the Key Person by typing the Key
Person’s full or last name in the SearchSearch bar.
Step 2A: Adding Key Personnel
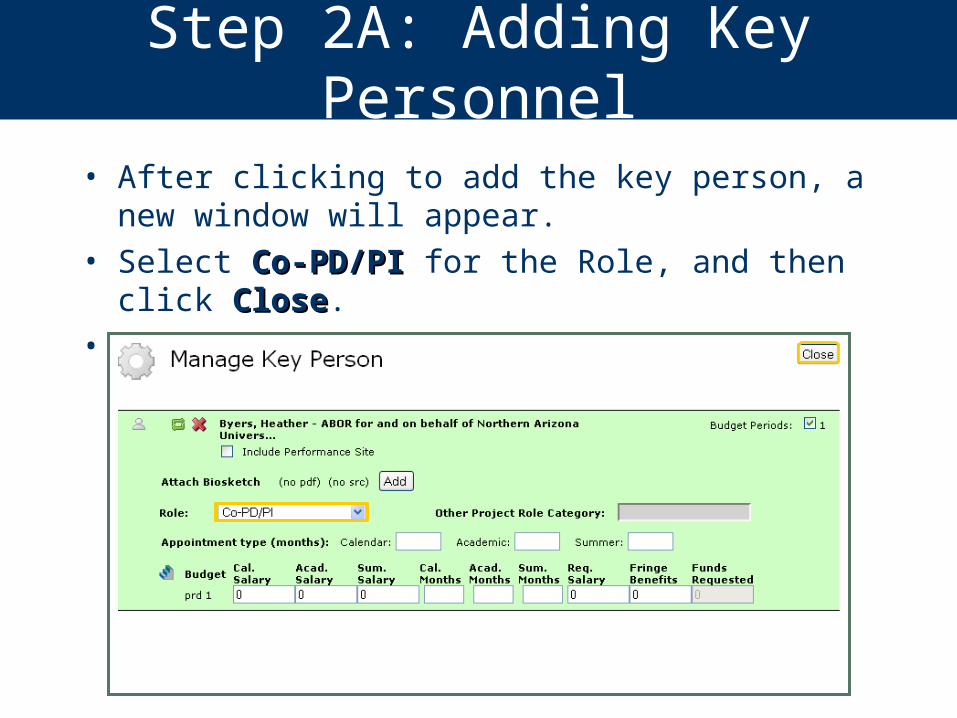
• After clicking to add the key person, a new window will appear.
• Select Co-PD/PICo-PD/PI for the Role, and then click CloseClose.
• You do not need to fill out any other information.
Step 2: Hard-Entering the Budget
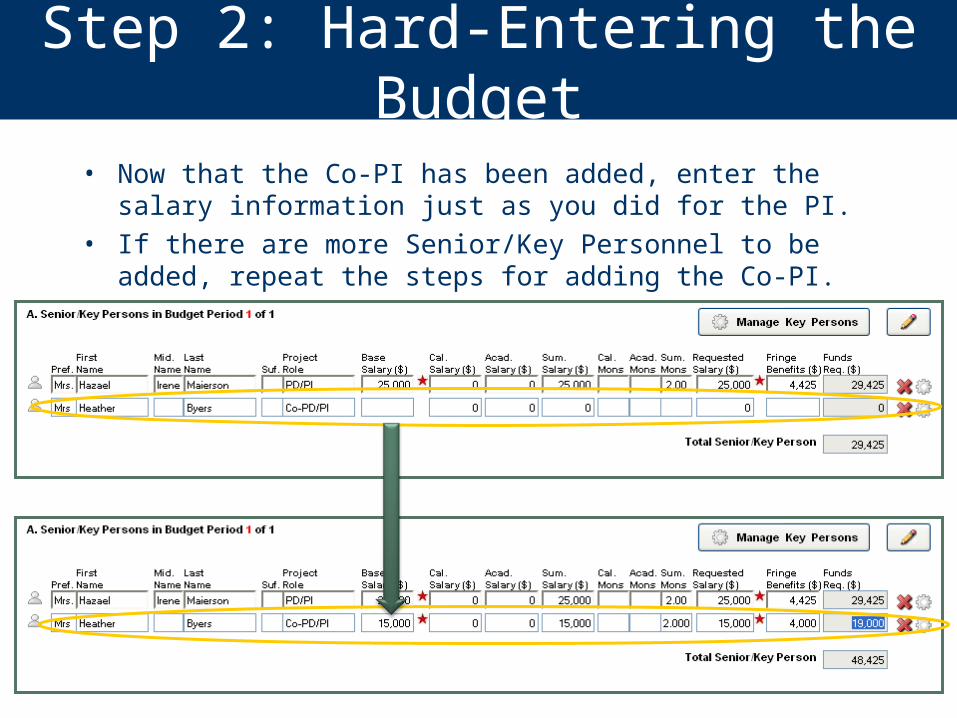
• Now that the Co-PI has been added, enter the salary information just as you did for the PI.
• If there are more Senior/Key Personnel to be added, repeat the steps for adding the Co-PI.
Step 2B: Other Personnel
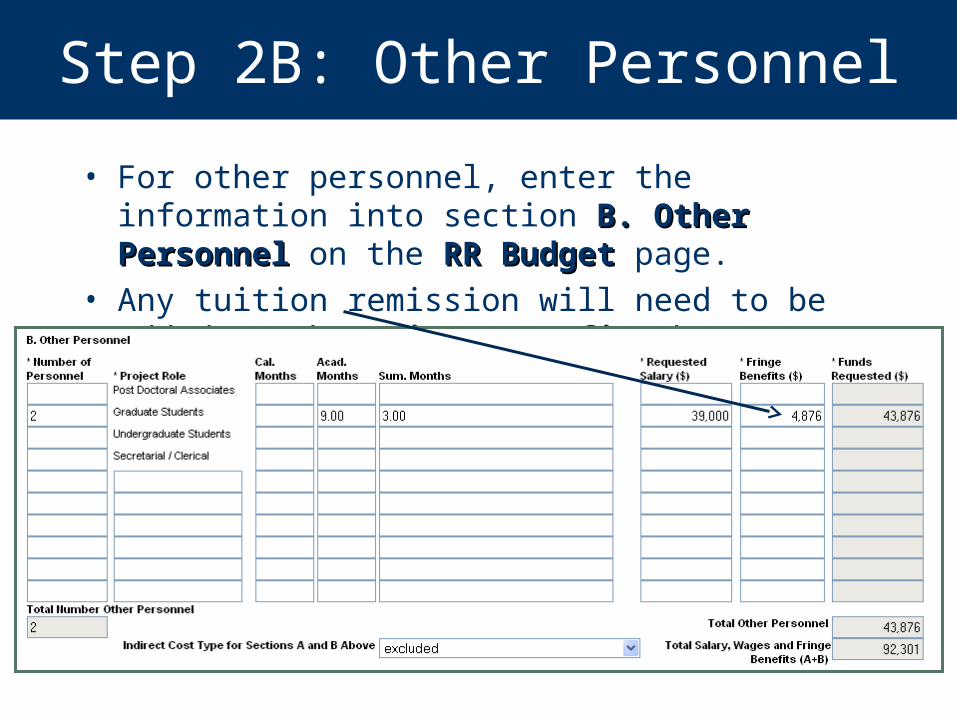
• For other personnel, enter the information into section B. Other PersonnelB. Other Personnel on the RR RR Budget Budget page.
• Any tuition remission will need to be added to the Fringe BenefitsFringe Benefits box.

Step 2C: Adding Equipment
• Section C: Equipment Description1. Click New Equipment RowNew Equipment Row.2. Enter Equipment ItemEquipment Item.3. Enter Funds RequestedFunds Requested.4. (If applicable) Select Indirect Cost Type Indirect Cost Type using drop
down menu (excluded set as default).
1
2 3
4
Step 2D: Travel, Materials & Costs
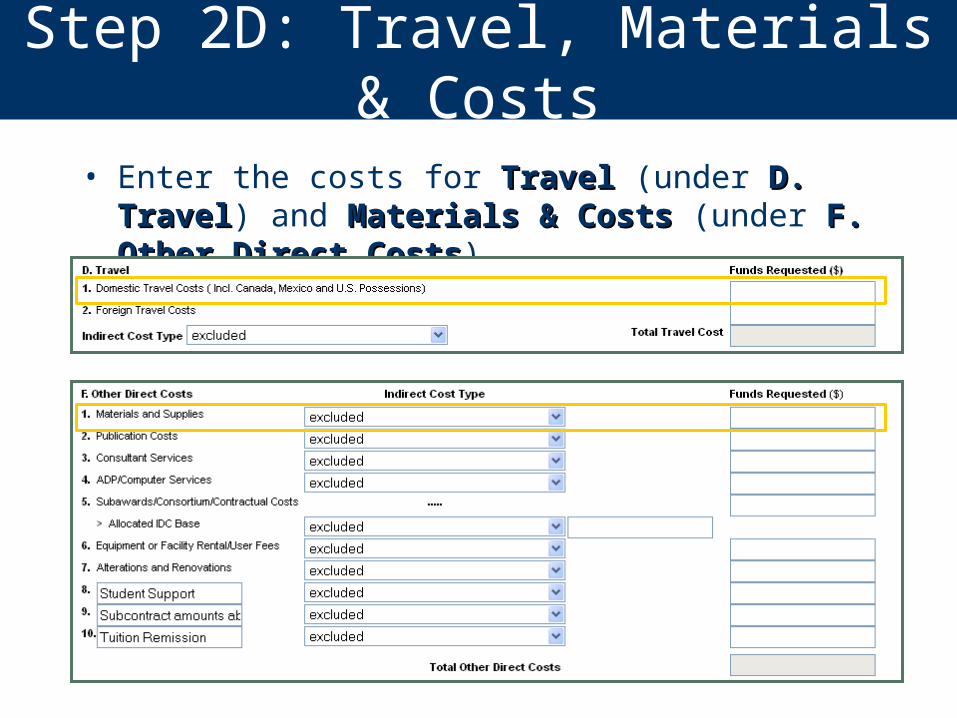
• Enter the costs for Travel Travel (under D. TravelD. Travel) and Materials & CostsMaterials & Costs (under F. Other F. Other Direct CostsDirect Costs).

Step 2E: Indirect Cost
• For Indirect Costs, select the cost type from the dropdown menu.
• Enter 4949 as the Indirect Cost Rate (%)Indirect Cost Rate (%), and then enter the Indirect Cost Base ($)Indirect Cost Base ($).
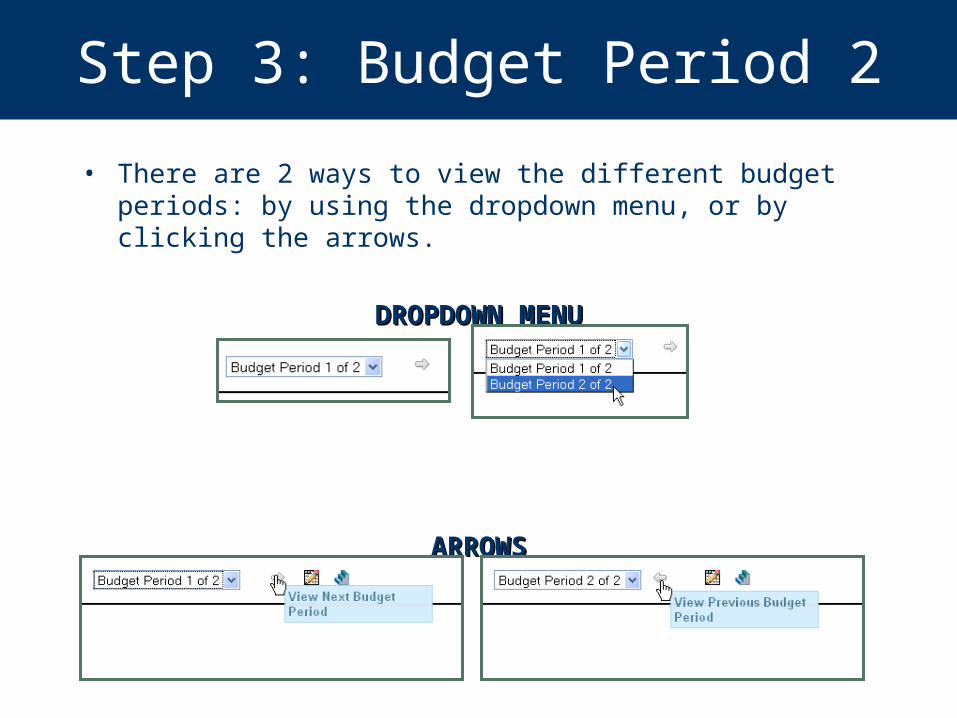
Step 3: Budget Period 2
• There are 2 ways to view the different budget periods: by using the dropdown menu, or by clicking the arrows.
DROPDOWN MENUDROPDOWN MENU
ARROWSARROWS
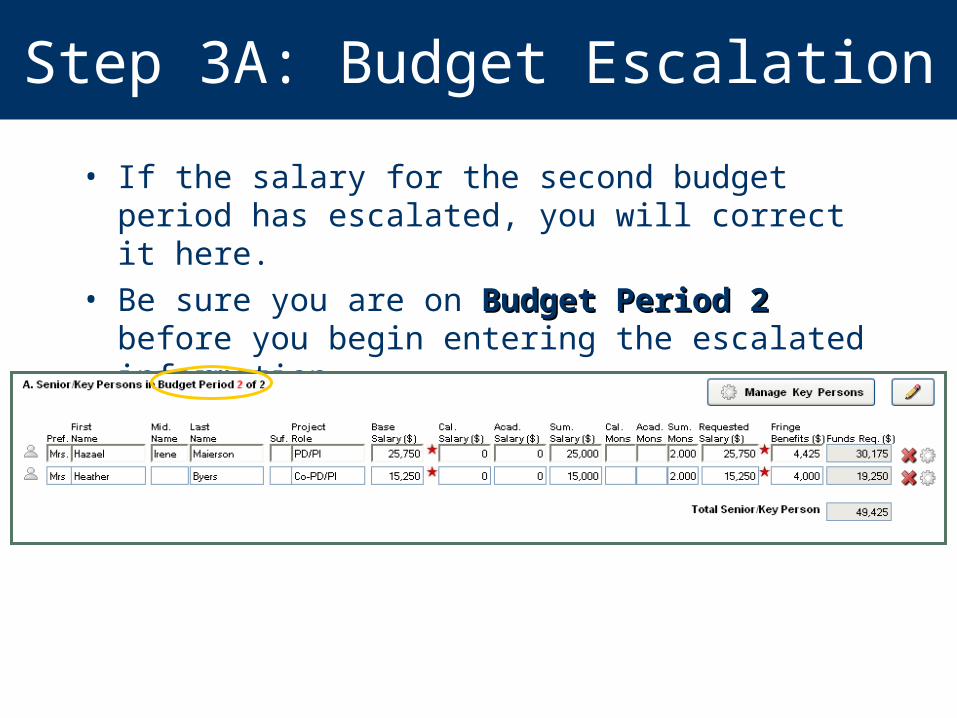
Step 3A: Budget Escalation
• If the salary for the second budget period has escalated, you will correct it here.
• Be sure you are on Budget Period 2 Budget Period 2 before you begin entering the escalated information.
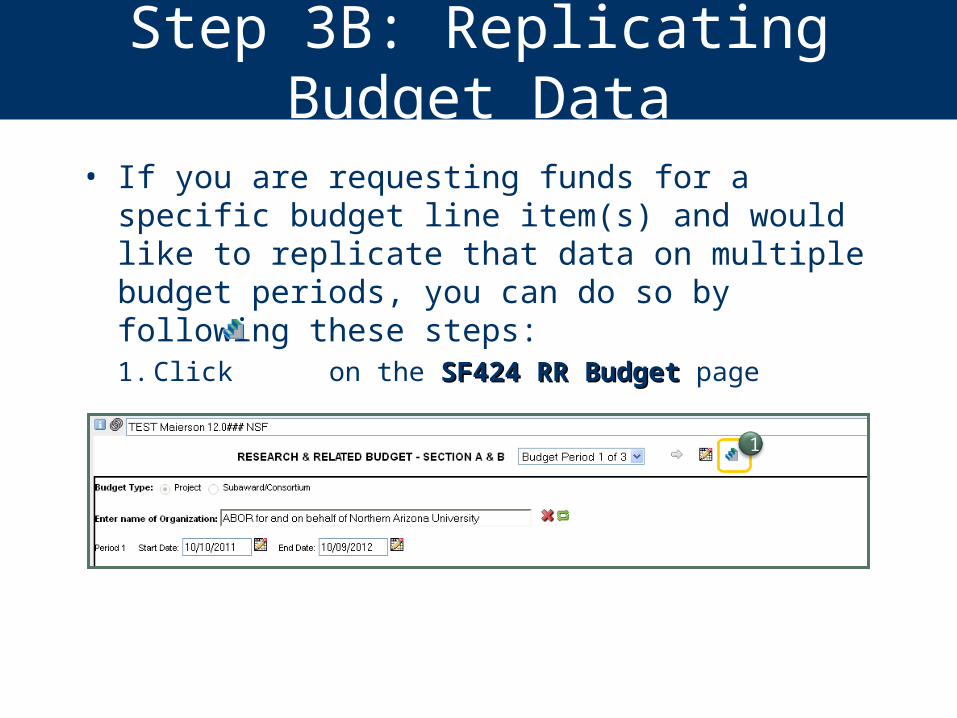
Step 3B: Replicating Budget Data
• If you are requesting funds for a specific budget line item(s) and would like to replicate that data on multiple budget periods, you can do so by following these steps:1. Click on the SF424 RR BudgetSF424 RR Budget page
1
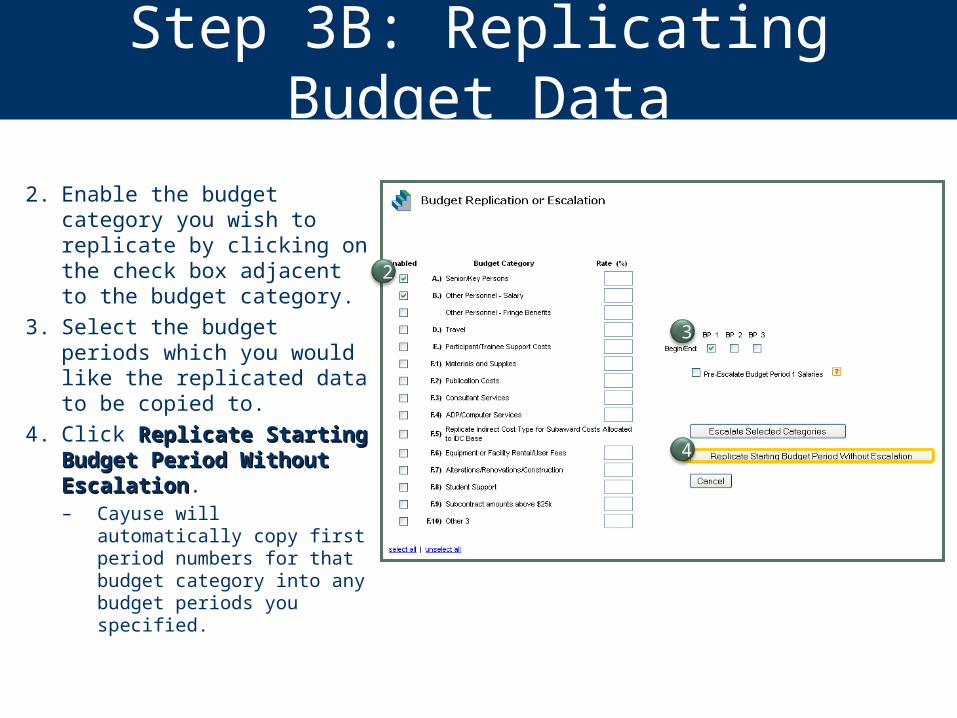
Step 3B: Replicating Budget Data
2. Enable the budget category you wish to replicate by clicking on the check box adjacent to the budget category.
3. Select the budget periods which you would like the replicated data to be copied to.
4. Click Replicate Starting Replicate Starting Budget Period Without Budget Period Without EscalationEscalation.– Cayuse will automatically
copy first period numbers for that budget category into any budget periods you specified.
2
3
4
Step 3C: Escalating Budget Data
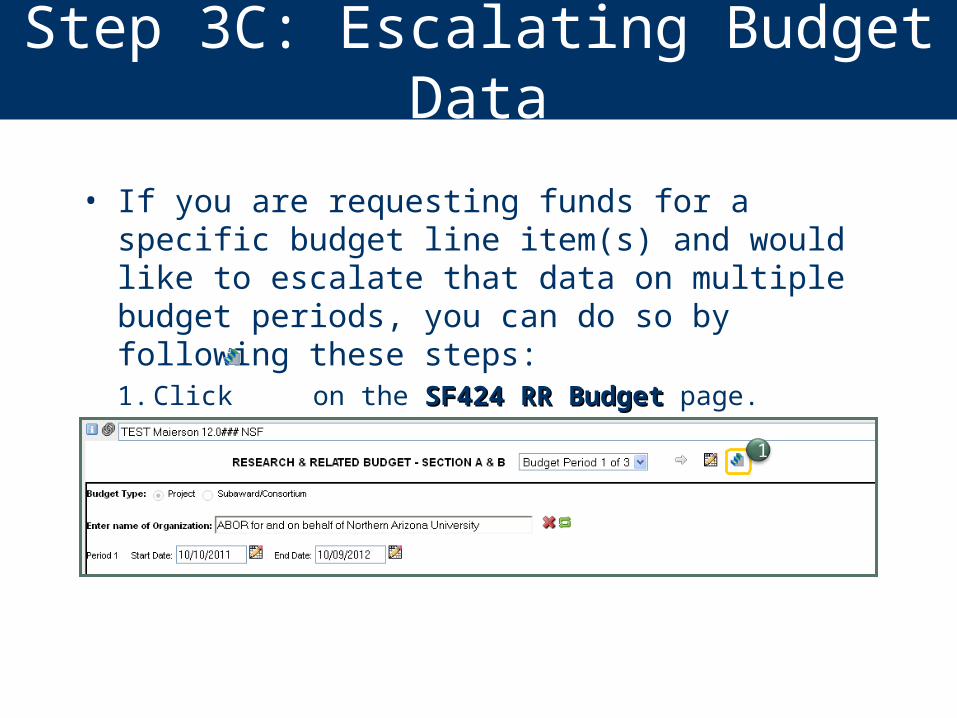
• If you are requesting funds for a specific budget line item(s) and would like to escalate that data on multiple budget periods, you can do so by following these steps:1. Click on the SF424 RR BudgetSF424 RR Budget page.
1
Step 3C: Escalating Budget Data
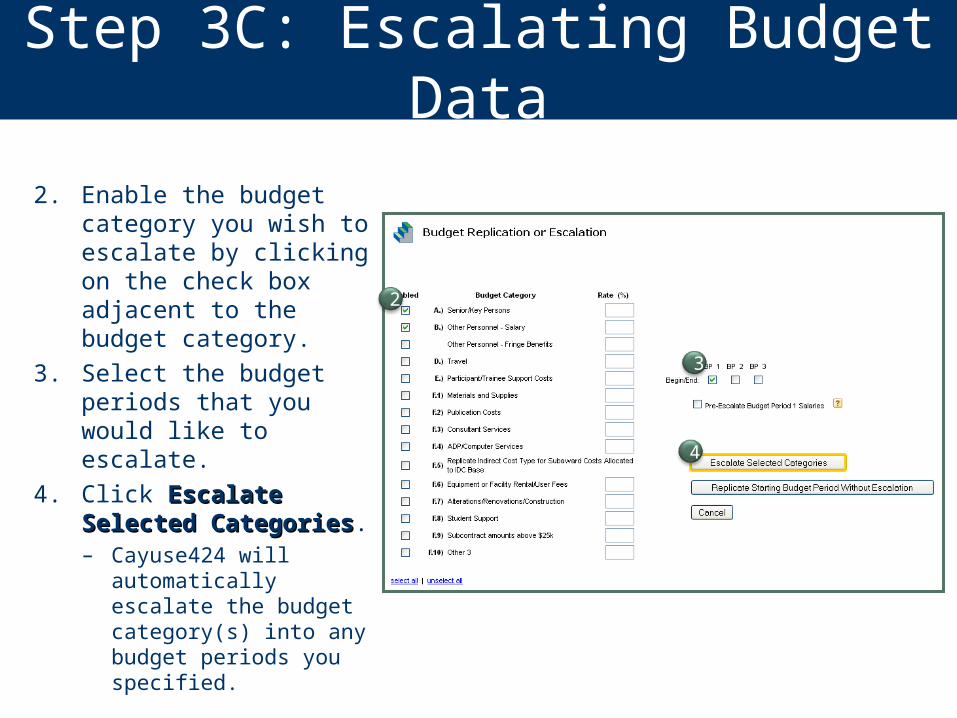
2. Enable the budget category you wish to escalate by clicking on the check box adjacent to the budget category.
3. Select the budget periods that you would like to escalate.
4. Click Escalate Escalate Selected CategoriesSelected Categories.– Cayuse424 will
automatically escalate the budget category(s) into any budget periods you specified.
2
3
4
Cheat Sheet
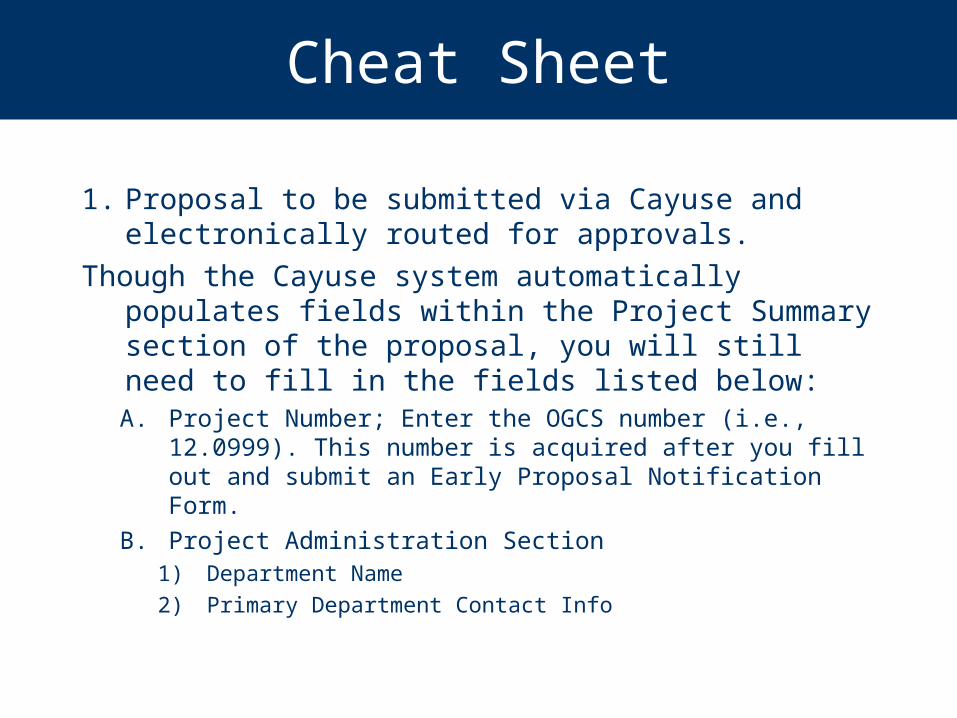
1. Proposal to be submitted via Cayuse and electronically routed for approvals.
Though the Cayuse system automatically populates fields within the Project Summary section of the proposal, you will still need to fill in the fields listed below:A. Project Number; Enter the OGCS number (i.e.,
12.0999). This number is acquired after you fill out and submit an Early Proposal Notification Form.
B. Project Administration Section 1) Department Name2) Primary Department Contact Info
Cheat Sheet
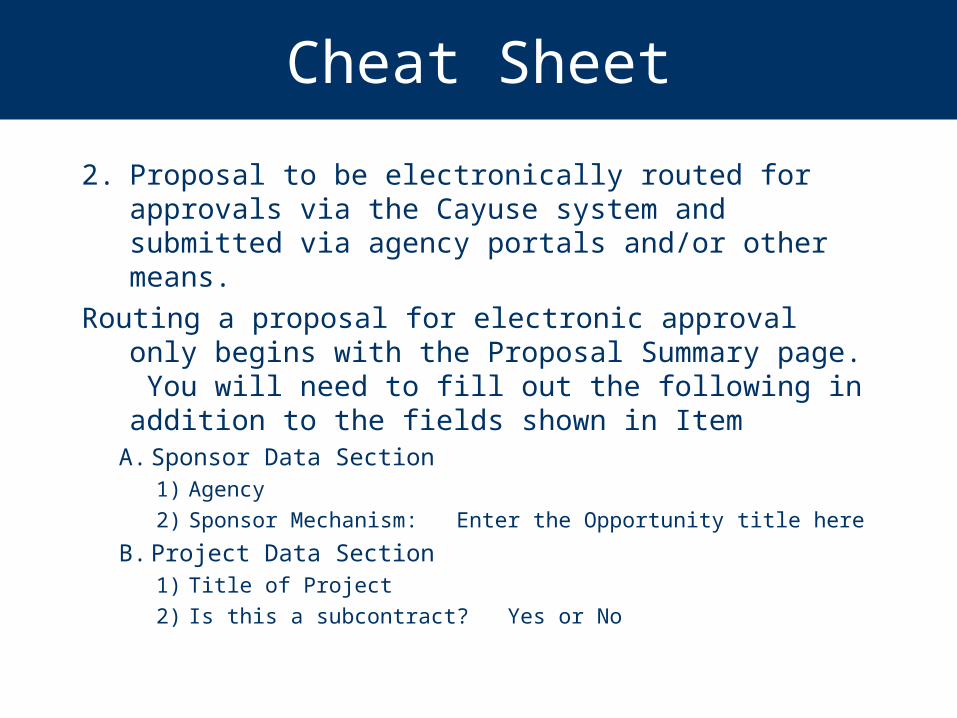
2. Proposal to be electronically routed for approvals via the Cayuse system and submitted via agency portals and/or other means.
Routing a proposal for electronic approval only begins with the Proposal Summary page. You will need to fill out the following in addition to the fields shown in Item
A. Sponsor Data Section1) Agency2) Sponsor Mechanism: Enter the Opportunity title here
B. Project Data Section1) Title of Project2) Is this a subcontract? Yes or No
Cheat Sheet
3. NAU Supplementary Information for Proposal Review.
• All proposals routed via the Cayuse System for Electronic Approval MUST have this form completely filled out and attached under the Documents section on the lower left side of the screen under Proposal Management Proposal Summary in Cayuse. Fill in all fields that are relevant to your proposal. Do not fill in the fields designated for the OGCS use only.
Cayuse Support
• For Help With Cayuse 424, You May…– Contact OGCS via email ([email protected]) or
call us at extension 4880.– Refer to the Training Materials on the OGCS
website:http://www.research.nau.edu/funding/ogcs/index.aspx
– Go to the Cayuse Support website:http://support.cayuse.com