Embed Size (px)
Citation preview

Property Assessment System 2.0
User’s Manual
Software Consulting Associates54 Elizabeth StreetSuite 17Red Hook, NY 12571Phone: 845-758-0104Fax: 845-758-0884

Table of ContentsTable of Contents........................................................................................................................................1
1.0 Getting Started....................................................................................................................................15
1.1 To log into the Property Assessment System (PAS):........................................................................15
2.0 User Profiles & Security Levels............................................................................................................16
2.1 To Create a New User ID:................................................................................................................16
2.2 To Change an Existing User ID.........................................................................................................16
2.3 To change what User ID is logged in:...............................................................................................16
2.4 To change the Assessment Year:.....................................................................................................17
2.5 Menus and Submenus.....................................................................................................................17
2.6 Navigating.......................................................................................................................................18
2.7 Alternative Data Entry Methods......................................................................................................18
2.8 Backing Up.......................................................................................................................................19
2.9 System Warnings and Messages.....................................................................................................19
3.0 General Administration.......................................................................................................................20
3.1 Assessment Year Control File..........................................................................................................20
3.2 SWIS Code Table..............................................................................................................................21
3.2.1 To Change the equalization rate or uniform percentage of value:...........................................21
3.2.2 Residential Assessment Ratio (RAR).........................................................................................22
3.2.3 Classified (Homestead vs. Non-Homestead)............................................................................22
3.2.4 School Code Table....................................................................................................................22
4.0 General Report Functions....................................................................................................................23
4.1 Parcel Lists.......................................................................................................................................23
4.1.1 To Create a Parcel List:.............................................................................................................23
1

4.1.2 To create a parcel list of the parcels generated by a particular report:...................................23
4.1.3 To Save a Parcel List:................................................................................................................23
4.1.4 Open or Load a Parcel List:.......................................................................................................24
4.2 Saving Report Templates.................................................................................................................25
4.2.1 Load Report Templates............................................................................................................25
4.2.2 Preview and Print Reports.......................................................................................................25
5.0 Parcels.................................................................................................................................................27
Create a New Parcel..............................................................................................................................27
5.1.1 Split\Merge Report..................................................................................................................30
5.1.2 Parcel Information Report........................................................................................................31
5.1.3 Name/Address Audit Trail Report............................................................................................31
6.0 Exemptions..........................................................................................................................................32
6.1 Exemption Code Tables...................................................................................................................32
6.1.1 To Add a new Exemption Code:...............................................................................................32
6.1.2 To Change an existing Exemption Code:..................................................................................32
6.1.3 Deleting an existing Exemption Code:......................................................................................32
6.2 Working with Exemption Codes......................................................................................................32
6.2.1 To Add an Exemption to a Parcel:............................................................................................33
6.2.2 To Add an Exemption to Multiple Parcels:...............................................................................33
6.2.3 Recalculating Exemptions........................................................................................................36
6.2.4 Special Exemptions..................................................................................................................36
6.2.5 Approving and Denying Exemptions........................................................................................38
6.2.6 Purging Exemptions.................................................................................................................39
6.2.7 Exemption Letters....................................................................................................................39
6.2.8 Exemption Status Report.........................................................................................................40
2
6.2.9 Exemption Report....................................................................................................................41
6.2.10 Exemption Comparison Report..............................................................................................41
6.2.11 Removed Exemptions Report.................................................................................................42
6.2.12 Exemption Impact Report......................................................................................................43
7.0 Special Districts....................................................................................................................................44
7.1 Special District Code Tables.............................................................................................................44
7.2 Working with Special Districts.........................................................................................................44
7.2.1 To Add a Special District to a Parcel:........................................................................................44
7.2.2 To Add a Special District to Multiple Parcels:...........................................................................44
7.2.3 To Delete a Special District from a Parcel:...............................................................................45
7.2.4 To Delete a Special District from Multiple Parcels:..................................................................46
7.2.5 To Update a Special District for Multiple Parcels:....................................................................46
7.2.6 Special District Report..............................................................................................................47
7.2.7 Special District Comparison Report..........................................................................................47
8.0 Assessment..........................................................................................................................................49
8.1 Changing Assessed Values...............................................................................................................49
8.1.1 To change the assessment information of a parcel:.................................................................49
8.1.2 Notes........................................................................................................................................49
8.3 Assessment Change Letters.............................................................................................................50
8.3.1 To Create Assessment Change Letters:....................................................................................51
8.4 Tentative and Final Assessment Rolls..............................................................................................51
8.4.1 To Create a Tentative or Final Assessment Roll:......................................................................52
8.5 Assessor’s Report............................................................................................................................53
8.6 Submitting to NYS ORPS..................................................................................................................53
8.7.........................................................................................................................................................53
3

8.7.1 To Submit the Tentative or Final Assessment Rolls:.................................................................53
8.7.2 To submit the annual Assessor’s Report:.................................................................................54
8.8 Additional Assessment Reports.......................................................................................................54
8.8.1 To Create the Assessment Reports:.........................................................................................54
8.9 Audit Reports..................................................................................................................................57
8.9.1 Assessor’s Trial Balance Report................................................................................................57
8.9.2 Audit Trail Report.....................................................................................................................57
8.10 Year End Rollover..........................................................................................................................58
8.10.1 Considerations for when to do perform year-end rollover....................................................58
8.10.2 To Execute the Year-End Rollover:.........................................................................................59
9.0 Sales....................................................................................................................................................60
9.1 Sales Tables.....................................................................................................................................60
9.1.2 Entering a sales record.............................................................................................................60
9.1.3 Viewing Sales History and Owner Changes..............................................................................61
9.1.4 Sales Report.............................................................................................................................61
9.1.5 To Transmit Sales to NYS ORPS:...............................................................................................62
9.1.6 Sales Analysis Report...............................................................................................................63
9.1.7 Sales Extract \ List....................................................................................................................63
10.0 Comparable Sales..............................................................................................................................64
10.1 Comparables Display.....................................................................................................................64
11.0 Inventory...........................................................................................................................................65
11.1 Adding Residential or Commercial Sites........................................................................................65
11.2 Buildings, Land, Forest or Improvements......................................................................................65
11.3 Income/Expense for Commercial Parcels......................................................................................65
11.4 Residential Buildings: Square Foot Living Area Recalculation........................................................66
4

12.0 Documents, Property Cards & Pictures.............................................................................................67
12.1 Picture and Property Card Report.................................................................................................68
13.0 Billing.................................................................................................................................................69
13.1 Billing Cycles..................................................................................................................................69
13.1.1 To Load New Arrears and Clear Previous Arrears:.................................................................70
13.1.2 To Import Bank Codes:...........................................................................................................70
13.2 Billing Extracts...............................................................................................................................70
14.0 Letters & Labels.................................................................................................................................71
14.1 Letter Text Maintenance...............................................................................................................71
14.1.1 To Create a New Letter:.........................................................................................................71
14.1.2 To Edit or Modify an Existing Letter:......................................................................................71
14.2 Generic Letters..............................................................................................................................72
14.2.1 To run Generic Letters:...........................................................................................................72
14.3 Labels............................................................................................................................................73
14.3.1 To Create Labels:....................................................................................................................73
14.3.2 To Create Labels for Exemption Letters and Generic Letters:................................................74
15.0 Managing & Customizing Reports.....................................................................................................75
15.1 Report Manager............................................................................................................................75
15.1.1 To access the Report Manager:..............................................................................................75
15.2 Search Report................................................................................................................................76
15.2.1 To access the Search Report:.................................................................................................76
15.3 Generalized Extract.......................................................................................................................78
15.3.1 To access the Generalized Extract:.........................................................................................78
16.0 Map Add-On......................................................................................................................................79
16.1 To Enable the Map Add-On:..........................................................................................................79
5

16.2 To open the Map Add-On:.............................................................................................................79
16.3 Create a Map Setup:......................................................................................................................79
16.4 Working with Layers......................................................................................................................80
16.4.1 To Delete a Layer:..................................................................................................................80
16.4.2 To Add a Layer:......................................................................................................................80
16.5 Navigating the Map Display...........................................................................................................80
16.6 Selection Tools..............................................................................................................................81
16.7 Criteria Search:..............................................................................................................................81
16.7.1 To utilize the Criteria Search:.................................................................................................81
16.8 Parcel List Options:........................................................................................................................81
16.9 Import/Export Options:.................................................................................................................81
17.0 Grievance Add-On.............................................................................................................................83
17.1.1 Recording the Results once the BAR has made a decision:....................................................84
17.2 Grievance Tables...........................................................................................................................85
17.3 Grievance Results Letters..............................................................................................................86
17.4 Grievance Summary Report..........................................................................................................87
17.4.1 To access the Grievance Summary Report:............................................................................87
17.5 Grievance Results Audit Trail Report.............................................................................................87
17.5.1 To access the Grievance Results Audit Trail Report:..............................................................87
17.6 Small Claims..................................................................................................................................88
17.6.1 To Create, View or Modify a Small Claim:..............................................................................88
17.6.2 Making Notes for Parcels with Small Claims:.........................................................................89
17.6.3 Small Claims Summary Report...............................................................................................89
17.6.4 Small Claims Calendar Report................................................................................................89
17.7 Certiorari.......................................................................................................................................90
6
17.7.1 To Create, View or Modify a Certiorari:.................................................................................90
17.7.2 Making Notes for Parcels with Certiorari...............................................................................91
17.7.3 Certiorari Summary Report....................................................................................................91
17.7.4 Certiorari Calendar Report.....................................................................................................92
17.7.5 Certiorari Exposure Report.....................................................................................................92
17.7.6 Certiorari Notes Report..........................................................................................................92
18.0 Prorata Add-On.................................................................................................................................94
18.1 To Calculate or Recalculate Proratas:............................................................................................94
18.2 Prorata Information Report...........................................................................................................94
18.3 Prorata Worksheets......................................................................................................................95
18.4 Prorata Value Transfer..................................................................................................................95
18.4.1 To Transfer Prorata Values:....................................................................................................95
18.5 Co-op Building Maintenance.........................................................................................................96
18.5.1 Coop Tax Roll..........................................................................................................................97
7
1.0 Getting Started1.1 To log into the Property Assessment System (PAS):There are three ways to open PAS - Property Assessment System:
Double click on the PAS Icon
Right click on the PAS Icon and select open
Go to Start, select Programs, and select PAS ver2, select PAS ver2
Once you have launched PAS:
Enter your User Id and Password, then click OK
Select the radial button for This Year, Next Year or History. If you select History, a fill-in box will appear to the right, where you need to enter a four digit year you would like to view. Once you have made your selection, click OK
You will be prompted to confirm the Assessment Year you selected, click OK
The home dialogue appears when you initially log in to PAS. This screen shows the complete version # of PAS, the Municipality, the Assessment Year you are working in, what user ID is logged in and today’s date.
8
2.0 User Profiles & Security LevelsEach user must have a User Profile to log in to PAS. User Profiles define the level of access the user has to view, change and manipulate data within PAS. To control access to specified data, each menu item is assigned a Security Level. A User Profile’s access to the menu items is determined by assigning the User Profile the corresponding Security Level. User Profiles are created through the Supervisor log in.
2.1 To Create a New User ID: Log in to PAS using the Supervisor User ID
On the Main Menu, go to Options, User Profile
Click the New button
Enter the new User ID & password
You will be prompted to confirm the password
Re-type the password, hit Enter, click OK
Enter the corresponding Name for the User ID
Select the level of access to This Year and Last Year
Enter a number between 1 and 10 for the Security Level
Check or uncheck the appropriate boxes for the User ID
Click on the User Options Tab
Choose the preferences for the User ID
Click Save, click Yes to Save Changes
2.2 To Change an Existing User ID Log in to PAS using the Supervisor User ID and log in
On the Main Menu, go to Options, User Profile
Click once on the User ID to highlight it
Make the desired changes
Click Save, click Yes to Save Changes
2.3 To change what User ID is logged in: Go to Options on the Main Menu
Select Log In as Different User
Enter your User Id and Password, then click OK
Select the radial button for This Year, Next Year or History
a. If you select History, a fill-in box will appear to the right, in the box you will need to enter the four digit year you would like to view
b. Once you have made your selection, click OK You will be prompted to confirm the Assessment Year you selected, click OK
9

2.4 To change the Assessment Year: Go to Options on the Main Menu
Select Assessment Year
Select the radial button for This Year Next Year or History
If you select History a fill-in box will appear to the right, in the box you will need to enter the four digit year you would like to view
Once you have made your selection, click OK
You will be prompted to confirm the Assessment Year you selected, click OK
PAS audits changes made by users based on the User ID. It is important to be sure you are logged in under the correct User ID to fully utilize the audit functions.
2.5 Menus and SubmenusThe main menu categories run across the top of the dialogue. When you pass the mouse over top of the main menu categories, a raised grey box appears around the category to be selected. To select a category, click once on the category. The box becomes depressed and you will see the sub-categories or options. To select a sub-category, pass the mouse to the option, which will be highlighted in navy blue, and click on it. Some of the sub-categories have a right pointing arrow. These sub-categories have sub-items. To view these sub-items, move the mouse to the sub-category and click on it. You may also leave the mouse pointer still for a few seconds and the sub-items will appear to the right. Move the mouse straight over to the sub-items and select the option that you want in the same way you would for sub-categories.
10
2.6 NavigatingOnce you have selected the category you would like to work in, you will utilize several controls for navigation.
Notebooks
There are 2 kinds of notebook folders: one with the folder Tabs at the top and one with the folder Tabs at the bottom. In order to go to the folder, just single click on the Tab.
Scroll Boxes
Scroll boxes give you several options for navigation. You can choose any of the following methods:
click on the up and down arrows located on the side of the box at the top and bottom use the up and down arrows on your keyboard use the scroll wheel on your mouse use the fill-in box by entering the first few characters of the option you are looking for
2.7 Alternative Data Entry Methods
Drop-down boxes
Drop-down boxes allow you to select from a list rather than manually enter data. If you click on the arrow at the right of the box, a list drops down of all the valid options you can select from by scrolling up and down. You may also just type in the option if you know it and the list will automatically drop down and scroll to the correct option as you type.
Cut or Copy and Paste
If you have used a word processor such as Microsoft Word or Corel Word Perfect, you may be familiar with cutting and pasting information that you see on the screen. To use this feature click the left mouse button to the left of the text you want to copy. While holding the left mouse button down, move the mouse to the right until you get to the end of the text you want to copy or cut, then let go of the left mouse button. The information that you want to copy should now be highlighted. Hold down the <Ctrl> key and press C. This key command copies the text to a temporary holding area called the Clipboard. Then go to the part of the Property Assessment System where you want to copy the text to and click the left mouse button to place the cursor. Hold down the <Ctrl> key and press V to paste the text into this place. You can also cut (remove) the original text by holding down the <Ctrl> key and pressing X.
11
2.8 Backing UpPAS provides a system back up function that allows users to create a complete set of back up data. All users are required to exit PAS while the backup is running. These users include users of SCA Code Enforcement which utilizes and communicates with PAS. Users with SCA Tax or SCA Municity do not have to exit their systems.
On the Main Menu, go to System
Choose Back Up Property Assessment System Data
You will be prompted to confirm you want to back up the data, click Yes
You will be prompted to verify all users have exited PAS, click OK
You will be prompted that PAS will shut down and a backup utility will open, click OK
Save As dialogue box appears, select the location of your backup file (default is PAS/Backups)
Click Save and the Backup dialogue box opens
When the backup is complete, a confirmation dialogue appears, click OK
PAS will re-open
2.9 System Warnings and MessagesPAS has a variety of System Warnings embedded for software users. Warnings for users offer a Yes or OK button and are designed for procedural or preventative purposes. Warning Messages and Error Messages are intended to provide “clues” to SCA support staff and programmers.
12
3.0 General Administration3.1 Assessment Year Control FileThe Assessment Year Control File is where Supervisors enter the significant dates for the Assessment Year. The dates entered in the Control File are:
Valuation Date
The date on which a value estimate applies. For assessment purposes, the valuation date in New York State is set by statute in all but a few jurisdictions as July 1 of the prior year.
Final Assessment Roll Date
The date that the document containing Assessment and Exemption information on all parcels in a municipality is produced. It differs from the tentative assessment roll with respect to changes ordered by a board of assessment review, assessment and ceiling assessments made by the Office of Real Property Services and ownership and address changes since the tentative roll. It is filed on July 1 in most towns.
Taxable Status Date
The particular date on which the taxable status of real property must be determined according to its condition and ownership. An improvement added after taxable status date is not assessable until the following year; an improvement added before taxable status date is subject to current year assessment and taxation. The taxable status date of most towns in New York State is March 1.
To access the Assessment Year Control File:
Go to the Main Menu, Select Tables
Choose Assessment Year Set Up
Make any desired changes and click Save
Assessor’s Office File
The Assessor’s Office File is where the contact and mailing information is entered for the Municipality and Assessor.
To access the Assessor’s Office File:
Go to the Main Menu, Select Tables
Choose Miscellaneous Tables, Assessor’s Office File
Make any desired changes and click Save
13
3.2 SWIS Code Table The SWIS Code Table is where pertinent assessment information is entered for each SWIS
Code.
To access the SWIS Code Table:
Go to the Main Menu, Select Tables
Choose SWIS Codes
Make any desired changes and click Save
The information required for each SWIS Code is:
6-digit SWIS Code SWIS codes are a state wide system to identify taxing jurisdictions. The code consists of 6 digits and is broken down into three 2 digit components. The first two numbers being the County code, the second two numbers indicating the Town and the last two designate a Village or outside of a village. Short Code indicates the last two digits of the SWIS Code.
Name (Jurisdiction) &Type
Assessment jurisdiction name and type, such as a city, town and village. Split Village indicates a village that is split between two towns (field is for reference only).
Equalization Rate & Uniform Percentage of Value
The equalization rate is the weighted average ratio of the total assessed value in a municipality divided by the total market value. The uniform percentage of value is the standard of assessment in New York State. All properties in an assessing unit must be assessed at the same percentage of their market values except where classified assessments are allowed, in which case all properties in the same class must be assessed at the same percentage of their market values.
3.2.1 To Change the equalization rate or uniform percentage of value: In the SWIS Code Table, select the equalization rate field or uniform percentage of value
Change it to the new rate
Click Save
If the municipality has more than one SWIS code, you will be asked if you want the new equalization rate to apply to all SWIS codes
14
If you choose yes, the new equalization rate will be applied to all SWIS Codes You will then be asked if you want to recalculate the Exemptions to account for the new
equalization rate The Exemptions and then the on-line roll totals will be recalculated If you choose no, please recalculate the Exemptions later by going to the System menu and
selecting Exemptions Recalculation If the equalization rate is changed in This Year, the change is not automatically made in Next
Year. The change can be made in Next Year by changing the current assessment year to Next Year and following the above process.
3.2.2 Residential Assessment Ratio (RAR)The residential assessment ratio is an indicator of the level of assessment of 1, 2 and 3 family homes within a municipality. The ratio is equal to the level of assessment of residential property used to calculate the state equalization rate for that assessment roll.
3.2.3 Classified (Homestead vs. Non-Homestead)Indicates if the municipality has adopted the local option to establish two separate property tax rates: a lower tax rate for residential property owners (homestead tax), and a higher rate for all other property owners (non-homestead tax). Check the Classified box only if the municipality has adopted Article 19 - Section 1903 of the RPTL.
3.2.4 School Code TableSchool District Codes are numbers established by Office of Real Property Services which identify each school district within New York State. A single school district can contain as many as fifteen or more municipal segments and are only alterable through transfer from one district to another through the New York State Education Department.
To access the School Code Table:
Go to the Main Menu, Select Tables
Choose School Codes
Make any desired changes and click Save
School districts that are within the boundaries of a city or town that has the homestead tax must use the homestead tax unless they opt out of the program by passing a resolution.
15

4.0 General Report FunctionsPAS contains an extensive array of reports. The Report Manager provides easy storage and retrieval of reports. Reports can be printed to screen (Print Preview), printed to local and network printers and/or exported to MS Excel.
PAS contains several functions for creating, viewing, exporting and saving reports. Each pre-designed report is unique. Therefore, not all reports have all of the features mentioned in this section.
4.1 Parcel ListsA Parcel List is a group of user-specified Parcel IDs that can be used for report generation. When using a Parcel List, the report will be created based on the parcels in the list. No other parcels other than those in the list will be considered. Parcel Lists can be saved as a file to be reused.
4.1.1 To Create a Parcel List: Go to Options on the Main Menu
Select Show Parcel List, the Parcel List Window will appear
Click the Add button
The Locate a Parcel Window will open
Find a parcel, select it by clicking OK or double clicking on the parcel.
Continue to add parcels to the list until you have all the parcels desired
Alternatively, when viewing or modifying a parcel, the Parcel Toolbar will appear. Parcels can be added by clicking the icon Add this parcel to the Parcel List.
A Parcel list can be created automatically during report generation. The unique list created based on the criteria selected for the report can be:
used for other reports used to create letters and mailing labels
4.1.2 To create a parcel list of the parcels generated by a particular report: Select the Create Parcel List option in the report options prior to generating the report
4.1.3 To Save a Parcel List: Type a description for the list in the Enter Description box
Click Save, the Save As dialogue box will open
Type a unique file name for the list in File name
Click Save to store the file
16
To Sort a Parcel List:
Click the Sort button, the Sort by selection box opens
Select your preferred sort order (Parcel ID, Name, Address Name/Address Number or Address Number/Address Name)
Click OK
To Modify a Parcel List:
Parcel Lists can be modified by deleting and adding Parcels as needed.
To delete a parcel from the list, simply click the Delete button. To add a parcel to the list, see Create Parcel List above.
Remember to save the list once all modifications have been made. You can save the list with the existing file name to replace the originally list; or a new unique file name if you want to retain the original list and create a new list based on the modifications. To save a list, please see Save Parcel List above.
4.1.4 Open or Load a Parcel List:A Parcel List can be used as input for several PAS reports. If a parcel list is used, the report will consider only the parcels on the list. All report options and report criteria will be applied to the parcels on the list.
The desired Parcel List must be open to be used with a report.
4.1.4.1 To use a Parcel List with a report: Open the desired report
Go to Options on the Main Menu
Select Show Parcel List, the Parcel List Window will appear
Click the Load button.
Navigate to the location of the Parcel List
Click Open
In the Report Options, check Load from Parcel List
Proceed creating the report.
A Parcel List cannot be used for all reports. If a report does not have the Load from Parcel List option, the feature is not available for that particular report.
17
4.2 Saving Report Templates The Save function allows you to save your report options and setting so you can re-use
them:
Once you have selected all the settings you desire, click the Save button
The Save As dialogue box will open
Name the report (a meaningful file name will be more easily identifiable in the future)
Choose the location to save the report template by navigating to the desired folder.
Click Save and close the dialogue box
4.2.1 Load Report TemplatesThe Load function will retrieve report templates that you saved previously.
Click Load, the Open dialogue box will open
Navigate to the location of your saved template file
Click Open, your selected options and settings will load
4.2.2 Preview and Print ReportsPAS provides users the ability to preview all reports before printing them. Though you have the ability to print your reports directly, we suggest that you always review your report on the screen prior to sending it to the printer. Once you print to the screen and review the report, you will have the option of sending it to a printer.
Preview Reports offers the following features:
Zoom - plus and minus - changes the viewing size of the report Zoom - page width and whole page selects the zoom type Left and Right Pointing Fingers - move backward and forward one page at a time Left and Right Arrow - move between the first page and the last page of the report Printer Icon - sends the report to the printer selected in the Print dialogue box Red Door - exits the report
To preview the report:
Determine what report to run
Click Print and the Printer dialogue box will open
Check the Print to File box
Click OK to print this report to the screen
18
Once you have previewed the report:
To print, click the Printer Icon
The Printer dialogue box will open
Select the printing options you desire and click OK.
Click the Red Door Icon to exit the report.
A dialogue box will appear with the completed report options:
o E-Mail - allows you to send the report via electronic mail to one or more recipients using your default mail client (such as MS Outlook). The report is automatically attached to the e-mail.
o Make a Copy - allows you to make a duplicate of the file you just created and save it to anywhere on your computer and/or network.
o View as Text - will open the report in Word Pad.o Done, Save - saves the snapshot of the report and closes the Report Option dialogue
box.o Exit, Don’t Save - allows you to exit the Report Option dialogue box without
consequence.
19

5.0 ParcelsModify a parcel vs. View a parcel
Modify a parcel allows the user to make permitted changes to an existing parcel. Permissions to make changes are established through the system’s security settings for individual users.
View a parcel allows the user to simply view the existing parcel. View a parcel also allows the user to view the history of a parcel.
Parcel Toolbar
Both Modify and View a Parcel feature the Parcel Toolbar. The parcel toolbar has the following functions:
Display Comparable Parcels (See Comparables) Print a snapshot of the screen (This function sends to your printer what is currently shown on
the screen at the time the icon is clicked.) Print a Parcel Summary Sheet (This function prints a summary of the parcel information
including Assessment, Exemption and Sales information.) Add the Parcel to a List (see General Report Functions) Print an Audit Trail of the Parcel (See Assessment)
Create a New Parcel
Go to Parcels on the Main Menu Select Add a Parcel Enter the new parcel identification number, click OK. You will be prompted to enter a split merge number
a. If you choose yes, you will be prompted to enter a split/merge
b. If you choose no, an empty set of Notebook pages appear Enter your new parcel information
20
To Inactivate a Parcel:
Go to Parcels on the Main Menu
Select Inactivate a Parcel
Scroll or use the search options to locate the inactive parcel you want to reactivate
Double click on the parcel
You will be prompted to confirm this is the parcel you want to inactivate
You will be prompted to enter a split/merge number to reactivate the parcel
a. If yes, you will be prompted to fill in a split merge number manually
b. Click OK
To Reactivate a Parcel:
Go to Parcels on the Main Menu
Select Reactivate a Parcel
Scroll or use the search options to locate the inactive parcel you want to reactivate
Double click on the parcel entry
You will be prompted to confirm this is the parcel you want to reactivate
You will be prompted to enter a split/merge number to reactivate the parcel
a. If yes, you will be prompted to fill in a split merge number manually
b. Click OK
To Split a Parcel:
Go to Parcels on the Main Menu
Select Split/Merge/SBL Change/Copy
Choose the radio button for Split
Enter the parcel ID for the parcel being split and the new parcel ID number(s) being created
Click Start, you will be prompted to see if you would like to print the split
You will be prompted to confirm if the original parcel should be deactivated
21
To Merge Parcels:
Go to Parcels on the Main Menu
Select Split/Merge/SBL Change/Copy
Choose the radial button for Merge
Enter the parcel IDs for the parcels being merged and the new parcel ID number being created
Click Start, you will be prompted to see if you would like to print the merge
You will be prompted to confirm if the original parcel should be deactivated
To Copy Parcel Data:
Go to Parcels on the Main Menu
Select Split/Merge/SBL Change/Copy
Choose the radial button for Copy
Enter the parcel ID for the parcel information you want to copy (Use the Tab or Enter key to move between boxes)
Enter the new parcel IDs you want to copy the information to
Check the boxes for Create List, Copy Pictures & Copy Inventory, if desired
Enter Split/Merge number, if desired
Click Start, you will be prompted to see if you would like to copy only to the first parcel
You will be prompted to confirm you want to copy the parcel data
To Change a Parcel ID:
Go to Parcels on the Main Menu
Select Split/Merge/SBL Change/Copy
Choose the radial button SBL Change
Enter the current parcel ID for the parcel being changed (Use the Tab or Enter key to move between boxes)
Enter the new parcel ID number
Check the boxes for Create List and Copy Pictures if desired
Enter Split/Merge number, if desired
Click Start, you will be prompted to see if you would like to print the SBL Change
You will be prompted to switch the original parcel data to the new ID
22

a. If yes, the parcel will be converted to the new parcel ID completely
b. If no, the parcel will be converted to the new parcel ID and the old parcel ID will be inactivated
To Switch Parcel IDs:
Go to Parcels on the Main Menu
Select Split/Merge/SBL Change/Copy
Choose the radial button for Switch Parcels
Enter the parcel IDs for the parcels being switched (Use the Tab or Enter key to move between boxes)
Check the boxes for Create List and Copy Pictures, if desired
Enter Split/Merge number, if desired
Click Start, you will be prompted to see if you would like to print the Parcel Switch
You will be prompted to confirm you want to switch parcel data
5.1.1 Split\Merge ReportThe Split\Merge Report displays parcels that have been separated or combined. The Split\Merge Report can be:
generated for All Dates or Date Range generated for All Split/Merge Numbers or Split/Merge Range sorted by Split/Merge Number or Date/Time
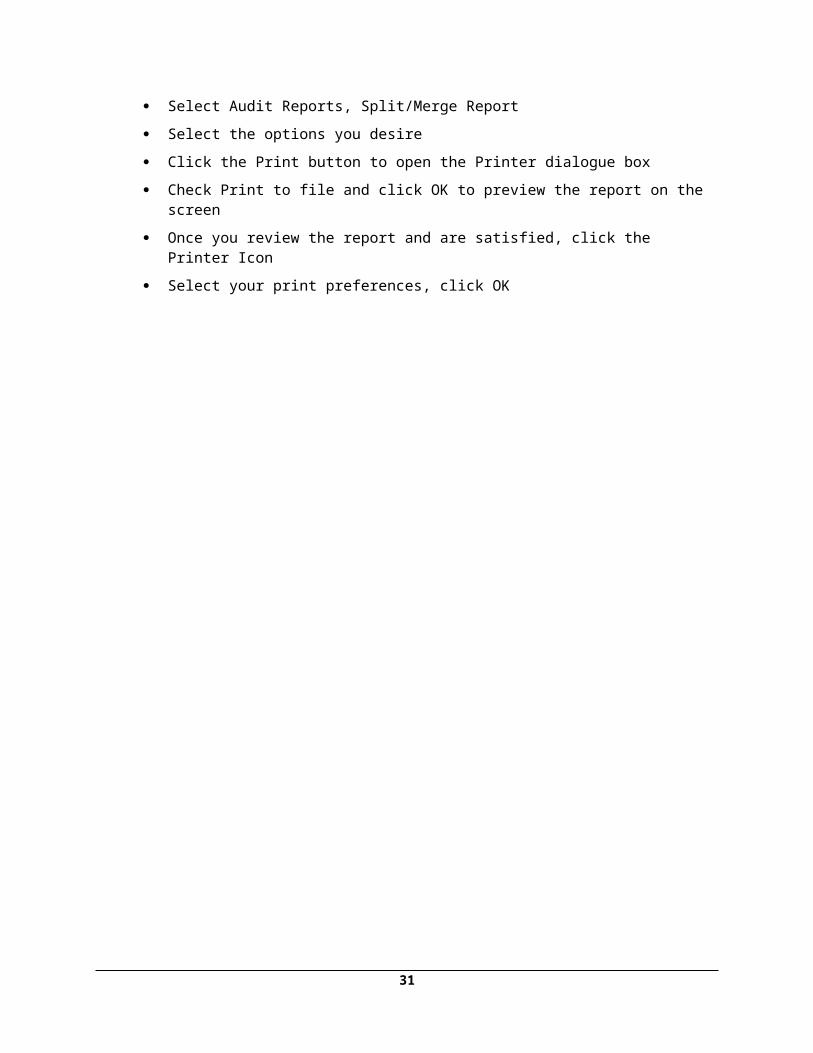
5.1.1.1 To access the Split/Merge Report: Go to Reports on the Main Menu
Select Audit Reports, Split/Merge Report
Select the options you desire
Click the Print button to open the Printer dialogue box
Check Print to file and click OK to preview the report on the screen
Once you review the report and are satisfied, click the Printer Icon
Select your print preferences, click OK
23

5.1.2 Parcel Information ReportThe Parcel Information Report produces a detailed report of information for parcels. A Parcel Information Report can be generated:
With Base and/or Assessment Information With Special District, Exemptions, Sales, Residential/Commercial Inventory, Picture, and Notes For This Year or Next Year From all Parcels, a Range of Parcels or a Parcel List
5.1.2.1 To access the Parcel Information Report: Go to Reports on the Main Menu
Select Parcel Information Report
Select the options you desire
Click the Print button to open the Printer dialogue box
Check Print to file and click OK to preview the report on the screen
Once you review the report and are satisfied, click the Printer Icon
Select your print preferences, click OK
5.1.3 Name/Address Audit Trail ReportThe Name/Address Audit Trail Report finds and displays modifications parcel name and/or address. The Name/Address Audit Trail Report can be generated for:
All Dates or Date Range All Parcel IDs or Parcel ID Range Users or User ID Range All or limited SWIS and School Codes
5.1.3.1 To access the Name/Address Audit Trail Report: Go to Reports on the Main Menu
Select Audit Reports, Name/Address Audit Trail Report
Select the options you desire
Click the Print button to open the Printer dialogue box
Check Print to file and click OK to preview the report on the screen
Once you review the report and are satisfied, click the Printer Icon
Select your print preferences, click OK
24

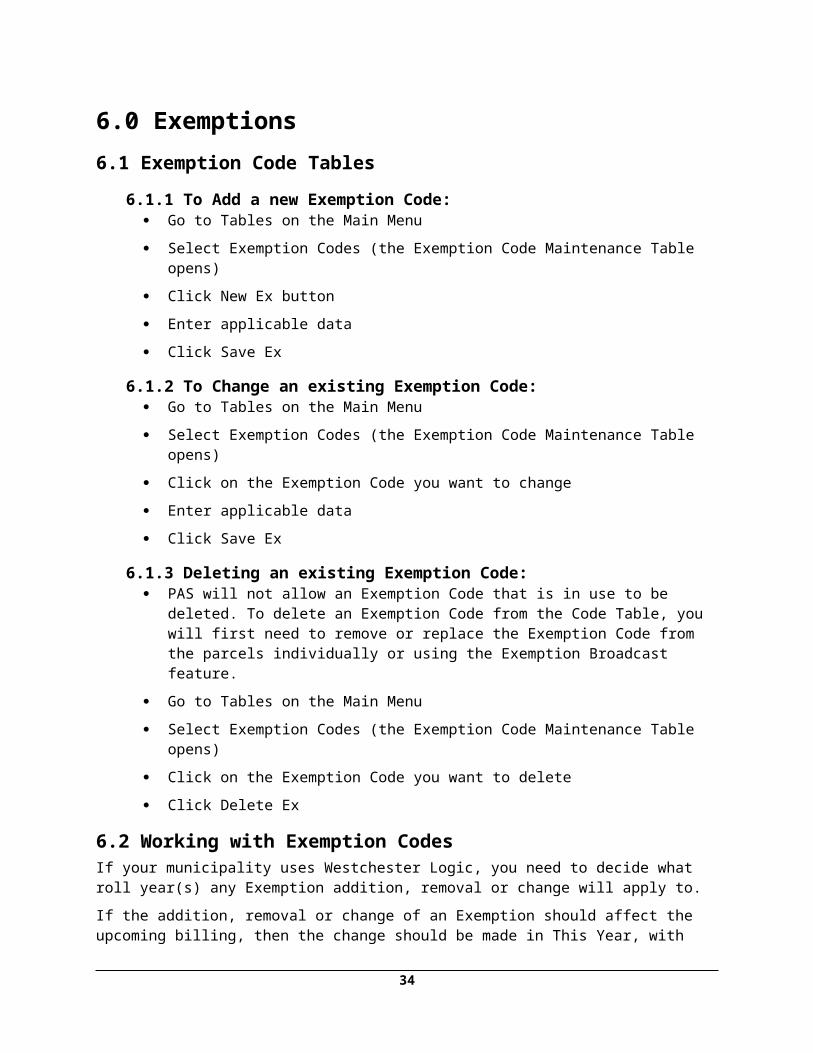
6.0 Exemptions6.1 Exemption Code Tables
6.1.1 To Add a new Exemption Code: Go to Tables on the Main Menu
Select Exemption Codes (the Exemption Code Maintenance Table opens)
Click New Ex button
Enter applicable data
Click Save Ex
6.1.2 To Change an existing Exemption Code: Go to Tables on the Main Menu
Select Exemption Codes (the Exemption Code Maintenance Table opens)
Click on the Exemption Code you want to change
Enter applicable data
Click Save Ex
6.1.3 Deleting an existing Exemption Code: PAS will not allow an Exemption Code that is in use to be deleted. To delete an Exemption
Code from the Code Table, you will first need to remove or replace the Exemption Code from the parcels individually or using the Exemption Broadcast feature.
Go to Tables on the Main Menu
Select Exemption Codes (the Exemption Code Maintenance Table opens)
Click on the Exemption Code you want to delete
Click Delete Ex
6.2 Working with Exemption CodesIf your municipality uses Westchester Logic, you need to decide what roll year(s) any Exemption addition, removal or change will apply to.
If the addition, removal or change of an Exemption should affect the upcoming billing, then the change should be made in This Year, with the Change This Year and Next Year Together flag on. This will duplicate the change Next Year so that the change does not need to be entered twice.
If this Exemption change does not apply to the upcoming billing, then the change should be made in Next Year only. This is the case for renewed Exemptions or new applications for Exemptions.
No change (Exemption or otherwise) ever goes backwards from Next Year to This Year.
25

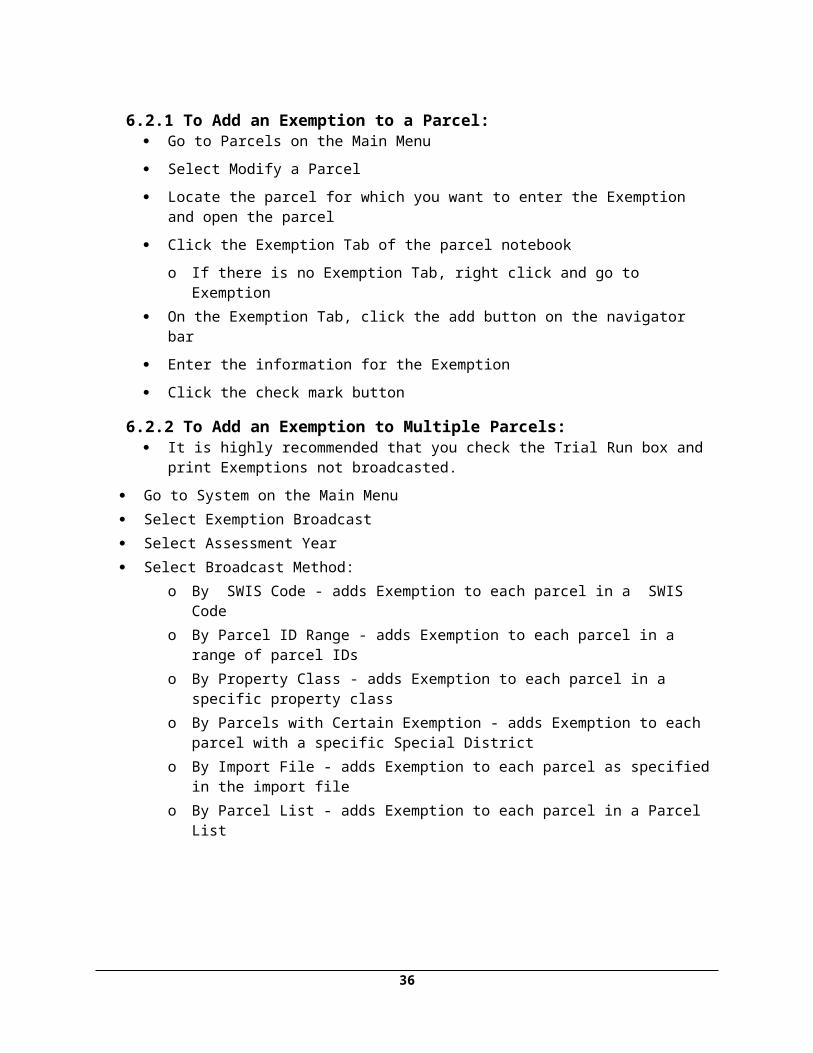
6.2.1 To Add an Exemption to a Parcel: Go to Parcels on the Main Menu
Select Modify a Parcel
Locate the parcel for which you want to enter the Exemption and open the parcel
Click the Exemption Tab of the parcel notebook
o If there is no Exemption Tab, right click and go to Exemption On the Exemption Tab, click the add button on the navigator bar
Enter the information for the Exemption
Click the check mark button
6.2.2 To Add an Exemption to Multiple Parcels: It is highly recommended that you check the Trial Run box and print Exemptions not
broadcasted.
Go to System on the Main Menu Select Exemption Broadcast Select Assessment Year Select Broadcast Method:
o By SWIS Code - adds Exemption to each parcel in a SWIS Codeo By Parcel ID Range - adds Exemption to each parcel in a range of parcel IDso By Property Class - adds Exemption to each parcel in a specific property classo By Parcels with Certain Exemption - adds Exemption to each parcel with a specific
Special Districto By Import File - adds Exemption to each parcel as specified in the import fileo By Parcel List - adds Exemption to each parcel in a Parcel List
26
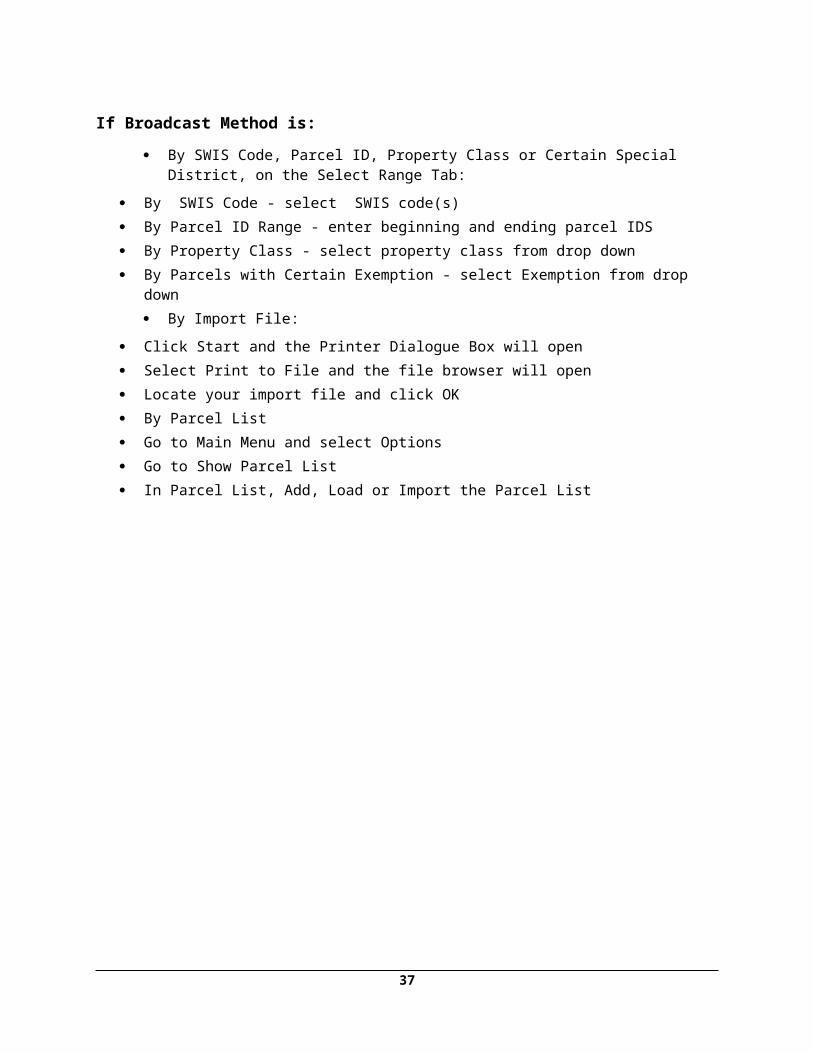
If Broadcast Method is:
By SWIS Code, Parcel ID, Property Class or Certain Special District, on the Select Range Tab:
By SWIS Code - select SWIS code(s) By Parcel ID Range - enter beginning and ending parcel IDS By Property Class - select property class from drop down By Parcels with Certain Exemption - select Exemption from drop down
By Import File:
Click Start and the Printer Dialogue Box will open Select Print to File and the file browser will open Locate your import file and click OK By Parcel List Go to Main Menu and select Options Go to Show Parcel List In Parcel List, Add, Load or Import the Parcel List
27

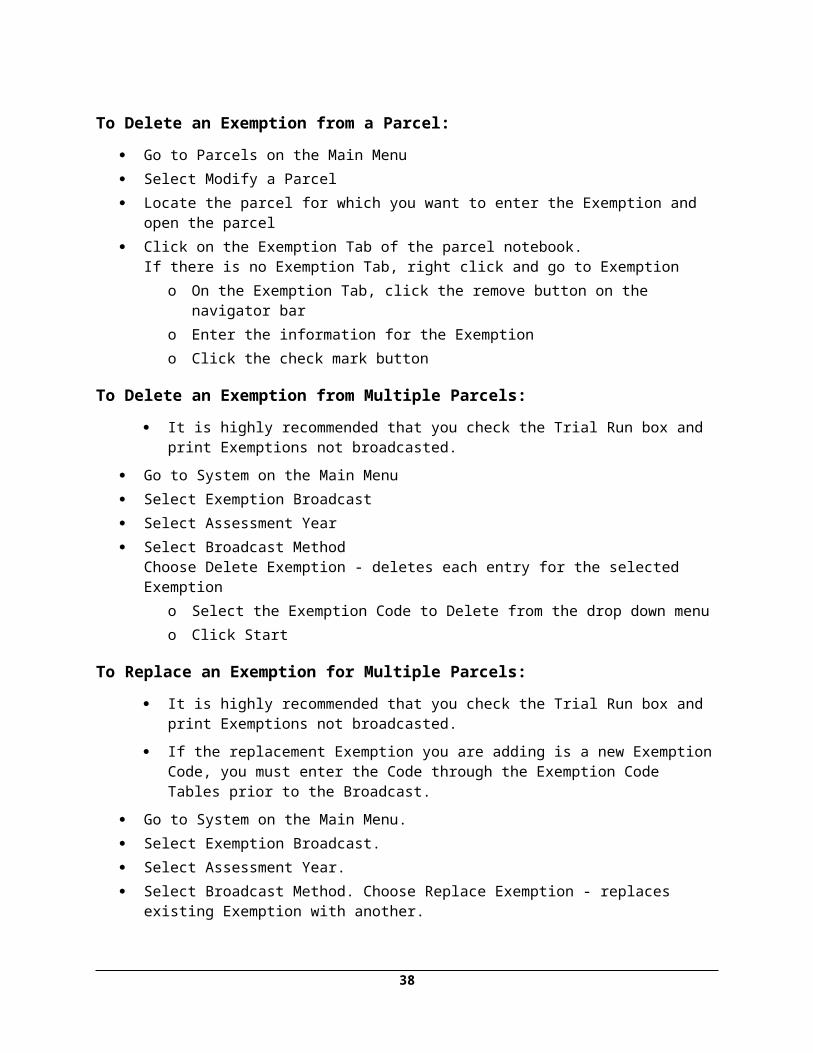
To Delete an Exemption from a Parcel:
Go to Parcels on the Main Menu Select Modify a Parcel Locate the parcel for which you want to enter the Exemption and open the parcel Click on the Exemption Tab of the parcel notebook.
If there is no Exemption Tab, right click and go to Exemption o On the Exemption Tab, click the remove button on the navigator baro Enter the information for the Exemptiono Click the check mark button
To Delete an Exemption from Multiple Parcels:
It is highly recommended that you check the Trial Run box and print Exemptions not broadcasted.
Go to System on the Main Menu Select Exemption Broadcast Select Assessment Year Select Broadcast Method
Choose Delete Exemption - deletes each entry for the selected Exemptiono Select the Exemption Code to Delete from the drop down menuo Click Start
To Replace an Exemption for Multiple Parcels:
It is highly recommended that you check the Trial Run box and print Exemptions not broadcasted.
If the replacement Exemption you are adding is a new Exemption Code, you must enter the Code through the Exemption Code Tables prior to the Broadcast.
Go to System on the Main Menu. Select Exemption Broadcast. Select Assessment Year. Select Broadcast Method. Choose Replace Exemption - replaces existing Exemption with
another.o Enter the new Exemption information to be placed on the parcelso Click Select Range Tab. Choose the Exemption to be replaced from the drop down
menu. Click Setup Tabo Choose the replacement Exemption from the drop down menu. Click Start
28

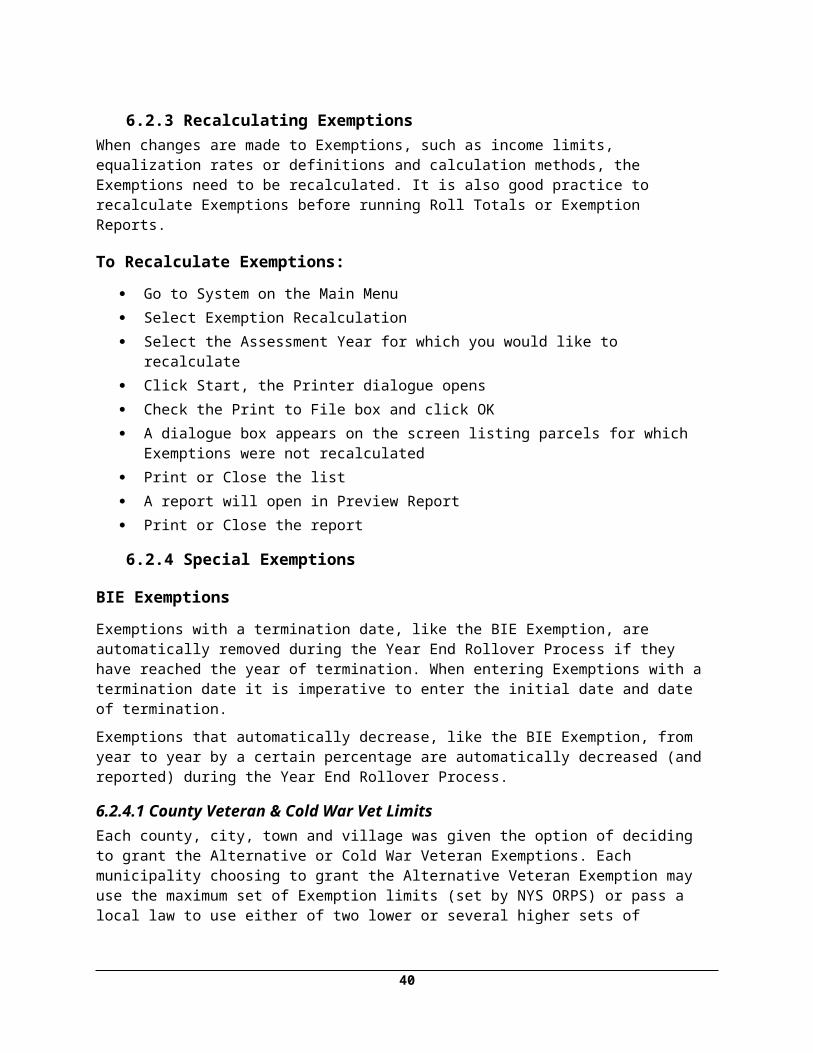
6.2.3 Recalculating ExemptionsWhen changes are made to Exemptions, such as income limits, equalization rates or definitions and calculation methods, the Exemptions need to be recalculated. It is also good practice to recalculate Exemptions before running Roll Totals or Exemption Reports.
To Recalculate Exemptions:
Go to System on the Main Menu Select Exemption Recalculation Select the Assessment Year for which you would like to recalculate Click Start, the Printer dialogue opens Check the Print to File box and click OK A dialogue box appears on the screen listing parcels for which Exemptions were not recalculated Print or Close the list A report will open in Preview Report Print or Close the report
6.2.4 Special Exemptions
BIE Exemptions
Exemptions with a termination date, like the BIE Exemption, are automatically removed during the Year End Rollover Process if they have reached the year of termination. When entering Exemptions with a termination date it is imperative to enter the initial date and date of termination.
Exemptions that automatically decrease, like the BIE Exemption, from year to year by a certain percentage are automatically decreased (and reported) during the Year End Rollover Process.
6.2.4.1 County Veteran & Cold War Vet LimitsEach county, city, town and village was given the option of deciding to grant the Alternative or Cold War Veteran Exemptions. Each municipality choosing to grant the Alternative Veteran Exemption may use the maximum set of Exemption limits (set by NYS ORPS) or pass a local law to use either of two lower or several higher sets of Exemption limits. The Cold War Veteran Exemption is calculated as a percentage of assessed value with maximum limitations.
For more information regarding Alternative & Cold War Veteran Exemption please refer to NYS ORPS.
To set the County Veteran & County Cold War Veteran Limits:
Go to Tables on the Main Menu
Select Assessment Year Set Up, the Assessment Year Control File opens
Select the Limit Set from the drop down menu
If the Limit Set you desire is not available:
Go to Tables on the Main Menu
29
Select Miscellaneous Tables
Choose Veteran or County Cold War Veteran
Click New Code
Enter the data and click Save Code
6.2.4.2 NYS Income Verification Program (IVP)Senior Exemptions can be automatically renewed through the NYS Income Verification Program (IVP). Seniors who re-apply for Enhanced STAR may authorize the assessor to have their incomes verified in subsequent years by the New York State Department of Taxation and Finance (DTF).
Seniors enrolled in the Income Verification Program (IVP) are required to submit a STAR Income Verification Application (RP-425-IVP).
For more information regarding the NYS Income Verification Program (IVP) please refer to NYS ORPS.
To mark a senior as enrolled in the IVP:
Go to the Exemption Tab of the parcel notebook
Check Auto Renew for the Enhanced STAR Exemption
To generate a list of all seniors enrolled in this program (marked Auto-Renew):
Go to Reports and select Search Report
On the Criteria Tab, click Add Selection
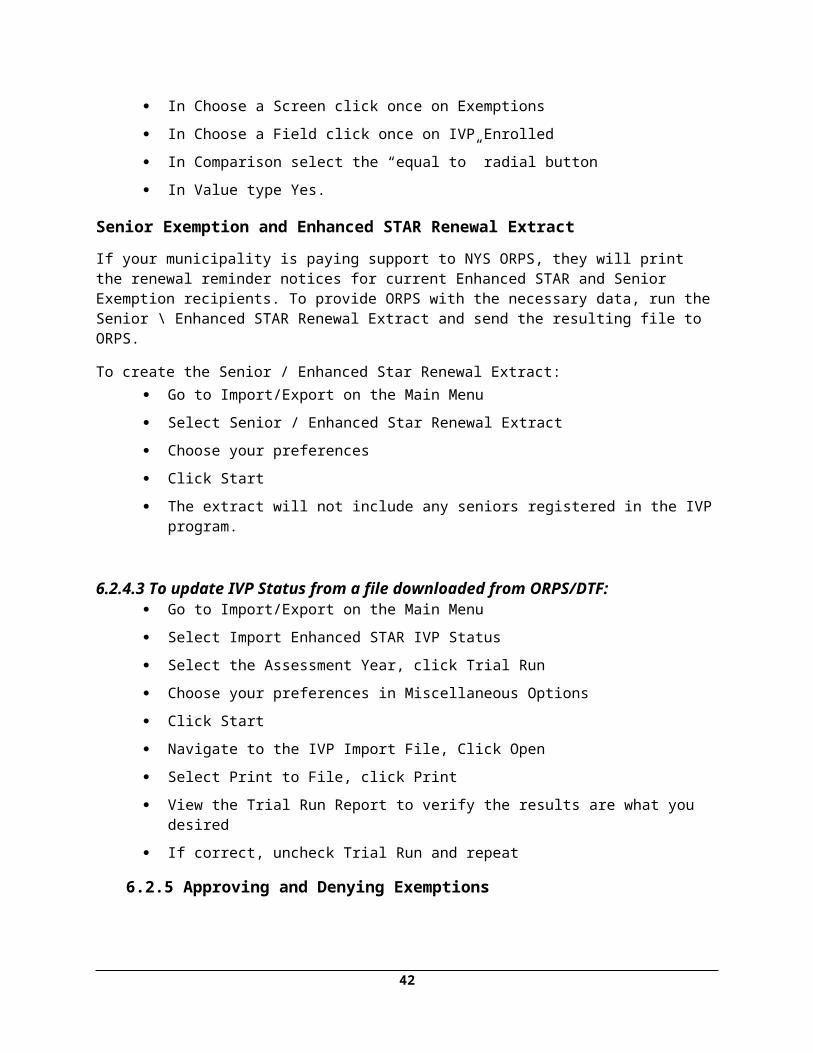
In Choose a Screen click once on Exemptions
In Choose a Field click once on IVP Enrolled
In Comparison select the “equal to” radial button
In Value type Yes.
Senior Exemption and Enhanced STAR Renewal Extract
If your municipality is paying support to NYS ORPS, they will print the renewal reminder notices for current Enhanced STAR and Senior Exemption recipients. To provide ORPS with the necessary data, run the Senior \ Enhanced STAR Renewal Extract and send the resulting file to ORPS.
To create the Senior / Enhanced Star Renewal Extract: Go to Import/Export on the Main Menu
Select Senior / Enhanced Star Renewal Extract
Choose your preferences
Click Start
The extract will not include any seniors registered in the IVP program.
30
6.2.4.3 To update IVP Status from a file downloaded from ORPS/DTF: Go to Import/Export on the Main Menu
Select Import Enhanced STAR IVP Status
Select the Assessment Year, click Trial Run
Choose your preferences in Miscellaneous Options
Click Start
Navigate to the IVP Import File, Click Open
Select Print to File, click Print
View the Trial Run Report to verify the results are what you desired
If correct, uncheck Trial Run and repeat
6.2.5 Approving and Denying Exemptions
To approve an Exemption:
Go to Parcel on the Main Menu
Select Modify Parcel
Choose the parcel for which you want to approve the Exemption
Click on the Exemption Tab
Select the Exemption Code you want to approve
Check Ex Apprvd
This marks the Exemption for printing an Exemption Letter at a later date.
To deny an Exemption (remove the Exemption):
Go to Parcel on the Main Menu
Select Modify Parcel
Choose the parcel for which you want to deny/remove the Exemption
Click on the Exemption Tab
Select the Exemption Code you want to remove
Click the delete button on the navigator bar
You will be prompted to verify if the Exemption removal requires a pro-rata calculation.
If you are removing the Exemption because the applicant no longer qualifies for the Exemption, click No
If you are removing the Exemption because the original applicant no longer resides there (or is no longer the owner or co-owner), click Yes
If you clicked Yes, enter the effective date of the pro-rata calculation
31

The default effective date is the last sale date, you must manually enter a different date for any other reason (such as death of the original applicant)
An Exemption removal record is created, marking it for an Exemption Letter at a later date (See Exemption Letters).
To see what Exemptions have been removed & marked for pro-rata calculation (See Removed Exemptions Report).
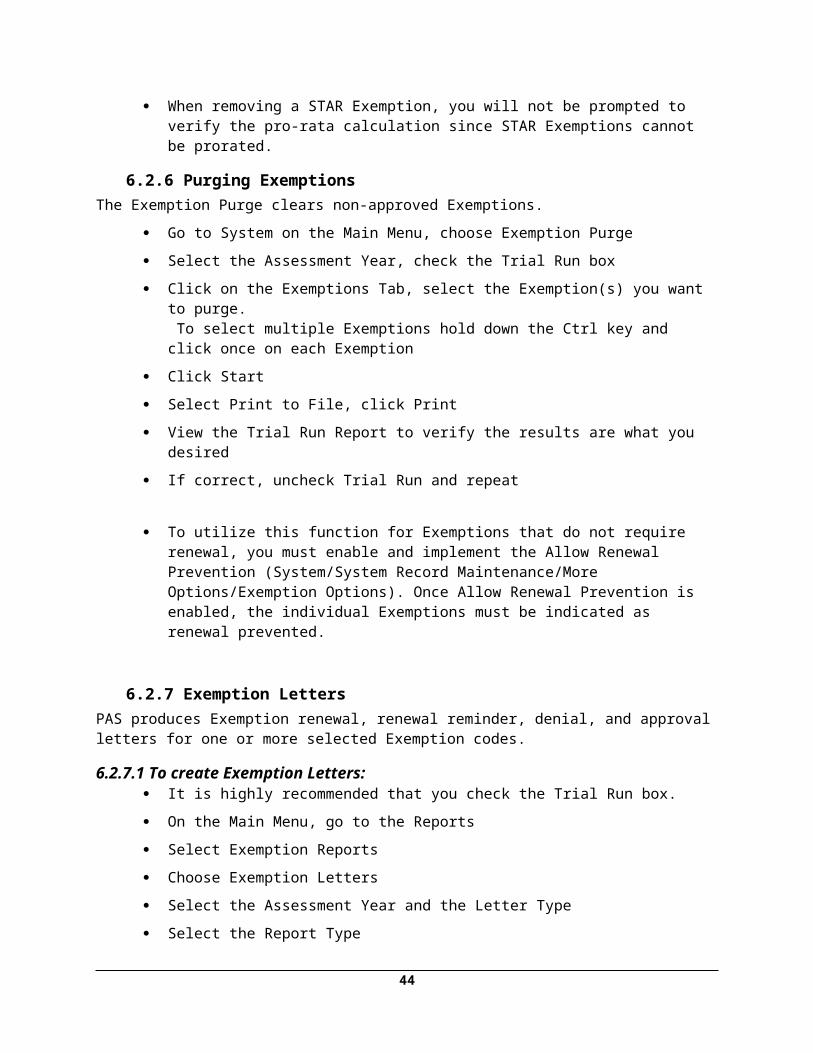
When removing a STAR Exemption, you will not be prompted to verify the pro-rata calculation since STAR Exemptions cannot be prorated.
6.2.6 Purging ExemptionsThe Exemption Purge clears non-approved Exemptions.
Go to System on the Main Menu, choose Exemption Purge
Select the Assessment Year, check the Trial Run box
Click on the Exemptions Tab, select the Exemption(s) you want to purge. To select multiple Exemptions hold down the Ctrl key and click once on each Exemption
Click Start
Select Print to File, click Print
View the Trial Run Report to verify the results are what you desired
If correct, uncheck Trial Run and repeat
To utilize this function for Exemptions that do not require renewal, you must enable and implement the Allow Renewal Prevention (System/System Record Maintenance/More Options/Exemption Options). Once Allow Renewal Prevention is enabled, the individual Exemptions must be indicated as renewal prevented.
6.2.7 Exemption LettersPAS produces Exemption renewal, renewal reminder, denial, and approval letters for one or more selected Exemption codes.
6.2.7.1 To create Exemption Letters: It is highly recommended that you check the Trial Run box.
On the Main Menu, go to the Reports
Select Exemption Reports
Choose Exemption Letters
Select the Assessment Year and the Letter Type
Select the Report Type
Choose your preferences in Misc Options
Click on the Exemptions Tab
32

Select the Exemption code(s) for which you would like to produce the letters/labels
Click on the Letter Text Tab
Select the letter that you want to print and review the text
If you want to edit the text, click in the box that displays the letter template
A word processor will appear, allowing you to make changes you want
Click Save
Click Print and review the letters
Once you are satisfied, remove the check from the Trial Run box
Click Print
The Exemptions are marked that the letters have been printed as follows:
Renewal letters - Renewal Date will be filled in for the Exemption code(s) Approval letters - Apprv Printed and Approval Date are filled in Denial letters - Printed Date on the Exemption denial page will be filled in Renewal reminder notices – No record is created since they can be sent multiple times.
If you need to reprint letters, there is an override Reprint Letters on the Misc Options Tab.
If you need to create a new letter template, see Letter Text Maintenance.
6.2.8 Exemption Status ReportThe Exemption Status Report displays the current status of Exemption in the renewal process for one or more selected Exemption codes. The Exemption Status available is as follows:
Renewals sent Renewal reminders sent Renewals received Renewals not yet received Exemptions approved Exemptions not yet approved Approvals sent Exemptions denied Denials sent
The Exemption Status Report can be generated:
For all or select Exemption Codes For all or select SWIS\School Codes With user selected Enhanced STAR types and IVP Status
33
6.2.8.1 To create the Exemption Status Report: On the Main Menu go to Reports
Select Exemption Reports
Choose Exemption Status Report
Choose your preferences on the Options, SWIS\School Codes and Exemption Tabs
To load a Parcel List from which to generate the report, go to Option Show Parcel List
Click the Print button to open the Printer dialogue box
Check Print to file and click OK to preview the report on the screen
Once you review the report and are satisfied, click the Printer Icon
Select your print preferences, click OK
Type of Enhanced STAR dialogue box will appear, make you selections, Click OK
6.2.9 Exemption ReportThe Exemption Report displays Exemptions This Year, Next Year or History. The Exemption Report can be:
Generated for all or select Exemption Codes Generated for all or select SWIS\School Codes Generated for all or select Roll Sections Sorted by Parcel ID, Name, Legal Address or Account Number
6.2.9.1 To create the Exemption Report Select Reports, Exemption Reports, and Exemption Report
Choose your preferences: Options, SWIS\School Codes and Exemption Tabs
Click the Print button to open the Printer dialogue box
Check Print to file and click OK to preview the report on the screen
Once you review the report and are satisfied, click the Printer Icon
Select your print preferences, click OK
6.2.10 Exemption Comparison ReportThe Exemption Comparison Report evaluates differences for an Exemption from year to year. Comparisons can be done for This Year vs. Next Year; or Prior Year vs. This Year. The Exemption Comparison Report can be:
34

Generated for one Exemption Code at a time Generated for all or select SWIS\School Codes Exported to a MS Excel spreadsheet
6.2.10.1 To create the Exemption Comparison Report:
Select Reports, Exemption Reports, and Exemption Comparison Report
Choose your preferences: Options and SWIS\School Codes Tabs
Click the Print button to open the Printer dialogue box
Check Print to file and click OK to preview the report on the screen
Once you review the report and are satisfied, click the Printer Icon
Select your print preferences, click OK
6.2.11 Removed Exemptions Report
The Removed Exemption Report provides detailed information on the current condition of an Exemption for a Parcel. Comparisons can be done for This Year or Next Year. The Exemption Status Report can be:
Generated for all or select Exemption Codes Generated for all or select SWIS\School Codes Generated for all or select Roll Sections Sorted Parcel ID, Name or Legal Address
6.2.11.1 To create the Removed Exemptions Report
Select Reports, Exemption Reports, and Removed Exemption Report
Choose your preferences: Options, More Options, SWIS\School Codes and Exemption Tabs.
Click the Print button to open the Printer dialogue box
Check Print to file and click OK to preview the report on the screen
Once you review the report and are satisfied, click the Printer Icon
Select your print preferences, click OK
35
6.2.12 Exemption Impact Report
The Exemption Impact Report generates displays data about the impact of Exemptions on the equalized total assessed value. It identifies the number of an individual Exemption Code granted, the total equalized value of the Exemption Code and the percent of the value exempted. Additionally, the report produces total values for all Exemptions. The report can be generated for:
This Year, Next Year and History County, Town, Village or School Exemption Values Specific or all Roll Sections Specific or all SWIS and School Codes Specific or all Exemption Codes
6.2.12.1 To create the Exemption Impact Report:
On the Main Menu, go to Reports
Select Exemption Reports
Choose Exemption Impact Report
Choose you preferences from the Options, SWIS/School Code and Exemptions Tabs
Click the Print button to open the Printer dialogue box
Check Print to file and click OK to preview the report on the screen
Once you review the report and are satisfied, click the Printer Icon
Select your print preferences, click OK
36
7.0 Special Districts7.1 Special District Code Tables
To Create a New Special District:
Go to Tables on the Main Menu
Choose Special Districts
Click on New District icon
To Delete a Special District:
PAS will not allow a Special District that is in use to be deleted. To delete a Special District from the Code Table, you will first need to remove or replace the Special District from the parcels individually or using the Special District Broadcast feature.
Go to Tables on the Main Menu
Choose Special Districts
Click on Remove District icon
7.2 Working with Special Districts7.2.1 To Add a Special District to a Parcel:
Go to Parcels on the Main Menu
Select Modify a Parcel
Locate the parcel for which you want to add the Special District, open the parcel
Click on the Special District Tab of the parcel notebook (if there is no Special District Tab, right click and go to Special District)
On the Special District Tab, click the add button on the navigator bar
7.2.2 To Add a Special District to Multiple Parcels: It is highly recommended that you check the Trial Run box.
Go to System on the Main Menu
Select Special District Broadcast
Select Assessment Year
Select Broadcast Method
By SWIS Code - adds Special District each parcel in a SWIS Code By Parcel ID Range - adds Special District to each parcel in a range of parcel IDs By Property Class - adds Special District to each parcel in a specific property class By Parcels with Certain Special District- adds Special District to each parcel with a specific Special District By Import File - adds Special District to each parcel as specified in the import file
37
By Parcel List - adds Special District to each parcel in a Parcel List
If Broadcast Method is:
By SWIS Code, Parcel ID, Property Class or Certain Special District, on the Select Range Tab:
By SWIS Code - select SWIS code(s)
By Parcel ID Range - enter beginning and ending parcel IDS
By Property Class - select property class from drop down
By Parcels with Certain Special District- select Special District from drop down
By Import File:
o Click Start and the Printer Dialogue Box will open
o Select Print to File and the file browser will open
o Locate your import file and click OK
By Parcel List:
o Go to Main Menu and select Options
o Go to Show Parcel List
o In Parcel List, Add, Load or Import the Parcel List
7.2.3 To Delete a Special District from a Parcel:
Go to Parcel on the Main Menu
Select Modify a Parcel
Locate the parcel for which you want to remove the Special District, open the parcel
Click on the Special District Tab of the parcel notebook
If there is no Special District Tab, right click and a menu will appear, go to Special District
On the Special District Tab, click on the remove button on the navigator bar
38

7.2.4 To Delete a Special District from Multiple Parcels:
It is highly recommended that you check the Trial Run box.
Go to System on the Main Menu
Select Special District Broadcast
Select Assessment Year
Select Broadcast Method
Delete Special District– deletes each entry for the selected Special District Delete Special District by Parcel List - deletes each entry for the select Special District on the
Parcel List
7.2.5 To Update a Special District for Multiple Parcels:
It is highly recommended that you check the Trial Run box.
Go to System on the Main Menu
Select Special District Broadcast
Select Assessment Year
Select Broadcast Method, Update Existing Special District by Parcel List
Go to Main Menu and select Options
Go to Show Parcel List
In Parcel List, Add, Load or Import the Parcel List
On Special District Broadcast screen, select Properties of Special District to Broadcast
Click Start
39
7.2.6 Special District Report
The Special District Report displays Special Districts in This Year, Next Year or History. The Special District Report can be:
generated for all or select Special Districts generated for all or select SWIS\School Codes generated for all or select Roll Sections sorted by Parcel ID, Name, Legal Address or Account Number extracted to Excel used to create a Parcel List
7.2.6.1 To create the Special District Report:
Select Reports, Special District Report, and Special District Report
Choose your preferences
Click the Print button to open the Printer dialogue box
Check Print to file and click OK to preview the report on the screen
Once you review the report and are satisfied, click the Printer Icon
Select your print preferences, click OK
7.2.7 Special District Comparison Report
The Special District Comparison Report evaluates the difference in a Special District Code from one tax year to another tax year. The Special District Comparison Report can be:
generated for all or select SWIS/School Code(s) extracted to Excel used to create a Parcel List
Select Reports, Special District Reports, and Special District Comparison Report
Select the first year and the second year which you would like to compare
40

Select the Special District Code
Select Extract to Excel or Create Parcel List, if desired
Select SWIS and School District Codes
Click the Print button to open the Printer dialogue box
Check Print to file and click OK to preview the report on the screen
Once you review the report and are satisfied, click the Printer Icon
Select your print preferences, click OK
41
8.0 Assessment
8.1 Changing Assessed Values
8.1.1 To change the assessment information of a parcel:
On the Main Menu go to Parcel
Select Modify
Enter the updated information
Click Save.
8.1.1.1 Physical & Equalization Increases or Decreases
PAS offers the ability to distribute the amount of the assessment change between Physical value and Equalization value. Physical value indicates a change in the property value due to a physical change. Examples of a physical change would be construction, renovation or demolition. Equalization indicates a change based on the fair market value. This distribution is tracked and utilized in the Assessor’s Report to assist in balancing the tax rolls. Additionally, the fields created are available for use in any customized report.
8.1.1.2 Partial Assessment
The Partial Assessment check box allows the parcel to be flagged for a re-visit and informs the owner that the change in assessment is not based on the completed project or open permit.
8.1.2 Notes
PAS also offers the ability to enter an individualized note that will carry over to the Assessment Change Letters, giving the opportunity to explain the reasoning for the change to the taxpayer.
42

8.2 8.2.1.1 Notes Report
The Notes Report produces a report for parcels that have an associated Notes record. The Notes Report can be:
generated for all or select SWIS/School Codes generated for Note Type of Regular or Tickler, or both generated for Notes Status of Open or Closed, or both extracted to MS Excel
To access the Notes Report:
On the Main Menu go to Reports
Select Notes Report
Choose your preferences on the Options, More Options and SWIS\School Codes Tabs
Click Print to open the Printer dialogue box
Check Print to file and click OK button to preview the report on the screen
Once you review the report and are satisfied, click the Printer Icon
Select your print preferences, click OK
8.3 Assessment Change Letters
The Assessment Change Letters produces customizable letters with assessment increases, decreases and both increases or decreases. A report can be produced with the letters or in place of the letters. An Assessment Change Letter can be:
generated for all or select Roll Sections generated for all or select SWIS Codes sorted alphabetically, by Parcel ID, Roll Section, Zip Code or Legal Address
43
8.3.1 To Create Assessment Change Letters:
Go to Reports on the Main Menu Select Reports, Labels\Letters, Assessment Change Letters
Choose your preferences: Options, More Options, SWIS Codes and Letter Text Tabs
Click the Letter Text Tab and select the letter that you want to print
If you want to change the text of an existing letter, just click in the box that displays the letter template and a word processor will appear with the letter in it
Make desired changes in this word processor and save the changes
If this is the first time you are generating this type of letter and need to create a new letter template, please see Letter Text Maintenance
Click Print to open the Printer dialogue box
Check Print to file and click OK button to preview the report on the screen
Once you review the report and are satisfied, click the Printer Icon
Select your print preferences, click OK
8.4 Tentative and Final Assessment RollsThe Assessment Rolls Report provides assessment roll and full roll information for a specified year. The report can be:
Produced from all or select Roll Sections: Taxable, Taxable State Lands, Special Franchise, Utility & Non-ceiling RR, Ceiling RR, Wholly Exempt, and more
Created from Tentative or Final Roll Type Produced from all Parcels or a select Parcel List; Generated for all or select SWIS and/or School Codes Sorted by Parcel ID, Owner Name or Location Exported to MS Excel Printed with Date Printed, Uniform % of Value, Roll Section Totals, Zoning Code, and more. Printed on different paper sizes: Letter, Legal, Executive, A3/A4/A5, 11x17, Envelopes, and more printed portrait or landscape oriented, double sided and in binding formats
44
8.4.1 To Create a Tentative or Final Assessment Roll: Go to Reports on the Main Menu Select Reports, Assessment Roll On the Options Tab:
o Fill in the Assessment Yearo Select the Print Ordero Select the Roll Type (Tentative or Final)o Select Roll Sections and Values to Print
On the Misc Options, SWIS/School Codes Tabs make any selections you prefer Click the Print button You will be prompted to confirm you want to print the Rolls, review the summary and click Yes The Print dialogue box will open, check Print to file and click the OK You will receive a message dialogue summarizing the Roll parameters, click Yes You will receive prompt confirming your page size selection, click Yes You will receive a message stating the Roll Totals will be printed first, click Yes Review the Roll Totals, Print and/or Close the Report Preview You will be prompted to Save the Roll Totals
o If this is you final Tentative Roll or Final Roll, it is a good practice to Save the fileo Rename the File with the Year and Save
You will be prompted to confirm you want to print the full roll, click Yes The Print dialogue appears, check Print to File, click OK Review the Roll, Print and/or Close the Report Preview Print - Click the Printer Icon, select your print preferences, click OK You will be prompted to Save the Roll
o If this is you final Tentative Roll or Final Roll, it is a good practice to Save the fileo Rename the File with the Year and Save
A message appears stating the number of parcels on the roll, click OK You will be prompted to create a roll to transmit to NYS ORPS
o If Yes, you will be prompted to include parcel inventoryo Click Yes or No (based on your Municipality’s preferences)o Follow steps 7 through 15 of To Submit the Tentative or Final Assessment Rolls
45

8.5 Assessor’s Report
The Assessor’s Report is used to determine the change in level of assessment between the prior roll and the current roll. The data in this report is used to establish special equalization rates, where applicable, for final special franchise assessments and railroad ceilings, final assessments on taxable State lands, school tax apportionments, and agricultural ceilings.
The report includes the RPS (Real Property System) 210T1 extract file for NYS ORPS.
8.6 Submitting to NYS ORPS
8.7 For ORPS to establish current equalization rates for all cities and towns that use rates for school tax apportionment (STAR), the Tentative and Final Assessment Rolls and the Assessor’s Report must be submitted.
The Tentative Assessment Roll files, along with the Uniform Percentage of Value, must be submitted within the first ten days following the Tentative Roll Date.
The Final Assessment Roll files and the signed Assessor’s Report must be submitted within thirty days after the Final Roll Date.
8.7.1 To Submit the Tentative or Final Assessment Rolls:
On the Main Menu, go to Import/Export Select Full File Extract (995) Select your preferences Click Start Navigate to the location where you want the files saved, click Save twice When the Extract is completed, a dialogue appears showing a summary of the Extract, click OK A prompt appears asking if you would like to Save and Zip the File Click Yes, the Copy/Zip Files dialogue opens, check the box Zip Files even if they fit… Click OK, the Save File dialogue opens Select the file location and name the file (e.g. TownEden2009Final Roll), click Save A dialogue appears confirming the files were zipped/saved, click OK A dialogue box appears asking if you want to make another copy, click No A dialogue box appears asking if you want to email the files If you use MS Outlook, click yes and follow the prompts If you do not, you will need to manually attach the files to an email, click no
46
8.7.2 To submit the annual Assessor’s Report:
On the Main Menu, go to Reports Select Assessor’s Report Check Print Part 3 Transmittal Letter Select your remaining preferences Click Print, the printer dialogue appears Select Print to File, click OK Preview the report, Print the report Click Exit and Save A dialogue appears stating if the Assessor’s Report is balanced If you want to create the 210T1 Extract for email transmittal to NYS ORPS, click Yes In your email software, create a new email to the ORPS file reception email address
([email protected]) Attach the ASSESSOR.rpt file from PAS Reports folder Attach the RPS210T1 file from PAS Extracts folder Complete email as desired and send
8.8 Additional Assessment Reports
8.8.1 To Create the Assessment Reports:
Go to Reports on the Main Menu Select Reports, choose the report you would like to run (see descriptions) Choose your preferences Click Print to open the Printer dialogue box Check Print to file and click OK button to preview the report on the screen Once you review the report and are satisfied, click the Printer Icon Select your print preferences, click OK
47

8.8.1.1 Assessment by Property Class Report
The Assessment by Property Class Report displays the Tentative or Final Assessment Roll. It provides information for all or select Property Classes. The report can be:
Produced from current, next or historical data Produced from all Parcels or a select Parcel List Generated for all or select SWIS and/or School Codes Saved and retrieved for reuse Exported to a MS Excel spreadsheet
8.8.1.2 Assessment Summary Report
The Assessment Summary Property List Report provides assessed value and total information for select Roll Sections and/or select Property Classes. The report can be:
Produced from This Year, Next Year or historical data Generated for Report Type options: Roll Section, School Code, Parcel ID, Owner, Legal Address,
Property Class or Address Printed suborder by Parcel ID, Owner Name or Location Produced for Assessed Value Type Show Land and Total Assessed Values, Show Taxable Values, Don’t Show Any Values Printed with Page Breaks by SWIS Code or Grand Totals Produced from all Parcels or a select Parcel List Generated for all or select SWIS and/or School Codes Exported to a MS Excel spreadsheet Produced with select or all Roll Sections; and/or select or all Property Classes
48

8.8.1.3 Assessment Variance Report
The Assessment Variance Report provides a means to compare values between assessment years: This Year vs. Next Year or Prior Year vs. This Year. The report can be:
Generated for all or select: SWIS Codes, School Codes and Roll Sections Produced for specific Roll Section Changes Only parcels that changed RS Only parcels that did not change RS Produced from all Parcels or a select Parcel List Exported to MS Excel
8.8.1.4 Assessor’s Verification Report
The Assessor’s Verification Report identifies parcels with up to 27 different inconsistencies or possible errors. This report can be:
Generated for This Year, Next Year or History data Produced from all Parcels or a select Parcel List Saved for later use Sorted by SWIS Code A Parcel List can be created and saved from the results of the report
8.8.1.5 Top Taxpayer Report
The Top Tax Report provides a report of the top taxpayers. The report can be:
Produced by Roll Section, tax year, SWIS and/or School Code Output to display a user defined number of tax payers (unlimited maximum) Based on value assessed, county, town/city, village and school values
49

8.9 Audit Reports
8.9.1 Assessor’s Trial Balance Report
The Assessor’s Trial Balance Report can be used for balancing for any time period. This report is typically used for daily balancing. Assessor’s Trial Balance Report can be:
Produced from data for This Year, Next Year or All Years Generated for specific Date Range, Parcel ID Range, User ID Range Generated for all or select SWIS\School Codes, Special District Codes, Exemption Codes Sorted by Section Block Lot, Date or User Generated with the Taxable Value Change in AV Section suppressed A Parcel List can be created and saved from the results of the report
8.9.2 Audit Trail Report
The Audit Trail Report finds and displays changes made to parcel records. The Audit Trail Report can be:
Produced from data for This Year, Next Year or All Years Generated for all or specific Date Range, Parcel ID Range, User ID Range Generated for all or select SWIS and School Codes Sorted by Section Block Lot, Date or User Generated for changes to all or select fields on all or select screens A Parcel List can be created and saved from the results of the report
8.9.2.1 To narrow fields that are audited, click the Select Screens/Fields button on the Options Tab:
Select a desired screen from the Screen Selection list Select all desired fields from the screen on the Field Selection list To select field more than one field, press the Ctrl key on your keyboard and single-click on the
desired fields Repeat this process until all desired fields are selected Click Finalize Field Selection(s) button to complete selection of fields from the desire screen. Click Done once all screens/fields are selected
50

8.10 Year End Rollover
Once the assessment year is completed, you will need to perform the year-end rollover in order to prepare the system for a new assessment roll. This will move the This Year roll to History, Next Year to This Year and prepare the Next Year roll for new data entry.
8.10.1 Considerations for when to do perform year-end rollover
8.10.1.1 If your municipality uses Westchester logic, before you perform the year-end rollover:
Run the Final Assessment Roll. Run a balanced copy the Assessor’s Report Submit files to the county and NYS ORPS
8.10.1.2 If your municipality does not use Westchester logic:
If your municipality submits an Assessment Roll or Full File Extract (995) to a village for village taxing purposes, you may want to wait to do the year-end rollover until after submitting this information. There are 3 reasons for this:
The assessments that the village needs to calculate its taxes are the This Year assessed values. If you do the year-end rollover, these values will be moved back into history and replaced by your current Next Year values. This means that you will either need to set aside a copy of the PAS data or generate all the necessary extracts and rolls that the villages need prior to performing the year-end rollover.
The longer you wait to submit the final information to the village, the more accurate the names and addresses will be. There will not be a long delay between the time when the extract (or roll) information is created and the village uses the information to generate taxes.
All information entered after the final roll (with the exception of small claims or certioraris decisions, corrections of errors or other extenuating circumstances) in preparation for the next year’s roll will be entered in Next Year. This means that you do not have to worry about entering information into This Year and Next Year simultaneously.
If you choose to wait to do the year-end rollover, then any information entered for the next assessment roll will be entered in Next Year only. This includes Exemption, assessment, name \ address, Special District and inventory changes (among others). You may continue entering information on the Next Year
51
roll up until you need to run the Tentative Assessment Roll, since the assessed values that print on the assessment roll come from the This Year roll. If you wish to prevent searchers from seeing any of the changes on Next Year until the tentative roll is made available to the public.
8.10.2 To Execute the Year-End Rollover:
Make sure that all users are out of the Property Assessment System.
This includes any other system that may be connected to PAS data such as SCA Code Enforcement.
On the Main Menu, go to the System Select Year-End Rollover Click the Start PAS will make a backup of all the data prior to the rollover After clicking OK, PAS will close down and a backup utility will appear To begin the backup, click Start and then click Save to store a backup with the listed file name After the backup completes, click OK, PAS will restart Log back into PAS and return to Year-End Rollover Review the STAR amounts, equalization rate, uniform percent of value, veteran’s limits and
valuation and roll dates If you do not yet know these values for the new assessment year, leave them as they are
displayed. You may change them later in the assessment year.
Choose from the Year End Roll Over Options and then click Start If you are prompted to create a final Full File Extract (995), select Yes Select the print destination for the year-end rollover report and click Print. Allow the year-end rollover to run (this may take from 10 minutes to several hours depending
on the size of your municipality). When the rollover is complete, PAS will shut down and perform another backup of all the
system data
Run the Assessor’s Verification report against both the This Year and Next Year rolls to check for error conditions.
52

9.0 Sales9.1 Sales Tables
The Sales Tables contain information that is utilized repeatedly for sales transactions. This information includes:
Arms Length Transaction Sale Conditions Codes Deed Type Ownership Type Sale Validity Verification Method
9.1.1.1 To access these Tables: Go to Tables on the Main Menu Select Sales Codes
Many of the codes utilized in PAS by assessing units are defined and standardized by ORPS. Before modifying any codes please verify their status with ORPS.
9.1.2 Entering a sales record Go to Parcels on the Main Menu
Select Modify a Parcel
Locate the parcel for which you want to enter the sale information, open the parcel
Click on the Sales Tab of the parcel notebook
If there is no sales Tab, right click and go to Sales On the Sales Tab, click on the insert button on the navigator bar Enter the owner name, mailing address and bank code. After entering this information, click OK
to continue Enter the information from the deed and other relevant documentation, click the check mark
when finished to save your entry After saving the sale, the time of sale information is recorded and the owner name and address
information is updated
If the sale date is prior to the final roll date of the This Year roll or the system option to always changes to both This Year and Next Year, the owner name and mailing address will be updated on both the This Year and Next Year Roll. If the sale date is after the final roll date of This Year and the above mentioned system option is not active, the owner name and mailing address will only be updated on Next Year.
53
9.1.3 Viewing Sales History and Owner Changes
9.1.3.1 To view the most recent or prior sales:
Go to the Sales Tab of the parcel notebook, the most recent sale will appear on the screen
To view a previous sale, click on the prior button of the navigator bar Click on the Sale Inventory button to view the sales inventory associated with that sale Click on the Owner Progression button to view the name and address changes that have
occurred on this parcel since PAS was installed
9.1.4 Sales Report
The Sales Report provides a simple list of the sales for a given period of sale dates, sales entry dates (i.e. when a sale was physically entered into PAS), and sale date transmitted period, or parcel ID range. The Sales Report can be:
Generated for all or select: SWIS Codes/School Codes Generated for Arms Length Only Sales Sorted by SBL, Owner Name, Sales Date or Legal Address Transmitted to ORPS Extracted to MS Excel
9.1.4.1 To create the Sales Report
Go to Reports on the Main Menu Select Sales Report, Sale Report Choose your preferences from the Options, More Options and SWIS\School Codes Tab Click Print to open the Printer dialogue box Check Print to file and click OK button to preview the report on the screen Once you review the report and are satisfied, click the Printer Icon Select your print preferences, click OK
54

9.1.5 To Transmit Sales to NYS ORPS:
The transmittal will extract all sales that have an “A” Status Code (complete and ready for transmittal). The necessary files will be compressed into a file that can be emailed, saved or placed on a disk.
Go to Reports on the Main Menu Select Sales Report, Sale Report Choose your preferences from the Options, More Options and SWIS\School Codes Tabs Select the Transmit Report check box and click Print After the viewing and/or printing the report, close the report, and a dialogue box will appear Select Yes to copy the file to another location (i.e., specific folder, floppy diskette, CD, etc.) Once the zip file is created, an Information box will appear An email confirmation dialogue box will appear next Select Yes to send an email to NYS ORPS with an attachment of the file that was created Selecting Yes will create and open a new message with the attachment You need to supply the appropriate email address and send the email
55
9.1.6 Sales Analysis Report
This report provides a comprehensive view of the sales that have been entered into PAS. There are many options that allow you to choose the sales population, such as sales date range, assessment range, sales price range, condominium or cooperative status and more. This report provides statistical information such as mean and median sales price, assessed value, sales price ratio and COD (in relation to the ratio). The Sales Analysis Report can be:
Generated for all or select: SWIS Codes/School Codes, Property Class, Neighborhoods, Sections Generated for all or a range of: Sales Dates, Assessed Values, Account #, AV/SP Ratio Grouped and sorted by many different alternatives
9.1.6.1 To create the Sales Analysis Report:
Go to Reports on the Main Menu Select Sales Report, Sales Analysis Report Choose your preferences from Ranges, Options, Report Type, SWIS\School, Property Class,
Neighborhood, Section Tabs Click Print to open the Printer dialogue box Check Print to file and click OK button to preview the report on the screen Once you review the report and are satisfied, click the Printer Icon Select your print preferences, click OK
9.1.7 Sales Extract \ List
This report prints out the tentative or final assessment roll. To get to the report, go to the Reports menu and select Assessment Rolls.
56

10.0 Comparable SalesA Comparable Sale (aka Comp) is a property which has sold recently and is sufficiently similar to the subject of an appraisal so that its adjusted selling price may be taken as an indication of the market value.
10.1 Comparables Display On the Main Menu, go to Reports Select Comparables Display The View parcel window opens, double click the template parcel (parcel for which you would
like to produce the comps) If you are seeking comps based on: Assessed Value - click the Assessed button in the upper left corner Sale Value - click the Sales button in the upper left corner Click on the Results Tab to view the Comps identified by PAS
10.1.1.1 Customization Options: Groups Tab - enter SWIS, Neighborhood, Property Class and Building Codes beyond the
template parcel to include in the Comp results Min/Max Tab - adjustments can be made to individual values and the original values can be
restored Group Members - Specific Group members can be selected for viewing in Results Weights Tab – Customized weighting can be created and saved.
57

11.0 InventoryInventory data is needed to value each parcel of property located within an assessing jurisdiction. Residential, Farm, Vacant, Forestry and Commercial property all require different inventory data.
For more information about maintaining property inventories, please refer to NYS ORPS.
11.1 Adding Residential or Commercial Sites Go to Parcel on the Main Menu Select Modify a Parcel Locate the parcel for which you want to enter the site, open the parcel Click on the Res Site or Comm Site Tab of the parcel notebook (if there is no Res Site or Comm
Site Tab, right click and go to Residential or Commercial, select Sites) Click the add button Enter your information Click on the save button (checkmark)
A Residential or Commercial parcel may have more than one site.
11.2 Buildings, Land, Forest or Improvements For residential & commercial parcels, a site must be added to enter buildings, land, forests
or improvements.
Click on the Res Site or Comm Site Tab of the parcel notebook
Right click within the PAS screen, go to Residential or Commercial, select the inventory type you would like to add (building, land, forest, improvement)
Enter your information
Click on the save button (checkmark)
11.3 Income/Expense for Commercial ParcelsFor commercial property, a site must be added to enter income/expense and rentable areas.
Click on the Comm Site Tab of the parcel notebook Right click within the PAS screen, go to Commercial, select Income/Expense or Rentable Areas Enter your information Click on the save button (checkmark)
58

11.4 Residential Buildings: Square Foot Living Area RecalculationPAS can automatically calculate the square footage of living area for all Residential Buildings. The calculation is based on the entries made in the Residential Building Tab of parcels.
To calculate or recalculate square footage of living area:
Go to System on the Main Menu
Select Square Foot Living Area Recalculation Select the Assessment Year for which you want to recalculate Click Start, the Printer dialogue box will open Check Print to file, click OK You will be prompted when the calculations are completed, click OK The Preview Report window will open showing what recalculations were made Print and/or Close the report
59
12.0 Documents, Property Cards & PicturesPAS offers the ability to link documents, scanned property record cards and pictures to parcels for quick referencing, viewing and printing. Compatible documents can be in several formats including 16 scanned file types, MS Word and WordPerfect documents, Excel and Quattro Pro spreadsheets and Adobe PDFs. Documents, scanned property record cards and pictures can be linked individually or as a batch.
To Link as a Batch:
The files you are batch loading should be located in the same folder.
The naming convention required to utilize the batch loading feature is <PrintKey><description>.<file extension>. For example, 159.63-2001-10sitevisit.doc could be an MS Word document recording observations made during a site visit for parcel ID 159.63-2001-10. The text entered in the file name for <description> can be added as notes on the file within PAS.
On the Main Menu, go to Import\Export
Select Load Picture\Documents\Apex Sketches Choose What to Load Click the Folder to Find button Navigate to the file folder containing the items you want to link, click OK Select your preferences, click Print In the Print dialogue, select Print to File, click OK Once completed, the Preview dialogue opens, providing a report of the batch load
To Link to a Parcel:
On the Main Menu, go to Parcel
Select Modify a Parcel Click on the Docs, Pics, or Cards Tabs or right click on the Parcel Screen and select Documents,
Pictures or Property Cards Click on New Doc, New Pic or New Card
For New Pic or New Card:
In the Open File dialogue, navigate to the file location
Click once on the file to highlight it, click Open
For New Docs:
Select the type of file you want to load, click Next
60

Select Link to an Existing Document, click OK In the Open File dialogue, navigate to the file location Click once on the file to highlight it, click Open
To Delete a Link:
On the Main Menu, go to Parcel
Select Modify a Parcel Click on the Docs, Pics, or Cards Tab Select the file you want to delete Click Remove button You will be prompted to verify you want to delete the link, click Yes You will be asked if you want to delete the actual file (this cannot be undone), select yes or no
12.1 Picture and Property Card Report The Picture and Property Card Report produces a report for parcels that have linked pictures or property cards or parcels that do not. A Picture and Property Card Report can be:
generated for all or select SWIS/School Codes generated for all or select Property Class Codes generated with or without Parcel Detail sorted by Parcel ID, Legal Address or Owner Name
To access the Picture and Property Card Report:
On the Main Menu go to Reports Select Picture and Property Card Report Select Pictures of Property Cards Choose your preferences on the Options, SWIS\School Codes and Property Class Tabs Click Print to open the Printer dialogue box Check Print to file and click OK button to preview the report on the screen Once you review the report and are satisfied, click the Printer Icon Select your print preferences, click OK
61
13.0 Billing13.1 Billing Cycles
Create a new billing cycle:
On the Main Menu, Select Tax Billing Select Create/Modify Tax Collection Cycle Click the Add New Bill Cycle button Select Collection Type Add # of Payments Enter Due Date Click the check mark to save changes Click Close
Set the parameters of the new billing cycle:
On the Main Menu, Select Tax Billing Select Set Tax Rates Select Collection Type Enter Collection # Press the Enter key
Enter all appropriate values Click the check mark to save changes Click Close
Calculate the tax bills:
On the Main Menu, Select Tax Billing Select Calculate Tax Bills Select Collection Type Enter Collection # Click Start
Preview the tax roll:
On the Main Menu, Select Tax Billing Select Print Tax Roll Select Collection Type Enter Collection # Click the Print button Select Print to file Click OK
62

13.1.1 To Load New Arrears and Clear Previous Arrears: To utilize this feature you must have the SCA Tax or Delinquent Tax Systems.
If you do not have SCA Tax or Delinquent Tax Systems, you can still clear the arrears flag.
On the Main Menu, Select Tax Billing
Select Load Arrears Flags from Current and/or Delinquent Tax System
Select which System(s) you will be loading from
Select or Deselect the Clear Old Arrears Flags
Click Start
13.1.1.1 To Clear the Arrears Flag from Parcels: On the Main Menu, Select Tax Billing
Select Clear Arrears
Click Start
13.1.2 To Import Bank Codes: On the Main Menu, go to Import/Export Select Bank Code Import Enter the Code used previously for the bank which you are loading From the drop down menu, select the name of the bank (if applicable) Click Import In the TSO File to Open dialogue, navigate to the file location Click once to highlight the file, click Open In the Printer dialogue, select Print to File, click OK When the import is complete, Preview Report dialogue opens with a summary Choose Print and/or Close
13.2 Billing ExtractsPAS has the ability to extract billing information to be utilized by other SCA applications, such as SCA Tax or Delinquent Tax Systems. The files used for this data transfer are the Tax Roll Print/Bill Extract (155) and the Rate File (147). Additionally, a Laser Bill Extract (160) can be created to produce tax bills through a third party.
63

14.0 Letters & Labels14.1 Letter Text Maintenance
14.1.1 To Create a New Letter:
On the Main Menu, go to Tables
Select Miscellaneous Table
Choose Letter Text Maintenance
Click the Add button on the Navigation Bar
Enter a New Letter Code
Double click in the Enter Letter Text window, a word processing editor opens
Enter the body text for the new letter
When you are finished, go to File
Choose Save and Exit, the word processing editor will close
On the Navigation Tool Bar click the check mark
Click Close
The letter will now appear in the Letters and Labels feature
14.1.2 To Edit or Modify an Existing Letter:
On the Main Menu, go to Tables
Select Miscellaneous Table
Choose Letter Text Maintenance
Click on the letter you want to edit or modify
Double click in the Enter Letter Text window, a word processing editor opens
Edit or modify the body text for the letter
When you are finished, go to File
64

Choose Save and Exit, the word processing editor will close
On the Navigation Tool Bar click the check mark
Click Close
14.2 Generic Letters
The Generic Letters feature provides a flexible method to generate customizable batches of letters. Generic letters can be:
Generated for This Year or Next Year Produced from all Parcels or a select Parcel List Generated for all parcels, Commercial Inventory or Residential Inventory Generated for all or select Exemption Codes, Special District Codes, SWIS\School, Property
Class, Roll Section and Zip Codes Sorted by Parcel ID, Roll Section, School District, Exemption Code, Special District, Bank Code,
Property Class, Name or Address
14.2.1 To run Generic Letters:
On the Main Menu go to Reports
Select Labels\Letters
Choose Generic Letters
Choose your preferences on the Options Tab
Click on the Letter Tab
Select the Letter you want to use
Select your criteria on the Exemption Codes, Special District Codes, SWIS\School, Property Class, Banks\Roll Section and Zip Codes Tabs.
Click Print to open the Printer dialogue box
Check Print to file and click OK to preview the letters on the screen
Once you review the letters and are satisfied, click the Printer Icon
Select your print preferences, click OK
65
14.3 Labels
The Labels Print provides a convenient way to produce mailing labels for letters and documents generated within or outside of PAS. Labels can be:
Generated for popular label types or envelopes Generated for This Year or Next Year Produced from all Parcels or a select Parcel List Generated for all parcels, Commercial Inventory, Residential Inventory or No Inventory Generated for all or select Exemption Codes, Special District Codes, SWIS\School, Property
Class, Roll Section, Zip Codes and Roads (street numbers and names, randomly or by range) Sorted by Parcel ID, Roll Section, School District, Exemption Code, Special District, Bank Code,
Property Class, Name, Address or Account Number
14.3.1 To Create Labels:
On the Main Menu go to Reports
Select Labels\Letters
Choose Labels
Choose your preferences on the Options and More Options Tab
Set the formatting details of the labels on the Format Tab
Select your criteria on the Exemption Codes, Special District Codes, SWIS\School, Property Class, Banks\Roll Section, Zip Codes and Roads Tabs
Click Print to open the Printer dialogue box
Check Print to file and click OK button to preview the labels on the screen
Once you review the labels and are satisfied, click the Printer Icon
Select your print preferences, click OK
14.3.2 To Create Labels for Exemption Letters and Generic Letters:
Select the Create Parcel List option when running the letters
66
Save and name the Parcel List
On the Main Menu go to Reports
Select Labels\Letters
Choose Labels
Choose your preferences on the Options Tab
On the More Options Tab, select Load from Parcel List
Go to Options on the Main Menu
Select Show Parcel List
Click Load
Navigate to the Parcel List
Set the formatting details of the labels on the Format Tab
Click Print to open the Printer dialogue box
Check Print to file and click OK button to preview the labels on the screen
Once you review the labels and are satisfied, click the Printer Icon
Select your print preferences, click OK
67

15.0 Managing & Customizing Reports
15.1 Report Manager
When a report is run and previewed in PAS, the results of that report are stored automatically and indexed by the Report Manager. The Report Manager tracks the Report Name, File Name, File Date, File Time and File Size. The Report Manager links the index to the snap shot of the report results allowing users to view their previous data. Additionally, when report results are saved they are easily accessible and viewable from the Report Manager.
15.1.1 To access the Report Manager:
On the Main Menu, go to System, Select Report Manager
15.1.1.1 To view a report in the PAS preview:
Double click on the Report Name and the Open dialogue box appears
Navigate to the location of the file (the default location is PAS32/reports)
Select the file, click Open
68
15.2 Search Report
The Search Report provides a flexible method to generate customized reports and extract information from PAS for analysis in other programs. The Search Report can access individual data fields in PAS allowing the user to enter their criteria, choose what data they want to view, print, or extract (MS Excel, Parcel List, Tab or Comma Delimited).
15.2.1 To access the Search Report:
On the Main Menu, go to Reports
Select Search Report
15.2.1.1 To set the filtering Criteria:
On the Criteria Tab, click Add Selection (Add Search Selection dialogue opens)
In Choose a Screen, click once to highlight the Screen (containing the field which you would like to select)
In Choose a Field, the data fields available for each Screen appear, click once to highlight your desired field
In Comparison, select the filtering statement
In Values, enter the value result(s) you desire
Click OK
Repeat as needed until you have all of the Criteria entered for your desired Report
On the More Options Tab, you can set the qualifying Comparison statement (AND/OR) for Criteria.
For example, if SWIS Code is the Field with “equal to” as the Comparison and the Value is “123456” AND you set Property Code as “equal to” as the Comparison and the Value as “210”, you will get a Report showing all parcels in SWIS Code “123456” with a Property Code of “210”.
15.2.1.2 To set the fields that will be displayed by the Report:
69

On the Fields to Print Tab, click Add Selection (Add a Field to Print dialogue opens)
In Choose a Screen, click once to highlight the Screen (containing the field which you would like to select)
In Choose a Field the data fields available for each Screen appear, click once to highlight your desired field
Click OK
Repeat as needed until you have all of the Fields entered for your desired Report
15.2.1.3 To display specific Totals on the Report:
On the Totals Tab, click Add Selection (Add a Field to Print dialogue opens)
In Choose a Screen, click once to highlight the Screen (containing the field which you would like to select)
In Choose a Field the data fields available for each Screen appear, click once to highlight your desired field
Click OK
Repeat as needed until you have all of the fields you would like to have Totals for your desired Report
15.2.1.4 To filter the Report for specific SWIS, School District, Exemption and/or Special District Codes:
On the SWIS/School District, Ex Code and/or Special District Codes Tab, click once to highlight the desired code. To Select more than one Code, hold down the Ctrl key and click on each Code
Select your preferences on the Options, More Options and Extract File Tabs
Click Print, the Printer dialogue box will open
Check Print to File, Click OK
Once you preview the report and are satisfied, click the Printer Icon or Close the Report
70
In the Report Options dialogue, choose your preferences
If you want to save the report template to be re-used or modified at a later date, click Save in the main Search Report screen once all of your parameters have been set.
15.3 Generalized Extract
The Generalized Extract provides a direct method to extract information from PAS for analysis in other programs. The Generalized Extract pulls all entries in specific data field(s) from PAS and exports to a Tab or Comma Delimited file.
15.3.1 To access the Generalized Extract:
On the Main Menu, go to Import/Export
Select Generalized Export
On the Definition Tab:
Choose a Screen, click once to highlight the Screen (containing the field which you would like to select)
Choose one or more Fields (data fields available for each Screen appear), click once to highlight your desired field
To Select more than one Field on a Screen, hold down the Ctrl key and click on each Field To Select more than one Field on multiple Screens, highlight the new Screen Repeat as needed until you have all of the fields you would for your Extract On the Options Tab, select your preferences Click Start
71

16.0 Map Add-On
SCA offers an Add-On package for PAS that integrates data from popular Geographic Information Systems (GIS) with the PAS application for visual and limited analytical purposes. The file types accepted by the GIS Add-On are:
ARC/INFO – Vector data comprised of a set of internal binary files used by ARC/INFO by ESRI CAD – Vector data format using DWG by AutoCAD and DXF by Autodesk Shapefile – Vector data format using SHP, SHX and DBF by ESRI MrSID – Raster data set, Multi-Resolution Seamless Image Database by Lizardtech
16.1 To Enable the Map Add-On:
On the Main Menu, go to Options Select Maintain System Record Click Add-Ons Tab, go to Map Options Check Maps Enabled, All Selected Layers Created Locally and Searcher Creates Selected Layers
Locally Click Save, then click Close
16.2 To open the Map Add-On:
On the Main Menu, go to Reports Select Maps
16.3 Create a Map Setup:
On the Mapping application Main Menu, click the Tools Icon (Mapping Options dialogue opens) Click on the Map Setups Tab (default screen) Click New Setup button On the Options Tab, enter a Setup Name Click Save Setup button Set your preferences on Options, Layers to Auto Load and Map Linking Tabs Click Save Setup
72

16.4 Working with Layers
On the Main Menu, go to Reports Select Maps On the Mapping application Main Menu, click the Tools Icon (Mapping Options dialogue opens) Click on the Layer Available Tab
16.4.1 To Delete a Layer:
Click the Layer once to highlight it Click Remove Layer button
16.4.2 To Add a Layer:
Click Add Layer button, an Open File dialogue box opens Navigate to and select the file you want to add, click Open In the Layers Available Grid, enter a Layer Name for the Layer Choose the Layer Type from the drop-down menu Select you preference for Transparency and Color Define whether you want this Layer to be the Main Layer (Base Layer) Click Save Layer and close the dialogue box You will be prompted to re-load the map with the new settings
16.5 Navigating the Map Display
R – Allows you to select an area to zoom in on – To select the zoom area extent, hold down the left mouse button and drag the corner of the box around the desired area. When you release the mouse button, the map will be zoomed to the extent you designated.
I - Allows the user to select a parcel and view a summary of the demography profile, Sales, Exemptions, Special Districts and Inventory.
Zoom – Standard zoom options. Pan – Standard West, East, North & South panning tools. Global View – Zooms to the full extent of the map. Locate a Parcel – Opens the Locate Parcel Dialogue. Allows the user to designate what parcel to
select and zooms the map display to the selected parcel.
16.6 Selection Tools
73

S – Allows the user to manually select one or more parcels. To select more than one parcel hold down the shift key when clicking the mouse.
Clear All Selected Parcels – Clears all selected parcels. Show Parcels with Pictures – Selects parcels with pictures in the current view extent. Select Parcels by Street – Allows the user to select parcels by legal address Street Name and
Number. Select Parcels within a Radius – Selects parcels within a user defined radius of a specific parcel. Locate Unknown Parcels – Locates all mismatching parcels from the PAS to the GIS parcel data.
16.7 Criteria Search:
The Criteria Search allows the user to select parcels based on School Code, SWIS Code, Special District, Exemption, Roll Section and/or Property Class. The user can set ranges for selection criteria, such as Land Values, Assessed Value, Zoning Code, Neighborhood Code, etc.
16.7.1 To utilize the Criteria Search:
Select your Criteria from School/ SWIS, Special District/Ex, PropCls/RS Tabs Set any Range Criteria on the Range Tab Click once on the Criteria Search icon
16.8 Parcel List Options:
Open Parcel List – Opens the Parcel List dialogue. Show Parcel List on Map – Displays the parcels from the loaded Parcel List on the map Add Selected Parcels to Parcel List – Adds all parcels selected on the map to the Parcel List
dialogue.
16.9 Import/Export Options:
Copy Map – Copies Map to the Clipboard to be pasted in other applications Save Picture of Map – Saves a bitmap image of the map to a user specified location Print – Maps, Labels and Parcel List Extract GIS and PAS data to Excel – Allows user to export specified data fields from PAS and the
GIS base layer.
74

Extract Mailing Information to Excel – Extracts the Parcel ID, Owner Name and Mailing information of selected parcels to Excel.
Set PAS Data Field from GIS Data – Imports data from GIS layer to PAS database.
75

17.0 Grievance Add-OnEnable the Grievance Add-On:
On the Main Menu, go to Options Select Maintain System Record Click Add-Ons Tab, go to Grievance Options Check Grievance Enabled Click Save, then click Close
Create, View or Modify a Grievance:
On the Main Menu, go to Parcel Select Modify Parcel Locate and open the parcel for which you want to enter the grievance Click on the Grievance Tab or Right click and select Grievance If there are any previously entered grievances, they will appear
To view or modify an existing grievance:
Double click the grievance
To create a new grievance:
Click New Grievance button, Enter New Grievance dialogue box opens:o Grievance Year will default to the current roll year (Next Year for Westchester logic)o Grievance Number will default to the next available grievance numbero Enter a representative code from the drop down list or add a New Representative using
the Add Representative Code button On the Parcel Information Tab:
o Ownership, mailing address, assessed values, and current Exemptions are auto-filled o Enter any Notes and/or Appearance Number (if your municipality pre-assigns the order
of petitioner appearances before the board)o Prevent Results from Updating Parcel prohibits PAS from updating the parcel
This feature is most often used if a decision involves multiple parcels
On the Petitioner Tab:o Petitioner is auto-filled as the current owner o If the owners are representing themselves, no representative information will be filled
in o Enter the Complaint Information o Choose the complaint category and complaint sub-reason o Enter the assessed value requested and\or any Exemptions
76
o Asking Land Value, Assessed Percent Claimed, and Full Market Value Claimed can be filled in but are not required
Multiple grievance filings on the same parcel:
You can enter an unlimited number of grievances on a parcel. Each filing has a different grievance number.
One grievance filed for multiple parcels (i.e. a condominium complex):
Enter the Grievance on one parcel, click Copy Grievance button Enter Destination Parcels dialogue box opens Click Add, the Locate a Parcel dialogue opens Select the parcels that should have this Grievance
o Hold down the Shift key and click the first and last parcels in a range o Hold down the Ctrl key and click individual parcels
The grievance number changes between the time of filing and the hearing:
Select the Grievance from the main Grievance screen Click Renumber Grievance button
o Enter the new grievance number, click OK
17.1.1 Recording the Results once the BAR has made a decision: Open the Grievance, click on the Results Tab Choose the disposition that applies to this case
o If the grievance was denied, you will be prompted to enter a denial reason code o If the grievance was granted, enter the assessed value or Exemption granted
Enter the votes of the board members and any notes pertaining to their decision (optional) Once you click Save, PAS will offer to automatically transfer the change to the main parcel
o If you choose to not update the parcel at this time, you can make the change manually or run a bulk update
If the petitioner grieved multiple items in the same filing:
Each item that was grieved appears in the grid on the Results Tab. Click on the corresponding item and enter the decision for that item separately.
77

To Bulk Update Grievance Results:
This will not update parcels that were marked to prevent updating.
On the Main Menu, go to System Select Grievance Bulk Update Click Start In the Printer dialogue box, select Print to File, click OK
o The Preview window openso Review the report, click Print or Close
17.2 Grievance Tables
To Add or Modify BAR Members:
On the Main Menu, go to Tables Select Grievance Tables
o Choose BAR Members
To Create or Modify the Disposition Codes:
On the Main Menu, go to Tables Select Grievance Tables
o Choose BAR Disposition Codes
To Create or Modify Denial Codes:
On the Main Menu, go to Tables Select Grievance Tables
o Choose BAR Denial Reason Codes
To Add or Modify Petitioner Complaint Category or Reason Codes:
On the Main Menu, go to Tables Select Grievance Tables
o Choose Petitioner Complaint Category or Reason Codes
78

17.3 Grievance Results Letters
To Create Grievance Results Letters:
If it is the first time printing the letters, it is highly recommended that you check the Trial Run box.
On the Main Menu, go to Reports Select Grievance Reports
o Choose Grievance Letterso Select the Letter Type Resultso Select the preferred Print Ordero Check the Grievance Results Type(s)o Enter the Grievance Yearo Select the remaining Optionso If you need to reprint letters, there is an override Reprint Letters on the Options Tab
Click on More Options Tab to print Labels, select your preferences Click on the Letters Tab
o Select the letter that you want to print o Click Print, you will be prompted to confirm you want to print the letters, click Yeso In the Print dialogue box, check Print to Fileo Click Print and review the letterso Once you are satisfied, remove the check from the Trial Run boxo Click Print
79

17.4 Grievance Summary ReportThe Grievance Summary Report produces a list of grievances in a simple format with grievance number, parcel ID, petitioner, and legal address or a detailed format with information about the complaint. The Report is based on the current grievance status, the representative, the complaint reason, and \ or the denial reason (if it was denied).
17.4.1 To access the Grievance Summary Report: Go to Reports on the Main Menu, select Grievance Reports Go to Grievance Summary Report
17.5 Grievance Results Audit Trail ReportThe Grievance Results Audit Trail Report produces a list of grievance results in a simple format sorted by parcel ID, user name or date. The Report can be generated for all Grievances in a Grievance Period, School and/or SWIS Code or filtered for a specific period of time, a specific parcel range and/or a specific user.
17.5.1 To access the Grievance Results Audit Trail Report: Go to Reports on the Main Menu, select Grievance Reports Go to Grievance Results Audit Trail Report
80
17.6 Small Claims17.6.1 To Create, View or Modify a Small Claim:
On the Main Menu, go to Parcel Select Modify Parcel Locate and open the parcel for which you want to enter the Small Claim Click on the Small Claim Tab or Right click, and select Small Claim If there are any previously entered Small Claims, they will appear
To view or modify an existing Small Claim:
Double click the Small Claim
To create a new Small Claim:
Click New Small Claim button
The Enter New Small Claim dialogue box opens:
Small Claim Year will default to the current roll year (i.e. Next Year for those using Westchester logic)
Small Index Number is the number assigned by the court Enter a representative code from the drop down list or add a New Representative using the Add
Representative Code buttonClick OK
On the Parcel Information Tab:
Ownership, mailing address, assessed values, and Information at the Time of the Small Claim are auto-filled
Enter any Notes and/or Grievance ResultsOn the Rep/Reason Tab:
the Petitioner is auto-filled as the current owner if the owners are representing themselves, no representative information will be filled in Enter the Complaint Information
Small Claim Tab:
Enter the Small Claim Information & ResultsAppraisal Tab:
Enter the summarized details of any appraisalsCalendar Tab:
Enter the summarized details for conferences, pre-trials and trials
81
Documents Tab:
Link pertinent documents
17.6.2 Making Notes for Parcels with Small Claims:There are two ways to make notes for parcels with Small Claims. One option is to use the Note field on the Parcel Information Tab for the Small Claim. The notes made in this field are associated with the Small Claim itself. The second option is to utilize the Notes Tab on the Add/Modify screen of the Sml Clm Tab. These Notes are associated with the parcel and not the specific Small Claim. The Notes Tab features three types of notes: Tickler, Regular and Value Change. These Notes can be assigned and given due dates.
17.6.2.1 To access the Notes Tab: On the Main Menu, go to Parcel Select Modify a Parcel Choose the Small Claims Tab Select the parcel for which you want to enter the Note (double click or highlight and click OK) The Small Claims Add/Modify screen opens, click on the Notes Tab Click New Note button In the Note grid, the Note #, Date Entered, Time Entered and Entered By fields are auto-filled
Complete the remaining fields
Click Save Note
17.6.3 Small Claims Summary Report
The Small Claims Summary Report produces a list of small claims in a simple format with index number, parcel ID, owner name, a legal address, representative, tentative amount and petitioner amount. The Report can be filtered by status and by representative.
17.6.3.1 To access the Small Claims Summary Report:
Go to Reports on the Main Menu, select Small Claims Reports Go to Small Claims Summary Report
17.6.4 Small Claims Calendar Report
The Small Claims Calendar Report produces a list of small claims in a simple format with index number, parcel ID, property class, school code, petitioner, representative, legal address, final assessment, small claim amount, the claim difference and the trial date. The Report can be filtered by date range and trial type.
82

17.6.4.1 To access the Small Claims Calendar Report:
Go to Reports on the Main Menu, select Small Claims Reports Go to Small Claims Calendar
17.7 Certiorari
17.7.1 To Create, View or Modify a Certiorari:
On the Main Menu, go to Parcel Select Modify Parcel Locate and open the parcel for which you want to enter the Certiorari Click on the Certiorari Tab or right click, and select Certiorari If there are any previously entered Certiorari, they will appear
17.7.1.1 To view or modify an existing Certiorari:Double click the Certiorari
17.7.1.2 To create a new Certiorari:Click New Certiorari button
The Enter New Certiorari dialogue box opens
Certiorari Year will default to the current roll year (i.e. Next Year for those using Westchester logic)
Certiorari Number is the number assigned by the court Enter a representative code from the drop down list or add a New Representative using the Add
Representative Code buttonClick OK
On the Parcel Information Tab:
Ownership, mailing address are auto-filled Enter Information at the Time of the Certiorari and any Notes and/or Grievance Results
On the Rep/Reason Tab:
The Petitioner is auto-filled with the current owner If the owners are representing themselves, no representative information will be filled in
83

Enter the Complaint Information Cert Info Tab:
Enter the Certiorari Information & ResultsAppraisal Tab:
Enter the summarized details of any appraisalsCalendar Tab:
Enter the summarized details for appraisal exchange, conferences, pre-trial conferences or memos and trials
17.7.2 Making Notes for Parcels with Certiorari
There are two ways to make notes for parcels with Certiorari. One option is to use the Note field on the Parcel Information Tab for the Certiorari. The notes made in that field are associated with the Certiorari itself. The second option is to utilize the Notes Tab on the Add/Modify screen of the Cert Tab. These notes are associated with the parcel and not the specific Certiorari. The Notes Tab features three types of notes: Tickler, Regular and Value Change. These notes can be assigned and given due dates.
17.7.2.1 To access the Notes Tab:
On the Main Menu, go to Parcel Select Modify a Parcel Choose the Certiorari Tab Select the parcel for which you want to enter the note (double click or highlight and click OK) The Certiorari Add/Modify screen opens, click on the Notes Tab Click New Note button In the Note grid, the Note #, Date Entered, Time Entered and Entered By fields are auto-filled Complete the remaining fields Click Save Note
17.7.3 Certiorari Summary Report
The Certiorari Summary Report produces a list of Certiorari in a simple format with index number, parcel ID, owner name, a legal address and assessed value requested. The Report can be filtered by status, representative, School code and SWIS code.
17.7.3.1 To access the Certiorari Summary Report:
84
Go to Reports on the Main Menu, select Certiorari Reports Go to Certiorari Summary Report
17.7.4 Certiorari Calendar Report
The Certiorari Calendar Report produces a list of Certiorari in a simple format with index number, parcel ID, property class, school code, petitioner, representative, legal address, final assessment, Certiorari claim amount, the claim difference and the trial date. The Report can be filtered by date range and trial type.
17.7.4.1 To access the Certiorari Calendar Report:
Go to Reports on the Main Menu, select Certiorari Reports Go to Certiorari Calendar
17.7.5 Certiorari Exposure Report
The Certiorari Exposure Report produces an extensive report displaying the total exposure of the municipality if all Certiorari are settled at the full asking value. The report displays per parcel and year, beginning with the earliest year which has an open Certiorari. Totals are displayed per year and as a grand total. The Report can be filtered by School Code and SWIS Code.
17.7.5.1 To access the Certiorari Exposure Report:
Go to Reports on the Main Menu, select Certiorari Reports Go to Certiorari History Report
Due to the amount of data provided in this Report, it is recommended that the Report be extracted to Excel. Additionally, the Report is most useful when the Current AV and Asking AV are displayed.
17.7.6 Certiorari Notes Report
The Certiorari Notes Report produces a list displaying the parcel ID and the associated notes made on the Certiorari Notes Tab. The report can be filtered by date entered or due, by the User Responsible or by the Transaction Code. The report can be set to show Tickler and/or Regular notes with Open and/or
85

Closed status. The report can be run for a specific time period, user ID range or specific Transaction Code. The report can be further limited to special School and SWIS codes.
17.7.6.1 To access the Certiorari Notes Report:
Go to Reports on the Main Menu, select Certiorari Reports Go to Certiorari Notes Report
86

18.0 Prorata Add-OnWhen an Exemption is removed from a parcel, PAS prompts the user to define whether the Exemption being removed should be prorated. With the PAS Prorata Add-On, users have the ability to calculate and recalculate proratas, produce reports of proratas for multiple collection cycles, produce reports on individual parcels, create letter merges and transfer prorata values to parcels for multiple collection cycles.
18.1 To Calculate or Recalculate Proratas:
On the Main Menu, go to Prorata Select Prorata Calculation
Under Options:
Choose the Collection Type from the drop down menu Deselect the levies you do not want to prorate Calculation Date auto-fills with today’s date Enter the Collection Start Month, Collection Start Day and Prorata Year (also the Collection Year) Clear Prorata Info is check by default. Clear Prorata Info clears and replaces the previous
calculations run for that collection cycle Click Start, the Print dialogue box opens Check print to file, click OK Preview dialogue opens with the Prorata Information Report Review the Report Print and\or Close
18.2 Prorata Information Report
On the Main Menu, go to Prorata Select Prorata List Choose the Collection Type Enter the Prorata Year (also the Collection Year) Click Print, the Print dialogue box opens Check Print to file, click OK Preview dialogue opens with the Prorata Information Report Review the Report Print and/or Close
Check Print Details to see a summary of each parcel.
87
18.3 Prorata Worksheets
On the Main Menu, go to Prorata Select Prorata Worksheets Choose the Collection Type Enter the Prorata Year (also the Collection Year) Click Print, the Print dialogue box opens Check print to file, click OK Preview dialogue opens with the Prorata Worksheets Review the Worksheets Print and/or Close
18.4 Prorata Value Transfer
For billing purposes, the Prorata values must be transferred to the Special Districts on parcels which they apply.
18.4.1 To Transfer Prorata Values:
On the Main Menu, go to Prorata Select Prorata Value Transfer Enter the Prorata Year (also the Collection Year) Choose the Collection Type Choose the Prorata Special District Code Check the Trial Run box Click Print, the Print dialogue box opens Check print to file, click OK Preview dialogue opens showing Prorata Amounts Transferred Report Review the Report to ensure the results Uncheck the Trial Run box Re-run the Report, click Print, the Print dialogue box opens Check Print to file, click OK Preview dialogue opens with the Prorata Amounts Transferred Report Print and/or Close
88
Co-op Rolls Add-on
Cooperative ownership is based on shares reflecting the individual owner’s equity in the cooperative’s real estate. The Co-op Roll Add-on is created for municipalities that need to manage data for multiple housing cooperatives.
The Coop Roll Add-on features tools to manage exemptions and assessed values based upon the equity of shares. Municipalities have the ability to provide cooperative management with reports breaking down the distribution of taxes based on the exemptions and equity of each owner.
Many of the functions of the Coop Roll Add-on directly mirror the functions of the greater PAS program. As such, the features specific to Coop Rolls are outline herein.
18.5 Co-op Building Maintenance
To Add a New Co-op:
On the Main Menu, select Coops, choose Coop Building Maintenance Click once on New Coop Enter the corresponding SBL for the Cooperative Parcel Enter the common name for the Cooperative Building Enter the total Assessment Enter the total Shares
To Add a New Co-op Unit(s) & Calculate Share Distributions:
On the Main Menu, select Parcels, choose Add a Parcel Enter the Cooperative Parcel ID including the Building and/or Unit number according the
numbering system adopted by your municipality Complete entering the applicable data for the Unit, including the Shares, Exemptions, etc. Once you have entered the desired Unit(s), return to the Main Menu Go to Coops, choose Coop Building Maintenance Click once on Update Coops (This calculates the distribution of the Assessment based on the Shares per unit.)
Transferring coop values to main rolls
On the Main Menu, select Coops, choose Transfer Values from Cooperative Roll to Main Roll Select the Assessment Year Select Trial Run under options
89
Click Start and the Printer Dialogue opens Select Print to File, click Print View the Trial Run Report to verify the results are what you desired If correct, uncheck Trial Run and repeat
18.5.1 Coop Tax Roll
To Copy the Tax Rates from the Main Roll to the Cooperative Roll
On the Main Menu, select Coops, choose Copy Tax Rates from Main Roll Enter the Assessment Year and select the Collection Type Click Copy Repeat for multiple Collections
Calculate Tax Bills
On the Main Menu, Select Coops, choose Calculate Tax Bills Select Collection Type Enter Collection # Choose your desired Options Click Start
Print Cooperative Tax Roll
On the Main Menu, Select Coops, choose Print Cooperative Tax Roll Select Collection Type Enter Collection # Click the Print button Select Print to file Click OK
90