Embed Size (px)
Citation preview
projects
step 1.
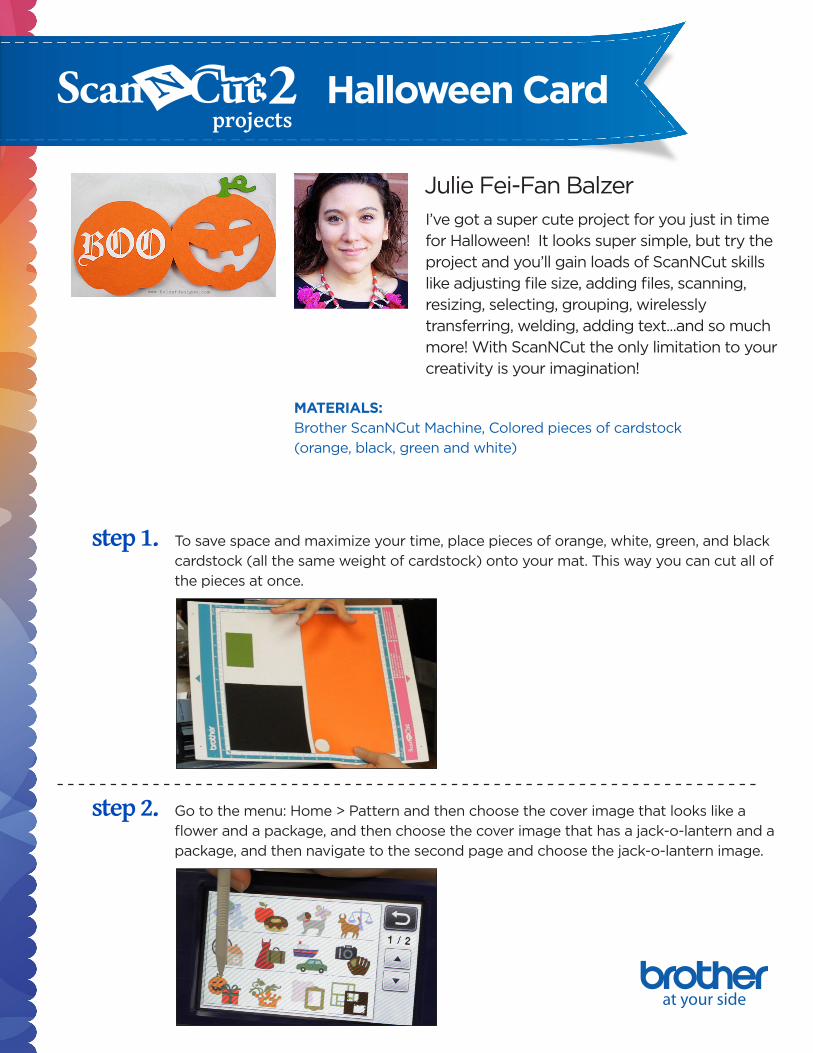
I’ve got a super cute project for you just in time for Halloween! It looks super simple, but try the project and you’ll gain loads of ScanNCut skills like adjusting file size, adding files, scanning, resizing, selecting, grouping, wirelessly transferring, welding, adding text...and so much more! With ScanNCut the only limitation to your creativity is your imagination!
Halloween Card
Julie Fei-Fan Balzer
MATERIALS: Brother ScanNCut Machine, Colored pieces of cardstock
(orange, black, green and white)
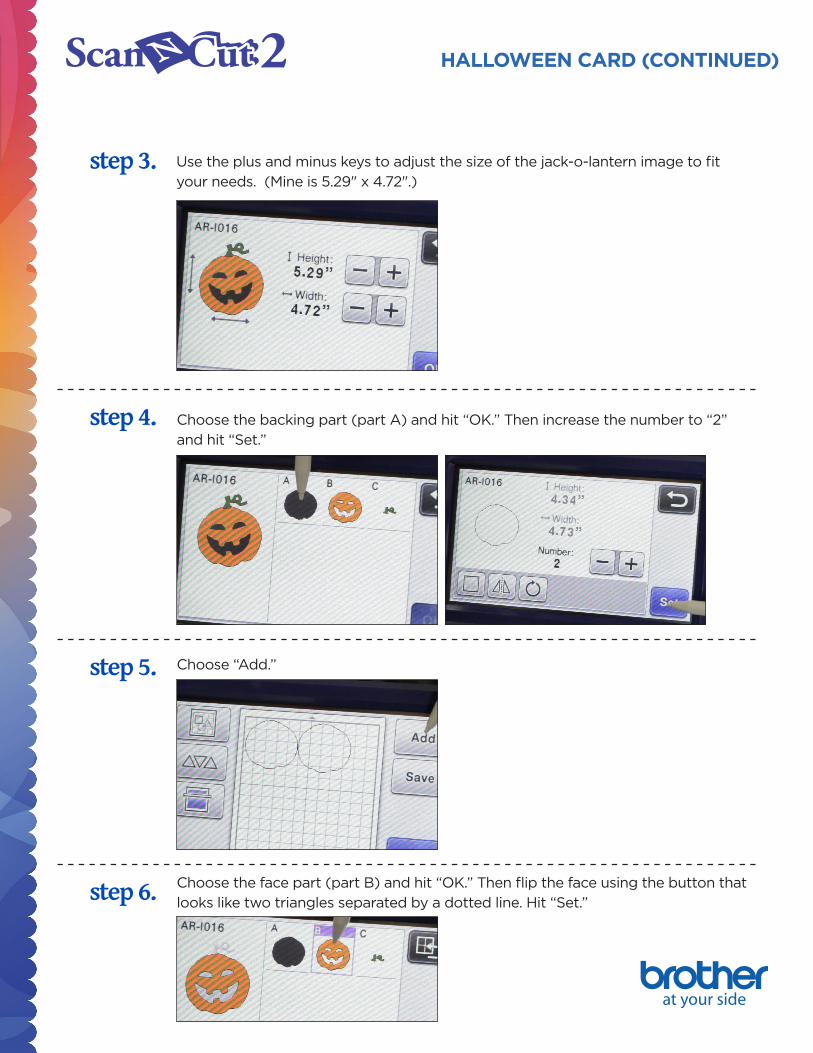
To save space and maximize your time, place pieces of orange, white, green, and black
cardstock (all the same weight of cardstock) onto your mat. This way you can cut all of
the pieces at once.
step 2. Go to the menu: Home > Pattern and then choose the cover image that looks like a
flower and a package, and then choose the cover image that has a jack-o-lantern and a
package, and then navigate to the second page and choose the jack-o-lantern image.
HALLOWEEN CARD (CONTINUED)
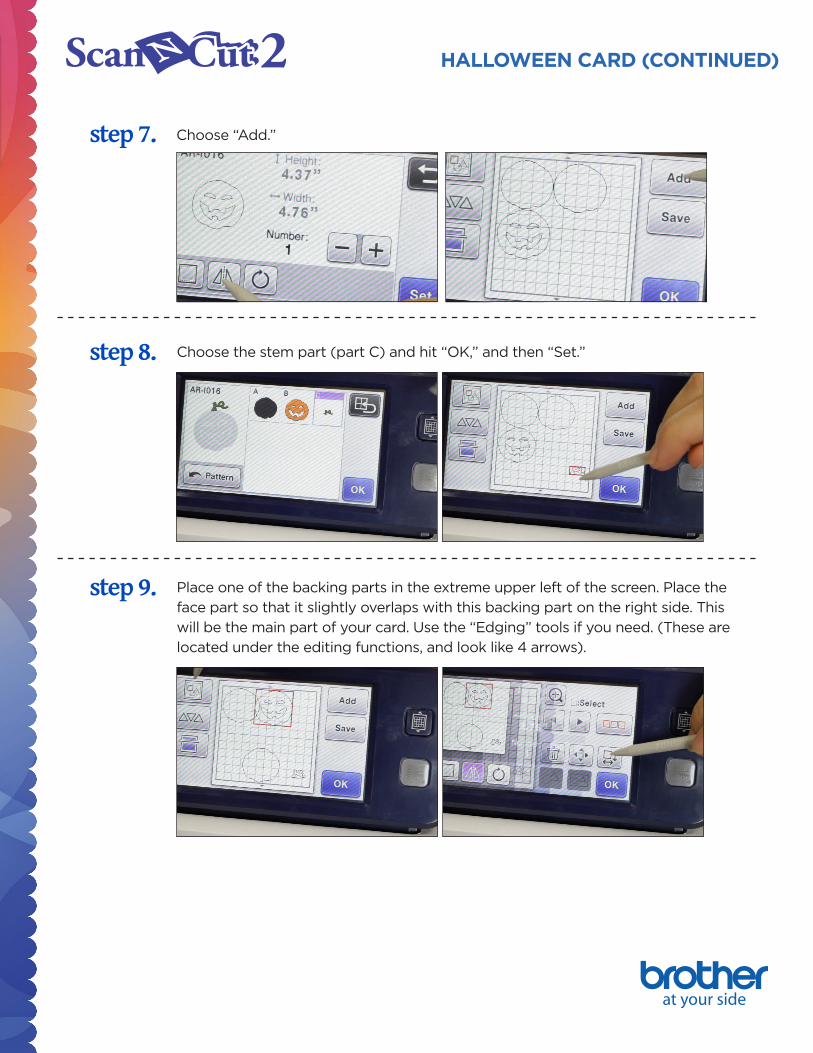
step 3. Use the plus and minus keys to adjust the size of the jack-o-lantern image to fit
your needs. (Mine is 5.29" x 4.72".)
step 4. Choose the backing part (part A) and hit “OK.” Then increase the number to “2”
and hit “Set.”
step 5. Choose “Add.”
step 6. Choose the face part (part B) and hit “OK.” Then flip the face using the button that
looks like two triangles separated by a dotted line. Hit “Set.”
step 7. Choose “Add.”
step 8. Choose the stem part (part C) and hit “OK,” and then “Set.”
step 9. Place one of the backing parts in the extreme upper left of the screen. Place the
face part so that it slightly overlaps with this backing part on the right side. This
will be the main part of your card. Use the “Edging” tools if you need. (These are
located under the editing functions, and look like 4 arrows).
HALLOWEEN CARD (CONTINUED)
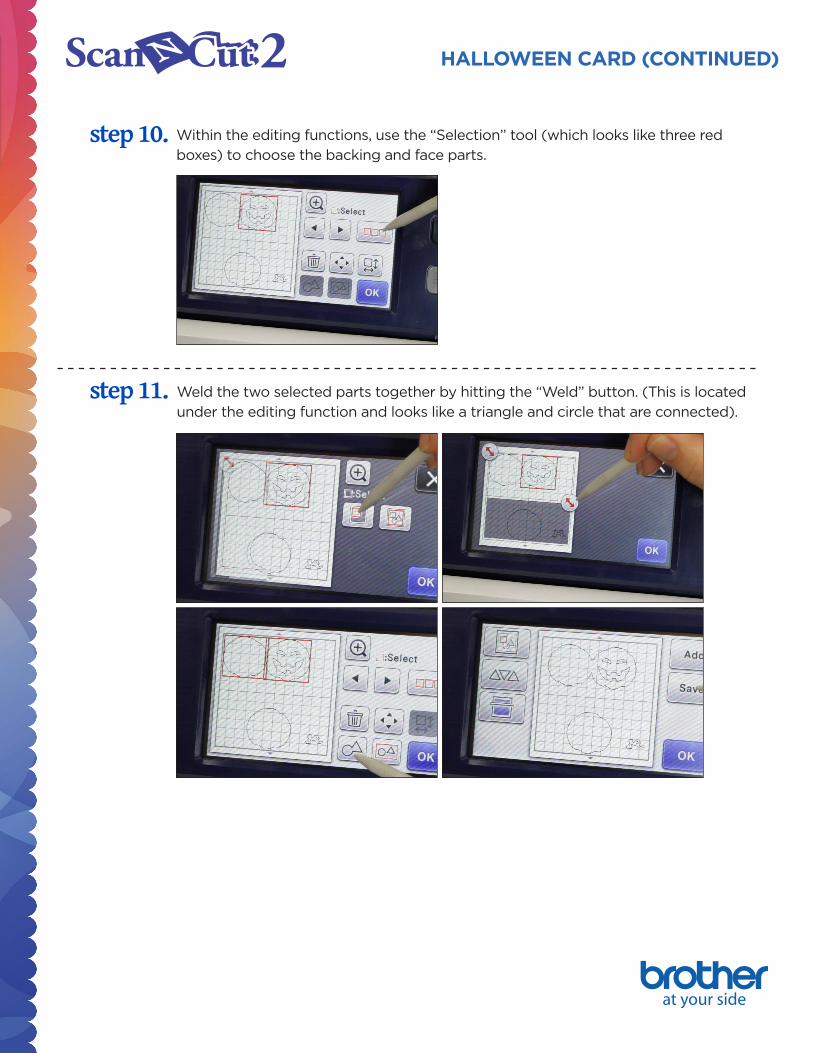
step 10. Within the editing functions, use the “Selection” tool (which looks like three red
boxes) to choose the backing and face parts.
step 11. Weld the two selected parts together by hitting the “Weld” button. (This is located
under the editing function and looks like a triangle and circle that are connected).
HALLOWEEN CARD (CONTINUED)
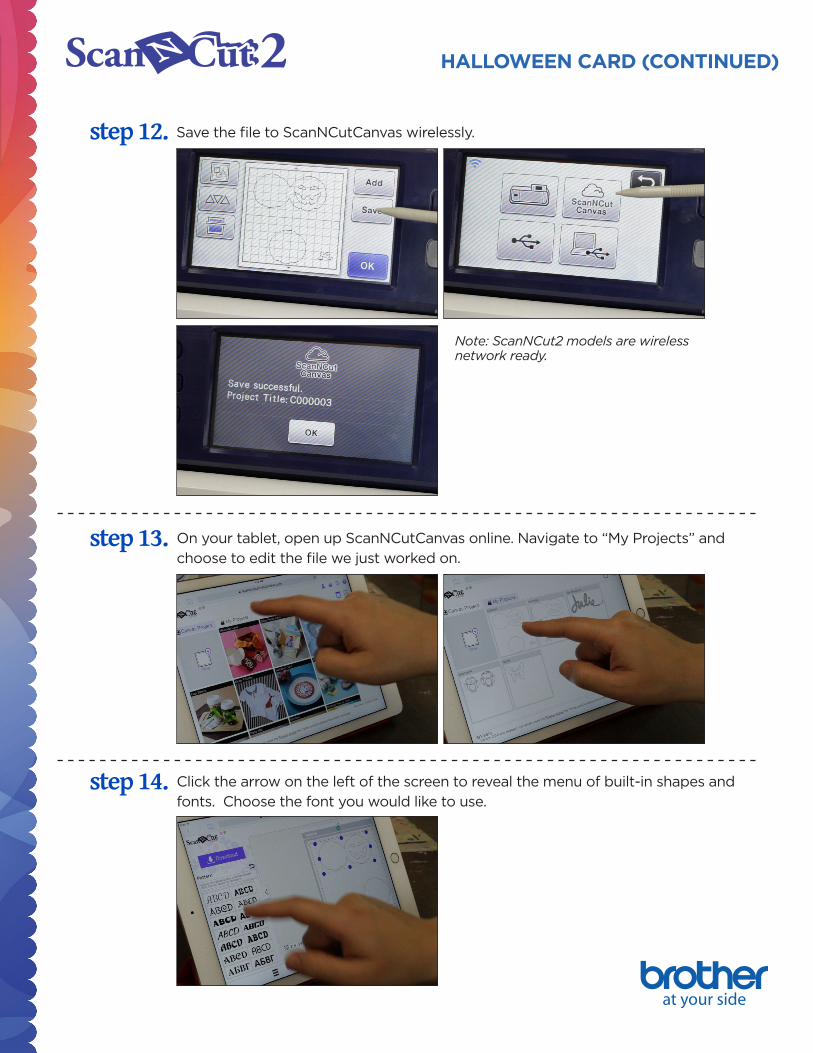
step 12. Save the file to ScanNCutCanvas wirelessly.
step 13. On your tablet, open up ScanNCutCanvas online. Navigate to “My Projects” and
choose to edit the file we just worked on.
HALLOWEEN CARD (CONTINUED)
step 14. Click the arrow on the left of the screen to reveal the menu of built-in shapes and
fonts. Choose the font you would like to use.
Note: ScanNCut2 models are wireless network ready.
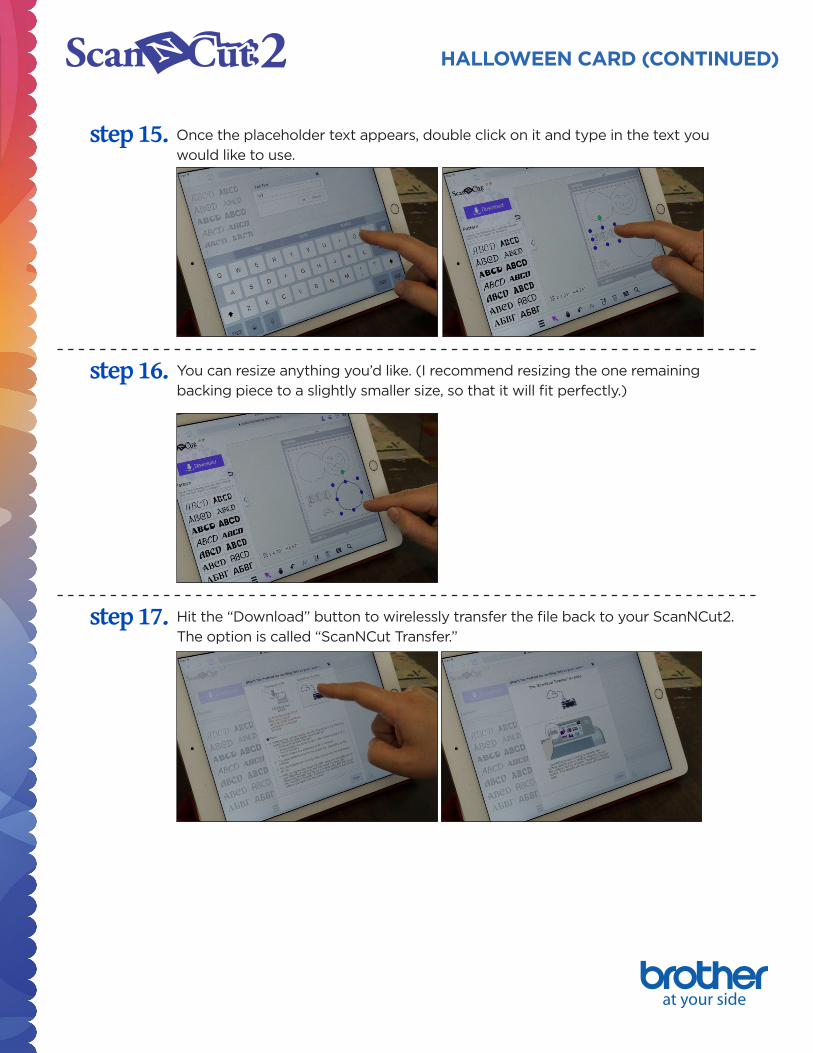
step 15. Once the placeholder text appears, double click on it and type in the text you
would like to use.
step 16. You can resize anything you’d like. (I recommend resizing the one remaining
backing piece to a slightly smaller size, so that it will fit perfectly.)
HALLOWEEN CARD (CONTINUED)
step 17. Hit the “Download” button to wirelessly transfer the file back to your ScanNCut2.
The option is called “ScanNCut Transfer.”
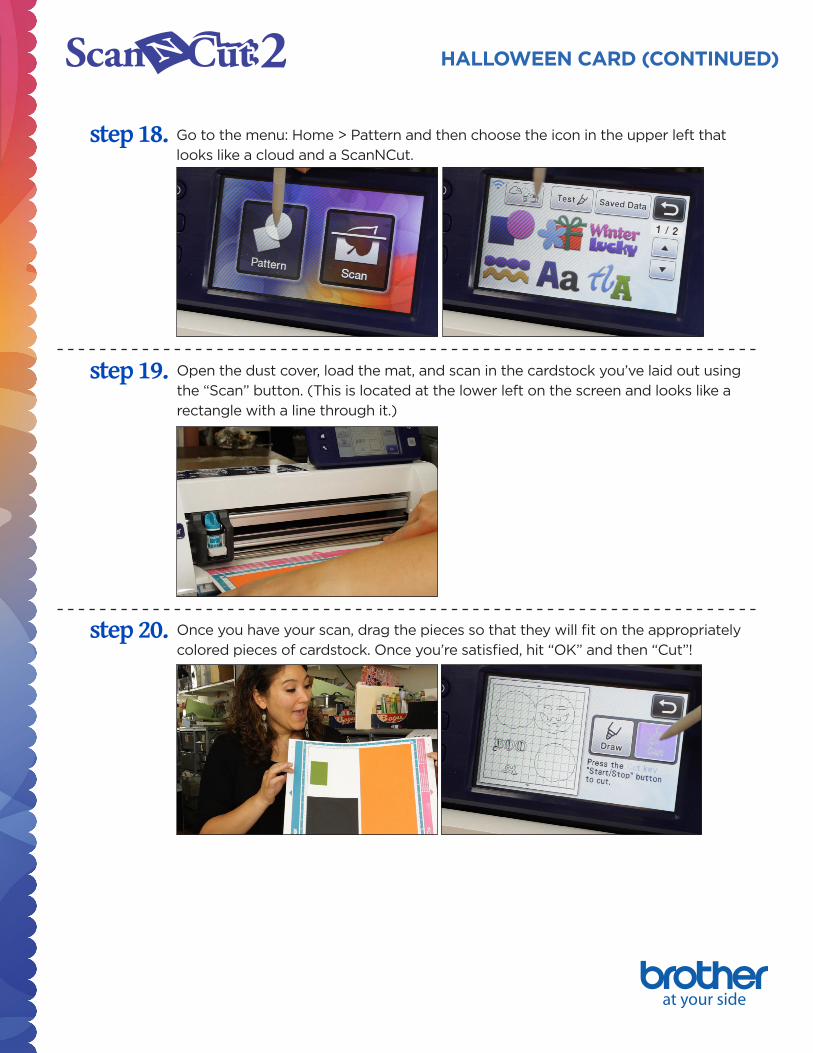
step 18. Go to the menu: Home > Pattern and then choose the icon in the upper left that
looks like a cloud and a ScanNCut.
step 19. Open the dust cover, load the mat, and scan in the cardstock you’ve laid out using
the “Scan” button. (This is located at the lower left on the screen and looks like a
rectangle with a line through it.)
HALLOWEEN CARD (CONTINUED)
step 20. Once you have your scan, drag the pieces so that they will fit on the appropriately
colored pieces of cardstock. Once you’re satisfied, hit “OK” and then “Cut”!

step 21. Unload the mat and pull all the pieces of the pumpkin card off of the mat.
step 22. Fold the main card in half where the two pieces meet.
HALLOWEEN CARD (CONTINUED)
step 23. Glue the backing into the card. Glue the stem to the top of the jack-o-lantern face.
Glue the sentiment onto the back of the card.