Embed Size (px)
Citation preview
Advanced Computer Security 2019
Department of Electrical and Information TechnologyLund University
Project: TPM
Learning goals:
• Introduce TPM usage concept.
• Understand TPM1.2 key hierarchy.
• Understand binding and sealing, and attestation.
• Understand key migration.
• Write a simple TPM application.
Computer Security(EITA25)
Advanced Computer Security(EITN50)
Web Security(EITF05)
Advanced Web Security(EITN41)
Cryptography(EDIN01)
Data Security(EITF55)
Helsingborg
version 2019-09-24
Version Comment2019-09-24 updated year numbers for 2019.2018-08-30 preliminary version for 2018.
Table 1: Document version history
Preparations
This project concerns a study of the use of the Trusted Computing Group(TCG) Trusted Plat-form Module (TPM). Currently, there are two versions of TPMs, the TPM1.2 and the TPM2.0.Although this project concerns TPM12 specifics it also is a general introduction to some of thetypical use of TPM functions that also return in the newer TPM201.
• Read the course slides,
• Get and glance through the TPM specifications, part1, [7], and part3, [9], (especially thedocument where the TPM commands are defined). Later you might need to lookup thedescription of some commands.
• Read the entire project description (this document) before you begin.
• Read the document http://www.eit.lth.se/fileadmin/eit/courses/eitn50/the_making_of_a_report.pdf about how to write the report.
If you use the virtual machines TPM1, TPM2 and TSS then there is no need to further configureor install additional software like TrouSerS. Only if you want to run the project in your ownenvironment you may have to install additional software packages.
Instructions for Project Approval
The project consists of a number of assignments that guide your work and you should use theassignment numbers in the answers in your report.
• In the report give clear indications with reference to the related assignment and questionnumbers when you write down your answers.
• Indicate the version date of this document upon which you base your work an report.
• Document your work with logs and printouts.
• IMPORTANT: Send your report to [email protected] and MARK ITWITH YOUR GROUP NUMBER, add also the name of the group members.
• The first part of the project contains A type assignments and the second part contains theB type assignments that you need to do to qualify for a grade 4.
Document change history
Table 1 shows updates of this document. See to it that you have always the latest. Old versionsof this report can be found using the link structure below. http://www.eit.lth.se/fileadmin/eit/courses/eitn50/Project_TPM/Project_TPM_2018_08_30.pdf
1TPM1.2 uses different ways to authenticate commands; OIAP, OSAP, and DSAP. Although essential, we donot study these as their specifics are no longer present in TPM2.0 which has a much more flexible way to implementcommand authentication through so-called policies.
2
version 2019-09-24 2 TROUSERS
1 Introduction
The TPM is a security chip that has been specified by the Trusted Computing Group (TCG) toallow a PC/server platform to implement several security functions that increase the trustwor-thiness of the (processing) platform. In particular, the TPM provides functions to implement averified or measured boot, secure remote attestation of platform configuration, and secure storageof sensitive data. When developing software that makes use of the TPM one needs access toTPM functionality. Using here an actual physical TPM, albeit most realistic, is problematic asthe TPM has limitations when it comes to bringing it to a pristine state after one has conductedsome experiments, it security mechanisms can lock out users, the non-volatile storage has a limitedlifespan, and certain operations are limited by the use of so-called localities.
In this project you will use an environment for testing TPM application software with an TPMemulator. This emulator can be easily be completely reset or one can save its state if one laterwants to redo a test under the same conditions. The project considers the TPM version 1.2. Thisversion is now being phased out but since it has concepts in common with the newer TPM version2.0 (short TPM 2.0) and since there are much more mature tool chains freely available the version1.2 TPM is still the most useful learning vehicle.
The TPM emulator provides an almost accurate functional emulation of the TPM. Of courseit responses faster than the real, physical, TPM that has a very slow bus interface and a veryconstraint processor. The emulated TPM can, like the real TPM, lock itself. That can be rathercatastrophic with a real TPM but here we just can remove the file with the TPM state and wecan start all over again.
2 TrouSerS
The TCG has specified several APIs to use the TPM. The lowest level of API is formed by thecommand and response messages that are sent to/back from the TPM. This calls TCG the TCGDevice Drivery Library (TDDL). A more convenient API is formed by the TCS API which liftsthe low level API into a standard function call API. This API allows users to use all the TPMfunctions but leaves many details to the user to solve, for example, the handling of the key blobswhen they have to be stored outside the TPM. Also some use cases of the TPM, like the useof unbind/bind requires the implementation of functions outside the TPM, in this case the bindoperation because the TPM only implements the unbind operation. For that reason there is evena higher level API, the TSP. The combination of TCS, TSP, and driver library TDDL is calledthe TCG Software Stack, TSS, see Figure 1. A very frequently used implementation of TSS isthe open source TrouSerS. In our project we will use TrouSers. TrouSerS supports the use of areal physical TPM, a local emulated TPM or even a remote TPM. We use the latter setup andhave the remote TPM as an emulated TPM running on another machine. Here we use a virtualmachine or mini system like a Raspberry Pi that we connect via TCP/IP.
TrouSerS has been developed initially by IBM for use under Unix. Although some Windows andJava ports of TrouSerS exist (in part), TrouSerS is a more Unix inclined software stack. Microsofthas developed an own TSS. It has a slightly different setup. Under Windows the TDDL is replacedby a TBS and a TBS.dll2. The TCS layer is an adoption of the TCG, see course lecture slides.
Figure 2 shows the setup of your the project environment. Although it is possible to connect to aphysical TPM we will only use the TPM emulator. The TPM emulator keeps its internal state intoa file 00.permall. If you want to totally reset the TPM you can just delete this file. The file is inthe directory specified by the environment variable TPM_PATH=/home/pi/tpm/tpm4720/tpmstate.
1This project uses exercise material developed in the Master Thesis ”Emulation of TPM on Raspberry Pi” byMarcus Sundberg and Erik Nilsson. [1].
2Windows 8.1 and Windows 10 have a TBS.dll that handles TPM version 1.2 and TPM 2.0 and differs from theTBS.dll in Windows 7 and older.
3

version 2019-09-24 3 PROJECT ASSIGNMENTS - PART A
Figure 1: TCG Software Stack (TSS)
3 Project Assignments - Part A
In the project assignments you will try out different TPM functions and at the and write aTPM application that you developed yourself. Reading the TPM specifications and the TrouSerSAPI description is very useful but since the information is rather overwhelming we take thisapproach to lead you to the point that you can write an TPM application yourself and have abasic understanding how the TPM V1.2 works.
A set of command lines utilities designed to demonstrate various TPM functionality comes bundledwith the IBM TPM emulator. These utilities can be used to demonstrate the following functions:
• Key creation
• Key migration
• File encryption
• Authentication
• Attestation
As explained before, to develop an actual TPM application we use the TrouSerS implementationof the TSS Stack. Development of such an application using TrouSerS will be described in thelast two (type B) assignments. But before we do that we get you going and we go through someof the basic steps of using the TPM.
3.1 Assignment 1: Setting up the environment
For this project you find three prepared virtual machines called TSS, TPM1, and TPM2. The TSS
machine is to be seen as an instance of a PC or a server. On this server we use a TPM but inour case this TPM is emulated and not a physical TPM and actually not located on the machineitself. The emulated TPM is found on TPM1 and TPM2. The virtual machines are placed on avirtual network via which they can communicate without being part of the lab computer network.Start machines TSS and TPM1 on your computer using VirtualBox, login on TSS as user ”tss” usingpassword ”lab” and check that you can ping the TPM1 machine which has IP address 10.0.2.14.
4
version 2019-09-24 3 PROJECT ASSIGNMENTS - PART A
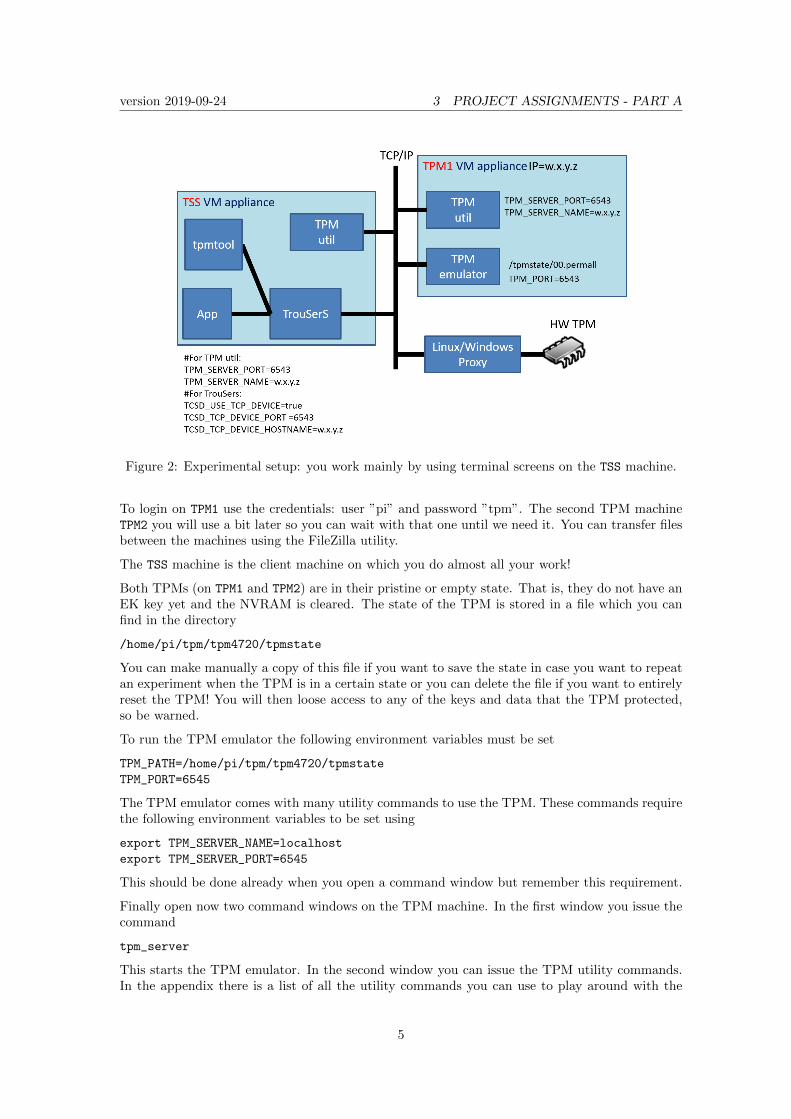
Figure 2: Experimental setup: you work mainly by using terminal screens on the TSS machine.
To login on TPM1 use the credentials: user ”pi” and password ”tpm”. The second TPM machineTPM2 you will use a bit later so you can wait with that one until we need it. You can transfer filesbetween the machines using the FileZilla utility.
The TSS machine is the client machine on which you do almost all your work!
Both TPMs (on TPM1 and TPM2) are in their pristine or empty state. That is, they do not have anEK key yet and the NVRAM is cleared. The state of the TPM is stored in a file which you canfind in the directory
/home/pi/tpm/tpm4720/tpmstate
You can make manually a copy of this file if you want to save the state in case you want to repeatan experiment when the TPM is in a certain state or you can delete the file if you want to entirelyreset the TPM! You will then loose access to any of the keys and data that the TPM protected,so be warned.
To run the TPM emulator the following environment variables must be set
TPM_PATH=/home/pi/tpm/tpm4720/tpmstate
TPM_PORT=6545
The TPM emulator comes with many utility commands to use the TPM. These commands requirethe following environment variables to be set using
export TPM_SERVER_NAME=localhost
export TPM_SERVER_PORT=6545
This should be done already when you open a command window but remember this requirement.
Finally open now two command windows on the TPM machine. In the first window you issue thecommand
tpm_server
This starts the TPM emulator. In the second window you can issue the TPM utility commands.In the appendix there is a list of all the utility commands you can use to play around with the
5

version 2019-09-24 3 PROJECT ASSIGNMENTS - PART A
TPM. The utilities that are also installed on the TSS machine.
On the TSS machine you use TrouSerS and this requires you to set TCSD_USE_TCP_DEVICE,TCSD_TCP_DEVICE_PORT and TCSD_TCP_DEVICE_HOSTNAME as well as TPM_SERVER_NAME.
export TCSD_USE_TCP_DEVICE=true
export TCSD_TCP_DEVICE_PORT=6545 (default port)
export TCSD_TCP_DEVICE_HOSTNAME=10.0.2.15 (the actual IP number of the TPM machine)
export TPM_SERVER_NAME=10.0.2.15 (the actual IP number of the TPM machine)
Check these environment variables by entering the env command. If necessary, replace the IPaddress with the actual IP address of the TPM1 machine which you can check via the ifconfig
command on the TPM machine.
Remark 1: If you want the do ”copy and paste” from the virtual machine and your host, youshould enable this feature in the VirtualBox application. Google if needed.3
Remark 2: If you want to (re)compile the code of the emulator or the utility programs read theinstructions in the appendix section.
3.2 Assignment 2: Getting the TPM ready for use
3.2.1 Introduction
First we have to do a number of basic steps to get the TPM working. The first step is to activatethe TPM. A TPM that has been newly installed on the system is normally deactivated. The TPMis activated in the BIOS (which means that the BIOS must be adopted to use the TPM!). Thenext step is to ensure that the TPM contains an EK key pair and a certificate for the EK. It shouldbe the manufacturer that creates the EK and certificate at manufacturing but unfortunately thisis not always the case. If the EK is not created at manufacturing it has to be created and certifiedas the second step in the TPM provisioning. For our purpose we ignore the EK certificate.
The third step is to take ownership of the TPM. It is in this step where the SRK is created.Two passwords have to be set in this step. One for the owner of the TPM and one for the SRK.The owner password is needed when, for example, the TPM settings are changed and the SRKpassword is required when the SRK is used to store other keys.
3.2.2 Instructions and Questions
Before we can do anything with the TPM we must be able to send commands to it end receive itsresponses.
1. An actual hardware TPM is enabled and disabled in the BIOS. Before a connection to thesoftware TPM is made, the BIOS process has to be simulated. This is done by issuing thetpmbios command on the TSS machine (the search path for executables is already configuredto this command). This does a TPM_Startup, which is the TPM command used to eitherdeactivate the TPM, start up the TPM with a reset of the PCR registers, or start up theTPM with a restore of PCR values from their saved state [2].
Note: tpmbios has to be reentered (on the TSS machine) every time the TPM emulator isstarted.
2. Next we establish a connection from the TSS machine to the TPM emulator on machineTPM1 over TCP/IP. Towards this end we start a deamon process on the TSS machine byissuing in a command window on its own only for this purposesudo -E /usr/local/sbin/tcsd -e -f
The ”-E” option is important so the environment variables are correctly passed to the sudoenvironment.
3Enable copy and paste video: https://www.youtube.com/watch?v=_DZbZ3kuzf4.
6
version 2019-09-24 3 PROJECT ASSIGNMENTS - PART A
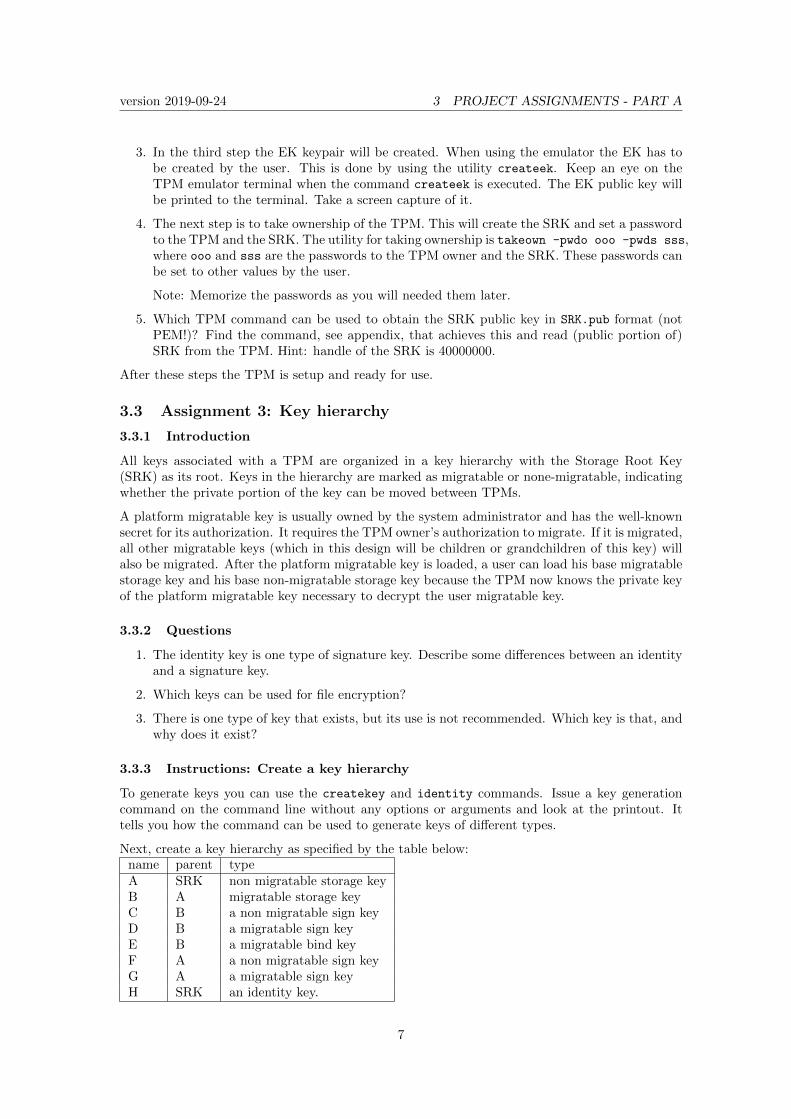
3. In the third step the EK keypair will be created. When using the emulator the EK has tobe created by the user. This is done by using the utility createek. Keep an eye on theTPM emulator terminal when the command createek is executed. The EK public key willbe printed to the terminal. Take a screen capture of it.
4. The next step is to take ownership of the TPM. This will create the SRK and set a passwordto the TPM and the SRK. The utility for taking ownership is takeown -pwdo ooo -pwds sss,where ooo and sss are the passwords to the TPM owner and the SRK. These passwords canbe set to other values by the user.
Note: Memorize the passwords as you will needed them later.
5. Which TPM command can be used to obtain the SRK public key in SRK.pub format (notPEM!)? Find the command, see appendix, that achieves this and read (public portion of)SRK from the TPM. Hint: handle of the SRK is 40000000.
After these steps the TPM is setup and ready for use.
3.3 Assignment 3: Key hierarchy
3.3.1 Introduction
All keys associated with a TPM are organized in a key hierarchy with the Storage Root Key(SRK) as its root. Keys in the hierarchy are marked as migratable or none-migratable, indicatingwhether the private portion of the key can be moved between TPMs.
A platform migratable key is usually owned by the system administrator and has the well-knownsecret for its authorization. It requires the TPM owner’s authorization to migrate. If it is migrated,all other migratable keys (which in this design will be children or grandchildren of this key) willalso be migrated. After the platform migratable key is loaded, a user can load his base migratablestorage key and his base non-migratable storage key because the TPM now knows the private keyof the platform migratable key necessary to decrypt the user migratable key.
3.3.2 Questions
1. The identity key is one type of signature key. Describe some differences between an identityand a signature key.
2. Which keys can be used for file encryption?
3. There is one type of key that exists, but its use is not recommended. Which key is that, andwhy does it exist?
3.3.3 Instructions: Create a key hierarchy
To generate keys you can use the createkey and identity commands. Issue a key generationcommand on the command line without any options or arguments and look at the printout. Ittells you how the command can be used to generate keys of different types.
Next, create a key hierarchy as specified by the table below:name parent typeA SRK non migratable storage keyB A migratable storage keyC B a non migratable sign keyD B a migratable sign keyE B a migratable bind keyF A a non migratable sign keyG A a migratable sign keyH SRK an identity key.
7
version 2019-09-24 3 PROJECT ASSIGNMENTS - PART A
Hint: Are all combinations possible? If not, why?
Make a drawing of your key hierarchy and motivate your solution. Look at the utility commandsin the appendix section. The keys can be loaded into the TPM by using the command loadkey.When loading a key keep track of the key handle the TPM gives to the key.
3.4 Assignment 4: Key Migration
3.4.1 Introduction
By using key migration the user can transfer the migratable keys to another system. This is usefulfor backups and when the TPM is transferred to another system. If a parent key is migrated allthe children of this key are migrated as well. When doing a key migration, a blob is created whichis then transferred to the target.
3.4.2 Questions
1. Is it possible for a migratable key to be the parent of a non-migratable key?
2. Which command is the first to be executed when performing a key migration?
3. Give a short description of the command TPM_ConvertMigrationBlob.
4. Which TPM command loads the migrated keys into the TPM?
5. Is it the TPM or the TSS that handles the transfer of the migration blob?
Hint: Use the document ”TPM Main Part 3 Commands” ([9]) to find more information about theTPM commands.
Migration in TPM1.2 can be realized in various ways. There are procedures by which it is possibleto secure that migration only can happen between real TPMs, that is, the private portion of thekey is never exposed in cleartext outside the TPM. Since these procedures have been replaced inTPM2.0 we will not study them.
3.4.3 Instructions: Key migration in the TPM emulator
In this assignment we will show how migratable keys can be migrated. We migrate a key fromthe TPM on machine TPM1 to the TPM on machine TPM2. We use again the emulator demoutilities on the TSS machine.
Now you have to start the virtual machine TPM2 and prepare it for use. You may have to removethe state of the TPM2 so you start from a conditions where you know the state of this TPM. Notealso the IP address of TPM2. We switch between the two TPMs by changing the TPM_SERVER_NAME
and TCSD_TCP_DEVICE_HOSTNAME environment variables, e.g.,
export TPM_SERVER_NAME=<TPM2 ipaddress>
export TCSD_TCP_DEVICE_HOSTNAME=<TPM2 ipaddress>
On the TSS machine you have to restart the tcsd deamon after you modified these two environmentvariables.
We use the keys and the blobs of Assignment 3, specifically keys A through E. First create amigration key blob on TPM1 for B that can be saved and then reloaded on TPM2. Migrate thekeys using the utility migrate. Change both environment variables to the TPM2 machine andreload the key on TPM2 using the utility loadmigrationblob.
After we migrated key B to TPM2 try to load key C, D, and E into TPM2. Explain what happens(why does it work or not work?).
8
version 2019-09-24 3 PROJECT ASSIGNMENTS - PART A
Hints:4 Warning: when working with two TPMs it is advised to do that from different directorieson the TSS machine. When issuing TPM commands files will be written in the directory fromwhich you issue the commands and it may happen that you overwrite existing files.
migrate -hp <parent handle in hex> -pwdp <parent password>
-pwdo <TPM owner password>
-hm <handle of migration key> or -im TPM2_STORAGEKEY_FILENAME.key
-pwdk <TPM2_STORAGEKEY_PASSWORD>
-pwdm <MIGRATION_PASSWORD of STORAGEKEY>
-ik STORAGEKEY_FILENAME.key
-ok migrationblob.bin
loadmigrationblob -hp TPM2_STORAGEKEY_HANDLE -pwdp TPM2_STORAGEKEY_PASSWORD
-if migrationblob.bin
3.4.4 Questions
1. Do the above migration and document in your report.
2. There are other ways to migrate keys. When do you use a key of type TPM_KEY_USAGE =TPM_Migrate (Hint: look in [8])
3. What is the rewrap option of the migrate command used for?
3.5 Assignment 5: Extending values to PCRs
3.5.1 Introduction
The PCRs (Platform Configuration Registers) are used to save SHA-1 hash digests of applications.This capability is used for both trusted boots and attestations. By calculating and recording adigest of an application, it is possible to assess if the application is authentic or not. If one singlebit is changed in the application, the hash digest will differ.
3.5.2 Questions
1. Describe one TPM command that can be used to extend a SHA-1 digest to a PCR.
2. Describe which TPM command that can be used to read a PCR value.
3.5.3 Instructions: SHA-1 calculation and PCR extending using the TPM emulator
This assignment will show how a TPM can calculate a SHA-1 digest of an application and thenextend this to a PCR. This is done by using the commands:
TPM_SHA1Start
TPM_SHA1Update
TPM_SHA1CompleteExtend
The first command starts the SHA-1 calculation, and if the file is too large then it passes theremaining calculation to the second command. The last command finishes the calculation andextends the result into a PCR. The demo function that can be used to illustrate these commandsis sha -if <filename> -ix <PCR index>. Calculate the hash value of, for example, the binaryfile tpmbios and extend it to the PCR 11. Keep an eye on the TPM emulator terminal. Read thePCR value using the utility pcrread when the calculation is done and put in the report.
4Because of limitations in the implementation in the migrate commands we cannot migrate a migratable storagekey such that SRK becomes its parent.
9
version 2019-09-24 3 PROJECT ASSIGNMENTS - PART A
3.6 Assignment 6: File encryption
There are four commands that handle the encryption and decryption of data in the TPM. Threecommands are supported by the TPM: TPM_UnBind, TPM_Seal, and TPM_UnSeal. The fourthcommand is supported by the TSS, TSS_Bind.
3.6.1 Questions
1. Why is TSS_Bind a TSS command, and not a TPM command?
2. Give some differences between Data binding and Data sealing.
3. Can a key used for data sealing be migrated to another TPM?
3.6.2 Instructions: Data binding using the TPM emulator
Create a migratable binding key using the command createkey on TPM1. Then encrypt a filewith some text using the .pem file created by createkey. The command used for this is bindfile.(Note that the key does not have to be loaded into the TPM). Then try to decrypt the file usingthe command unbindfile. Note that the command loadkey has to be executed before decryptionis possible. Why doesn’t the key have to be loaded inside the TPM when encrypting, but it hasto be when decrypting?
Now migrate the binding key to TPM2 and see if you can decrypt the file there too. Explain whatyou observe.
3.6.3 Instructions: Data Sealing using the TPM emulator
Create a storage key and load it into the TPM using the commands createkey and loadkey. Seala text file using the storage key with the command sealfile. Unseal the file using the commandunseal. Test if you can do a sealing with a legacy key, a binding key or a signing key. If not,why?
Now migrate the storage key to TPM2 and see if you can unseal the file there too. Explain whatyou observe.
3.7 Assignment 7: TPM Authentication
3.7.1 Introduction
TPM authentication is used to bring answer to the question “Is this it really TPM X?” we areinteracting with and not a hostile system claiming to be a TPM.
Signature based:The goal of this assignment is to show how a TPM can authenticate itself by digitally signing afile using a signature key, and then letting the target verify the signature using the public part ofthe signature key pair. If the signature is valid then this proves that the TPM knows the privatekey of the signature key pair and this proves that the TPM is who he claims to be.
Decryption based:The goal of this assignment is to show how a TPM can authenticate itself by decrypting a file.If a TPM encrypts a file using its public storage key, then only the user that has the private keyportion of the key pair is able to decrypt the file. If a user can decrypt the file, then this userpossesses the private key and is therefore the correct user.
3.7.2 Questions
1. In the above, could the verifyfile command have been done by another TPM?
10

version 2019-09-24 3 PROJECT ASSIGNMENTS - PART A
2. Which TPM command is used to decrypt the file?
3. Can the decryption based authentication be done by using data sealing instead of binding?
3.7.3 Instructions
Do the following and document in you report.
1. Sign a file with some text in it by loading a signature key into the TPM1 and use this key tosign the file using the utility signfile. Let TPM2 verify the signature by using the utilityverifyfile.
2. Encrypt a file by creating a binding key and load it into the TPM and then encrypt a textfile using the command bindfile Then decrypt it using the command unbindfile.
3.8 Assignment 8: Attestation
Attestation is a mechanism used to obtain a proof that the right software was loaded (by recordingits hash in a PCR). The goal of attestation is to prove to a remote party that the loaded applicationsoftware is authentic and thus trustworthy. This is useful by for example banks who now couldask the user to show that he has the correct versions of the banking software. Just like withauthentication, attestation can either be signature based or decryption based.
3.8.1 Signature based attestation
Create an AIK (Attestation Identity Key) using the command identity. Use it to quote a PCRvalue, like the PCR with the hash digest of tpmbios. The verification of the quote will be doneautomatically. Hints:
identity -pwdo <owner password> -la <a label>
-pwds <SRK password>
-ok <key filename>
quote -v -hk <key handle in hex> -bm <pcr hash digest> -pwdk <key password>
Document the steps in your report. The -v option in the quote command is needed to see thesignature since it is not printed on the screen otherwise.
Note: because the bash shell will hijack your quote command you should instead of just quote
enter the full path of the quote command, i.e. /home/tss/tpm/tpm4720/libtpm/utils/quote. .
3.8.2 Decryption-based attestation
With a decryption based attestation we bind a PCR value to a storage key. The key can only beused for decryption if the PCR value that was bound to the key is unchanged or has obtained thesame value after a restart of the system. So if a program has been changed, then the PCR valuewill be different and then the key cannot be used for decryption.
Create a text file and extend the hash digest to a PCR. Create a storage key and bind it to thePCR value using the command createkey (-ix is used to specify the PCR index). Load the keyinto the TPM. Seal the text file using the storage key with the command sealfile. Unseal thefile using the command unsealfile (Should be successful).
Change the text in the text file and extend the PCR with the new hash digest of the text file. Trydecrypt the file again (should not work, PCR value bound to the storage key has changed). Clearownership of the TPM using the command forceclear.
Document the steps in your report..
11
version 2019-09-24 4 ASSIGNMENTS - PART B
4 Assignments - Part B
4.1 Assignment 9: Your first TPM application
Now you have worked with some of the basic functions it is time to write your own TPM appli-cation. You need to use here TrouSerS. Remember that on the TSS machine TrouSers is alreadyinstalled. Recall to have the proper environment variables set.
export TCSD_USE_TCP_DEVICE=true
export TCSD_TCP_DEVICE_PORT=6545 (default port)
export TCSD_TCP_DEVICE_HOSTNAME=10.0.2.15 (replace with the actual IP number)
You have to clear TPM1 on the machine TPM1. Simply stop the tpmserver program, remove the00.permall file and restart tpmserver. Do not forget on TSS to issue the tpmbios and createek
commands to initialize TPM and generate the EK. This puts TPM1 in a well-defined state.
Take command of the TPM using tpm_tools by writing tpm_takeownership -z -y in the ter-minal. Use the examples found in the section ”Developing TPM applications” and write yourown TPM application. For example generate random numbers using Tspi_TPM_GetRandom or thevalue in a PCR using Tspi_TPM_PCRRead.
Note1: Instead of brutally clearing the TPM you can also use the following sequence.
forceclear
tpm_setenable -e -f
After that you can run the tpm_takeownership -y -z command.
Note2: In case you do not have experience writing C code you find in Section 4.3 a small codesnippet to print an array of BYTES.
4.2 Assignment 10: Programmed setup of SRK
In the first part we used the command line to interact with the TPM and created an SRK. Inthis assignment you have to create the endorsement key and SRK programmatically using anapplication that you write. Expand the code of your first applications so it will create the EK andan SRK. Make printouts of the public key values of these two keys using the following hexdumproutine that writes to you screen.
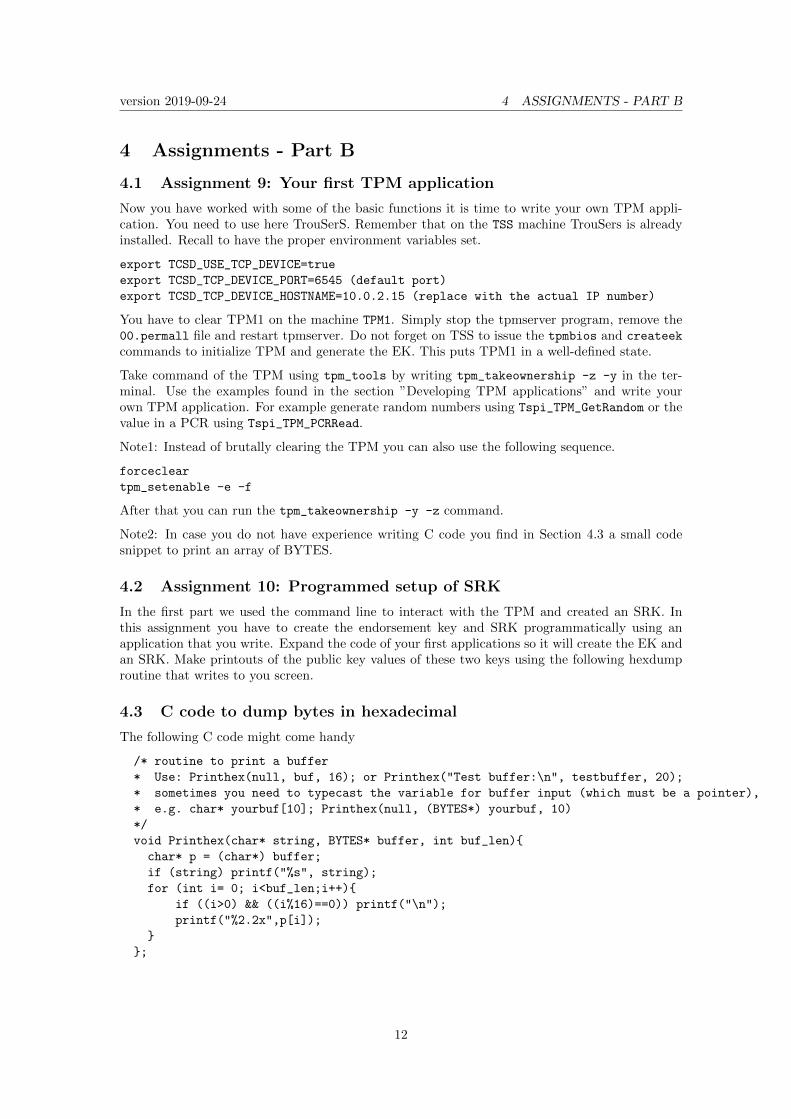
4.3 C code to dump bytes in hexadecimal
The following C code might come handy
/* routine to print a buffer
* Use: Printhex(null, buf, 16); or Printhex("Test buffer:\n", testbuffer, 20);
* sometimes you need to typecast the variable for buffer input (which must be a pointer),
* e.g. char* yourbuf[10]; Printhex(null, (BYTES*) yourbuf, 10)
*/
void Printhex(char* string, BYTES* buffer, int buf_len){
char* p = (char*) buffer;
if (string) printf("%s", string);
for (int i= 0; i<buf_len;i++){
if ((i>0) && ((i%16)==0)) printf("\n");
printf("%2.2x",p[i]);
}
};
12
version 2019-09-24 5 DEVELOPING TPM APPLICATIONS
References
[1] Sundberg Marcus, Nilsson, Erik, Emulation of TPM on Raspberry Pi, MSc Thesis LundUniversity, December 2014.
[2] Challener David,Yoder Kent,Catherman Ryan,Sanord David, Van Doorn Leendert. A prac-tical guide to trusted computing, IBM Press, Jan 2008, page 63.
[3] Challener David,Yoder Kent,Catherman Ryan,Sanord David, Van Doorn Leendert. A prac-tical guide to trusted computing, IBM Press, Jan 2008, page 79.
[4] Challener David,Yoder Kent,Catherman Ryan,Sanord David, Van Doorn Leendert. A prac-tical guide to trusted computing, IBM Press, Jan 2008, page 81.
[5] Challener David,Yoder Kent,Catherman Ryan,Sanord David, Van Doorn Leendert. A prac-tical guide to trusted computing, IBM Press, Jan 2008, page 304.
[6] IBM software tpm at sourceforge. http://sourceforge.net/projects/ibmswtpm/.
[7] Part 1 - Design Principles, TPM Main Specification Level 2 Version 1.2, Revision 116
[8] Part 2 - Structures of the TPM, TPM Main Specification Level 2 Version 1.2, Revision 116
[9] Part 3 - Commands, TPM Main Specification Level 2 Version 1.2, Revision 116
[10] Challener, David. An introduction to programming the tpm. https://www.cylab.cmu.edu/tiw/slides/challener-TPM.pdf.
[11] TCG. Tss 1 2 errata a-final.pdf page 182.
[12] TCG. Tss 1 2 errata a-final.pdf page 191.
[13] TCG. Tss 1 2 errata a-final.pdf page 232.
5 Developing TPM applications
5.1 Sample code
As mentioned before when developing TPM application, ones uses normally the TSS library. ForTPM1.2 TCG has released a specification of the TSS and a package with C header files. It ishowever up to each vendor to develop their own TSS. One TSS that is free and open source isTrouSerS as mentioned before. When writing TPM applications on a high level the TSP layerin the TSS architecture is used. This will provide a useful API for easy TPM programmingand make the application responsible for key management, memory usage and error handling. Asimple TrouSerS application typically is given in Listing 1 and can be downloaded via this linkhttp://www.eit.lth.se/fileadmin/eit/courses/eitn50/Project_TPM/sample.c.
5.2 The basic TSPI commands
These are the basic steps that are needed to issue commands to the TPM. It requires the TSPIcommands:
Tspi Context Create: This command tells the TSP to generate a new context handle for theapplication. This command must be used since there can be more TPM application runningon the same machine, so this context is used by TSP to keep track of each application. Italso provides functions for resource management and freeing of memory. The handle to thecreated context object is saved in TSS HCONTEXT hContext [11], [3].
Tspi Context Connect: This command connects the TSP context to a TCS provider. The localTCS is represented by Null as seen in the code. If the TPM is not activated on the systemthen this command will return TSS E NO CONNECTION. If the TPM is not activated then
13

version 2019-09-24 5 DEVELOPING TPM APPLICATIONS
Listing 1: A simple template for a TPM app [2] .
#inc lude<s t d i o . h>#inc lude<s t r i n g . h>#inc lude<s t d l i b . h>#inc lude<sys / s t a t . h>#inc lude<sys / types . h>#inc lude<t s s / plat form . h>#inc lude<t s s / t s s d e f i n e s . h>#inc lude<t s s / t s s t y p ed e f . h>#inc lude<t s s / t s s s t r u c t s . h>#inc lude<t s s / t s p i . h>#inc lude<t r ou s e r s / t r ou s e r s . h>#inc lude<t s s / t s s e r r o r . h>#de f i n e DEBUG 1// Macro f o r debug messages#de f i n e DBG(message , tResu l t ) { i f (DEBUG) p r i n t f (” ( Line%d , %s ) %sreturned 0x%08x . %s .\n” ,\
LINE , f u n c , message , tResult ,\( char ∗) T r sp i E r r o r S t r i n g ( tResu l t ) ) ; }
// MAIN entry po inti n t main ( i n t argc , char ∗∗ argv ){
TSS HCONTEXT hContext=0;TSS HTPM hTPM = 0 ;TSS RESULT r e s u l t ;TSS HKEY hSRK = 0 ;TSS HPOLICY hSRKPolicy=0;TSS UUID SRK UUID = TSS UUID SRK ;// By de f au l t the SRK s e c r e t i s 20 zero bytes// takeownership −zBYTE wks [ 2 0 ] ;memset (wks , 0 , 2 0 ) ;// At the beg inning// Create context and get tpm handler e s u l t =Tspi Context Create (&hContext ) ;DBG(” Create a context \n” , r e s u l t ) ;r e s u l t=Tspi Context Connect ( hContext , NULL) ;DBG(”Connect to TPM\n” , r e s u l t ) ;r e s u l t=Tspi Context GetTpmObject ( hContext , &hTPM) ;DBG(”Get TPM handle \n” , r e s u l t ) ;// Get SRK handle// This opera t i on need SRK s e c r e t when you takeownership// i f takeownership −z the SRK i s wks by de f au l tr e s u l t=Tspi Context LoadKeyByUUID (
hContext ,TSS PS TYPE SYSTEM,SRK UUID,&hSRK) ;
DBG(”Get SRK handle \n” , r e s u l t ) ;r e s u l t=Tspi GetPol icyObject (hSRK, TSS POLICY USAGE, &hSRKPolicy ) ;DBG(”Get SRK Pol i cy \n” , r e s u l t ) ;r e s u l t=Tsp i Po l i c y S e tS e c r e t ( hSRKPolicy ,TSS SECRET MODE SHA1,20 , wks ) ;DBG(” Tsp i Po l i c y S e tS e c r e t \n” , r e s u l t ) ;// INSERT TPM COMMANDS HERE:. . .// END OF APP// Free memoryr e s u l t = Tspi Context FreeMemory ( hContext , NULL) ;DBG(” Tspi Context Free Memory\n” , r e s u l t ) ;r e s u l t = Tspi Context Close ( hContext ) ;DBG(” Tspi Context Close \n” , r e s u l t ) ;r e turn 0 ;
14

version 2019-09-24 5 DEVELOPING TPM APPLICATIONS
it is recommended to end the program after this command and activate the TPM beforeexecuting again [11], [4].
Tspi Context GetTpmObject: After a TCS connection is made in the command Tspi Context Connect,then this command is used to retrieve a handle to the TPM object [4].
Tspi Context LoadKeyByUUID: This command creates an object of a key and loads it into theTPM. All information about the key is handled by the TCS. In the initial step the SRK isloaded into the TPM with this command.
Tspi GetPolicyObject: This command is used to locate the current authorization policy associ-ated with the context [5].
Tspi Policy SetSecret: This command is used to create a policy object of the authorizationdata (owner password), and returns a handle for this object [13].
Note in particular the policy commands and policy objects. They are essential. When the TPMis initialised the user may test its functionality by running for example:Tspi TPM GetRandom, which returns a random number of a specified size. Freeing allocated mem-ory is done with the command: Tspi Context FreeMemory Last command to be used is thecommand that closes the context: Tspi Context Close The TPM application can easily be com-piled with GCC. The command is [4]:gcc -o trousersApp trousersApp.c -ltspi -Wall
This gives you the executable trousersApp.
5.3 Install TPM software
This section is only for those that want to do their project in their own environment instead ofusing the TPM1, TPM2, and TSS virtual machines. If you use the TPM1, TPM2, and TSS virtualmachines you do not have to install any additional TPM software; all is present.
In order to build and install the Software TPM by IBM in the TPM machine, there is a buildscript to automate the process. See Section 4.4. There are two parameters the user can configure.The default setting are
#version
export TPM_V=tpm4720
#install path
export TPM_INSTALL_PATH=/...
In order to build the Software TPM, some packages need to be installed on the TPM system:libtool, automake, libssl-dev, openssl. 5. These are already installed on both machines.Now simply run build.sh in a terminal shell. The build script compiles the Software TPM at thedefined location of choice (if you have the the permission to write at the location of course).
Many distributions support TrouSerS and tpmtools so they can easily be installed then. ForDebian based distributions use:
sudo apt-get install trousers
However it is not difficult to built them yourself. Download TrouSerS from SourceForge. Buildand install it with the following commands:
sh bootstrap.sh
configure {enable-debug
make
sudo make install
When setting up TrouSerS, the first step is to add the line:
5Run sudo apt-get install libtool automake libssl-dev openssl in a terminal shell.
15

version 2019-09-24 6 TPM EMULATOR UTILITY COMMANDS
remote_ops = seal,unseal,registerkey,unregisterkey,loadkey,
createkey,sign,random,getcapability,unbind,quote,readpubek,
getregisteredkeybypublicinfo,getpubkey,selftest
in /usr/local/etc/tcsd.conf
Next step is to initialise the environment variables. Since TrouSerS will communicate with theTPM over TCP. Check that the following environment variables are set (use of TPM1)
export TCSD_USE_TCP_DEVICE=true
export TCSD_TCP_DEVICE_PORT=6545 (default port)
export TCSD_TCP_DEVICE_HOSTNAME=10.0.2.15 (replace with the actual IP number)
However in the TrouSers version 1.333 there is a bug which blocks the remote access of TrouSersvia IP. Also not all TPM commands are possible. The course web there is a version of the file thatshould be used instead so you should replace the original one with this file before you compile andinstall or you just issue make again and do sudo make install after you replaced the file.
5.4 IBM emulator install shell
#!/bin/bash
# required stuff
#apt-get install libtool automake libssl-dev openssl
# versions
export TPM_V=tpm4720
# install path
export TPM_INSTALL_PATH=/...
cd $TPM_INSTALL_PATH
mkdir $TPM_V
cd $TPM_V
# download and extract
wget -c http://downloads.sourceforge.net/project/ibmswtpm/$TPM_V.tar.gz
tar -zxvf $TPM_V.tar.gz
# build
cd tpm
make --file=makefile-ts
cd ../libtpm
./autogen
./configure
make
# clean up
cd ..
find . -name "*.o" -type f -delete
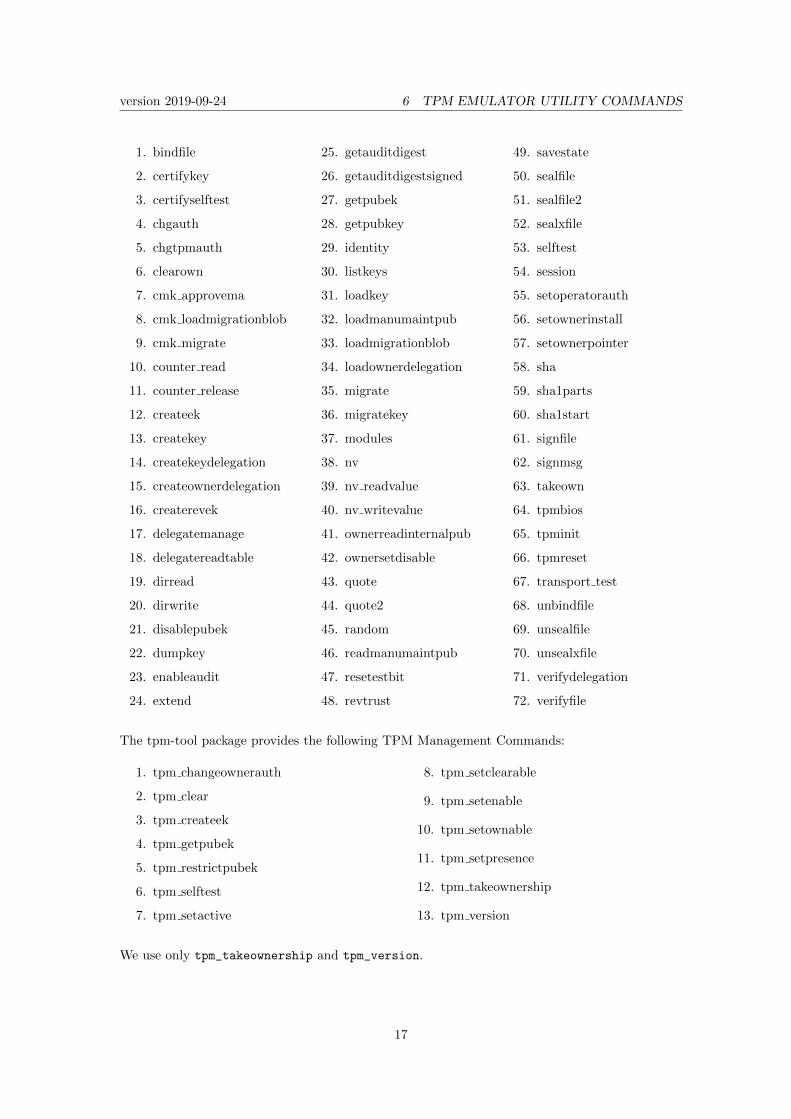
6 TPM emulator utility commands
There are to sets of utility commands. One set comes with the TPM emulator and the secondcomes with the tpm-tool package. The commands from the emulator we only use in the beginning.The tpm-tool commands use the TrourSers library and thus TrouSerS must be setup.
Note: For most of the utility commands below you get an explanation how to use the commandif you enter the command without any options or arguments.
16
version 2019-09-24 6 TPM EMULATOR UTILITY COMMANDS
1. bindfile
2. certifykey
3. certifyselftest
4. chgauth
5. chgtpmauth
6. clearown
7. cmk approvema
8. cmk loadmigrationblob
9. cmk migrate
10. counter read
11. counter release
12. createek
13. createkey
14. createkeydelegation
15. createownerdelegation
16. createrevek
17. delegatemanage
18. delegatereadtable
19. dirread
20. dirwrite
21. disablepubek
22. dumpkey
23. enableaudit
24. extend
25. getauditdigest
26. getauditdigestsigned
27. getpubek
28. getpubkey
29. identity
30. listkeys
31. loadkey
32. loadmanumaintpub
33. loadmigrationblob
34. loadownerdelegation
35. migrate
36. migratekey
37. modules
38. nv
39. nv readvalue
40. nv writevalue
41. ownerreadinternalpub
42. ownersetdisable
43. quote
44. quote2
45. random
46. readmanumaintpub
47. resetestbit
48. revtrust
49. savestate
50. sealfile
51. sealfile2
52. sealxfile
53. selftest
54. session
55. setoperatorauth
56. setownerinstall
57. setownerpointer
58. sha
59. sha1parts
60. sha1start
61. signfile
62. signmsg
63. takeown
64. tpmbios
65. tpminit
66. tpmreset
67. transport test
68. unbindfile
69. unsealfile
70. unsealxfile
71. verifydelegation
72. verifyfile
The tpm-tool package provides the following TPM Management Commands:
1. tpm changeownerauth
2. tpm clear
3. tpm createek
4. tpm getpubek
5. tpm restrictpubek
6. tpm selftest
7. tpm setactive
8. tpm setclearable
9. tpm setenable
10. tpm setownable
11. tpm setpresence
12. tpm takeownership
13. tpm version
We use only tpm_takeownership and tpm_version.
17
version 2019-09-24 7 LOCATION OF THE VM IMAGES
7 Location of the VM images
The originals of the VM images TSS, TPM1, and TPM2 can be found as zipped files on the coursedisk which should be mounted as S: on a lab computer in the PROJ3 directory. Copy the imagesfrom there to your (lab) machine, unpack them in an directory of your choice from which you wantVirtualBox to load the images. Remember that VirtualBox will store the data in the directorythat sort of reflects the state of the VM machine. Also snapshots are placed there.
WARNING: After your done with the project you should remove the images. Note that storingan image on the desktop makes it a part of your profile and thus, due to the size, will cause anincrease in your login time if the profile is not present on the machine you login.
18


![I C A Work in Progress - Trusted Computing Group€¦ · [2] TCG TSS 2.0 TPM Command Transmission Interface (TCTI) API Specification [3] TCG TSS 2.0 Marshaling/Unmarshaling (MU) API](https://img.pdfslide.us/doc/110x75/5ec89d72b531cf0b9b5a4ed3/i-c-a-work-in-progress-trusted-computing-group-2-tcg-tss-20-tpm-command-transmission.jpg)