Embed Size (px)
Citation preview

Project Based Learning
tm0001.v1.indd 1 2/8/12 11:59 AM

tm0001.v1.indd 2 2/8/12 11:59 AM

Design and Coaching Guide
Expert Tools for
Innovation and Inquiry
for K–12 Educators
Thom markham
Project Based Learning
tm0001.v1.indd 3 2/8/12 11:59 AM

© 2012 by Thom Markham
ISBN 978-1-61623-361-7
HeartIQ PressSan Rafael, California
produced by wilsted & taylor publishing servicesProject manager Christine Taylor
Copy editor Melody Lacina
Designer and compositor Yvonne Tsang
Proofreader Andrew Joron
Printed in Canada by Transcontinental Printing
tm0001.v1.indd 4 2/8/12 11:59 AM

CONTENTS
Acknowledgments ix
Introduction. PBL: A Bridge to the FutureNext Steps for Project Based Learning x
Improving PBL xi
From Projects to PBL xii
Teacher as Coach xiii
Using This Guide xv
PART 1. GeT ReAdy foR PBL
Six Tasks for PBL Teachers
1. Establish a “PBL-Friendly” Culture
Start with Drive, Passion, and Purpose
1. Build on Trust and Care 3
2. Redefine Rigor 4
3. Create the Right Conditions 5
4. Learn from the Gamers 6
5. Design Projects That Matter 7
6. Expect More 8
✽ Teaching Innovation: The Right to Be Wrong 10
2. Teach the Heart of Your Discipline
Choose Depth before Coverage
1. Take Charge of Standards 13
2. Frame Projects with Concepts 14
3. Prepare for Information Gaps 16
4. Use Standards-Based Grading 17
5. Embrace the Information Age 19
✽ Teaching Innovation: Hold Technology to a Standard 19
tm0001.v1.indd 5 2/8/12 11:59 AM

3. Coach for Performance
Show Every Student How to Get Better
1. Open the Lines of Communication 23
2. Know the Coach’s Roles 24
3. Use Coaching Protocols 24
4. Break Down Skills into Steps 26
5. Teach the Power of Goal Setting 27
✽ Teaching Innovation: Why People Succeed 28
4. Teach Teamwork
Collaborate for a Purpose
1. Turn Groups into Teams 31
2. Design Your Teams 32
3. Train Your Teams 33
4. Use Teams to Build Character, Culture, and Community 34
5. Prepare for Outliers 35
✽ Teaching Innovation: Motivating the Facebook Generation 35
5. Guide the Inquiry
Distinguish PBL from Discovery Learning
1. Know Exactly What You Expect from PBL 39
2. Establish Benchmarks 40
3. Anchor Expectations 40
4. Manage Through Assessment 42
5. Make Critical Thinking Explicit 43
6. Bring Back Argument 44
7. Envision Innovative Performance 44
✽ Teaching Innovation: Visible Thinking 45
6. Lead the Way
Be a PBL Champion
1. Think Beyond One Project 47
2. Sustain PBL 49
3. Collaborate on Quality 49
4. Institute a Knowledge Management System 51
5. Integrate PBL into Technology 52
6. Go Global 53
✽ Teaching Innovation: Online Projects 55
tm0001.v1.indd 6 2/8/12 11:59 AM
PART 2. desiGn The PRojecT
Four Steps to Powerful Projects
7. Identify the Challenge
Make the Problem Meaningful
1. Begin with an Authentic, Creative Idea 59
2. Decide the Scope of the Challenge 60
3. Design an Interdisciplinary Project 61
4. Raise the Stakes 61
5. Offer Choice and Challenge 62
✽ Teaching Innovation: Finding Exemplars 63
8. Craft the Driving Question
Give Your Project a “North Star”
1. Turn the Challenge into a Question or Problem Statement 65
2. Reframe Concepts and Essential Questions 66
3. Refine the Question for Authenticity and Depth 67
4. Analyze the Question with Students 67
✽ Teaching Innovation: Protocols for “Voice and Choice” 68
9. Start with Results
Bring the Project into Focus
1. Imagine a Dramatic End 73
2. Empower Your Teams 74
3. Create a Teaching Plan 74
4. Design Concepts into the Plan 76
5. Prune the Project 76
✽ Teaching Innovation: Global-Age Skills 77
10. Build the Assessment
Define Success
1. Differentiate the Five Types of Performance 81
2. Choose the Right Assessment Tool 82
3. Score the Thinking 83
4. Grade the Project 84
5. Answer the Driving Question 85
✽ Teaching Innovation: Assessing Creativity 85
tm0001.v1.indd 7 2/8/12 11:59 AM
PART 3. MAnAGe The PRocess
Three Keys to Exceptional Results
11. Enroll and Engage
Expect Students to Do the Work
1. Set the Hook 91
2. Describe the Why of the Project 91
3. Emphasize Career Readiness 92
4. Refine the Driving Question—Again 92
✽ Teaching Innovation: Love of Learning 93
12. Focus on Quality
Build Collective Knowledge Through Collaboration
1. Prepare the Teams 97
2. Insist on Norms 98
3. Empower Students to Coach One Another 99
4. Challenge the Teams 100
5. Value Beautiful Work 101
✽ Teaching Innovation: The Value of Critique 101
13. End with Mastery
Make Learning Memorable
1. Plan for Exhibitions and Presentations 105
2. Reflect on Performance and Learning 106
3. Reteach If Necessary 106
✽ Teaching Innovation: Parents as Learning Partners 107
PLAnninG TooLs
Project Design Cycle Planning Form (Secondary) 110
Project Design Cycle Planning Form (Elementary) 121
Project Schedule 132
Index of Online Folders 136
tm0001.v1.indd 8 2/8/12 11:59 AM

ix
ACKNOWLEDGMENTS
Project based learning (PBL) should be seen as a philosophy of teaching and learning rather than as another educational strategy. It is a blueprint or framework for how educa-tion will be organized in the future, and the field has been enriched by many sources over the last ten years, as minds around the world have tried to envision how inquiry-based learning can succeed in the unfolding global age.
The contributors, as we would expect, include experts and practitioners in education who must grapple with standards and skills as the industrial system fades. But PBL can fulfill its promise only by tapping expertise from elsewhere. Questions of relevance, stu-dent engagement, and student readiness are the domain of psychologists and youth spe-cialists. Techniques for coaching for peak performance, developing leaders, and helping teams collaborate and communicate come from high-performing industries. All of these sources are reflected in this Design and Coaching Guide.
I first began practicing PBL in 1996. Along the way I have worked with many students, nearly three thousand teachers, and numerous organizations committed to PBL. I’ve been exposed to hundreds of articles, books, blogs, and ideas. Here I would like to acknowl-edge a number of them.
I am grateful to my colleagues at the Buck Institute for Education. Through the Insti-tute, I had the opportunity to be the principal author of the Project Based Learning Hand-book: A Guide to Standards-Focused Project Based Learning for Middle and High School Teachers. This collaborative book helped define the field of PBL, and it also allowed me to think through and organize my ideas on PBL.
PBL teachers and aspiring PBL teachers continue to earn my respect. I return from nearly every workshop with the same impression: Teachers want to adapt their teaching and curriculum to meet the needs of today’s students. Often, the system constrains them. But their instincts are sound.
I also want to acknowledge schools that work. Models of excellence are emerging everywhere. Particularly, I salute Envision Schools in San Francisco and High Tech High in San Diego. These schools light the way to a postindustrial system.
tm0001.v1.indd 9 2/8/12 11:59 AM

INTRODUCTION
PBL: A Bridge to the FutureNext Steps for Project Based Learning
Imagine a day when a student comes home from school and one parent asks, “What did you do at school today?” And the child answers, “The teacher tried something new today. She called it a ‘lecture.’ It’s something they used to do in school at the beginning of the century.”
As the world moves forward, so must education—and eventually lecture and direct instruction may be long-forgotten remnants of a prior age, while project based learning (PBL) becomes the preferred teaching method worldwide.
We’re not there yet. Perhaps we won’t get there, given the arrival of a digital world, the shift to information as a commodity, and unforeseen ways of organizing instruction for young people. No one knows.
But the sudden acceleration in the number of teachers using PBL over the first decade of the twenty-first century is not an accident or idle trend. Teachers are searching for ways to get ahead of the curve of change and prepare students for a world exponentially different from that of the 1990s, let alone the previous century. Even the early years of this century now seem dated.
Why the growing popularity of PBL? First, it teaches doing as well as knowing. Stu-dents acquire knowledge, but they also apply what they learn to solve authentic problems and produce results that matter. Most important, well-crafted PBL offers an extended, active, learning challenge that today’s students find satisfying and engaging.
Second, PBL offers teachers the opportunity to teach, observe, and measure the growth of real-world skills. To succeed at PBL, students must practice and demonstrate the skills necessary in the workplace or in any environment that requires self-starting, self-managing, and skillful individuals. In fact, PBL can be defined as an extended learning process that uses inquiry and challenge to stimulate the growth and mastery of skills.
Finally, PBL refocuses education on the student, not on the curriculum. Despite the fact that students live as digital natives in a one-click, real-time world, the current
x
tm0001.v1.indd 10 2/8/12 11:59 AM

inTroducTion xi
approach to knowledge acquisition still rewards the mastery of bits and bytes of data from a bygone era. PBL is a natural fit for meeting the vital goal of teaching students how to be self-empowered learners in an on-demand environment.
iMPRovinG PBL
While successful and increasingly popular, PBL has yet to adapt fully to the needs of the global generation of youth. Projects still tend to focus on teaching content rather than on acquiring skills and the habits of inquiry. Also, teachers are reluctant—or do not know how—to place the power of learning in students’ hands. PBL is a student-centered, inquiry-based process that succeeds when students put their full resources behind a proj-ect. Both the teacher-driven classroom and the overreliance on content are artifacts of industrial teaching. As a PBL teacher, you must commit to melding content and skills, as well as using leadership tools to motivate students, organize them into productive teams, and teach them to take charge of their own learning.
How can PBL be improved and help us meet the challenge of preparing young people for their world? This Guide will suggest ten ways to advance PBL that reflect the new imperatives of twenty-first-century education.
• �Teach�concepts,�not�standards. Using the ideas of H. Lynn Erickson in Stirring the Head, Heart, and Soul: Redefining Curriculum and Instruction (Corwin Press, 1995; second edition, 2002) and Concept-Based Curriculum and Instruction: Teaching Beyond the Facts (Corwin Press, 2002), PBL teachers can get much better at design-ing information-rich projects that help students develop and demonstrate an essen-tial, deep understanding of topics—the real goal of learning today. With the concept-based approach, what may be considered the weakness of PBL—it de-emphasizes teaching facts and standards—no longer matters. Instead, focus on what PBL does best: Teach students to think.
• �Teach�critical� thinking� through�contextual�challenges.�Cognitive psycholo-gists limit critical thinking to higher-order, brain-based processes that can be taught. But recent research indicates that critical thinking relies on a blend of attributes, including habits, attitudes, and emotional openness; thinking strategies; background knowledge; conceptual knowledge; and criteria for judgment. All of these can be learned—synergistically—through well-designed projects that challenge students to solve meaningful problems. The lesson for twenty-first century education is that criti-cal thinking cannot be taught as an isolated skill.
• �Start�with�questions.�This is another way of saying: Begin with the learner. In terms of Monday morning lesson plans, it means Start with questions, not curriculum. Questions, whether obviously relevant to students or made relevant through good teaching, engage today’s students.
• �Emphasize� innovation.� PBL relies on a problem-solving process that requires students to learn and use information to find the solution. In the hands of an ad-vanced practitioner of PBL, a project—from start to finish—is an exercise in critical
tm0001.v1.indd 11 2/8/12 11:59 AM

inTroducTionxii
thinking, collaboration, and demonstration of accomplishments. With this under-standing, design projects around the core themes of innovation and creativity.
• �Teach�and�assess�collaboration�and�communication.�The list of skills neces-sary for twenty-first-century life has lengthened. But collaboration and communica-tion are the core skills—and should be taught and assessed in every project. Students collaborate as part of their daily life; through projects, they can learn to collaborate purposefully and respectfully.
• �Focus�on�quality. During a project, provide every student with multiple opportuni-ties to perform deep, quality work. PBL must be designed around a process of excel-lence, using drafts, prototypes, peer protocols, thinking and brainstorming exercises, and clear performance standards.
• �Teach�drive,�passion,�and�purpose.� In an unstable world, no amount of skills and knowledge will be sufficient without a foundation of personal strengths such as resilience, flexibility, persistence, empathy, and self-awareness. These attributes, not necessarily developed in an industrial school system, are now critical to peak perfor-mance. Such intangible assets cannot be taught out of a textbook: they must be acti-vated through experience. PBL offers that kind of experience if teachers use proven methods from the human performance field to liberate students’ passion, purpose, and engagement.
• �Practice�planet-craft.�Designing projects that take students into deep, authentic realms and purposeful learning is a powerful motivator for excellence. Projects lend themselves to authentic work in the community, local or global, and now is the per-fect time for teachers to plan projects with students to help them make a contribution to the world, as well as acquire core knowledge.
• �Learn� from� students.� No matter how confident educators feel about their cur-riculum and teaching methods, everything is on the table for negotiation with today’s students—and PBL allows students and teachers to create fruitful learning partner-ships. Many new protocols and tools have evolved that enable teachers and students to collaborate as a learning community. Students can be trained in project design, and help set standards for their own performance.
• �Infuse� PBL� into� technology.� The next decade will be decisive in terms of merging virtual schooling and technology tools with traditional concerns over con-tent and accountability. How to infuse technology into education is no longer the question. Rather, PBL teachers must ask: How do I infuse PBL into technology? This Guide offers the best ideas available by addressing hybrid or distance learn- ing models for projects—and also discuss importing successful gamer practices into PBL.
fRoM PRojecTs To PBL
In the Guide, “PBL” and “projects” are used interchangeably. But in your mind, you should distinguish them. Projects have a long history, often in the guise of discovery learning, guided inquiry, or experiential learning. In projects, students pursue their own interests
tm0001.v1.indd 12 2/8/12 11:59 AM

inTroducTion xiii
to find out answers to questions, or they simply “do things” that have an undefined edu-cational value. Projects are often equated with “hands-on” learning.
PBL incorporates aspects of guided inquiry; it has a strong constructivist orientation and places value on student interests. But PBL employs a sophisticated project design process based on replicable, scalable methods that incorporate key components into the project process.
The seven design principles in Parts 2 and 3 of this Guide show how PBL differs from projects. Each principle is backed by a specific set of tasks and methods. Taken as a whole, the design principles allow you to conceive of and implement a coherent problem-solving process that brings out students’ best work and addresses key learning outcomes. These seven principles are:
• �Identify�the�challenge.�At the core of a problem lies a challenge. You want to make the challenge both meaningful and doable. Criteria given here measure this.
• �Craft�the�Driving�Question.�A good PBL teacher drives a project through inten-tion. What is the deep understanding that you want your students to have at the end of the project? This Guide presents a proven process for constructing a Driving Question.
• �Start�with�results.�As the instructional leader, you need to decide the tasks and outcomes of the project. Content objectives are project specific, but you will also want to include skills mastery and dispositions in your outcomes.
• �Build� the�assessment.�The mantra of PBL is create and deliver. At the end of a project, students produce a result. The result is assessed against specific criteria es-tablished at the beginning of the project and defined in an assessment plan.
• �Enroll�and�engage.�A field-tested set of best practices will help you engage students in the project from the beginning. Starting right is the key to success at the end.
• �Focus�on�quality.�High-performance PBL relies on quality student work. In PBL, quality work results when student teams commit to purposeful collaboration and continuous improvement. Teaching teams to use proven tools and coaching teams to perform better are central to successful projects.
• �End� with� mastery.� The PBL process is a nonlinear problem-solving process. A good PBL teacher knows how to manage the work flow throughout the project and prepare students to present their best work at the end, including planning powerful exhibitions to public audiences. Most important, at the culmination of well-executed projects, students experience the feeling of mastery.
TeAcheR As coAch
Just as job descriptions in the workforce have broadened, so has the role of the teacher expanded to include more than front-of-the-room instructing skills and curriculum fidel-ity. This shift is not news to teachers, who have heard the term “guide on the side” for a decade. PBL formalizes this transition from teacher to coach. In PBL, coaching is nec-essary to improve performance across the domains of thinking, doing, and feeling. This
tm0001.v1.indd 13 2/8/12 11:59 AM

inTroducTionxiv
Guide focuses on blending the best of coaching philosophy with the classroom leadership and direct teaching that students require.
The role of coach may challenge your skills as a teacher and a person. An inquiry-based process like PBL is designed to stimulate higher-order thinking, creativity, and a nonlinear path of action. Projects tend to be complex endeavors that yield multiple solu-tions, rely on nuanced judgment, and require self-regulation on the part of learners. As you coach students through a project, expect your patience, faith, and desire for certainty to be tested. Even more important, be prepared to “walk the talk.” If you want your stu-dents to be skilled communicators and collaborators, so must you be.
can you succeed with PBL?Some teachers view PBL as an esoteric or unattainable form of instruction that requires special talents. It doesn’t. Especially if you have been moving in the direction of offering your students more active instruction, you will find it easy to shift to more inquiry- and student-centered methods that develop students’ deeper understanding.
One reason that teachers have shied away from PBL—the lack of specific techniques and a tested methodology for projects—is no longer a barrier. Field-tested design prin-ciples for projects show teachers how to successfully plan, organize, and implement high-quality project based learning experiences for students. PBL—as opposed to “projects”—relies on rigorous assessments, challenging questions, proven management methods, and exhibitions of knowledge and skills to ensure powerful learning.
This Guide will help you deliver high-quality projects in any classroom or school environment, in any subject. The principles presented here apply to teaching/coaching in elementary or secondary schools, specialized programs related to STEM (science, technology, engineering, and mathematics) or career-technical education, small learning communities or academies, and international classrooms—in fact, in any system moving from less rote to more active forms of instruction.
Several other books have been published to guide PBL teachers through the design and management of projects. Most notable are the Project Based Learning Handbook: A Guide to Standards-Focused Project Based Learning for Middle and High School Teach-ers, written by myself and colleagues at the Buck Institute for Education; and the PBL Starter Kit and PBL in the Elementary Grades, also published by the Buck Institute for Education. See www.bie.org for more resources.
Online links and assistance can be found as well through the George Lucas Educa-tional Foundation (www.edutopia.org). A number of projects have been filmed and docu-mented, and are available at www.edutopia.org and www.bie.org, or on YouTube channels. More information can be found at www.thommarkham.com.
A Word about standardsVirtually every national system of education is struggling to redefine the core content that students must know in the information age. This effort has resulted in better, though not fewer, standards, as information explodes and subjects compete for space in the daily
tm0001.v1.indd 14 2/8/12 11:59 AM

inTroducTion xv
six-hour window of school. The more standards that teachers are required to cover, the more challenging is the environment for PBL.
But a second objective—at odds with lengthening the list of standards—supports PBL: moving away from facts and topics to teaching concepts and problem solving. For example, the U.S. Common Core Standards, introduced in 2011, place more stress on projects, deep thinking, active learning, and performance-based instruction methods than most previous state standards. High-performing systems in Finland, Shanghai, Ontario, and Singapore mirror this trend.
Educators face basic questions: Do we want students to know more, or perform bet-ter? Should we teach information or skills? No one is quite certain. Our rapid shift into a technology-driven, information-rich, global environment has made ambiguity inevitable. Sorting out a new system for twenty-first-century learners will take time.
Educators can teach both information and skills, but little guidance exists to show them how. Too often the pressure of standards turns PBL into “coverage by another name,” in which teachers feel compelled to concentrate on low-level, topic-based instruc-tion. This Guide will support your efforts to move past the present impasse and design projects—with your students—that will help them learn to think, collaborate, innovate, persist, perform, and contribute, while still mastering core knowledge.
Should we dispense with all traditional methods of teaching? Absolutely not. No “one-size-fits-all” approach works. Smart PBL means adapting PBL to the requirements of your discipline. Do students need more skill-based practice, as in math? Or do they need to wrestle with philosophic themes, as in a novel? This Guide will provide tips on how to make good judgments about PBL. Don’t throw out proven methods just to do something new.
Teaching innovationPBL offers a unique opportunity for teachers and students to join together in the inquiry process. Using protocols, reflective exercises, divergent thinking strategies, and quality design processes, teachers can coach students in mastering the tools required of lifelong learners in a global world. These innovative techniques for planning, critiquing, and cre-ating depend on PBL teachers’ desire to build student “voice and choice” into the PBL experience. In each chapter, you will find a special section, Teaching Innovation, that suggests ways you and your students can make the project more innovative, inspiring, reflective, and student-driven.
UsinG This GUide
This working guide is divided into three sections. Part 1, Get Ready for PBL, explains the PBL coaching approach, offers an overview of tools and best practices for PBL teach-ers, and identifies six steps for creating a high-performance environment in your class-room.
Part 2, Design the Project, offers a step-by-step, proven process for designing rigor-ous projects. For easy use, planning forms and other resources are included, as well as
tm0001.v1.indd 15 2/8/12 11:59 AM

inTroducTionxvi
suggestions for applying the planning process to your teaching situation. Lay the Guide out flat, use the planning form, and plan your project by following the four design prin-ciples that form the foundation for a project.
Part 3, Manage the Process, shifts the focus to the partnership between students and a PBL teacher. A PBL teacher plans the project, but students do the work. This process requires a teacher to blend facilitation, mentoring, and organizational skills. The end result is a far higher level of performance from students.
Copies of project planning forms for elementary and secondary projects are included at the end of this volume. The Guide also works in tandem with downloadable resources; see the Index of Online Folders at the end of the Guide. Read the Guide with your com-puter handy and view the regularly updated resources as you plan your project. Register at www.thommarkham.com/pbltools and download the materials you need.
PBL teachers worldwide increasingly use a common set of best practices for project design and implementation, as described in this Guide. However, substantial variations in standards and expectations occur across national and cultural boundaries. Use pages found at www.thommarkham.com/pbltools to find information focused on your country, language, or particular set of educational outcomes, as well as other digital resources for professional networking and information sharing.
tm0001.v1.indd 16 2/8/12 11:59 AM

PART 1
Get Ready
for PBL
Six Tasks for PBL Teachers
tm0001.v1.indd 1 2/8/12 11:59 AM

1
establish a “PBL-friendly” cultureStart with drive, Passion, and Purpose
1. Build on Trust and Care
2. Redefine Rigor
3. Create the Right Conditions
4. Learn from the Gamers
5. Design Projects That Matter
6. Expect More
✽ Teaching Innovation: The Right to Be Wrong
tm0001.v1.indd 2 2/8/12 11:59 AM

eSTabliSh a "Pbl-friendly" culTure 3
The last ten years have been the most productive period for PBL in
its short history. Thousands of teachers in many hundreds of schools
have helped students carry out impressive, noteworthy projects.
Working on these projects, students often have reported a qualitatively dif-
ferent experience of education, a shift from being rote recipient to active
partner. Just as often, they have demonstrated skills and behaviors associ-
ated with success in twenty-first-century life—a sense of purpose, a mastery
of concepts, and a positive attitude toward learning. These outcomes cross
all demographics and age groups, as well as national boundaries.
Why do carefully designed projects help students perform so well? Be-
cause PBL taps into intangibles that make learning effortless and engaging:
drive, passion, and purpose. The core strength of PBL is that it can inspire
peak performance in students.
But other than pointing to “relevant” themes or “authentic” challenges,
little discussion has taken place to explain why students enjoy PBL and work
hard for good results. This lack is not surprising, given that our current sys-
tem of education emphasizes curriculum and instruction rather than the nat-
ural strengths and innate curiosity of learners.
In a learner-centered process like PBL, this emphasis must be shifted—a
task that begins with incorporating the following six ideas into your daily
routines.
1 Build on Trust and care
Outside of education, the success of PBL is not a mystery. Over three decades, the field of human performance—which blends findings from organizational psychology, positive psychology, and emotional intelligence—has identified the core factors that maximize individual effort and the desire to achieve. Most important for educators, these findings hold true for research in youth development, adolescent mental health, and developmen-tal psychology. These factors can be condensed into three points:
• Caring�relationships.�Whether growing up in a household, studying in school, or working in a job, people perform better when they feel cared for and attended to. The central role of a caring relationship in a young person’s ability and desire to perform cannot be overstated. A caring relationship begins with recognizing and respecting the individual’s autonomy.
tm0001.v1.indd 3 2/8/12 11:59 AM

ParT 1. geT ready for Pbl4
• �The�desire�for�meaning�and�purpose.�Human beings work harder—on behalf of themselves or others—when they have a goal. The goal must be relevant to the person’s needs and desires.
• The�power�of�mastery.�Achievement is a natural state of being. People enjoy doing tasks well, and that sense of reward perpetuates a spiral of further achievement.
Well-designed projects offer students autonomy, a relevant and meaningful learning experience, and the opportunity for mastery. Without these factors in place, young people tend to learn the minimum amount necessary. This means, in most cases, they will do the work required for the test but not much more. Your goal is to establish a “drive and thrive” atmosphere, in which students consistently work hard for better results because they believe in themselves.
Underlying all of these factors is an atmosphere of trust and care. A safe, caring en-vironment encourages peak cognition and intelligent behavior. Check your beliefs here: If you hold a secret conviction that students are naturally unmotivated, or that they need to be frightened into learning, you will not get the results you want in PBL. Successful PBL depends on your belief that young people want to learn and will perform well when respected by an adult and guided appropriately.
2 Redefine Rigor
The factors essential to human performance—caring relationships, meaning, and mastery —match the mantra that drove education reform in the first decade of the twenty-first century: rigor, relevance, and relationship. But there is a key reason that the desire to infuse learning with greater authenticity and meaning has not been fully successful: The concept of rigor has remained static. Rigor continues to be associated exclusively with information mastery and testing. Whether it’s the quantity of problems assigned for homework, the amount of reading required for the next day, or the “hardness” of the test, rigor is defined in industrial terms.
In the human performance field, rigor is defined quite differently. It is a measure of personal performance, not a standard to quantify how much information has been learned. As a PBL teacher, you must make this crucial shift and envision a new goal for students: Become a rigorous person. Think of rigor as the broad capacity to learn, apply, communicate, and share information. In the global world, learning and doing are insepa-rable parts of the whole. We need to teach both, measure both, and honor both.
An updated definition of rigor encompasses three aspects of performance:
• Core�knowledge.�The information age mandates that educators focus on concepts and principles rather than on facts and data. However, students must be able to dem-onstrate that they know the central conventions of a discipline, can use its vocabu-lary, and deeply understand its principles.
• Skills.�Reading, writing, knowledge accumulation, and critical thinking have long been considered the essential skills for preparing students for college entry. But stu-
tm0001.v1.indd 4 2/8/12 11:59 AM

eSTabliSh a "Pbl-friendly" culTure 5
dents are now expected to master the key “soft” skills of communication and collabo-ration to function proficiently in college, in a career, and as a citizen.
• Dispositions. Navigating a changing world demands flexibility, empathy, resilience, and persistence. These are not skills but well-defined dispositions or attributes that lead to a better work ethic, more engagement, improved relationships, and a greater sense of well-being.
Keep in mind one guideline: A performance-based world does not distinguish be-tween content, skills, and dispositions. Learning always includes an emotional compo-nent. It is not possible to teach the new definition of rigor without integrating academic, emotional, and behavioral learning.
Typically, education does the opposite by separating instruction, skills, and behavior into discrete domains. The mastery of content is regarded as a purely cognitive process—the province of a core academic teacher—while attitudes about learning or emotional barriers are shunted to counselors or special education teachers. You will need to work around those barriers and simultaneously address the what, the why, and the how. PBL succeeds when teachers blend instruction, skill building, and the basics of human perfor-mance into a powerful project design methodology.
3 create the Right conditions
Creating a drive and thrive culture that supports PBL begins with an honest admission: Peak performance cannot be taught; rather, much like a plant, it grows under the right conditions. The PBL teacher must design the environment in which peak performance flourishes. Many teachers have their own techniques for connecting and communicating with students. The following guidelines can also serve as foundation:
• Use�the�language�of�peak�performance.�Creativity starts with teacher attitudes. For example, research confirms that IQ is malleable and performance is driven by self-fulfilling belief systems. Students who move from a “fixed mindset” to a “growth mindset” will believe in themselves, and in their creative potential.
• �Treat�“soft”�skills�as�“hard”�skills.�Writing an essay or solving a math problem is traditionally regarded as a hard skill, while communicating your beliefs in an inter-view or listening to someone who disagrees with you is a soft skill. The reverse is ac-tually true: Communication and collaboration are the most difficult skills—and need to be taught and practiced relentlessly. Also, judge these soft skills by hard standards. Use rubrics and include the assessments in your grade book.
• �Expect�mastery.�Setting high expectations for academic performance is usual in good teaching. But setting high expectations for performance is crucial in PBL. Ex-pect students to communicate, collaborate, and manage themselves according to the standards of high-performing industries, not the standards of industrial education. When you stress personal mastery of difficult skills—and hold students to that high standard—they respond by performing like adults.
tm0001.v1.indd 5 2/8/12 11:59 AM

ParT 1. geT ready for Pbl6
• �Train� the� imagination.� Societies around the world have rapidly focused on a new goal for education: Teach innovation, problem solving, and creativity to the glo- bal generation. In a world that is clearly trying to reinvent itself, creativity will soon be valued as a basic skill and has been identified as the number one leadership competency of the future. Use proven creativity exercises to help students think divergently.
• �Reward�“wow!”�Currently, we have no measure for peak performance in schools. But you can design rubrics with a “breakthrough” category—a blank column that in-vites students to deliver a product that cannot be anticipated or easily defined. It’s not the “A” category, which is Mastery or Commended or a similar high-ranking indicator. The breakthrough column goes beyond the A, rewarding innovation, creativity, and unusual performance—a kind of “wow” column.
• �Pass�along�the�10,000-hour�rule. Recent research indicates that mastering a skill at a very high level takes 10,000 hours of practice. Your students aren’t likely to put that many hours into Algebra 1. But let them know that practice works—and the more they practice, the better they will be. World-class educators know that achieve-ment comes from hard work, not from a special gene for brilliance.
• �Teach� to� the� iceberg.�Remember that anything engaging the deeper self—the domain of creativity—is not immediately accessible. Take time and care to bring the process to the surface. This applies to all skills. Think in terms of an iceberg. Below the tip of the iceberg is 90 percent of the human being. If we want skillful creators, we need to pay attention to empathy, bias, and all the normal variations in a young person’s emotional makeup. Creativity requires opportunities to reflect, dis-cuss, meditate, brainstorm, and experience the cycle of failure and success.
• �Be�aware�of�your�emotional�content. PBL involves “up close and personal” teach-ing. As you work side by side with students, they will closely observe your attitudes toward skills, lifelong learning, and emotional balance. Be aware. Be positive.
• ���Do�the�small�things. Small acts of kindness and re-spect can leverage larger shifts in your classroom cul-ture. Stand at the door and greet students at the begin-ning of the period. Wish them well as they exit. Reward them with unexpected five-minute breaks when they perform well. Celebrate on occasion.
• ���Don’t� use� “teacher”� talk. Sarcasm and put-downs by teachers are all too common in classrooms. Be firm when necessary—but don’t question character or use a tone of voice that a friend would find offensive.
4 Learn from the Gamers
Many students who barely perform in school often experience peak performance on a daily basis—through playing the huge number of multilevel, multiplayer games that at-tract nearly 700 million players worldwide. The reason? Virtually every expert on games
Peak performance cannot be
taught; rather, much like a
plant, it grows under the right
conditions. The PBL teacher must
design the environment in which
peak performance flourishes.
tm0001.v1.indd 6 2/8/12 11:59 AM

eSTabliSh a "Pbl-friendly" culTure 7
points to the feeling of wholehearted engagement and accomplishment derived from games. Though the results may matter only in virtual reality, games provide an intense, meaningful outlet for players to use their skills and creativity to the utmost.
No one knows exactly how games and education will hybridize in the future. But as a PBL teacher (and as a game player) I urge you to think futuristically. Not only can its les-sons be applied to PBL, but also game-playing philosophy will affect the design of online projects. As you design your projects and seek ways to help your students maximize their performance, consider the following game elements:
• Leveling�up.�The purpose of a game is to “level up” by becoming more masterful. Increased mastery and pride in accomplishment are noticeable by their absence in many classrooms today—but they are essential to peak performance.
• �More�“ferio.”�As gamers progress, they attain superpowers. The faster they go, the more powerful they become. As their powers increase, studies show that gamers in-creasingly enter the “flow” state—the brain state associated with peak performance and effortless achievement. In gameplay, this is known as “ferio.” This cycle of reward operates quickly, giving players instant feedback and allowing them to change course quickly. The lesson for PBL? Create meaningful rewards for peak performance and allow students to fail as they learn.
• �Creative�collaboration.�Despite the image of the solitary gamer, millions of gamers interact globally to solve problems, offer specific expertise, or otherwise collaborate toward the ultimate goal of leveling up. Many gamers play for this precise experience of working with others to achieve a meaningful goal. This grouping together can translate into effective, high-performing teams of students in projects.
• �Narrative�and�well-ordered�problems.�Gamers don’t thrive on facts and informa-tion. They solve problems by relying on clear goals, good tools, and copious feedback. Inject those elements into your projects.
• �Epic� quests.� Games allow ordinary humans to accomplish extraordinary acts of heroism and service. The most popular games offer “epic” quests that traverse danger-ous environments and strange lands. The challenges encourage heroic actions against “boss rule” opponents and overwhelming odds. In school, the quest for grades is less epic, so competing with a digital world may be difficult. But think about the chal-lenges the earth and its inhabitants face over the next century. The challenges are no less daunting—and infinitely more real.
5 design Projects That Matter
The primary power of any project can be traced to its authenticity. Does the project mat-ter, to the students or the world?
Today’s students are less motivated by grades, college entrance, and preparing for the workplace than by resonant themes such as service, change, innovation, and the future. Beneath every powerful project must lie a big idea or authentic challenge—a foundation that infuses the project with meaning and purpose. As a PBL teacher, you should strive to
tm0001.v1.indd 7 2/8/12 11:59 AM

ParT 1. geT ready for Pbl8
provide students with challenges that actively engage them in the world. I call this “PBL with a purpose.”
Often, projects are around social or environmental themes. As the world enters a stormier, more chaotic period characterized by life-altering issues that will directly affect them as adults, students will likely demand a larger role in finding solutions. PBL of-fers the PBL teacher an ideal opportunity to blend academic work with sustainability by designing projects that matter to young people. Experts predict that contributing to the social good will constitute the main challenges for future generations.
Woven throughout this Guide are ways to make projects authentic and meaningful to students. These methods include several important ideas for successful PBL in the com-ing decade. Looking beyond the walls of school is the first step to designing authentic projects. Whether at the global or community level, problems exist—and they need solu-tions. Turn your students loose on the important issues of the day and they will respond with enthusiasm. Tie the goals of the project to your standards, organize the project around a challenge, and let students present their findings to the public.
• �Blend�PBL�and�community�service.�Though generally project oriented, service learning often is not directly connected to academic learning. Link these two kinds of learning. Center your project on an important social issue, scientific debate, or local topic.
• �Take�on�neighborhood�challenges. Within three blocks from any school can be found an assortment of problems for students to address. Have students survey their community, assess needs, and work on solutions. Use PBL to positively impact the local environment.
• �Take�on�global�difficulties.�You cannot solve global issues in a classroom, but don’t be timid about taking them on. Define questions in ways that allow students to deeply examine world matters. Their best ideas for solutions can then be shared, debated, and discussed in end-of-project exhibitions.
6 expect More
A student’s commitment to a “drive and thrive” attitude naturally varies, depending on temperament, emotions, time of day, school background, and home life. But even more challenging is the fact that your students most likely have not been trained to perform at their best. School reinforces passive skills, such as listening and paying attention. Your goal, instead, is to teach students to be flexible in their skills (know when not to pay attention).
Orienting students to this new expectation takes time, patience, and focus. Be pre-pared for some groaning and objection. Performance takes more effort and commitment than listening or taking notes. Here are a number of approaches that help:
• �Believe�that�students�want�to�work�harder.�If you think that teaching and learn-ing is an uphill battle, it will be. Shift to trusting that human beings want to learn—
tm0001.v1.indd 8 2/8/12 11:59 AM

eSTabliSh a "Pbl-friendly" culTure 9
and are willing to work at it. Your job is to put interesting challenges in your students’ path.
• �Begin�the�year�with�a�culture-building�event.�Shaking up students’ perceptions about school is a good way to start. Prior to introducing the curriculum, open your class with playful, unusual exercises such as listening, team-building, or other activi-ties that stimulate curiosity and reflection.
• �Use�a�“project-project.”�If you’ve had experience with PBL, plan a short project that opens the year with questions such as “Why School?” or “Why Algebra?” Teach the basics of teamwork or presentation during the first week. Let students know that projects may be different from what they have been exposed to in the past.
• �Utilize�classroom�space�as�your�ally.�Arrange your classroom to take you away from the front of the room and set you up visually as a mentor, not a lecturer. Good facilitators use their desks as a workspace, rather than as a symbol of power or a barrier to communication. Keep your desk small and out of the way. Get rid of rows. Decorate with as much color as you’re allowed. Turn the classroom into a creative workspace.
• �Show�them�the�“why.”�Give your students data they’ve never seen. For example, share the recent research report-ing that the biggest predictor of college success is a stu-dent’s conscientiousness, as measured by dependability, perseverance, and work ethic. The next best predictors were agreeableness, including teamwork, and emotional balance. A “drive and thrive” culture teaches these disposi-tions and habits.
• �Plan�a�skill-building�curriculum.��Treat skills like any other part of the curricu-lum. Introduce and identify the key skills of twenty-first-century life, and reinforce skill building throughout the year. Use scaffolds, such as listening exercises, before teaching teamwork. Teach your students how to hold eye contact with an audience before preparing them to make presentations.
• �Go�back�to�basics.�When students forget their commitment to better performance, go back to fundamental questions. Why is performance essential to success? What are the differences between school skills and real-life skills? Never hesitate to stop and have a meaningful, reflective discussion about the commitment to performance. Students know how important these skills are to their life. Just keep working at get-ting them to buy in.
• �Create�a�community. Good teachers develop a sense of community in a classroom. This feeling becomes paramount in PBL. Use the typical tools—icebreakers, games, discussions, and group activities—to build and reaffirm community throughout the year. Institute rituals that reinforce connection, such as I Love You walls, or Circle Time for sharing ideas and observations.
• �Establish�norms,�not�rules.�Communities operate under a set of common stan-dards that guide interactions. Rules dictate behavior, while norms help internalize behavior. At the beginning of the year, take a class period or two to build and agree on a set of norms. Post the list and revisit it as necessary.
Trust that human beings
want to learn—and are willing
to work at it. Your job is to
put interesting challenges
in your students’ path.
tm0001.v1.indd 9 2/8/12 11:59 AM

ParT 1. geT ready for Pbl10
✽ TeAchinG innovATion
The right to be Wrong
In gameplay, failure is considered necessary to success, and gamers report the “fun of failure.” In fact, games lower the risk of failure so that players will explore, take risks, and seek alternative solutions. The same is true of life today: The ability to risk failure is equated with success. Try these methods for encouraging your students to volunteer the wrong answer and develop a healthy appreciation for risk taking:
• �Applaud�being�wrong.�When a student gives a wrong answer, encourage the rest of the class to applaud.
• �Employ�the�circus�bow.�Want to take it a step further? When a student makes a big error, have him or her stand up and take a circus bow—just like the world-renowned aerialist in the circus who misses the bar occasionally.
• �Help�each�other�be�right.�Use the Japanese solution: Have a student who doesn’t understand a math problem well come up to the board and demonstrate his or her solution. Engage the rest of the class in a dialogue on the solution’s efficacy. Reward speculation, informed guesses, and well-intentioned mistakes.
tm0001.v1.indd 10 2/8/12 11:59 AM

tm0001.v1.indd 11 2/8/12 11:59 AM

2
Teach the heart of your disciplinechoose depth before coverage
1. Take Charge of Standards
2. Frame Projects with Concepts
3. Prepare for Information Gaps
4. Use Standards-Based Grading
5. Embrace the Information Age
✽ Teaching Innovation: Hold Technology to a Standard
tm0001.v1.indd 12 2/8/12 11:59 AM

Teach The hearT of your diSciPline 13
PBL is an inquiry-based process designed around important questions
or problems that need to be answered or solved. To stimulate critical
analysis and problem solving, the questions must be open-ended and
the problems must have more than one solution. Throughout the process,
students are compelled to acquire core knowledge and other information
necessary to answer the questions or solve the problems. The overall pro-
cess leads to deeper learning and enduring understanding.
This practice is the foundation of PBL. And it’s a good one. A learner-
centered, inquiry-based process results in better retention, more in-depth
knowledge, and expanded curiosity.
But in this chapter, we will address two major difficulties with the PBL
approach. First, the transmission model of education emphasizes topics
and facts rather than in-depth learning. This approach invites direct instruc-
tion, rote learning, and teaching to the test—and makes PBL difficult or im-
possible.
Second, while PBL promotes understanding and in-depth learning, criti-
cal information often is left out of a project. Teachers find it difficult to teach
for understanding and, at the same time, prepare students for tests or en-
sure that students have the core knowledge and skills necessary to master
a subject.
Someone once said that the fastest way around a problem is straight
through it. That is the approach we will take with PBL in this chapter. How
can you design smart projects that meet curriculum, testing, and standards
objectives while retaining the spirit and intent of PBL? The answer is to
combine concept-based instruction and problem-solving, framed by PBL
methodology.
1 Take charge of standards
Many teachers have been beaten down by a rigid approach to teaching, including pacing guides, too many tests, or lack of autonomy in deciding their curriculum. But a different path is possible: Take charge of your standards.
If you choose to accept the conditions that prescribe your role as a teacher and pre-vent you from teaching vital concepts to students, you won’t do well with PBL. But if you are confident of your professional ability and knowledge, know your discipline, and have
tm0001.v1.indd 13 2/8/12 11:59 AM
ParT 1. geT ready for Pbl14
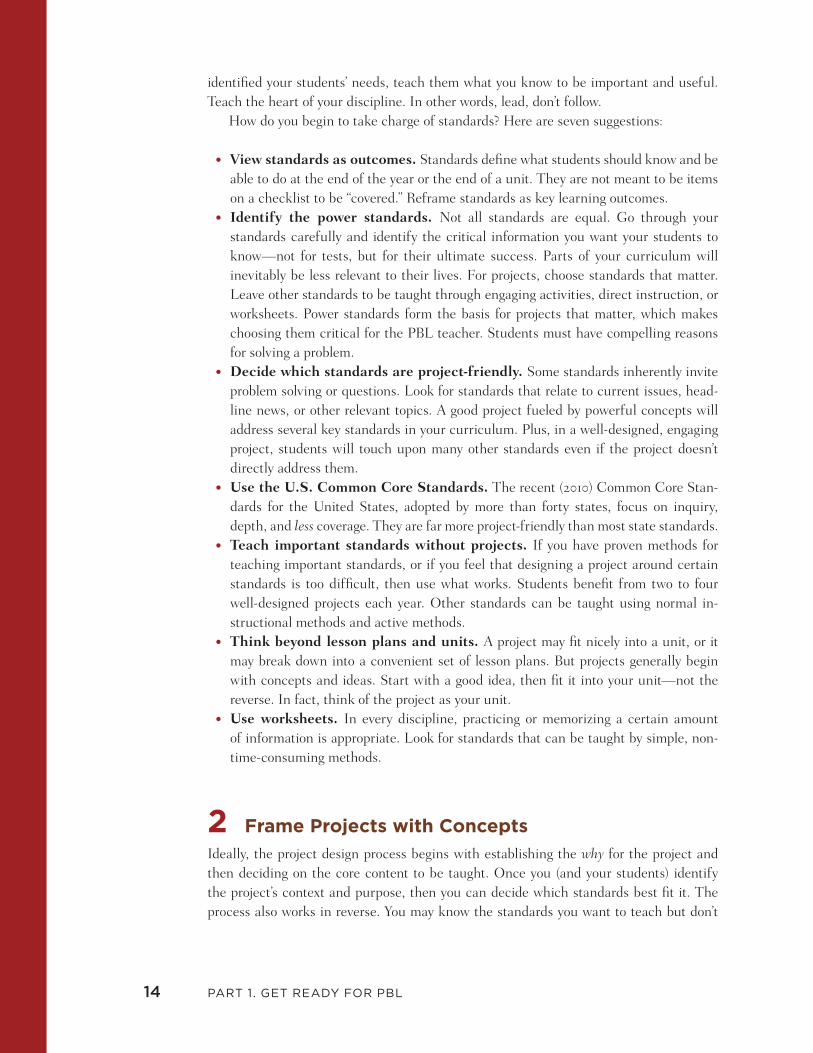
identified your students’ needs, teach them what you know to be important and useful. Teach the heart of your discipline. In other words, lead, don’t follow.
How do you begin to take charge of standards? Here are seven suggestions:
• View�standards�as�outcomes.�Standards define what students should know and be able to do at the end of the year or the end of a unit. They are not meant to be items on a checklist to be “covered.” Reframe standards as key learning outcomes.
• �Identify� the� power� standards.� Not all standards are equal. Go through your standards carefully and identify the critical information you want your students to know—not for tests, but for their ultimate success. Parts of your curriculum will inevitably be less relevant to their lives. For projects, choose standards that matter. Leave other standards to be taught through engaging activities, direct instruction, or worksheets. Power standards form the basis for projects that matter, which makes choosing them critical for the PBL teacher. Students must have compelling reasons for solving a problem.
• Decide�which�standards�are�project-friendly.�Some standards inherently invite problem solving or questions. Look for standards that relate to current issues, head-line news, or other relevant topics. A good project fueled by powerful concepts will address several key standards in your curriculum. Plus, in a well-designed, engaging project, students will touch upon many other standards even if the project doesn’t directly address them.
• �Use�the�U.S.�Common�Core�Standards.�The recent (2010) Common Core Stan-dards for the United States, adopted by more than forty states, focus on inquiry, depth, and less coverage. They are far more project-friendly than most state standards.
• �Teach�important�standards�without�projects.�If you have proven methods for teaching important standards, or if you feel that designing a project around certain standards is too difficult, then use what works. Students benefit from two to four well-designed projects each year. Other standards can be taught using normal in-structional methods and active methods.
• �Think�beyond�lesson�plans�and�units.�A project may fit nicely into a unit, or it may break down into a convenient set of lesson plans. But projects generally begin with concepts and ideas. Start with a good idea, then fit it into your unit—not the reverse. In fact, think of the project as your unit.
• �Use�worksheets.� In every discipline, practicing or memorizing a certain amount of information is appropriate. Look for standards that can be taught by simple, non-time-consuming methods.
2 frame Projects with concepts
Ideally, the project design process begins with establishing the why for the project and then deciding on the core content to be taught. Once you (and your students) identify the project’s context and purpose, then you can decide which standards best fit it. The process also works in reverse. You may know the standards you want to teach but don’t
tm0001.v1.indd 14 2/8/12 11:59 AM

Teach The hearT of your diSciPline 15
have a project in mind. In that case, thinking about how the standards apply to students’ lives—and designing a project that conveys the relationship between school and life—is your creative task.
This process is greatly improved if you initially think in terms of concepts rather than standards. Developed in the 1990s, concept-based instruction anticipated the need for problem- solving approaches in education by recommending that teachers focus on providing discipline-based concepts and principles, and then use facts and topics as tools to help students develop deeper understanding. Concept-based instruction allows you to bundle information into core concepts that teach students knowledge es-sential for solving problems and advancing their lives, and to make knowledge more use-ful, accessible, and relevant by distinguishing fact-based, retrievable information from enduring understandings.
The first important step to distinguish a concept from a topic. A topic is a discrete, information-based chunk of knowledge backed by facts; a concept is a timeless, abstract, and broad idea that can be found in a variety of subjects. The table below provides ex-amples of the difference.
ToPic concePT
Thanksgiving
U.S. Westward Expansion
Revolutionary War
Dinosaurs
Evolution
Political Parties
Celebrations
Migration
Conflict/Revolutions
Extinction
Change/Continuity
Conflict/Cooperation
Some school districts have rewritten their standards to be framed by concepts. In most cases, however, you will need to take on the task of bundling standards into con-cepts. By beginning with concepts, you will be better able to meet the core objectives of PBL. Concepts help PBL teachers frame a project with big ideas and still meet the stan-dards of secondary education. Concepts offer other advantages for PBL:
• Concepts� encourage� inquiry. Concepts help teachers frame the project at the deepest possible level. To teach concepts instead of topics, it is helpful to think in terms of a discipline instead of a subject. A subject emphasizes information and a silo approach to learning; a discipline connotes both knowing and doing.
• Concepts�help�students�identify�patterns�and�connections�between�topics�or� facts.�Our goal as global educators is to help young people learn, understand, and master rather than memorize and respond.� Using concepts as the lens for a project helps teachers overcome an undue emphasis on facts and isolated topics for study.
A learner-centered,
inquiry-based process
results in better retention,
more in-depth knowledge,
and expanded curiosity.
tm0001.v1.indd 15 2/8/12 11:59 AM

ParT 1. geT ready for Pbl16
• Concepts�are�applicable�across�disciplines. In today’s world, students need to learn the conventions, processes, and vocabulary of the discipline they are studying. But disciplines increasingly overlap, and so should projects. For example, change ap-plies to historical shifts in governments, evolutionary dynamics, character develop-ment, or thermodynamics. These connections and patterns make learning meaning-ful and help children answer the question: Why should I learn this? Also, since many concepts apply to more than one topic, a concept-based approach reduces the amount of material to be covered.
• Concepts�lead�to�questions. Understanding concepts requires that they be filtered through a process of questioning, investigation, and reflection. In other words, facts and topics can be taught, but concepts must be learned. This shifts the focus to the learner and requires that teachers put in place a well-organized process for problem-solving, with support and feedback. That is the essence of PBL.
In Chapters 7 and 8, we’ll look at how concepts can be reframed as a challenge and turned into a specific Driving Question for a project. Read Concept-Based Curricu-lum and Instruction (Corwin Press, 2002) by H. Lynn Erickson for more information on concepts.
3 Prepare for information Gaps
Through projects, students learn concepts and problem-solving skills. During the pro-cess, they also learn essential facts that prepare them for tests. But you often find that
critical content or key pieces of information for mastering standards are missing in a project, or that students need specific exercises, problems, or vocabulary to succeed.
Prepare for these gaps by analyzing the project plan and adding les-sons to the project that teach specific content. Try to keep the lessons in context with the project. But if that’s too complicated, teach outside the process. Consider using the following techniques:
• Direct�instruction.�Lecture can be easily incorporated into PBL. If direct instruc-tion works, use it. But use it sparingly, not as your main method. Also, resist the temptation to teach students all the necessary details and facts prior to starting a project. The idea of PBL is make them hungry to learn facts on their own.
• �“Just�in�time”�instruction.�Prior to beginning a project, either use your own judg-ment or work with students to identify potential gaps in their knowledge or anticipate aspects of the project that will need more intensive instruction. Plan on brief bursts of direct instruction to fill the gaps in a timely way. Be prepared to present mini-lessons on the spot.
• �Workshops.�Plan an in-class seminar or workshop for students who want tutoring or review of a specific topic. Conduct the workshop in a corner of the classroom while other students continue work on the project.
Start with a good idea,
then fit it into your
unit—not the reverse.
Think of the project
as your unit.
tm0001.v1.indd 16 2/8/12 11:59 AM

Teach The hearT of your diSciPline 17
• �Textbooks.�Generally, PBL does not rely on textbooks. But they can be a key as-sistant in projects. If you don’t have time to review a topic in class, assign textbook reading and make a bargain with your students: The more you read, the more time in class for an authentic project.
• �Homework�and�tests. These traditional tools of school work well in a project—as long as they are not the focus. Including homework and tests in projects helps push students toward mastery of content and teaches the value of practice.
• �An�SAT�test�prep�class—in�your�class.�If you feel that projects during the year have not fully prepared students for end-of-course exams or high-stakes testing, stop the projects and run your class as if it’s an SAT test prep class for one or two weeks. Practice PBL, but be practical.
An inquiry-based process is not designed to teach foundational skills (although a project can be designed for that purpose). You may need to build specific skills instruction into a project. Use the follow-ing examples as a guide.
• English/Language�Arts.�If you are planning an English project and are concerned about grammar mastery, include grammar exercises. Use the workshop method (sit down with weaker students for twenty minutes during project time), assign textbook or worksheet exercises, or highlight grammar requirements by weighting grades in favor of better grammar and fewer grammatical mistakes.
• �Math.�Math projects often falter because students lack basic skills. Include instruc-tion in basic skills as part of the project.
• �Social� Studies. In a history project, students can easily demonstrate knowledge of historical events and relate those events to contemporary issues—both desirable outcomes. But, at the same time, they may overlook timelines, dates, and bench-marks. Teach these through conventional methods. Remember that, in addition to concepts, students must know the academic conventions and vocabulary of the discipline.
4 Use standards-Based Grading
To help focus your teaching on standards in a project and provide an accurate picture of achievement based on the standards for which students are accountable at their grade level, use a standards-based grading approach. This system of grading, which is becom-ing increasingly popular, works very well for PBL. Each student is graded on proficiency against a specific standard. The following example, derived from the work of Robert Marzano (www.marzanoresearch.com), a leading standards-based educator, demonstrates how results might be recorded in a standards-based grade book.
Facts and topics can
be taught, but concepts
must be learned.
tm0001.v1.indd 17 2/8/12 11:59 AM

ParT 1. geT ready for Pbl18
STandardS-baSed grade book
name Standard 1: Write an alternate ending for a story
Standard 2: identify the elements of a story
Standard 3: compare and contrast two stories
Juan Partially proficient Proficient Partially proficient
Simone Proficient Proficient Partially proficient
Kelly Partially proficient Partially proficient Partially proficient
Bobby Advanced Proficient Proficient
Delia Partially proficient Advanced Proficient
In a traditional grading system, students are judged not against the exact standard they are learning but against a collection of grades on tests, quizzes, homework, and es-says. A traditional grade book looks like the below.
TradiTional grade book
name homework average Quiz 1 chapter 1 Test
Juan 90 65 70
Simone 50 75 78
Kelly 110 50 62
Bobby 80 90 85
Delia 95 100 90
Remember that each student’s overall grade for the project will include content and skills, which can make grading projects a complex task. Deciding how much weight to allocate to skills versus content is sometimes difficult. Most PBL teachers opt for no more than 40 to 50 percent for content. However, using a standards-based system will help you identify the exact standards to be taught in the project—and ensure that you don’t over-look critical content.
See Chapter 5 for more on assessment, and Chapter 10 for building the assessment plan for your project. The Project Design Cycle planning form also contains a space for standards-based assessment.
tm0001.v1.indd 18 2/8/12 11:59 AM
Teach The hearT of your diSciPline 19
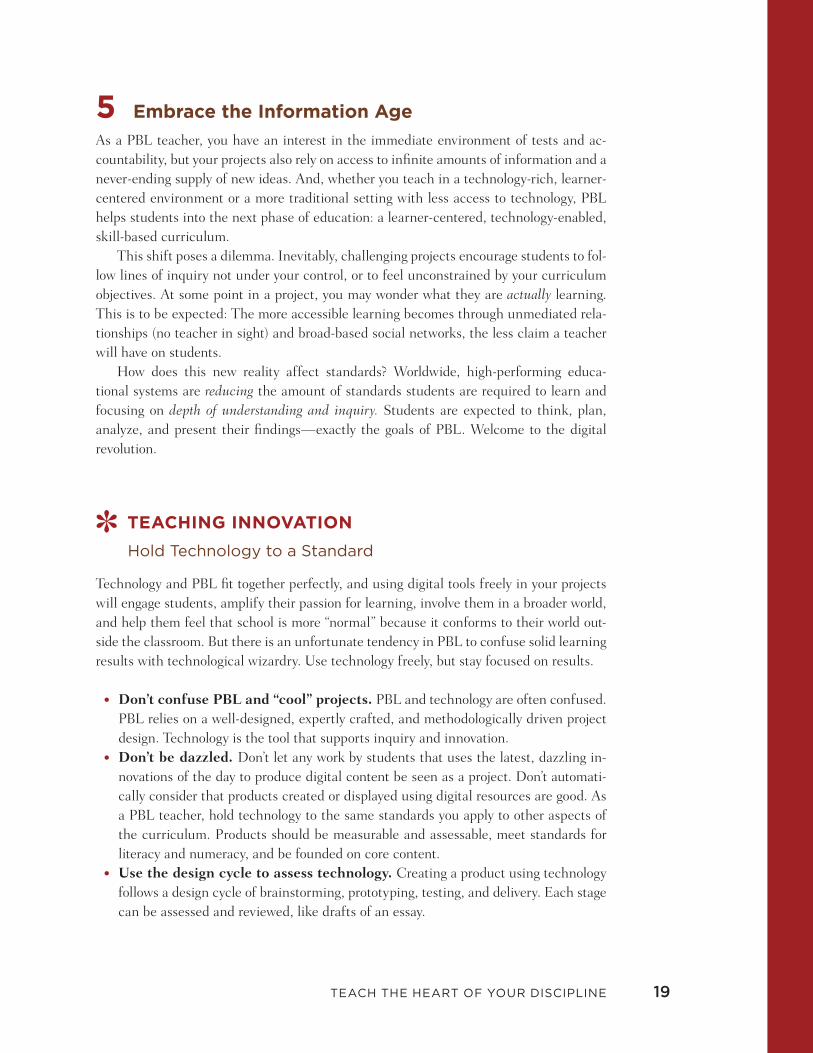
5 embrace the information Age
As a PBL teacher, you have an interest in the immediate environment of tests and ac-countability, but your projects also rely on access to infinite amounts of information and a never-ending supply of new ideas. And, whether you teach in a technology-rich, learner-centered environment or a more traditional setting with less access to technology, PBL helps students into the next phase of education: a learner-centered, technology-enabled, skill-based curriculum.
This shift poses a dilemma. Inevitably, challenging projects encourage students to fol-low lines of inquiry not under your control, or to feel unconstrained by your curriculum objectives. At some point in a project, you may wonder what they are actually learning. This is to be expected: The more accessible learning becomes through unmediated rela-tionships (no teacher in sight) and broad-based social networks, the less claim a teacher will have on students.
How does this new reality affect standards? Worldwide, high-performing educa-tional systems are reducing the amount of standards students are required to learn and focusing on depth of understanding and inquiry. Students are expected to think, plan, analyze, and present their findings—exactly the goals of PBL. Welcome to the digital revolution.
✽ TeAchinG innovATion
hold Technology to a Standard
Technology and PBL fit together perfectly, and using digital tools freely in your projects will engage students, amplify their passion for learning, involve them in a broader world, and help them feel that school is more “normal” because it conforms to their world out-side the classroom. But there is an unfortunate tendency in PBL to confuse solid learning results with technological wizardry. Use technology freely, but stay focused on results.
• �Don’t�confuse�PBL�and�“cool”�projects.�PBL and technology are often confused. PBL relies on a well-designed, expertly crafted, and methodologically driven project design. Technology is the tool that supports inquiry and innovation.
• �Don’t�be�dazzled.�Don’t let any work by students that uses the latest, dazzling in-novations of the day to produce digital content be seen as a project. Don’t automati-cally consider that products created or displayed using digital resources are good. As a PBL teacher, hold technology to the same standards you apply to other aspects of the curriculum. Products should be measurable and assessable, meet standards for literacy and numeracy, and be founded on core content.
• �Use�the�design�cycle�to�assess�technology.�Creating a product using technology follows a design cycle of brainstorming, prototyping, testing, and delivery. Each stage can be assessed and reviewed, like drafts of an essay.
tm0001.v1.indd 19 2/8/12 11:59 AM

ParT 1. geT ready for Pbl20
• �Use�digital�portfolios.�Learning in the digital age is “process-oriented.” Use digital resources to summarize student learning and proficiency around broad standards and skill acquisition, as well as encourage reflection and meta-cognition.
• �Define�“digital� literacy.”�Traditional literacy comes in two grades: the ability to read basic information and the ability to decipher academic-level discourse. Basic digital literacy is the ability to text, network with friends, and use the Internet; pre-mium digital literacy requires students to understand and use technological terms and analyze the underlying processes of technology. Don’t settle for basic.
tm0001.v1.indd 20 2/8/12 11:59 AM

tm0001.v1.indd 21 2/8/12 11:59 AM

3
coach for PerformanceShow every Student how to get better
1. Open the Lines of Communication
2. Know the Coach's Roles
3. Use Coaching Protocols
4. Break Down Skills into Steps
5. Teach the Power of Goal Setting
✽ Teaching Innovation: Why People Succeed
tm0001.v1.indd 22 2/8/12 11:59 AM

coach for Performance 23
Coaching is a proven means for increasing performance in sports, on
the job, and in life by using established methods that help individuals
define goals, adjust behavior, and improve skills. High-performance
PBL mandates a similar role for teachers: the teacher as coach.
This responsibility is new in education, but it is a natural step as teach-
ers move from the front of the room to “guide on the side.” One of your
chief responsibilities as a PBL teacher is to train your students in the how of
learning—and to hold them accountable for making their best effort.
To be successful, adopt the tools, practices, and attitudes of a coach. This
chapter will guide you through the best practices for coaching students in
the classroom.
1 open the Lines of communication
Coaching relies on communication. Even if you are not directly coaching a student, you are always communicating through body language, expression, and attitude—and students notice. I call this the “ping” factor. A “ping” is a network tool that sends a mes-sage from one computer to another in order to check whether it is reachable and active. If it is, it sends back a “pong” that establishes the line of communication between the computers.
Research verifies that humans have similar capabilities. The rhythmic beating of the heart generates an electromagnetic field that carries information, much like a cell phone signal. Humans process this information as emotional waves of connection or disconnec-tion that affect mood and performance. As you “ping” students, creating an atmosphere of care, safety, and unity, the class develops a coherent focus and sense of shared purpose that makes individual coaching easier.
How to “ping”? It begins with your own emotional state. Any method for calming yourself, disengaging from stress, or practicing serenity at the beginning of class helps. During class, a look, a gesture, or a word can let students know that you constantly are assessing their activity and response. Good teachers develop a sixth sense that tells them a student needs assistance but isn’t asking. A good coach knows when to coach.
tm0001.v1.indd 23 2/8/12 11:59 AM

ParT 1. geT ready for Pbl24
2 Know the coach’s Roles
The teacher as coach incorporates three roles: coaching, counseling, and mentoring. The roles are slightly different. As you move between them, depending on the students and the circumstances, keep in mind the goals for each role.
• �The�coach.�A coach focuses on performance. Your role is to define the task, pro-vide training, measure success, and give feedback on performance. In a PBL project, this means that you will clearly detail the process, allow time for practice and mas-tery, supply well-defined rubrics and other assessments, and offer timely, in-depth responses. Coaching may be done with teams as well as individuals.
• �The�counselor.�The counselor role requires that you differentiate between skill and will. People of any age can be resistant or difficult; young people can be even more temperamental. The main skill of the counselor is to listen and offer feedback if re-quested. Listening leads to coachable moments in which you may be able to train a student. But the counselor knows that performance cannot be forced.
• �The�mentor. The mentor role combines the coach and counselor roles and adds an additional element: advice and direction. But remember that the mentor role can-not be successful unless the counselor role is intact. Without listening, you will not establish the channel of trust necessary for students to actively seek or take your advice.
PBL is an intensive process that offers many opportunities for one-on-one interaction with students. In the course of these interactions, their personalities will surface. Tak-ing on the role of the coach enables you to personalize your instruction and get students working on their own behalf. The ultimate goal is for them to do the work, not you.
3 Use coaching Protocols
Professional coaches have identified four principles that are critical for working effec-tively in the coaching role:
• Stay�present.�Bring your full attention to the needs of the person you are coaching. Signs of attention begin with good listening and eye contact. But more than that, you must be fully present. Tune into each student by reading voice, body language, and emotional signals.
• �Care. Care begins with sincerity. You must want to help your students by showing interest in them as people.
• �Inspire.�In PBL, students see you up close and personal—not just from the front of the room or as a teacher. Modeling good behavior, which includes listening, is the best way to inspire. But be ready with ideas for change and achievement. Communi-cate the best about yourself and what you know.
tm0001.v1.indd 24 2/8/12 11:59 AM

coach for Performance 25
• �Be�rigorous. Coaching is much more than patting students on the back; it is about pulling them forward and squaring up to them. Hold students to a high standard in both their performance and their values. Speak frankly, without judgment.
Once you have established a connection with students, the prescribed protocol below will enable coaching conversations to go more smoothly. Don’t follow this protocol mechanically—use it to make your to approach to students consistent. This model of interaction will also teach students how to interact with their peers and teammates.
1.�Ask�the�student�what�he�or�she�is�doing�well.�Always begin with the positive, and work from the perspective of the student. Your initial job is to listen, observe, and gather data.
2.�Give�positive�feedback.�Speak in specifics and respond as directly as you can to student comments. This is not the time to overly praise or indulge students. Simply acknowledge what has gone right.
3.�Ask�the�student�to�identify�what�he�or�she�is�not�doing�well.�Work again from the student’s perspective. Once you have listened attentively and acknowledged suc-cess, the door opens to self-reflection. Encourage students to identify specific behav-iors that will improve their performance.
4.�Give�observations�or�data�as�feedback.�Judgment is not effective, particularly with young people. Provide feedback in the form of observations of fact, not infer-ence. Say “I see you failed the test” rather than “Why didn’t you study?”
5.�Define�what�a�good�job�looks�like.�Be specific about what you want from stu-dents. Use videos or exemplars to show students the right method or outcome. Make sure they know what top performance looks like.
6.�Offer�training.�What resources can you offer to help students improve? Let them know where and how to find assistance.
Keep in mind that coaching has its limitations and will not be effective with all stu-dents. Judge your efforts by your sincere attempts to change behaviors or help students perform. Consider these other guidelines for coaches:
• Stop�thinking�of�exceptions.�Remember the 80–20 rule. Although 20 percent of your students resist coaching, 80 percent will respond. Go with the majority.
• �Know�what�needs�training�versus�what�needs�to�be�communicated.�Not all actions require coaching help. Train for the more challenging tasks. Use your judg-ment to decide when to train and when to instruct.
• �Identify� behaviors� driving� the� performance.� Always seek to understand the behavior behind the actions. For example, underneath a bored attitude often lies anger. Behind disengagement may be family dysfunction and loss of love. Defiance aimed at you may be meant for someone else. If you feel confident of your counseling skills, use them. If you don’t, consult and get help. Remember that caring is never a mistake.
A good coach knows
when to coach.
tm0001.v1.indd 25 2/8/12 11:59 AM

ParT 1. geT ready for Pbl26
• �Lower�emotional�barriers.�A good coach knows that negative emotions block com-munication. To unblock, practice sincere listening and communication. If you sense that you’ve hit an emotional hot spot during a coaching conversation, return to listen-ing and asking, rather than telling or advising.
• �Be�aware�of�your�circle�of�control.�A coach can improve performance by offer-ing specific suggestions. But the bumper-sticker philosophy applies: “A mind is like a parachute. It works only when it’s open.” If a student rejects coaching, move away and allow for natural consequences—which also change behavior.
• �Is�it�will�or�skill?�Knowing the source of the problem is critical. Sometimes even the student affected can’t tell whether it’s a motivational block or a skills block. A coach can teach skills, but willpower issues require a counseling approach.
• �Are�you�listening—or�waiting�to�respond?�If the coaching session begins to fail, check your listening skills. Often when we seem to be listening, we are really waiting for the opportunity to advise.
• �Watch�assumptions.�Are you wondering, “How intelligent is this kid?” or are you thinking, “How is this child intelligent?”
4 Break down skills into steps
Coaching is not effective unless you give students specific feedback. This information varies from large, attitude-adjustment suggestions to small, discrete steps that students can take to improve performance. This input is the core challenge of coaching, particu-larly since all students require slightly different messages. Plus, students may require different challenges and tasks to succeed.
• Name�the�behavior� to�change.�The language that a PBL coach uses with stu-dents is critical. (This includes body language, which speaks louder than words.) The best approach with a struggling student is to observe, wait, and reflect before of-fering suggestions for improvement. Avoid judgment and respond to what you ob-serve rather than to what you assume. Give the student specific recommendations that distinguish the new behaviors from the old and help the student reach a new standard.
• Differentiate�the�task.�Adjust the task or role of the student if necessary. Your goal as a coach is to present the student with the right level of challenge.
• Offer�ongoing�support.�Coaching requires more than one conversation with a stu-dent. A good coach remains patient with changes in behavior.
Scaffolding is a common term applied to helping students improve performance by breaking down academic assignments into manageable tasks. In PBL, skills need to be scaffolded as well. Analyze a skill, break it down into components, and sequence a num-ber of skill-building exercises. This work is best done prior to a project. Many of the skill-building exercises can be taught early in the year, before projects are under way. To scaffold skills, think of yourself as a sports coach, breaking down larger tasks into fundamentals.
tm0001.v1.indd 26 2/8/12 11:59 AM

coach for Performance 27
What do the fundamentals of twenty-first-century skills look like? Here are compo-nents of skills to scaffold prior to a project:
• PresentationsRelaxationVoice and projectionBody postureEye contactUse of note cardsUse of PowerPoint
• CollaborationEmpathyListeningSpeaking upFollowing and leadingHolding peers accountable
• Self-managementBringing materials to classMeeting deadlinesDealing with setbacksCompleting assignmentsKeeping agreements
5 Teach the Power of Goal setting
Goal setting is the most common method used in industry to improve performance on the job and is a fundamental coaching tool. Yet goal setting remains an underutilized tool in education, despite research that shows people who set goals are much more likely to achieve results. Incorporate goal setting into your projects or classroom, and expect sig-nificant results. Try some of these basics:
• �Measure�more� than� grades.� Goal setting is a method for observing one’s own behavior, habits, and progress. Have students set goals for skills acquisition and per-sonal habits that will make them more successful in school and in life.
• Use�SMART�goals�to�make�a�realistic�action�plan. Use the proven goal-setting method of Specific, Measurable, Attainable, Realistic, and Timely goals. Commit goals to writing.
• �Revisit�goals�frequently.�A basic, but often forgotten point: Goals need to be re-viewed, revised, and reaffirmed on a regular basis. Systematically record and reflect on goals. Set “goals” dates on your calendar. Start a list of goals on your computer for easy access and review. Your goal-setting system can be incorporated into the Per-sonal Success Plan or portfolio system described below.
tm0001.v1.indd 27 2/8/12 11:59 AM

ParT 1. geT ready for Pbl28
Coaching students individually results in agreements and goals. In the workplace, these contracts and aims are usually recorded, revisited, and discussed at a future point. The same system works well in the classroom. As a teacher, you already keep detailed
records of student achievement. In PBL, the goal is for students them-selves to record their progress and development. This personal tracking encourages reflection, growth, and self-management skills.
Depending on your school, the system for recording students’ prog-ress may reside in your classroom, in an advisory class, or with the home-room teacher. Systems vary by school but have two common elements:
• �A�Personal�Success�Plan.�The Personal Success Plan (PSP) describes goals, agree-ments, and successes or challenges. The document may include grade goals, college choices, and similar academic information. It may also highlight skills and attitudes as well as career and internship goals. The critical factor is how the PSP is used: It must be kept as an easily available record in the classroom or online, and revisited on a designated schedule to encourage reflection and renewal of goals.
• Portfolios.�A written or online portfolio is a common method for recording a stu-dent’s growth. Portfolios contain more information than a PSP and may include, in addition to personal information, video clips of project presentations or team work. The most powerful portfolios in schools using PBL consistently give detailed looks at students’ progress in developing twenty-first-century skills, helping students prepare for careers as well as college.
If neither of these options is available, simply make sure that agreements between you and students are written down and saved in a safe place. Also, the People Management system can be incorporated into the evaluation and data system described in Chapter 6.
✽ TeAchinG innovATion
Why People Succeed
Grades and assessment place relentless focus on learning and mastering information. But all research demonstrates that successful people share a set of attributes that carry more weight in life than academic achievement, gender, ethnicity, socioeconomic status, and IQ. As you evaluate students, always look for—and reward—growth in the following areas:
• Self-awareness.� Are your students beginning to recognize their strengths, chal-lenges, special talents, and passions?
• �Proactivity.�Are your students actively engaged in the world and beginning to see that they have control over their performance and responsibility for their outcomes?
• �Perseverance.�Do your students demonstrate ability to persist despite adversity or setbacks?
Think of yourself as a
sports coach, breaking
down larger tasks into
fundamentals.
tm0001.v1.indd 28 2/8/12 11:59 AM

coach for Performance 29
• �Progress�over�time.�Do students show significant growth in their ability, attitude, or engagement?
• Goal�setting.�Can your students set up a plan and a step-by-step process for success?• �Use�of�effective�support�systems.�Do your students seek out help from you or
their peers?• �Emotional�coping�strategies.�Do your students show that they can reduce or cope
with stress and frustration, and do they keep a positive attitude despite setbacks?
tm0001.v1.indd 29 2/8/12 11:59 AM

4
Teach Teamworkcollaborate for a Purpose
1. Turn Groups into Teams
2. Design Your Teams
3. Train Your Teams
4. Use Teams to Build Character, Culture, and Community
5. Prepare for Outliers
✽ Teaching Innovation: Motivating the Facebook Generation
tm0001.v1.indd 30 2/8/12 11:59 AM

Teach TeamWork 31
In workshops, I remind teachers of the reason that sports teams do not
call themselves groups. Groups form low-level associations for the pur-
poses of discussing and comparing each other’s work. Teams, in contrast,
depend on shared intention.
Shared intentionality is defined as “the ability to participate with oth-
ers in collaborative activities with shared goals and intentions.” Groups are
central to collaboration—when we share intentionality, we identify as part of
a group—but as a team, we deliberately and explicitly agree on a goal, and
we understand what others expect us to do to work toward the goal. Shared
intentionality enables us to take collective action.
As a PBL teacher, your most crucial task is to help your students work ef-
fectively as a team. You will need to train them in basic teamwork and show
them how collaboration leads to better products and outcomes. For PBL,
the importance of teaching collaboration skills cannot be understated. High-
performance teams lead to powerful, successful projects.
1 Turn Groups into Teams
All students understand the concept of teams, but unless a coach has explicitly taught them principles of teamwork, they rarely understand the underpinnings that make teams succeed. A good first step is to establish the difference between groups and teams. Five principles define a team:
• �Commitment.��Teams consist of individuals committed to the success of the team and to upholding their individual responsibilities to make the team work. If one indi-vidual fails to contribute, the team may fail.
• �Knowledge�of�strengths�and�roles.�Team members know how to best contribute to a team. They know their roles and obligations, as well as when and where they will likely need help.
• �Focus�on�a�common�goal.�Groups focus on process; teams focus on achievement. Teams work best when the goal is well defined and doable. All teamwork begins with the end in mind: What do we need to create, produce or achieve?
• �Ability� to� critique� performance.� Teams continuously improve by regularly re-viewing objectives, measuring accomplishments, and deciding next steps. They learn from one another through objective praise and analysis.
• �Acceptance�of�a�process. Teams operate by formal mechanisms and guidelines designed to foster efficiency, communication, and productivity.
tm0001.v1.indd 31 2/8/12 11:59 AM

ParT 1. geT ready for Pbl32
Forming a team to accomplish goals is often a good choice. You may want to share with students some of the key reasons why they should work in teams:
• Motivation.�Many times, you can meet your individual goals only through group success.
• Social�cohesion. When more than one person cares about a goal, it’s easier to ac-complish it.
• �Cognitive� advantages. The group mind increases mastery, finds divergent solu-tions, and improves critical thinking.
• �Cognitive�elaboration. If you can explain a concept to a teammate and discuss it in depth, you understand it.
• �Interpersonal�skills�and�self-awareness.�Putting team members together forces students to know one another better, appreciate strengths and differences, and en-gage in growth-inducing reflection on their personal habits and personality attributes.
Establish the differences between groups and teams through discussion, reflection, or guest speakers from industry who can talk about the central role of teams in business. Once the discussion is over, however, you will need to consistently employ a set of tools to train students in teamwork. This process can be lengthy and frustrating, but teaching students to work in teams is one of the most important goals of a twenty-first-century teacher.
Keep in mind that teams operate in stages. Early on, they may not be effective. Give them the time and support necessary to get better at their job, just as individuals do. When the teams begin to function at a higher level, move the bar of assessment higher.
2 design your Teams
Forming teams requires thoughtful planning before a project is launched. In general, PBL teachers have to decide how many teams will work on the project and who will be on each team. The best approach is to think carefully about the end of the project. What will teams present? To what audience? What products can they produce, and how can each team contribute to answering the Driving Question? Remember that the more complex the challenge, the easier it will be to assign rich tasks to each team.
Other issues will arise. Keep in mind these helpful guidelines:
• Determine�the�number�and�size�of�teams�by�the�complexity�of�the�project.�The content and goals of the project drive the logistics of teamwork. How many topics need investigation? How does the work naturally divide up? Teams can be composed of three or more members, but there is no magic number.
• �Vary�team�tasks.�Will teams be assigned the same task, or will each team work on a different product? Resolve this question by thinking through the culmination of the project. If all teams deliver similar findings on the same topic, projects run the risk of endless, repetitive presentations. A better route is to require teams to approach the Driving Question from different perspectives. Each team then offers a unique solu-tion, analysis, or critique.
tm0001.v1.indd 32 2/8/12 11:59 AM

Teach TeamWork 33
• �Form�expert�groups�instead�of�teams.�Often projects require initial research by expert groups, who then take on a specific topic and share their research with other class members through jigsaws or similar techniques. Expert groups can function more informally than teams.
• �Carefully�consider� team�membership.�Do you assign students to teams or let them choose? The answer: It depends. Team grouping methods vary with students’ age levels, teacher comfort and style, PBL experience, and time of year. Think in terms of a continuum: begin with selecting teams yourself, and later find a hybrid method in which students have some choice but you make the final decisions. Experiment occasionally with complete student freedom of choice, and then debrief at the end of the project. Did they make good choices?
• �Balance�the�challenge.�Team members will naturally differ in how much they con-tribute to the team. Your goal is to spur maximum participation from each student, a task that begins with making sure the team is not dominated by one or two mem-bers, or composed of too many quiet individuals. To reward individual effort, always include an individual product and grade within the team.
• �Assign�team�roles.�Teams can work well when each team member has a specific role, such as writer, researcher, test engineer, facilitator, or timekeeper. For older students with more experience in PBL, this process should evolve into a student-led activity in which students automatically divide up roles at the beginning of the proj-ect. Regardless of roles, the team should work together to create one product or result.
• �Make�collaboration�age-appropriate.�If you teach very young children, you will need to adjust your PBL methods. The concept of teams may not be appropriate for children just beginning to learn to work as a group. Let them work as a whole group and learn teamwork principles. Focusing on social skills—how to listen, how to inter-act, how to share—will serve as a foundation for future teamwork.
3 Train your Teams
Successful PBL teachers have helped evolve six core tools for teaching teamwork to stu-dents. These tools work in concert, and all six need to be incorporated into the PBL process until students have mastered teamwork. But learning to work in a team is a scaffolded activity. Use at least one tool in every project, but vary them according to the students’ grade level and experience in PBL. Once students know how to work in teams, you can focus more on assessment and less on training.
• �Contracts.�At the beginning of a project, teams should agree on operating principles and roles. They may write their own agreements, using exemplars, or use a standard agreement you provide to them.
• �Peer�collaboration�rubrics.�Training students to work in teams begins with a well- crafted rubric that describes the exact behaviors that lead to good teamwork. The rubric should be gradable and included in the final project assessment.
• Leadership� and� work� bonus� systems. Use a system of leadership rewards or
Groups focus on
process; teams focus
on achievement.
tm0001.v1.indd 33 2/8/12 11:59 AM

ParT 1. geT ready for Pbl34
bonus points to have students decide on credit for the work and to distribute grades more equitably. This method encourages assessment and critique, accountability, and team communication.
• �Protocols.�Protocols are structured communication exercises that force participants to listen attentively, reflect deeply, and respond appropriately. Protocols are useful because they teach the basics of team communication. But they also help students become more adult-like in their conversations and interactions with peers.
• Fishbowls�and�conference�space. Once students understand the importance of teams, allow them to work in private spaces or unsupervised areas. Trust, but verify. Make sure they understand their task (have them set an agenda) and can report progress (have them report to you). Slowly give them the freedom to get work done on their own.
• �Frequent�check-ins.�Use a variety of methods to track team progress and produc-tivity. Sit in on team discussions. Coach teams through difficult problems. Be alert for nonparticipants or saboteurs. Have teams develop an agenda before a work period and designate a team leader to report on the agenda at the end.
4 Use Teams to Build character, culture, and community
Good teamwork yields many benefits beyond helping students collaborate in solving a problem. In teams, students learn to listen, withhold judgment, share resources, and reflect on their personality and communication styles. Evidence shows that PBL teams help students learn empathy, appreciate diversity, and become more tolerant. They also are instrumental in making students’ social relationships outside the classroom more in-clusive. In short, teams build character and community, and the quality of teamwork in your projects will affect the culture of your classroom and campus.
To facilitate this process, use methods to foster reflection, improve peer communica-tion, explore values, and teach self-assessment and self-awareness.
• �Teach� active� or� empathic� listening� skills.� A three-minute exercise can help students distinguish between good listening and simply “waiting to respond.” This drill is the core scaffold for effective communication. Put students in pairs and have them listen to one another, then report back what they heard. Have them listen for substance and tone.
• �Stop�and�reflect�midway�through�a�project.�Without warning, stop the work of the team and ask them to do a quick check of their process. Who is talking the most? Who is not participating? Are they listening? Have students reflect on their style and contribution.
• �Have�team�members�assess�their�performance—and�each�other.�Systems for distributing points for hard work or leadership, peer discussions of team performance, and other reflective tools that encourage honest discussion will increase team ac-countability and individual self-awareness.
tm0001.v1.indd 34 2/8/12 11:59 AM

Teach TeamWork 35
5 Prepare for outliers
Teachers’ most common complaint about teams is “My students don’t want to work to-gether; they just want me to give them the information!” Too often this is the case—for one embarrassing reason: Our current education system has taught students to be passive recipients of information rather than active participants. The blame lies not with students but with adults. We designed the system.
But remedies exist. Generally, a PBL teacher will encounter two kinds of “outliers”: those who won’t work in teams and those who can’t. Each requires a different approach. Overall, in developing teams, take the long view. You may spend an entire semester or a good part of the academic year teaching students teamwork. Remember that industry spends millions of dollars each year to train employees in this exact skill.
• �Discuss� the� “why”�of�collaboration.�Cite the many inspiring examples of col-laborative work that makes a difference in the world. Help students become aware of the vast number of social and entrepreneurial networks active around the globe (use this opportunity to inspire students with ideas for projects). Bring in human-relations managers from nearby corporations.
• �Rehire�me—please! One favorite best practice is the “firing clause” in team con-tracts. The contracts include a list of commitments that students must uphold—and a list of offenses that get them fired from the team if they don’t. Either fired students work individually from that point on in the project or they can apply, using an inter-view process, to be rehired and work with another team.
• �Beware�the�high�achiever.�Group work has a bad reputation with many students and parents—and particularly with students who have mastered the art of homework, note taking, and tests. The system in place works well for them and they are reluctant to attach themselves to a group. For good reason. Too often, work and reward are not evenly divided in groups. This should never be the case in teams. Always reward individual effort in a team and carefully use rubrics and peer evaluations to capture noncontributors.
• �Respect�true�outliers.�Occasionally students will be too shy or insecure to partici-pate in a team. If you can create a safe environment, gently encourage team participa-tion and support. If not, look for creative ways to limit their role on a team.
✽ TeAchinG innovATion
motivating the facebook generation
Collaboration is now a way of life. Today’s students use social networking sites, play multi- player games online, and move in digital herds to follow media events and trends. They interact, share, and operate in groups to cooperate, coordinate, and create. Despite this
If you can explain a
concept to a teammate
and discuss it in depth,
you understand it.
tm0001.v1.indd 35 2/8/12 11:59 AM

ParT 1. geT ready for Pbl36
reality, leading educators—along with the industries that surround education—preach the mission of competition rather than collaboration.
For teachers, this dichotomy raises questions: What really motivates students? Is the Facebook generation driven by the desire to collaborate rather than compete? Since global problems require global solutions, and innovation requires collaboration, is competition the right message for young people?
With PBL, you have the opportunity to motivate students differently. Teach students to collaborate to solve important community problems. Help them transcend national borders and cooperate internationally. As students come to adulthood, addressing global challenges will be their chief goal. Projects can give them a start on that process—and they will respond enthusiastically.
An element of competition, of course, can work for you. Most students, along with adults, enjoy a contest and a challenge. But keep in mind that the origin of the compete is the Latin verb competere, which means “to come together or to strive together.” All competition involves collaboration—and vice versa.
tm0001.v1.indd 36 2/8/12 11:59 AM

tm0001.v1.indd 37 2/8/12 11:59 AM

5
Guide the inquirydistinguish Pbl from
discovery learning
1. Know Exactly What You Expect from PBL
2. Establish Benchmarks
3. Anchor Expectations
4. Manage Through Assessment
5. Make Critical Thinking Explicit
6. Bring Back Argument
7. Envision Innovative Performance
✽ Teaching Innovation: Visible Thinking
tm0001.v1.indd 38 2/8/12 11:59 AM

guide The inQuiry 39
Teaching through PBL is both an art and a craft. The art is to know
when to step aside and allow students to discover solutions or find
information on their own; the craft is to know when to provide the
tools and information students require to move the process of discov-
ery forward at a rate that meets the school schedule and your curricular
goals.
Your objective is to put the maximum responsibility for learning onto
your students. But the process cannot be open-ended. As you alternate
between guiding the inquiry process and giving students instruction, the
following steps will help you keep the process on track and productive.
1 Know Exactly What you expect from PBL
PBL has roots in constructivist learning and discovery-based methods, both of which rely on the inquiry process and students’ ability to devise solutions based on their individual perspective and thinking. But don’t confuse PBL and discovery learning. PBL is a care-ful, systematic process that uses a distinct methodology to elicit students’ best thinking, but it also sets parameters and objectives for the skills and knowledge that students are expected to acquire. In other words, PBL blends performance, creativity, and standards of intellectual quality.
The clearest statement of the three core PBL objectives comes from Dr. Fred New-man, author of Authentic Achievement: Restructuring Schools for Intellectual Quality (Jossey-Bass, 1996).
• �Construction�of�knowledge.�Students will devise a solution to a problem, create a product, or answer a complex question by drawing upon their own internal assets, thinking, and knowledge base. Ask yourself: Does the project offer students sufficient time to think through a solution to the challenge?
• �Disciplined�inquiry.�The inquiry process will take place within the specified dis-cipline. Students are expected to end the inquiry process with a product that dem-onstrates the use of prior knowledge, in-depth understanding, and elaborated com-munication. Ask yourself: Will students learn the history and facts about the topic? Ask yourself: Will they learn concepts and essential themes? Ask yourself: Will they know the vocabulary and terms appropriate to the topic?
tm0001.v1.indd 39 2/8/12 11:59 AM

ParT 1. geT ready for Pbl40
• �Value�beyond�school.�The challenge in a project can focus on a community issue or an intellectual question. Regardless, the problem must be linked to value. Ask yourself: Will students be able to tell me how their solution applies to their future or the world outside of school?
2 establish Benchmarks
A well-organized project inspires students’ confidence. Confidence leads to more fo-cused behavior and improved performance. But instead of emphasizing due dates solely for homework or tests, break the project into stages that represent steps in the solution
process. Have problem-solving deadlines by using the Project Schedule (see Planning Tools) to help students identify when prototypes and drafts are due. Allow time for preparation of final products. Consider other ways to establish benchmarks and expectations:
• �Focus�on�mastery.�Provide each student or team with a packet that contains the Project Schedule, rubrics and grading plan, project overview, and any other core doc-uments. Carefully review the packet with students. Focus on the rubrics, especially the category for mastery.
• �Share�documents,�resources,�and�materials.�Identify as many resources as you can before the project begins. Include a resource list in the project packet. Make the problem-solving process as accessible as possible to students.
• �Schedule�presentations�and�exhibitions.�Set the schedule for presentations early in the project. Expect students to be ready on the date scheduled. Do not accept requests such as “Can we go tomorrow instead? We’re not ready.” If students have a difficulty with the deadline, have them problem-solve a solution.
• �Ask�for�clarifying�questions.�After you present the project, allow time for clarify-ing questions. The purpose and outline of the project must be completely clear for students to see the problem and perform at their best.
• �Refine�the�project�plan.�If confusion or opposition arises about the project idea, consider refining the project plan before proceeding. Taking a day to improve the project will work better than continuing with a poorly planned project.
3 Anchor expectations
Anchor expectations by discussing rubrics with students. First, be sure not to make the common mistake of confusing scoring guides with rubrics. A scoring guide might award ten points for having a cover page on a report; a rubric describes the quality of the cover page. Good performance rubrics contain incisive verbs that describe specific levels of competence.
Rubrics act as playbooks,
showing students exactly what
they must do to perform.
tm0001.v1.indd 40 2/8/12 11:59 AM

guide The inQuiry 41
Think of rubrics as a training tool. They can be used to assess performance at the end of the project, but at the beginning of and during the project they act as playbooks, showing students exactly what they must do to perform.
Three core rubrics will be sufficient to train students. As projects proceed, or for students in higher grades, you may want to develop a wider variety. But start with rubrics that describe three core competencies:
• �Teamwork�and�collaboration.�A teamwork rubric describes how students inter-act, make commitments, and establish productive relationships with each other. Ad-vanced teamwork rubrics may assess more intangibles such as empathy and com- passion.
• �Presentation�and�communication.�A presentation rubric should outline the ba-sics of a front-of-the-room presentation. It may also include use of supporting media, such as PowerPoint.
• �Work�ethic.�Work ethic includes setting goals, bringing materials, staying on task, meeting deadlines, and turning in quality work.
Regardless of which rubrics you use, the key to improving student performance is to anchor the descriptive language in students’ minds.
• �Focus� your� rubrics.� When first using rubrics with students, choose one rubric per project. Train students carefully on the rubric before moving to the next. Not all skills need to be taught—or assessed—in every project. After students have been well trained on individual rubrics, the individual rubrics can be combined into one project rubric.
• �Deconstruct� the� rubrics.� Make sure students understand the vocabulary and meaning of every word in the rubric. For example, have them highlight and discuss the rubric, rewrite the rubric, and go through the rubric with a peer.
• �Anchor�the�rubrics.�If possible, provide previous student work for students to re-view and assess according to the rubric. For example, have them review a video of a presentation and evaluate it.
• �Keep�the�rubrics�visible. Give every student a copy of the rubric. Review it regu-larly. When conferring with students, use the rubric as a coaching tool, comparing their behavior to the language of the rubric.
• �Have� students� grade� themselves. At the end of the project, have them assess themselves and discuss their results in teams. Let them compare their assessments with your observations.
Elementary students require grade-level appropriate rubrics. For very young students, use rubrics with visuals, such as smiley faces. Add brief descriptors as students go into higher grades. Focus on basic social skills that are age- and grade-level appropriate.
tm0001.v1.indd 41 2/8/12 11:59 AM

ParT 1. geT ready for Pbl42
4 Manage Through Assessment
PBL values growth through a problem-solving process in which students demonstrate mastery in two ways: (1) clearly elaborating the steps in the process; and (2) producing a final product that illustrates the steps have been applied intelligently.
This process means that the teacher/coach’s goal is to help students manage their learning in order to meet the highest standard possible before the final assessment. Assessment in PBL becomes a tool to help students self-assess, self-correct, and self- generate solutions. Assessment starts at the beginning of a project and is carried through-out it past the final exam or presentation.
• �Make�assessments�explicit.�Take advantage of the cornerstone of human perfor-mance: People perform better when they know what is expected of them. The more clearly you describe the outcomes, grading system, and performance standards by which students will be assessed, the better they will perform.
• �Discuss�the�“why”�behind�your�assessments.�Assessing solely for content or to dispatch a grade for the university is not viable in the global age. Your goal is to help students prepare for college, career, and life. Success requires knowledge, skills and personal strengths.
• �Provide� exemplars.� Have students examine high-quality student work from the prior year (and discuss and grade it). Show videos of presentations and discuss the presentation rubric. The more students can see performance, the better they will do.
• Talk�to�students�with�the�rubrics�in�hand.�When talking with students about their current work, keep the performance standards close by. If you’re using a team-work rubric, have students measure their behavior against the rubric. Are they really listening and contributing? Reinforce expectations throughout the project.
• Use�formative�assessments�throughout�the�project.�Have a well-prepared set of formative assessments to utilize regularly, including quizzes, peer evaluations, teacher observations, or other formal and informal check-ins that reinforce the idea that PBL is a process of discovery, reflection, and production.
• �Reflect�on�performance.�The project is not over until students carefully consider their performance. Include yourself in the reviews. How did you perform as a coach?
Assessment and evaluation are commonly misperceived. See assessment as the core of the coaching process in which you help students improve performance by continuously ask-ing three questions:
• What actions can I take to help students understand key concepts, master skills, and be aware of their personal strengths and challenges?
• What “instructional attention” is necessary to help students learn?• What feedback from me will be most useful?
See evaluation as a set of questions that enables you to decide the level and quality of student performance.
tm0001.v1.indd 42 2/8/12 11:59 AM
guide The inQuiry 43
• What evidence will be necessary to demonstrate the quality of the products?• What evidence will be necessary to judge the quality of the process? • How will I know if teams have performed well? • How will I know if individuals have performed well?• Which tools should I use for assessment?
Of course, PBL assessments must be turned into a letter grade or points at the end of a project. In that sense, PBL is no different from traditional forms of instruction. You will issue students a final grade on the project or give them several grades on different aspects of the project. But the PBL process takes place over multiple weeks and allows you numerous oppor-tunities to assess a student’s progress and give feedback. This ongoing assessment fits perfectly with best practices in assessment. The goal is to help all students get better, regardless of the point at which they begin.
For tests and quizzes, this grading is straightforward. But to give students appropri-ate feedback on skills and the process of inquiry, you will need to make adjustments. Every teacher has personal preferences when grading, but the following guidelines may be helpful.
• Align�your�grade�book�with�PBL.�Standardized grade books may not permit grad-ing for skills and personal strengths. If your grade book is not a flexible tool, you will need to create your own mechanisms for recording skills, growth over time, and other assessable pieces of a PBL project.
• �Weight� grades.� Distribute grading throughout a project rather than recording one grade at the end. This apportionment gives students an opportunity to perform in several areas as well as to demonstrate their learning through the process of the project.
• �Use�rubrics�with�a�point�scale.�Rubric language can be directly translated into a point scale by designing rubrics that link points to each column of performance. Even more, the points can be distributed within a column to give you a fine-grained tool for feedback and assessment.
See Chapter 10 for more details on building your assessment and grading projects.
5 Make critical Thinking explicit
Critical thinking is difficult to define, but the quality of the inquiry process throughout the project will be greatly determined by your ability to make your expectations about critical thinking explicit. Your goal is to create a community of thinkers who are address-ing a meaningful challenge. You can begin by sharing five criteria for critical thinking developed by Critical Thinking Consortium in Vancouver, Canada:
• Background�knowledge.�Students need information about a topic for thoughtful reflection. What do you need to teach them to help them make informed judgments?
Assessment in PBL becomes
a tool to help students
self-assess, self-correct,
and self-generate solutions.
tm0001.v1.indd 43 2/8/12 11:59 AM

ParT 1. geT ready for Pbl44
• Criteria� for� judgment.� In judging various alternatives, students need to know if judgments are accurate, plausible, fair, and feasible.
• �Critical�thinking�vocabulary.�Students need a vocabulary that enables them to make distinctions about the issues and the choices facing them. Teach terms such as inference; generalization; premise; conclusion; bias, and point of view.
• �Thinking�strategies.�Critical thinking is never a simple set of steps, but there are strategies or algorithms that can guide students. What procedures will they follow in making a decision? How will they organize their information? Can they put them-selves in another role so they consider differing points of view?
• Habits�of�mind.�These are the habits and values of a careful, conscientious thinker, such as being open-minded, fair-minded, independent, and curious. Help develop these habits in your classroom culture.
See Teaching Innovation at the end of the chapter for ideas on how to make critical think-ing visible in your classroom.
6 Bring Back Argument
The new Common Core Standards in English/language arts affirm that “argument is the soul of an education.” Argument lies at the heart of inquiry, innovation, and problem solving—and your PBL classroom should have an “argument culture” that allows time and opportunity for students to weigh and value information, resolve conflicting opinions, and propose reasonable solutions. In fact, PBL can be seen as a process devoted to de-veloping and organizing arguments to solve problems, answer questions, and seek under-standing. Argument not only makes concepts more interesting; it dramatically increases students’ ability to retain, retrieve, apply, and synthesize knowledge.
Argument and problem solving are not linear processes that fit neatly into instruc-tional modules. In PBL, you will find the project process occasionally chaotic, with ques-tions and arguments that go nowhere and seemingly solve nothing. But deeper learning often lies just under the surface of chaos. This is called “thinking.” The more you coach this process, the better the results will be with your students.
One method is simply to be alert to “teachable” moments. Allow students multiple opportunities during a project to argue questions, debate pros and cons, and engage in the messy process of discovery through resolving conflicting opinions, deciding on competing facts, and coming to reasonable solutions.
7 envision innovative Performance
Inspiring students at the beginning of the project will spur a successful inquiry process. Discuss solutions to the problem or innovative ways in which students can meet the chal-lenge. Get the creative juices flowing early in the project by brainstorming, speculating, and imagining. Set the right conditions for creativity and innovation to flourish and be recognized.
tm0001.v1.indd 44 2/8/12 11:59 AM

guide The inQuiry 45
To support innovation, encourage solutions that extend beyond the curriculum by using assessment tools that invite creativity and critical thinking:
• Critical� thinking� rubric.�Use a well-crafted critical thinking rubric to describe the exact problem-solving outcomes you’re looking for. Generic rubrics, with vague language, will not be helpful.
• �Creativity�rubric.�Begin with a template of a detailed creativity rubric, and then add in your own language to describe outcomes and products from the project. As with critical thinking, a vague rubric is not helpful to you or students.
• �Breakthrough�column. Any rubric used in a project can be designed with a column that extends the learning past the Mastery or Top Performance column. Today’s stu-dents have the capacity to take learning beyond the standard curriculum and show us extraordinary work. Reward Mastery with an “A,” but reward the “breakthrough” with extra credit, praise, and public acknowledgment.
✽ TeAchinG innovATion
Visible Thinking
A good PBL coach directs argument and dialogue by using well-developed “visible think-ing” routines, such as the following core routines developed by the Harvard School of Education. These procedures can be easily incorporated into any project plan. (See the online folders—listed in the Index of Online Folders—for links.)
• What�Makes�You�Say�That? Interpretation with justification routine.• Think�Puzzle�Explore. A routine that sets the stage for deeper inquiry. • Think�Pair�Share. A routine for active reasoning and explanation.• Circle�of�Viewpoints. A routine for exploring diverse perspectives.• I�used�to�think�.�.�.�Now�I�think�.�.�. A routine for reflecting on how and why our
thinking has changed.• See�Think�Wonder.�A routine for exploring works of art and other interesting things.• Compass�Points. A routine for examining propositions.
tm0001.v1.indd 45 2/8/12 11:59 AM

6
Lead the Waybe a Pbl champion
1. Think Beyond One Project
2. Sustain PBL
3. Collaborate on Quality
4. Institute a Knowledge Management System
5. Integrate PBL into Technology
6. Go Global
✽ Teaching Innovation: Online Projects
tm0001.v1.indd 46 2/8/12 11:59 AM

lead The Way 47
PBL is still a work in progress. It encourages the skills of the future—in-
quiry, collaboration, communication, and creativity—and is designed
to expand curriculum to encompass authentic issues and topics rel-
evant to the needs of young people in a global world. It is the best method
educators have for engaging students in deciding the course of their own
learning. But PBL must continue to adapt to a changing world and a differ-
ent educational landscape.
As a PBL teacher, you have the opportunity to sustain and enhance the
evolution of PBL. This chapter suggests ways that you can become a cham-
pion for PBL and help create a new educational vision for the twenty-first
century.
1 Think Beyond one Project
Successful PBL requires a systematic, multiyear effort to be effective and sustainable. It also requires collaboration with colleagues and agreements between teachers. Recall that PBL is designed as a process that results in growth and mastery over time. Expecting mi-raculous outcomes at the end of one semester, or even one academic year, is unrealistic. Instead, plan a comprehensive, multiyear program to put PBL to work.
Thinking systematically about projects immensely improves their efficacy with students. Initially, projects should be designed to engage students in PBL, teach basic teamwork, encourage technical mastery, or measure high-performance presentations— depending on the students, time of year, and grade level. Subsequent projects should be designed for high-level challenges. This approach requires planning:
• �Agree�on�a�vision�for�your�graduates.�Whether students are exiting an elemen-tary, middle, or high school, the end result is most important. For example, in high school, what do you want your students to know and be able to do by the time they graduate? Particularly, be specific about twenty-first-century skills. What core skills should every student possess?
• �Plan� before� school� begins.� Discussing the year ahead with colleagues before school starts is a critical step in developing projects that fit the needs of your students. What kinds of skills will new students have? Do they have PBL experience? What does your team want them to learn by the end of the year? Use the items below to guide a discussion with your colleagues about PBL and your students.
tm0001.v1.indd 47 2/8/12 11:59 AM

ParT 1. geT ready for Pbl48
• What will you focus on this year?• How can projects help?• How will this program vary by grade level?• How will you open the year?• Will a big event or exhibition of skills be held at the end of the year?• What are your hopes and fears about PBL?
• �Plan�backwards.�School teams can establish benchmarks for skills and knowledge acquisition at each grade level, or plan to make certain that every student, at each grade level, participates in a variety of projects that teach and assess twenty-first-century skills.
• Use�grade-level�planning.�Teachers often have the opportunity to plan grade-level outcomes for the year. Focus the discussion on skills rather than curriculum cover-age. Identify which skills students will be taught during the coming year—and which teachers will take responsibility for the teaching.
• Plan�for�the�beginning�as�well�as�the�end. Students usually need to be trained in PBL. For example, if you are part of a ninth-grade team of teachers and will offer projects to an incoming class, those students will need explicit orientation in project expectations and teamwork.
• �Plan�the�year�in�advance.�Lay out your projects in sequence. Just as students learn more complex information later in the year, their skills should improve during the year. A good flow for skills is to emphasize self-management, teamwork, and presenta-tion skills in order. By the end of the year, students should have practiced and been assessed on key skills.
• �Plan�years�in�advance. You may have the opportunity to plan over several years. Your goal is to have students exit your school ready for the next level—or for the world. What is the profile of your ideal graduate, and how can projects help meet that goal?
• �Increase�the�skills�challenge�annually.� One year of PBL will not teach students to master twenty-first-century skills. Makes sure that students are on a constant tra-jectory toward mastery. Each year, either change the rubric to demand better perfor-mance from students or interpret the rubric more rigorously.
• �Teach�different�skills�when�projects�are�side�by�side.�If several teachers are conducting projects at the same time, with the same students, teach and assess dif-ferent skills in each project. Use a calendar to begin and end projects at different times. Too many projects at one time result in too much multitasking by students—and poorer quality at the end.
• �Consult� your� Mission� Statement.� Help your school become a mission-driven, high-performing organization by making your school Mission or Vision Statement come alive. What do you promise students and parents? How can you fulfill those promises? Are there gaps between what you state the school will do and what actually happens? Fill the gaps with PBL.
tm0001.v1.indd 48 2/8/12 11:59 AM

lead The Way 49
2 sustain PBL
Your projects cannot be better than your ability to design and facilitate high-quality PBL. Since PBL is designed to educate students for a high-performance, knowledge-driven, and skills-oriented world, you must share these qualities with them. Mainly, this occurs through the same process expected of students in a project: to assume a role of self-directed autonomy within a collaborative, creative culture.
Schools vary in their support for this role. But leadership and PBL coaching go hand in hand. The following will help you design better projects, share results with colleagues, and become a spokesperson for effective PBL.
• �Remove�misconceptions�about�PBL.�Teachers still hold misconceptions about PBL, including confusing PBL and “projects.” Help colleagues understand that PBL incorporates standards, does not require any more time than normal teaching, can be used along with many other teaching methods, and relies on rigorous accountability.
• �Share�best�practices.�Set aside time to discuss teaching methods that work in a project. Be specific about techniques that worked, and why.
• �Observe�colleagues.�The door to your classroom should be open or transparent. Visit each other during projects. Use a PBL Classroom Observation rubric to offer helpful feedback. Confer in the spirit of improvement.
• �Use�protocols.�Protocols use a simple set of norms to ensure good listening, perti-nent questions, and targeted feedback. Protocols vary for different kinds of discus-sions. But using the spirit of protocols in conversations with colleagues will help move discussions from stories about daily events in the classroom to focused examination of teaching methods and results.
• �Make�staff�presentations.�Nearly all schools hold regular staff meetings. Often these meetings, besides covering school business, offer opportunities for discussions on teaching and learning. When a project is successful, bring several students into a staff meeting to present the project, answer questions, and begin a discussion on PBL.
• �Show�the�world.�Post work on the school website, invite a local news reporter to events, or bring in industry experts to review a project.
• �Link�to�other�schools.�Find other PBL teachers with whom to share results. Have student-to-student discussions. Invite cross-school teamwork.
3 collaborate on Quality
Collaborative teams should focus relentlessly on the critical questions of student learn-ing. What outcomes do you expect from PBL? How will you know if students are learning? How will you respond and intervene if they’re not learning? How will you re-
A good flow for skills is to
emphasize self-management,
teamwork, and presentation
skills in order.
tm0001.v1.indd 49 2/8/12 11:59 AM

ParT 1. geT ready for Pbl50
spond and extend the learning when they do learn? Don’t assume that students automati-cally benefit from PBL. Your job as a PBL champion is to continuously review results, seek evidence for learning, and improve the professional practice of you and your colleagues.
• �Launch�your�project�after� a�planning�protocol.�Plan your project as well as you can, but then use a Critical Friends Protocol (see the Teaching Innovation in Chapter 8) with colleagues to review and refine it. Their ideas will make the project more effective. Gaps in projects usually result from not using the PBL methods, such as crafting a good Driving Question. Colleagues can often help pinpoint these gaps.
• Regularly�review�student�work�from�projects. Look for gaps in skills and content mastery. Examine student work using a well-defined protocol that focuses on key elements.
• �Use�classroom�visitations�to�improve�your�projects.�Use the Japanese lesson study approach to better teaching. Ask colleagues to observe your projects and PBL approach. Use a PBL classroom observation rubric or other indicators of PBL com-petencies. Debrief after the visit. What did your colleagues observe about your PBL practice?
• Go�back�to�culture. An industrial school or classroom culture is not project-friendly. If students can’t work in teams, refuse to be accountable, or remain passive learners, PBL will stall. Go back to team builders, work ethic rubrics, and other methods to build your culture before proceeding with projects.
• Get�help�from�parents�and�your�community. PBL should lead to better outcomes for students. But shifting to PBL is hard work, and results will not be instant. Share your projects and outcomes with parents and the wider community to help increase expectations, develop new insights into teaching, and encourage community-wide agreements on learning.
• Compare�results�to�the�world,�not�your�school.�A well-defined set of outcomes is in place worldwide through international comparison tests such as PISA (Pro-gramme for International Student Assessment). Try to set a world-class standard of achievement for your students. Those benchmarks, not local expectations, are the ones that matter.
• �Argue�for�quality.�As a PBL champion, you will need to “hold” the vision for PBL, which means arguing on behalf of the key elements that lead to outstanding projects. This Guide highlights many of these elements, but here is a checklist for high-quality PBL, as provided by Bob Lenz, chief executive officer of Envision Schools, a San Francisco–based educational organization that operates four successful high schools using PBL as their chief instructional method:
✓ A timeline that is short or long, ranging from a few days to several weeks, so students learn how to benchmark and manage projects of different sizes.✓ An engaging launch to hook students into taking on the project.✓ Academic rigor and alignment with standards allowing students to master content knowledge and skills, and to demonstrate or apply that knowledge.
tm0001.v1.indd 50 2/8/12 11:59 AM

lead The Way 51
✓ An inquiry into a student-friendly, provocative essential question that drives the learning. This question often drives the unit or is one of the larger questions in the discipline. For example, “Who am I?”✓ A demonstration of key knowledge and skills in which students show evidence through the product that they have mastered the standards outlined in the course map (state standards).✓ Applied learning so that students think and do something new with their knowledge or skills.✓ An authentic audience that ensures the students take the project, learning, and results seriously and present it professionally (for example, the class, students from another class, staff, parents, or professionals).✓ High-quality products or performance at the end that show the results of inquiry into a question through applied knowledge and skills (presentations, artistic rep-resentations, written and performed speeches, video documentation). A nontradi-tional product might be an added layer to a traditional product such as an essay or test; for example, students might debate after writing a research paper.✓ Student choice and creativity that empowers and inspires the students to own their own learning and engage deeply in the project.✓ Projects that tackle relevant issues and have importance beyond the classroom.✓ Exemplary models by other students, teachers, or professionals to set criteria for high-quality work and set strategies to attain them.✓ Hands-on work, such as art, technology, or processes related to the discipline.✓ Lasting learning of a deeper learning skill, idea, or way of thinking that is relevant to students’ lives and their futures, and transforms who they are as human beings.✓ Mirrors real-world work of professionals in craft, process, or skill (for example, historians, writers, mathematicians, artists).✓ Moves beyond the classroom in purpose, audience, or contribution to the community.
4 institute a Knowledge Management system
Capturing progress over time, with opportunity to reflect on project work and skill mas-tery, is a powerful tool for propelling students to better performance. This can be done using journals and folders, but many schools now employ digital knowledge manage-ment systems. These systems, available from vendors or adapted from platforms such as Moodle, allow students to review their progress and keep a record of their growth. To set up a system, you will need to consider the following:
• Capture�a�variety�of�data.�Set up a template that includes, at minimum, the grade in each project, the skills assessment, and other critical data such as work ethic and
Using the spirit of protocols in
conversations with colleagues
will help move discussions from
stories about daily events in the
classroom to focused examination
of teaching methods and results.
tm0001.v1.indd 51 2/8/12 11:59 AM

ParT 1. geT ready for Pbl52
attitudes. The goal is to develop a record that the student accesses regularly to mea-sure progress, reflect on accomplishments, and identify gaps in performance.
• �Allow�students�time�to�reflect.�Set aside regular, specific times during the year for reflection, goal setting, and peer discussion about performance. Often, these sessions can be scheduled during an advisory or homeroom period.
• �Turn�projects�into�portfolios.�A knowledge management system turns into a com-piled record of a student’s progress over a period of years. More complex systems can include videos of presentations, exemplars of student work, personal profiles, and other information that become a portfolio of work useful for defense of graduation or college admissions.
5 integrate PBL into Technology
Education came before technology, so it is natural to think of technology as an add-on to the curriculum. For example, we infuse technology into the classroom. Right now, many PBL teachers use little more than word processing and PowerPoint in proj-ects. And, to be clear, technology is not essential to PBL. But with online collab-
orative workspace expanding exponentially and hand-held tech-nologies available to most students, it will soon be impossible to do PBL without technology. How do you anticipate this de-velopment?
• �Put� tech� in� every� project.� As a PBL leader, you can help students prepare by designing and supporting projects that use tools for collaboration, communication, presentation, and problem solving. These tools take advantage of the digital knowl-edge and experiences that students bring to the classroom and offer students the use of real-world applications, as well as helping them become informed, expert digital citizens. Innovation surges forward each day—and as digital natives, students push harder than anyone. The end result is an avalanche of networks and tools that sup-port the key elements of PBL. Sites change daily (see the Index of Online Folders for the latest sites and tools). Current sites and Web 2.0 tools that support and enhance PBL include:• �Video�or�digital� images. Students use Windows Movie Maker, iMovie, Ani-
moto, or similar sites to create videos.• �Interactive�posters/presentations.�Students design presentations and posters
using Web resources such as Glogster, Flickr, Google Docs, VoiceThread, Wordle, Kerpoof, and Fluxtime.
• �Podcasts/videocasts.�Students create video or audio broadcasts using Audacity, iTunes, Garageband, Netvibes, ccMixter, or Screentoaster.
• �Slide�shows.�Students share slides and visuals using Slideshare, Slideboom, and Slideroll.
• �Collaborative� sharing.� Students collaborate on Class Wiki, Skype, Edmodo, Twitter, Class Blog, Wiggio, Stupeflix Studio, Flixtime, SchoolTube, Moodle, Ning, iPod Touch, Diigo, Delicious, YouTube, and Vimeo.
“Hold” the vision for PBL
and argue for quality.
tm0001.v1.indd 52 2/8/12 11:59 AM

lead The Way 53
• �Use�social�networking�sites.�The use of social networking sites and tools is contro-versial in the United States, but concerns over risks to students are now outweighed by benefits. Utilizing teaching techniques that incorporate social media, teachers are able to increase students’ engagement in their education, increase their technological proficiency, contribute to a greater sense of collaboration in the classroom, and build better communication skills. Keep up with cell phone applications, social networks, and interactive sites. Use these tools and experiment with them. They represent the future of education. Keep track of what works and what doesn’t. Share results with your colleagues. This knowledge base needs to grow.
Technology extends to teachers as well. New PBL practices are emerging regularly as more schools and teachers employ PBL methods. Stay abreast of best practices, contrib-ute when possible, and link to the PBL community.
• �Look�beyond�education�for�guidance.�Most of the best practices in PBL coach-ing have originated in the fields of psychology and business coaching. Regularly con-sult these resources for improving your coaching skills.
• �Access�current�PBL�resources.�Browse www.bie.org or www.edutopia.org to keep abreast of new project exemplars, hear about success stories, or find out what bloggers are saying about PBL. Use Twitter (@#PBL) to find out what the world community is doing with PBL.
• �Stay�current�about�educational�trends.�A knowledgeable teacher both contrib-utes to and benefits from the steady flow of new information about testing, methods, world-class standards, and global trends in education.
• Blog�and�contribute.�If your project is noteworthy, or you learned something about PBL that the rest of the education community should know, share it. Share on www .bie.org or the ASCD site, http://edge.ascd.org.
6 Go Global
Technology easily encircles the globe, but schools rarely use it to have students com-municate and collaborate across national boundaries and with distant parts of the world. However, more schools and districts are now focusing on global education and out-comes. Encourage your school, colleagues, and yourself to reach out and conduct global projects.
Two prominent organizations that support global projects in schools are Global School Net (www.globalschoolnet.org) and the International Education and Resource Network (www.iearn.org). How to get started? Here is a digest of suggestions from IEARN:
• Partner�with�other�teachers.�Teachers who have been successful in doing interna-tional collaborations have found that building a support community is essential. Start by building support at your local school level. For professional development, partner with several other teachers in your building who are also interested in international collaborations. Get together to reflect on how Internet skills are developing, to ask
tm0001.v1.indd 53 2/8/12 11:59 AM

ParT 1. geT ready for Pbl54
each other questions, and to give each other support. Together you can check out resources for international collaborations to enhance your curricular goals. Include your school or district support personnel in your collaborative effort so that they can provide technical assistance.
• Build� collaboration� with� other� schools.� Having several schools involved in a project ensures greater student participation and greater viability. With more than two schools involved, the project can continue even if one school drops out.
• �Start�with�a�topic�your�students�know�well.�Generating a new curricular topic isn’t always necessary to do online international collaboration. Many common topics among classrooms around the world can be the focus of local-to-global collaborations. Have your students communicate with global peers on topics they already know well
so that the content is something they are familiar with and are eager to share. Provide plenty of in-class learning experiences around the topic your class has chosen to share online so that all your students participate in the global conversations. Your students will make more meaningful contributions to their on-line collaborations if they are communicating from classroom learning that is rich in content and experience.
• Clearly� articulate� goals,� timelines,� and� expectations.� Designing projects with clearly articulated goals, timelines, and commitments from participating schools helps everyone prepare and plan for the project, generates valuable learn-ing experiences, and allows project participants to create and share valued student products.
• �Encourage�ongoing�dialogues.�When communicating online, have your students include not only the topic content they are sharing but also questions of inquiry to their global peers that invite continuing dialogues. Mentor students in appropriate content for global communication that generates positive interactions. Likewise, as they receive communication from global peers, respond with appreciation for what they are learning from one another. The purpose of local-to-global communication is to build dialogues of understanding.
• �Build�a�community�of�teachers.�A key to successful project work is developing effective relationships with other educators. Many teachers have found that as they build a community of teachers with whom they can collaborate, they continue to do projects with these same teachers. You and your global teaching peers can de-velop an ongoing collaborative community of teaching and learning. As you gain new students each year, you and your online colleagues can repeat the projects you did together in previous years and continue to build your local-to-global collaborative curricular teaching and learning expertise. By building communities of teachers and students who collaborate globally to learn within real-world contexts and issues of importance, we have the greatest hope of making this world a better and more sus-tainable place.
Most of the best practices in
PBL coaching have originated
in the fields of psychology
and business coaching.
tm0001.v1.indd 54 2/8/12 11:59 AM

lead The Way 55
✽ TeAchinG innovATion
online Projects
Technology will be essential for the next phase of PBL, when more projects take place over distance learning channels or through hybrid classrooms in which teachers mentor teams of students who conduct most of their work online. Many of these will be virtual teams, using avatars who gather in digital workspaces. Already, early data from distance projects indicate that students who use avatars adopt more positive learning habits than do onsite peers.
Can distance projects work? Absolutely. But they require the careful use of PBL tools to ensure quality and participation.
• �Coaching.�Online projects require a coach and mentor. Students are responsible for information, but they need help in organizing and applying what they know.
• �Collaboration�rubrics.�Online students must be anchored in etiquette, expecta-tions, and collaborative methods. A peer collaboration rubric adapted for a virtual environment can set the right expectations and tone for the project.
• �Performance�guidelines.�Products delivered online tend to highlight technology and can easily neglect the conventions and core knowledge associated with the topic or discipline. Create performance or project rubrics for major online projects to re-flect brick-and-mortar expectations.
tm0001.v1.indd 55 2/8/12 11:59 AM

tm0001.v1.indd 56 2/8/12 11:59 AM
PART 2
Four Steps to Powerful Projects
design
the Project
tm0001.v1.indd 57 2/8/12 11:59 AM

7
identify the challengemake the Problem meaningful
1. Begin with an Authentic, Creative Idea
2. Decide the Scope of the Challenge
3. Design an Interdisciplinary Project
4. Raise the Stakes
5. Offer Choice and Challenge
✽ Teaching Innovation: Finding Exemplars
tm0001.v1.indd 58 2/8/12 11:59 AM

idenTify The challenge 59
From this point on in the Guide, you will use the Project Design Cycle
to plan your project. You may use the online writable form or the print
version found in the back of this book.
The Project Design Cycle begins with four steps: (1) translate an idea
into a challenge; (2) turn the challenge into an assessable Driving Question;
(3) define outcomes and plan backwards; and (4) build a solid assessment
plan. Once planned, the project unfolds in three stages: (1) enroll and en-
gage; (2) facilitate the teams and collaboration; and (3) keep the end in
mind by focusing on quality products. However, planning a project is not a
linear process. All elements must fit together. Expect changes in other parts
of your plan as you move through each step.
At each stage of the design process, the Guide suggests reflective or
collaborative exercises with colleagues or students that can improve the
project plan.
1 Begin with an Authentic, creative idea
Your first goal is to design a project that matters—an authentic project that confronts issues, attacks problems, seeks solutions, and impacts the community. Authentic is a descriptor associated with terms such as real world or hands-on. In the context of PBL, authentic can be defined as “the reason to learn.” Why is this concept or idea impor-tant? Why should students and teacher spend time and energy investigating this topic or question?
• �Daydream.�Often an idea for a project will surface unexpectedly. The best projects come from ideas generated while driving a long highway on the morning commute or singing in the shower. First, think of creative ideas, and then tie the project to your standards or units of instruction.
• �Look�within�a�mile�of�school.�Problems and challenges exist everywhere. Most can be found locally, close to school, or at least in your community. Look for social ills, nature centers that need support, contested issues, or any challenge faced by lo-cal government or residents.
• �Read�the�headlines.�Stay alert for national or global issues that tie into your cur-riculum. Then plan a project around the issue.
• �Put�a�“soft�focus”�on�your�standards.�Review your standards. Why do students learn about this subject or topic? If the answer is “It’s on the test,” then don’t plan a
tm0001.v1.indd 59 2/8/12 11:59 AM

ParT 2. deSign The ProjecT60
project around it. But the powerful concepts behind most standards can help you find a theme for a project.
• Think�discipline,�not�subject.�A subject implies a set of facts; a discipline encom-passes a set of core ideas, processes, and questions centered on a particular area of life. Use the discipline approach to reach into the heart of your subject and extract the important learning that can be a basis for a project.
• ���Frame�the�idea�with�concepts�and�generalizations. Good project ideas are framed by major concepts, such as commu-nity, work, interdependence, systems, patterns, and interaction. A good project idea also fits easily into enduring understandings or essential themes. For example, a project focused on a com-munity conflict is an example of a generalization about con-cepts: Individuals and groups react to issues and events based on their values and worldviews.
• �Ask�students.�Share with students the standards they will need to learn. How do the learning objectives relate to their lives? How can they be incorporated into an authentic project?
• �Ask�yourself:�Is�a�project�necessary?�Often a problem can be solved or taught through direct instruction, an interesting activity, or a well-crafted essay. If so, use that method instead of a project. Reserve projects for the most challenging, interest-ing topics.
2 decide the scope of the challenge
Authentic problems are generally complex, hard-to-handle issues that your students can’t solve in a multiweek project. In fact, in a project, you’re more interested in the quality of student thinking and collaborating than in perfect solutions. But keeping the scope of the challenge reasonable will lead to better solutions.
When starting out, PBL teachers want to know: How big and how long should my projects be? Even for experienced teachers, the scope of the challenge is a difficult plan-ning issue.
First, the scope of the challenge varies with the size and purpose of the project. For smaller, more contained projects, the challenge may be tightly linked to a few concepts, or even a single one. Understanding the structure of cells, for example, is a typical standard in biology. Using a project to teach cell structure might take two weeks.
But learning about cell structure can be embedded in examining current scientific work on stem cells, or designing nutrients for a future spaceship, or looking at disease in a biomedical curriculum. Such work makes the project significantly more interesting to students, but it significantly increases the time required as well. A project of this scope may take three to five weeks.
Too much challenge overwhelms students and leads to unfocused, fuzzy results that are impossible to assess. Too narrow a topic does the opposite. Consider these guidelines:
An authentic project
confronts issues, attacks
problems, seeks solutions,
and impacts the community.
tm0001.v1.indd 60 2/8/12 11:59 AM

idenTify The challenge 61
• �Shift�the�focus�from�global�to�local.�If the problem is climate change, focus the project on how climate change will affect the weather in your community or local area.
• Align�the�problem�with�the�length�of�the�project.�More prescribed problems are appropriate for shorter projects. More open-ended challenges require longer projects. A “normal” timeline for a project is two to four weeks.
• Don’t�confuse�PBL�with�activities. Problem solving requires time for students to think, brainstorm, and solve. Generally, any project shorter than a week does not allow for deep problem solving.
3 design an interdisciplinary Project
A challenging project almost always crosses subject boundaries and invites a cross- disciplinary focus. At the elementary and middle school level, this approach is often pos-sible. In high schools, it is more difficult, unless your school has designed its schedule and departments to be project-friendly. If you are able to plan an interdisciplinary project, the rewards are worth it. However, plan projects involving more than one subject when it is convenient and doable. Some guidelines make this process easier:
• Limit�the�subjects.�Combine no more than two or three subjects. Schoolwide proj-ects that involve five or six different teachers may carry through a theme but rarely result in an assessable project.
• �Distinguish� an� interdisciplinary� project� from�parallel� instruction.� An in-terdisciplinary project blends content from two or more courses into a single project, uses one question to drive the project, and relies on a shared product for assessment. Parallel instruction reflects a common theme but uses separate assessments and curriculum.
• �Look�for�a�natural�fit.�Any combination of subjects can be integrated into a proj-ect, but combining subjects that fit naturally—such as math and science—is usually easier. Even easier is to make one teacher the lead, with the greater responsibilities, and use the teacher of the second subject to fill in gaps, deepen information, or teach specific skills necessary for the project’s success. For example, a history project may benefit from essay skills taught in language arts.
• �Plan�for�planning�time.�Interdisciplinary projects fail without the opportunity to collaborate. Set aside planning time during the school day.
4 Raise the stakes
Before, during, and after drafting your project plan, ask yourself a series of key questions about the project.
• Does the project center on a semi-structured question or problem that is meaningful to your students?
tm0001.v1.indd 61 2/8/12 11:59 AM

ParT 2. deSign The ProjecT62
• Do students produce something of value to society?• Does the project inspire further curiosity?• Does the project teach the competencies and encourage the personal strengths
needed in today’s world?• Does the project allow students to communicate and present their ideas to the
public?• Does the project encourage meaningful interaction between students and adults?• Does the project allow for collaboration between students and teachers?• Does the project include plans for students to reflect on their growth as learners and
people?
5 offer choice and challenge
If students are enthusiastic about the project, they will naturally generate questions and ideas of their own. Particularly, they will speculate about how the project can be made more meaningful or relevant to their interests. As part of your initial project planning, ask students how they could make the final products more useful to them or to the community.
If you’re not sure of your project idea, share it with students or colleagues and refine it using the Critical Friends Protocol (see the Teaching Innovation in Chapter 8). Filter-ing your plan through a protocol will make your project more powerful by revealing small shifts in the plan that could yield visibly better results. Have colleagues help you look for the following elements:
• �Is� this�challenge�a� “big� idea”�or�a�unit� theme?� Is the challenge meaningful to students and to the world? Are you inventing a challenge just to cover the right material?
• �Does�the�challenge�capture�a�problem,�dilemma,�or�question?�The challenge must�force students to analyze, critique, weigh, solve, and choose.
• �Does�the�challenge�encourage�enduring�understanding,�lead�to�a�meaning-ful�result,�and�have�value�beyond�school?�The challenge should be rooted in the real world, with meaning beyond school. PBL can help you get students ready for the test, but that’s not the primary goal of a challenge.
• �Does�the�challenge�require�in-depth�inquiry,�evidence,�and�analysis?�How easy or difficult will it be for students to meet the challenge? Will they have to dig a bit, persevere, and think?
• �Does�the�solution�encourage�creativity�and�construction�of�knowledge?�The opportunity to create a better solution or product in response to a challenge is a pow-erful driver of student performance.
• �Does�the�challenge�encompass�important�standards?�If the challenge is worth-while, it will show up in the standards. Look for standards that students will learn as they address the challenge.
• �Can�the�challenge�be�solved�without�using�elaborated�communication�and�the�conventions�of�the�discipline?�At the end of a project, students should be
tm0001.v1.indd 62 2/8/12 11:59 AM

idenTify The challenge 63
able to present their solutions using professional language and the core vocabulary of the discipline, as well as demonstrate that they understand the main conventions of the topic. If the challenge is too simple, it invites a yes-or-no answer, not a thorough process of discovery and mastery.
One note for elementary teachers: Very young students have difficulty distinguishing the challenge from the Driving Ques-tion. Challenges such as “How can we become better listeners?” or “How can we learn to work with each other?” serve as the Driving Question. The next chapter may not necessary to your project plan.
✽ TeAchinG innovATion
finding exemplars
The number of available project exemplars has grown considerably in the last five years, and many can be found either online or in publications. Look through exemplars for ideas on projects. Some projects will fit your needs exactly and can be duplicated; others will be sources of inspiration.
onLine LiBRARies
The Buck Institute for Education (www.bie.org) maintains an extensive resource bank for projects, searchable by grade level and subject. Often, these projects are fully docu-mented, with rubrics and teaching and learning activities outlined. This site also of-fers numerous videos of projects for all grade levels. Use the Project Search tool on the website.
The George Lucas Educational Foundation (www.edutopia.org) offers teachers an extensive video library of projects.
PUBLicATions
All publications from the Buck Institute for Education contain project examples. PBL in the Elementary Grades highlights seven sample elementary projects, while the PBL Starter Kit spotlights six examples from various grade levels. The Project Based Learning Handbook details five high school and middle school projects.
Powerful concepts behind
most standards can help you
find a theme for a project.
tm0001.v1.indd 63 2/8/12 11:59 AM

8
craft the driving Questiongive your Project a “north Star”
1. Turn the Challenge into a Question or Problem Statement
2. Reframe Concepts and Essential Questions
3. Refine the Question for Authenticity and Depth
4. Analyze the Question with Students
✽ Teaching Innovation: Protocols for “Voice and Choice”
tm0001.v1.indd 64 2/8/12 11:59 AM

crafT The driVing QueSTion 65
Moving from a meta-level idea or challenge to a Driving Question
means you must take a quantum leap in planning your project by
thinking deeply about the why of the project. This process has sev-
eral benefits. First, deciding the question forces you to analyze and clarify
your intentions for the project. Second, a crisp question focuses the project
for students, giving them direction and serving as a class management tool.
Third, and most important, a good question allows you to assess how well
students have met the challenge of the project. Because you now have an
assessable question, you have taken the primary step that distinguishes a
project from PBL.
Use a four-step process to craft your Driving Question.
1 Turn the challenge into a Question or Problem statement
Begin by reviewing the challenge or problem for the project. What question lies behind the challenge? Your first tendency may be to describe the challenge in terms of a topic, much like an essential question serves as a guide for a unit of instruction. But your goal is to phrase a powerful, interesting question that will compel students to answer it. The Driving Question should lead students to develop more than one answer. You may ap-proach this task in two ways:
• �Focus�on�a�meaningful�question�that�invites�in-depth�exploration.�Questions of this kind are useful for examining a clash of ideas, resolving philosophical differ-ences, or probing a problem.
• �Use� a� problem-based� template.� PBL grew out of problem-based learning, in which students were assigned roles and expected to solve a well-constructed problem. Problem-based learning typically uses a template for a question. Usually, the template designates specific roles for students and focuses on a clearly defined solution: How can we, as ______ (role), ______ (do, create, design, build, etc.) for/to _____ (purpose)?
A World History Example: You are planning a tenth-grade world history project focused on the Enlightenment and revolutionary thought, with an emphasis on revolu-tions in England, France, and the United States. Students will compare and contrast the Glorious Revolution of England, the American Revolution, and the French Revolution and their enduring effects worldwide on the political expectations for self-government and individual liberty.
tm0001.v1.indd 65 2/8/12 11:59 AM

ParT 2. deSign The ProjecT66
The challenge you are setting for students is to understand why revolutions occur in various societies. One of your chief goals is to engage students in history and show them that history can be a guide to the present.
Concepts embody both topics and facts. A project concentrating on the American Revolution might be organized around the concept of change. Topics might focus on a description of colonial America and the events preceding 1776. Facts might include the wording of the Declaration of Independence or the exact dates of its signing.
The ultimate goal is to have students exit the project with an en-during understanding of the events and significance of the revolution, as well as knowing that revolutions occur regularly and will most certainly happen in parts of the world in their lifetime.
The Initial Driving Question: Do revolutions always advance society?
A Science Example: You are planning a ninth-grade integrated science project fo-cused on ecology and climate change. The project’s purpose is to make students under-stand that ecology is affected by warming or cooling of the planet. You also want the project to have a local angle, so that students somehow study their own ecology. In addi-tion, you intend for the project to incorporate the following standards: (1) recognizing that biodiversity is the sum total of a region’s different organisms; (2) knowing how to analyze changes in an ecosystem; (3) comprehending how populations fluctuate; (4) knowing the water, carbon, and nitrogen cycle; (5) be familiar with the role of producers and decom-posers; and (6) understanding the energy pyramid in a food web.
The challenge is for students to realize that humans are part of the ecology, and that scientists encounter difficulties calculating the exact effects of climate change.
The Initial Driving Question: How can we use our knowledge of ecological principles to predict how climate change affects biodiversity in our local ecosystem?
An Engineering Example: You are an engineering teacher whose curriculum in-cludes creating a self-propelled boat. The purpose of the project is for students to develop a boat design and propulsion system. Students will work in teams and race their boats at the end of the project. The curriculum doesn’t include a Driving Question, but you would like to develop one. Rather than frame the challenge around the boat design, you challenge the students to work as an effective team.
The Initial Driving Question (using a problem-based template): How can we, as a team of boat designers, use our communication and collaboration skills to design the fastest boat possible?
2 Reframe concepts and essential Questions
Concepts lend themselves to essential questions. But an essential question tends to be broad and usually needs to be rewritten as a Driving Question to make it more specific or reframe it as a problem. For example, a typical essential question from geography, such as What are the five themes of geography?, encourages a list rather than critical thinking.
A good question allows
you to assess how well
students have met the
challenge of the project.
tm0001.v1.indd 66 2/8/12 11:59 AM

crafT The driVing QueSTion 67
Reframe it so it applies to a solution: How can we use the five themes of geography to decide if our town is unique?
For biology, use a similar approach. How does studying cycles help us understand natu-ral processes? can be turned into a Driving Question that invites direct assessment: How can our understanding of photosynthesis help us analyze the level of carbon dioxide in the atmosphere?
3 Refine the Question for Authenticity and depth
Note that the above section refers to the initial Driving Question. Teachers typically stop at this point and begin planning. But I strongly urge you not to accept the first draft of your question. It can be vastly improved through a refinement process.
This process is designed to deepen your thinking about the question and reach that “quantum leap.” It works best in a collaborative environment, with feedback from col-leagues. Revising also helps you shift the question from a knowing question to a feeling question that invites more engagement from students. Here are illustrations of the pro-cess, with guidelines that may help:
• Avoid simple yes-or-no questions.Was the lunar landing a hoax? How can we use scientific evidence to determine if the lunar landing was a hoax?
• Move from “what” to “how.” What services are available in the library? How can we create a web page that helps ninth graders use the library effectively?
• Dig down for the real question. What can we learn from the 1930s? How important is self-reliance in today’s world?
• Look for big themes relevant to today’s world. How did the novel Night deepen your understanding of the Holocaust? How do we avoid genocide in the twenty-first century?
• Turn the question from “knowing” to “doing.” What qualities did the first five presidents of the United States possess? How can we use our knowledge of the first five presidents to become more informed voters in the 2020 presidential election?
• Stay local. How do rivers influence the settlement and culture of populations? How has the Monongahela River influenced the settlement of Morgantown?
• Critically analyze a local issue. Be concrete. What is our community? How do our family, school, and town make us part of a community?
4 Analyze the Question with students
However satisfied you may be with the Driving Question, what matters most is if students understand and feel engaged in answering it. At the beginning of the project, plan time to discuss and anchor the question with students.
tm0001.v1.indd 67 2/8/12 11:59 AM
ParT 2. deSign The ProjecT68
• �Explain�the�criteria. Giving students prompts for refining the question may help. Why does it matter? How will it help us in life? Does it inspire us?
• �Use�a�protocol.�Refining the question works best in a more formal discussion. Use a protocol such as the Critical Friends Protocol (see below). This method teaches students high-level communication skills.
• �Revise�the�question,�if�necessary. Students often can make the question more interesting and meaningful. Ask for their variations. Use a second protocol to make final refinements.
• Speculate. What are possible answers to this question?
✽ TeAchinG innovATion
Protocols for “Voice and choice”
Student “voice and choice” is an essential element of PBL. PBL teachers have the op-portunity to go beyond traditional notions of student voice by engaging students in a structured dialogue that allows them to shape the quality and direction of their learning, as well as to learn communication and collaboration skills, develop habits of reflection and deeper thinking, and apply analytical reasoning to project design and outcomes. The key is to use protocols.
A protocol is a computer-age term that can be defined as a “set of procedures to be followed when communicating.” Protocols are characterized by norms that encourage
clear presentation of the issue, attentive listening, nonjudgmen-tal feedback, time to reflect, and problem-solving suggestions. Protocols can be designed to improve planning and design of a project, refine the direction of the project, assess results and outcomes, and reflect on future projects.
Typically, protocols are most powerful and effective when used within an ongoing professional learning community and
facilitated by a skilled coach. Educators have developed numerous protocols for the classroom. Most are available through the National School Reform Faculty resource site, http://www.nsrfharmony.org. The examples below have been adapted from that site.
All protocols need to be modeled and practiced several times before they are effective. Start by acting as the facilitator, then teach students how to facilitate.
As a PBL coach, consider adapting the following three protocols for use during a project.
PLAnninG The PRojecT: cRiTicAL fRiends PRoTocoL
The Critical Friends (or Tuning) Protocol was developed by the Coalition of Essential
Schools as a means of providing teachers feedback on the assessment systems they were engaged in developing, including exhibitions and portfolios. Use this process with students.
Shifting the question from
a knowing question to a
feeling question invites more
engagement from students.
tm0001.v1.indd 68 2/8/12 11:59 AM

crafT The driVing QueSTion 69
1. Introduction (up to 5 minutes)
Set up a circle of students (a maximum of twenty is best; if your class is larger, seat the other students outside the circle). Keep one chair in the circle empty so that students from the outer circle can circulate and join.
Introduce the protocol, set time limits, choose a facilitator and timekeeper, and ex-plain the protocol to students. Ask for questions and clarifications. Make sure students have nothing in their hands to distract them. Remind students what good listening looks like: eye contact, attentive expression, unfolded arms.
2. Presentation (up to 10 minutes)
Share the details of your project plan with the circle of students, including the chal-lenge, Driving Question, activities, end product, and ideas for the exhibition of work. Tell students what you intend for them to learn and how it will be accomplished. Students remain silent and listen.
3. Clarifying questions (up to 5 minutes)
Students ask you questions to get information that will help them understand the project. The facilitator should distinguish clarifying questions about facts, such as “How long is the project going to be?,” from probing or judgmental questions, such as “Isn’t this project too long?” Probing questions belong in the warm/cool feedback section. If the student facilitator has trouble here, step in.
4. Warm and cool feedback (up to 15 minutes)
Move your chair outside of the circle and remove yourself from the discussion. Remind the facilitator that all comments should be directed at members of the circle, not at you. At this point you are invisible to them.
Students share feedback with each other while you remain silent. The feedback gen-erally begins with a few minutes of warm (positive) feedback, moves on to a few minutes of cool (more critical) feedback (sometimes phrased in the form of reflective questions), and then moves back and forth between warm and cool feedback. Often students offer specific suggestions to improve the project.
Remain silent and take notes on the discussion.
5. Reflection (up to 5 minutes)
Rejoin the circle. Respond to the comments and ideas. Remember that this is not a time to defend yourself but is instead a time for you to reflect aloud on those ideas or questions that seem particularly interesting or relevant.
6. Debriefing (up to 5 minutes)
Discuss the experience with the group.
tm0001.v1.indd 69 2/8/12 11:59 AM

ParT 2. deSign The ProjecT70
UsinG TeAMs To iMPRove WoRK QUALiTy: consULTAncy
The Consultancy Protocol is typically used by a small group of teachers to engage deeply with issues and problems of teaching and learning. A teacher brings a problem, issue, or question to a group, reflects on the issue, and listens in on the discussion of other group members. Student teams can adapt this protocol by having two teams present their work samples to each other. One team presents while the other acts as the consultancy group. They then switch roles. One student from a team acts as a facilitator as well as a partici-pant in the discussion. The facilitator changes when the teams switch roles.
1. Assign roles
Students agree on presenters and work sample to be discussed. Have students choose a facilitator and timekeeper.
2. Provide an overview of the work (up to 5 minutes)
The presenters give a quick overview of the team work sample, highlight the major issues or concerns, and frame a question for the consultancy group to consider. The framing of this question, as well as the quality of the presenters’ reflection on the work and related issues, are key features of this protocol. Practice is required.
3. The consultancy group examines the work (up to 5 minutes)
4. The consultancy group asks clarifying questions (up to 5 minutes)
Clarifying questions should be framed to have brief, factual answers.
5. The consultancy group asks probing questions (up to 10 minutes)
These questions should be worded so that they help the presenting team clarify and expand their thinking. The goal here is for the presenting team to learn more about the question that was framed or to do some analysis of the issue presented. The presenting team responds to the consultancy group’s questions, but there is no discussion by the larger group of the presenters’ responses.
6. The consultancy group discusses the presenting
team’s work (up to 15 minutes)
Group members talk among themselves about the work and related issues. What did we hear? What didn’t we hear that we need to know more about? What do we think about the question and issue(s) presented? Some groups like to begin the conversation with warm feedback, answering questions such as “What are the good points about this work?” or “What’s the good news here?”
The group then moves on to cooler feedback, addressing such issues as “Where are the gaps?” or “What areas need further improvement or investigation?” Sometimes the group will raise questions for the presenting team to consider, such as “What would happen if . . .?” or “Why. . .?”). The presenting team is not allowed to speak during this discussion but instead listens and takes notes.
tm0001.v1.indd 70 2/8/12 11:59 AM

crafT The driVing QueSTion 71
7. The presenting team responds (up to 10 minutes)
A whole group discussion might take place, depending on the time allotted.
AT The end of The PRojecT: The sUccess AnALysis PRoTocoL
The Success Analysis Protocol provides students a self-assessment tool, intended to gen-erate new insights and deepen student investment in their own work. Working in triads, a student presents his or her best work to two other classmates or members of the team, who then look at the work to identify the qualities that contribute to making it the “best work.”
1. Prepare for the protocol (up to 10 minutes)
Each student in the triad chooses a sample of his or her best work and reflects on and writes a short description of a “Best Practice” that made the work successful. What is it about the practice that made the work so successful? How does this work differ from other work in the past?
2. Set up roles
This protocol requires a timekeeper and a facilitator. The facilitator’s role is to help the triad stay focused on analyzing the “Best Practices” in the work sample. “Best Practice” is defined as a process that proved to be highly effective in achieving the intended outcome.
3. Share the work (up to 30 minutes per student)
One student shares a “Best Practice” and why it was so successful. The remaining two members of the group ask clarifying questions. (up to 10 minutes)
The two listening members of the group analyze the presenter’s success and offer insights about how this practice differs from other practices. Probing questions are ap-propriate, and the presenter is encouraged to participate in the conversation. (up to 10 minutes)
The presenting student responds to the group’s analysis of what made this experience so successful. (up to 10 minutes)
4. Take a moment to celebrate the success of the presenter
(up to 2 minutes)
5. Take turns
Each of the other members of the group takes turns sharing a “Best Practice” and what made it so successful, followed by clarifying questions and group discussion analyzing how the practice differs from other practices.
6. Debrief the protocol as a whole group (up to 5 minutes)
Pose questions to encourage discussion: What worked well? How might we apply what we learned to other work? What adaptations to this protocol might improve the process?
tm0001.v1.indd 71 2/8/12 11:59 AM

9
start with Resultsbring the Project into focus
1. Imagine a Dramatic End
2. Empower Your Teams
3. Create a Teaching Plan
4. Design Concepts into the Plan
5. Prune the Project
✽ Teaching Innovation: Global-Age Skills
tm0001.v1.indd 72 2/8/12 11:59 AM

STarT WiTh reSulTS 73
Identifying the challenge and writing a Driving Question are the first steps
in project planning. At this point, you may find yourself thinking, “Now
what?” The answer to that question comes by quickly pivoting to the end
of the project. What will students do to exhibit their findings, demonstrate
mastery of concepts, and present solutions to the problem or challenge?
This pause before planning the teaching and learning activities helps you es-
tablish a clear vision of what you expect from students. The more powerful
and imaginative your vision for the end, the more impressive and satisfying
the project will be.
1 imagine a dramatic end
Not all projects end with fireworks and rock-star festivities. But all projects should end with products that students present publicly to an audience outside the classroom. In PBL, you, as the teacher, are the audience of last resort.
The public product can range from posters hung in a hallway to a gathering of parents and other adults who view presentations from students, ask questions, and interact with student teams. Your goal is to have students design and deliver high-quality, relevant work to an audience. To reach that goal, follow these steps:
• �Choose�an�audience.�An authentic audience improves performance; the teacher as audience does the reverse. Plan for the highest-stakes audience possible. Can you bring in experts or guest panelists to serve as judges? Can students present their work outside of school?
• �Create�a�high-stakes�exhibition. Large-scale projects often culminate in a presen-tation of learning or exhibition that involves community members, business represen-tatives, and parents. Such high-visibility presentations make a game-changing impact on students. Although they require practice and logistics planning, they change stu-dent perceptions and expectations about learning and invite them to work harder in the future.
• �Decide�on�a�public�product.�If a performance is not possible, think, “How do I get students’ work out there?” Post products on websites or in the hallways. Present at lunchtime in the cafeteria or in another class. Go to the elementary school down the block.
• �Envision�success.�Use your imagination to see the outcome of the project. How will students behave, speak, and perform?
tm0001.v1.indd 73 2/8/12 11:59 AM

ParT 2. deSign The ProjecT74
2 empower your Teams
Skills and content receive equal billing in projects, but PBL teachers know that teamwork is decisive. Students who work well in teams will learn more, bring more rigor to exam preparation, and be more prepared for presentations. The more skillful your teams, the more responsibility and work they can carry.
Read Chapter 12 for more tips on using teams effectively. In your initial project plan-ning, consider the following guidelines.
• Coach�the�teams.�Once you have identified the audience and the product, analyze your teams. What do students need to know? What do they need to be able to do? How will you encourage high-level performance? Using both observation and dis-cussion with students, catalogue their skill deficiencies. Do they need to be more empathetic, become better listeners, or learn the finer points of team leadership? Younger students often need help in self-management, such as meeting deadlines and following through on commitments. Older students need to learn facilitation, project management, and brainstorming skills.
• Clarify�the�task.�Introduce the concepts and overall tasks to the teams. Have them thoroughly discuss the why of the project and help them articulate its context. You may choose to have students produce a product early in the process that demonstrates they understand their mission.
• �Rewrite�your�collaboration�rubric.� If necessary, analyze and rewrite your col-laboration rubric to identify specific behaviors and teamwork skills you would like to emphasize in the project.
• �Make�collaboration�your�ally.�Teamwork is not just a way to get along; it’s a means to brainstorm solutions and perfect products. The more your students collaborate in high-performance teams, the better the project. Use teams to reflect on prog-ress, critique products, offer solutions for refinement, and develop team standards for achievement.
3 create a Teaching Plan
Although teachers are well trained in delivering content, PBL requires a different kind of delivery. Rather than spending the bulk of your time at the front of the room covering content, as a PBL teacher you facilitate the learning of content. At the same time, certain topics cannot be learned without direct instruction from a teacher. In your project, you will need to find a balance. Err on the side of less delivery and more learning.
• Identify� the� key� standards� to� be� taught.� Choose no more than three to five standards, depending on the length of the project. You goal is to go deep, so keep the list short.
• Imagine�the�project�flow.�Projects have a rhythm, beginning with students’ initial work to engage themselves in the Driving Question and learn the basic information
tm0001.v1.indd 74 2/8/12 11:59 AM

STarT WiTh reSulTS 75
necessary to answer the question. The early part of the project will involve more re-search and direct instruction; later in the project, teams will work on solutions and preparing their products.
• �Plan� for�direct� instruction. Lectures and front-of-the-room teaching work well in a project as long as they are balanced with dynamic, student-based activities and teamwork. Anticipate sections of the project in which direct instruction is appropri-ate.
• Prepare�for�critical�content. Remember information gaps that you may need to fill through textbook reading, worksheets, lectures, test preparations, or similar methods.
Review the Project Schedule form found in Planning Tools at the back of this book. Notice that it includes core content as well as process. Your goal is to develop a teaching plan that interweaves core concepts in a carefully scaffolded set of activities and ma-terials to culminate in coherent end products that blend content and skills. Keep in mind the following points.
• Time.�Allocate sufficient time for team collaboration, extended work periods, skills training, peer feedback and reflection, and presentation practice.
• �Formative� assessment.� Schedule in time to check for understanding as well as team growth and performance. Interventions require time, as does group feedback.
• �Structure.�Decide when teams or expert groups do the work—and when you do the work at the front of the room. Organize students as research groups that investigate aspects of a topic and then contribute to the overall solution, or as teams that focus on the overall question. If the project is long enough, research groups can present findings to the class and new teams can be formed to answer the Driving Question.
• �Documents�and�tools.�Prepare all vital documents, technology tools, rubrics, and handouts ahead of the project and make them available to students.
• �Facilitation.�Allow time for meeting with team leaders, mentoring teams, and hear-ing progress reports to monitor the quality of work being produced.
• �Experts�and�guest�artists.�Schedule site visits, field trips, training and consulta-tion from outside experts, or classroom visits by guest artists from the community.
• �Critical�content.�In addition to normal scaffolding of topics, concepts, and stan-dards, plan time for in-class workshops, peer tutoring, or other mechanisms for learn-ing factual or foundational information necessary to succeed in the project.
• Presentations.�Plan for top presentation performance by analyzing and breaking down the tasks into a series of steps. Decide which steps need to be taught, practiced, or refined. Schedule time for peer-to-peer practice. Have students evaluate one an-other against a presentation rubric. Allow class time for rehearsal.
• �Artwork,�PowerPoint,�and�public�documents.�Specify the requirements for any visual product, using a rubric if available. Create deadlines and collect drafts ahead of presentations. Have students revise and edit all displays. Require that posters be well drawn with no misspellings. Allow time for PowerPoint documents to be revised before presentations. Emphasize that public documents, such as web pages, need to be edited before posting.
The more skillful your teams,
the more responsibility and
work they can carry.
tm0001.v1.indd 75 2/8/12 11:59 AM

ParT 2. deSign The ProjecT76
4 design concepts into the Plan
Curriculum is generally organized as a series of topics, which often leads to a default method for planning instruction: List the topics to be covered. In PBL, teaching topics and critical content is insufficient, and most likely you will have to refocus on concepts to complete your teaching plan.
The first step is to be clear on the concepts and essential understandings you have identified for the project. What big ideas frame the project? What core understandings will students have at the end of the project?
Once you have answered those questions, you need to establish a thread of instruction that pulls students through the process of going deeper.
• �Frame�each�stage�of�the�project�with�a�sub-question.�Each week, start with a sub-question that supplements the Driving Question or serves as a prompt for think-ing or reflection. At the end of the week, check for understanding.
• �Relate� the� topics� to� the� larger� purpose� or� context.� When teaching topics, ask students to speculate on how the information contributes to understanding the concept.
• �Give�regular�open-ended�assignments.�Use brief journal entries, short essays, or reflective exercises to remind students of the concepts.
• �Assign�a�problem�log�or�idea�journal�to�be�kept�throughout�the�project.�Have students reflect regularly on their knowledge of the topics and understanding of the concept. Use peer discussions to share ideas.
5 Prune the Project
Projects naturally tend to sprawl. There are always more ideas than you can profitably use in a project—and more standards and ideas to be covered than you have time for. Prune the project down to essentials by letting go of extraneous ideas. If necessary, use a Critical Friends Protocol to get help from colleagues.
Once you’re clear on the essentials, use a backwards planning approach to begin to scaffold core concepts, teach critical content, break down skills into steps, and design a systematic teaching schedule that leads to deeper understanding. Projects require a care-ful “pacing guide”—an exact schedule for teaching core concepts and skills. In addition, you must plan to fill gaps in critical content areas. But focus first on the learning rather than on developing a strict timetable. Think about the key aspects:
• �Results. As a PBL teacher, you are also a project manager. Smart managers begin with the results they want to achieve. They eliminate everything that doesn’t support this goal. Stay focused on a small number of core project outcomes—and let every-thing fall in place around those outcomes. Your focus in a project is threefold: skills, content, and personal strengths.
Err on the side of
less delivery and
more learning.
tm0001.v1.indd 76 2/8/12 11:59 AM

STarT WiTh reSulTS 77
• �Activities. Begin by brainstorming the fundamental teaching and learning activities you will employ to meet the outcomes. Don’t schedule them yet. Simply determine what it will take to get to the destination you have set. Carefully break down the activities into a series of lessons or mini-activities. Share ideas with colleagues, then finalize your plan.
• �Priorities.�Resist the need to teach everything. Focus on teaching basic skills, core concepts, and vital habits of mind. Distinguish levels of knowledge by deciding what is worth being familiar with, important to know, or necessary for enduring under-standing.
• �Time�estimates. The key to successful planning is to plan both work and time. De-termine which topics require big blocks of time, and which can be handled through assigned reading, worksheets, or out-of-class work. Look for ways to multitask. Offer a workshop on critical content during team time. Plan important team time while students are fresh and ready.
• �Scheduling. Describe each day’s activities in detail, rather than using a phrase or reminder.
• �Flexibility. Allow time for error, uncertainty, and reteaching. Working toward deep understanding and skills mastery is more important than covering material.
✽ TeAchinG innovATion
global-age Skills
A decade ago, educators began to compile a list of skills essential for postsecondary edu-cation, work, and citizenship in an information-based, global world. The Partnership for Twenty-First-Century Skills breaks the list into three categories:
Skills�related�to�twenty-first-century�life• Global awareness• Financial, economic, business, and entrepreneurial literacy• Civic literacy• Health and wellness awareness
Learning�and�thinking�skills• Critical thinking and problem-solving• Communication• Creativity and innovation• Collaboration• Contextual learning• Information and media literacy
Life�skills• Ethics• Accountability
tm0001.v1.indd 77 2/8/12 11:59 AM

ParT 2. deSign The ProjecT78
• Leadership• Adaptability• Personal productivity• Personal responsibility• People skills• Self-direction• Social responsibility
What is wrong with lists like this? Nothing, except how do you choose what to teach in your projects? The best approach is to familiarize yourself with the new basic skills and then focus on a limited number of skills and attitudes that your students should master. Don’t get caught up in the need to teach everything. A few skills, well learned, will make the difference in the lives of your students. Teach and assess no more than two skills per project.
tm0001.v1.indd 78 2/8/12 11:59 AM

tm0001.v1.indd 79 2/8/12 11:59 AM

10
Build the Assessmentdefine Success
1. Differentiate the Five Types of Performance
2. Choose the Right Assessment Tool
3. Score the Thinking
4. Grade the Project
5. Answer the Driving Question
✽ Teaching Innovation: Assessing Creativity
tm0001.v1.indd 80 2/8/12 11:59 AM

build The aSSeSSmenT 81
Building the assessment begins with differentiating the tasks that
will be learned in a project and targeting the assessments to match
the tasks. In PBL, the range of learning extends far beyond content
mastery. And, when using concepts, content itself can be broken down into
categories. Also, coaching and assessment go together. A well-prepared as-
sessment plan, shared with students at the beginning of the project, lets
students know how they will be judged and graded.
1 differentiate the five Types of Performance
In a project, students are expected to be actively learning in five domains. Your task is to capture each of these through some form of assessment.
• Facts.�Facts can be defined as “information that can be easily retrieved.” For exam-ple, search the Internet for the five causes of the American Civil War and the infor-mation comes back within thirty seconds. Facts may need to be learned, for general knowledge or for an exam. But the bulk of responsibility for learning facts rests with students, not with teachers. Knowledge of facts can be assessed through short-answer and multiple-choice exams or other similar instruments.
• Concepts.�Mastering concepts requires a blend of basic knowledge (knowing the conventions and vocabulary of the topic) as well as a deeper understanding of the process and context of the topic. Some concepts may be considered macro-concepts, which are large, overarching concepts that embrace a range of topics. Some are micro-concepts, which are more specific. See Section 3 of this chapter for tips on assessing concepts.
• �Skills.� Skills are specific behaviors that can be demonstrated and are the visible results of internal processes of thinking and application. It is common to confuse attitudes with skills. For example, global awareness and compassion are not skills. Assess skills through rubrics that break down behaviors into observable elements.
• �Processes.�Processes such as critical thinking, reflection, flexibility, resilience, and empathy take place internally. Judge processes by specific results (Is the student act-ing empathetically toward teammates?) or through reflective mechanisms such as journals. Grading processes is highly subjective.
• �Demonstrations.�Demonstrations are exhibitions of learning that integrate all of the above. During a presentation, students offer facts, interpret concepts, demon-strate skills, use standards-based vocabulary, and reveal their creativity and depth of thinking. Assessing demonstrations requires a holistic approach using a series of rubrics or a detailed project rubric.
tm0001.v1.indd 81 2/8/12 11:59 AM

ParT 2. deSign The ProjecT82
2 choose the Right Assessment Tool
Every project has several outcomes, and each outcome requires a different assessment tool. No single tool will give you all the information you need to determine how well a student has performed. Use tools as a set of assessments that gives you a holistic view of achievement.
A rubric for major products
This is the most challenging aspect of PBL assessment, since each major product must be evaluated against rubrics written for that unique product. The rubric language must contain precise criteria for the product and should address all important elements of the product. For example, a media piece might include criteria for (1) technology; (2) design; (3) content; (4) audience appeal; and (5) solutions to the challenge. The assessment crite-ria list for a complex product doesn’t need to be exhaustive; choose the elements that you consider most important to the project, or that will drive the best performance.
A rubric for skills
In a project, skills receive equal billing with content. Choose one or two global-age skills to teach in a project, and use a rubric to assess each skill. Review the rubrics in the Online Folders (an index of them appears at the back of this book). These can be down-loaded and adapted to your use. Keep in mind the core skills rubrics:
• Collaboration• Presentation and communication• Critical thinking• Creativity• Work ethic
Note that any of these rubrics can be elaborated or adapted to your needs. Also, you might focus on particular rubrics and revise them to suit a specific purpose. For example, if your students request too many passes during class, incorporate that into the work ethic rubric.
Core content
Address core content through traditional evaluation tools, such as tests, essays, or other common instruments. Use what is normal for your teaching style and subject, and what is appropriate for your students. Capture factual knowledge, vocabulary, and concepts.
If you choose to use standards-based grading, list the key standards in the project and decide how students will demonstrate their knowledge of each standard. This assessment also may be done through homework, essays, tests, or similar means.
Assessing conceptual-level understanding is always difficult, and you may choose to assess conceptual understanding through several channels. Key principles, generaliza-tions, and “big ideas” should be addressed in major products, teams’ conversations, class discussions, and the reflections at the end of the project. In general, seek to have students
tm0001.v1.indd 82 2/8/12 11:59 AM

build The aSSeSSmenT 83
demonstrate that they can go beyond the information given to them and show deeper understanding and critical thinking.
If you want to write rubric criteria for conceptual understanding, use verbs such as explain, exemplify, apply, justify, compare and contrast, contextualize, or generalize.
Dispositions or personal strengths
No multiple-choice methods exist for measuring personal strengths. Use qualitative methods such as journals, reflections, and observations to measure each student’s growth over time. Pick one or two habits or strengths to emphasize in every project. You may choose to include these as graded items.
Graded exhibitions
If you decide to assess and grade the final exhibition of learning, use a separate rubric that covers specific aspects of the exhibition, such as the ability to answer questions from the audience or present using technology. Many PBL teachers choose not to grade the final exhibi-tion, treating it as a celebration or culmination of the project.
Project rubrics
Instead of using separate rubrics, you may prefer to utilize one project rubric to evaluate the project. A project rubric has the advantage of capturing all the project outcomes on one sheet, making it easy to use and easy for students to understand. The disadvantage is that the language of a project rubric may be shorter and less descriptive. Use both individual skills rubrics and project rubrics, depending on whether you want to focus on particular skills or a more holistic outcome.
Typically, a project rubric includes the following:
• �Major�products.�This section describes in detail the criteria for top performance on the major products.
• Content.�Core content objectives and evaluation criteria may require two columns.• Skills.�This section may include a column for teamwork or presentations, or both.
Evaluate no more than two skills per project.• �Process.�Allocate one column to work ethic, empathy, leadership, or any other per-
sonal strength that students will focus on during the project.
3 score the Thinking
Promising students that you will teach them conceptual understanding, deeper thinking, and critical inquiry imposes a daunting responsibility: How do you assess good thinking and mastery of concepts?
The best answer is to realize that one method will not be adequate. Instead, concepts must be assessed as “a family of related abilities,” described as Six Facets of Under-standing by Grant Wiggins and Jay McTighe, authors of the Understanding by Design series (ASCD, 1998). These facets fit well into PBL and can be built into the forma-
In PBL, the range of
learning extends far
beyond content mastery.
tm0001.v1.indd 83 2/8/12 11:59 AM

ParT 2. deSign The ProjecT84
tive and summative assessment plan. As you create your assessment plan, check the following:
• Explanation.�Can students explain the why and how of an idea or phenomenon? Review your project rubrics for language in the mastery column that rewards students for full explanations, not just recitals of facts.
• Interpretation.�What does it mean? What does it matter? Students who have per-spective on a concept can tell you. Teach how to interpret through discussions on the Driving Question, responses to the weekly sub-questions, or reflective essays. Con-sider grading growth over time rather than giving one cumulative grade.
• Application.�Using the concepts in a novel or diverse context shows deep mastery. Build this facet into your descriptions of the final product, or create a Q&A column in your rubrics that requires students to answer questions that rely on their conceptual understanding.
• Perspective. The primary goal is to have students assume another point of view when considering an idea. Use the critical thinking rubric for this purpose.
• Empathy.�Empathy is the ability to get inside another person’s feelings and world-view. Use the collaboration rubric for this purpose, and include it in the final project grade. Many schools now use a rule of thumb: Ten percent of the project grade is based on teamwork.
• Self-knowledge.�The ultimate expression of conceptual thinking is the ability to recognize one’s ignorance. Teach students to probe each other’s statements and as-sertions. Peer-to-peer evaluation works well for this purpose; have them score each other.
4 Grade the Project
Assessment and evaluation overlap throughout a project. Your goal is to help students per-form at their best, give them regular feedback based on the criteria you have presented, and at the end of the project show them the final grade they have earned. Consider these tips for making the process smoother:
• �Use�rubrics�with�point�scales.�Translating a rubric score into a point total that fits into a grade book can confuse both teacher and students. Use rubrics that have points included in the columns.
• �Weigh�every�project�differently.�The only guideline: Grade skills and content, not just content alone.
• �Include�formative�grading.�Never wait until the end of the project to issue a grade. Use formative assessments along the way, and note those assessments in your grade book. Help each student develop a cumulative record of progress.
• �Grade�teams.�In industry, teams are often assessed on their group’s ability to achieve a goal. Train students to think in terms of team commitments and execution—and grade them accordingly.
tm0001.v1.indd 84 2/8/12 11:59 AM

build The aSSeSSmenT 85
• �Grade�individuals,�as�well�as�teams.�Students should always have the opportu-nity to display their own accomplishments.
• �Personalize� the�grading.�Track every student across a variety of assessments—including writing, tests, and work ethic—to determine why he or she succeeds or not. Keep assessment records for all students that clearly reveal strengths and challenges, and that give them feedback on areas for improvement.
Remember to enter all grades into the portfolio or knowledge management system you use to help students track progress over time. These entries should include much more than letter grades. Students need a rich record to reflect upon during the year or as graduation approaches.
5 Answer the driving Question
Remember that your students’ overarching goal in the project is to answer the Driving Question. Consider these three methods:
• �The� final� exhibition.� Focus the end-of-project presentations on the Driving Question.
• �Tests�and�essays.�Make one core product a test or essay focused on answering the Driving Question.
• �Post-project�reflection.�The project is not complete until students reflect on their performance after project activities end. Reflection always includes review of the Driving Question and students’ appraisal of how well they have answered the Driving Question. See the section on reflection in Chapter 13 for tips on this process.
✽ TeAchinG innovATion
assessing creativity
Can we really teach or assess creativity? That question challenges educators under increasing pressure from society to produce a new generation of problem solvers and innovators.
Why is it a challenge? Because teaching creativity—or even its close cousin, critical thinking—is not remotely similar to teaching the photosynthesis cycle or the causes of World War I. The skills of innovation and creativity can be lumped into a mysterious set of processes that human beings use to make sense of their world; they enter a dark tun-nel of confusion and reemerge with a solution. How this occurs no one knows. How we teach the process we’re not quite sure. Assessing the journey though this dark tunnel and evaluating the end product are even more difficult. Think of judging a piece of modern art. It’s that subjective.
Consider grading growth
over time rather than giving
one cumulative grade.
tm0001.v1.indd 85 2/8/12 11:59 AM
ParT 2. deSign The ProjecT86
Teaching creativity requires that we “go deep” with students rather than provide them with more information. Given that human performance is not directly teachable, it means setting up conditions under which creativity flourishes. It also means, as in the case of
the modern art example, that we may not know creativity until we see it. Such vagueness doesn’t fit well with a data-driven, standards-based accountability system.
In fact, the evolution in the mission of schools places the cur-rent system at direct odds with the future. Teaching people instead of
stuff requires educators to draw upon the fields of psychology and human performance, which consider the industrial structure and mindset as barriers to peak performance and creativity. But thoughtful educators can apply important lessons from the human perfor-mance field to the classroom.
• Speak� the� language� of� creativity.� A teacher’s attitude can spur creativity or squelch it. Research confirms that IQ is malleable, and that performance is af-fected by self-fulfilling belief systems. Students who move from a “fixed mindset” to a “growth mindset” will believe in themselves and in their creative potential. Yet in every school I visit, I hear teachers talking about who is “smart” or “gifted” or a “slow learner.” Aside from the placebo effect this conversation induces, it violates what we know about the brain: The brain is a plastic organ capable of change over a life-time—and is particularly shifting between ages five and eighteen. Sorting students by assuming who has potential and who doesn’t kills the creative urge, not to mention the damage it does to Algebra I scores (“I can’t do math—I didn’t get the math gene”).
• Emphasize�questions�and�inquiry.�Charles Leadbeater, the British futurist and educational innovator, has insights into creativity. In “Learning from the Extremes,” a recent report for Cisco Systems, he recommends that schools start “learning from challenges that people face rather than from a formal curriculum.” Teachers can ei-ther cover standards or turn them into concepts and problems to be solved. Inquiry works toward supporting the out-of-the-box thinking we need for the future.
• �Use�breakthrough�assessments. Throughout this Guide, I mention the “break-through” category on rubrics—a blank column that invites students to deliver a prod-uct that cannot be anticipated or easily defined. The breakthrough column goes be-yond the “A” category—Mastery, Commended, or a similar high-ranking indicator —and rewards innovation, creativity, and something new outside the formal cur-riculum. It’s a “show me” category. Students like it, and so do teachers. It particularly appeals to high-end students who feel current offerings are drab, and to the middling student who will not work simply for a grade but who seeks the psychic reward of creating something cool.
• �Teach�to�the�iceberg. This point is last on the list but first in importance. An un-fortunate legacy of the cognitive model that dominates education is the belief that everything important in life takes place from the neck up. But creativity originates in the deeper self and is not immediately accessible or public. In workshops, I share the iceberg model of skills developed at the Massachusetts Institute of Technology, which shows skills as the tip of the iceberg—the demonstrable, visible part. Below
Grade skills and content,
not just content alone.
tm0001.v1.indd 86 2/8/12 11:59 AM
build The aSSeSSmenT 87
the tip of the iceberg is 90 percent of the human being. Teaching creativity requires shifting our attention to the process of inner discovery, allowing students time to re-flect, brainstorm, and discuss, as well as using proven methods for getting the creative juices flowing, such as mindfulness, meditation, silence, and structured interactive exercises.
tm0001.v1.indd 87 2/8/12 11:59 AM

tm0001.v1.indd 88 2/8/12 11:59 AM
PART 3
Manage
the Process
Three Keys to Exceptional Results
tm0001.v1.indd 89 2/8/12 11:59 AM

11
enroll and engageexpect Students to do the Work
1. Set the Hook
2. Describe the Why of the Project
3. Emphasize Career Readiness
4. Refine the Driving Question—Again
✽ Teaching Innovation: Love of Learning
tm0001.v1.indd 90 2/8/12 11:59 AM

enroll and engage 91
Introducing a project is a sales event—and you are the salesperson. The
product that you want students to buy? Self-motivation. The more stu-
dents see value in the project for themselves, the easier it will be to pull
them through the project—not just push them to perform.
What is the right note for beginning a project? Project a sense of leader-
ship, organization, and certainty. Offer a project with a clear timetable, high
expectations, an engaging Driving Question, and authentic products. Do as
little talking as possible on the day the project begins. Instead, immediately
challenge students with an absorbing, relevant problem.
1 set the hook
If you have designed the project around a thoughtful, significant challenge, Day One is easy. Always assume that students want to exert themselves to solve meaningful prob-lems. Three tools will help you introduce the topic and the challenge, as well as immedi-ately draw students into the problem-solving process:
• �The� Entry� Event.� Introduce the challenge with a provocative discussion, video, guest lecture, timely article, or any other means you think will hook students into the project by stimulating their curiosity and interest.
• �The�Entry�Document.�A more formal, written mechanism, the Entry Document engages students in the project by setting forth the problem or challenge and asking students to form teams to solve it. A good Entry Document establishes clear roles and tasks for the students, generates questions, and outlines a lucid timeline and assess-ment criteria for the project.
• �The� Know/Need� to� Know� chart.� Both the Entry Event and Entry Document should raise questions in students’ minds. What do they already know? What more do they need to know to solve the problem? Start a Know/Need to Know chart to capture questions and current knowledge. Keep the chart running throughout the project and update it every few days. This tool is excellent for managing the project process and tracking student learning.
2 describe the Why of the Project
Context is crucial to learning. Discuss the goals of the project and why you believe the project is worthwhile. Ask for student input. To deepen understanding of the project, consider two other methods:
tm0001.v1.indd 91 2/8/12 11:59 AM

ParT 3. manage The ProceSS92
• �Have�students�discuss�the�project�in�a�fishbowl.�Gather a small group of stu-dents for a fishbowl discussion. Ask them to discuss the reasons and authenticity of the project while the rest of the class listens.
• �Put� the� teaching� team� in� a�fishbowl.� If you are working with other teachers on the project, discuss the project with them in a fishbowl while students listen. Project plans always contain questions, gaps, and unknowns. Giving voice to those unknowns and asking for student response is extremely powerful.
3 emphasize career Readiness
In industry, employees have defined goals: increase income; gain a promotion; increase job satisfaction. During the twentieth century, schools set a goal for students: Obtain certification through a university or technical course. But today, with job opportunities in flux, rising rates of unemployment for university graduates, and a more competitive global job market, this goal is not sufficient for students. Your job as a PBL teacher is to
prepare students for college, career, and citizenship. Together, these areas constitute career readiness.
You can use career readiness as a motivational tool by educating your students about global workforce requirements, competing school systems, and achievements of students from other countries. Let them know how other systems define a world-class education, including the following four elements:
• �Success�in�academic�courses.�Relate success in academics not to admission to the best university but to job competency. The best employees are knowledgeable and schooled.
• �Strong�generic�work�skills.�Getting to work on time, knowing how to take supervi-sion, and work ethic are key attitudes. Build work ethic and collaboration skills into your project as assessable skills.
• �Technical� competence� in� job-specific� skills.� If your curriculum permits, let students know the technical competencies required for a job. These competencies ex-tend beyond technical courses; every field has a set of technical requirements for suc-cess. For example, historians follow a set of technical protocols for research. These competencies can also be taught and assessed through projects.
• �Problem�solving. High-performing school systems teach students to ask questions, analyze, and think deeply about problems and challenges.
4 Refine the driving Question—Again
Introduce the Driving Question early in the project. Along with the Entry Event and the Know/Need to Know chart, the Driving Question provides the strong direction necessary to a fast start on the project. Most teachers introduce the Driving Question on Day One; others prefer to wait several days until the momentum of the project has been set.
Always assume that
students want to exert
themselves to solve
meaningful problems.
tm0001.v1.indd 92 2/8/12 11:59 AM

enroll and engage 93
Once you’ve introduced the Driving Question, discuss it with students and make sure they understand it. Consider other techniques:
• �Use�a�protocol�to�refine�the�question.�Offer a draft question that students refine through a protocol or structured discussion that allows them to reframe or improve the question—and thoroughly own the project.
• �Create�a�question.�The process can work in reverse: Once students understand the objectives of the project, use a process to have them draft a Driving Question. You can then refine the question as necessary.
✽ TeAchinG innovATion
love of learning
Nearly every teacher hopes to instill in students the essential values and habits of mind that make for good citizenship, fulfilling lives, and lifelong curiosity. But no one has in-vented a method for teaching love of learning. PBL, however, does offer you a unique pro-cess for fostering the fundamental qualities of character associated with love of learning.
Each of us has a personal view on character, so any list of defining qualities is incom-plete. But you have to start somewhere. In Character Strengths and Virtues: A Handbook and Classification (Oxford University Press, 2004), positive psychologists Christopher Peterson and Martin Seligman identified the most commonly accepted strengths of char-acter. Here are seven strengths that fit well with any PBL project:
• �Creativity.�The ability to produce ideas or behaviors that are recognizably original is closely tied to innovation: the ideas must be adaptable and useful to oneself or others.The PBL solution? Use the breakthrough rubric for creativity.
• �Curiosity.�Curiosity is an intrinsic desire for experience and knowledge, plus an ac-tive pursuit of challenging activities. The PBL solution? Create a challenging project focused on an engaging Driving Question.
• �Open-mindedness.� A person who possesses this strength willingly searches for evidence against favored beliefs, plans, or goals and weighs such evidence when it is available. The PBL solution? A good Driving Question requires problem solving and critical thinking—the hallmarks of open-mindedness.
• �Persistence.�Persistence is the voluntary continuation of a goal-directed activity in spite of obstacles, difficulties, or discouragement. Nothing defines a good learner more than this strength. The PBL solution? Use a work ethic rubric and have students keep journals on their abil-ity to work through difficult challenges.
• �Citizenship.�Citizenship includes social responsibility, loyalty, and teamwork. Stu-dents who learn citizenship feel a sense of obligation that includes the self but ex-tends beyond their own self-interest.
tm0001.v1.indd 93 2/8/12 11:59 AM

ParT 3. manage The ProceSS94
The PBL solution? The collaborative environment of PBL offers numerous opportunities for students to reflect on their character, measure their growth as individuals, and exhibit their character in relationship to others.
• �Empathy�and�kindness.�An empathetic person appreciates others, regardless of background, culture, gender, or similar reasons for bias. The larger strength is the ability to love and feel compassion. The PBL solution? Learning empathy and kindness begins with listening to others at-tentively, using respectful language, and supporting one another. When students work in focused teams in PBL, these attributes become evident and can be measured.
• �Hope.�This strength encompasses optimism and future-mindedness. Hope enables confidence, goal-directed actions, and high expectations. The PBL solution? Design projects that matter and help students solve important chal-lenges while they hone their skills. When reflecting on projects at the end, talk about the future. What problem do we tackle next?
tm0001.v1.indd 94 2/8/12 11:59 AM

tm0001.v1.indd 95 2/8/12 11:59 AM

12
focus on Qualitybuild collective knowledge
Through collaboration
1. Prepare the Teams
2. Insist on Norms
3. Empower Students to Coach One Another
4. Challenge the Teams
5. Value Beautiful Work
✽ Teaching Innovation: The Value of Critique
tm0001.v1.indd 96 2/8/12 11:59 AM

focuS on QualiTy 97
Once the project is under way, the focus shifts from organizing to
performing. Your ultimate goal is to have students take responsibil-
ity for the quality of their products and learn tools for reflection,
analysis, and judgment that result in peak performance and outstanding
products. In projects, this process occurs through collaboration, either us-
ing whole-group collaboration in lower grades or forming high-functioning
teams with older students.
Research in learning confirms that collaboration leads to deeper under-
standing, higher-order thinking, and better performance on complex tasks.
But the ultimate power of collaboration stems from the experience of dis-
covering solutions that cannot be found by the individual alone. Teaching
how to work together as a coherent team, in pursuit of quality or a purpose,
is one of the most profound gifts you can give to your students.
Use a set of proven best practices to encourage successful collaboration.
You may want to review Chapter 4, Teach Teamwork, before planning this
section of the project.
1 Prepare the Teams
Forming teams that will do quality work is a crucial task in the first days of the project. The earlier team members begin to work together, the more responsibility for the project they take on. Follow a step-by-step process. Allow for these steps in your Project Sched-ule (see the form at the back of this book).
• Discuss�teams�versus�groups.�Remind students of the difference between a group and a team. A team relies on each member’s commitment to one another’s success, has a well-defined purpose, and uses the combined resources of the team to produce a better product.
• Issue�guidelines.�The process of actually forming teams can be highly directive (you may choose all members beforehand), or it can be a longer process of self- selection based on interests and abilities. If you opt for the longer process, have strict guidelines in place when you introduce the project. Decide the size of teams (teams of three to five members work well, but use your best judgment), how teams will function, and the criteria that students will use to decide how teams are formed. One rule of thumb: If teams have not worked well before, take more time with the team selection and formation process.
tm0001.v1.indd 97 2/8/12 11:59 AM

ParT 3. manage The ProceSS98
• �Balance� teams.� No team exists in which every member contributes exactly the same amount of time, energy, and expertise. Humans vary—and it is your job to get the best combination of students on each team. Introduce exercises to help students identify their strengths and potential contributions, or simply assign team member-ship based on past performance, your knowledge of the students, and goals for the project.
• �Require�team�roles.�Assign roles for team members, or let students decide on their roles. Give them time to work out issues. Determining roles is a valuable lesson in negotiation and teamwork.
• �Teach�the�cycle�of�reflection�and�perfection.�Link the conversation to the ex-pectations of the work world. Establish the idea that reflection and revision lead to quality work. Consistently test teams to make sure they are moving in the direction of higher quality. Never wait until the conclusion of the project to review and assess student work.
Early in the project, introduce the concept of continuous improvement and the cycle of quality. Many variations exist in this cycle, but all contain the same basic elements. One simple version, for example, looks like this:
2 insist on norms
At the beginning of the project, set expectations and lay the foundation for smooth team functioning. Expect teams to operate by agreements and norms. At the same time, recog-nize that this process is ongoing.
Early in the project, all team members should be able to answer the following five questions:
1. What do I bring to the team?2. What are our commitments to one another?3. What differences exist between us?4. How will we operate?5. How will we know we are succeeding?
Ask
Investigate
CreateDiscuss
Reflect
tm0001.v1.indd 98 2/8/12 11:59 AM
focuS on QualiTy 99
You can take a number of actions to develop performance standards and direction:
• Help�teams�set�norms.�With younger students, this step may require more time. Teams should begin with agreements on how they will operate, speak to one another, honor their commitments, and handle breakdowns. Each time a new member joins a team (if a new student arrives, or if teams get reshuffled for any reason), the team needs to readdress their norms.
• �Approve�contracts�and�operating�documents.�Norms vary, from informal short lists of agreements to more comprehensive contract documents. If you want teams to write a longer document, allow time in the Project Schedule.
• �Reflect� on� commitments.� Have students discuss their commitments to one another’s success—and why they could fail. How will they regroup?
• �Reflect�on�strengths.�After students understand the proj-ect, have them examine and reflect on the strengths and challenges they bring to the team.
• �Review�rubrics.�Teams should review the assessments for the project so that their tasks and objectives are clear.
• �Mine� for�conflict.�Take time to discuss differences and potential personality conflicts.
• �Have�teams�identify�the�skills�necessary�for�success.�Discuss problem solving, communication, listening, objectivity, empathy, and asking for help.
• �Emphasize�first�meetings�and�initial�actions.�Start fast. Give teams a task to accomplish right away. Review results. Set a quick pace, with high expectations.
• Intervene�early.�Be ready to regroup and go back to basics if a team falls apart. Remember that introducing a new team member requires revising the norms.
• Use�positive�feedback.�Becoming a good, contributing team member takes time and maturity. Look for what students are doing right as team members. Use positive feedback to instruct other team members.
• Celebrate� success.� If a team finishes tasks early or shows signs of good perfor-mance, allow them downtime and the opportunity to celebrate.
Review the tools for teams in Chapter 4. Incorporate into your project plan the use of con-tracts, work ethic rubrics, or collaboration rubrics. These tools will enable you to gauge and direct team performance.
3 empower students to coach one Another
PBL incorporates best practices for inquiry, and these practices should be evident within teams. Are students having a sustained conversation about the quality of their work? Do they demonstrate a continuous effort to address the complexities of their task?
As teams move through the work of the project, look for opportunities for students to teach each other. A number of methods are available.
The ultimate power of
collaboration stems from the
experience of discovering
solutions that cannot be
found by the individual alone.
tm0001.v1.indd 99 2/8/12 11:59 AM

ParT 3. manage The ProceSS100
• �Make�students�answer�their�own�questions.�Instead of students forming a line to ask you a question, make sure they have first asked each of their teammates that same question.
• �Use�experts.�Instead of teaching an entire team, draw together team leaders (for ex-ample, the test engineers) and explain to them how a process or procedure will work. Their responsibility is to return to their teams and become the trainer.
• �Turn�an�open-ended,�debatable�issue�into�a�teachable�moment.�If teams are wrestling with a common issue, take time for each team to come up with their best ideas—then share with the class.
• �Ask�students�to�brainstorm�and�share.�Break teams into pairs or triads to brain-storm a difficult solution. Have them report results back to the teams.
• �Jigsaw�the�teams.�Have members of teams rotate through other teams to share solu-tions, offer ideas, or reflect on drafts and prototypes.
4 challenge the Teams
Your goal is to have teams develop a “growth mindset.” Keep them challenged. Use fresh thinking strategies. Consider the following ideas:
• Introduce�the�Driving�Question�in�the�second�week�of�the�project.� Occa-sionally, letting your students grapple with information or wrestle with an issue before you share the Driving Question with them works better. After a bit of research and thinking, they may find the question more provocative.
• �Introduce�a�twist.�In classic problem based learning, teachers introduce a “twist” or new piece of information that changes the direction or parameters of the project. Use this technique by withholding—and then disclosing—a key set of facts or conditions that forces students to rethink and replan.
• Use� “Big�Think”� tools.� Use the visible thinking routines cited in Chapter 5 or similar thinking games to stimulate argument, inquiry, and exchange. For exam-ple, in The Big Think (Hi Willow Research and Publishing, 2009), authors David Loertscher, Carol Koechlin, and Sandi Zwaan suggest that students “stretch their thinking” by asking questions:
How is ________ related to ________? What perspectives are (not) represented ________? Why is ________ important to ________? Is there another way to ________? How might ________ change in the future?
• �Use�the�“sandbox�approach.”�Encourage fun and creativity by having teams con-struct interpretive visuals, string webs to connect information, brainstorm how a concept “feels” or what it “sounds like,” build a collage of ideas, or create a short skit.
tm0001.v1.indd 100 2/8/12 11:59 AM

focuS on QualiTy 101
5 value Beautiful Work
In the work world, quality results matter. Many jobs require an understanding of the cycle of quality improvement and excellence. Allowing students to reflect and revise their work teaches this approach and leads to improved results.
• �Review�the�rubrics.�Well-written rubrics constitute the best guide for quality. Carry the rubrics with you as you work with teams; constantly bring students back to the expectations and standards contained in the rubrics. Use the rubrics as a coaching tool to improve products.
• �Grade� drafts� and� prototypes.� In the Project Schedule, establish clear due dates for drafts, prototypes, or any other products that give you a clear view of progress. Grade these products, with extensive feedback.
• �Allow�time�for�practice�for�exhibitions�or�presentations.�The bigger the audi-ence for the final presentation, the more practice students need. Allot time in the last week for peer-to-peer practice and final run-throughs under conditions as close as possible to the real event. Many students find that practicing their presentation in the hall or auditorium helps make the final product sharper.
• �Make�the�work�public. If the project does not include presentations, make sure that the core product will be posted in a public place or be viewed outside of class—or school.
• �Replan�the�final�week. As the project comes to a close, review your schedule and replan if necessary. A coach knows that flexibility is essential; always respond to changed circumstances with a revised plan to fill gaps, anticipate unexpected delays, or teach essential information that dropped out along the way.
✽ TeAchinG innovATion
The Value of critique
The phrase “doing beautiful work” was coined by Ron Berger, author of An Ethic of Excellence (Heinemann, 2003). His protocols for peer critique of student work—which results in far higher quality—has been adapted by other teachers. Consider the following adaptation.
PURPose
The purpose of the critique is to teach students particular skills. Do not use this time as an opportunity for the whole class to give a student feedback on his or her work.
cRiTiQUe RULes
• Be kind.• Be specific.• Be helpful.
Turn an open-ended,
debatable issue into
a teachable moment.
tm0001.v1.indd 101 2/8/12 11:59 AM

ParT 3. manage The ProceSS102
The PRoTocoL
1. The lesson. Think about what lesson you are trying to teach your students. After looking at a draft of student work, what big idea are students missing? What is trou-bling about the work? What next step are many of the students ready to take? List three to six skills that you want students to improve.
2. Selecting the work. Find student work that serves as great examples of what you are looking for, or else great examples of what you are not looking for. Examining merely mediocre work will not lead to helpful discussion. (If you show an example of poor work quality, use work done by students your students don’t know—and be sure no names appear on it.)
3. The critique• Give students one or two pieces of student work for in-depth critique. Examples
could include excerpts from student writing, architectural blueprints, solutions to math problems, or lab write-ups.
• Give students time to look silently at the work and think about what makes the work beautiful or where it falls short.
• Depending on age level, have students discuss in small groups.• Lead a group conversation about the work. The goal is to identify the attributes of
great work for this particular assignment. Once those attributes are identified, they need to be named in simple language so that they can be used by students. Keep in mind that your students may name other useful skills.
4. Next draft. Students now create a new draft of the assignment, incorporating the skills identified during the critique session. Let students know in advance how many drafts the assignment will require to be completed. Each draft should be somewhat different from the preceding one, to avoid student burnout. For example, students’ first draft could be a rough sketch of a storyboard. The next draft could be a detailed sketch of the storyboard. The final draft could be a high-quality storyboard utilizing materials that professionals in the field use.
tm0001.v1.indd 102 2/8/12 11:59 AM

tm0001.v1.indd 103 2/8/12 11:59 AM

13
end with Masterymake learning memorable
1. Plan for Exhibitions and Presentations
2. Reflect on Performance and Learning
3. Reteach If Necessary
✽ Teaching Innovation: Parents as Learning Partners
tm0001.v1.indd 104 2/8/12 11:59 AM

end WiTh maSTery 105
Projects can start right but end poorly. Poor endings include rushed
work for unmeetable deadlines, mediocre presentations, low-quality
products, and lack of mastery of critical content as reflected in tests.
Projects normally encounter problems in the final week; some can be
solved by quick adjustments to the schedule, but others can be avoided
by keeping the end in mind as you coach students through the project. To
a great extent, success at the end will reflect careful planning during the
project.
As with any sustained effort, key steps you take anchor the learning,
celebrate the accomplishments, and prepare for the next project.
1 Plan for exhibitions and Presentations
Big projects should have big endings, and big endings require significant preparations. If you are planning an exhibition or public presentation, know that much of the time during the last half of the project will be spent on preparing for the final event. Consider the following as you plan for the end of the project.
• Know�why�students�will�exhibit.�Be sure to scale exhibitions. Sometimes a poster presentation in the hallways is sufficient to make work public. At other times, a com-munity event is the best venue for student work. Vary exhibitions during the year ac-cording to your time and needs. One large, high-stakes presentation per school year may be sufficient.
• �Plan�according�to�the�school�calendar.�Identify an important date on the school calendar, such as Open House, when exhibition of work is particularly appropriate. Plan projects around that date.
• �Allow�for�practice�and�mastery.�Schedule sufficient practice time in the last week of the project. Have students do their last practice presentations in the same room as the final presentation. Review dress, logistics, and outcomes with students.
• �Use�an�exhibition�checklist.�Develop a comprehensive list of the tasks necessary for a successful exhibition. Assign responsibilities and due dates.
• �Have�students�do�the�planning.�Planning exhibitions teaches teamwork, logistics, and other useful skills. As the project winds down, assign a team of students to be your planning committee.
• �Showcase�PBL.�If you would like your students’ parents and community to better understand PBL, create a showcase event. Have students present work, answer ques-tions, and engage in conversation with parents and other adults about what they’ve learned—and how they like it. Invite your fellow teachers and the local press as well.
tm0001.v1.indd 105 2/8/12 11:59 AM

ParT 3. manage The ProceSS106
2 Reflect on Performance and Learning
The project does not end on the day of the presentations or the final test. On your project schedule, allot time after the final presentations for reflection. Use a formal process of your choosing—such as a survey, whole-group discussion, or reflection form—to debrief all aspects of the project. This appraisal includes your performance as well as that of students.
A two-day reflection process is preferable. On Day One, focus on the “how” of the project:
• How well did we perform?• What did we learn? • How engaged were we? • How meaningful was the project? • How clear were our goals and instructions? • How well planned was the process?• Were the evaluations fair and accurate?• Did we answer the Driving Question?
On Day Two, help students find personal meaning in the project:
• What do I/we do with this knowledge? • What new questions do I/we have?• How have I/we improved as learners? • What new skills do I/we have?• What else can I/we explore? • How am I/we different after this project?
At the end of the reflection, gather potential ideas for other projects. Even if you can’t yet plan for them, the ideas may be handy in the future. To build team spirit and enthu-siasm for another project, remember to celebrate after the end of the reflection. Use the Reflection Matrix in the Online Folders (see the index of them at the back of this book) for additional guidance.
3 Reteach if necessary
As you review the project and participate in the reflection, note any gaps in knowledge or obvious concerns about the learning. If necessary, fill the gaps by reteaching a lesson or incorporating the gaps into subsequent lessons.
tm0001.v1.indd 106 2/8/12 11:59 AM

end WiTh maSTery 107
✽ TeAchinG innovATion
Parents as learning Partners
Involving parents in projects is productive for several reasons. Projects show parents what quality learning in the twenty-first century can be. Parents enjoy seeing their children as motivated, enthusiastic students. And parents recognize that the skills taught through projects will be critical to their children’s success. PBL teachers have effectively involved parents in various ways:
• �Ask�parents�to�serve�as�judges.�Parents can sit on panels for presentations and use rubrics you provide to assess student performance.
• Use�parents� to� raise� the�stakes.�During an exhibition, have students circulate among students and ask questions. Give parents prompts before the exhibition.
• Debrief�with�parents.�Have a student-teacher-parent discussion after the project. What did parents see that they liked? What do they question? What suggestions do they have?
• Plan�with�parents.�Thinking about projects for the year ahead? Sit down with a small team of parents and plan together.
tm0001.v1.indd 107 2/8/12 11:59 AM

tm0001.v1.indd 108 2/8/12 11:59 AM

PLAnninG TooLs
Project Design Cycle Planning Form (Secondary)
Project Design Cycle Planning Form (Elementary)
Project Schedule
Index of Online Folders
tm0001.v1.indd 109 2/8/12 11:59 AM

desiGn And coAchinG GUide
Project design cycleA project planning guide for upper elementary and secondary grades
Project title: _____________________________________________________
Participants: __________________________________
__________________________________
__________________________________
__________________________________
Date: ______________ School: ______________________________________
tm0001.v1.indd 110 2/8/12 11:59 AM

idenTify The chALLenGe
The Project Design Cycle begins with an authentic challenge that asks
children to solve a real-world problem or address a meaningful issue.
Capture the challenge in the form of a Driving Question.
1. Summarize the authentic challenge in this project:
_________________________________________________________________
_________________________________________________________________
_________________________________________________________________
2. Share your ideas with a colleague. Discuss the following:
can you make the challenge more authentic and more likely to lead
to deeper learning?
review the scope of the challenge. do you need to make it more manageable?
can students refine the challenge?
Put a “soft focus” on your standards. does the challenge help students learn
the content of your course?
how could students present their solutions at the end of the project? To whom?
3. Imagine the students at the end of the project. What will they know?
How will solving the challenge add to their knowledge and lives?
tm0001.v1.indd 111 2/8/12 11:59 AM

cRAfT The dRivinG QUesTion
Draft a Driving Question for the project:
_________________________________________________________________
_________________________________________________________________
_________________________________________________________________
Discuss your draft question with colleagues. Refine and redraft the question
as necessary.
Preliminary Driving Question for the project:
_________________________________________________________________
_________________________________________________________________
_________________________________________________________________
The final Driving Question may change as you proceed in your planning.
Keep the space below blank until you complete your planning.
Final Driving Question for the project:
_________________________________________________________________
_________________________________________________________________
_________________________________________________________________
Identify methods you will use to refine the Driving Question with students.
_________________________________________________________________
_________________________________________________________________
_________________________________________________________________
tm0001.v1.indd 112 2/8/12 11:59 AM
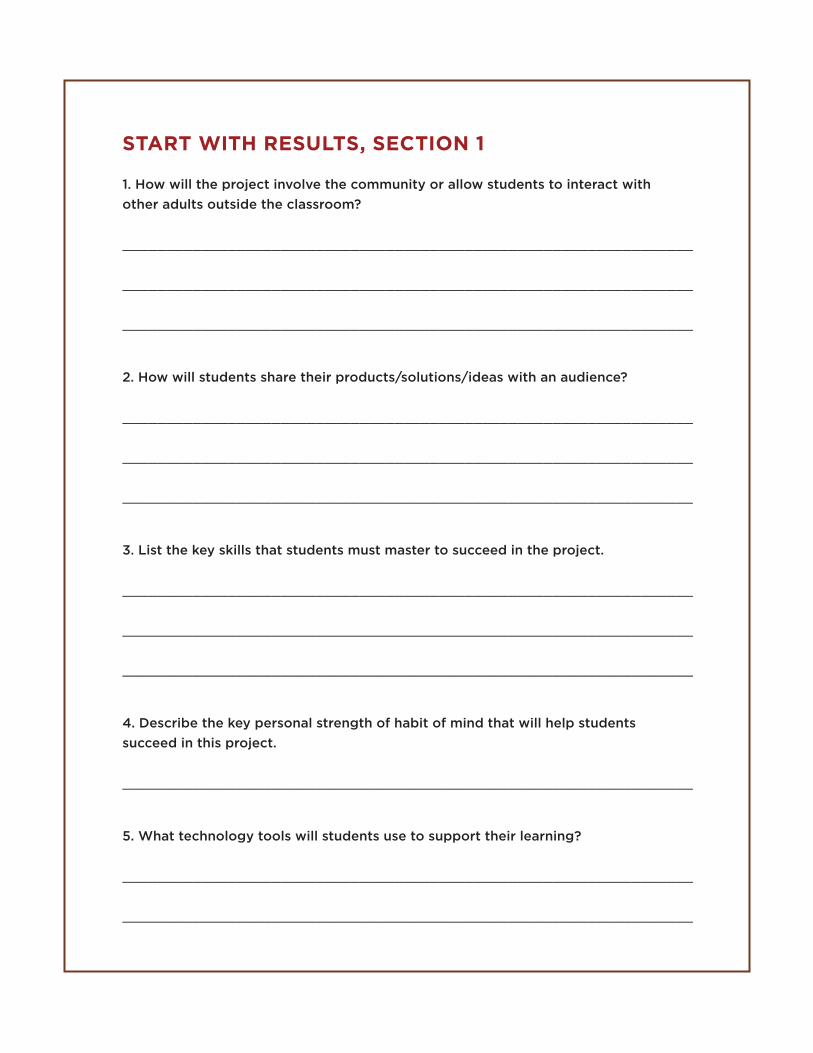
sTART WiTh ResULTs, secTion 1
1. How will the project involve the community or allow students to interact with
other adults outside the classroom?
_________________________________________________________________
_________________________________________________________________
_________________________________________________________________
2. How will students share their products/solutions/ideas with an audience?
_________________________________________________________________
_________________________________________________________________
_________________________________________________________________
3. List the key skills that students must master to succeed in the project.
_________________________________________________________________
_________________________________________________________________
_________________________________________________________________
4. Describe the key personal strength of habit of mind that will help students
succeed in this project.
_________________________________________________________________
5. What technology tools will students use to support their learning?
_________________________________________________________________
_________________________________________________________________
tm0001.v1.indd 113 2/8/12 11:59 AM

sTART WiTh ResULTs, secTion 2
1. Identify the core concepts that students will learn in the project.
_________________________________________________________________
_________________________________________________________________
_________________________________________________________________
2. List the key standards or outcomes to be learned in this project.
1) _______________________________________________________________
2) _______________________________________________________________
3) _______________________________________________________________
4) _______________________________________________________________
5) _______________________________________________________________
3. Compare your projected outcomes to required state standards. Identify
critical content gaps.
_________________________________________________________________
_________________________________________________________________
_________________________________________________________________
4. How will you evaluate personal strengths?
_________________________________________________________________
_________________________________________________________________
tm0001.v1.indd 114 2/8/12 11:59 AM

BUiLd The AssessMenT, secTion 1
Use the next two boxes to focus on evaluation and grading.
List the assessable products and skills for the project.
How will you assess each of these? What does breakthrough look like?
ProducT/comPeTency aSSeSSmenT Tool breakThrough?
major Product:
major Product:
Skill:
Skill:
Work ethic:
Personal Strength:
tm0001.v1.indd 115 2/8/12 11:59 AM

BUiLd The AssessMenT, secTion 2
If your school uses standards-based grading, create a grading matrix for each standard
that students will learn in the project. Fill in the PROFICIENT column with criteria.
STandard
1
d = 1.50–1.99
___________
2
c = 2.00–2.49
____________
3
b = 2.50–2.99
ProficienT
4
a = 3.00–4.00
____________
1.
2.
3.
4.
5.
tm0001.v1.indd 116 2/8/12 11:59 AM

BUiLd The AssessMenT, secTion 3
How will you grade the project? Assign and weigh grades for each product or skill.
Content should be no more than 50% of the final grade.
iTem grade WeighT
major Product:
major Product:
Skill:
Skill:
Work ethic:
Social Skill/Personal Strength:
content:
Total: 100%
How will students answer the Driving Question?
_________________________________________________________________
_________________________________________________________________
tm0001.v1.indd 117 2/8/12 11:59 AM

enRoLL And enGAGe
1. Plan the first two days of the project. Check tools to be used to begin the project.
Entry event _____ Handouts _____
Need to know chart _____ Rubrics _____
Contract _____ Driving Question refinement _____
Norms setup _____ Protocols _____
Project timeline _____ Team formation _____
Exemplars _____
2. Create the Entry Event for the project. Attach it to the Project Design Cycle form.
Use the next three boxes to guide the PBL process.
focUs on QUALiTy
1. How will you form teams?
_________________________________________________________________
2. List team-building/training plans:
_________________________________________________________________
_________________________________________________________________
3. How will you use revision and reflection to assure quality products?
_________________________________________________________________
_________________________________________________________________
tm0001.v1.indd 118 2/8/12 11:59 AM

end WiTh MAsTeRy
1. How will you prepare and practice for the exhibition or public event?
_________________________________________________________________
_________________________________________________________________
_________________________________________________________________
2. How will students reflect on their performance at the end of the project?
_________________________________________________________________
_________________________________________________________________
_________________________________________________________________
3. How will students celebrate their success?
_________________________________________________________________
_________________________________________________________________
_________________________________________________________________
4. Have you planned to reteach, if necessary?
5. With all of the above in mind, fill out your Project Schedule.
tm0001.v1.indd 119 2/8/12 11:59 AM

iMPRove The PRojecT
Use the Critical Friends Protocol (CFP) to share your project plan with colleagues.
Use their feedback to refine and improve the plan.
What did they like about the project?
_________________________________________________________________
_________________________________________________________________
_________________________________________________________________
_________________________________________________________________
What did they wonder about the project?
_________________________________________________________________
_________________________________________________________________
_________________________________________________________________
_________________________________________________________________
What useful suggestions/resources did they offer?
_________________________________________________________________
_________________________________________________________________
_________________________________________________________________
_________________________________________________________________
tm0001.v1.indd 120 2/8/12 11:59 AM

desiGn And coAchinG GUide
Project design cycleA project planning guide for grades K–4
Project title: _____________________________________________________
Participants: __________________________________
__________________________________
__________________________________
__________________________________
Date: ______________ School: ______________________________________
tm0001.v1.indd 121 2/8/12 11:59 AM

idenTify The chALLenGe
The Project Design Cycle begins with an authentic challenge that asks
children to solve a real-world problem or address a meaningful issue.
Capture the challenge in the form of a Driving Question.
1. Summarize the authentic challenge in this project:
_________________________________________________________________
_________________________________________________________________
_________________________________________________________________
2. Share your ideas with a colleague. Discuss the following:
can you make the challenge more authentic and more likely to lead
to deeper learning?
review the scope of the challenge. is it manageable for young children?
how could children present their solutions at the end of the project? To whom?
3. Imagine the children at the end of the project. What will they know?
What new social skills will they be able to demonstrate? How will solving the
challenge add to their knowledge and lives?
tm0001.v1.indd 122 2/8/12 11:59 AM

cRAfT The dRivinG QUesTion
Capture the challenge in the form of a Driving Question:
_________________________________________________________________
_________________________________________________________________
_________________________________________________________________
Note: For very young children, the challenge and Driving Question may be identical.
Discuss your draft question with colleagues. Refine and redraft the question as
necessary. The final Driving Question may change as you proceed in your planning.
Keep the space below blank until you complete your planning.
Final Driving Question for the project:
_________________________________________________________________
_________________________________________________________________
_________________________________________________________________
List ways that the children can help you refine the challenge or the Driving Question.
_________________________________________________________________
_________________________________________________________________
_________________________________________________________________
tm0001.v1.indd 123 2/8/12 11:59 AM

sTART WiTh ResULTs, secTion 1
1. How will the project involve the community or allow students to interact with
other adults outside the classroom?
_________________________________________________________________
_________________________________________________________________
_________________________________________________________________
2. How will children share their products/solutions/ideas with an audience?
_________________________________________________________________
_________________________________________________________________
_________________________________________________________________
3. Describe the key social and academic skills that children will learn in the project.
_________________________________________________________________
_________________________________________________________________
_________________________________________________________________
4. What technology tools will students use to support their learning?
_________________________________________________________________
_________________________________________________________________
tm0001.v1.indd 124 2/8/12 11:59 AM

sTART WiTh ResULTs, secTion 2
1. Identify the core concepts that students will learn in the project.
_________________________________________________________________
_________________________________________________________________
_________________________________________________________________
2. List the key standards or outcomes to be learned in this project.
1) _______________________________________________________________
2) _______________________________________________________________
3) _______________________________________________________________
4) _______________________________________________________________
5) _______________________________________________________________
3. Compare your projected outcomes to required state standards. Identify
critical content gaps.
_________________________________________________________________
_________________________________________________________________
_________________________________________________________________
4. How will you evaluate the social skills to be learned in the project?
_________________________________________________________________
_________________________________________________________________
tm0001.v1.indd 125 2/8/12 11:59 AM

BUiLd The AssessMenT, secTion 1
Use the next two boxes to focus on evaluation and grading.
List the assessable products and skills for the project.
How will you assess each of these? What does breakthrough look like?
ProducT/comPeTency aSSeSSmenT Tool breakThrough?
major Product:
major Product:
Skill:
Skill:
Work ethic:
Social Skill:
tm0001.v1.indd 126 2/8/12 11:59 AM

BUiLd The AssessMenT, secTion 2
If your school uses standards-based grading, create a grading matrix for each standard
that children will learn in the project. Fill in the PROFICIENT column with criteria.
STandard
1
d = 1.50–1.99
___________
2
c = 2.00–2.49
____________
3
b = 2.50–2.99
ProficienT
4
a = 3.00–4.00
____________
1.
2.
3.
4.
5.
tm0001.v1.indd 127 2/8/12 11:59 AM

BUiLd The AssessMenT, secTion 3
How will you grade the project? Assign and weigh grades for each product or skill.
Content should be no more than 50% of the final grade.
iTem grade WeighT
major Product:
major Product:
Skill:
Skill:
Work ethic:
Social Skill:
content:
Total: 100%
How will students answer the Driving Question?
_________________________________________________________________
_________________________________________________________________
tm0001.v1.indd 128 2/8/12 11:59 AM

enRoLL And enGAGe
1. Plan the first two days of the project. Check tools to be used to begin the project.
Entry event _____ Handouts _____
Need to know chart _____ Rubrics _____
Contract _____ Driving Question refinement _____
Norms setup _____ Protocols _____
Project timeline _____ Team formation _____
Exemplars _____
2. Create the Entry Event for the project. Attach it to the Project Design Cycle form.
Use the next three boxes to guide the PBL process.
focUs on QUALiTy
1. Will the project include specific ways to build collaboration?
_________________________________________________________________
_________________________________________________________________
2. How will you use revision and reflection to assure quality products?
_________________________________________________________________
_________________________________________________________________
tm0001.v1.indd 129 2/8/12 11:59 AM

end WiTh MAsTeRy
1. How will you prepare and practice for the exhibition or public event?
_________________________________________________________________
_________________________________________________________________
_________________________________________________________________
2. How will students reflect on their performance at the end of the project?
_________________________________________________________________
_________________________________________________________________
_________________________________________________________________
3. How will students celebrate their success?
_________________________________________________________________
_________________________________________________________________
_________________________________________________________________
4. Have you planned to reteach, if necessary?
5. With all of the above in mind, fill out your Project Schedule.
tm0001.v1.indd 130 2/8/12 11:59 AM

iMPRove The PRojecT
Use the Critical Friends Protocol (CFP) to share your project plan with colleagues.
Use their feedback to refine and improve the plan.
What did they like about the project?
_________________________________________________________________
_________________________________________________________________
_________________________________________________________________
_________________________________________________________________
What did they wonder about the project?
_________________________________________________________________
_________________________________________________________________
_________________________________________________________________
_________________________________________________________________
What useful suggestions/resources did they offer?
_________________________________________________________________
_________________________________________________________________
_________________________________________________________________
_________________________________________________________________
tm0001.v1.indd 131 2/8/12 11:59 AM
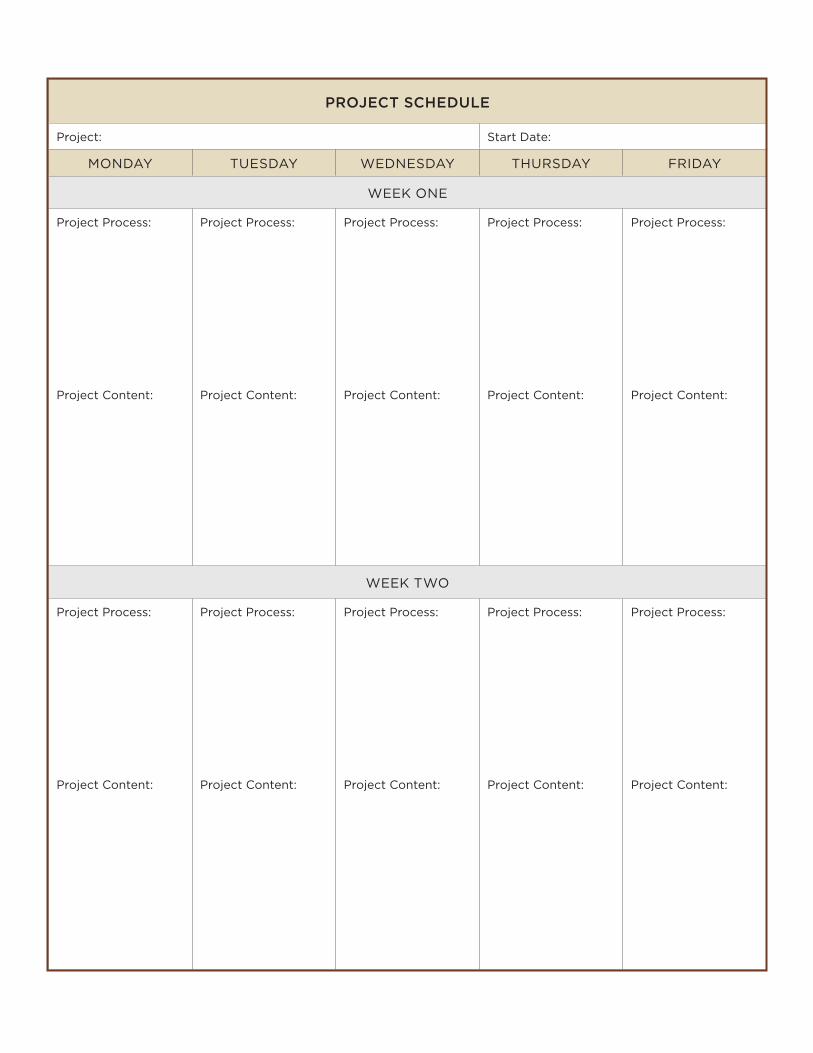
PROJECT SCHEDULE
Project: Start date:
monday TueSday WedneSday ThurSday friday
Week one
Project Process:
Project content:
Project Process:
Project content:
Project Process:
Project content:
Project Process:
Project content:
Project Process:
Project content:
Week TWo
Project Process:
Project content:
Project Process:
Project content:
Project Process:
Project content:
Project Process:
Project content:
Project Process:
Project content:
tm0001.v1.indd 132 2/8/12 11:59 AM

PROJECT SCHEDULE
Project: Start date:
monday TueSday WedneSday ThurSday friday
Week one
Project Process:
Project content:
Project Process:
Project content:
Project Process:
Project content:
Project Process:
Project content:
Project Process:
Project content:
Week TWo
Project Process:
Project content:
Project Process:
Project content:
Project Process:
Project content:
Project Process:
Project content:
Project Process:
Project content:
PROJECT SCHEDULE
Project: Start date:
monday TueSday WedneSday ThurSday friday
Week Three
Project Process:
Project content:
Project Process:
Project content:
Project Process:
Project content:
Project Process:
Project content:
Project Process:
Project content:
Week four
Project Process:
Project content:
Project Process:
Project content:
Project Process:
Project content:
Project Process:
Project content:
Project Process:
Project content:
tm0001.v1.indd 133 2/8/12 11:59 AM

PROJECT SCHEDULE
Project: Start date:
monday TueSday WedneSday ThurSday friday
Week fiVe
Project Process:
Project content:
Project Process:
Project content:
Project Process:
Project content:
Project Process:
Project content:
Project Process:
Project content:
Week Six
Project Process:
Project content:
Project Process:
Project content:
Project Process:
Project content:
Project Process:
Project content:
Project Process:
Project content:
tm0001.v1.indd 134 2/8/12 11:59 AM

PROJECT SCHEDULE
Project: Start date:
monday TueSday WedneSday ThurSday friday
Week fiVe
Project Process:
Project content:
Project Process:
Project content:
Project Process:
Project content:
Project Process:
Project content:
Project Process:
Project content:
Week Six
Project Process:
Project content:
Project Process:
Project content:
Project Process:
Project content:
Project Process:
Project content:
Project Process:
Project content:
PROJECT SCHEDULE
Project: Start date:
monday TueSday WedneSday ThurSday friday
Week SeVen
Project Process:
Project content:
Project Process:
Project content:
Project Process:
Project content:
Project Process:
Project content:
Project Process:
Project content:
Week eighT
Project Process:
Project content:
Project Process:
Project content:
Project Process:
Project content:
Project Process:
Project content:
Project Process:
Project content:
tm0001.v1.indd 135 2/8/12 11:59 AM

indeX of onLine foLdeRs
These folders and others can be accessed at www.thommarkham.com/pbltools.
Tools for Project Planning
Project design Planning forms
Project Schedule
refining a driving Question: examples and Tips
Tools for Assessment
collaboration rubrics
communication and Presentation rubrics
critical Thinking rubrics
creativity rubrics
Sample Project rubrics
Tools for Inquiry
Protocols for refining Projects
Protocols for Sustaining Pbl
The reflection matrix
Visible Thinking routines
Tools for Teams
Work ethic rubrics
rules for high-Performance collaboration
Sample contracts
Team-building activities
tm0001.v1.indd 136 2/8/12 11:59 AM