Embed Size (px)
Citation preview

Programming Scratch to Control a K’NEX Fairground Ride
Raspberry Pi and K’NEX System
K’NEX
Model
Motor
LED
Lights
PiFace
Raspberry
Pi
Switch
Speaker

Computer Control Parts
Scratch Raspberry Pi
PiFace

How does Scratch control the motor, lights and mini speakers?
Scratch
Raspberry Pi
Scratch Handler
PiFace
Switch Lights Motor
Speakers
KNEX
Model
Key =
=
Software Hardware
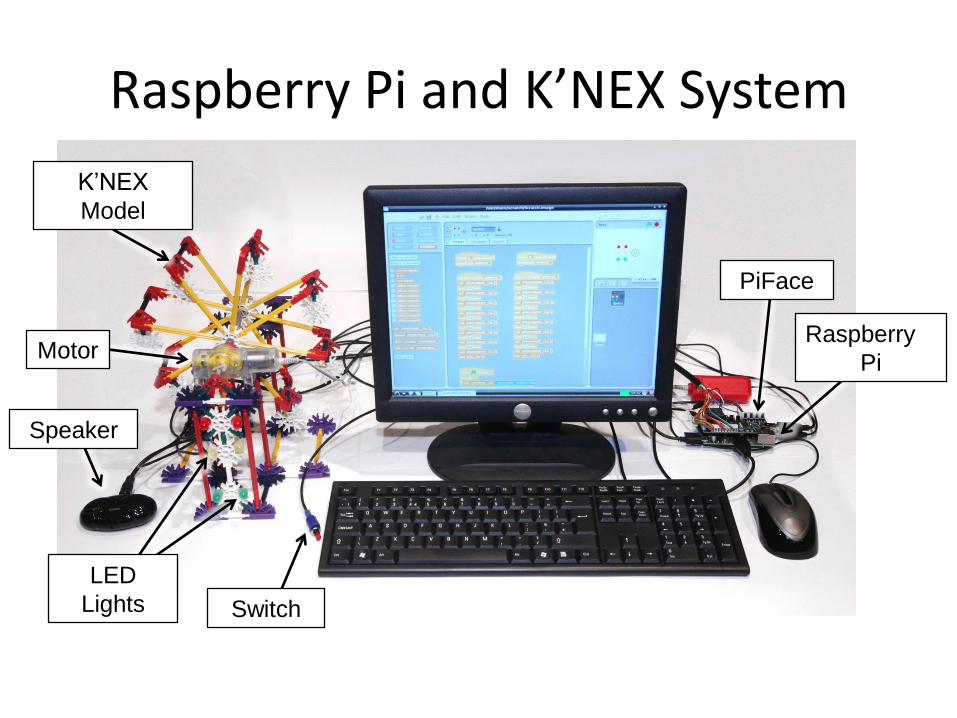
How does Scratch use the switch to control the lights and motor?
Scratch
Raspberry Pi
Scratch Handler
PiFace
Switch Lights Motor
Speakers
KNEX
Model
1. Press the switch. Scratch gets to know by a certain variable being set to 1
2. The Scratch program decides what to do and sets variables to tell the lights and motor what to do
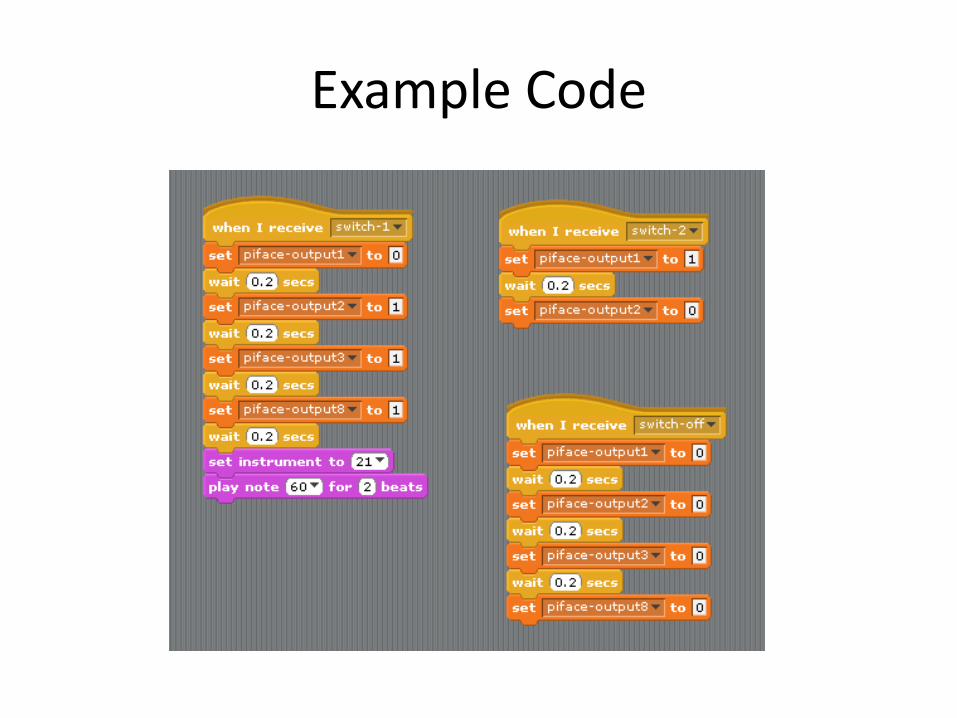
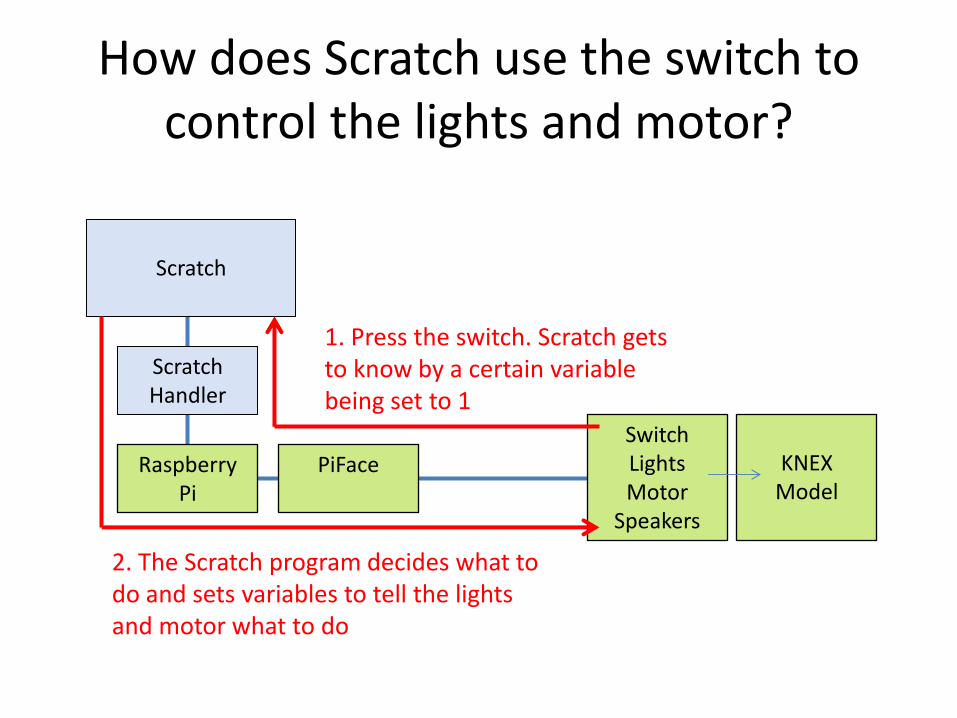
Example Code
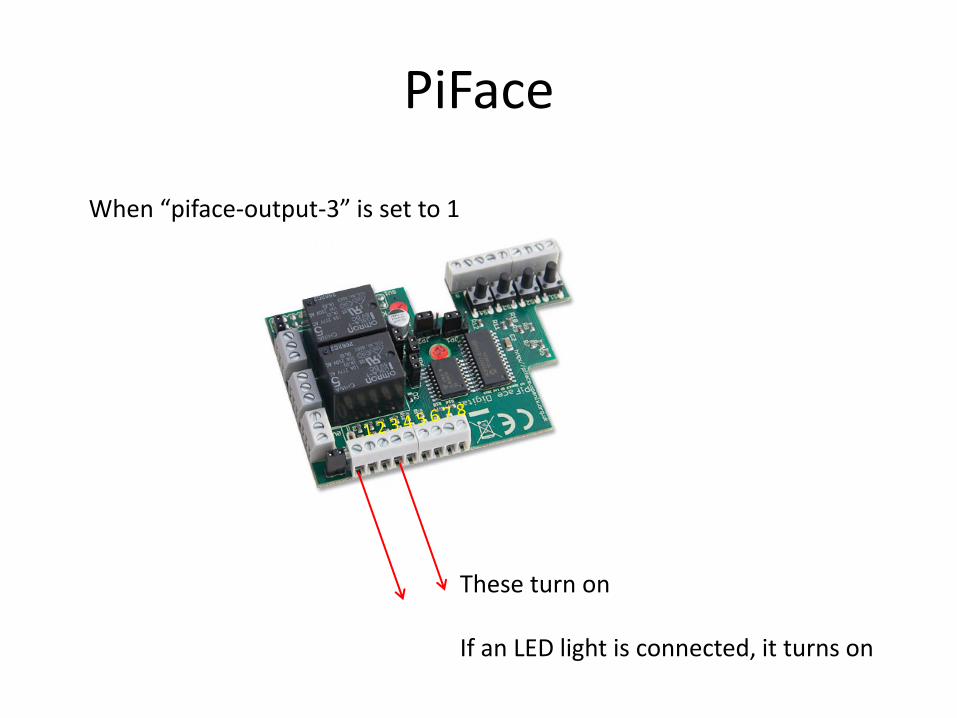
PiFace
When “piface-output-3” is set to 1
These turn on If an LED light is connected, it turns on

Computer Models and Computer Simulation
Computer Aided Design (Computer Model: printed circuit board)
Computer Model = Computer’s internal way of representing the real world objects Computer Simulation = Running a program that uses the computer model to predict how the real work objects will behave
Forecasting (Computer Model: sky conditions above the UK)
Computer Models and Computer Simulation
• Why do we create computer models and run simulations?
• Because it’s too difficult, too slow or too expensive to use the real thing
• To predict what will happen in the future, or predict how something will behave
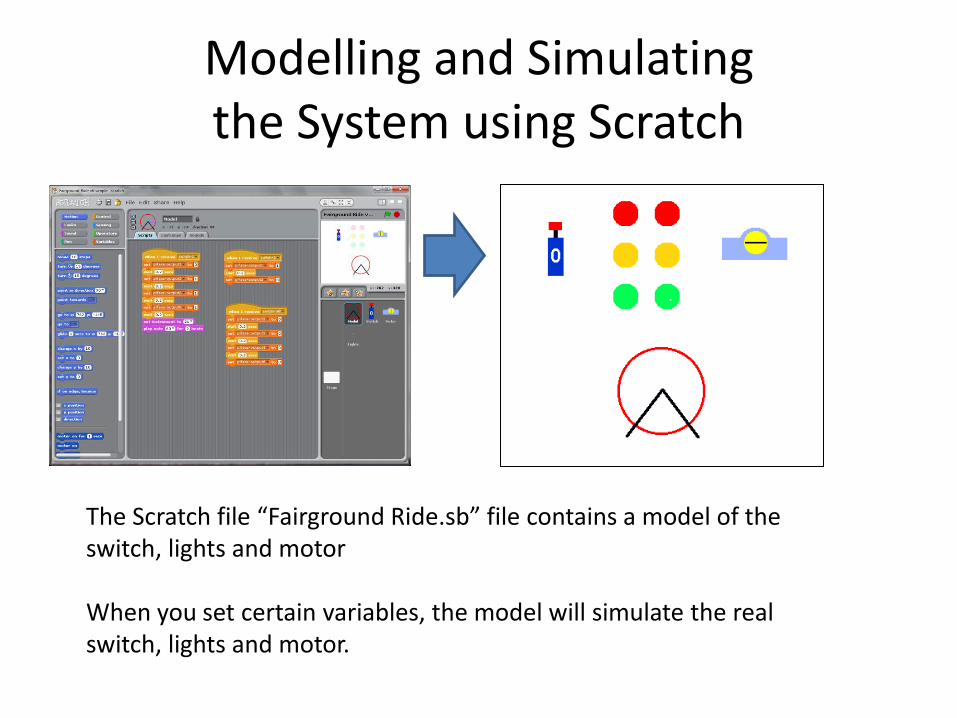
Modelling and Simulating the System using Scratch
The Scratch file “Fairground Ride.sb” file contains a model of the switch, lights and motor When you set certain variables, the model will simulate the real switch, lights and motor.
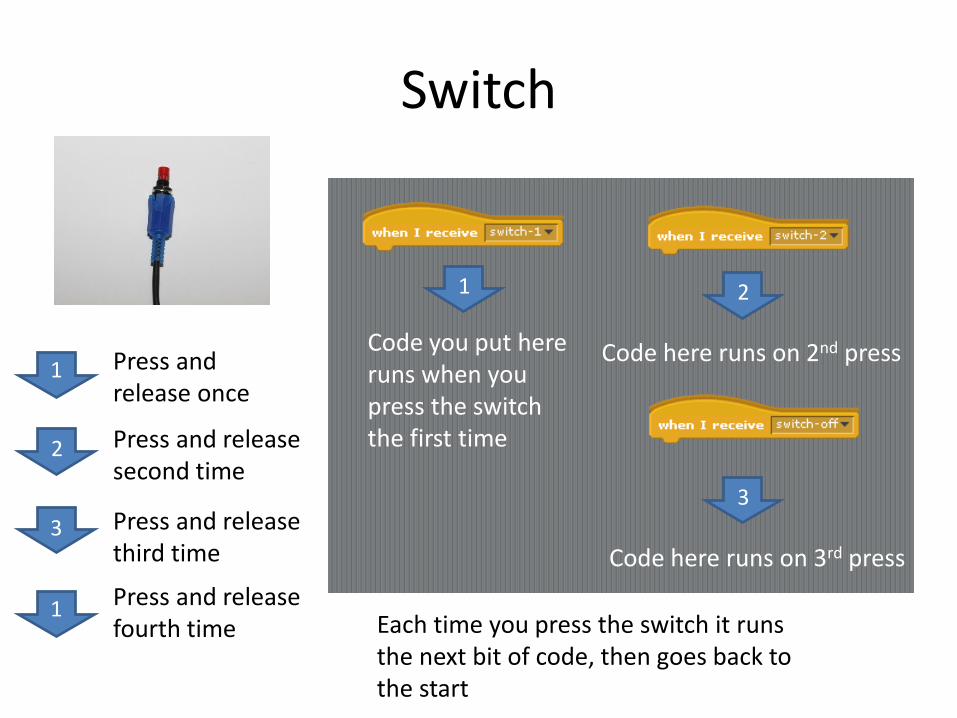
Switch
1
1 1
2
2
3
3
Press and release once
Press and release second time
Press and release third time
1 1 Press and release
fourth time
Code you put here runs when you press the switch the first time
Code here runs on 2nd press
Code here runs on 3rd press
Each time you press the switch it runs the next bit of code, then goes back to the start

LED Lights
Turn on red light 1
Turn on red light 2
Turn on yellow light 1
Turn on yellow light 2
Turn on green light 1
Turn on green light 2
Turn off red light 1
If you wait between the “set” commands, the program will be less likely to hang. If you do too many things at the same time, the PiFace can’t supply the electric current and it stops the Raspberry Pi. You will then have to reboot it.

Motor
Set one of the variables to 1 and the other one to 0 to make the motor run
Swap the numbers over to make the motor run in the opposite direction
Set both the variables to 0 to turn the motor off. (Setting them both to 1 also turns the motor off).
Don’t forget to wait between the two “set” commands
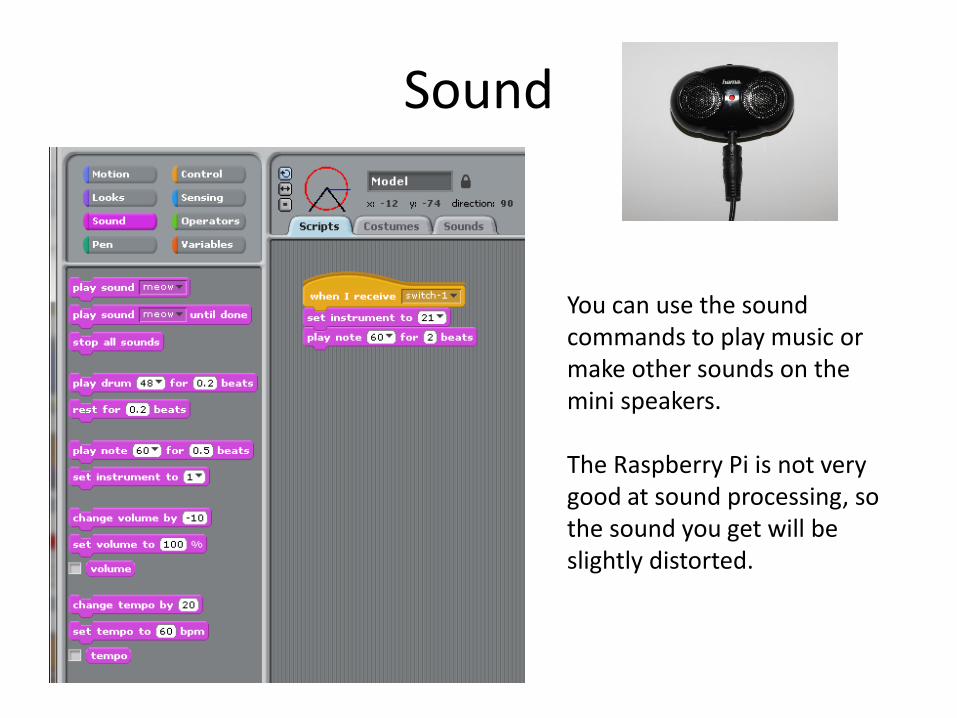
Sound
You can use the sound commands to play music or make other sounds on the mini speakers. The Raspberry Pi is not very good at sound processing, so the sound you get will be slightly distorted.

Stopping a Loop If you use a “forever” loop, it will never finish, even if you press the switch again. It will only stop when you press the red stop button at the top right in Scratch.
If you want the loop to finish when the switch is next pushed, you need to create a variable (e.g. “stop”) and use that to control the loop.
Experienced programmers are all expected to use repeat-until loops in their programs
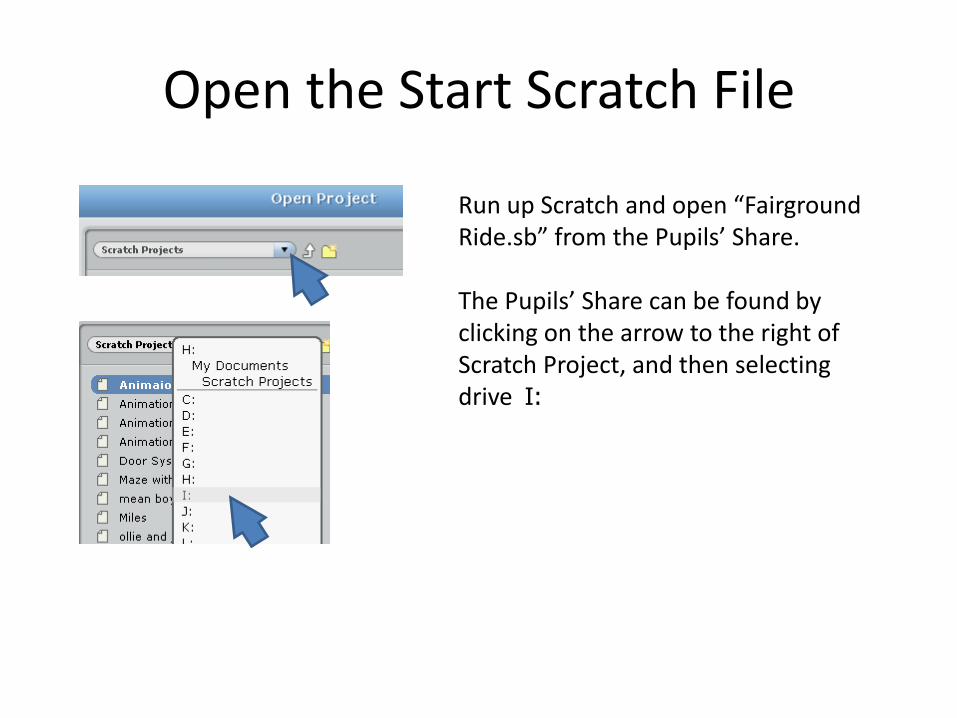
Open the Start Scratch File
Run up Scratch and open “Fairground Ride.sb” from the Pupils’ Share. The Pupils’ Share can be found by clicking on the arrow to the right of Scratch Project, and then selecting drive I:
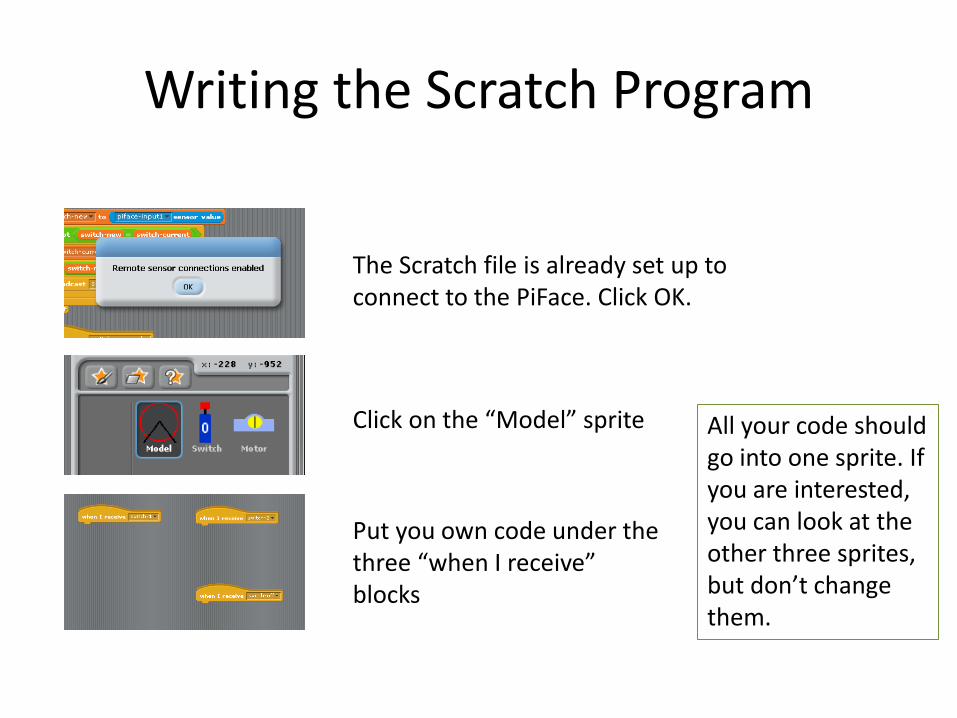
Writing the Scratch Program
The Scratch file is already set up to connect to the PiFace. Click OK.
Click on the “Model” sprite
Put you own code under the three “when I receive” blocks
All your code should go into one sprite. If you are interested, you can look at the other three sprites, but don’t change them.
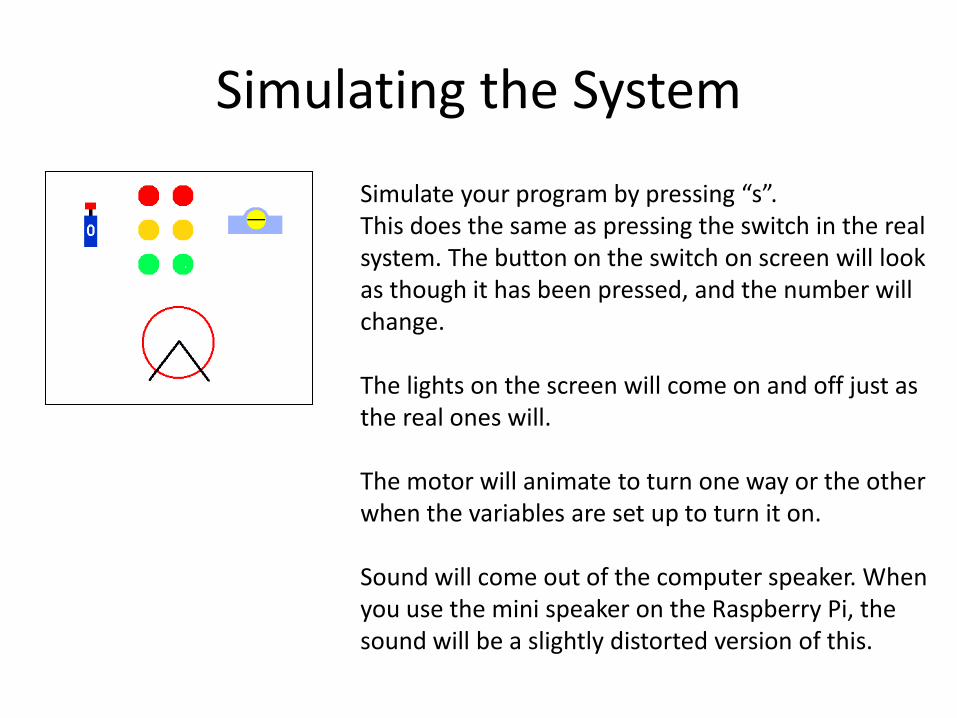
Simulating the System
Simulate your program by pressing “s”. This does the same as pressing the switch in the real system. The button on the switch on screen will look as though it has been pressed, and the number will change. The lights on the screen will come on and off just as the real ones will. The motor will animate to turn one way or the other when the variables are set up to turn it on. Sound will come out of the computer speaker. When you use the mini speaker on the Raspberry Pi, the sound will be a slightly distorted version of this.
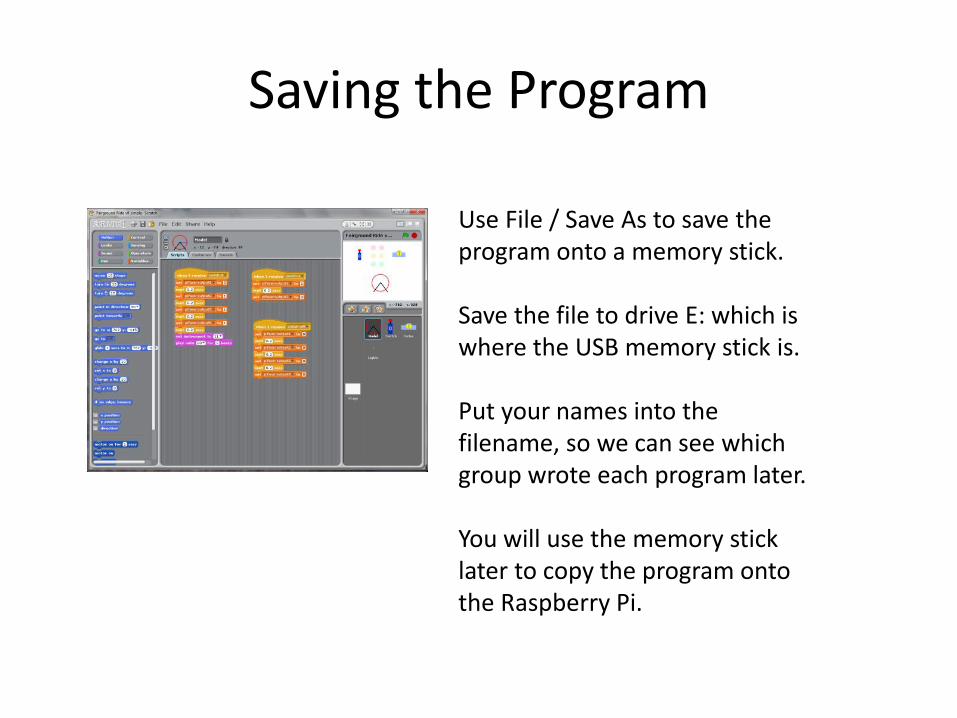
Saving the Program
Use File / Save As to save the program onto a memory stick. Save the file to drive E: which is where the USB memory stick is. Put your names into the filename, so we can see which group wrote each program later. You will use the memory stick later to copy the program onto the Raspberry Pi.