Embed Size (px)
Citation preview
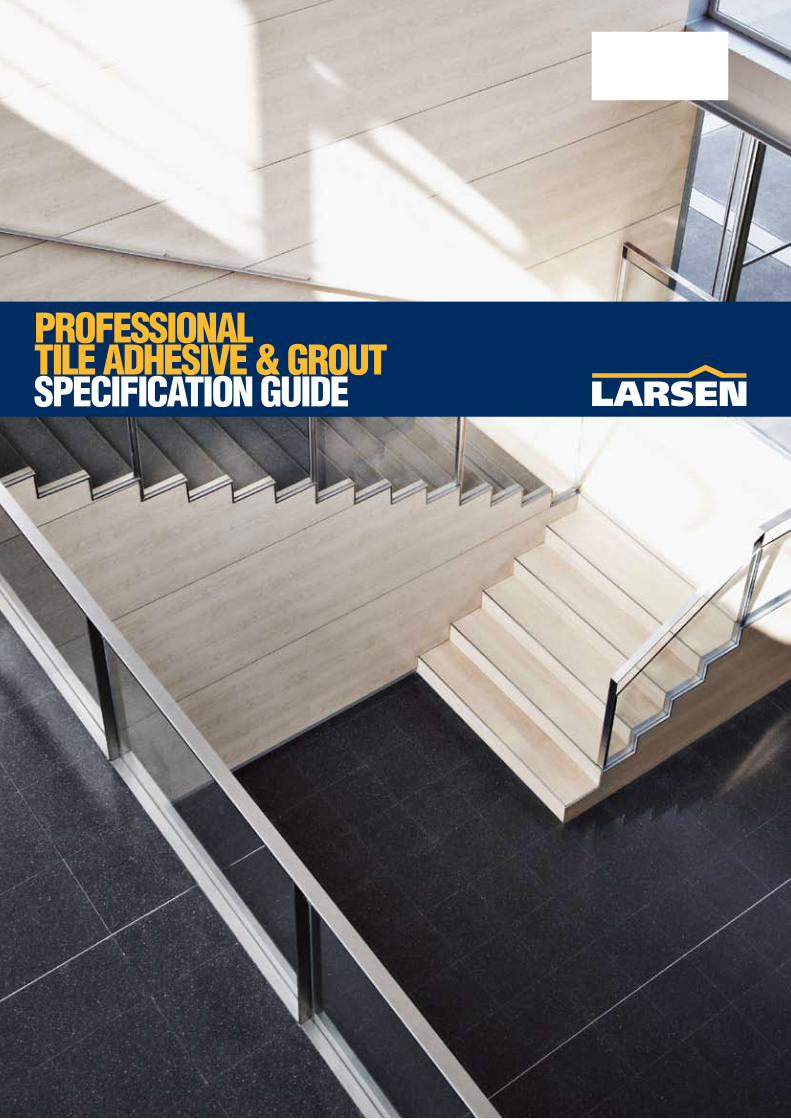
PROFESSIONALTILE ADHESIVE & GROUTSPECIFICATION GUIDE
CI/SfB
Uniclass
L553
Yt3/4
E1910
EPIC


IntroductionProductsAdhesiveGroutAncillarySelector TablesAdhesiveGroutMaintenanceGuidanceGeneral InformationWall TilingFloor TilingSpecial CasesFurther Considerations
04
071115
232526
2932343740
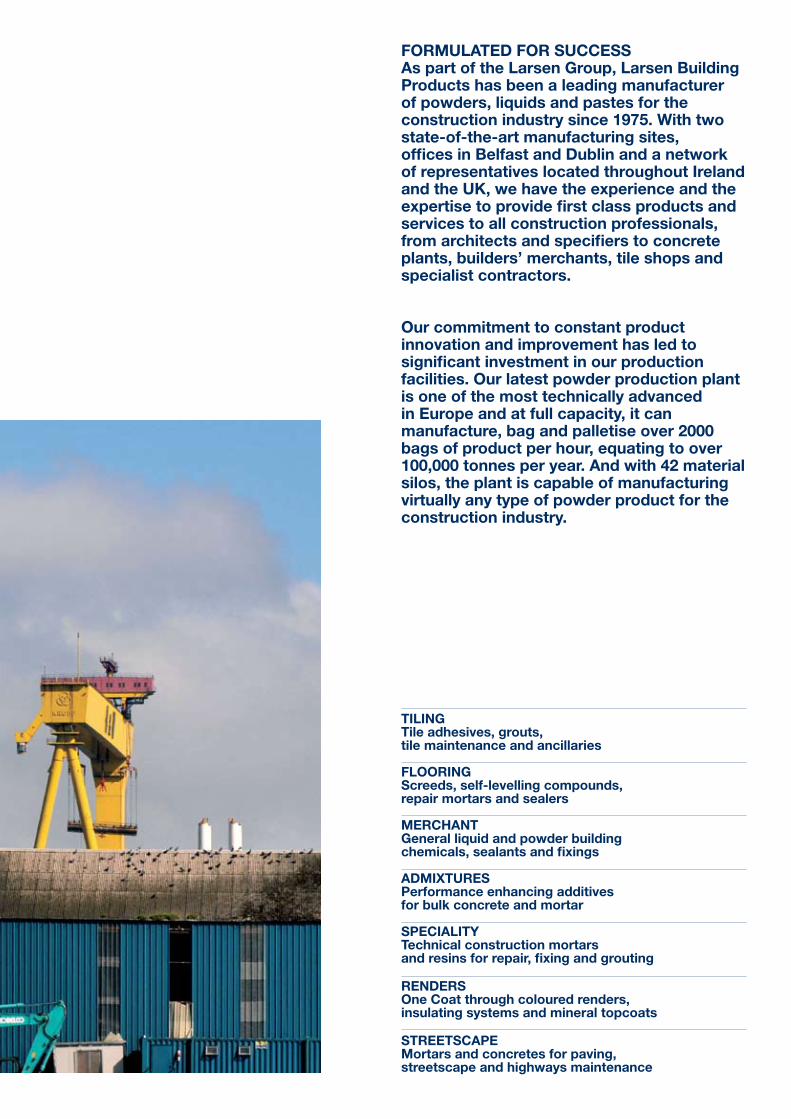
FORMULATED FOR SUCCESSAs part of the Larsen Group, Larsen Building Products has been a leading manufacturer of powders, liquids and pastes for the construction industry since 1975. With two state-of-the-art manufacturing sites, offices in Belfast and Dublin and a network of representatives located throughout Ireland and the UK, we have the experience and the expertise to provide first class products and services to all construction professionals, from architects and specifiers to concrete plants, builders’ merchants, tile shops and specialist contractors.
Our commitment to constant product innovation and improvement has led to significant investment in our production facilities. Our latest powder production plant is one of the most technically advanced in Europe and at full capacity, it can manufacture, bag and palletise over 2000 bags of product per hour, equating to over 100,000 tonnes per year. And with 42 material silos, the plant is capable of manufacturing virtually any type of powder product for the construction industry.
TILINGTile adhesives, grouts, tile maintenance and ancillaries
FLOORINGScreeds, self-levelling compounds, repair mortars and sealers
MERCHANTGeneral liquid and powder building chemicals, sealants and fixings
ADMIXTURESPerformance enhancing additives for bulk concrete and mortar
SPECIALITYTechnical construction mortars and resins for repair, fixing and grouting
RENDERSOne Coat through coloured renders, insulating systems and mineral topcoats
STREETSCAPEMortars and concretes for paving, streetscape and highways maintenance

TEN YEAR GUARANTEE
*For full details of the conditions of this guarantee, contact our technical department.
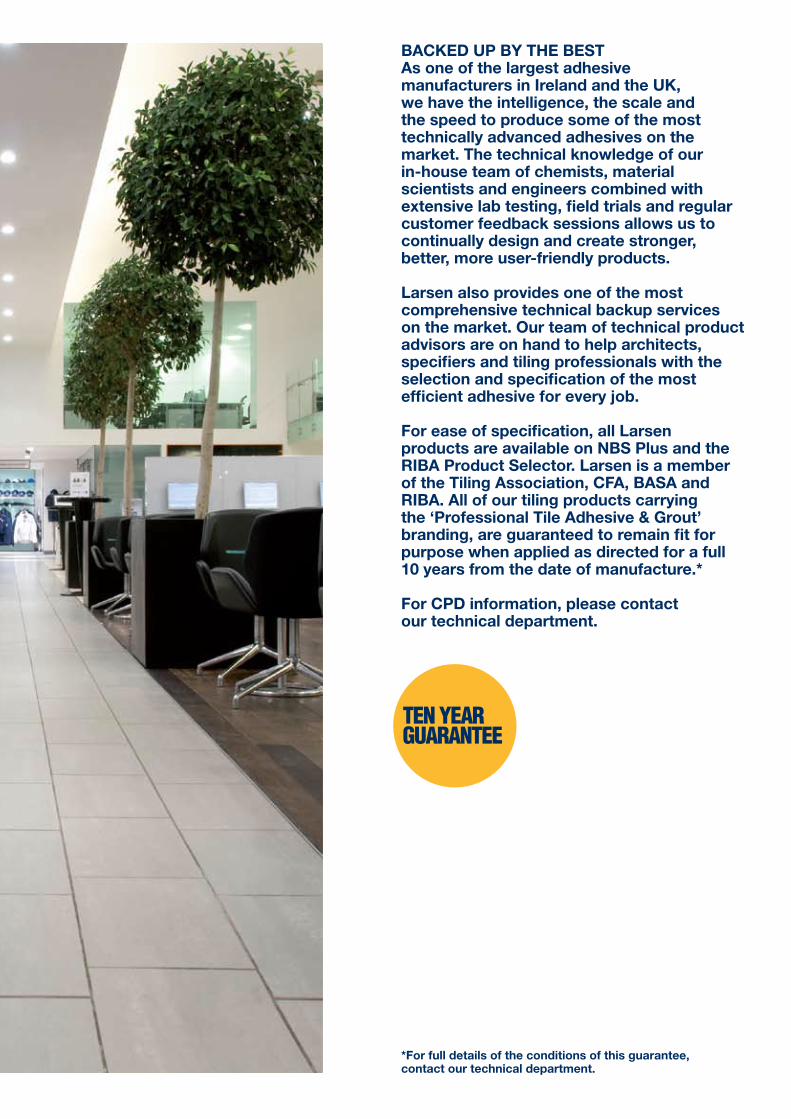
BACKED UP BY THE BESTAs one of the largest adhesive manufacturers in Ireland and the UK, we have the intelligence, the scale and the speed to produce some of the most technically advanced adhesives on the market. The technical knowledge of our in-house team of chemists, material scientists and engineers combined with extensive lab testing, field trials and regular customer feedback sessions allows us to continually design and create stronger, better, more user-friendly products.
Larsen also provides one of the most comprehensive technical backup services on the market. Our team of technical product advisors are on hand to help architects, specifiers and tiling professionals with the selection and specification of the most efficient adhesive for every job.
For ease of specification, all Larsen products are available on NBS Plus and the RIBA Product Selector. Larsen is a member of the Tiling Association, CFA, BASA and RIBA. All of our tiling products carrying the ‘Professional Tile Adhesive & Grout’ branding, are guaranteed to remain fit for purpose when applied as directed for a full 10 years from the date of manufacture.*
For CPD information, please contact our technical department.
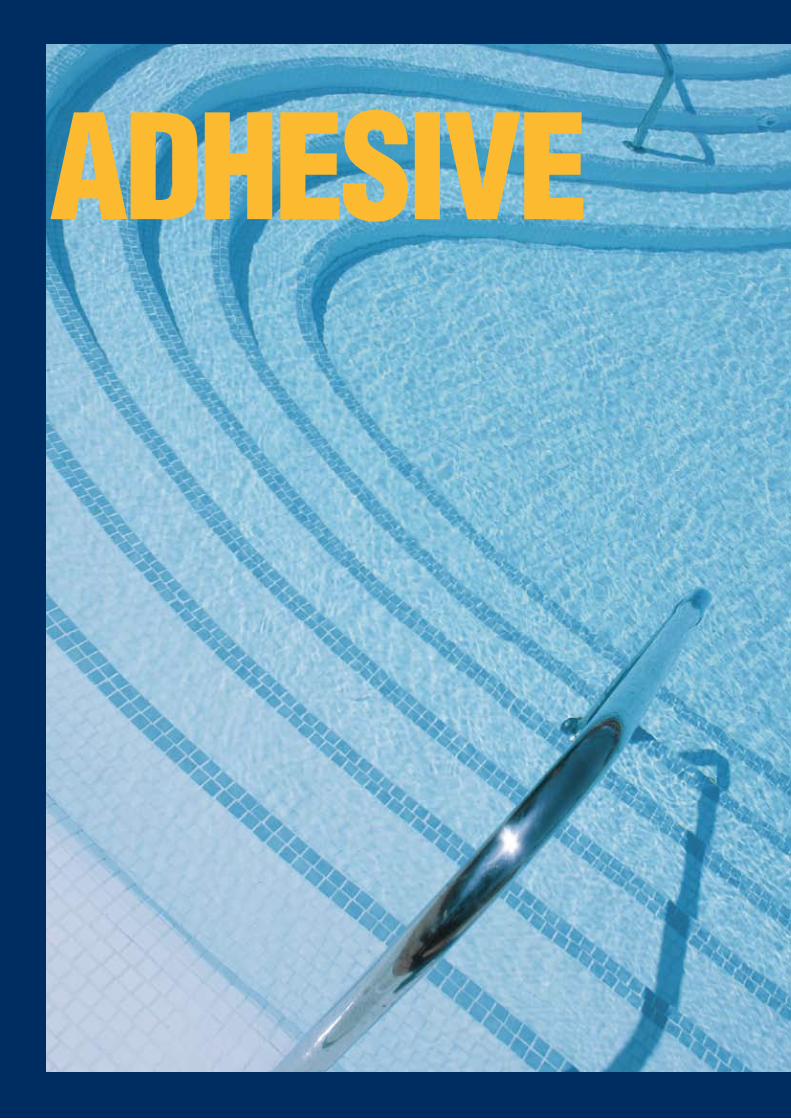
ADHESIVE
08
PROFESSIONAL FLEXIBLE FAST SETProfessional Flexible Fast Set is a specially formulated, polymer modified, deformable, fast setting, cement based adhesive. It is suitable for beds of 3 – 6mm, interior, exterior, floor and wall applications. While it is mainly used up to 6mm bed depth it is suitable for use up to 12mm in isolated areas. It is suitable for areas which are totally immersed in water e.g. swimming pools and wet rooms. Professional Flexible Fast Set is recommended for fixing ceramic, fully vitrified tiles, natural stone and mosaics to a variety of substrates including those subject to minor movement/vibration such as under floor heating and properly prepared timber.
Suitable for: Ceramic, marble/natural stone, porcelain, glass, mosaic and terrazzo tiles.Suitable for: Under floor heating and over-sheeted timber.DeformableGrout after 2 hoursGrey and WhiteBS EN 12004 Type C2F S1
PROFESSIONAL FLEXIBLE STANDARD SETProfessional Flexible Standard Set is a specially formulated, polymer modified, deformable, standard setting, cement based adhesive. It is suitable for beds of 3 – 6mm, interior, exterior, floor and wall applications. While it is mainly used up to6mm bed depth it is suitable for use up to 12mm in isolated areas. It is suitable for areas which are totally immersed in water e.g. swimming pools and wet rooms. Professional Flexible Standard Set is suitable for fixing ceramic, fully vitrified tiles,natural stone and mosaics to a variety of substrates including those subject to minor movement/vibration such as under floor heating and properly prepared timber.
Suitable for: Ceramic, marble/natural stone, porcelain, glass, mosaic and terrazzo tiles.Suitable for: Under floor heating and over-sheeted timber.DeformableIdeal for large format tiles.Grout after 18 hoursWhite and GreyBS EN 12004 Type C2 TE S1
PROFESSIONAL WOODEN FLOOR FAST SETProfessional Wooden Floor Fast Set is ideal for fixing directly to wood based sheets and tongue & groove floorboards. It is a specially formulated cement based adhesive with a very high polymer content to give exceptional bond to wooden substrates. Professional Wooden Floor Fast Set has been designed to accommodate the minor movement associated with the natural shrinkage and expansion process of correctly prepared wooden floors.
Suitable for: Ceramic, marble/natural stone, porcelain, glass, mosaic and terrazzo tiles.Suitable for: Under floor heating,sheeted timber and direct to T&G floorboards
Highly DeformableGrout after 3 hoursGrey and WhiteBS EN 12004 Type C2F S2
FLEXIBLECEMENT BASED
09
PROFESSIONAL FAST SET Professional Fast Set is a specially formulated, polymer improved, fast setting, cement based adhesive. It is suitable for beds of 3 – 6mm, interior, exterior, floor and wall applications. While it is mainly used up to 6 mm bed depth it is suitable for use up to 12mm in isolated areas. It is suitable for areas which are totally immersed in water e.g. swimming pools and wet rooms. Professional Fast Set is suitable for fixing ceramic, fully vitrified tiles, natural stone and mosaics to a variety of substrates including heated screeds.
Suitable for: ceramic, marble/natural stone, porcelain, glass, mosaic and terrazzo tiles.Ideal for Fast Track ProjectsPolymer improvedGrout after 2 hoursGrey and WhiteBS EN 12004 Type C2F
PROFESSIONAL STANDARD SETProfessional Standard Set is a specially formulated, polymer improved, standard setting, cement based adhesive. It is suitable for beds of 3 – 6mm, interior, exterior, floor and wallapplications. While it is mainly used up to 6 mm bed depth it is suitable for use up to 12mm in isolated areas. It is suitable for areas which are totally immersed in water e.g. swimmingpools and wet rooms. Professional Standard Set is suitable for fixing ceramic, fully vitrified tiles, natural stone and mosaics to a variety of common substrates, including heated screeds.
Suitable for: Ceramic, marble/natural stone, porcelain, glass, mosaic and terrazzo tiles.Ideal for large format wall tilesPolymer improved5 hour pot lifeNon-slipWhite and GreyBS EN 12004 Type C2 TE
PROFESSIONAL FAST SET PTBProfessional Fast Set PTB (Pourable Thick Bed) is a specially formulated, polymer improved, pourable, thixotropic cement based adhesive. It is designed for use with large format ceramic floor tiles, natural stone slabs, deep studded tiles, etc. without the need for back-buttering. Professional Fast Set PTB is particularly suitable for solid bed fixing between 5 and 20 mm and readily copes with uneven tiles and substrates including heated screeds.
Suitable for: Ceramic, marble/natural stone, porcelain, glass, mosaic and terrazzo tiles.PourablePolymer improved3 – 20mm solid bedGrout after 3 hoursGrey (white available on request)BS EN 12004 Type C2F
POLYMERIMPROVEDCEMENT BASED
PROFESSIONAL SHOWERPROOF Professional Showerproof is a ready mixed acrylic thin-bed adhesive for interior wall tiling applications. It offers high grab and is suitable for application at 3mm bed depths. Professional Showerproof is ideal for use in domestic showers, kitchens and bathrooms and will bond ceramic wall tiles and mosaics to a range of common substrates.
Ready MixedHigh GrabStrong BondEasy To SpreadMould ResistantBS EN 12004 Type D1T
PROFESSIONAL GRIP RIGHTProfessional Grip Right is a ready mixed acrylic thin-bed adhesive for interior wall tiling applications. It has been specifically designed to offer non-slip performance with heavier and larger tiles and is suitable for application at 3mm bed depths. Professional Grip Right is ideal for use in domestic showers, kitchens and bathrooms and will bond ceramic wall tiles and mosaics to a range of common substrates.
Ready MixedExcellent GrabNon-SlipStrong BondMould ResistantBS EN 12004 Type D1T
PROFESSIONAL CLASS AA WATER RESISTANTProfessional Class AA is a ready mixed water resistant acrylic thin-bed adhesive. It has been specifically designed to offer high bond strengths in both wet and dry interior wall tiling applications and is suitable for application at 3mm bed depths. Professional Class AA is ideal for use in domestic showers, power showers, kitchens and bathrooms and will bond ceramic wall tiles and mosaics to a range of common substrates.
Ready MixedWhiteNon-SlipStrong BondWater ResistantMould ResistantBS EN 12004 Type D2T
10
READY MIXED

01
GROUT
12
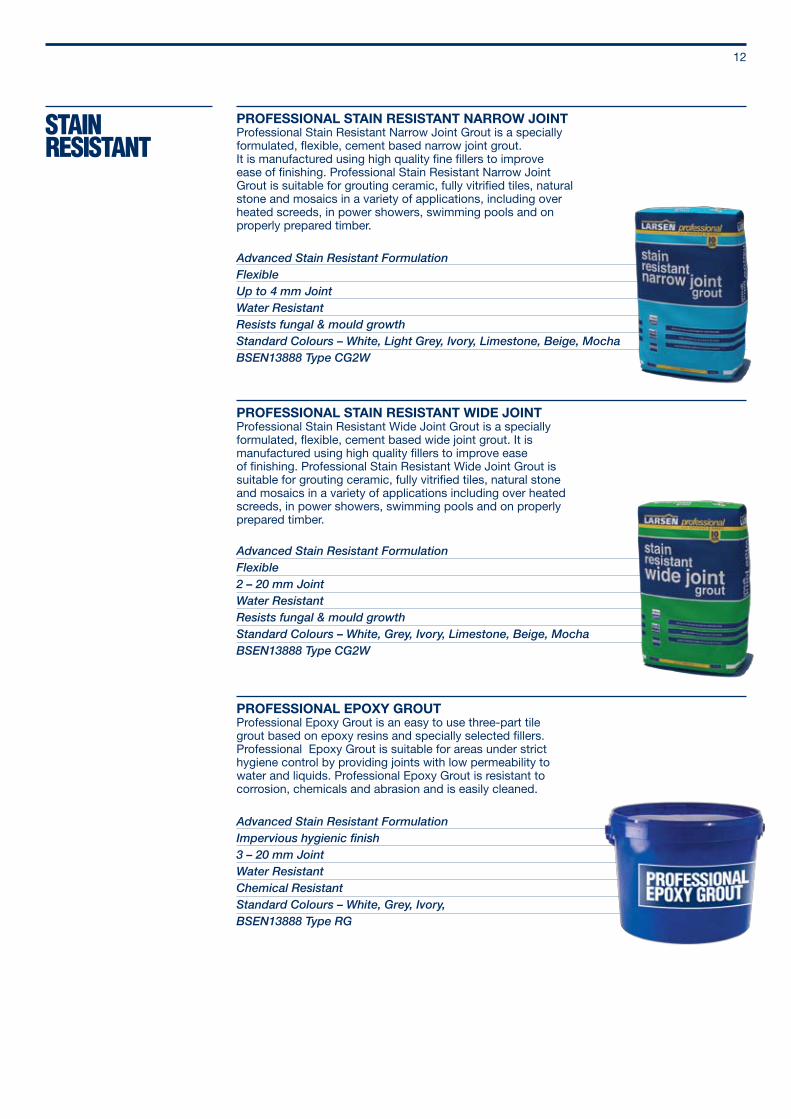
STAIN RESISTANT
PROFESSIONAL STAIN RESISTANT NARROW JOINTProfessional Stain Resistant Narrow Joint Grout is a specially formulated, flexible, cement based narrow joint grout. It is manufactured using high quality fine fillers to improveease of finishing. Professional Stain Resistant Narrow Joint Grout is suitable for grouting ceramic, fully vitrified tiles, natural stone and mosaics in a variety of applications, including over heated screeds, in power showers, swimming pools and on properly prepared timber.
Advanced Stain Resistant FormulationFlexibleUp to 4 mm JointWater ResistantResists fungal & mould growthStandard Colours – White, Light Grey, Ivory, Limestone, Beige, MochaBSEN13888 Type CG2W
PROFESSIONAL STAIN RESISTANT WIDE JOINTProfessional Stain Resistant Wide Joint Grout is a specially formulated, flexible, cement based wide joint grout. It is manufactured using high quality fillers to improve easeof finishing. Professional Stain Resistant Wide Joint Grout is suitable for grouting ceramic, fully vitrified tiles, natural stone and mosaics in a variety of applications including over heated screeds, in power showers, swimming pools and on properly prepared timber.
Advanced Stain Resistant FormulationFlexible2 – 20 mm JointWater ResistantResists fungal & mould growthStandard Colours – White, Grey, Ivory, Limestone, Beige, MochaBSEN13888 Type CG2W
PROFESSIONAL EPOXY GROUTProfessional Epoxy Grout is an easy to use three-part tile grout based on epoxy resins and specially selected fillers. Professional Epoxy Grout is suitable for areas under strict hygiene control by providing joints with low permeability to water and liquids. Professional Epoxy Grout is resistant to corrosion, chemicals and abrasion and is easily cleaned.
Advanced Stain Resistant FormulationImpervious hygienic finish3 – 20 mm JointWater ResistantChemical ResistantStandard Colours – White, Grey, Ivory,BSEN13888 Type RG
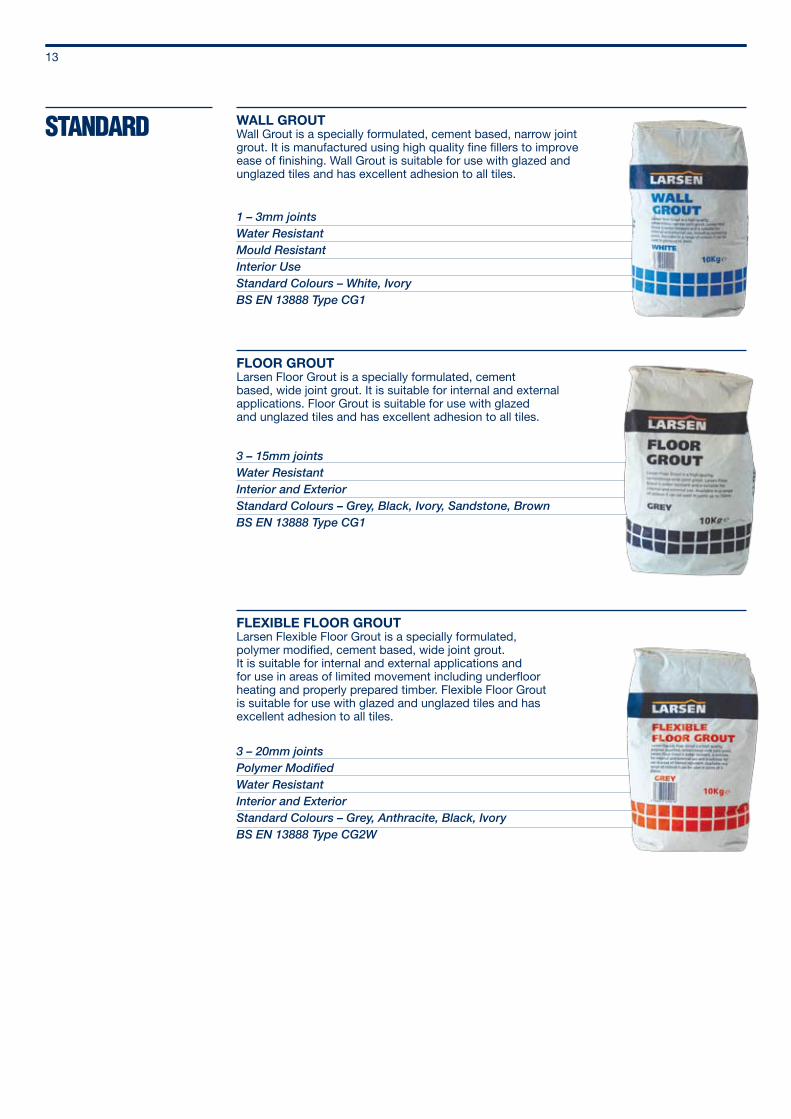
WALL GROUTWall Grout is a specially formulated, cement based, narrow joint grout. It is manufactured using high quality fine fillers to improve ease of finishing. Wall Grout is suitable for use with glazed and unglazed tiles and has excellent adhesion to all tiles.
1 – 3mm jointsWater ResistantMould ResistantInterior UseStandard Colours – White, IvoryBS EN 13888 Type CG1
FLOOR GROUTLarsen Floor Grout is a specially formulated, cement based, wide joint grout. It is suitable for internal and external applications. Floor Grout is suitable for use with glazed and unglazed tiles and has excellent adhesion to all tiles.
3 – 15mm jointsWater ResistantInterior and ExteriorStandard Colours – Grey, Black, Ivory, Sandstone, BrownBS EN 13888 Type CG1
FLEXIBLE FLOOR GROUTLarsen Flexible Floor Grout is a specially formulated, polymer modified, cement based, wide joint grout.It is suitable for internal and external applications and for use in areas of limited movement including underfloor heating and properly prepared timber. Flexible Floor Grout is suitable for use with glazed and unglazed tiles and has excellent adhesion to all tiles.
3 – 20mm jointsPolymer ModifiedWater ResistantInterior and ExteriorStandard Colours – Grey, Anthracite, Black, IvoryBS EN 13888 Type CG2W
STANDARD
13
14

ANCILLARYPRODUCTS
TILEMAINTENANCE
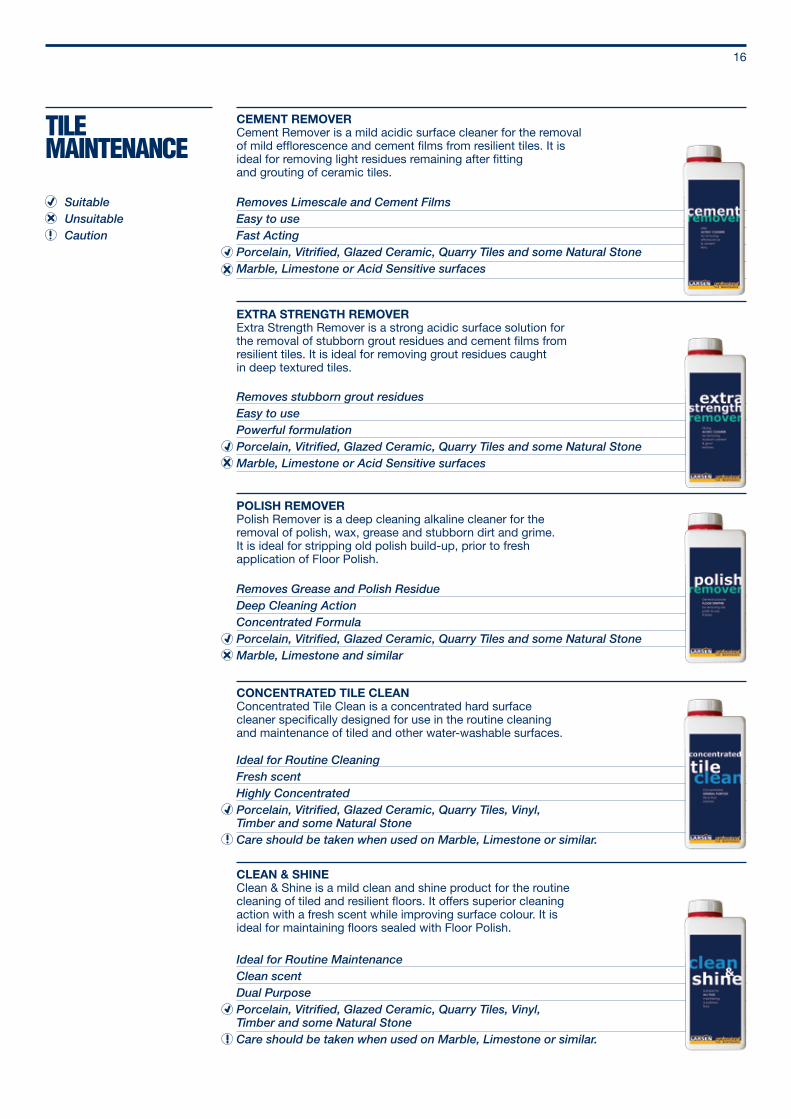
CEMENT REMOVERCement Remover is a mild acidic surface cleaner for the removal of mild efflorescence and cement films from resilient tiles. It is ideal for removing light residues remaining after fittingand grouting of ceramic tiles.
Removes Limescale and Cement FilmsEasy to useFast ActingPorcelain, Vitrified, Glazed Ceramic, Quarry Tiles and some Natural StoneMarble, Limestone or Acid Sensitive surfaces
EXTRA STRENGTH REMOVERExtra Strength Remover is a strong acidic surface solution for the removal of stubborn grout residues and cement films from resilient tiles. It is ideal for removing grout residues caughtin deep textured tiles.
Removes stubborn grout residuesEasy to usePowerful formulationPorcelain, Vitrified, Glazed Ceramic, Quarry Tiles and some Natural StoneMarble, Limestone or Acid Sensitive surfaces
POLISH REMOVERPolish Remover is a deep cleaning alkaline cleaner for the removal of polish, wax, grease and stubborn dirt and grime. It is ideal for stripping old polish build-up, prior to freshapplication of Floor Polish.
Removes Grease and Polish ResidueDeep Cleaning ActionConcentrated FormulaPorcelain, Vitrified, Glazed Ceramic, Quarry Tiles and some Natural StoneMarble, Limestone and similar
16
CONCENTRATED TILE CLEANConcentrated Tile Clean is a concentrated hard surface cleaner specifically designed for use in the routine cleaning and maintenance of tiled and other water-washable surfaces.
Ideal for Routine CleaningFresh scentHighly ConcentratedPorcelain, Vitrified, Glazed Ceramic, Quarry Tiles, Vinyl, Timber and some Natural StoneCare should be taken when used on Marble, Limestone or similar.
CLEAN & SHINEClean & Shine is a mild clean and shine product for the routine cleaning of tiled and resilient floors. It offers superior cleaning action with a fresh scent while improving surface colour. It is ideal for maintaining floors sealed with Floor Polish.
Ideal for Routine MaintenanceClean scentDual PurposePorcelain, Vitrified, Glazed Ceramic, Quarry Tiles, Vinyl, Timber and some Natural StoneCare should be taken when used on Marble, Limestone or similar.
SuitableUnsuitableCaution
17
TILEMAINTENANCE
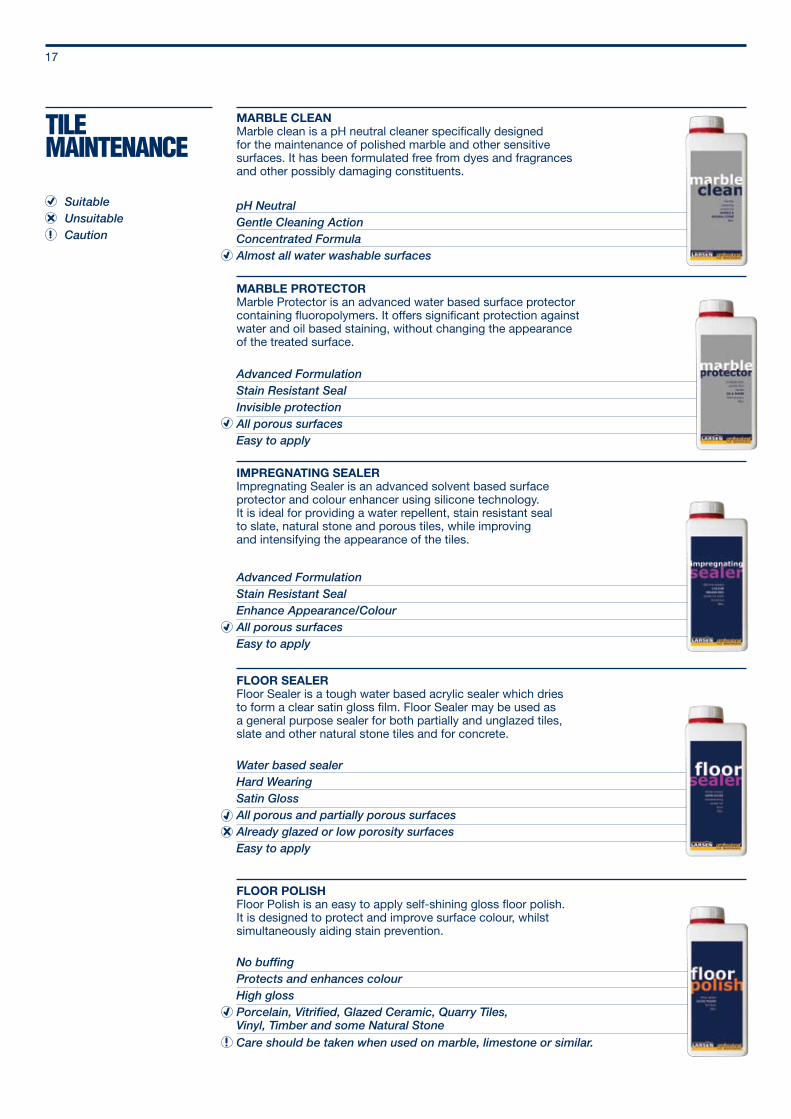
FLOOR SEALERFloor Sealer is a tough water based acrylic sealer which dries to form a clear satin gloss film. Floor Sealer may be used as a general purpose sealer for both partially and unglazed tiles, slate and other natural stone tiles and for concrete.
Water based sealerHard WearingSatin GlossAll porous and partially porous surfacesAlready glazed or low porosity surfacesEasy to apply
FLOOR POLISHFloor Polish is an easy to apply self-shining gloss floor polish. It is designed to protect and improve surface colour, whilst simultaneously aiding stain prevention.
No buffingProtects and enhances colourHigh glossPorcelain, Vitrified, Glazed Ceramic, Quarry Tiles, Vinyl, Timber and some Natural StoneCare should be taken when used on marble, limestone or similar.
MARBLE PROTECTORMarble Protector is an advanced water based surface protector containing fluoropolymers. It offers significant protection against water and oil based staining, without changing the appearance of the treated surface.
Advanced FormulationStain Resistant SealInvisible protectionAll porous surfacesEasy to apply
MARBLE CLEANMarble clean is a pH neutral cleaner specifically designed for the maintenance of polished marble and other sensitive surfaces. It has been formulated free from dyes and fragrancesand other possibly damaging constituents.
pH NeutralGentle Cleaning ActionConcentrated FormulaAlmost all water washable surfaces
IMPREGNATING SEALERImpregnating Sealer is an advanced solvent based surface protector and colour enhancer using silicone technology. It is ideal for providing a water repellent, stain resistant sealto slate, natural stone and porous tiles, while improving and intensifying the appearance of the tiles.
Advanced FormulationStain Resistant SealEnhance Appearance/ColourAll porous surfacesEasy to apply
SuitableUnsuitableCaution

19
SELF LEVELLING COMPOUNDS
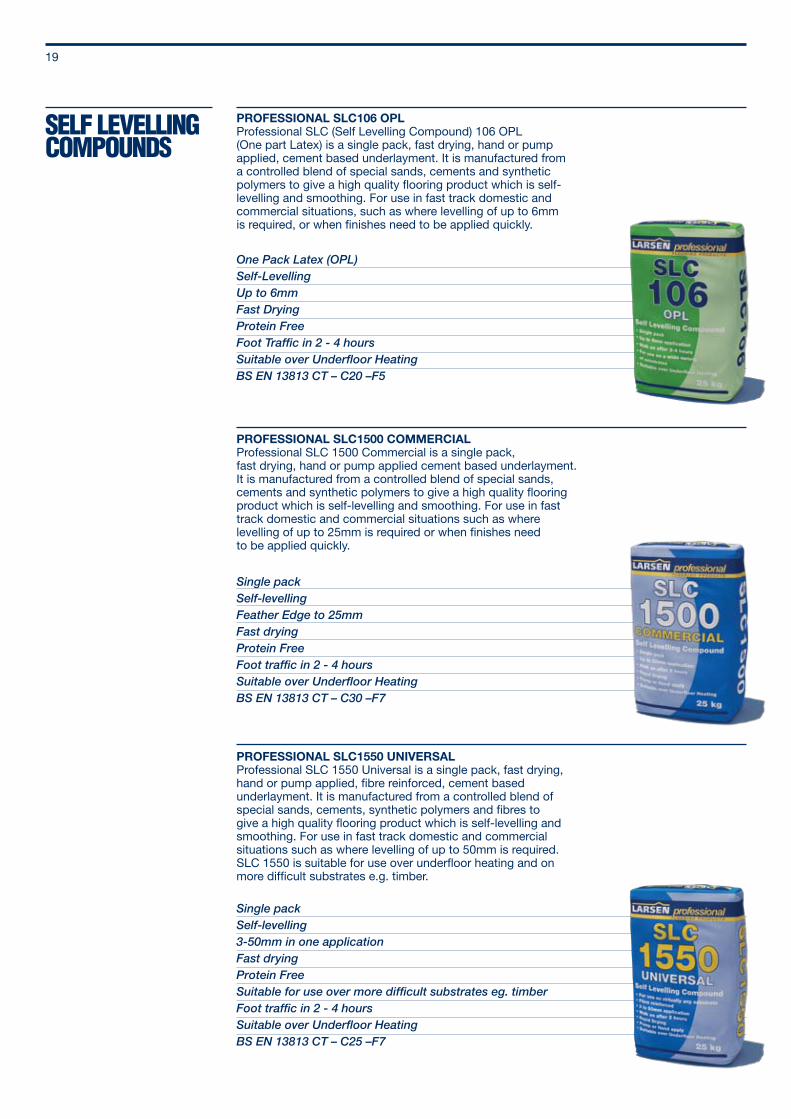
PROFESSIONAL SLC106 OPLProfessional SLC (Self Levelling Compound) 106 OPL (One part Latex) is a single pack, fast drying, hand or pump applied, cement based underlayment. It is manufactured from a controlled blend of special sands, cements and synthetic polymers to give a high quality flooring product which is self-levelling and smoothing. For use in fast track domestic and commercial situations, such as where levelling of up to 6mm is required, or when finishes need to be applied quickly.
One Pack Latex (OPL)Self-Levelling Up to 6mm Fast Drying Protein FreeFoot Traffic in 2 - 4 hoursSuitable over Underfloor HeatingBS EN 13813 CT – C20 –F5
PROFESSIONAL SLC1500 COMMERCIALProfessional SLC 1500 Commercial is a single pack, fast drying, hand or pump applied cement based underlayment. It is manufactured from a controlled blend of special sands, cements and synthetic polymers to give a high quality flooring product which is self-levelling and smoothing. For use in fast track domestic and commercial situations such as where levelling of up to 25mm is required or when finishes need to be applied quickly.
Single packSelf-levelling Feather Edge to 25mmFast drying Protein FreeFoot traffic in 2 - 4 hoursSuitable over Underfloor HeatingBS EN 13813 CT – C30 –F7
PROFESSIONAL SLC1550 UNIVERSALProfessional SLC 1550 Universal is a single pack, fast drying, hand or pump applied, fibre reinforced, cement based underlayment. It is manufactured from a controlled blend of special sands, cements, synthetic polymers and fibres to give a high quality flooring product which is self-levelling and smoothing. For use in fast track domestic and commercial situations such as where levelling of up to 50mm is required. SLC 1550 is suitable for use over underfloor heating and on more difficult substrates e.g. timber.
Single packSelf-levelling 3-50mm in one application Fast drying Protein FreeSuitable for use over more difficult substrates eg. timberFoot traffic in 2 - 4 hoursSuitable over Underfloor HeatingBS EN 13813 CT – C25 –F7
20
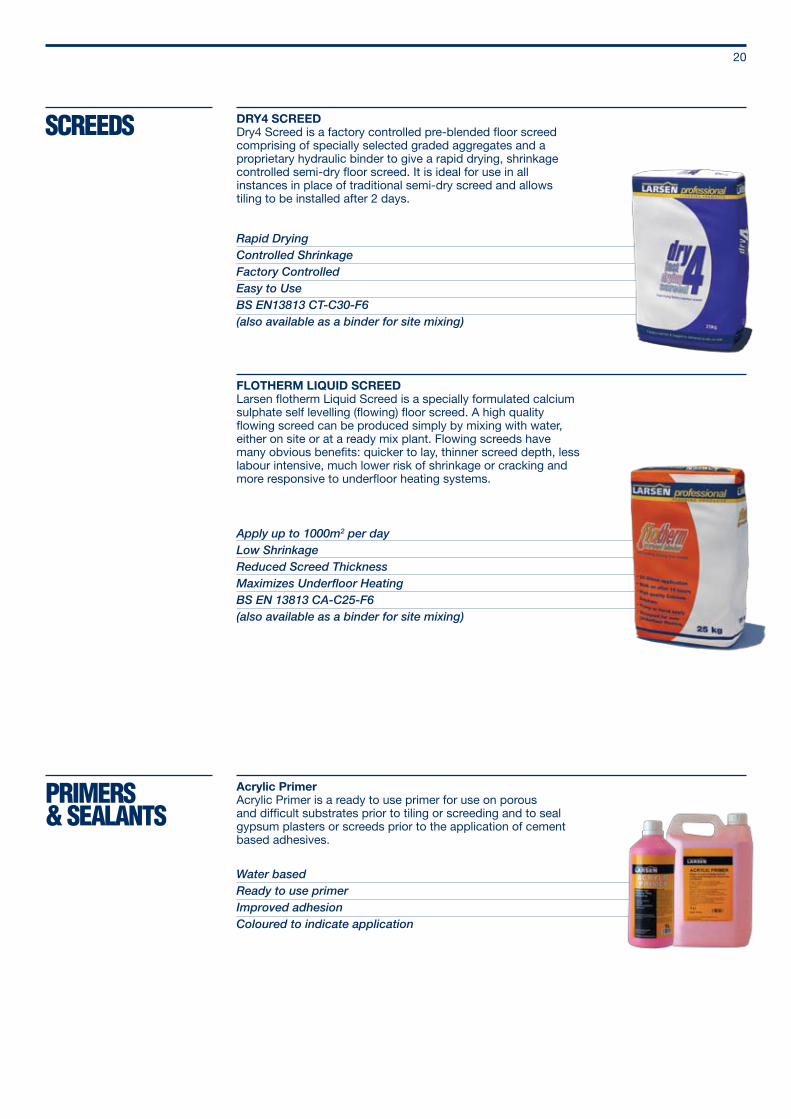
Acrylic PrimerAcrylic Primer is a ready to use primer for use on porous and difficult substrates prior to tiling or screeding and to seal gypsum plasters or screeds prior to the application of cement based adhesives.
Water based Ready to use primerImproved adhesionColoured to indicate application
PRIMERS& SEALANTS
SCREEDS DRY4 SCREEDDry4 Screed is a factory controlled pre-blended floor screed comprising of specially selected graded aggregates and a proprietary hydraulic binder to give a rapid drying, shrinkage controlled semi-dry floor screed. It is ideal for use in all instances in place of traditional semi-dry screed and allows tiling to be installed after 2 days.
Rapid Drying Controlled ShrinkageFactory ControlledEasy to UseBS EN13813 CT-C30-F6(also available as a binder for site mixing)
FLOTHERM LIQUID SCREEDLarsen flotherm Liquid Screed is a specially formulated calcium sulphate self levelling (flowing) floor screed. A high quality flowing screed can be produced simply by mixing with water, either on site or at a ready mix plant. Flowing screeds have many obvious benefits: quicker to lay, thinner screed depth, less labour intensive, much lower risk of shrinkage or cracking and more responsive to underfloor heating systems.
Apply up to 1000m2 per dayLow ShrinkageReduced Screed ThicknessMaximizes Underfloor HeatingBS EN 13813 CA-C25-F6(also available as a binder for site mixing)
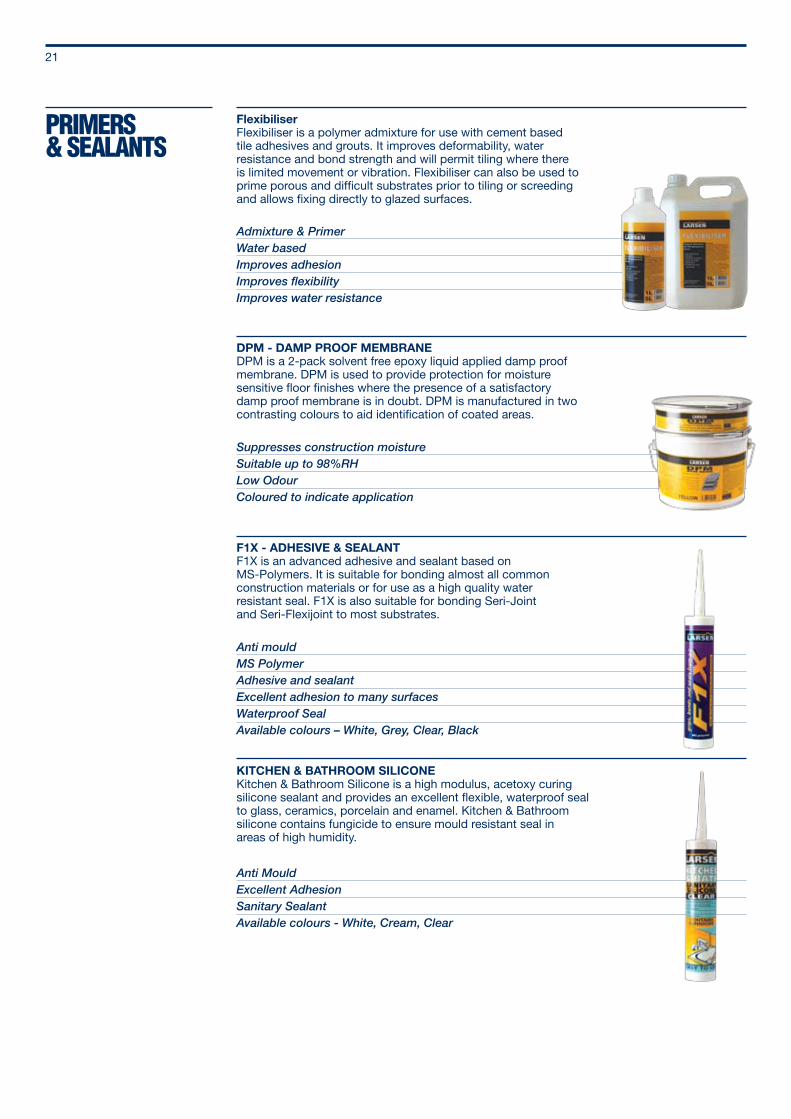
FlexibiliserFlexibiliser is a polymer admixture for use with cement based tile adhesives and grouts. It improves deformability, water resistance and bond strength and will permit tiling where there is limited movement or vibration. Flexibiliser can also be used to prime porous and difficult substrates prior to tiling or screeding and allows fixing directly to glazed surfaces.
Admixture & PrimerWater basedImproves adhesionImproves flexibilityImproves water resistance
DPM - DAMP PROOF MEMBRANEDPM is a 2-pack solvent free epoxy liquid applied damp proof membrane. DPM is used to provide protection for moisture sensitive floor finishes where the presence of a satisfactory damp proof membrane is in doubt. DPM is manufactured in two contrasting colours to aid identification of coated areas.
Suppresses construction moistureSuitable up to 98%RHLow OdourColoured to indicate application
F1X - ADHESIVE & SEALANTF1X is an advanced adhesive and sealant based on MS-Polymers. It is suitable for bonding almost all common construction materials or for use as a high quality water resistant seal. F1X is also suitable for bonding Seri-Joint and Seri-Flexijoint to most substrates.
Anti mouldMS PolymerAdhesive and sealantExcellent adhesion to many surfacesWaterproof SealAvailable colours – White, Grey, Clear, Black
KITCHEN & BATHROOM SILICONEKitchen & Bathroom Silicone is a high modulus, acetoxy curing silicone sealant and provides an excellent flexible, waterproof seal to glass, ceramics, porcelain and enamel. Kitchen & Bathroom silicone contains fungicide to ensure mould resistant seal in areas of high humidity.
Anti MouldExcellent AdhesionSanitary SealantAvailable colours - White, Cream, Clear
21
PRIMERS& SEALANTS
TANKING &DECOUPLING
TANKING KITTanking Kit is a versatile, multi-component system ideal for use as secondary protection in ceramic tiling applications. The system comprises an advanced water based liquid applied membrane, a flexible sealing strip and a number of prefabricated pieces for corners, pipe and drain surrounds. Two pack sizes are available: Small Packs cover 5 m2 and contain sufficient components for a shower enclosure, while Large Packs cover 10m2 and contain sufficient components for a wet room.
Water-based membrane Touch-dry in 1 hourTile after 24 hoursTough & highly flexible membrane
SERI-DEC MATTINGSeri-Dec Matting is a specially designed waterproofing and decoupling underlay for flooring applications where direct fixing to the substrate would be problematic. The membrane consists of 3mm dimpled impermeable sheet with an integrated reinforcing mesh on the top face and a geotextile decoupling fleece on the underside. Larsen Seri-Dec can be used in all tanking applications when installed with Larsen Seri-Joint (or Seri-Flexijoint) and where required Larsen Seri-Wall matting. Providing the substrate is sufficiently load bearing, Seri-Dec will also permit tiles to be installed immediately over: gypsum screeds, green cement based screeds, heated screeds, floating screeds and can usually replace the need for over-plying on timber substrates.
Decoupling and waterproofing Tile immediatelyIsolates stresses, Bridges cracking Ideal for problematic substrates
SERI-WALL MATTINGSeri-Wall Matting is a specially coated watertight elastic sealing membrane. It is ideal for the easy tanking of walls in wet areas such as bathrooms, communal showers and commercial areas.
Easy to use Waterproof mattingTile immediately
SERI-JOINT TAPESeri-Joint Tape is a waterproof sealing tape used for jointing sheets of Seri-Dec Matting when used as a tanking layer.
Easy to use Waterproof mattingTile immediately
SERI-FLEXIJOINT TAPESeri-Flexijoint Tape is a flexible waterproof sealing tape used for jointing sheets of Seri-Dec Matting when used as a tanking layer in areas prone to movement. It is also used to seal the wall/floor joint between Seri-Dec and Seri-Wall. Pre-fabricated corner pieces, pipe collars and drain mats are also available.
Waterproof tapeFlexiblePrefabricated components also available
22
C2F S16mm (12mm)1
60 mins10 mins2 hrsGrey or White
P
P
P
P P FP
P P
ADHESIVESELECTOR
23
PERFORMANCEBS EN 12004 TypeMax bed depthPotlifeOpen timeGrout afterColour
USE / LOCATIONWallFloorDry internalIntermittently wetProlonged wetSwimming poolExternal
TILE TYPECeramicPorcelainMarble & natural stoneMosaicsLarge format
SUBSTRATE / WALLGypsum plasterPlasterboardRenderBlockworkExisting tilesConcretePlywood
FLOORConcreteCement screedGypsum screedPlywoodTongue & grooveUnderfloor heatingExisting tilesVinyl tiles
Recommended application
Suitable with some limitations
Prime first
Requires the addition of Flexibiliser
In isolated areas
P
F
1
WOODEN FLOOR FAST SET
FLEXIBLE CEMENT BASED
C2TE S16mm (12mm)1
5 hrs30 mins18 hrsWhite or Grey
P
P
P
P P FP
P P
C2F S26mm (12mm)1
60 mins10 mins3 hrsGrey or White
P
P
P
P
P P
FLEXIBLE FAST SET
FLEXIBLE STANDARD SET
PLEASE NOTEThe recommendations in this brochure are guidelines only and are based on both current development work and many years experience. Whilst every effort is made to ensure that the information is reliable we cannot accept responsibilityfor any work carried out with our materials where we have no control over methods of application, site conditions etc.For full product information consult the relevant Product Data Sheet or if a detailed specification is required, please consult with our Technical Department.
*All curing times are approximate and are dependent on ambient temperatures, depth of substrate and site conditions.
PotlifeThe maximum time interval during which the adhesive can be used after mixing.
Open TimeMaximum interval after application at which tiles can be embedded in the applied adhesive and meet the specified adhesive strength requirement.
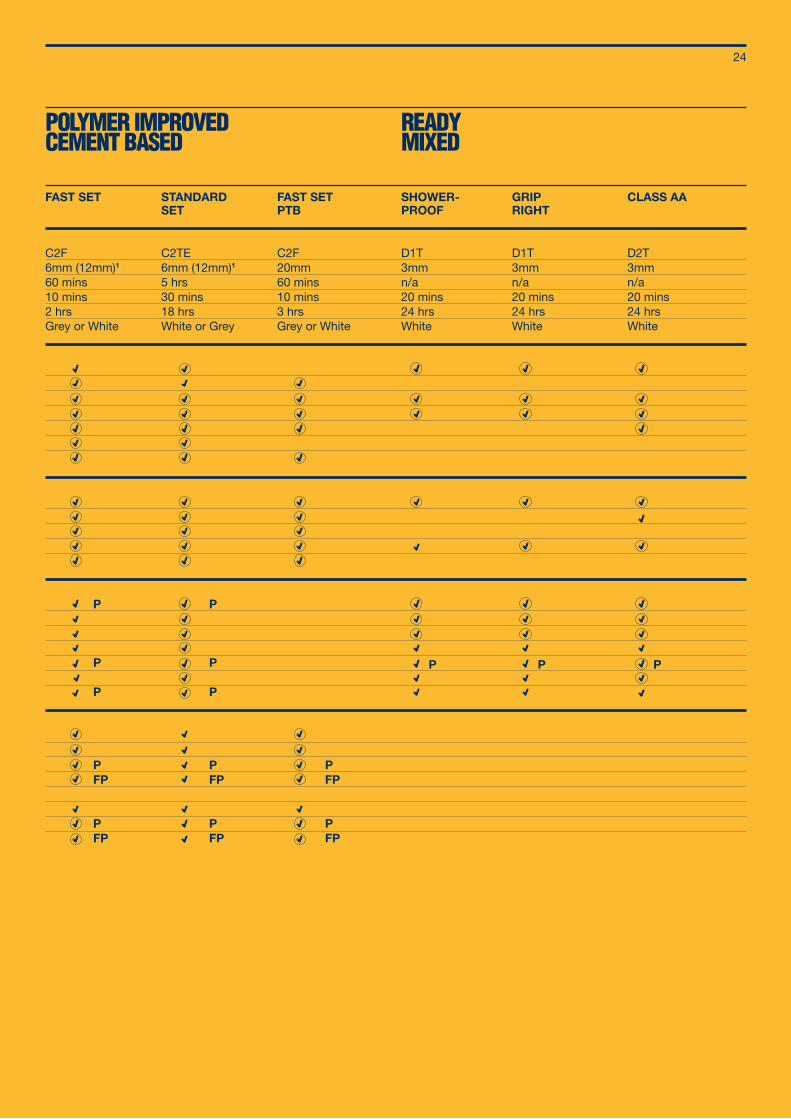
24
C2F6mm (12mm)1
60 mins10 mins2 hrsGrey or White
P
P
P
P FP
P FP
C2TE6mm (12mm)1
5 hrs30 mins18 hrsWhite or Grey
P
P
P
P FP
P FP
C2F20mm60 mins10 mins3 hrsGrey or White
P FP
P FP
FAST SET STANDARD SET
FAST SET PTB
POLYMER IMPROVED CEMENT BASED
P P P
D1T3mmn/a20 mins24 hrsWhite
D1T3mmn/a20 mins24 hrsWhite
D2T3mmn/a20 mins24 hrsWhite
SHOWER-PROOF
GRIP RIGHT
CLASS AA
READY MIXED
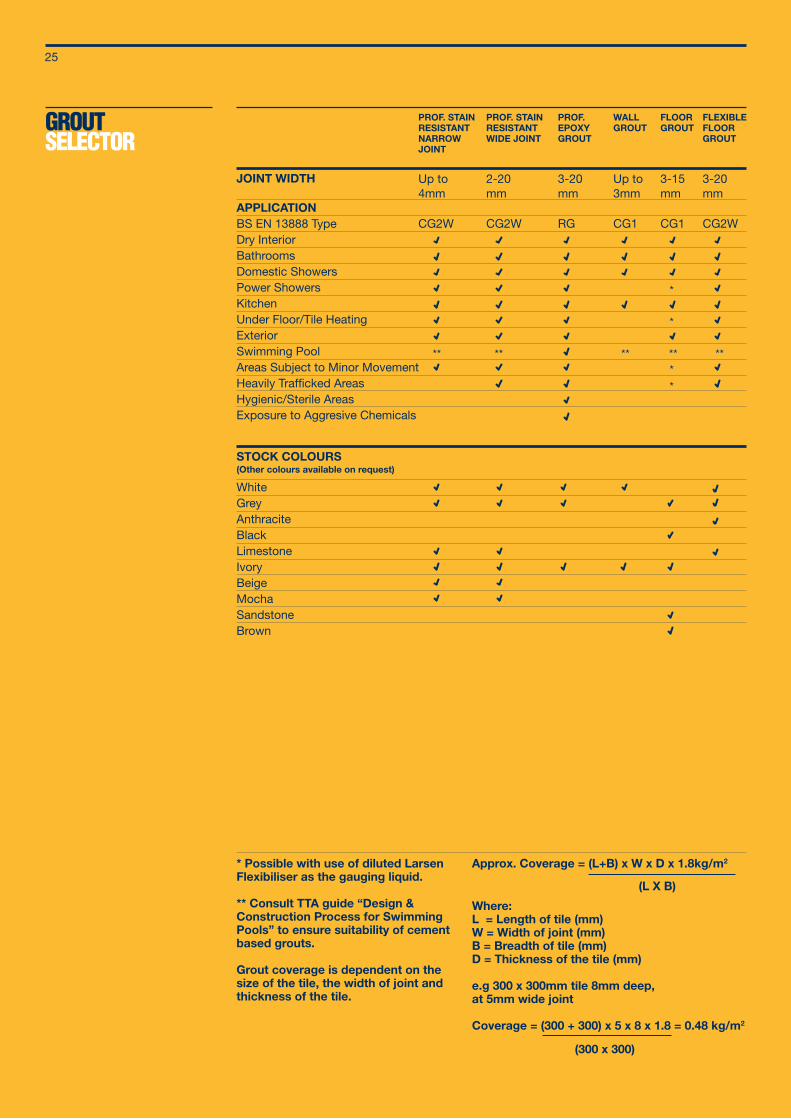
GROUTSELECTOR
PROF. STAINRESISTANTNARROWJOINT
PROF. STAIN RESISTANTWIDE JOINT
WALL GROUT
FLOOR GROUT
FLEXIBLE FLOOR GROUT
PROF. EPOXYGROUT
JOINT WIDTH
APPLICATIONBS EN 13888 TypeDry InteriorBathroomsDomestic ShowersPower ShowersKitchenUnder Floor/Tile HeatingExteriorSwimming PoolAreas Subject to Minor Movement Heavily Trafficked AreasHygienic/Sterile AreasExposure to Aggresive Chemicals
CG2W CG2W RG CG1 CG1 CG2W
STOCK COLOURS(Other colours available on request)
WhiteGreyAnthraciteBlackLimestoneIvoryBeigeMochaSandstoneBrown
Up to 4mm
2-20mm
3-20mm
3-15mm
3-20mm
Up to3mm
* Possible with use of diluted Larsen Flexibiliser as the gauging liquid.
** Consult TTA guide “Design & Construction Process for Swimming Pools” to ensure suitability of cement based grouts.
Grout coverage is dependent on the size of the tile, the width of joint and thickness of the tile.
Approx. Coverage = (L+B) x W x D x 1.8kg/m2
(L X B)
(300 x 300)
Where: L = Length of tile (mm)W = Width of joint (mm)B = Breadth of tile (mm)D = Thickness of the tile (mm)
e.g 300 x 300mm tile 8mm deep, at 5mm wide joint
Coverage = (300 + 300) x 5 x 8 x 1.8 = 0.48 kg/m2
** ** **** **
*
*
**
25
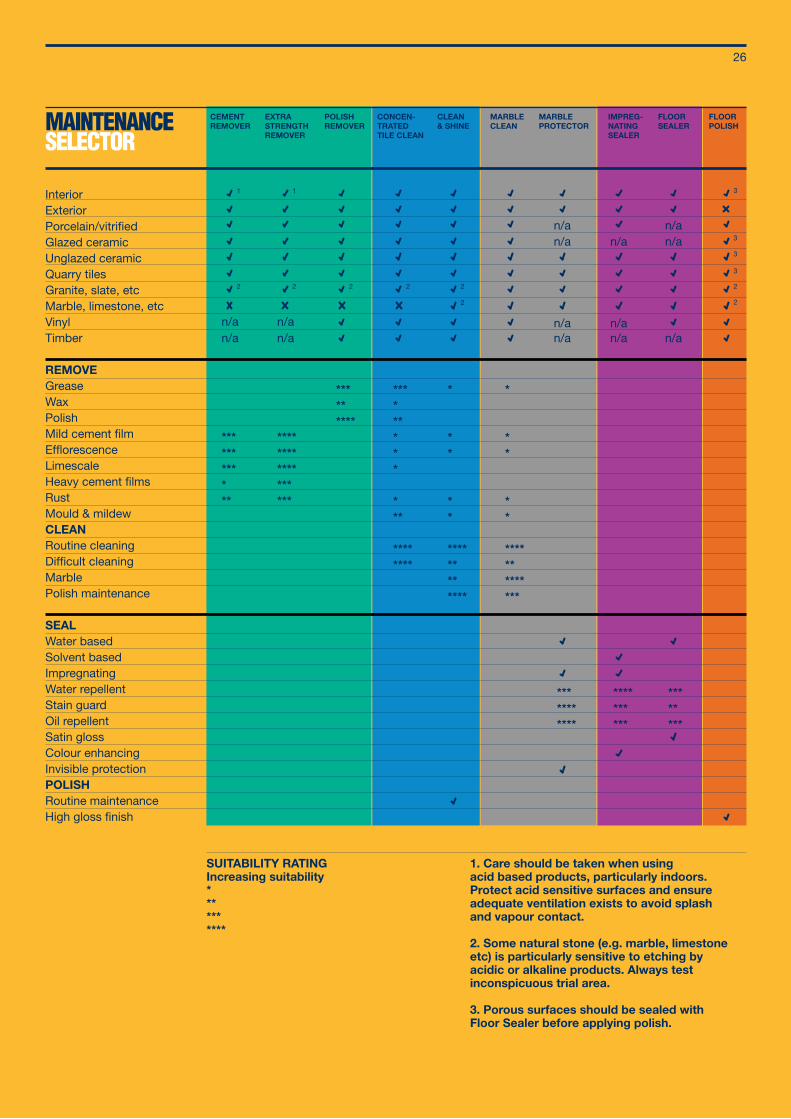
SUITABILITY RATINGIncreasing suitability**********
1. Care should be taken when using acid based products, particularly indoors. Protect acid sensitive surfaces and ensure adequate ventilation exists to avoid splash and vapour contact.
2. Some natural stone (e.g. marble, limestone etc) is particularly sensitive to etching by acidic or alkaline products. Always test inconspicuous trial area.
3. Porous surfaces should be sealed with Floor Sealer before applying polish.
MAINTENANCESELECTOR
26
InteriorExteriorPorcelain/vitrifiedGlazed ceramicUnglazed ceramicQuarry tilesGranite, slate, etcMarble, limestone, etcVinylTimber
REMOVEGreaseWaxPolishMild cement filmEfflorescenceLimescaleHeavy cement filmsRustMould & mildewCLEANRoutine cleaningDifficult cleaningMarblePolish maintenance
SEALWater basedSolvent basedImpregnating Water repellentStain guardOil repellentSatin glossColour enhancingInvisible protectionPOLISHRoutine maintenanceHigh gloss finish
CEMENTREMOVER
n/a
1
2
n/a
************
EXTRASTRENGTHREMOVER
n/a
1
2
n/a
******************
POLISHREMOVER
*********
2
FLOOR POLISH
2
3
3
3
3
2
CONCEN-TRATED TILE CLEAN
********
*********
***
2
CLEAN & SHINE
************
*
**
**
2
2
MARBLE CLEAN
*************
*
**
**
MARBLEPROTECTOR
n/a
***********
n/a
n/a
n/a
FLOOR SEALER
n/a
********
n/an/a
IMPREG-NATINGSEALER
**********
n/a
n/a
n/a

The key to a successful tiling installation is in the preparation. This includes substrate preparation, correct adhesive choice or more importantly giving consideration to movement of the substrate.
It is becoming ever more apparent with greater reliance on ‘Fast-Track’ methods and pressure to reduce installation times that shortcuts are being taken. However, we cannot highlight enough the importance of taking time at the early stages of an installation to ensure that the correct materials are being used on correctly prepared substrates in the correct manner. This time is always well spent and may be the difference between success and a costly failure.
The following is a guide to recommended practices and information which is based on many years experience, current codes of practice and trade body recommendations. Following this guidance will minimise the occurrence of unnecessary common failures. We would recommend that the current codes of practice and trade body recommendations and the relevant product datasheets are always consulted before undertaking any work.
29
GENERALINFORMATION
GLAZED CERAMIC TILESGlazed Ceramic Tiles consist of aporous bisque body with a decorative glazed surface.
They can generally be fitted with any ready mixed adhesive on walls or any cement based adhesive on walls and floors. Some size restrictions apply.
STONEWAREStoneware (or Vitrified) tiles are usually unglazed and require the use of a polymer enhanced cement based adhesive for their installation.
PORCELAINPorcelain (or Fully Vitrified) can be glazed or unglazed, polished or textured and typically have a low water absorption and require the use of a polymer enhanced adhesive. It is generally not recommended to fix porcelain wall tiles with ready mixed adhesives.
NATURAL STONENatural Stone offers the widest variety in performance and behaviour. Limestones, sandstones and some marbles can be soft and porous with light colours being almost translucent, while slates, granites and other marbles are quite dense. Tiles can be calibrated or uncalibrated and are available in a variety of finishes: polished, hone, riven, flamed, tumbled, antiqued or brushed. They require the use of a polymer enhanced adhesive to ensure good bond strength and light colours require the use of a white adhesive with solid bed fixing to prevent shadowing of the adhesive showing through the tile. Natural stone tiles usually require sealing before and after grouting to protect from staining.
TERRAZZOTerrazzo tiles are manufactured from a blend of cement based binder and decorative aggregates which are subsequently polished after curing. A polymer enhanced adhesive is recommended.
AGGLOMERATED STONEAgglomerated Stone tiles are similar to Terrazzo although they usually comprise of a resin binder. Advice for fixing should be sought from the manufacturer as some thin versions can be prone to ‘curling’ and may require the use of a resin adhesive.
METAL TILESMetal Tiles can be either solid metal or a thin sheet formed around a backer. Solid tiles should be fixed with Larsen Larfix E epoxy adhesive. For tiles formed around a backing block a flexible (S1) adhesive should be used.
GLASS TILES Glass tiles can generally be treated in the same way as Porcelain.
MOSAICS Mosaics are small format tiles typically held in a pattern by a mesh backing or paper facing. They should be fixed according to the nature of tile used. Thin bed solid bed fixing is preferred.
TYPES OF TILES
30
TYPICAL BED DEPTH~ 1.5 mm~ 1.5mm~ 3 mm~ 3 mm3-6 mm
TYPICAL COVERAGE50%100%70%100%100%
It is important that the correct type of trowel is chosen to ensure the correct bed depth and adhesive coverage is achieved. The following are some typical trowels and the coverage achieved:
TYPE
NotchedNotchedNotchedThin Bed Solid BedThick Bed Solid Bed
SIZE
6 x 6mm 25mm centres3 x 3mm 6mm centres6 x 6mm 12mm centres10 x 5mm 12mm centres20 x 10mm 25mm centres
TROWEL CHOICE
LARGE FORMAT TILESLarge format tiles are described as tiles with at least one edge >600mm or anarea of >1800cm2 (e.g. 60 x 30cm). The following are some of the issues with large format tiling:
Weight – typically large format wall tiles will be thicker than standard format and will have correspondingly a greater weight per square metre. Careful consideration should therefore be paid to the background and its ability to support the weight of the installation. For this reason it is not recommended to fit large format wall tiles onto paint or existing tiles.
Safety – Large format wall tiles should only be fixed by mechanical means when fitted above 3 metres.
Fitting – The substrates must be sufficiently flat to ensure that a suitable fixing method can be employed. ‘Dot and Dab’ fixing is never acceptable. It is important to ensure large format floor tiles are fitted in a solid bed of adhesive to prevent hollows and subsequent weaknesses. This may necessitate the use of back buttering or a pourable thick bed adhesive. Only polymer enhanced cement based adhesives (C2) should be used to fit large format tiles.
Movement – due to fewer joints between tiles, less stress can be accommodated at tile joints. Therefore large areas of large format tiling generally require a greater number of movement joints in a given area. Further, careful consideration should be given when installing large format tiles in areas subject to thermal movement and deflection.
SUBSTRATE PREPARATION
In order to achieve a successful tiling installation, it is of paramount importance to ensure that the substrate is correctly prepared. The following are general guidelines which should always be followed. Subsequent sections will give substrate specific information.
The substrate must be sound and suitably dry.
The substrate must be sufficiently strong, rigid and durable to support the tiling installation for the intended duty and traffic.
The substrate must be free from dust, grease, loose materials and any other contaminant which may interfere with the bond.
The substrate should be suitably level for the fixing method being used. This is particularly true when using ready mixed adhesives which have a maximum bed depth of 3mm.
Priming may be required to improve the bond to some surfaces but should never be used to make good a poor substrate.
In wet areas some substrates require protection with a suitable tanking system.
31
FIXING It is essential that the type of substrate and tile along with the installation are carefully considered when selecting the correct adhesive.
Adhesives should be spread and evenly trowelled with a suitable notched trowel.Dot and Dab is not an acceptable method of fixing on walls or floors.
Position the tile on the adhesive within the open time for the adhesive.
Press the tile gently but firmly with a slight twisting action.
In exterior, wet areas and on floors ensure 100% adhesive coverage of the tile without voids.
Ready mixed adhesive should only be used on walls and where thin bed application is appropriate (maximum bed depth of 3mm).
Where limited movement or vibration is expected, a deformable (S1) adhesive should be used.
GROUTING When choosing a grout type, consideration should be given to joint width, tile type and requirements of the tiling installation. Before grouting commences, ensure that the adhesive is fully hardened – in general this is 24-48 hours for ready mixed adhesives, up to 24 hours for standard setting adhesives and 2-3 hours for fast setting adhesives*
Apply the grout to the joints with a grouting float, squeegee or sponge, ensuring that the joints are completely filled.
Allow the grout to harden sufficiently, then clean off excess with a damp cloth or sponge working diagonally across the joints. Do not use excessive amounts of water as this can induce shading variations.
Where limited movement or vibration is expected, a flexible grout should be used.
For ease of cleaning, when using polymer modified and epoxy grouts, it is advisable to work on areas of 1m2, as their improved performance also makes the hardened grout more difficult to clean from the tile face.
Before starting, ensure that any adhesive in the joints is raked back to give an even joint depth.
When mixing always use the correct and consistent amount of water to reduce shade variation.
MOVEMENT JOINTS
Movement joints should be detailed by the architect or designer at the outset of the design. Due to the complexities of this subject please refer to the recommendations set out in BS 5385. In general movement joints should be placed:
Over existing construction movement joints.
At junctions between different substrates.
On floors around the tiling perimeter.
Where tiling butts another surface.
On floors at 4.5-10m centres.
On internal walls at vertical corners and at 4.5-10m centres vertically and horizontally.
On exterior walls at external vertical angles, horizontally between floor levels and vertically at 3-4.5m centres.
PLEASE NOTEThe recommendations in this brochure are guidelines only and are based on both current development work and many years experience. Whilst every effort is made to ensure that the information is reliable we cannot accept responsibilityfor any work carried out with our materials where we have no control over methods of application, site conditions etc.For full product information consult the relevant Product Data Sheet or if a detailed specification is required, please consult with our Technical Department.
*All curing times are approximate and are dependent on ambient temperatures, depth of substrate and site conditions.
WALLTILING
COMMON SUBSTRATES ON WALLS
SAND CEMENT RENDER Sand and cement render is the preferred substrate for wall tiling.
Must be 4 weeks old before tiling*.
To reduce suction on porous surfaces, prime with Larsen Acrylic Primer diluted 1:1 with clean water.
GYPSUM PLASTERMust be 2 weeks old before tiling*.Concrete, brick and block walls must have been at least 4 weeks old prior to application of plaster*.
Backing plasters such as Bonding or Browning are not suitable to directly receive tiling.
Polished surfaces should be roughened with a stiff brush.
Ensure weight of tiles and adhesive does not exceed 20kg/m2.
Cement based adhesives may only be used when the substrate is primed as follows: first coat Acrylic Primer diluted 1:1 with water and allowed to dry; second coat Acrylic Primer applied neat; apply tile adhesive while second coat is tacky.
PLASTERBOARDBoards should generally be 12.5mm and must be securely fixed and rigid.In intermittently damp areas water resistant boards should be used. In regularly wet areas e.g. shower enclosures, boards should be tanked.
Ensure tiling installation does not exceed 32 kg/m2.
32
CRITICAL WEIGHTS FOR WALL TILING
While our adhesives are capable of bonding almost all tile types and sizes, consideration must be given to the substrate’s ability to support the weight of the tiling (i.e. adhesive and tiles) without failure. The following are a list of common backgrounds and recommended maximum loadings.
Further to the weight of tiles, the weight of adhesive must be added when considering substrate suitability. Typically allow ~5kg/m2 for a 3mm solid bed of cement based adhesive and ~2.5kg/m2 for 2mm bed 70% coverage of ready mixed adhesives.
Glazed Ceramic Glazed CeramicPorcelainPorcelain Natural StoneNatural StoneNatural Stone
6mm10mm10mm12mm7mm10mm20mm
10kg/m2
17kg/m2
23kg/m2
28kg/m2
19kg/m2
27kg/m2
55kg/m2
Gypsum Plaster (Finish plaster)Plasterboard (direct to paper face – no skim)PlywoodTile backer boardSand cement render
20kg/m2
32kg/m2
Around 30kg/m2
Up to 60kg/m2 (refer to supplier’s guidance)Unlikely to be exceeded (very heavy tiles may require the use of reinforcement)
The critical factors to consider are the thickness of the tile and the type of tile – the facial dimension of the tile has no bearing on its weight per square metre. The following are some typical weights per square metre for tiles:
33
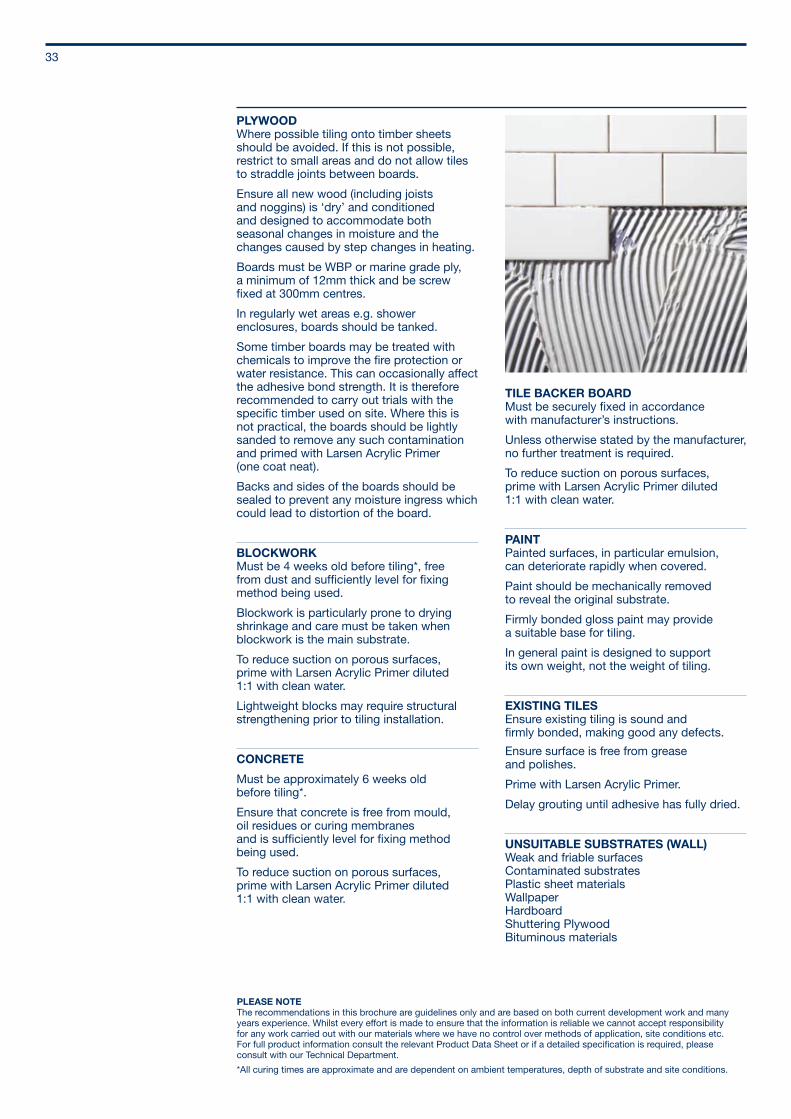
PLYWOODWhere possible tiling onto timber sheets should be avoided. If this is not possible, restrict to small areas and do not allow tiles to straddle joints between boards.
Ensure all new wood (including joists and noggins) is ‘dry’ and conditioned and designed to accommodate both seasonal changes in moisture and the changes caused by step changes in heating.
Boards must be WBP or marine grade ply, a minimum of 12mm thick and be screw fixed at 300mm centres.
In regularly wet areas e.g. shower enclosures, boards should be tanked.
Some timber boards may be treated with chemicals to improve the fire protection or water resistance. This can occasionally affect the adhesive bond strength. It is therefore recommended to carry out trials with the specific timber used on site. Where this is not practical, the boards should be lightly sanded to remove any such contamination and primed with Larsen Acrylic Primer (one coat neat).
Backs and sides of the boards should be sealed to prevent any moisture ingress which could lead to distortion of the board.
BLOCKWORKMust be 4 weeks old before tiling*, free from dust and sufficiently level for fixing method being used.
Blockwork is particularly prone to drying shrinkage and care must be taken when blockwork is the main substrate.
To reduce suction on porous surfaces, prime with Larsen Acrylic Primer diluted 1:1 with clean water.
Lightweight blocks may require structural strengthening prior to tiling installation.
CONCRETE
Must be approximately 6 weeks old before tiling*.
Ensure that concrete is free from mould, oil residues or curing membranes and is sufficiently level for fixing method being used.
To reduce suction on porous surfaces, prime with Larsen Acrylic Primer diluted 1:1 with clean water.
TILE BACKER BOARDMust be securely fixed in accordance with manufacturer’s instructions.
Unless otherwise stated by the manufacturer, no further treatment is required.
To reduce suction on porous surfaces, prime with Larsen Acrylic Primer diluted 1:1 with clean water.
PAINTPainted surfaces, in particular emulsion, can deteriorate rapidly when covered.
Paint should be mechanically removed to reveal the original substrate.
Firmly bonded gloss paint may provide a suitable base for tiling.
In general paint is designed to support its own weight, not the weight of tiling.
EXISTING TILESEnsure existing tiling is sound and firmly bonded, making good any defects.
Ensure surface is free from grease and polishes.
Prime with Larsen Acrylic Primer.
Delay grouting until adhesive has fully dried.
UNSUITABLE SUBSTRATES (WALL)Weak and friable surfacesContaminated substratesPlastic sheet materialsWallpaperHardboardShuttering PlywoodBituminous materials
PLEASE NOTEThe recommendations in this brochure are guidelines only and are based on both current development work and many years experience. Whilst every effort is made to ensure that the information is reliable we cannot accept responsibilityfor any work carried out with our materials where we have no control over methods of application, site conditions etc.For full product information consult the relevant Product Data Sheet or if a detailed specification is required, please consult with our Technical Department.
*All curing times are approximate and are dependent on ambient temperatures, depth of substrate and site conditions.
34
FLOORTILINGCOMMON SUBSTRATES ON FLOORS
CONCRETEMust be approximately 6 weeks old before tiling*.
Ensure surface is free from curing membranes, sealers and other contaminants.Power floated concrete should have the surface layer mechanically removed and exposed surface primed with Larsen Acrylic Primer.
SAND AND CEMENT SCREEDEnsure the screed is sufficiently strong and stable for the installation.
New screeds should be at least 3 weeks old before tiling*.
For ‘Fast-Track’ installations, specify the use of a Larsen Dry4 Screed *.
Porous screed should be primed with Larsen Acrylic Primer diluted 1:1 with clean water.
GYPSUM SCREEDEnsure screed is fully dry with a moisture content of less than 0.5%.
Cement based adhesives may only be used when the substrate is primed as follows: first coat Acrylic Primer diluted 1:1 with water and allowed to dry; second coat Acrylic Primer applied neat; apply tile adhesive while second coat is tacky.
Alternatively Larsen Seri-Dec can be used to neutralise the vapour pressure and lay on a gypsum screed with a moisture content of 2.0% or less.
GREEN SCREEDGreen screed is a sand cement screed which has not yet reached adequate maturity. It may not be sufficiently strong to receive tiling and will be prone to movement as a result of the loss of construction moisture. Larsen Seri-Dec can be used to neutralise any risk of vapour pressure and to decouple any stress as a result of moisture movement or cracking in the screed.
EXISTING TILESRemove and repair all damaged or hollow tiling.
Ensure all polish, sealers and dirt have been removed.
Prime surface with Larsen Acrylic Primer.
EXISTING VINYL TILESEnsure that the vinyl tiles are securely bonded and in sound condition.
Remove and repair all loose or damaged tiles.
Ensure all polish, sealers and dirt have been removed.
Prime the surface with Larsen Acrylic Primer applied neat.
To further improve the key apply a slurry coat. Mix 1 part Larsen Flexibiliser with 4 parts powder adhesive, apply with a brush and allow to dry to a tacky finish before tiling.
Cushioned vinyl is not a suitable substrate to receive tiling.
ASPHALTIt is imperative that the Asphalt is flooring grade and of sufficient structural integrity to support the tiling installation.
The surface should be thoroughly cleaned and degreased.
Improve the key on asphalt without a sand scatter finish by applying a slurry coat.
Alternatively apply Larsen Seri-Dec Matting to the floor to provide a sound substrate.
ACOUSTIC MATTINGMatting must be thin, firmly bonded and non-compressible.
Matting should be installed as per the manufacturer’s instructions.
Tiles can be fitted using Professional Flexible Fast Set or Professional Wooden Floor Fast Set.
35
HEATED FLOOR
UNSUITABLE SUBSTRATES (FLOOR)Weak and friable surfacesContaminated SubstratesFlexible SubstratesRoofing Grade AsphaltPlastic sheet materials
HEATED SCREED
Ensure the substrate is sufficiently cured and that the heating system has been tested for a minimum of 7 days.
Check in case screed is gypsum based.Switch off the underfloor heating approx. 48hrs before tiling (or in cold conditions turn it down to give an average floor temperature of 15°C).
Install tiles as normal using a polymer enhanced adhesive or preferably an S1 deformable adhesive.
Ensure solid bed fixing.
Do not butt-joint into corners or retaining walls, proprietary expansion joints should be used or alternatively a joint width of 1½ times the normal grout width used in these areas.
Allow a minimum of 48hrs after tiling before switching on the heating and do so gradually stepping up the temperature gradually 5°C per day.
If the heating system has not been trialled after the installation of the screed and prior to tiling, or the screed has developed stress cracks, Larsen Seri-Dec should be used over the whole floor area to decouple any stress as a result of moisture related movement or cracking in the screed.
UNDERTILE HEATINGThe substrate must be suitable to receive the tiling installation and stable to thermally induced movement.
The electrical undertile heating mat should be installed as per the manufacturer’s instructions.
To prevent damage to the mat a suitable levelling compound should be applied over the floor area, encasing the cables by at least 3mm.
Install tiles as normal using a polymer enhanced adhesive or preferably an S1 deformable adhesive.
Ensure solid bed fixing.
Do not butt-joint into corners or retaining walls, proprietary expansion joints should be used or alternatively a joint width of 1½ times the normal grout width used in these areas.
Allow a minimum of 48hrs after tiling before switching on the heating and do so gradually stepping up the temperature gradually 5°C per day.
Cushioned VinylMagnesite ScreedsHardboardShuttering PlywoodBituminous materials
TIMBER FLOORS - GENERALTiles are a rigid floor covering, therefore it is clear that a timber based substrate could cause a major problem. Wherever possible, tiling onto timber based substrates should be avoided. Timber is prone to deflection and to minor lateral movement as a result of moisture and thermal changes. Any transverse deflection must be accounted for at the preparation stage and the use of a flexible adhesive will ensure both a strong bond to the timber and accommodate any minor movement. Ceramic Tiles should never be fixed to wooden substrates externally or in wet areas. Hardboard, shuttering plywood and moisture sensitive particle boards are not suitable to receive tiling directly.
Some timber boards may be treated with chemicals to improve the fire protection or water resistance. These can occasionally affect the adhesive bond strength. It is therefore recommended to carry out trials with the specific timber used on site. Where this is not practical, the boards should be lightly sanded to remove any such contamination and primed with Larsen Acrylic Primer (one coat neat). The following are recommendations for the different forms of timber flooring which may be encountered.
TIMBER FLOOR SUBSTRATES
PLEASE NOTEThe recommendations in this brochure are guidelines only and are based on both current development work and many years experience. Whilst every effort is made to ensure that the information is reliable we cannot accept responsibilityfor any work carried out with our materials where we have no control over methods of application, site conditions etc.For full product information consult the relevant Product Data Sheet or if a detailed specification is required, please consult with our Technical Department.
*All curing times are approximate and are dependent on ambient temperatures, depth of substrate and site conditions.
36
NEW TIMBEREnsure the floor has been designed to accommodate the tiling installation.
Ensure adequate ventilation exists beneath the floor and that it is well supported.
Ensure all new wood (including joists and noggins) is ‘dry’ and conditioned.
The floor should be designed to accommodate both seasonal changes in moisture and the changes caused by step changes in heating.
The floor should be sufficiently strong and rigid to support the tiling without excess deflection.
Minimum 15mm marine grade plywood should be used with edges and underside sealed with Larsen Acrylic Primer and should be screw-fixed at 300mm centres.
All board edges must be supported underneath with noggins or joists.If floor still lacks sufficient rigidity then overlay the existing timber with minimum 15mm marine grade plywood or minimum 6mm tile backer board screw-fixed at 300mm centres. Alternatively, install Larsen Seri-Dec which is a decoupling, anti-fracture membrane.
This should be fixed with flexible (S1) tile adhesive using a 3-4mm notched trowel and thereafter a maximum of a 6mm flexible adhesive bed is applied over the mat to embed the tiles.
In bathrooms, protect substrate with Larsen Tanking Kit or Seri-Dec Matting. Only use a deformable (S1 or S2) tile adhesive.
DIRECT TO TONGUE AND GROOVE FLOORBOARDSEnsure adequate ventilation exists beneath the floor and that it is well supported.
Contamination such as floor polish, wax and adhesive residues should be removed by sanding the boards, then vacuumed to remove any residue.
Screw-fix the boards to joists at 300mm centres with 2 screws per board width.
If insufficient support exists to allow this or if excess deflection is evident treat as for ‘Other Existing Timber’.
Use Professional Wooden Floor Fast Set.
Ensure a solid bed of adhesive with a recommended 3mm bed depth.
Alternatively, install Larsen Seri-Dec which is a decoupling, anti-fracture membrane.
OTHER EXISTING TIMBEREnsure adequate ventilation exists beneath the floor.
Overlay the existing timber with minimum 15mm marine grade plywood, which has had edges and underside sealed or minimum 6mm tile baker board screw-fixed at 300mm centres.
In bathrooms, protect substrate with Larsen Tanking Kit.
Only use a deformable (S1 or S2) tile adhesive.
Alternatively, install Larsen Seri-Dec.
FLOATING FLOORSWhere possible it is recommended to avoid direct fixing of ceramic tiles to floating timber floors and ceramic tiles should never be installed on to a floating timber floor in areas subject to heavy loadings either static or dynamic. In areas of light traffic the following guidelines may be followed.
Insulation must be of flooring grade and installed to provide minimum deflection under loading.
The concrete subfloor must be free from ridges to prevent localised stresses on insulation layer.
Generally speaking chipboard or similar products are used in the construction of floating floors, these should be of the moisture resistant type.
The boards should be tongue and groove type with glued joints, cut edges must be supported underneath with noggins. Where a batten support exists, the boards must be screwed to the supports at 300mm centres.
The existing floating timber should then be overlaid with minimum 15mm marine grade plywood or minimum 6mm tile backer board secured at maximum 300mm intervals using screws to the material beneath.
Joints should be staggered with the floating timber joints. This process will help prevent individual movement of the boards and improve the overall rigidity of the floor.
At this stage an assessment should be made as to the rigidity of the floor under expected loadings. If the floor is still likely to be subject to excess deflection, Larsen Seri-Dec Matting must be used.
It is important that a deformable adhesive is used, either Professional Flexible Fast Set or Professional Wooden Floor Fast Set.
No voids should exist between the tile and substrate, minimum bed thickness 3mm.
Do not butt-joint into corners or retaining walls, proprietary movement joints should be used.
TIMBER FLOOR SUBSTRATES
37
Tiling onto sheet metal should be carried out with care. While steel is inherently strong, it can be prone to vertical movement if not properly supported and horizontal expansion/contraction when subject to temperature fluctuation. The surface of the metal should be thoroughly cleaned and degreased to ensure it is free from all rust or other surface contamination.
Galvanised, painted steel or aluminium are not considered suitable substrates for tiling.
The steel should be adequately supported and fixed to prevent deflection due to its
The substrate must be suitable to receive the tiling installation and sloped to allow sufficient run-off to drains or guttering (approx 1.5mm/m).
If the balcony is a flat roof conversion or similar non load-bearing design, consult a structural engineer for advice.
It is recommended to apply Larsen Seri-Dec matting to the substrate. Joints with walls, between sheets and over the balcony edge should be sealed with Larsen Flexijoint Tape.
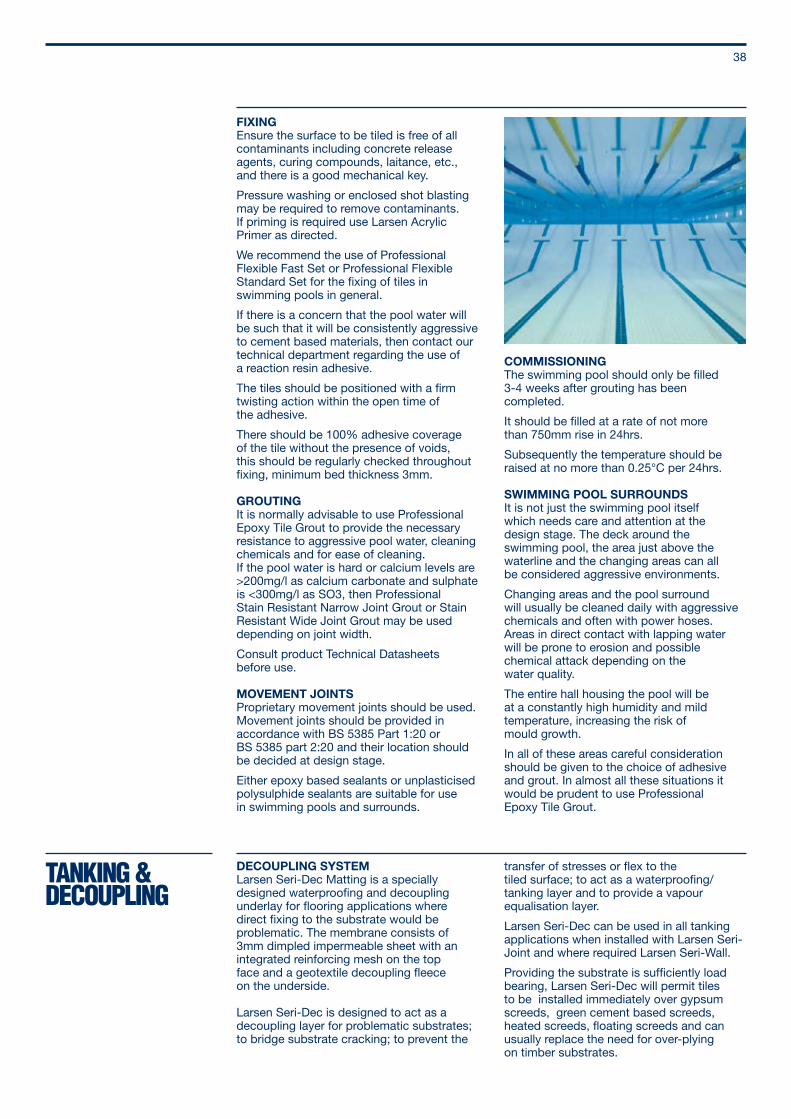
Tiling of swimming pools is, in general, no different to tiling any other wall/floor.
The following are guidelines for the recommended products and methods to be used. No attempt is made to cover topics of waterproofing, tanking or design of structural elements of swimming pools.
For full information consult the Tile Association’s paper ‘Design and Construction Process for Swimming Pools’.
PREPARATION The pool shell shall be designed and installed to be capable of meeting the watertightness criteria in BS8007.
New concrete should be at least 6 weeks old before tiling.
If the pool shell is not suitable for direct tiling, the surface must be mechanically prepared to receive new screed/render and applied when the shell is at least 6 weeks old.
This new screed/render should be at least 3 weeks old before tiling.
It is important that these times are adhered to as much of the shrinkage of the structure will occur during this early period.
Priming will not generally be required unless the surface is very porous or dusting.
Install tiles as normal using a flexible S1 deformable adhesive.
Ensure solid bed fixing.
Perimeter joints should be sealed with a flexible waterproof sealant e.g. Larsen F1X adhesive and sealant.
Consideration should be given to the installation of skirting tiles with proprietary waterproof trims.
own weight, the weight of tiling or any applied load during the life of the tiling installation and to prevent excessive expansion/contraction due to temperature change.
A resin based adhesive should be used i.e. Larsen Epoxy Bond or Larfix E.
Alternatively, install Larsen Seri-Dec which is a decoupling, anti-fracture membrane.
This should be fixed with Larsen Epoxy Bond or Larfix E using a 3-4mm notched trowel and thereafter a maximum of a 6mm flexible adhesive bed is applied over the mat to embed the tiles.
METAL
BALCONIES
SWIMMING POOLS
SPECIALCASES
FIXING Ensure the surface to be tiled is free of all contaminants including concrete release agents, curing compounds, laitance, etc., and there is a good mechanical key.
Pressure washing or enclosed shot blasting may be required to remove contaminants.If priming is required use Larsen Acrylic Primer as directed.
We recommend the use of Professional Flexible Fast Set or Professional Flexible Standard Set for the fixing of tiles in swimming pools in general.
If there is a concern that the pool water will be such that it will be consistently aggressive to cement based materials, then contact our technical department regarding the use of a reaction resin adhesive.
The tiles should be positioned with a firm twisting action within the open time of the adhesive.
There should be 100% adhesive coverage of the tile without the presence of voids, this should be regularly checked throughout fixing, minimum bed thickness 3mm.
GROUTING It is normally advisable to use Professional Epoxy Tile Grout to provide the necessary resistance to aggressive pool water, cleaning chemicals and for ease of cleaning. If the pool water is hard or calcium levels are >200mg/l as calcium carbonate and sulphate is <300mg/l as SO3, then Professional Stain Resistant Narrow Joint Grout or Stain Resistant Wide Joint Grout may be used depending on joint width.
Consult product Technical Datasheets before use.
MOVEMENT JOINTS Proprietary movement joints should be used.Movement joints should be provided in accordance with BS 5385 Part 1:20 or BS 5385 part 2:20 and their location should be decided at design stage.
Either epoxy based sealants or unplasticised polysulphide sealants are suitable for use in swimming pools and surrounds.
38
COMMISSIONINGThe swimming pool should only be filled 3-4 weeks after grouting has been completed.
It should be filled at a rate of not more than 750mm rise in 24hrs.
Subsequently the temperature should be raised at no more than 0.25°C per 24hrs.
SWIMMING POOL SURROUNDSIt is not just the swimming pool itself which needs care and attention at the design stage. The deck around the swimming pool, the area just above the waterline and the changing areas can all be considered aggressive environments.
Changing areas and the pool surround will usually be cleaned daily with aggressive chemicals and often with power hoses.Areas in direct contact with lapping water will be prone to erosion and possible chemical attack depending on the water quality.
The entire hall housing the pool will be at a constantly high humidity and mild temperature, increasing the risk of mould growth.
In all of these areas careful consideration should be given to the choice of adhesive and grout. In almost all these situations it would be prudent to use Professional Epoxy Tile Grout.
TANKING & DECOUPLING
DECOUPLING SYSTEMLarsen Seri-Dec Matting is a specially designed waterproofing and decoupling underlay for flooring applications where direct fixing to the substrate would be problematic. The membrane consists of 3mm dimpled impermeable sheet with an integrated reinforcing mesh on the top face and a geotextile decoupling fleece on the underside.
Larsen Seri-Dec is designed to act as a decoupling layer for problematic substrates; to bridge substrate cracking; to prevent the
transfer of stresses or flex to the tiled surface; to act as a waterproofing/tanking layer and to provide a vapour equalisation layer.
Larsen Seri-Dec can be used in all tanking applications when installed with Larsen Seri-Joint and where required Larsen Seri-Wall.
Providing the substrate is sufficiently load bearing, Larsen Seri-Dec will permit tiles to be installed immediately over gypsum screeds, green cement based screeds, heated screeds, floating screeds and can usually replace the need for over-plying on timber substrates.
39
PREPARATIONEnsure the substrate is sufficiently level and load-bearing for the tiling installation and duty.
It should be free from loose materials, grease, oil etc.
Gypsum based substrates must have a moisture content of less than 2%. They should have any surface laitance removed and be primed as follows: first coat Acrylic Primer diluted 1:1 with water and allowed to dry; second coat Acrylic Primer applied neat.
Timber based substrates should be conditioned and sufficiently dry. Existing timber sheet materials should be a minimum 15mm flooring grade and screw-fixed at 300mm centres. Floorboards should be screw-fixed to joists at 300mm centres with 2 screws per board width. If insufficient support exists or the floor is subject to excessive deflection or spring, consideration should be given to include a minimum 15mm plywood overlay prior to the installation of Larsen Seri-Dec.
INSTALLATIONRoll out Larsen Seri-Dec, measure and cut to size without overlap, allowing a 5-10mm expansion joint around the perimeter of the room. Roll sheet back up.
Apply a flexible (S1) tile adhesive to the floor with a 3x3mm or 4x4mm notched trowel. Roll the membrane into the adhesive and smooth with a rubber float ensuring there are no air pockets within the adhesive open time.
Butt joint adjoining sheets.
Where the membrane is to be used as a waterproofing or vapour equalisation layer, joints between sheets, across movement joints and around the perimeter must be sealed.
Apply a thin layer of adhesive as before to both sides of the joint and bed in Larsen Seri-Joint or Seri-Flexijoint Tape.
When the walls are also to be tanked, prepare and prime the substrate as required. Apply Larsen Seri-Wall in the same manner as Larsen Seri-Dec. Larsen Seri-Wall should overlap the perimeter joint of Larsen Seri-Flexi joint by a minimum of 50mm.
TILINGThe tiles can then be fitted immediately using a suitable adhesive. Although not essential it is recommended to use an S1 deformable adhesive.
Construction movement joints should be carried through the Larsen Seri-Dec and tiling installation. Sheets of Larsen Seri-Dec should be cut to permit this.
Where required ensure proprietary movement joints are used particularly in tanked installations.
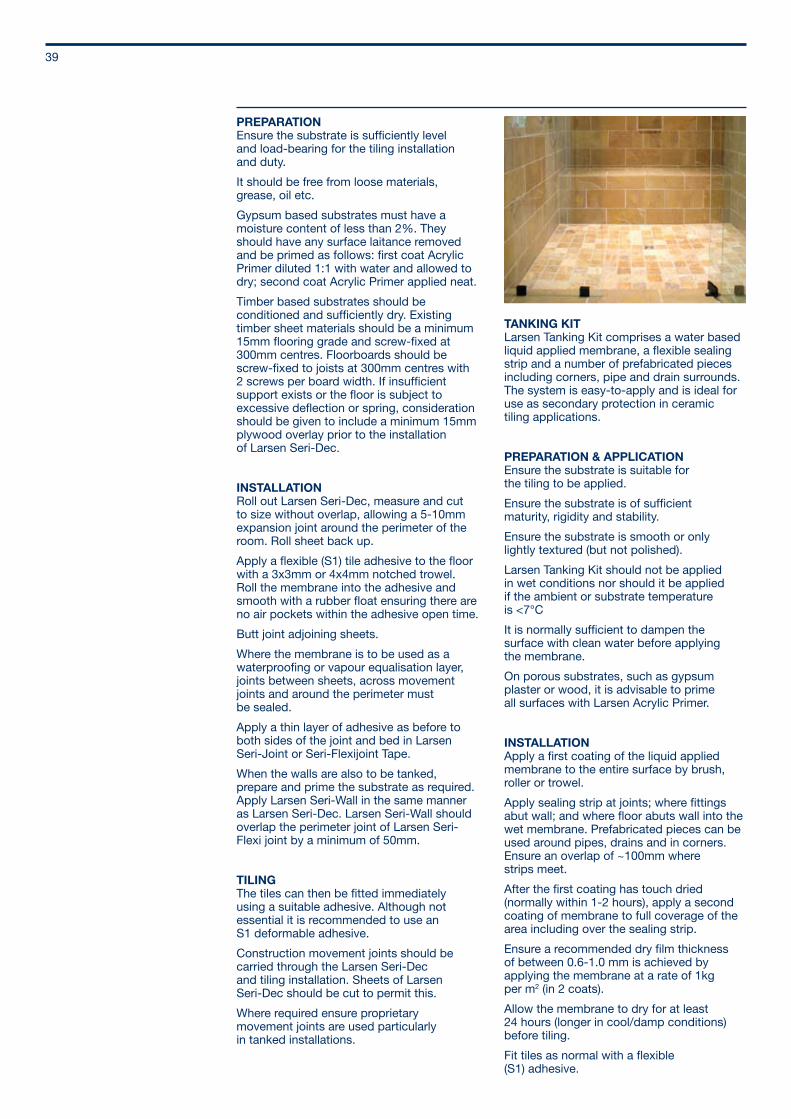
TANKING KIT Larsen Tanking Kit comprises a water based liquid applied membrane, a flexible sealing strip and a number of prefabricated pieces including corners, pipe and drain surrounds. The system is easy-to-apply and is ideal for use as secondary protection in ceramic tiling applications.
PREPARATION & APPLICATIONEnsure the substrate is suitable for the tiling to be applied.
Ensure the substrate is of sufficient maturity, rigidity and stability.
Ensure the substrate is smooth or only lightly textured (but not polished).
Larsen Tanking Kit should not be applied in wet conditions nor should it be applied if the ambient or substrate temperature is <7°C
It is normally sufficient to dampen the surface with clean water before applying the membrane.
On porous substrates, such as gypsum plaster or wood, it is advisable to prime all surfaces with Larsen Acrylic Primer.
INSTALLATIONApply a first coating of the liquid applied membrane to the entire surface by brush, roller or trowel.
Apply sealing strip at joints; where fittings abut wall; and where floor abuts wall into the wet membrane. Prefabricated pieces can be used around pipes, drains and in corners.Ensure an overlap of ~100mm where strips meet.
After the first coating has touch dried (normally within 1-2 hours), apply a second coating of membrane to full coverage of the area including over the sealing strip.
Ensure a recommended dry film thickness of between 0.6-1.0 mm is achieved by applying the membrane at a rate of 1kg per m2 (in 2 coats).
Allow the membrane to dry for at least 24 hours (longer in cool/damp conditions) before tiling.
Fit tiles as normal with a flexible (S1) adhesive.
40
PRIMINGPriming should never be used to make a poor substrate good for tiling nor should a good substrate be primed for the sake of it. A poor substrate should always be repaired or replaced before tiling.
Priming is carried out for two reasons, either to reduce (or prevent) absorption into the substrate, e.g. in the case of a porous screed, or to improve the adhesive bond to a ‘low porosity’ substrate and the adhesive, e.g. in tile on tile applications.
SETTING AND DRYINGPowder tile adhesives and grouts are cement based. Cement is a hydraulic binder which means that there is a chemical reaction between the cement and water. Setting times of cement-based tile adhesives are affected by temperature as this affects the speed of this chemical reaction. When the temperature is high the reaction will be much quicker, particularly with fast setting adhesives, and when it is low the reaction will be much slower. Below 5°C the reaction can stop altogether which is one of the reasons adhesives should never be used below 5°C.
Ready-mixed tile adhesives on the other hand are composed of organic polymer binders which set and gain bond strength as the adhesive loses water, much in the same way as an emulsion paint dries and hardens. As such the setting times of ready-mixed tile adhesives are greatly increased by anything which slows this loss of moisture, i.e., low temperature, heavy bed depth, low porosity tile and/or substrate. The adhesive is at its weakest after sufficient drying has taken place to remove the initial wet grab but before the adhesive has sufficiently dried to provide significant bond strength. This period is lengthened with heavy beds, larger format tiles and cold site conditions.
GROUTING ISSUESGrout is an intrinsic part of any tiling installation and while proprietary grouts can be as durable and hard wearing as the tiles, often grouting gives the most problems. More often than not, all of the following common grout problems can be overcome by taking a few simple steps:
Cracking – The main causes of grout cracking are movement in the substrate (in which case it is possible that the tiles have also debonded) or use of a narrow joint grout in too wide a joint width, or the use of too much mixing water.
Colour Shading – This is the most obvious grout issue and is usually a result of water. Too much or inconsistent amounts of mixing water (common when mixing part bags by eye) or too much water used in the clean up (particularly when cleaning early) lead to variation in the surface strength of the grout and pigment wash out which lead to colour variations. Generally the more water the lighter the colour. The reverse is also true, so areas where the water is absorbed away or evaporates off rapidly (e.g. in direct sunlight) tend to be darker.
Weak or dusty surface – Again too much water is the issue resulting in a weak layer on the surface where the cement has effectively been washed out.
A white powder on the surface is usually a result of efflorescence which is common in all cementitious materials (particularly when excess water is used, in cold or damp site conditions). Efflorescence can be removed with a mild acid based cleaner.
When colour is critical, it is recommended to grout test panels on site with all materials to be used to get a true representation. When grouting large areas always ensure the grout is from the same batch and if not preblend the different batches before mixing. It is always worth remembering that light coloured grouts on floors are difficult to keep looking clean.
ADDITIONALINFORMATION
FURTHERCONSIDERATIONS
41
POLYMERThe addition of polymers to cement based tile adhesives greatly improves their performance. The polymers improve durability, water resistance and deformability of the adhesive and allow bonding to low porosity surfaces such as porcelain tiles. While it is possible to add a liquid additive, most modern adhesives use redispersible polymer powders premixed in the formulation. The use of premixed polymer-modified adhesives ensures consistent polymer content and should always be specified in preference to site mixing using a flexible admixture. All adhesives in the Larsen Professional range of powder tile adhesives are sufficiently polymer-modified to provide a strong bond with porcelain, fully vitrified and natural stone tiles.
FLEXIBLE ADHESIVESThe use of the term ‘Flexible’ with regard to polymer modified cement based adhesives has been widespread in the industry and until the introduction of EN12002 was uncontrolled. Most people take the term ‘Flexible’ in this context to mean an adhesive suitable for use in instances where there is minor movement due to vibration, thermal expansion etc. However, in its truest sense the use of the word Flexible when describing a cement based material is misleading as even a highly polymer modified adhesive could be described as being rigid rather than flexible. The standard describes two classes of deformable (rather than flexible) cement based adhesives - S1 and S2. The test is basically a measure of how far the adhesive can deform before cracking. This is an indication of the adhesive’s ability to prevent stresses (e.g. as a result of movement) transmitting from the substrate to the tile. In meeting the requirements ofS1 or S2 classification, most products will contain a relatively high polymer content which in turn normally improves the bond strength under most conditions. Where we use ‘Flexible’ to describe or name any of our tile adhesives we mean a highly polymer modified product which will meet the requirements of ‘deformable’ either class S1 or S2 in terms of EN12002.
MOVEMENTMovement is one of the biggest causes of tiling failures. Tiles are rigid and brittle and therefore not ideally suited for dealing with movement. The use of flexible tile adhesives can go some way to reduce the transmission of stresses from the substrate to the tiles but ultimately if the movement (and therefore force) is great enough something will give. Thin, less strong tiles may crack and thicker, stronger tiles are likely to debond. It is therefore best to address sources of movement before tiling. The following are the most common:
Drying shrinkage All cement based materials (blocks, concrete, screed etc) will shrink as they cure and dry out. The movement generated by this shrinkage can develop very high shear stresses in a ‘rigid’ tiling installation. These stresses can develop to the point where the force generated is greater than the bond strength allowing the tile to be ‘blown’ off. As such, great care should always be given to ensure recommended drying times are adhered to.
THERMAL MOVEMENT (INTERNAL) Heated screeds can induce differential expansion in the substrate, tile bed and tiles, particularly if heating is increased rapidly. The use of a ‘flexible’ adhesive and a controlled ramping of the heat are generally sufficient to prevent failure.
THERMAL MOVEMENT (EXTERNAL)Dark tiles will warm and cool quickly especially in South/West facing installations. In these cases a flexible adhesive should be used with solid bed fixing in order to accommodate the risk of thermal shock.
DEFLECTION & MOISTURE MOVEMENTTimber floors are inherently flexible and can suffer from excess deflection and swelling/contraction with moisture variation. As such great care is required when tiling onto timber substrates and specific guidelines should be followed.
IMPORTANT STANDARDSBS 8000 – Workmanship on Building Sites - Part 11 Code of practice for wall and floor tilingBS 5385 parts 1 to 5 – Wall and Floor Tiling Codes of PracticeBS 8204 parts 1 to 6 – Screeds, Bases and in situ flooring Codes of PracticeBS EN 12004 - Adhesives for tiles. Definitions and specificationsBS EN 13888 - Grouts for tiles. Definitions and specificationsBS EN 14411 - Ceramic tiles. Definitions, classification, characteristics and marking
THE TILE ASSOCIATION GUIDANCE DOCUMENTSAdhesives & Grouts in Internal TilingDesign & Construction Process for Swimming PoolsGuidelines for Tile FixingLarge Format Tiles in Internal TilingMovement joints in Internal TilingSlip Resistance of Hard FlooringThe Cleaning of Ceramic TilesTiling in Wet RoomsTiling to Acoustic Systems to meet requirements of Building RegulationsTiling to Calcium Sulphate Based ScreedsTiling to Heated FloorsTiling to Timber Sheets & Boards, Timber Substrates & Alternative Products
PRODUCT CLASSIFICATIONS ACCORDING TO CURRENT EUROPEAN STANDARDS
42
ADHESIVESTypeCDR
Class12FTES1S2
GROUTSTypeCG1CG2WCG2ACG2WARG
CementitiousDispersionReaction Resin
NormalImproved with additional characteristicsFast SettingNon-SlipExtended Open TimeDeformableHighly Deformable
Normal CementitiousCementitious grout with improved water resistanceCementitious grout with improved abrasion resistanceCementitious grout with improved water and abrasion resistanceReaction Resin Grout

UK T 028 9077 4000F 028 9077 6945
IRELANDT 01 8348255F 01 8348277
www.larsenbuildingproducts.com