Embed Size (px)
Citation preview
Prof. T.H. Read Prof. T.H. Read Prof. T.H. Read Prof. T.H. Read Prof. T.H. Read
800-225-3001 www.madeirausa.com
Embroidery Threads and Supplies ®
Shipping from more locations nationwide than any other embroidery supplier!
0408
Professor T.H. Readʼs��Lessons in Carefree Embroidery��
How to Use an Upper Thread Tension GaugeTake the guess work out of setting thread tensions.
Using thread tension gauges makes it easy to adjust both bobbin and upper tensions. Itʼs quick, easy and will help youeliminate unsightly bobbin thread showing on top, looping top stitches and thread breaks. Your embroidery will look its bestwith consistent, balanced thread tensions. Hereʼs how to use a bobbin tension gauge to take the tension out of setting tensions!
Instructions for Use:1. Pull approximately 6 inches of thread through the needle and
presser foot.
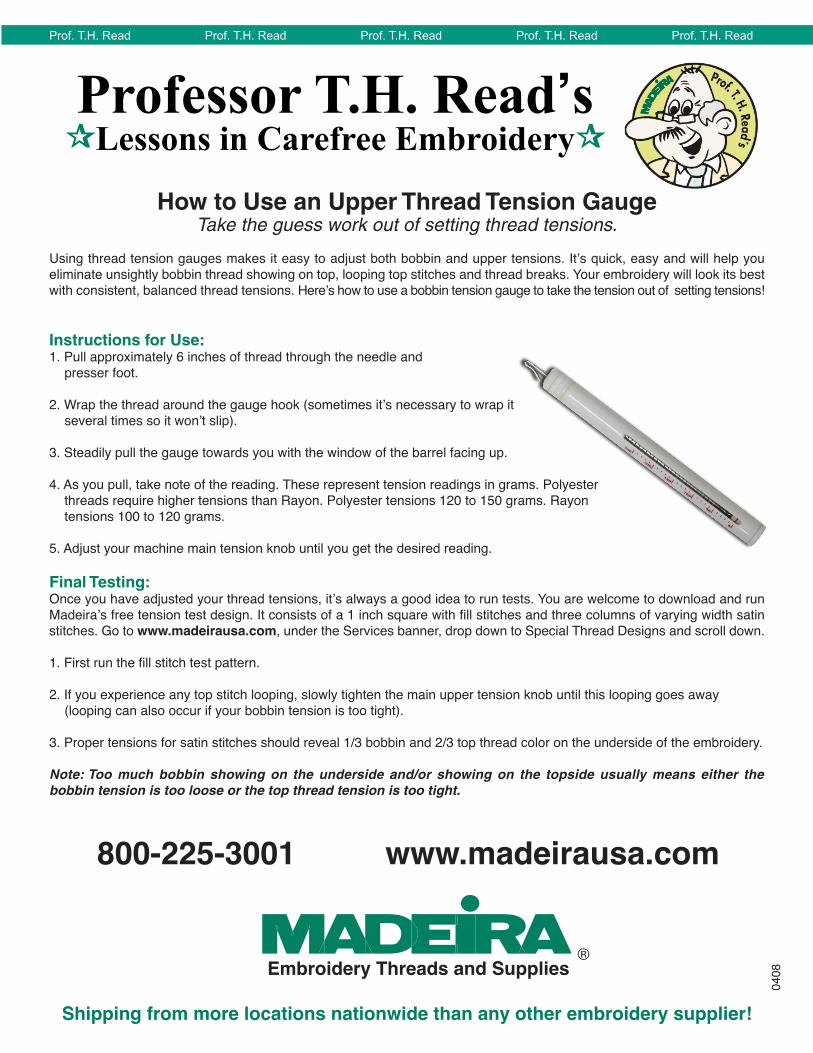
2. Wrap the thread around the gauge hook (sometimes itʼs necessary to wrap itseveral times so it wonʼt slip).
3. Steadily pull the gauge towards you with the window of the barrel facing up.
4. As you pull, take note of the reading. These represent tension readings in grams. Polyesterthreads require higher tensions than Rayon. Polyester tensions 120 to 150 grams. Rayontensions 100 to 120 grams.
5. Adjust your machine main tension knob until you get the desired reading.
Final Testing:Once you have adjusted your thread tensions, itʼs always a good idea to run tests. You are welcome to download and runMadeiraʼs free tension test design. It consists of a 1 inch square with fill stitches and three columns of varying width satinstitches. Go to www.madeirausa.com, under the Services banner, drop down to Special Thread Designs and scroll down.
1. First run the fill stitch test pattern.
2. If you experience any top stitch looping, slowly tighten the main upper tension knob until this looping goes away(looping can also occur if your bobbin tension is too tight).
3. Proper tensions for satin stitches should reveal 1/3 bobbin and 2/3 top thread color on the underside of the embroidery.
Note: Too much bobbin showing on the underside and/or showing on the topside usually means either thebobbin tension is too loose or the top thread tension is too tight.


![[]Ogden, T.H. (1998), Reverie and Interpretation Sensing Something Human.pdf](https://img.pdfslide.us/doc/110x75/577cc0761a28aba711903189/ogden-th-1998-reverie-and-interpretation-sensing-something-humanpdf.jpg)