Embed Size (px)
Citation preview

Production DecisionsProduction DecisionsChapter 6Chapter 6
Mr. HigginsMr. Higgins

ObjectivesObjectives• Identify the need for a plan of Identify the need for a plan of
procedureprocedure• List the steps in making production List the steps in making production
decisionsdecisions• Describe alternative tools for Describe alternative tools for
completing cabinet-making processcompleting cabinet-making process– Preparing to build cabinetry involves Preparing to build cabinetry involves
research and planning.research and planning.– This Chapter deals with the This Chapter deals with the HOW TO HOW TO
DO ITDO IT and and WHY TO DO IT THIS WAYWHY TO DO IT THIS WAY

Production DecisionsProduction Decisions• Production Decisions – Production Decisions –
– Guide you in the Guide you in the HOW TO DO ITHOW TO DO IT and and WHY TO WHY TO DO IT THIS WAYDO IT THIS WAY
– They relate very closely to design decisionThey relate very closely to design decision– Sometimes you make your own design Sometimes you make your own design
decisions, or use someone else's decisions, or use someone else's – The drawling specify shapes, dimensions, and The drawling specify shapes, dimensions, and
joinery for the productjoinery for the product– Decisions include how to do the followingDecisions include how to do the following
• CuttingCutting• SurfacingSurfacing• FormingForming• AssemblingAssembling• FinishingFinishing

Planning your WorkPlanning your Work
• Planning – essential so you do not Planning – essential so you do not waste time and materials.waste time and materials.
• Each steps builds on previous task Each steps builds on previous task and goes to the next.and goes to the next.– Example Squaring a board.Example Squaring a board.– Must have a written Plan of Procedure Must have a written Plan of Procedure – Fig 6-2Fig 6-2
•Sketch – Specify size – Production Decisions Sketch – Specify size – Production Decisions – Perform Operations – Control Quality – – Perform Operations – Control Quality – Evaluate Former ProductsEvaluate Former Products

Plan of ProcedurePlan of Procedure• Plan and Procedure – the What to do StepsPlan and Procedure – the What to do Steps
– Identify the appropriate toolsIdentify the appropriate tools– Obtain materials and suppliesObtain materials and supplies– Lay out and rough cut standard stockLay out and rough cut standard stock– Square work pieces and components accurately to sizeSquare work pieces and components accurately to size– Prepare joints Prepare joints – Create holes and other openingsCreate holes and other openings– Shape componentsShape components– Assemble componentsAssemble components– Apply finishApply finish– Install HardwareInstall Hardware
• Stock – Materials in unprocessed formStock – Materials in unprocessed form• Workpices – rough cut stock being sizedWorkpices – rough cut stock being sized• Component – one or more pieces being processed Component – one or more pieces being processed
into a bill of materialsinto a bill of materials

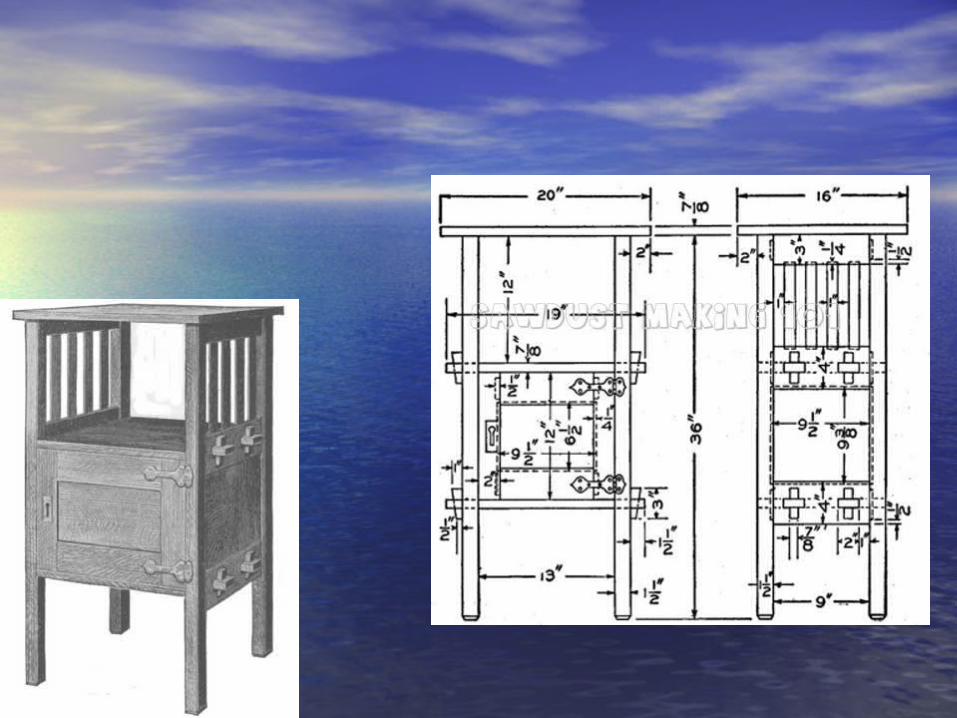
Sample Plan of ProcedureSample Plan of Procedure• save a great deal of uninteresting labor, secure the following save a great deal of uninteresting labor, secure the following
pieces of stock, surfaced on four sides and cut to length:pieces of stock, surfaced on four sides and cut to length:• 4 legs, 1-1/2 by 1-1/2 by 36 in., S-4-S. 4 legs, 1-1/2 by 1-1/2 by 36 in., S-4-S. • 4 rails, 7/8 by 4 by 10 in., S-4-S. 4 rails, 7/8 by 4 by 10 in., S-4-S. • 2 rails, 7/8 by 3 by 10 in., S-4-S. 2 rails, 7/8 by 3 by 10 in., S-4-S. • 2 panels, 3/8 by 9-3/8 by 9-1/2 in., S-4-S. 2 panels, 3/8 by 9-3/8 by 9-1/2 in., S-4-S. • 1 panel, 3/8 by 6-1/2 by 9-1/2 in., S-4-S. 1 panel, 3/8 by 6-1/2 by 9-1/2 in., S-4-S. • 2 shelves, 7/8 by 12 by 19 in., S-4-S. 2 shelves, 7/8 by 12 by 19 in., S-4-S. • 1 top, 7/8 by 16 by 20 in., S-4-S. 1 top, 7/8 by 16 by 20 in., S-4-S. • 2 stiles for door, 7/8 by 2 by 12 in., S-4-S. 2 stiles for door, 7/8 by 2 by 12 in., S-4-S. • 2 rails for door, 7/8 by 3 by 10 in., S-4-S. 2 rails for door, 7/8 by 3 by 10 in., S-4-S. • 1 back, 7/8 by 12 by 13 in., S-4-S. 1 back, 7/8 by 12 by 13 in., S-4-S. • 8 slats, 3/8 by 1 by 8 in., S-4-S. 8 slats, 3/8 by 1 by 8 in., S-4-S.
• Begin the work on the rails for the sides of the stand. Have them Begin the work on the rails for the sides of the stand. Have them all squared up to exactly the same length and to the correct width all squared up to exactly the same length and to the correct width and thickness. Mark the tenons on the ends of each and cut them and thickness. Mark the tenons on the ends of each and cut them with a saw and chisel.with a saw and chisel.
• When this is finished, try the legs to see that they are all the same When this is finished, try the legs to see that they are all the same length and that their surfaces are square with each other. Next length and that their surfaces are square with each other. Next mark the mortises in the legs for the tenons of the rails. To make mark the mortises in the legs for the tenons of the rails. To make the mortises, first bore to depth with a bit 1/8 in, smaller than the the mortises, first bore to depth with a bit 1/8 in, smaller than the width of the mortise and cut to the line with a chisel.width of the mortise and cut to the line with a chisel.

Identifying ToolsIdentifying Tools
• More tools in this shop then most.More tools in this shop then most.
• Must know how to use them and the Must know how to use them and the safety associated with each and safety associated with each and every machine.every machine.

Identify Proper ToolingIdentify Proper Tooling• Correct saw bladesCorrect saw blades
– CrosscutCrosscut– Rip Rip – CombinationCombination
• Correct bitsCorrect bits– Hundreds of different bitsHundreds of different bits
• JigJig– Holds the workpiece and guides the toolHolds the workpiece and guides the tool
• FixtureFixture– Holds the workpiece while the operator guides Holds the workpiece while the operator guides
the toolthe tool
Lay out and rough cutting Lay out and rough cutting stockstock• Stock – machine surfaced, measured, laid out, Stock – machine surfaced, measured, laid out,
and rough cut larger then the worpiece and rough cut larger then the worpiece dimensions shown on the working drawlingdimensions shown on the working drawling– You need the extra wood to square the stockYou need the extra wood to square the stock
• Plane the stock to the surface you are desiringPlane the stock to the surface you are desiring• Lay out materials being aware or grain direction Lay out materials being aware or grain direction
and wood defectsand wood defects– Cabinet sides have vertical grainCabinet sides have vertical grain– Work around visual defects of Knots, cracks, Work around visual defects of Knots, cracks,
• After laying out material make cuts from After laying out material make cuts from 1/32 to 1/16 oversize. You can cut it to1/32 to 1/16 oversize. You can cut it to desired length on the second cut.desired length on the second cut.

Squaring Workpices to SizeSquaring Workpices to Size
• Surface one face on the PlanerSurface one face on the Planer
• Smooth one edge with the jointerSmooth one edge with the jointer
• Surface the second Face using the Surface the second Face using the planerplaner
• Rip the lumber to width on a table sawRip the lumber to width on a table saw
• Square one end on the radial arm sawSquare one end on the radial arm saw
• Crosscut the Work piece to lengthCrosscut the Work piece to length– Check machines setups regularly Check machines setups regularly
for square-ness and accuracyfor square-ness and accuracy

Preparing JointsPreparing Joints
• Joinery is an important part of Joinery is an important part of cabinetmakingcabinetmaking
• More then 30 types of jointsMore then 30 types of joints
• On some joints you have to follow On some joints you have to follow certain steps to make them work.certain steps to make them work.– Make the mortise firstMake the mortise first

Creating Holes and other Creating Holes and other OpeningOpening• Drilled after the stock is squaredDrilled after the stock is squared
• Usually before cutting curves because Usually before cutting curves because you need square edges to find the you need square edges to find the locationlocation
• You can make holes with many You can make holes with many different toolsdifferent tools– RouterRouter– Portable power drillPortable power drill– Drill pressDrill press– Saber SawSaber Saw

Shaping ComponentsShaping Components
• Shaping – means creating a Shaping – means creating a
curved face, edge, or end on a curved face, edge, or end on a
workpiece.workpiece.
• Shaping before joints could Shaping before joints could
result in poor jointsresult in poor joints
• Edge shaping is done with Edge shaping is done with
a shaper or routera shaper or router
• Carving is a special means of shaping. Carving is a special means of shaping.

Smoothing ComponentsSmoothing Components• Smoothing a surface often is the most Smoothing a surface often is the most
time consuming part of the time consuming part of the cabinetmaking process.cabinetmaking process.
• Once each work piece is cut and shapedOnce each work piece is cut and shaped• Hand planes, Hand Scrappers and jointersHand planes, Hand Scrappers and jointers• Abrasive, sanding – many different typesAbrasive, sanding – many different types
– Machine Sanders, Hand sandersMachine Sanders, Hand sanders– Start with a 80-100 grid sand paperStart with a 80-100 grid sand paper– Then use 150 grit sand paperThen use 150 grit sand paper– Smooth with a 150-220 grit paperSmooth with a 150-220 grit paper
Assembling ComponentsAssembling Components
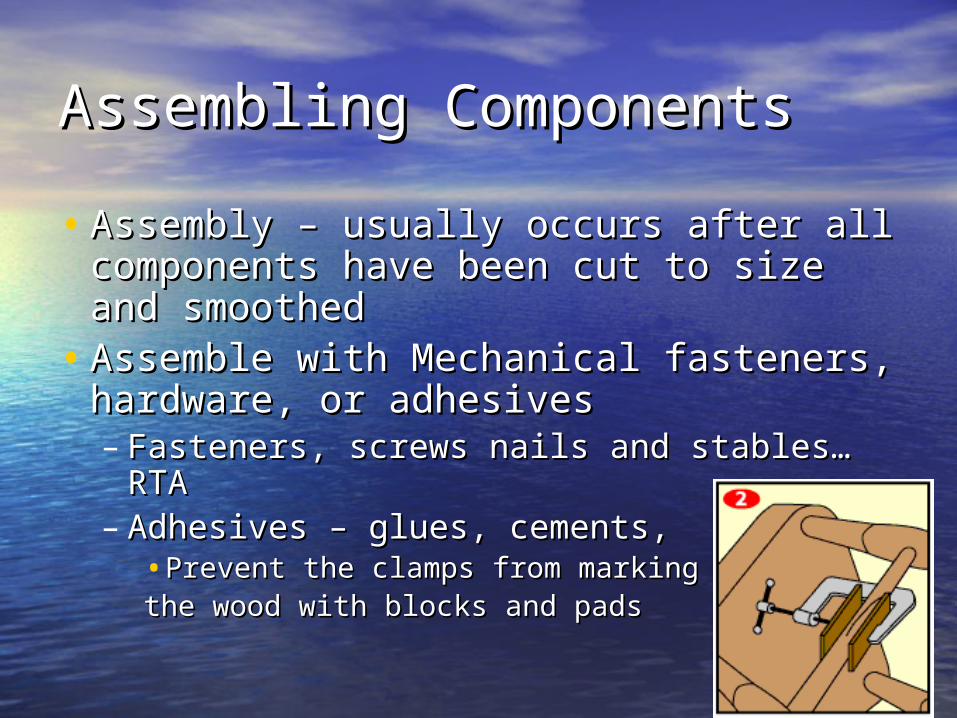
• Assembly – usually occurs after all Assembly – usually occurs after all components have been cut to size components have been cut to size and smoothedand smoothed
• Assemble with Mechanical fasteners, Assemble with Mechanical fasteners, hardware, or adhesiveshardware, or adhesives– Fasteners, screws nails and stables… RTAFasteners, screws nails and stables… RTA– Adhesives – glues, cements, Adhesives – glues, cements,
•Prevent the clamps from marking Prevent the clamps from marking the wood with blocks and padsthe wood with blocks and pads

Applying FinishApplying Finish• Build up finishes form a film on the surfaceBuild up finishes form a film on the surface
– Film resists scratchesFilm resists scratches
• Penetrating Finishes are absorbed into the surfacePenetrating Finishes are absorbed into the surface– Oil-Resin, linseed oil, and tung oilOil-Resin, linseed oil, and tung oil
• Application ProcedureApplication Procedure– Remove any glue with scrapper. Remove any glue with scrapper. Dried glue does not accept glueDried glue does not accept glue– Raise dents by using a wet rag and Raise dents by using a wet rag and warm iron over itwarm iron over it– Make repairs with wood putty, fillerMake repairs with wood putty, filler– Remove dust with a fine bristle brush Remove dust with a fine bristle brush or vacuum cleaner or dry ragor vacuum cleaner or dry rag– Brush or wipe the finish on the wood. Brush or wipe the finish on the wood. Wiping stain is done with a lint less cloth pad.Wiping stain is done with a lint less cloth pad.

Heath considerationsHeath considerations
• Finish must have a dust collection Finish must have a dust collection system, air ventilation system and system, air ventilation system and open areaopen area
• Place rags in a Approved metal Place rags in a Approved metal containercontainer
• Install hardware when everything is Install hardware when everything is donedone