Embed Size (px)
Citation preview
PROCUREMENT CARD US BANK ACCESS ONLINE
SYSTEM USER GUIDE
Contracts and Procurement Procurement Card Program
September 2011
2
Contents Web Browser Security Settings ................................................................. 3 Internet Explorer Security Settings ........................................................... 3 Opera Security Settings ............................................................................. 3 Registering your US Bank Visa Pcard on Access Online ............................. 6 Login to the Access Online system ............................................................ 9 Changing your password ......................................................................... 10 How To View Your Cardholder Information ............................................. 12 Reviewing Transactions in Access Online ................................................ 14 Disputing a Transaction in Access Online ................................................ 17 Printing the Cardholder Activity Report ................................................... 22
3
Web Browser Security Settings Before you can us the US Bank Access online system, you must complete the following security settings for Internet Explorer and Opera web browsers
Internet Explorer Security Settings 1. Open Internet Explorer
2. Choose Tools - Internet Options and click the Security tab
3. Click the Trusted Sites icon and then click the Sites button
4. Enter https://report.access-online.com/ in the Add this website to the zone
text box and check the Require Server Verification (https:) check box
5. Click Add and then Close
6. Click the Privacy tab
7. On the Privacy tab click the Sites button
8. Enter https://report.access-online.com/ in the Address of website text box
9. Click Allow and verify the new URL is in the Managed Websites box
10. Click OK, then click OK again
11. Close the internet window
Opera Security Settings 1. If you do not already have it installed, download and install the Opera web
browser
2. Once installed, start the Opera web browser
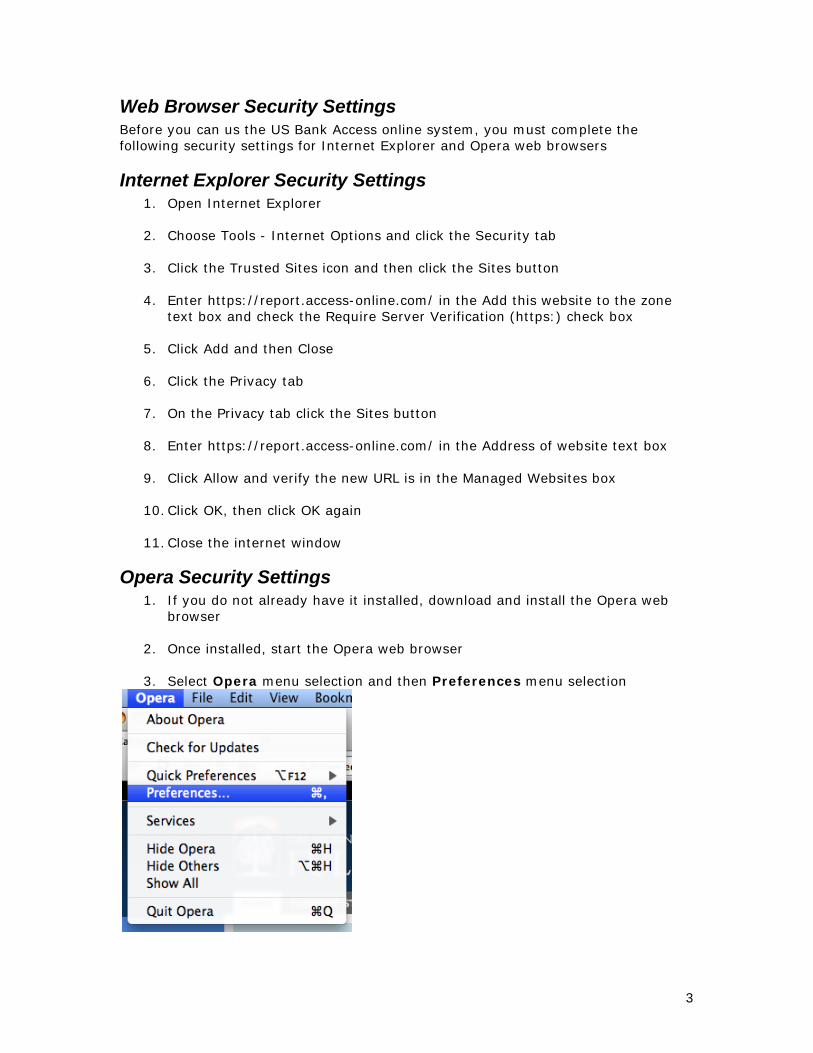
3. Select Opera menu selection and then Preferences menu selection
4
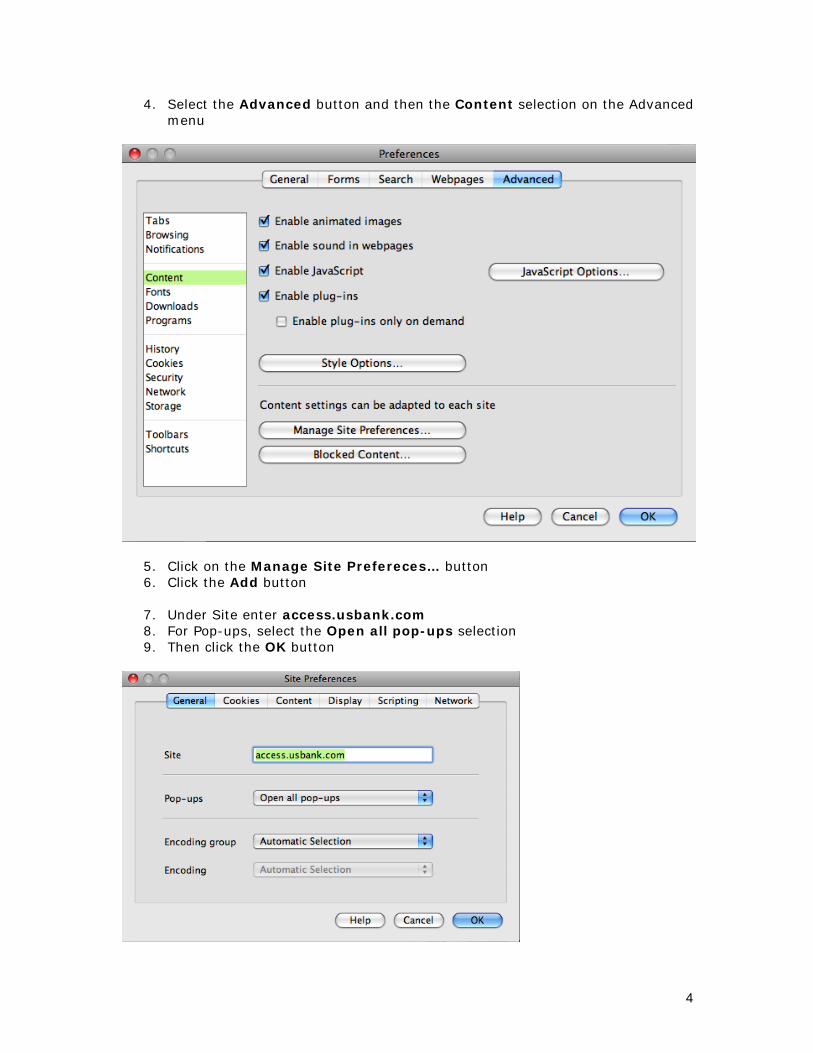
4. Select the Advanced button and then the Content selection on the Advanced menu
5. Click on the Manage Site Prefereces… button 6. Click the Add button
7. Under Site enter access.usbank.com 8. For Pop-ups, select the Open all pop-ups selection 9. Then click the OK button
5
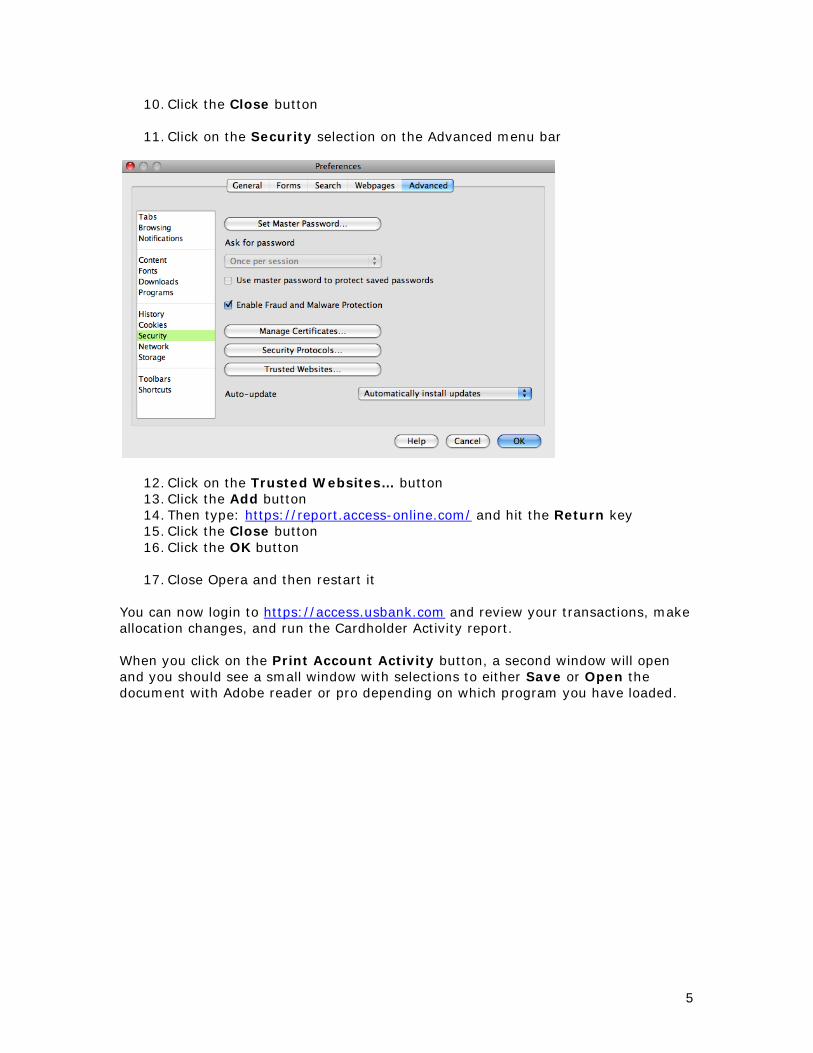
10. Click the Close button
11. Click on the Security selection on the Advanced menu bar
12. Click on the Trusted Websites… button 13. Click the Add button 14. Then type: https://report.access-online.com/ and hit the Return key 15. Click the Close button 16. Click the OK button
17. Close Opera and then restart it
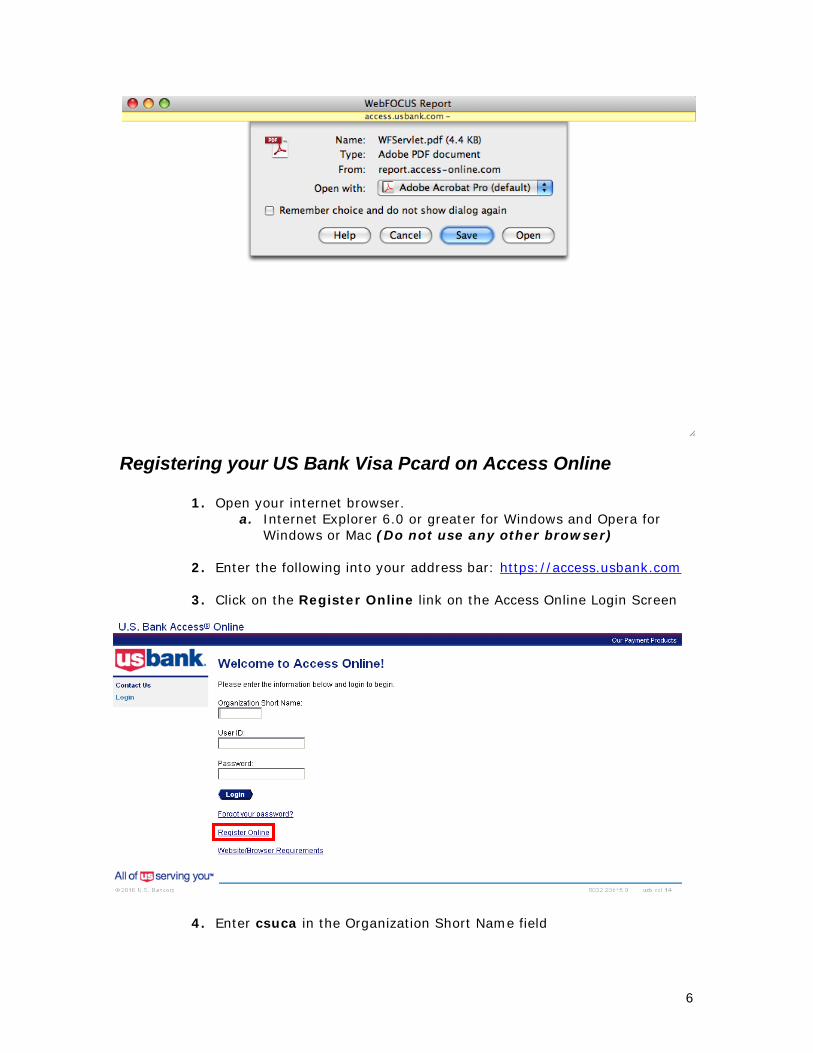
You can now login to https://access.usbank.com and review your transactions, make allocation changes, and run the Cardholder Activity report. When you click on the Print Account Activity button, a second window will open and you should see a small window with selections to either Save or Open the document with Adobe reader or pro depending on which program you have loaded.
6
Registering your US Bank Visa Pcard on Access Online
1. Open your internet browser. a. Internet Explorer 6.0 or greater for Windows and Opera for
Windows or Mac (Do not use any other browser)
2. Enter the following into your address bar: https://access.usbank.com
3. Click on the Register Online link on the Access Online Login Screen
4. Enter csuca in the Organization Short Name field
7
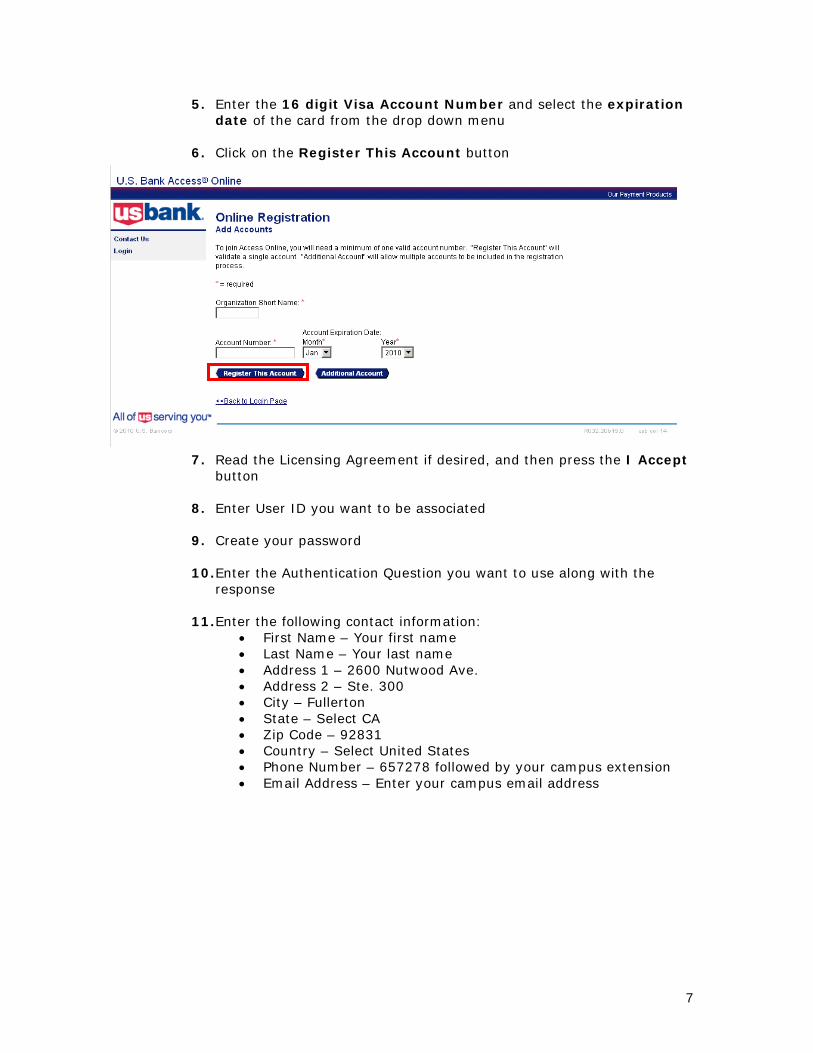
5. Enter the 16 digit Visa Account Number and select the expiration date of the card from the drop down menu
6. Click on the Register This Account button
7. Read the Licensing Agreement if desired, and then press the I Accept button
8. Enter User ID you want to be associated
9. Create your password
10. Enter the Authentication Question you want to use along with the response
11. Enter the following contact information:
• First Name – Your first name • Last Name – Your last name • Address 1 – 2600 Nutwood Ave. • Address 2 – Ste. 300 • City – Fullerton • State – Select CA • Zip Code – 92831 • Country – Select United States • Phone Number – 657278 followed by your campus extension • Email Address – Enter your campus email address
8
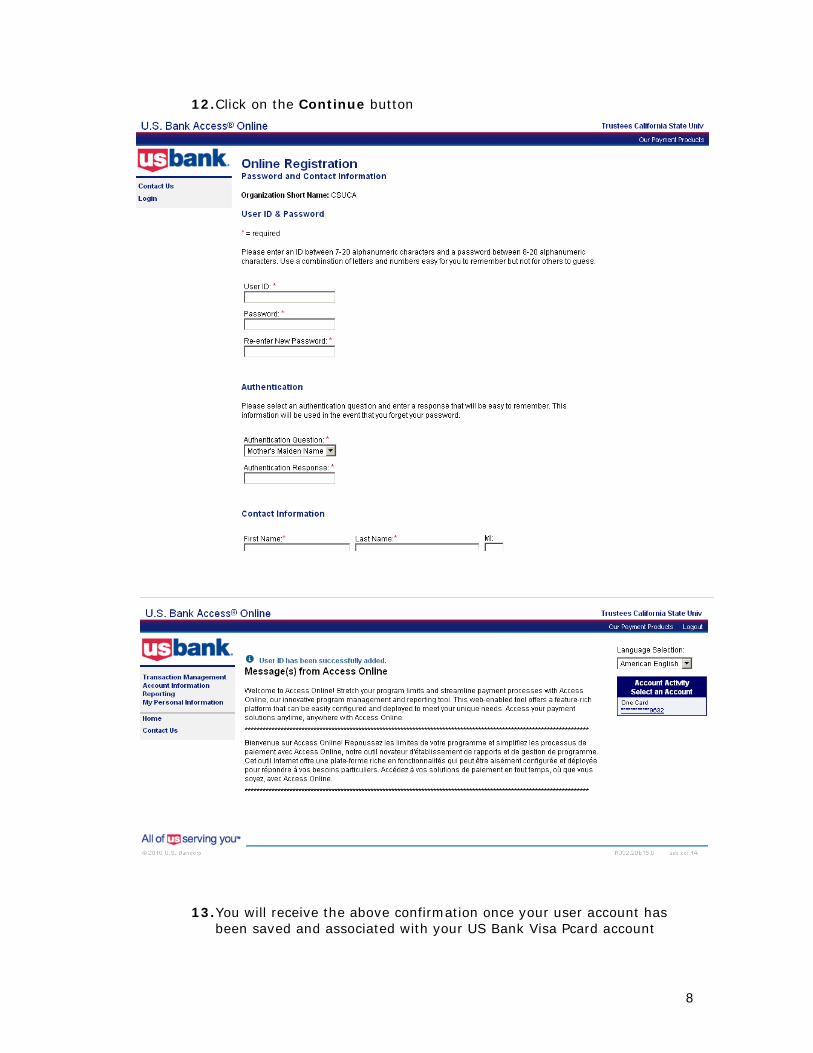
12. Click on the Continue button
13. You will receive the above confirmation once your user account has
been saved and associated with your US Bank Visa Pcard account
9
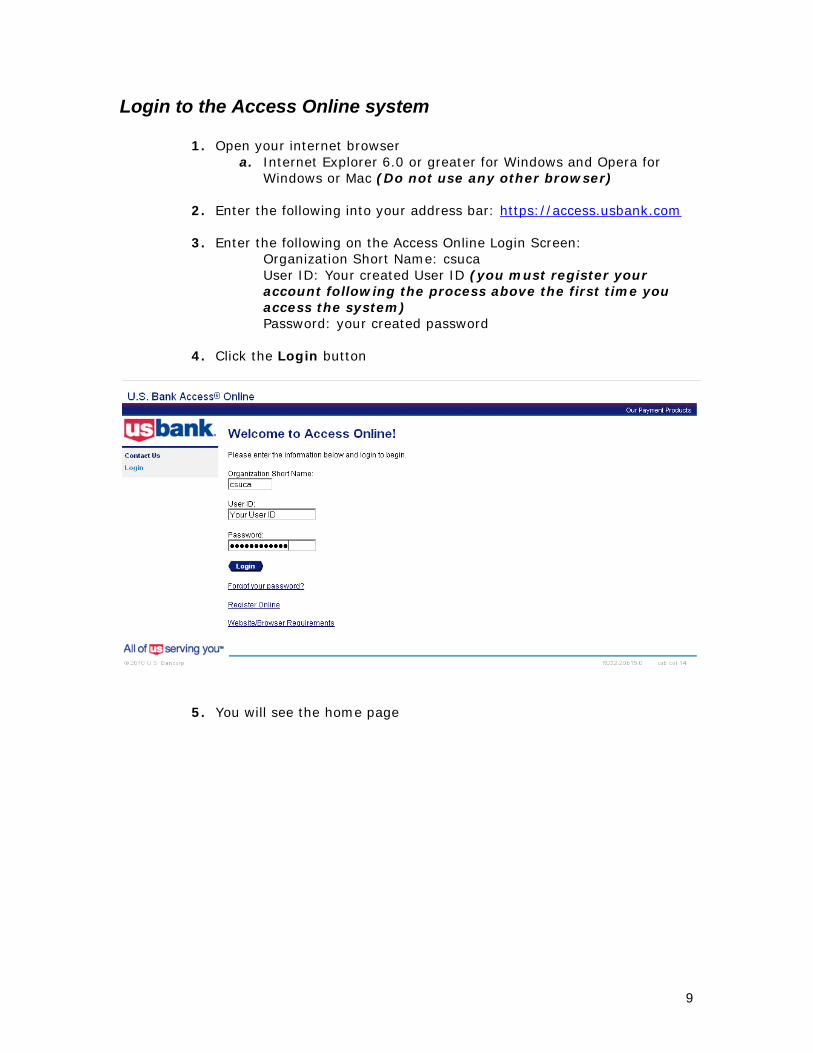
Login to the Access Online system
1. Open your internet browser a. Internet Explorer 6.0 or greater for Windows and Opera for
Windows or Mac (Do not use any other browser)
2. Enter the following into your address bar: https://access.usbank.com
3. Enter the following on the Access Online Login Screen: Organization Short Name: csuca User ID: Your created User ID (you must register your account following the process above the first time you access the system) Password: your created password
4. Click the Login button
5. You will see the home page
10
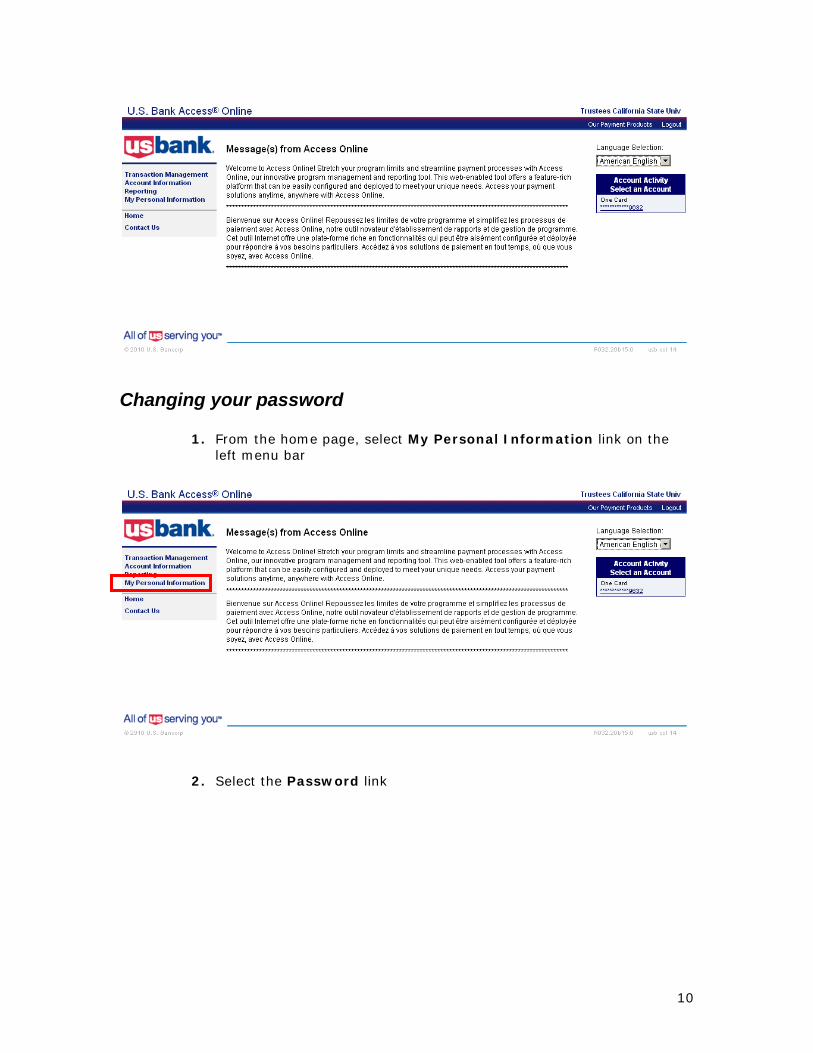
Changing your password
1. From the home page, select My Personal Information link on the left menu bar
2. Select the Password link
11
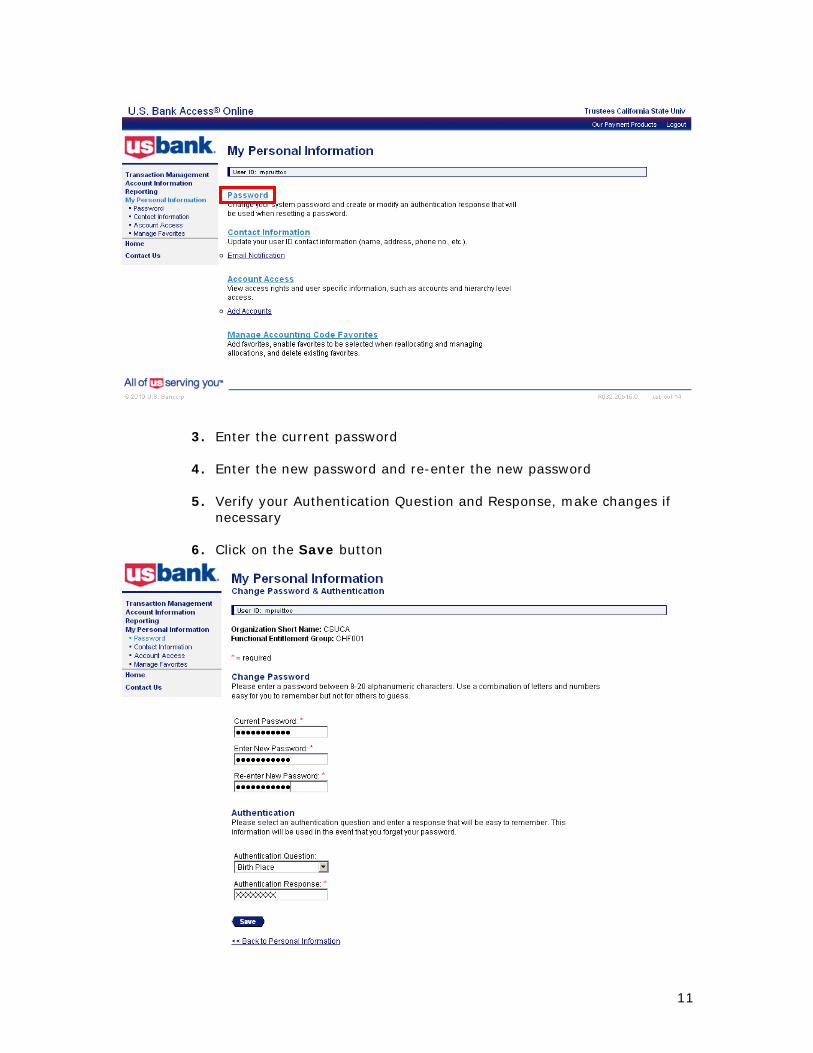
3. Enter the current password
4. Enter the new password and re-enter the new password
5. Verify your Authentication Question and Response, make changes if necessary
6. Click on the Save button
12
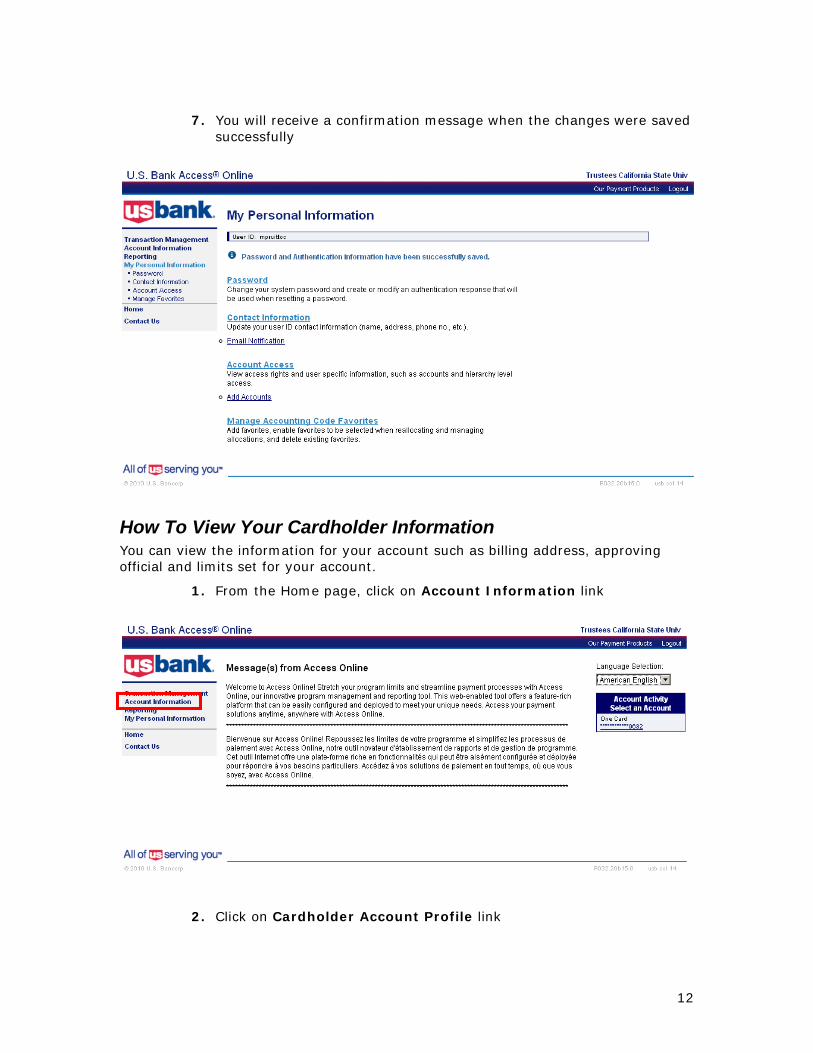
7. You will receive a confirmation message when the changes were saved
successfully
How To View Your Cardholder Information You can view the information for your account such as billing address, approving official and limits set for your account.
1. From the Home page, click on Account Information link
2. Click on Cardholder Account Profile link
13
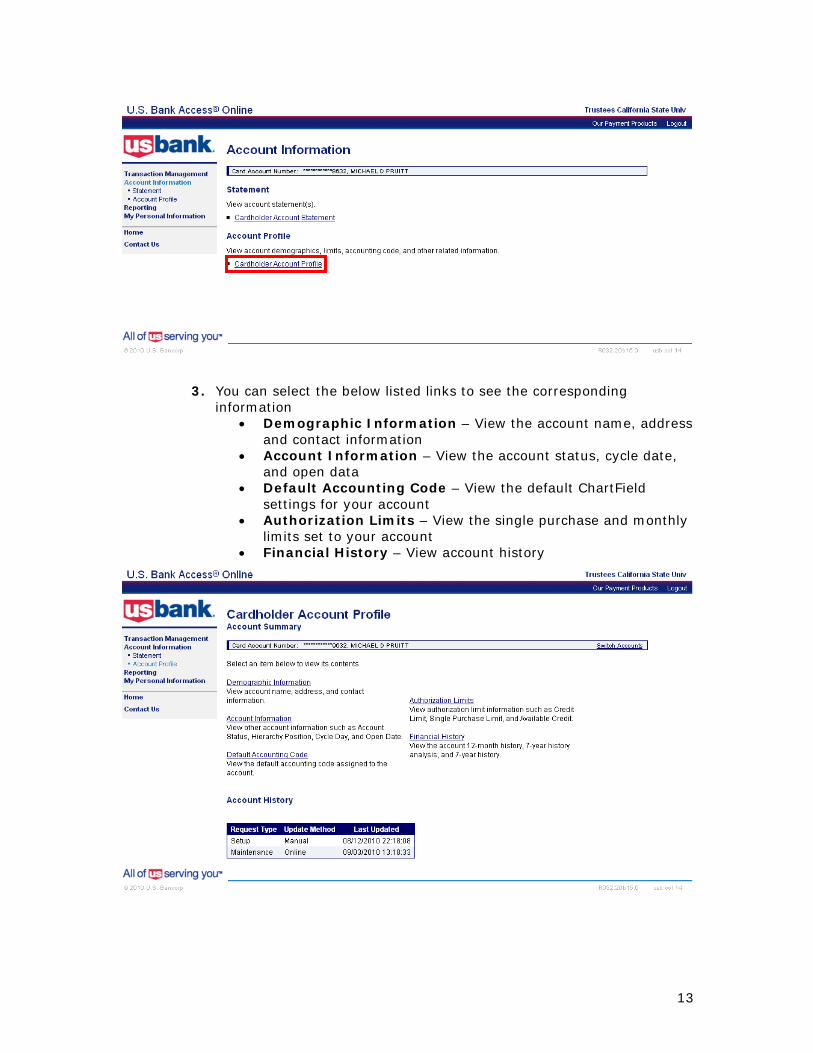
3. You can select the below listed links to see the corresponding information
• Demographic Information – View the account name, address and contact information
• Account Information – View the account status, cycle date, and open data
• Default Accounting Code – View the default ChartField settings for your account
• Authorization Limits – View the single purchase and monthly limits set to your account
• Financial History – View account history
14
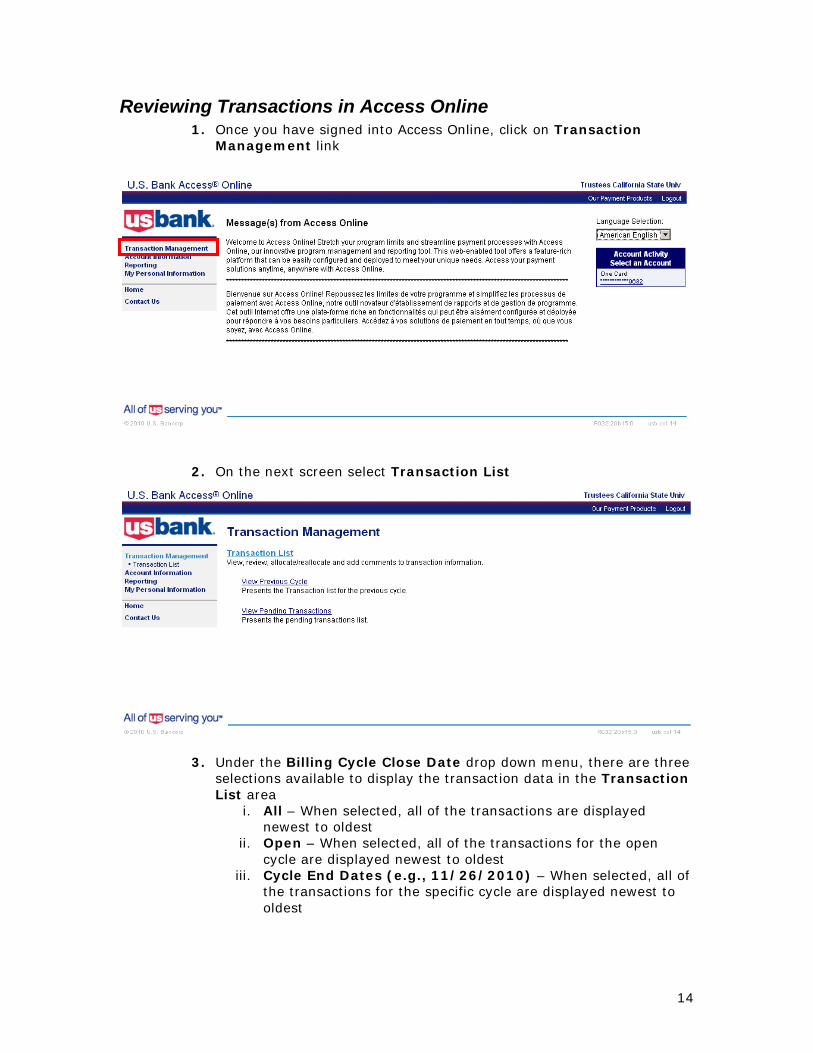
Reviewing Transactions in Access Online 1. Once you have signed into Access Online, click on Transaction
Management link
2. On the next screen select Transaction List
3. Under the Billing Cycle Close Date drop down menu, there are three selections available to display the transaction data in the Transaction List area
i. All – When selected, all of the transactions are displayed newest to oldest
ii. Open – When selected, all of the transactions for the open cycle are displayed newest to oldest
iii. Cycle End Dates (e.g., 11/26/2010) – When selected, all of the transactions for the specific cycle are displayed newest to oldest
15
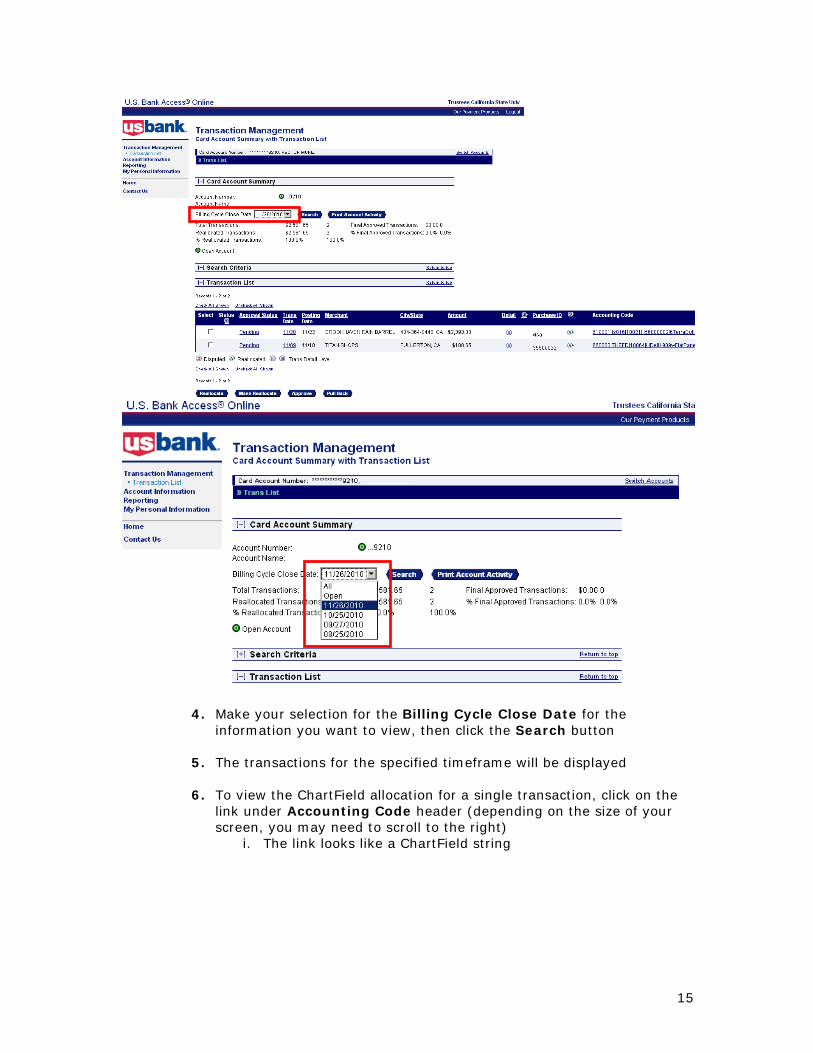
4. Make your selection for the Billing Cycle Close Date for the information you want to view, then click the Search button
5. The transactions for the specified timeframe will be displayed
6. To view the ChartField allocation for a single transaction, click on the link under Accounting Code header (depending on the size of your screen, you may need to scroll to the right)
i. The link looks like a ChartField string
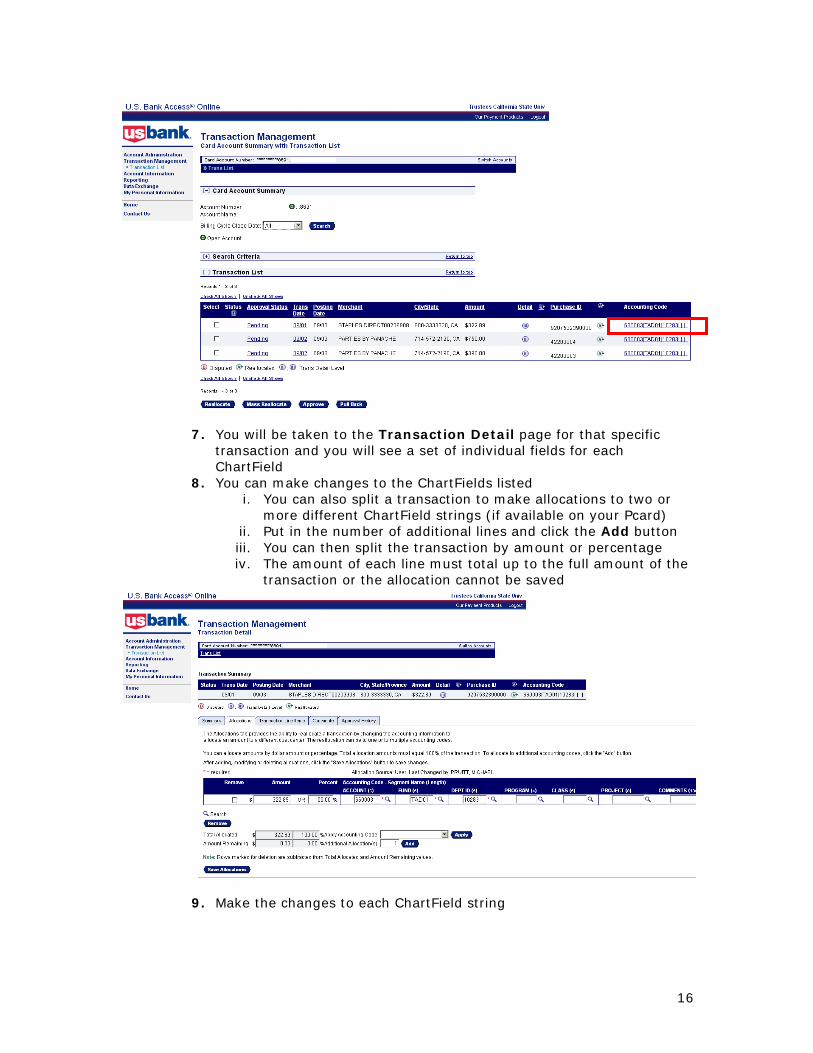
16
7. You will be taken to the Transaction Detail page for that specific transaction and you will see a set of individual fields for each ChartField
8. You can make changes to the ChartFields listed i. You can also split a transaction to make allocations to two or
more different ChartField strings (if available on your Pcard) ii. Put in the number of additional lines and click the Add button iii. You can then split the transaction by amount or percentage iv. The amount of each line must total up to the full amount of the
transaction or the allocation cannot be saved
9. Make the changes to each ChartField string

17
10. Enter any Travel Authorization or Q numbers in the Comments field
i. The Comments field is the last field on the right; you may need to scroll to the right to see the field depending on the size of your web browser screen
ii. Any comments written in the Comments Tab, which is a separate box that is not part of the allocation field, will not show up in the Cardholder Activity report
11. To save any changes you made, click on the Save Allocations button
12. To return to the transaction list, click on the Back to Transaction List link at the bottom of the page or the Transaction List link in the menu bar on the left
13. There is an Approve button that is available on the bottom of the Transaction Management web page. Our campus does not use the online approval process that is available in Access Online. Do not use the Approve button for any transactions
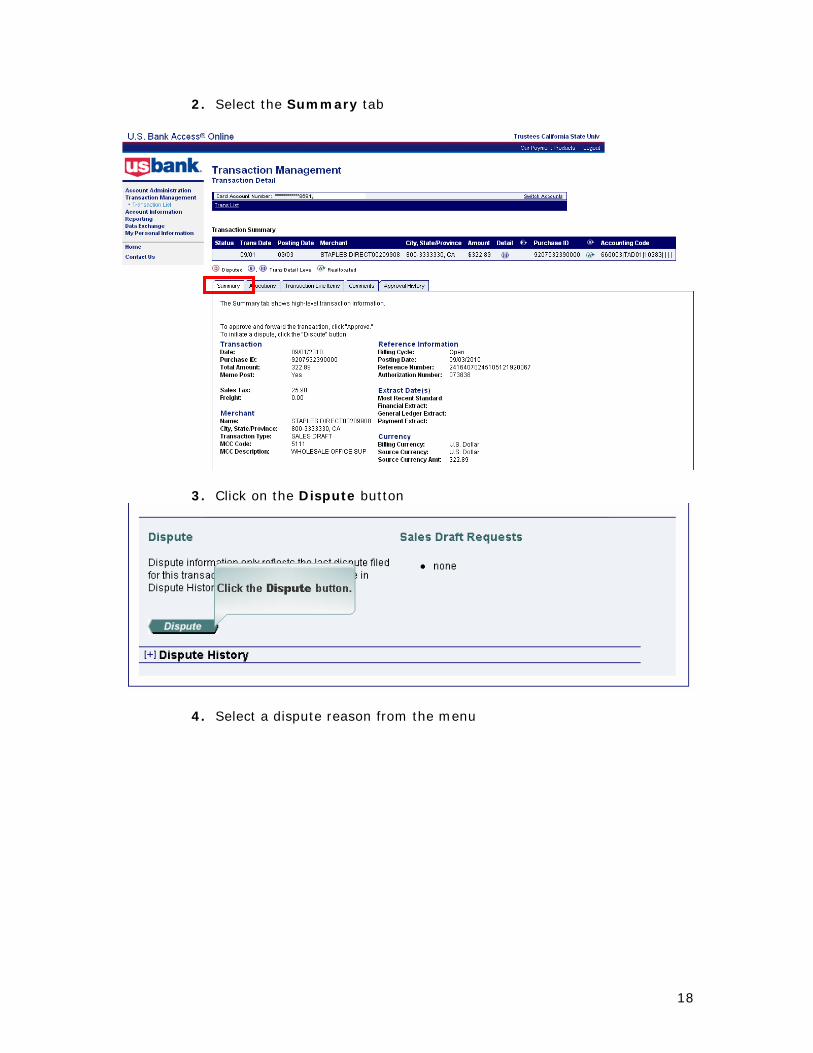
Disputing a Transaction in Access Online 1. In the transaction list section of the program, select a transaction by
clicking on the link under Accounting Code
18
2. Select the Summary tab
3. Click on the Dispute button
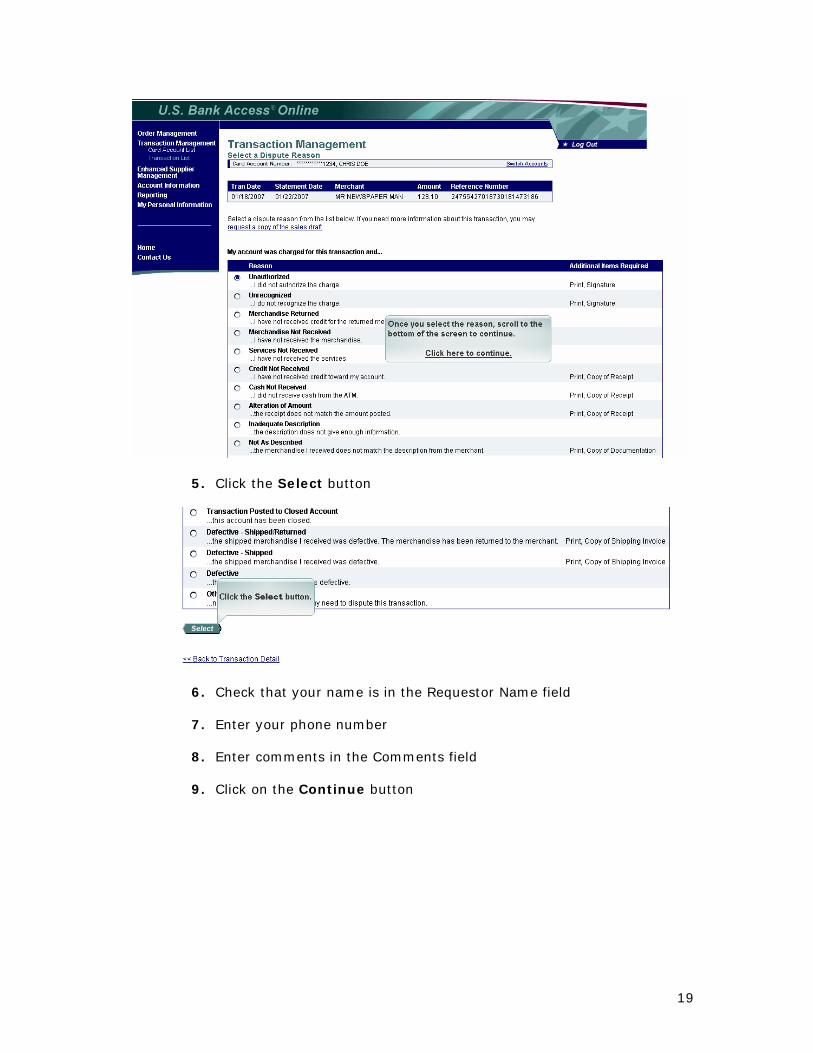
4. Select a dispute reason from the menu
19
5. Click the Select button
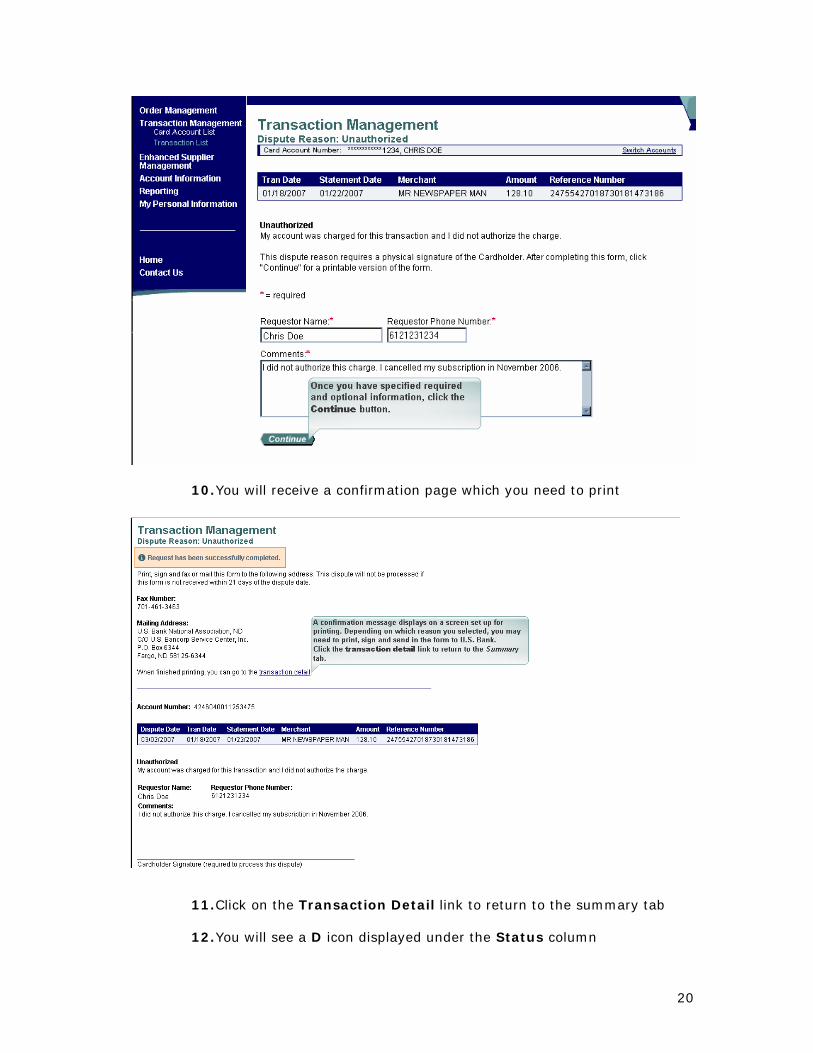
6. Check that your name is in the Requestor Name field
7. Enter your phone number
8. Enter comments in the Comments field
9. Click on the Continue button
20
10. You will receive a confirmation page which you need to print
11. Click on the Transaction Detail link to return to the summary tab
12. You will see a D icon displayed under the Status column
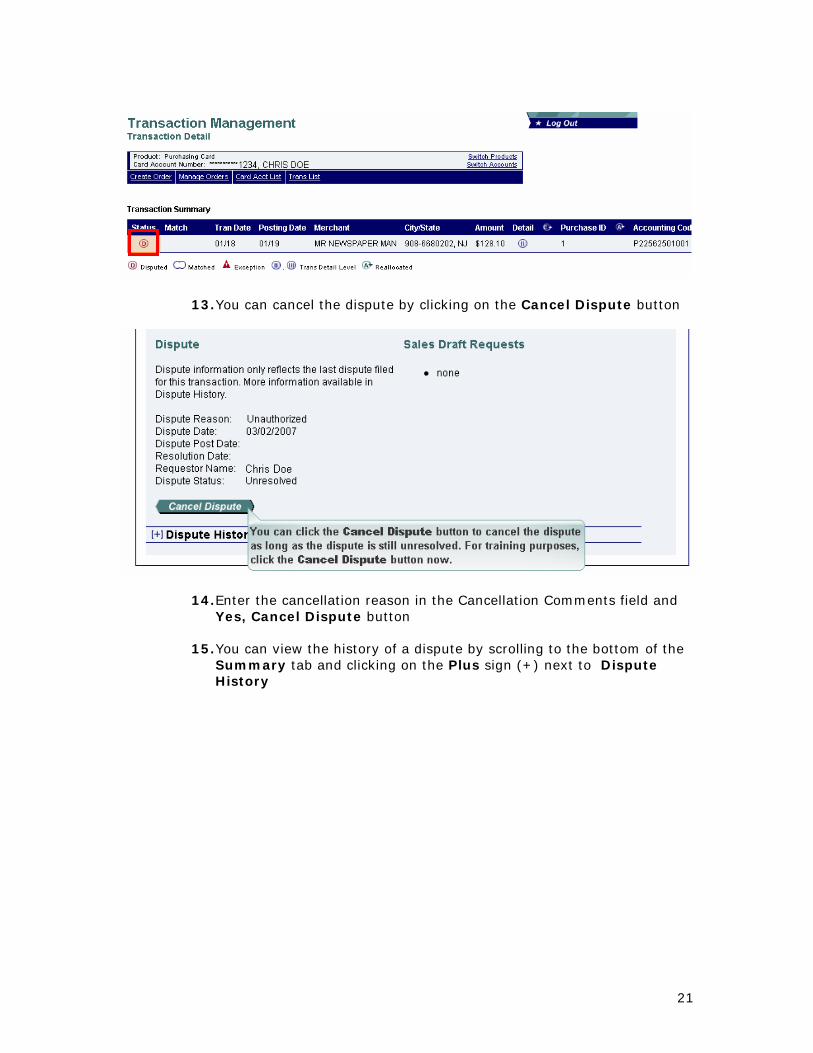
21
13. You can cancel the dispute by clicking on the Cancel Dispute button
14. Enter the cancellation reason in the Cancellation Comments field and Yes, Cancel Dispute button
15. You can view the history of a dispute by scrolling to the bottom of the Summary tab and clicking on the Plus sign (+) next to Dispute History

22
Printing the Cardholder Activity Report 1. If not already signed on, login to the Access Online system
2. If not at the Transaction Management web page, click Transaction
Management, then Transaction List
3. Select the billing cycle end date from the drop down menu for the billing cycle you want to print and then select the Search button
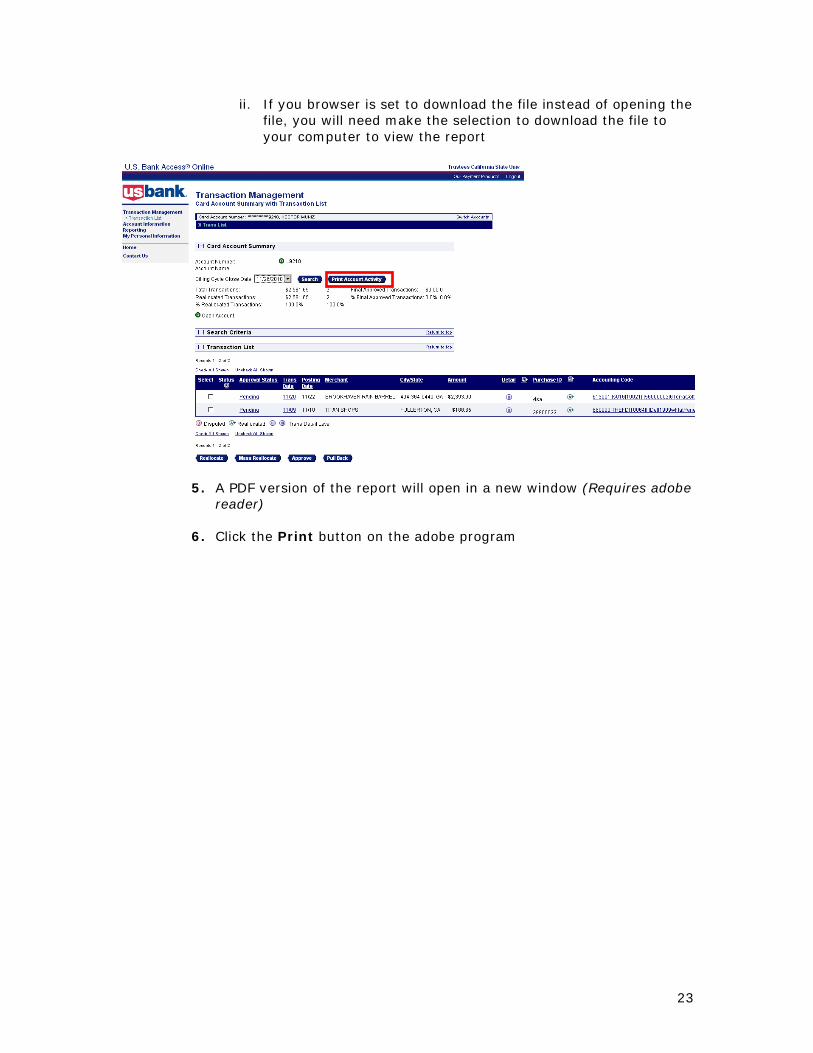
4. Once the information for the select billing cycle is displayed, click on the Print Account Activity button
i. The first time you click on the button, the web browser pop up blocker may stop the second window from displaying. If the pop up is blocked, you need to make the selection to “Always allow pop ups from this site”
23
ii. If you browser is set to download the file instead of opening the file, you will need make the selection to download the file to your computer to view the report
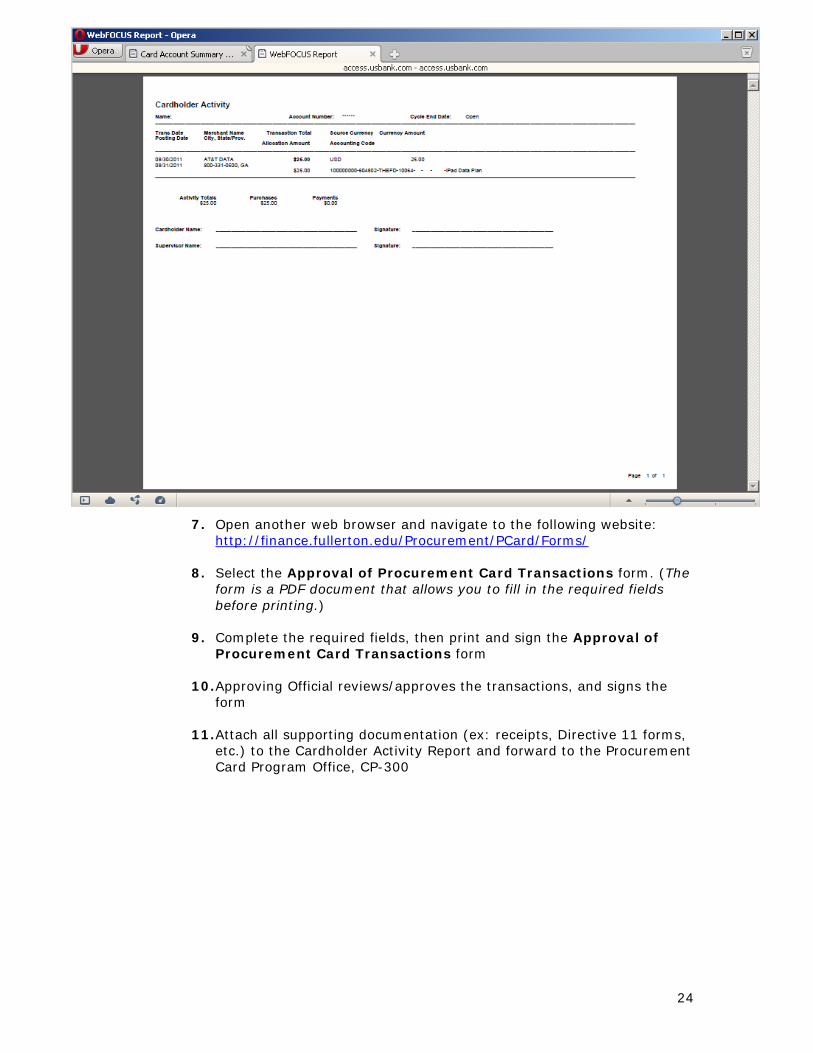
5. A PDF version of the report will open in a new window (Requires adobe reader)
6. Click the Print button on the adobe program
24
7. Open another web browser and navigate to the following website: http://finance.fullerton.edu/Procurement/PCard/Forms/
8. Select the Approval of Procurement Card Transactions form. (The
form is a PDF document that allows you to fill in the required fields before printing.)
9. Complete the required fields, then print and sign the Approval of
Procurement Card Transactions form
10. Approving Official reviews/approves the transactions, and signs the form
11. Attach all supporting documentation (ex: receipts, Directive 11 forms,
etc.) to the Cardholder Activity Report and forward to the Procurement Card Program Office, CP-300