Embed Size (px)
Citation preview
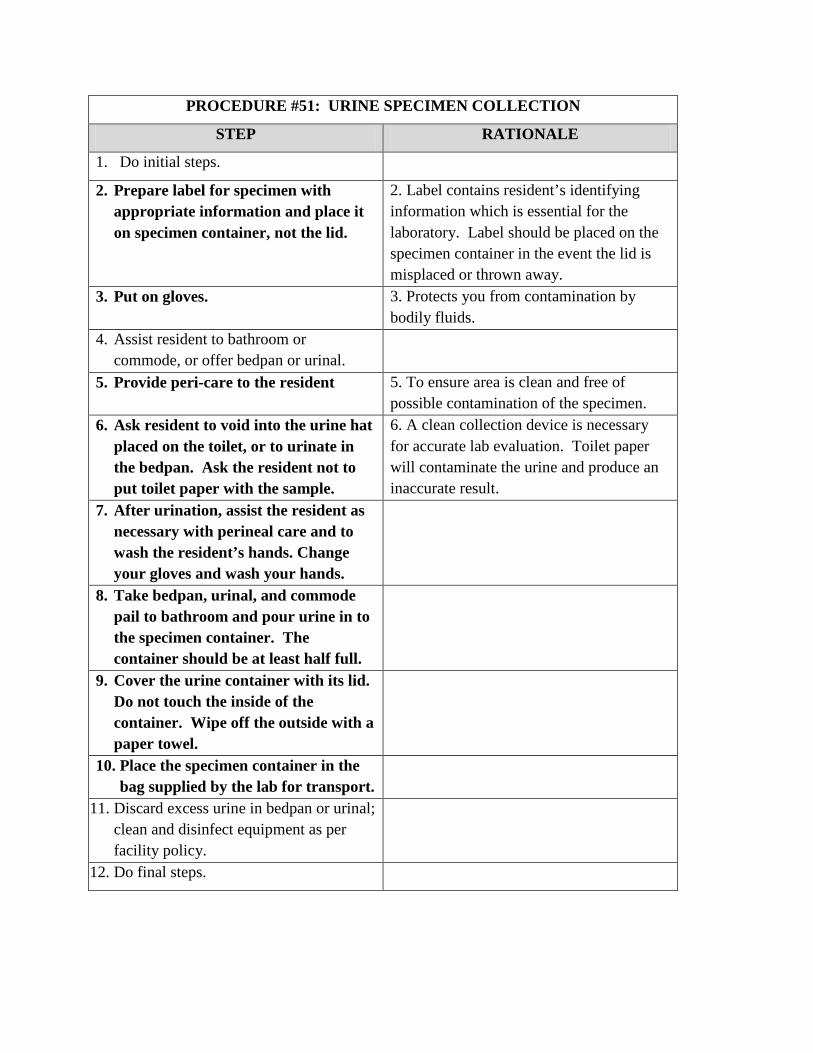
PROCEDURE #51: URINE SPECIMEN COLLECTION
STEP RATIONALE
1. Do initial steps.
2. Prepare label for specimen with appropriate information and place it on specimen container, not the lid.
2. Label contains resident’s identifying information which is essential for the laboratory. Label should be placed on the specimen container in the event the lid is misplaced or thrown away.
3. Put on gloves. 3. Protects you from contamination by bodily fluids.
4. Assist resident to bathroom or commode, or offer bedpan or urinal.
5. Provide peri-care to the resident 5. To ensure area is clean and free of possible contamination of the specimen.
6. Ask resident to void into the urine hat placed on the toilet, or to urinate in the bedpan. Ask the resident not to put toilet paper with the sample.
6. A clean collection device is necessary for accurate lab evaluation. Toilet paper will contaminate the urine and produce an inaccurate result.
7. After urination, assist the resident as necessary with perineal care and to wash the resident’s hands. Change your gloves and wash your hands.
8. Take bedpan, urinal, and commode pail to bathroom and pour urine in to the specimen container. The container should be at least half full.
9. Cover the urine container with its lid. Do not touch the inside of the container. Wipe off the outside with a paper towel.
10. Place the specimen container in the bag supplied by the lab for transport.
11. Discard excess urine in bedpan or urinal; clean and disinfect equipment as per facility policy.
12. Do final steps.

I verify that this procedure was taught and successfully demonstrated according to ISDH Standards. _____________________________________ ________________________ Student Signature Date _____________________________________ ________________________ Instructor Signature Date

PROCEDURE #52: STOOL SPECIMEN COLLECTION
STEP RATIONALE
1. Do initial steps. 2. Prepare label for specimen with
appropriate information and place it on specimen container, not the lid.
2. Label contains resident’s identifying information which is essential for the laboratory. Label should be placed on the specimen container in the event the lid is misplaced or thrown away.
3. Put on gloves. 3. Protects you from contamination by bodily fluids.
4. When the resident is ready to move bowels, ask him/her not to urinate at the same time. Ask the resident not to put toilet paper with the sample.
4. A clean collection device is necessary for accurate lab evaluation. Urine contaminated stool will produce an inaccurate result.
5. Provide the resident with a bedpan, assisting if needed.
6. After the bowel movement, assist as needed with perineal care.
7. Remove gloves, wash hands and put on clean gloves.
8. Using two tongue blades, take about two tablespoons of stool and put in the container. Try to collect material from different areas of the stool.
8. In order to ensure adequate amount of stool for test ordered. Obtaining material from different areas ensures that all possible contents will be identified.
9. Cover the container with lid. Label as directed per facility policy and procedure and place in the plastic bag supplied by the lab for transport. Dispose of remaining stool; clean and disinfect equipment as per facility policy. Notify nurse of collection.
10. Do final steps.

I verify that this procedure was taught and successfully demonstrated according to ISDH Standards. _____________________________________ ________________________ Student Signature Date _____________________________________ ________________________ Instructor Signature Date

PROCEDURE #53: APPLICATION OF INCONTINENT BRIEF
STEP RATIONALE
1. Do initial steps. 2. Put on gloves. 3. Provide the resident privacy. 3. Privacy 4. Unfasten and remove brief resident is
currently wearing and place in small plastic trash bag for disposal in soiled utility bag.
4. Residents should have soiled briefs removed promptly to decrease risk of skin breakdown.
5. Provide perineal care as indicated. 5. Prevents infection, odor, and skin breakdown; improves resident’s comfort.
6. Wash hands and change gloves. 7. Place back of brief under resident’s
hips, plastic side of disposable brief away from resident’s skin.
7. Plastic may cause irritation of the resident’s skin.
8. Bring front of brief between resident’s legs and up to his/her waist.
9. Fasten each side of brief and adjust fit.
9. Adjusting brief to a snug fit will prevent leakage.
10. Apply resident’s clothing 11. Do final steps. I verify that this procedure was taught and successfully demonstrated according to ISDH Standards. _____________________________________ ________________________ Student Signature Date _____________________________________ ________________________ Instructor Signature Date

PROCEDURE #54: UNOCCUPIED BED
STEP RATIONALE
1. Do initial steps
2. Collect clean linen in order of use. 2. Organizing linen allows procedure to be completed faster.
3. Carry linen away from your uniform 3. If linen touches your uniform, it becomes contaminated.
4. Place linen on clean surface (bedside stand, over bed table or back of chair).
4. Prevents contamination of linen.
5. Place bed in flat position. 5. Allows you to make a neat, wrinkle free bed.
6. Loosen soiled linen. Roll linen from head to foot of bed and place in barrel at door or room or in bag and place at foot of bed or chair.
6. Always work from cleanest (head of bed) to dirtiest (foot of bed) to prevent spread of infection. Rolling dirtiest surface of linen inward, lessening contamination.
7. Fanfold bottom sheet to center of bed and fit corners.
8. Fanfold top sheet to center of bed. 9. Fanfold blanket over top sheet.
10. Tuck top linen under foot of mattress and miter corner.
10. Mitering prevents resident’s feet from being restricted by or tangled in linen when getting in or out of bed.
11. Move to other side of bed. 11. Completing one side of bed at a time
allows procedure to be completed faster and reduces strain on the caregiver.
12. Fit corners of bottom sheet, unfold top linen, tuck it under foot of mattress, and miter corner.
13. Fold top of sheet over blanket to make cuff.
14. With one hand, grasp the clean pillow case at the closed end, turning it inside out over your arm.

15. Using the same hand that has the pillow case over it, grasp one narrow edge of the pillow and pull the pillow case over it with your free hand.
16. Place the pillow at head of bed with open edge away from the door.
17. For open bed: make toe pleat and fanfold top linen to foot of bed with top edge closest to center of bed.
17. Top edge of top linen must be closest to head of bed so resident can easily reach covers.
18. For closed bed: pull bedspread over pillow and tuck bedspread under lower edge of pillow. Make toe pleat.
18. Toe pleat automatically reduces pressure of top linen on feet when resident returns to bed.
19. Removed soiled linens. 19. Prevents contamination. 20. Do final steps. I verify that this procedure was taught and successfully demonstrated according to ISDH Standards. _____________________________________ ________________________ Student Signature Date _____________________________________ ________________________ Instructor Signature Date

PROCEDURE #55: OCCUPIED BED
STEP RATIONALE
1. Do initial steps 2. Collect clean linen in order of use. 2. Organizing linen allows procedure to be
completed faster 3. Carry linen away from your uniform 3. If linen touches your uniform, it
becomes contaminated. 4. Place linen on clean surface (bedside
stand, over bed table or back of chair).
4. Prevents contamination of linen.
5. Lower head of bed and adjust bed to a safe working level, usually waist high. Lock bed wheels.
5. When bed is flat, resident can be moved without working against gravity.
6. Drape the resident 7. The caregiver will make the bed one
side at a time. The caregiver will raise the side rail on far side of bed (if rail not in use, ensure there is a second caregiver on the opposite side of the bed to ensure that the resident does not roll over the side of bed). Assist resident to turn onto side moving away from you toward raised side rail (or second caregiver).
8. Loosen bottom soiled linen on the side of bed on which you are working.
9. Roll bottom soiled linen toward resident and tuck it snuggly against the resident’s back.
9. Rolling puts dirtiest surface of linen inward, lessening contamination. The closer the linen is rolled to resident, the easier it is to remove from the other side.
10. Place clean bottom linen on unoccupied side of bed and roll remaining clean linen under resident in the center of the bed.
11. Smooth bottom sheet out and ensure

there are no wrinkles. Roll all extra material toward resident and tuck it under the resident’s body.
12. Raise the side rail nearest you (or remain in place if a second caregiver is being utilized) and assist the resident to turn onto clean bottom sheet. Move to opposite side of bed, as resident will now be facing away from you.
13. While resident is lying on side, loosen soiled linen and roll linen from head to foot of bed, avoiding contact with your skin or clothing.
13. Always work from cleanest (head of bed) to dirtiest (foot of bed) to prevent spread of infection. Rolling dirtiest surface of linen inward, lessening contamination.
14. Place soiled linen in barrel or bag at foot of bed or in chair.
15. Pull clean bottom linen as was done on the opposite side.
16. Assist resident to roll onto back, keeping resident covered and comfortable.
17. Unfold the top sheet placing it over the resident. Request the resident to hold the clean top sheet. While slipping the bath blanket or previous sheet out from underneath the clean sheet.
17. Maintains resident’s dignity and right to privacy by not exposing body.
18. Assist resident with blanket over the top sheet and tuck the bottom edges of the top sheet and blanket under the bottom of the mattress. Miter the corners and loosen the top linens over the resident’s feet.
18. Mitering prevents resident’s feet from being restricted by or tangled in linen when getting in or out of bed. Prevents pressure on feet which can cause pressure sores.
19. Remove pillow and remove the soiled pillow case by turning it inside out.
20. With one hand, grasp the clean pillow
case at the closed end, turning it inside out over your arm.
21. Using the same hand that has the pillow 21. Prevents contamination.

case over it, grasp one narrow edge of the pillow and pull the pillow case over it with your free hand.
22. Place the pillow under resident’s head with open edge away from the door.
23. Assist resident to comfortable position and return the bed to the appropriate position.
24. Removed soiled linens from room – carrying away from uniform.
25. Do final steps.
I verify that this procedure was taught and successfully demonstrated according to ISDH Standards. _____________________________________ ________________________ Student Signature Date _____________________________________ ________________________ Instructor Signature Date

PROCEDURE #56: THICKENED LIQUIDS
STEP RATIONALE
1. Do initial steps.
2. Obtain thickener and measuring spoon.
2. Measuring spoon is required to ensure proper amount of thickener is utilized to obtain ordered thickness.
3. Thicken liquids to desired consistency following manufacturer’s instructions.
3. Physician will specify thickness. Various brands of thickener require different amounts of product to be added.
4. Offer thickened fluid to resident. Encourage resident to consume thickened fluids.
4. Decreases risk of resident becoming dehydrated.
5. Ensure the water pitcher has been removed from the bedside unless facility policy states otherwise.
5. Resident may attempt to drink liquids that have not been thickened which will increase risk of choking.
6. Do final steps.
I verify that this procedure was taught and successfully demonstrated according to ISDH Standards. _____________________________________ ________________________ Student Signature Date _____________________________________ ________________________ Instructor Signature Date

PROCEDURE #57: PASSING FRESH ICE WATER
STEP RATIONALE
1. Do initial steps. 2. Obtain cart, ice container, ice scoop
and go to ice machine. Keep ice scoop covered.
3. Fill container with ice using ice scoop. 4. Replace ice scoop in proper covered
container, or cover it with a clean towel or plastic bag to prevent contamination.
4. Keeping the ice scoop covered maintains infection control practices.
5. Proceed to resident rooms, noting any fluid restriction(s) prior to pass and any residents who require thickened liquids.
5. Residents who require a fluid restriction or thickened liquids should not have a water pitcher placed at the bedside unless facility policy states differently.
6. Empty water from pitcher and bedside glass into the sink. If resident is on I&O’s – record intake of water.
6. Emptying the pitcher of old water will allow you to fill it with ice and fresh water. Emptying the glass will allow you to fill it with fresh water.
7. Take pitcher into hall and fill it with ice. NOTE: Do not touch the pitcher with the ice scoop.
7. The ice scoop is utilized for all residents thus should not be contaminated by touching a water pitcher.
8. Replace the scoop in covered container, clean towel or plastic bag between rooms to prevent contamination.
8. Maintains infection control practices.
9. Return to resident’s room and fill pitcher with water at bathroom sink, not allowing pitcher to touch faucet.
9. Ensures that resident has fresh ice water in pitcher.
10. Pour fresh water into bedside glass and leave a straw with the glass, if needed.
10. Ensures that water is available and ready for resident when he/she desires it.
11. Offer the resident a drink of fresh water if resident is present.
11. Resident may be unable to independently obtain a drink of water.
12. Repeat procedure until all residents have been provided with fresh ice water.
12. Ensures that all residents receive fresh ice water.
13. Do final steps.

I verify that this procedure was taught and successfully demonstrated according to ISDH Standards. _____________________________________ ________________________ Student Signature Date _____________________________________ ________________________ Instructor Signature Date

PROCEDURE #58: FEEDING
STEP RATIONALE
1. Do initial steps. 2. Confirm diet card/tray. Check name,
diet, utensils and condiments. 2. This will ensure that the resident is being served the diet as ordered; at the appropriate consistency.
3. Explain procedure. 4. Have resident wash hands, help the
resident if needed. 4. Provides good hygiene in preparation for meal consumption.
5. Sit on unaffected side eye level with resident and facing them.
5. Encourages interaction with the resident and placement of spoon at an appropriate angle.
6. Resident’s head should be elevated at least 45 degrees, if in bed.
6. Places resident at an angle to promote swallowing and reduce risk of choking.
7. Protect the resident’s clothing with a clothing protector or per facility policy and procedures.
7. Use of a napkin or clothing protector (if resident desires) preserves dignity by keeping clothing clean and free of spillage.
8. Offer different foods; ask resident’s preference.
8. Involving the resident encourages consumption.
9. Food should be in bite sized pieces or with the spoon half full. Food should be fed to the unaffected side of the mouth.
9. Reduces risk of choking.
10. Allow time for resident to chew and empty mouth between bites. Notify nurse immediately should choking occur.
10. Reduces risk of choking.
11. Frequently offer beverage. If required, measure I&O’s and percentage of food eaten.
11. Encourages swallowing.
12. Make conversation with the resident; atmosphere should be pleasant.
12. Enhances meal experience, thus encourages consumption.
13. Cleanse the resident’s hands/face as needed during the meal and after.
13. Promotes good hygiene.
14. Do final steps.

I verify that this procedure was taught and successfully demonstrated according to ISDH Standards. _____________________________________ ________________________ Student Signature Date _____________________________________ ________________________ Instructor Signature Date

PROCEDURE #59: ASSIST TO EAT
STEP RATIONALE
1. Do initial steps.
2. Confirm diet card/tray. Check name, diet, utensils and condiments.
2. This will ensure that the resident is being served the diet as ordered; at the appropriate consistency.
3. Confirm any adaptive equipment is present, if indicated.
3. Provision of adaptive equipment will encourage resident participation.
4. Assist to protect the resident’s clothing, if desired.
4. Use of a napkin or clothing protector (if resident desires) preserves dignity by keeping clothing clean and free of spillage.
5. Assist to open carton(s), arrange food items within reach, season foods per resident preference, etc.
5. The resident may have limited hand dexterity and/or weakness, making it difficult to open cartons/containers.
6. Offer assistance if resident appears to be having difficulty during meal.
6. Residents may refrain from “asking” for assistance, thus, staff should be pro-active in observing the need for assistance and offer the same.
7. Offer to assist in cleansing resident’s hands/face following the meal.
7. Promotes good hygiene.
8. Assist resident to room or location of choice.
9. Do final steps. Measure I&O’s if required.
I verify that this procedure was taught and successfully demonstrated according to ISDH Standards. _____________________________________ ________________________ Student Signature Date _____________________________________ ________________________ Instructor Signature Date

PROCEDURE #60: INSPECTING SKIN
STEP RATIONALE
1. Do initial steps.
2. Provide the resident privacy. 2. Maintains resident’s dignity and right to privacy by not exposing body. Keeps resident warm.
3. Check bony areas including ears, shoulder blades, elbows, coccyx, hips, knees, ankles and heels for redness and warmth.
3. Redness and warmth indicates that the skin is under pressure and position should be changed more frequently.
4. Check friction areas including under breasts and arms, between buttocks, groin, thighs, skin folds, contracted areas, and around any tubing for redness, irritation, moisture and odor.
4. Pressure, rubbing and perspiration will cause skin to break down.
5. Undrape resident. 6. Report any unusual findings to the
nurse immediately. 6. Provides nurse with necessary information to properly assess resident’s condition and needs.
7. Do final steps.
I verify that this procedure was taught and successfully demonstrated according to ISDH Standards. _____________________________________ ________________________ Student Signature Date _____________________________________ ________________________ Instructor Signature Date
PROCEDURE #61: FLOAT HEELS
STEP RATIONALE
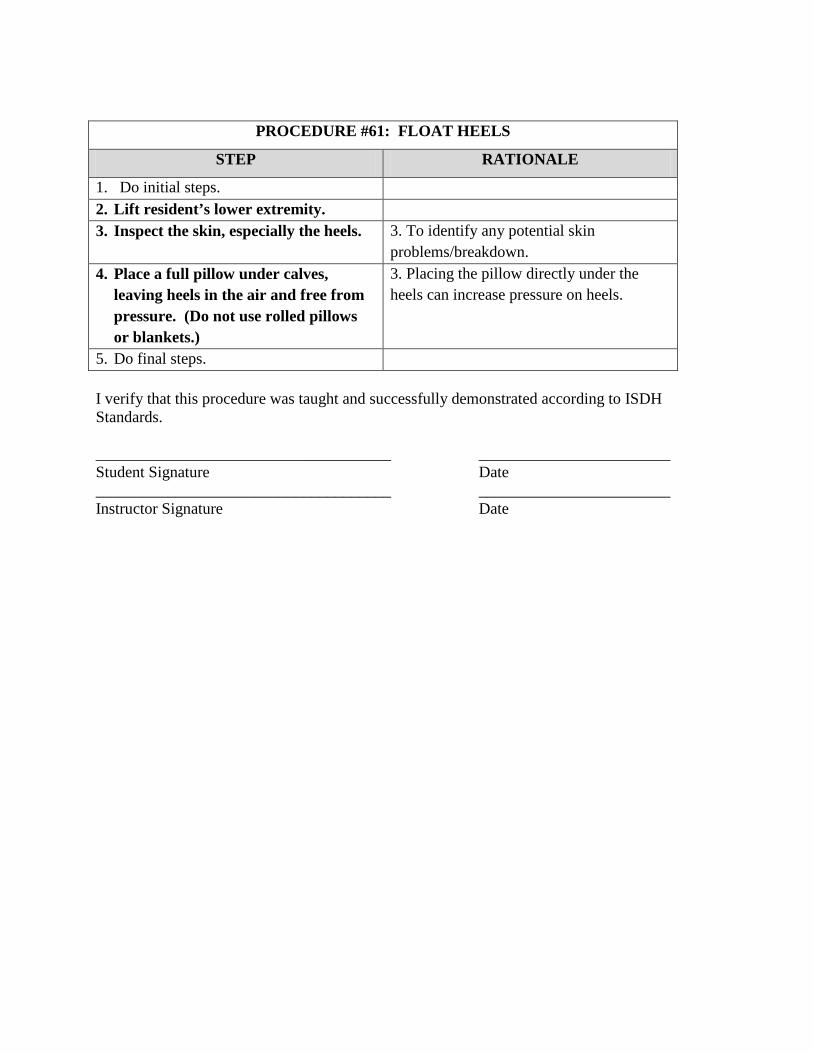
1. Do initial steps. 2. Lift resident’s lower extremity. 3. Inspect the skin, especially the heels. 3. To identify any potential skin
problems/breakdown. 4. Place a full pillow under calves,
leaving heels in the air and free from pressure. (Do not use rolled pillows or blankets.)
3. Placing the pillow directly under the heels can increase pressure on heels.
5. Do final steps. I verify that this procedure was taught and successfully demonstrated according to ISDH Standards. _____________________________________ ________________________ Student Signature Date _____________________________________ ________________________ Instructor Signature Date

PROCEDURE #62: BED CRADLE
STEP RATIONALE
1. Do initial steps. 2. Place bed cradle on bed according to
manufacturer’s instructions. 2. If equipment is not applied according to manufacturer’s instructions, discomfort or injury could result.
3. Cover bed cradle with top sheet and bedspread/blanket.
3. Keeps the top linens from applying pressure/weight to toes, feet and lower legs.
4. Do final steps. I verify that this procedure was taught and successfully demonstrated according to ISDH Standards. _____________________________________ ________________________ Student Signature Date _____________________________________ ________________________ Instructor Signature Date

PROCEDURE #63: PASSIVE RANGE OF MOTION
STEP RATIONALE
1. Do initial steps. 2. Position resident in good body
alignment. 2. Reduces stress to joints.
3. Observe joints. If swelling, redness or warmth is present, or if resident complains of pain, notify nurse. Continue procedure only if instructed.
3. Indicates inflammation in joint which can be worsened if procedure is continued.
4. Support limb above and below joint. 5. Begin range of motion at shoulders
and include the shoulders, elbows, wrists, thumbs, fingers, hips, knees, ankles and toes.
5. Allows you to control joint movement and minimize resident’s discomfort.
6. Slowly move joint in all directions it normally moves.
6. Rapid movement may cause injury.
7. Repeat movement at least five times. 7. Ensures benefit from procedure. 8. Encourage resident to participate as
much as possible. 8. Promotes resident’s independence and self-esteem.
9. Stop procedure at any sign of pain and report to nurse immediately.
9. Pain is a warning sign for injury.
10. Do final steps. I verify that this procedure was taught and successfully demonstrated according to ISDH Standards. _____________________________________ ________________________ Student Signature Date _____________________________________ ________________________ Instructor Signature Date

PROCEDURE #64: SPLINT APPLICATION
STEP RATIONALE
1. Do initial steps. 2. Observe affected joints. If swelling,
redness, or warmth is present or if resident complains of pain, notify nurse. Continue procedure only if instructed.
2. Indicates inflammation in joint which can be worsened if splint is applied.
3. Apply splint according to therapy recommendation and physician’s order.
3. Application of splint not in accordance with therapy recommendation could cause injury or discomfort to resident.
4. Remove splint after designated period of time. Cleanse the skin, dry thoroughly and again observe for swelling, redness, warmth, complaint of pain or open area. Notify the nurse if present.
4. Indicates inflammation in joint. Notifying nurse provides him/her with information to assess resident’s condition and needs.
5. Do final steps. I verify that this procedure was taught and successfully demonstrated according to ISDH Standards. _____________________________________ ________________________ Student Signature Date _____________________________________ ________________________ Instructor Signature Date
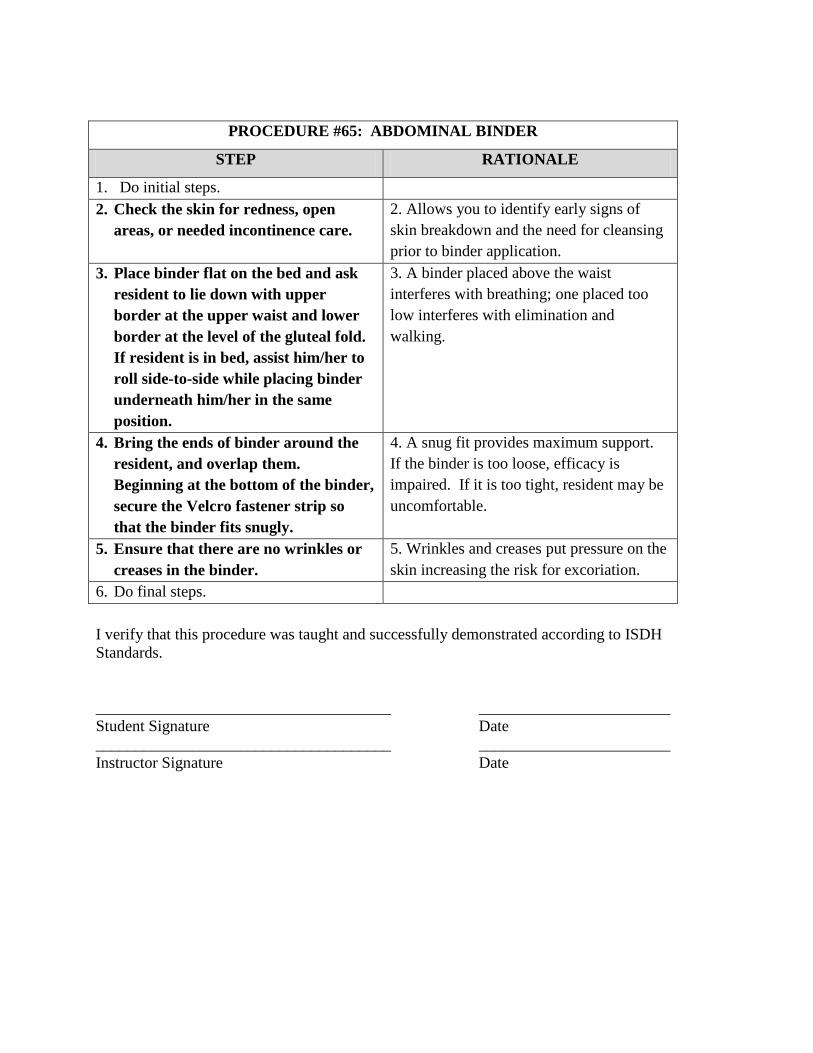
PROCEDURE #65: ABDOMINAL BINDER
STEP RATIONALE
1. Do initial steps. 2. Check the skin for redness, open
areas, or needed incontinence care. 2. Allows you to identify early signs of skin breakdown and the need for cleansing prior to binder application.
3. Place binder flat on the bed and ask resident to lie down with upper border at the upper waist and lower border at the level of the gluteal fold. If resident is in bed, assist him/her to roll side-to-side while placing binder underneath him/her in the same position.
3. A binder placed above the waist interferes with breathing; one placed too low interferes with elimination and walking.
4. Bring the ends of binder around the resident, and overlap them. Beginning at the bottom of the binder, secure the Velcro fastener strip so that the binder fits snugly.
4. A snug fit provides maximum support. If the binder is too loose, efficacy is impaired. If it is too tight, resident may be uncomfortable.
5. Ensure that there are no wrinkles or creases in the binder.
5. Wrinkles and creases put pressure on the skin increasing the risk for excoriation.
6. Do final steps. I verify that this procedure was taught and successfully demonstrated according to ISDH Standards. _____________________________________ ________________________ Student Signature Date _____________________________________ ________________________ Instructor Signature Date

PROCEDURE #66: ABDUCTION PILLOW
STEP RATIONALE
1. Do initial steps. 2. Place the pillow between the supine
resident’s legs. Slide it with the narrow end pointing toward the groin until it touches the legs all along its length.
3. Place the upper part of both legs in the pillow’s indentations. Raise each leg slightly by lifting under the knee and ankle to bring straps under and around leg and then secure the straps to the pillow.
3. Securing the straps prevents the pillow from slipping out of place.
4. Do final steps. 5. Report resident intolerance or
complaint of pain upon application to the nurse.
5. Provides nurse with information to assess resident’s condition and needs.
I verify that this procedure was taught and successfully demonstrated according to ISDH Standards. _____________________________________ ________________________ Student Signature Date _____________________________________ ________________________ Instructor Signature Date

PROCEDURE #67: KNEE IMMOBILIZER
STEP RATIONALE
1. Do initial steps.
2. With resident lying supine in bed, one caregiver will support the leg above the knee and at the ankle and lift the leg in one motion, providing enough height for a second caregiver to place the immobilizer under the affected leg. Check skin prior to applying the immobilizer.
2. It is important to maintain the leg in a
straight position while placing the
immobilizer and to monitor for any skin
problems/breakdown.
3. The caregiver will lower the leg into the open immobilizer, keeping the leg straight.
4. Pull both sides of the immobilizer to center of front of leg and wrap one side over the other, securing the Velcro strip holding the immobilizer in place. Make sure the Velcro stabilizer bar strips are attached to opposite sides of the immobilizer to prevent any motion of the knee medially or laterally.
5. Bring straps around each side and secure to stabilize the immobilizer.
6. When removing the immobilizer for bathing/care, support the leg in the same manner, keeping the leg straight at all times. Observe for any reddened areas, particularly at the upper and lower edge of the immobilizer, which is in contact with the resident’s skin.
6. Constant contact with the edge of the immobilizer can place the skin at risk of breakdown. Early detection of any concern can prevent further breakdown.
7. Report to the nurse any skin irritation, open area, or complaint of pain.
7. Reporting to the nurse will ensure that treatment is obtained, if needed.
8. Do final steps.

I verify that this procedure was taught and successfully demonstrated according to ISDH Standards. _____________________________________ ________________________ Student Signature Date _____________________________________ ________________________ Instructor Signature Date
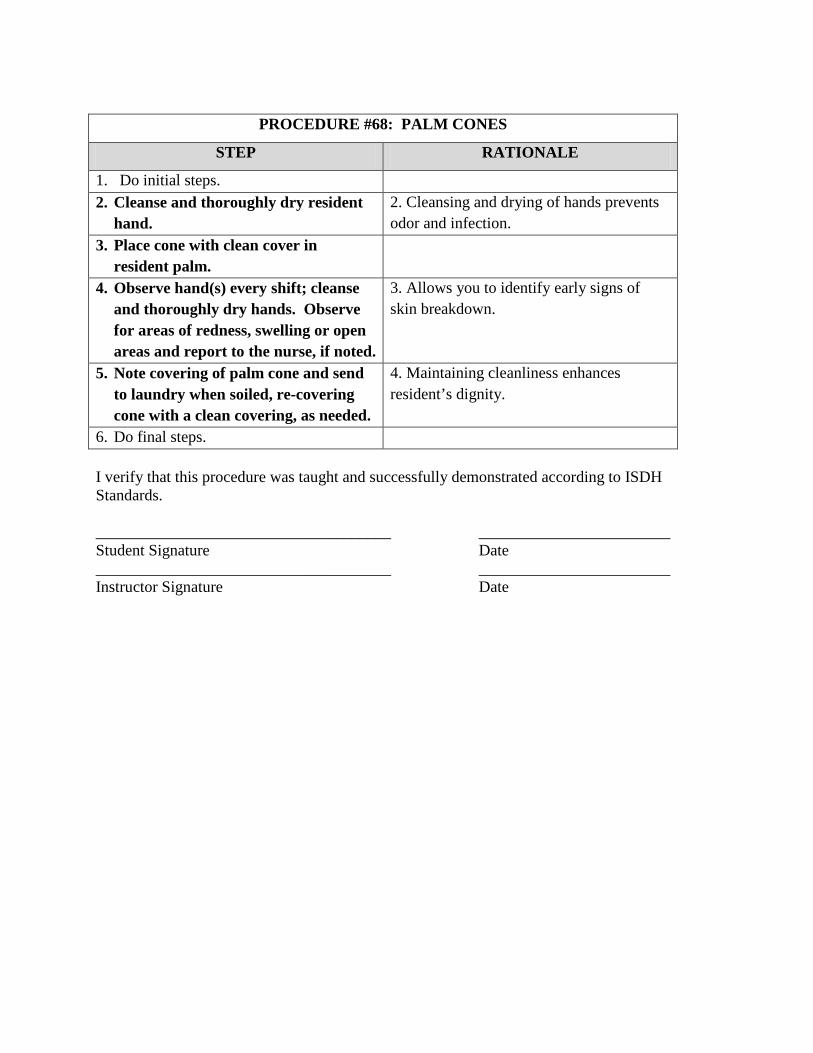
PROCEDURE #68: PALM CONES
STEP RATIONALE
1. Do initial steps. 2. Cleanse and thoroughly dry resident
hand. 2. Cleansing and drying of hands prevents odor and infection.
3. Place cone with clean cover in resident palm.
4. Observe hand(s) every shift; cleanse and thoroughly dry hands. Observe for areas of redness, swelling or open areas and report to the nurse, if noted.
3. Allows you to identify early signs of skin breakdown.
5. Note covering of palm cone and send to laundry when soiled, re-covering cone with a clean covering, as needed.
4. Maintaining cleanliness enhances resident’s dignity.
6. Do final steps. I verify that this procedure was taught and successfully demonstrated according to ISDH Standards. _____________________________________ ________________________ Student Signature Date _____________________________________ ________________________ Instructor Signature Date
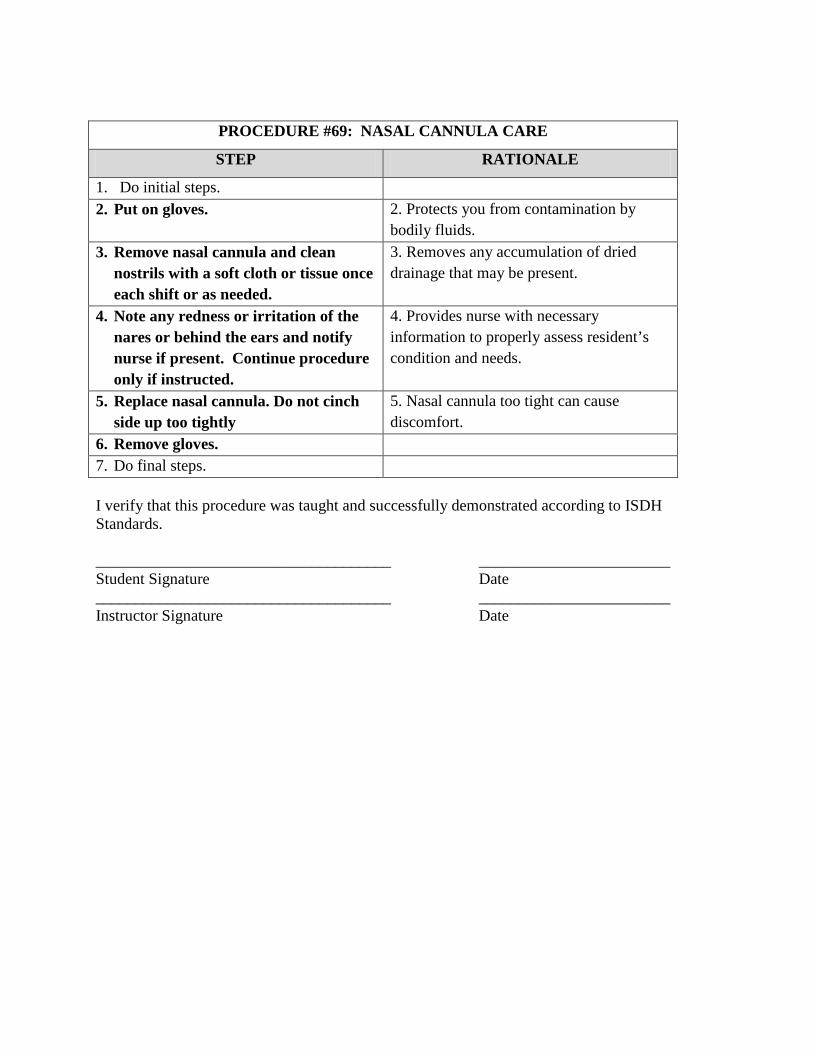
PROCEDURE #69: NASAL CANNULA CARE
STEP RATIONALE
1. Do initial steps. 2. Put on gloves. 2. Protects you from contamination by
bodily fluids. 3. Remove nasal cannula and clean
nostrils with a soft cloth or tissue once each shift or as needed.
3. Removes any accumulation of dried drainage that may be present.
4. Note any redness or irritation of the nares or behind the ears and notify nurse if present. Continue procedure only if instructed.
4. Provides nurse with necessary information to properly assess resident’s condition and needs.
5. Replace nasal cannula. Do not cinch side up too tightly
5. Nasal cannula too tight can cause discomfort.
6. Remove gloves. 7. Do final steps. I verify that this procedure was taught and successfully demonstrated according to ISDH Standards. _____________________________________ ________________________ Student Signature Date _____________________________________ ________________________ Instructor Signature Date

PROCEDURE #70: ASSISTING WITH HEARING AIDS
STEP RATIONALE
1. Do initial steps. 2. Gently clean resident’s ear with a
damp washcloth. Clean hearing aid of wax and dirt when needed according to manufacturer’s instructions
2. To ensure ears are clean prior to insertion of hearing aids, thus ensuring maximum acuity.
3. Insert hearing aid into resident’s ear. 4. Assist to adjust the volume control to
a desired level. 4. To ensure that aid is turned up high enough for resident to hear, but not so high that noises will hurt resident’s ear(s).
5. Do final steps. 6. Report any abnormalities to nurse. 6. Provides nurse with necessary
information to properly assess resident’s condition and needs.
7. Keep hearing aid in safe place when not in use.
I verify that this procedure was taught and successfully demonstrated according to ISDH Standards. _____________________________________ ________________________ Student Signature Date _____________________________________ ________________________ Instructor Signature Date

PROCEDURE #71: ELASTIC/COMPRESSION STOCKING APPLICATION OR
TED HOSE
STEP RATIONALE
1. Do initial steps. 2. Observe skin prior to applying the
stockings for any redness, warmth, swelling, excessive dryness, or open area. Notify nurse if abnormalities present. Continue procedure only if instructed.
2. Provides nurse with information to assess resident’s condition and needs.
3. Apply the hose before resident gets out of bed.
3. Hose should be applied before veins become distended and edema (swelling) occurs.
4. Hold heel of stocking and gather the rest in your hand turning hose inside out to mid foot area.
5. Support foot at the heel and slip the front of the stocking over the toes, foot and heel.
6. Pull the stocking up until it is fully extended.
7. Smooth away any wrinkles or twisted areas.
7. Wrinkles, creases, or twisted areas can irritate the skin and interfere with circulation.
8. Remove the hose at least twice daily for skin care unless otherwise indicated by physician.
8. Allows you to identify early signs of skin break down.
9. Do final steps. I verify that this procedure was taught and successfully demonstrated according to ISDH Standards. _____________________________________ ________________________ Student Signature Date _____________________________________ ________________________ Instructor Signature Date
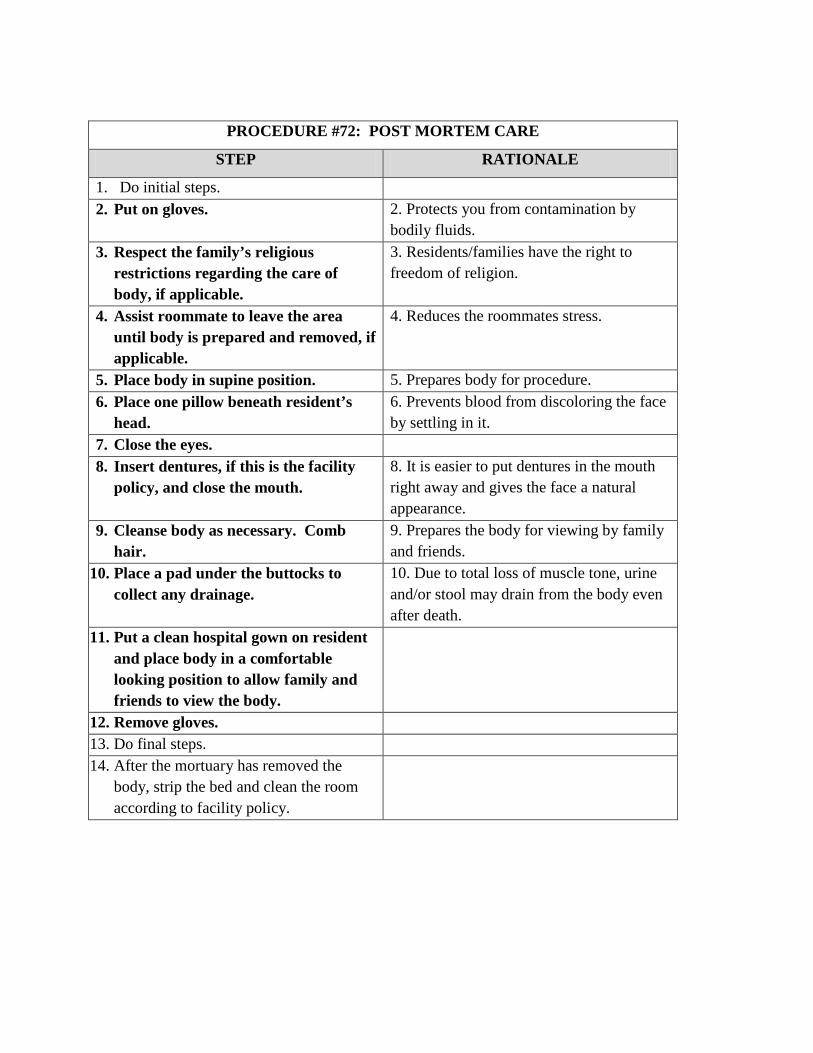
PROCEDURE #72: POST MORTEM CARE
STEP RATIONALE
1. Do initial steps. 2. Put on gloves. 2. Protects you from contamination by
bodily fluids. 3. Respect the family’s religious
restrictions regarding the care of body, if applicable.
3. Residents/families have the right to freedom of religion.
4. Assist roommate to leave the area until body is prepared and removed, if applicable.
4. Reduces the roommates stress.
5. Place body in supine position. 5. Prepares body for procedure. 6. Place one pillow beneath resident’s
head. 6. Prevents blood from discoloring the face by settling in it.
7. Close the eyes. 8. Insert dentures, if this is the facility
policy, and close the mouth. 8. It is easier to put dentures in the mouth right away and gives the face a natural appearance.
9. Cleanse body as necessary. Comb hair.
9. Prepares the body for viewing by family and friends.
10. Place a pad under the buttocks to collect any drainage.
10. Due to total loss of muscle tone, urine and/or stool may drain from the body even after death.
11. Put a clean hospital gown on resident and place body in a comfortable looking position to allow family and friends to view the body.
12. Remove gloves. 13. Do final steps. 14. After the mortuary has removed the
body, strip the bed and clean the room according to facility policy.

I verify that this procedure was taught and successfully demonstrated according to ISDH Standards. _____________________________________ ________________________ Student Signature Date _____________________________________ ________________________ Instructor Signature Date

Answers to Review Questions Lesson 1
1. The licensed nurse 2. An objective observation is factually seen, heard, felt or smelled by the person reporting;
a subjective observation is what one “thinks” or “heard” happened from someone else. 3. Time to get dressed in the morning; whether to shower or bathe in a tub; what time to go
to bed in the evening. Lesson 2
1. Examine survey results, voice grievances, self administer medications 2. The caregiver must immediately report signs/symptoms of abuse, neglect or
misappropriation 3. Verbal, physical, emotional/ mental, sexual, neglect, involuntary seclusion,
misappropriation 4. Leaving a resident in bed soiled. Leaving the call light or water out of resident reach 5. Using a resident’s personal telephone to make calls. Taking a resident’s money or
personal belongings. 6. Report it immediately. Follow your facility’s policies and procedures for reporting abuse
Lesson 3
1. Causative Agent, Reservoir, Portal of Exit, Mode of Transmission, Portal of Entry, Susceptible Host
2. Hand washing 3. Before resident/patient contact, before aseptic task, after exposure to blood/body fluids,
after resident/patient contact, after contact with resident/patient surroundings 4. Proper usage will provide a barrier between the caregiver and the pathogen, thus,
preventing the spread of infection
Lesson 4 1. Touching an infected person and then proceeding to touch another person without
washing one’s hands 2. Touching a contaminated object and then proceeding to touch a person without washing
one’s hands. 3. No
Lesson 5
1. Clutching the throat 2. MSDS – Material Safety Data Sheet 3. Call for nurse and stay with resident, assist the nurse with positioning the resident on

his/her side, place padding under head and move furniture away from resident, do not
restrain resident or place anything in mouth, loosen resident’s clothing, especially around
the neck, after the seizure stops, assist nurse to check for injury, note duration of seizures
and areas involved.
Lesson 6
1. Remove residents from area of immediate danger; Activate the fire alarm; Contain the fire, if possible (close doors); Extinguish, if possible.
2. Pull the pin; Aim at the base of the fire; Squeeze the handle; Sweep back and forth at the base of the fire
3. Stop, drop and roll to smother the flames Lesson 7
1. 60 – 100 beats per minute 2. The average BP range for adults is systolic blood pressure: 100-139; Normal range for
Diastolic blood pressure is 60-89 however, it depends on the individual. 3. Place your hand on the resident’s chest and feel the chest rise and fall during breathing
Lesson 8
1. The resident’s shoulders are directly above their hips; their head and neck are straight; their arms and legs are in a natural position
2. Supine, Lateral, Fowler’s and Semi-Fowler’s 3. Semi-Fowler’s 4. Less 5. False
Lesson 9
1. False Lesson 10
1. Female: Separate labia; wash urethral area first; wash between and outside labia in downward strokes, alternating from side to side and moving outward to thighs. Use a different part of washcloth for each stroke. Male: Pull back foreskin if male is uncircumcised. Wash and rinse the tip of the penis using circular motion beginning with urethra. Continue washing down the penis to the scrotum and inner thighs Rationale/Importance: Prevents the spread of infection by washing pathogens away from the urethra and not toward the urethra where pathogens could enter.

Lesson 11 1. Irritation, raised areas, coated or swollen tongue, sores, complaint of mouth pain, white
spots, loose/chipped or decayed teeth 2. Due to poor circulation, even a small sore on the foot can become a large wound
Lesson 12
1. A clean catch mid-stream requires that genitalia be cleansed prior to collecting the urine specimen.
2. True Lesson 13
1. Calendar, clock, familiar pictures, visual cues 2. True
Lesson 14
1. Dry mouth, weight loss, foul smelling urine, dark urine, cracked lips and sunken eyes 2. Water 3. Nectar thick, honey thick, pudding thick 4. True
Lesson 15
1. True 2. True 3. True
Lesson 16
1. True 2. At least once every hour and more frequently if the resident’s condition requires 3. At least every two hours, or more often if necessary except when the resident is asleep
Lesson 17
1. Active range of motion exercises are done by the resident himself; Passive range of motion exercises are done by caregivers providing support and moving the resident’s joints through the range of motion when the resident cannot move on their own.
2. Contractures 3. Restorative Services
Lesson 18
1. False 2. True 3. True

Lesson 19
1. redness, warmth, tenderness, open area 2. True 3. True
Lesson 20
1. Change in vital signs – B/P, pulse, respiration, nausea, vomiting, sweating, tearful or frowning, sighing, moaning or groaning, breathing heavy or shortness of breath, restless or having difficulty moving, holding or rubbing a body part, tightening jaw or grinding teeth
2. Medication administration, such as antibiotics, nutrition administration, hydration, blood products, solutions are administered by gravity or through a portable pump
3. Fear of addiction to pain medication, feeling caregivers are too busy to deal with pain, fear pain medication will cause other problems, i.e., drowsiness, sleepiness, constipation
Lesson 21
1. A delusion – a fixed, false belief. 2. An elopement 3. Validation Therapy 4. Sundowning
Lesson 22
1. Immediately 2. Remain calm, step out of the way, remove other residents, never strike back or respond
verbally, leave the resident alone to calm down (if safe) and report the behaviors to the nurse immediately.
Lesson 23
1. True 2. False
Lesson 24
1. True 2. True
Lesson 25
1. cold/clammy skin, double or blurry vision, shaking/trembling, hunger, tingling or numbness of skin
2. True Lesson 26
1. True 2. True
Lesson 27
1. Prepare the room for the resident’s arrival; introduce self to resident and family/responsible party and explain role; explain surroundings to resident, including use of call light to summon help, if needed; create a trusting relationship; be available to family; become a resource and support for the family; refer family members requesting information about a resident to the nurse.
2. Personal inventory record. Lesson 28
1. Cyanosis 2. True
Lesson 29
1. Draw a single line through the error, print word “error” above entry and initial and date the correction.
2. Report any resident condition that will need the attention of the oncoming shift (e.g., resident is on the bedpan, etc.)
Lesson 30
1. Exhibiting anger toward co-workers and/or residents; arguing with a supervisor or co-workers about assignments; complaining about responsibilities; feeling tired, even when you are well rested; difficulty focusing on residents and job duties.
2. The CNA must work for a healthcare provider at least one eight hour shift every twenty-four months.