Embed Size (px)
Citation preview
PRO RACING WHEEL& PEDALS
� � ENGLISH
1. Before the first use
Thank you for purchasing the Pro Racing Wheel and Pedals. Before using the wheel, please read this instruction manual carefully and keep it for future reference.
2. Features
• The Pro Racing Wheel and Pedals is compatible with PS4, XBOX ONE, PC and PS3• It is compatible with all the racing games on those platforms• An official controller is required to use the wheel on PS4 and XBOX ONE
• Compatible with all PC games (X-lnput and Direct Input)• 270 degree steering rotation• Steering sensitivity control (3 positions)• 8 programmable buttons for tailor made button configuration for use with differentracing games• Dual motors vibration-effect• Fully analog driving control for more realistic driving experience• Spring-loaded acceleration and brake control pedals• Optional gear shift stick control• 8 way digital directional pad for menu navigation• Connection to the console through USB port• The cable connector design for pedals prevents an accidental disconnection of cable• Super strong and long lasting suction cups for stabilizing
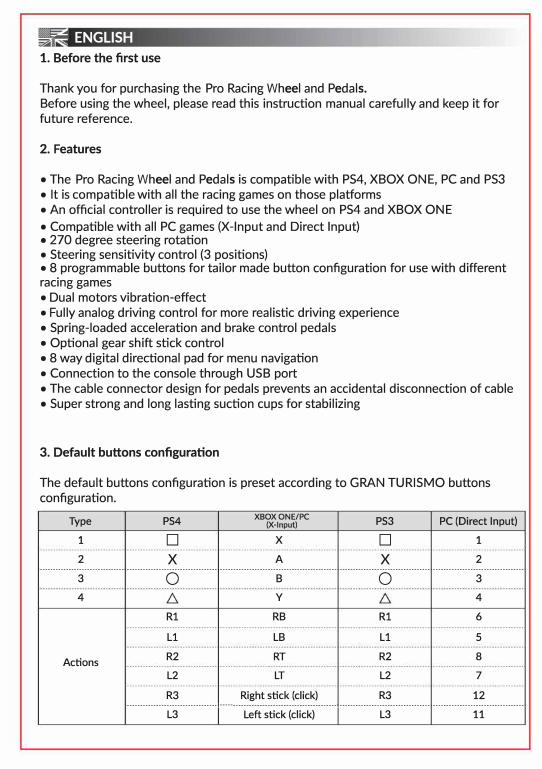
3. Default buttons configuration
The default buttons configuration is preset according to GRAN TURISMO buttons configuration.
Type PS4
1 □
XBOXONE/PC (X-lnput)
X
PS3 PC (Direct Input)
□ 1
2 X A X 2 -------------------------------- ---------------------------------- -------------------------------------------- ---------------------------------- ----------------------------------
3 Q B Q 3
4
Actions
R1
L1
R2
L2
R3
y
RB
LB
RT
LT
Right stick (click)
R1
L1
R2
L2
R3
4
6
5
8
7
12 ----------------------------------t---------------i---------------------------------- ----------------------------------
L3 Left stick (click) L3 11

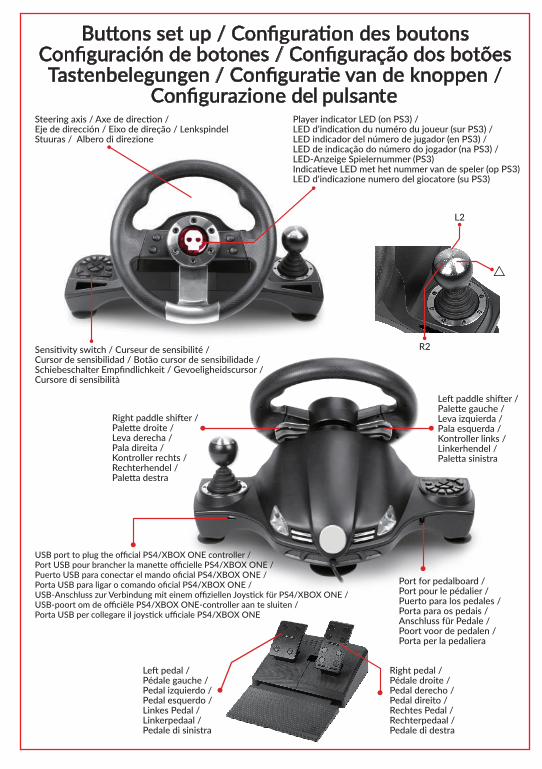
D-Pad
Functions
Steering wheel
Left paddle
Right paddle
Left pedal --------------------------------
Right pedal
Mode
Gearstick -
Gearstick+
Gearstick R
4. Installation
up
down
left
right
OPTIONS
SHARE
Left analog stick
L2
R2
L2 ----------------------------------
R2
HOME
L1
R1
f::,.
Set up the wheel on PS4
up
down
left
right
MENU
VIEW
Left analog stick
LT
RT
LT
RT
XBOX button
LB
RB
y
up
down
left
right
START
SELECT
Left analog stick
□
X
□ ----------------------------------
X
HOME
L2
R2
f::,.
up
down
left
right
10
9
X axis
1
2
1 ----------------------------------
2
13
7
8
4
1. Make sure that the PS4 is turned off.
2. Plug the wheel cable into a USB port on the console.
3. Plug the cable from the pedals into the steering wheel.
4. Turn on the console.
5. Plug an official PS4 controller into the USB port located on the wheel, use the
provided USB/Micro USB cable. IMPORTANT: the controller must be switched off.
6. The red LED of the wheel stays lit. Press the HOME button on the wheel to connect
it to the console.
7. The steering wheel is now ready to use.
Set up the wheel on XBOX ONE
1. Make sure that the XBOX ONE is turned off.
2. Plug the wheel cable into a USB port on the console.
3. Plug the cable from the pedals into the steering wheel.
4. Turn on the console.
5. Plug an official XBOX ONE controller into the USB port located on the wheel, use
the provided USB/Micro USB cable. IMPORTANT: the controller must be switched
off.
6. The red LED of the wheel stays lit. Press the HOME button on the wheel to
connect it to the console.
7. The steering wheel is now ready to use.
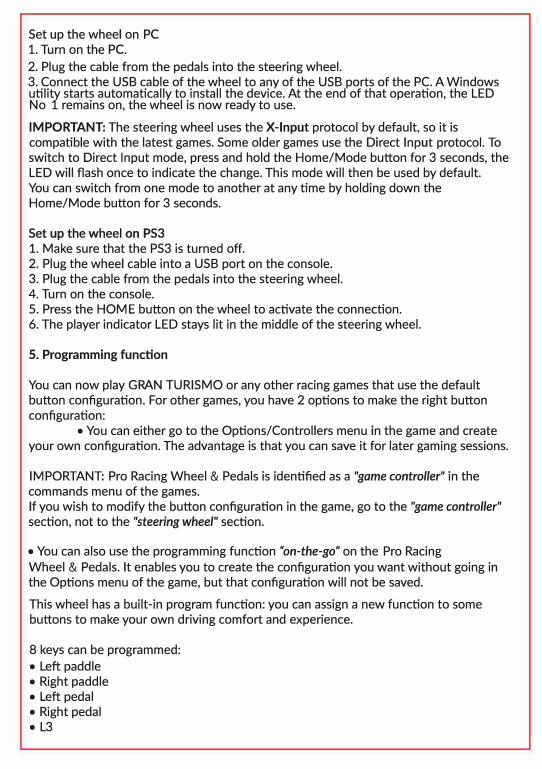
IMPORTANT: The steering wheel uses the X-lnput protocol by default, so it is
compatible with the latest games. Some older games use the Direct Input protocol. To
switch to Direct Input mode, press and hold the Home/Mode button for 3 seconds, the
LED will flash once to indicate the change. This mode will then be used by default.
You can switch from one mode to another at any time by holding down the
Home/Mode button for 3 seconds.
Set up the wheel on PS3
1. Make sure that the PS3 is turned off.
2. Plug the wheel cable into a USB port on the console.
3. Plug the cable from the pedals into the steering wheel.
4. Turn on the console.
5. Press the HOME button on the wheel to activate the connection.
6. The player indicator LED stays lit in the middle of the steering wheel.
5. Programming function
You can now play GRAN TURISMO or any other racing games that use the default
button configuration. For other games, you have 2 options to make the right button
configuration:
• You can either go to the Options/Controllers menu in the game and create
your own configuration. The advantage is that you can save it for later gaming sessions.
IMPORTANT: Pro Racing Wheel & Pedals is identified as a "game controller" in the
commands menu of the games.
If you wish to modify the button configuration in the game, go to the "game controller" section, not to the "steering wheel" section.
• You can also use the programming function "on-the-go" on the Pro Racing
Wheel & Pedals. It enables you to create the configuration you want without going in
the Options menu of the game, but that configuration will not be saved.
This wheel has a built-in program function: you can assign a new function to some
buttons to make your own driving comfort and experience.
8 keys can be programmed:
• Left paddle
• Right paddle
• Left pedal
• Right pedal
• L3
Set up the wheel on PC
1. Turn on the PC.
2. Plug the cable from the pedals into the steering wheel.
3. Connect the USB cable of the wheel to any of the USB ports of the PC. A Windows utility starts automatically to install the device. At the end of that operation, the LED
No 1 remains on, the wheel is now ready to use.
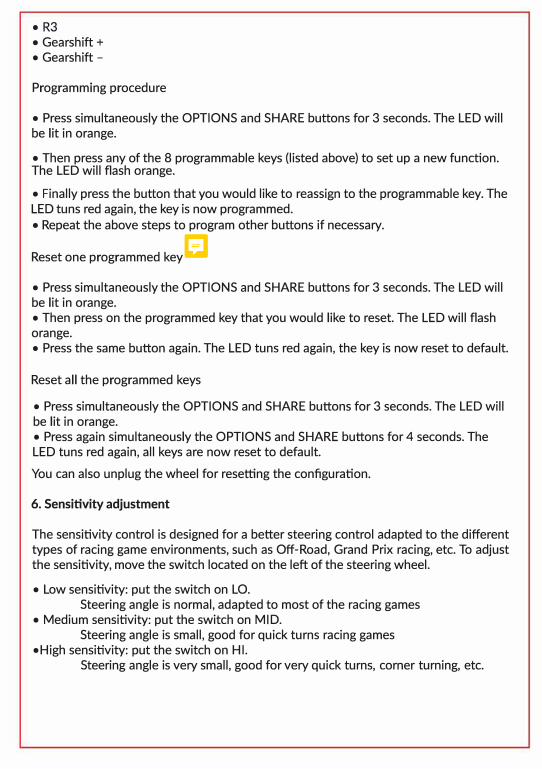
• R3
• Gearshift +• Gearshift -
Programming procedure
• Press simultaneously the OPTIONS and SHARE buttons for 3 seconds. The LED will be lit in orange.
• Then press any of the 8 programmable keys (listed above) to set up a new function. The LED will flash orange.
• Finally press the button that you would like to reassign to the programmable key. The LED tuns red again, the key is now programmed.• Repeat the above steps to program other buttons if necessary.
Reset one programmed key
• Press simultaneously the OPTIONS and SHARE buttons for 3 seconds. The LED will be lit in orange.• Then press on the programmed key that you would like to reset. The LED will flash orange.• Press the same button again. The LED tuns red again, the key is now reset to default.
Reset all the programmed keys
• Press simultaneously the OPTIONS and SHARE buttons for 3 seconds. The LED willbe lit in orange.• Press again simultaneously the OPTIONS and SHARE buttons for 4 seconds. TheLED tuns red again, all keys are now reset to default.
You can also unplug the wheel for resetting the configuration.
6. Sensitivity adjustment
The sensitivity control is designed for a better steering control adapted to the different types of racing game environments, such as Off-Road, Grand Prix racing, etc. To adjust the sensitivity, move the switch located on the left of the steering wheel.
• Low sensitivity: put the switch on LO.Steering angle is normal, adapted to most of the racing games
• Medium sensitivity: put the switch on MID.Steering angle is small, good for quick turns racing games
•High sensitivity: put the switch on HI.Steering angle is very small, good for very quick turns, corner turning, etc.
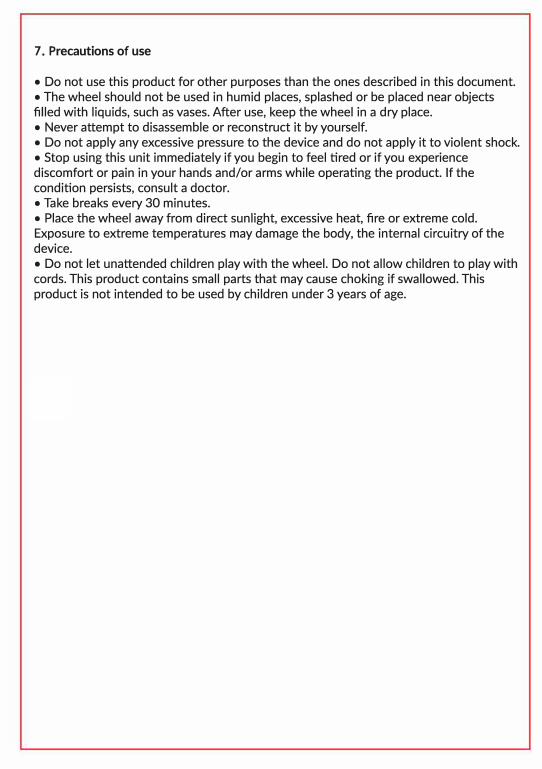
• Do not use this product for other purposes than the ones described in this document.
• The wheel should not be used in humid places, splashed or be placed near objects
filled with liquids, such as vases. After use, keep the wheel in a dry place.
• Never attempt to disassemble or reconstruct it by yourself.
• Do not apply any excessive pressure to the device and do not apply it to violent shock.
• Stop using this unit immediately if you begin to feel tired or if you experience
discomfort or pain in your hands and/or arms while operating the product. If the
condition persists, consult a doctor.
• Take breaks every 30 minutes.
• Place the wheel away from direct sunlight, excessive heat, fire or extreme cold.
Exposure to extreme temperatures may damage the body, the internal circuitry of the
device.
• Do not let unattended children play with the wheel. Do not allow children to play with
cords. This product contains small parts that may cause choking if swallowed. This
product is not intended to be used by children under 3 years of age.
7. Precautions of use

8. Contact and Customer Support
Please feel free to contact Numskull for more information about the Pro Racing Wheel
& Pedals, or other products in our range of peripherals.
Email: [email protected] Tel: (+44)1707 800881
9. Respect the environment
In order to protect the environment, please do not discard
electric/electronic devices and appliances with household garbage.
Please take them to a recycling collect on centre.
Australia & New Zealand Technical and Warranty Support
These goods come with guarantees that cannot be excluded under the AustralianConsumer Law and New Zealand Consumer Guarantees Act. You are entitled to areplacement or refund for a major failure and compensation for any otherreasonably foreseeable loss or damage. You are also entitled to have the goodsrepaired or replaced if the goods fail to be of acceptable quality and the failuredoes not amount to a major failure.
If purchased in Australia or New Zealand, this product comes with one year (12months) warranty from date of purchase.
Defects in the product must have appeared within one year from date of purchase,in order to claim warranty. All warranty claims must be facilitated backthrough the retailer of purchase in accordance with the retailers returns policyand procedures.
Any expense incurred as a result of returning the product to the retailer of purchaseare the full responsibility of the customer.
NEW ZEALANDFiveight Distribution LtdUnit B, 39 Westpoint DriveHobsonvilleAuckland 0618, New ZealandPhone: (64) 9 479 1530Email - [email protected] - http://www.fiveight.co.nz
AUSTRALIABluemouth InteractiveLevel 2, 2 Darling StreetSouth YarraVIC 3141Phone: (03) 9867 2666Email - [email protected] - www.bluemouth.com.au
FRANc;AIS
1. Avant la premiere utilisation
Merci d'avoir achete le volant de course et pedales pro.Avant d'utiliser le volant, lisez attentivement ce manuel d'utilisation. Veuillez le conserver pour toute reference ulterieure.
2. Caracteristiques
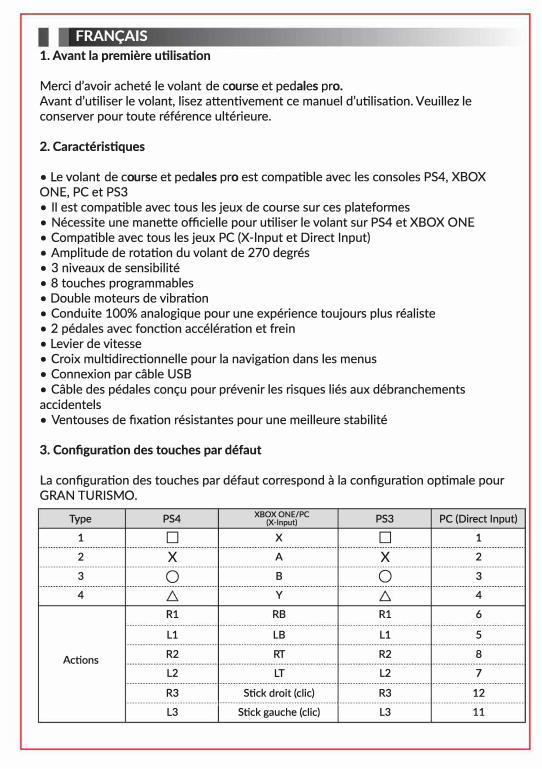
• Le volant de course et pedales pro est compatible avec les consoles PS4, XBOXONE, PC et PS3• II est compatible avec taus les jeux de course sur ces plateformes• Necessite une manette officielle pour utiliser le volant sur PS4 et XBOX ONE• Compatible avec taus les jeux PC (X-lnput et Direct Input)• Amplitude de rotation du volant de 270 degres• 3 niveaux de sensibilite• 8 touches programmables• Double moteurs de vibration• Conduite 100% analogique pour une experience toujours plus realiste• 2 pedales avec fonction acceleration et frein• Levier de vitesse• Croix multidirectionnelle pour la navigation dans les menus• Connexion par cable USB• Cable des pedales conc;:u pour prevenir les risques lies aux debranchementsaccidentels• Ventouses de fixation resistantes pour une meilleure stabilite
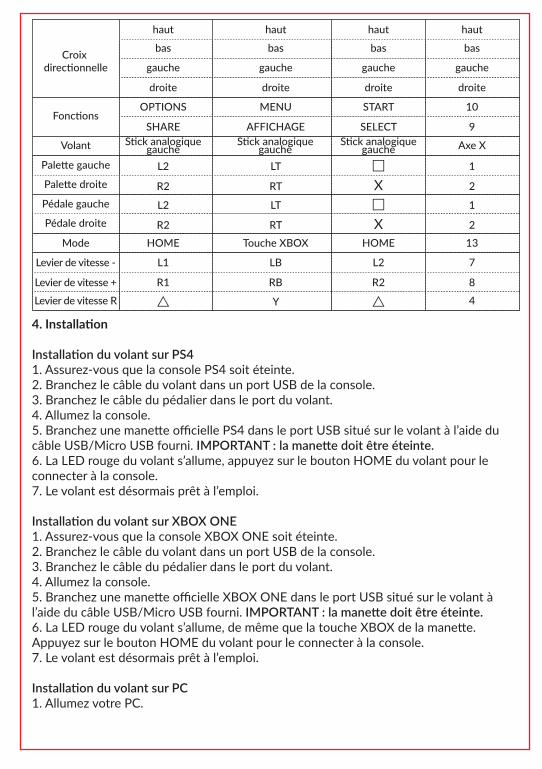
3. Configuration des touches par defaut
La configuration des touches par defaut correspond a la configuration optimale pour GRAN TURISMO.
Type PS4
1 □
XBOXONE/PC (X-lnput)
X
PS3 PC (Direct Input)
□ 1
2 X A X 2 -------------------------------- ---------------------------------- -------------------------------------------- ---------------------------------- ----------------------------------
3 Q B Q 3
4
Actions
Rl
Ll
R2
L2
R3
y
RB
LB
RT
LT
Stick droit (die)
Rl
Ll
R2
L2
R3
4
6
5
8
7
12 ----------------------------------1---------------i---------------------------------- ----------------------------------
L3 Stick gauche (die) L3 11
• Palette gauche• Palette droite• Pedale gauche• Pedale droite• L3• R3
• Levier de vitesse +• Levier de vitesse -
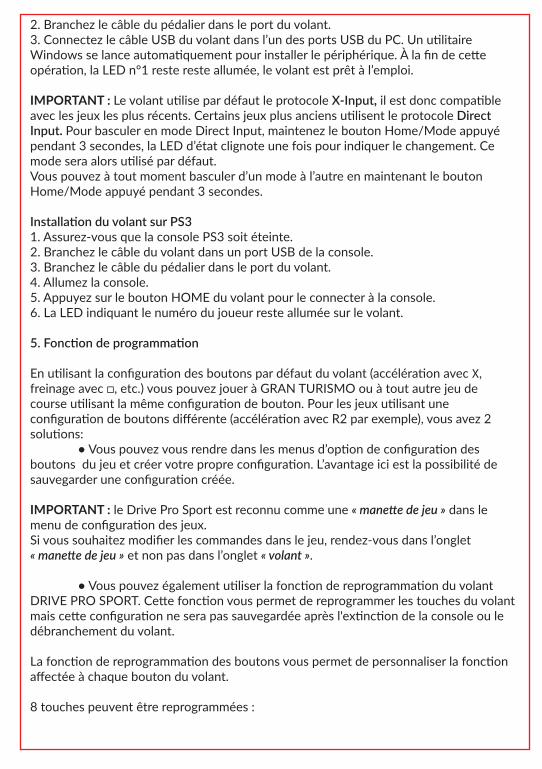
Programmation des touches
• Appuyez simultanement sur les boutons OPTIONS et SHARE pendant 3 secondes. La LED du volant reste allumee en orange.
• Appuyez ensuite sur l'une des 8 touches reprogrammables a laquelle vous voulez attribuer une nouvelle fonction (voir ci-dessus). La LED du volant clignote en orange.
• Enfin, appuyez sur le bouton qui correspond a la nouvelle fonction que vous
souhaitez attribuer. La LED redevient rouge, la touche est desormais reprogrammee.• Repetez !'operation avec les autres touches reprogrammables si vous le souhaitez.
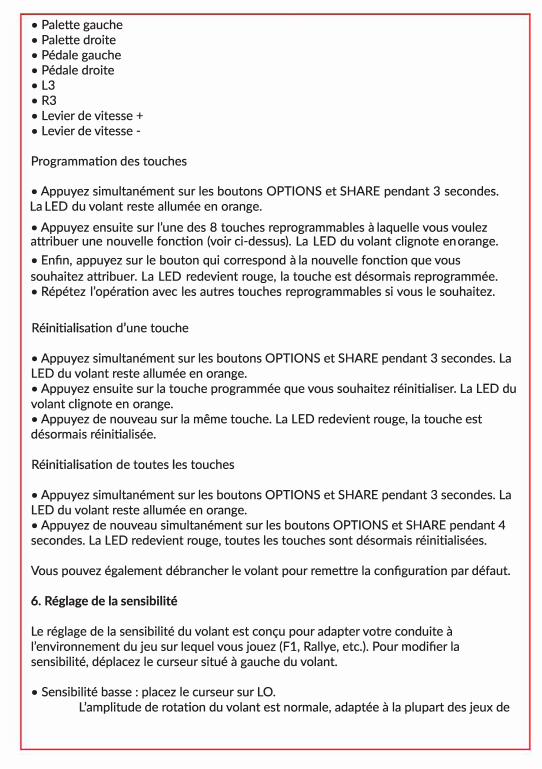
Reinitialisation d'une touche
• Appuyez simultanement sur les boutons OPTIONS et SHARE pendant 3 secondes. LaLED du volant reste allumee en orange.• Appuyez ensuite sur la touche programmee que vous souhaitez reinitialiser. La LED du
volant clignote en orange.• Appuyez de nouveau sur la meme touche. La LED redevient rouge, la touche estdesormais reinitialisee.
Reinitialisation de toutes les touches
• Appuyez simultanement sur les boutons OPTIONS et SHARE pendant 3 secondes. LaLED du volant reste allumee en orange.• Appuyez de nouveau simultanement sur les boutons OPTIONS et SHARE pendant 4secondes. La LED redevient rouge, toutes les touches sont desormais reinitialisees.
Vous pouvez egalement debrancher le volant pour remettre la configuration par defaut.
6. Reglage de la sensibilite
Le reglage de la sensibilite du volant est conc;u pour adapter votre conduite al'environnement du jeu sur lequel vous jouez (F1, Rallye, etc.). Pour modifier la sensibilite, deplacez le curseur situe a gauche du volant.
• Sensibilite basse : placez le curseur sur LO.
L.'.amplitude de rotation du volant est normale, adaptee a la plupart des jeux de
course. • Sensibilite moyenne: placez le curseur sur MID.
L.'.amplitude de rotation est plus reduite, parfaite pour des jeux de course avec beaucoup de virages. • Sensibilite haute : placez le curseur sur HI.
L.'.amplitude de rotation est courte, ideale pour enchainer des virages serres.
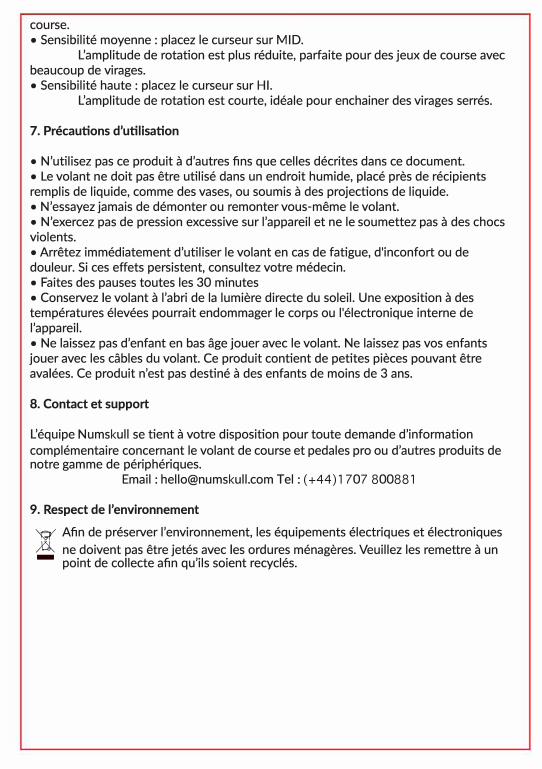
7. Precautions d'utilisation
• N'utilisez pas ce produit a d'autres fins que celles decrites dans ce document.• Le volant ne doit pas etre utilise dans un endroit humide, place pres de recipientsremplis de liquide, comme des vases, au soumis a des projections de liquide.• N'essayez jamais de demonter au remonter vous-meme le volant.• N'exercez pas de pression excessive sur l'appareil et ne le soumettez pas a des chocsviolents.• Arretez immediatement d'utiliser le volant en cas de fatigue, d'inconfort au dedouleur. Si ces effets persistent, consultez votre medecin.• Faites des pauses toutes les 30 minutes• Conservez le volant a l'abri de la lumiere directe du soleil. Une exposition a destemperatures elevees pourrait endommager le corps au l'electronique interne del'appareil.• Ne laissez pas d'enfant en bas age jouer avec le volant. Ne laissez pas vos enfantsjouer avec les cables du volant. Ce produit contient de petites pieces pouvant etreavalees. Ce produit n'est pas destine a des enfants de mains de 3 ans.
8. Contact et support
L.'.equipe Numskull se tient a votre disposition pour toute demande d'information complementaire concernant le volant de course et pedales pro au d'autres produits de notre gamme de peripheriques.
Email: [email protected] Tel: (+44)1707 800881
9. Respect de l'environnement
� Afin de preserver l'environnement, les equipements electriques et electroniques A ne doivent pas etre jetes avec les ordures menageres. Veuillez les remettre a un - point de collecte afin qu'ils soient recycles.
ESPANOL
1. Antes del primer uso
Gracias par comprar el volante de carreras y pedales pro.Antes de utilizar, lea atentamente este manual, y conservelo para posteriores consultas.
2. Caracterfsticas
• El volante de carreras y pedales pro es compatible con las consolas PS4, XBOX ONE,PC y PS3• Es compatible con todos las juegos de carreras de estas plataformas
• Se necesita un mando oficial para utilizar el volante con la PS4 y la XBOX ONE• Compatible con todos las juegos de PC (X-lnput y Direct Input)• Amplitud de rotaci6n del volante: 270 grados• 3 niveles de sensibilidad• 8 botones programables• 2 motores de vibraci6n• Conducci6n 100% anal6gica, para una experiencia cada vez mas realista• 2 pedales con funci6n de acelerador y freno• Palanca de cambios• Cruz multidireccional para navegar par las menus• Conexi6n par cable USB• Cable de pedales diseiiado para prevenir las riesgos de desconexiones accidentales• Fuerte fijaci6n con ventosas, para una mayor estabilidad
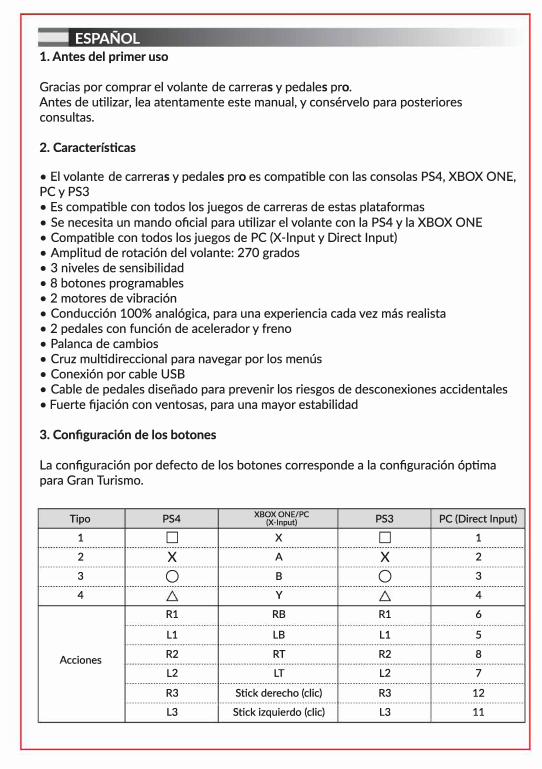
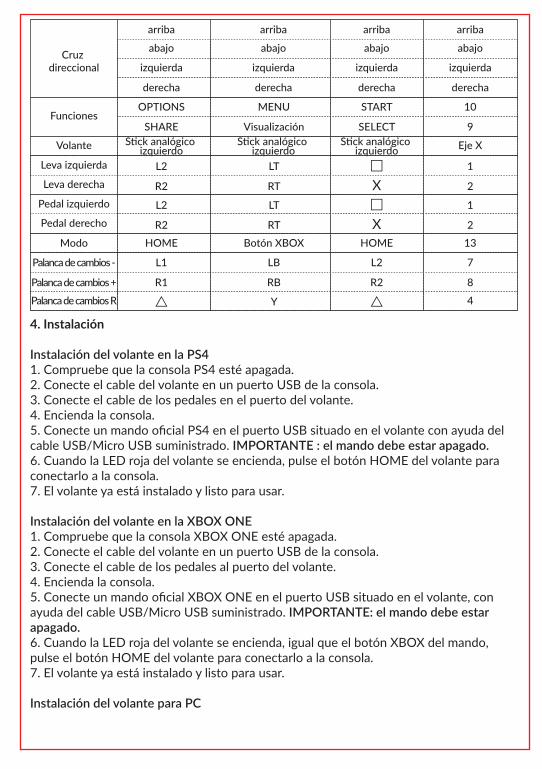
3. Configuraci6n de los botones
La configuraci6n par defecto de las botones corresponde a la configuraci6n optima para Gran Turismo.
Tipo PS4
1 □
XBOXONE/PC (X-lnput)
X
PS3 PC (Direct Input)
□ 1
2 X A X 2 -------------------------------- ---------------------------------- -------------------------------------------- ---------------------------------- ----------------------------------
3 Q B Q 3
4
Acciones
Rl
Ll
R2
L2
R3
y
RB
LB
RT
LT
Stick derecho (die)
Rl
Ll
R2
L2
R3
4
6
5
8
7
12 ----------------------------------1-----------------I---------------------------------- ----------------------------------
L3 Stick izquierdo (die) L3 11
• Leva izquierda
• Leva derecha• Pedal izquierdo• Pedal derecho
• L3• R3
• Palanca de cambios +
• Palanca de cambios -
Programaci6n de botones
• Pulse a la vez los botones OPTIONS y SHARE durante 3 segundos. La LED del volante
permanece iluminada en naranja.
• Pulse despues el bot6n reprogramable al que quiere asignar una nueva funci6n (ver
abajo). La LED del volante parpadea en naranja.
• Por ultimo, pulse el bot6n que corresponde a la nueva funci6n que desea asignar. La
LED cambia a color rojo, el bot6n ya esta reprogramado.
• Si lo desea, puede repetir la operaci6n con el resto de botones reprogramables.
Reinicio de un bot6n
• Pulse a la vez los botones OPTIONS y SHARE durante 3 segundos. La LED del volante
permanece iluminada en naranja.• Pulse despues el bot6n programado que desea reiniciar. La LED del volante parpadea
en naranja.
• Pulse de nuevo el mismo bot6n. La LED se cambia a color rojo, y el bot6n ya se ha
reiniciado.
Reinicio de todos los botones
• Pulse a la vez los botones OPTIONS y SHARE durante 3 segundos. La LED del volante
permanece iluminada en naranja.
• Pulse de nuevo simultaneamente los botones OPTIONS y SHARE durante 4 segundos.La LED se vuelve roja, y todos los botones se han reiniciado.
Tambien puede desconectar el volante para volver a la configuraci6n por defecto.
6. Ajuste de la sensibilidad
El ajuste de la sensibilidad del volante adapta su conducci6n al entorno del juego (F1,
Rally, etc.). Para modificar la sensibilidad, desplace el cursor situado a la izquierda del
volante.
• Sensibilidad baja: coloque el cursor en LO.La amplitud de rotaci6n del volante es normal, adaptada a la mayorfa de los
juegos de carreras.
• Sensibilidad normal: coloque el cursor en MID.La amplitud de rotaci6n es mas reducida, id6nea para los juegos de carreras con
muchas curvas. •Sensibilidad alta: coloque el cursor en HI.
La amplitud de rotaci6n es corta, ideal para encadenar vi raj es ajustados.
7. Precauciones de uso
• No utilice este producto para otros fines distintos a los descritos en este documento.• No utilice el volante en un lugar humedo, o cerca de recipientes llenos de lfquidos, ocon riesgo de salpicaduras.• No intente desmontar o volver a montar el volante usted mismo.• No ejerza una presi6n excesiva sabre el aparato ni le someta a choques violentos.• En caso de fatiga, incomodidad o dolor, deje inmediatamente de utilizarlo. Si losefectos persisten, consulte a su medico.• Haga pausas cada 30 minutos.• Conserve el volante protegido de la luz directa del sol. La exposici6n a temperaturaselevadas podrfa dafiar la estructura o la electr6nica interna del aparato.• No permita a nifios de corta edad jugar con el volante, ni con los cables. Este productocontiene piezas pequefias que podrfan ser ingeridas. Este producto no esta destinado anifios menores de 3 afios.
8. Contacto y soporte
El equipo Numskull esta a su disposici6n para cualquier informaci6n complementaria relativa al de carreras y pedales pro o a cualquier otro producto de nuestra gama de perifericos.
Email: [email protected] Tel: (+44)1707 800881
9. Respeto al medioambiente
� Proteja el medioambiente. Los equipos electricos y electr6nicos no deben A desecharse junta con la basura domestica. Deposftelos en un punto limpio para su - reciclaje.
DEUTSCH
1. Vor der ersten Verwendung
Vielen Dank fur den Kaut des rennrad und pedale pro-Lenkrads. Lesen Sie vor dem Gebrauch des Lenkrads aufmerksam diese Bedienungsanleitung. Bitte bewahren Sie diese fur die Zukunft auf.
2. Merkmale
• Das rennrad und pedale pro-Lenkrad ist kompatibel mit den PS4-, XBOX ONE- PS3 und PC• Er ist kompatibel mit alien Rennspielen dieser Plattformen• Erfordert einen offizielien Joystick, um das Lenkrad mit der PS4 und der XBOX ONEzu verwenden• Kompatibel mit alien PC-Spielen (X-lnput und Direct Input)• Lenkbereich des Rads ist 270 Grad• 3 Empfindlichkeitsstufen• 8 Programmierbare Tasten• Doppelvibrationsmotoren• 100%ige Fahranalogie fur ein immer realistisches Gefuhl• 2 Pedale mit Beschleunigungs- und Bremsfunktion• Gangwahlhebel• D-pad fur die Menufuhrung• USB-Kabelverbindung• Pedalkabel derart ausgelegt, dass die Risiken bei versehentlichem Trennenvermindert werden• Bestandige Saugnapfe fur die Stabilitat
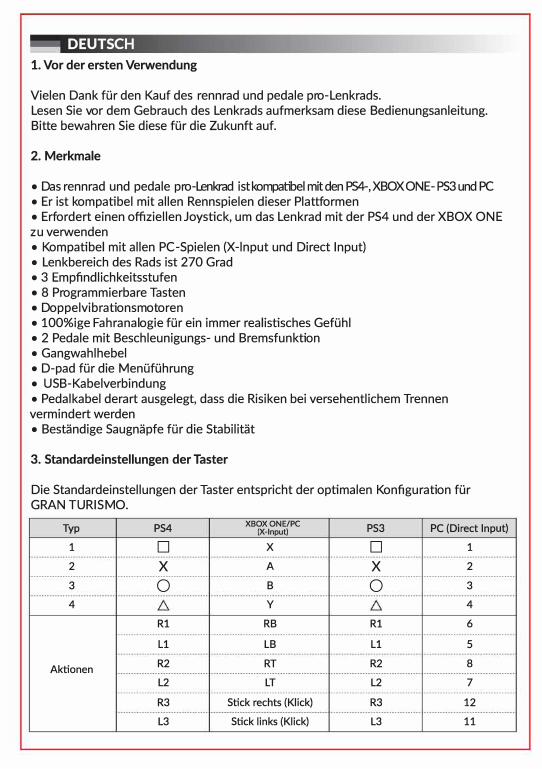
3. Standardeinstellungen der Taster
Die Standardeinstellungen der Taster entspricht der optimalen Konfiguration fur GRAN TURISMO.
Typ
1
2
3
4
Aktionen
PS4
□
X
0
R1
L1
R2
L2
R3
L3
XBOXONE/PC (X-lnput)
X
A
B
y
RB
LB
RT
LT
Stick rechts (Klick)
Stick links (Klick)
PS3
□
X
0
R1
L1
R2
L2
R3
L3
PC (Direct Input)
1
2
3
4
6
5
8
7
12
11
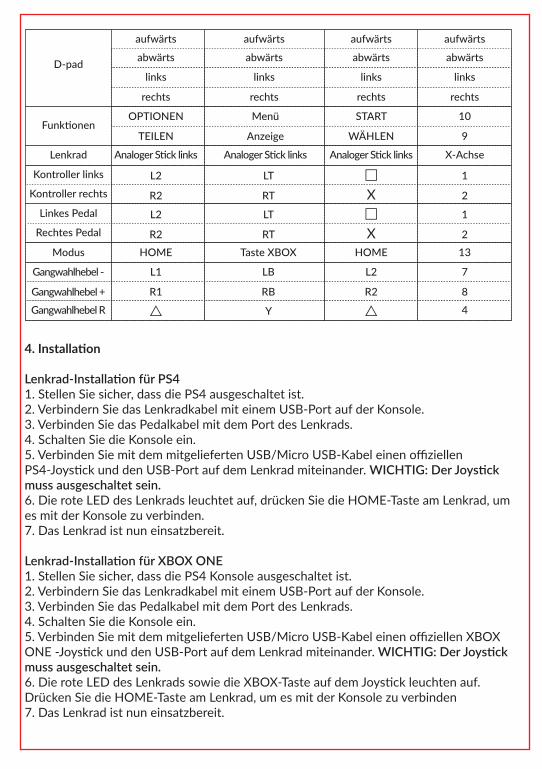
Lenkrad-lnstallation auf dem PC 1. Schalten Sie lhren PC ein.2. Verbinden Sie das Pedalkabel mit dem Port des Lenkrads.3. Verbinden Sie das Lenkradskabel mit einem der USB-Ports am PC. EinWindows-Dienstprogramm startet automatisch, um das Gerat zu installieren. Am Endedieses Vorgangs bleibt die LED N °1 des Lenkrads eingeschaltet, das Lenkrad istbetriebsbereit.
WICHTIG: Das Lenkrad verwendet standardmaBig das X-lnput-Protokoll, so dass er mit den neuesten Spielen kompatibel ist. Einige altere Spiele verwenden das Direct Input -Protokoll. Um in den Direct Input Modus zu wechseln, halten Sie die Home/Mode Taste3 Sekunden lang gedrOckt. Die Status-LED blinkt einmal, um die Anderung anzuzeigen.Dieser Modus wird dann standardmaBig verwendet.Sie konnen jederzeit von einem Modus in einen anderen wechseln, indem Sie dieHome/Mode Taste 3 Sekunden lang gedrOckt halten.
Lenkrad-lnstallation fur PS3 1. Stellen Sie sicher, dass die PS4 ausgeschaltet ist.2. Verbindern Sie das Lenkradkabel mit einem USB-Port auf der Konsole.3. Verbinden Sie das Pedalkabel mit dem Port des Lenkrads.4. Schalten Sie die Konsole ein.5. DrOcken Sie die HOME-Taste am Lenkrad, um es mit der Konsole zu verbinden6. Die LED der Spielernummer auf dem Lenkrad leuchtet nun dauerhaft.
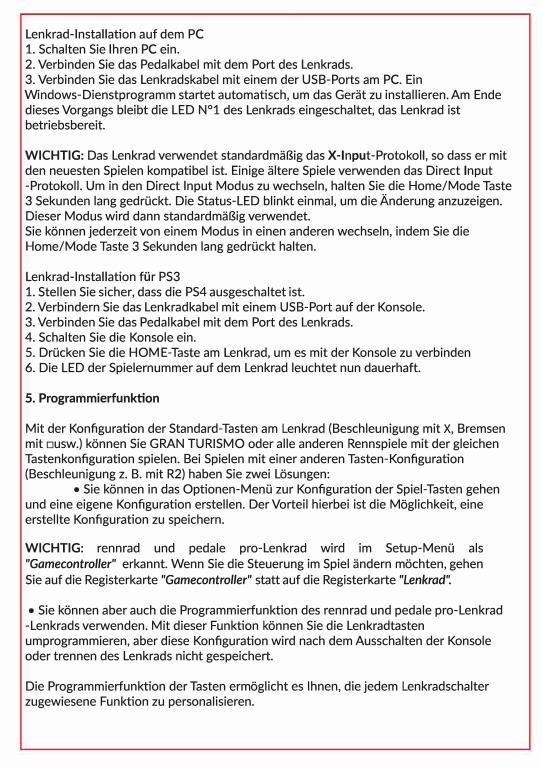
5. Programmierfunktion
Mit der Konfiguration der Standard-Tasten am Lenkrad (Beschleunigung mit X, Bremsen mit □usw.) konnen Sie GRAN TURISMO oder alle anderen Rennspiele mit der gleichen Tastenkonfiguration spielen. Bei Spielen mit einer anderen Tasten-Konfiguration (Beschleunigung z. B. mit R2) haben Sie zwei Losungen:
• Sie konnen in das Optionen-MenO zur Konfiguration der Spiel-Tasten gehenund eine eigene Konfiguration erstellen. Der Vorteil hierbei ist die Moglichkeit, eine erstellte Konfiguration zu speichern.
WICHTIG: rennrad und pedale pro-Lenkrad wird im Setup-Meno als "Gamecontroller" erkannt. Wenn Sie die Steuerung im Spiel andern mochten, gehen Sie auf die Registerkarte "Gamecontroller" statt auf die Registerkarte "Lenkrad''.
• Sie konnen aber auch die Programmierfunktion des rennrad und pedale pro-Lenkrad-Lenkrads verwenden. Mit dieser Funktion konnen Sie die Lenkradtastenumprogrammieren, aber diese Konfiguration wird nach dem Ausschalten der Konsoleoder trennen des Lenkrads nicht gespeichert.
Die Programmierfunktion der Tasten ermoglicht es Ihnen, die jedem Lenkradschalter zugewiesene Funktion zu personalisieren.
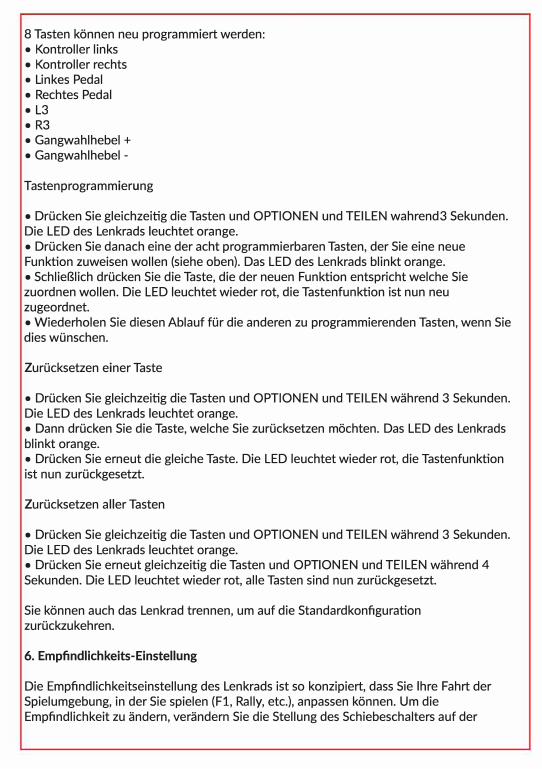
8 Tasten ki:innen neu programmiert werden: • Kontroller links• Kontroller rechts• Linkes Pedal• Rechtes Pedal• L3• R3
• Gangwahlhebel +• Gangwahlhebel -
Tastenprogrammierung
• Dri.icken Sie gleichzeitig die Tasten und OPTION EN und TEI LEN wahrend3 Sekunden. Die LED des Lenkrads leuchtet orange.• Dri.icken Sie danach eine der acht programmierbaren Tasten, der Sie eine neue Funktion zuweisen wollen (siehe oben). Das LED des Lenkrads blinkt orange.• SchlieBlich dri.icken Sie die Taste, die der neuen Funktion entspricht welche Sie zuordnen wollen. Die LED leuchtet wieder rot, die Tastenfunktion ist nun neu zugeordnet.• Wiederholen Sie diesen Ablauf fi.ir die anderen zu programmierenden Tasten, wenn Sie dies wi.inschen.
Zuri.icksetzen einer Taste
• Dri.icken Sie gleichzeitig die Tasten und OPTION EN und TEI LEN wahrend 3 Sekunden.Die LED des Lenkrads leuchtet orange.• Dann dri.icken Sie die Taste, welche Sie zuri.icksetzen mi:ichten. Das LED des Lenkradsblinkt orange.• Dri.icken Sie erneut die gleiche Taste. Die LED leuchtet wieder rot, die Tastenfunktionist nun zuri.ickgesetzt.
Zuri.icksetzen a lier Tasten
• Dri.icken Sie gleichzeitig die Tasten und OPTION EN und TEI LEN wahrend 3 Sekunden.Die LED des Lenkrads leuchtet orange.• Dri.icken Sie erneut gleichzeitig die Tasten und OPTION EN und TEI LEN wahrend 4Sekunden. Die LED leuchtet wieder rot, alle Tasten sind nun zuri.ickgesetzt.
Sie ki:innen auch das Lenkrad trennen, um auf die Standardkonfiguration zuri.ickzukehren.
6. Empfindlichkeits-Einstellung
Die Empfindlichkeitseinstellung des Lenkrads ist so konzipiert, dass Sie lhre Fahrt der Spielumgebung, in der Sie spielen (F1, Rally, etc.), anpassen ki:innen. Um die Empfindlichkeit zu andern, verandern Sie die Stellung des Schiebeschalters auf der
linken Seite des Lenkrads.
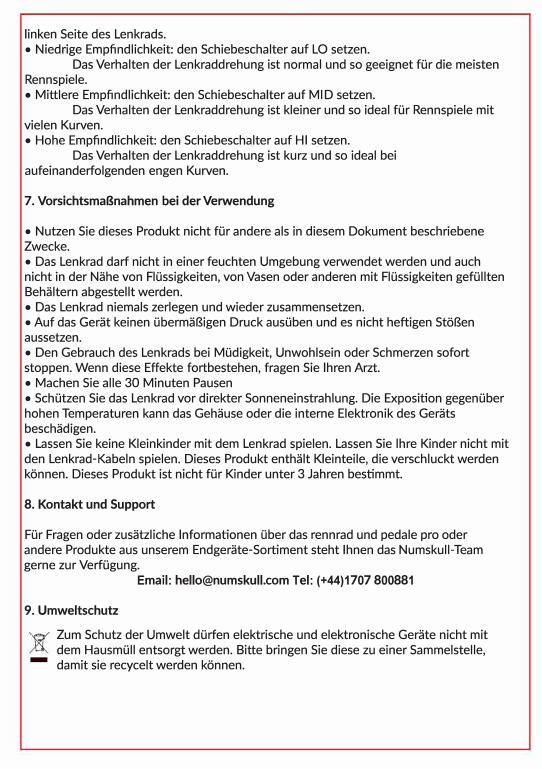
• Niedrige Empfmdlichkeit: den Schiebeschalter auf LO setzen.
Das Verhalten der Lenkraddrehung ist normal und so geeignet fur die meisten
Rennspiele.
• Mittlere Empfmdlichkeit: den Schiebeschalter auf MID setzen.
Das Verhalten der Lenkraddrehung ist kleiner und so ideal fur Rennspiele mit
vielen Kurven.
• Hohe Empfindlichkeit: den Schiebeschalter auf HI setzen.
Das Verhalten der Lenkraddrehung ist kurz und so ideal bei
aufeinanderfolgenden engen Kurven.
7. VorsichtsmaBnahmen bei derVerwendung
• Nutzen Sie dieses Produkt nicht fur andere als in diesem Dokument beschriebene
Zwecke.
• Das Lenkrad darf nicht in einer feuchten Umgebung verwendet werden und auch
nicht in der Nahe von FI0ssigkeiten, von Vasen oder anderen mit FIOssigkeiten gefullten
Behaltern abgestellt werden.
• Das Lenkrad niemals zerlegen und wieder zusammensetzen.
• Auf das Gerat keinen 0bermaBigen Druck ausuben und es nicht heftigen St6Ben
aussetzen.
• Den Gebrauch des Lenkrads bei M0digkeit, Unwohlsein oder Schmerzen sofort
stoppen. Wenn diese Effekte fortbestehen, fragen Sie lhren Arzt.
• Machen Sie alle 30 Minuten Pausen
• Schutzen Sie das Lenkrad vor direkter Sonneneinstrahlung. Die Exposition gegenuber
hohen Temperaturen kann das Gehause oder die interne Elektronik des Gerats
beschadigen.
• Lassen Sie keine Kleinkinder mit dem Lenkrad spielen. Lassen Sie lhre Kinder nicht mit
den Lenkrad-Kabeln spielen. Dieses Produkt enthalt Kleinteile, die verschluckt werden
konnen. Dieses Produkt ist nicht fur Kinder unter 3 Jahren bestimmt.
8. Kontakt und Support
Fur Fragen oder zusatzliche lnformationen Ober das rennrad und pedale pro oder
andere Produkte aus unserem Endgerate-Sortiment steht Ihnen das Numskull-Team
gerne zur Verfugung.
Email: [email protected] Tel: (+44)1707 800881
9. Umweltschutz
-
Zurn Schutz der Umwelt durfen elektrische und elektronische Gerate nicht mit
dem Hausm0II entsorgt werden. Bitte bringen Sie diese zu einer Sammelstelle,
damit sie recycelt werden konnen.
I ITALIANO
1. Prima del primo utilizzo
Grazie per aver acquistato ii volante e pedali pro. Prima di utilizzare ii volante, leggere attentamente questo manuale. Si prega di conservarlo per riferimenti futuri.
2. Caratteristiche
• II volante e pedali pro e compatibile con la console PS4, XBOX ONE, PC e PS3• E compatibile con tutti i giochi di corse su queste piattaforme• Richiede un joystick ufficiale per utilizzare ii volante su PS4 e XBOX ONE• Compatibile con tutti i giochi per PC (X-lnput e Direct Input)• Ampiezza di rotazione del volante di 270 gradi• 3 livelli di sensibilita• 8 tasti programmabili• Doppio motore di vibrazione• Guida 100% analogica per un'esperienza ancora piu realistica• 2 pedali con funzione accelerazione e frenata• Leva del cambio.• Croce direzionale (D-pad) per la navigazione del menu• Collegamento con cavo USB• Cava pedali progettato per prevenire i rischi di disconnessioni accidentali• Ventose di flssaggio resistenti per una migliore stabilita
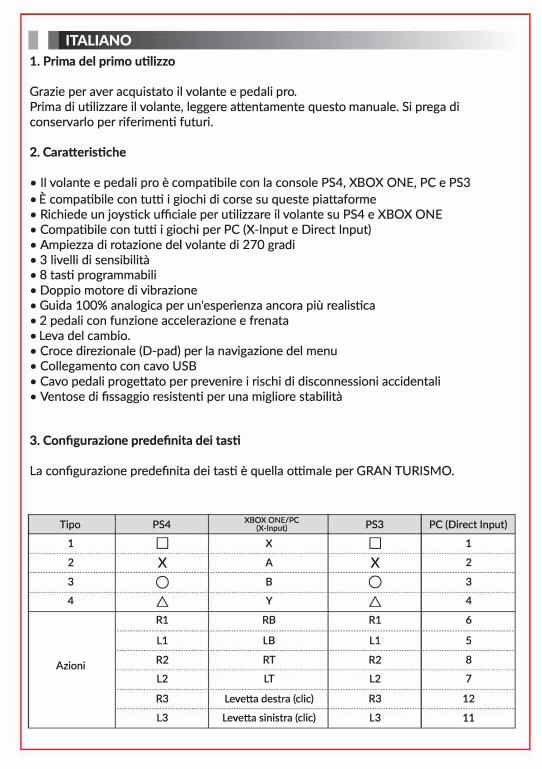
3. Conflgurazione predeflnita dei tasti
La conflgurazione predeflnita dei tasti e quella ottimale per GRAN TURISMO.
Tipo PS4 XBOXONE/PC
(X-lnput) PS3 PC (Direct Input)
1 □ X □ 1
2 X A X 2 -------------------------------- ---------------------------------- -------------------------------------------- ---------------------------------- ----------------------------------
3 Q B Q 3
4
Azioni
R1
L1
R2
L2
R3
L3
y
RB
LB
RT
LT
Levetta destra (die)
Levetta sinistra (die)
R1
L1
R2
L2
R3
L3
4
6
5
8
7
12
11
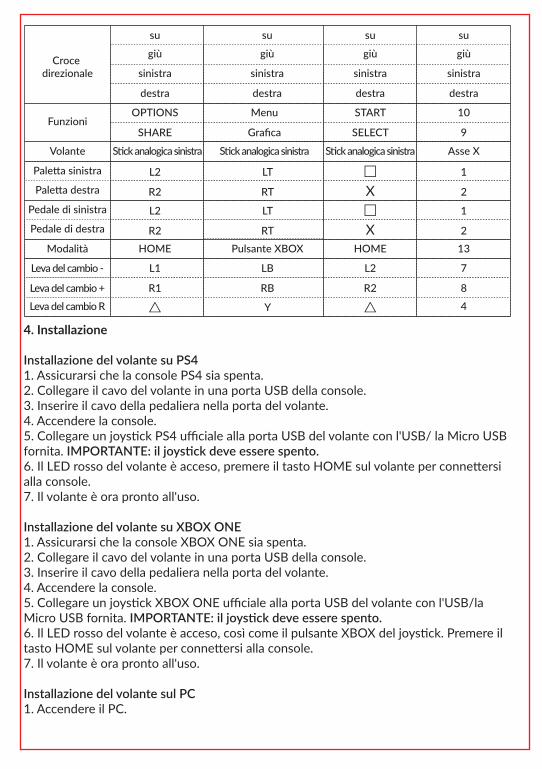
2. lnserire ii cavo della pedaliera nella porta del volante.3. Collegare ii cavo del volante a una delle porte USB del PC. Un' utilita Windows awiaautomaticamente l'installazione del dispositivo. Al termine di questa operazione, la LEDN °1 del volante rimane accesa, ii volante e pronto per l'uso.
IMPORTANTE: II volante utilizza ii protocollo X-lnput per impostazione predefinita, quindi e compatibile con i giochi piu recenti. Alcuni vecchi giochi utilizzano ii protocollo Direct Input. Per passare alla modalita Direct Input, tenere premuto ii pulsante Home/Mode per 3 secondi, ii LED di stato lampeggia una volta per indicare la modifica. Questa modalita verra quindi utilizzata per impostazione predefinita. E possibile passare da una modalita all' altra in qualsiasi momenta tenendo premuto ii pulsante Home/Mode per 3 secondi.
lnstallazione del volante su PS3 1. Assicurarsi che la console PS3 sia spenta.2. Collegare ii cavo del volante in una porta USB della console.3. lnserire ii cavo della pedaliera nella porta del volante.4. Accendere la console.5. Premere ii tasto HOME sul volante per connettersi alla console.6. II LED che indica ii numero del giocatore rimane accesa sul volante.
5. Funzione di programmazione
Utilizzando la configurazione predefinita dei pulsanti (accelerazione con X, frenata con □, ecc.) si puo giocare a GRAN TURISMO o a qualsiasi altro gioco di corse con la stessa configurazione del tasto. In giochi che utilizzano una diversa configurazione di pulsanti (accelerazione con R2 per esempio), si hanno 2 soluzioni:
• Si puo andare al menu opzione di configurazione dei pulsanti di gioco e crearela propria configurazione. II vantaggio e la possibilita di salvare una configurazione creata.
IM PORTANTE: II racing volant e pedali pro viene riconosciuto come "controller di
gioco" nel menu di configurazione del gioco. Se si desidera modificare i controlli nel gioco, andare alla scheda " controller di gioco " invece della scheda ''volante''.
• E inoltre possibile utilizzare la funzione di riprogrammazione del volantee pedali pro.. Questa funzione consente di riprogrammare i tasti sul volante, ma questa configurazione non viene salvata dopa aver spento la console o aver scollegato ii volante.
La funzione di riprogrammazione dei pulsanti consente di personalizzare la funzione assegnata ad ogni pulsante del volante.
8 tasti possono essere riprogrammati • Paletta sinistra
• Paletta destra• Pedale di sinistra• Pedale di destra• L3
• R3
• Leva del cambio +• Leva del cambio -
Programmazione dei tasti
• Premere simultaneamente i pulsanti OPTIONS e SHARE per 3 secondi. II LED del volante restera illuminato in arancione.• Quindi premere uno degli otto pulsanti riprogrammabili a cui si desidera assegnare una nuova funzione (vedi sopra). II LED del volante lampeggera in arancione.• lnfine, premere ii pulsante corrispondente alla nuova funzione che si desidera
assegnare. II LED diventera di nuovo rosso, ii tasto e ora riprogrammato.• Ripetere l'operazione con gli altri pulsanti riprogrammabili, se lo si desidera.
Ripristino di un tasto
• Premere simultaneamente i pulsanti OPTIONS e SHARE per 3 secondi. II LED delvolante restera illuminato in arancione.• Quindi premere ii tasto programmato che si desidera ripristinare. II LED del volantelampeggera in arancione.• Premere di nuovo lo stesso tasto. II LED diventera di nuovo rosso, ii tasto e oraripristinato.
Ripristino di tutti i tasti
• Premere simultaneamente i pulsanti OPTIONS e SHARE per 3 secondi. II LED delvolante restera illuminato in arancione.• Premere di nuovo simultaneamente i pulsanti OPTIONS e SHARE per 4 secondi. IILED diventera di nuovo rosso, tutti i pulsanti sono ora ripristinati.
E anche possibile scollegare ii volante per ripristinare la configurazione predefinita.
6. Regolazione della sensibilita
De instelling van de stuurgevoeligheid is ontworpen om uw rijden aan te passen aan de omgeving van het spel dat u speelt (F1, Rally, etc.). Om de gevoeligheid te wijzigen, verplaatst u de cursor die zich links van het stuur bevindt.
La regolazione della sensibilita del volante e stata progettata per adattare la vostra guida all'ambiente di gioco in cui state giocando (F1, Rally, ecc). Per modificare la sensibilita, spostare ii cursore a sinistra del volante.
• Bassa sensibilita: spostare ii cursore sul LO.L'.ampiezza di rotazione del volante e normale, adatta per la maggior parte dei
giochi di corsa. • Sensibilita media: spostare ii cursore su MID.
L'.ampiezza di rotazione e minore, perfetta per i giochi di corse con molte curve. • Alta sensibilita: spostare ii cursore su HI.
L'.ampiezza di rotazione e breve, ideale per catene di curve strette.
7. Precauzioni d'uso
• Non usare questo prodotto per scopi diversi da quelli descritti nel presentedocumento.• II volante non deve essere utilizzato in un luogo umido, collocato vicino recipienticontenenti liquidi, come vasi, o soggetti a perdite di liquidi.• Non smontare o rimontare da soli ii volante.• Non mettere pressione eccessiva sul dispositivo e non sottoporlo a forti scosse.• lnterrompere immediatamente l'uso del volante in caso di stanchezza, disagio odolore. Se questi sintomi persistono, consultare ii medico.• Fare delle pause ogni 30 minuti• Mantenere ii volante al riparo della luce solare diretta. Un'esposizione ad altetemperature puo danneggiare ii corpo o l'elettronica interna del dispositivo.• Non lasciare un bambino piccolo giocare con ii volante senza sorveglianza. Nonlasciare giocare i bambini con i cavi del volante. Questa prodotto contiene piccole partiche possono essere ingerite. Questa prodotto non e indicato per bambini al di sotto dei3 anni.
8. Contatti e assistenza
II team Numskull ea vostra disposizione per ogni ulteriore informazione riguardo al volante e pedali pro o altri prodotti della nostra gamma di periferiche.
Email: [email protected] Tel: (+44)1707 800881
9. Rispetto dell'ambiente
'a Al fine di preservare l'ambiente, le apparecchiature elettriche ed elettroniche non A devono essere smaltite insieme ai rifiuti domestici. Si prega di farle pervenire a un - centro di raccolta che provveda al loro riciclaggio.