Embed Size (px)
Citation preview


Bamboo Domes This is page 95 of "Domebook Two", a book that was published in the 70's and is very hard to find. It was written by Pacific Domes (not the same as Pacific Domes), and I was able to find it at the local library.
Bamboo grows fast, is free material for a dome framework. It might be possible to suspend a tent skin or mosquito netting inside, or pull a stretch cloth over the outside and shoot foam. Tools: a pocket knife and string. The following instructions were prepared by R. Buckminster Fuller. I haven't tried this yet.
Dome Assembly
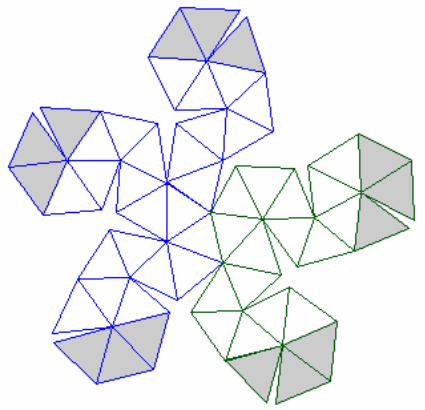
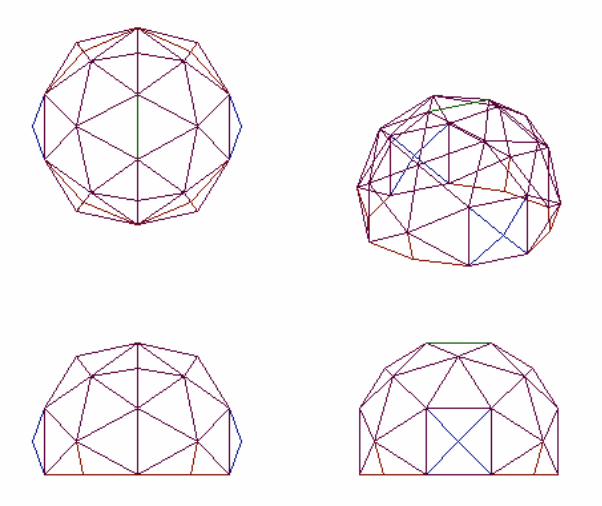
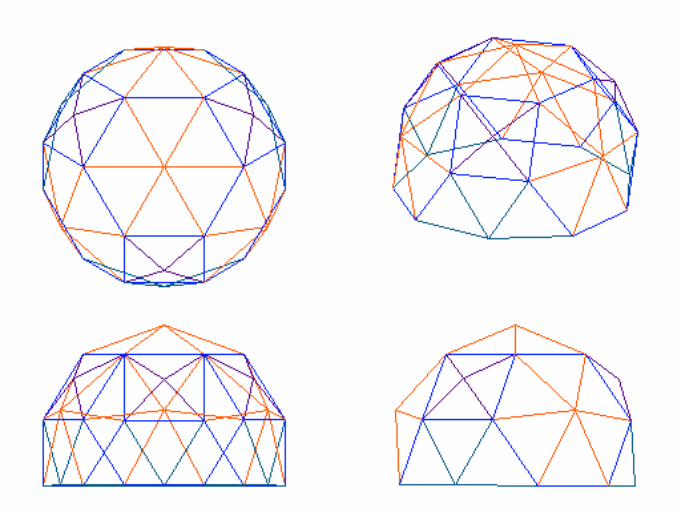
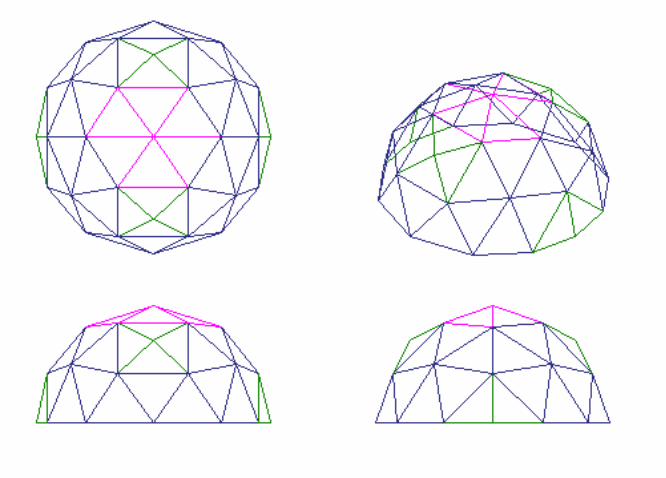
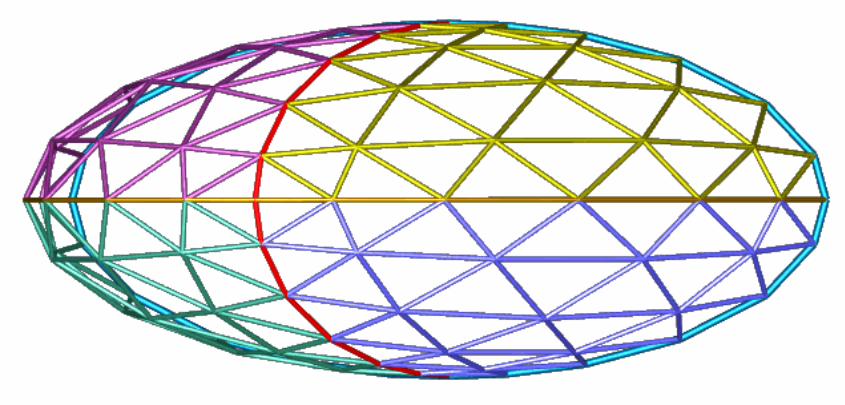
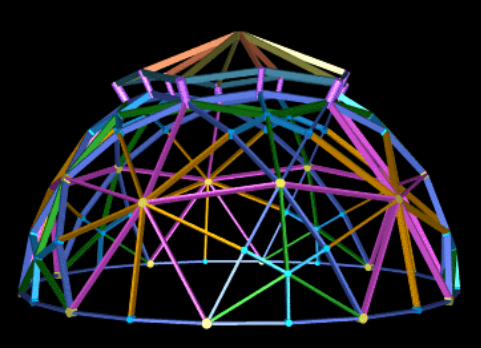
The geodesic dome, as shown in the assembly diagrams, contains two different joints: a B joint which occurs at the vertices of all pentagons formed, and an R joint which occurs at all other points. The spans from joint to joint are BB, BR, or RR. The arc factors of these lengths are: BB=.26030616, BR=.31030984, RR=.32636688. For these factors, the radius of the dome is 1.00. To construct a 22' dome (11' radius) the lengths of the arcs would be as follows: BB=2.86', BR=3.41', RR=3.59'.
Cutting and Measuring the Members
There are only two different lengths of members used in the erection.
For a 5/8 dome, 80 B members and 90 R members are required. A line of color can be drawn around the bamboo members at each measuring point. Use blue for the B points and use red for the R points.

Cross Assembly
The B cross consists of two B members whose
lengths are: 1/2 BB plus 1/2 BR plus 12" extra at each end.
The R cross consists of two R members whose lengths are: 1/2 BR plus 1/2 RR plus 12" extra at
each end.
With 12" extra on the end of each stick, there'll be a 24" overlap when the crosses are assembled.
Cross Tying
Place members at right angles to each other and tie firmly, but not too tight. During assembly of the dome, the crosses will twist into proper position as shown.
In all cases, when looking at a cross with the acute angles at the sides and the obtuse angles at the top and bottom, the member going from the upper right hand corner to the lower left hand corner always passes over the other member.

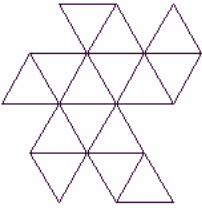
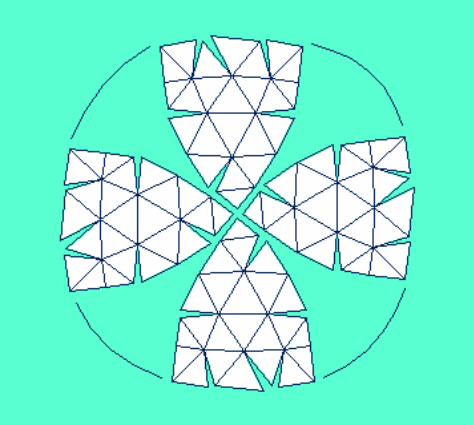
Stage 1 Assembly
The first stage in the assembly of the dome is the construction of the pentagons at the top of the dome. This
process employs 5 B crosses.
Step A: Tie together two B crosses as shown in in the diagram. Note that the end measuring points have the same designation as the cross to which they are connected.
Step B: Add two more B crosses in the same manner as shown in step A.
Step C: Add fifth B cross between the untied legs. In order to insert this cross, all crosses will be twisted so that a regular pentagon is formed.
Stage 2 Assembly
The second stage consists of closing the five triangles around the pentagon. Use five R crosses.

Again, the end measuring points always have the same designation as the cross to which they are connected.
At this point, the structure will tend to bow. Turn the figure so that it is concave downward.
Prop It
Lift the assembled figure off the ground to facilitate the addition of new crosses. Use five bi-ped props. Each prop consists of two bamboo sticks about 7 feet long, tied together near the top with a cord about a foot long. These props will then support the dome at equidistant points from it's apex; first at the five vertices at the top of the pentagon, later at five corresponding points on the top five hexagons.
Stage 3

For the third stage, use ten R crosses as shown.
Stage 4
The fourth stage uses 5 B crosses which close the five hexagons.
Stage 5

The fifth stage uses ten B crosses to close ten triangles. Six of the crosses can be seen in the diagram above.
Stage 6
The sixth stage uses ten B crosses and ten R crosses to complete the first horizontal band. We now have a
3/8 dome.
Stage 7,8
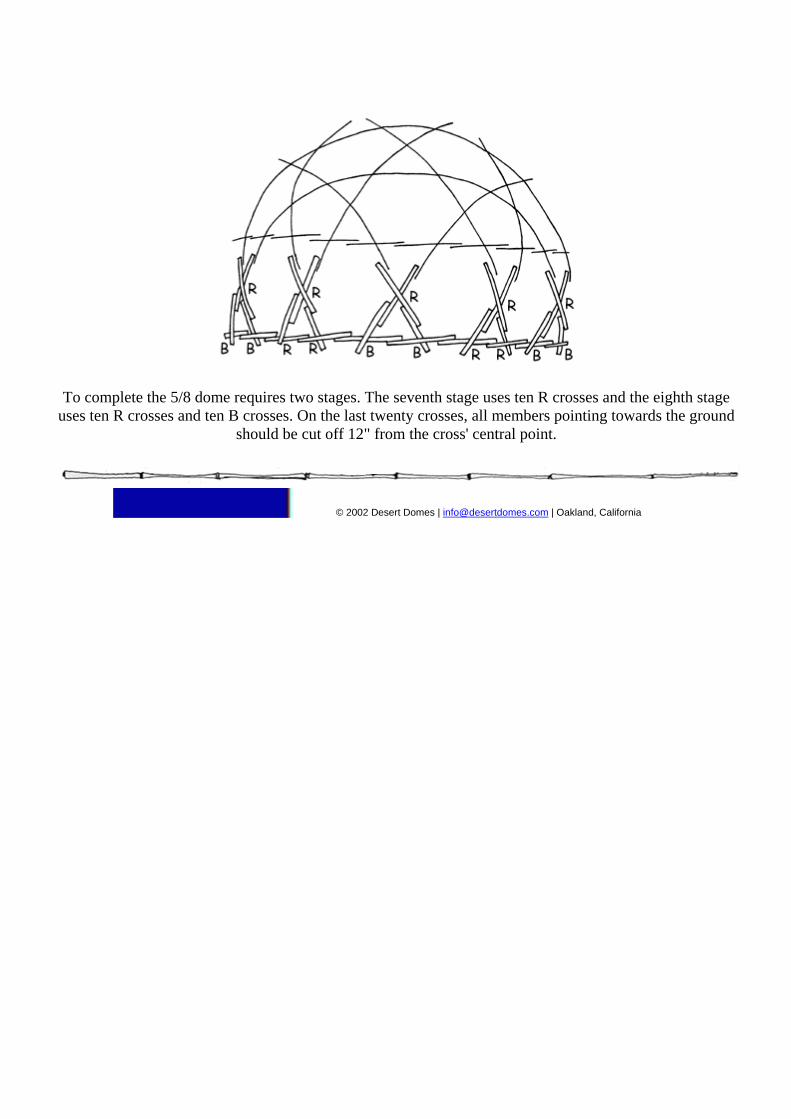
To complete the 5/8 dome requires two stages. The seventh stage uses ten R crosses and the eighth stage
uses ten R crosses and ten B crosses. On the last twenty crosses, all members pointing towards the ground should be cut off 12" from the cross' central point.
© 2002 Desert Domes | [email protected] | Oakland, California

Conduit, or EMT seems to be the material of choice for domes at Burning Man. Conduit is easy to work with, relatively inexpensive, and plated so painting isn't necessary. This page will provide tips for making conduit framed domes.
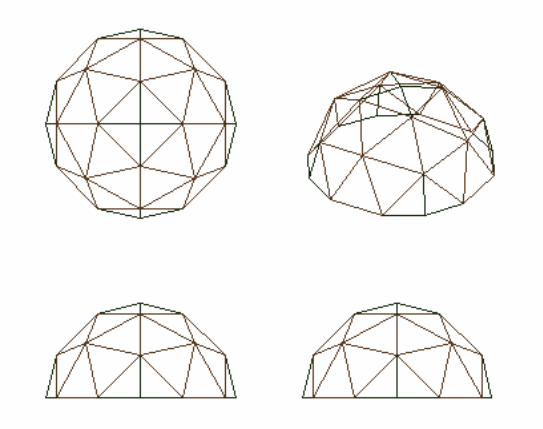
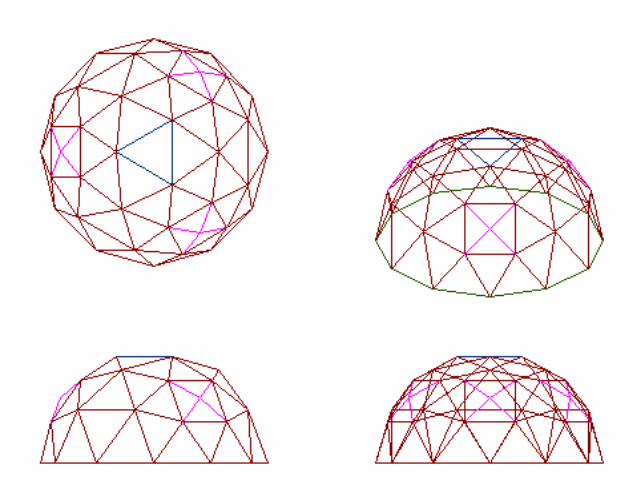
STEP 1: Deciding on a frequency The first thing you need to do is figure out what type of dome you want to build. If this is your first dome, the 2 or 3 frequency domes are recommended. These domes require a fewer number of struts, and therefore less confusion.
STEP 2: What Size? Once you have decided what kind of dome you are going to build, you need to decide on a size. Sometimes it is better to work out how long your longest or shortest strut will be and work from there. You can use the Reverse Dome Calculator when this is the case.
STEP 3: Calculating Strut Lengths This is where the Dome Calculator comes in. Go to the calculator and plug in the radius that you decided on for your dome. If it's been a long time since your last math class, radius is the distance from the center to the edge of a circle or sphere. In this case, the radius is the ceiling height for the even frequency domes. For the odd frequency domes, the ceiling will be higher than the radius that you put in (unless you are building the 3/8 dome, in that case the ceiling will be lower). 1v dome builders: Cut all your pipe the same length and skip to Step 5.
Step 4: Eliminating Waste This part is tedious, but worth the effort because it will save you money and you won't have to feel bad about throwing away tons of wasted pipe. You will have to repeat steps 2, 3, and 4 to do this right. It may take a while, but I would think you were a bad person if you didn't at least try. Conduit is usually sold in 10' lengths, so your job is to figure out how to cut those pieces eliminating as much waste as possible. Make sure to add 1½" for each strut to allow for drilling. For all you 2v dome builders, it's easy because there are only two lengths involved. The magic numbers for a 2v dome cut from 10' conduit pieces are A = 5.3', and B = 4.7'. These numbers allow for holed drilled ¾" away from the ends. 2v people may now skip to step 5. The rest of you: Still with me? Play with the numbers until you can get the maximum number of struts using the minimum number of conduit pieces. You may try 2 A's and 1 C, or 1 A, 1 C, and 1 F. Don't forget that different numbers of struts are required. Don't get stuck with more or less than what you need. I never said this was the easy part...
Step 5: Cutting the struts Cut the tubes according to the strut factors plus 1½". This allows for drilling the holes ¾" from the ends. Cut the struts using either a hacksaw or a pipe cutter. If you use a hacksaw, 16 or 18 tooth blades work best. When making many cuts, it's always best to use a jig so all the struts are exactly the same length.

STEP 6: Flattening the ends OK, there are a few ways to do this part. You can either pound the ends flat with a hammer, which could be really time consuming, or nearly impossible if you are as small as I am. You can also use a vise, but make sure it's a fairly large one so it doesn't break after a few squishes. The way I like to do it is to use a press. The press in the picture is a 1 ton arbor press bought at Harbor Freight Tools. It was really cheap, but only lasted about 20 squishes. The 3 ton press worked a lot better, but it started to bend after about 150 squishes. If you can afford it, a hydraulic press seems like the way to go. If you flatten the ends with a curved die like the one shown below, the ends will be stronger and therefore less likely to bend under load. (click image to enlarge) Please notice the weld along the side of the conduit. If you flatten the end with the weld on the side, the conduit will be likely to split there. It can also split if the weld is in the center of the flat part. I personally haven't had this happen, but I spend good money on dome parts, and would rather not learn the hard way. Keep in mind that the flattened ends need to be in the same plane. If you take a few minutes to construct a simple jig for this, I promise you won't regret it.
Step 7: Drilling Holes To drill the first hole in each strut, cut a V groove in a 2 X 4 six inches longer than the longest strut. Clamp it to a drill press with C clamps. Use a stop block so that all of the holes are the correct distance from the end of the pipe (¾" from
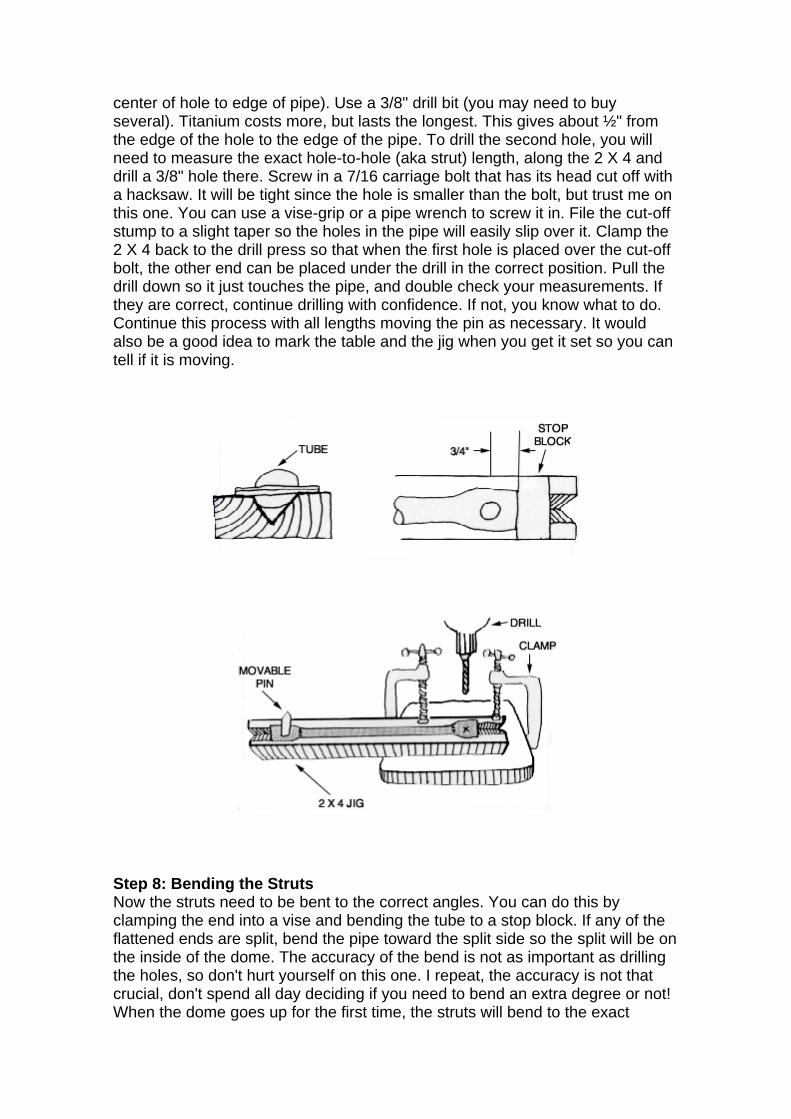
center of hole to edge of pipe). Use a 3/8" drill bit (you may need to buy several). Titanium costs more, but lasts the longest. This gives about ½" from the edge of the hole to the edge of the pipe. To drill the second hole, you will need to measure the exact hole-to-hole (aka strut) length, along the 2 X 4 and drill a 3/8" hole there. Screw in a 7/16 carriage bolt that has its head cut off with a hacksaw. It will be tight since the hole is smaller than the bolt, but trust me on this one. You can use a vise-grip or a pipe wrench to screw it in. File the cut-off stump to a slight taper so the holes in the pipe will easily slip over it. Clamp the 2 X 4 back to the drill press so that when the first hole is placed over the cut-off bolt, the other end can be placed under the drill in the correct position. Pull the drill down so it just touches the pipe, and double check your measurements. If they are correct, continue drilling with confidence. If not, you know what to do. Continue this process with all lengths moving the pin as necessary. It would also be a good idea to mark the table and the jig when you get it set so you can tell if it is moving.
Step 8: Bending the Struts Now the struts need to be bent to the correct angles. You can do this by clamping the end into a vise and bending the tube to a stop block. If any of the flattened ends are split, bend the pipe toward the split side so the split will be on the inside of the dome. The accuracy of the bend is not as important as drilling the holes, so don't hurt yourself on this one. I repeat, the accuracy is not that crucial, don't spend all day deciding if you need to bend an extra degree or not! When the dome goes up for the first time, the struts will bend to the exact

angles on their own. The bending angles are as follows: 1v dome: bend 32º on each end 2v dome: bend A's 18º, and B's 16º on each end 3v dome: bend A's 10º, B's and C's 12º on each end 4v dome: bend all struts 7º-9º on each end 5v dome: bend all struts 6º-7º on each end 6v dome: bend all struts 5º-6º on each end
Step 9: Painting The ends of the struts all need to be painted, because otherwise they will rust. Since you are painting anyway, why not color-code! I'm a big fan of color-coding, and when you try to assemble the dome you'll find out why. To make it even easier on yourself while you're in the desert, make a model using the same colors as in your dome. When you get to Burning Man, you can set the model down, lay out all of the struts, and sit back and relax while other people put it together for you. Well, not really, but it will make it a lot easier to put the dome together if you have a model as a reference.
Step 10: Break Time! Take a break, cause that was hard work. If your camp is anything like ours, you can't take a break because you just finished the prep work for the dome 3 hours before it's time to leave for the desert...
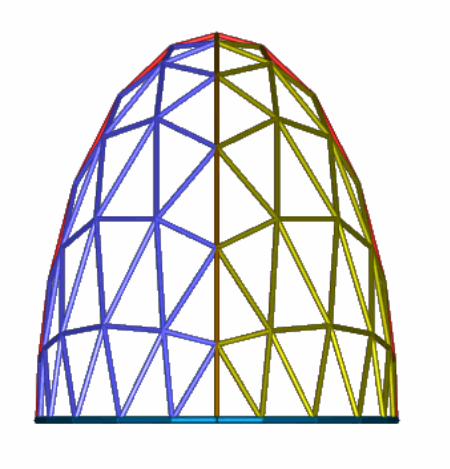
Step 11: Assembly Ahhh, the moment you've all been waiting for. Bet you're a little nervous if it's your first time. Don't be. If you followed these instructions carefully, your dome should go up smoothly. Domes can either be built from the top down or bottom up, depending on the size of the dome, and your tallest ladder. Building from the top down eliminates the need for a ladder, but you better have a lot of people helping. As the dome goes up, you will need one person at every vertex holding it up. If any of your poles get bent during this process, you better hope you listened to me before and made extras. Bottom to top assembly is much safer on the dome, but it means you have to bring ladders and/or scaffolding tall enough to reach the top

of the dome. I noticed several domes last year without tops. Build the dome in layers whether you are going from top to bottom or vise versa. Don't get ahead of yourself. If you build in layers, the dome will pretty much support itself as it goes up. It might be a good idea to designate one person as the parts person. All this person has to do is lay out the next layer of struts on the ground for the assembly crew. This prevents over anxious builders from getting ahead of the rest of the crew. Don't tighten the bolts until all of the struts are in place. The struts will shift into their proper alignments as the dome is built, and they can't do that if the bolts are tight. Remember the dome doesn't get its strength until the last strut is in place and all the bolts are tightened. Here are the assembly diagrams for domes 2-6. 2v dome 3v dome 4v dome 5v dome 6v dome If you are building your dome from the bottom up, here is some useful information: You will need to lay out the appropriate number of struts in a circle to get started. The numbers are given below. 1v dome - 5 struts 2v dome - 10 struts 3v 3/8 dome - 15 struts 3v 5/8 dome - 15 struts 4v dome - 20 struts 5v 3/8 dome - 25 struts 5v 5/8 dome - 25 struts 6v dome - 30 struts
Step 12: Staking Down Please don't forget this part. If you cover your dome before you stake it down, you will not be a happy camper when it catches wind and smashes into the cars parked a couple of feet away. Rebar bent into candycane shapes work really well for stakes. Make sure they are at least 2 feet long. Pound them in about every other vertex along the bottom.
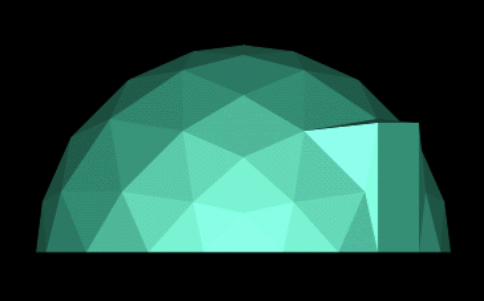
Step 13: Covering your dome The whole purpose of this IS for shade right? If not, you can stop here. Parachutes make really nice dome coverings because all have to do is pull the parachute over the dome and tie it down. The only problem with parachutes is that they were made to catch wind... Need I say more? You've gotten this far, you can make a covering. Be creative on this one. You can use bed sheets, canvas, or anything else you can think of. Reinforce all points that will be connected to the dome or they will tear with the slightest gust of wind. Woo Hoo! Now that your dome is finished, you can sit back and relax, or wander around knowing that you have a really cool shelter to return to. Be sure to come and see us at Camp Sunscreen for a relaxing sunscreen massage. If you know where you and your dome will be, please e-mail me with your address

so I can come check out your masterpiece and also take pictures for the photo gallery. See ya on the playa! Tara
Here are some other dome building tips pages. My friend and fellow Camp Sunscreen camper's dome tips page - there are lots of pictures and very good tips Michael Gourlay's Dome Page - Michael is another fellow Burning Man attendee


Domo de Bambú
El bambú crece rápido, es un material gratis para el marco de un domo. Podría ser posible suspender una cubierta de carpa o una malla mosquitera adentro, o tirar una stretch cloth sobre el exterior y shoot foam. Herramientas: una cortaplumas y cuerda. Las siguientes instrucciones fueron preparadas por R. Buckminster Fuller.
Montaje del Domo
El domo geodésico, como se muestra en los diagramas de ensamblaje, contiene dos uniones diferentes: una unión B que ocurre en los vértices de todos los pentágonos formados, y una unión R que ocurre en todos los demás puntos. Los lapsos de unión a unión son BB, BR, o RR. Los factores de arco de estas longitudes son: BB=.26030616, BR=.31030984, RR=.32636688. Para estos factores, el radio del domo es 1.00. Para construir un domo de 22' (11' de radio ) las longitudes de los arcos deberían ser las siguientes: BB=2.86', BR=3.41', RR=3.59'.
Cortando y Midiendo las Piezas
Sólo hay dos longitudes diferentes de las piezas usadas en la construcción.
Para un domo 5/8 , se requieren 80 piezas B y 90 piezas R. Se puede dibujar una línea de color alrededor de las piezas de bambú en cada punto de medición. Use el azul para los puntos B y el rojo para los puntos R.
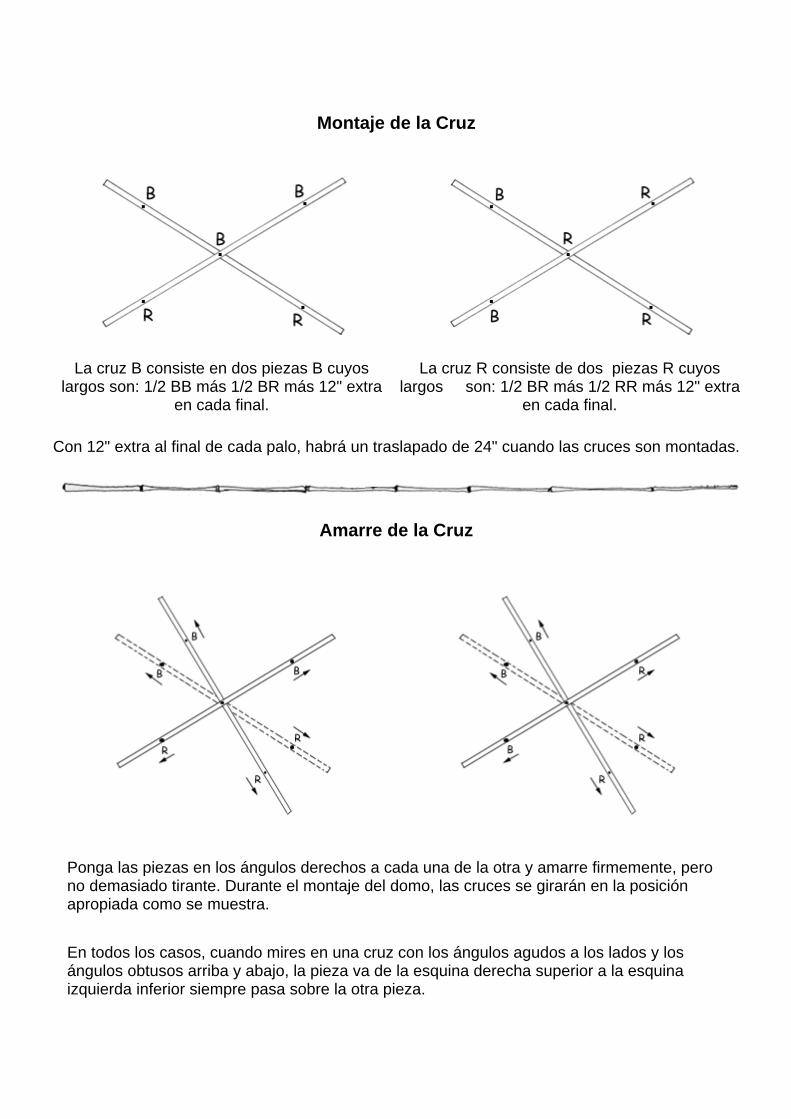
Montaje de la Cruz
La cruz B consiste en dos piezas B cuyos
largos son: 1/2 BB más 1/2 BR más 12" extra en cada final.
La cruz R consiste de dos piezas R cuyos largos son: 1/2 BR más 1/2 RR más 12" extra
en cada final.
Con 12" extra al final de cada palo, habrá un traslapado de 24" cuando las cruces son montadas.
Amarre de la Cruz
Ponga las piezas en los ángulos derechos a cada una de la otra y amarre firmemente, pero no demasiado tirante. Durante el montaje del domo, las cruces se girarán en la posición apropiada como se muestra.
En todos los casos, cuando mires en una cruz con los ángulos agudos a los lados y los ángulos obtusos arriba y abajo, la pieza va de la esquina derecha superior a la esquina izquierda inferior siempre pasa sobre la otra pieza.

Montaje Etapa 1
La primera etapa en el montaje del domo es la construcción de los pentágonos en la cima del
domo. Para esto se usan 5 cruces B.
Paso A: Amarre dos cruces B como se muestra en el diagrama. Note que al final de los puntos de medición tiene la misma designación que la cruz a la que están conectadas.
Paso B: Agregue dos cruces B igual como se muestra en el Paso A.
Paso C: Agregue la quinta cruz B entre las patas sin atar. Con el fin de inserter esta cruz , todas las cruces serán torcidas hasta que se forme un pentágono regular.

Etapa 2 Montaje
La segunda Etapa consiste en cerrar los cinco triángulos alrededor del pentágono. Use cinco
cruces R.
De nuevo, los puntos finales de medición siempre tienen la misma designación que la cruz a la
que están conectadas. En este punto, la estructura tenderá a inclinarse. Gire la figura de modo que lo cóncavo quede
hacia abajo.
Apóyelo
Levante la figura montada del suelo para facilitar la añadidura de nuevas cruces. Use cinco apoyos de dos patas. Cada apoyo consiste en dos palos de bambú de 7 pies de largo, amarrados cerca de la punta con un cordel como de un pie de largo. Estos apoyos soportarán en los puntos equidistantes desde su ápice; primero en los cinco vértices en la punta del pentágono, luego en los cinco puntos correspondientes en los cinco hexágonos.
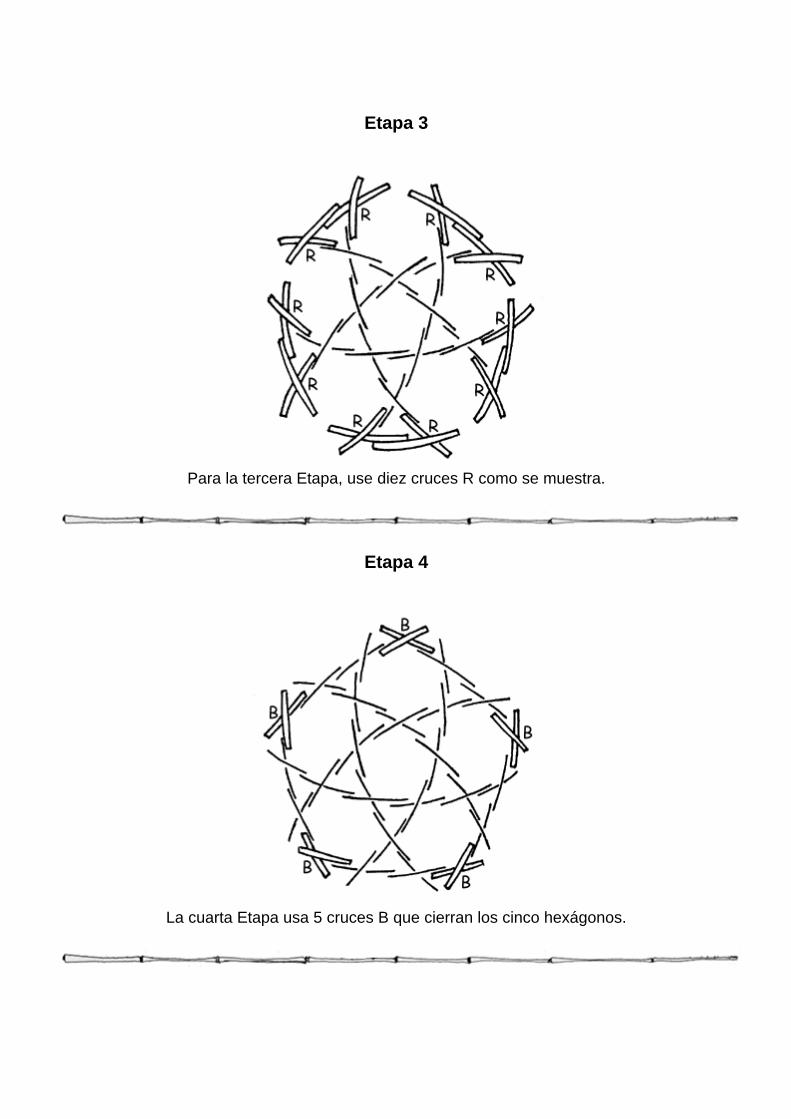
Etapa 3
Para la tercera Etapa, use diez cruces R como se muestra.
Etapa 4
La cuarta Etapa usa 5 cruces B que cierran los cinco hexágonos.

Etapa 5
La quinta Etapa usa diez cruces B para cerrar los diez triángulos. Seis de las cruces pueden ser
vistas en el diagrama de arriba.
Etapa 6
La sexta Etapa usa diez cruces B y diez cruces R para completar la primera banda horizontal.
Ahora tenemos 3/8 de domo .

Etapa 7,8
Para completar el 5/8 del domo requiere de dos Etapas. La séptima Etapa usa diez cruces R y la
octava Etapa usa diez cruces R y diez cruces B. En las última veinte cruces, todas las piezas apuntando hacia el piso debería ser cortada a 12" desde el punto central de la cruz.
© 2002 Desert Domes | info@desertdome .coms | Oakland, California. Traducción Rodrigo Urrea/PAN Chile 2005


Materiales para un Domo de Papel de Diario
• newspaper • doweling or broom handle • tape • marker pen • stapler (and staples) • measuring tape Like a real engineer, you will probably need to rely on teamwork to get this project finished. Why? Because the dome tends to flop over unless it's supported, and stapling is a bit tricky unless you get help holding all the newspaper tubes together. Using a piece of doweling makes stronger tubes that are harder to staple. Using a broom handle makes slightly weaker tubes that are easier to staple.
Instructions
1. Open up a sheet of newspaper. Roll the newspaper around the doweling diagonally from one corner to the other. 2. Cut a piece of tape and stick it to something (preferably not your head) for a minute. Hold the newspaper tube in one hand and gently pull out the dowel with your other hand. If you rolled the newspaper really tightly, you may need to wiggle and twist the dowel a bit. Use the piece of tape to keep the newspaper tube together. 3. Cut the tube to length. [Note: The ends of the tube are not very stiff. To make a stronger tube, make the tube the correct length by cutting some off both ends.] You need a total of 35 newspaper tubes measuring 71 cm and 30 tubes measuring 66 cm. So get busy rolling, measuring, and cutting. Keep the two lengths separated. 4. Use the marker pen to put a mark on the longer newspaper tubes. Now you'll be able to tell the two lengths apart easily. From now on, we will call the marked tubes As, the unmarked tubes Bs.

5. Arrange 10 As in a circle. 6. Overlap the ends of two tubes by 2 cm and staple together. Repeat this to form the base of the dome. 7. Lay alternating pairs of As and Bs radiating out from the central circle.
8. Pick up two of the As and form a triangle with them and one of the As from the circle. Staple the joints firmly. 9. Do the same thing with the rest of the tube pairs. You should end up with a circle of triangles poking into the air. Tall triangles should alternate with short triangles. 10. Connect the triangles by stapling a row of Bs across the top. 11. Every point where four Bs come together, staple on another B pointing straight up.
12. Brace the Bs by using two As, one attached to each adjacent joint. 13. Connect the tubes by stapling a row of As across the top. 14. Finish the dome by adding the last five Bs. These tubes come from the five joints and meet in the middle.