Embed Size (px)
Citation preview
1
Preparing for sewing Cutting room operations
2
Copyright © International Labour Organization 2019
First published 2019
Publications of the International Labour Office enjoy copyright under Protocol 2 of the Universal Copyright
Convention. Nevertheless, short excerpts from them may be reproduced without authorization, on condition
that the source is indicated. For rights of reproduction or translation, application should be made to ILO
Publications (Rights and Licensing), International Labour Office, CH-1211 Geneva 22, Switzerland, or by
email: [email protected]. The International Labour Office welcomes such applications.
Libraries, institutions and other users registered with a reproduction rights organization may make copies in
accordance with the licences issued to them for this purpose. Visit www.ifrro.org to find the reproduction
rights organization in your country.
ISBN: 9789220326435 (web pdf)
The designations employed in ILO publications, which are in conformity with United Nations practice, and
the presentation of material therein do not imply the expression of any opinion whatsoever on the part of
the International Labour Office concerning the legal status of any country, area or territory or of its
authorities, or concerning the delimitation of its frontiers.
The responsibility for opinions expressed in signed articles, studies and other contributions rests solely with
their authors, and publication does not constitute an endorsement by the International Labour Office of the
opinions expressed in them.
Reference to names of firms and commercial products and processes does not imply their endorsement by
the International Labour Office, and any failure to mention a particular firm, commercial product or process
is not a sign of disapproval.
Information on ILO publications and digital products can be found at: www.ilo.org/publns
Photos: © ILO
Printed in Thailand

3
Table of Contents
About the FIT module ................................................................ 4
Guidelines for successfully using the training tool ................ 5
Session 1
Business case study .................................................................. 9
Session 2
Learning about the topic ......................................................... 15
Session 3
Action items .............................................................................. 27
4
Factory Improvement Toolset
The Factory Improvement Toolset (FIT) is an innovative self-facilitated, activity-based
learning approach designed by the International Labour Organization (ILO) to create
more decent and sustainable employment. FIT supports manufacturers in global
supply chains to improve productivity, competitiveness and working conditions by
upgrading production systems and factory practices.
FIT has been developed to be a sustainable, time- and cost-efficient option for supporting factories to
enhance productivity through improved business practices and working conditions. FIT focuses on
areas of production improvement and actions to be taken specific to each participating factory. It can
be utilized as stand-alone learning tools or to complement other training programmes.
With each module lasting no more than 2.5 hours, FIT enables factories to train personnel, whilst
minimizing interference with production realities. The easy-to-use methodology makes it possible to
rapidly scale the implementation to reach a large cohort of trainees across multiple production
facilities.
Working in small groups, participants review real-life situations and engage in discussions to
determine improvements to be made in factory without an external trainer or specialist. This self-
facilitated, activity-based and highly participatory learning approach positions participants as both
student and teacher and makes the toolset self-tailored to the needs and interests of each group.
About this module This FIT module on Preparing for sewing is a training for garment manufacturers to improve cutting
room operations. Participants will work on marking, numbering, bundling, and ticketing operations. This
module takes about 2 hours to complete.
Upon completion of the training, participants should have: Reviewed best marking & numbering practices for ensuring sewing quality.
Compared different bundling systems.
Learnt to tag bundles adequately to ensure sewing quality.
The Factory Improvement Toolset of the International Labour Organization (ILO) are developed
and provided by the ILO’s Enterprises Department.
Authors: Alix Machiels, Sara Andersson, Charles Bodwell, Jayantha R. de Silva.
This work is licensed under the Creative Commons Attribution-ShareAlike 4.0 International License.
5
Guidelines for successfully using the training tool
Read out-loud
The FIT tool is designed for participants to take turns reading the instructions in the
modules out loud to the group. At least one member of the group should be selected in the
beginning of the session to take this responsibility.
Work as a group
Always work in groups of 5-7 during a FIT session. The programme will not be successful if
participants work independently or do not collaborate with each other.
Be active
Encourage everyone in the group to actively contribute to the discussion. Ensure that no
group member dominates the discussion or does not participate at all.
Monitor the time
Select one member of the group to monitor the time for each activity and remind the group
when it is time to move to the next exercise.
Complete the action plan
Complete the action plan at the end of the session. This will help ensure that FIT results in
improvements in the factory. Review the plan a while after the session to make sure that
actions in the plan has been completed accordingly.
6
Icons A set of icons is used throughout the modules to provide easy to recognize reference
points for different tasks within each session and activity.
Read out loud
One member of the group should read out loud to the rest of group.
Knowledge link
Knowledge and skills are linked to other FIT learning resources and
support.
Time allotted
Indicates how much time each sessions and activity should take.
Supplies needed
Indicates that supplies may be necessary to complete the session.
Begin step-by-step instructions
Indicates that the step-by-step instructions for an activity are
beginning.
Think about it Indicates additional information for the participants to think about.
7
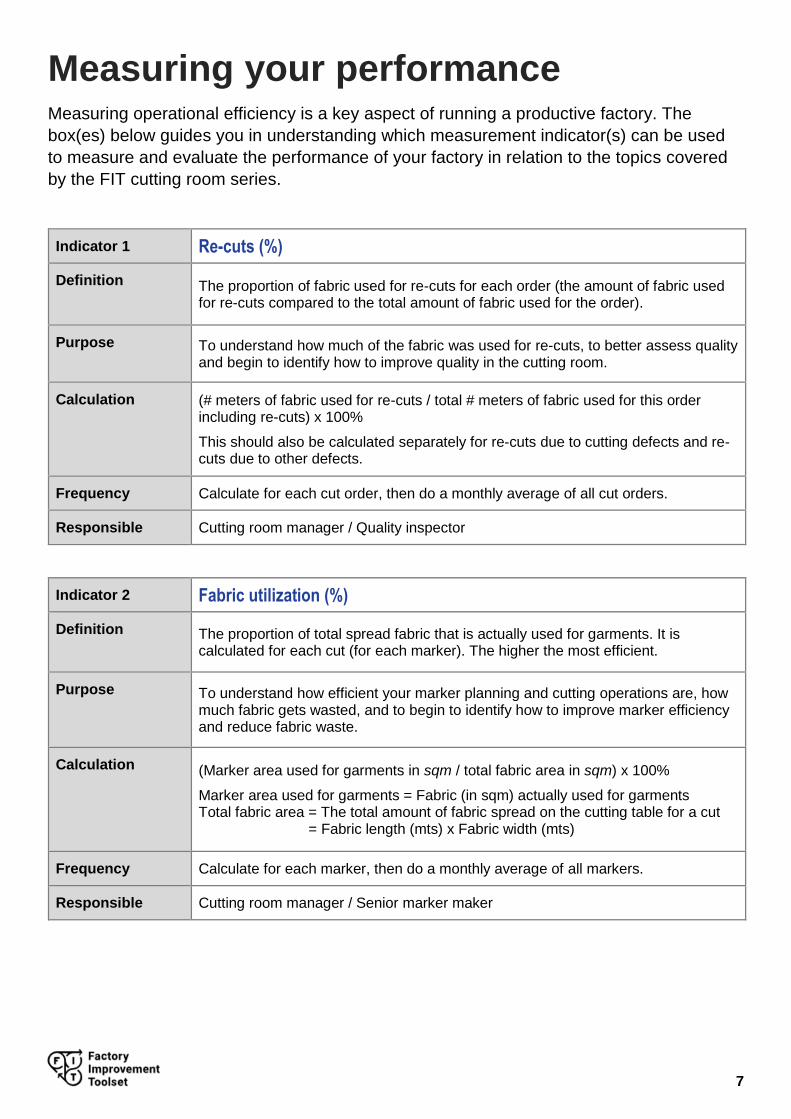
Measuring your performance Measuring operational efficiency is a key aspect of running a productive factory. The
box(es) below guides you in understanding which measurement indicator(s) can be used
to measure and evaluate the performance of your factory in relation to the topics covered
by the FIT cutting room series.
Indicator 1 Re-cuts (%)
Definition The proportion of fabric used for re-cuts for each order (the amount of fabric used for re-cuts compared to the total amount of fabric used for the order).
Purpose To understand how much of the fabric was used for re-cuts, to better assess quality and begin to identify how to improve quality in the cutting room.
Calculation (# meters of fabric used for re-cuts / total # meters of fabric used for this order including re-cuts) x 100%
This should also be calculated separately for re-cuts due to cutting defects and re-cuts due to other defects.
Frequency Calculate for each cut order, then do a monthly average of all cut orders.
Responsible Cutting room manager / Quality inspector
Indicator 2 Fabric utilization (%)
Definition The proportion of total spread fabric that is actually used for garments. It is calculated for each cut (for each marker). The higher the most efficient.
Purpose To understand how efficient your marker planning and cutting operations are, how much fabric gets wasted, and to begin to identify how to improve marker efficiency and reduce fabric waste.
Calculation (Marker area used for garments in sqm / total fabric area in sqm) x 100%
Marker area used for garments = Fabric (in sqm) actually used for garments Total fabric area = The total amount of fabric spread on the cutting table for a cut = Fabric length (mts) x Fabric width (mts)
Frequency Calculate for each marker, then do a monthly average of all markers.
Responsible Cutting room manager / Senior marker maker
8

9
Preparing you for the type of discussions you will have with
other group members throughout the learning module and
understanding the benefits of being exposed to different
perspectives.
Session 1
Business case study
Goals
Understanding better why preparation for sewing is important in
the factory.
10
Session 1
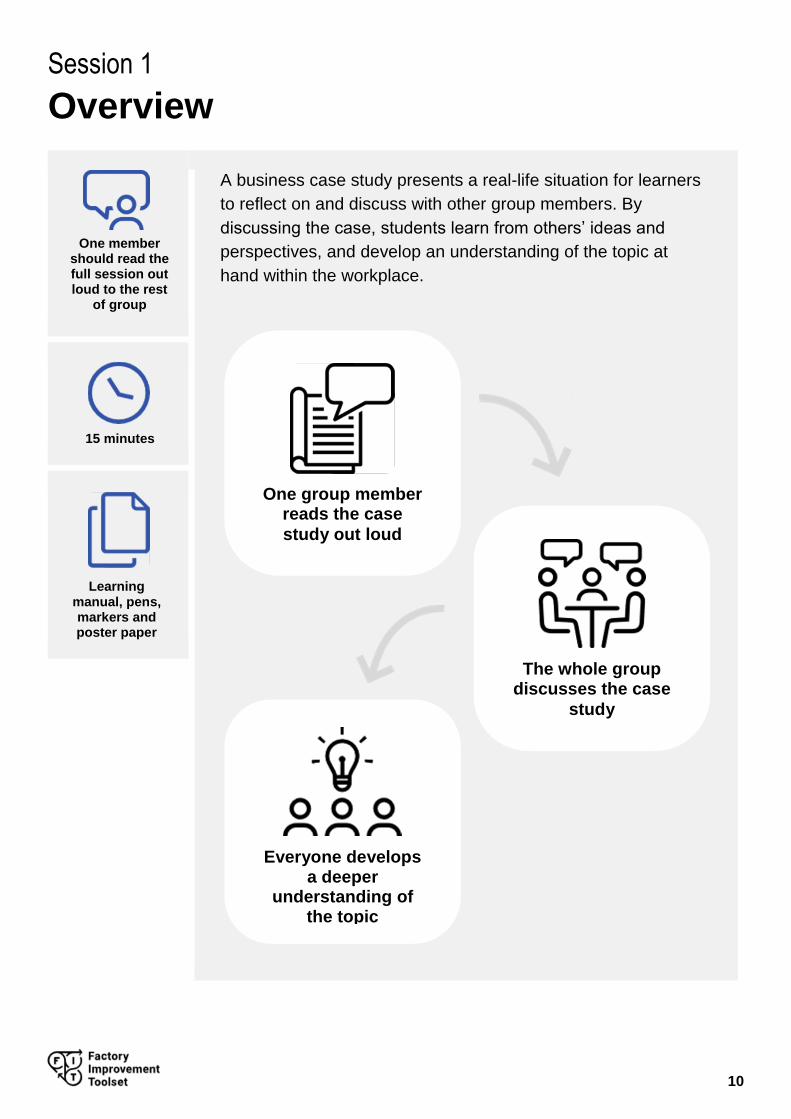
Overview
One member should read the full session out loud to the rest
of group
A business case study presents a real-life situation for learners
to reflect on and discuss with other group members. By
discussing the case, students learn from others’ ideas and
perspectives, and develop an understanding of the topic at
hand within the workplace.
15 minutes
Learning manual, pens, markers and poster paper
One group member reads the case
study out loud
Everyone develops a deeper
understanding of the topic
The whole group discusses the case
study
11
Activities
Case study review and respond
The case study below presents a situation that could happen in real
life.
Instructions:
1) As a group, listen to one member read the case study below
while following along in your learning module.
Ritthy is a new cutting room manager at the HS garment factory. He spots several problems and notices that pieces are sent to the sewing room after they have been cut without much preparation. For example, there is no markings to help sewing operators through their work. Cutting helpers only write down the garment size with a pen on the top layer of each stack. This makes it difficult for line supervisors and sewing operators to know which parts correspond to which style, and to which cutting order.
Ritthy decides to make some changes. First, he sets up a unit of workers responsible for preparing cut parts for sewing. He trains them in marking and numbering each cut piece with specific symbols and a serial number to help sewing operators do their work. Ritthy also sets up a bundling system. Cut parts are now tied together in “bundles” by shade, size and style before being sent to the sewing room. Each bundle has its own “ticket”, which lists information on style, size, shade and cutting order.
Thanks to these changes, sewing operators make fewer mistakes. The overall garment quality greatly improves, and less material is wasted through cutting and sewing errors. This saves the factory a lot of time and money.
2) Together, discuss Ritthy’s situation by answering the three
questions in table 1 on the next page.
Activity
1
15 minutes
Activity
1
15 minutes
12
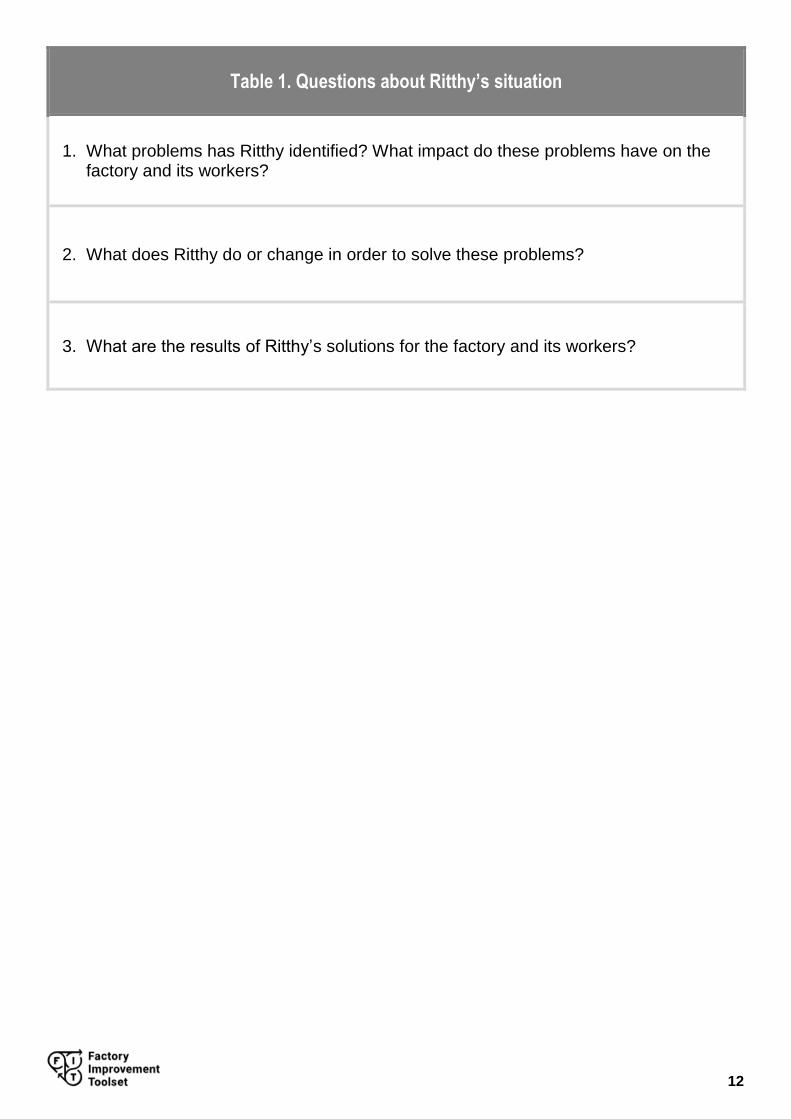
Table 1. Questions about Ritthy’s situation
1. What problems has Ritthy identified? What impact do these problems have on the factory and its workers?
2. What does Ritthy do or change in order to solve these problems?
3. What are the results of Ritthy’s solutions for the factory and its workers?

13
This page has been intentionally left
blank and can be used for note taking.

14

15
Session 2
Learning about the topic
Goals
Discussing the steps involved in preparation for sewing.
Discussing marking and numbering in your factory, and
reviewing best marking & numbering practices and
techniques for ensuring quality.
Comparing different bundling systems and discussing
your own.
Learning how to ticket / tag bundles efficiently and
appropriately to ensure sewing quality.
16
Session 2
Overview
One member should read the full session out loud to the rest
of group
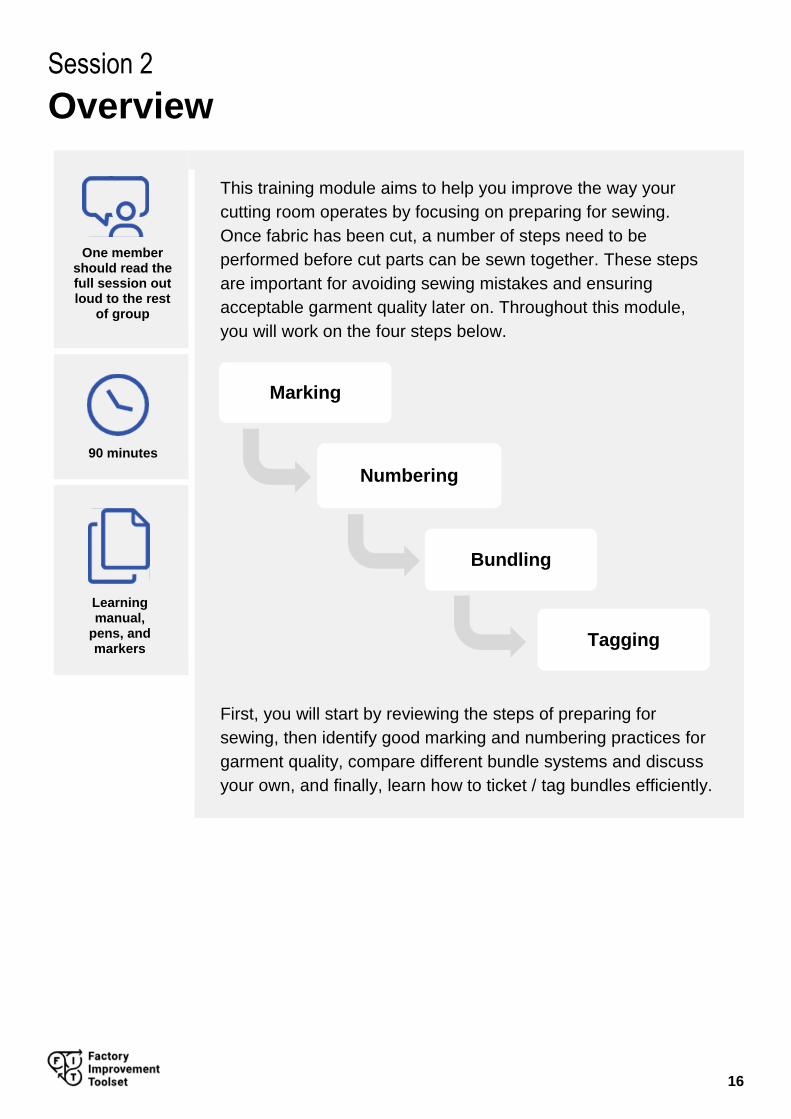
This training module aims to help you improve the way your
cutting room operates by focusing on preparing for sewing.
Once fabric has been cut, a number of steps need to be
performed before cut parts can be sewn together. These steps
are important for avoiding sewing mistakes and ensuring
acceptable garment quality later on. Throughout this module,
you will work on the four steps below.
First, you will start by reviewing the steps of preparing for
sewing, then identify good marking and numbering practices for
garment quality, compare different bundle systems and discuss
your own, and finally, learn how to ticket / tag bundles efficiently.
90 minutes
Learning manual,
pens, and markers
Marking
Bundling
Numbering
Tagging
17
Activities
Preparing for sewing
Once fabric has been cut, a number of steps need to be performed
before sewing. In this activity, you will discuss how you prepare cut
parts for sewing in your factory.
Instructions:
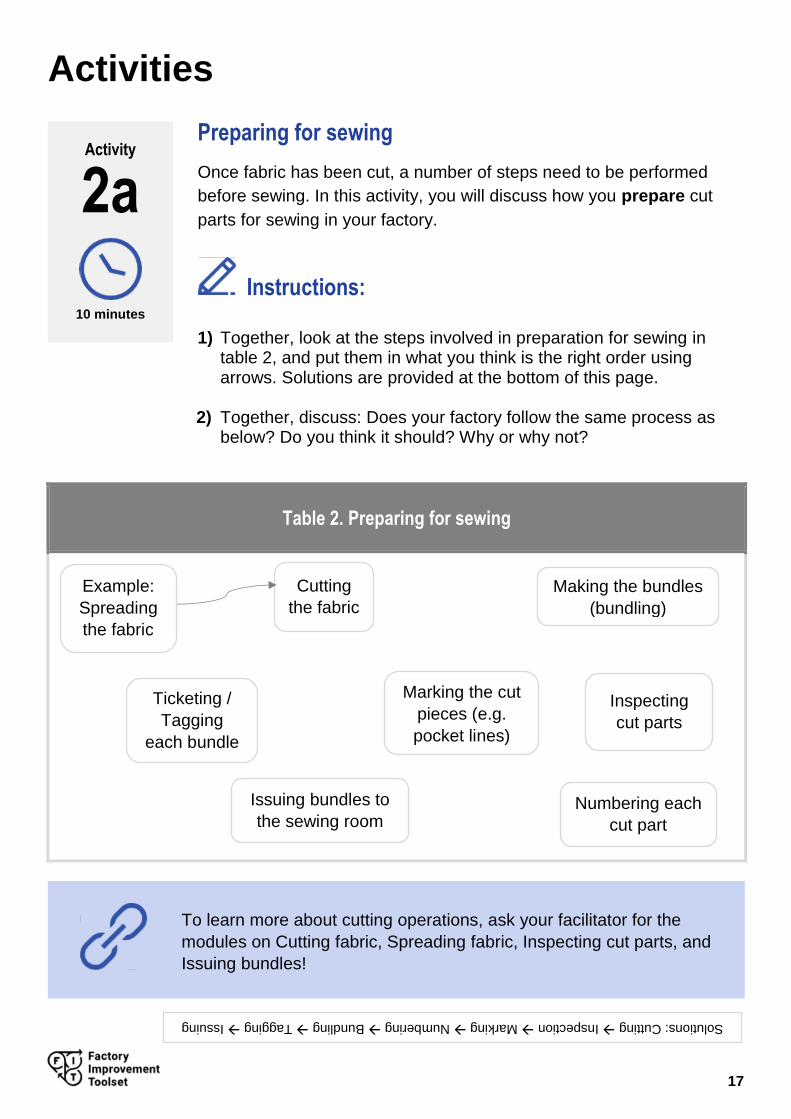
1) Together, look at the steps involved in preparation for sewing in table 2, and put them in what you think is the right order using arrows. Solutions are provided at the bottom of this page.
2) Together, discuss: Does your factory follow the same process as
below? Do you think it should? Why or why not?
Table 2. Preparing for sewing
Activity
2a
10 minutes
Cutting
the fabric
Marking the cut
pieces (e.g.
pocket lines)
Making the bundles
(bundling)
Ticketing /
Tagging
each bundle
Issuing bundles to
the sewing room Numbering each
cut part
Inspecting
cut parts
Example:
Spreading
the fabric
To learn more about cutting operations, ask your facilitator for the
modules on Cutting fabric, Spreading fabric, Inspecting cut parts, and
Issuing bundles!
Solutions: Cutting Inspection Marking Numbering Bundling Tagging Issuing
18
Marking
After cutting, stacked garment pieces are marked and numbered.
Position marking is the transfer of sewing information from pattern
pieces to cut pieces. In this activity, you will discuss position marking in
your factory, and review marking practices and symbols.
Instructions:
1) Together, discuss:
When is position marking done in your factory, and by who?
Which tools do you use for position markings (chalk, drill marks, etc.)?
2) Together, read through the ten good marking practices in table 3,
and put a ✔ in the column on the right if you do it in your factory.
3) Together, look at table 4, and match each marking symbol with the right description. Solutions are provided at the bottom of the page.
Table 3. Position marking
Good practices ✔
1. Choose a marking tool that will not damage or discolour the fabric (consider fabric shade, thickness, type, etc.), such as chalk, pencil, or wax crayon.
2. Choose a marking tool that can be easily removed, but will not be erased (by friction for example) before sewing, such as chalk, pencil, or wax crayon.
3. Choose a marking tool that is not harmful to workers’ health (such as chemical paint).
4. Never use drill marks on knitted fabrics.
5. Markings should only be made on the “wrong” side of the garment (the side that is not visible when the garment is worn).
6. Test the marking method on a fabric swatch before selecting it.
7. Make sure workers all use the same consistent marking symbols to avoid sewing mistakes (see step 3).
Activity
2b
20 minutes
19
8. Do not mark sheer fabrics or light colours as markings will show through the other side.
9. Avoid pin markings as it can damage the fabric and pins can easily slip and get lost.
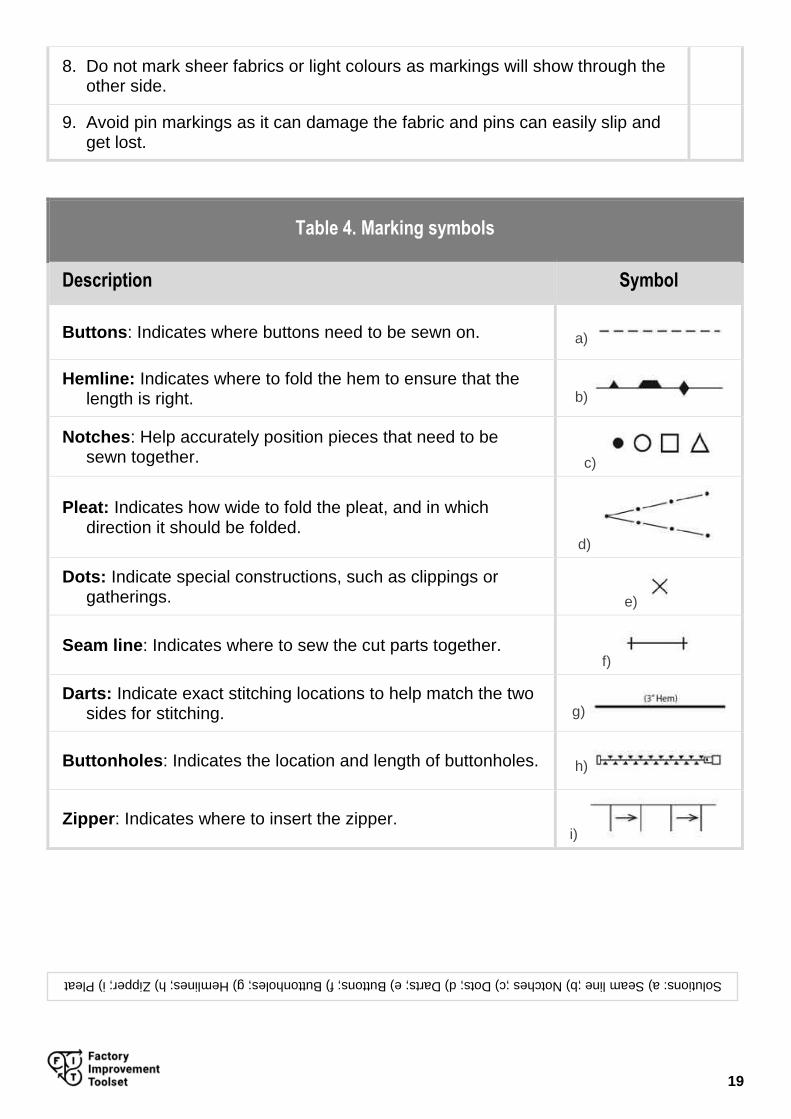
Table 4. Marking symbols
Description Symbol
Buttons: Indicates where buttons need to be sewn on. a)
Hemline: Indicates where to fold the hem to ensure that the length is right. b)
Notches: Help accurately position pieces that need to be sewn together. c)
Pleat: Indicates how wide to fold the pleat, and in which direction it should be folded.
d)
Dots: Indicate special constructions, such as clippings or gatherings. e)
Seam line: Indicates where to sew the cut parts together. f)
Darts: Indicate exact stitching locations to help match the two sides for stitching. g)
Buttonholes: Indicates the location and length of buttonholes. h)
Zipper: Indicates where to insert the zipper. i)
Solutions: a) Seam line ;b) Notches ;c) Dots; d) Darts; e) Buttons; f) Buttonholes; g) Hemlines; h) Zipper; i) Pleat
20
Numbering
After cutting, stacked garment pieces are marked and numbered.
Numbering (or “shade marking”) is the process of sticking/writing a
number on each cut piece to help identify it. In this activity, you will
discuss numbering practices and why numbering is important.
Instructions:
1) Have a participant read aloud the information about numbering in table 5, and make sure everyone understands.
2) Together, discuss:
Do you number cut parts in your factory?
If so, which tools do you use for numbering (chalk, ink, stickers, etc.)?
Does numbering include the same information in your factory?
3) Together, read the five questions in table 6 and select the correct answer. Solutions are provided at the bottom of the page.
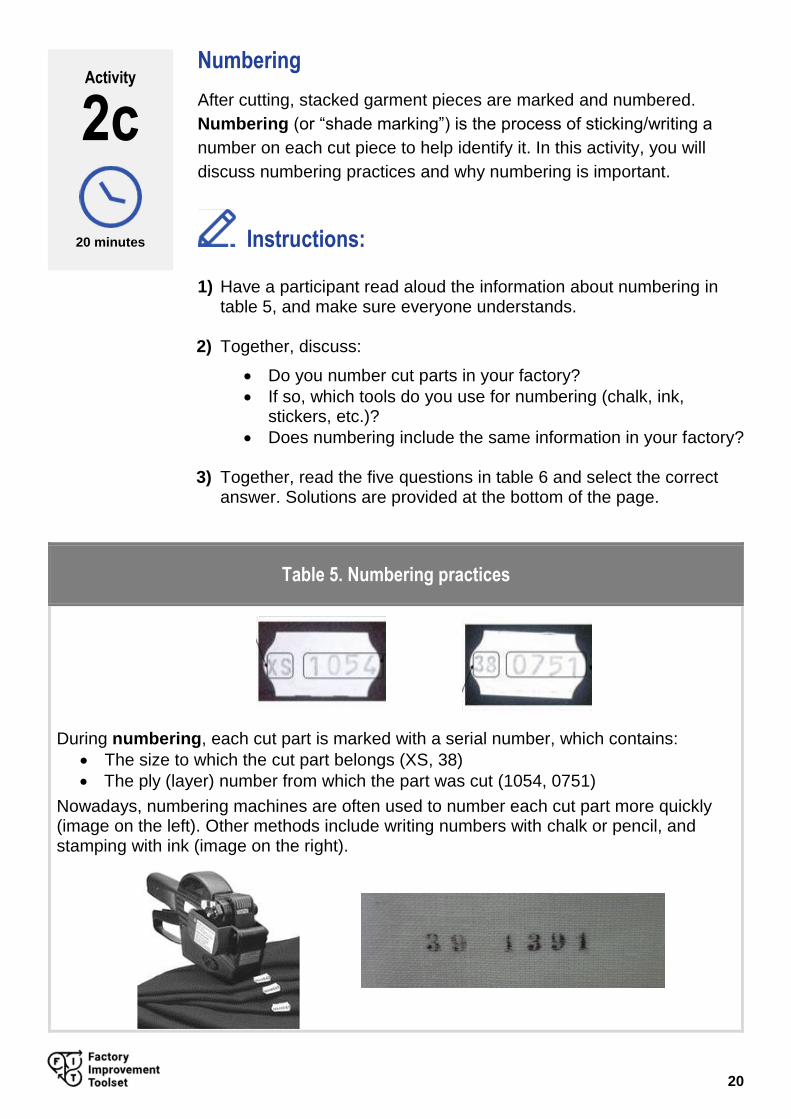
Table 5. Numbering practices
During numbering, each cut part is marked with a serial number, which contains:
The size to which the cut part belongs (XS, 38)
The ply (layer) number from which the part was cut (1054, 0751)
Nowadays, numbering machines are often used to number each cut part more quickly (image on the left). Other methods include writing numbers with chalk or pencil, and stamping with ink (image on the right).
Activity
2c
20 minutes
21
Table 6. Numbering
1. Numbering is done… a. On each cut part b. On each bundle c. On each fabric layer
2. Numbers should be written or pasted… a. On the “right” side of the garment (the one visible when the garment is worn) b. On the “wrong” side of the garment (invisible when garment is worn) c. On any side
3. Fabric plies should be numbered… a. From bottom layer to top layer b. It doesn’t matter c. From top layer to bottom layer
4. Identifying the garment size when numbering each cut part helps… a. Avoid errors when bundling cut parts together b. Avoid errors when sewing cut parts together (such as sewing two parts from
different sizes) c. Both answers above are correct
5. Identifying the ply number when numbering each cut part… a. Helps ensure that cut parts of the same fabric are sewn together b. Helps ensure that parts cut on the same day are sewn together c. Helps ensure that parts cut from the same layer are sewn together
As there can be shade variation in one same roll of fabric, sewing
parts cut from one same layer helps ensure that these two cut parts
will be of the same shade. This is a guarantee of quality.
Solutions: 1. a.; 2. b.; 3. c ; 4. c.; 5. c.
22
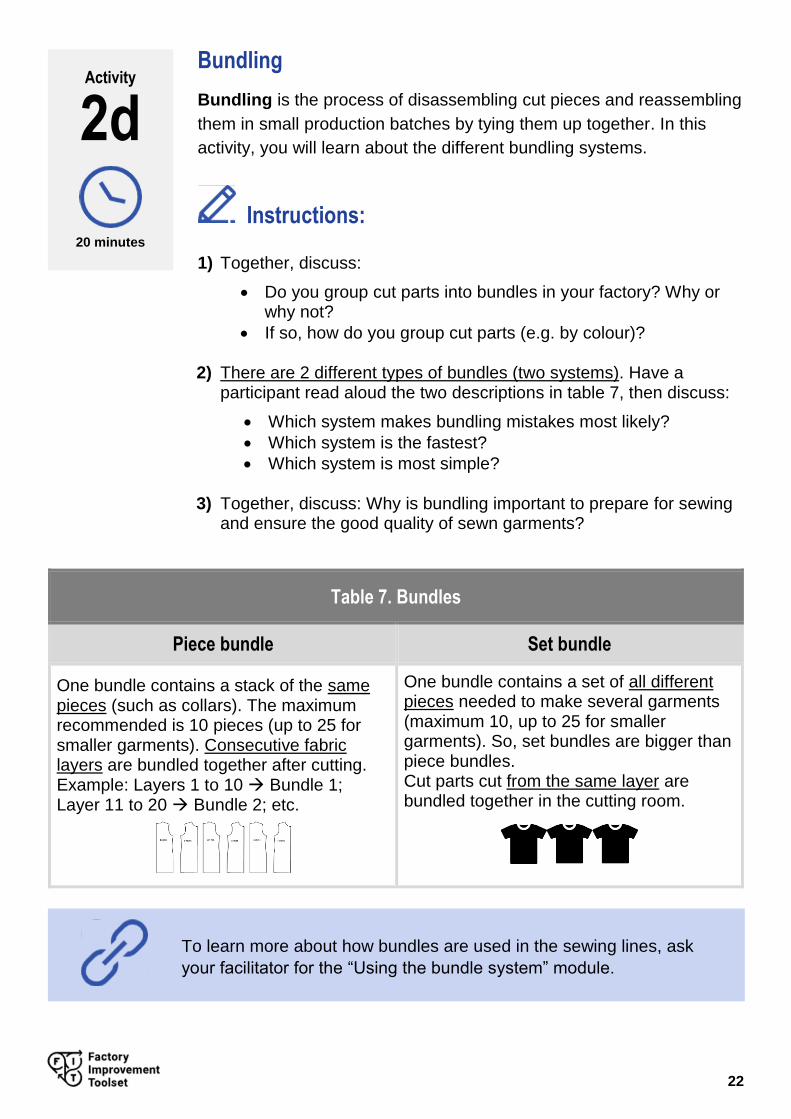
Bundling
Bundling is the process of disassembling cut pieces and reassembling
them in small production batches by tying them up together. In this
activity, you will learn about the different bundling systems.
Instructions:
1) Together, discuss:
Do you group cut parts into bundles in your factory? Why or why not?
If so, how do you group cut parts (e.g. by colour)?
2) There are 2 different types of bundles (two systems). Have a participant read aloud the two descriptions in table 7, then discuss:
Which system makes bundling mistakes most likely?
Which system is the fastest?
Which system is most simple?
3) Together, discuss: Why is bundling important to prepare for sewing and ensure the good quality of sewn garments?
Table 7. Bundles
Piece bundle Set bundle
One bundle contains a stack of the same pieces (such as collars). The maximum recommended is 10 pieces (up to 25 for smaller garments). Consecutive fabric layers are bundled together after cutting. Example: Layers 1 to 10 Bundle 1; Layer 11 to 20 Bundle 2; etc.
One bundle contains a set of all different pieces needed to make several garments (maximum 10, up to 25 for smaller garments). So, set bundles are bigger than piece bundles. Cut parts cut from the same layer are bundled together in the cutting room.
Activity
2d
20 minutes
To learn more about how bundles are used in the sewing lines, ask
your facilitator for the “Using the bundle system” module.
23
Tagging
After bundling, a bundle tag (or “bundle ticket”) is then attached to
each bundle to help track and identify the contents. In this activity, you
will learn what information should appear on them, and discuss the
reasons why they are useful.
Instructions:
1) Together, discuss:
Do you use bundle tags in your factory?
If so, what information do tags contain?
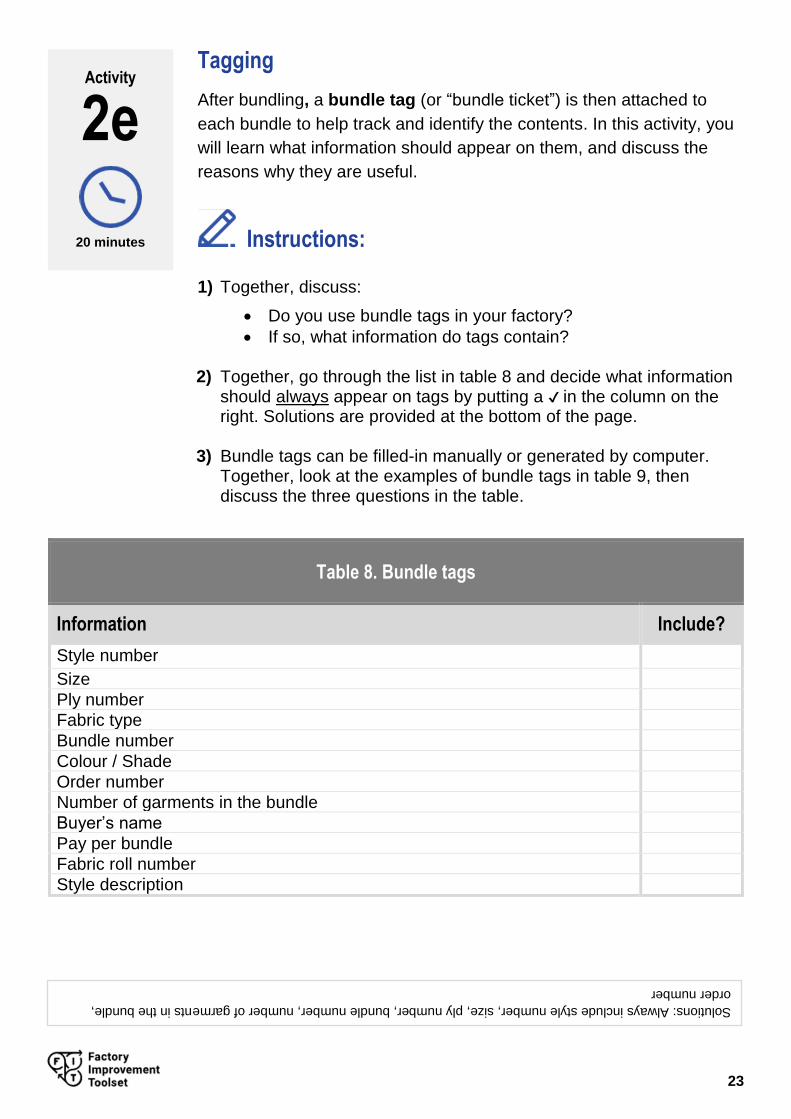
2) Together, go through the list in table 8 and decide what information should always appear on tags by putting a ✔ in the column on the right. Solutions are provided at the bottom of the page.
3) Bundle tags can be filled-in manually or generated by computer. Together, look at the examples of bundle tags in table 9, then discuss the three questions in the table.
Table 8. Bundle tags
Information Include?
Style number
Size
Ply number
Fabric type
Bundle number
Colour / Shade
Order number
Number of garments in the bundle
Buyer’s name
Pay per bundle
Fabric roll number
Style description
Activity
2e
20 minutes
Solutions: Always include style number, size, ply number, bundle number, number of garments in the bundle,
order number
24
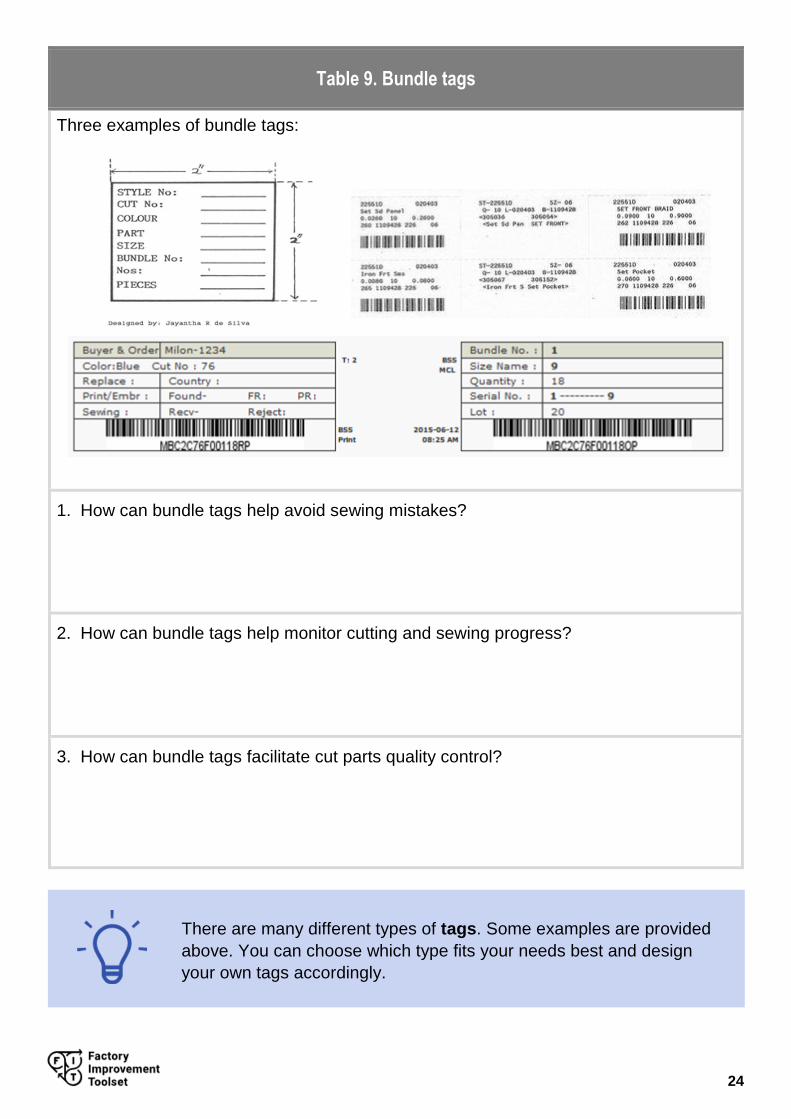
Table 9. Bundle tags
Three examples of bundle tags:
1. How can bundle tags help avoid sewing mistakes?
2. How can bundle tags help monitor cutting and sewing progress?
3. How can bundle tags facilitate cut parts quality control?
There are many different types of tags. Some examples are provided
above. You can choose which type fits your needs best and design
your own tags accordingly.

25
This page has been intentionally left
blank and can be used for note taking.
26

27
Identifying concrete applications of the new knowledge
that benefit your factory.
Summarizing and revising the new knowledge gained.
Session 3
Action items
Goals
28
Session 3
Overview
One member should read the full session out loud to the rest
of group
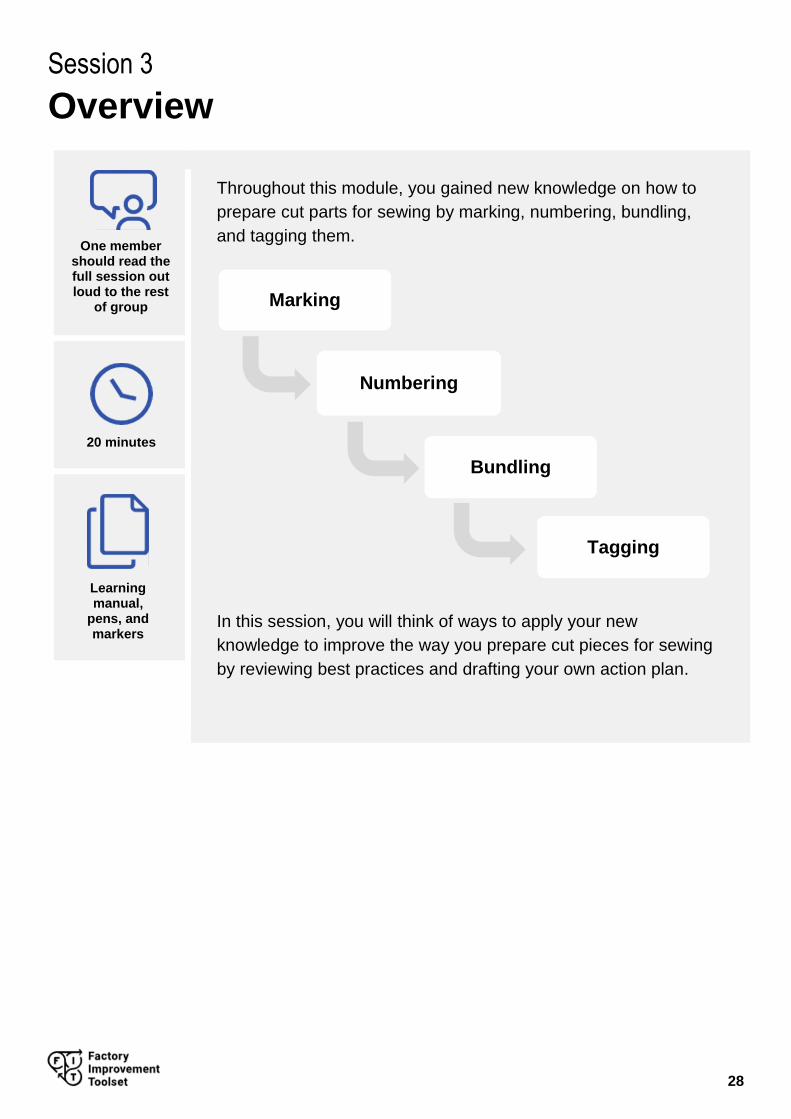
Throughout this module, you gained new knowledge on how to
prepare cut parts for sewing by marking, numbering, bundling,
and tagging them.
In this session, you will think of ways to apply your new
knowledge to improve the way you prepare cut pieces for sewing
by reviewing best practices and drafting your own action plan.
20 minutes
Learning manual,
pens, and markers
Marking
Bundling
Numbering
Tagging
29
Activities
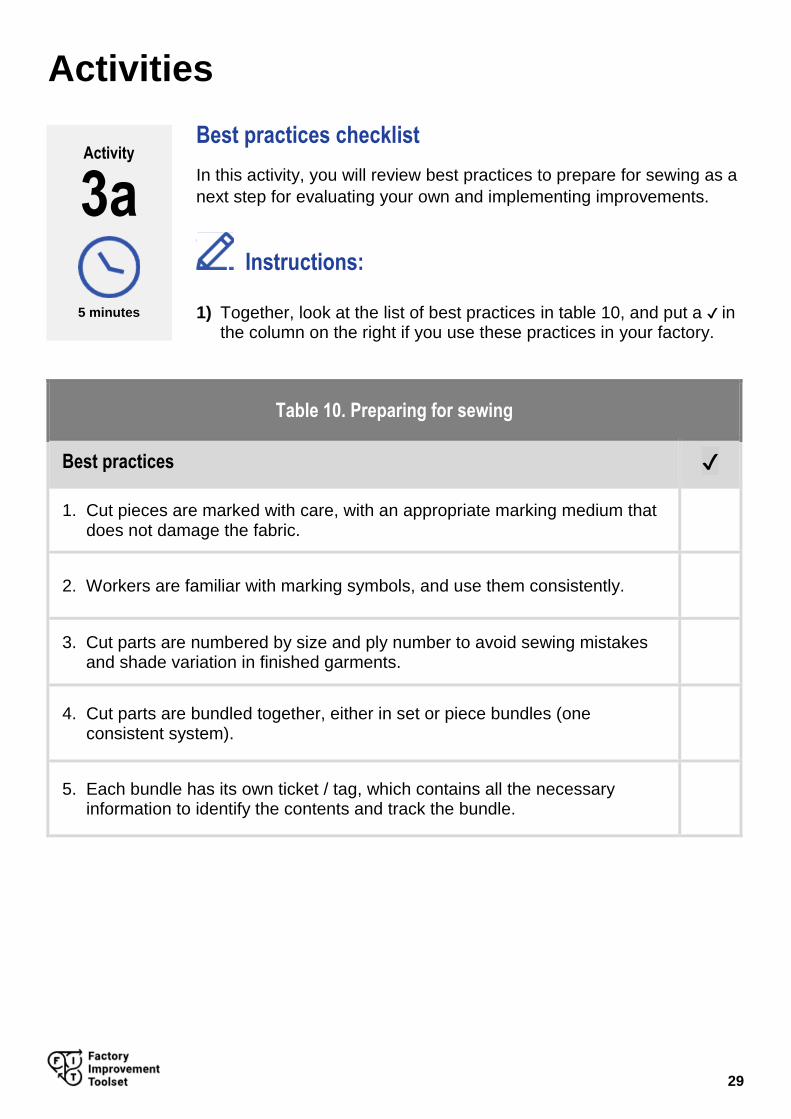
Best practices checklist
In this activity, you will review best practices to prepare for sewing as a
next step for evaluating your own and implementing improvements.
Instructions:
1) Together, look at the list of best practices in table 10, and put a ✔ in the column on the right if you use these practices in your factory.
Table 10. Preparing for sewing
Best practices ✔
1. Cut pieces are marked with care, with an appropriate marking medium that does not damage the fabric.
2. Workers are familiar with marking symbols, and use them consistently.
3. Cut parts are numbered by size and ply number to avoid sewing mistakes and shade variation in finished garments.
4. Cut parts are bundled together, either in set or piece bundles (one consistent system).
5. Each bundle has its own ticket / tag, which contains all the necessary information to identify the contents and track the bundle.
Activity
3a
5 minutes

30
Your action plan
In this activity, you will think of ways to apply your new knowledge to
improve preparation for sewing in your factory by drafting your own
action plan.
Instructions:
1) Together, fill in the action plan (table 12) on the next page. Identify a key problem that you want to solve and write down the solutions you identified while working on this module.
Activity
3b
15 minutes

31
Table 12. Preparing for sewing – Action Plan
Problem identified
Solutions identified Action(s) to be taken Person responsible By when? How will improvements be
measured?

0
ISBN: 9789220326435 (web pdf)
Preparing for sewing
The Factory Improvement Toolset (FIT) is an innovative self-facilitated, activity-based
learning approach designed by the International Labour Organization (ILO) to create
more decent and sustainable employment. FIT supports manufacturers in global supply
chains to improve productivity, competitiveness and working conditions by upgrading
production systems and factory practices.
FIT is being piloted in Asia under the regional Decent Work in the Garment Sector
Supply Chains in Asia project funded by the Government of Sweden.
Decent Work Technical Support Team for East and
South-East Asia and the Pacific
United Nations Building, 10th Floor
Rajdamnern Nok Avenue,
Bangkok 10200, Thailand
Tel.: 662 288 1234 Fax. 662 288 3058
Email: [email protected]