Embed Size (px)
Citation preview
December 2013 1 of 8
2860 De La Cruz Blvd., Suite 100 Santa Clara, CA 95050 408.935.1800 www.silver-peak.com
Preparing a Cisco UCS-E Blade with VMware vSphere for VXOA
This document summarizes the basic requirements and general procedures for using a Cisco UCS-E blade as the platform to run a Silver Peak virtual appliance on VMware vSphere. For Cisco’s comprehensive source document, click here.
Overview
The Cisco UCS-E servers are high-performance router blades for Cisco Integrated Services Routers Generation 2 (ISR G2). Each blade has its own processors, storage, network interfaces and memory that operate independently of the host router resources.
Running the Silver Peak VXOA software on an UCS-E blade is a great fit for those customers with an ISR G2 supported environment who need to optimize the links between geographically disperse locations without expanding the physical footprint in each location.
Prerequisites
In this document, we are using:
• Cisco 3945 router running IOS version 15.3(3)M1
• Cisco UCS-E 140S single-wide blade with no hypervisor preinstalled
• Customized VMware vSphere build: ESXi-5.0.0-623860-custom-Cisco-2.0.1.6.iso
Configure CIMC management access
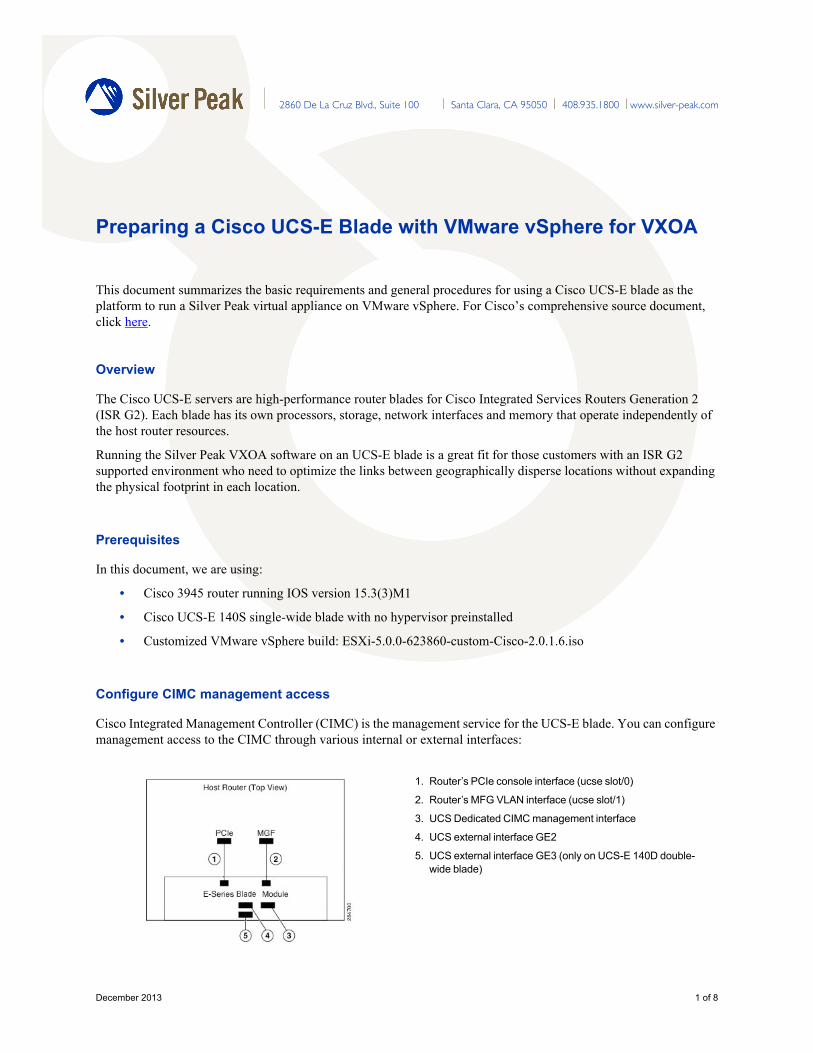
Cisco Integrated Management Controller (CIMC) is the management service for the UCS-E blade. You can configure management access to the CIMC through various internal or external interfaces:
1. Router’s PCIe console interface (ucse slot/0)
2. Router’s MFG VLAN interface (ucse slot/1)
3. UCS Dedicated CIMC management interface
4. UCS external interface GE2
5. UCS external interface GE3 (only on UCS-E 140D double-wide blade)
December 2013 2 of 8
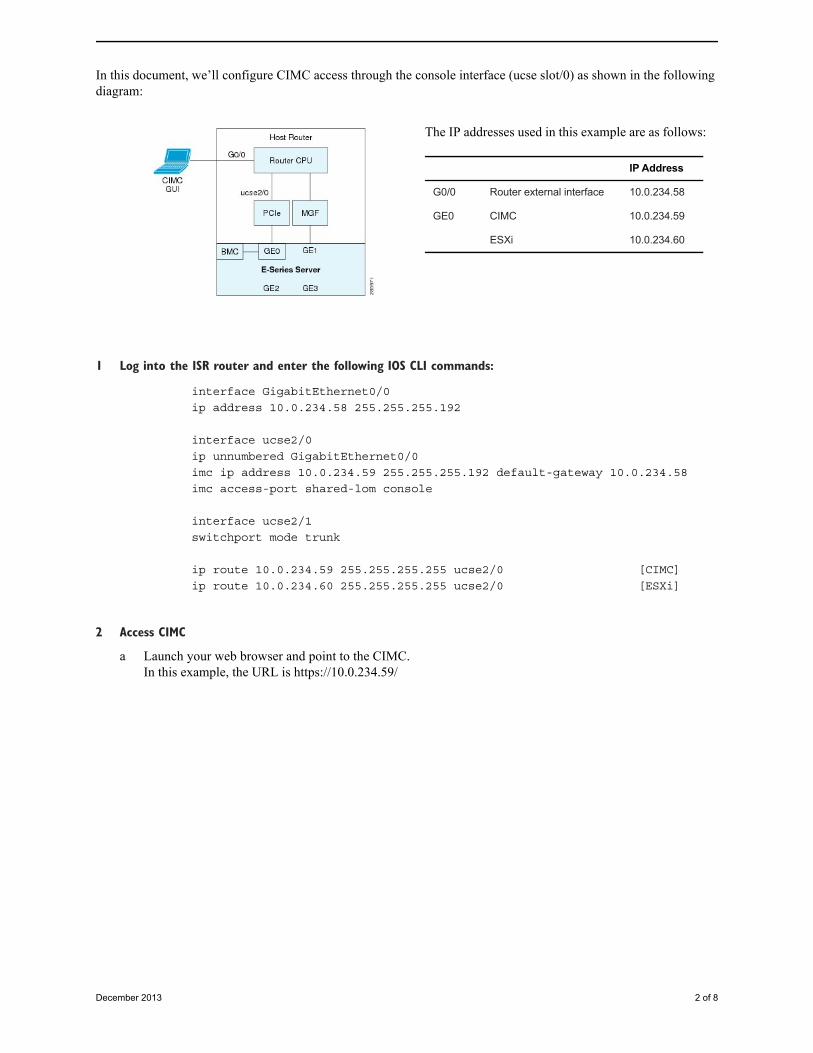
In this document, we’ll configure CIMC access through the console interface (ucse slot/0) as shown in the following diagram:
1 Log into the ISR router and enter the following IOS CLI commands:
interface GigabitEthernet0/0
ip address 10.0.234.58 255.255.255.192
interface ucse2/0
ip unnumbered GigabitEthernet0/0
imc ip address 10.0.234.59 255.255.255.192 default-gateway 10.0.234.58
imc access-port shared-lom console
interface ucse2/1
switchport mode trunk
ip route 10.0.234.59 255.255.255.255 ucse2/0 [CIMC]
ip route 10.0.234.60 255.255.255.255 ucse2/0 [ESXi]
2 Access CIMC
a Launch your web browser and point to the CIMC. In this example, the URL is https://10.0.234.59/
The IP addresses used in this example are as follows:
IP Address
G0/0 Router external interface 10.0.234.58
GE0 CIMC 10.0.234.59
ESXi 10.0.234.60
December 2013 3 of 8
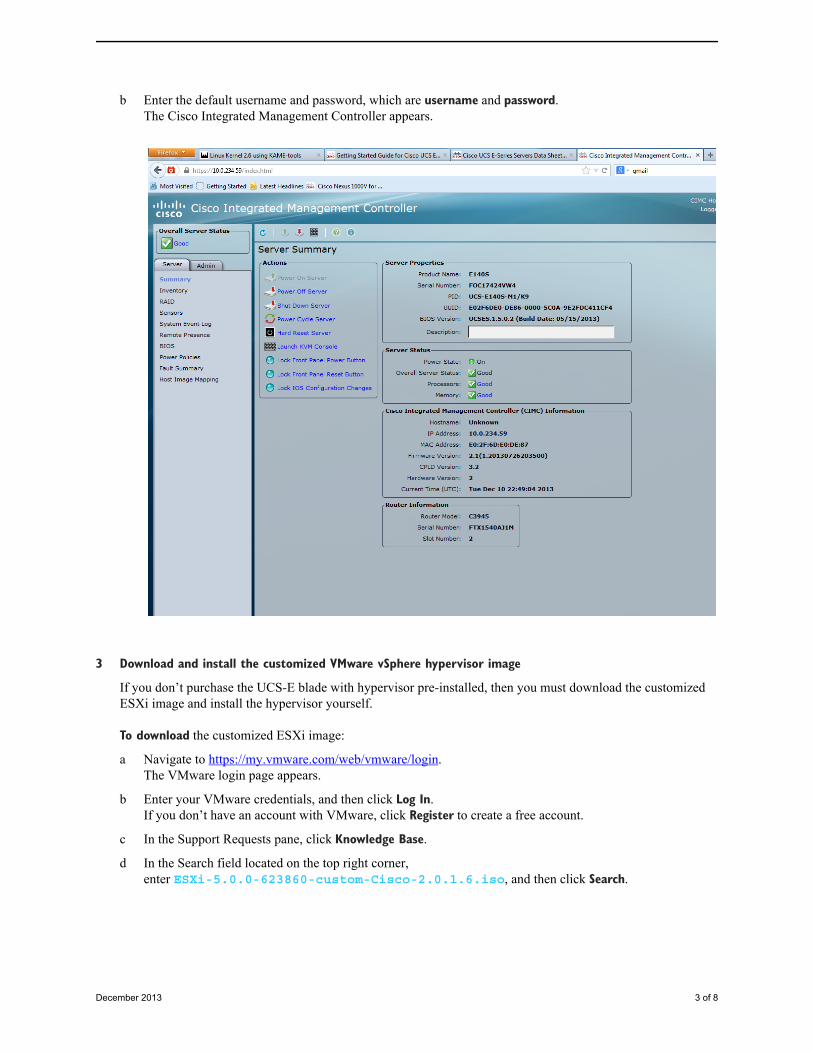
b Enter the default username and password, which are username and password. The Cisco Integrated Management Controller appears.
3 Download and install the customized VMware vSphere hypervisor image
If you don’t purchase the UCS-E blade with hypervisor pre-installed, then you must download the customized ESXi image and install the hypervisor yourself.
To download the customized ESXi image:
a Navigate to https:/ / my.vmware.com/ web/ vmware/ login. The VMware login page appears.
b Enter your VMware credentials, and then click Log In. If you don’t have an account with VMware, click Register to create a free account.
c In the Support Requests pane, click Knowledge Base.
d In the Search field located on the top right corner, enter ESXi-5.0.0-623860-custom-Cisco-2.0.1.6.iso, and then click Search.
December 2013 4 of 8
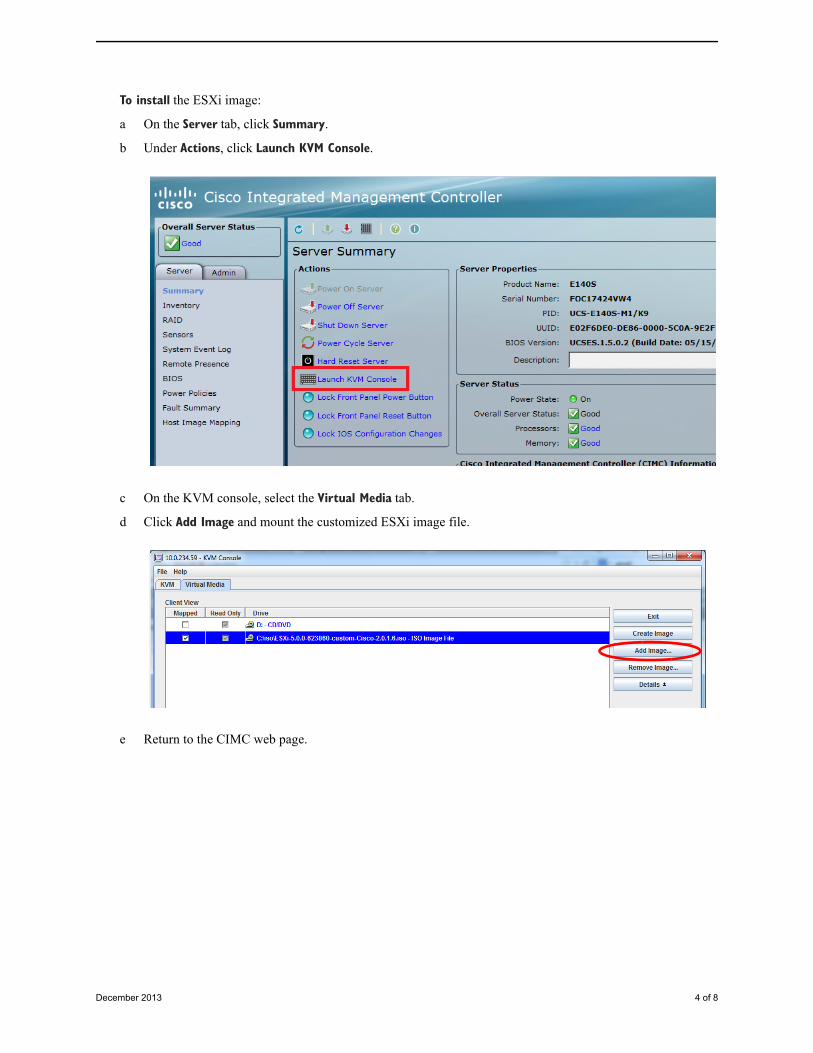
To install the ESXi image:
a On the Server tab, click Summary.
b Under Actions, click Launch KVM Console.
c On the KVM console, select the Virtual Media tab.
d Click Add Image and mount the customized ESXi image file.
e Return to the CIMC web page.
December 2013 5 of 8
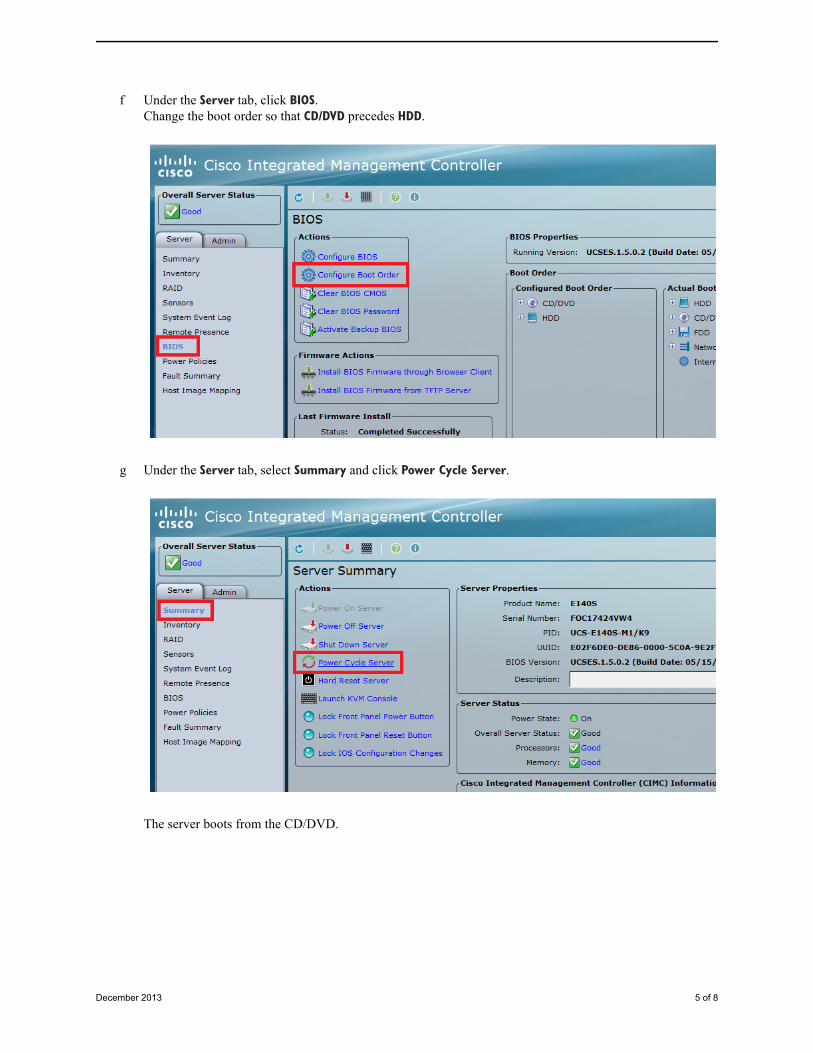
f Under the Server tab, click BIOS. Change the boot order so that CD/DVD precedes HDD.
g Under the Server tab, select Summary and click Power Cycle Server.
The server boots from the CD/DVD.

December 2013 6 of 8
h During ESXi installation, choose the Cypress 8GB module (instead of the hard disk) as the installation destination.
When installation is complete, a message appears.
i In the KVM console, go to the Virtual Media tab and deselect the Mapped check box for the ESXi ISO.
December 2013 7 of 8
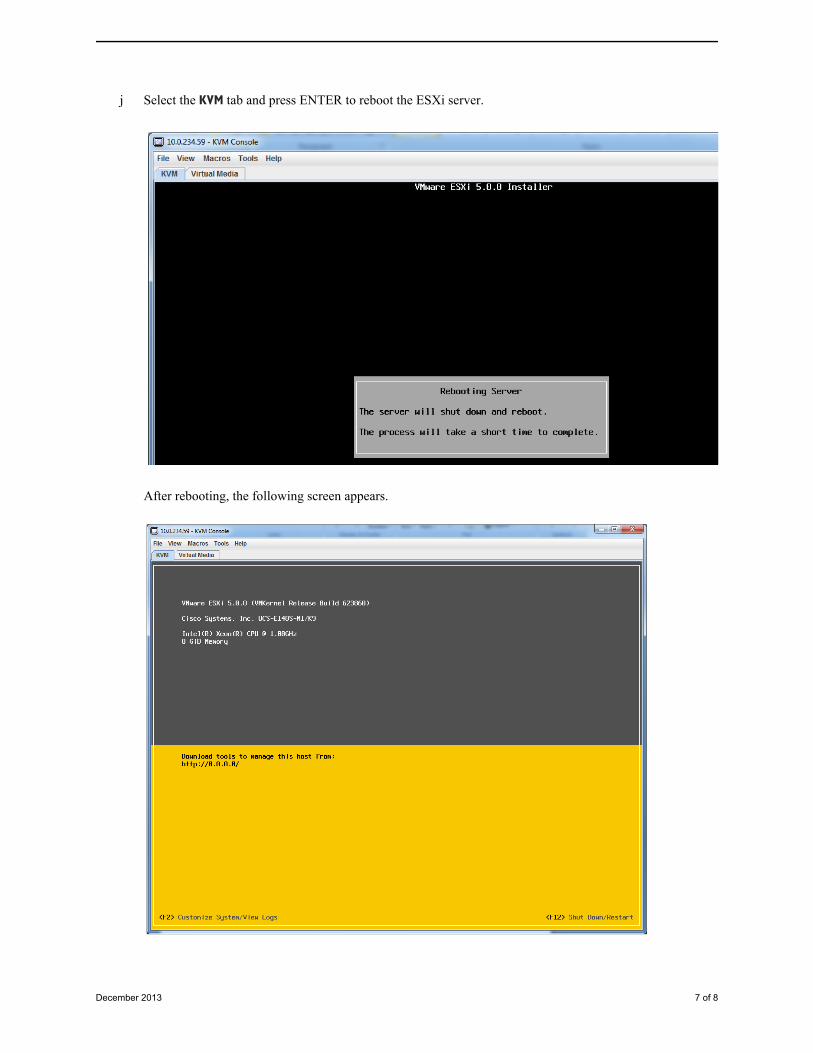
j Select the KVM tab and press ENTER to reboot the ESXi server.
After rebooting, the following screen appears.
December 2013 8 of 8
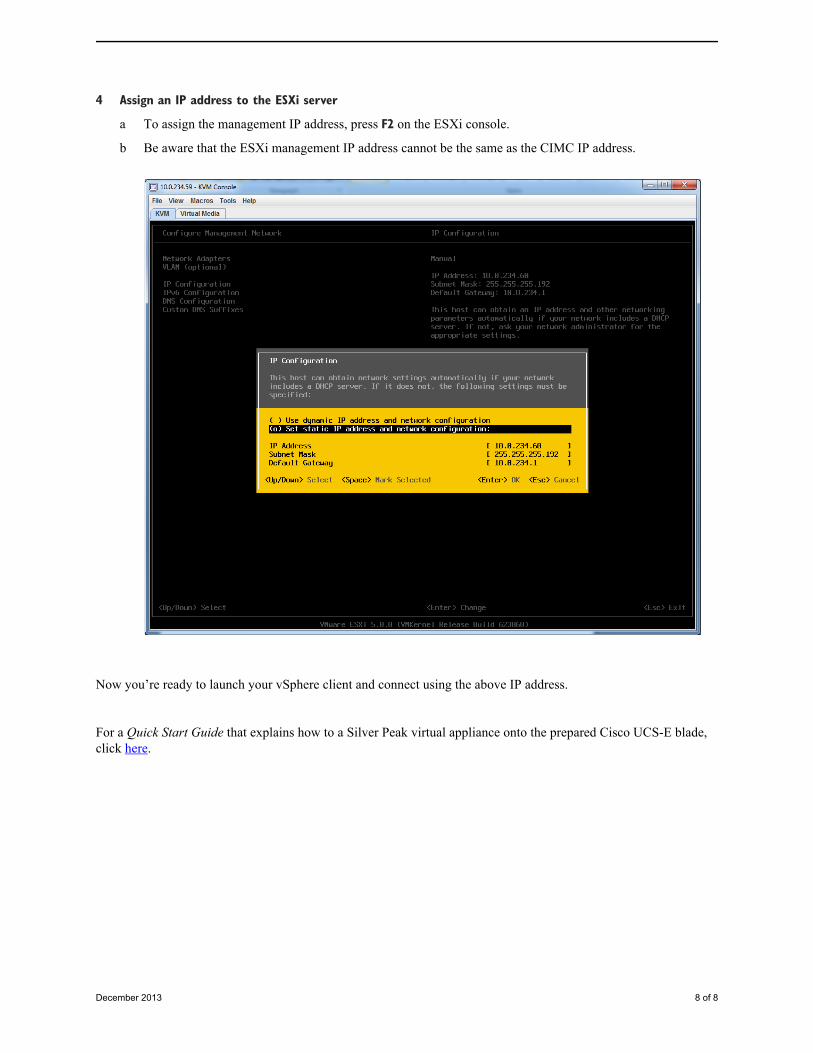
4 Assign an IP address to the ESXi server
a To assign the management IP address, press F2 on the ESXi console.
b Be aware that the ESXi management IP address cannot be the same as the CIMC IP address.
Now you’re ready to launch your vSphere client and connect using the above IP address.
For a Quick Start Guide that explains how to a Silver Peak virtual appliance onto the prepared Cisco UCS-E blade, click here.


![© 2014 Silver Peak Systems, Inc. Cisco UCS-E Blade€¦ · VX Virtual Appliance / VMware vSphere / vSphere Hypervisor / Server Mode [Single-Interface Deployment] Cisco UCS-E Blade](https://img.pdfslide.us/doc/110x75/5ad3d6e17f8b9a665f8e4a94/2014-silver-peak-systems-inc-cisco-ucs-e-vx-virtual-appliance-vmware-vsphere.jpg)