Embed Size (px)
Citation preview
Copyright Jennifer Maker | page 1 | please Do not copy or share
CUT ABOVE SVG Design Course by Jennifer Maker
CUT ABOVEsvg design Course
pre training series 2
The Joy
of SVGsby award-winning graphic designer and bestselling author
Jennifer Maker

Copyright Jennifer Maker | page 2 | please Do not copy or share
CUT ABOVE SVG Design Course by Jennifer Maker
Session 2: Uploading SVG FilesTip: You can watch video 2 https://jennifermaker.lpages.co/the-joy-of-svgs-video-2/
Hi there, and welcome back to session #2 of my training series, The Joy of SVGs. My name is Jennifer, founder of the CUT ABOVE SVG Design Course and the JenniferMaker.com blog, and I am so glad to be back here with you.
In this video, we’re going to talk about how to get these amazing SVG files you’ve found uploaded to your design software, such as Cricut Design Space or Silhouette Studio.
But more importantly, I’m also going to show you how this training help you create beautiful things with your cutting machine through the magic of SVGs.
In session and video #1, we talked about finding SVGs, which was intended to help you find awesome projects to make. I also shared how this is going to immediately help you put your cutting machine to work. So if you haven’t seen that video, go back and watch it now and then come back to this one!
Today I’m going to build on what we’ve already learned by talking about getting those super cool SVG cut files into your design software. This will help you break you free of the frustration of not understanding how they work and get you on track towards making things so that you can experience the beauty of a lovely home or the expression on your family’s faces.
We have a lot to cover today so be sure you have some paper and a pen ready to take notes and follow along. The truth is that trying to getting SVG cut files uploaded can be pretty frustrating sometimes. Sometimes they download into weird places, or even don’t look right after you’ve downloaded them. Other times, they don’t seem to upload the way we expect. Or we can’t get them uploaded at all!
And you’ve ever experienced one of these issues before, that’s totally normal.
Even so, you can’t let those frustrations stand in your way of making things.
I’ve heard WAY too many stories of how people buy the latest Cricut and it just sits there because they are either afraid to use it, or are stuck on something. You DO NOT NEED to be afraid. You can get unstuck. It’s amazing, and it has the power to change your life. I am not exaggerating at all. I
Copyright Jennifer Maker | page 3 | please Do not copy or share
CUT ABOVE SVG Design Course by Jennifer Maker
am the perfect example of how its changed a life.
That’s why in this video we’re going to get super practical and talk about uploading these cut files. So are you ready to dig in?
How Do You Upload SVG Files?Now let’s get all of those awesome SVG files you’ve found into your design software. I’m going to show you how to upload in different ways on a variety of devices.
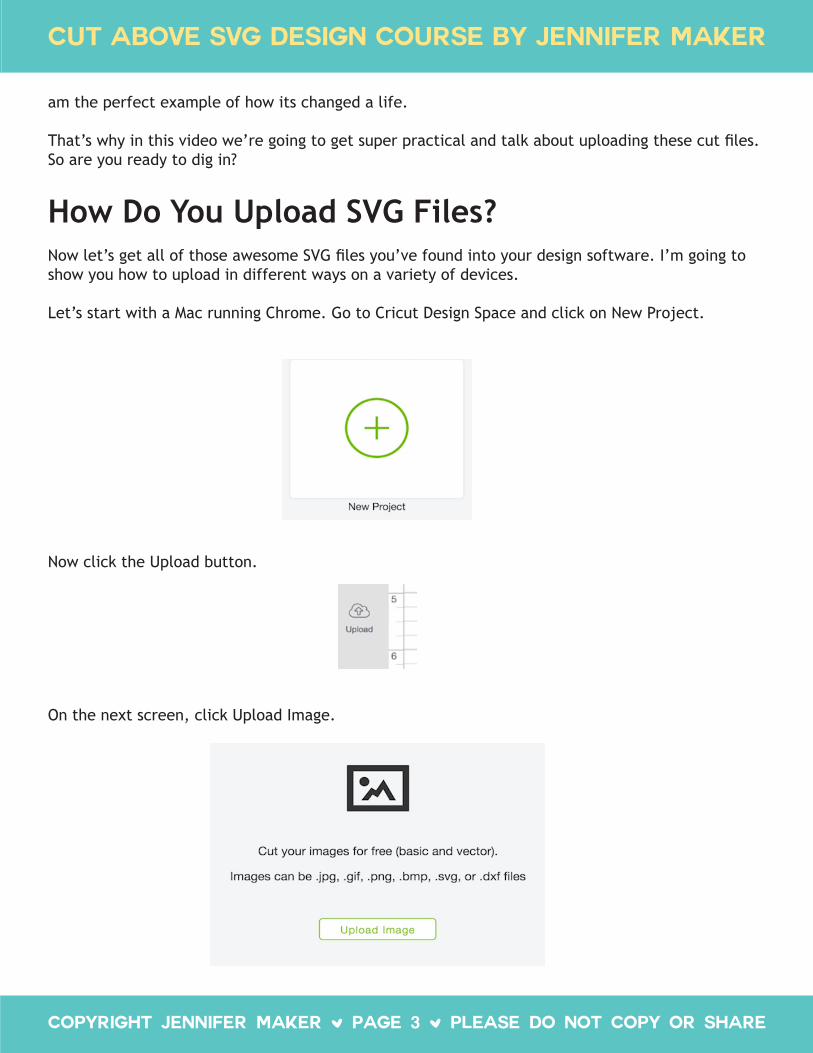
Let’s start with a Mac running Chrome. Go to Cricut Design Space and click on New Project.
Now click the Upload button.
On the next screen, click Upload Image.

Copyright Jennifer Maker | page 4 | please Do not copy or share
CUT ABOVE SVG Design Course by Jennifer Maker
On the screen that appears next, you can do one of two things. You can either drag your SVG file from the Finder right into the Upload area — it will turn green when the window recognizes a valid file, OR click the Browse button and use the File Open window to locate and select your SVG file. Either way works.
Tip: If you’re using the Browse button — type in SVG in the Find box in the upper right corner of your File Open window, select “Scalable Vector Graphics” from the drop-down list, and watch all the SVG files on your computer show up! Pretty nifty, eh? I appear to have a LOT.
Once you’ve selected your SVG file, be sure to give Cricut Design Space some time to load your file — some complicated files may take longer than you expect. A sliding green bar across the top of your screen indicates that it is uploading. When it is finished uploading, don’t stop yet — you have one more step to save it. You need to name and tag your image, and then click Save.
Copyright Jennifer Maker | page 5 | please Do not copy or share
CUT ABOVE SVG Design Course by Jennifer Maker
A note about the Image Name and Tags. I recommend you at least put in tags, as it will help tremendously later when you are looking for a file. Just put in some tags that make sense to you. When you’re ready, click the green Save button.
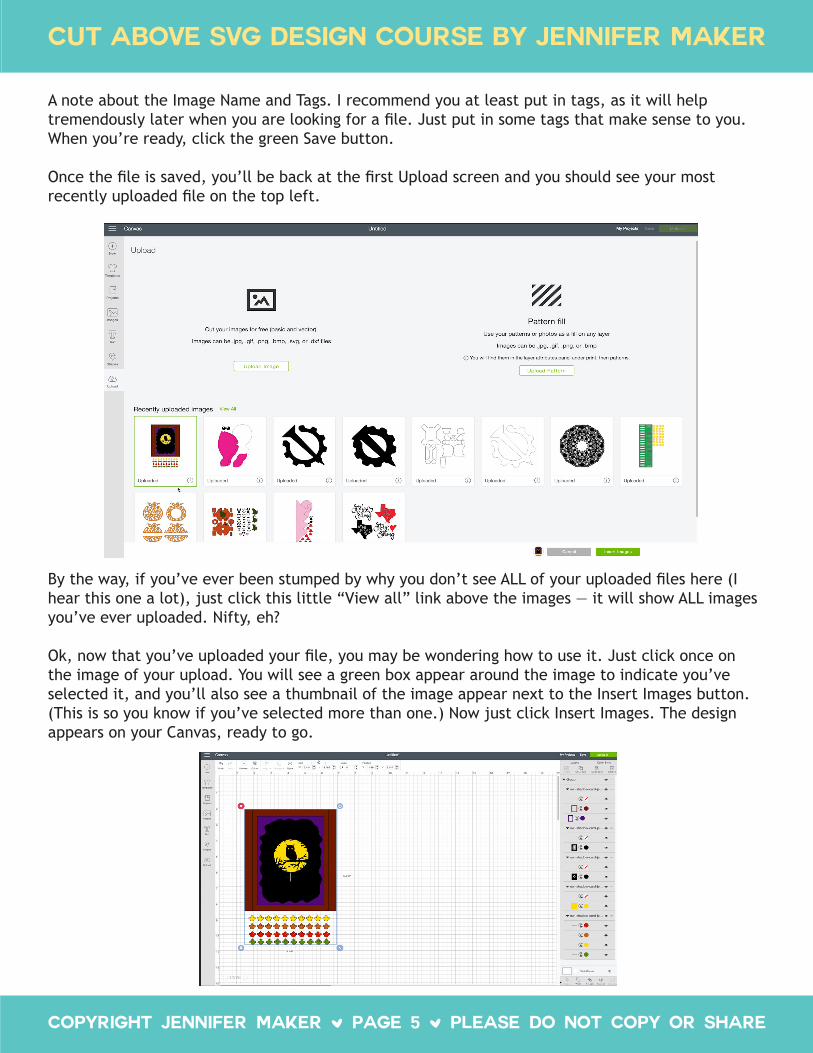
Once the file is saved, you’ll be back at the first Upload screen and you should see your most recently uploaded file on the top left.
By the way, if you’ve ever been stumped by why you don’t see ALL of your uploaded files here (I hear this one a lot), just click this little “View all” link above the images — it will show ALL images you’ve ever uploaded. Nifty, eh?
Ok, now that you’ve uploaded your file, you may be wondering how to use it. Just click once on the image of your upload. You will see a green box appear around the image to indicate you’ve selected it, and you’ll also see a thumbnail of the image appear next to the Insert Images button. (This is so you know if you’ve selected more than one.) Now just click Insert Images. The design appears on your Canvas, ready to go.
Copyright Jennifer Maker | page 6 | please Do not copy or share
CUT ABOVE SVG Design Course by Jennifer Maker
There are often things you need to do to designs, especially more complex and amazing designs, after you upload. We’ll talk all about that in the next session/video.
So that’s how you upload in Chrome.
Notes
............................................................................................................................................................................................................................................
............................................................................................................................................................................................................................................
............................................................................................................................................................................................................................................
............................................................................................................................................................................................................................................
............................................................................................................................................................................................................................................
............................................................................................................................................................................................................................................
............................................................................................................................................................................................................................................
............................................................................................................................................................................................................................................
............................................................................................................................................................................................................................................
............................................................................................................................................................................................................................................
............................................................................................................................................................................................................................................
............................................................................................................................................................................................................................................
............................................................................................................................................................................................................................................
............................................................................................................................................................................................................................................
............................................................................................................................................................................................................................................
............................................................................................................................................................................................................................................
............................................................................................................................................................................................................................................
............................................................................................................................................................................................................................................
............................................................................................................................................................................................................................................
............................................................................................................................................................................................................................................
Copyright Jennifer Maker | page 7 | please Do not copy or share
CUT ABOVE SVG Design Course by Jennifer Maker
How NOT to Upload SVG Files
Now let me tell you what you SHOULD NOT do if you’re attempting to upload a file.
1. Do not double-click the SVG file. This will cause your computer to look for a file that can open it, such as Inkscape or Illustrator. This is NOT what you want.
2. Do not drag it to your browser window. This will usually result in your browser displaying the image, but not in your design software. This will not get you where you want to go.
3. Similarly, do not drag it into Cricut Design Space unless you are in the Upload Image window with the gray dashed line. It won’t work, and your browser will simply display a static image of the file.
4. You also want to be careful to upload the SVG file, not the PDF or JPG or any other file that might be in the folder. I should also note that while DXF files are allowed, do not open those if you have an SVG — more data is in the SVG file and you’ll have better results with it. Most designers, including myself, include the DXF file for those who have design software that does not allow SVG files.
Notes
............................................................................................................................................................................................................................................
............................................................................................................................................................................................................................................
............................................................................................................................................................................................................................................
............................................................................................................................................................................................................................................
............................................................................................................................................................................................................................................
............................................................................................................................................................................................................................................
............................................................................................................................................................................................................................................
............................................................................................................................................................................................................................................
............................................................................................................................................................................................................................................
............................................................................................................................................................................................................................................
............................................................................................................................................................................................................................................
............................................................................................................................................................................................................................................
Copyright Jennifer Maker | page 8 | please Do not copy or share
CUT ABOVE SVG Design Course by Jennifer Maker
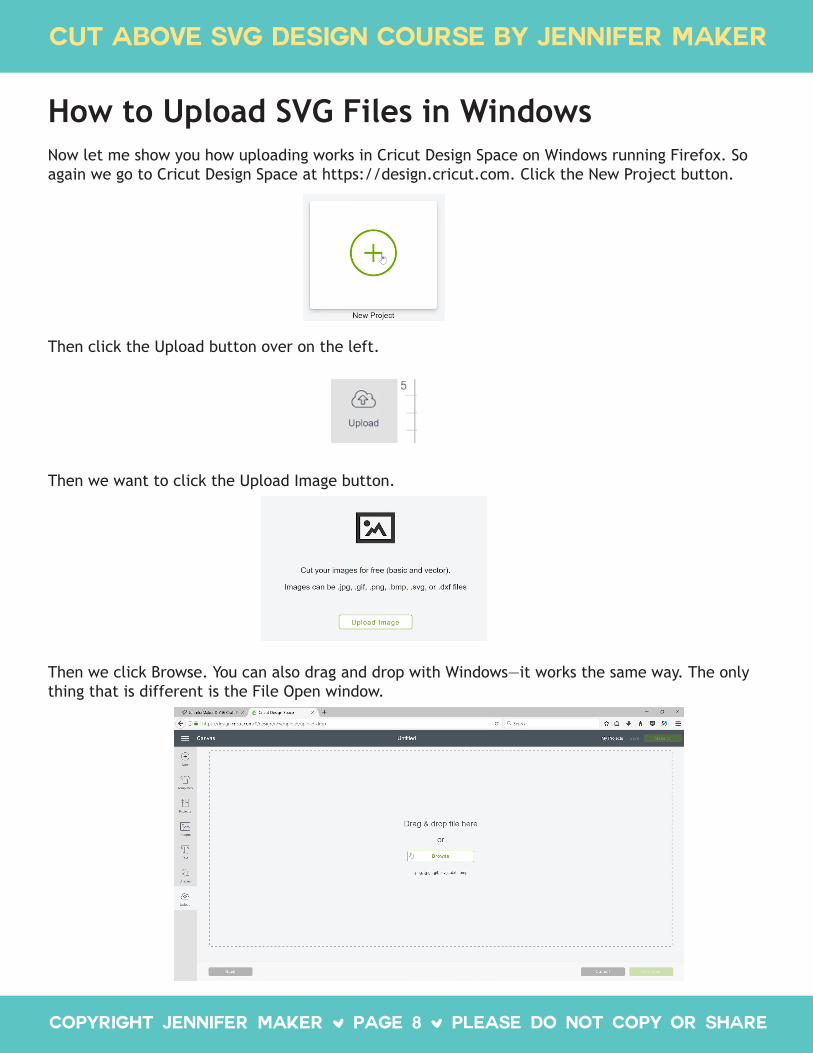
How to Upload SVG Files in WindowsNow let me show you how uploading works in Cricut Design Space on Windows running Firefox. So again we go to Cricut Design Space at https://design.cricut.com. Click the New Project button.
Then click the Upload button over on the left.
Then we want to click the Upload Image button.
Then we click Browse. You can also drag and drop with Windows—it works the same way. The only thing that is different is the File Open window.

Copyright Jennifer Maker | page 9 | please Do not copy or share
CUT ABOVE SVG Design Course by Jennifer Maker
So we locate the SVG file. Do not upload the ZIP file by accident. If you do, you will get this message:
It’s really important that you don’t just upload this ZIP file. You want to find the decompressed version, and then find the SVG file inside that folder, and then upload that. Otherwise it just won’t work and it will tell you so.
So here we go, our owl is uploaded. Add in some tags and click the Save button. And it will save to Cricut Design Space for us.
Copyright Jennifer Maker | page 10 | please Do not copy or share
CUT ABOVE SVG Design Course by Jennifer Maker
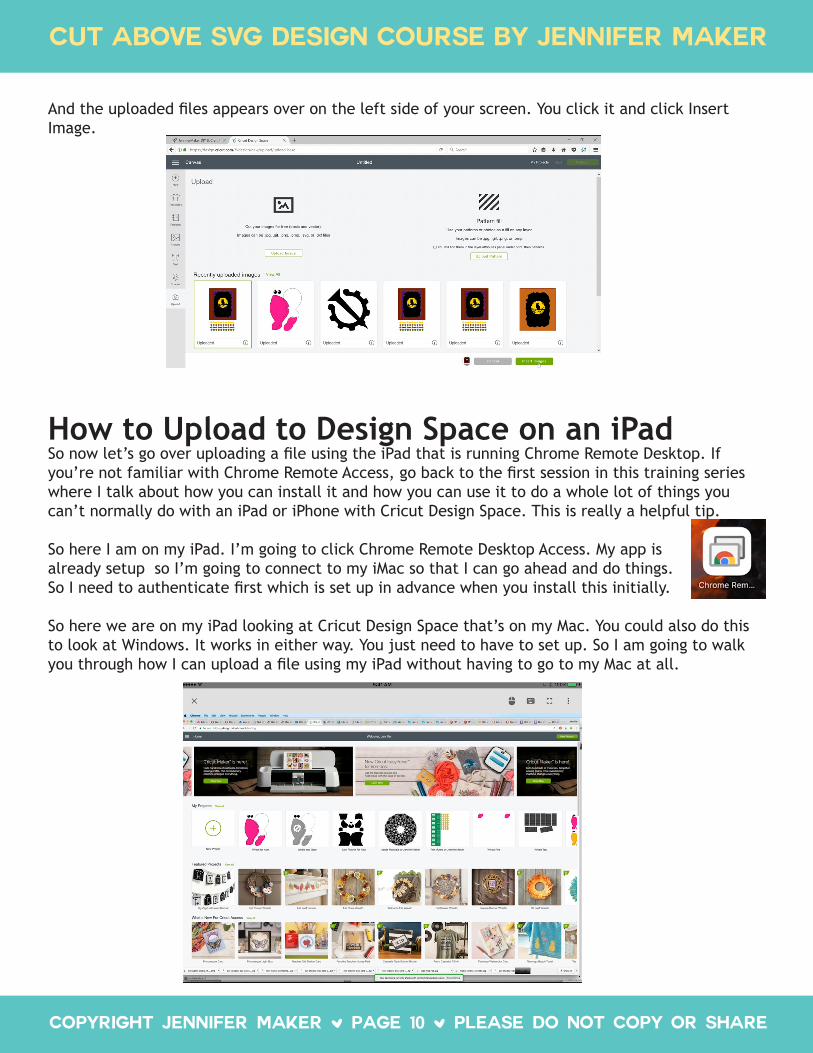
And the uploaded files appears over on the left side of your screen. You click it and click Insert Image.
How to Upload to Design Space on an iPadSo now let’s go over uploading a file using the iPad that is running Chrome Remote Desktop. If you’re not familiar with Chrome Remote Access, go back to the first session in this training series where I talk about how you can install it and how you can use it to do a whole lot of things you can’t normally do with an iPad or iPhone with Cricut Design Space. This is really a helpful tip.
So here I am on my iPad. I’m going to click Chrome Remote Desktop Access. My app is already setup so I’m going to connect to my iMac so that I can go ahead and do things. So I need to authenticate first which is set up in advance when you install this initially.
So here we are on my iPad looking at Cricut Design Space that’s on my Mac. You could also do this to look at Windows. It works in either way. You just need to have to set up. So I am going to walk you through how I can upload a file using my iPad without having to go to my Mac at all.
Copyright Jennifer Maker | page 11 | please Do not copy or share
CUT ABOVE SVG Design Course by Jennifer Maker
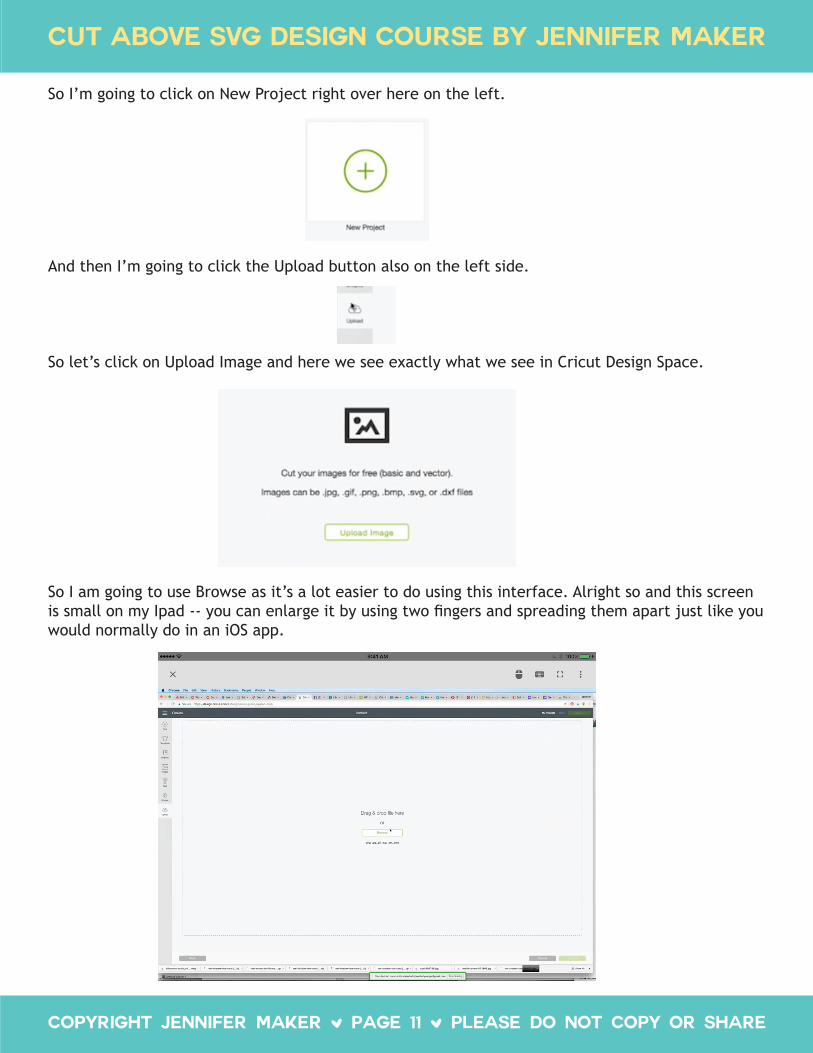
So I’m going to click on New Project right over here on the left.
And then I’m going to click the Upload button also on the left side.
So let’s click on Upload Image and here we see exactly what we see in Cricut Design Space.
So I am going to use Browse as it’s a lot easier to do using this interface. Alright so and this screen is small on my Ipad -- you can enlarge it by using two fingers and spreading them apart just like you would normally do in an iOS app.
Copyright Jennifer Maker | page 12 | please Do not copy or share
CUT ABOVE SVG Design Course by Jennifer Maker
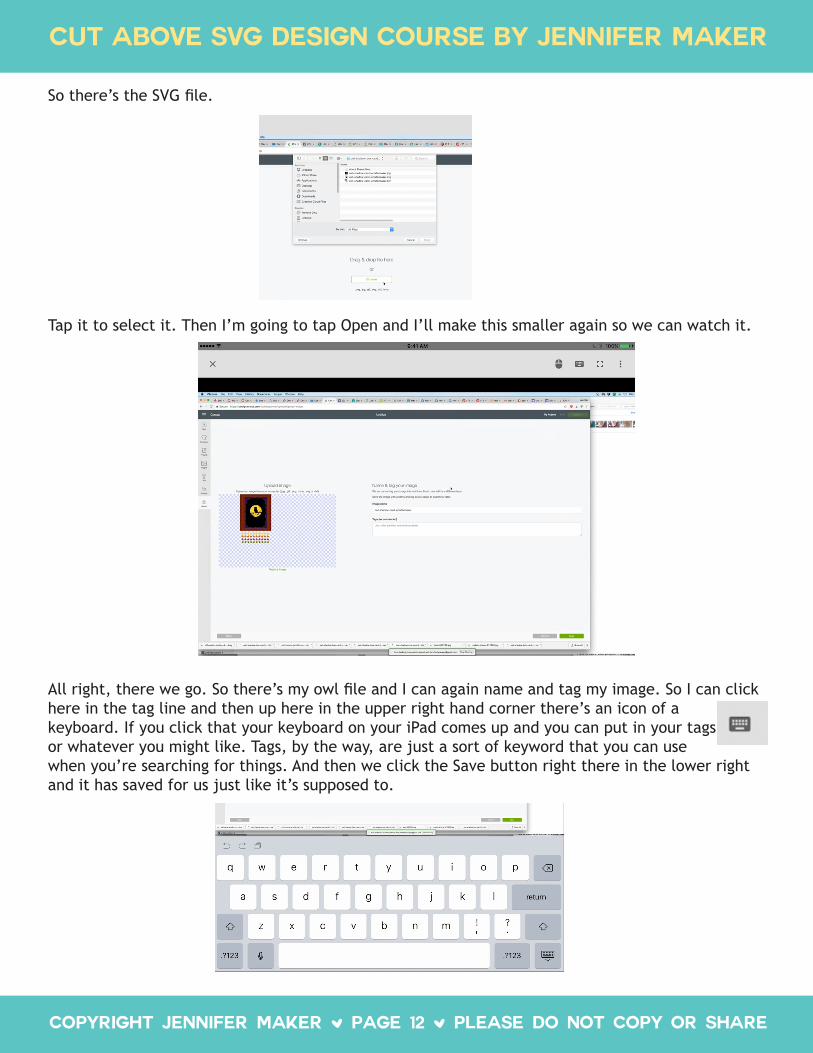
So there’s the SVG file.
Tap it to select it. Then I’m going to tap Open and I’ll make this smaller again so we can watch it.
All right, there we go. So there’s my owl file and I can again name and tag my image. So I can click here in the tag line and then up here in the upper right hand corner there’s an icon of a keyboard. If you click that your keyboard on your iPad comes up and you can put in your tags or whatever you might like. Tags, by the way, are just a sort of keyword that you can use when you’re searching for things. And then we click the Save button right there in the lower right and it has saved for us just like it’s supposed to.
Copyright Jennifer Maker | page 13 | please Do not copy or share
CUT ABOVE SVG Design Course by Jennifer Maker
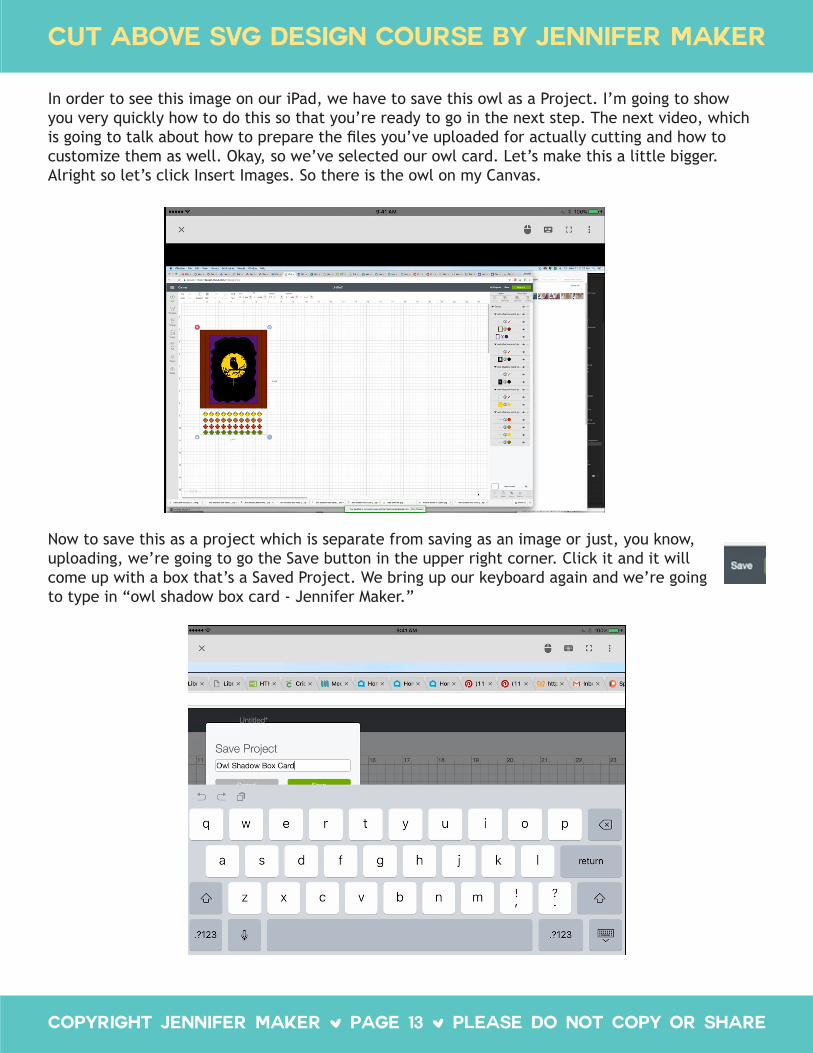
In order to see this image on our iPad, we have to save this owl as a Project. I’m going to show you very quickly how to do this so that you’re ready to go in the next step. The next video, which is going to talk about how to prepare the files you’ve uploaded for actually cutting and how to customize them as well. Okay, so we’ve selected our owl card. Let’s make this a little bigger. Alright so let’s click Insert Images. So there is the owl on my Canvas.
Now to save this as a project which is separate from saving as an image or just, you know, uploading, we’re going to go the Save button in the upper right corner. Click it and it will come up with a box that’s a Saved Project. We bring up our keyboard again and we’re going to type in “owl shadow box card - Jennifer Maker.”

Copyright Jennifer Maker | page 14 | please Do not copy or share
CUT ABOVE SVG Design Course by Jennifer Maker
There we go. Hide the keyboard window and click Save. It will tell you it is saving. So it’s now saved as a Project. This is not normally something you need to do until you’re actually read to save it, but in this case on the iPad we want to do that.
So now let’s go back and go into the Cricut Design Space app. Again, that’s different than using the Remote Chrome Access app to get to our desktop or laptop computers. Okay, so we’re going to click on the drop-down menu in the upper left corner and choose My Projects in the Cloud. This is important because these projects are’t saved on the iPad; they’re saved in the Cloud that we just did through remote access.
And, sure enough, it shows up and it’s available for us to use. All we have to do is click othe project and it’ll give us the option to use it.

Copyright Jennifer Maker | page 15 | please Do not copy or share
CUT ABOVE SVG Design Course by Jennifer Maker
And we click OK and it will appear on our Canvas. And that is how you get an SVG file uploaded into Cricut Design Space using an iPad running Chrome Remote Access. Now I will be showing you how you can modify and prepare this file for cutting right here in the Cricut Design Space app in the next video.
Jessica: A Case StudyOkay, so now that you’ve learned how to upload nearly any SVG on nearly any device, let’s spend a few minutes looking at what this process looks like in action through a short case study.
So one of my readers, Jessica, wrote me back at the start of summer. She told me about how she had gotten a Cricut, did the starter project, did a couple of easy projects in Design Space, but then got stuck. When I asked her why, she said got her Cricut because she’d really wanted to make a bunch of giant flowers to decorate her daughter’s room, but just couldn’t figure out to do it. She didn’t understand HOW to make things beyond what was presented in Design Space.
So I told her about the giant flowers I’d designed, and I told her how she could download the SVG, and how she could upload it. And that was all she needed! She was off and running, and has now made a dozen giant paper flowers for her daughter. And, YES, her daughter thinks her mom is amazing. I think her mom is amazing, too!!
Pretty awesome story, right?
Copyright Jennifer Maker | page 16 | please Do not copy or share
CUT ABOVE SVG Design Course by Jennifer Maker
Wrap Up Okay, so let’s do a quick review of what we learned today. We learned how to find the SVG after you download it, and how to decompress it when necessary. We learned how to upload SVGs to our design software using a Mac, a PC, AND an iPad. And we learned how to add the uploaded file to our project space to actually make it.
It’s a lot of info, so be sure to review your notes and try to take action right away! Go get yourself an SVG (I have like 50 of them in my free resource library) and upload it right now.
And speaking of taking action, before we go today, I want you to leave a comment right below this video and tell me about your experience uploading SVGs. Did this work for you? Do you have any tips for others?
In the next video I’m going to show you exactly how to modify the SVG files in Cricut Design Space, including changing score lines and write lines. And I’m going to show you how to ungroup and show/hide so you can cut just the parts you want. If you’re a Cricut owner, this is going to be a game changer for you!
Speaking of finding amazing projects to make, I’ve also been getting a lot of questions about my CUT ABOVE SVG Design Course. In the next session I’ll tell you all about it and how you can get started.
Next up, we’ll talk about how to take the next step toward modifying and actually making all these amazing projects you’ve been finding. I’ll see you in the next session/video!
Jennifer

Copyright Jennifer Maker | page 17 | please Do not copy or share
CUT ABOVE SVG Design Course by Jennifer Maker
Notes............................................................................................................................................................................................................................................
............................................................................................................................................................................................................................................
............................................................................................................................................................................................................................................
............................................................................................................................................................................................................................................
............................................................................................................................................................................................................................................
............................................................................................................................................................................................................................................
............................................................................................................................................................................................................................................
............................................................................................................................................................................................................................................
............................................................................................................................................................................................................................................
............................................................................................................................................................................................................................................
............................................................................................................................................................................................................................................
............................................................................................................................................................................................................................................
............................................................................................................................................................................................................................................
............................................................................................................................................................................................................................................
............................................................................................................................................................................................................................................
............................................................................................................................................................................................................................................
............................................................................................................................................................................................................................................
............................................................................................................................................................................................................................................
............................................................................................................................................................................................................................................
............................................................................................................................................................................................................................................
............................................................................................................................................................................................................................................