Embed Size (px)
Citation preview
November 2011
Information Systems Center
PowerPoint 2010 Reference Guide
Table of Contents
Objects .................................................................................................................................. 1
Align Objects ............................................................................................................................... 1
Group Objects ............................................................................................................................. 1
Vertically and/or Horizontally Center an Object ........................................................................ 1
Photo Albums ........................................................................................................................ 2
Create a Photo Album ................................................................................................................. 2
Edit an Existing Photo Album ...................................................................................................... 3
Pictures ................................................................................................................................. 4
Crop a Picture ............................................................................................................................. 4
Insert a Picture from a File .......................................................................................................... 4
Resize a Picture ........................................................................................................................... 5
Presentations ........................................................................................................................ 5
Add a Design ............................................................................................................................... 5
Add and Print Speaker Notes ...................................................................................................... 5
Create a Custom Template ......................................................................................................... 6
Create a New Presentation from Scratch ................................................................................... 9
Create a New Presentation Using a Custom Template .............................................................. 9
Create a PowerPoint Show File ................................................................................................. 10
Display a Presentation in Full Screen Mode ............................................................................. 10
Print Handouts .......................................................................................................................... 11
Slides .................................................................................................................................. 11
Add a Picture to the Slide Background ..................................................................................... 11
Change the Slide Background Color.......................................................................................... 12
Change the Slide Layout ........................................................................................................... 12
Delete a Slide ............................................................................................................................ 13
Insert a New Slide ..................................................................................................................... 13

Move a Slide .............................................................................................................................. 13
Text Boxes ........................................................................................................................... 13
Add a Border to a Text Box ....................................................................................................... 13
Change the Background Color of a Text Box ............................................................................ 14
Insert a Text Box ....................................................................................................................... 14
Monmouth College Information Systems Center PowerPoint 2010 Reference Guide
1
Objects
Align Objects
1. Click the first object that you want to align.
2. Press and hold the Ctrl key.
3. Click the other object(s) that you want to align.
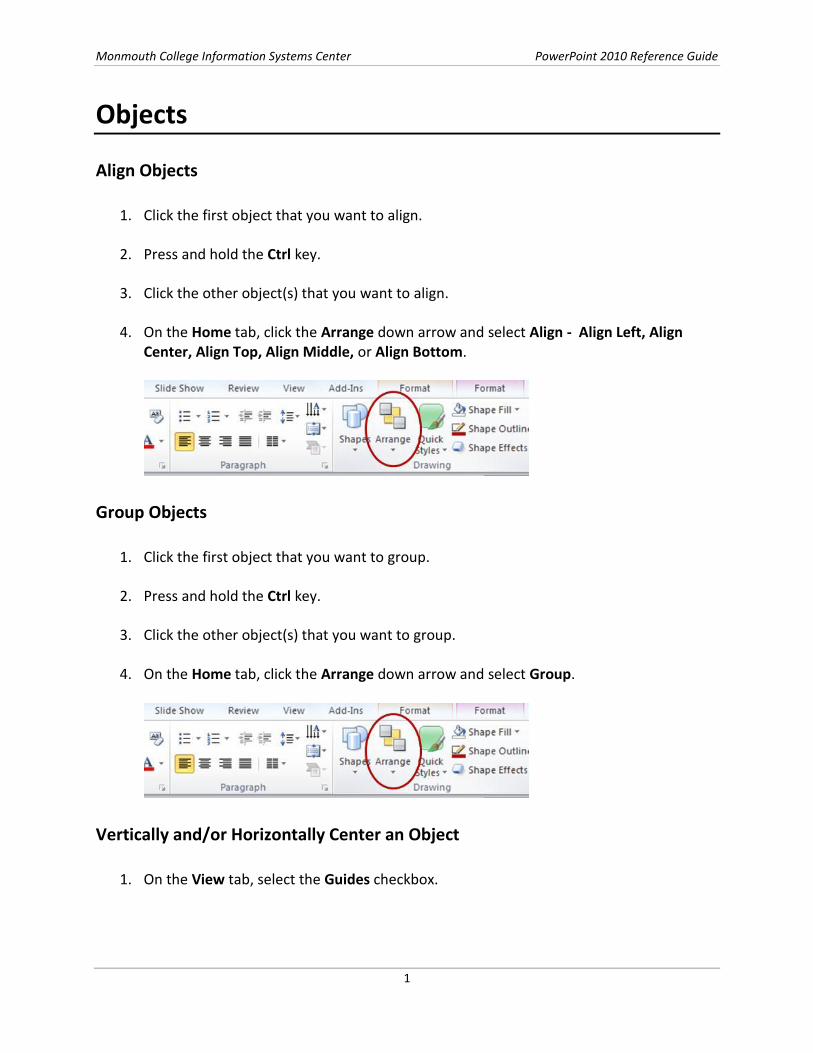
4. On the Home tab, click the Arrange down arrow and select Align - Align Left, Align Center, Align Top, Align Middle, or Align Bottom.
Group Objects
1. Click the first object that you want to group.
2. Press and hold the Ctrl key.
3. Click the other object(s) that you want to group.
4. On the Home tab, click the Arrange down arrow and select Group.
Vertically and/or Horizontally Center an Object
1. On the View tab, select the Guides checkbox.

Monmouth College Information Systems Center PowerPoint 2010 Reference Guide
2
2. Click the object you want to center.
3. Use the arrow keys to line up the vertical and/or horizontal sizing handles.
Photo Albums
PowerPoint’s Photo Album feature enables you to quickly create a presentation of pictures in just a few easy steps. After you create a photo album, you can format it and edit it like any other PowerPoint presentation.
Create a Photo Album
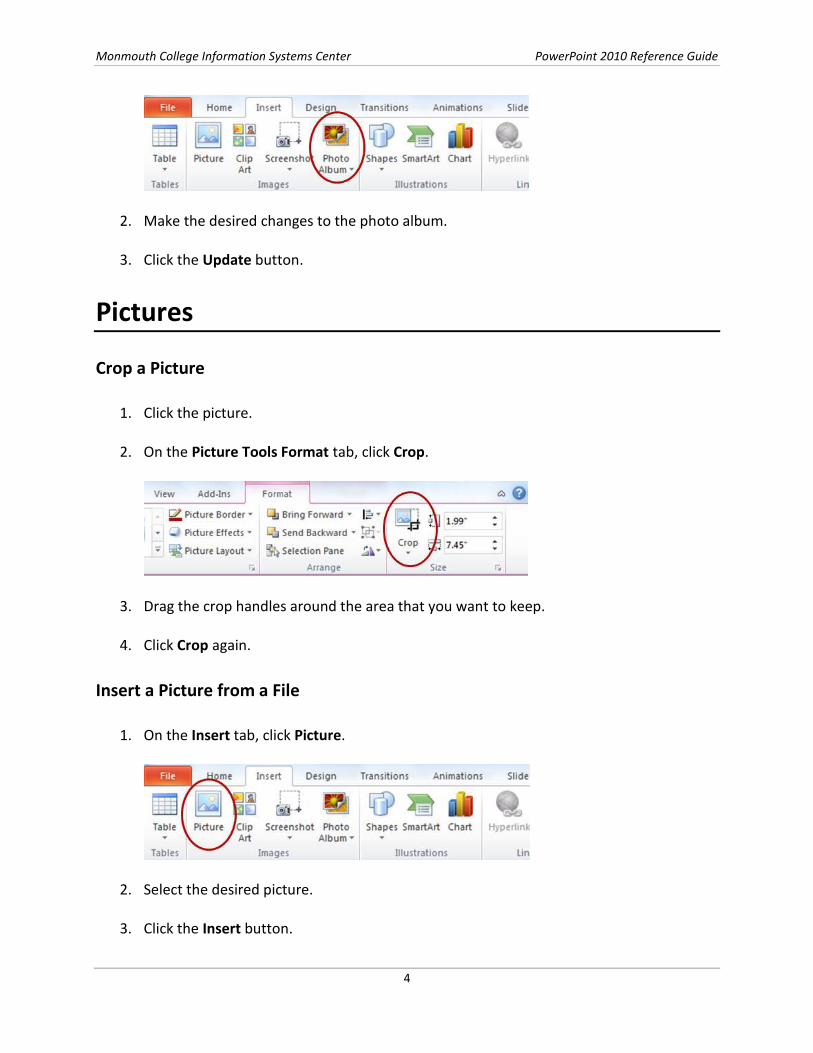
1. On the Insert tab, click Photo Album.
Monmouth College Information Systems Center PowerPoint 2010 Reference Guide
3
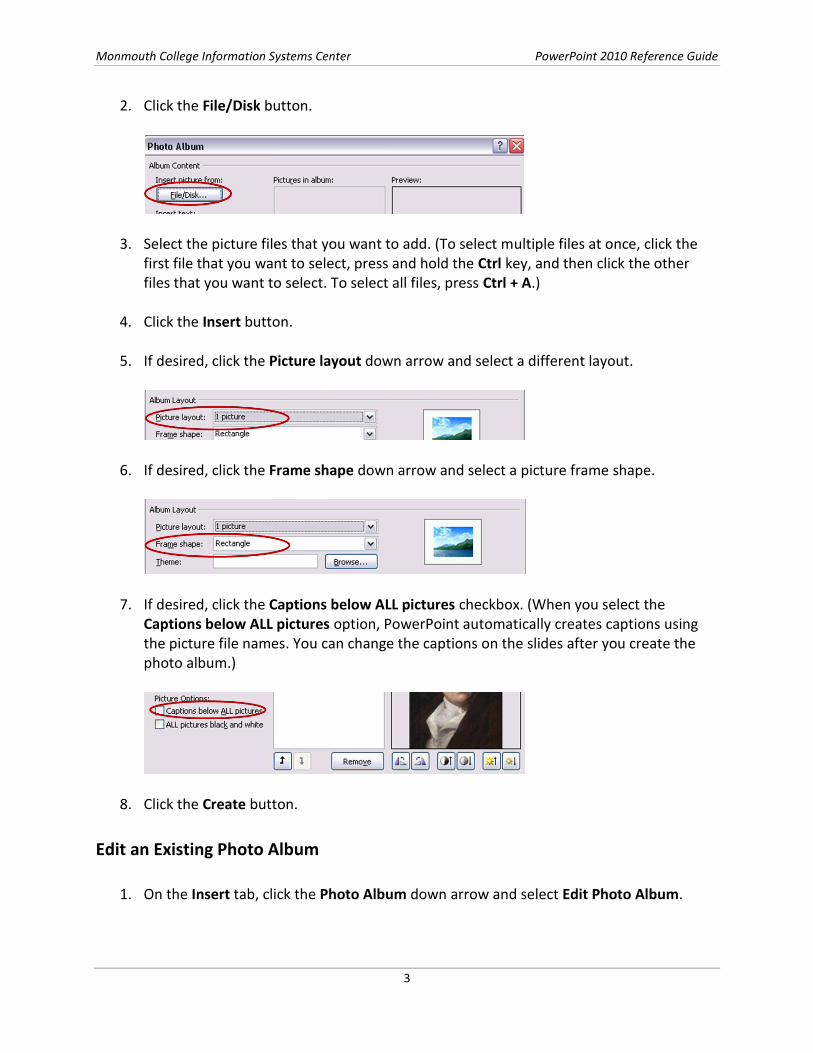
2. Click the File/Disk button.
3. Select the picture files that you want to add. (To select multiple files at once, click the first file that you want to select, press and hold the Ctrl key, and then click the other files that you want to select. To select all files, press Ctrl + A.)
4. Click the Insert button.
5. If desired, click the Picture layout down arrow and select a different layout.
6. If desired, click the Frame shape down arrow and select a picture frame shape.
7. If desired, click the Captions below ALL pictures checkbox. (When you select the Captions below ALL pictures option, PowerPoint automatically creates captions using the picture file names. You can change the captions on the slides after you create the photo album.)
8. Click the Create button.
Edit an Existing Photo Album
1. On the Insert tab, click the Photo Album down arrow and select Edit Photo Album.
Monmouth College Information Systems Center PowerPoint 2010 Reference Guide
4
2. Make the desired changes to the photo album.
3. Click the Update button.
Pictures
Crop a Picture
1. Click the picture.
2. On the Picture Tools Format tab, click Crop.
3. Drag the crop handles around the area that you want to keep.
4. Click Crop again.
Insert a Picture from a File
1. On the Insert tab, click Picture.
2. Select the desired picture.
3. Click the Insert button.
Monmouth College Information Systems Center PowerPoint 2010 Reference Guide
5
Resize a Picture
1. Click the picture.
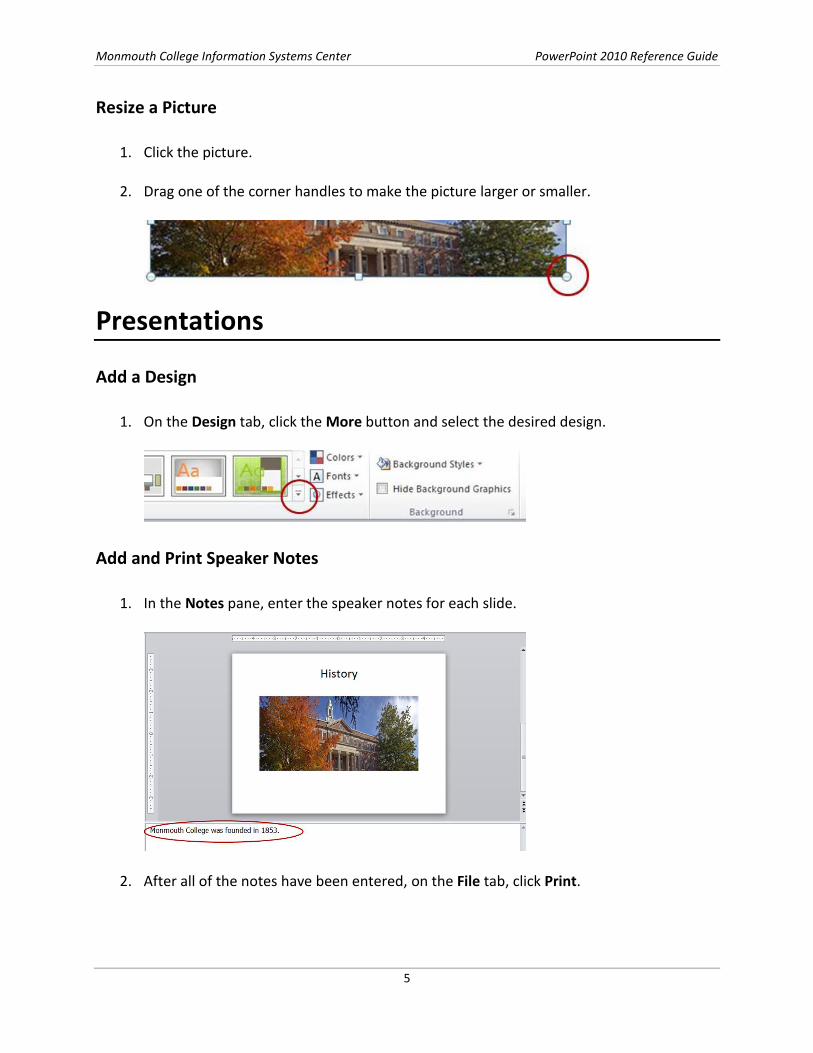
2. Drag one of the corner handles to make the picture larger or smaller.
Presentations
Add a Design
1. On the Design tab, click the More button and select the desired design.
Add and Print Speaker Notes
1. In the Notes pane, enter the speaker notes for each slide.
2. After all of the notes have been entered, on the File tab, click Print.
Monmouth College Information Systems Center PowerPoint 2010 Reference Guide
6
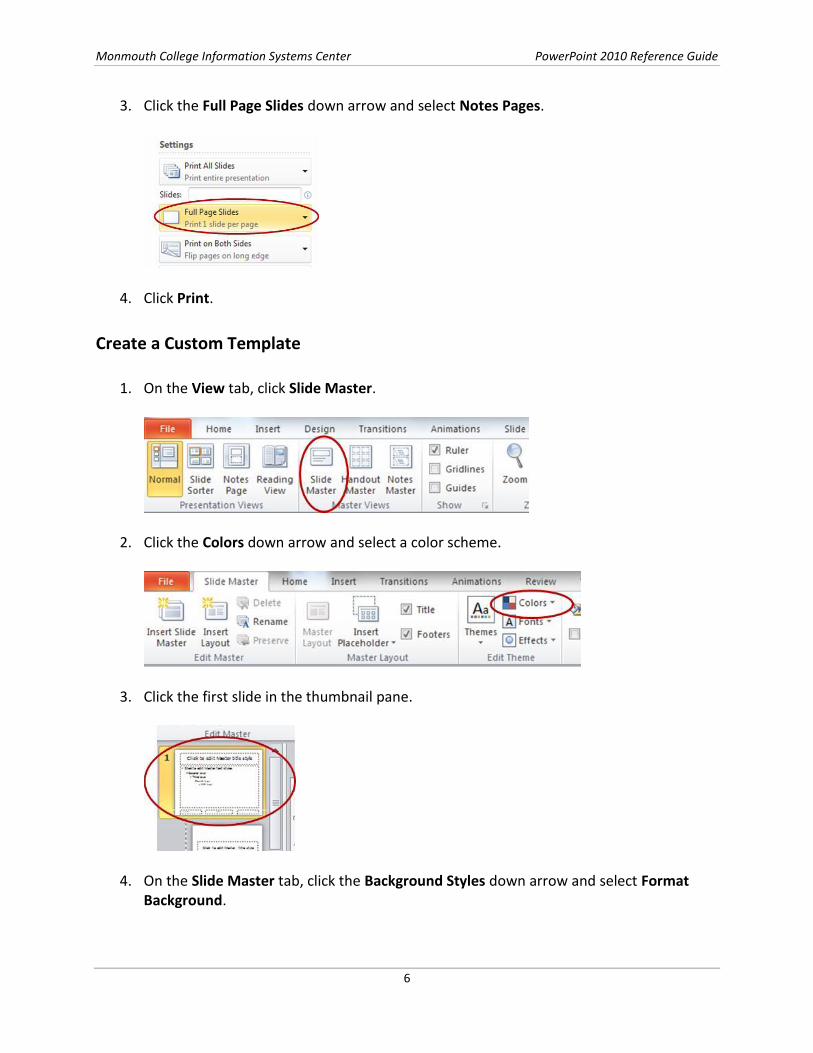
3. Click the Full Page Slides down arrow and select Notes Pages.
4. Click Print.
Create a Custom Template
1. On the View tab, click Slide Master.
2. Click the Colors down arrow and select a color scheme.
3. Click the first slide in the thumbnail pane.
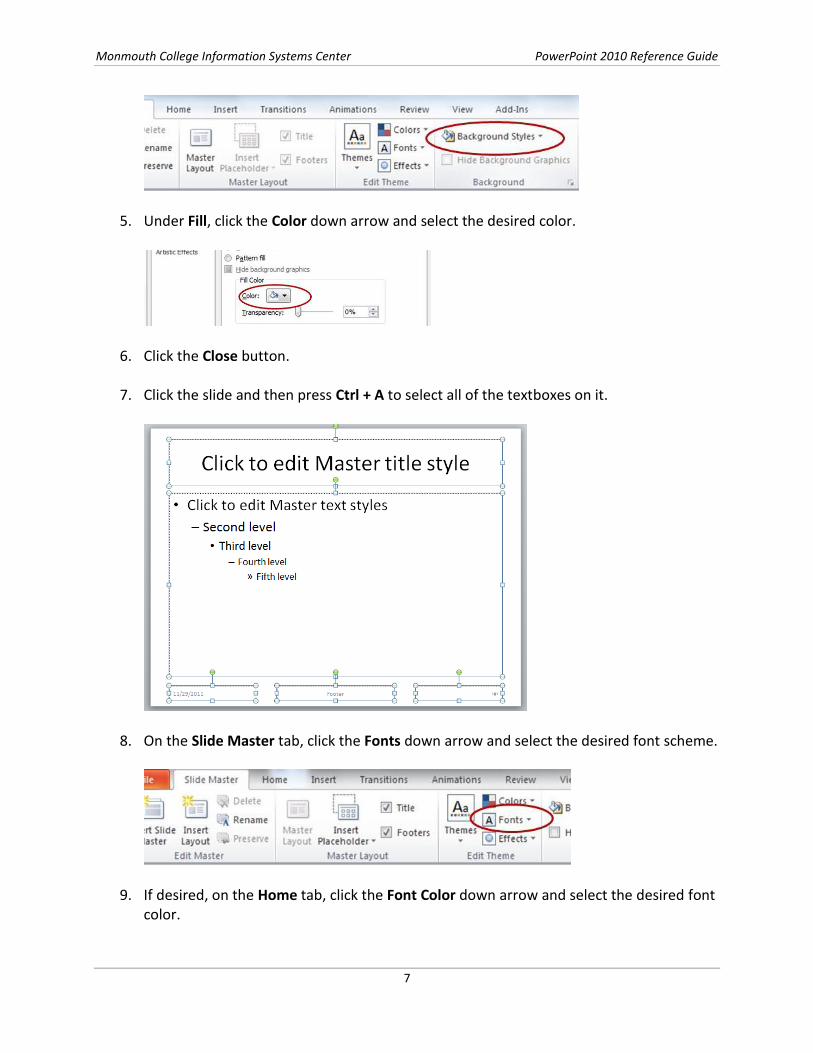
4. On the Slide Master tab, click the Background Styles down arrow and select Format Background.
Monmouth College Information Systems Center PowerPoint 2010 Reference Guide
7
5. Under Fill, click the Color down arrow and select the desired color.
6. Click the Close button.
7. Click the slide and then press Ctrl + A to select all of the textboxes on it.
8. On the Slide Master tab, click the Fonts down arrow and select the desired font scheme.
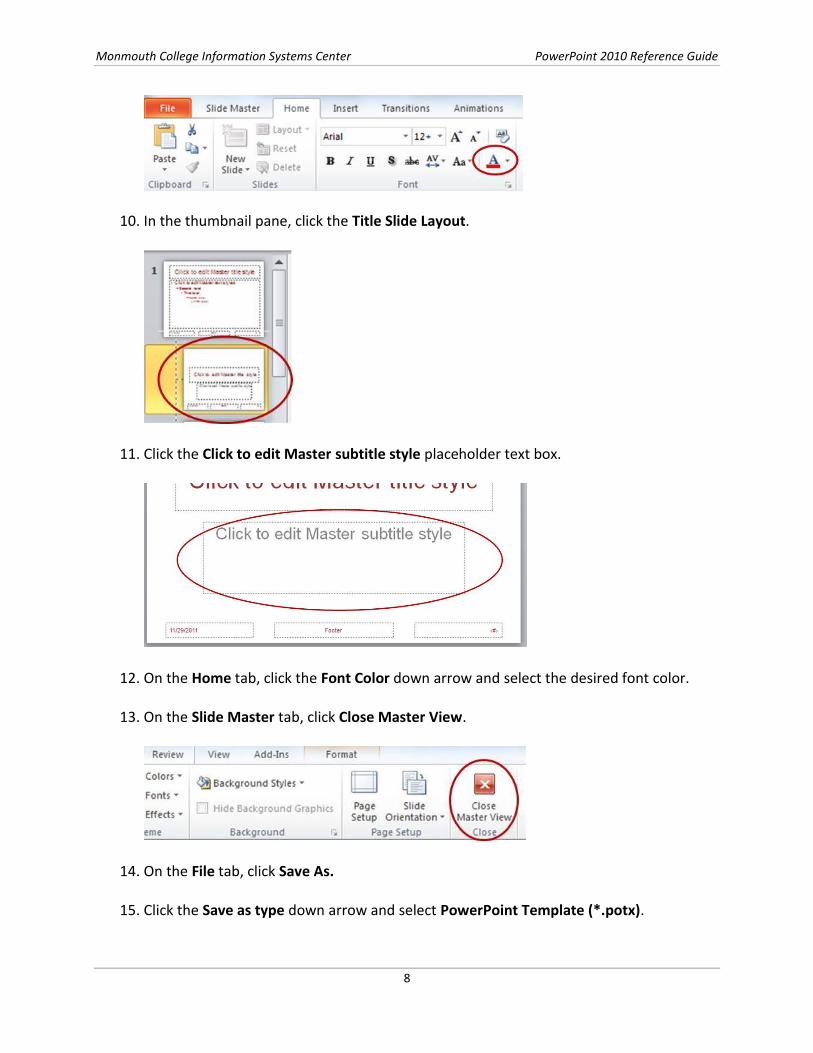
9. If desired, on the Home tab, click the Font Color down arrow and select the desired font color.
Monmouth College Information Systems Center PowerPoint 2010 Reference Guide
8
10. In the thumbnail pane, click the Title Slide Layout.
11. Click the Click to edit Master subtitle style placeholder text box.
12. On the Home tab, click the Font Color down arrow and select the desired font color.
13. On the Slide Master tab, click Close Master View.
14. On the File tab, click Save As.
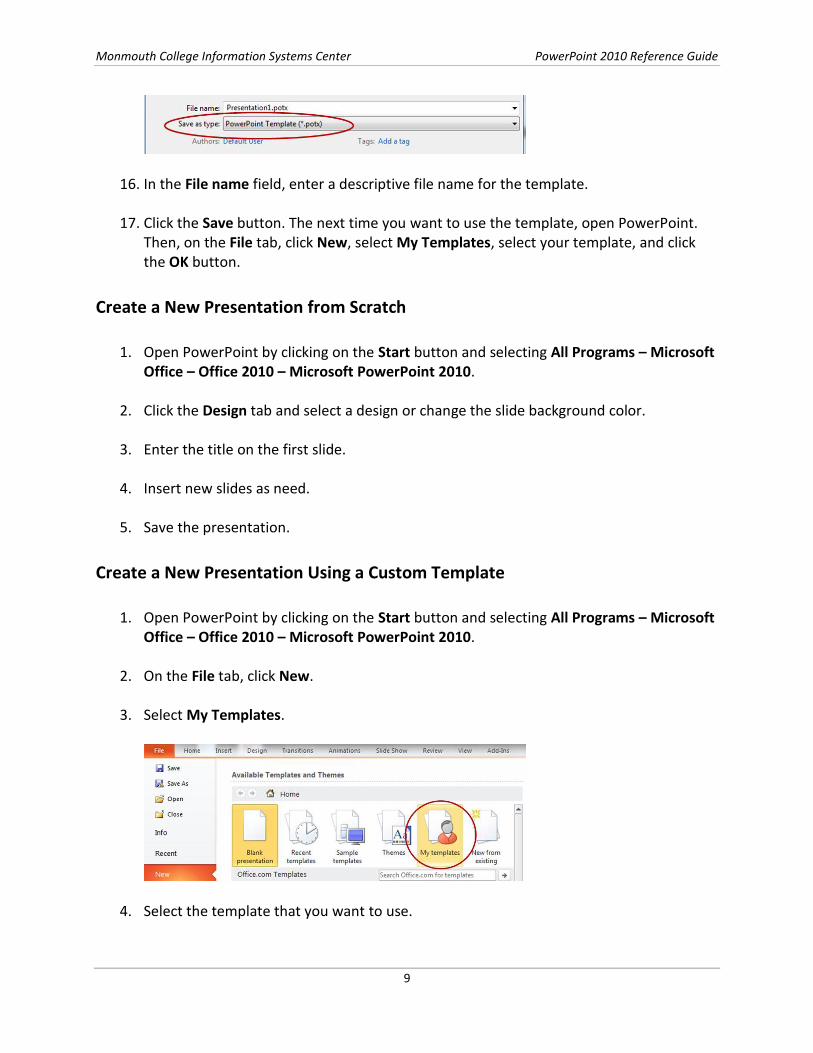
15. Click the Save as type down arrow and select PowerPoint Template (*.potx).
Monmouth College Information Systems Center PowerPoint 2010 Reference Guide
9
16. In the File name field, enter a descriptive file name for the template.
17. Click the Save button. The next time you want to use the template, open PowerPoint. Then, on the File tab, click New, select My Templates, select your template, and click the OK button.
Create a New Presentation from Scratch
1. Open PowerPoint by clicking on the Start button and selecting All Programs – Microsoft Office – Office 2010 – Microsoft PowerPoint 2010.
2. Click the Design tab and select a design or change the slide background color.
3. Enter the title on the first slide.
4. Insert new slides as need.
5. Save the presentation.
Create a New Presentation Using a Custom Template
1. Open PowerPoint by clicking on the Start button and selecting All Programs – Microsoft Office – Office 2010 – Microsoft PowerPoint 2010.
2. On the File tab, click New.
3. Select My Templates.
4. Select the template that you want to use.
Monmouth College Information Systems Center PowerPoint 2010 Reference Guide
10
5. Click the OK button.
6. Enter the title on the first slide.
7. Insert new slides as need.
8. Save the presentation.
Create a PowerPoint Show File
When you double-click a PowerPoint Show file, the presentation automatically opens in full-screen mode. You cannot edit a PowerPoint Show file, so you should create it only when you are finished working on the presentation. To create a PowerPoint Show file:
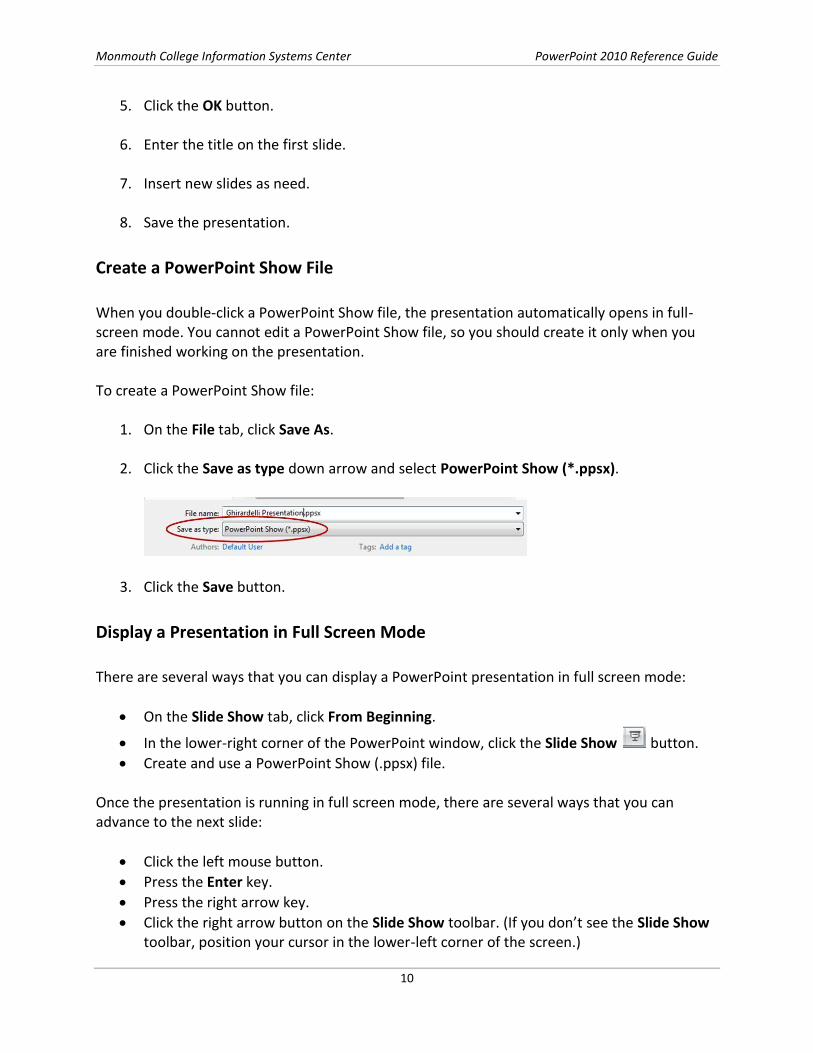
1. On the File tab, click Save As.
2. Click the Save as type down arrow and select PowerPoint Show (*.ppsx).
3. Click the Save button.
Display a Presentation in Full Screen Mode
There are several ways that you can display a PowerPoint presentation in full screen mode:
On the Slide Show tab, click From Beginning.
In the lower-right corner of the PowerPoint window, click the Slide Show button.
Create and use a PowerPoint Show (.ppsx) file.
Once the presentation is running in full screen mode, there are several ways that you can advance to the next slide:
Click the left mouse button.
Press the Enter key.
Press the right arrow key.
Click the right arrow button on the Slide Show toolbar. (If you don’t see the Slide Show toolbar, position your cursor in the lower-left corner of the screen.)
Monmouth College Information Systems Center PowerPoint 2010 Reference Guide
11
To go back to the previous slide, you can:
Press the Backspace key.
Press the left arrow key.
Click the left arrow button on the Slide Show toolbar. (If you don’t see the Slide Show toolbar, position your cursor in the lower-left corner of the screen.)
To exit full-screen mode at any time, press the Esc key.
Print Handouts
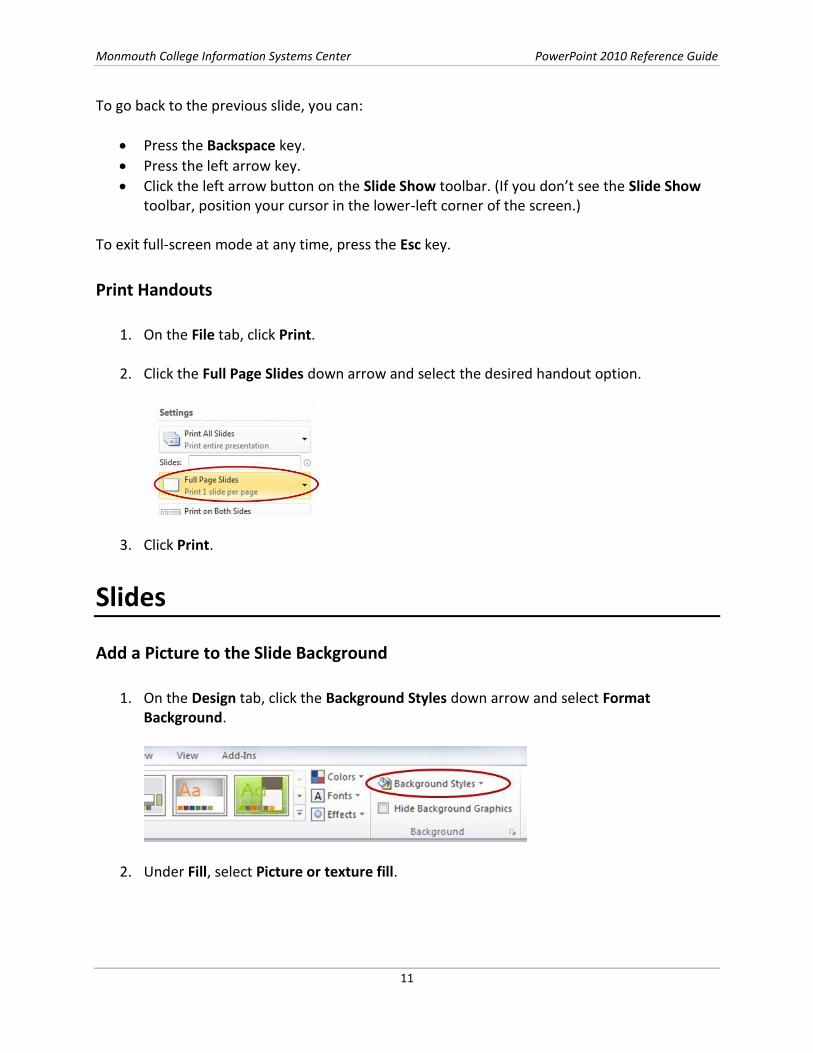
1. On the File tab, click Print.
2. Click the Full Page Slides down arrow and select the desired handout option.
3. Click Print.
Slides
Add a Picture to the Slide Background
1. On the Design tab, click the Background Styles down arrow and select Format Background.
2. Under Fill, select Picture or texture fill.
Monmouth College Information Systems Center PowerPoint 2010 Reference Guide
12
3. Click the File button.
4. Select the desired picture.
5. Click the Insert button.
6. Click the Close button.
Change the Slide Background Color
1. On the Design tab, click the Background Styles down arrow and select Format Background.
2. Under Fill, click the Color down arrow and select the desired color.
3. To apply the color to all of the slides in the presentation, click the Apply to All button and then click the Close button.
Change the Slide Layout
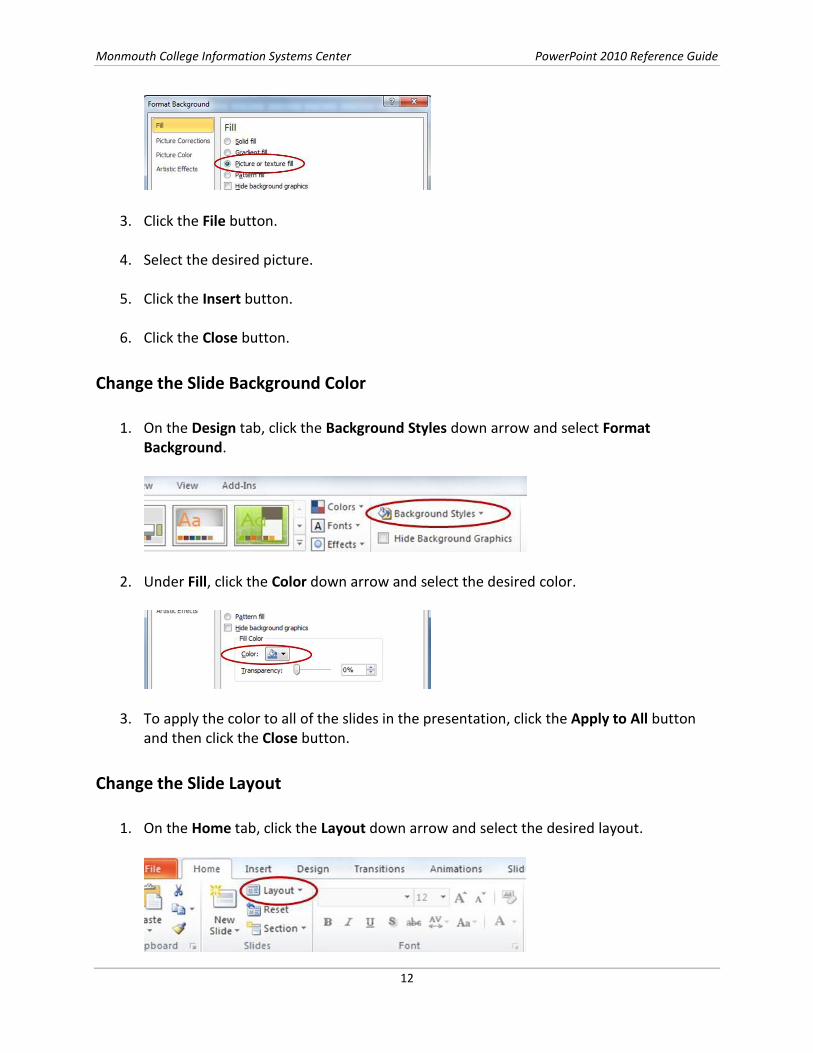
1. On the Home tab, click the Layout down arrow and select the desired layout.
Monmouth College Information Systems Center PowerPoint 2010 Reference Guide
13
Delete a Slide
1. On the Slides tab, click the slide thumbnail that you want to delete and then press the Delete key.
Insert a New Slide
1. On the Home tab, click New Slide.
Move a Slide
1. On the Slides tab, drag the slide thumbnail that you want to move to the desired location.
Text Boxes
Add a Border to a Text Box
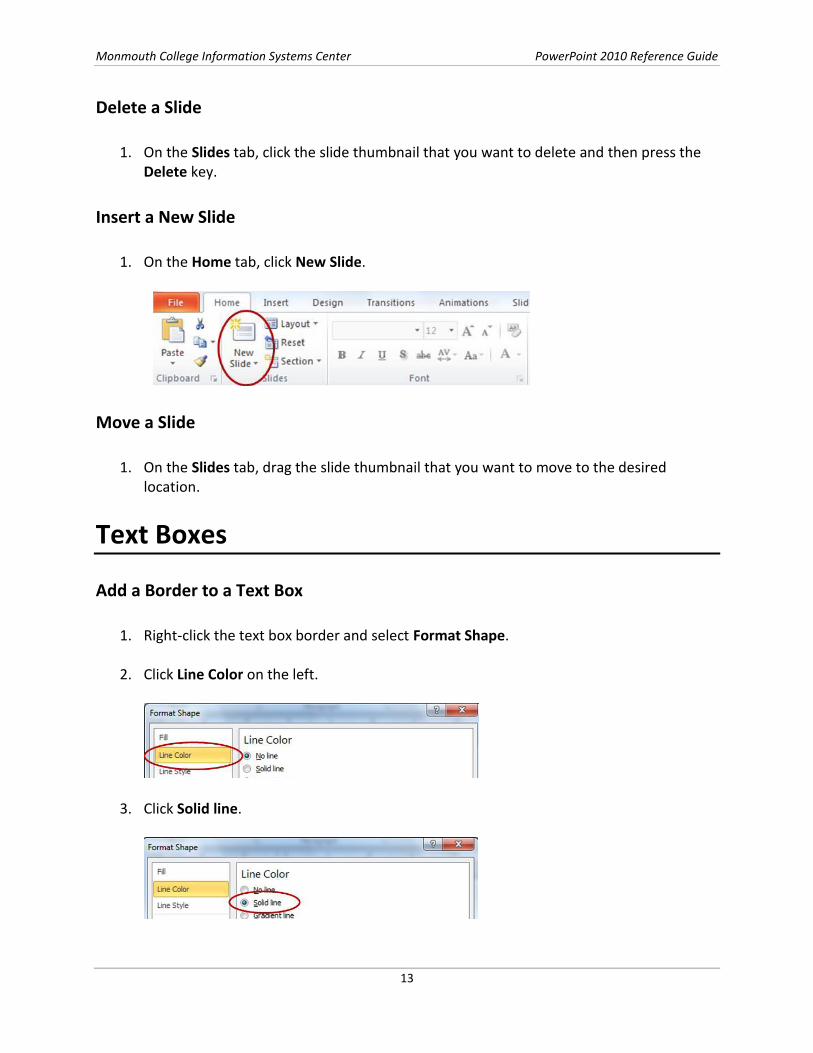
1. Right-click the text box border and select Format Shape.
2. Click Line Color on the left.
3. Click Solid line.
Monmouth College Information Systems Center PowerPoint 2010 Reference Guide
14
4. Click the Color down arrow and select the desired color.
5. Click Line Style on the left.
6. Select the desired line style options.
7. Click the Close button.
Change the Background Color of a Text Box
1. Right-click the text box border and select Format Shape.
2. Under Fill, click the Color down arrow and select the desired color.
3. Click the Close button.
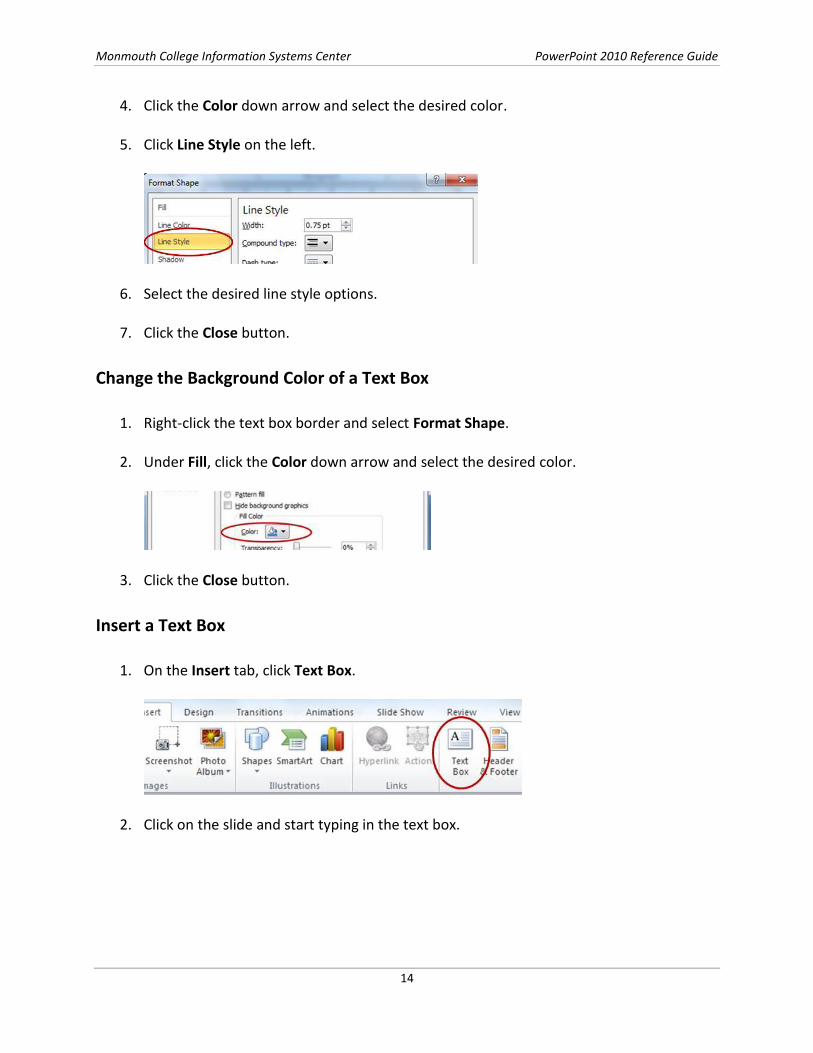
Insert a Text Box
1. On the Insert tab, click Text Box.
2. Click on the slide and start typing in the text box.