Embed Size (px)
Citation preview
Code 61421/61540/1/2
PortableAirless Spray + AccessoriesAn extremely portable, yet powerful
piston airless unit.
Operating & Safety Guide 591
59
1/0
2
©HSS Hire Service Group Plc 2003 No. 591/02
Group Office: 25 Willow Lane, Mitcham, Surrey CR4 4TS
Web Site: http://www.hss.com
...any comments?If you have any suggestions to enable us to improve
the information within this guide please fax yourcomments or write to the Product Manager at the
address belowFax: 020 8687 5001
For most jobs, point the gun at right angles to thesurface. In windy conditions, angle the gun to spray intothe wind and cover the area with vertical strokes.To ensure even coverage at the start and end of eachstroke, start the gun moving just before you squeezethe trigger and release the trigger just before thegun stops.Paint corners and edges with vertical strokes,positioning the gun so that the corner or edge is roughlyin the centre of the spray fan.If the spray tip should become blocked, reverse the tipso that the arrow points towards you and spray into asuitable metal container until the paint flows freely oncemore. The tip can then be returned to its normal spray position.
Keep the equipment clean. Even if you are taking only ashort break, clean it out thoroughly. Regularly remove thetip and seal for cleaning.
Remember that in cold weatherpaint will thicken and greaterpressure may be needed. Inwarm or hot weather, paintwill dry quicker. If using a two-pack paint ALWAYS consult themanufacturer before use, asweather conditions can drasticallychange the way it behaves. Damaged hoses are poten-tially dangerous so handlethem with care and coil themneatly, without kinks, forstorage.Never push the equipmentbeyond its design limits. If itwill not do what you want withreasonable ease and speed,assume you have the wrongtool for the job. Contact yourlocal HSS Hire Shop for advice.When not in use, store theequipment somewhere clean,dry and safe from thieves.
Switch the unit OFF andrelease any pressure via thespray gun before turning theprime valve to PRIME andengaging the gun’s trigger lock.Remove the spray tip andsoak it in the appropriatesolvent. Place the suctiontube into a container of asuitable solvent and hold thebleed line over the paintcontainer. Turn the pressureto minimum then switch theunit ON to recapture the paintstill in the system. Once solventstarts to flow out of the
bleed line quickly transfer it to the solvent container.Then simply clip the bleed line to the suction tubeand allow to circulate for a few minutes.Next, clean the spray gun and hose. Set the primevalve to spray and ‘pump’ the remaining paint backinto its can, keeping the gun in contact with the containerat all times.Once the solvent appears at the nozzle, continuepumping into the solvent container for a fewminutes to flush out any remaining paint.That done, set the prime valve to PRIME, remove thesuction tube from solvent, let the unit pump untilnearly dry, then switch OFF.You should now repeat the above procedure usingfresh solvent before cleaning up the spray - tip with a softbrush and refitting it.If water was used as the solvent, pump some airlesscorrosion check solution, available from your local HSSHire Shop, through the system. This will prevent
corrosion of the machine and the solidifying of paintduring storage.Collect everything together and give the unit a finalclean up ready for return, to your local HSS Hire Shop.
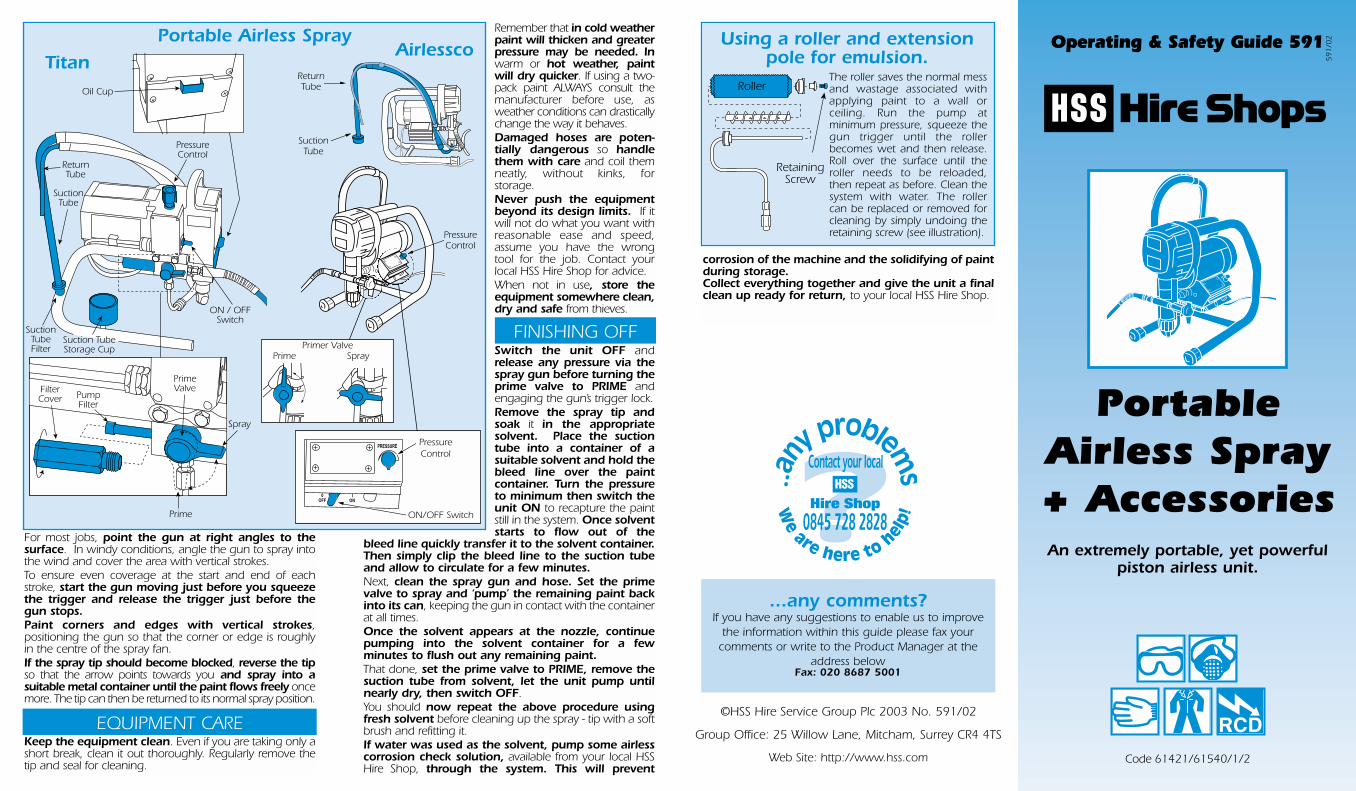
RetainingScrew
Roller
Using a roller and extension pole for emulsion.
The roller saves the normal mess and wastage associated with applying paint to a wall or ceiling. Run the pump at minimum pressure, squeeze the gun trigger until the roller becomes wet and then release. Roll over the surface until the roller needs to be reloaded, then repeat as before. Clean the system with water. The roller can be replaced or removed for cleaning by simply undoing the retaining screw (see illustration).
EQUIPMENT CARE
FINISHING OFF
ReturnTube
ON / OFFSwitch
SuctionTube
SuctionTubeFilter
Suction TubeStorage Cup
PressureControl
PrimeValve
Prime
Spray
PumpFilter
FilterCover
Oil Cup
ReturnTube
SuctionTube
PressureControl
Prime SprayPrimer Valve
PRESSURE
OFF ON0 I
ON/OFF Switch
PressureControl
Portable Airless Spray
TitanAirlessco
For advice on the safety and suitability of this equipmentcontact your local HSS Hire Shop.There is a serious risk of personal injury if you do notfollow all instructions laid down in this guide.The hirer has a responsibility to ensure that all necessaryrisk assessments have been completed prior to the useof this equipment.This equipment should only be used by an operatorwho has been deemed competent to do so byhis/her employer. This equipment should be used by an able bodied,competent adult who has read and understood theseinstructions. Anyone with either a temporary or permanentdisability, should seek expert advice before using it.Keep children, animals and bystanders away fromthe work area. Cordon off a NO GO area using eithercones, barriers or tape, available for hire from your localHSS Hire Shop.
Never use this equipment if you are ill,feeling tired, or under the influence of
alcohol or drugs.Safety goggles MUST be worn by everyone inthe work area.Some materials when sprayed containsubstances which, when inhaled, can be harmful
to health. A suitable mask must be worn when using thisequipment. Respiratory protective equipment is available forhire, contact your local HSS Hire Shop for details.
Wear practical, protective clothing, glovesand footwear. Avoid loose garments and
jewellery that could catch in moving parts, tie back long hair.This equipment is heavy (31kg), never attempt to liftit on your own, always get help.Never lift or move this equipment by its powersupply cable.Always switch OFF and unplug the equipment whennot in use.Ensure the work area is well lit and ventilated, if indoubt, ask about lighting and ventilation equipment atyour local HSS Hire Shop.
Airless spray equipment can cause serious injury, sotake care. Never point the gun at anyone and alwaysengage the trigger safety lock when not actuallyspraying.If spraying flammable materials, DO NOT work nearsources of ignition. Keep a minimum distance of 15mfrom such hazards.If working above ground-level, work from a suitable,stable platform, an access tower for example. Never workfrom ladders or steps.Make sure you know how to switch this machine OFFbefore you switch it ON in case you get into difficulty.Never leave the unit running and unattended.
Always disconnect the machine from its powersupply before making adjustments to it. Check thatyou have removed all spanners before restarting. Make sure that everyone is warned of what you aredoing. Check the condition of the equipment before use. Ifit shows signs of damage or excessive wear, return it toyour local HSS Hire Shop.
The HSS Portable Airless Spray Units require a110V 16amp power supply, obtainable from a 110Vgenerator or from the mains via a suitable transformer.Never connect 110V units directly to the 230V mainselectricity supply.If the equipment fails, or if its power supply cable orplug becomes damaged, return it. Never try to repairit yourself.Keep cables out of harm’s way, and clear of the workarea. It is preferable to extend the paint hose ratherthan use an extension lead. However, if an extensionlead must be used contact your local HSS Hire Shop foradvice. Extension leads should be fully unwound andloosely coiled, away from the equipment. Never runthem through water, over sharp edges or where they couldtrip someone.Keep the equipment dry, using electrical equipmentin very damp or wet conditions can be dangerous.
To reduce the risk of electric shock, always use asuitable RCD (Residual Current-Operated Device)
available from your local HSS Hire Shop. Or power theequipment from a mains circuit with a built in RCD.Ensure the spray unit and power socket are switchedOFF before plugging into the power supply.
It is essential to familiarise yourself with all thecontrols before starting. Hold the spray gun in a suitable container and squeezethe trigger, this will release any pressure stored within theunit and safeguard the user against the risk of an accident.
Tighten all hose connections with a pair of spanners,check that the maximum hose length has not beenexceeded, maximum 60m.Engage the gun’s trigger lock then remove the spraytip by turning the arrow 90 degrees from the direction ofspray and simply pulling it out.
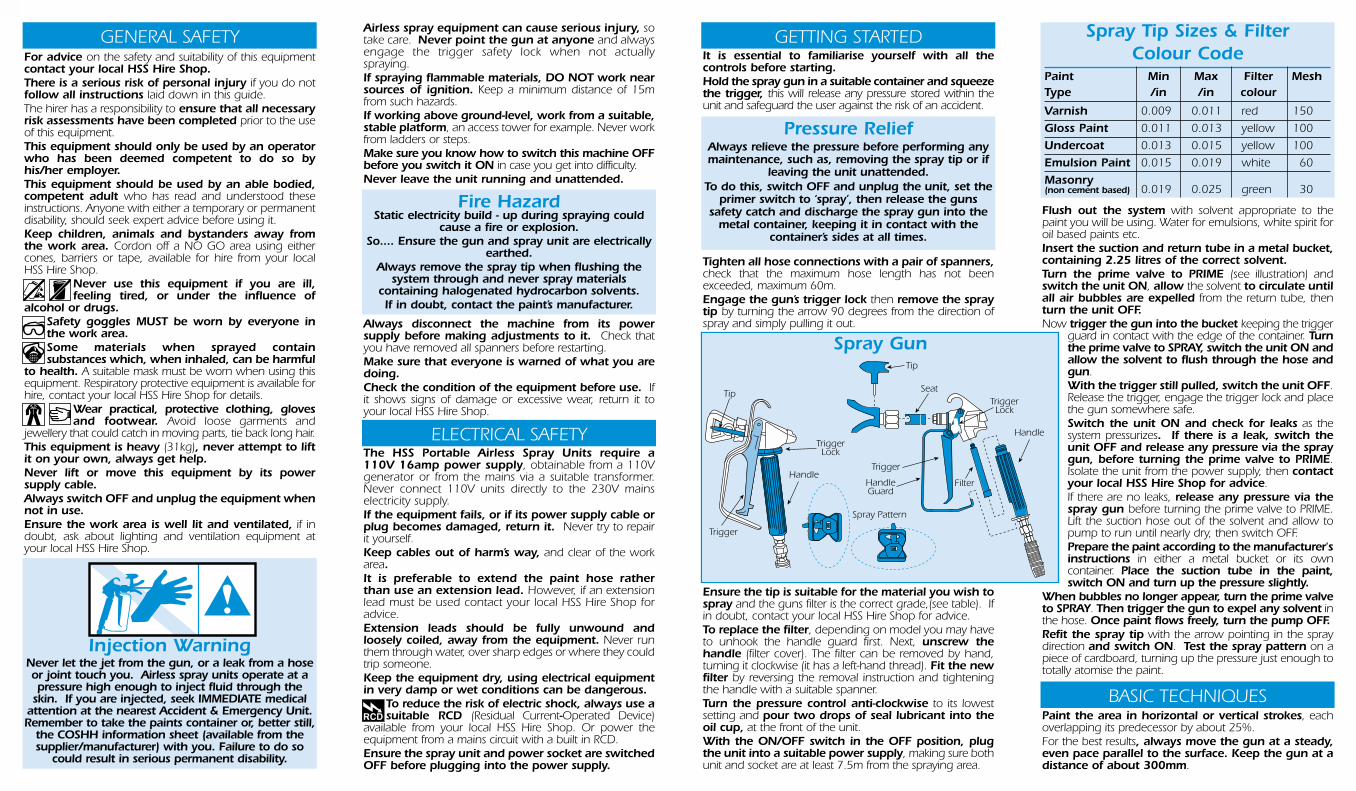
Ensure the tip is suitable for the material you wish tospray and the guns filter is the correct grade,(see table). Ifin doubt, contact your local HSS Hire Shop for advice.To replace the filter, depending on model you may haveto unhook the handle guard first. Next, unscrew thehandle (filter cover). The filter can be removed by hand,turning it clockwise (it has a left-hand thread). Fit the newfilter by reversing the removal instruction and tighteningthe handle with a suitable spanner.Turn the pressure control anti-clockwise to its lowestsetting and pour two drops of seal lubricant into theoil cup, at the front of the unit.With the ON/OFF switch in the OFF position, plugthe unit into a suitable power supply, making sure bothunit and socket are at least 7.5m from the spraying area.
GENERAL SAFETY GETTING STARTED
Injection WarningNever let the jet from the gun, or a leak from a hoseor joint touch you. Airless spray units operate at apressure high enough to inject fluid through the
skin. If you are injected, seek IMMEDIATE medicalattention at the nearest Accident & Emergency Unit.Remember to take the paints container or, better still,
the COSHH information sheet (available from thesupplier/manufacturer) with you. Failure to do so
could result in serious permanent disability.
Fire HazardStatic electricity build - up during spraying could
cause a fire or explosion. So.... Ensure the gun and spray unit are electrically
earthed. Always remove the spray tip when flushing the
system through and never spray materialscontaining halogenated hydrocarbon solvents. If in doubt, contact the paint’s manufacturer.
Pressure ReliefAlways relieve the pressure before performing anymaintenance, such as, removing the spray tip or if
leaving the unit unattended.To do this, switch OFF and unplug the unit, set the
primer switch to ‘spray’, then release the gunssafety catch and discharge the spray gun into the
metal container, keeping it in contact with thecontainer’s sides at all times.
ELECTRICAL SAFETY
Spray Tip Sizes & Filter Colour Code
Paint Min Max Filter MeshType /in /in colour
Varnish 0.009 0.011 red 150
Gloss Paint 0.011 0.013 yellow 100
Undercoat 0.013 0.015 yellow 100
Emulsion Paint 0.015 0.019 white 60
Masonry(non cement based) 0.019 0.025 green 30
Flush out the system with solvent appropriate to thepaint you will be using. Water for emulsions, white spirit foroil based paints etc.Insert the suction and return tube in a metal bucket,containing 2.25 litres of the correct solvent. Turn the prime valve to PRIME (see illustration) andswitch the unit ON, allow the solvent to circulate untilall air bubbles are expelled from the return tube, thenturn the unit OFF.Now trigger the gun into the bucket keeping the trigger
guard in contact with the edge of the container. Turnthe prime valve to SPRAY, switch the unit ON andallow the solvent to flush through the hose andgun.With the trigger still pulled, switch the unit OFF.Release the trigger, engage the trigger lock and placethe gun somewhere safe.Switch the unit ON and check for leaks as thesystem pressurizes. If there is a leak, switch theunit OFF and release any pressure via the spraygun, before turning the prime valve to PRIME.Isolate the unit from the power supply, then contactyour local HSS Hire Shop for advice.If there are no leaks, release any pressure via thespray gun before turning the prime valve to PRIME.Lift the suction hose out of the solvent and allow topump to run until nearly dry, then switch OFF.Prepare the paint according to the manufacturer'sinstructions in either a metal bucket or its owncontainer. Place the suction tube in the paint,switch ON and turn up the pressure slightly.
When bubbles no longer appear, turn the prime valveto SPRAY. Then trigger the gun to expel any solvent inthe hose. Once paint flows freely, turn the pump OFF.Refit the spray tip with the arrow pointing in the spraydirection and switch ON. Test the spray pattern on apiece of cardboard, turning up the pressure just enough tototally atomise the paint.
Paint the area in horizontal or vertical strokes, eachoverlapping its predecessor by about 25%.For the best results, always move the gun at a steady,even pace parallel to the surface. Keep the gun at adistance of about 300mm.
Tip
TriggerLock
Handle
Spray Pattern
Tip
SeatTriggerLock
Trigger
Filter
Handle
HandleGuard
Trigger
Spray Gun
BASIC TECHNIQUES