Embed Size (px)
Citation preview
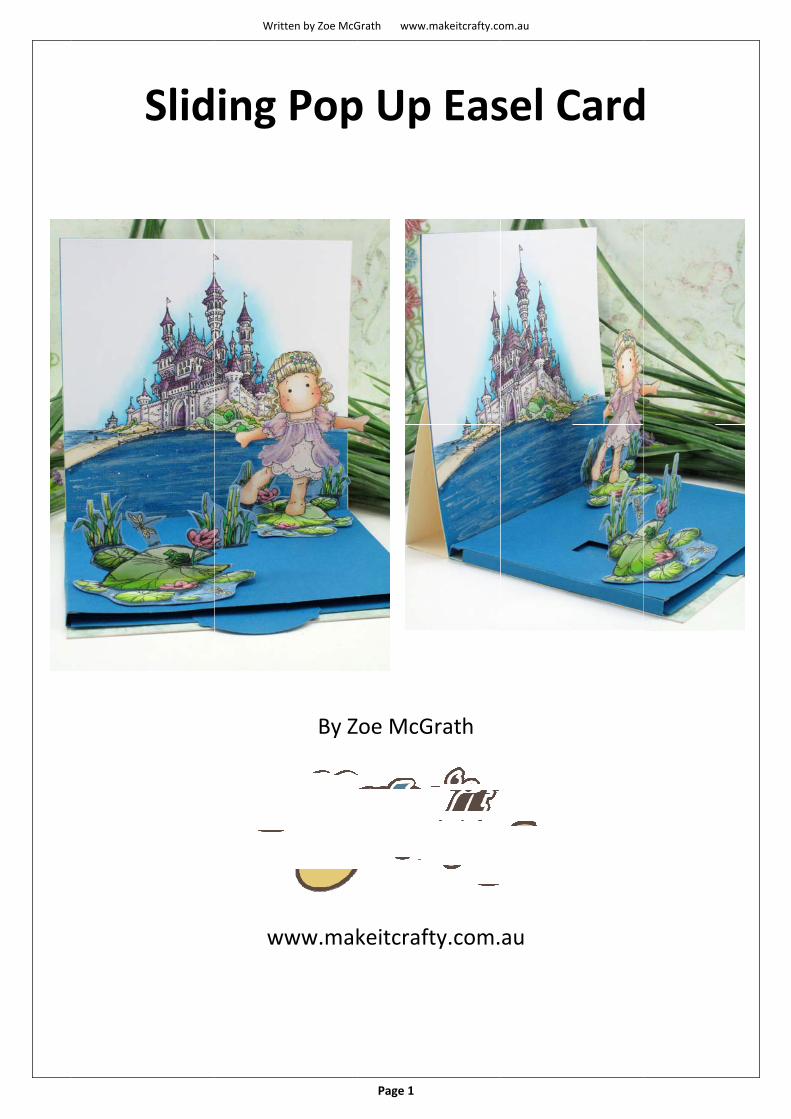
Slid
Writt
ing
ww
ten by Zoe McG
Pop
By Z
ww.mak
Grath www.
Page 1
p Up
Zoe McG
keitcraft
makeitcrafty.co
p Eas
Grath
ty.com.
om.au
sel C
au
Cardd

Written by Zoe McGrath www.makeitcrafty.com.au
Page 2
Begin by creating the base of your easel card. This is simply a regular square card but you fold one side of the card
in half towards the centre of the inside fold.
Next design the front cover. The front cover will be the
same size as the unfolded square on the right.
I decided to create a scene for my front cover that
becomes the backdrop of my pop up card. You can create
your backdrop using images, plain cardstock with cut out
images or designer paper. Let you imagination do its
magic.
Written by Zoe McGrath www.makeitcrafty.com.au
Page 3
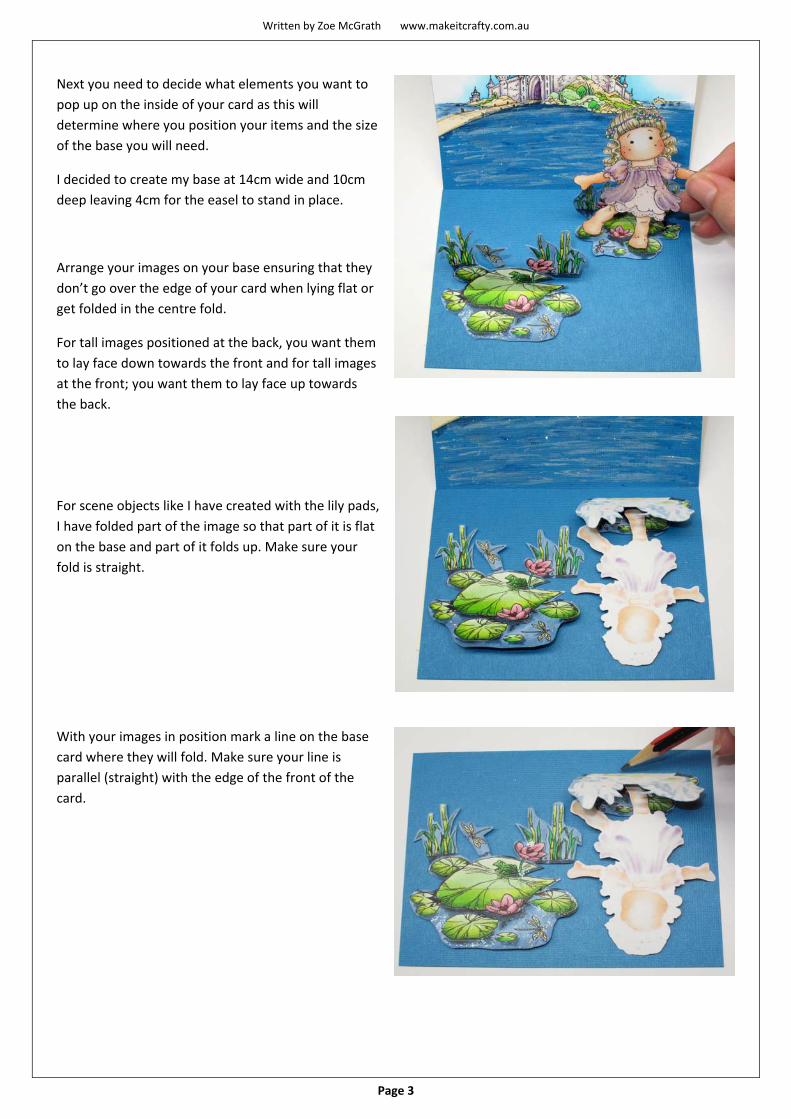
Next you need to decide what elements you want to
pop up on the inside of your card as this will
determine where you position your items and the size
of the base you will need.
I decided to create my base at 14cm wide and 10cm
deep leaving 4cm for the easel to stand in place.
Arrange your images on your base ensuring that they
don’t go over the edge of your card when lying flat or
get folded in the centre fold.
For tall images positioned at the back, you want them
to lay face down towards the front and for tall images
at the front; you want them to lay face up towards
the back.
For scene objects like I have created with the lily pads,
I have folded part of the image so that part of it is flat
on the base and part of it folds up. Make sure your
fold is straight.
With your images in position mark a line on the base
card where they will fold. Make sure your line is
parallel (straight) with the edge of the front of the
card.

Written by Zoe McGrath www.makeitcrafty.com.au
Page 4
For objects that will fold forward when closed; cut a
slot about a millimetre wide that is ‘smaller’ than the
line you drew. It is best to do this either in the centre
or at a high point of the folded object. In my example,
I created two slots along the line at the two high
points for extra stability.
For objects that will fold backward when closed; we
need to create a sliding mechanism. Select a point
along the marked line and mark a 24mm line at a right
angle. Then mark another 24mm line for the thickness
of the tab. My tab is 15mm wide and approximately
centred on the position marking.
Next add additional markings for your folds. My
markings are 4mm from the position marking, and
14mm from the position marking.
Using a knife and ruler, cut the two sides and the top
creating a tab. Make sure don’t cut the bottom that
will be folded to support your object.
Using a ruler, fold marked fold lines as shown below.
Written by Zoe McGrath www.makeitcrafty.com.au
Page 5
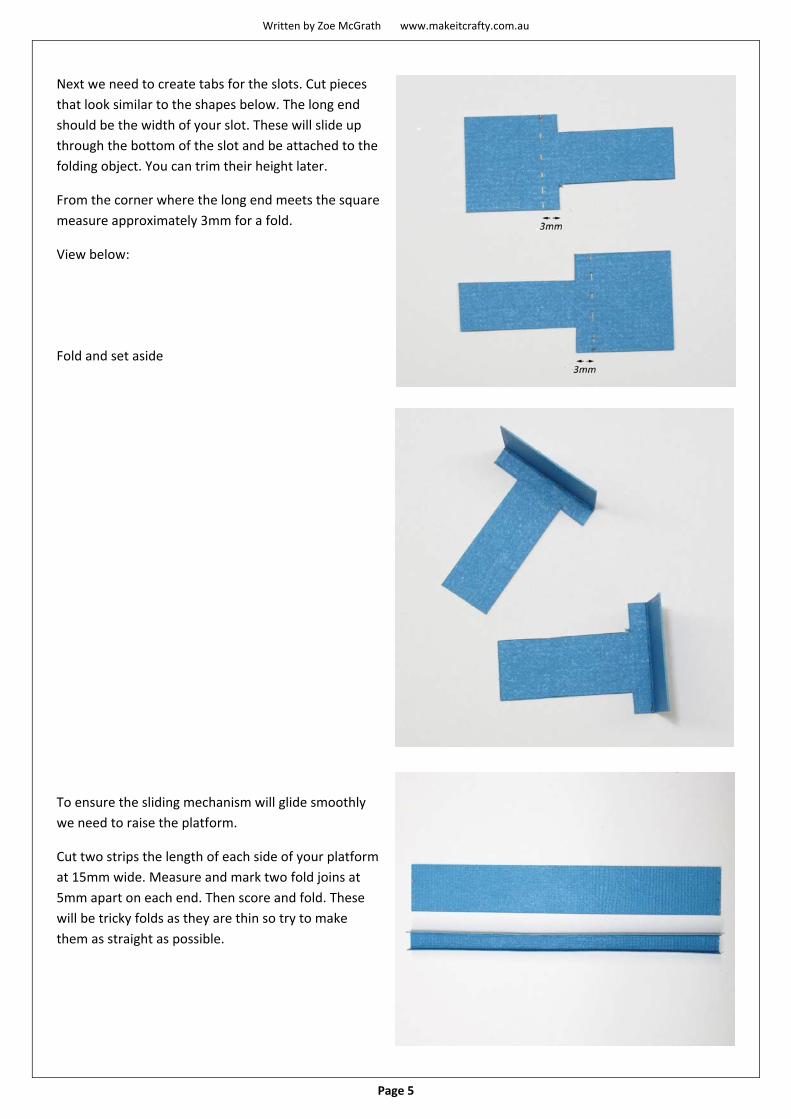
Next we need to create tabs for the slots. Cut pieces
that look similar to the shapes below. The long end
should be the width of your slot. These will slide up
through the bottom of the slot and be attached to the
folding object. You can trim their height later.
From the corner where the long end meets the square
measure approximately 3mm for a fold.
View below:
Fold and set aside
To ensure the sliding mechanism will glide smoothly
we need to raise the platform.
Cut two strips the length of each side of your platform
at 15mm wide. Measure and mark two fold joins at
5mm apart on each end. Then score and fold. These
will be tricky folds as they are thin so try to make
them as straight as possible.
Written by Zoe McGrath www.makeitcrafty.com.au
Page 6
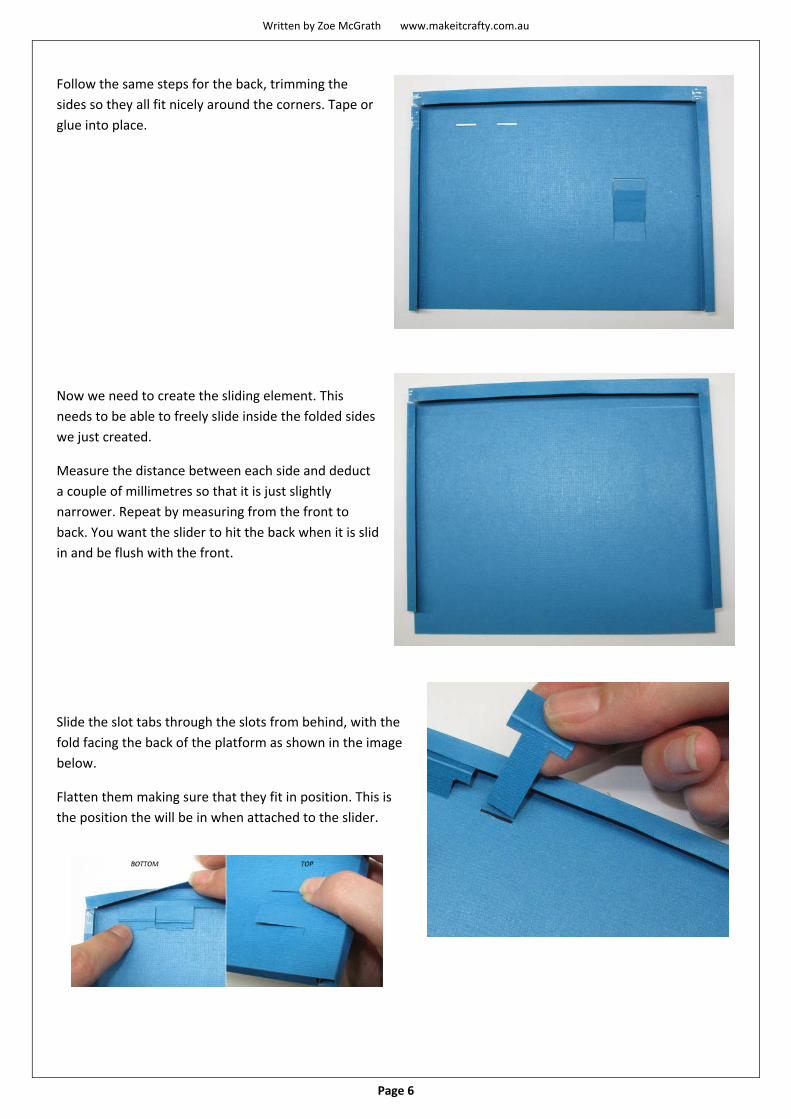
Follow the same steps for the back, trimming the
sides so they all fit nicely around the corners. Tape or
glue into place.
Now we need to create the sliding element. This
needs to be able to freely slide inside the folded sides
we just created.
Measure the distance between each side and deduct
a couple of millimetres so that it is just slightly
narrower. Repeat by measuring from the front to
back. You want the slider to hit the back when it is slid
in and be flush with the front.
Slide the slot tabs through the slots from behind, with the
fold facing the back of the platform as shown in the image
below.
Flatten them making sure that they fit in position. This is
the position the will be in when attached to the slider.
Written by Zoe McGrath www.makeitcrafty.com.au
Page 7
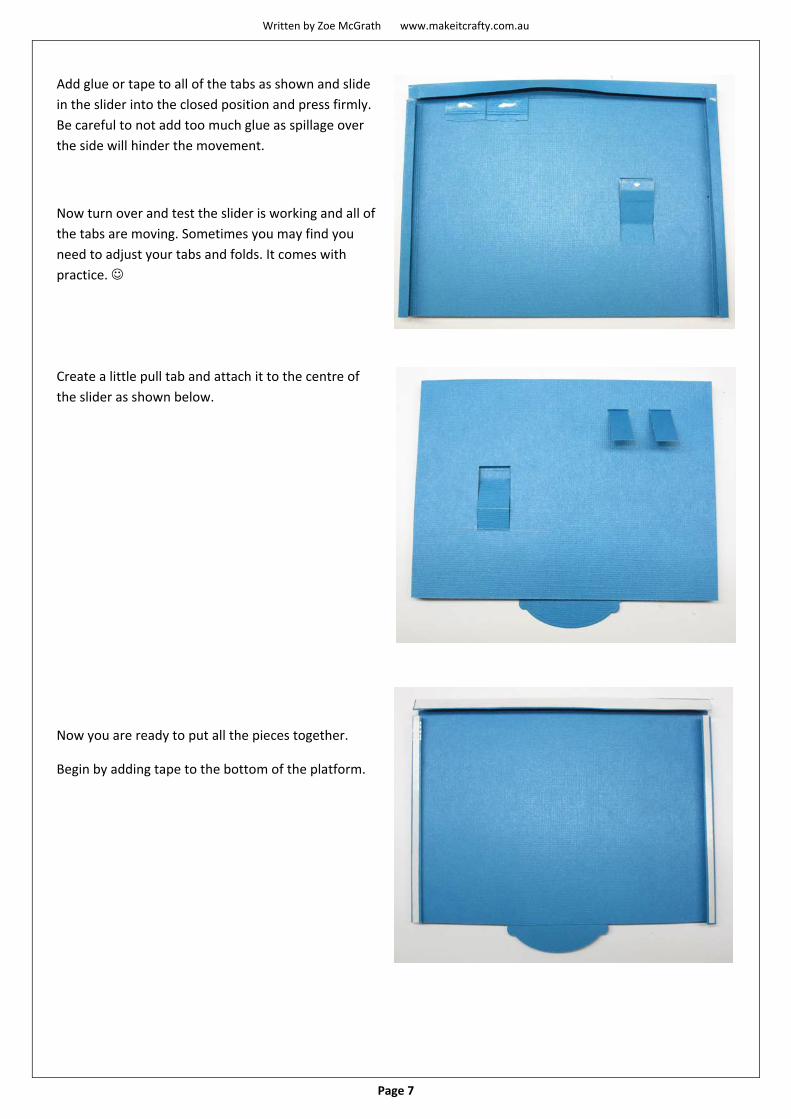
Add glue or tape to all of the tabs as shown and slide
in the slider into the closed position and press firmly.
Be careful to not add too much glue as spillage over
the side will hinder the movement.
Now turn over and test the slider is working and all of
the tabs are moving. Sometimes you may find you
need to adjust your tabs and folds. It comes with
practice.
Create a little pull tab and attach it to the centre of
the slider as shown below.
Now you are ready to put all the pieces together.
Begin by adding tape to the bottom of the platform.
Written by Zoe McGrath www.makeitcrafty.com.au
Page 8
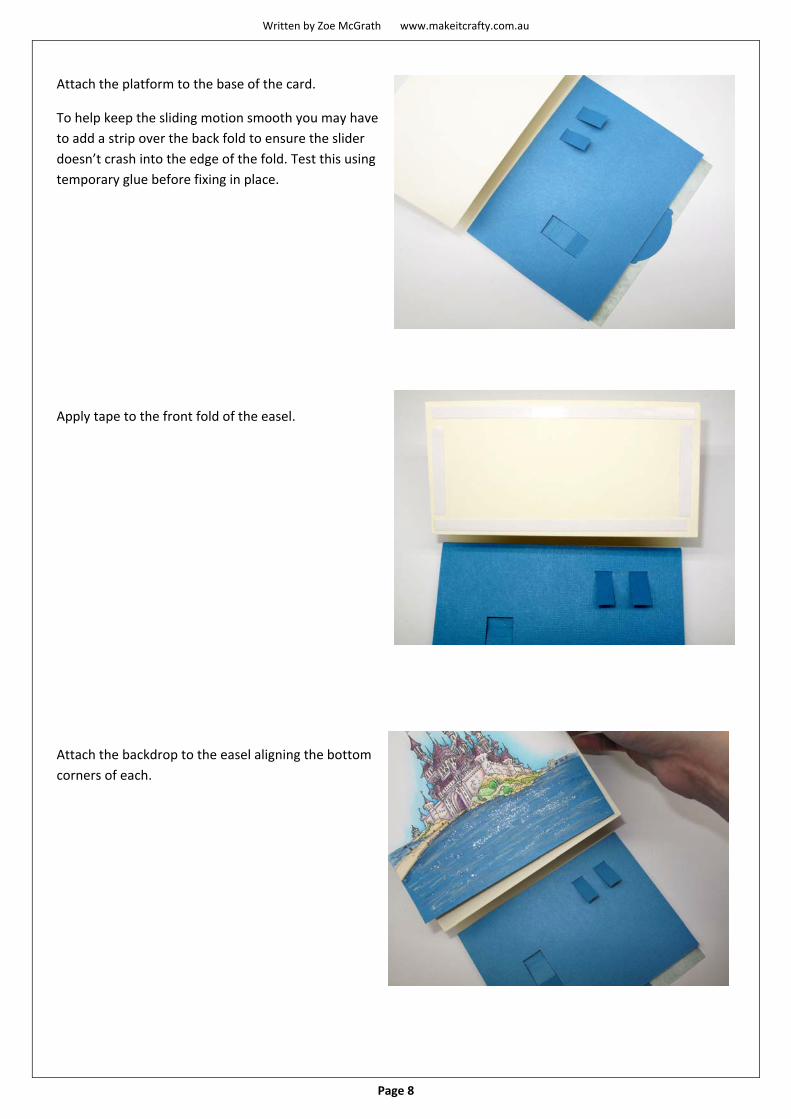
Attach the platform to the base of the card.
To help keep the sliding motion smooth you may have
to add a strip over the back fold to ensure the slider
doesn’t crash into the edge of the fold. Test this using
temporary glue before fixing in place.
Apply tape to the front fold of the easel.
Attach the backdrop to the easel aligning the bottom
corners of each.
Written by Zoe McGrath www.makeitcrafty.com.au
Page 9
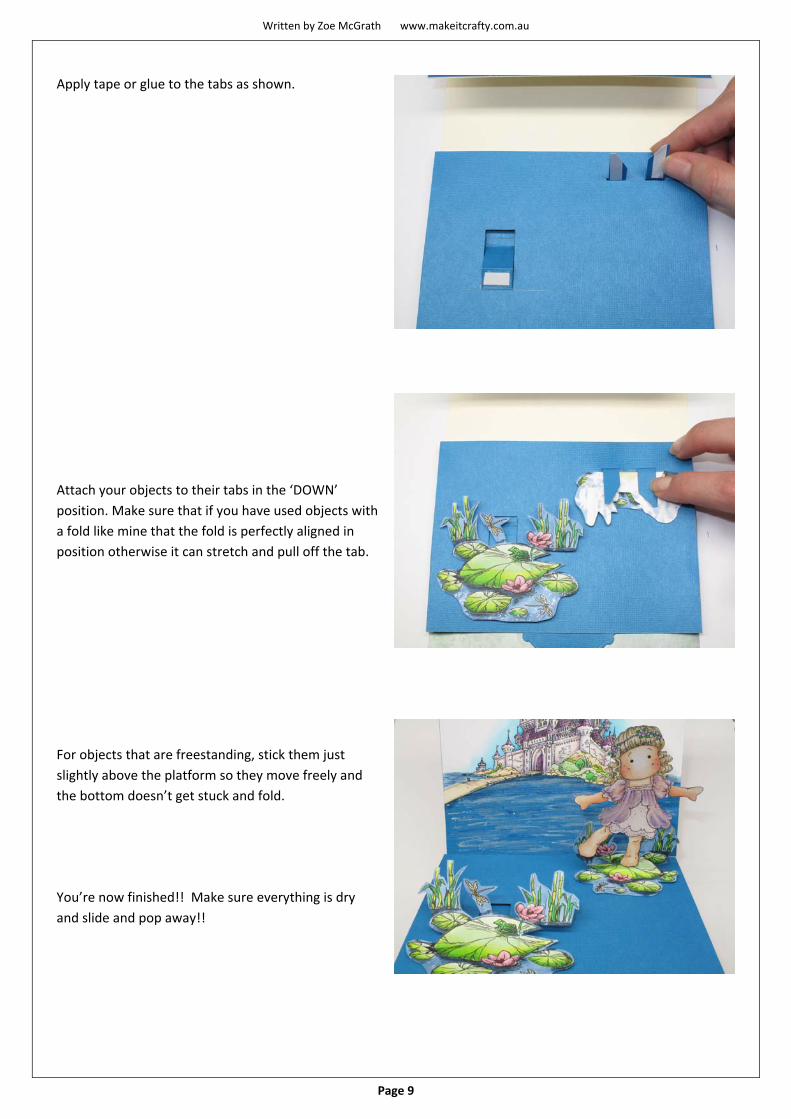
Apply tape or glue to the tabs as shown.
Attach your objects to their tabs in the ‘DOWN’
position. Make sure that if you have used objects with
a fold like mine that the fold is perfectly aligned in
position otherwise it can stretch and pull off the tab.
For objects that are freestanding, stick them just
slightly above the platform so they move freely and
the bottom doesn’t get stuck and fold.
You’re now finished!! Make sure everything is dry
and slide and pop away!!
Written by Zoe McGrath www.makeitcrafty.com.au
Page 10
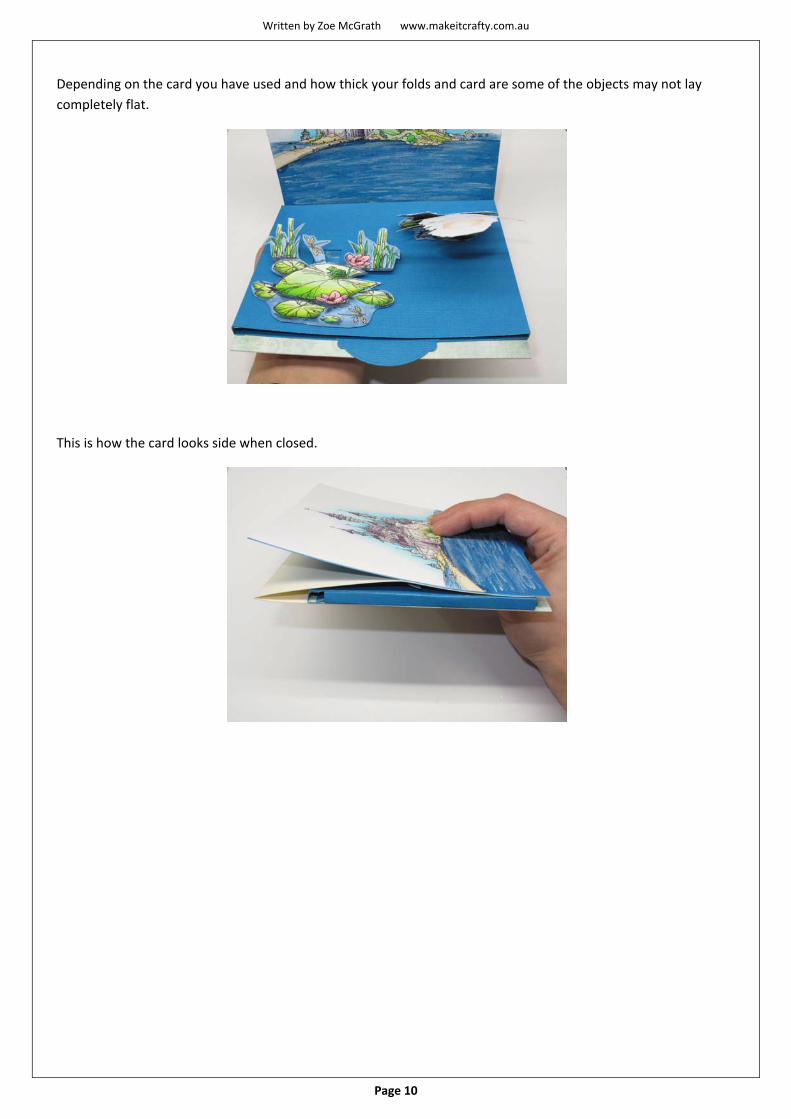
Depending on the card you have used and how thick your folds and card are some of the objects may not lay
completely flat.
This is how the card looks side when closed.