Embed Size (px)
Citation preview
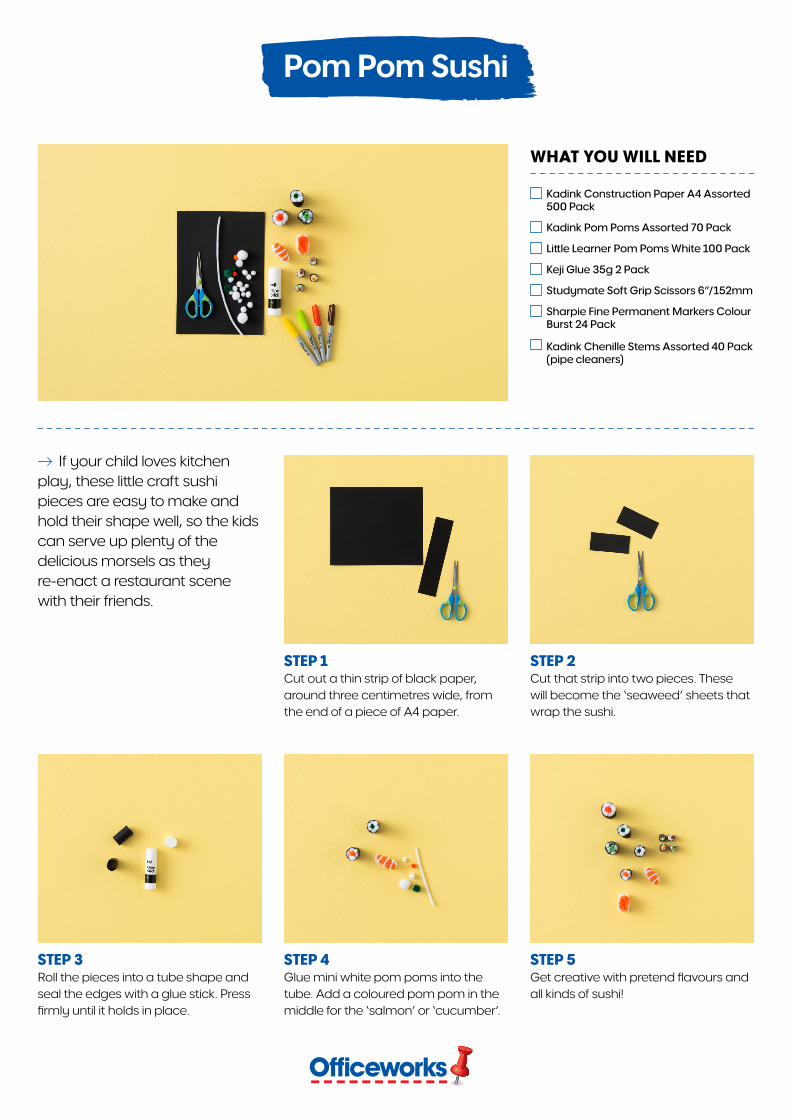
WHAT YOU WILL NEED
Kadink Pom Poms Assorted 70 Pack
Little Learner Pom Poms White 100 Pack
Little Learner Glitter Pompoms White 50 Pack
Kadink Low Temperature Glue Gun
Quill A5 240gsm Kraft Board 25 Pack
Studymate Soft Grip Scissors 6”/152mm
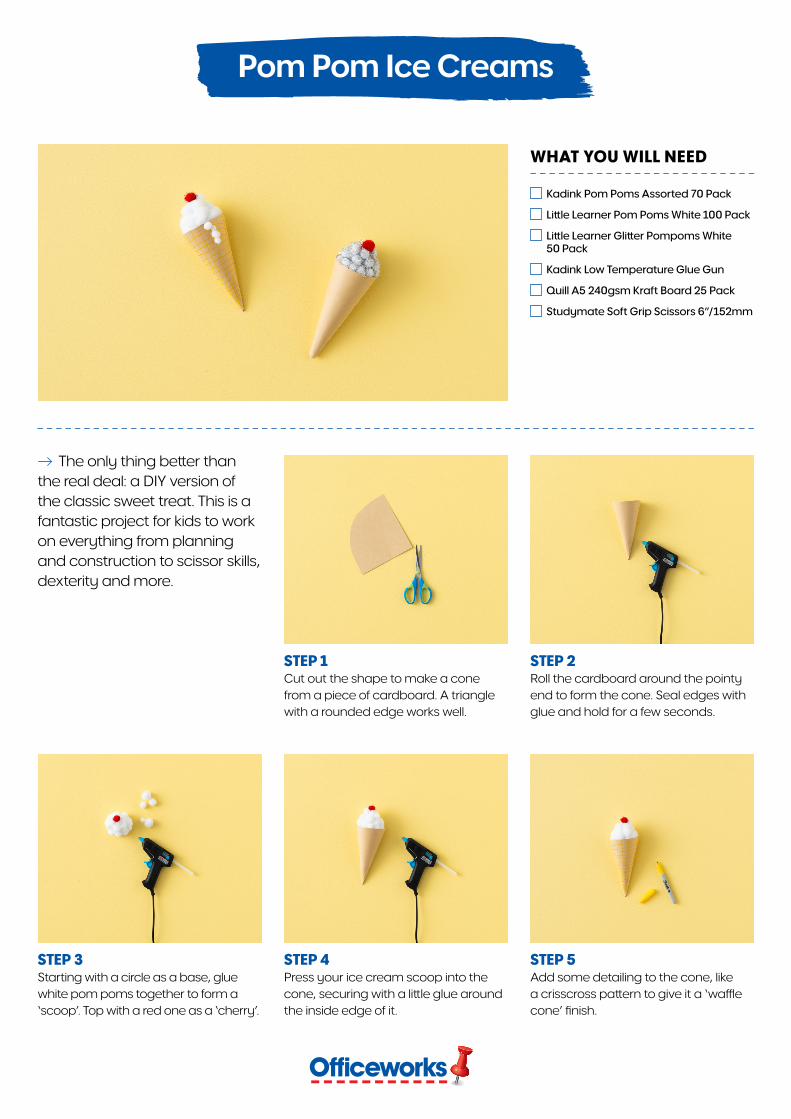
The only thing better than the real deal: a DIY version of the classic sweet treat. This is a fantastic project for kids to work on everything from planning and construction to scissor skills, dexterity and more.
STEP 2 Roll the cardboard around the pointy end to form the cone. Seal edges with glue and hold for a few seconds.
STEP 5 Add some detailing to the cone, like a crisscross pattern to give it a ‘waffle cone’ finish.
STEP 1 Cut out the shape to make a cone from a piece of cardboard. A triangle with a rounded edge works well.
STEP 4 Press your ice cream scoop into the cone, securing with a little glue around the inside edge of it.
STEP 3 Starting with a circle as a base, glue white pom poms together to form a ‘scoop’. Top with a red one as a ‘cherry’.
Pom Pom Ice Creams
WHAT YOU WILL NEED
Egg carton or Educational Colours Hygienic Egg Cartons 12 Pack
Kadink Pom Poms Assorted 70 Pack
Kadink Low Temperature Glue Gun
Studymate Soft Grip Scissors 6”/152mm
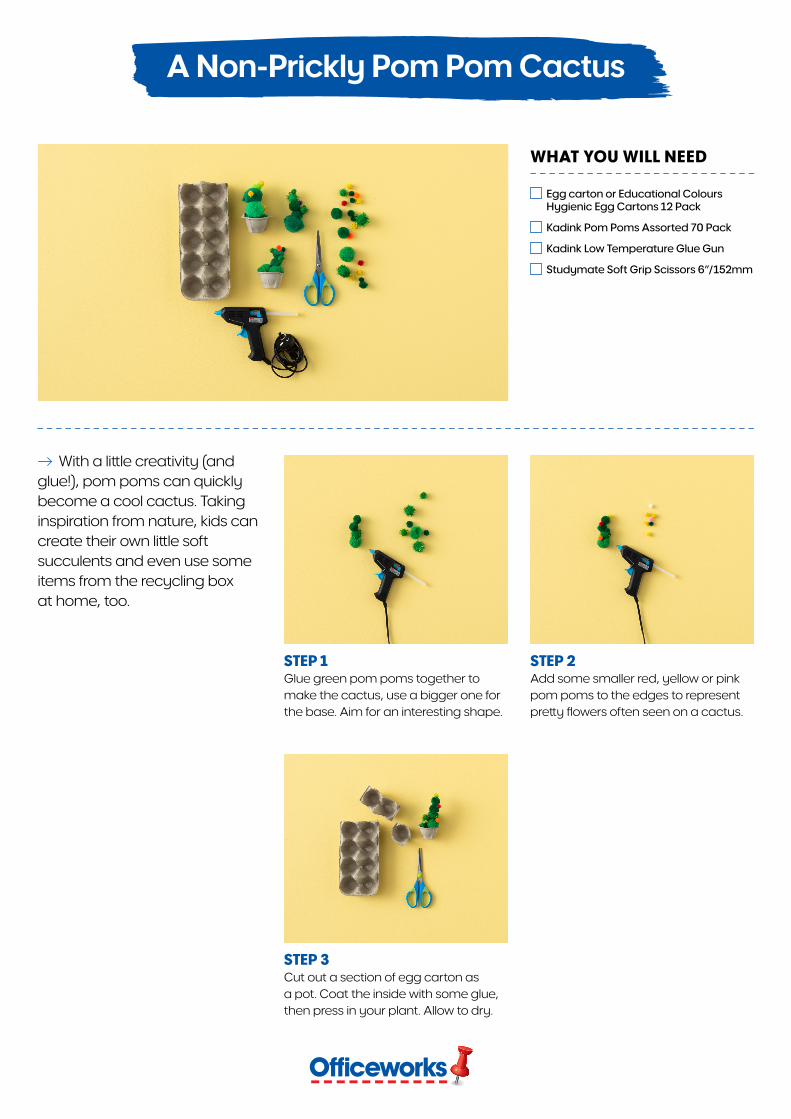
With a little creativity (and glue!), pom poms can quickly become a cool cactus. Taking inspiration from nature, kids can create their own little soft succulents and even use some items from the recycling box at home, too.
STEP 2 Add some smaller red, yellow or pink pom poms to the edges to represent pretty flowers often seen on a cactus.
STEP 1 Glue green pom poms together to make the cactus, use a bigger one for the base. Aim for an interesting shape.
STEP 3 Cut out a section of egg carton as a pot. Coat the inside with some glue, then press in your plant. Allow to dry.
A Non-Prickly Pom Pom Cactus
WHAT YOU WILL NEED
Kadink Chenille Stems Assorted 40 Pack (pipe cleaners)
Kadink Pom Poms Assorted 70 Pack
Kadink Low Temperature Glue Gun
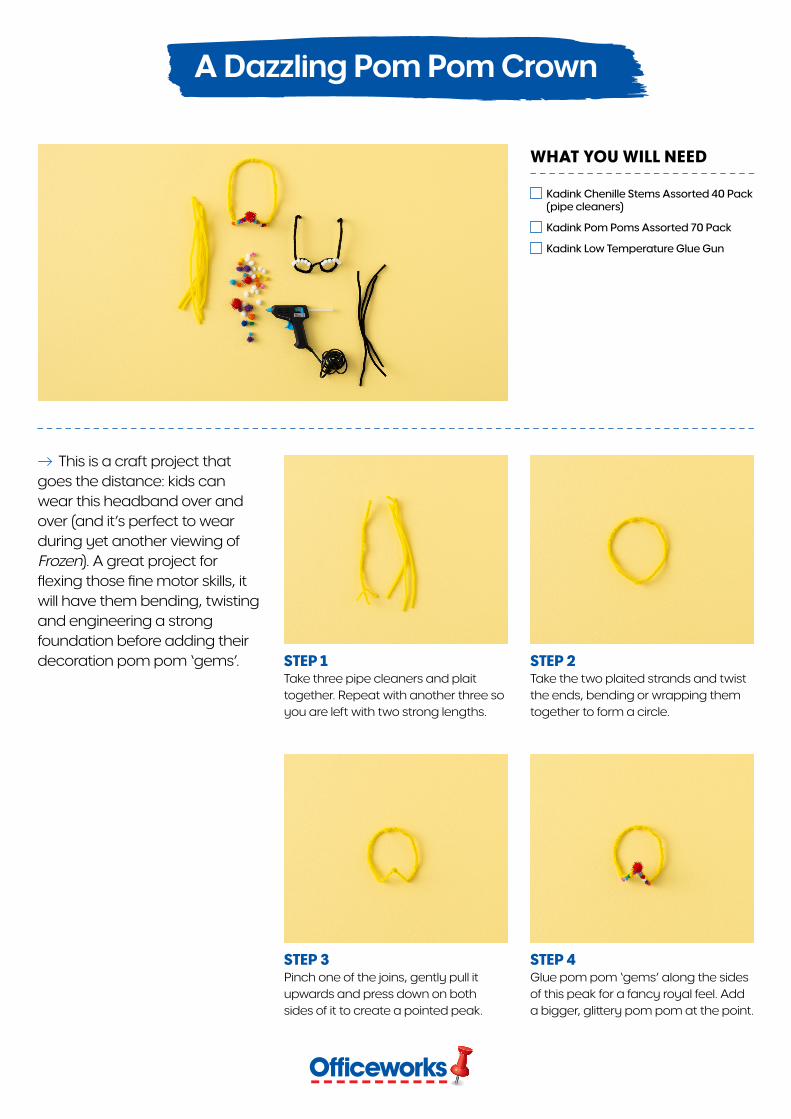
This is a craft project that goes the distance: kids can wear this headband over and over (and it’s perfect to wear during yet another viewing of Frozen). A great project for flexing those fine motor skills, it will have them bending, twisting and engineering a strong foundation before adding their decoration pom pom ‘gems’. STEP 2
Take the two plaited strands and twist the ends, bending or wrapping them together to form a circle.
STEP 4 Glue pom pom ‘gems’ along the sides of this peak for a fancy royal feel. Add a bigger, glittery pom pom at the point.
STEP 1 Take three pipe cleaners and plait together. Repeat with another three so you are left with two strong lengths.
STEP 3 Pinch one of the joins, gently pull it upwards and press down on both sides of it to create a pointed peak.
A Dazzling Pom Pom Crown
WHAT YOU WILL NEED
Kadink Pom Poms Assorted 70 Pack
Kadink Washable Bright Poster Paint 500mL White
Kadink Craft Sticks Coloured 180 Pack
Colorific Cardboard Rolls 36 Pack
Keji Glue 35g 2 Pack
Kadink Paintbrush Set Assorted 15 Pack
Kadink A4 Coloured Card 180gsm 30 Pack
Studymate Soft Grip Scissors 6”/152mm
sturdy cardboard
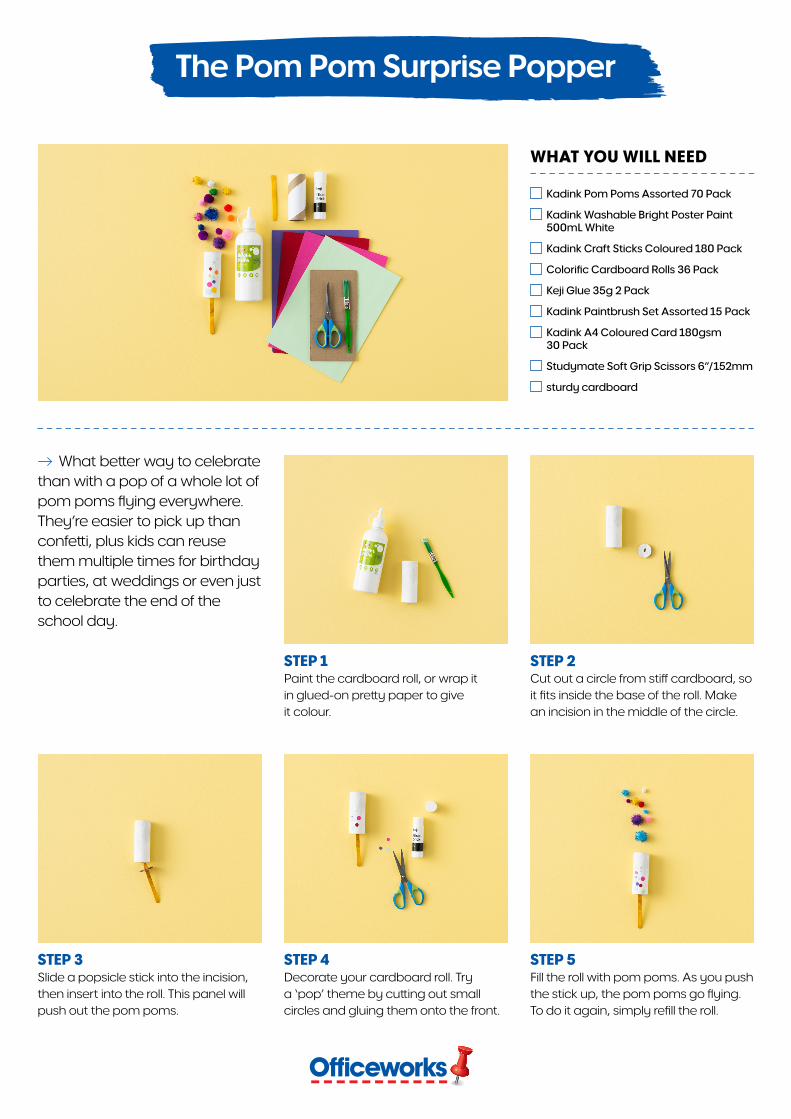
What better way to celebrate than with a pop of a whole lot of pom poms flying everywhere. They’re easier to pick up than confetti, plus kids can reuse them multiple times for birthday parties, at weddings or even just to celebrate the end of the school day.
STEP 2 Cut out a circle from stiff cardboard, so it fits inside the base of the roll. Make an incision in the middle of the circle.
STEP 5 Fill the roll with pom poms. As you push the stick up, the pom poms go flying. To do it again, simply refill the roll.
STEP 1 Paint the cardboard roll, or wrap it in glued-on pretty paper to give it colour.
STEP 4 Decorate your cardboard roll. Try a ‘pop’ theme by cutting out small circles and gluing them onto the front.
STEP 3 Slide a popsicle stick into the incision, then insert into the roll. This panel will push out the pom poms.
The Pom Pom Surprise Popper
WHAT YOU WILL NEED
Kadink Construction Paper A4 Assorted 500 Pack
Kadink Pom Poms Assorted 70 Pack
Little Learner Pom Poms White 100 Pack
Keji Glue 35g 2 Pack
Studymate Soft Grip Scissors 6”/152mm
Sharpie Fine Permanent Markers Colour Burst 24 Pack
Kadink Chenille Stems Assorted 40 Pack (pipe cleaners)
If your child loves kitchen play, these little craft sushi pieces are easy to make and hold their shape well, so the kids can serve up plenty of the delicious morsels as they re-enact a restaurant scene with their friends.
STEP 2 Cut that strip into two pieces. These will become the ‘seaweed’ sheets that wrap the sushi.
STEP 5 Get creative with pretend flavours and all kinds of sushi!
STEP 1 Cut out a thin strip of black paper, around three centimetres wide, from the end of a piece of A4 paper.
STEP 4 Glue mini white pom poms into the tube. Add a coloured pom pom in the middle for the ‘salmon’ or ‘cucumber’.
STEP 3 Roll the pieces into a tube shape and seal the edges with a glue stick. Press firmly until it holds in place.
Pom Pom Sushi